Cloud Platforms Autodiscovery
Device42 cloud discovery provides visibility into your cloud environments by discovering virtual machines, databases, storage, networking, and other resources across major cloud platforms. Discovery helps you optimize cloud costs, reduce shadow IT, and maintain audit readiness.
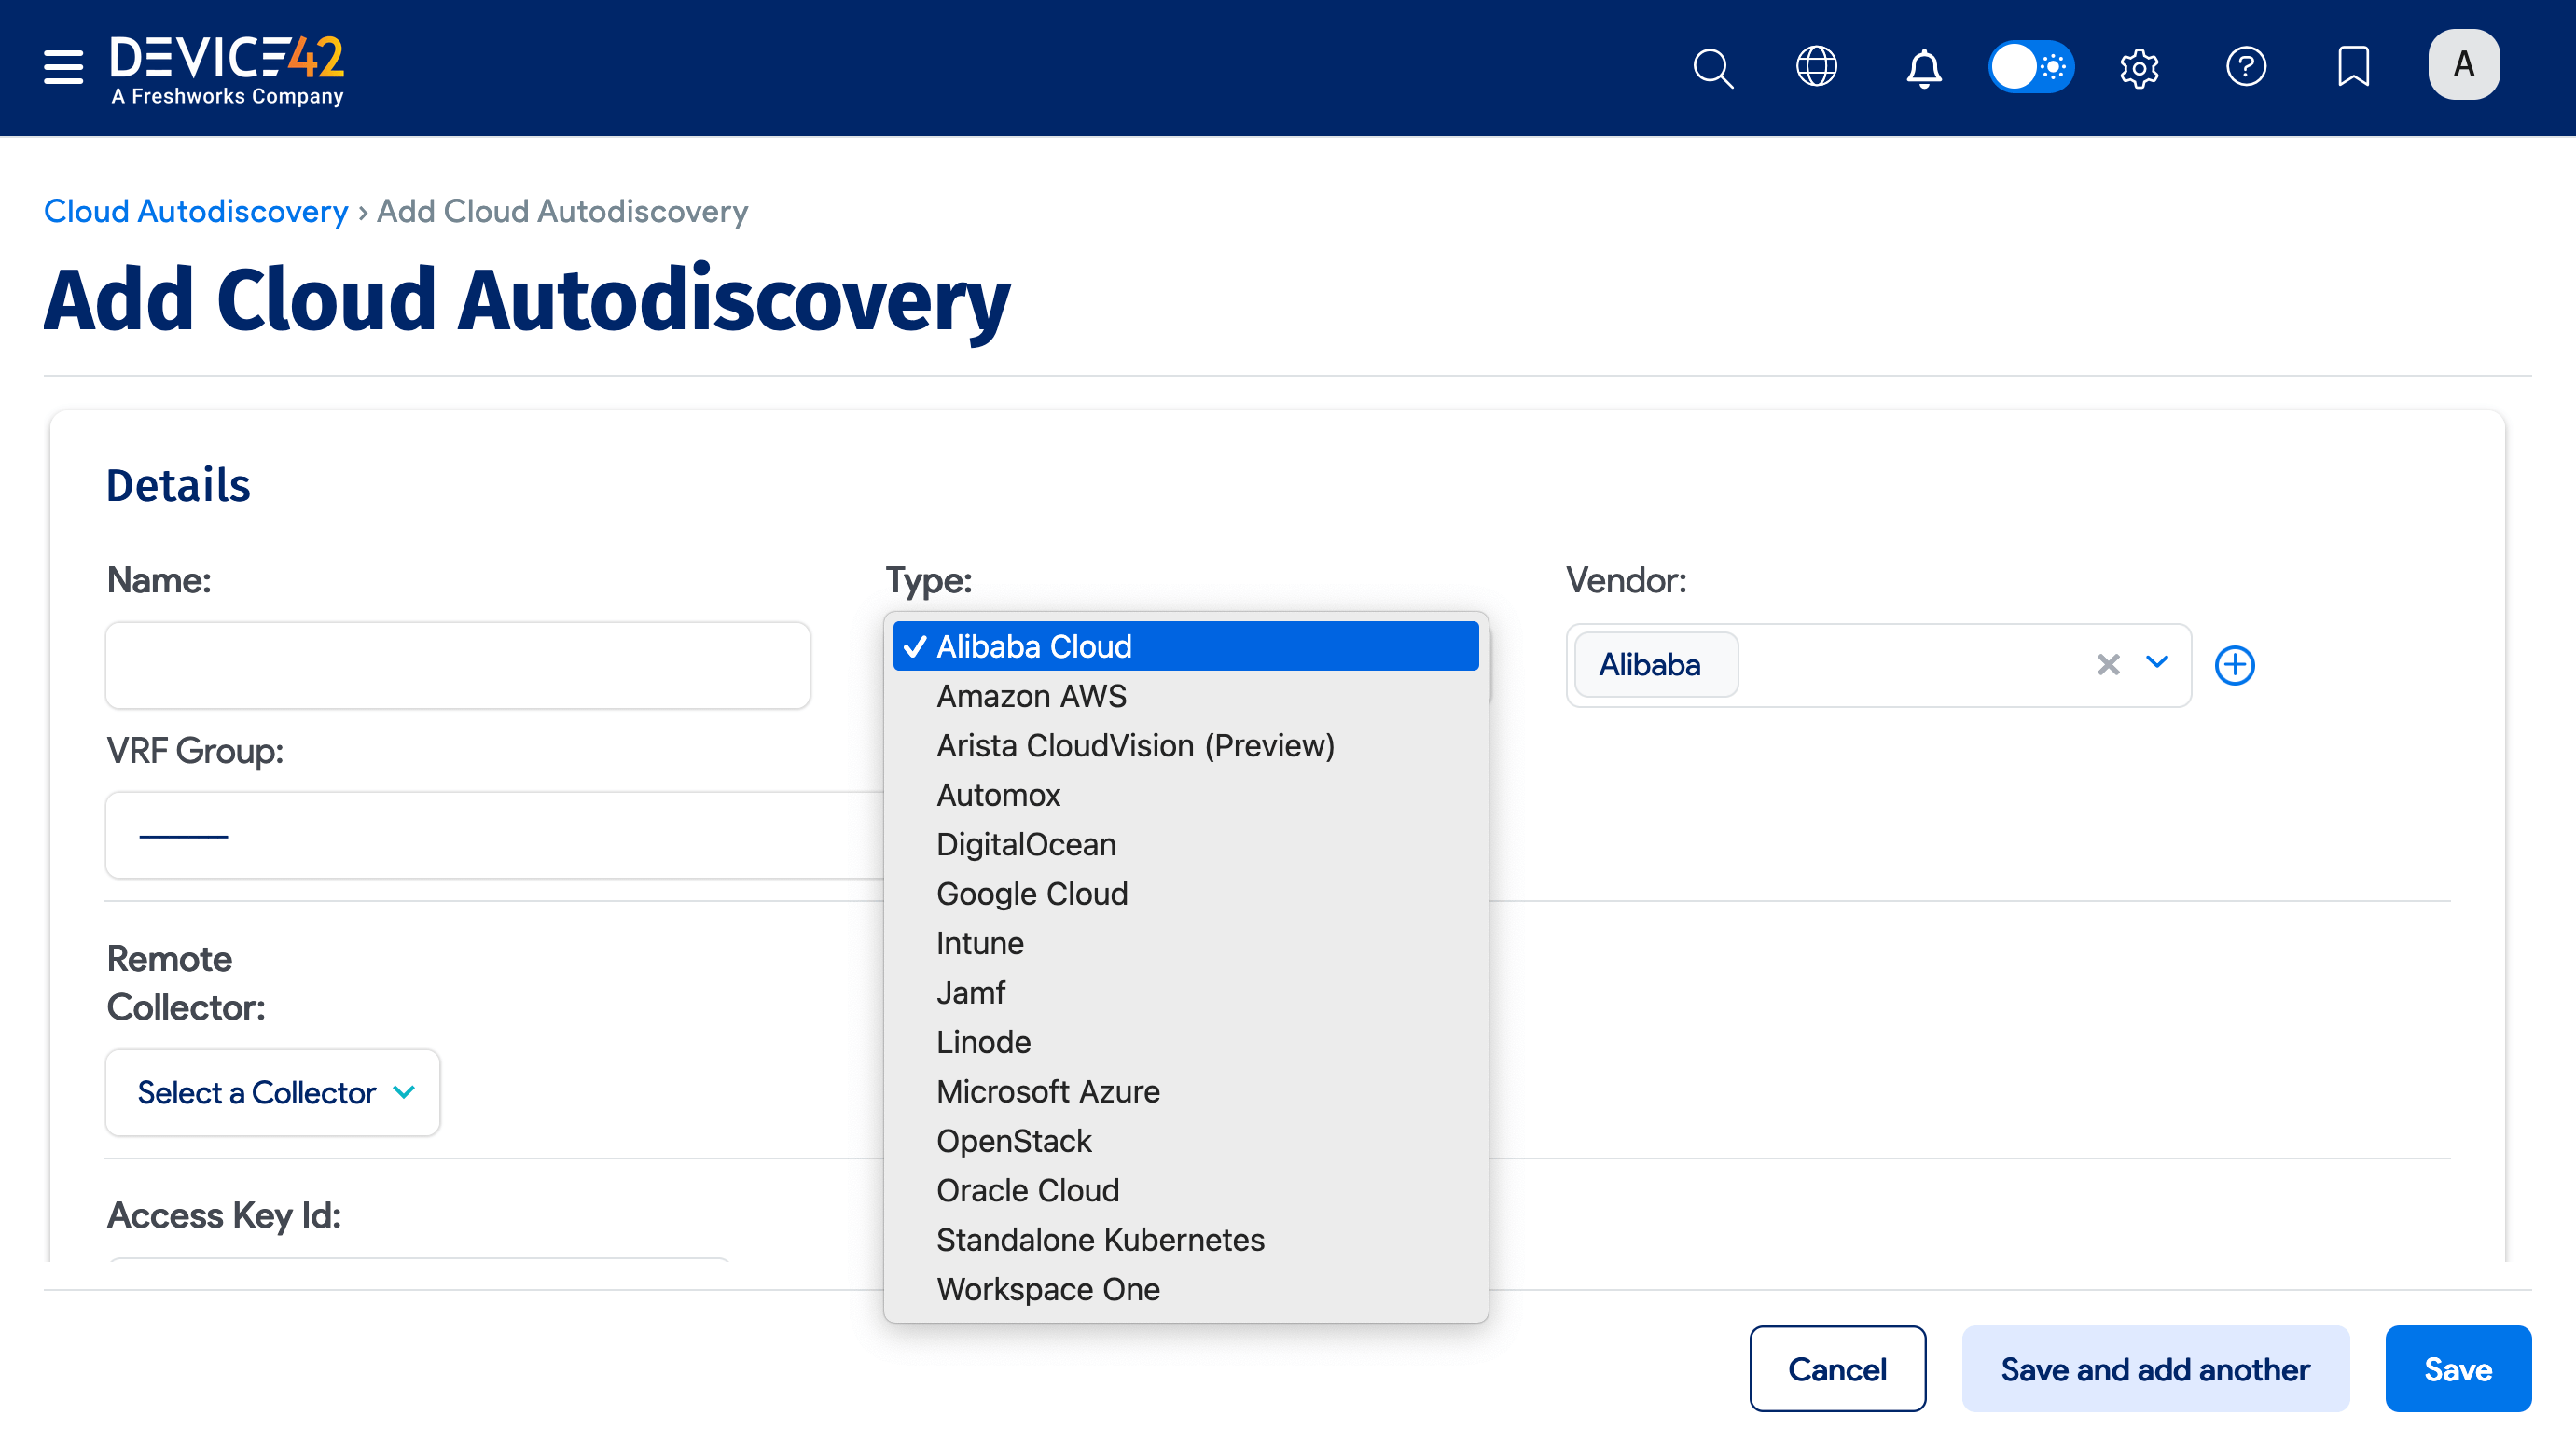
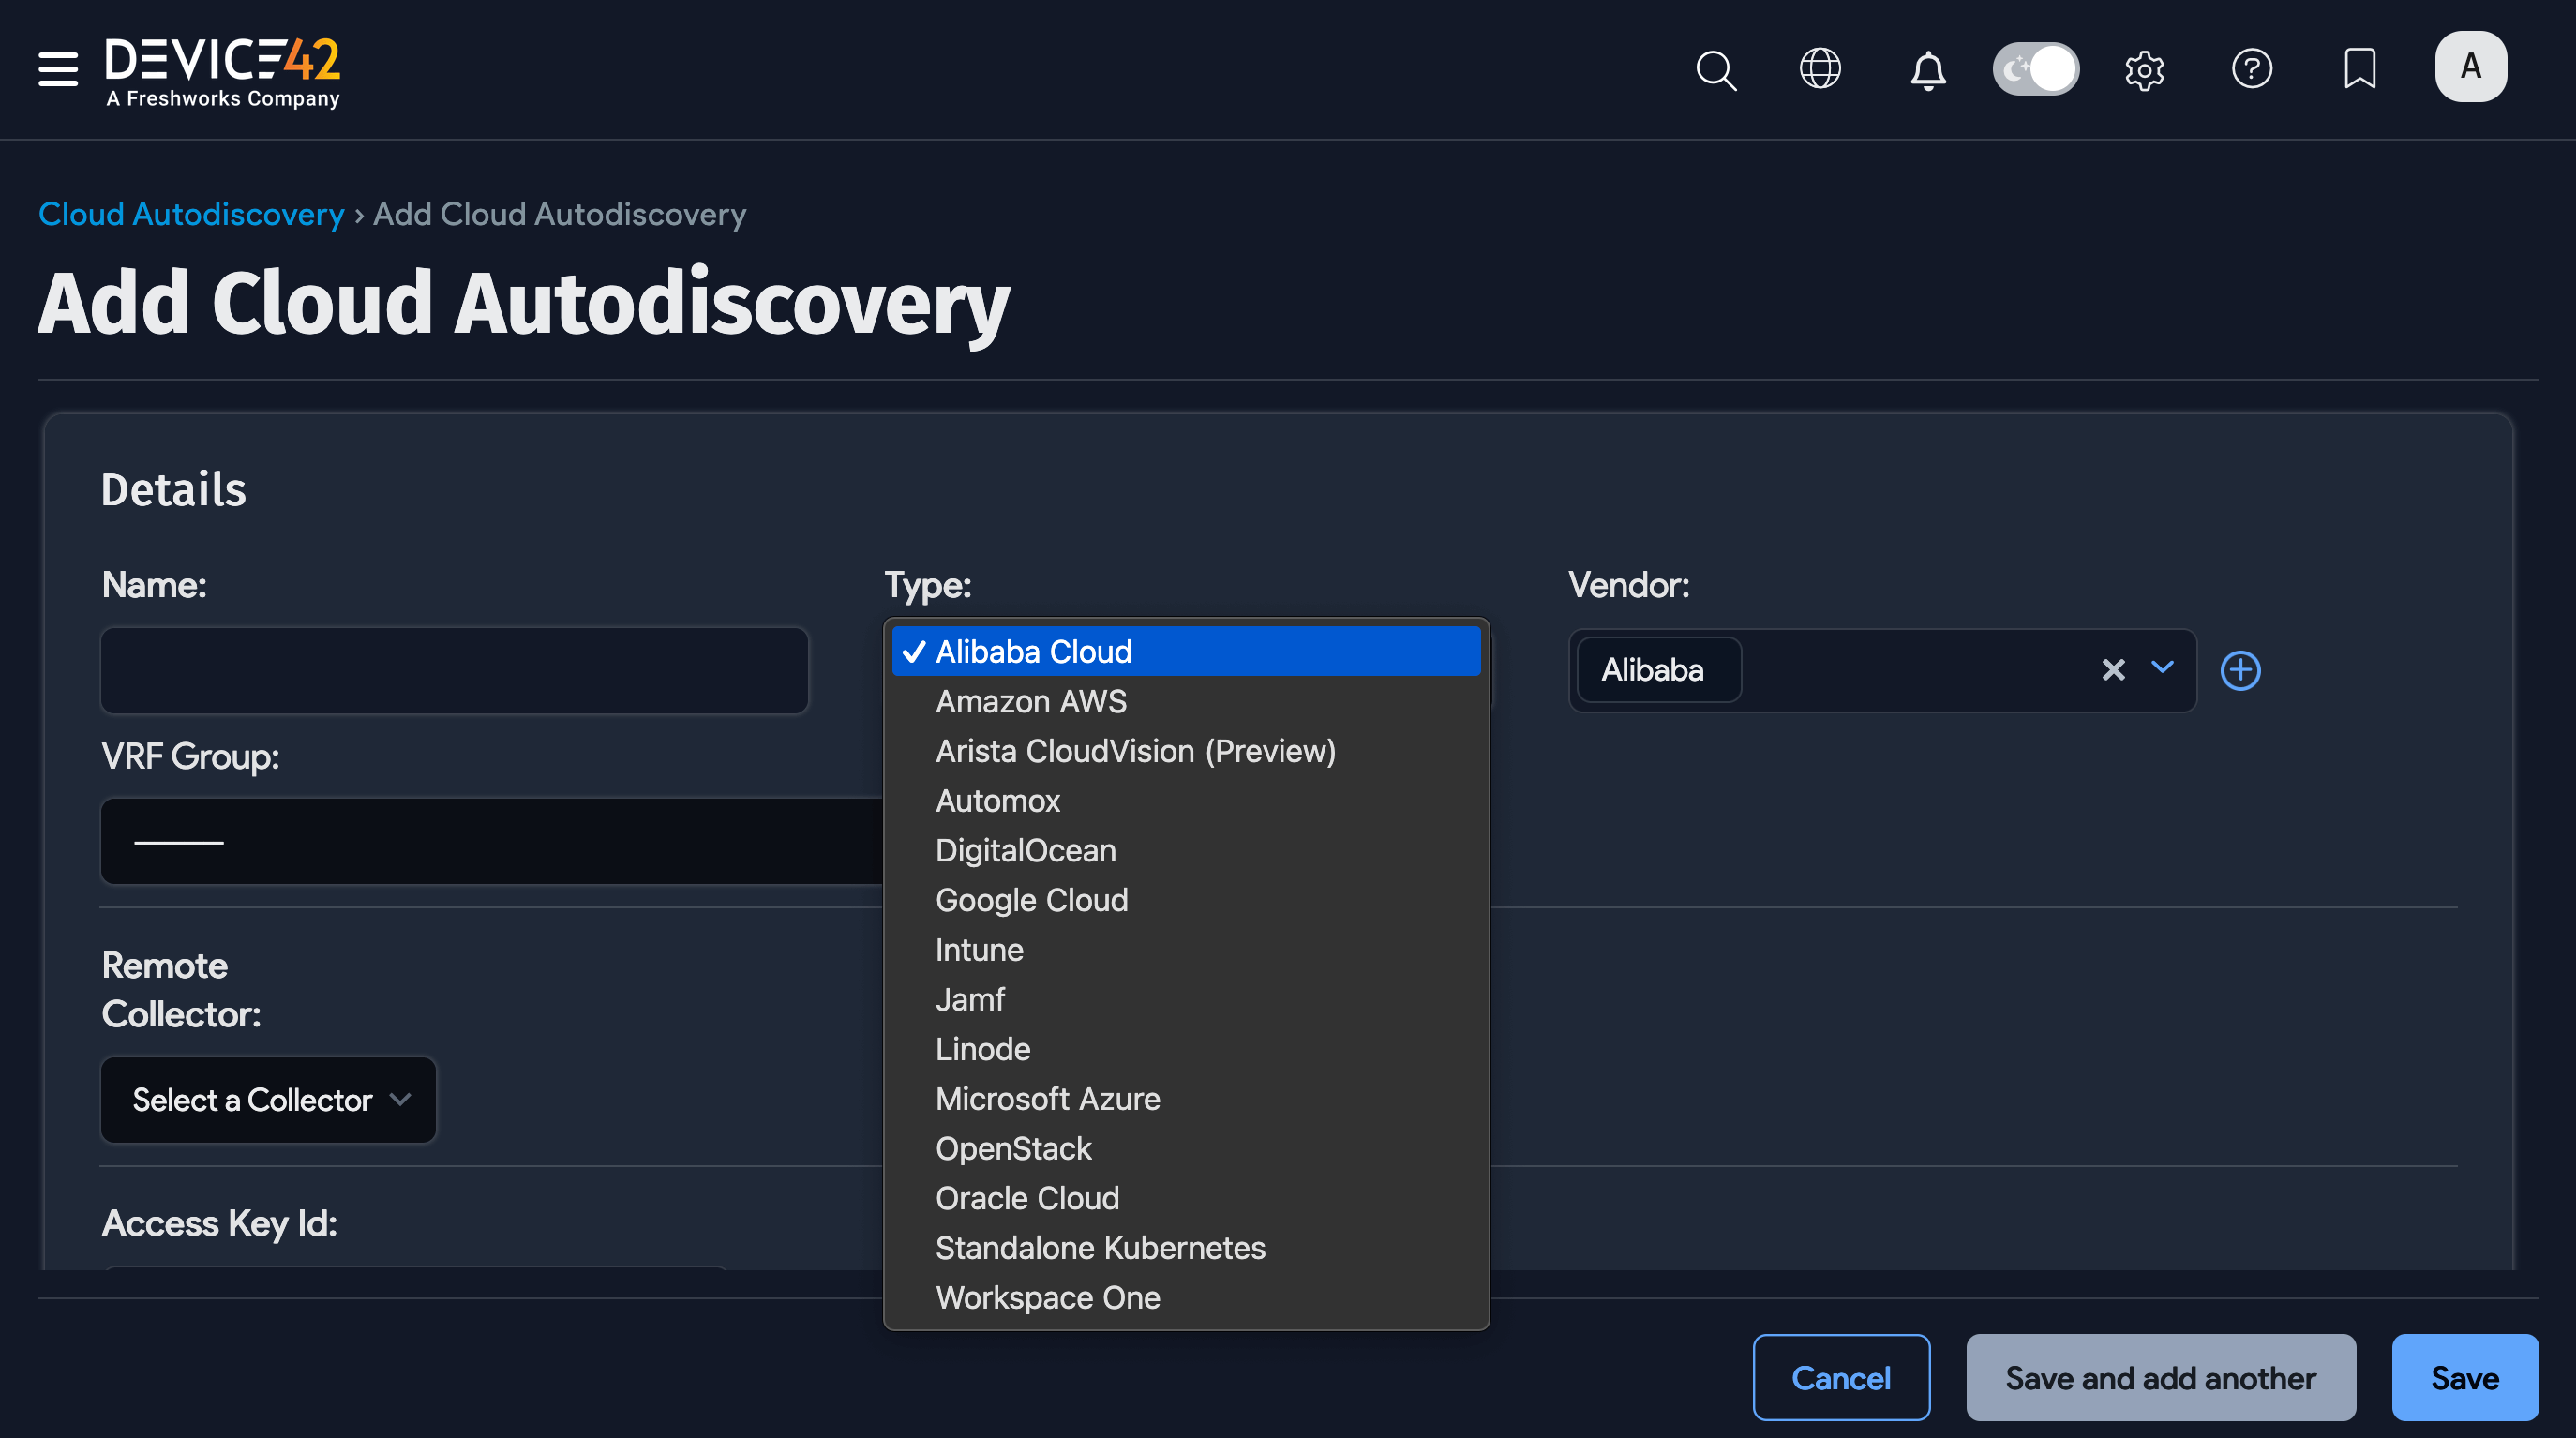
Device42 supports discovery of cloud instances on Amazon AWS, Microsoft Azure, Linode, DigitalOcean, OpenStack, Google Cloud, Alibaba Cloud, Oracle Cloud, and standalone Kubernetes. Email support to request discovery for new cloud platforms.
Discovered cloud virtual machines, databases, and storage are represented as devices in Device42. These cloud assets have the same features as any other device, so you can define application components, store passwords, and create custom keys just as you would for any other physical or virtual device.
To create a new cloud discovery job or view your existing jobs, navigate to Discovery > Cloud. You typically create one job per cloud account. Like other discovery jobs, cloud discovery jobs can be run immediately or scheduled.
Create a Cloud Platform Discovery Job
The Cloud Autodiscovery list page displays your existing jobs.
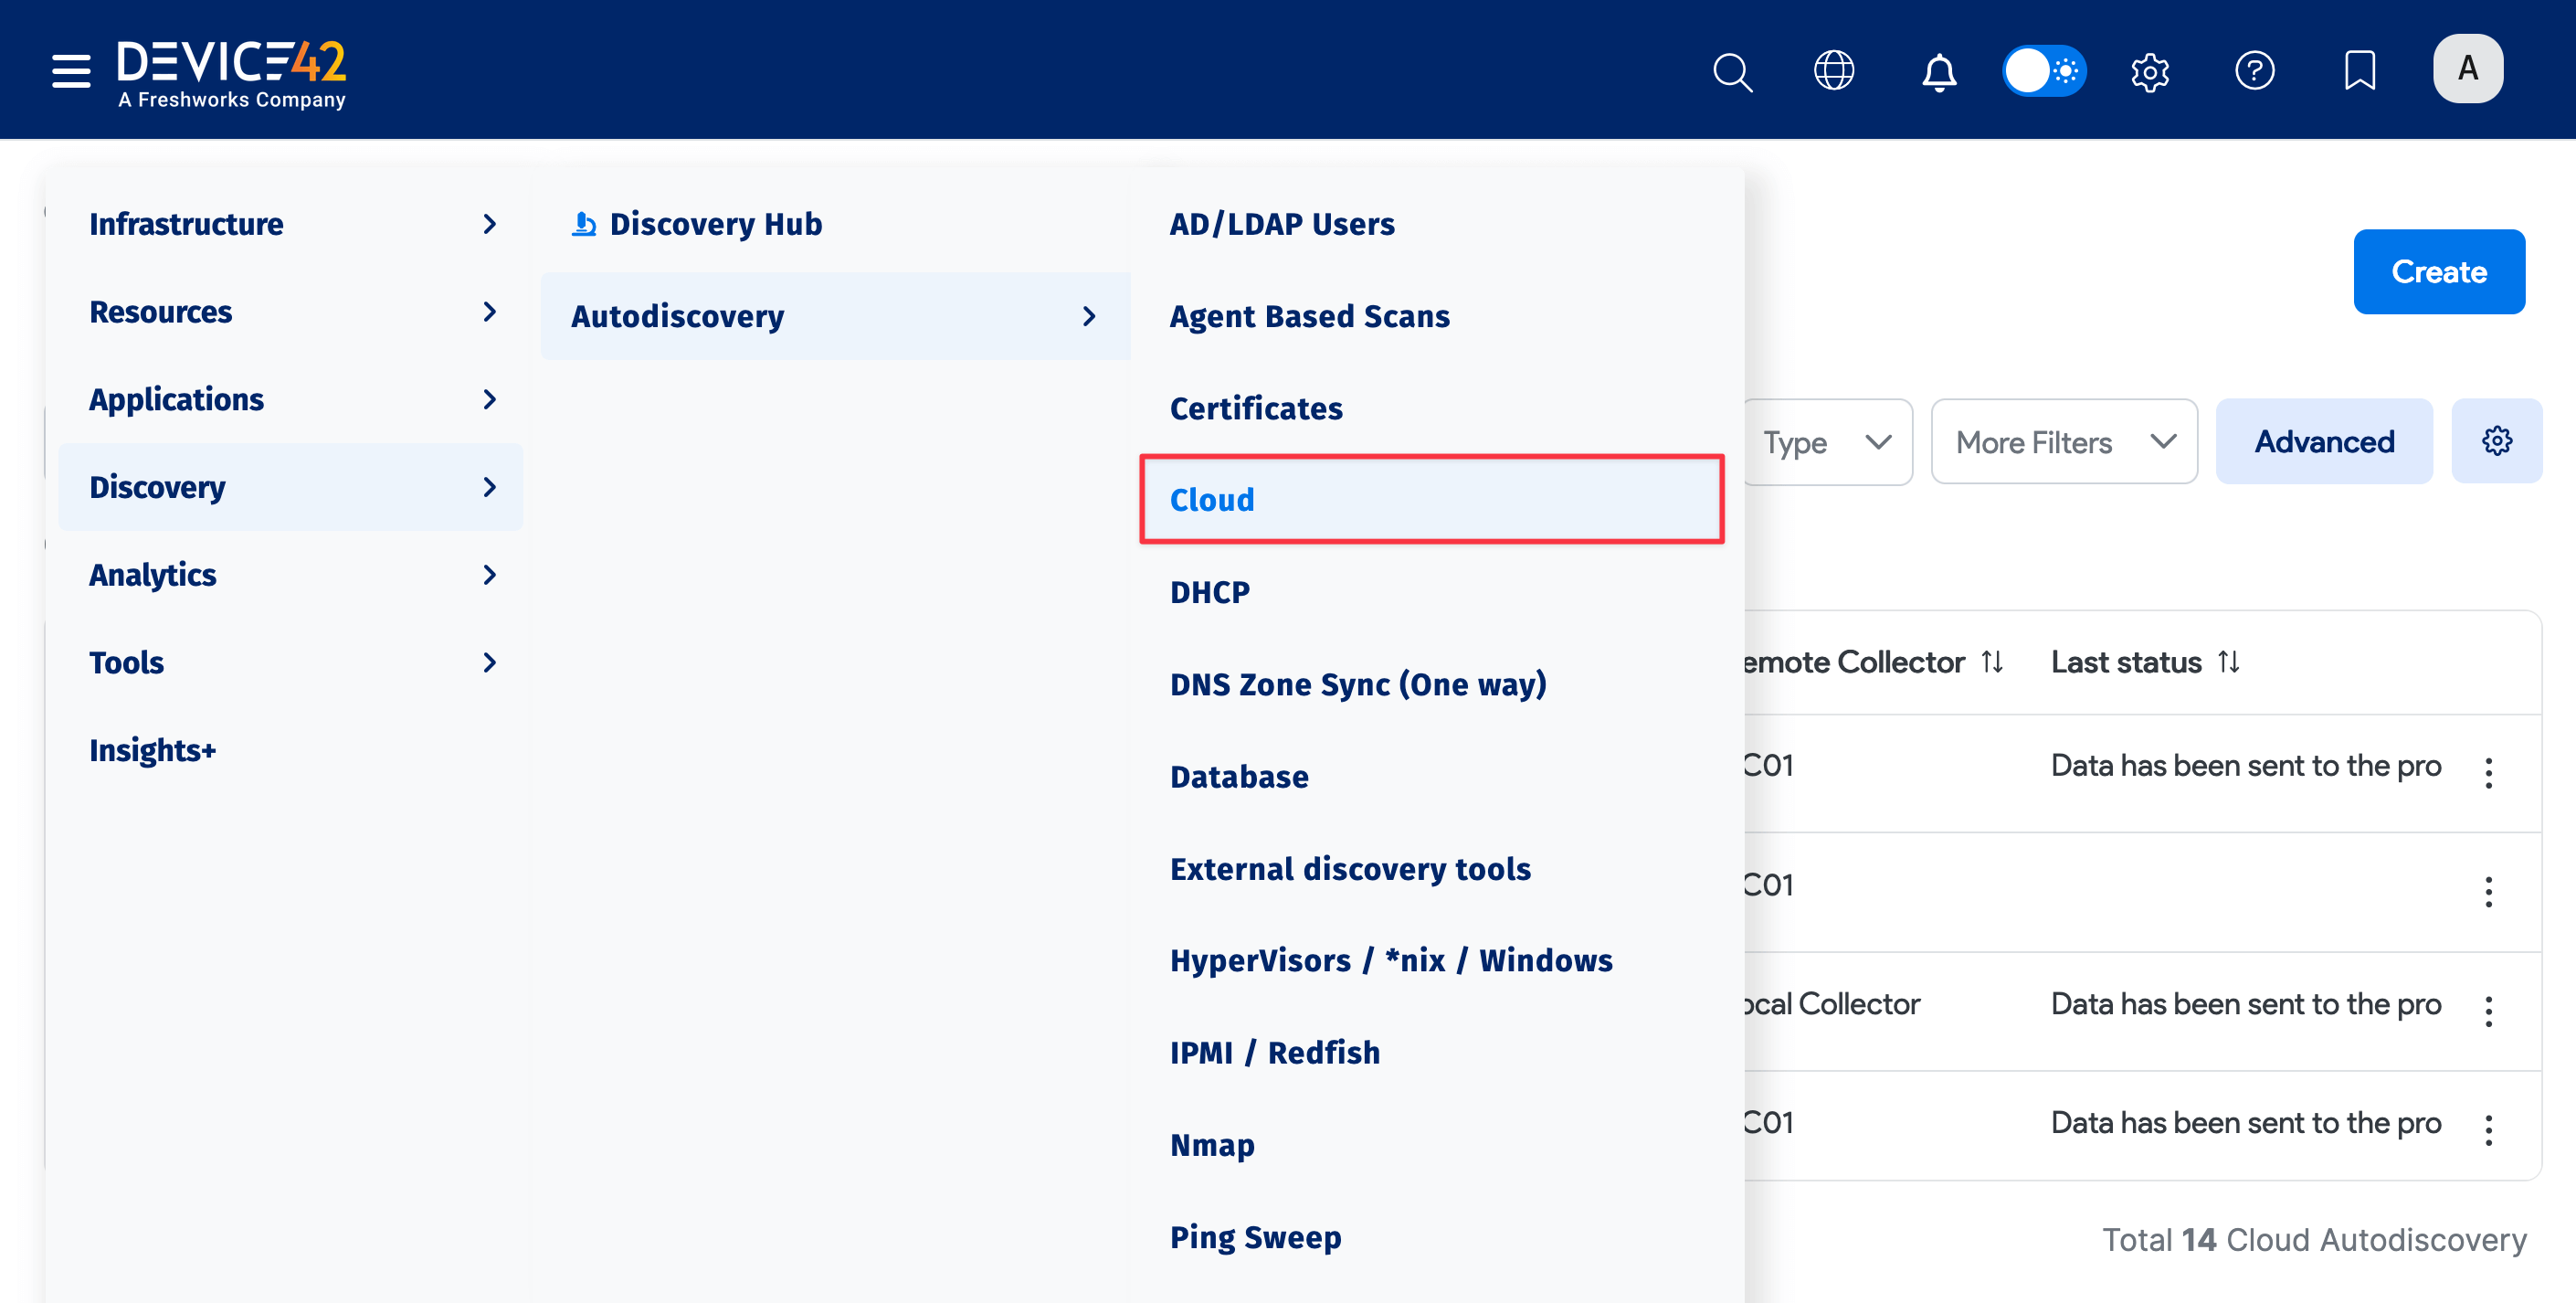
Click Create in the top right to create a new job, then select the platform Type:
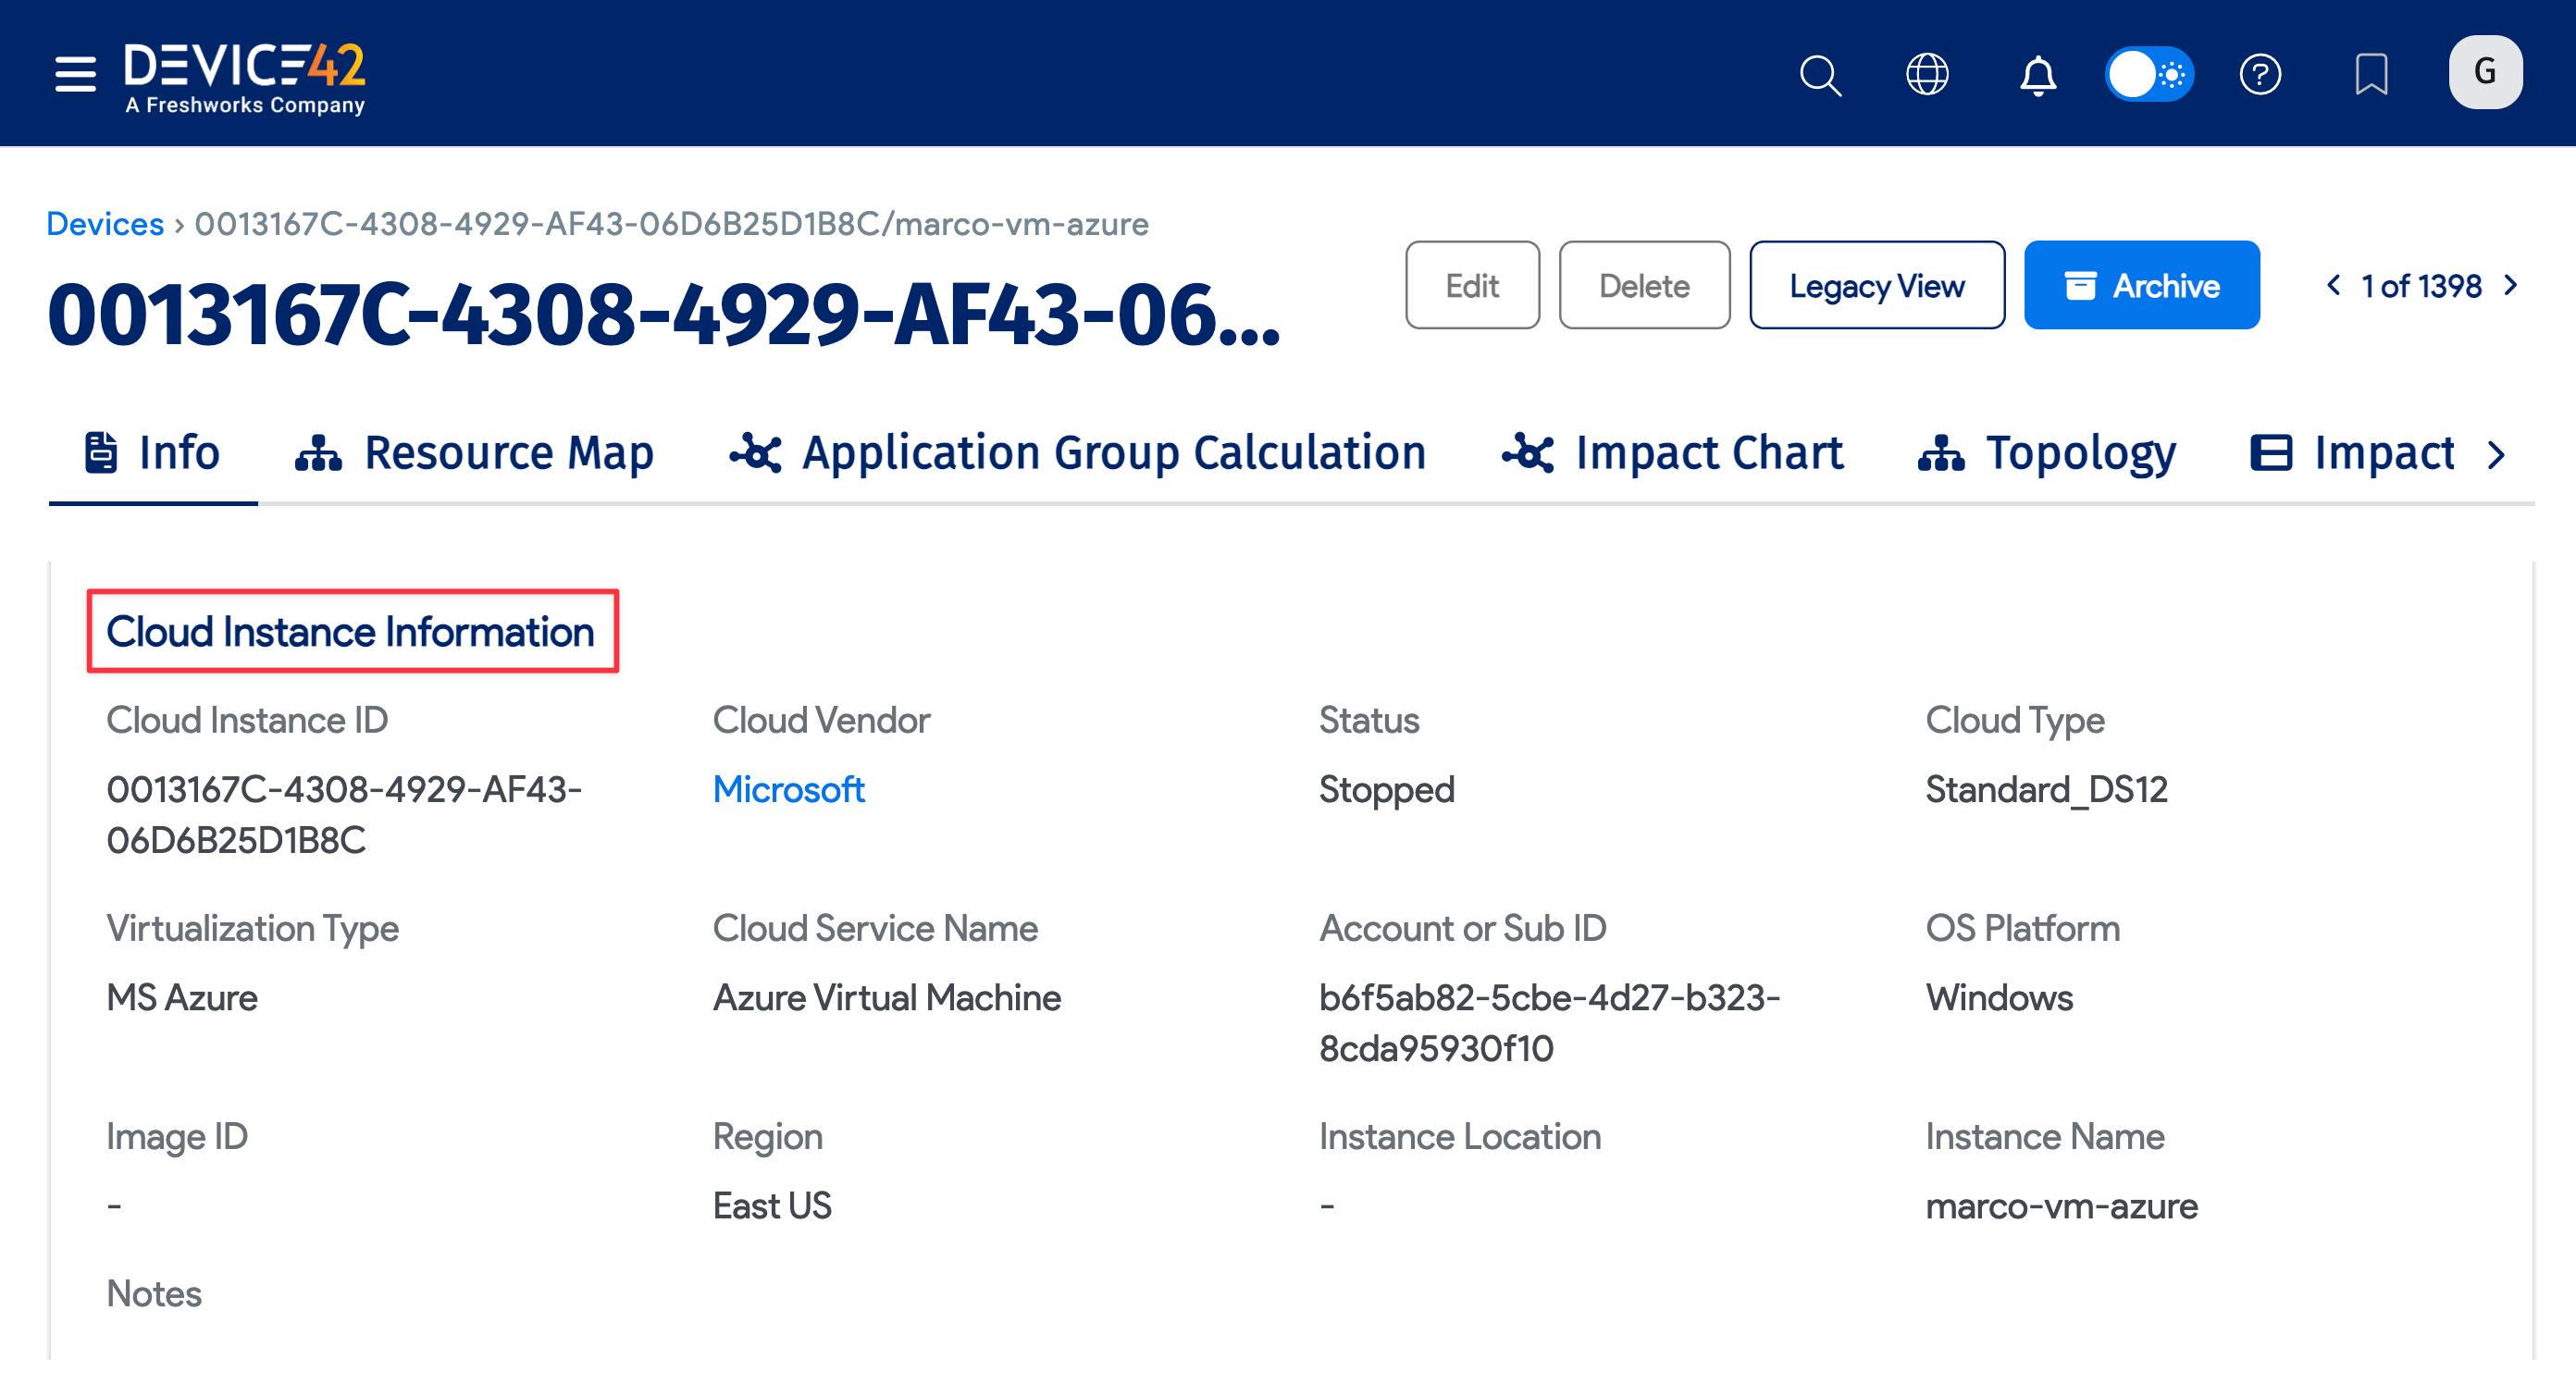
View Cloud Instance Information
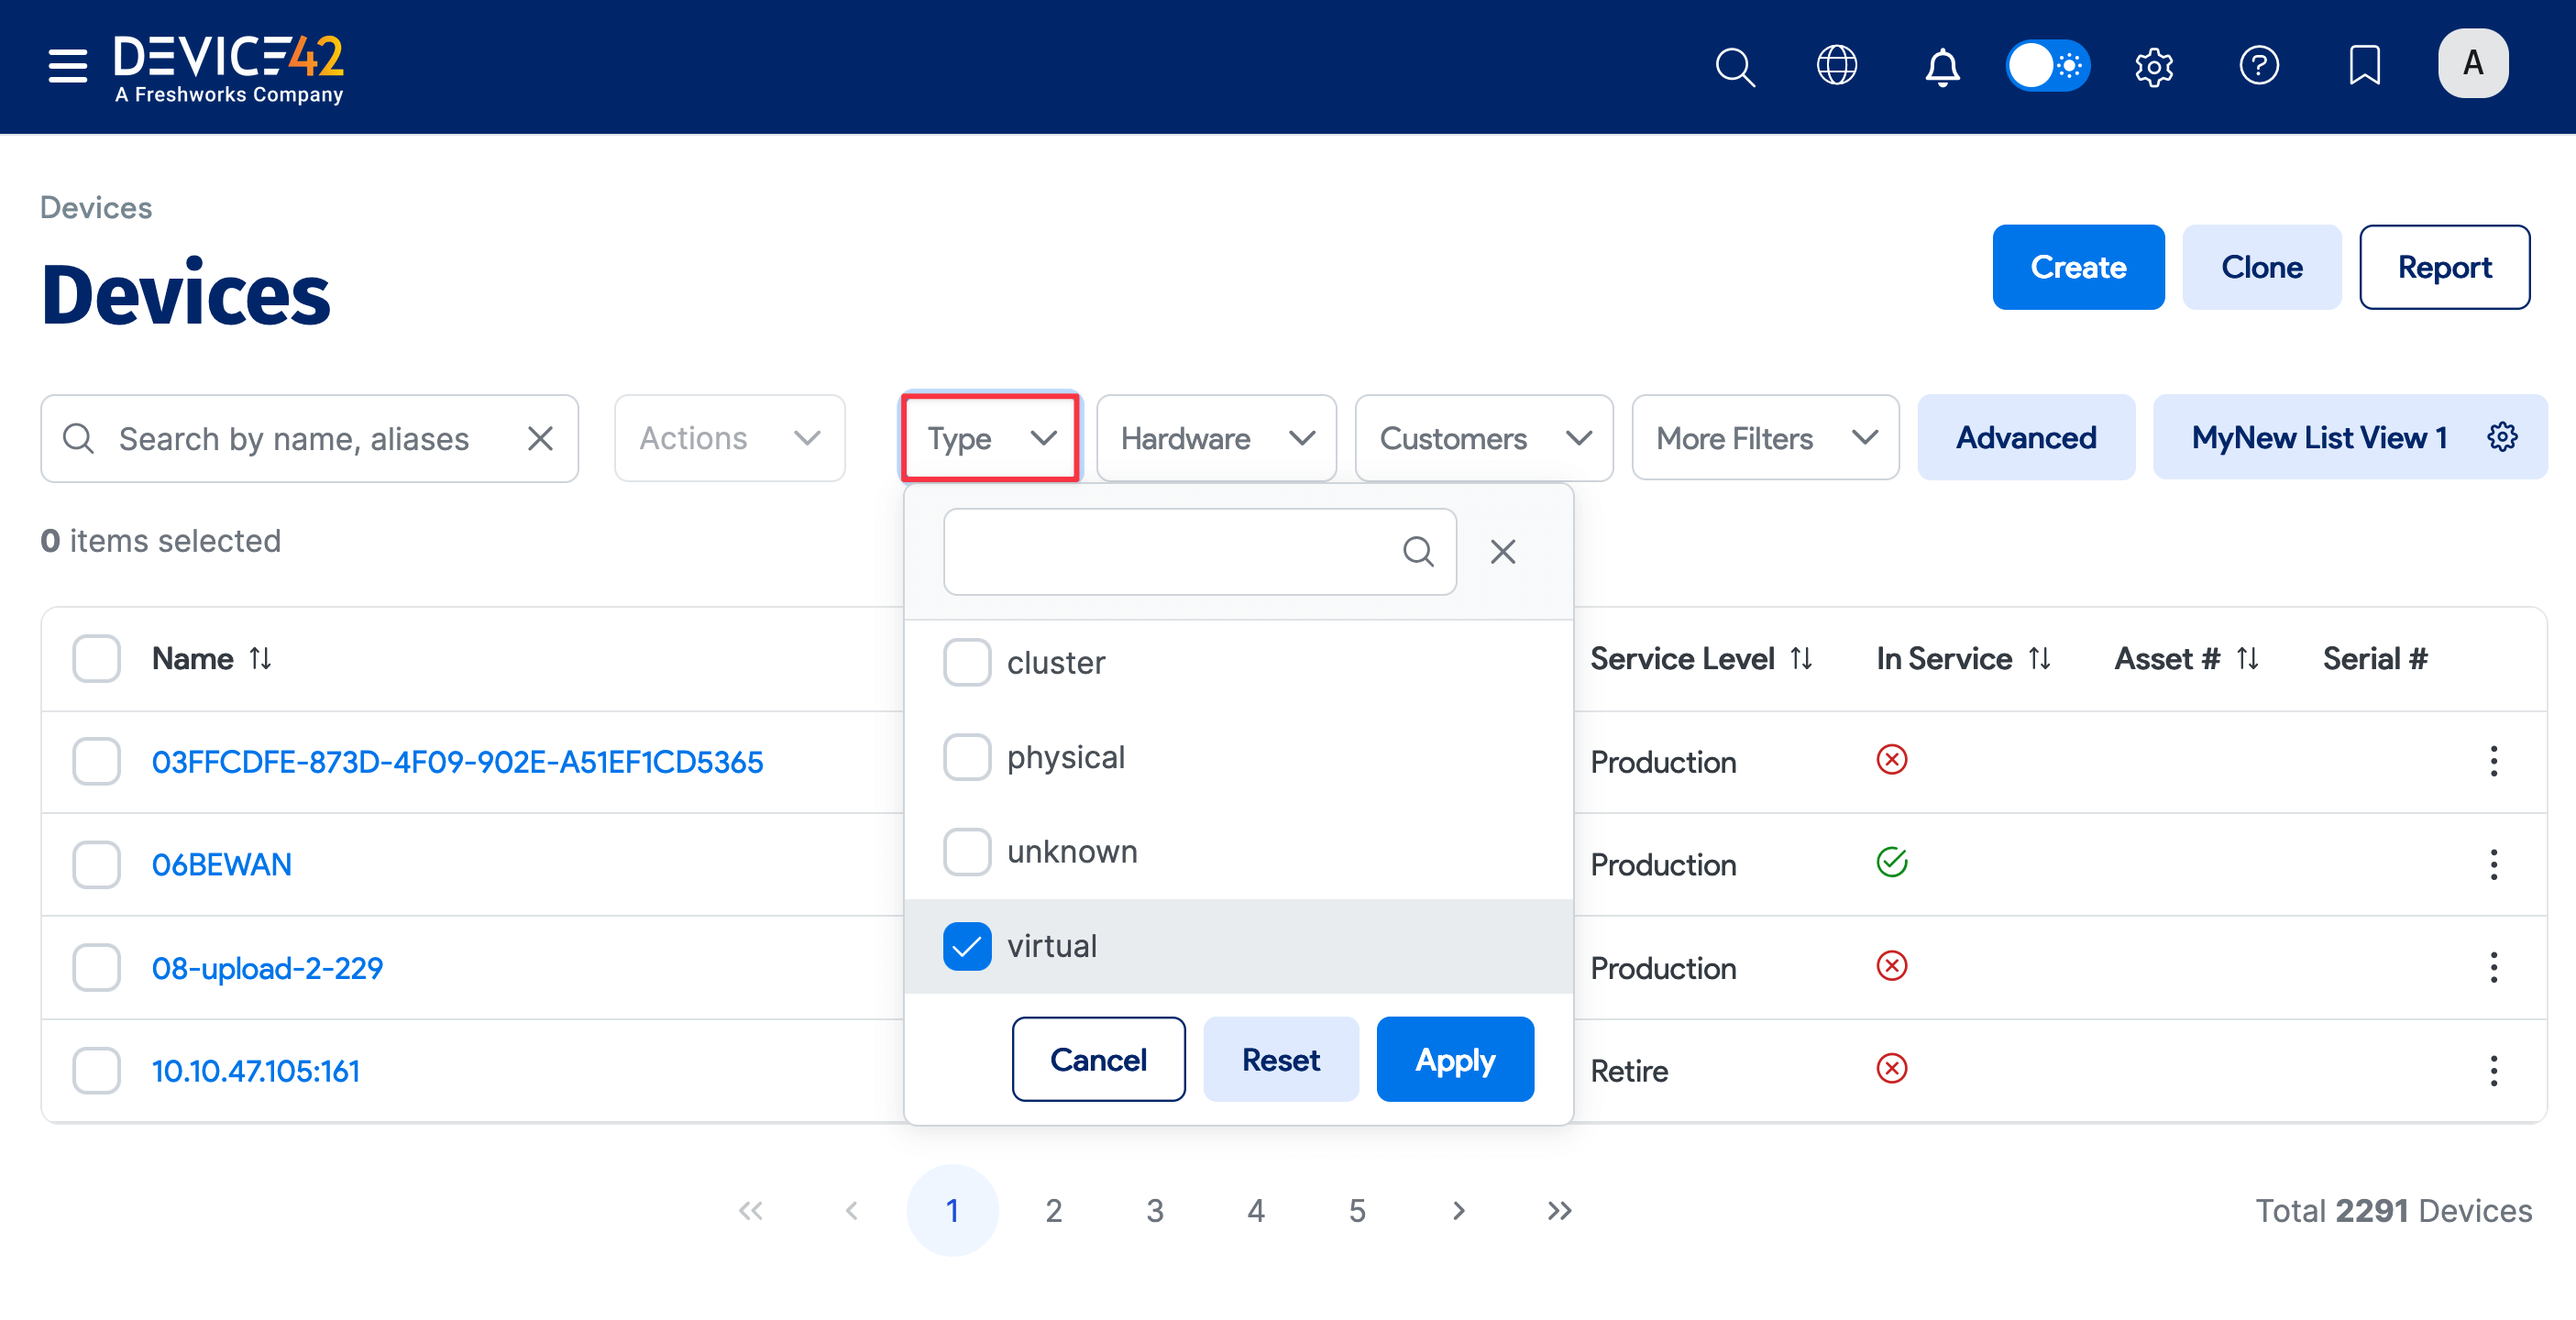
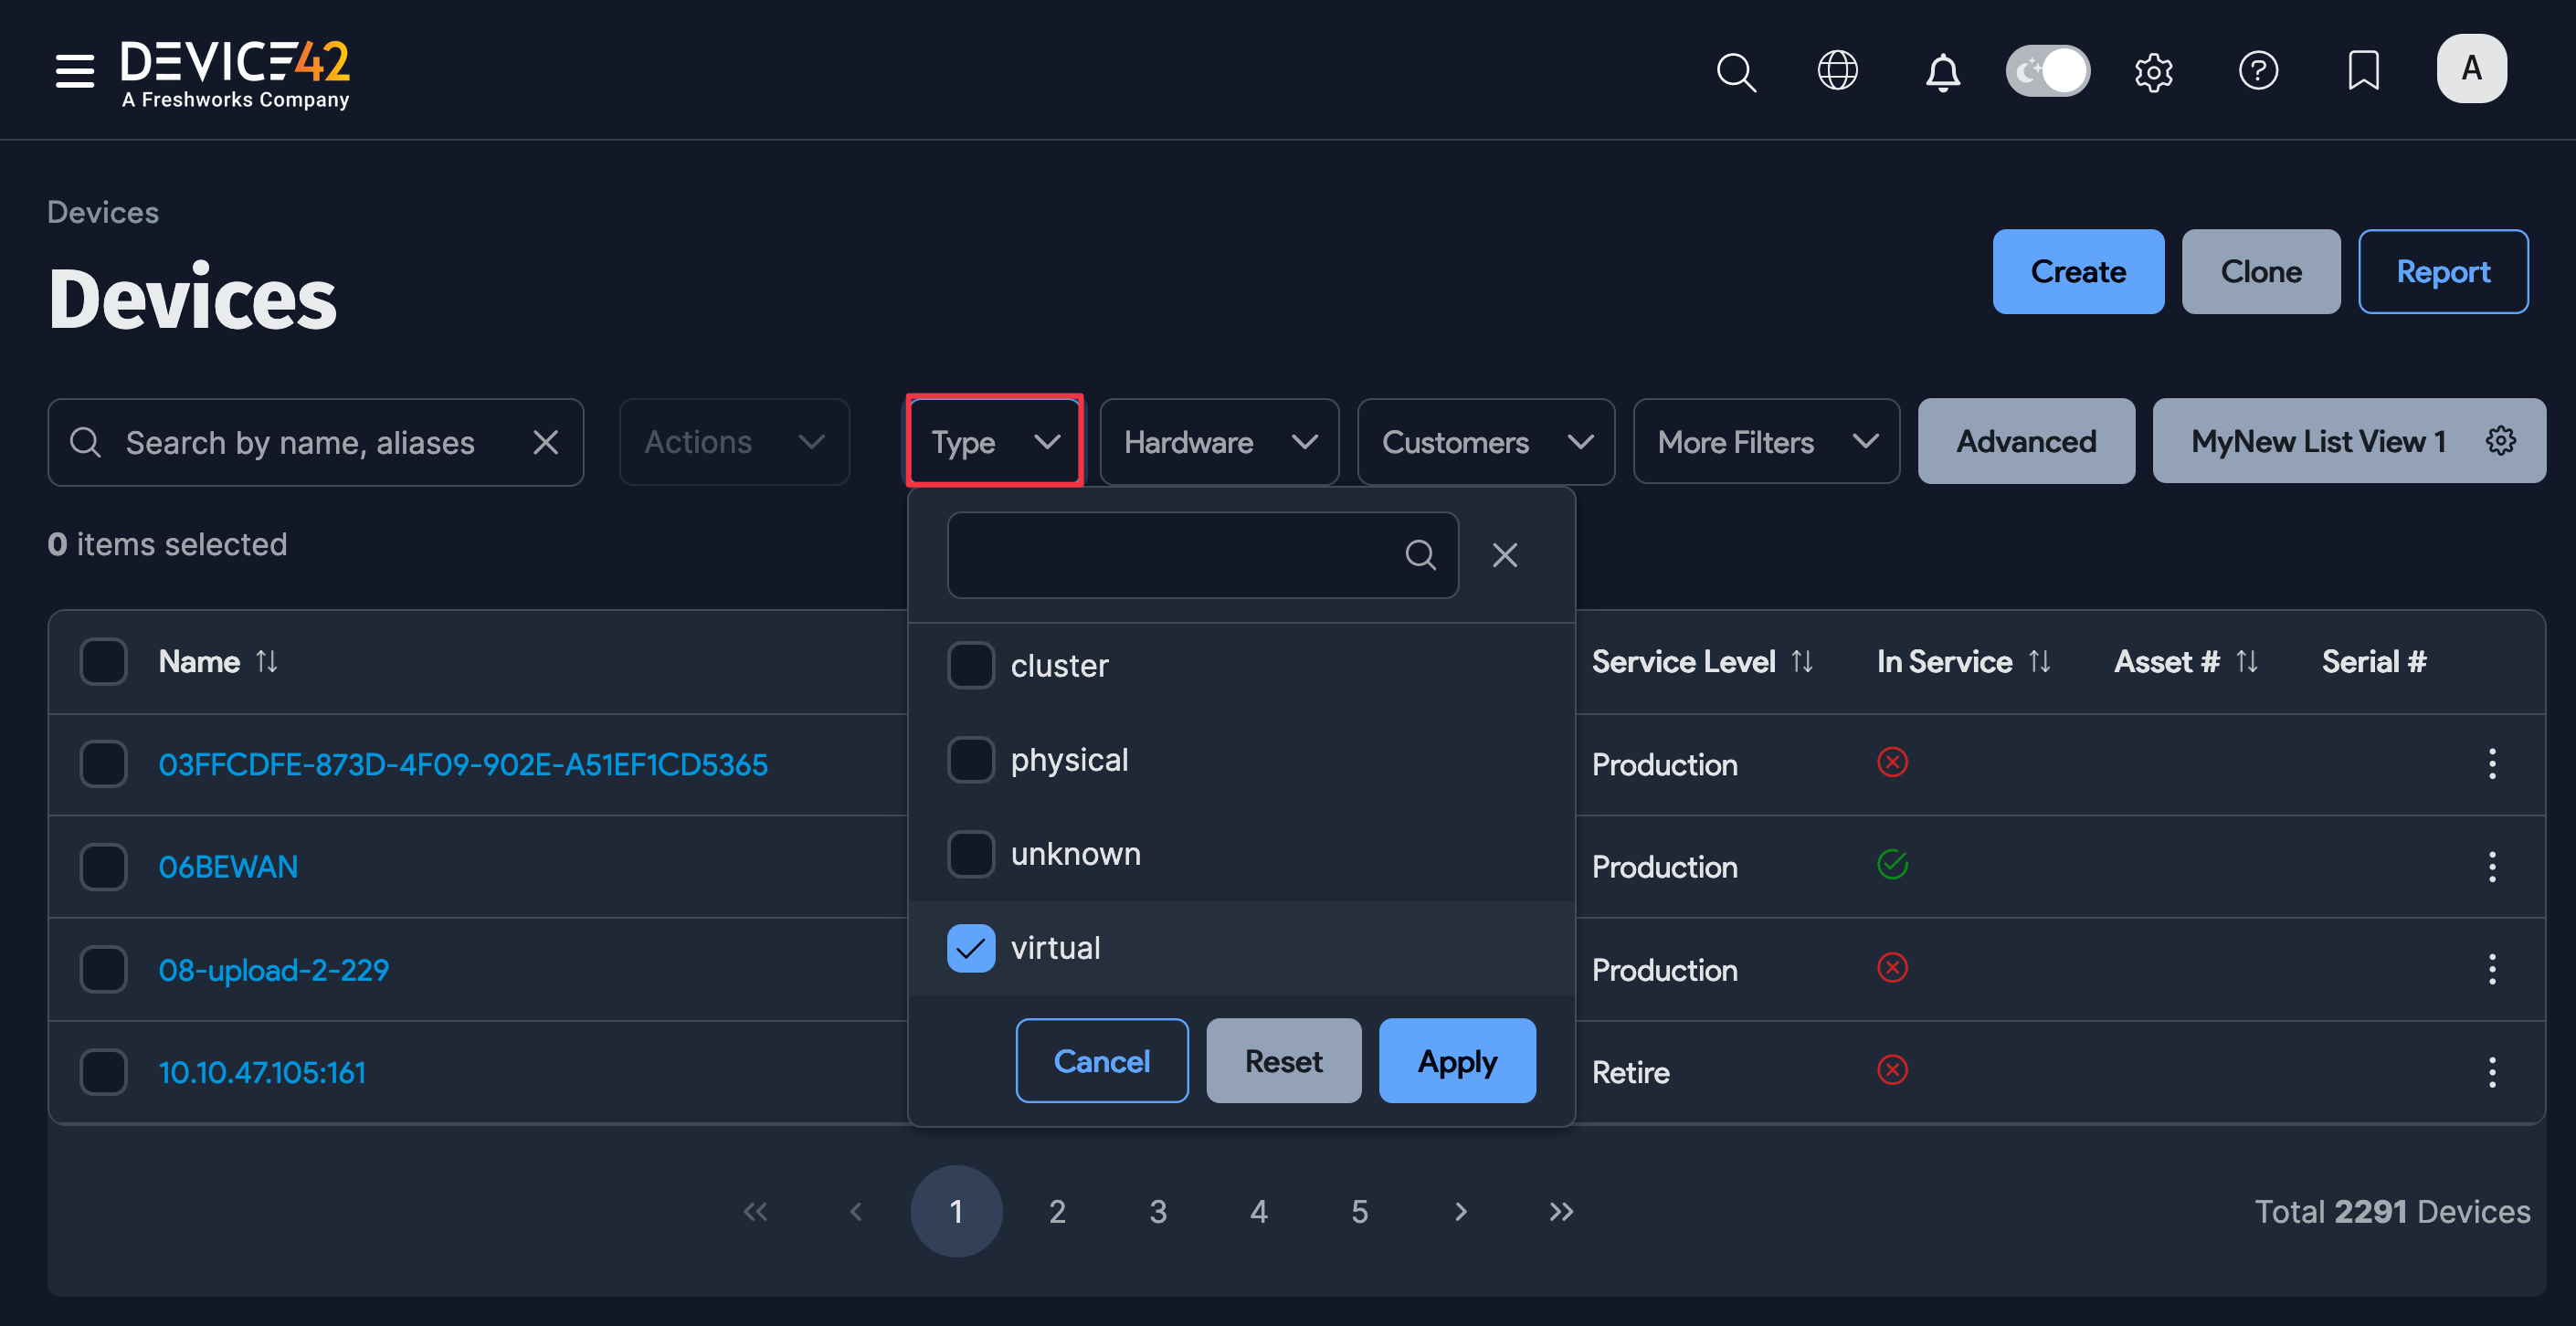
Go to Resources > Compute > All Devices, then select Virtual from the Type filter to display the list of virtual devices.
Click a device name to view its details. The Cloud Instance Information section is located at the bottom of the page.
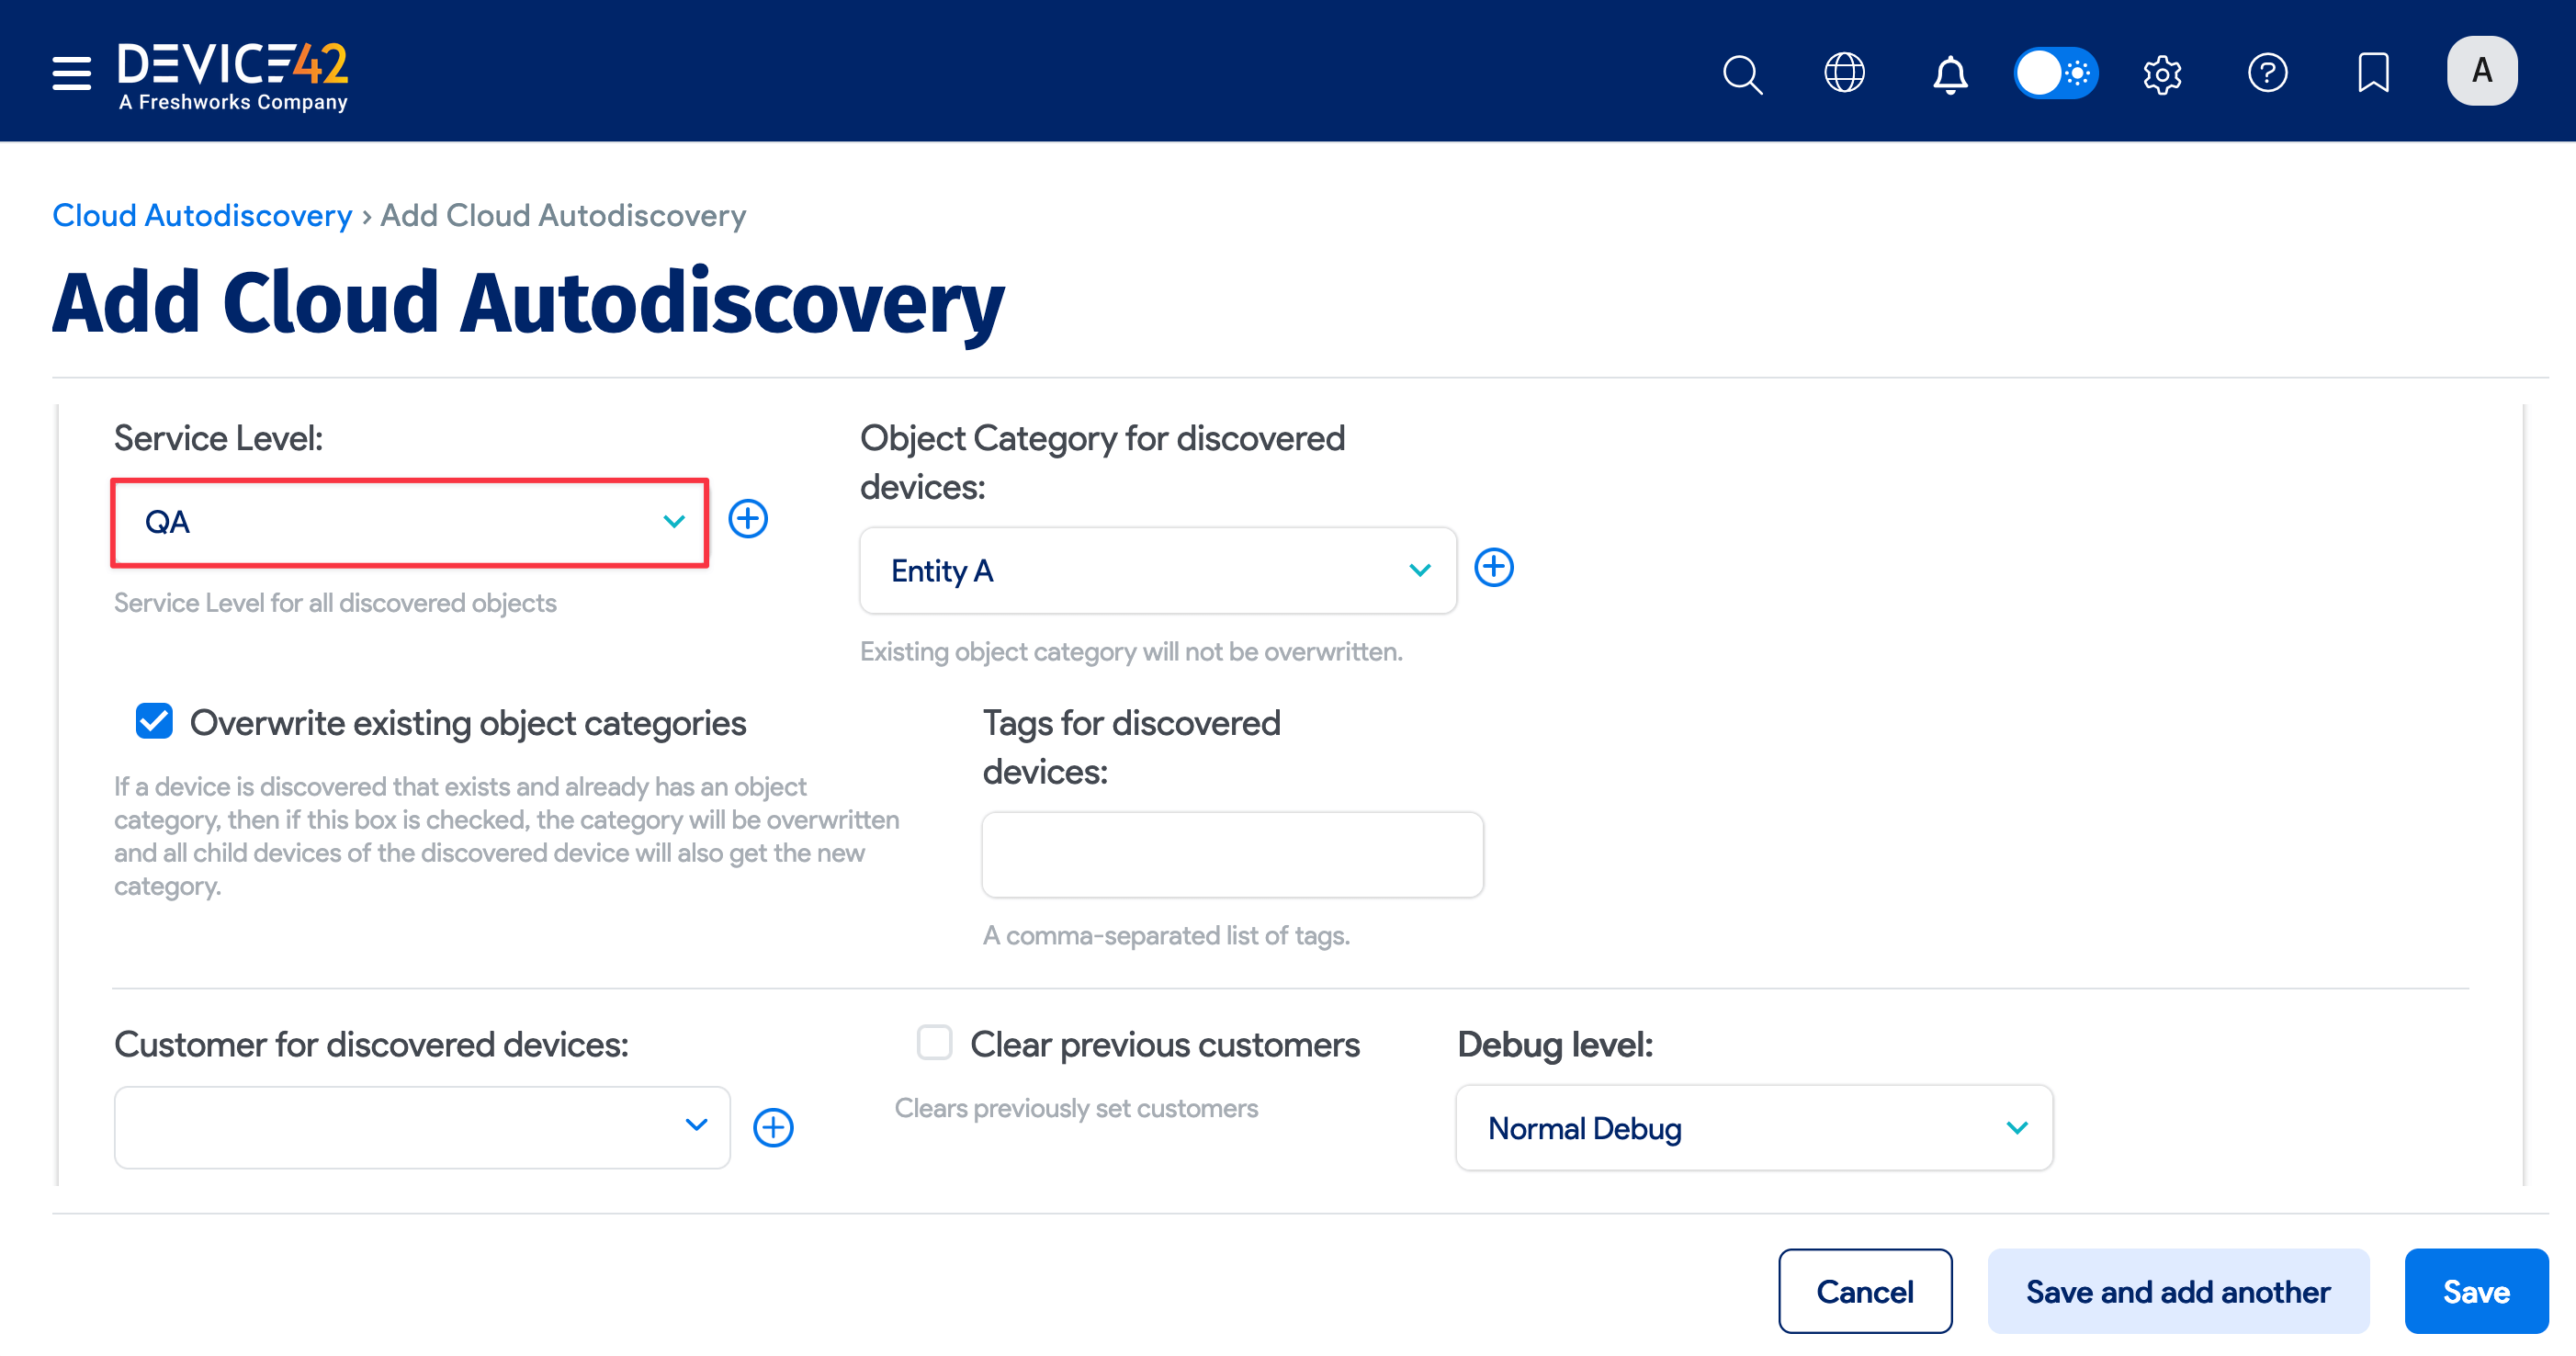
Service Level and Object Category Options
All cloud platform discovery jobs have the option to set the Service Level to apply to the discovered items. For example, you can set it so that the Development, Deployment, or Production service level is applied to discovered items.
Select an option from the dropdown menu, or add a new service-level category using the plus icon.
You can also set an Object Category for discovered devices to add another specialized classification. Select Overwrite existing object categories to give preference to the discovered object category over a manually defined object category.