Ping Sweep
This page is for Device42 administrators who need to perform quick network scans to identify live IP addresses. Device42's Ping Sweep autodiscovery performs a series of pings against specified networks to discover which IPs are live and respond.
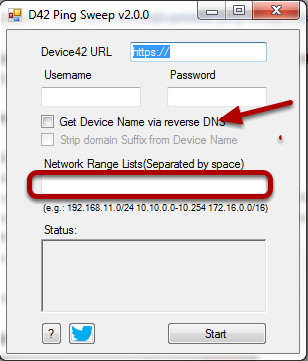
For the time being, an external standalone Device42 Ping Sweep utility is still available, but it may be deprecated in the future. See the Use the External Ping Sweep Utility section below for information on using the standalone tool.
Add or Edit a Ping Sweep Autodiscovery Job
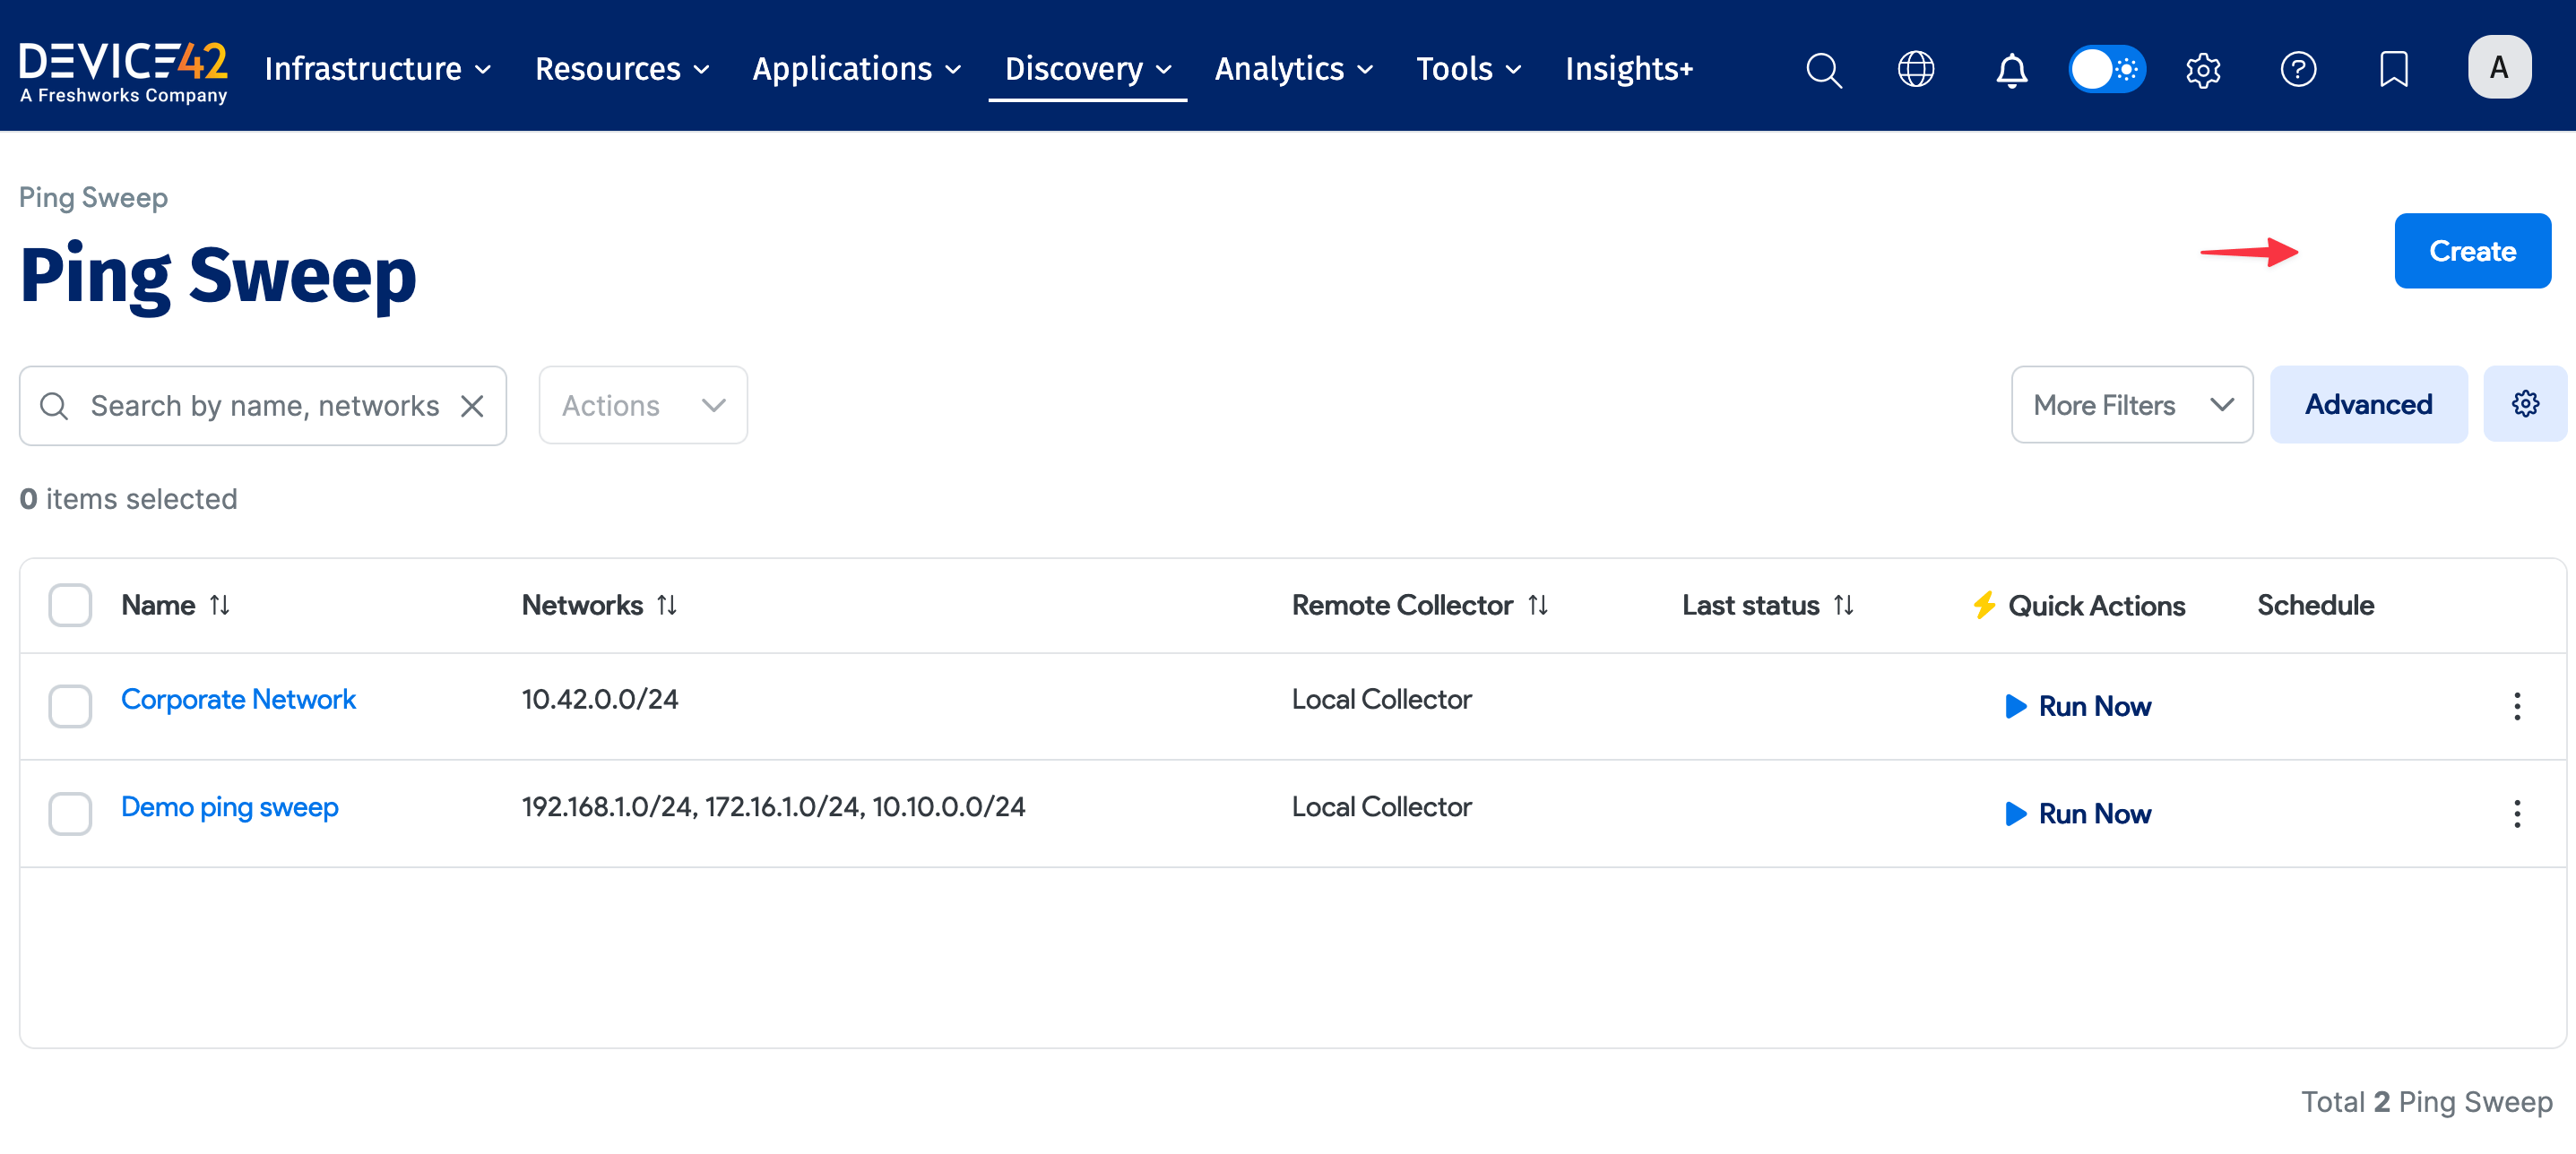
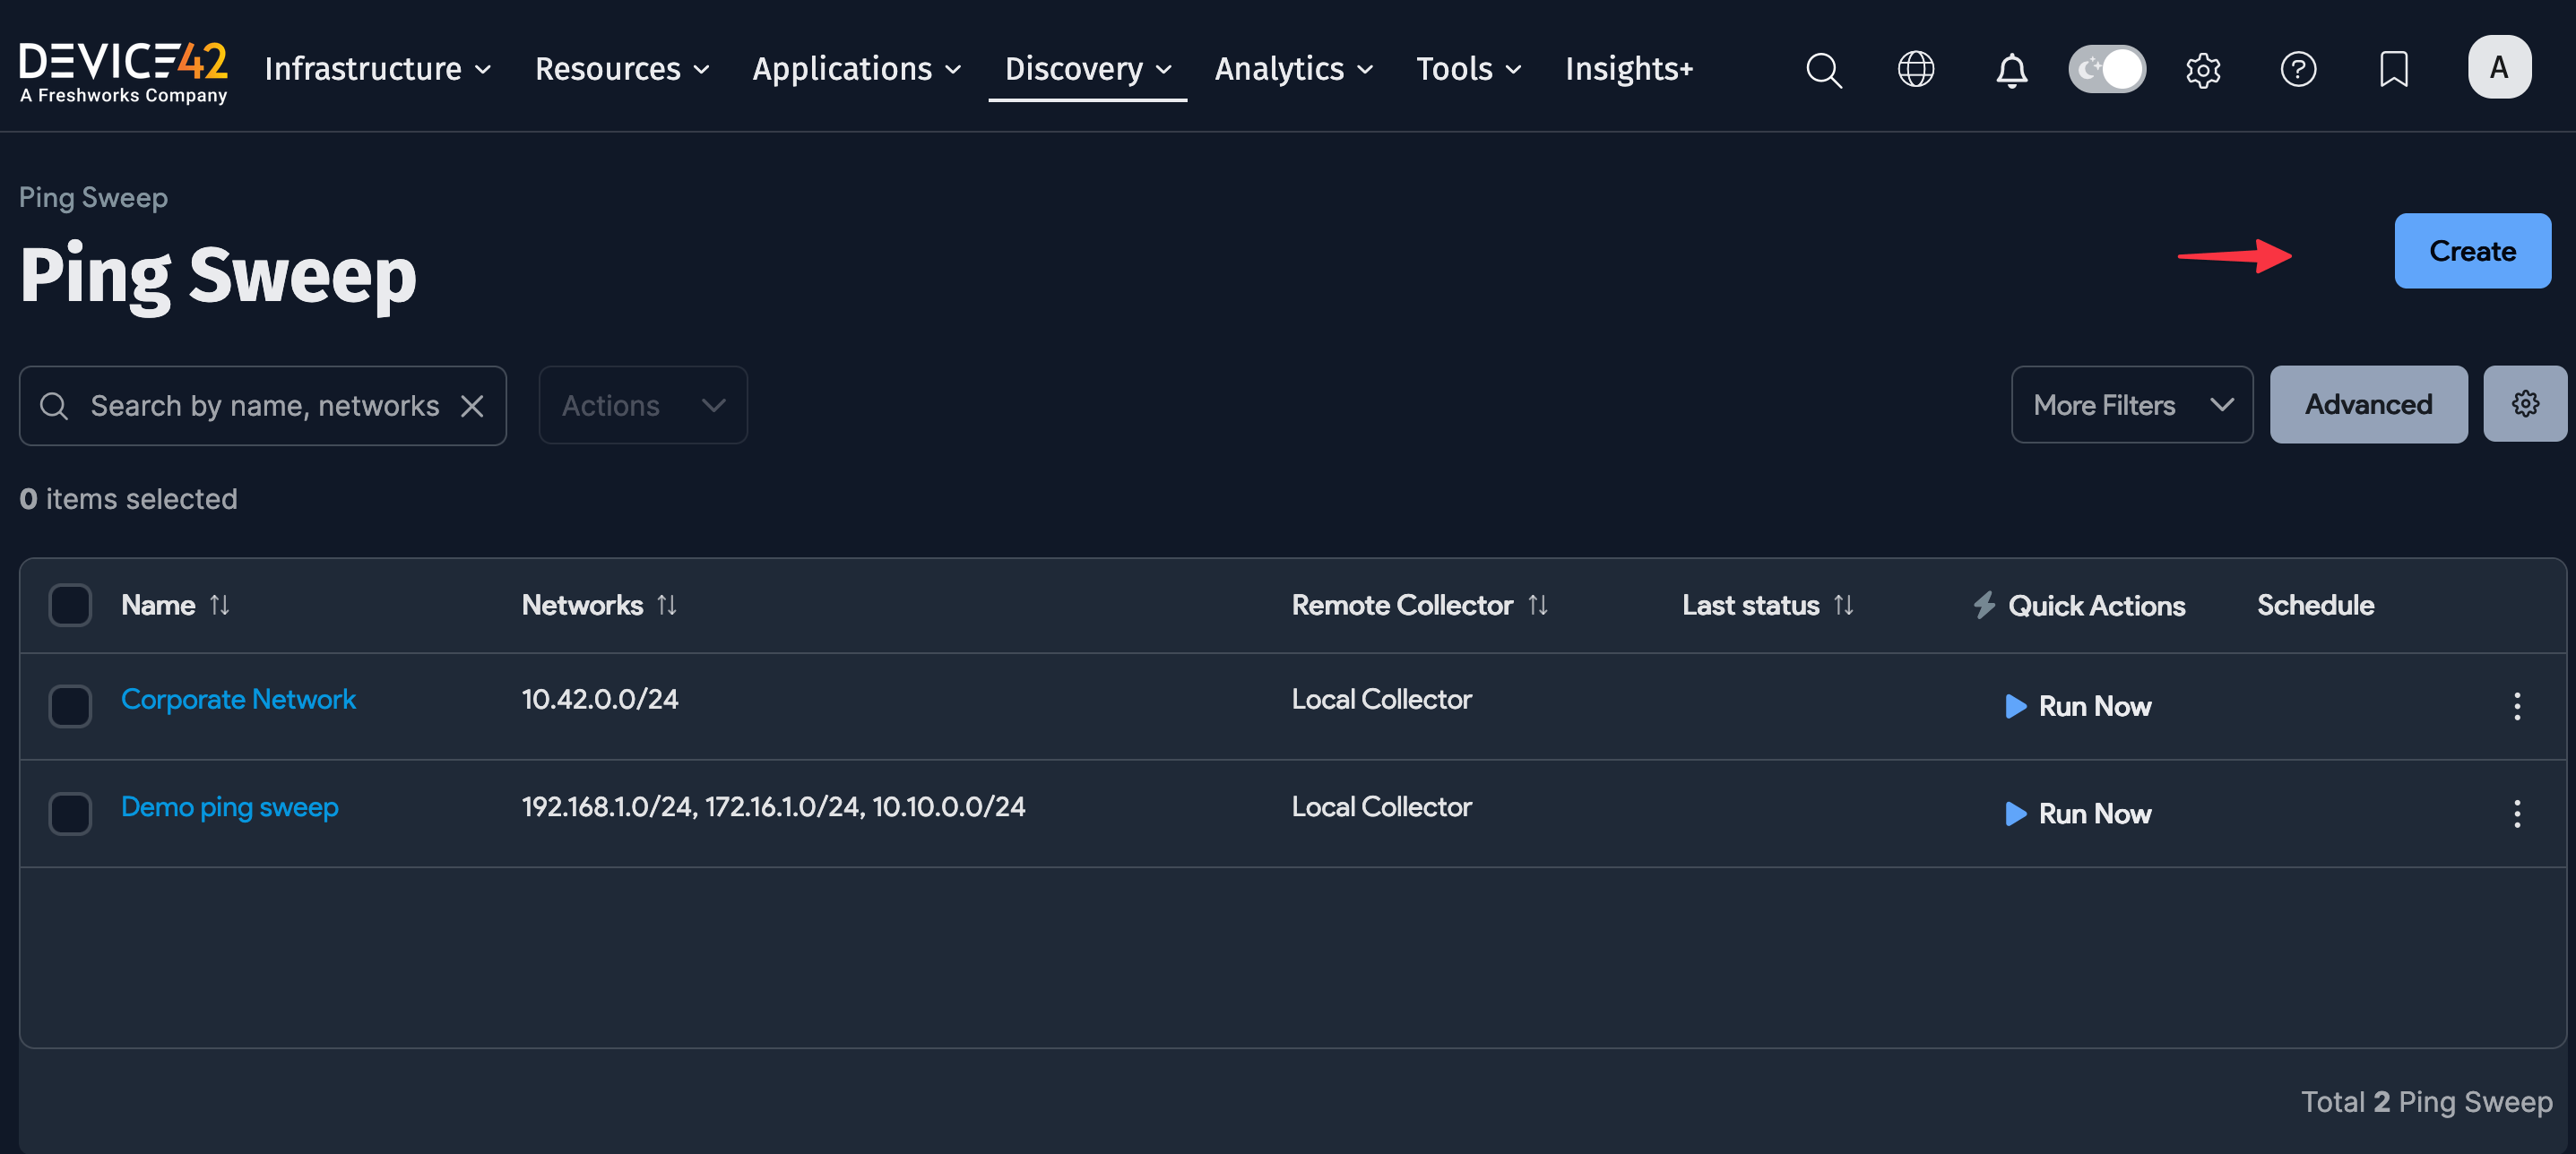
Navigate to Discovery > Ping Sweep from the Device42 main menu to display the Ping Sweep list page.
Click Create to add a new job. To edit an existing job, click a job name to display its details, and then click Edit.
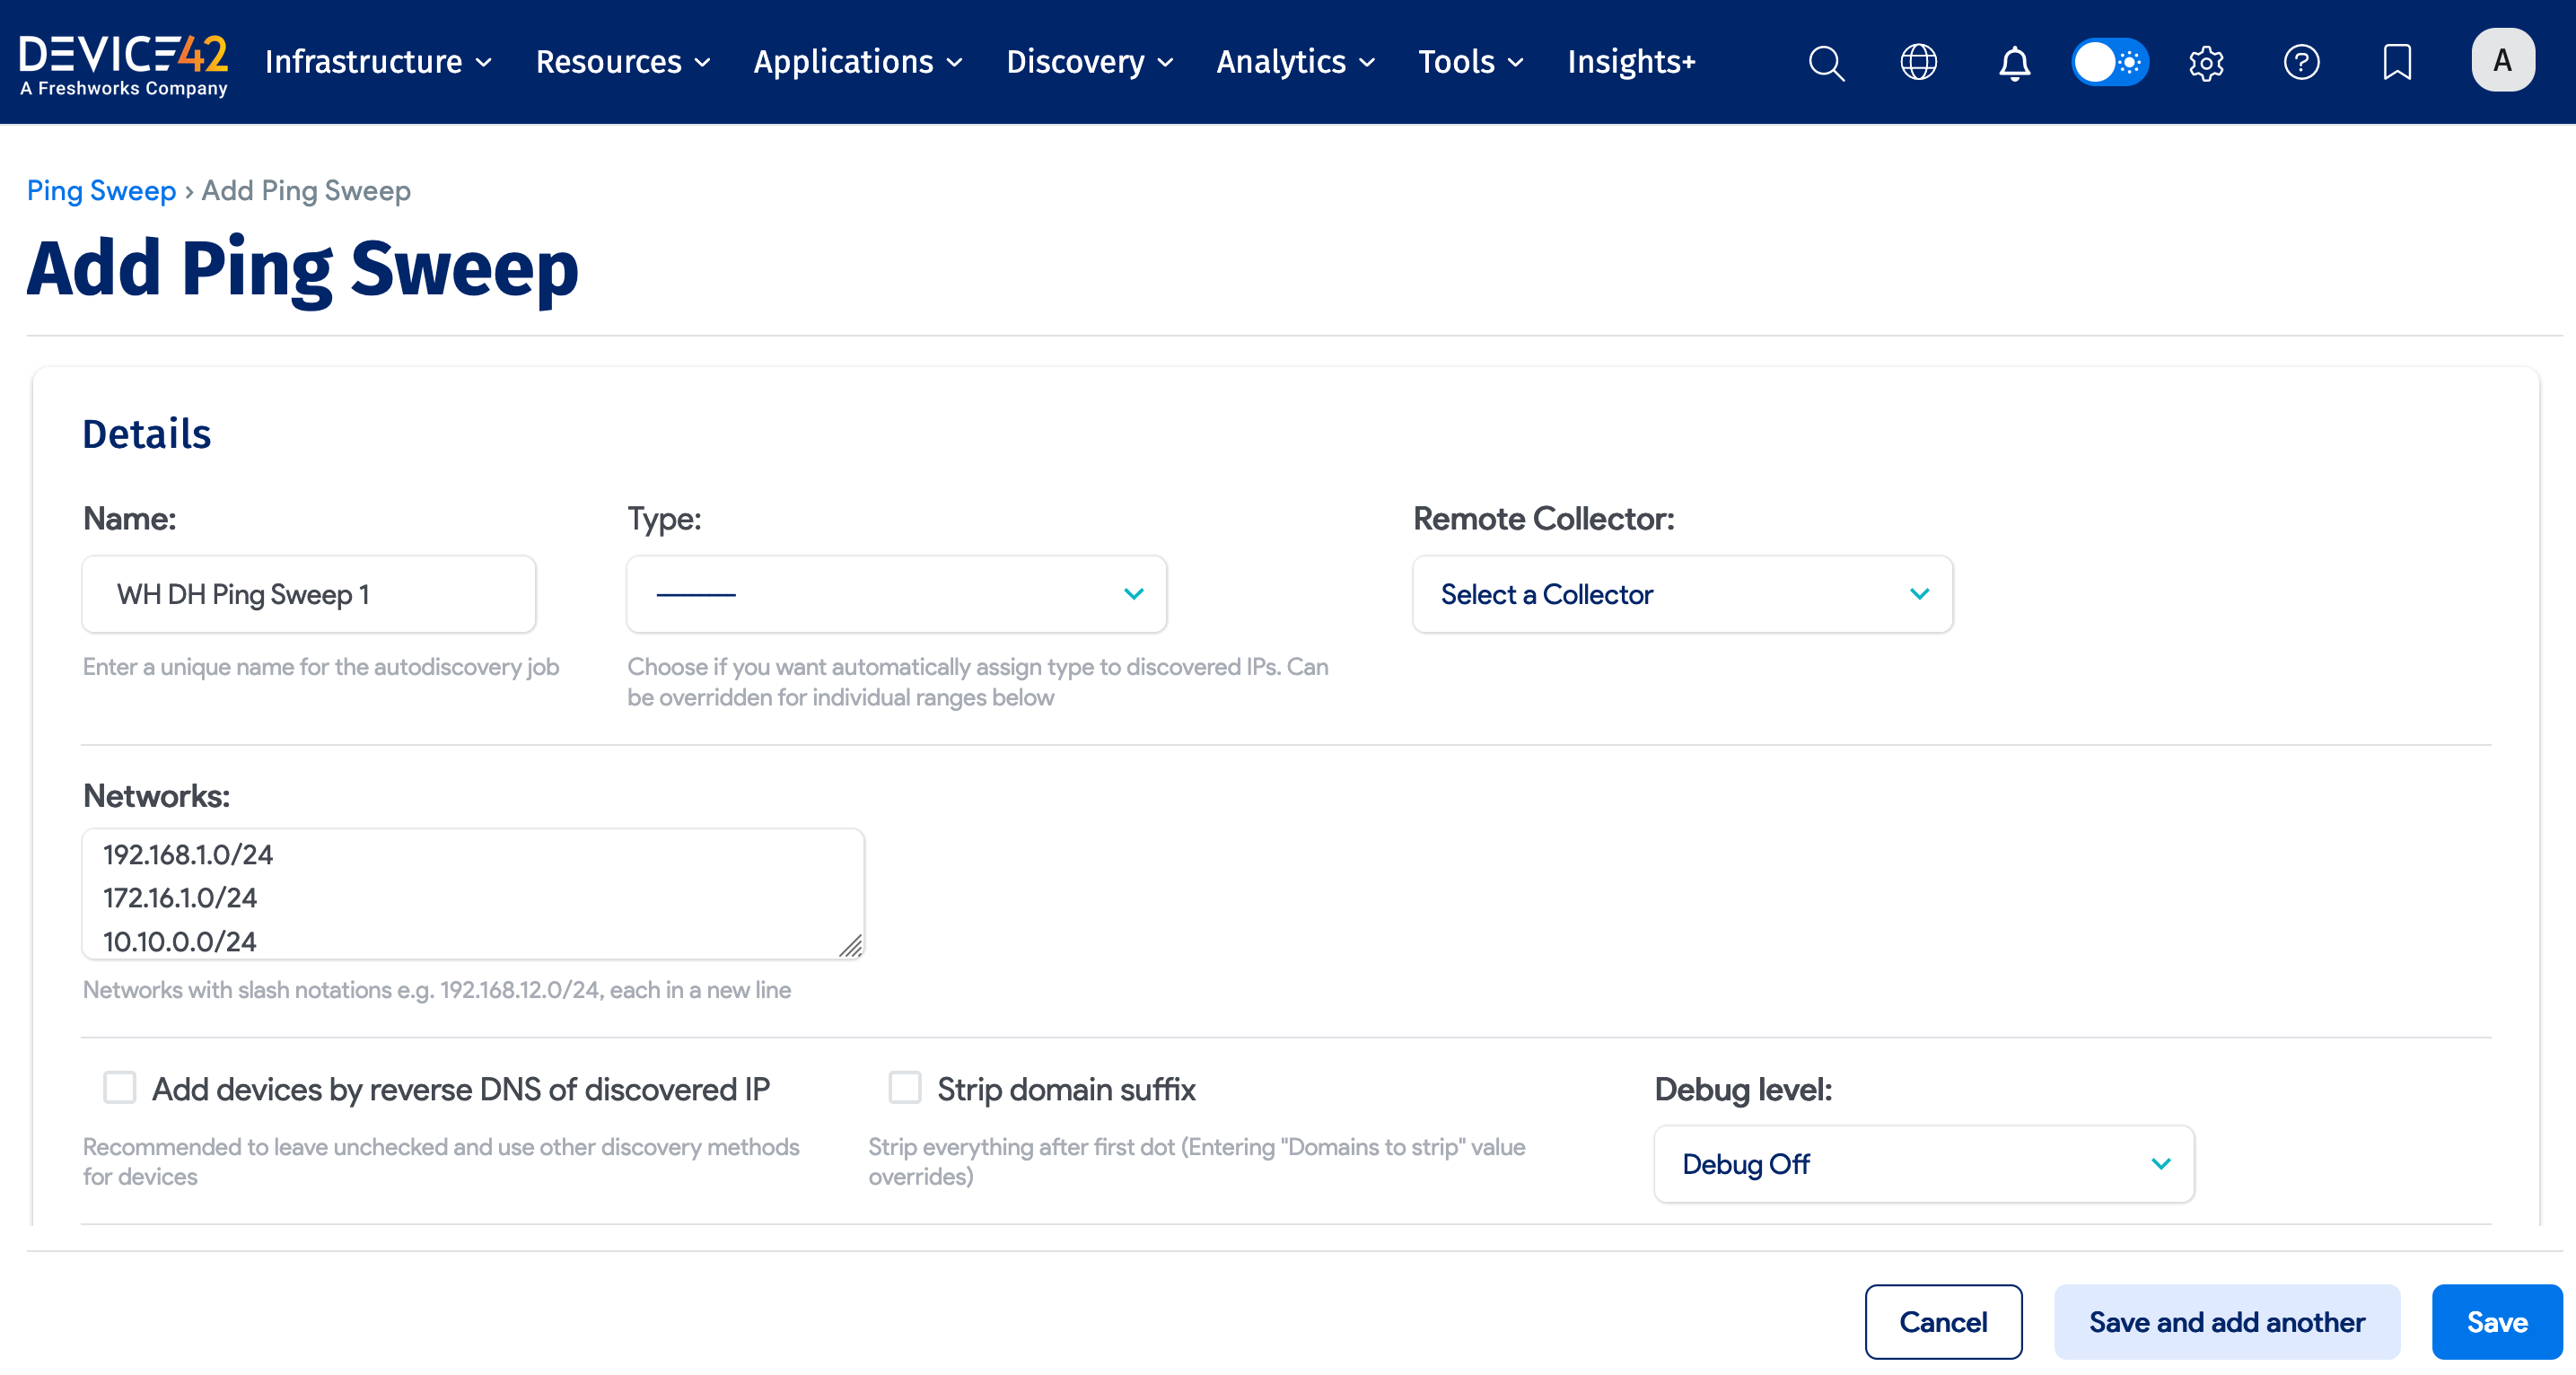
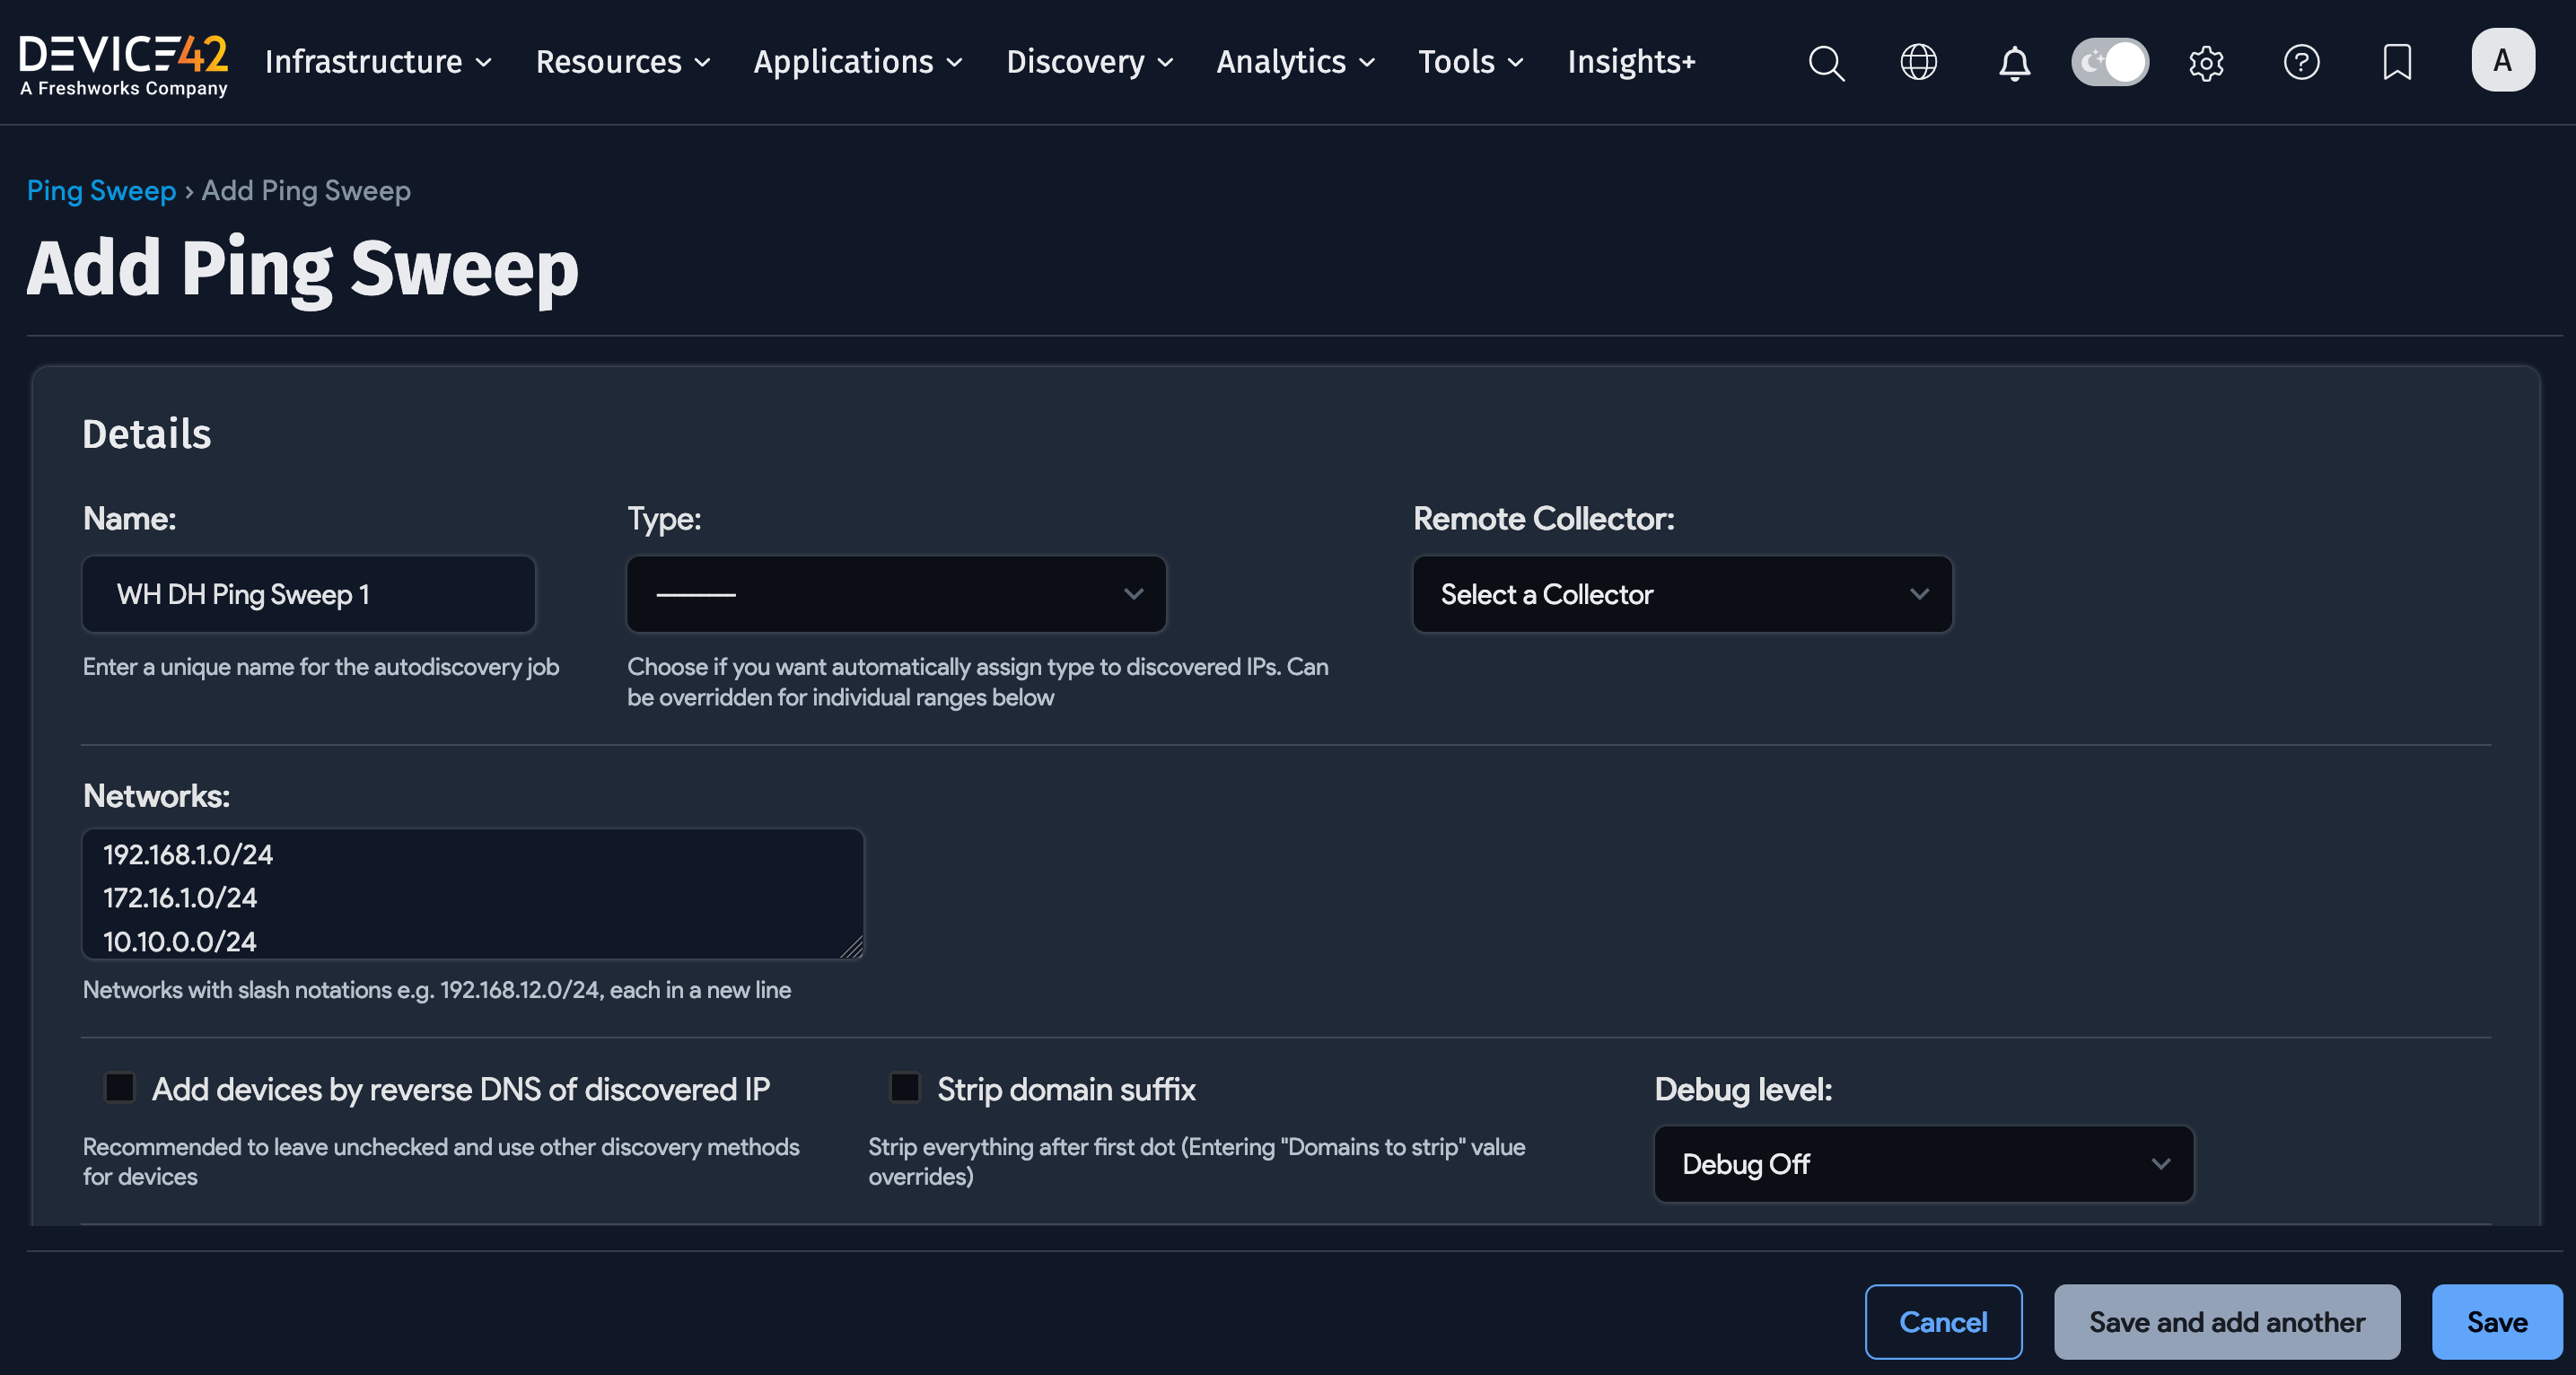
Fill in the job details:
- Enter a name for the job.
- In the Networks: field, enter a network range using mask bits in slash notation (for example,
192.168.11.0/24) or hyphenated IP ranges (192.168.11.1-254) in Nmap-style syntax. Multiple ranges can be separated via commas, spaces, or new lines.- By default, the Add devices by reverse DNS of discovered IP checkbox is unchecked Leave it unchecked unless you have a properly configured DNS environment to avoid creating duplicate devices. If you want to use reverse DNS values as device names, check this option.
- Other options include Strip domain name suffix and an option to Create new subnet for networks not found.
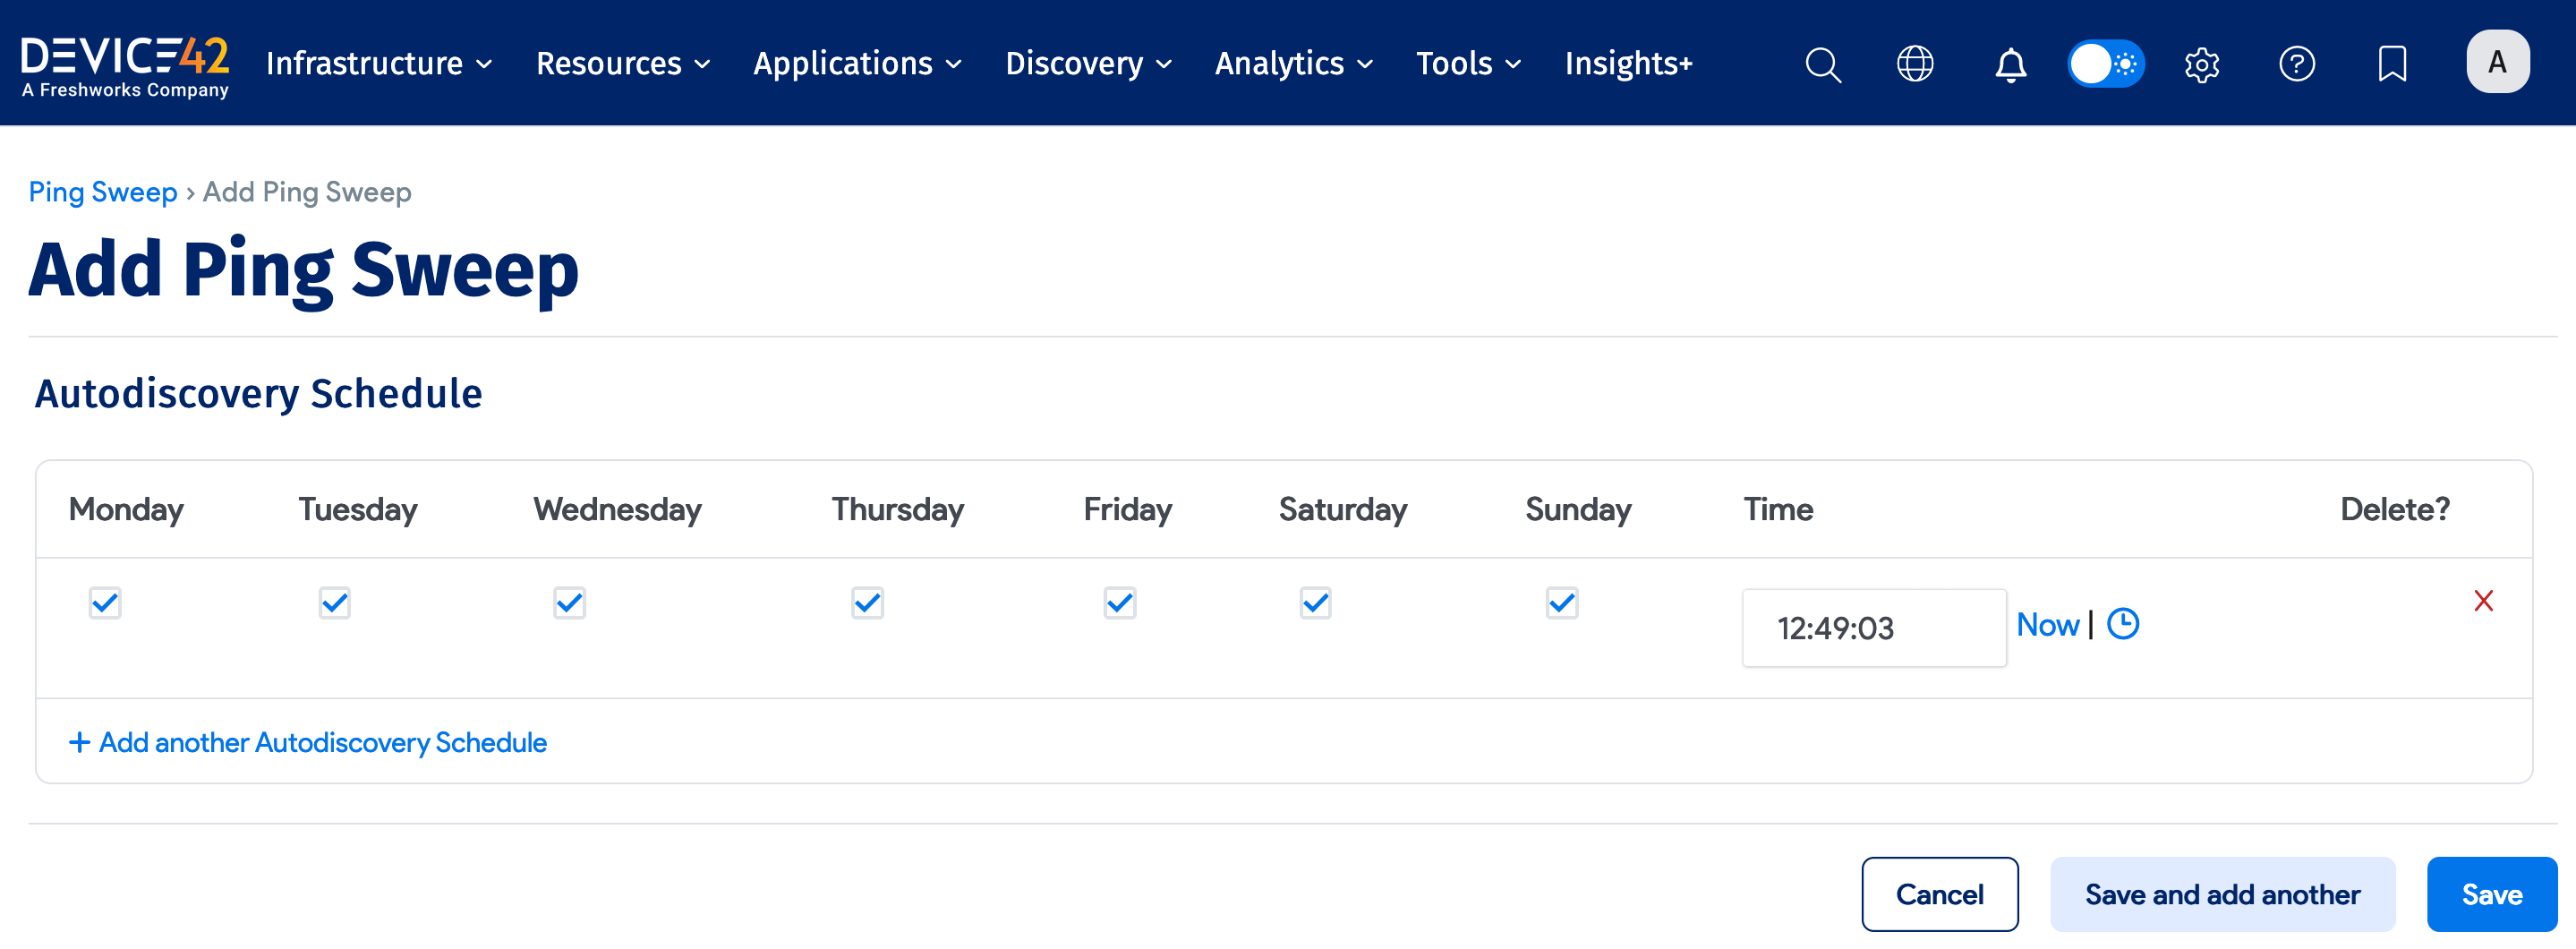
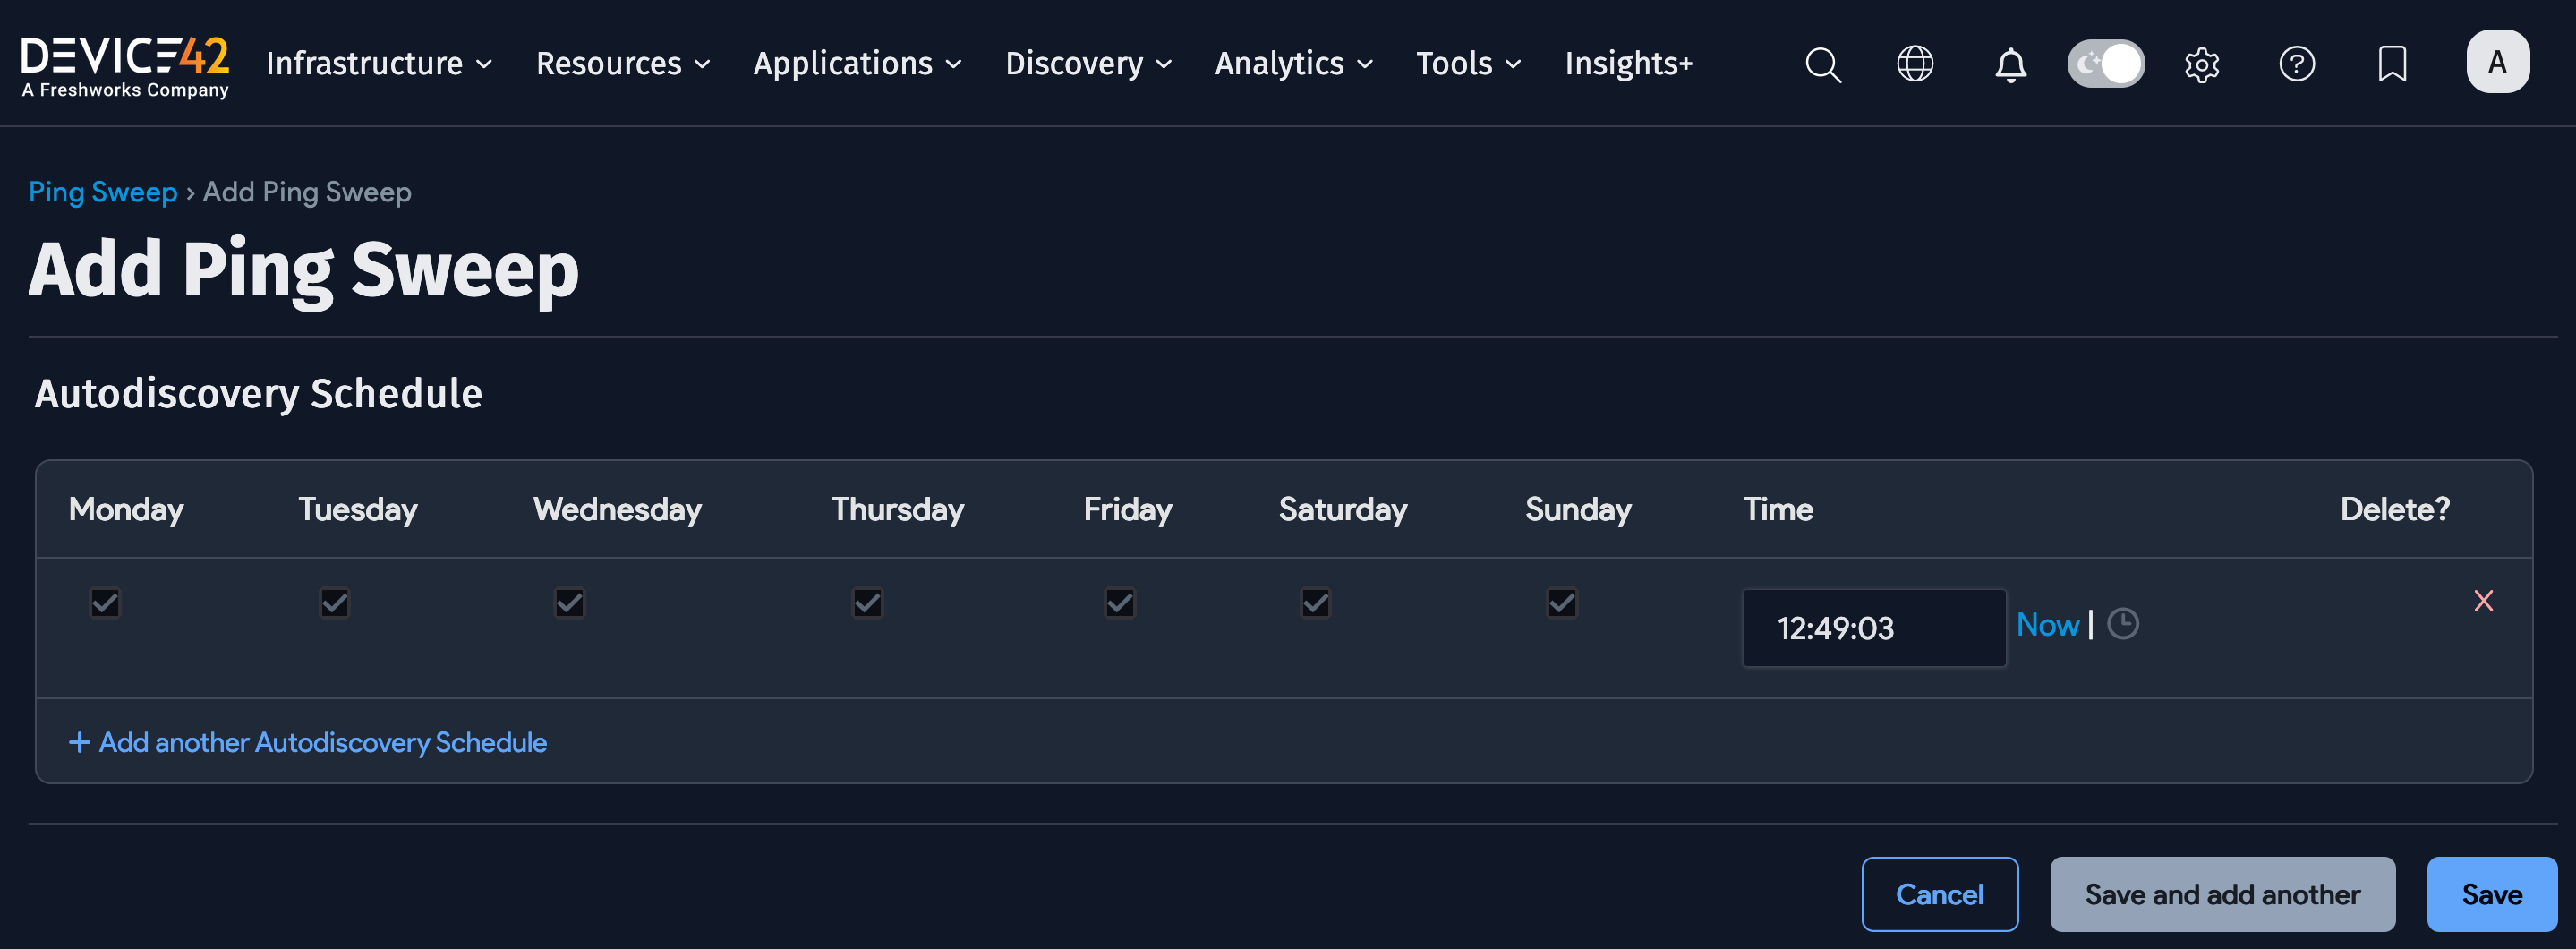
Optionally, you can automatically run the job by configuring a schedule in the Auto Discovery Schedule section. To run the job right away, click Run Now on the Ping Sweep list page.
View Ping Sweep Data in Device42
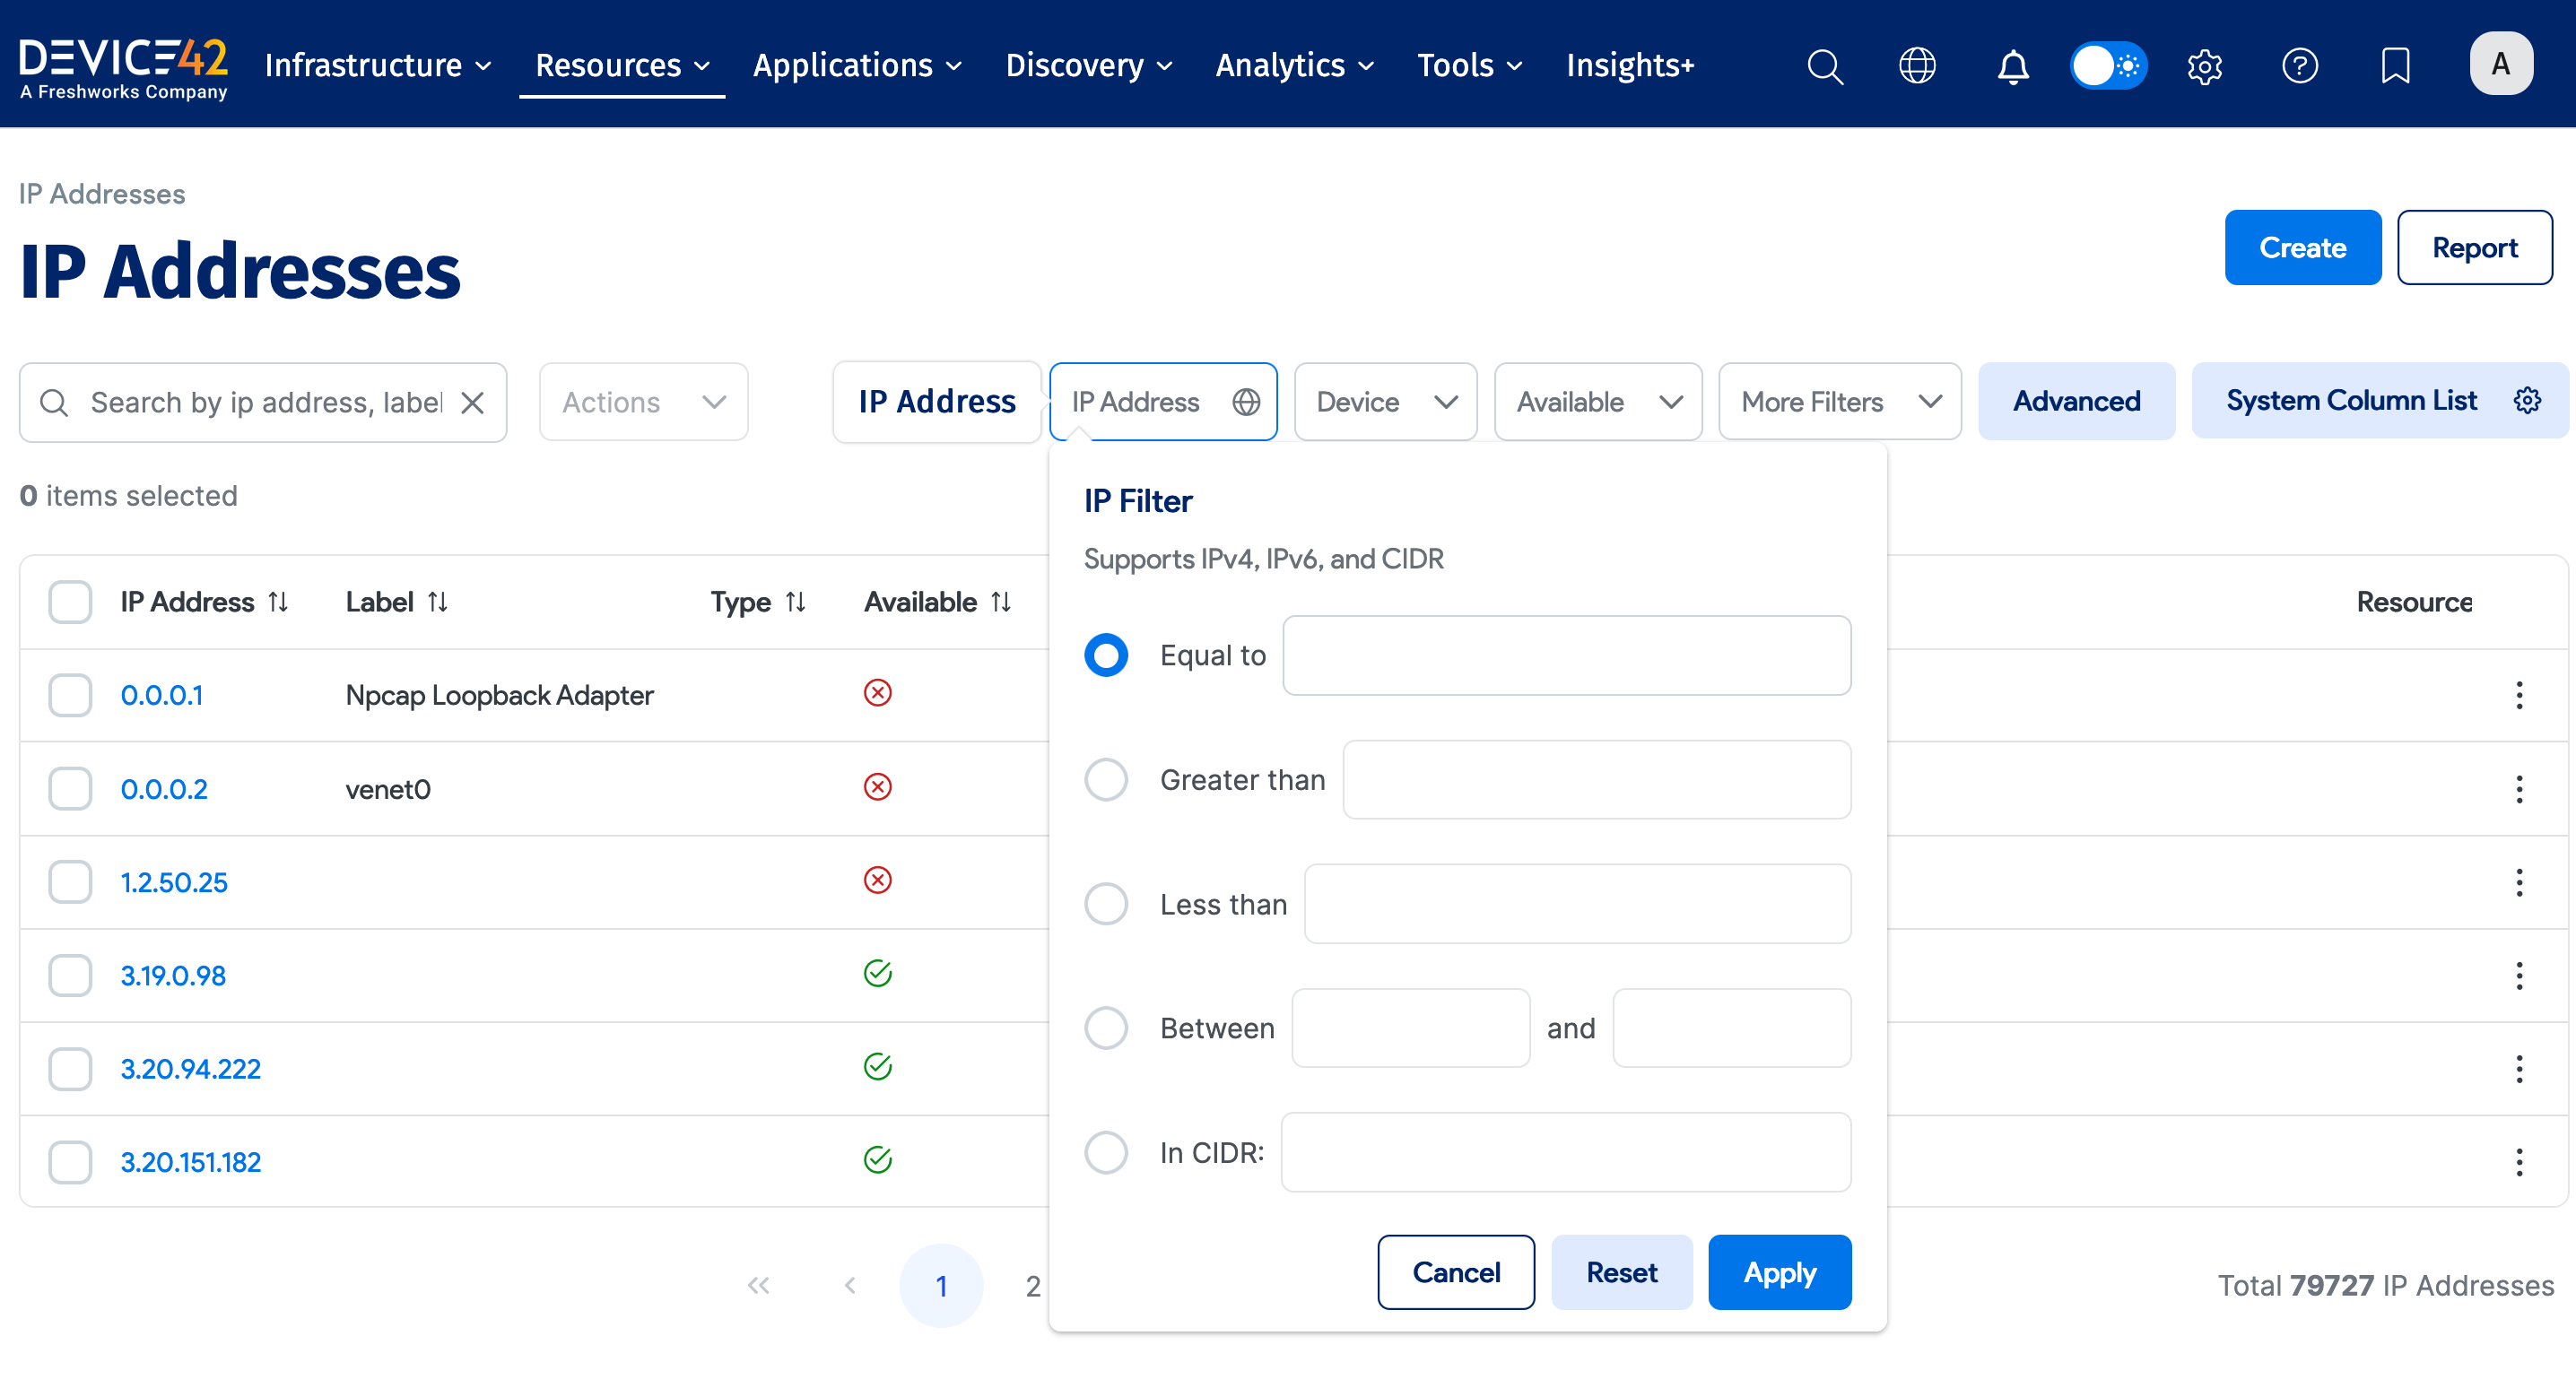
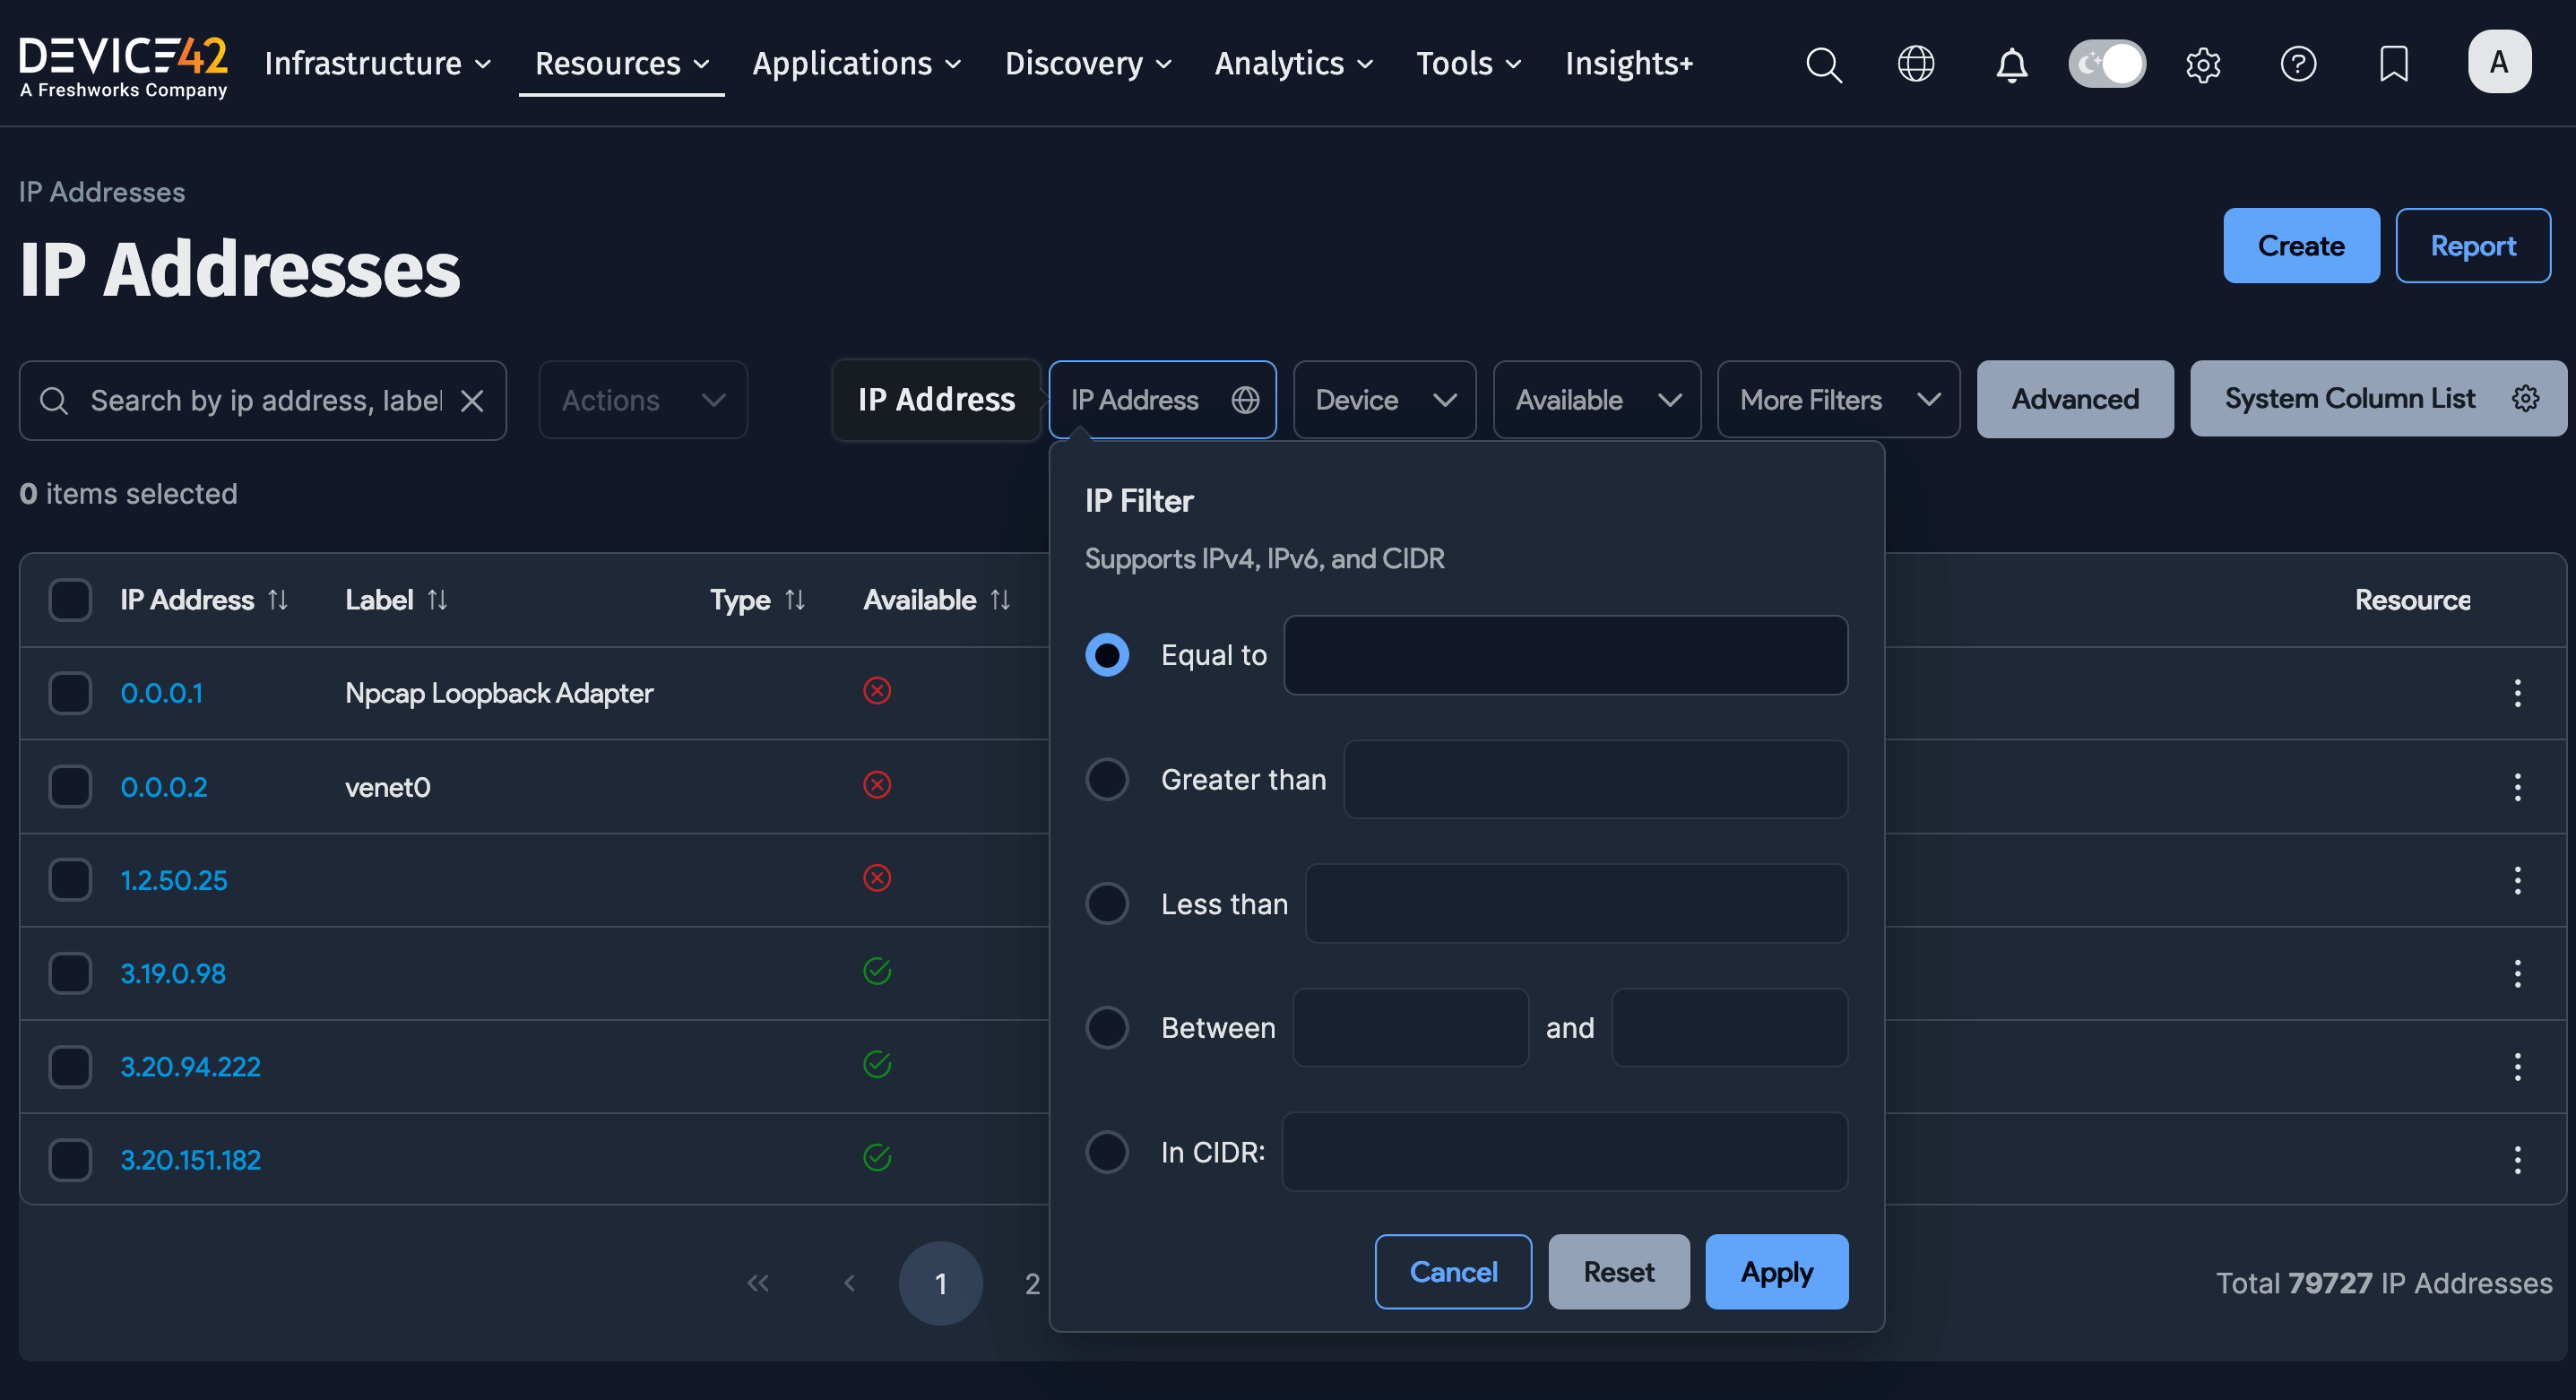
Select Resources > All IP Addresses from the Device42 menu to display the IP Addresses list page. You can narrow down the list using the available filters. Click IP Address for options to filter the results by IP address values.
Ping Sweep Usage Considerations
Add the respective subnets in Device42 before discovering and uploading IP information, otherwise, all IPs will go to an "undefined" subnet.
Ping Sweep considerations and best practices:
- MAC address discovery works only for local LANs.
- If the reverse DNS option is selected, discovery will take longer.
- Depending on the behavior of your network devices, some subnets or IP addresses will show up as used. For example, as some load balancers reply to pings for every IP on a given range, networks that live behind these load balancers may show up as used.
- Running discovery using a wireless card will only discover the wireless card itself.
- Device42 provides both a built-in Ping Sweep tool and a standalone external Ping Sweep utility that runs as a Windows application.
Use the External Ping Sweep Utility
The external Ping Sweep utility is a standalone tool that does a ping sweep on specified networks and uploads the results to the Device42 appliance. It runs on Windows or Linux platforms and has no external dependencies.
Download and Install
- Download the ping sweep
.zipfile from the Device42 Autodiscovery Tools page. - Unzip the downloaded
d42-ping-sweep.zipfile containing five files:d42_pingsweep_windows_386.exe(32-bit version)d42_pingsweep_windows_x64.exe(64-bit version)d42_pingsweep_linuxping.cfg.sampleversion.txt
- For Windows, use the
.exefile. For Linux, set thed42_pingsweep_linuxfile as executable by running the command:$ chmod +x d42_pingsweep_linux - Copy or move
ping.cfg.sampletoping.cfgand add your settings as described below. - Run the appropriate Windows
.exeor Linux executable. You're all set!
Configure the Ping Sweep Settings
Use the ping.cfg.sample file to select your settings. Make a copy of this file and rename it to ping.cfg.
Below is a sample of the ping.cfg file:
Click to expand the code block
[settings]
# base_url points to your Device42 server
# For example: base_url = https://192.168.1.50
base_url = https://192.168.1.100
# Device42 username and password
username = username
secret = password

[targets]
# targets can be specified as:
# single: 192.168.1.125
# range: 192.168.1.101-192.168.1.150
# cidr block: 192.168.1.0/24
# any combination of above: 192.168.3.0/24,192.168.4.1-192.168.4.10,192.168.55.22,10.0.0.0/24
targets = 192.168.1.1/24
-
In the
[settings]section, enter the base URL (FQDN or IP) for the Device42 appliance on your network, including credentials. Make sure the credentials have the required access permissions. The minimum required permissions are:- Ping Sweep | Can add Ping Sweep
- Ping Sweep | Can change Ping Sweep
- IP Address | Can add IP Address
- IP Address | Can change IP Address
- IP Address | Can view IP Address
- Subnet | Can add Subnet
- Subnet | Can change Subnet
- Subnet | Can view Subnet
- Device | Can add Device
- Device | Can change Device
-
In the
[targets]section, enter a network range using mask bits or hyphen ranges (per Nmap syntax). For example,192.168.11.0/24for the subnet range or192.168.11.1-254for the hyphenated range. Multiple ranges can be separated by spaces. -
The
[options]section provides the following options, with explanations in the formatoption_name: explanation = default value
get_mac_address: Try to get MAC address for found IP =Falseget_hostname: Try to get hostname for the found IP via DNS (if there are multiple domains using the same IP, only the first is used) =Falsethreads: Number of ping threads =128timeout: Timeout for each ping =2000retries: Number of retries (better to keep it greater than 2) =4print_ips: Print all found IPs =Falsedebug: Print all debug messages =Falsenameservers: Custom nameservers =8.8.8.8,8.8.4.4
-
The
[discovery_options]section provides the following options, with explanations in the formatdiscovery_option_name: explanation = default value
strip_domain_suffix: Strip everything after first dot =Falsecategory: Category for discovered subnets =Stringcreate_new_subnet: New subnet for networks not found =Falseoverwrite_subnet_categories: Overwrite existing subnet categories =Falsevrfgroup: VRF group for discovered subnets =Stringtype: Static/DHCP/Reserved =String
Run and Schedule Ping Sweep Jobs
You can start the process by running the executable from the command line – root or administrator privileges are required. You can also schedule runs using an operating system task scheduler (like crontab or at).
During and After an External Ping Sweep
You'll see a command prompt after you launch the ping sweep. When completed, the status will change to "Finished". If successful, you will see "Success" messages, and new and updated subnet and IP information in Device42.
