Dell/EMC Autodiscovery
Device42 discovers Dell and EMC storage arrays including Compellent, VNX/VMAX, Data Domain, Unity, and Isilon. This page lists the access protocols and default ports for each array, and provides steps for setting up users with minimum read-only permissions.
For general storage array discovery job setup, see Storage Arrays Discovery.
Access Protocols by Array
| Vendor | Array | Access Mechanism | Default Port |
|---|---|---|---|
| Dell | Compellent | REST | 3033 |
| Dell | VNX or VMAX | SMIS | 5988 or 5989 |
| EMC | Data Domain | REST or SSH | 3009 or 22 |
| EMC | Unity | REST | 443 |
| Dell | Isilon (Gen 6) | Vendor API | 8080 |
Minimum Permissions for Storage Array Discovery
Follow the steps below to set up users or roles with minimum read-only permissions for storage array discovery jobs.
Dell Compellent
Compellent discovery requires an associated Dell Storage Manager (DSM) appliance.
- Log in to your DSM deployment’s web UI.
- Select Data Collector settings.
- Go to the Users tab.
- Go to the Users & User Groups tab.
- Create a user and assign it the Reporter role.
- Select your new user and connect it to your target Storage Center via the Select Storage Center Mappings menu.
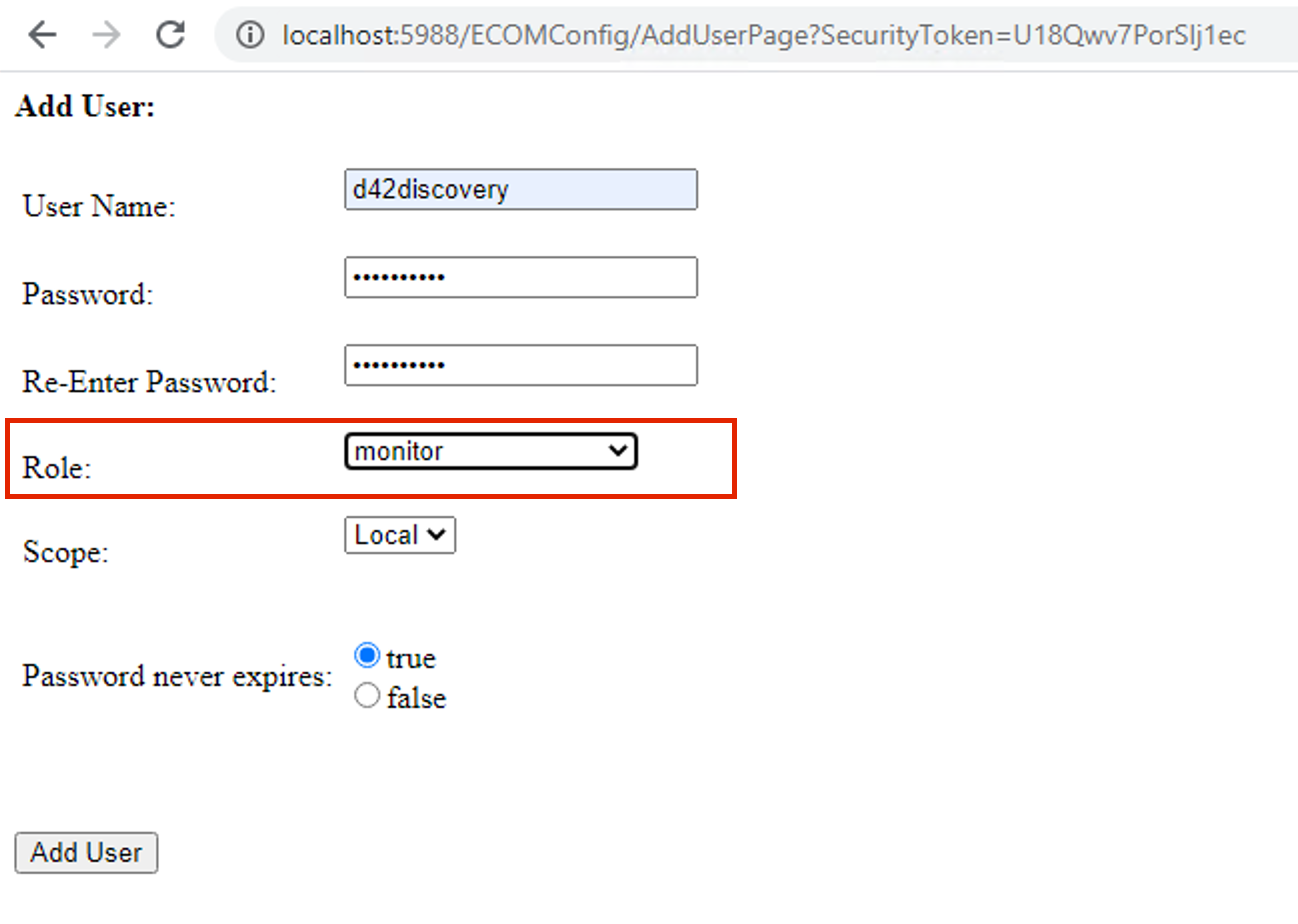
VNX or VMAX Using EMC SMIS Provider
Log in to the SMIS provider using http://<SMIS-Provider-IP>:5988/ECOMConfig or https://<SMIS-Provider-IP>:5989/ECOMConfig.
-
Click Add User and create a user with the monitor role.
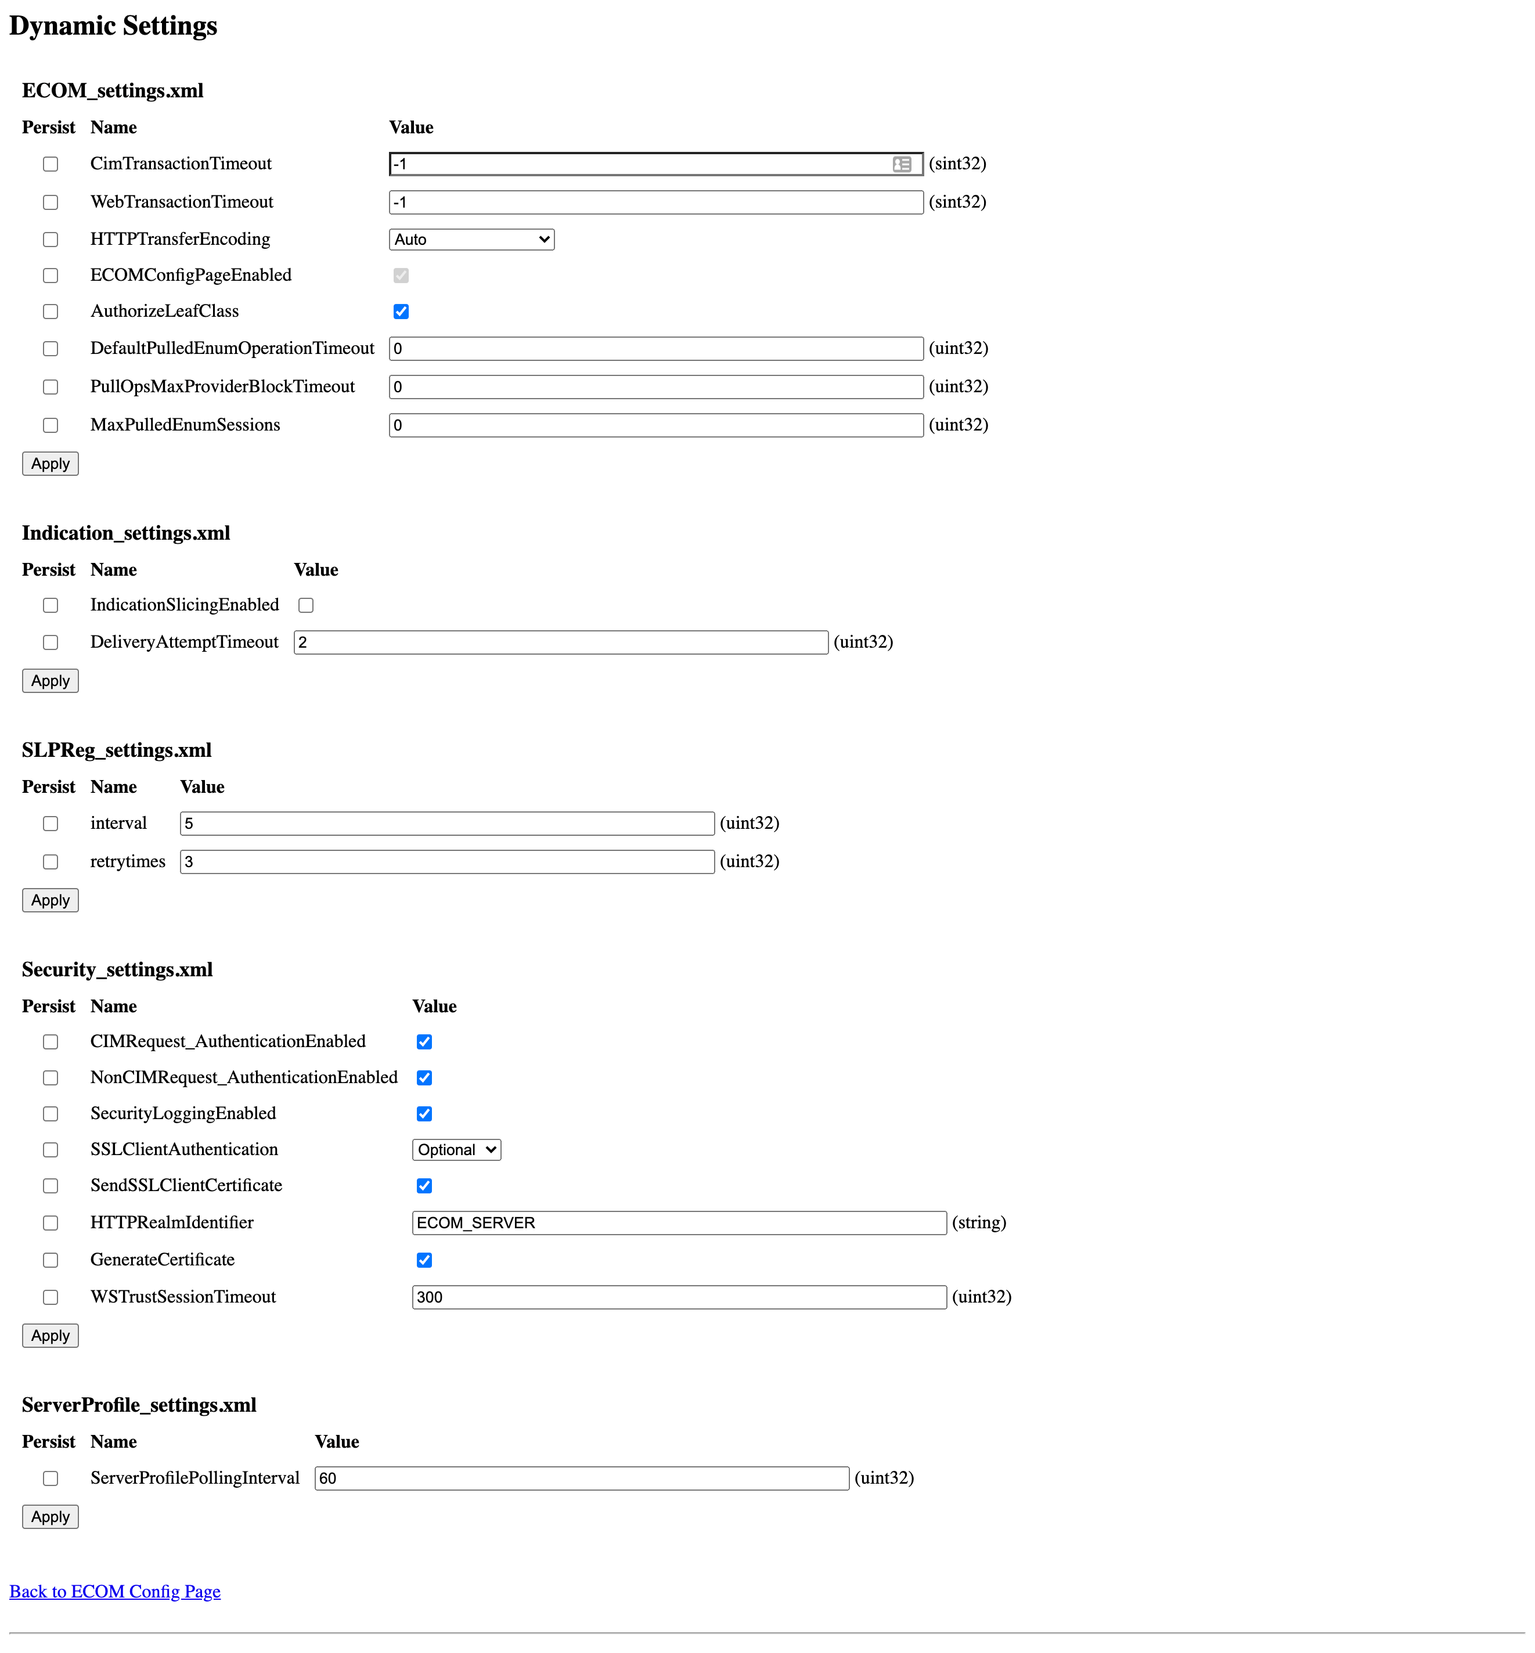
-
Use the Dynamic Settings shown below.
EMC Data Domain
- Log in to the Data Domain console.
- Select Administration > Access on the left panel.
- Go to the Local Users tab.
- Create a user and assign it the minimum user role. The available roles are:
adminlimited-adminsecurityuserback-operatornone
- Click OK and save the user.
EMC Unity
- Log in to the EMC Unity console.
- Click the gear icon in the toolbar to open the Settings window.
- Click the Users and Groups tab.
- Click the + button to add a user. This launches the Create User wizard.
- Select the type of user and click Next.
- Enter a username and password, and click Next.
- Assign the minimum Operator role. The available roles are:
- Administrator
- Storage Administrator
- Operator
- VM Administrator
- Click Finish and save the user.
Isilon
Create a new role and add the following read-only permissions:
Isilon read-only permissions
ISI_PRIV_LOGIN_CONSOLEISI_PRIV_LOGIN_PAPIISI_PRIV_LOGIN_SSHISI_PRIV_SYS_SHUTDOWNISI_PRIV_SYS_SUPPORTISI_PRIV_AUTHISI_PRIV_AUDITISI_PRIV_CLUSTERISI_PRIV_DEVICESISI_PRIV_FTPISI_PRIV_HDFSISI_PRIV_HTTPISI_PRIV_MONITORINGISI_PRIV_NDMPISI_PRIV_NETWORKISI_PRIV_NFSISI_PRIV_NS_TRAVERSEISI_PRIV_NS_IFS_ACCESSISI_PRIV_QUOTAISI_PRIV_REMOTE_SUPPORTISI_PRIV_SMARTPOOLSISI_PRIV_SMBISI_PRIV_STATISTICS
You can also use CLI commands to create roles:
-
Log in to the cluster using SSH.
-
Run the following commands:
-
To create a read-only role:
isi auth roles create --name readonly_role --description “Read-only role for D42” -
To give permissions to this role, add all the permissions from above:
isi auth roles modify readonly_role --add-priv-ro=ISI_PRIV_LOGIN_PAPI -
To create a user:
isi auth users create readonly_user --enabled yes --password xxxxxx -
To add a user to the role:
isi auth roles modify readonly_role --add-user=readonly_user
-
Alternatively, you can create the role and user via the web UI:
-
Log in to the cluster web UI.
-
Select Access Tab > Membership & Roles.
-
Select the Users tab.
-
Select LOCAL: System for the provider.
-
Create a user:
- Set the username and password.
- Select Users as the primary group.
- Enable the account.
-
Select the Roles tab.
-
Create a role:
- Set the Role Name.
- Add the member (the user created above).
- Add the following privileges as read-only:
Isilon web UI privileges
- Console
- Platform API
- SSH
- Shutdown
- Support
- Auth
- Audit
- Cluster
- Devices
- FTP
- HDFS
- HTTP
- Monitoring
- NDMP
- Network
- NFS
- Remote Support
- SmartPools
- SMB
- Statistics
- Namespace Traverse
- Namespace Access