Warranty Autodiscovery
Device42 discovers hardware warranties from Dell, IBM, Lenovo, Meraki, and Cisco (Preview), and tracks service contracts, order details, and coverage dates.
This page covers API key setup and how to configure and run a warranty discovery job. Warranty discovery originally started as a standalone script, which still works, but is now integrated into the Device42 Main Appliance.
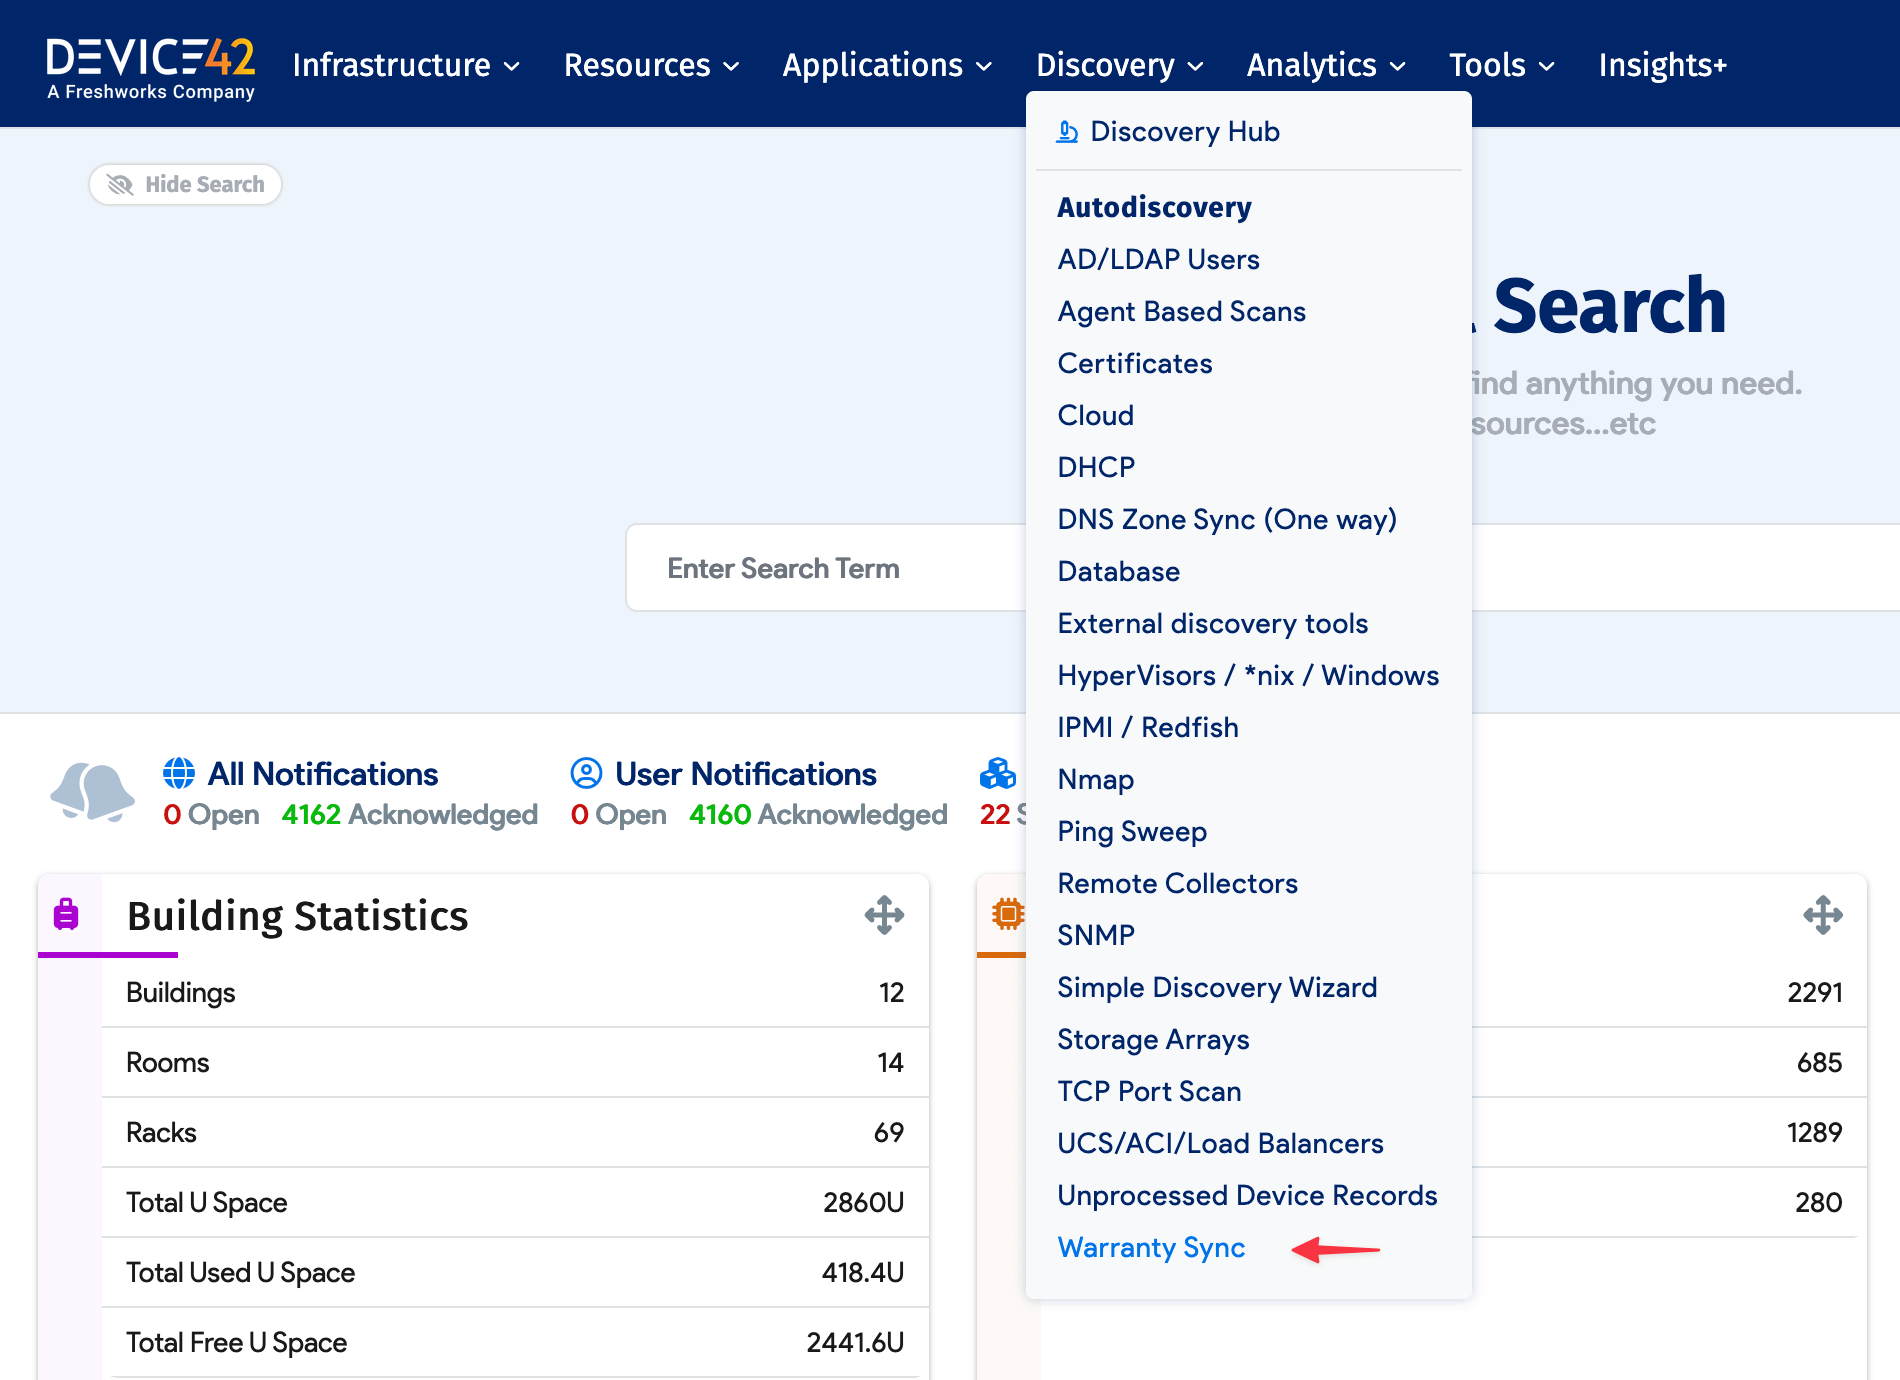
Navigate to Discovery > Warranty Sync from the main menu.
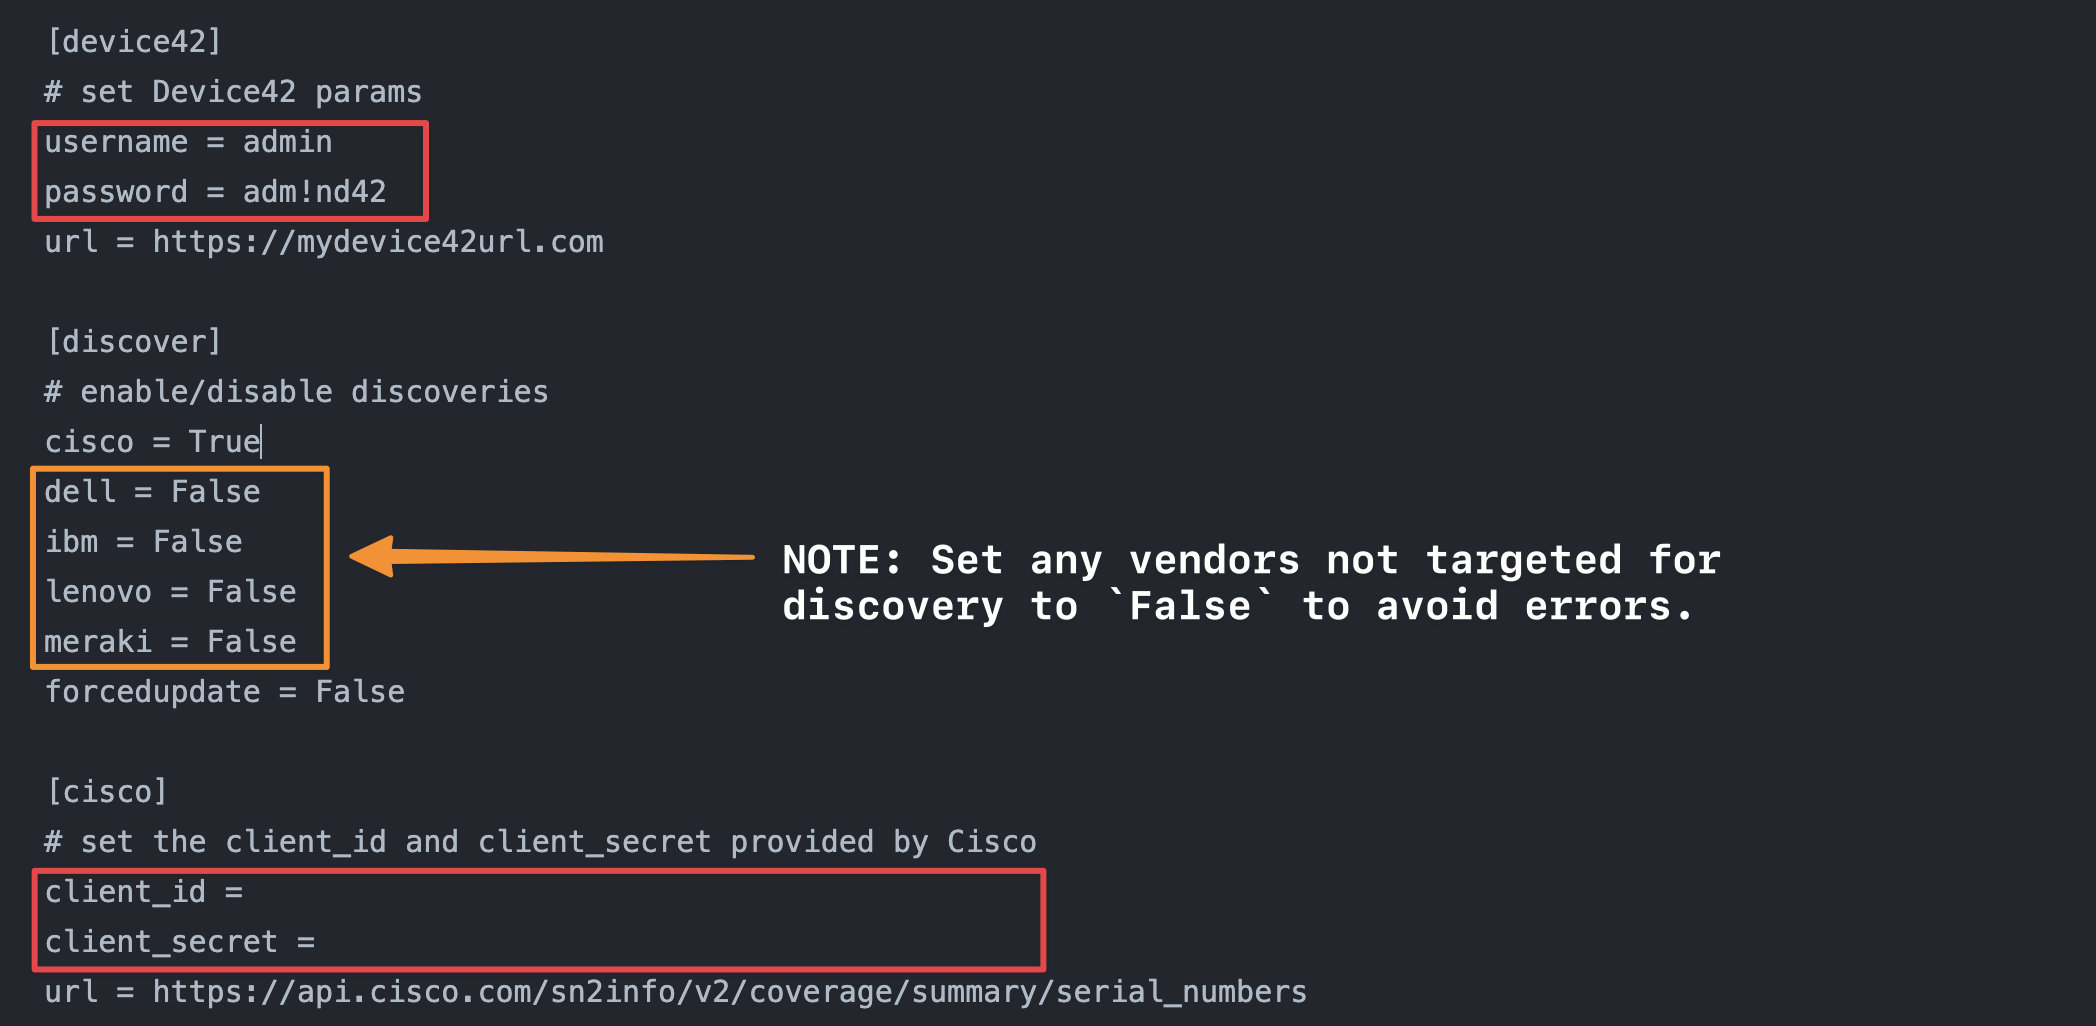
To configure automatic warranty discovery, you need to request API keys from the vendors that require them (currently Dell and Meraki). Once you've provided Device42 with the API access keys, machine IDs, and CI model and serial numbers, the warranty autodiscovery automatically discovers and populates your hardware's service contract information.
Supported Vendors
Device42 supports warranty discovery for the following vendors:
- Dell
- IBM
- Lenovo
- Meraki
- Cisco (Preview)
API Keys, Configuration, and Prerequisites
For Device42 to successfully retrieve warranty information for a given device, the device model and serial number fields must be correctly filled out (entered or discovered).
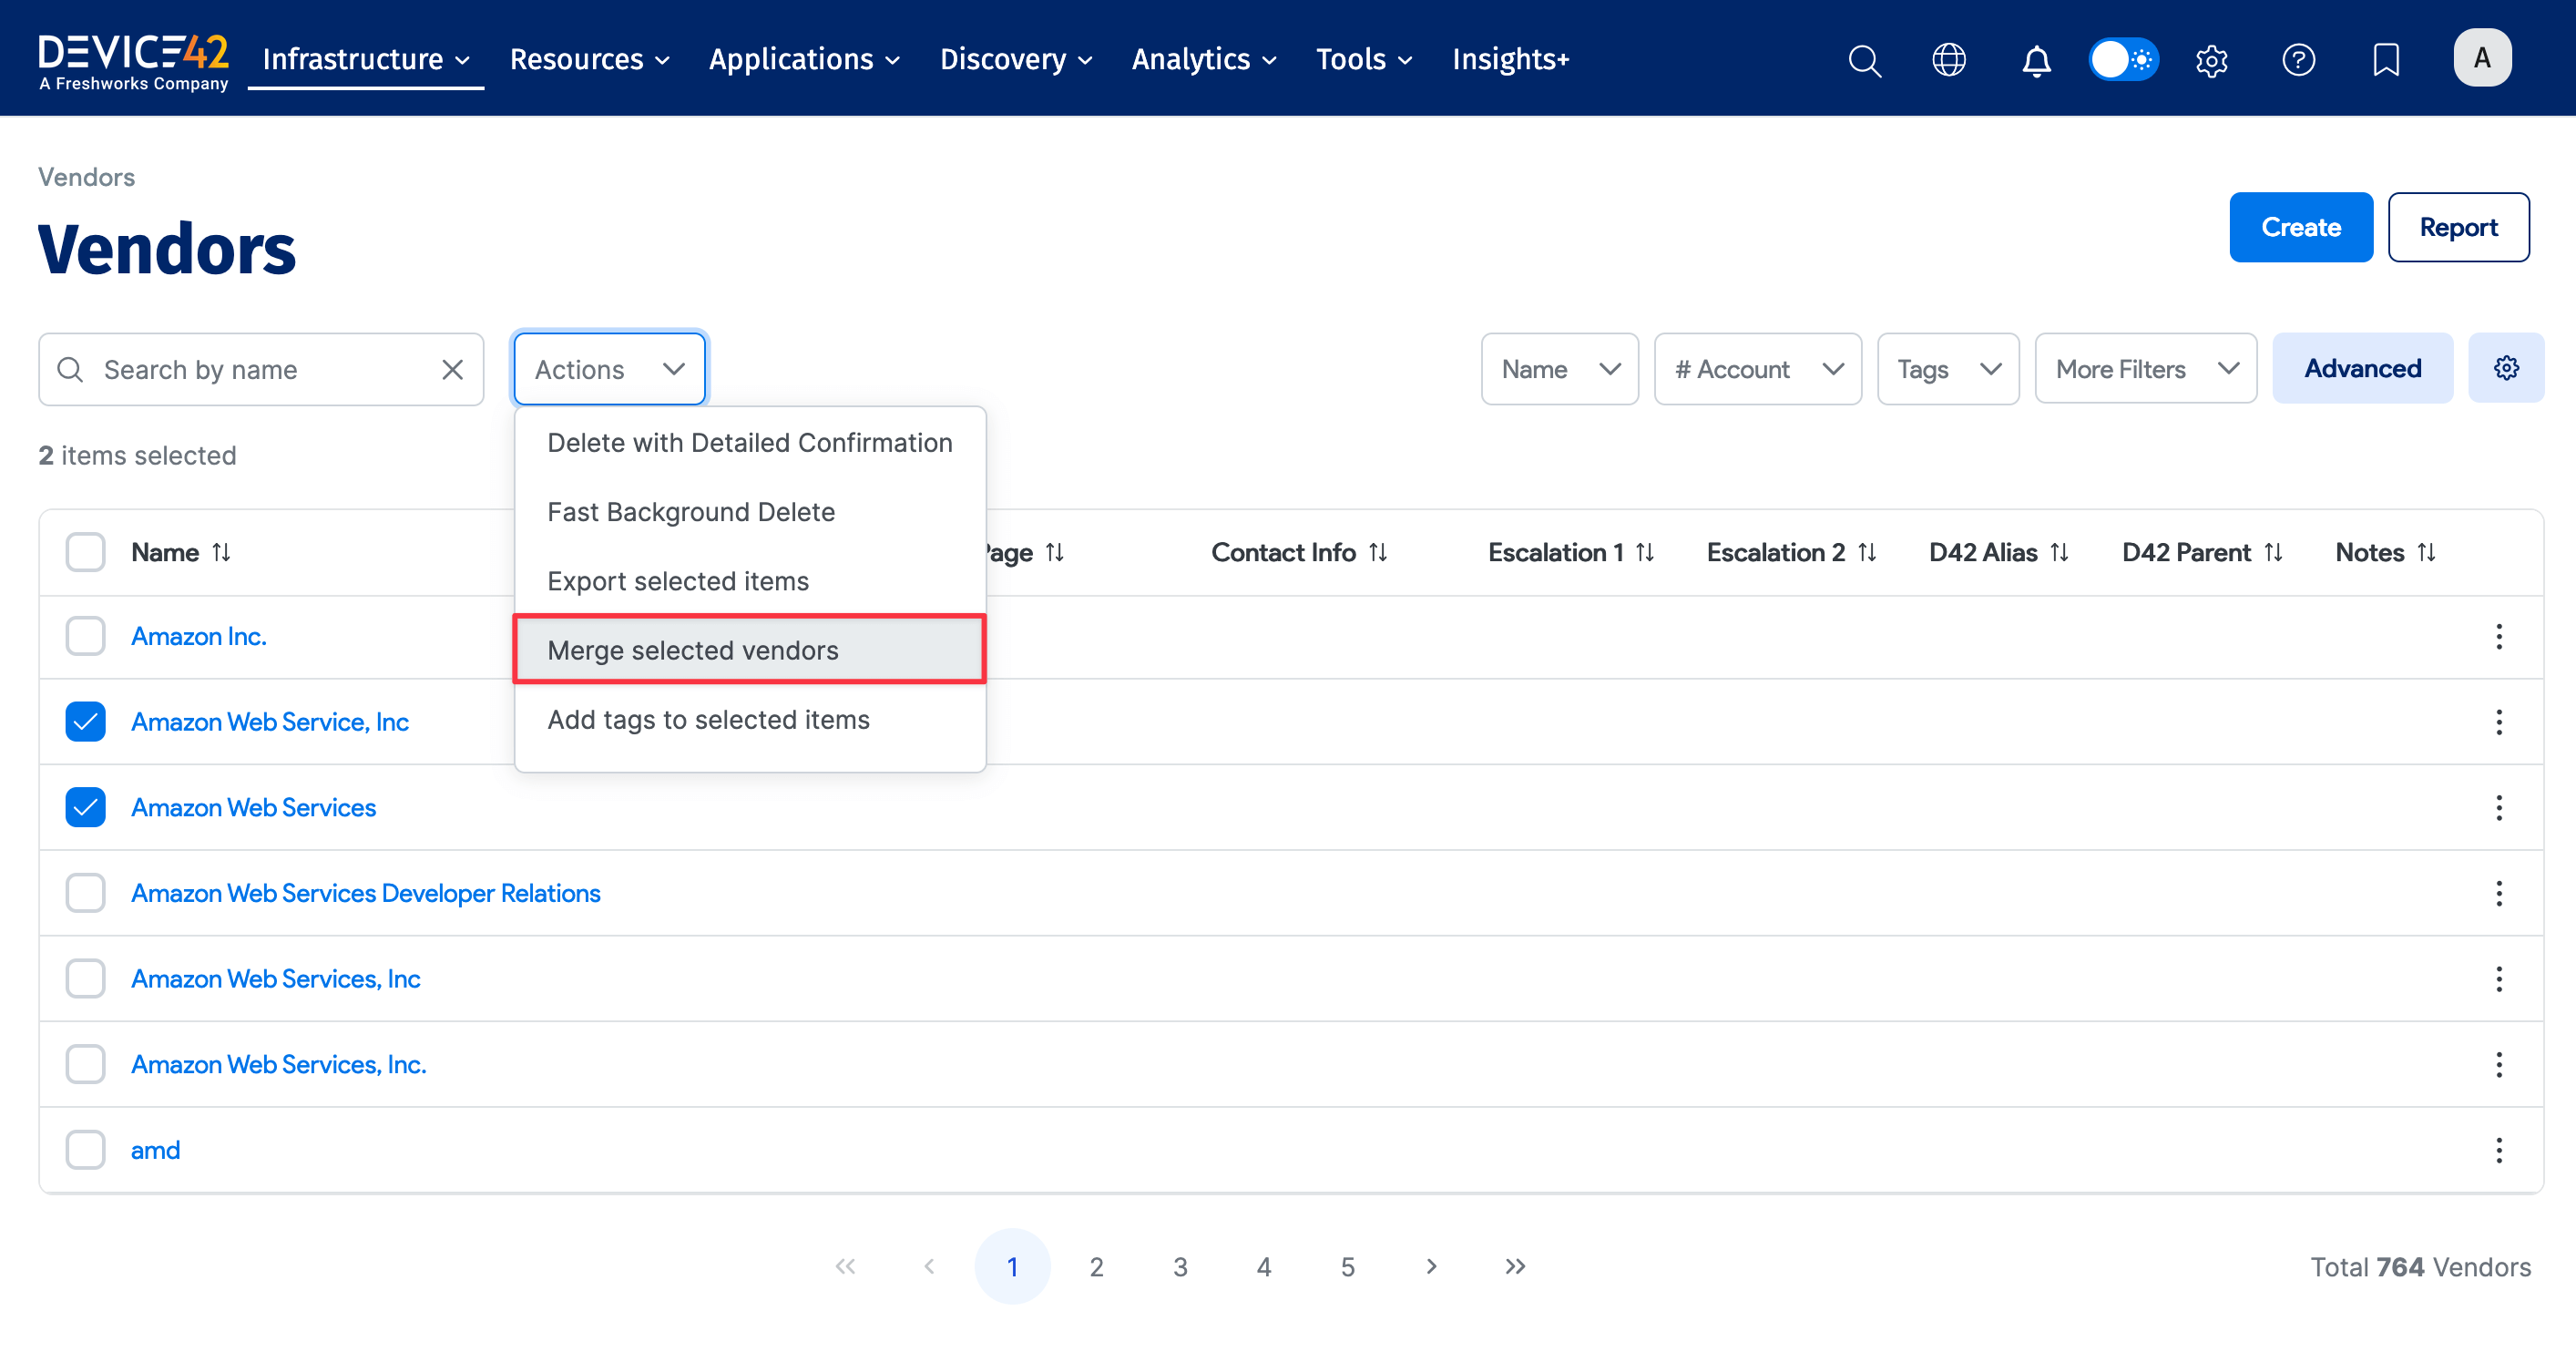
Merge Vendors
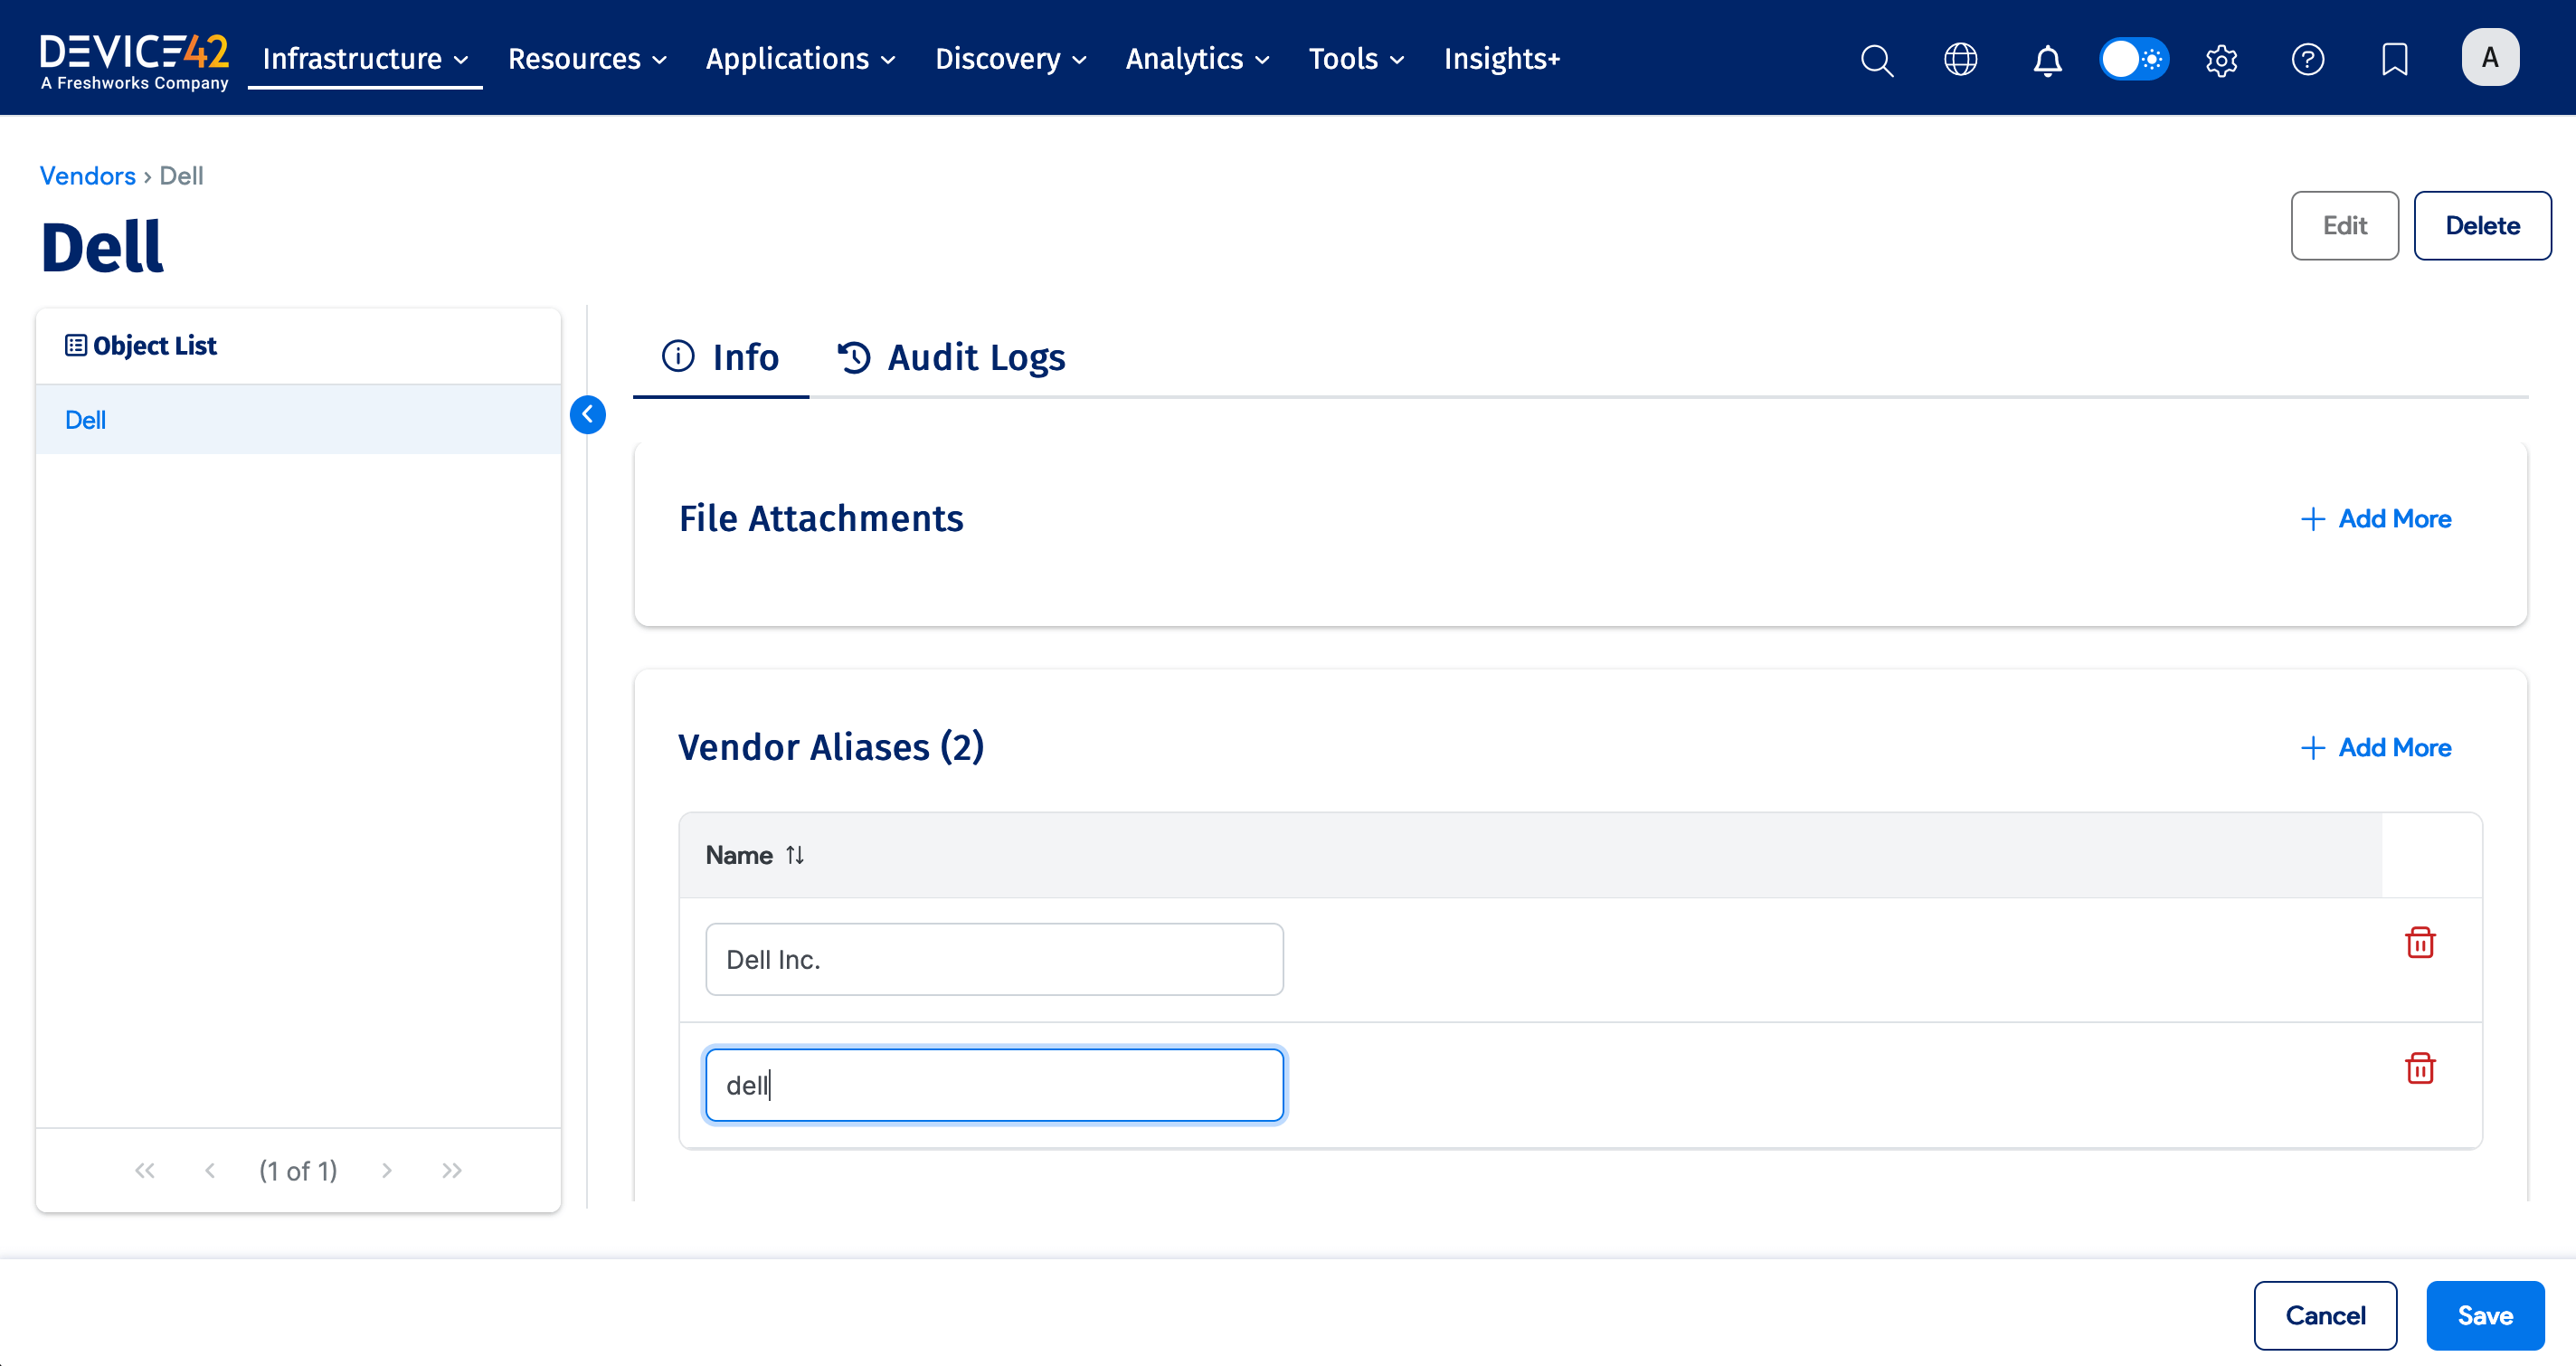
If you have multiple vendor entries for any of the supported warranty vendors (for example, "Dell", "Dell Inc.", "Dell Computers"), merge these into a single vendor using the vendor names Dell, IBM, Lenovo, or Meraki prior to discovery.
To merge multiple vendor names into a single vendor name:
- Choose Infrastructure > Vendors.
- Check the checkbox for the vendors you want to merge.
- Choose Actions > Merge.
- In the Merge Vendor dialog box, choose the vendor name you wish to assign to the selected vendor entries.
- Optionally check the checkbox to automatically merge the vendor names for like-named software.
- Click the Merge button.
Set the Model Field
The data Normalization and Enrichment Service has largely automated this requirement. Set the Model field to Dell, IBM, Lenovo, or Meraki. Hardware with different vendor name variations will not return a warranty.
You can easily add the proper Vendor Aliases to the vendors if your vendors are named differently. On the vendor edit screen, update the vendor entries. Enter dell for Dell, ibm for IBM, meraki for Meraki, and lenovo for Lenovo:
Get Your API Key
- Dell API key: Instructions for obtaining a Dell API key are available from TechDirect, which requires a valid Dell login.
- Meraki API keys: Device42 requires you to obtain a Meraki API key in order to retrieve warranty information.
- Lenovo API keys: Lenovo provides a warranty lookup API key to customers who request it via Lenovo Sales or Support Account Representatives.
- IBM API keys: Log in to your IBM account to access your warranty lookup information.
Cisco Support API Info
The required Cisco API, SN2INFO, is not available by default. You need to request access from Cisco.
Cisco warranty discovery uses the Serial Number to Information (SN2INFO) API and the following endpoint:
https://apix.cisco.com/sn2info/v2/coverage/summary/serial_numbers/{sr_no,sr_no,sr_no}.
To get access, register an application on the Cisco API console. When registering, select only the Client Credentials checkbox and nothing else; this allows you to use your client ID and secret to generate an OAuth 2.0 authorization token for API requests.
Most of the configuration information required for a successful Cisco warranty discovery is entered in the App Registration form in the Cisco API console.
The Application Type should be set to Service. Once registered, the API should be enabled and displayed in the My Apps & Keys section.
Meraki Details
For Meraki warranty discovery, all access points with corresponding serial numbers and hardware models need to have Meraki set as the vendor prior to sync.
Secure Communication Details
Both the UI and the warranty script transmit the same information (relevant serial numbers) to the appropriate vendor via port 443 SSL. The API key entered into Device42 is only included if required by the vendor (Dell or Meraki). The payload looks as follows:
payload = {'id': inline_serials, 'apikey': self.api_key, 'accept': 'Application/json'}
Warranty lookup queries the APIs at the following URLs:
Dell - apigtwb2c.us.dell.com https port 443
Lenovo/IBM - support.lenovo.com https port 443
Meraki - api.meraki.com https port 443
Configure a Job With an API Key
To set up a warranty discovery job:
-
Select Discovery > Warranty Sync from the main menu, click Create, and name your job.
-
Select a Vendor:
For Dell or Meraki, enter your matching API key (see the Get Your API Key section for details). If you select Dell, choose the API version from the dropdown.
For IBM or Lenovo, you need to be a large enterprise customer and contact a sales representative who will connect you with the correct team for the API key.
-
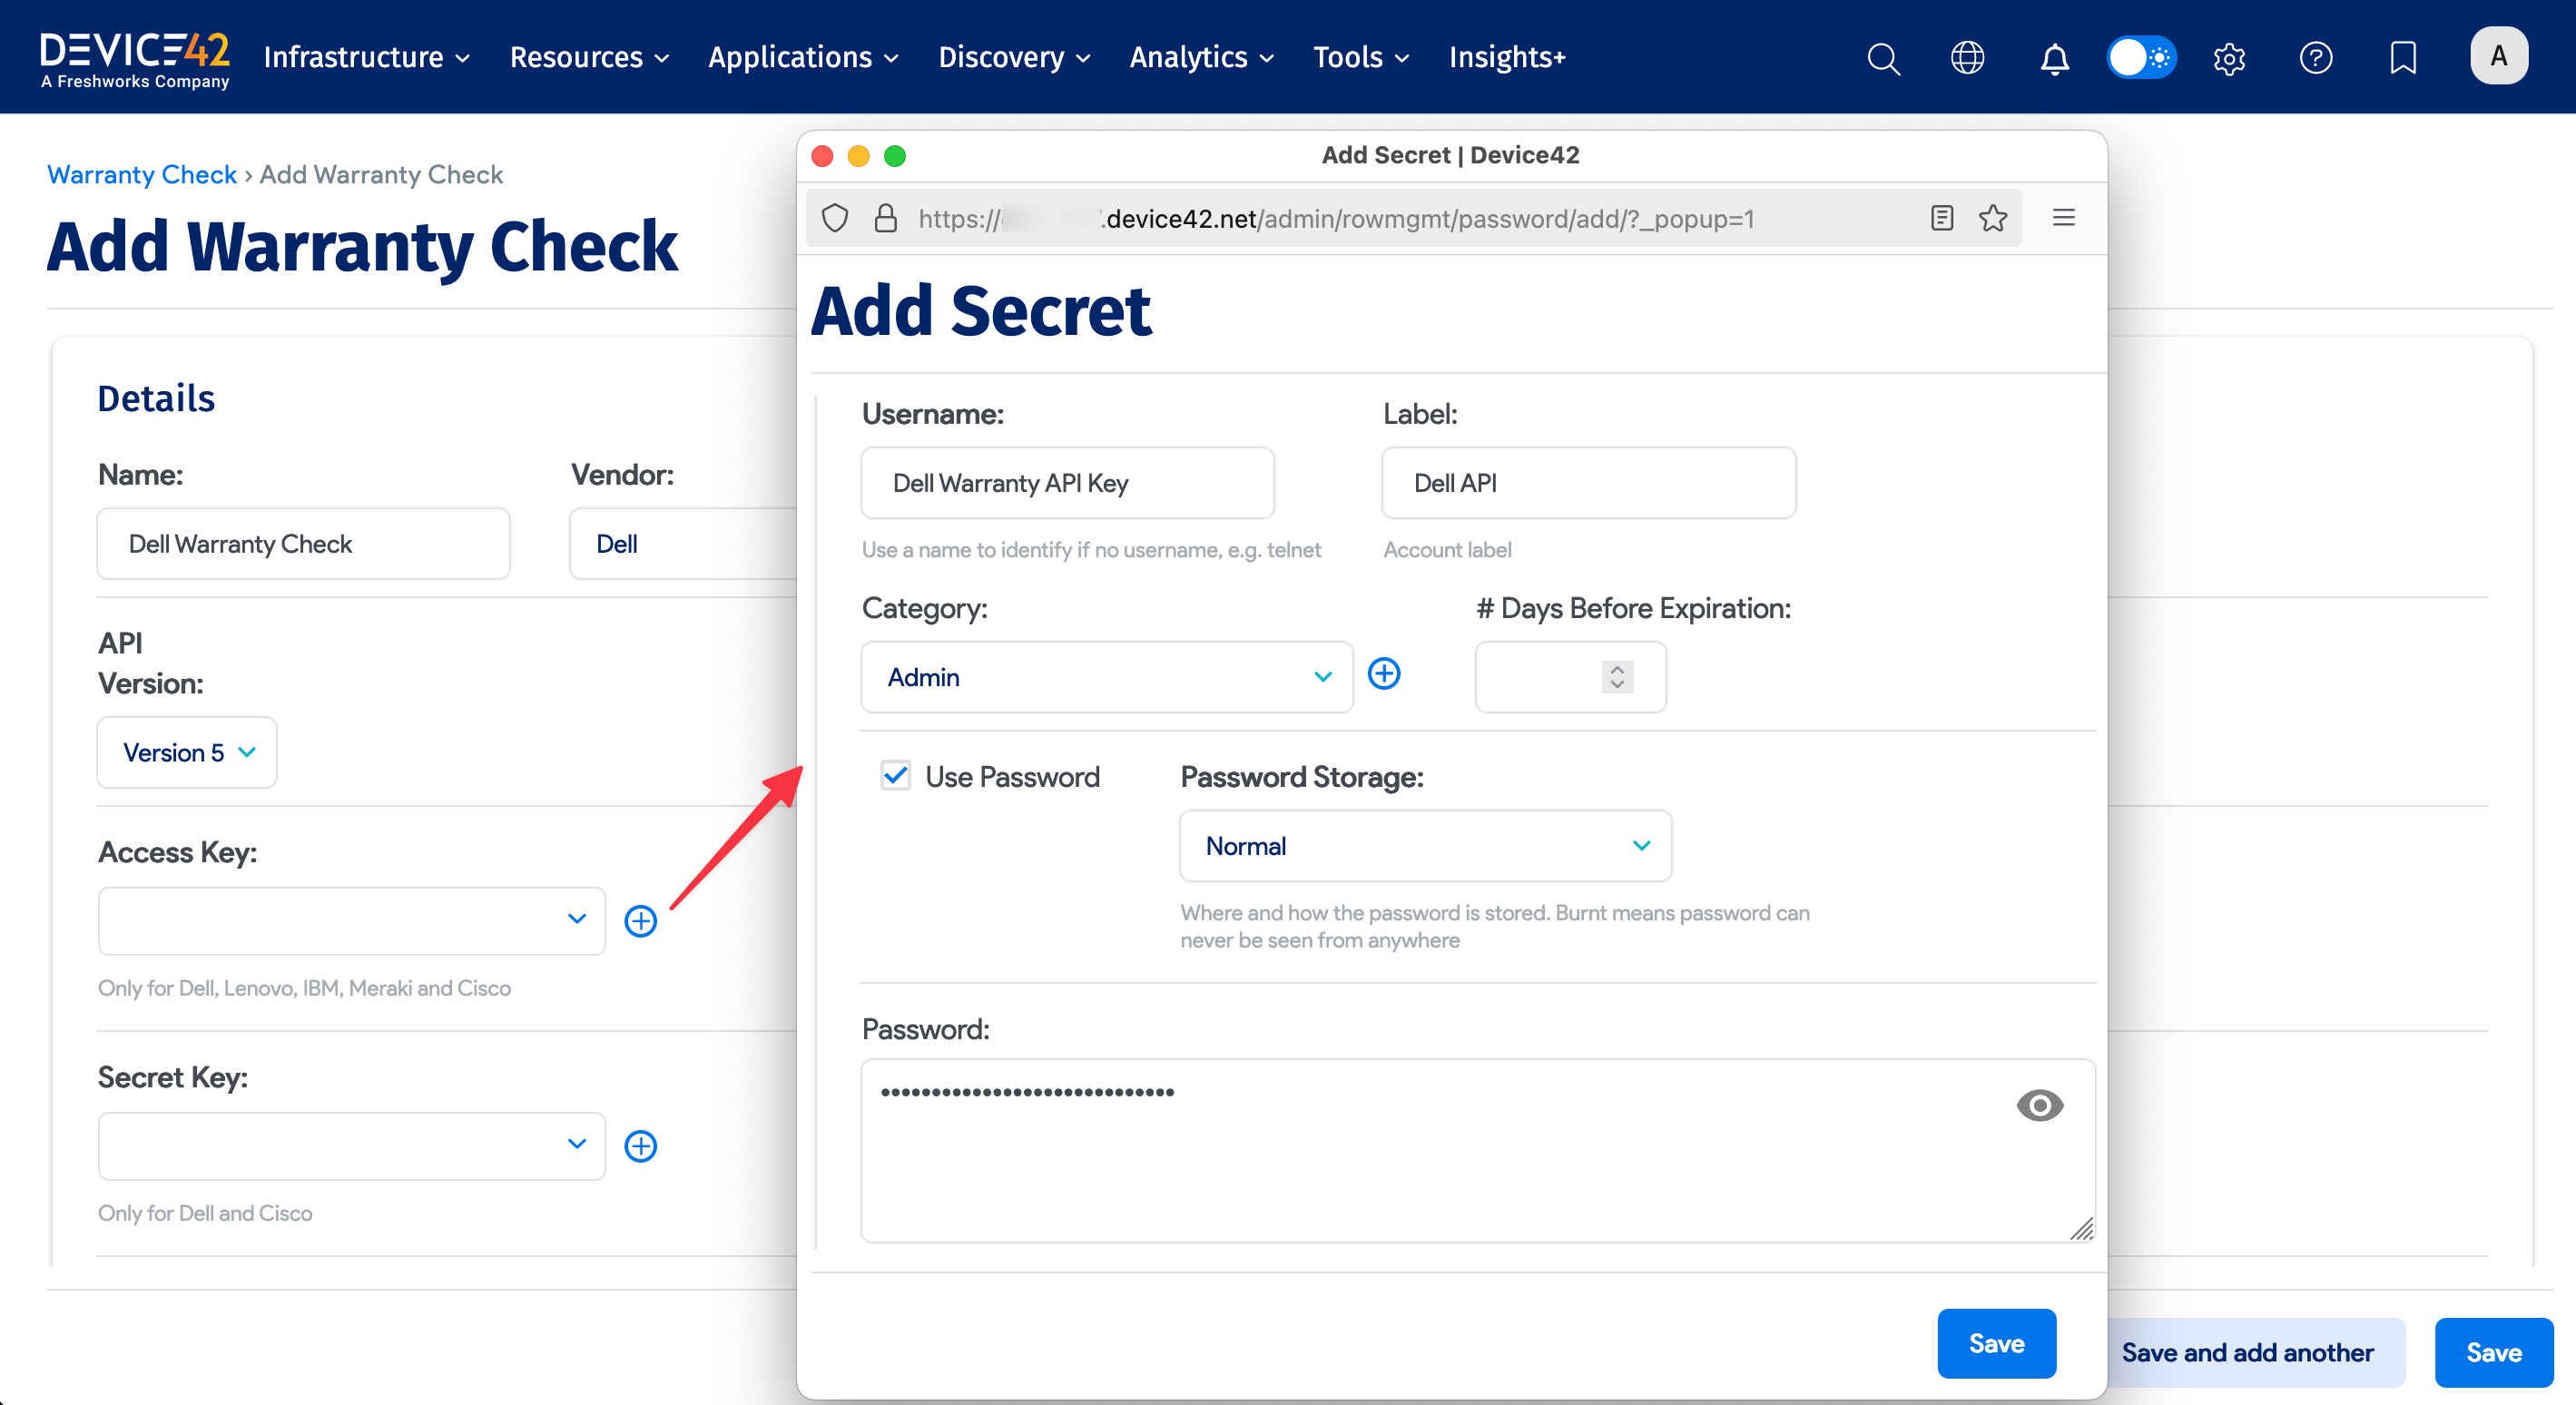
Add your API key by clicking the magnifying glass on the Access Key field, clicking Add Password in the upper-right corner of the popup, and adding your key as shown below. Repeat these steps for the Secret Key if necessary.
-
Choose your Order Number Type and Debug level options.
-
Set a schedule if desired and save the job.
-
Run the job.
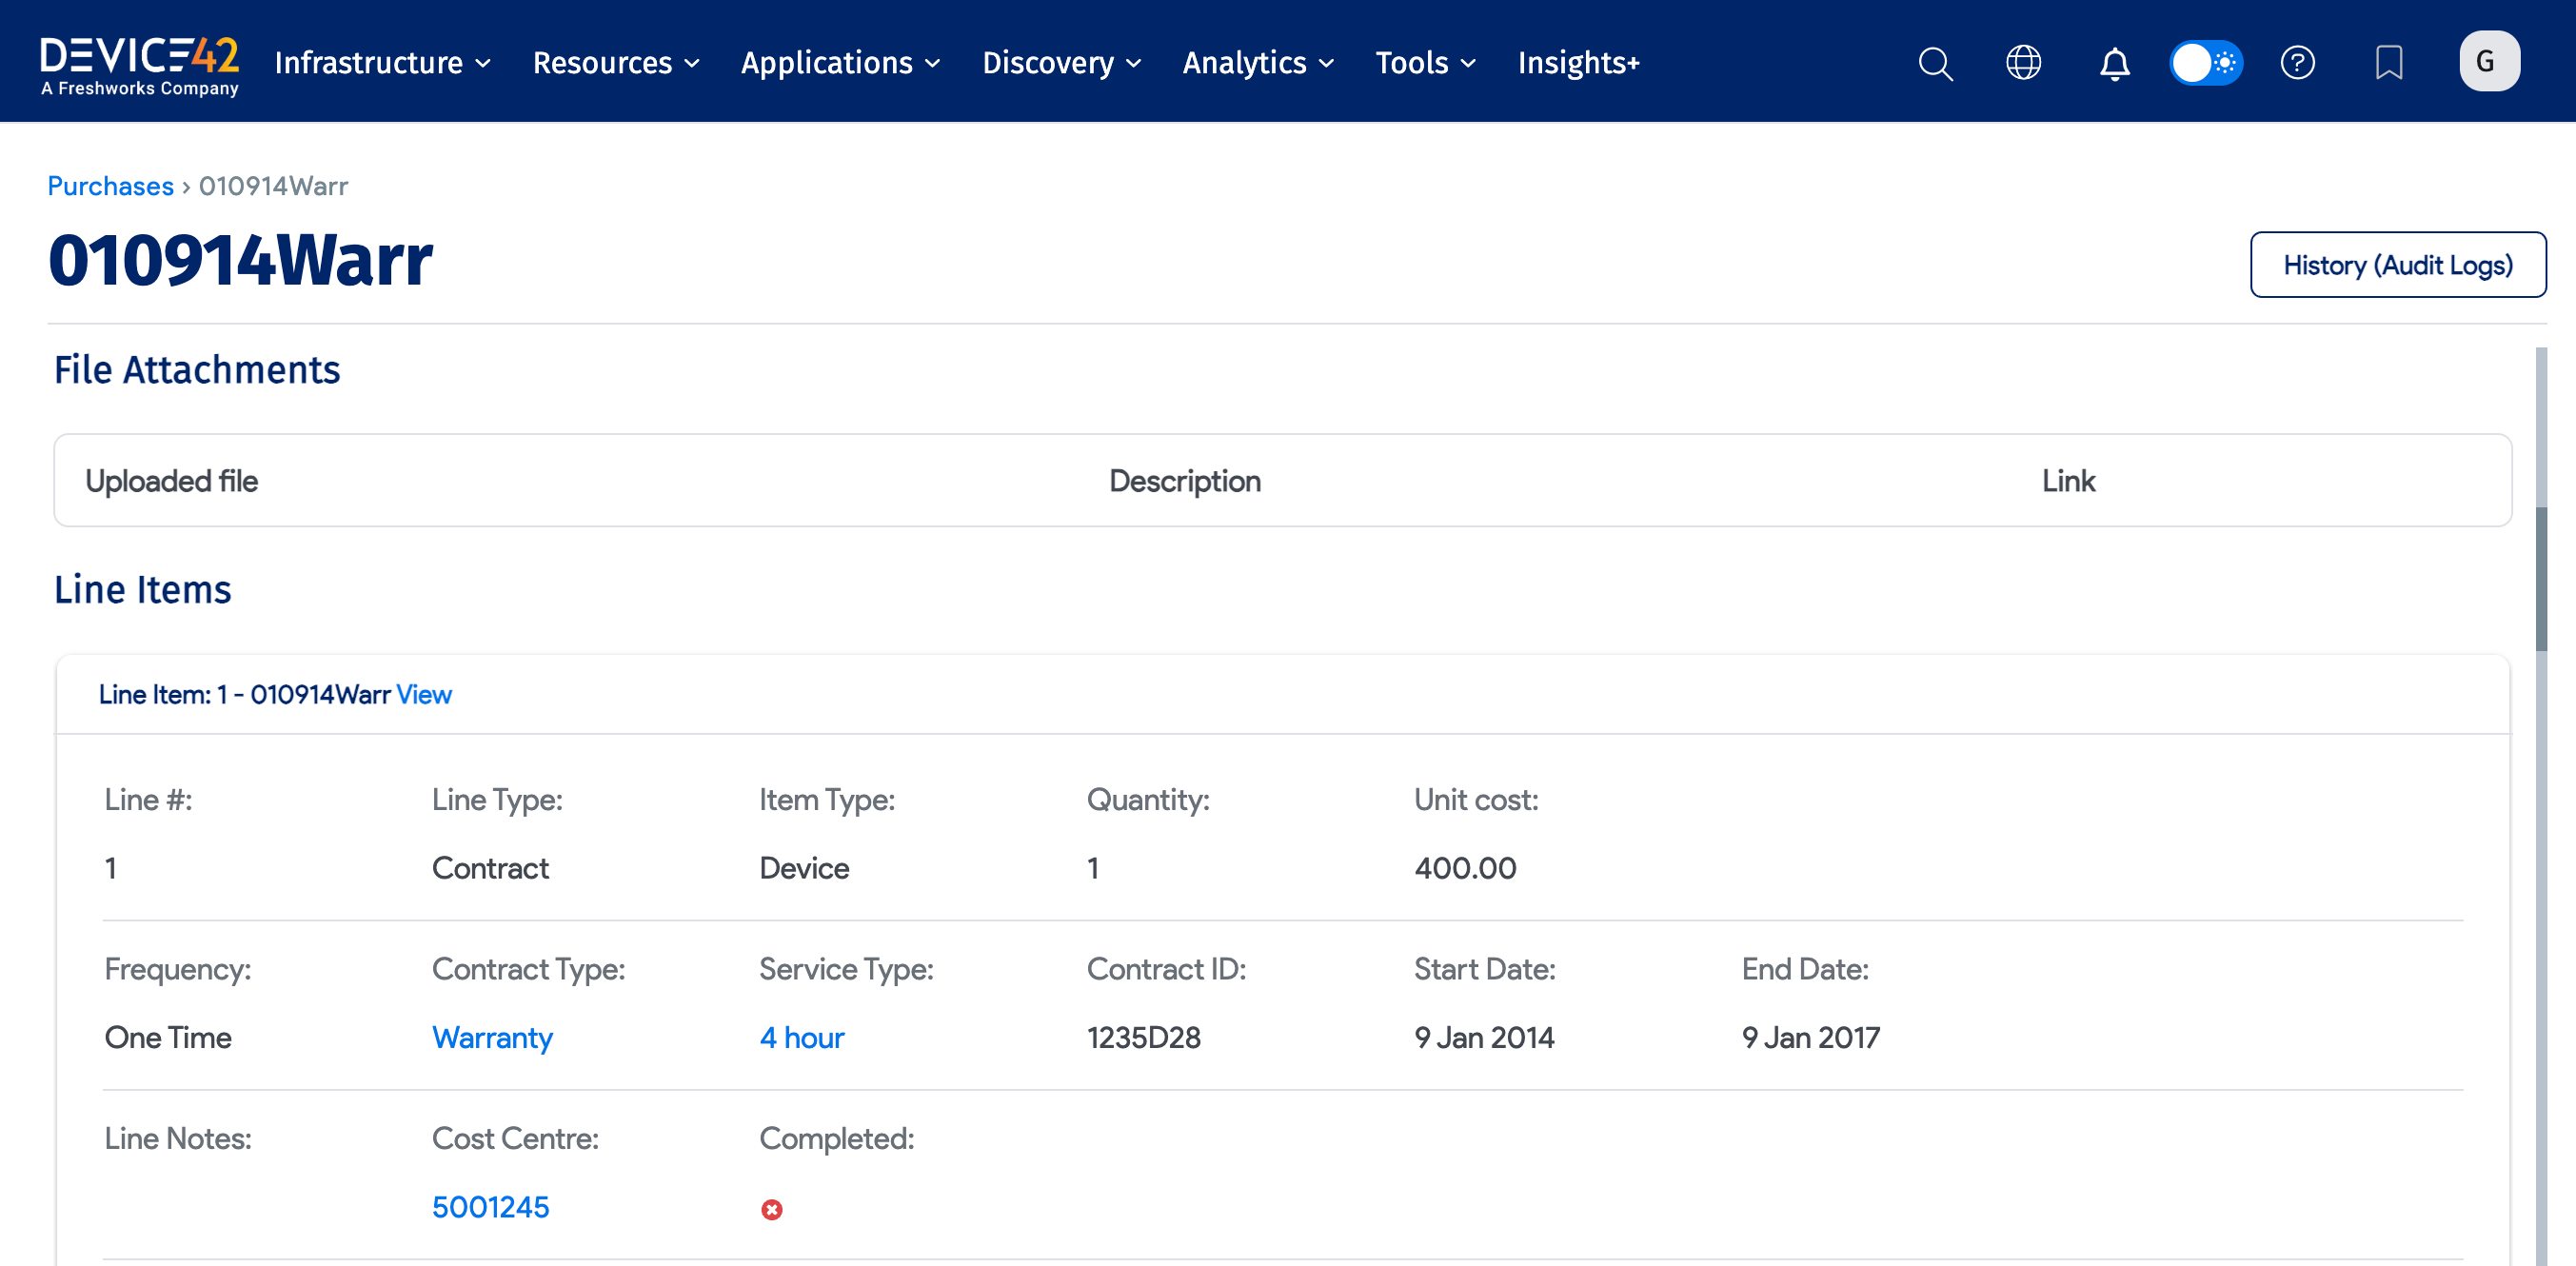
As long as your API key is active, and devices have a valid model, vendor, and serial number, the sync will gather warranty information. On each device in the Life Cycle tab or under Infrastructure > Purchases, you will find past and present warranty information. This includes order details, contract and service types, and dates.
Standalone Warranty Script
The warranty discovery functionality is now built into the main UI. The standalone script still functions but may be deprecated in the future. The latest version can be downloaded from GitHub.
If using the standalone warranty script, Python 2.7 must be installed along with the Python library requests.
Configure the Standalone Script
-
Create a working directory. Copy the files from Device42's
warranty_checkGitHub repo. -
Copy the file
warranty.cfg.exampletowarranty.cfg. -
Set the required parameters in
warranty.cfg[D42 instance info and API keys]:
-
Run the script:
$ python starter.py