UCS / ACI / Load Balancer / F5 Autodiscovery
This page is for Device42 administrators who need to discover load balancers, Cisco UCS, and ACI devices. Learn how to create discovery jobs and configure options for these device types.
Device42's load balancer discovery maps out virtual servers, pools, and their relationships to backend devices. To get started, first create and run an SNMP job to identify and discover the load balancer and other cluster devices. Next, run a Windows/*nix job to discover backend servers (pool members). Finally, create an API-based load balancer job under Discovery > UCS/ACI/Load Balancers to collect connectivity and dependency data.
Device42 discovers Cisco ASA, Cisco UCS, NetScaler, and cluster devices via their native APIs. Devices from A10 Networks should also produce good output using SNMP.
Citrix NetScaler load balancer API discovery is used to build TCP or UDP connections within application groups. NetScaler discovery will not add new devices and resources to the system. New devices and resources are typically added via SNMP scans.
Load Balancer Discovery
Create a job to collect load balancer configuration and connectivity data.
Prerequisites
For F5 discovery, ensure you have the username for a local account with access to the F5 API. The API calls work with read-only access and do not require administrative privileges.
Note that F5 devices do not support username and password authentication for accounts that use external authentication providers, such as Active Directory, which uses token-based authentication.
Create a Load Balancer Discovery Job
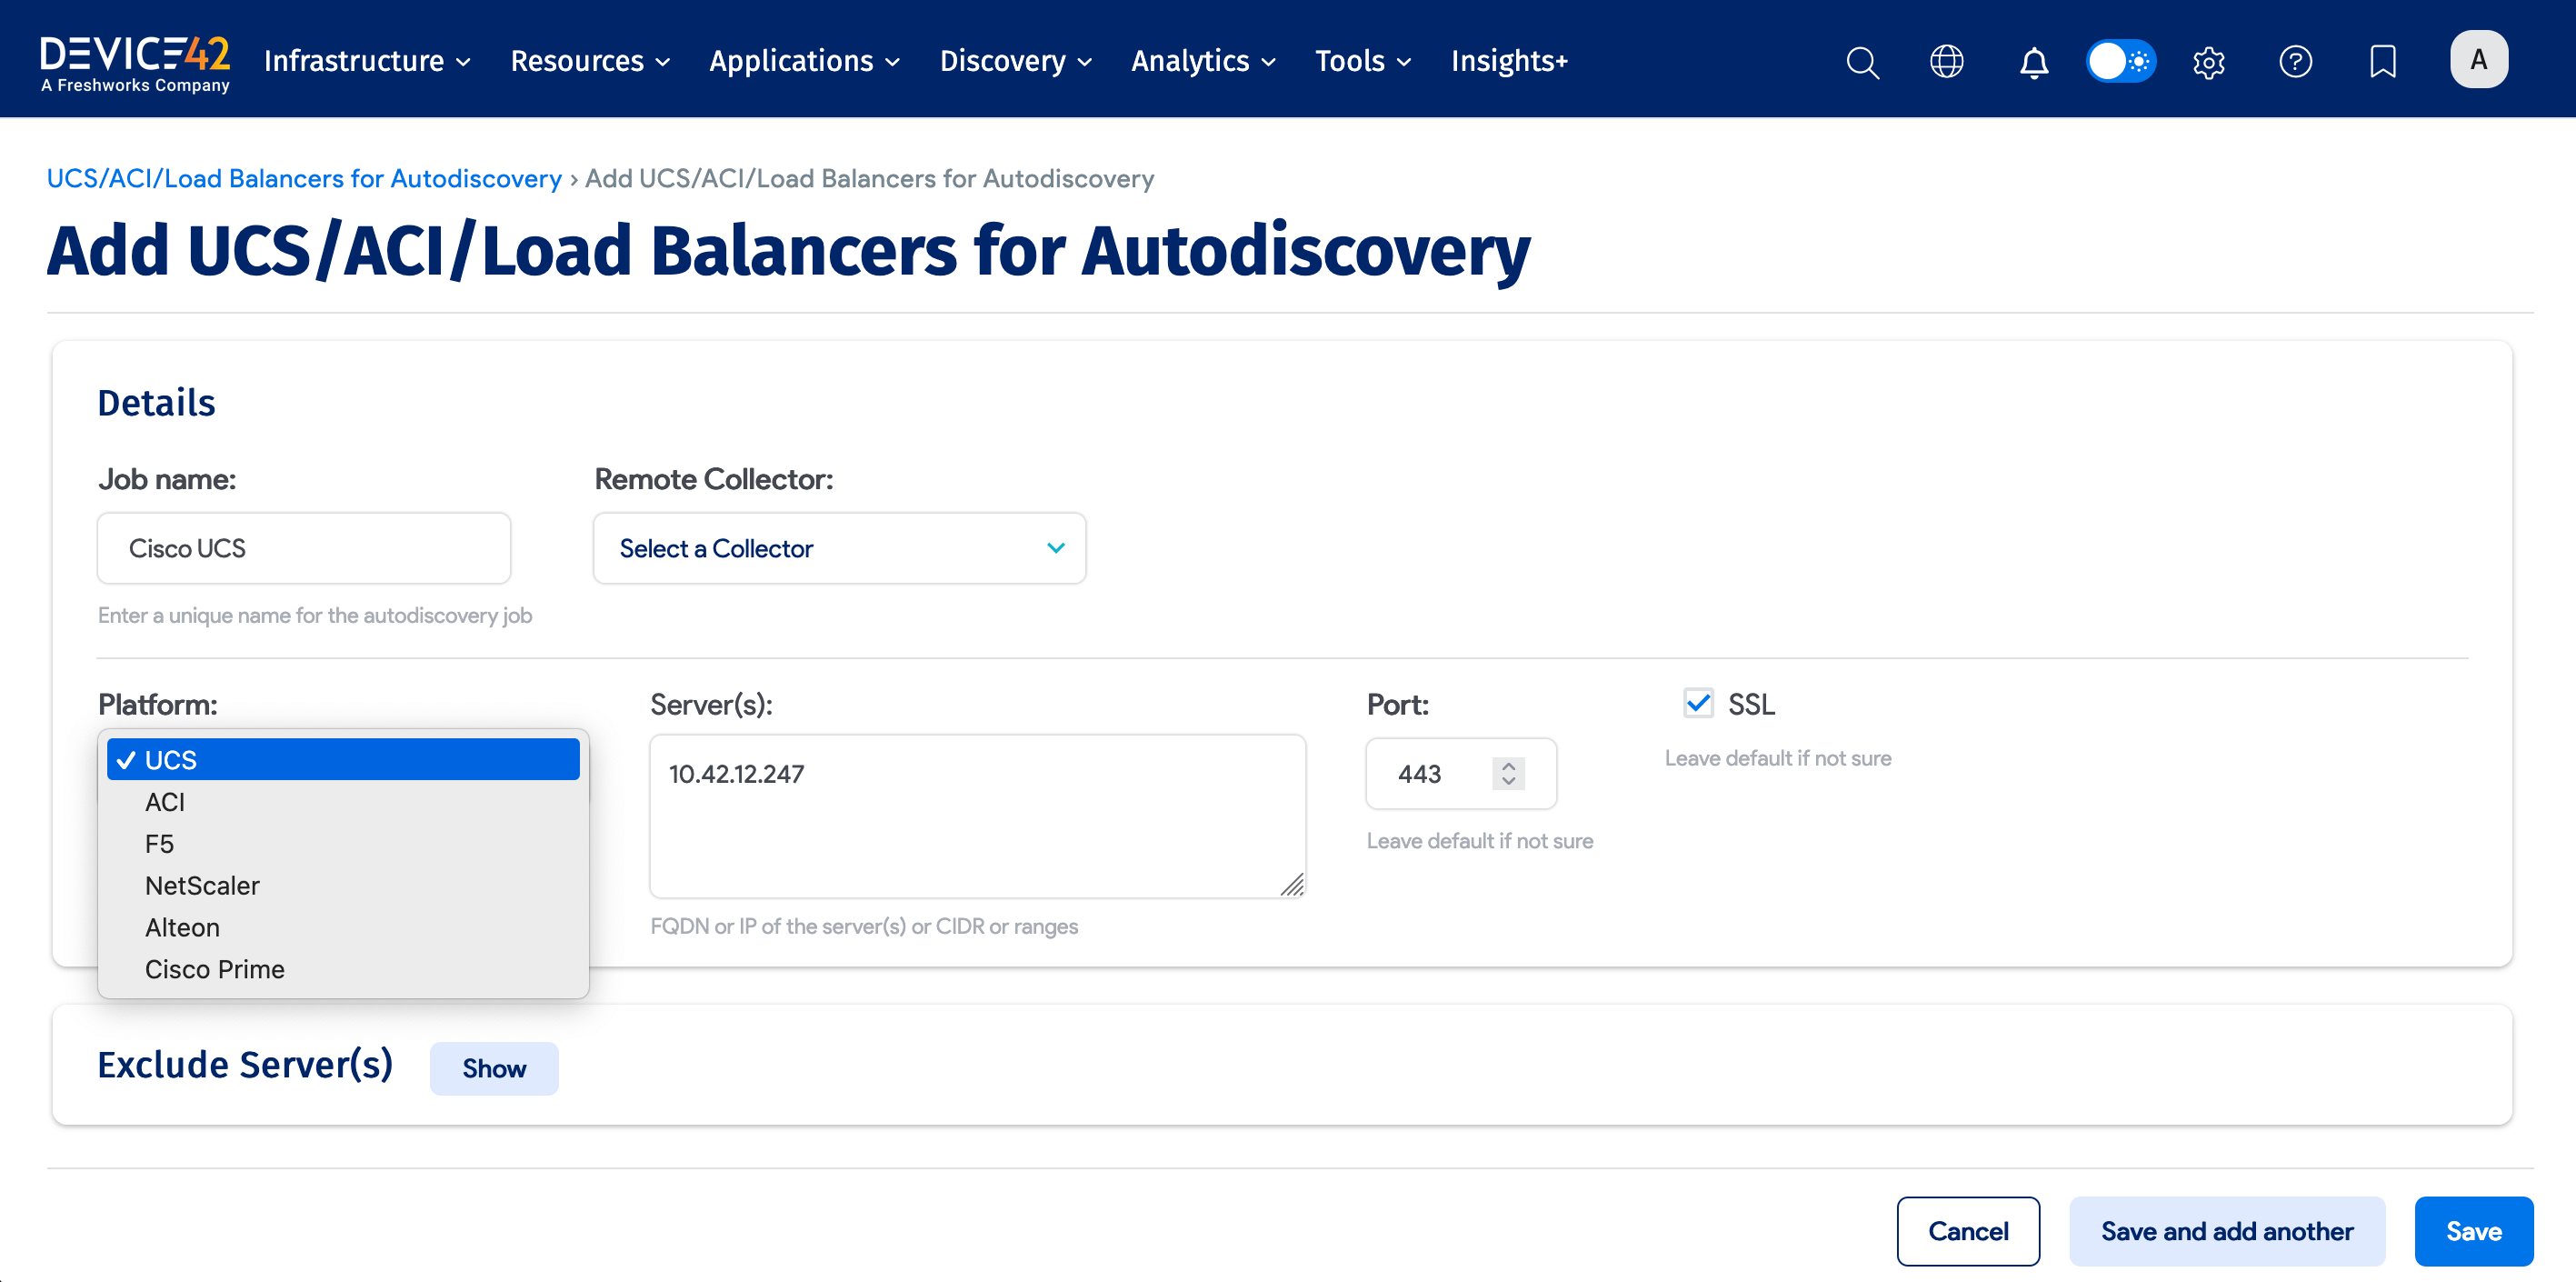
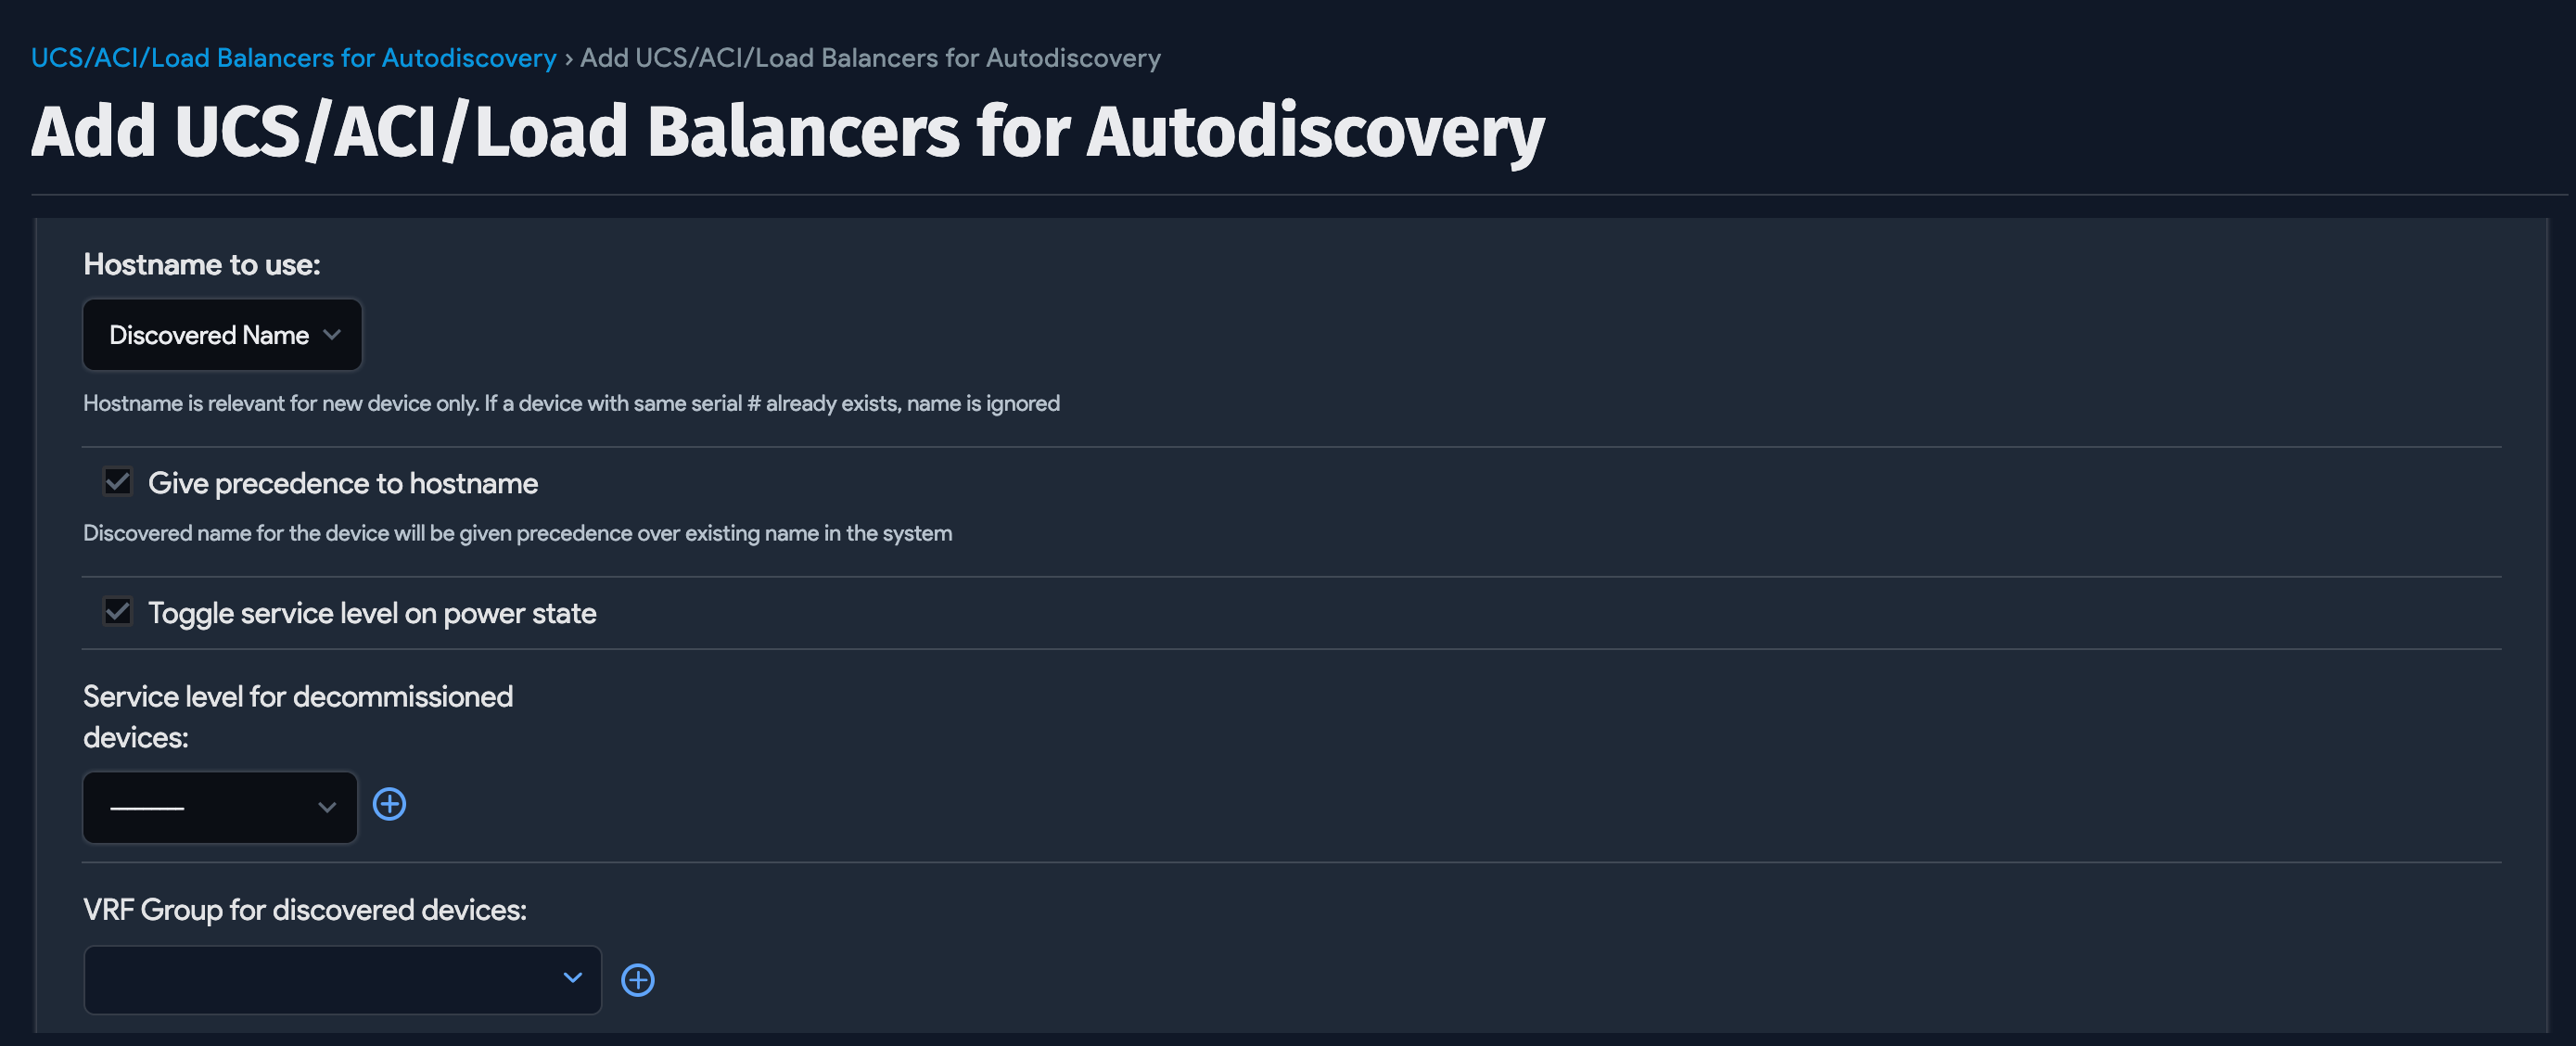
Navigate to Discovery > UCS/ACI/Load Balancers, click Create, and select the Platform for load balancer type from the dropdown menu.
If you're discovering an F5 device, follow these steps:
- Start by scanning an F5 device via SNMP. Add a job under Discovery > SNMP and input the correct matching community string. Ensure you configure SNMP on your F5. See the Load Balancers page for more information about SNMP discovery.
- Once discovered via SNMP, scan your F5 pool members via either SSH or the API, depending on the device's OS. This will allow you to gather detailed information about the F5 pool members.
- After you've discovered via SNMP, scan the F5 by creating a discovery job under Discovery > UCS/ACI/Load Balancers as shown above. This requires an account with F5 API permissions.
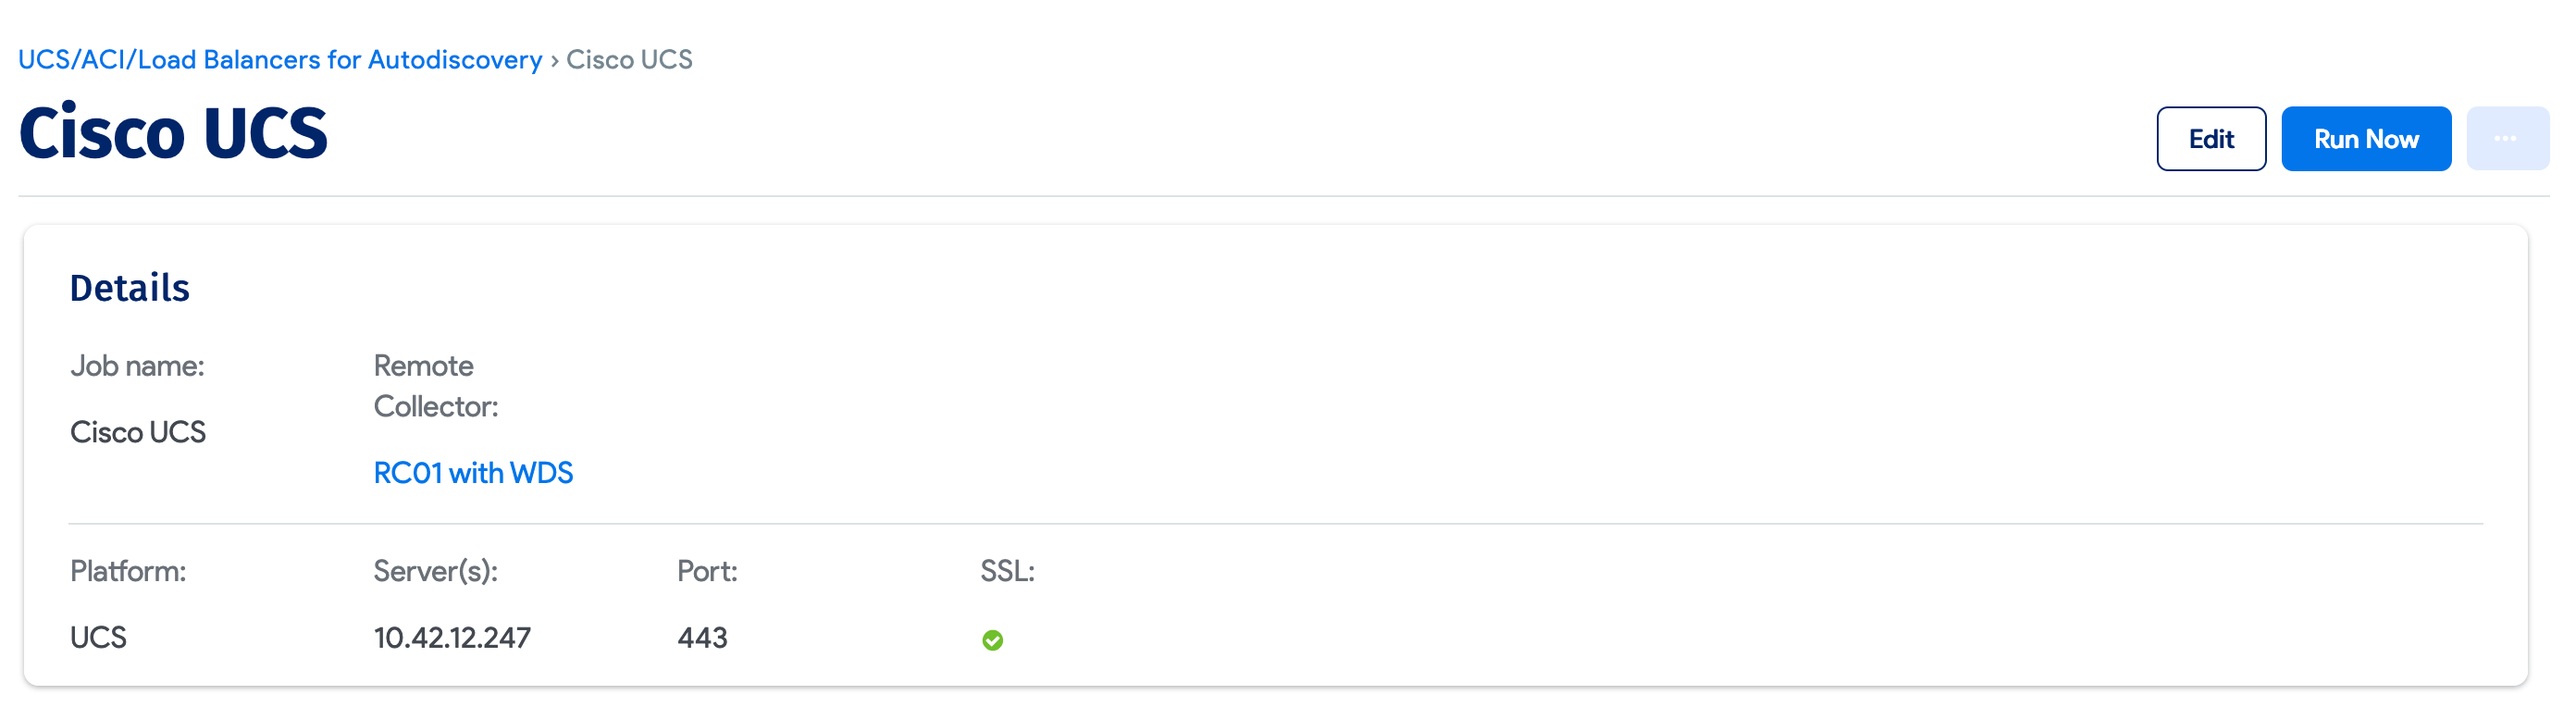
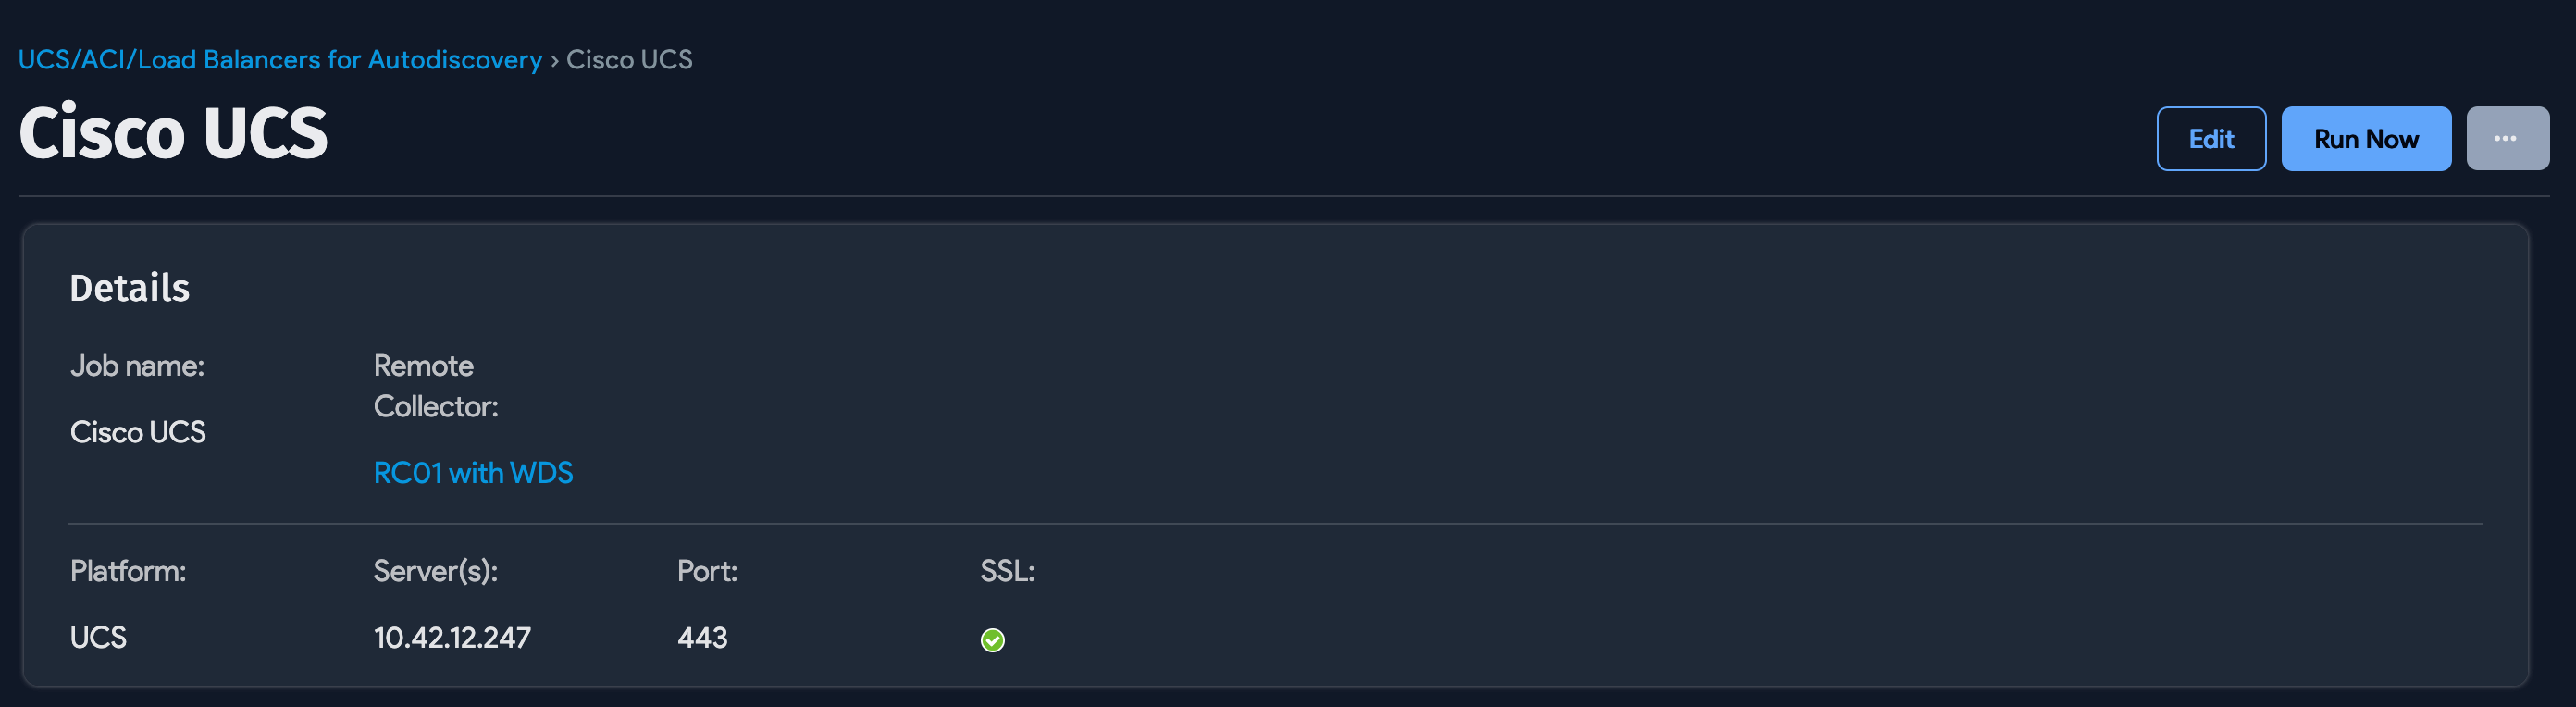
Create a Cluster Device (UCS) Discovery Job
To discover UCS or other cluster devices, select UCS from the Platform dropdown menu (pictured above).
- Give your job a meaningful, descriptive name and specify the server hostnames, IP addresses, IP ranges, or CIDR blocks for your cluster devices.
- Choose a Remote Collector (RC) if desired, specify the correct port, and select or clear the SSL option as needed.
- Choose one or more sets of credentials that will allow Device42 to authenticate and query your UCS/Cluster devices.
- Set other options (explained below) as needed, create a schedule if desired, and save your job.
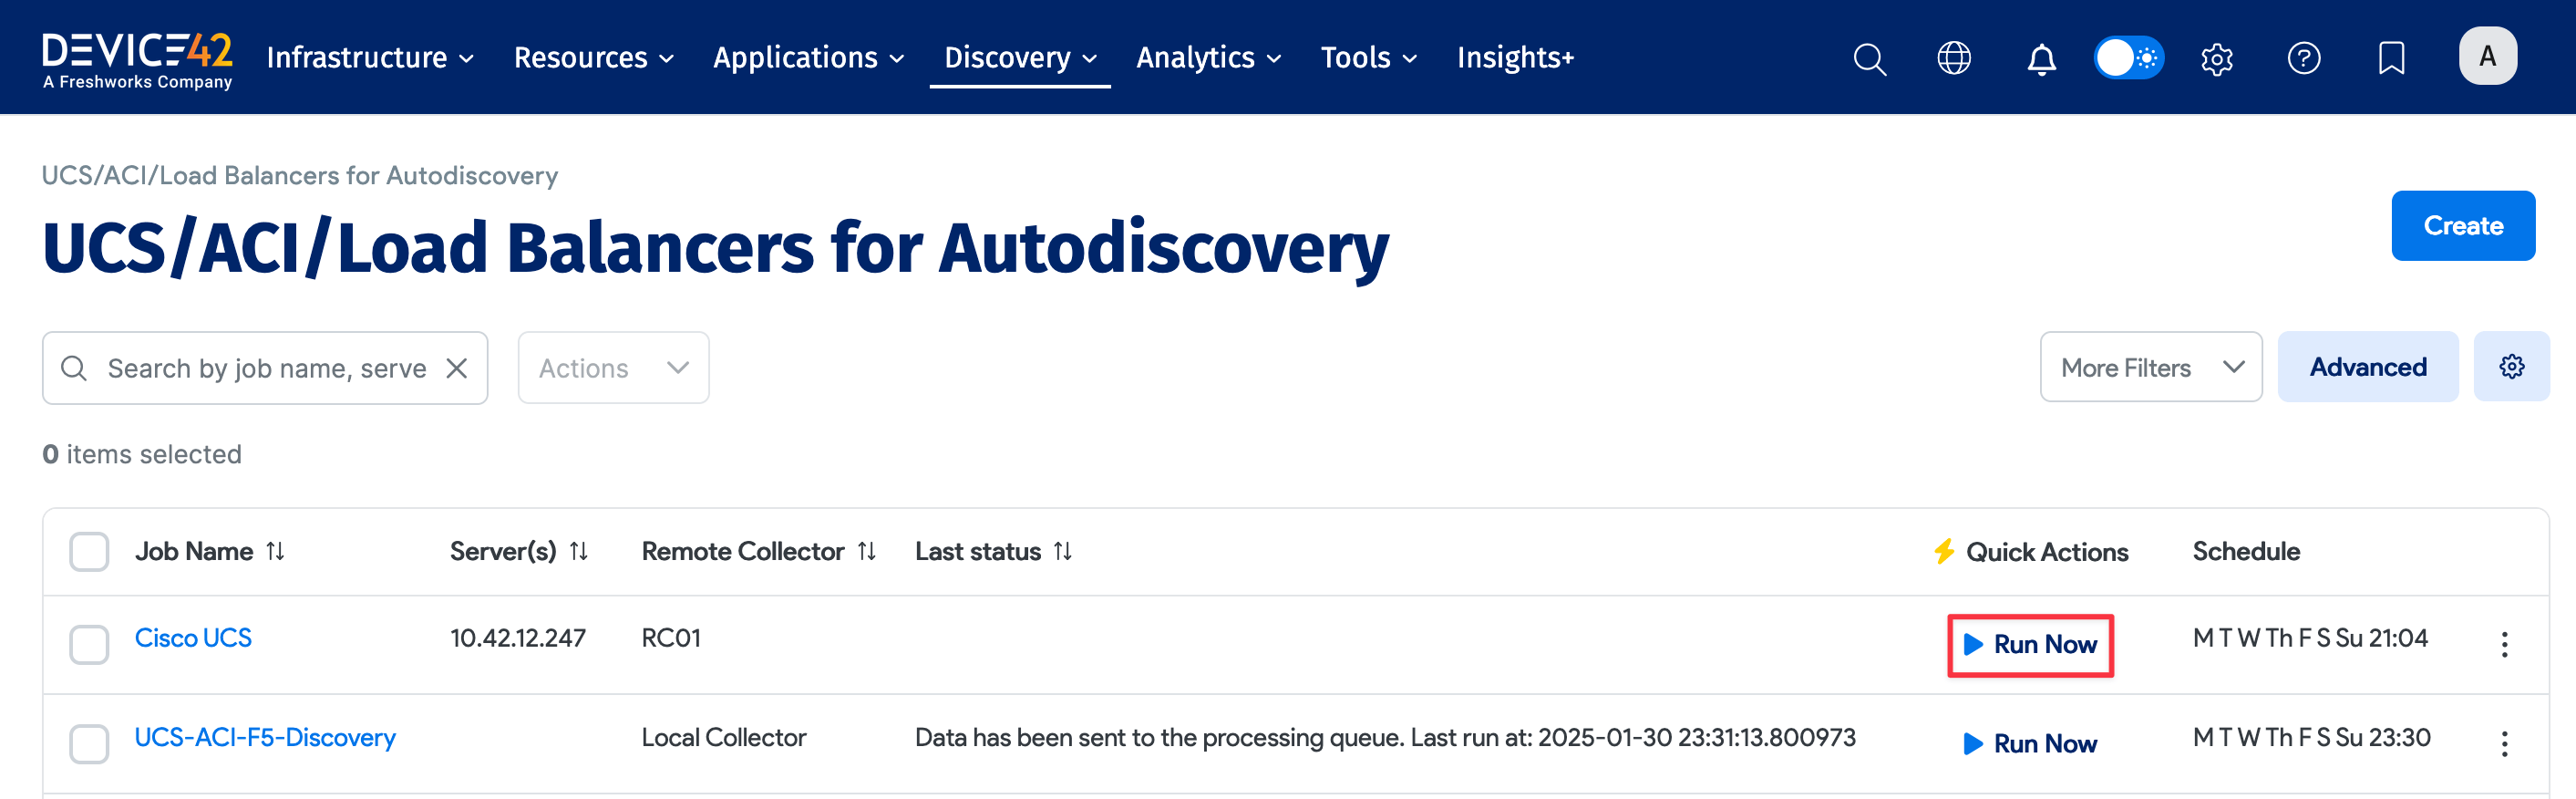
- Select Run now from the list page to run the discovery job now.
Visit the dedicated Cisco UCS / ACI discovery docs page for more information.
Discovery Options Definitions
The following options apply to UCS/ACI devices:
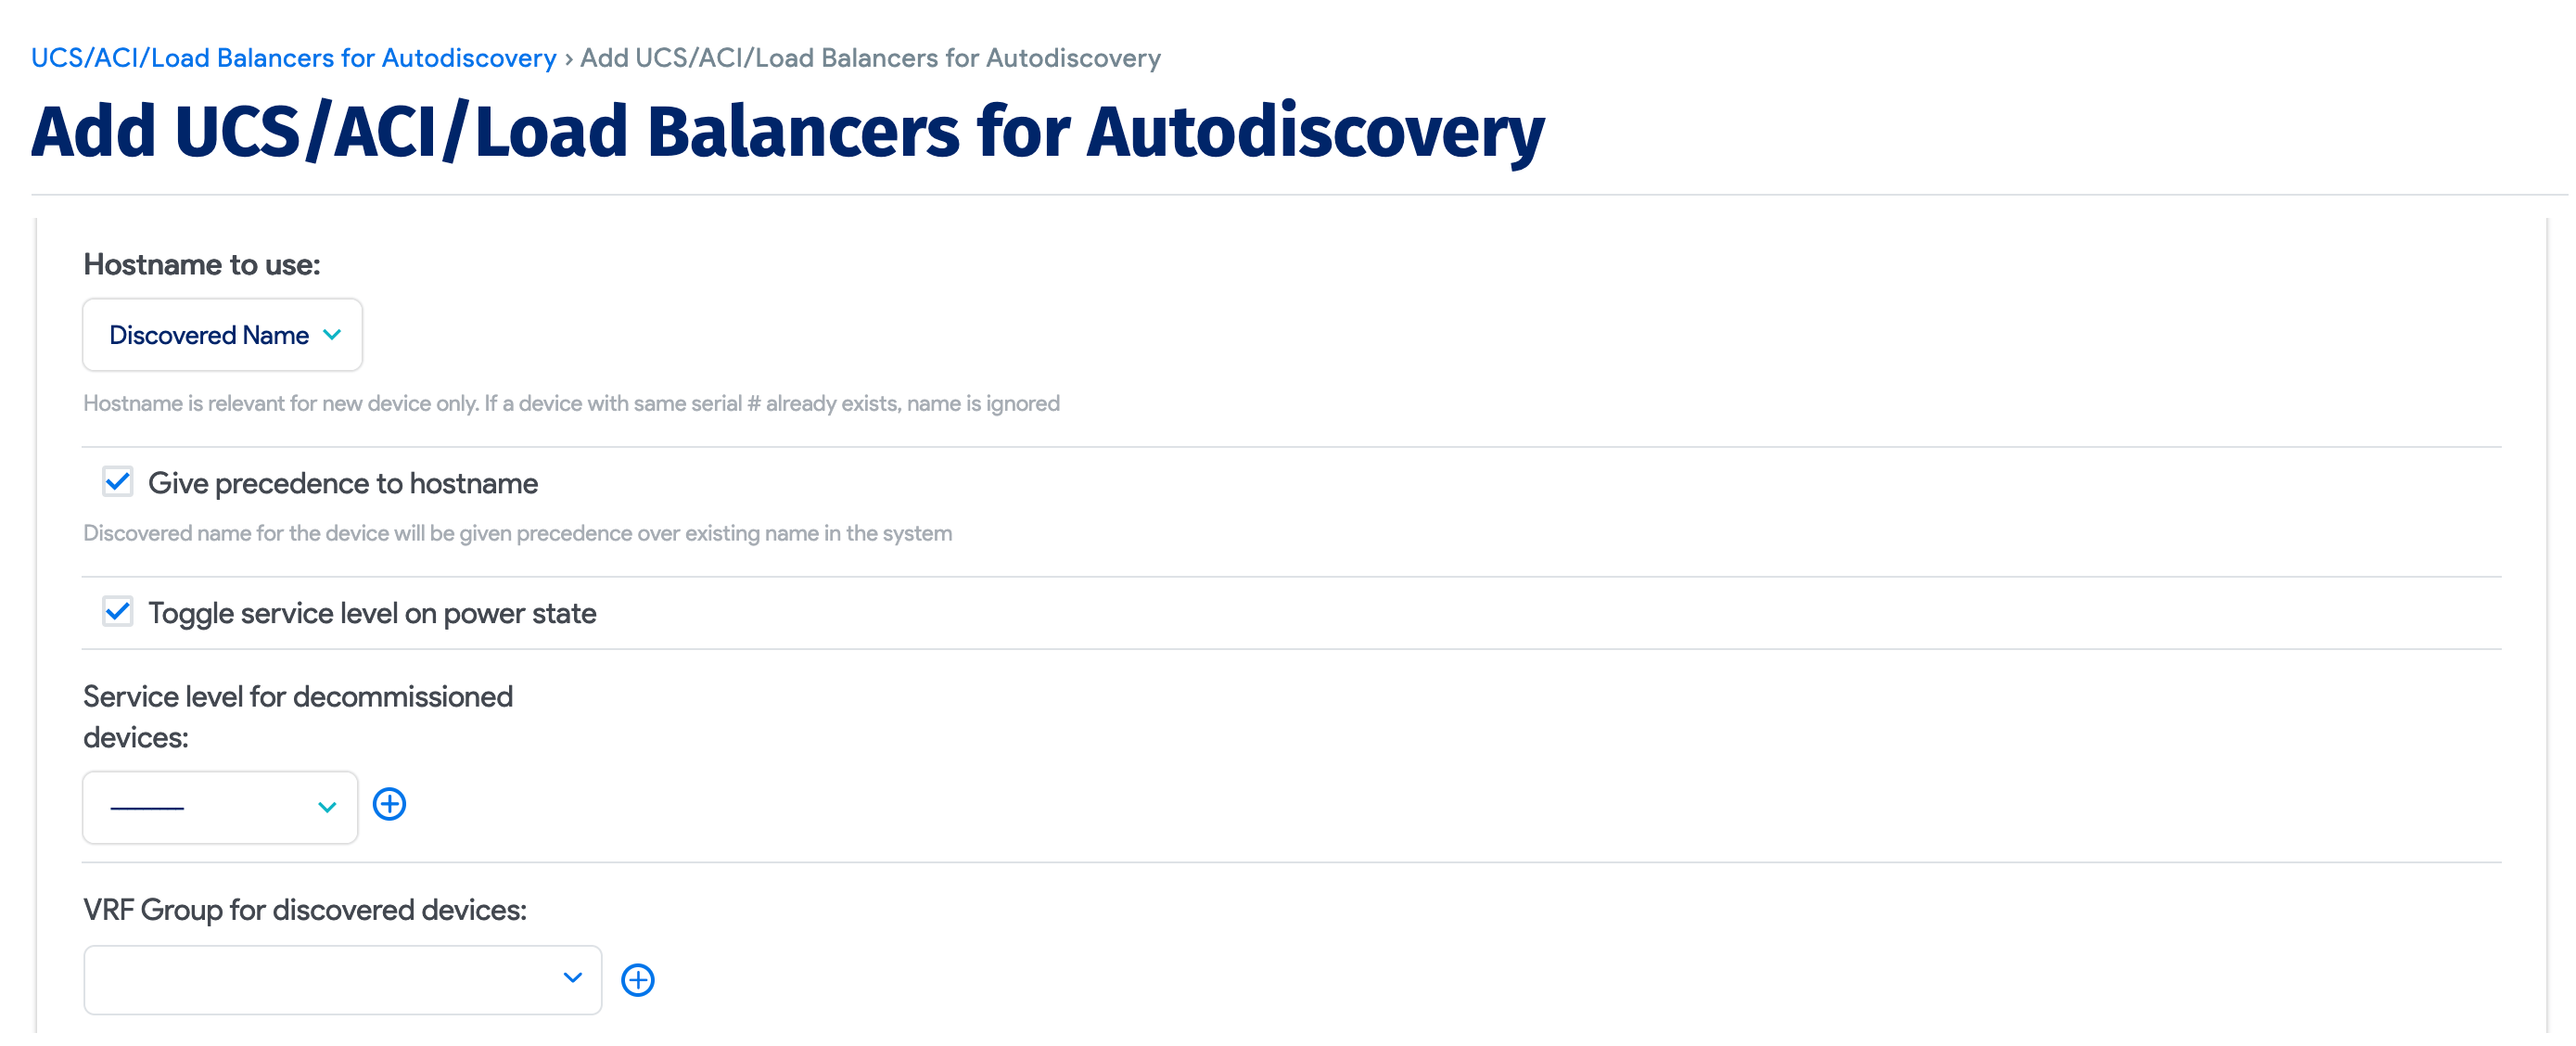
- Hostname to use: Choose the hostname format to use for newly discovered devices. Choose between Discovered Name or Serial #.
- Give precedence to hostname: Select to force-overwrite the current hostname for existing devices in Device42, using the hostname option selection in Hostname to use.
- VRF Group for discovered devices: Place discovered devices into the chosen VRF group.
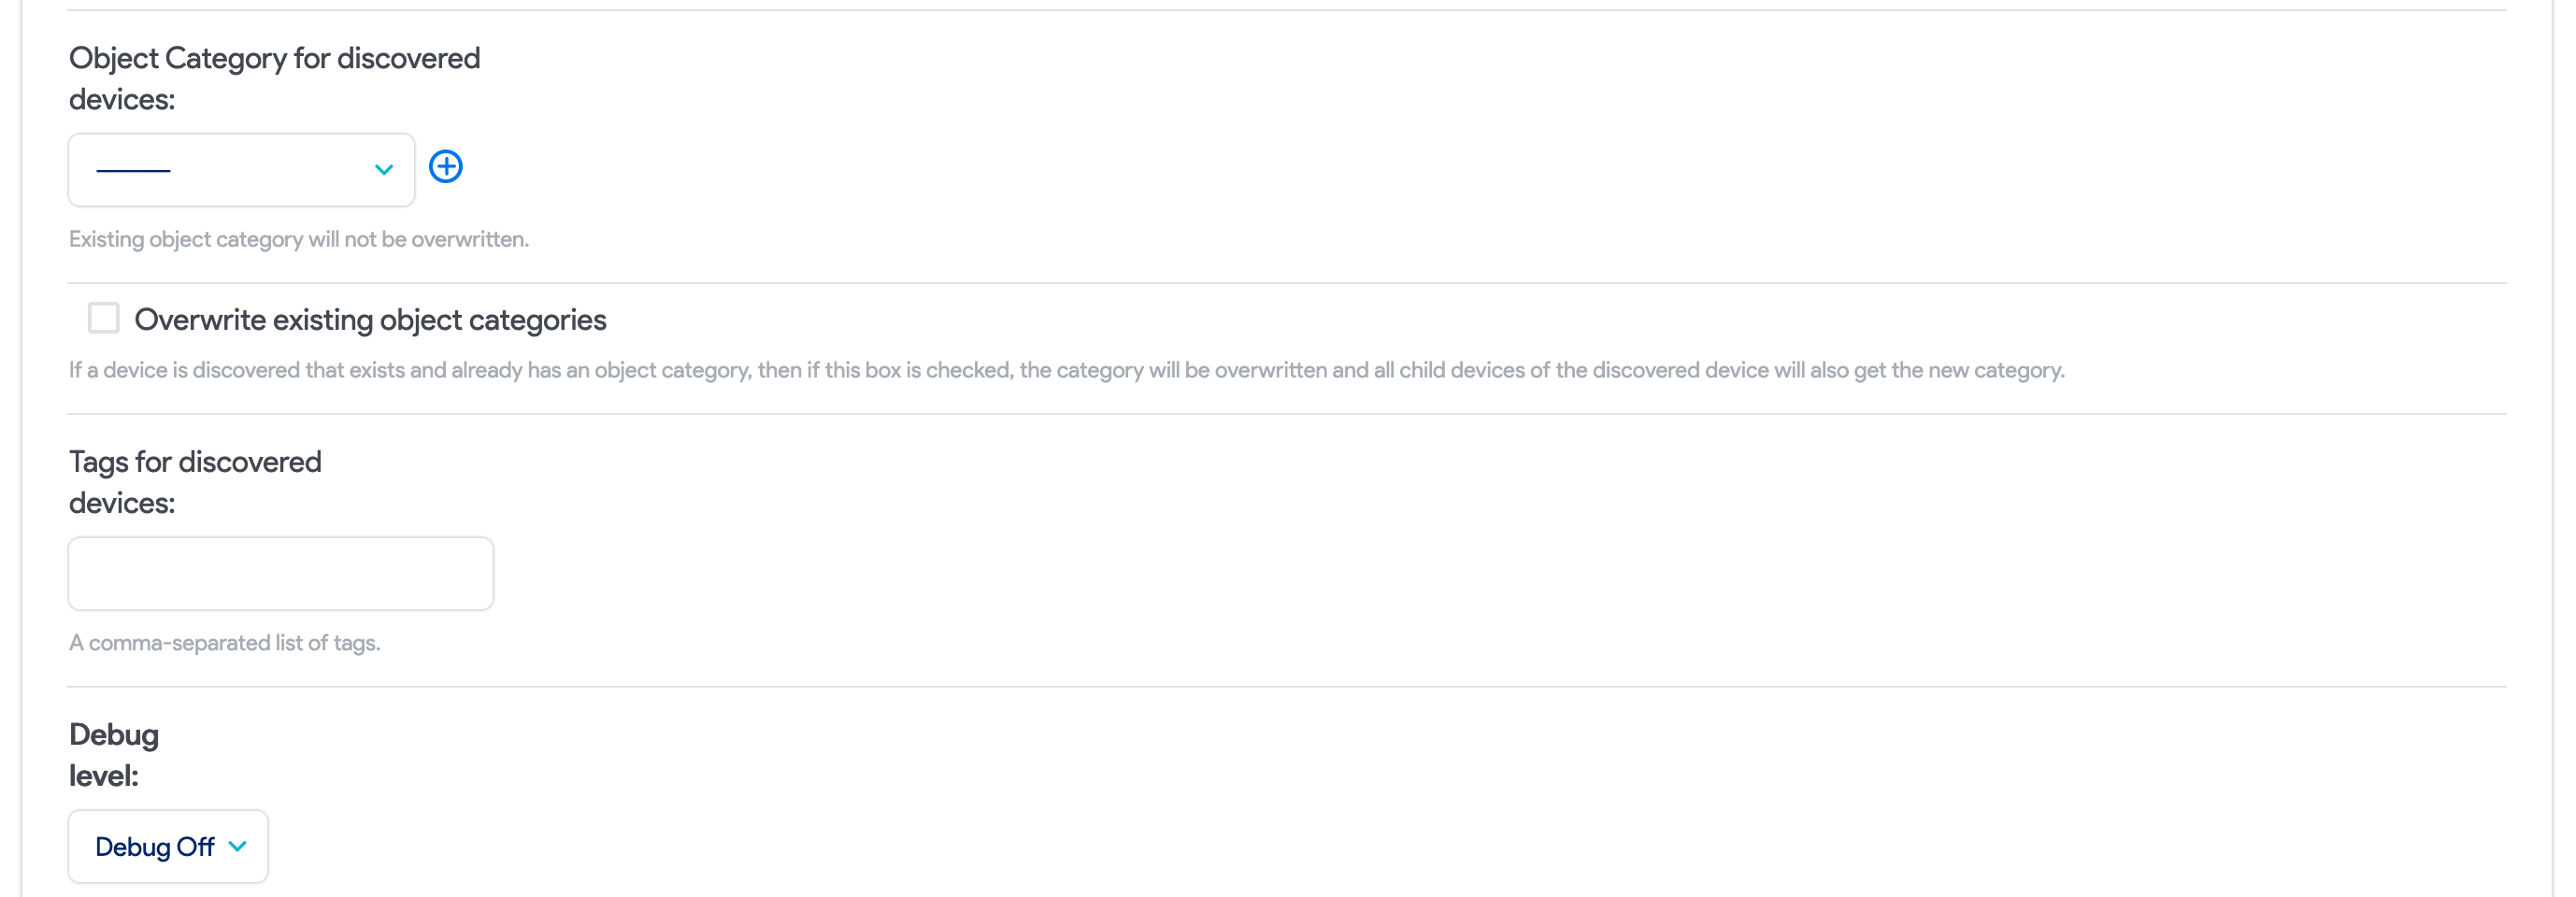
- Object Category for discovered devices: Place discovered objects into the chosen category in Device42.
- Overwrite existing object categories: Select to force-overwrite the object category for existing devices in Device42.
- Tags for discovered devices: Add tags to the discovered devices.
- Debug level: Enable debug logging for troubleshooting.
Run Now or Schedule
Select Add another Autodiscovery Schedule when editing a job to create a run schedule for that job.


After saving, you can select the Run Now option to run the job immediately.
Newly created jobs will not run on the first day they are created to prevent an unintentionally large number of jobs from running initially. If you want to run a job after its initial creation, select Run Now from the autodiscovery list page.