Linux and Unix Server Autodiscovery
This page is for Device42 administrators who need to discover Linux and Unix servers. Learn how to set up SSH-based discovery jobs, use SSH key authentication, and configure the required permissions.
Device42 supports SSH-based Linux and UNIX discovery from the Main Appliance. For a full list of supported Linux and UNIX operating systems, see Device42 Supported Operating Systems.
Information Discovered
Provided you have successfully configured the discovery account and the data is available, Device42 will gather the following information:
- Device host information
- Parts
- Operating System
- Service processes
- Software installed
- Installed common applications and configuration files
Within the Parts section of device details, the CPU, RAM, and storage entries for the device will be displayed. You may also see additional information such as model number, slot, and location.
Create a Linux/Unix Discovery Job
Before configuring an SSH-based discovery job, ensure the SSH port (standard TCP port 22 or a custom port) is open between the Device42 Main Appliance or Remote Collector and the targeted Unix or Linux servers.
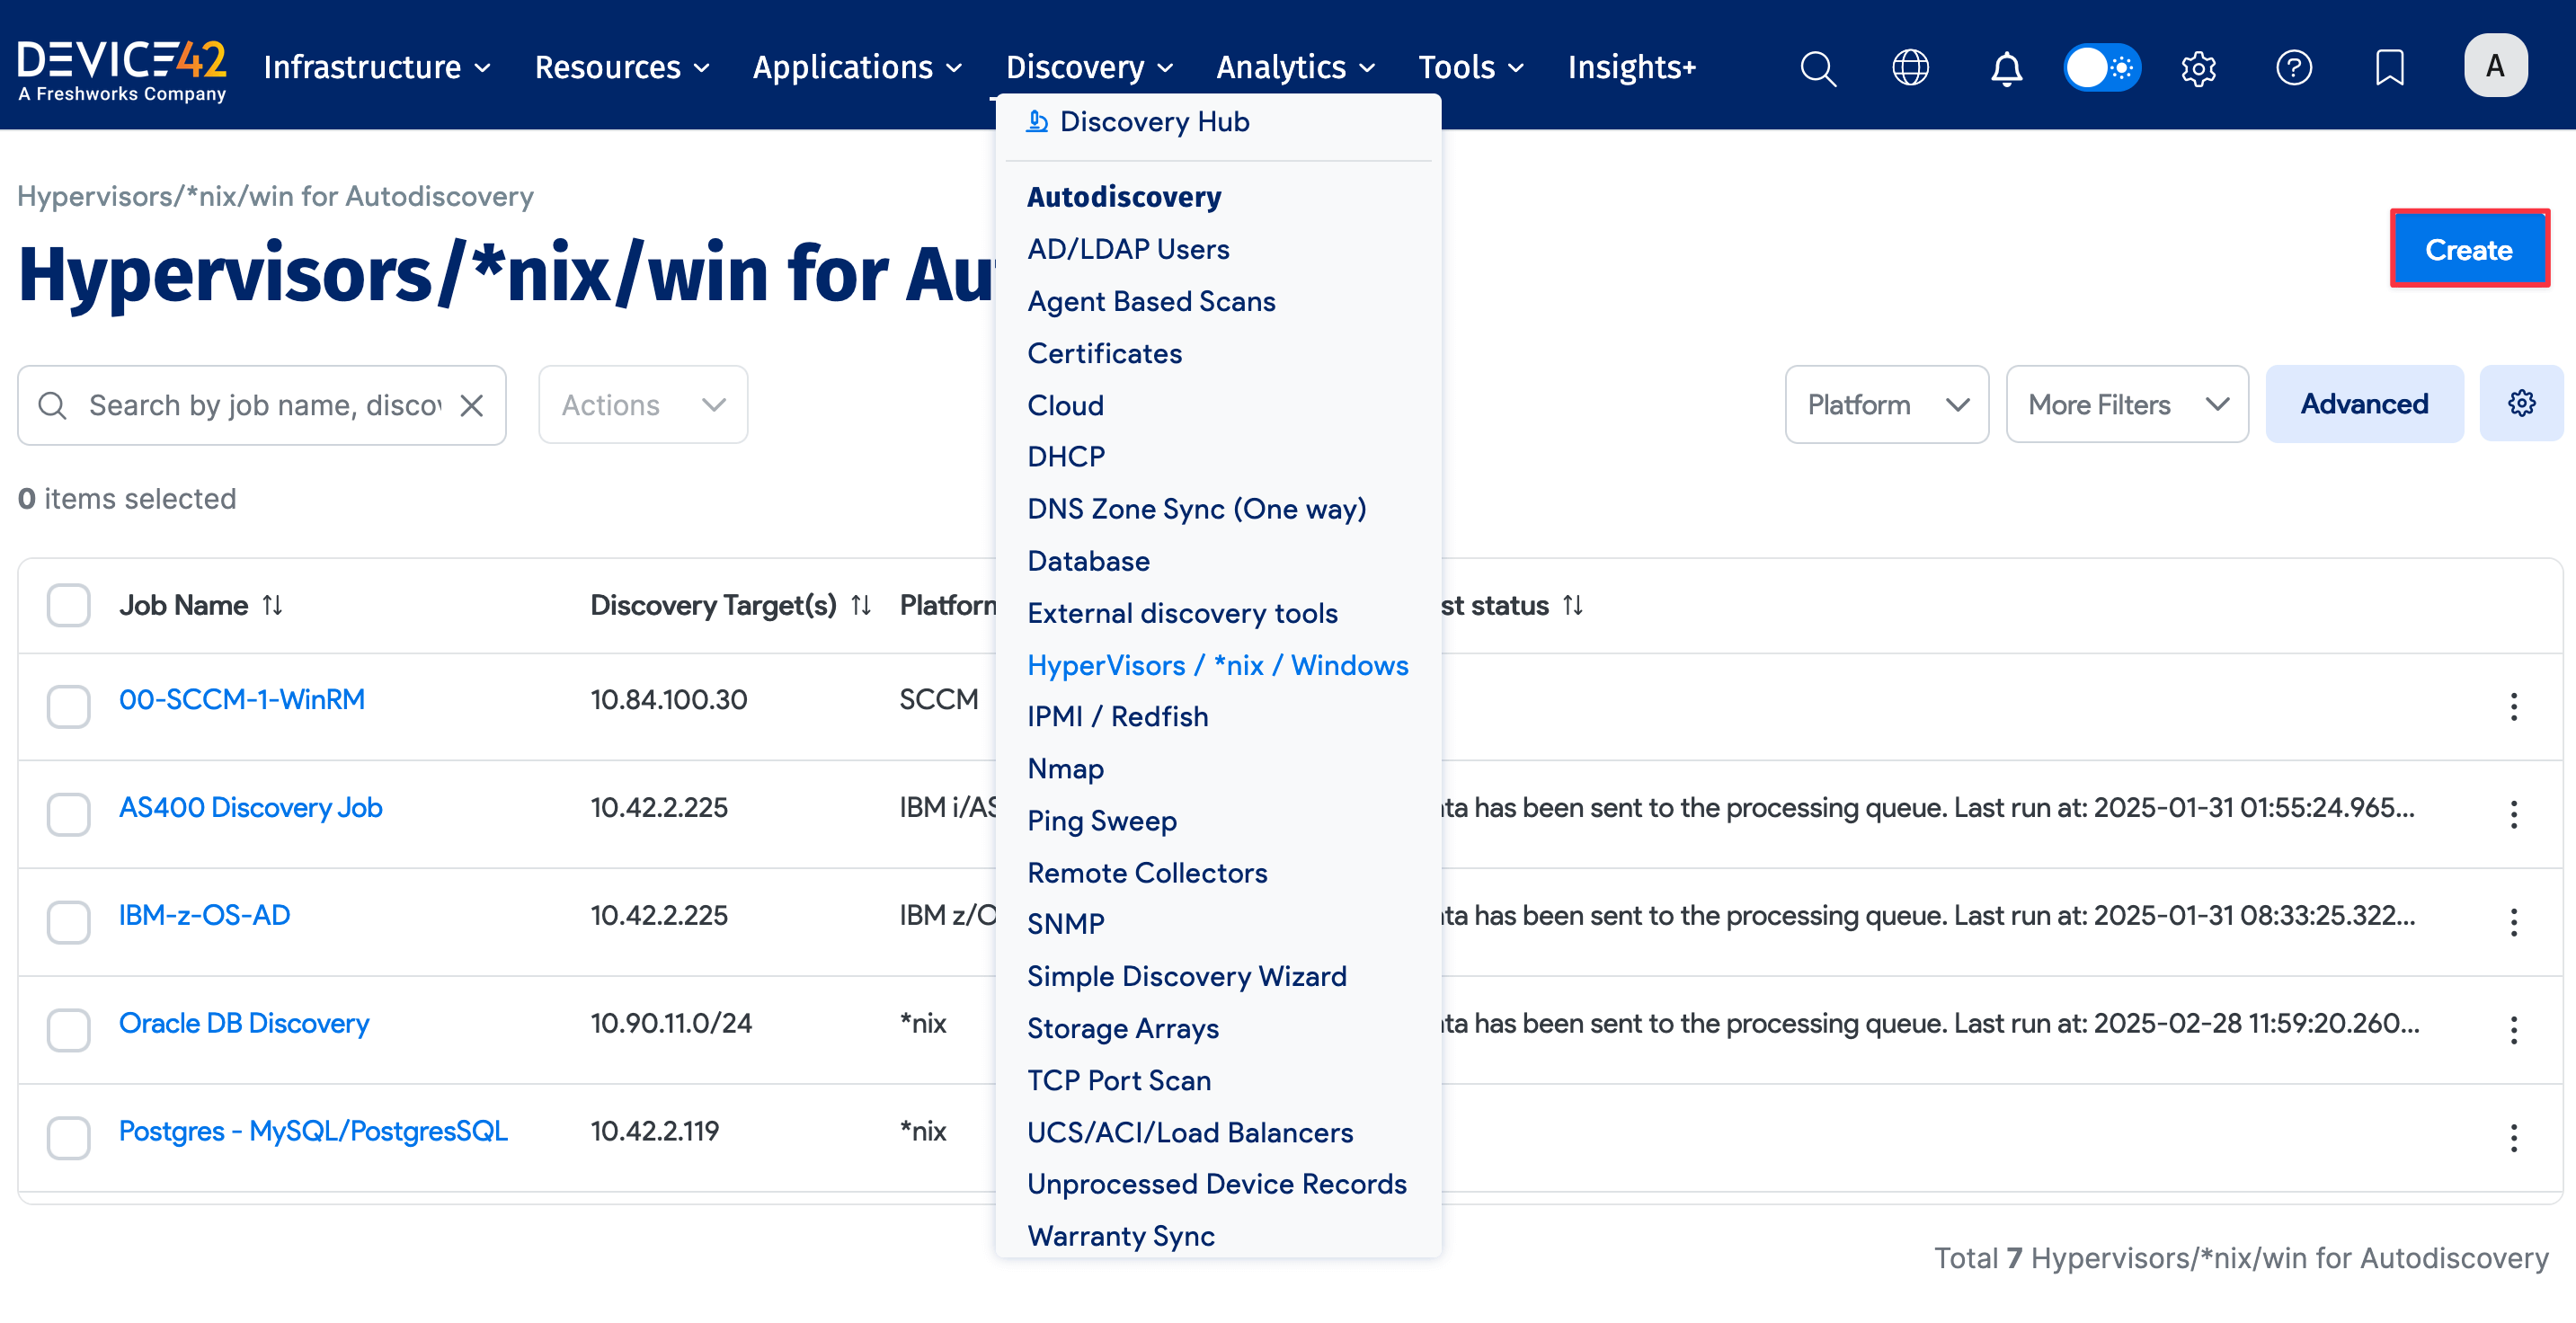
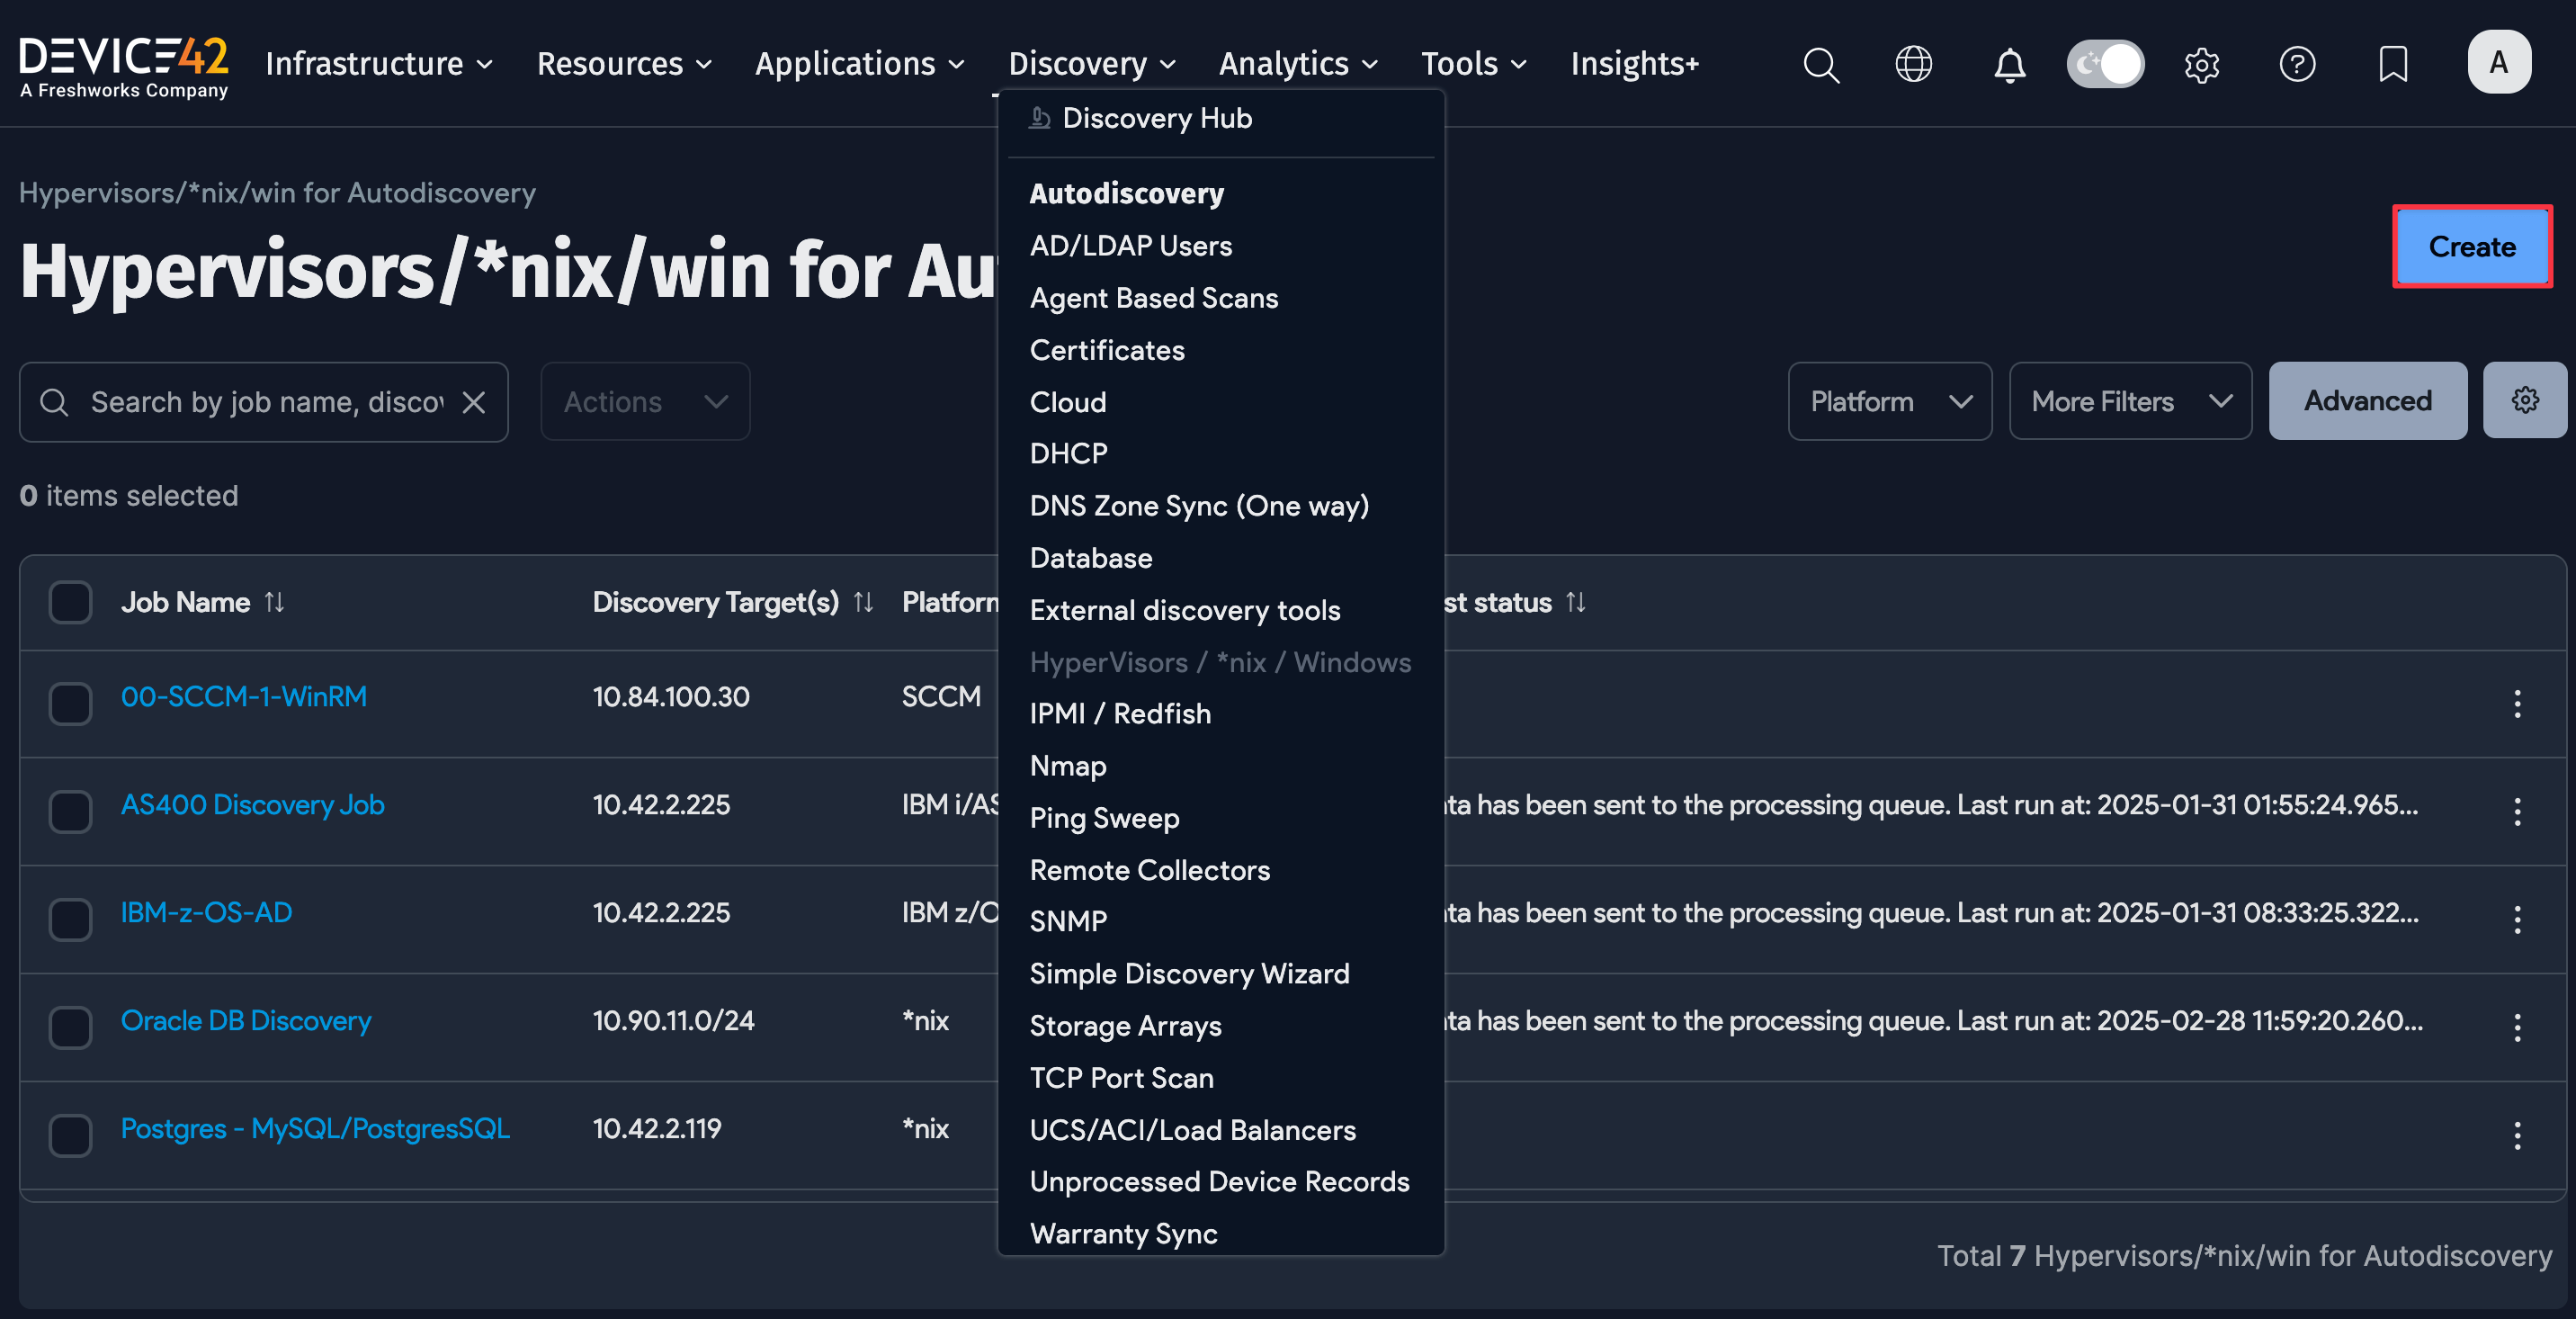
Select Discovery > Hypervisors / *nix / Windows from the main menu and click the Create button to add a discovery job to connect and gather host and VM details.
Choose *nix as the platform, and enter your discovery target (hostnames, IPs or IP range, or CIDR), credentials, and job options.

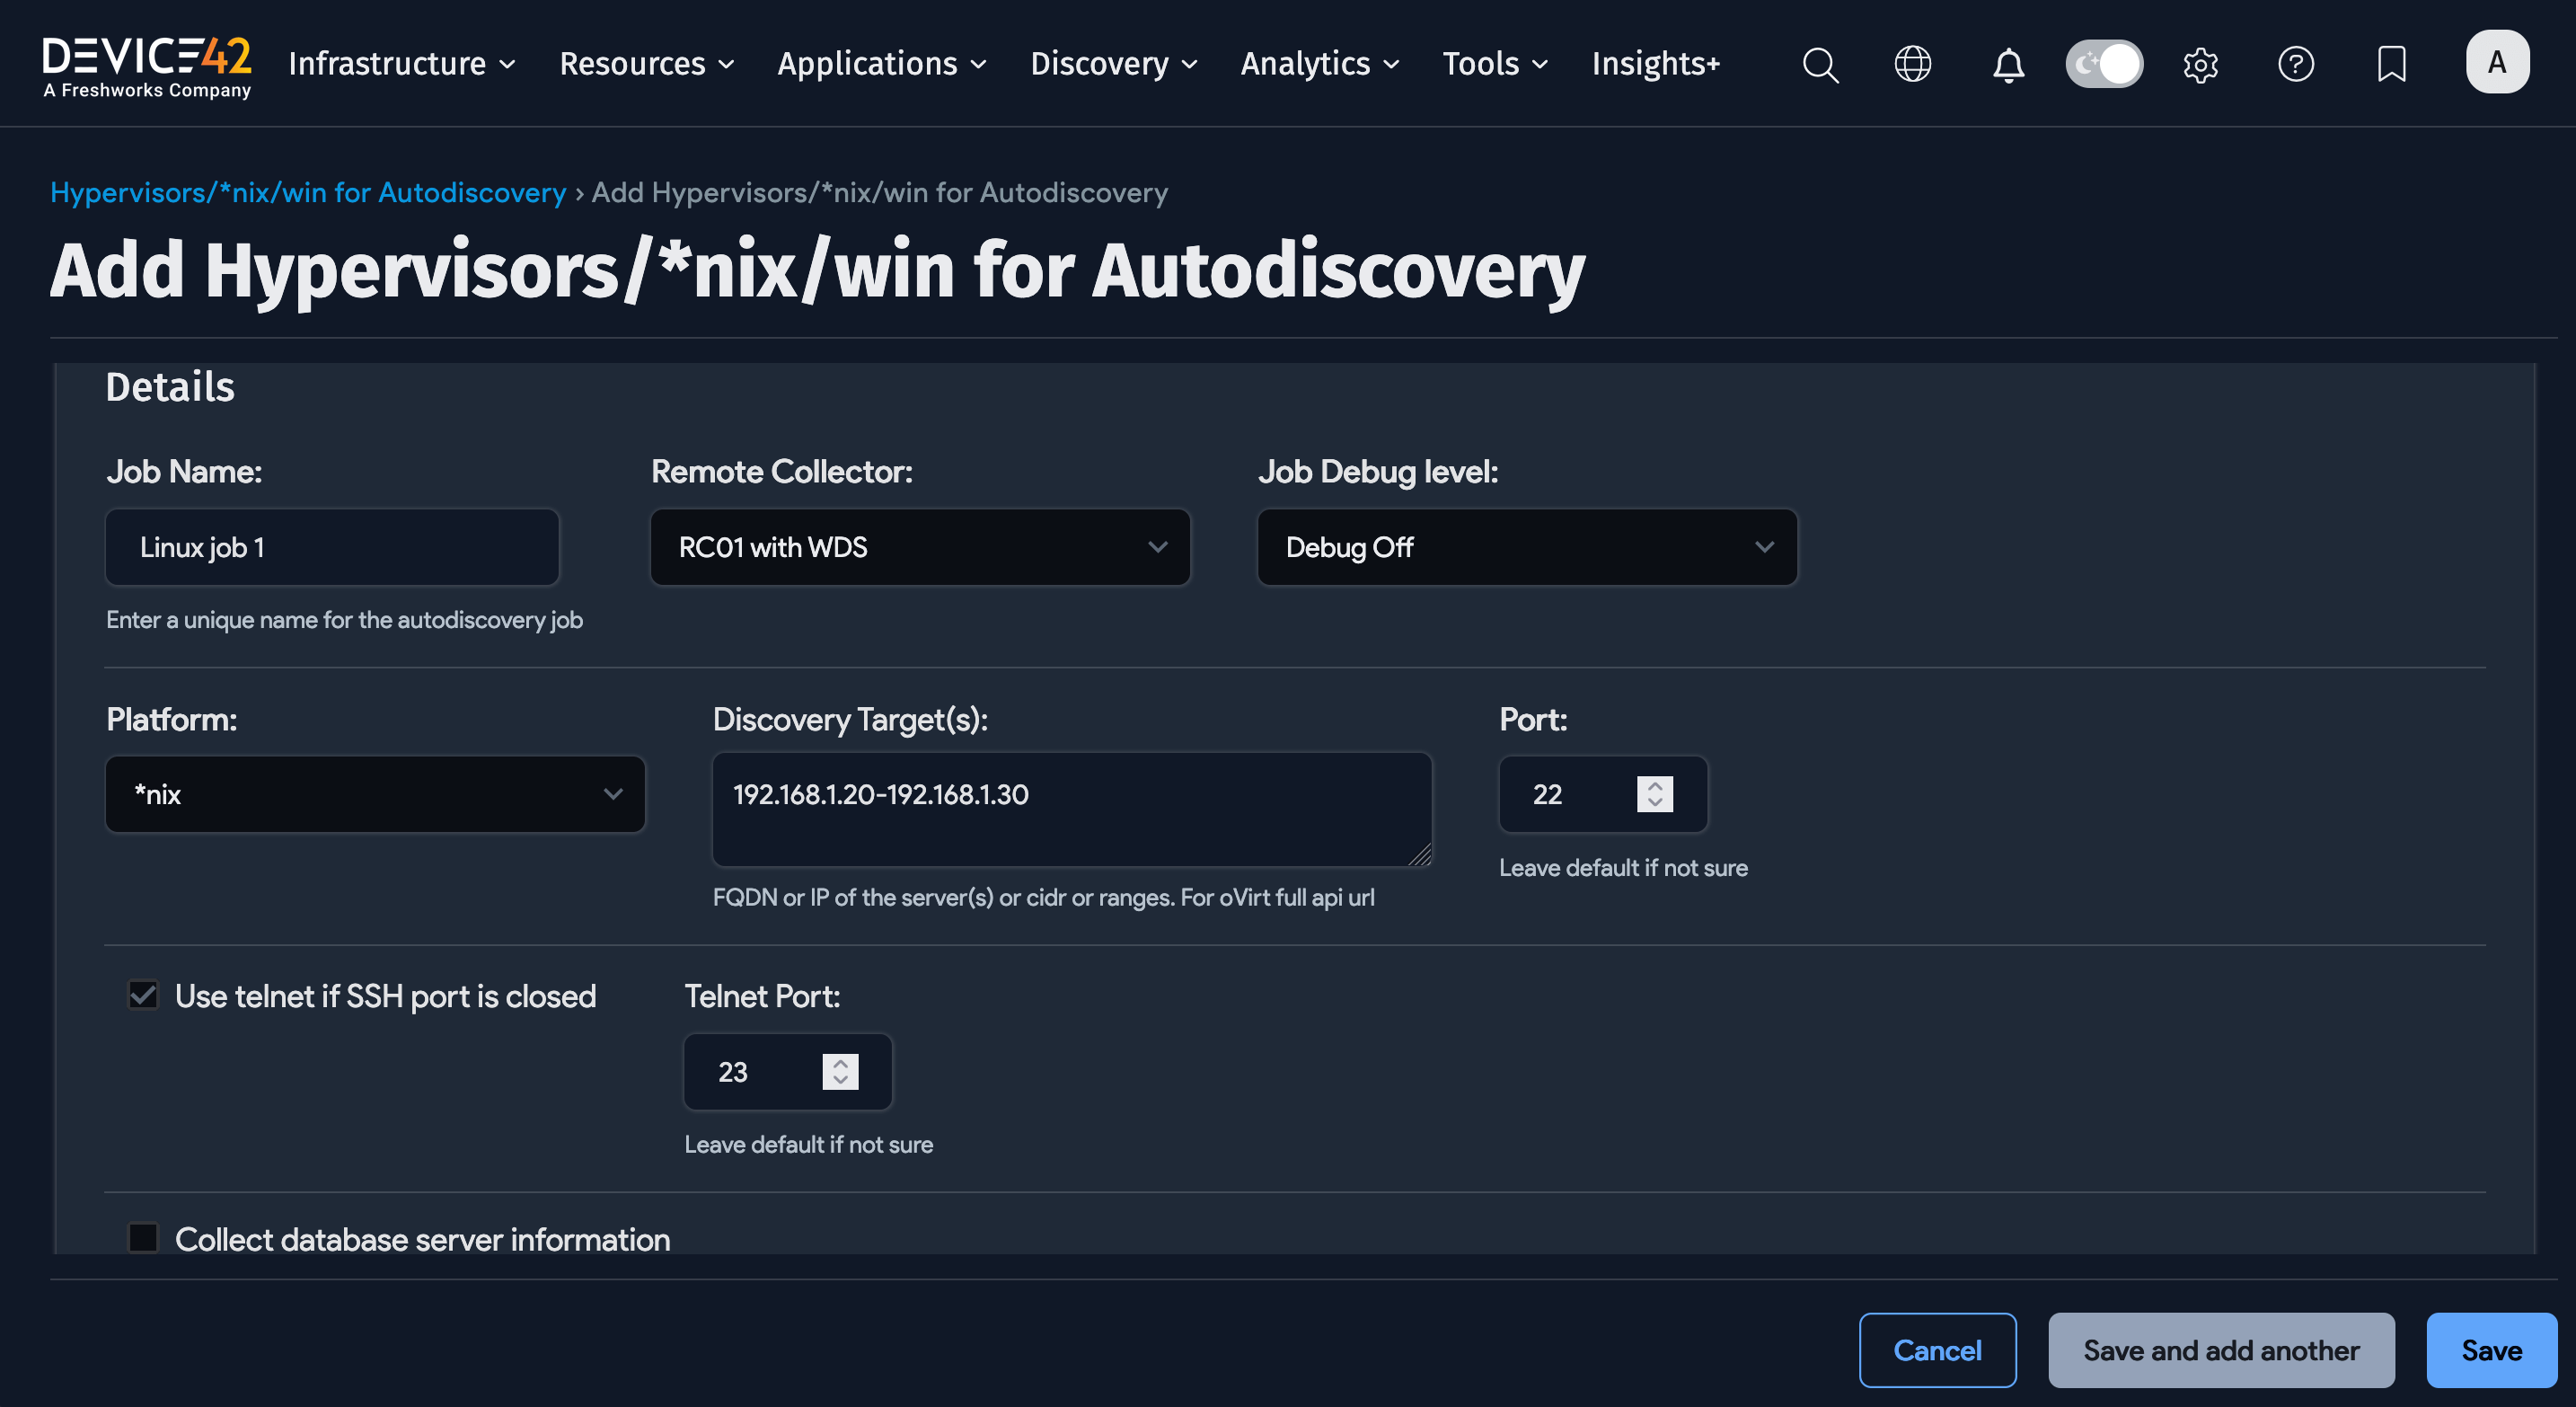
Linux/Unix Discovery Job Options
- Job Name: User-defined name for the job.
- Remote Collector: Select the remote collector to run the discovery job from (optional).
- Job Debug Level: Select Debug On for extra debug info, useful for a support ticket.
- Discovery Target(s): Specify FQDN or IP of discovery target(s). If using FQDN, Device42 must be configured to resolve the DNS.
- Port: This is 22 by default. Only change this if you have a different SSH port configured.
- Use telnet if SSH port is closed: Fall back to telnet (port 23) if the SSH port is found to be closed.
- Collect database server information: Select this option to discover Oracle database servers.
- Database Username/Password(s): Username and password with database server permissions.
- ADM Sampling Interval: Off by default. Enter a sampling interval in minutes or hours.
- Enable Resource Utilization Tracking for Device(s): Optionally enable the collection of resource utilization metrics from discovered devices.
- Resource Utilization Sampling Interval: Set the interval for RU data collection (only in effect if RU Tracking is enabled).
- Discovery Target(s) Credential(s): Use a username with permissions to connect to the Linux and Unix targets.
- Schedule for autodiscovery: You can schedule the discovery to run at certain times.
Do not set up a discovery scan using critical production account credentials. Create a separate, dedicated account to use only for discovery.
Account lockout could result in an otherwise avoidable outage depending on the permissions granted and your configured password policies.
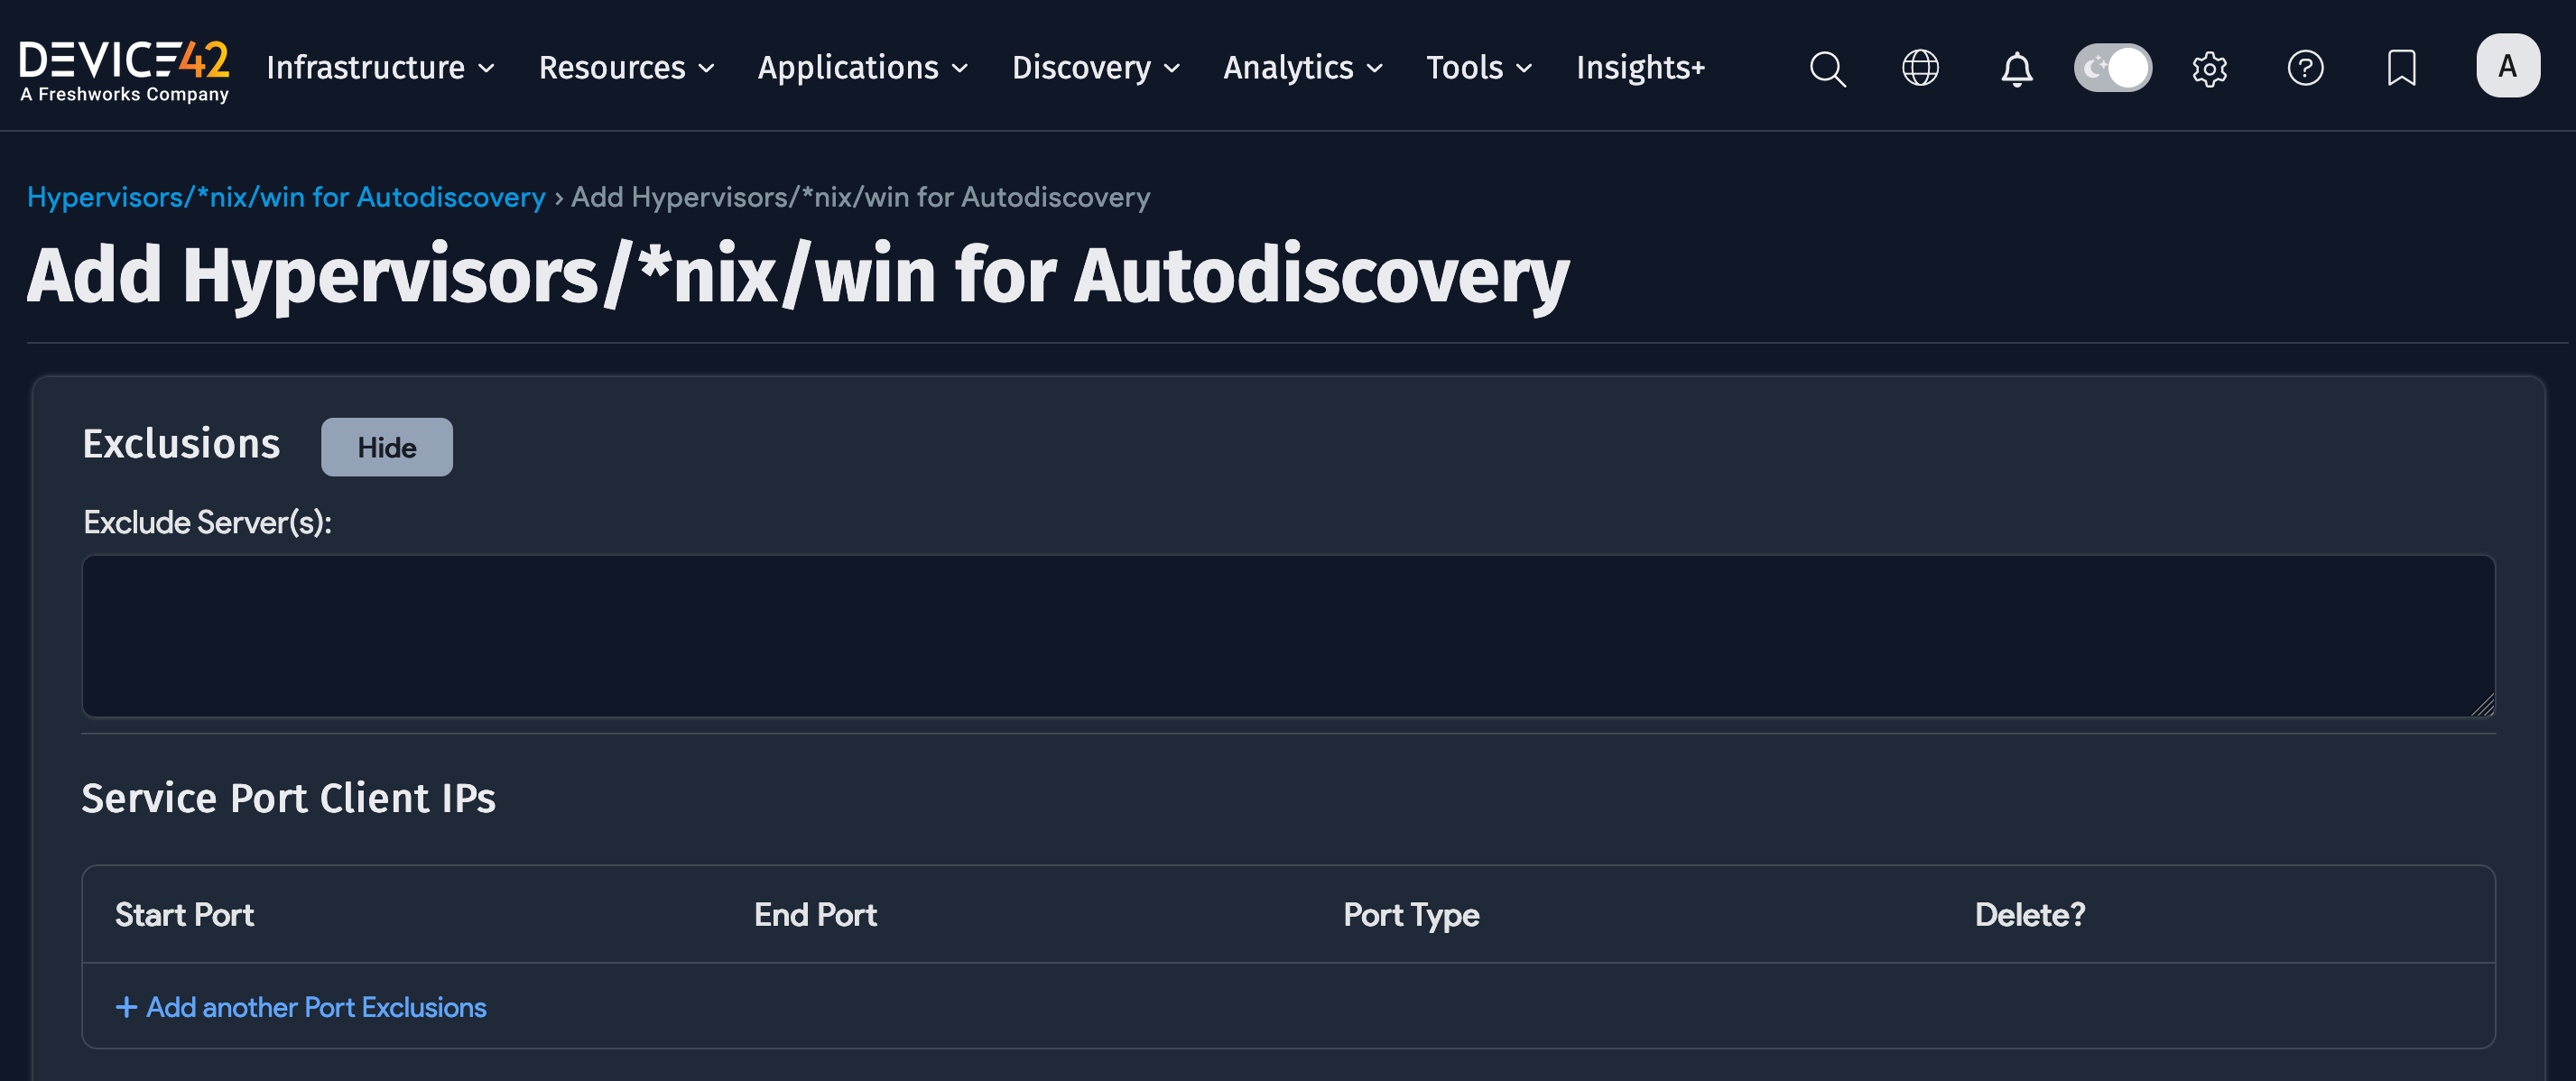
Option to Ignore IPs and MAC Addresses
You can prevent IP and MAC addresses from being included in the database during discovery. Devices with these addresses will still be discovered but the detailed information that would typically be collected and stored is ignored.
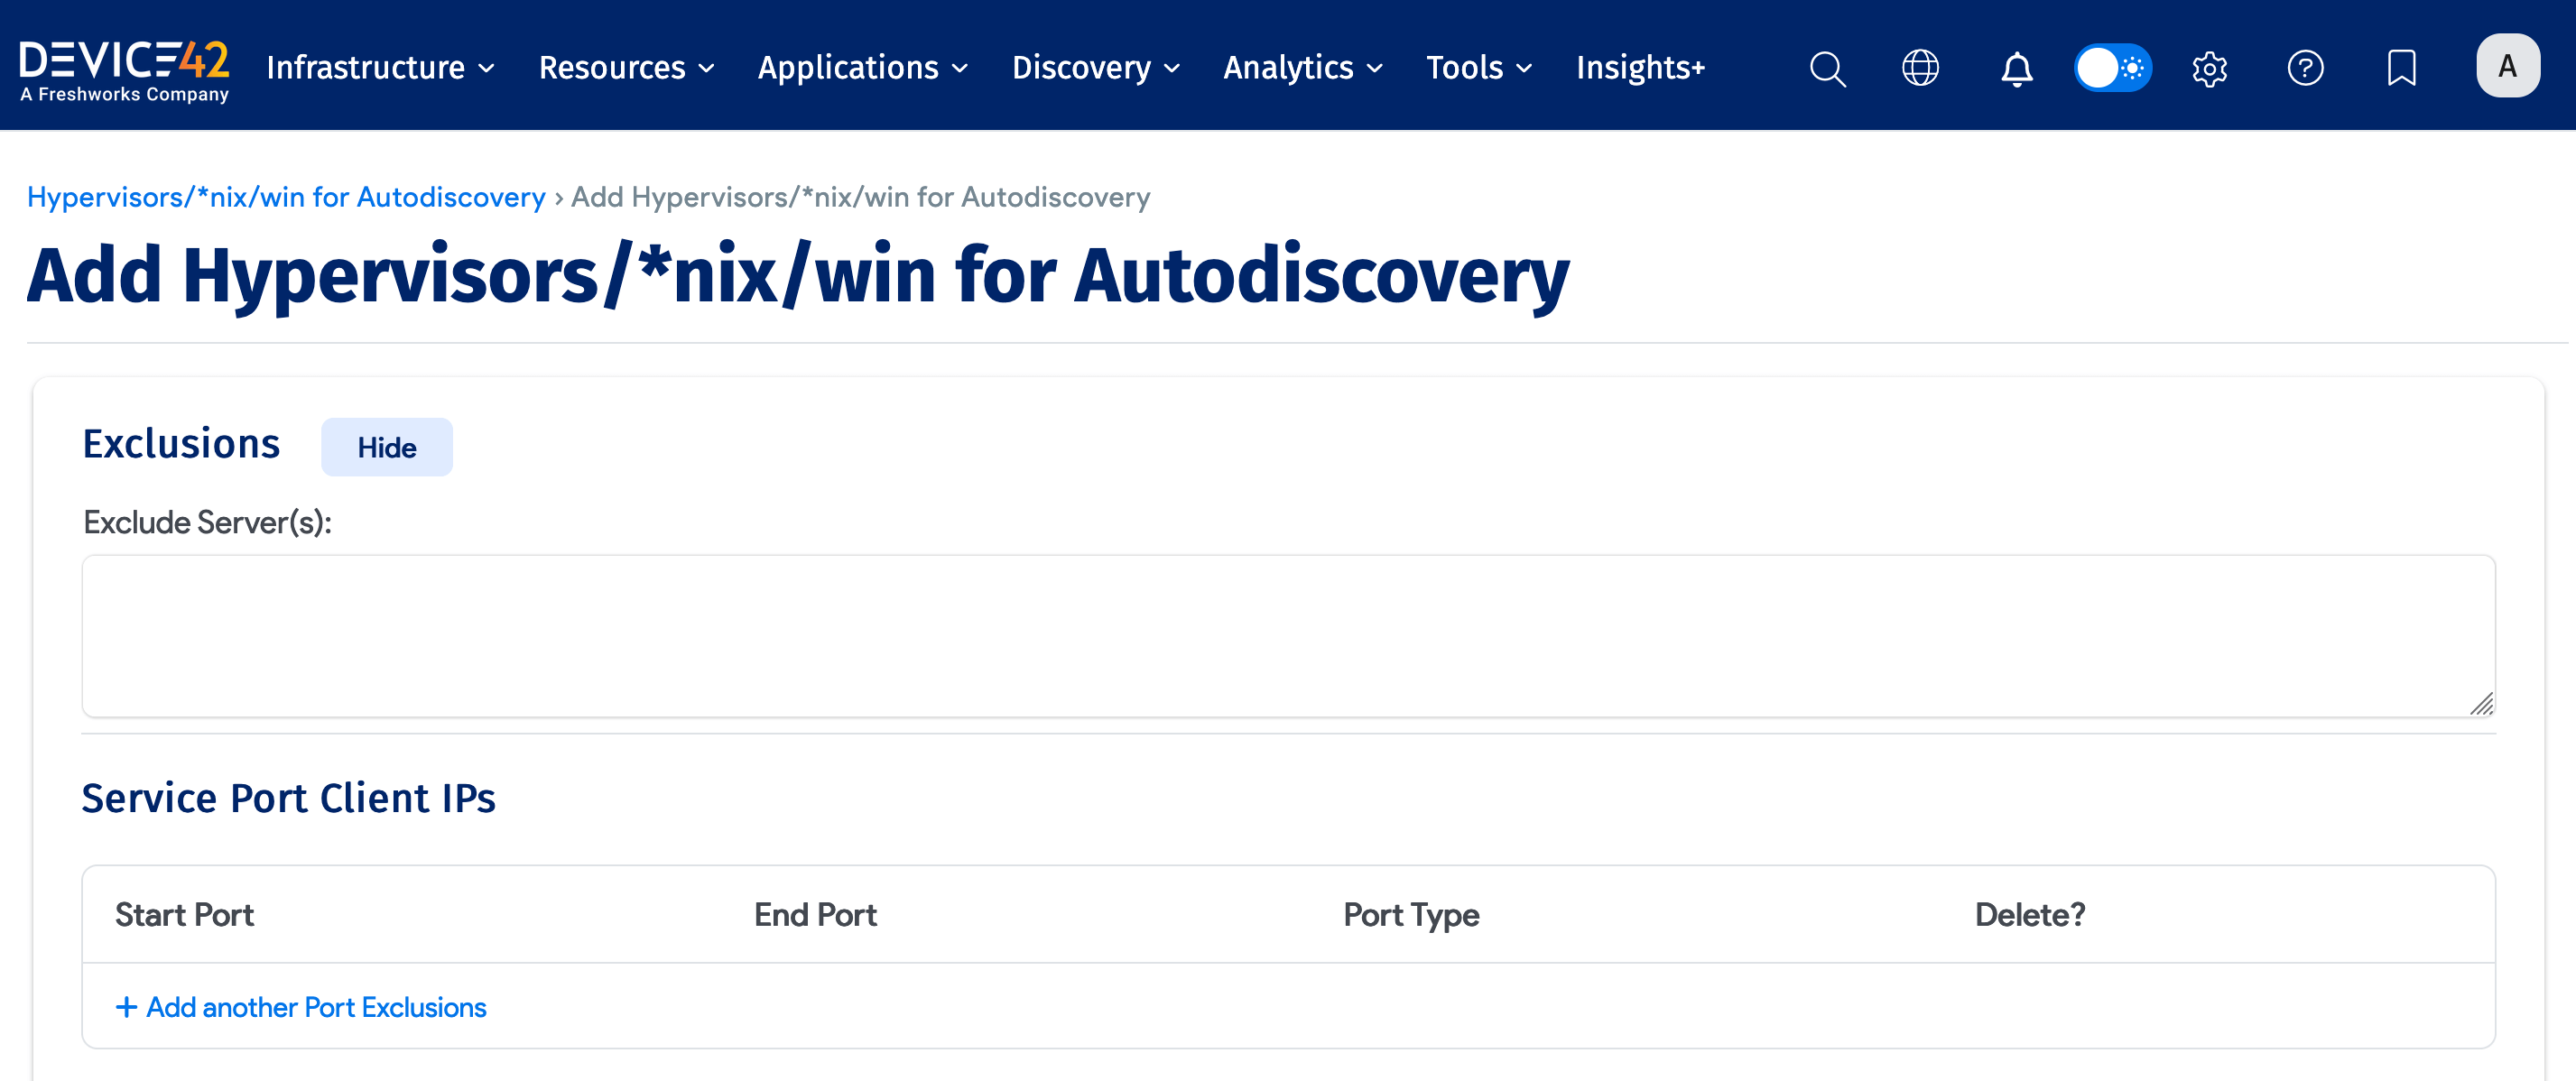
Configure rules to ignore IP and MAC addresses for a specific job when creating or editing the job.
-
Exclude Server(s): List the server IPs to exclude from discovery. This is useful for ignoring individual IPs when the discovery target is specified as a range or CIDR block.
-
Service Port Client IPs: Do not discover client connections on specified listening ports.
-
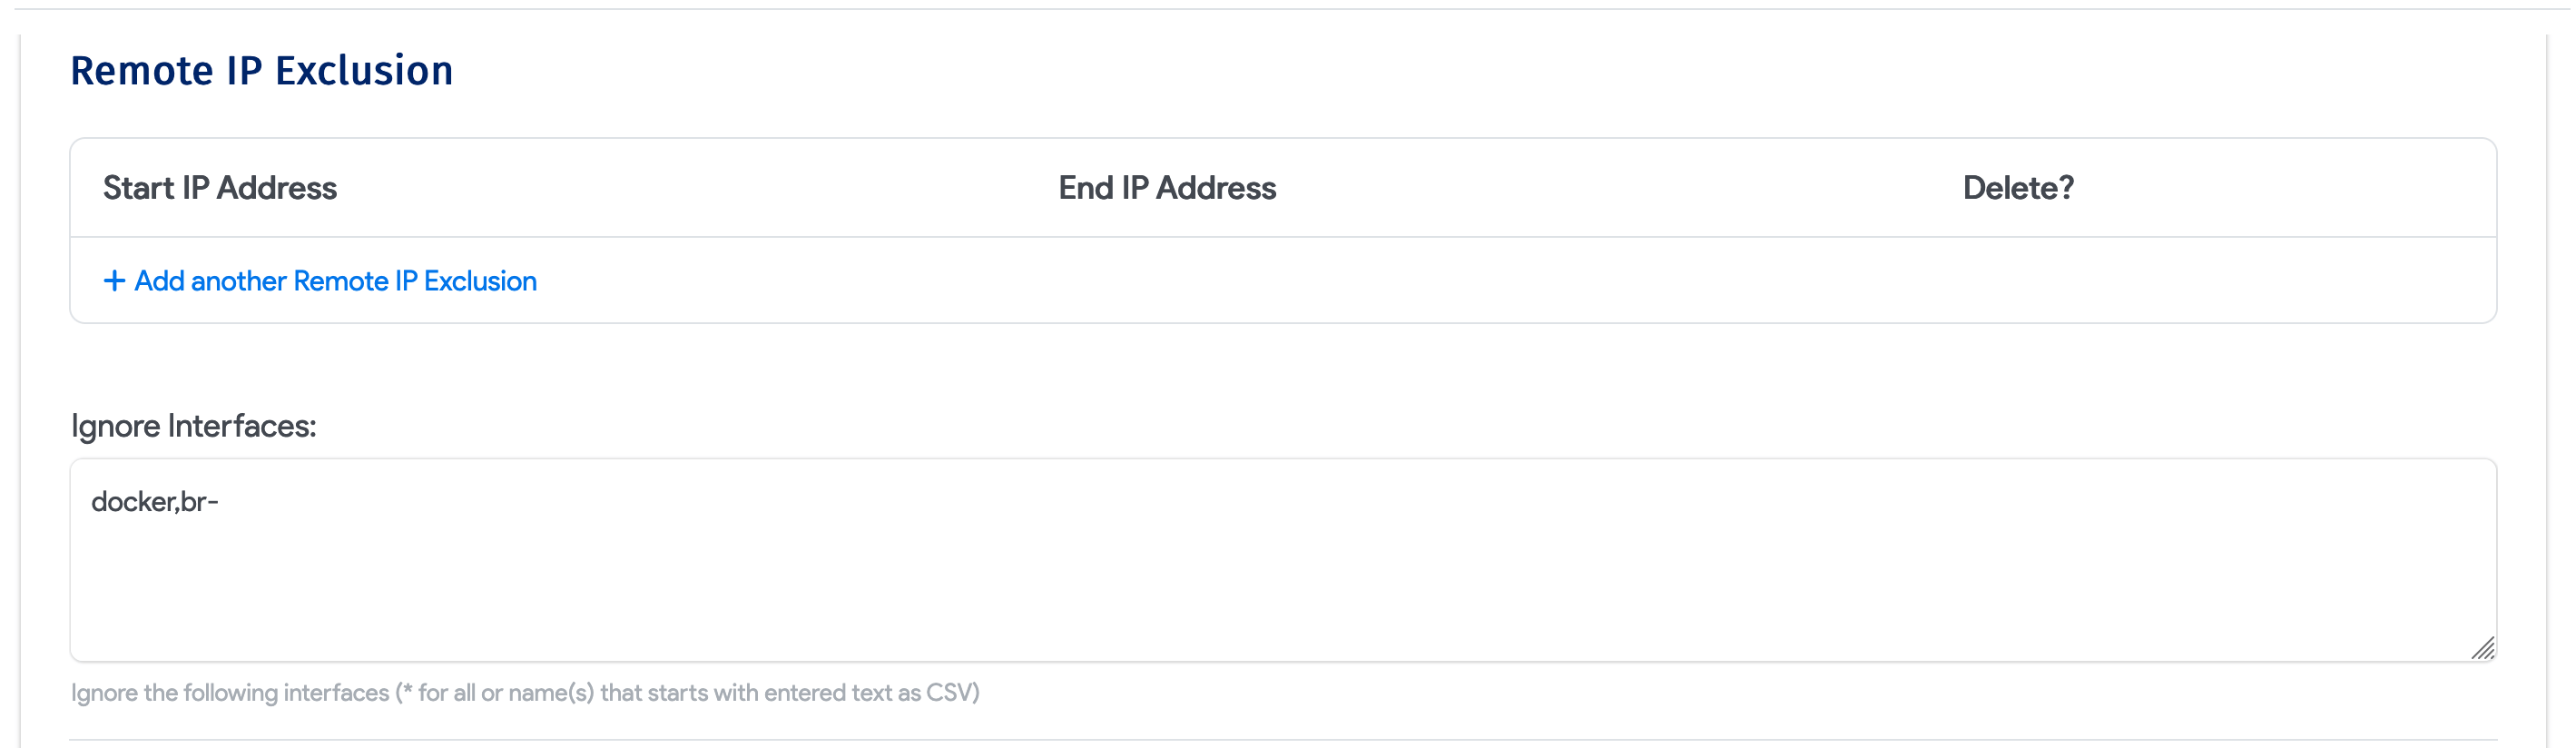
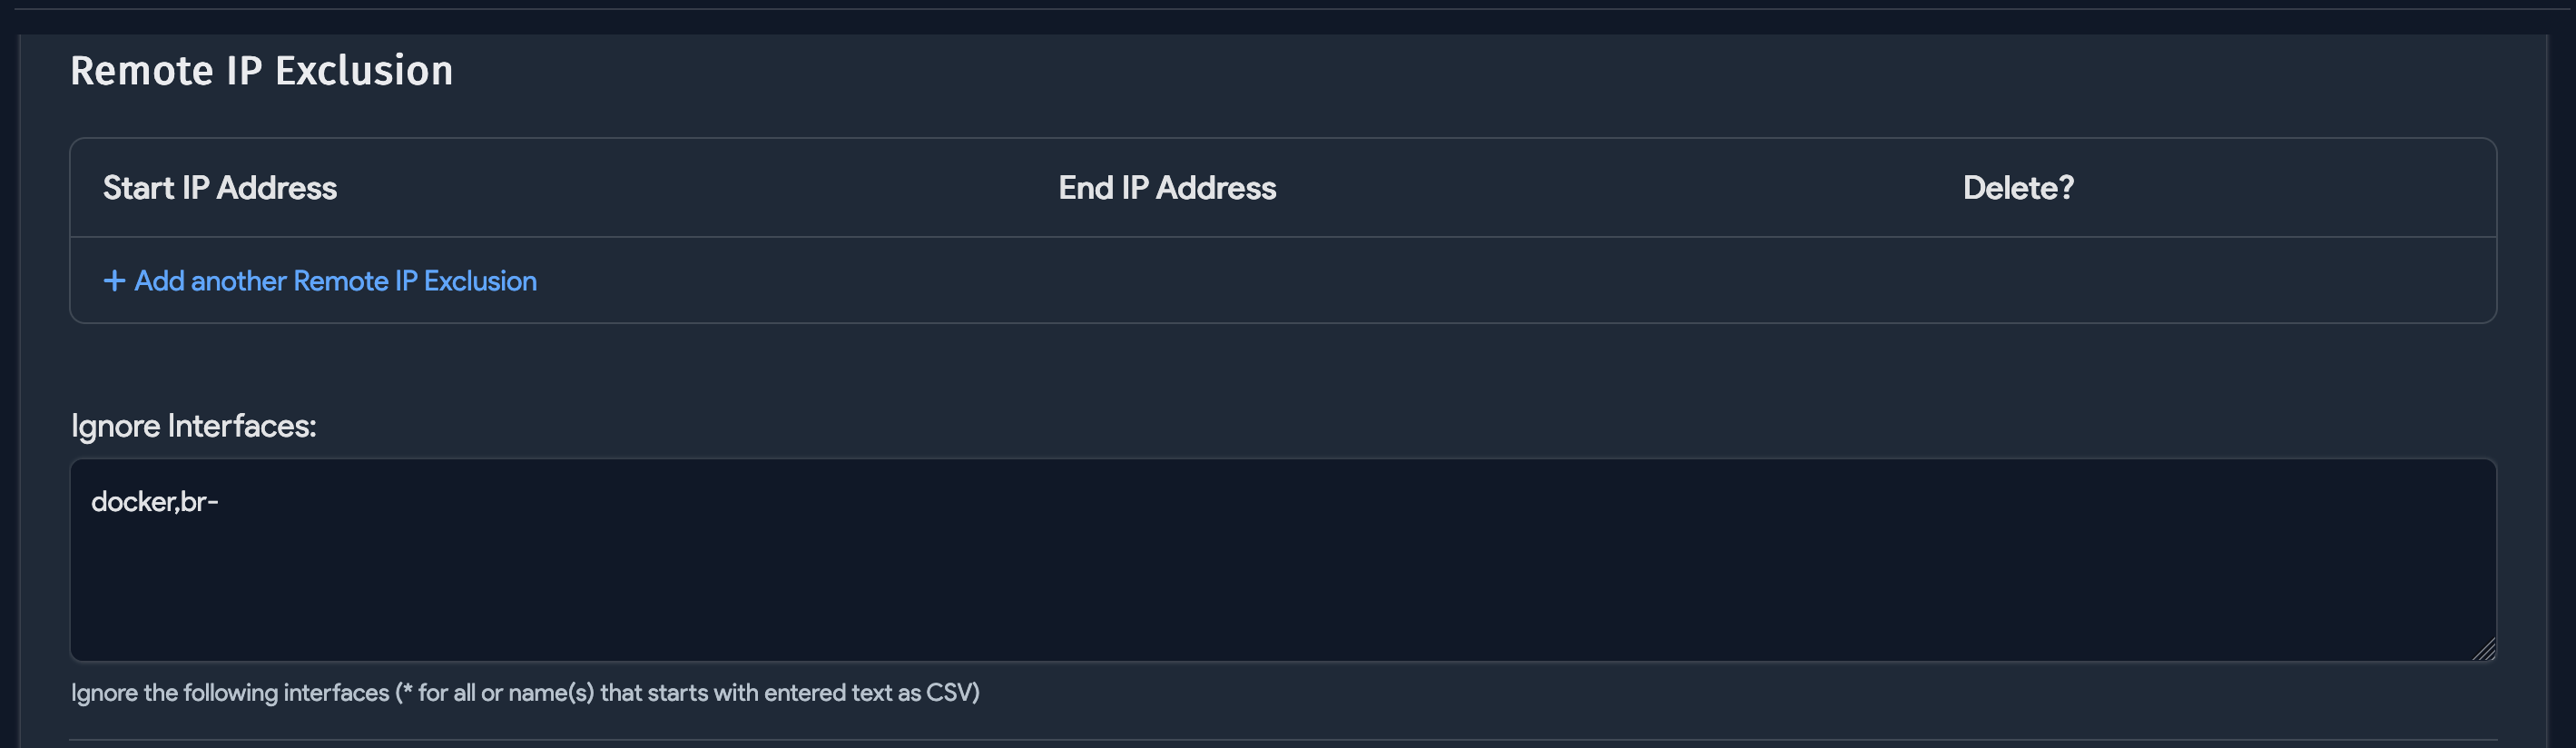
Remote IP Exclusion: Do not discover connections to or from any of these remote IPs.
-
Ignore Interfaces: List the network interfaces to ignore during discovery.
-
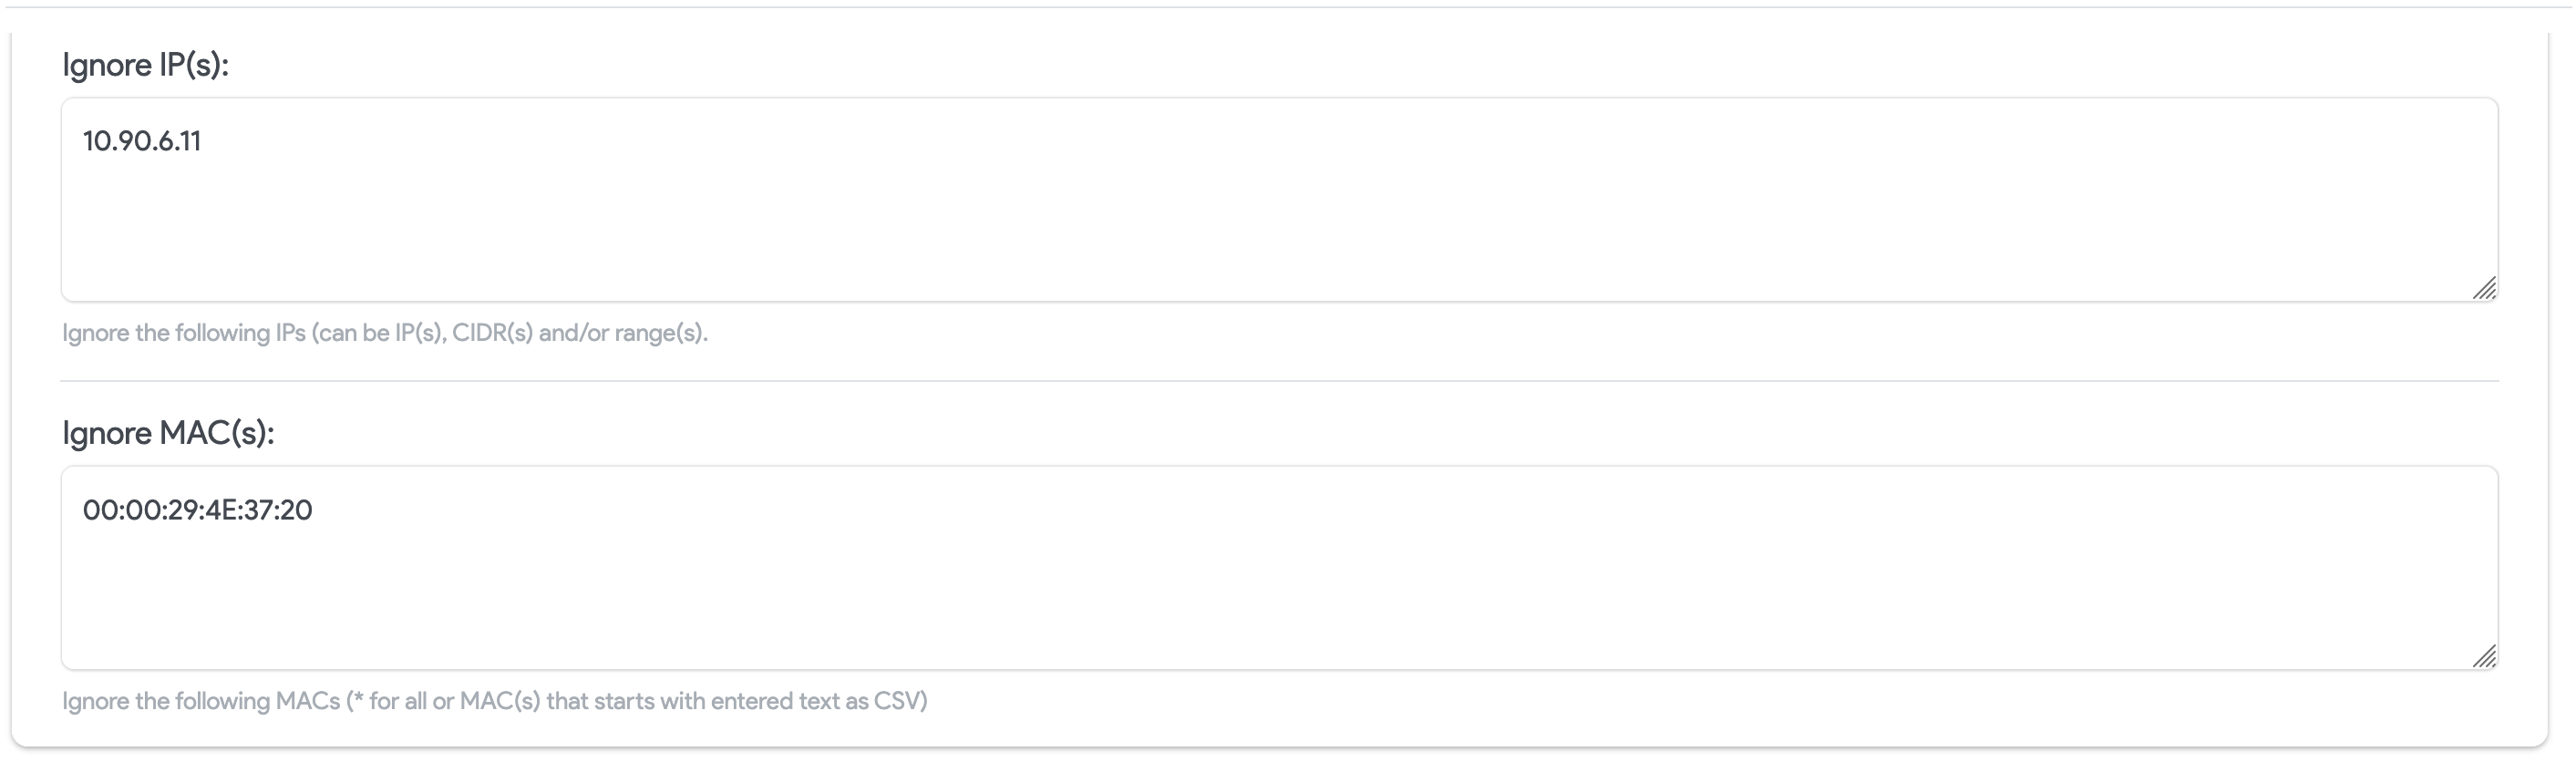
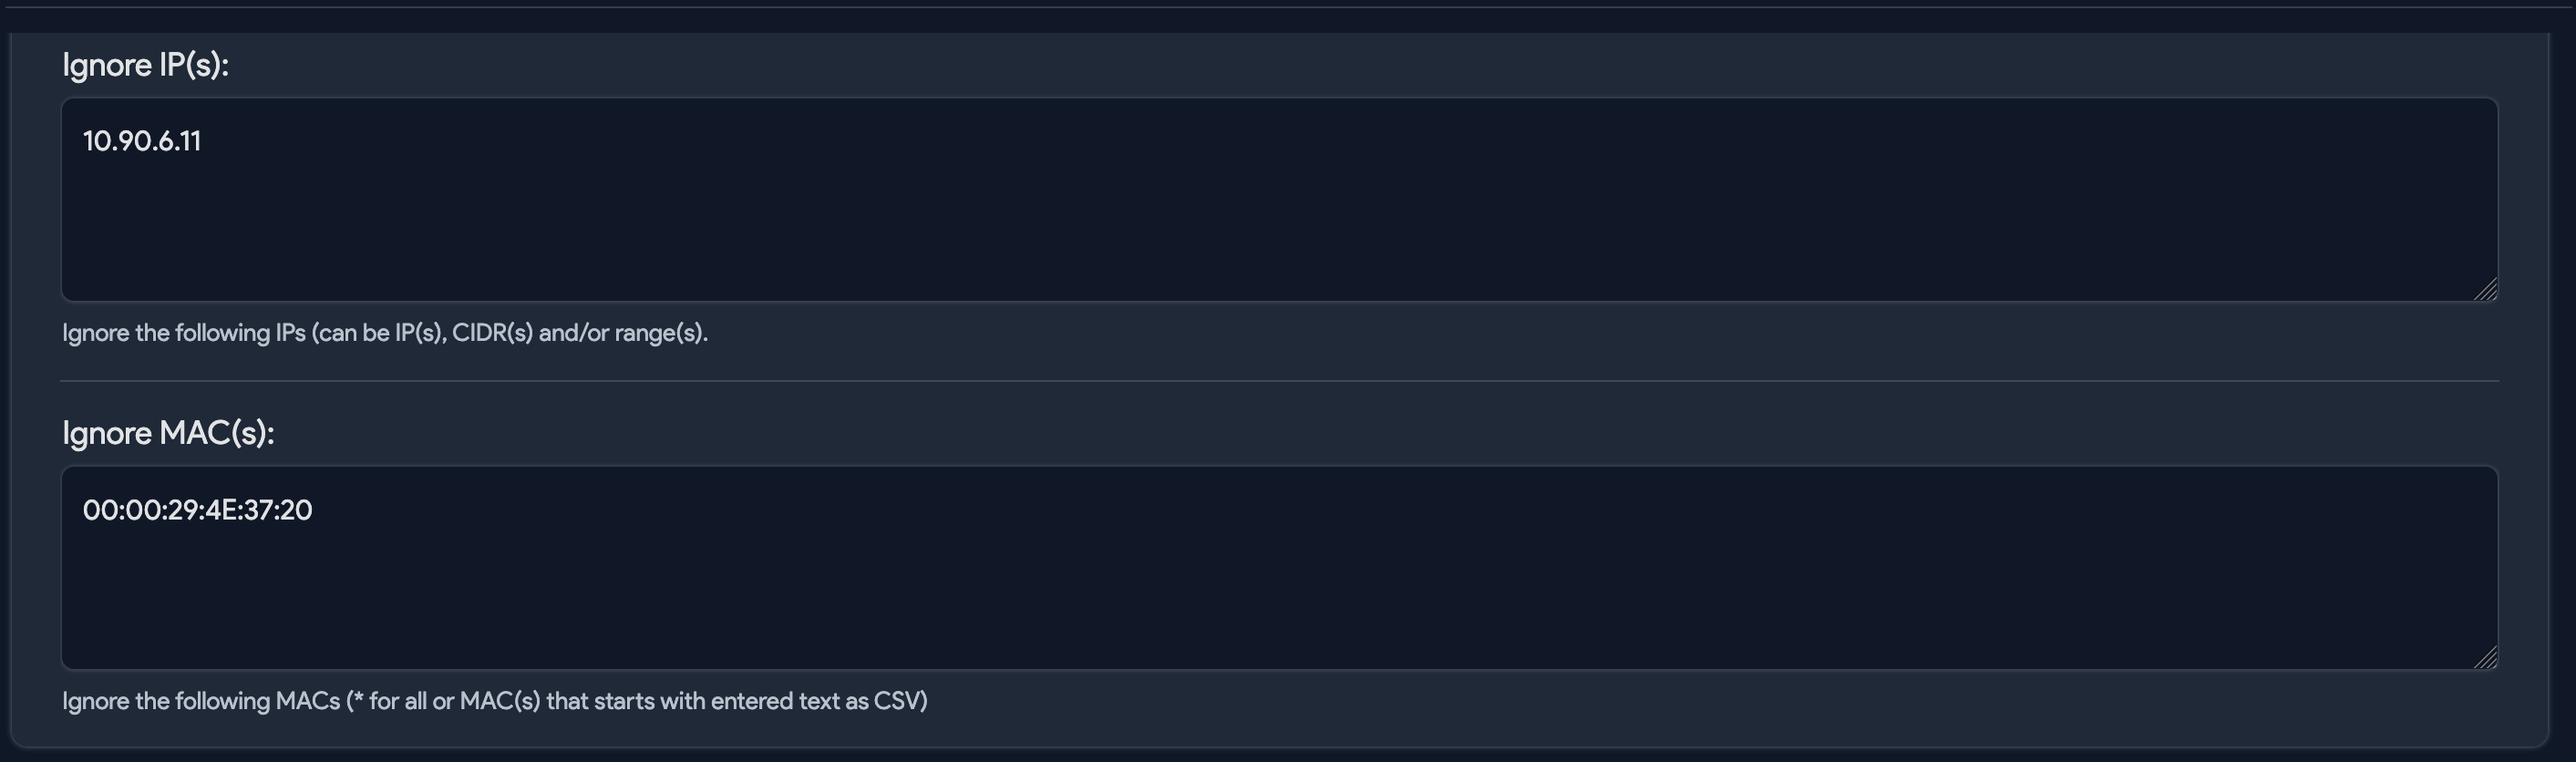
Ignore IP(s): Do not discover connections to or from any of these remote IPs.
-
Ignore MAC(s): Do not discover connections to or from any of these remote MAC addresses.
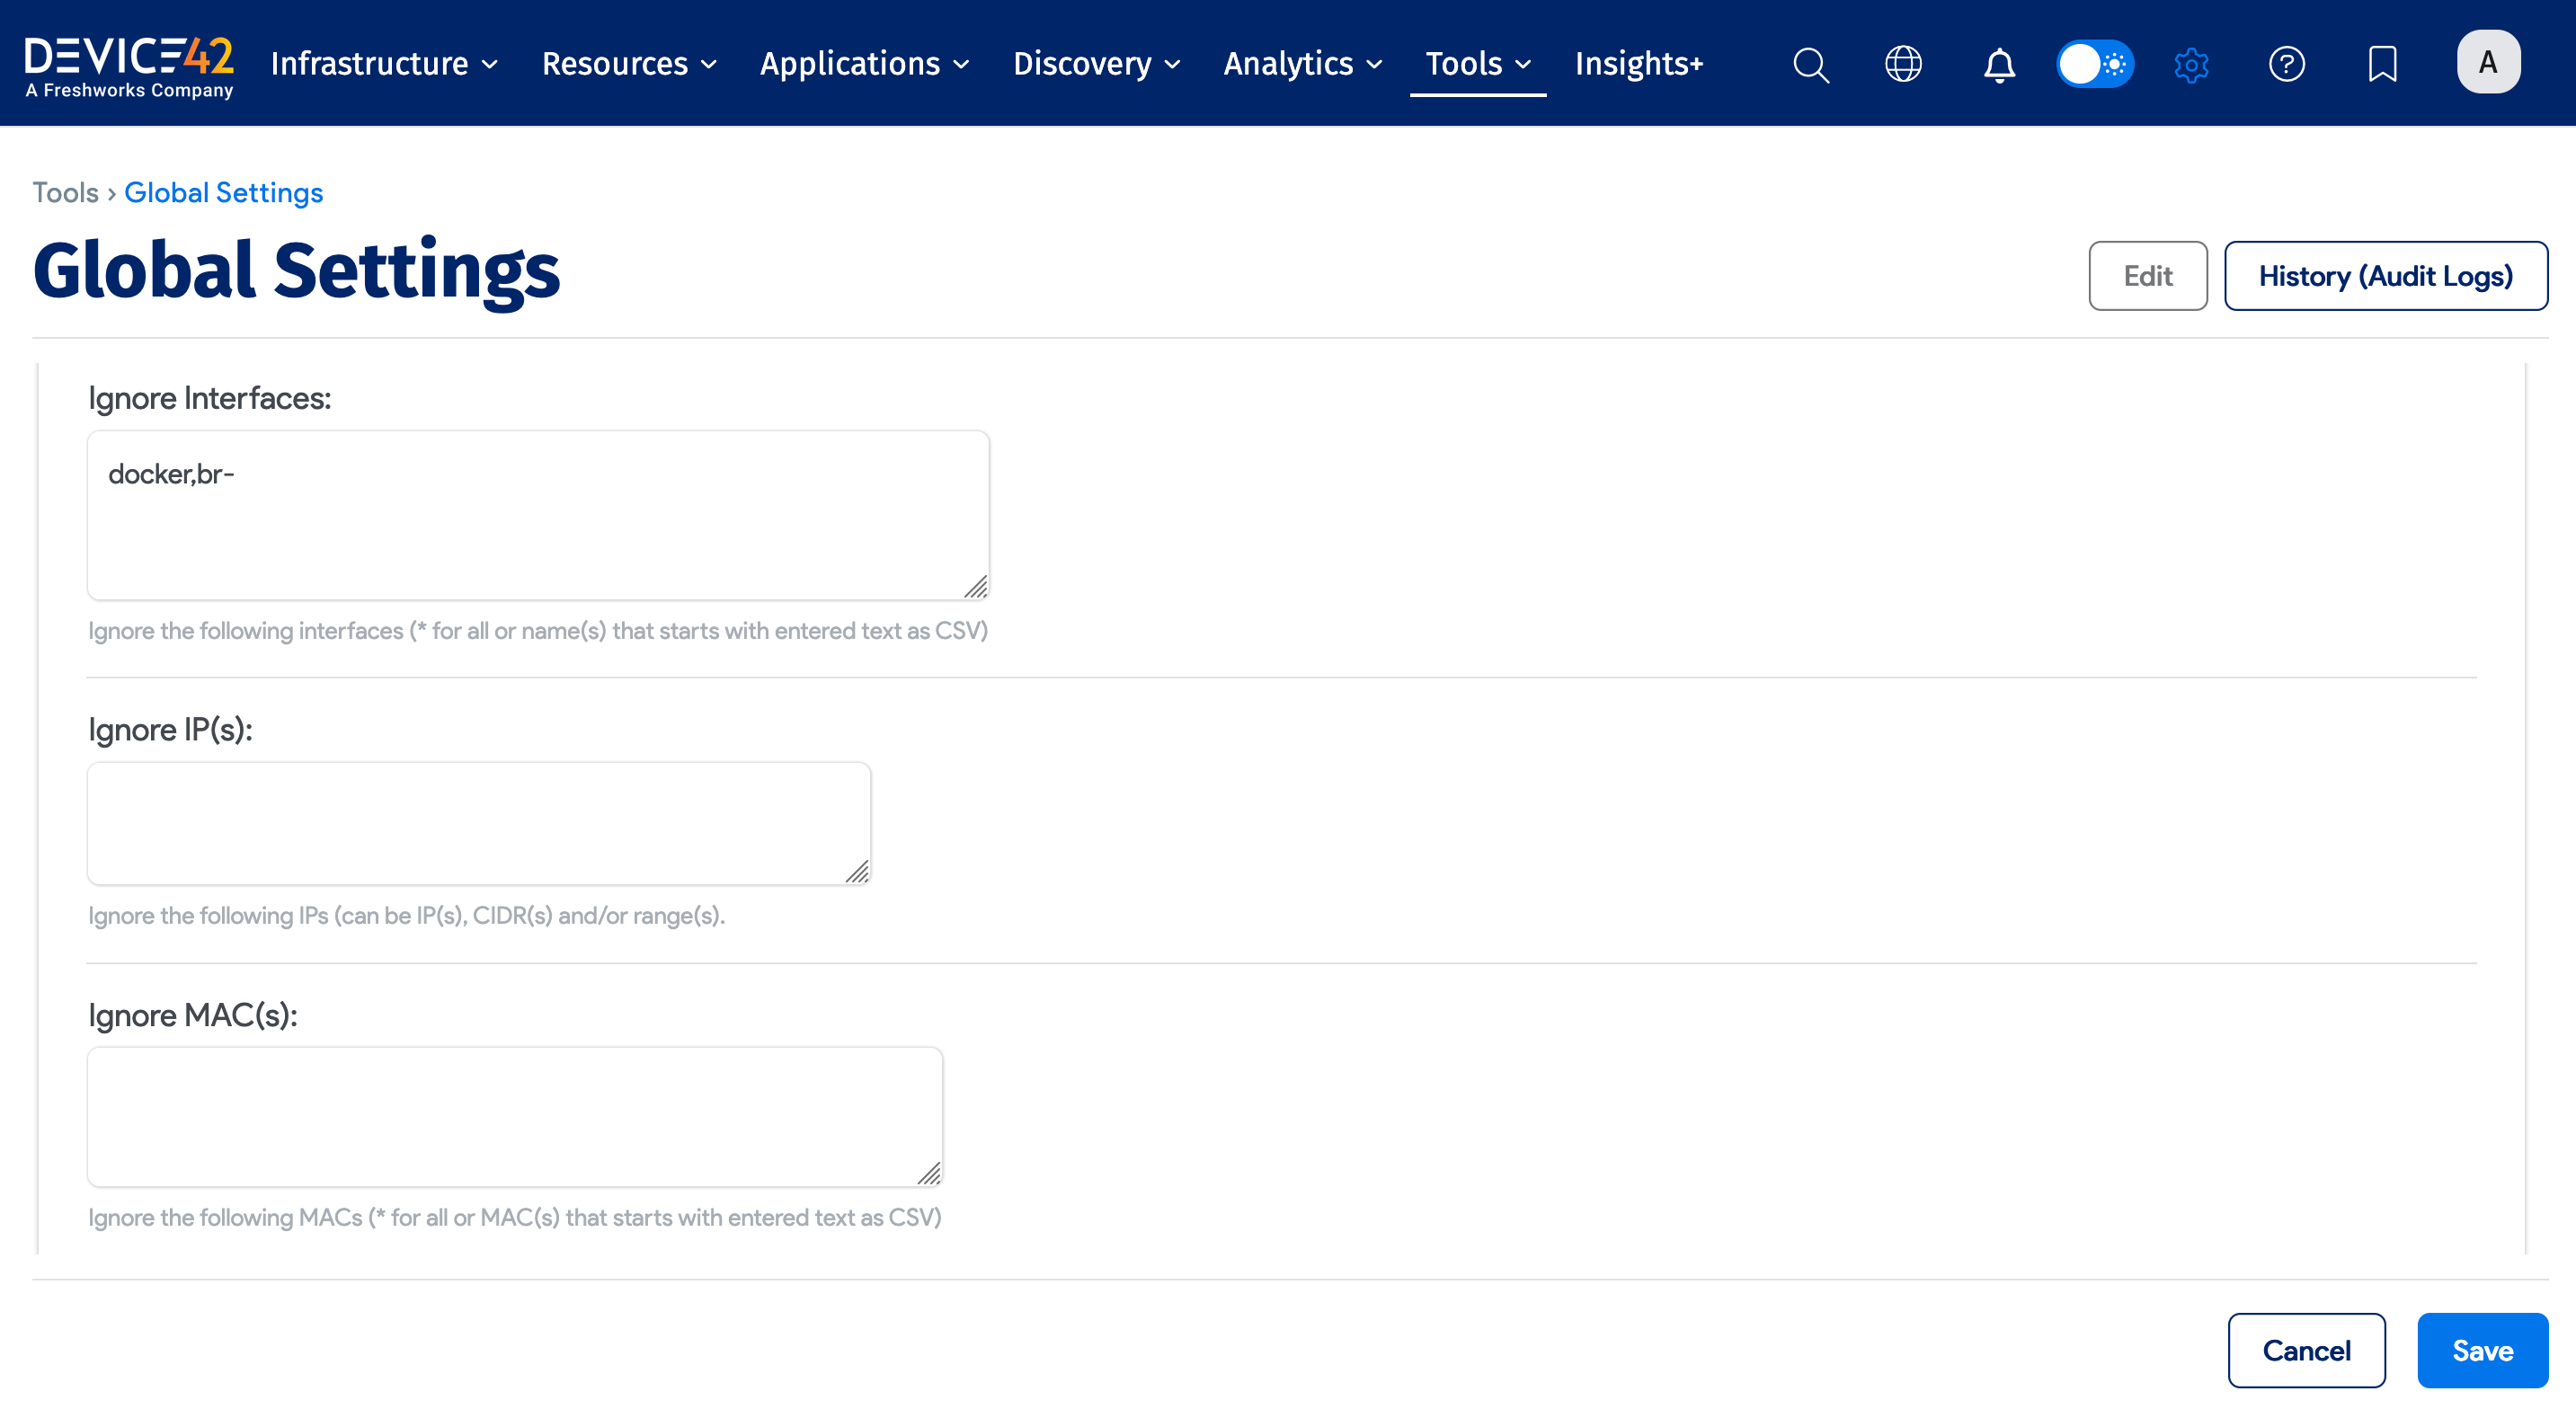
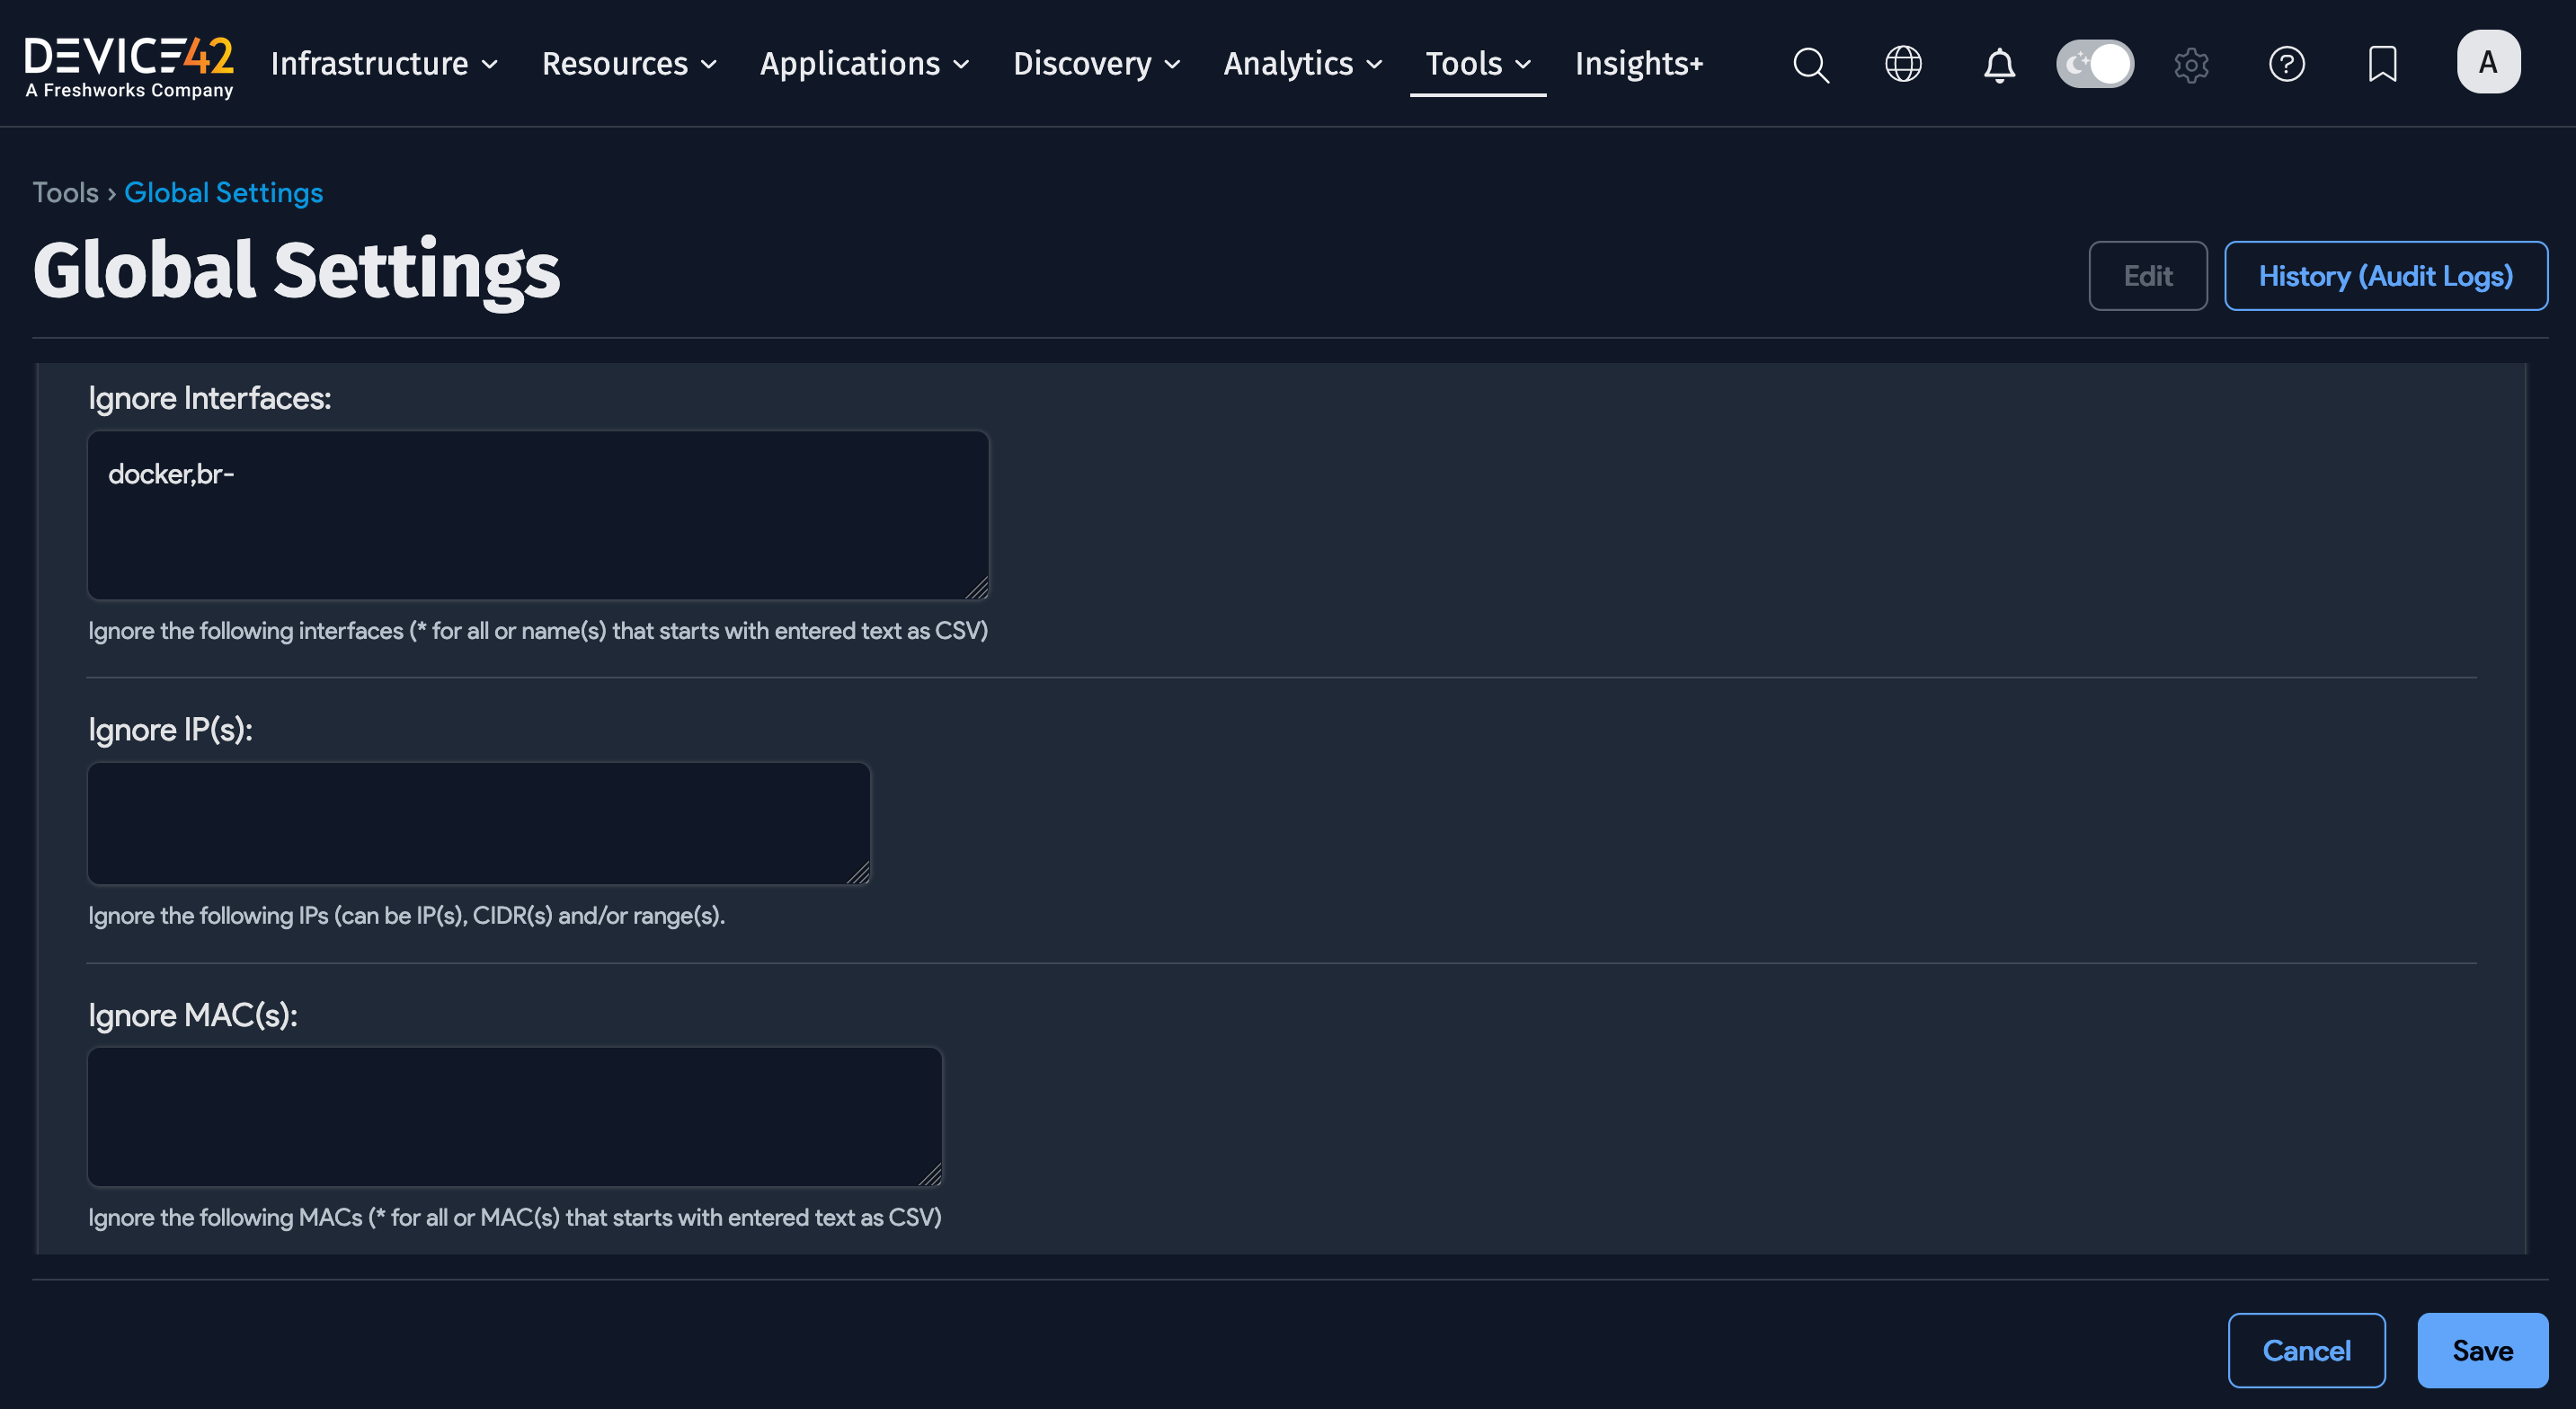
Global Exclusions
Globally, you can add an Exclusion to ignore IP and MAC addresses for all jobs by navigating to Tools > Settings > Global Settings on the Main Appliance.
Naming Options
Configure the naming options for discovered devices.
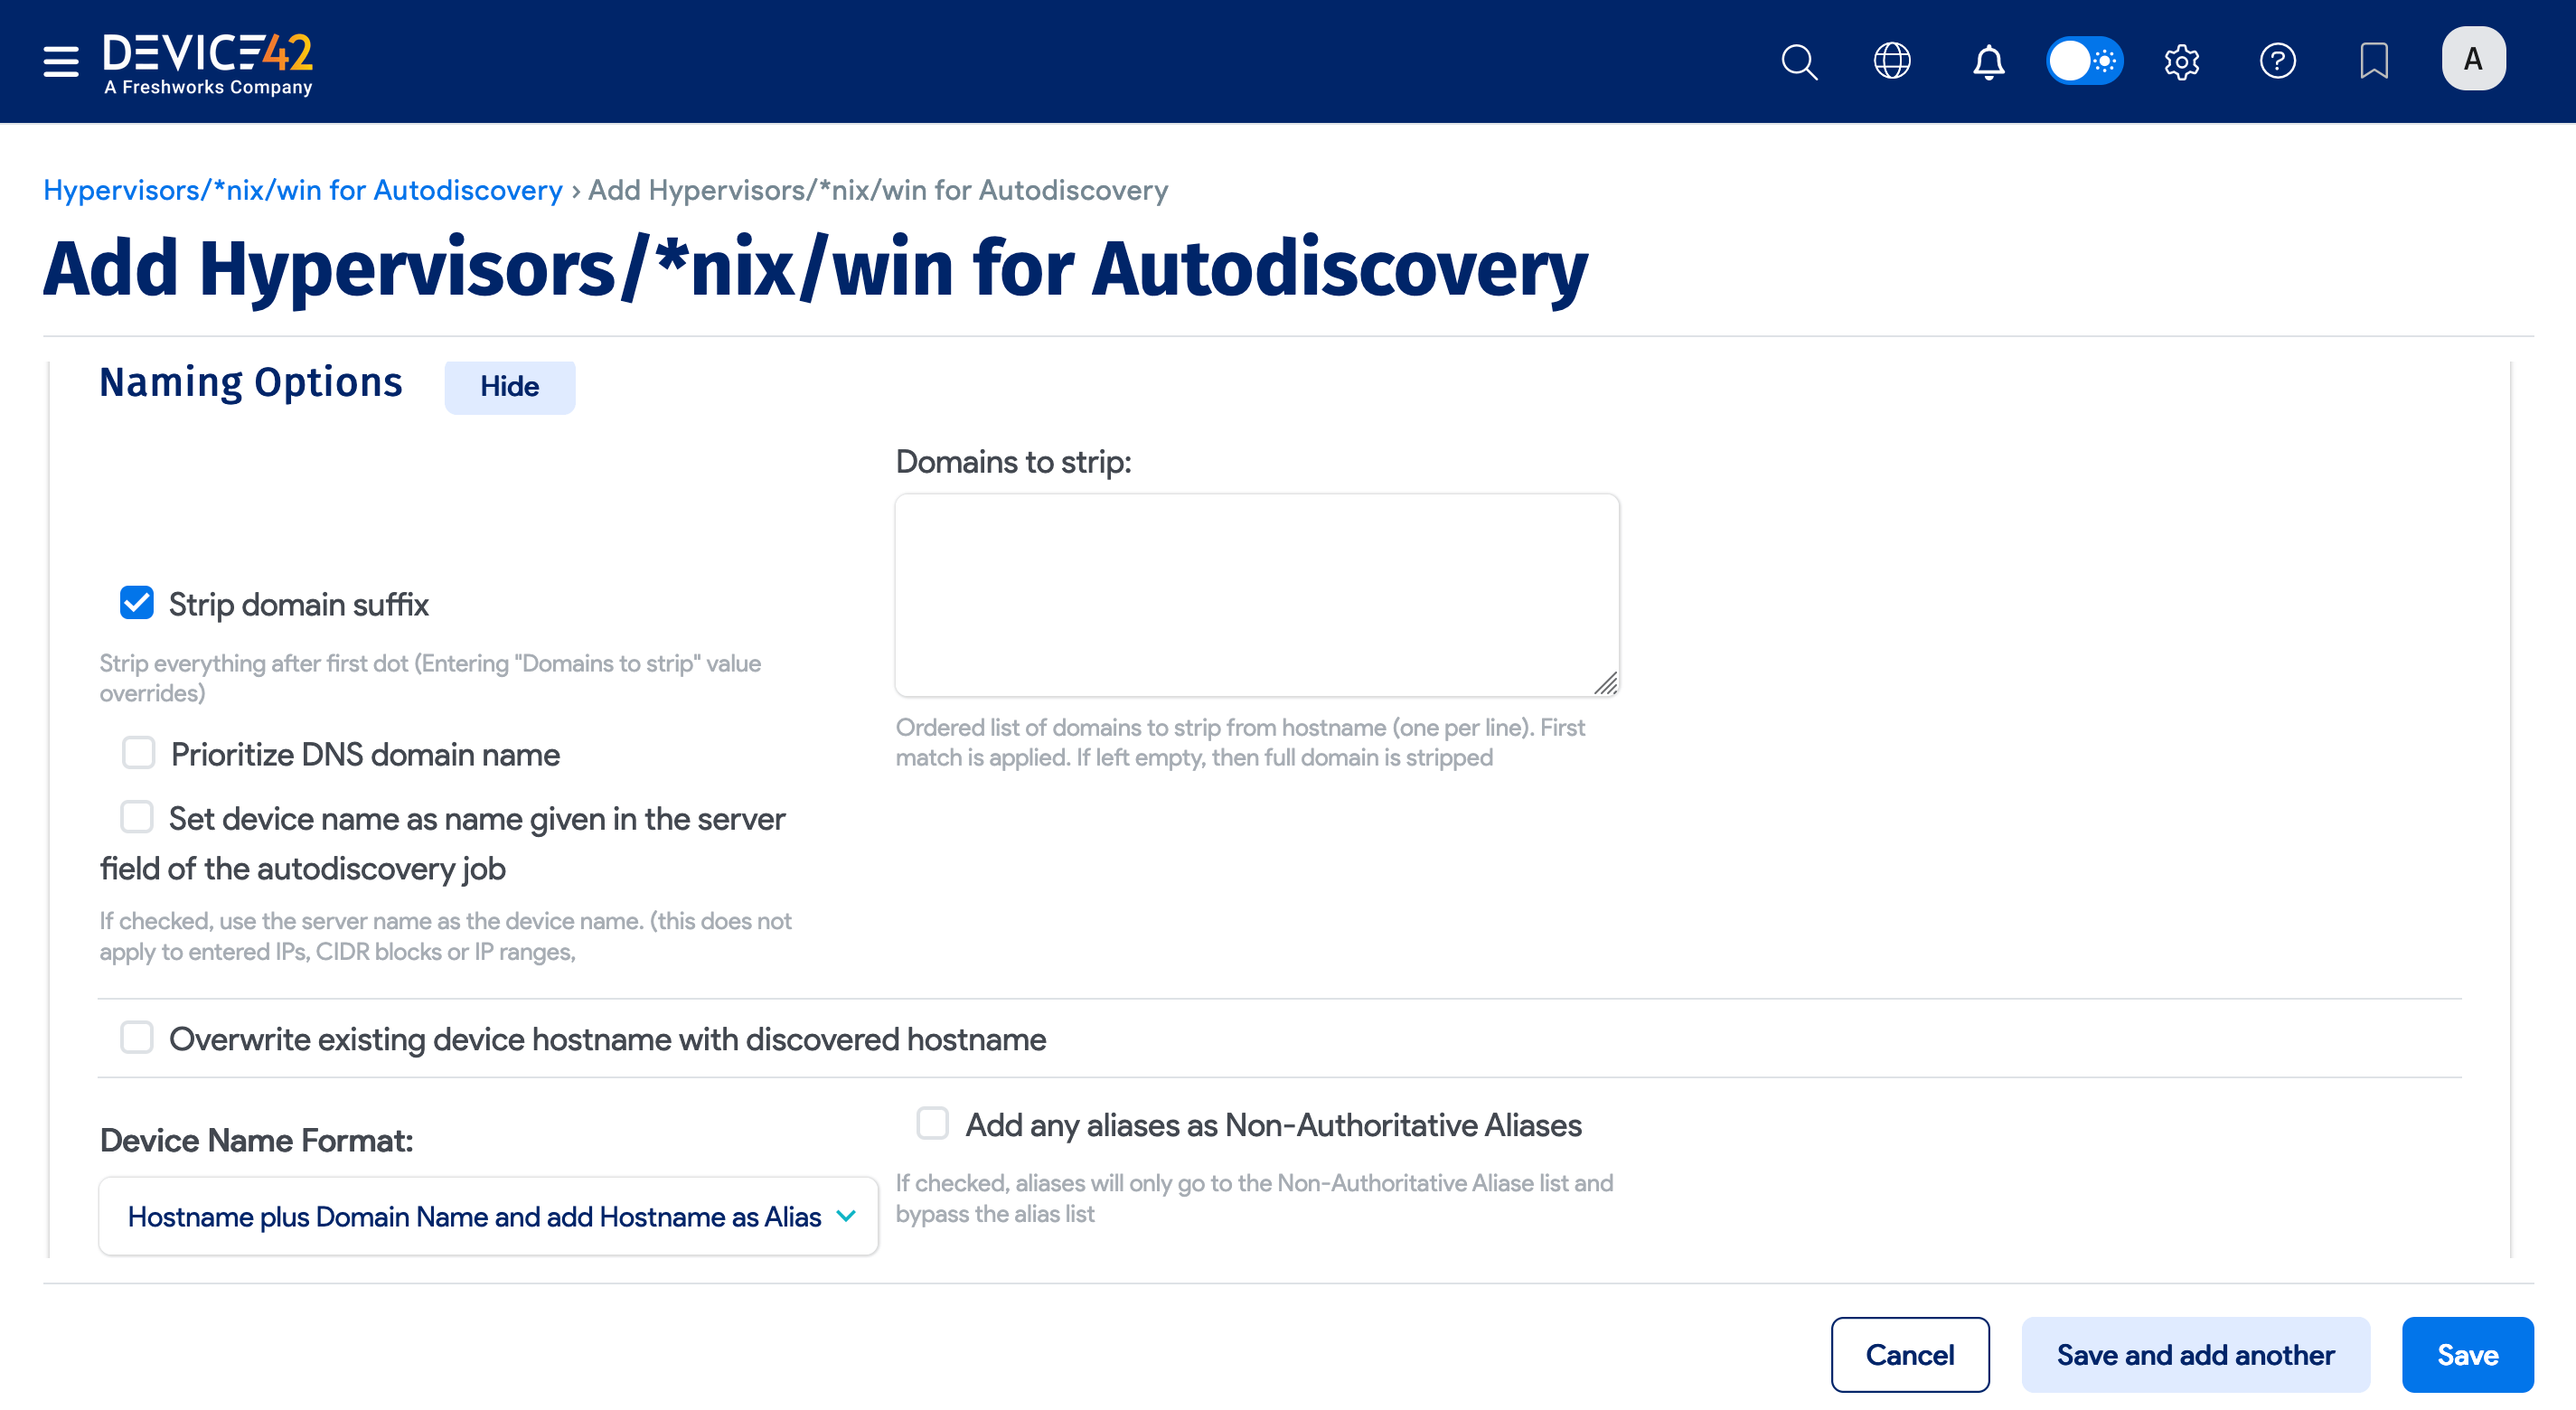
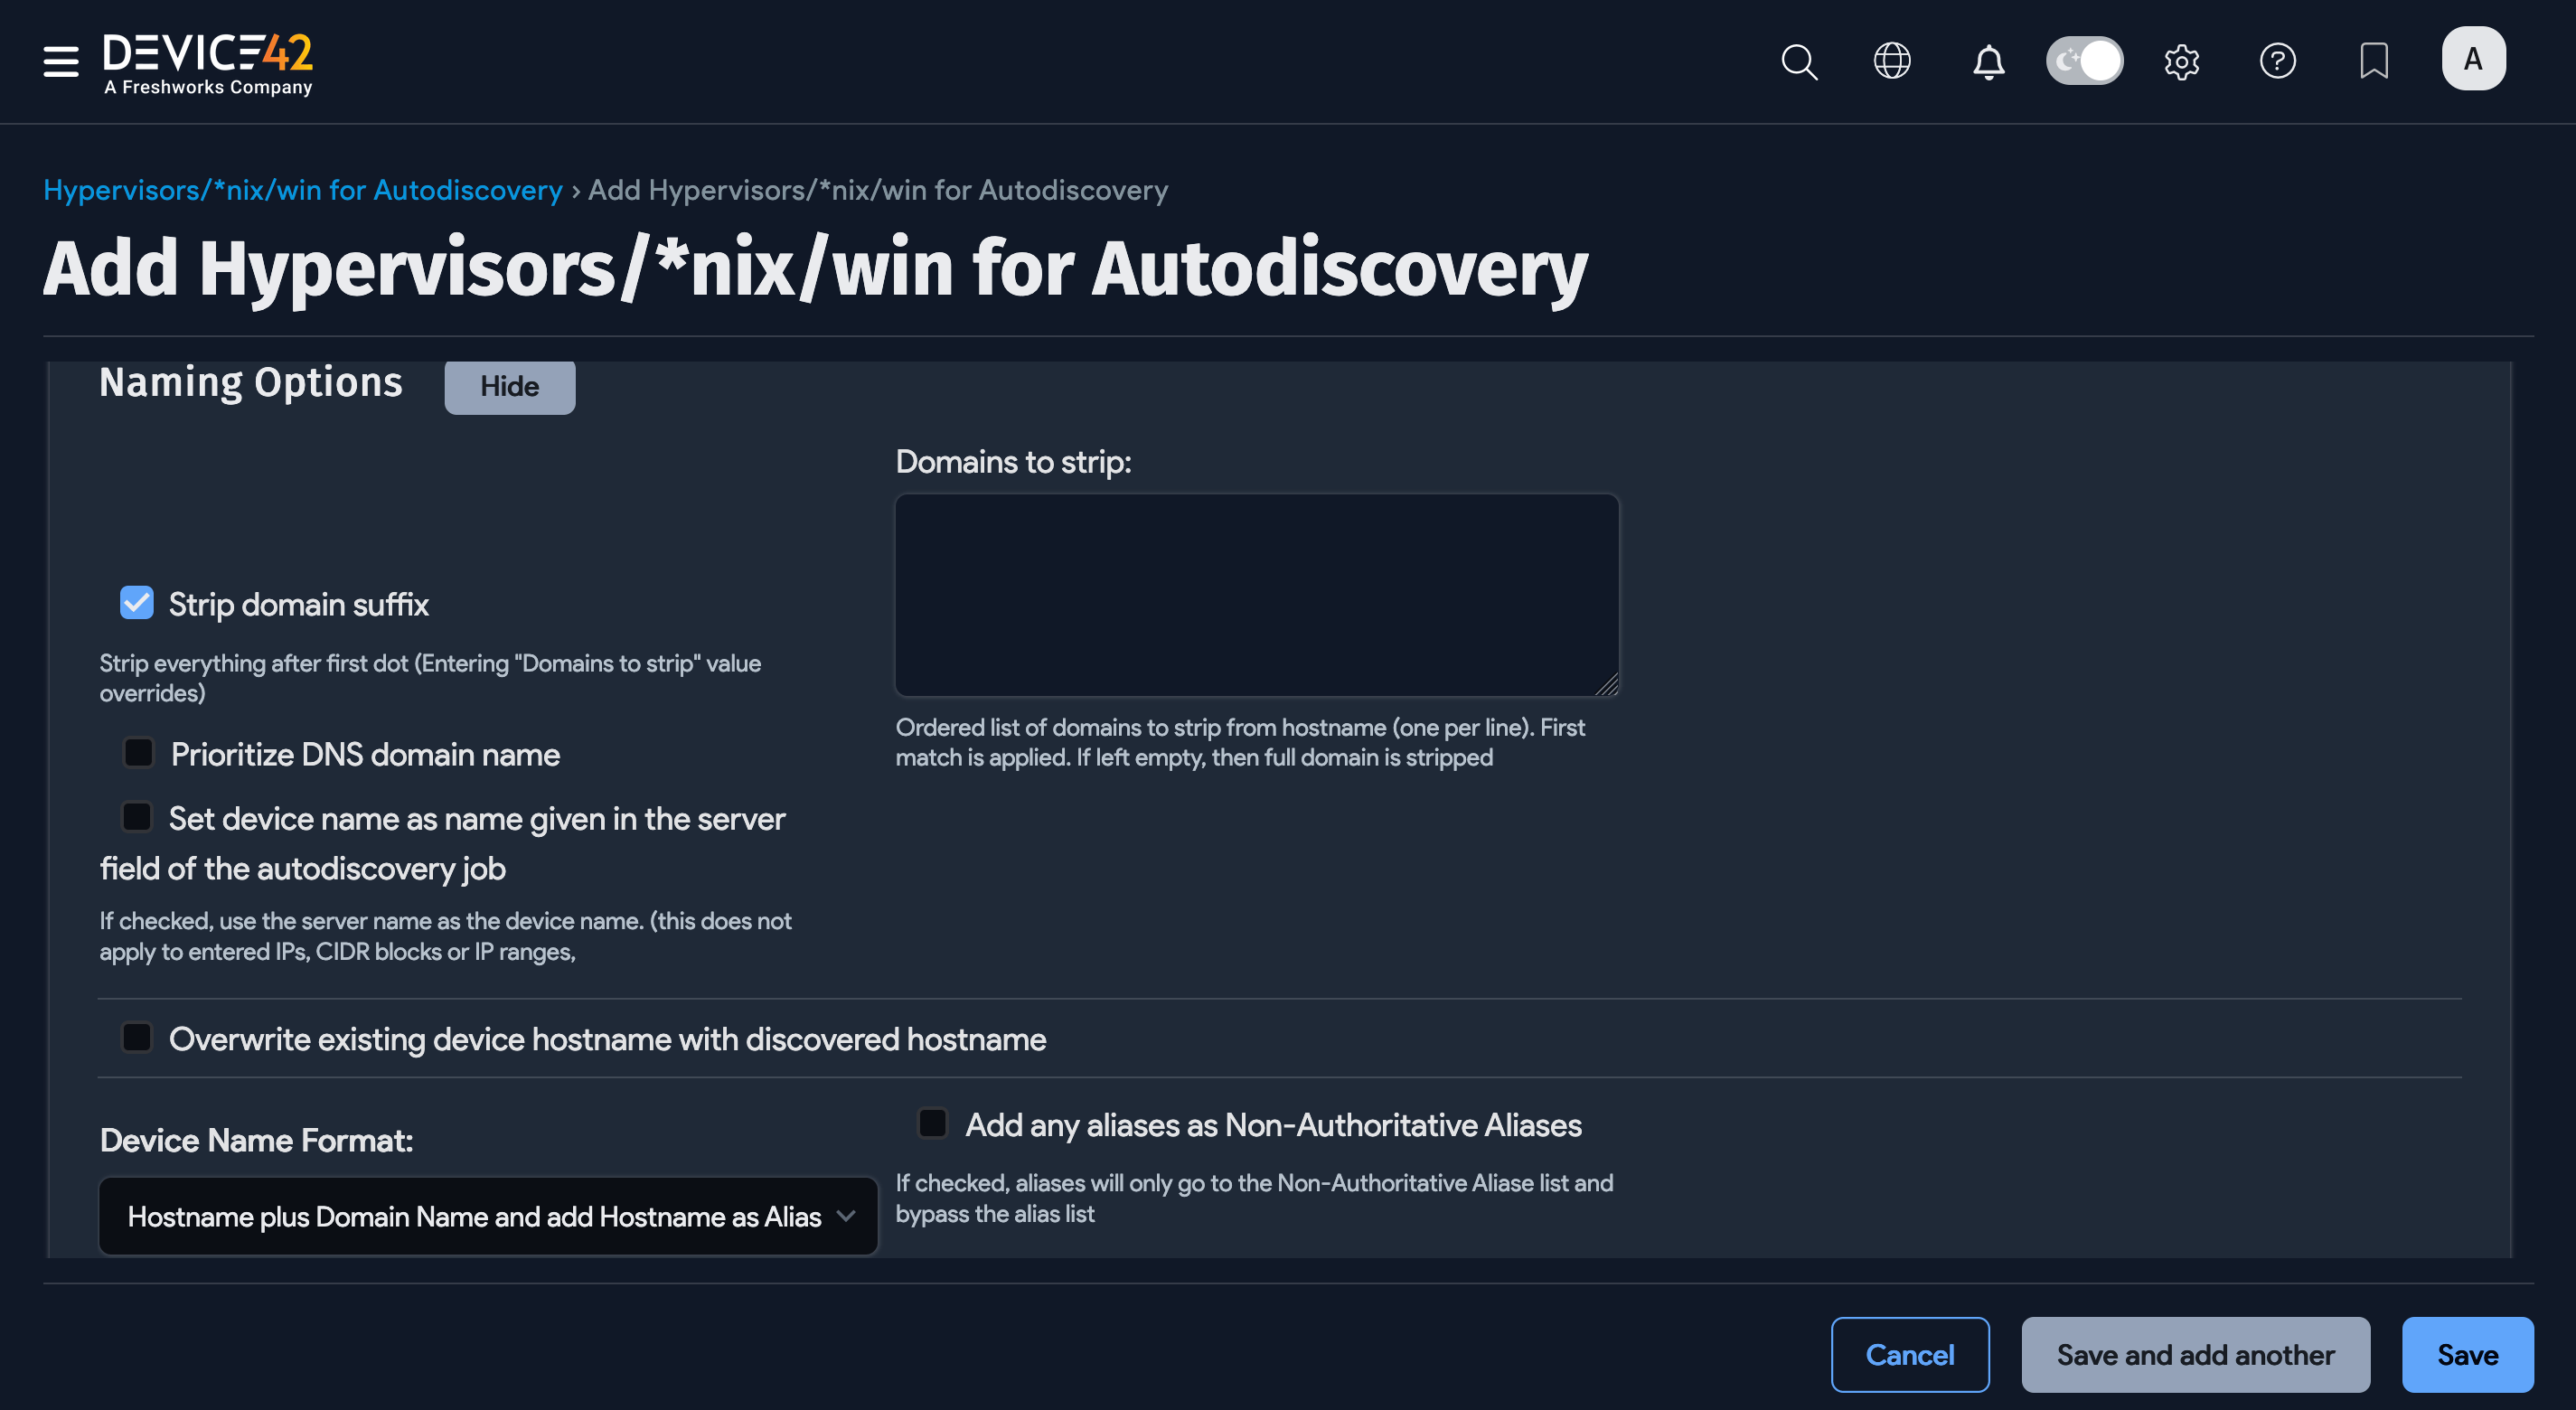
- Strip domain suffix: Check this option to strip the domain suffix from discovered servers.
- Domains to strip: Enter an ordered list of domains to strip from hostname, listing one per line. If left blank, the full domain is stripped; if specified, the first match is stripped.
- Prioritize DNS domain name: When checked, discovered devices are named using the hostname plus FQDN. If unchecked (default), discovered devices use the hostname plus the YP/NIS domain name.
After upgrading to v19.06, existing jobs have the Prioritize DNS domain name option disabled by default (devices are named using the hostname plus the YP/NIS domain name).
- Set the device name as the name given in the server field of the autodiscovery job: If checked and discovering via hostname or FQDN, the device will be named using the discovery target name provided.
- Overwrite existing device hostname with discovered hostname: Check this option to give precedence to the discovered hostname.
- Device Name Format: Select the desired device naming format.

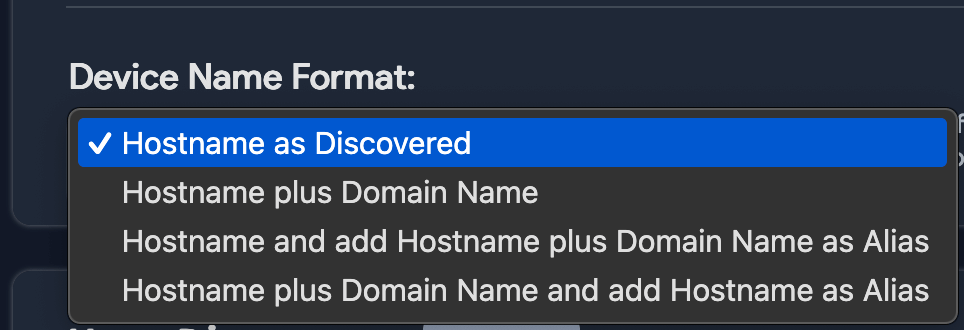
- Hostname as Discovered: If the domain is present and the domain is not in the name, it is set to
name. - Hostname plus Domain Name: The device name becomes
name.domain. - Hostname and add Hostname plus Domain Name as Alias: Names stay the same, and an alias is set as
name.domain. - Hostname Plus Domain Name and Add Hostname as Alias: The alias is set to
nameand the device name becomesname.domain.
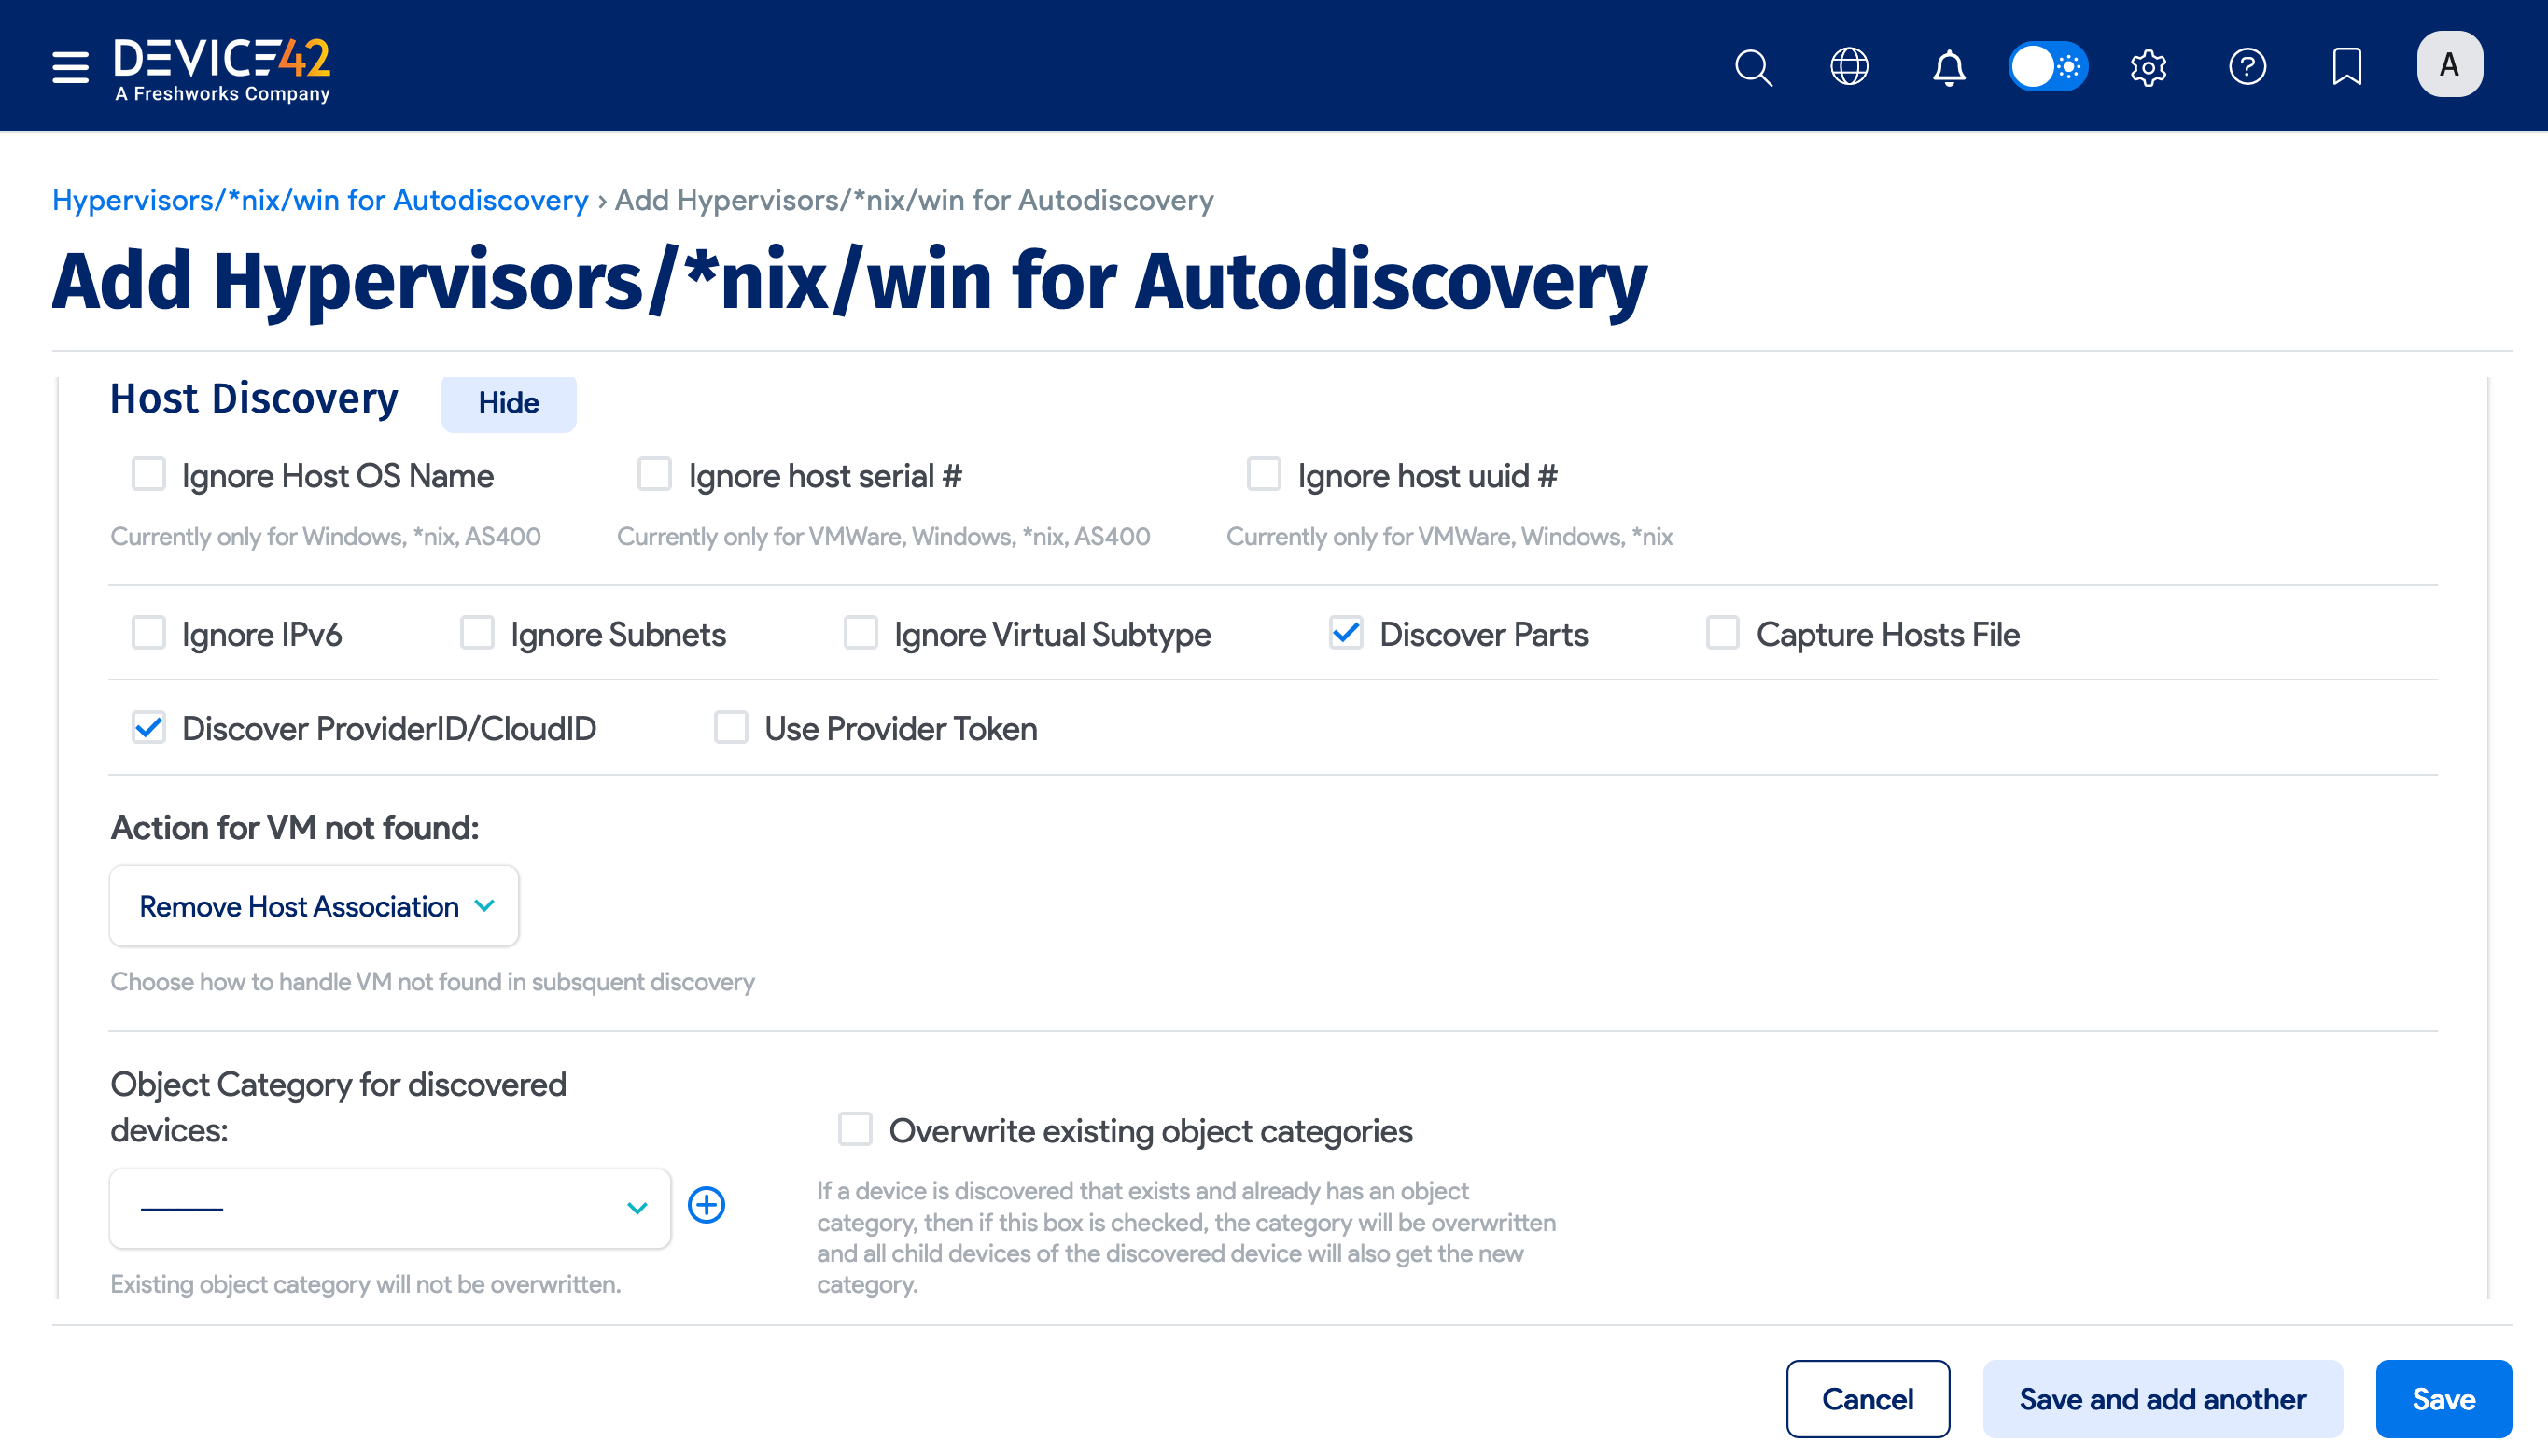
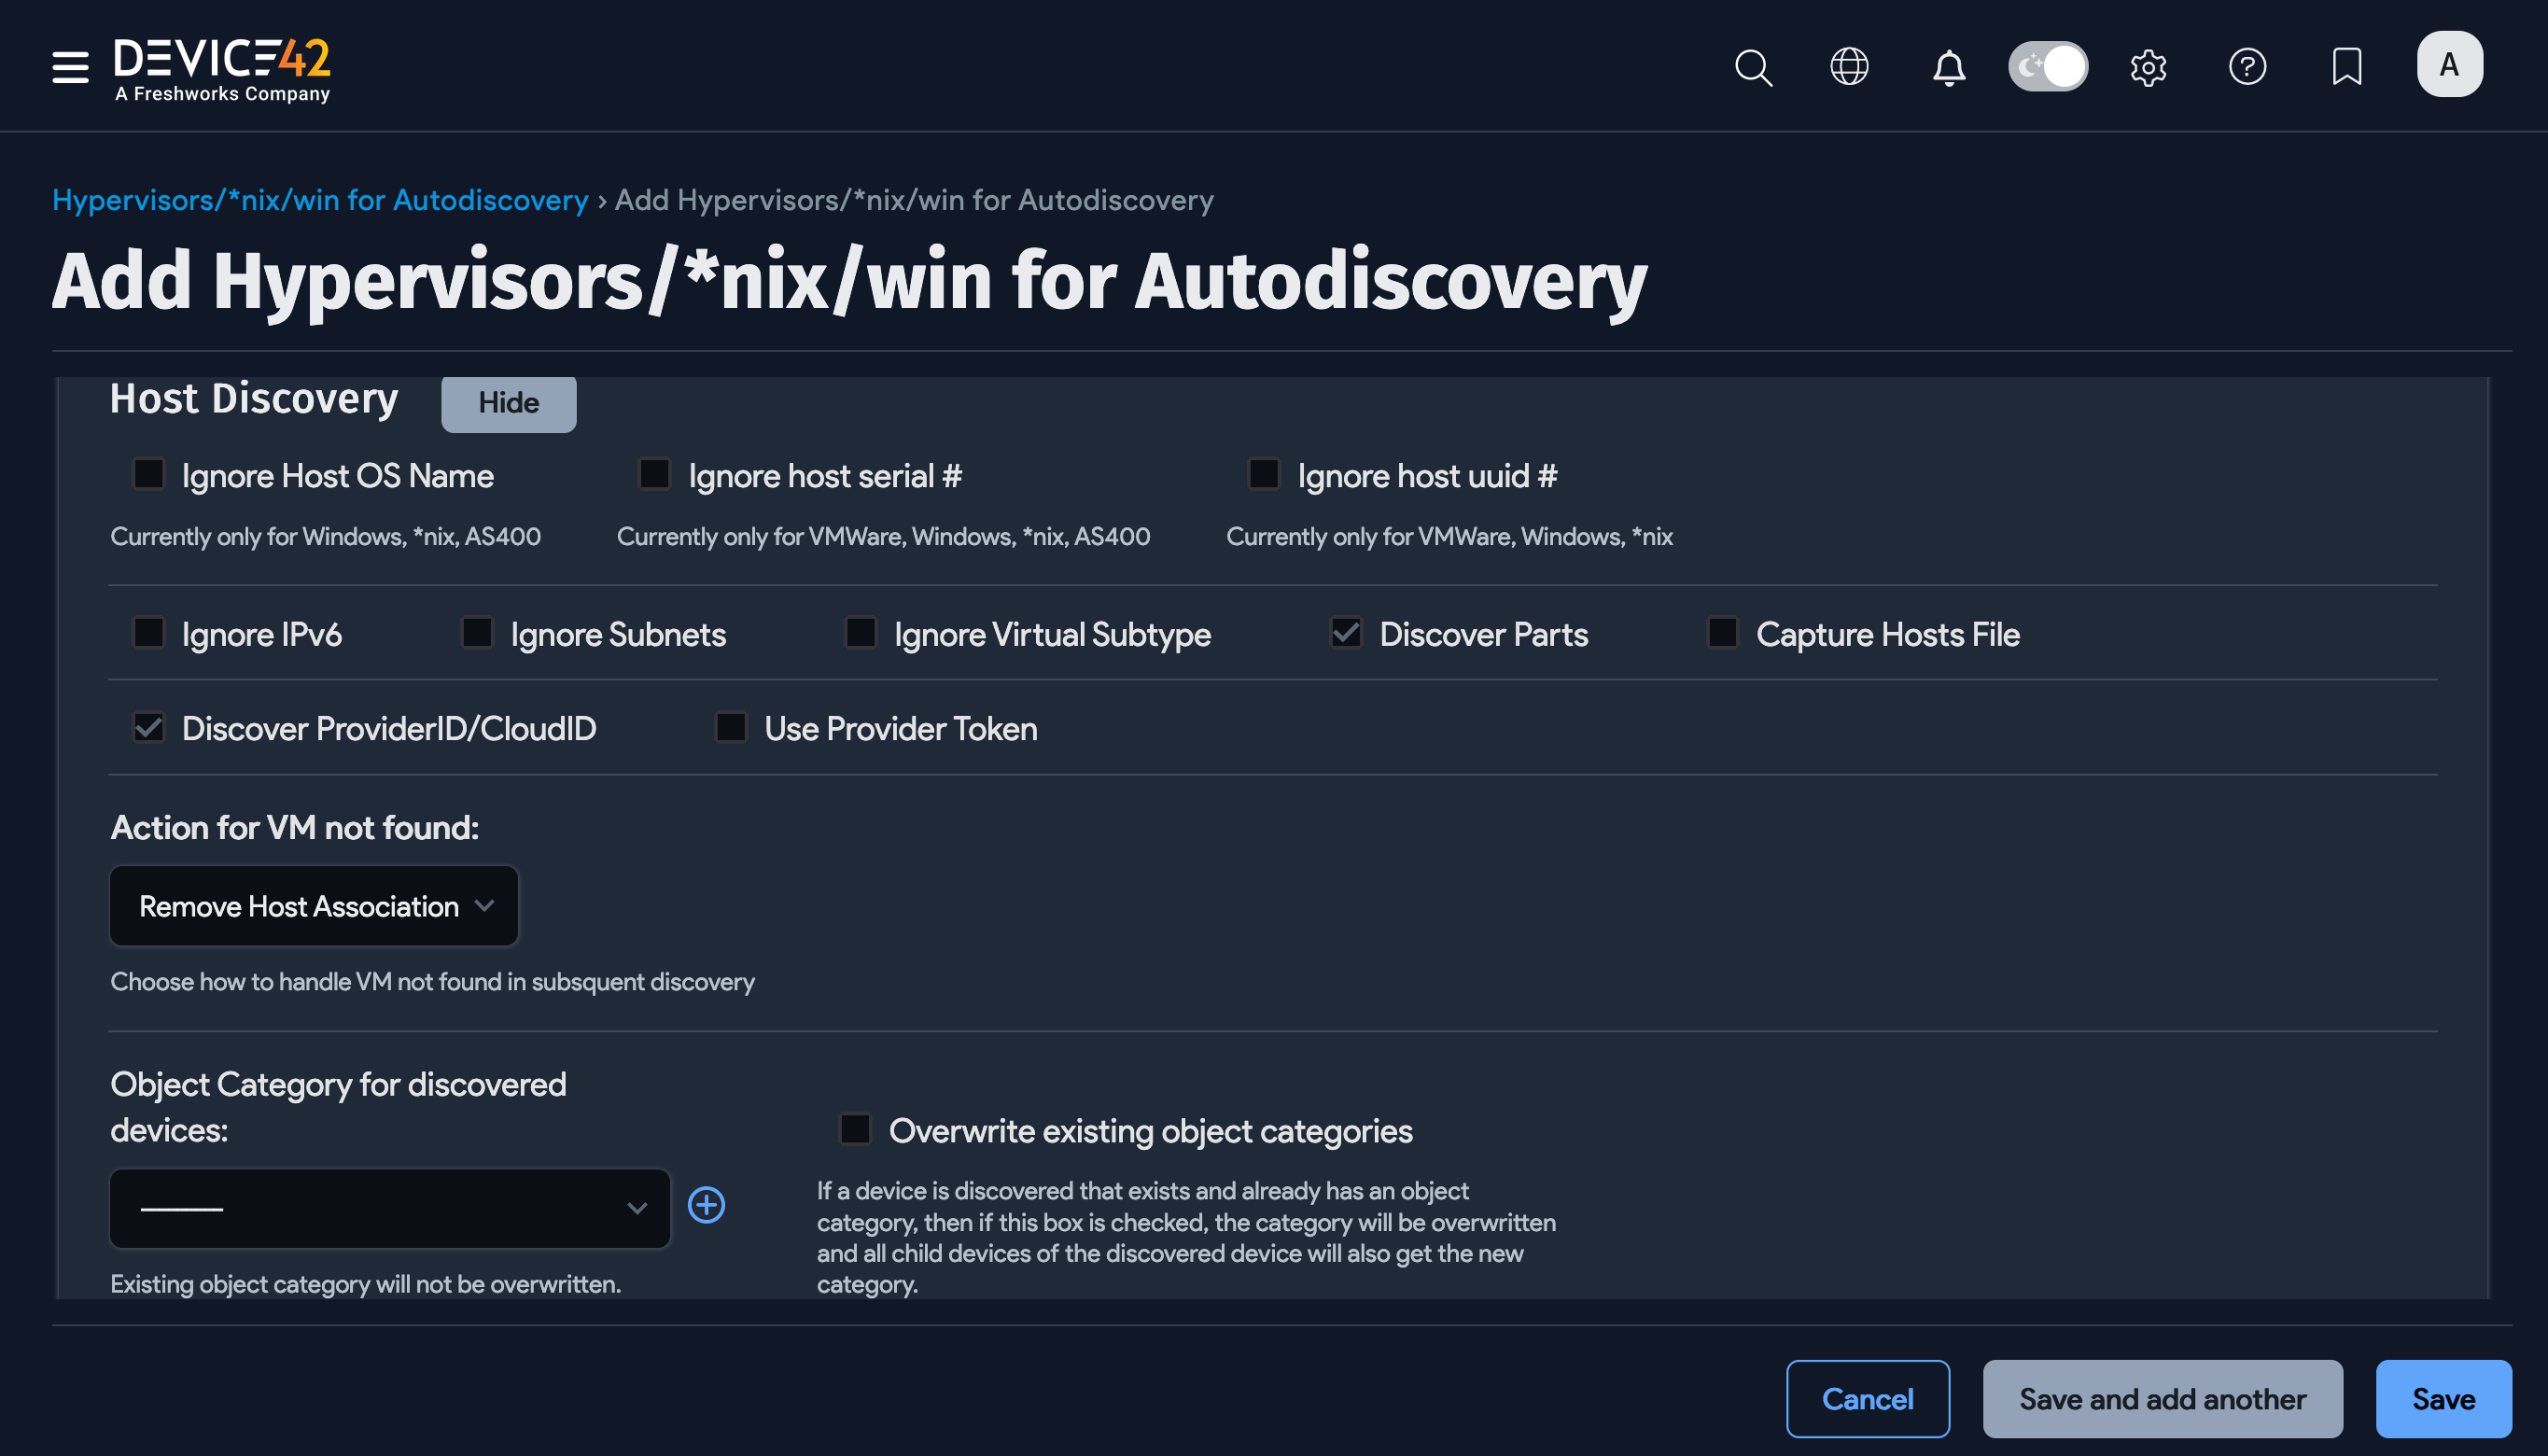
Host Discovery
Enable the Discover ProviderID/CloudID option to reveal the Provider Token option, which might be needed for authentication with the cloud service provider.
Miscellaneous Options
The lower portion of the discovery job page includes a Miscellaneous tab that contains additional options for *nix discovery jobs.
Specify the timeout range between 10 to 600 seconds in the Timeout field to set the maximum wait time for a server response.
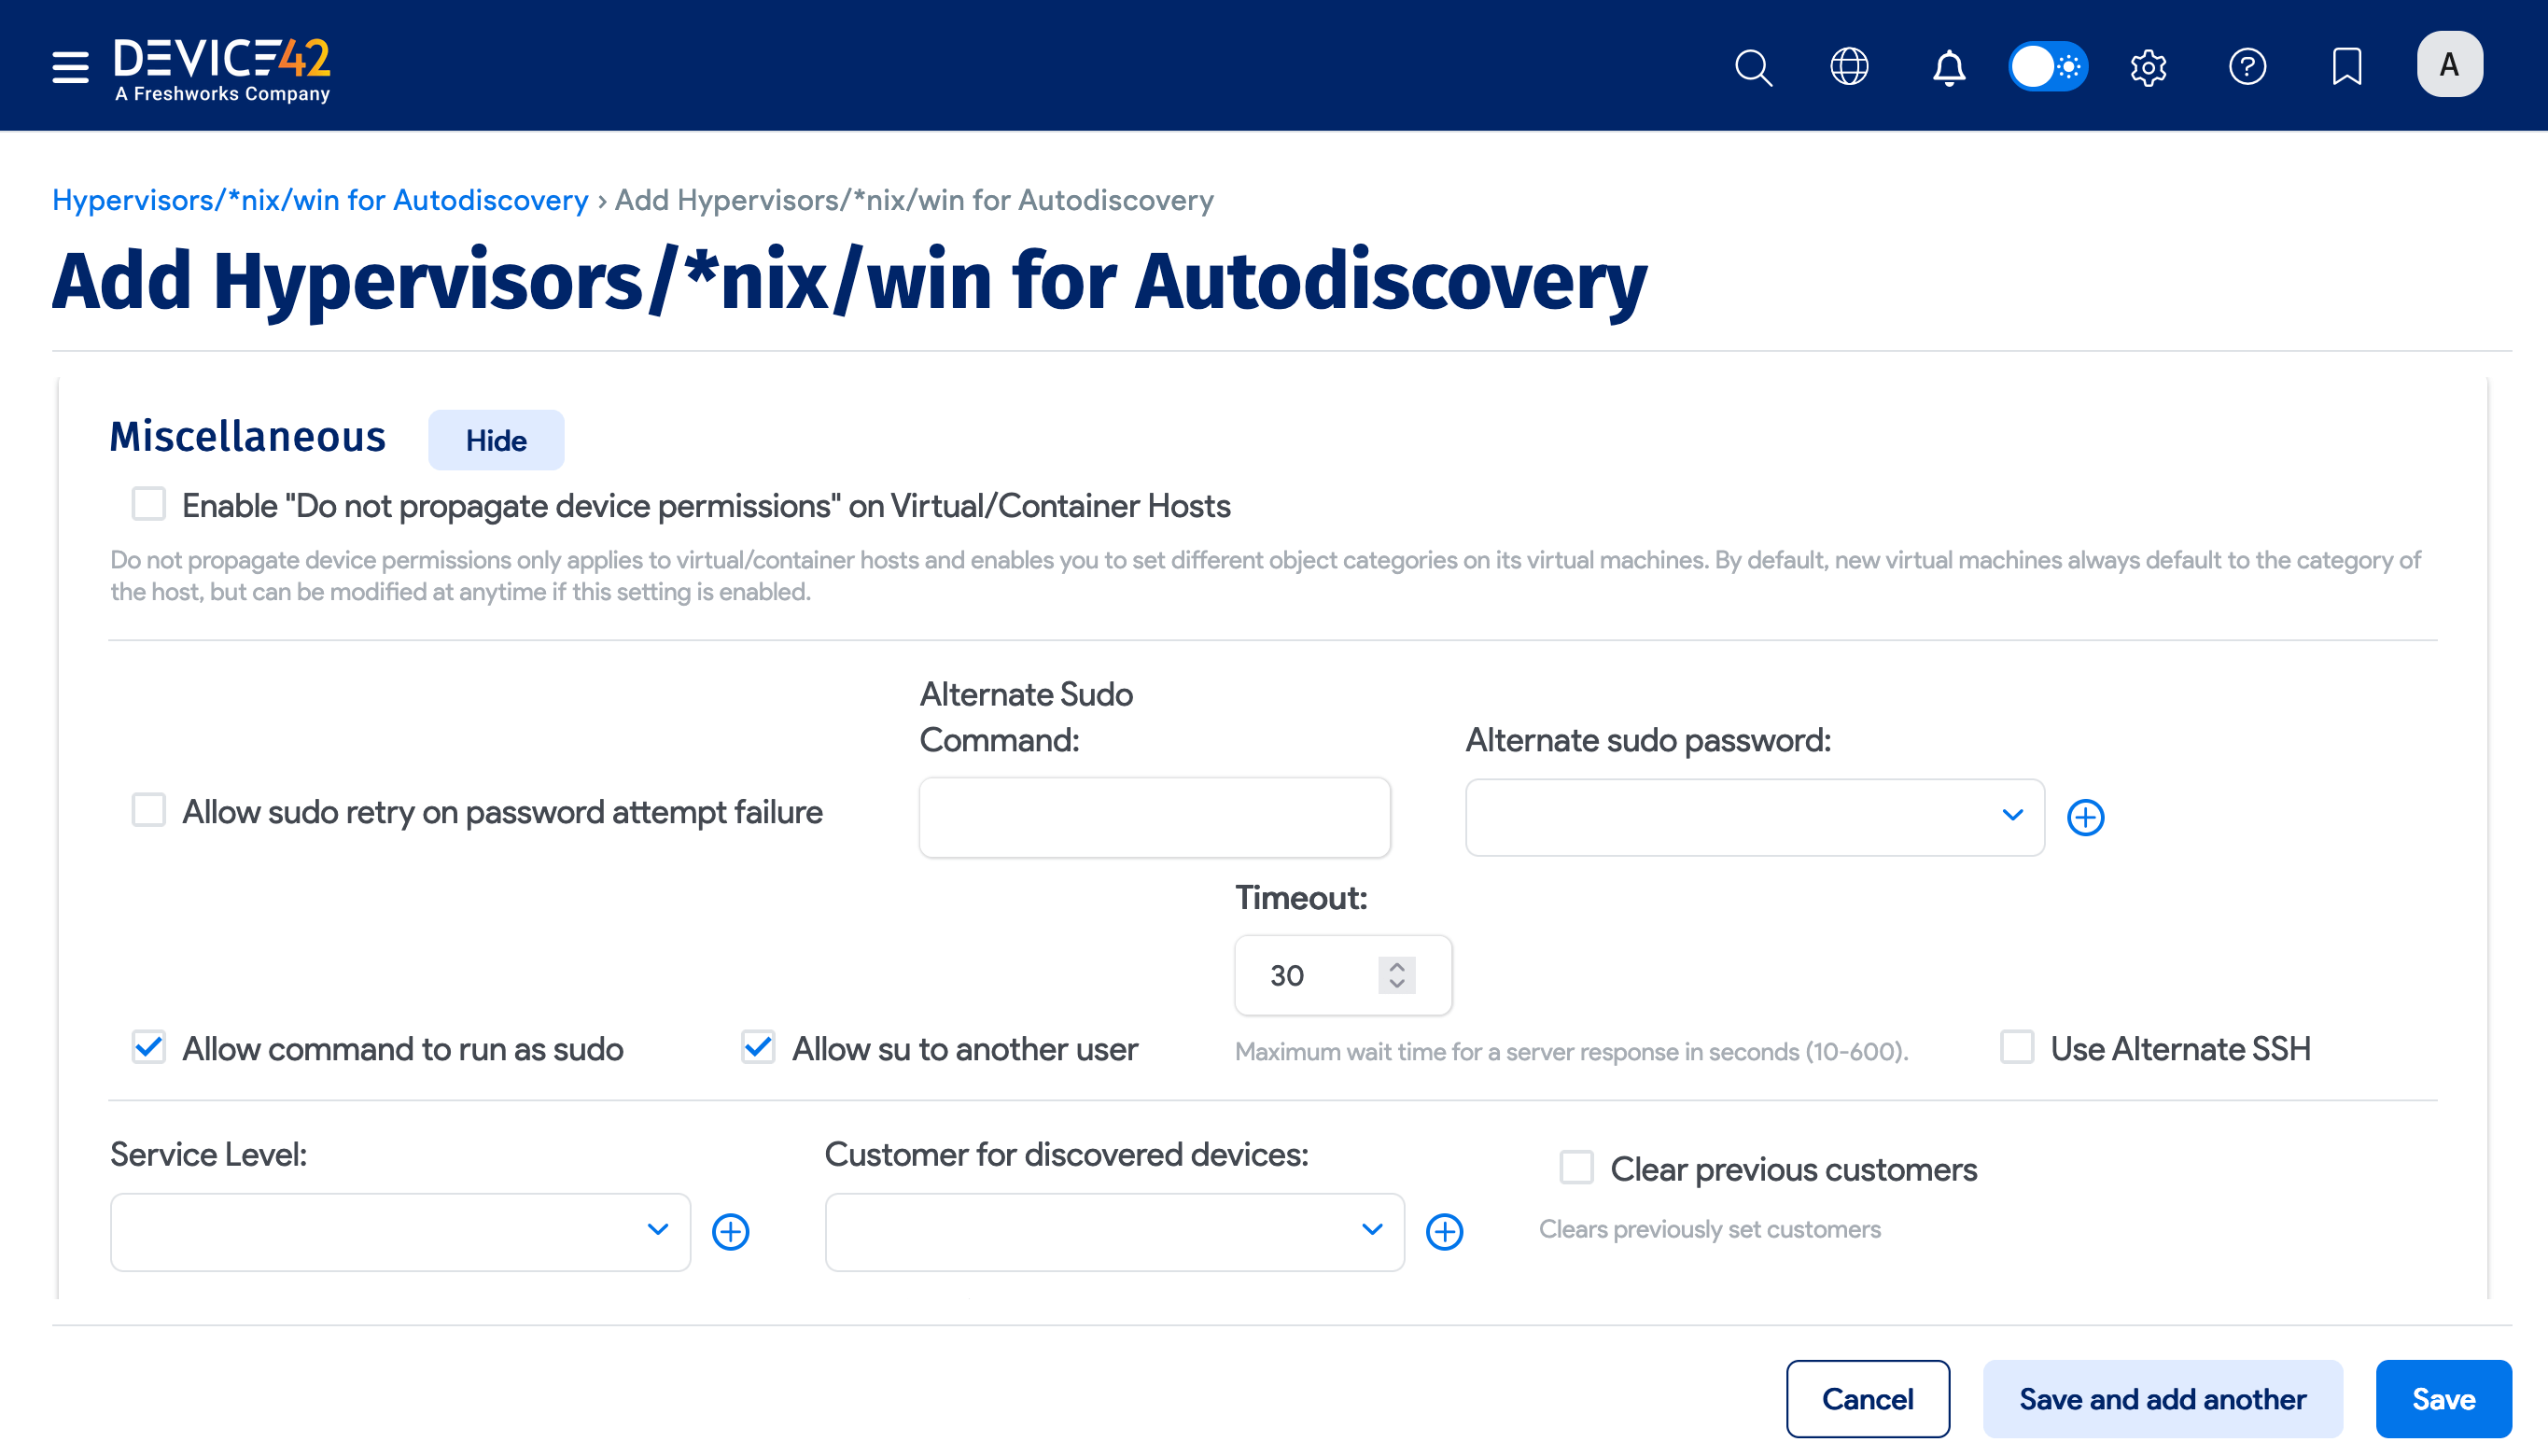
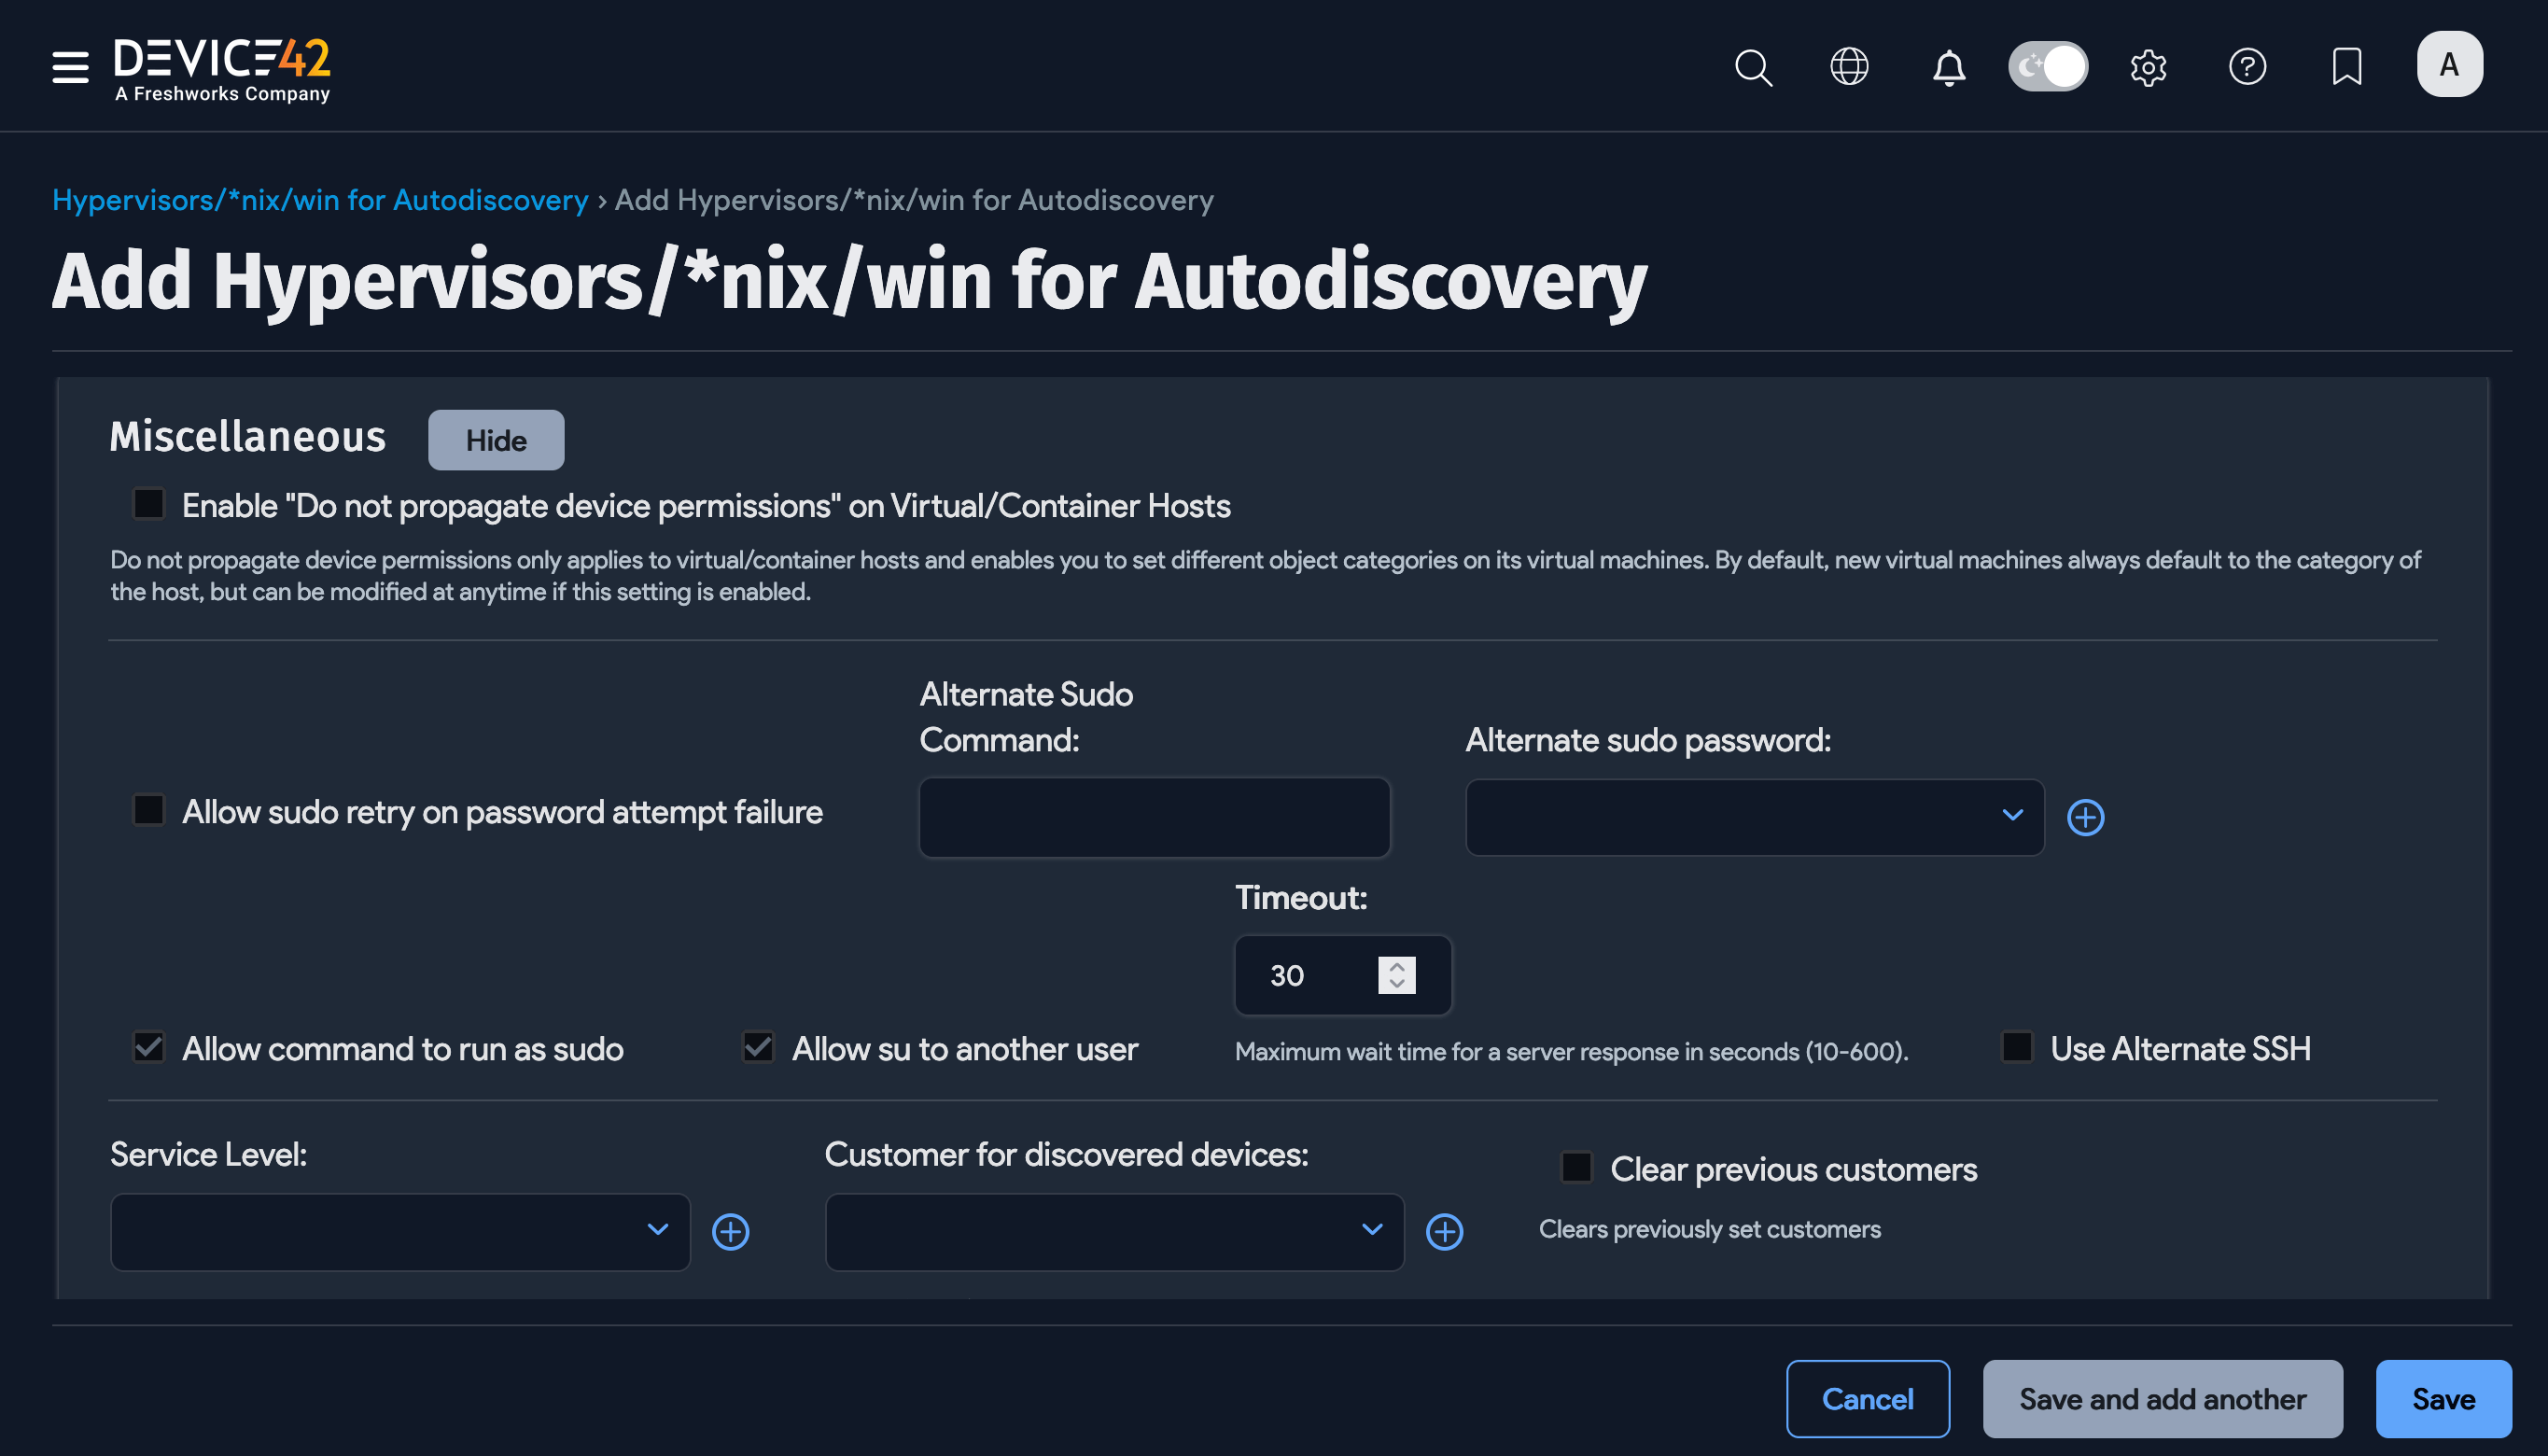
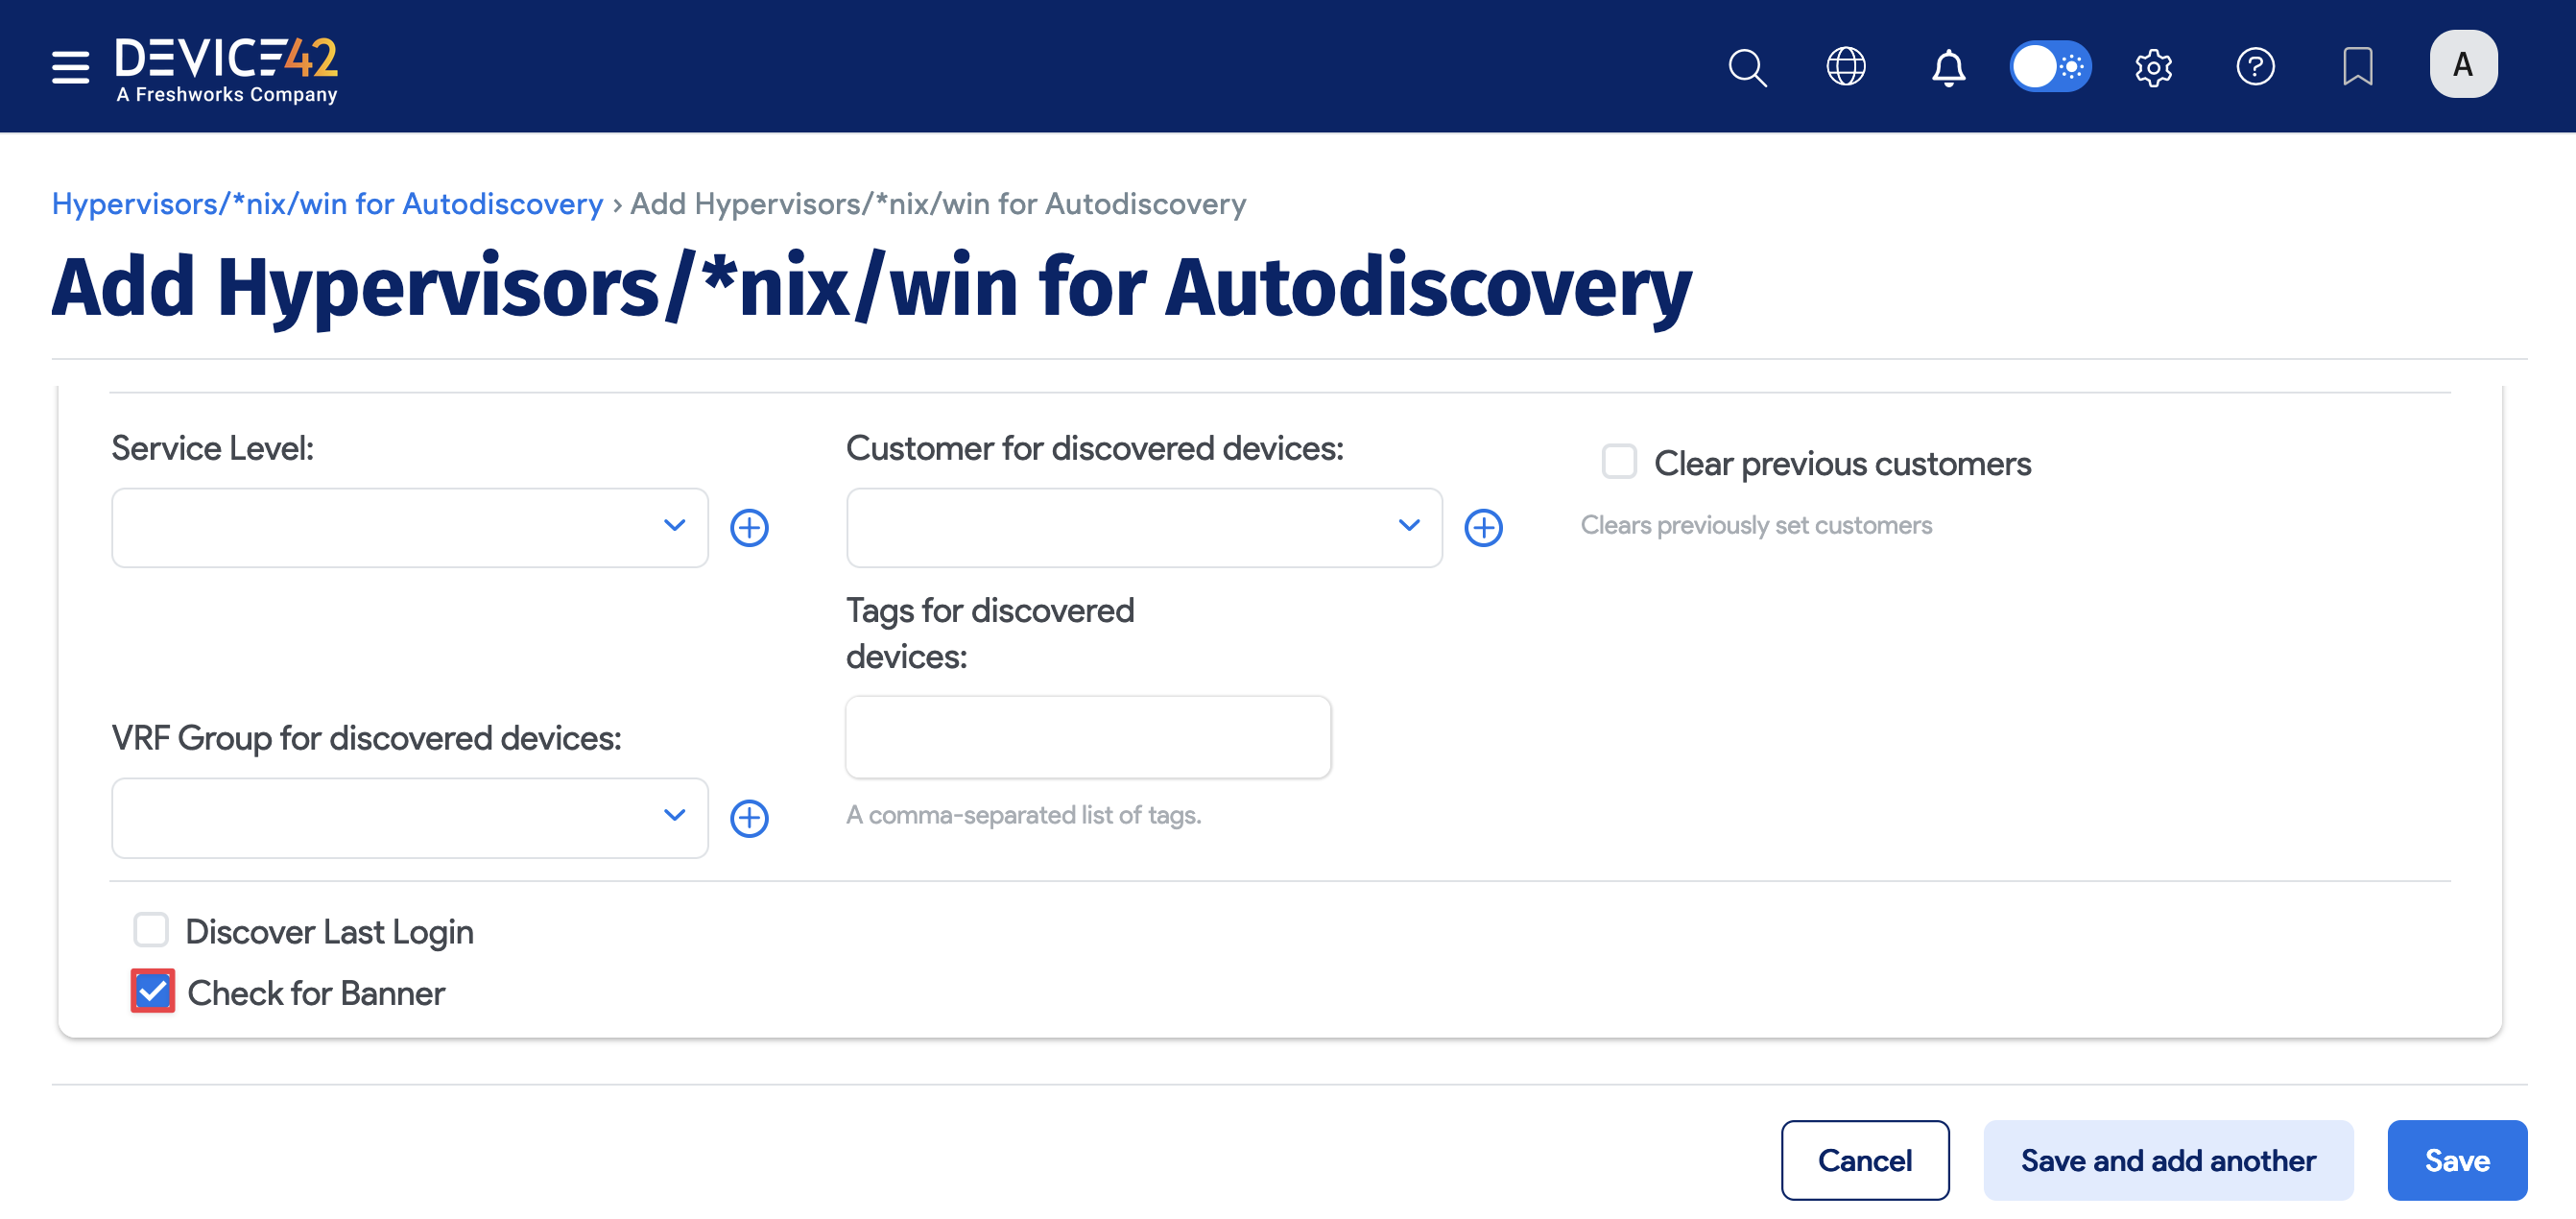
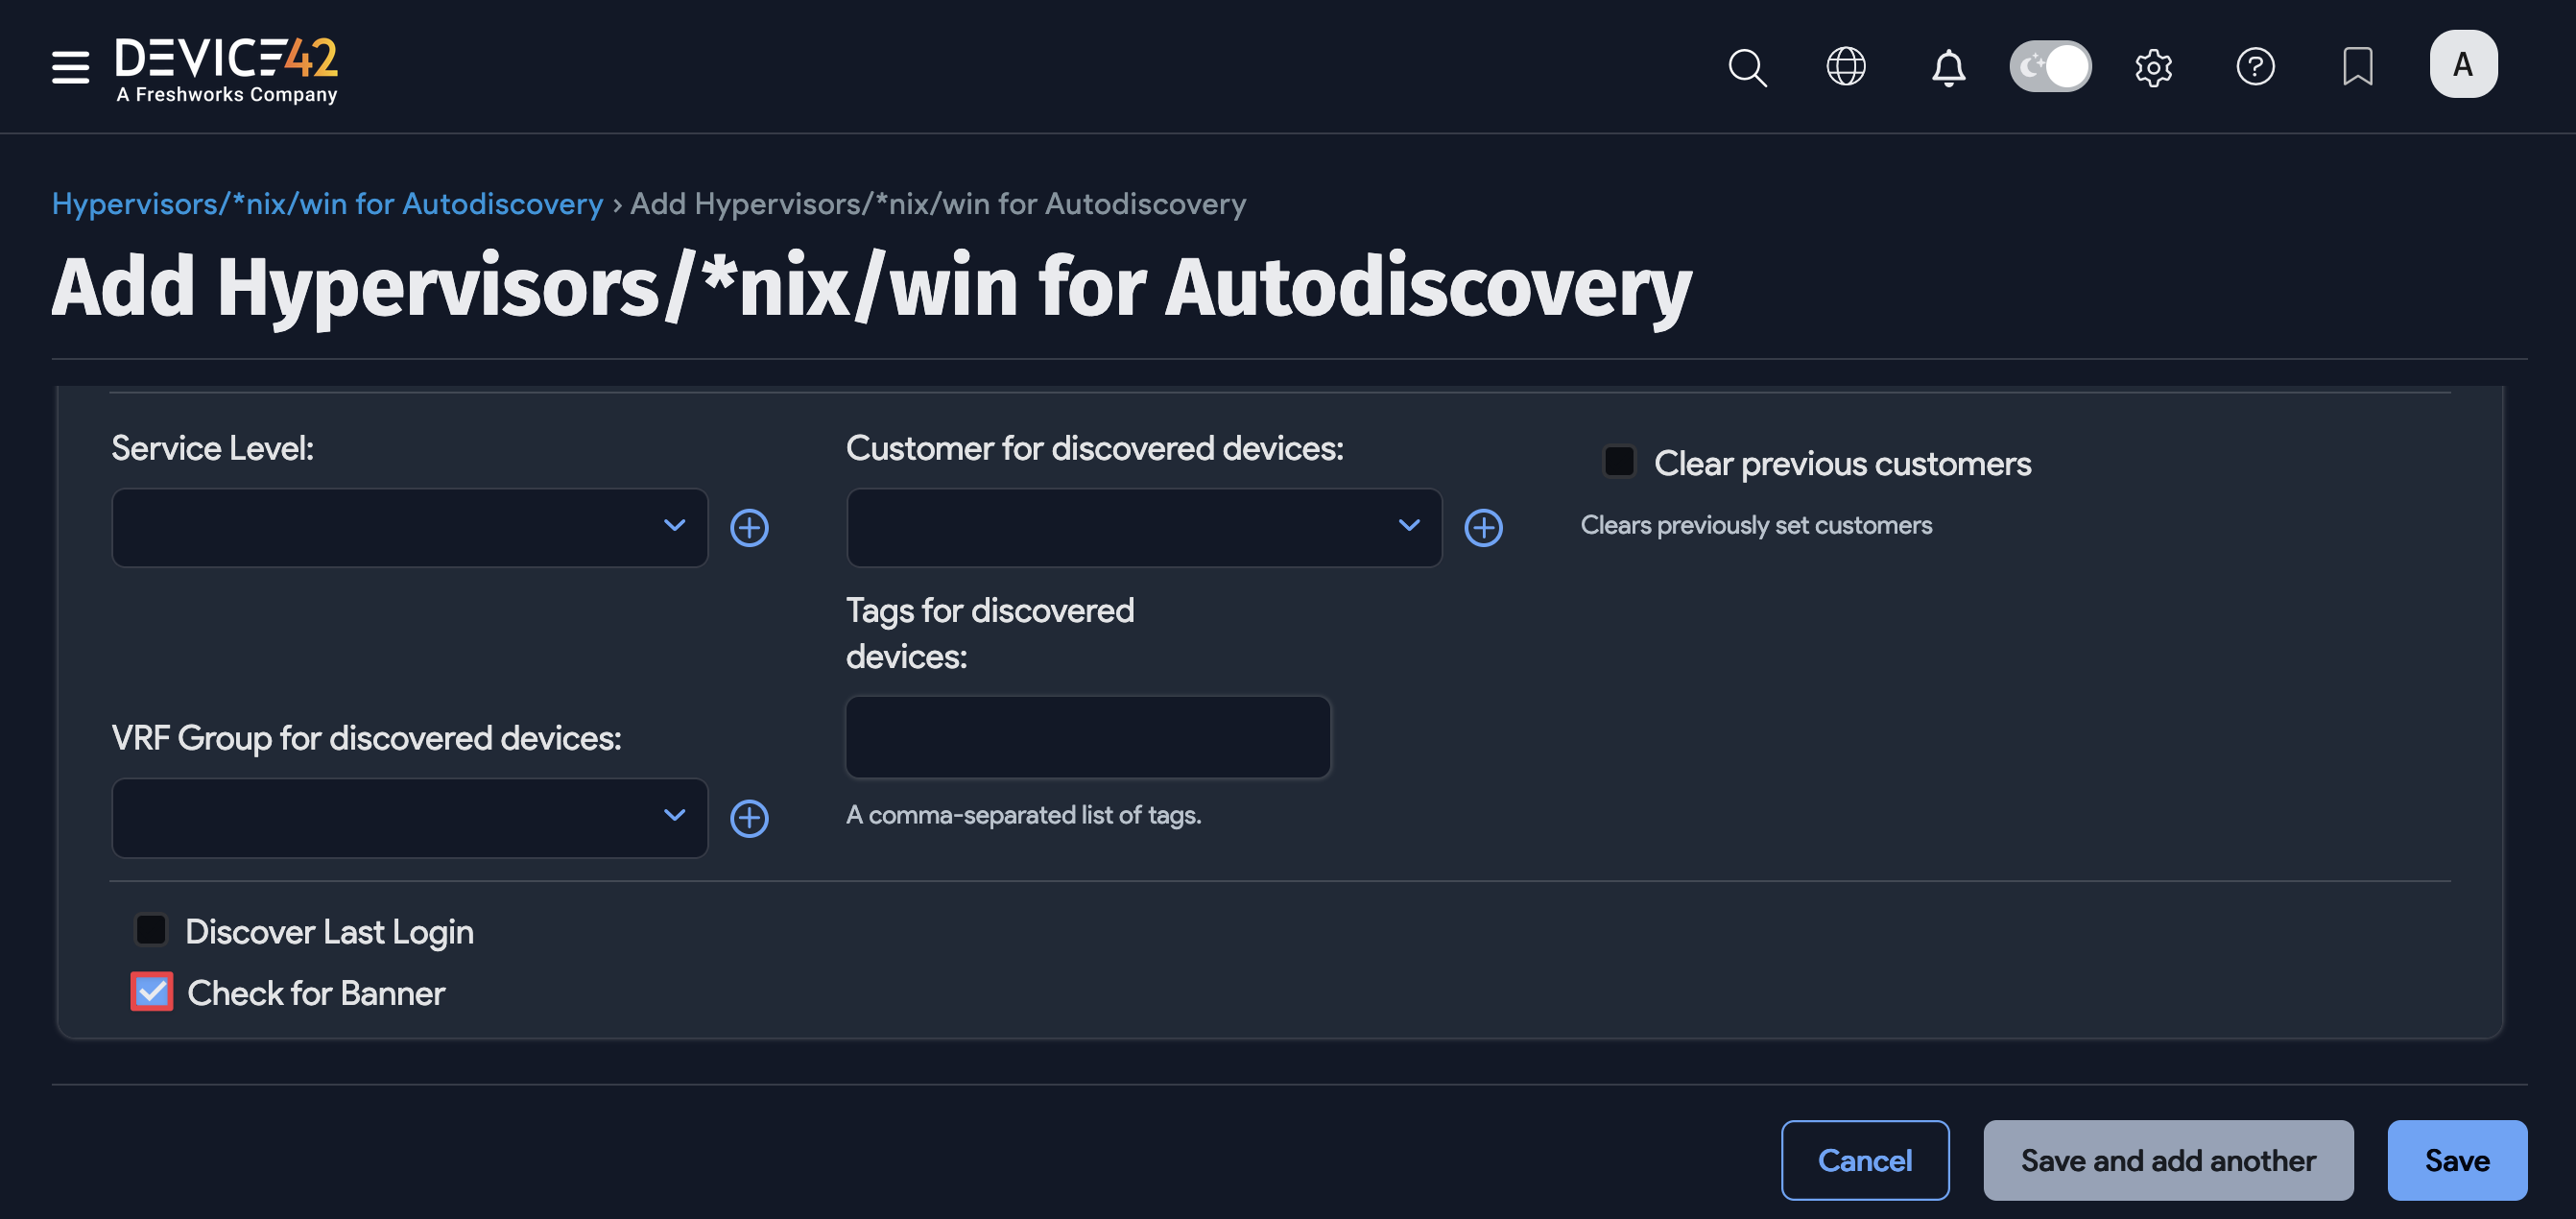
If you experience unexplainable issues during discovery that you suspect are due to banner text interfering with parsing, enable the Check for Banner option for discovery to detect and remove banner messages. The Check for Banner option is also available via API.
When discovery switches between *nix users, the triggered banner text messages may disrupt database discovery and Application Component creation, resulting in discovery errors or incomplete data collection.
Banner text interference cannot be directly determined from Device42. A power user with system access to the target machine is required to detect interference by switching users. Device42 support may advise you to select the banner option if they suspect banner text interference.
Configure SSH Key Auth for Discovery
SSH keys can be used for Linux discovery instead of a password. Setting up discovery to use an SSH key is a simple two-step process, and even easier if your servers are already configured for SSH key access.
If you can already use an SSH key to log on to your servers with the desired discovery user account, get your SSH private key and proceed with Step 2.
-
Ensure your Linux target servers are configured for SSH public key auth, and if not, configure them.
-
Add your SSH RSA (or DSA) Private key to a credential in Device42, and use that credential to configure your discovery job otherwise, as you always have.
Supported SSH Key Ciphers
Device42 supports the following ciphers for SSH-key-based discovery authentication:
- aes128-ctr
- aes192-ctr
- aes256-ctr
- aes128-gcm@openssh.com
- chacha20-poly1305@openssh.com
- arcfour256
- arcfour128
- arcfour
- aes128-cbc
- 3des-cbc
Step 1: Configure Discovery Target Servers for SSH Public Key Authentication
Configure Linux target servers for SSH public key authentication. You can create a new key pair or use an existing SSH key pair. To create a new key, generate an RSA key pair, use ssh-keygen, and run:
ssh-keygen -t rsa
Running ssh-keygen prompts you to set the file location of the key pair. You can use the default location, typically $HOME/.ssh/id_rsa. If a key already exists at this location, it will be overwritten unless you choose a different file location.
You will also be prompted to supply a passphrase (password) for your new private key. This is optional and you can leave it blank if you choose.
For example:
Click to expand the code block
Generating public/private RSA key pair.
Enter file in which to save the key (/Users/vivek/.ssh/id_rsa):
Enter passphrase (empty for no passphrase):
Enter same passphrase again:
Your identification has been saved in /Users/vivek/.ssh/id_rsa.
Your public key has been saved in /Users/vivek/.ssh/id_rsa.pub.
The key fingerprint is:
80:5f:25:7c:f4:90:aa:e1:f4:a0:01:43:4e:e8:bc:f5 vivek@desktop01
The key's randomart image is:
+--[ RSA 2048]----+
| oo    ...+.     |
|.oo  .  .ooo     |
|o .o. . .o  .    |
| o ...+o.        |
|  o .=.=S        |
| .  .Eo .        |
|                 |
|                 |
|                 |
+-----------------+
The following two files will be created by the command you just ran:
$HOME/.ssh/id_rsa: Contains your private key.$HOME/.ssh/id_rsa.pub: Contains your public key.
Save a copy of the id_rsa file (your private key) on your local machine so you can browse to it and upload it to Device42.
Use $ssh-copy-id to copy the newly generated certificate to your target host(s):
ssh-copy-id -i $HOME/.ssh/id_rsa.pub discovery_user@discoverytarget.device42.com
This sets up your target hosts for remote SSH-key-based authentication using the same user account you used to run the command. Verify that your SSH key-based login works from a remote terminal and proceed to Step 2 to set up your Linux discovery job.
Manual Set Up Option
Instead of using ssh-copy-id, you can log in to the target servers and manually set up the authentication:
- Create the
.sshdirectory in the home directory you'll be using for discovery and create anauthorized_keysfile in it. - Substitute
$HOMEwith your discovery user's username and set the permissions by running:
mkdir -p $HOME/.ssh
chmod 0700 $HOME/.ssh
- Create the
$HOME/.ssh/authorized_keysfile if it doesn't already exist. - Copy the entire newly generated public key and paste it on a new line in the
authorized_keysfile. It will look something like this:
Step 2: Create a Discovery Job With SSH Key Auth
Add the private SSH RSA or DSA key created in Step 1 to your Device42 discovery job.
- Set up a new discovery job. Go to Discovery > HyperVisors / *nix / Windows and click Create.
- Select a credential for the Discovery Target(s) Credential(s) field that includes the SSH key file instead of a password.
- You can also add the file via the discovery job page, or by going to Resources > All Secrets and clicking Create.
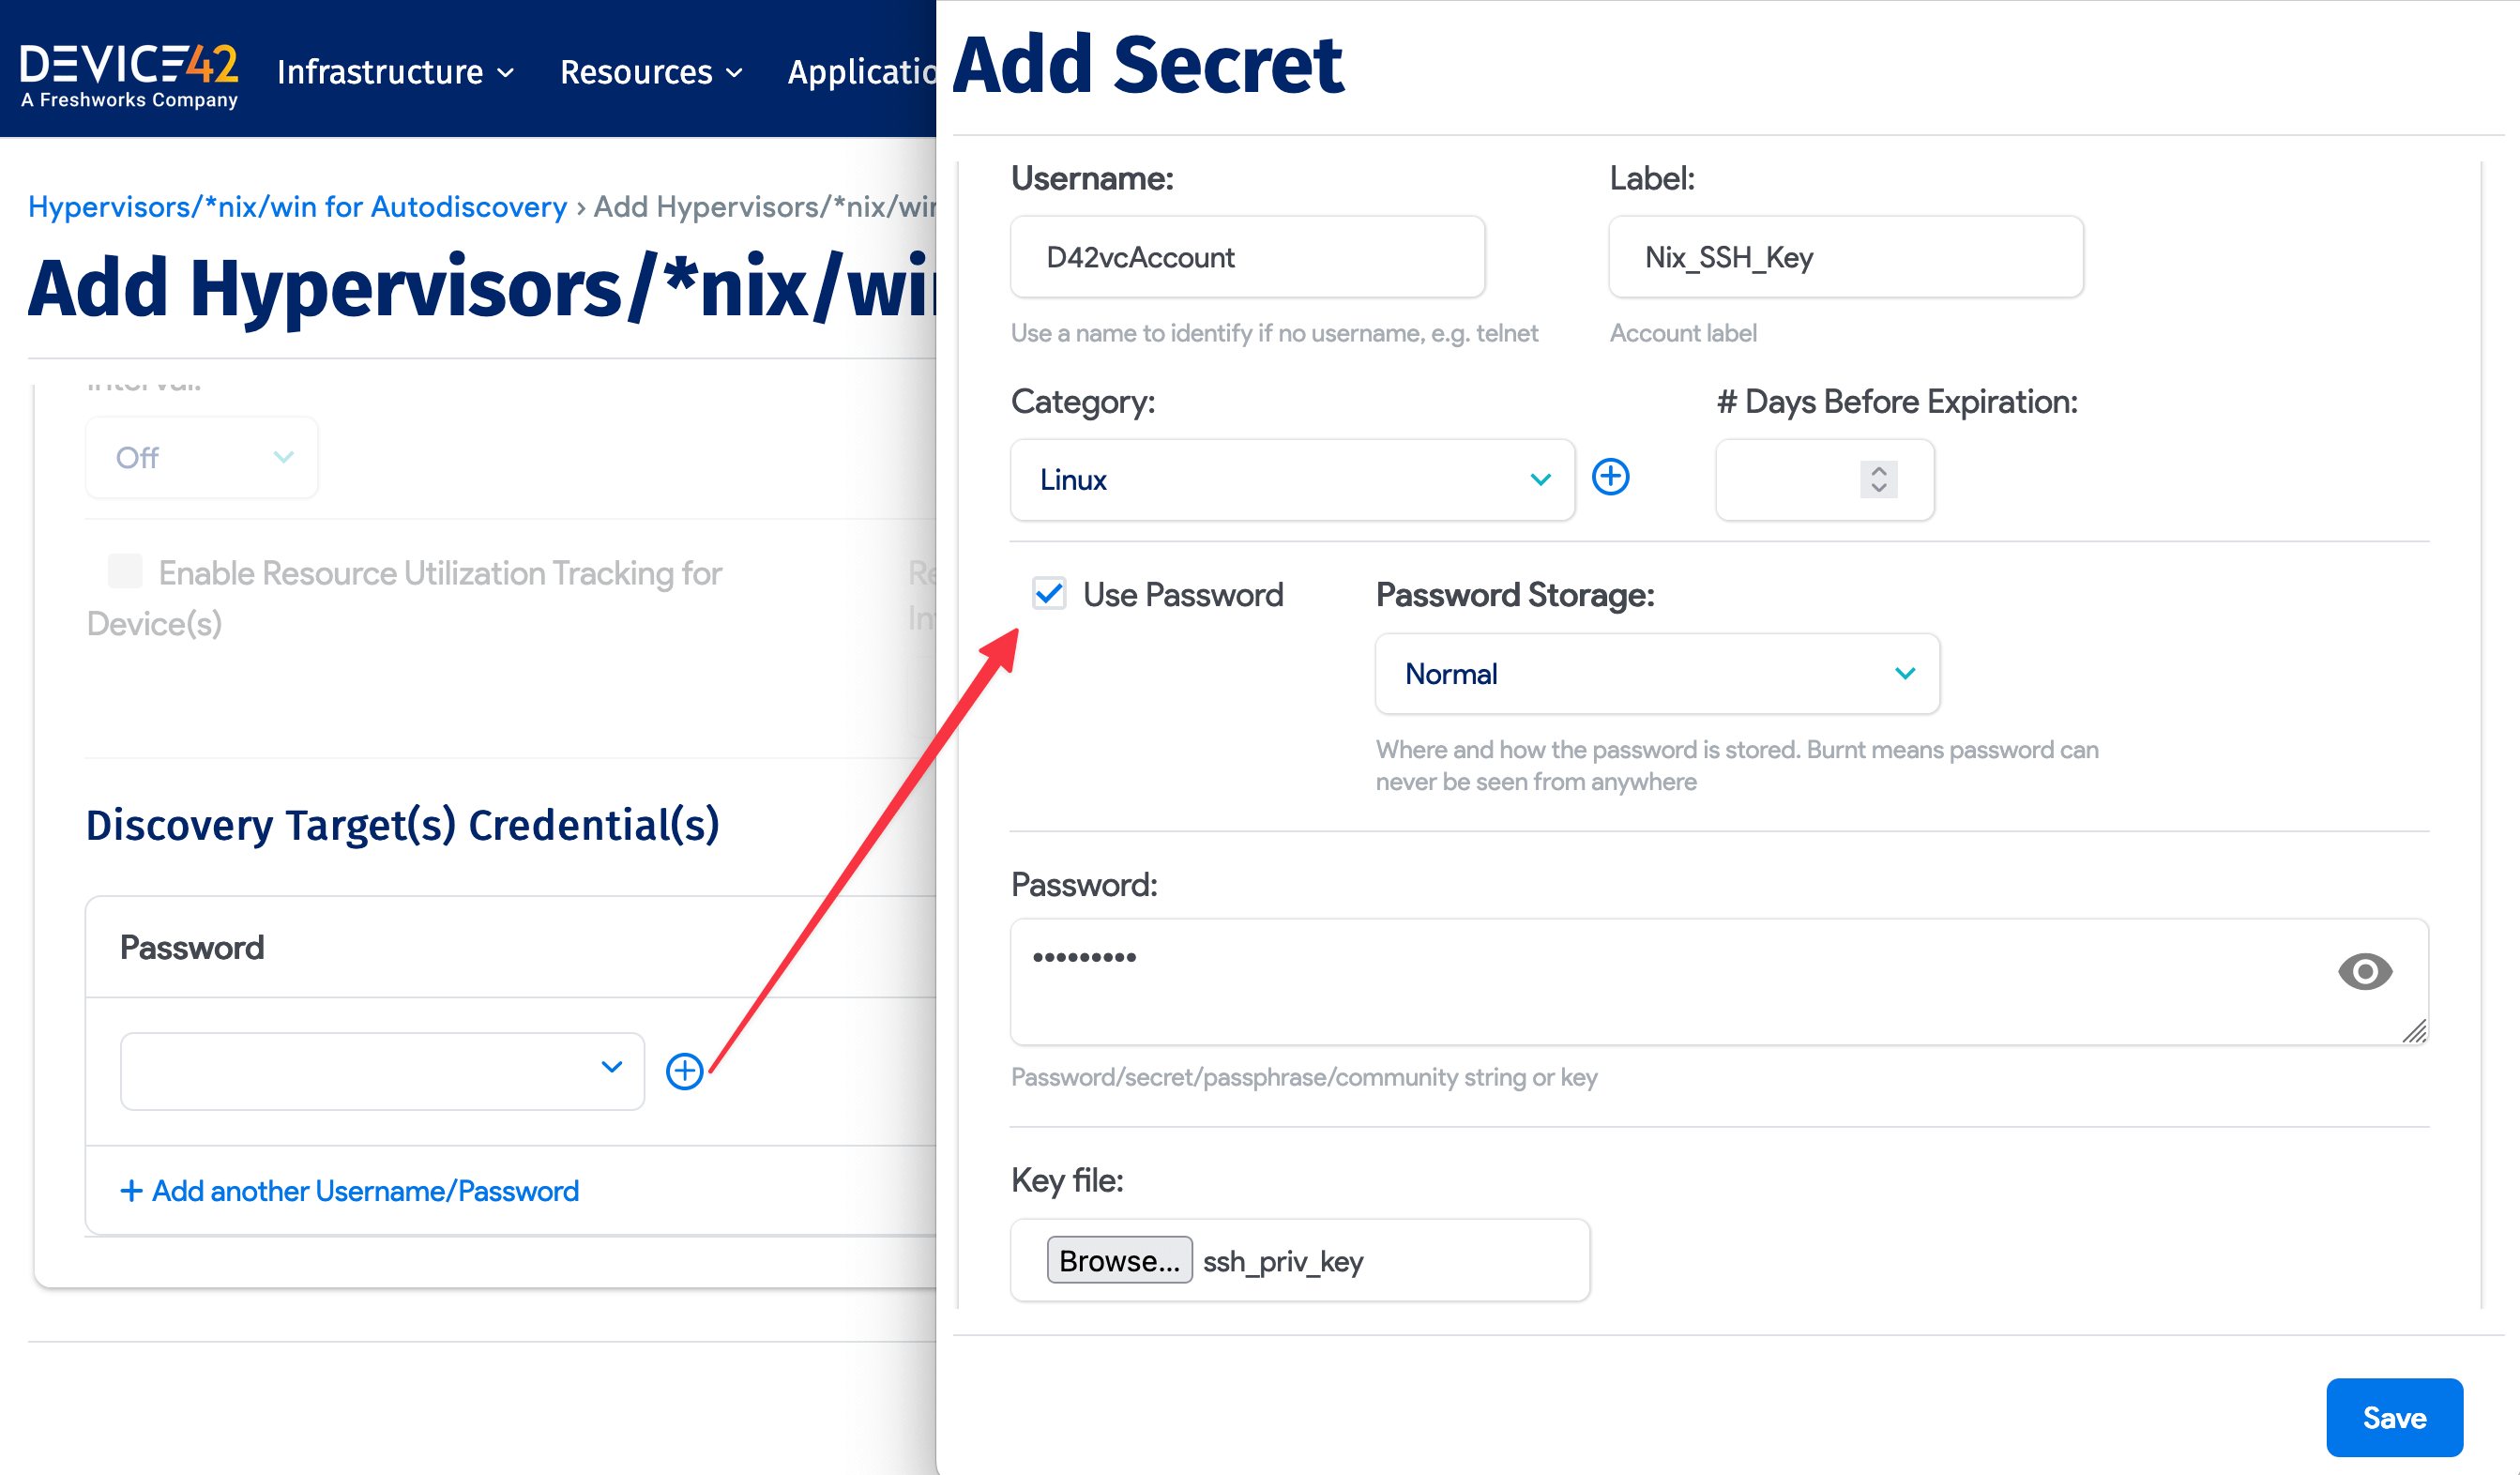
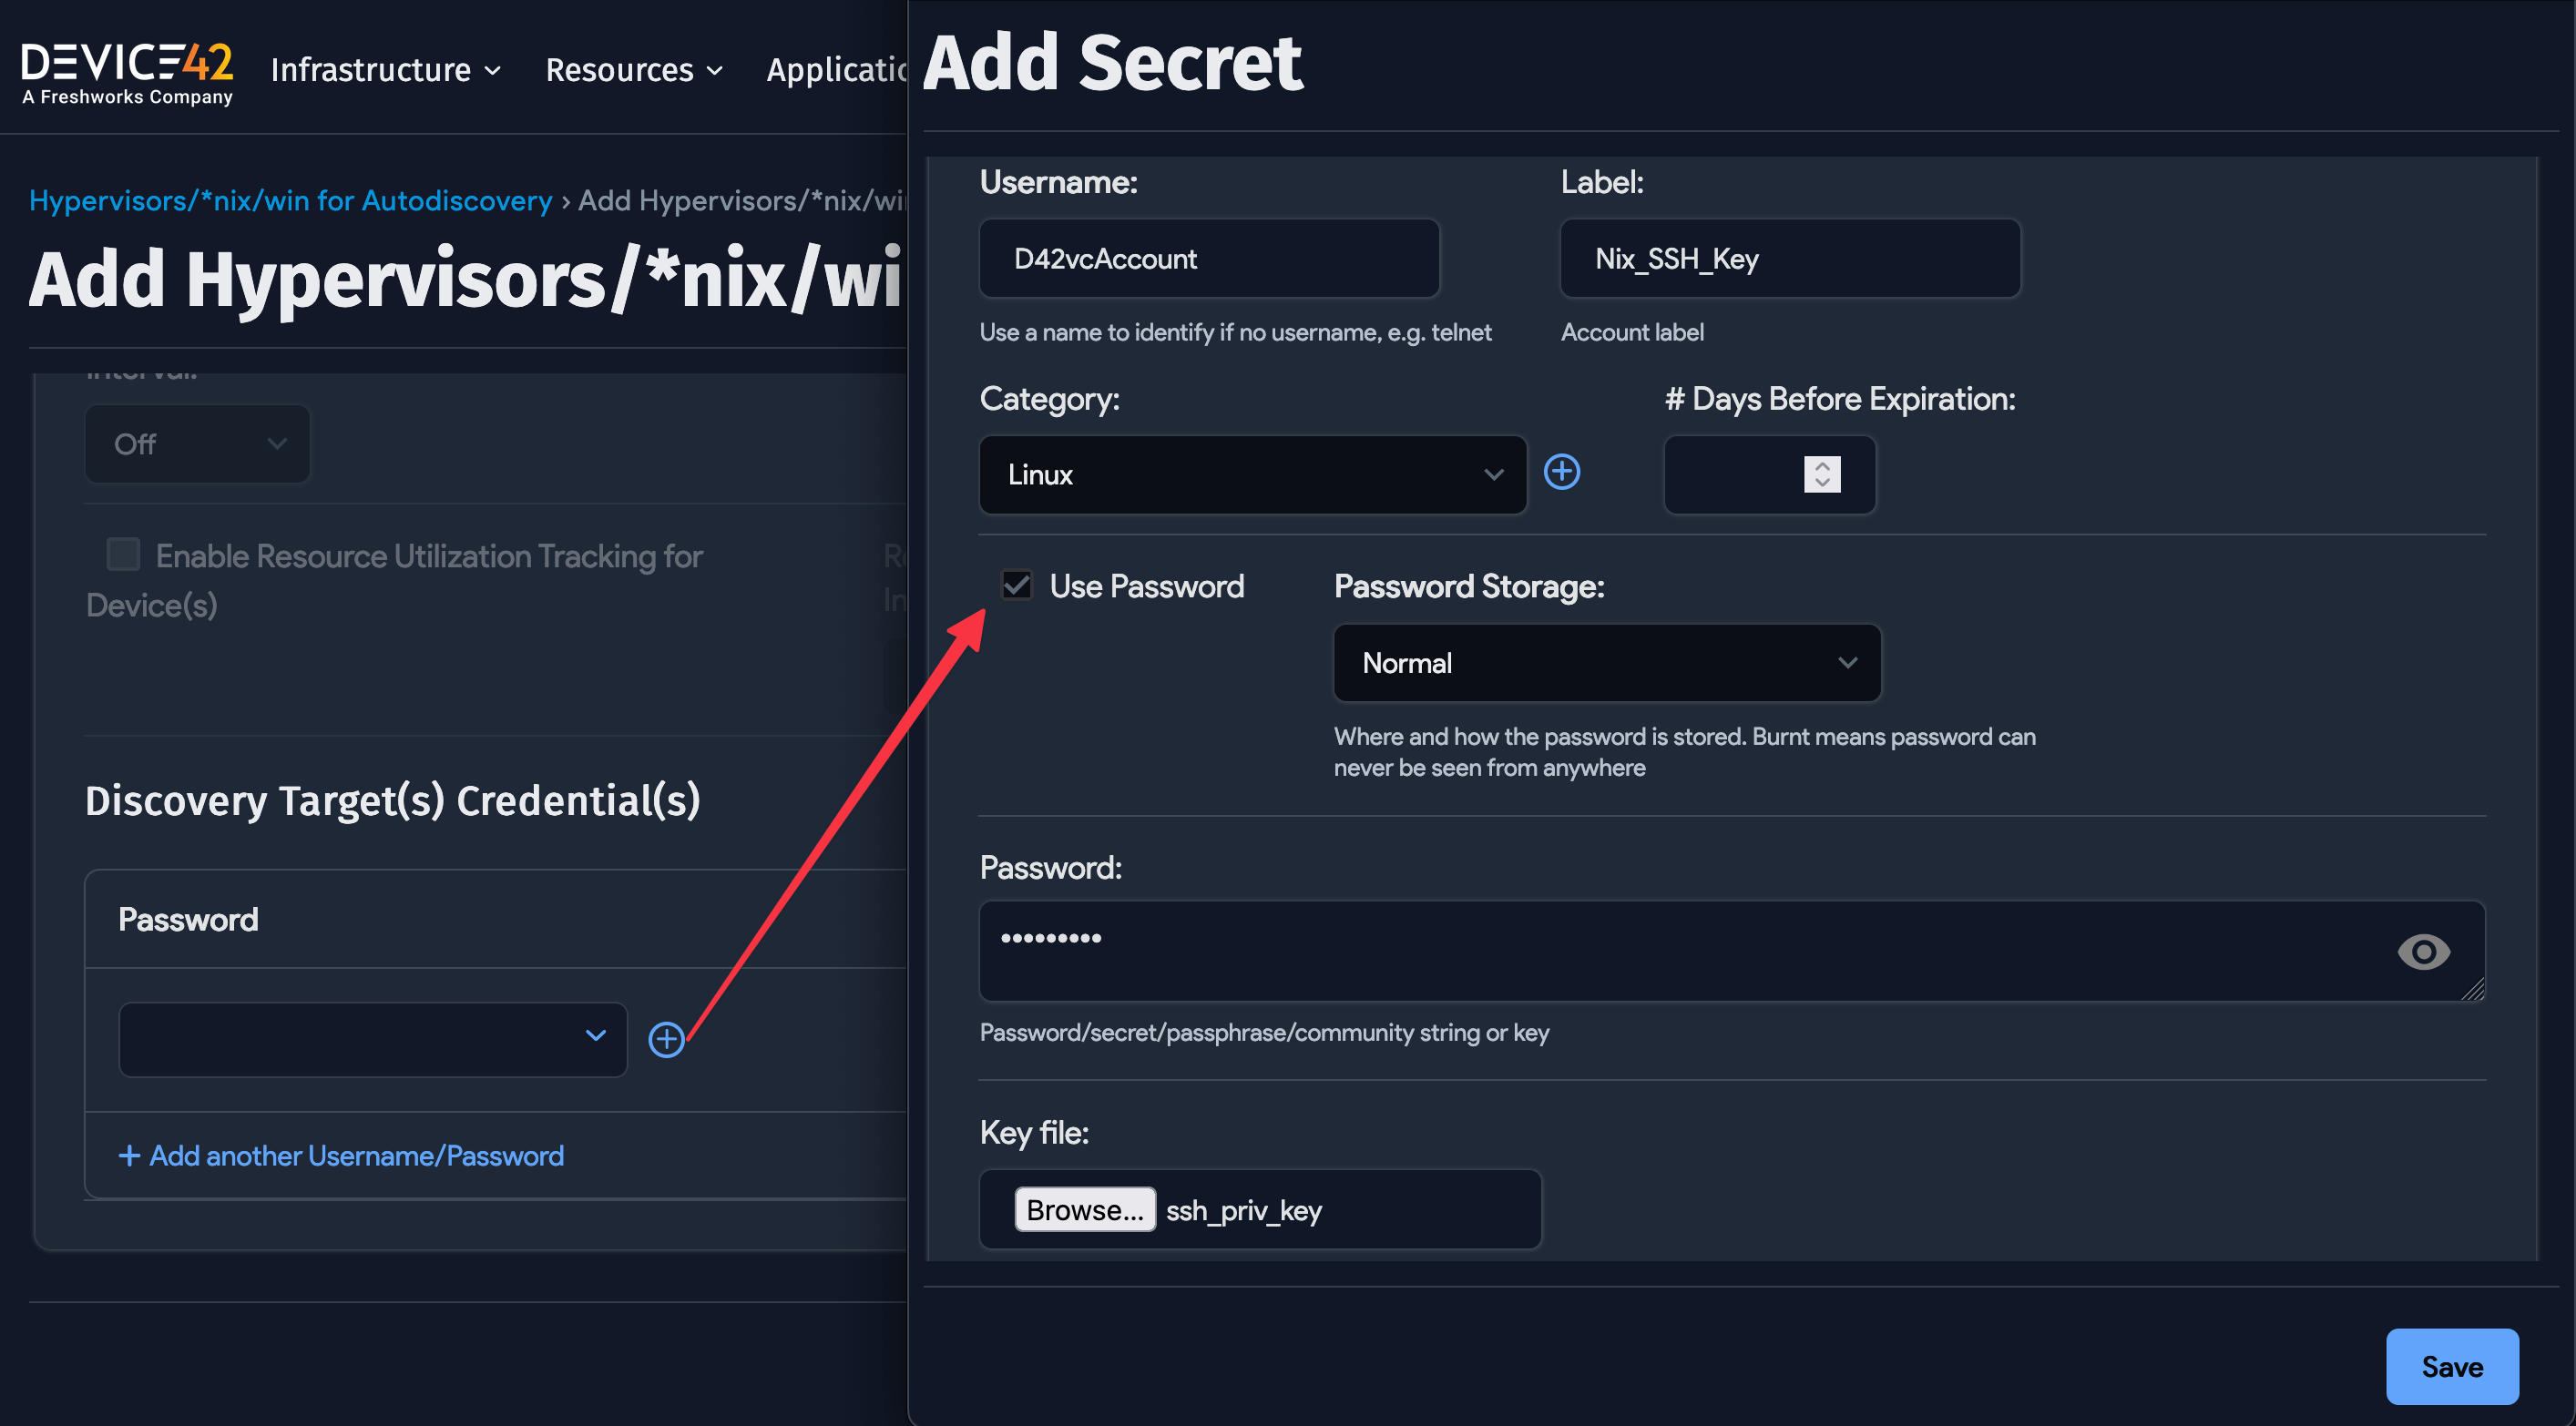
If you set a passphrase for your SSH key, check the Use Password box and supply the SSH key file's password and SSH key. Note that you can do this later by editing your created credential (called a Secret).
Save and run your discovery job to begin Linux discovery using an SSH key.
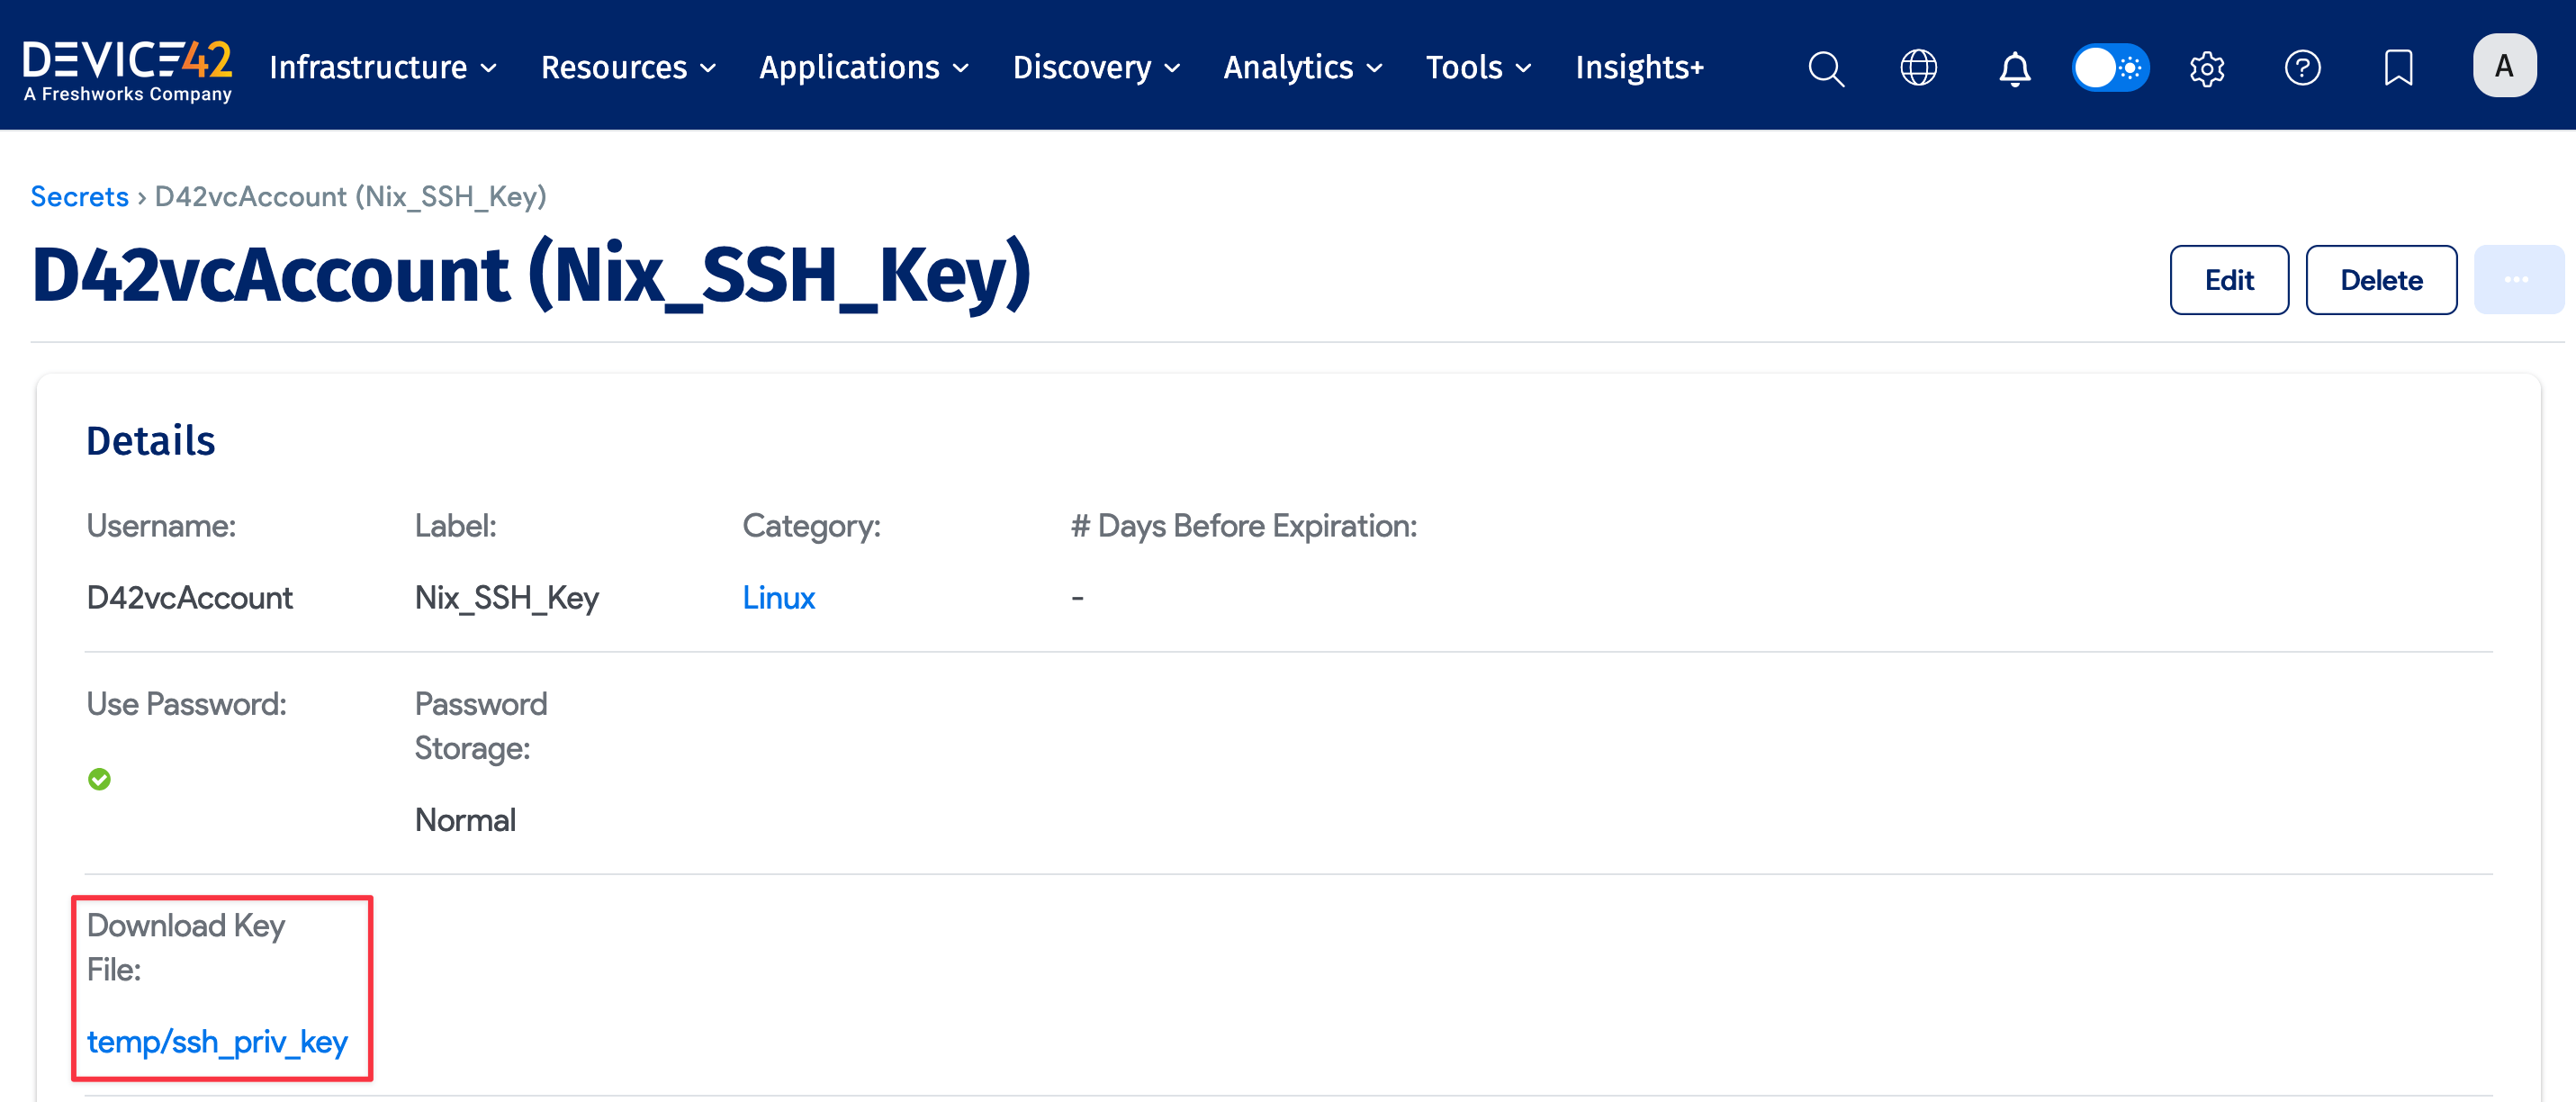
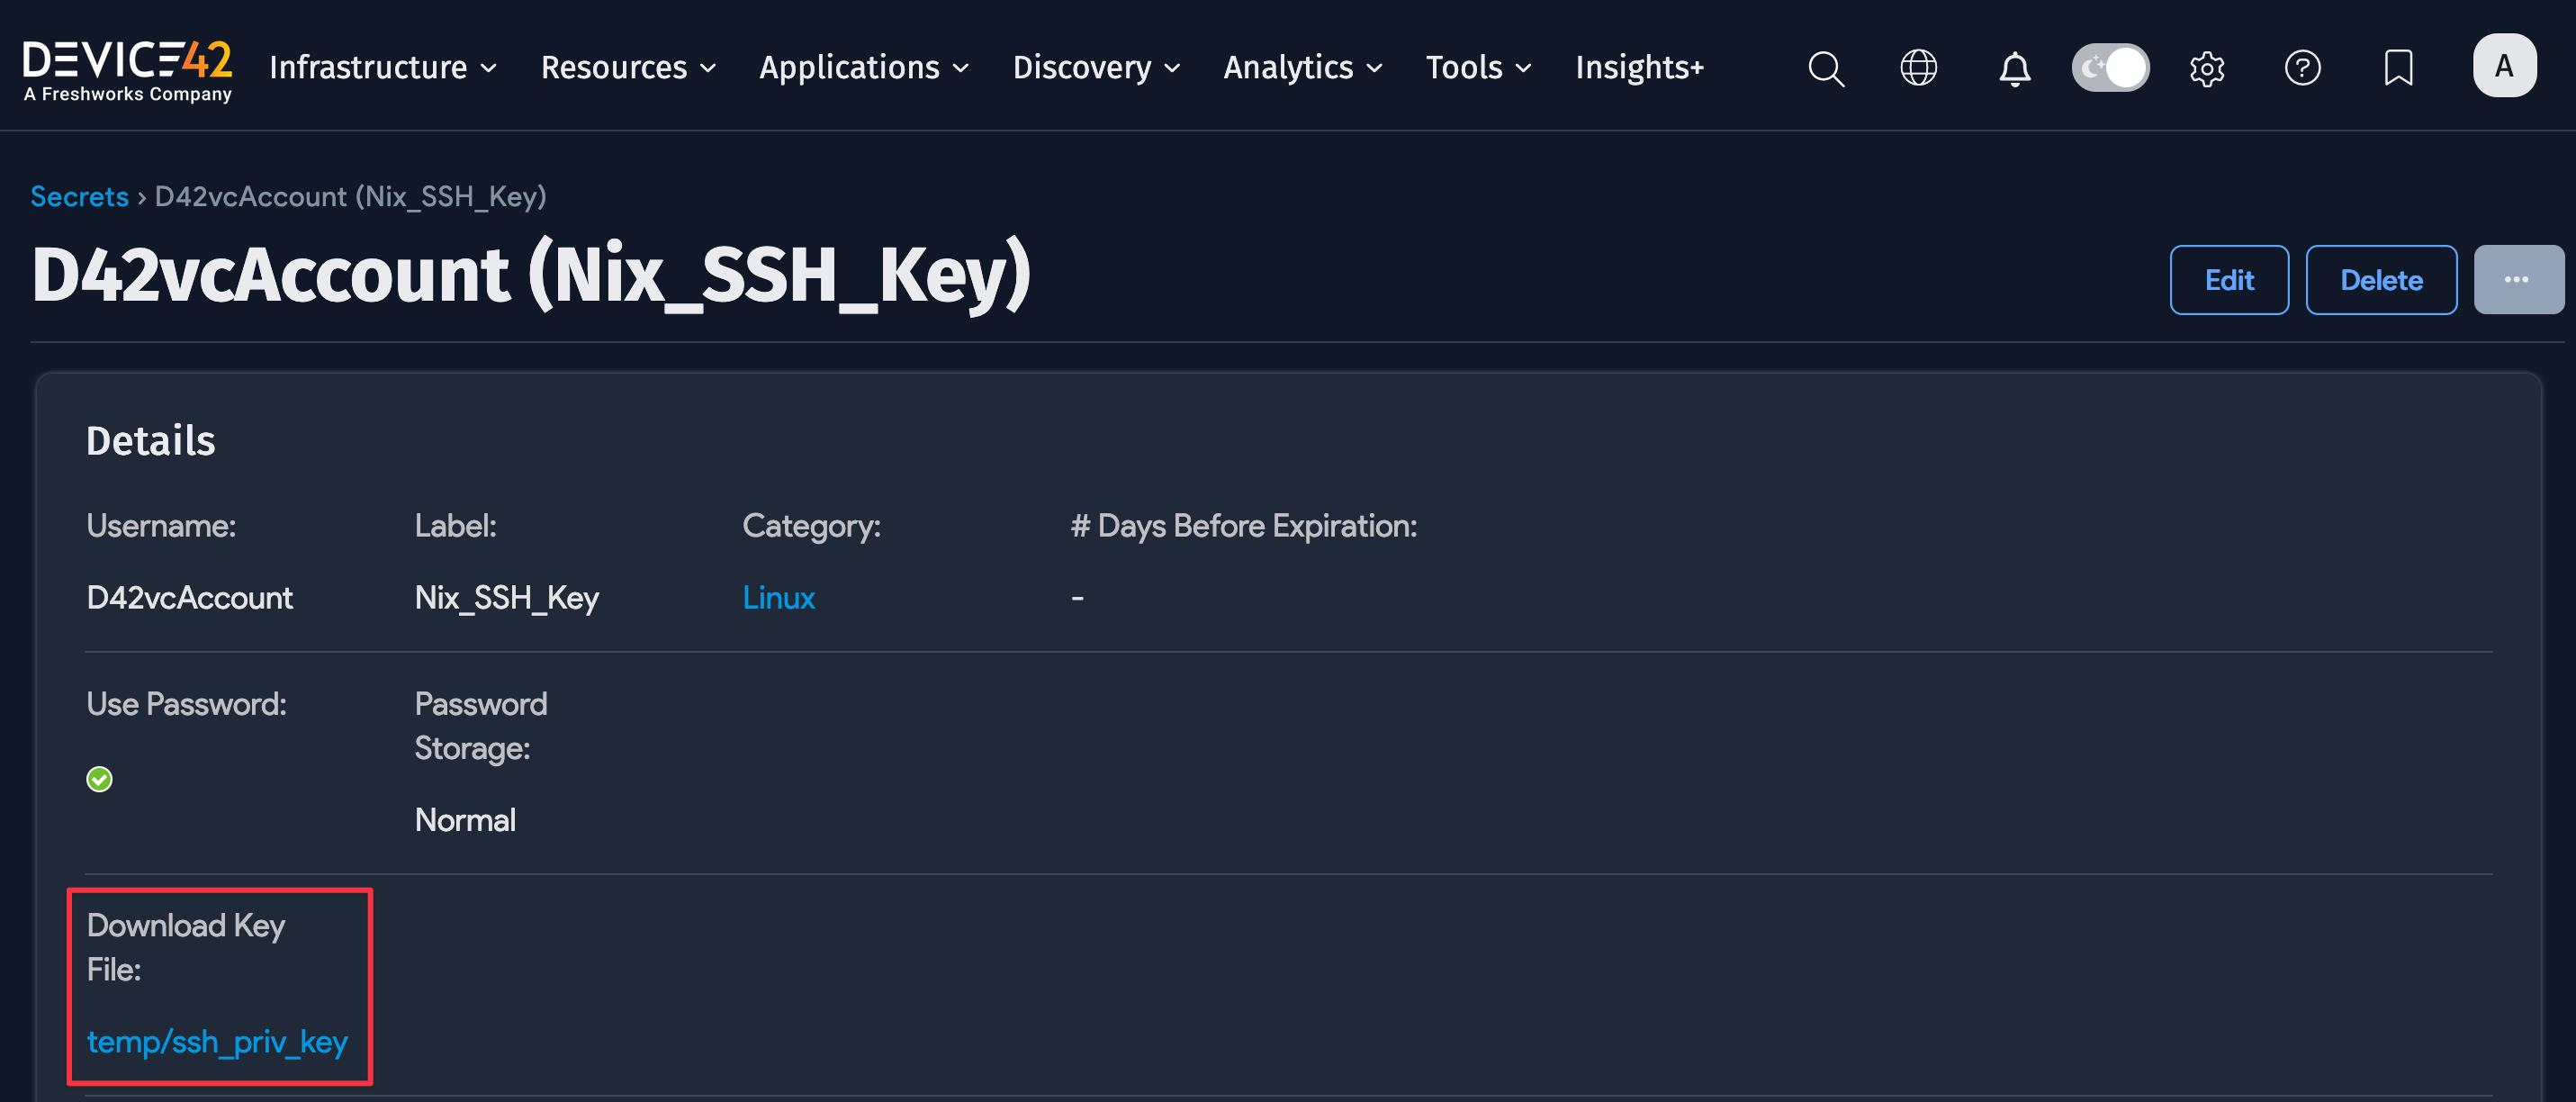
Download the Key File
You can download the key file when needed. Navigate to Resources > All Secrets and select the Secret with the SSH key file.
Configure Linux Hostname Discovery Details
When discovering a device name, the first command to check is hostname to derive the short name of the host. After running the hostname, run the following commands to obtain the domain name. They're ordered by which command's results we give the most weight to:
domainname
dnsdomainname
ypdomainname
nisdomainname
If you don't get a domain name with any of those commands, try running cat /etc/resolv.conf. In this case, split the text on the white space in the file and look for a domain token. When you see one, assign the domain as the second token after domain.
Run *nix SSH Discovery Job
After saving a discovery job, you can run it immediately using the Run Now button on the view and edit pages of the specific job, or you can run it from the list page grid under Discovery > HyperVisors / *nix / Windows.
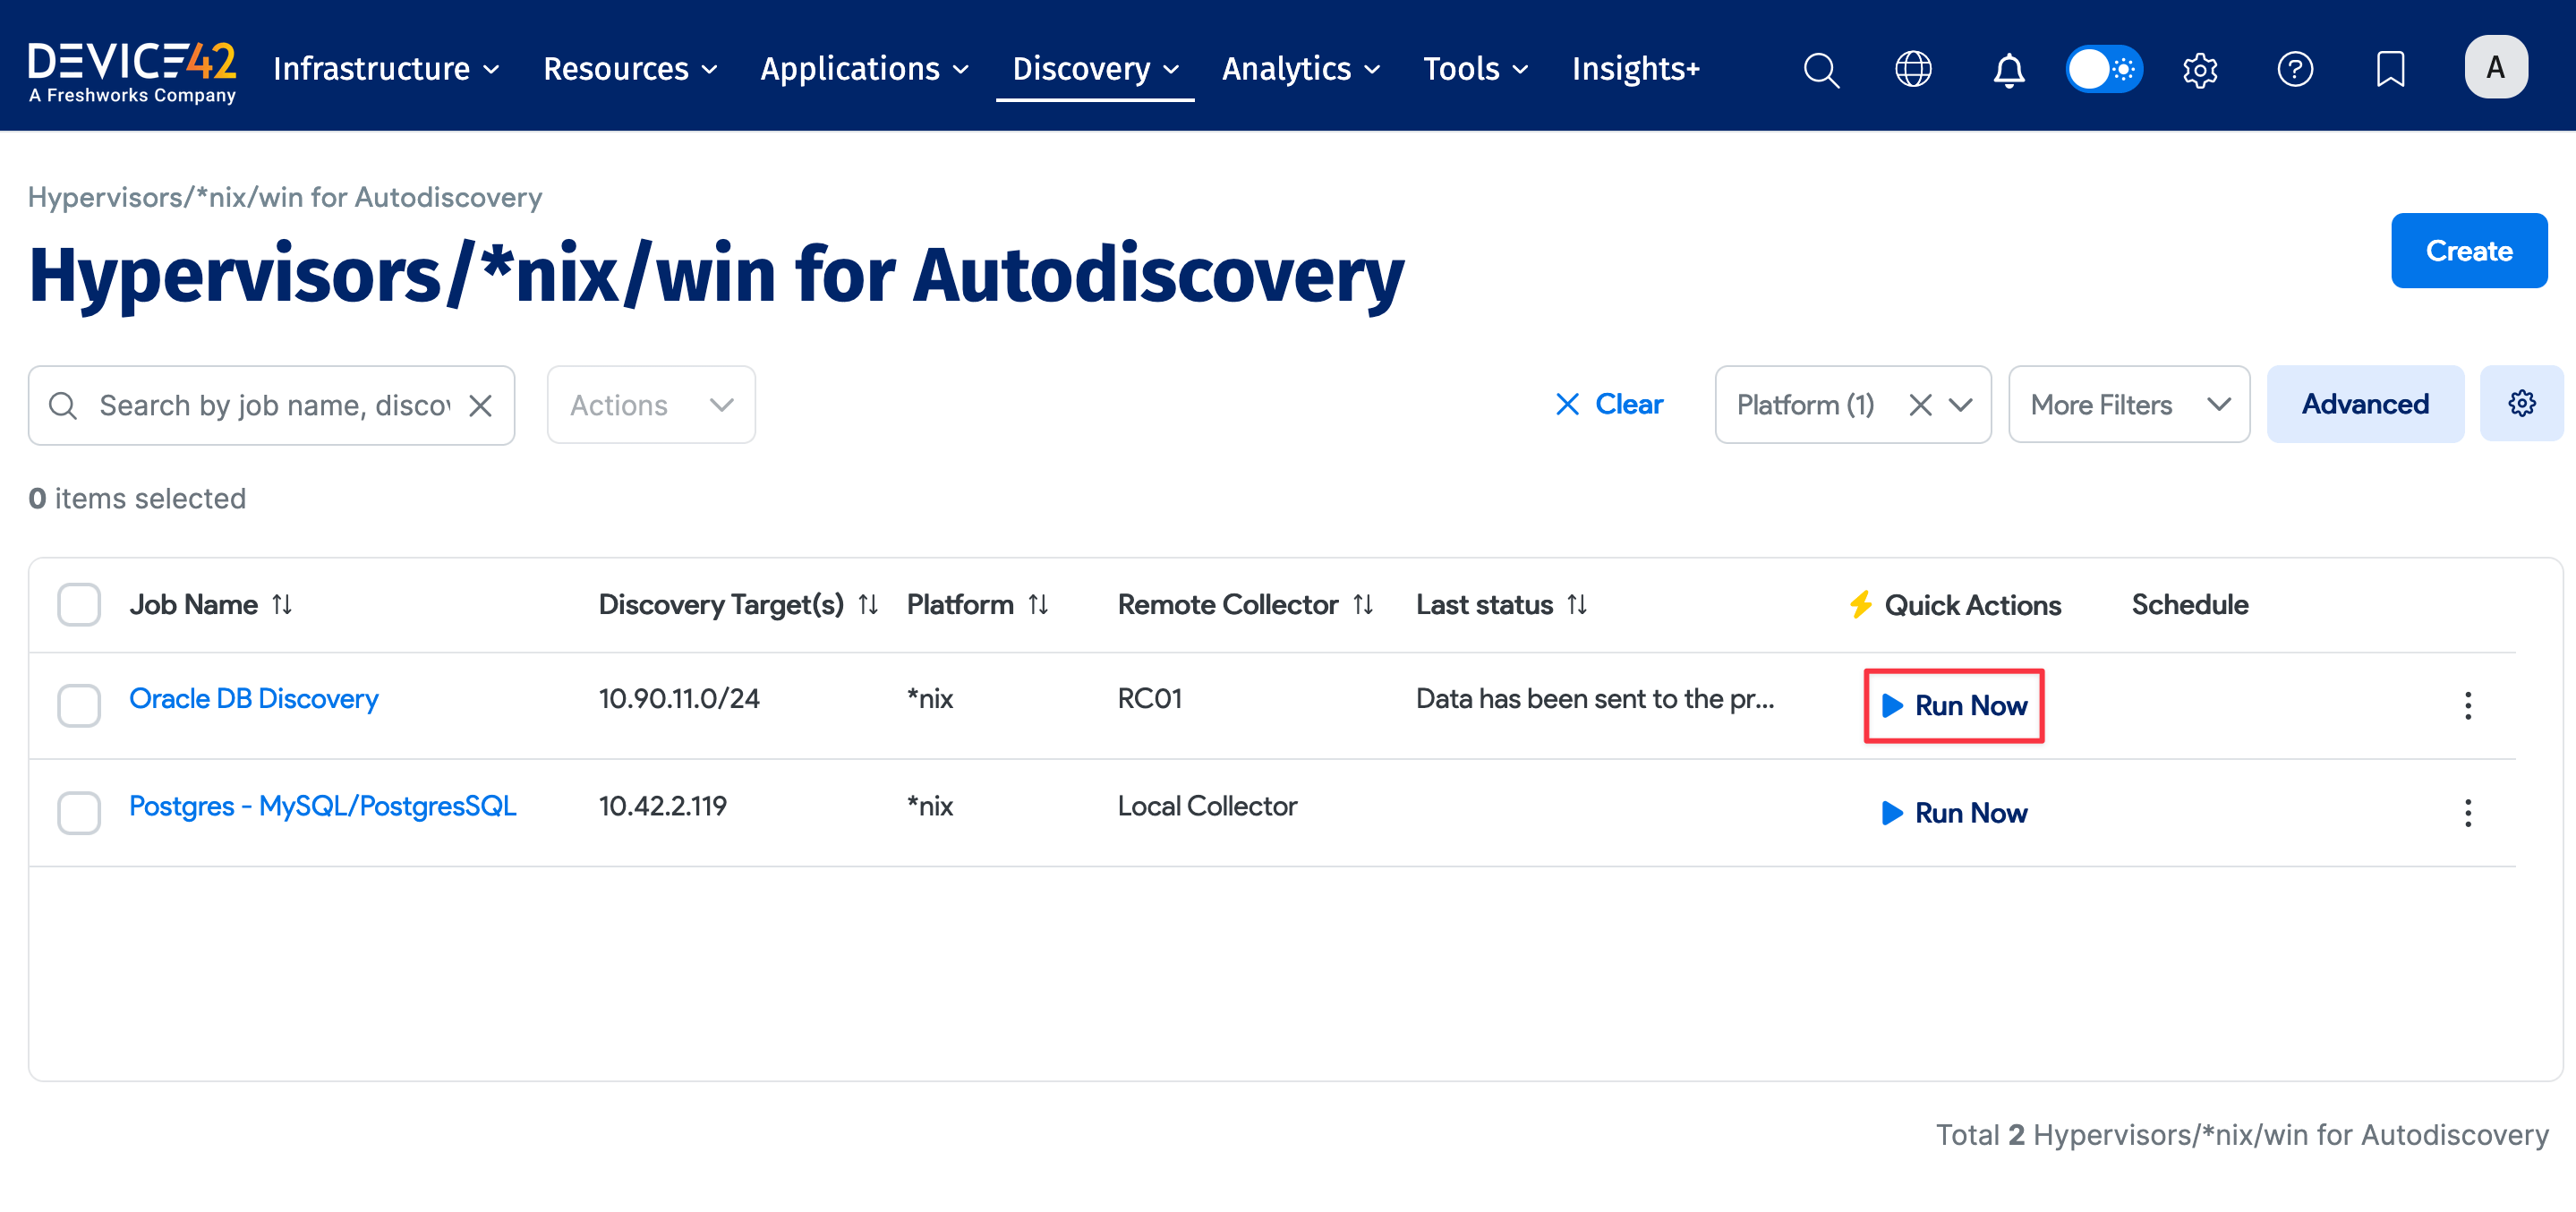

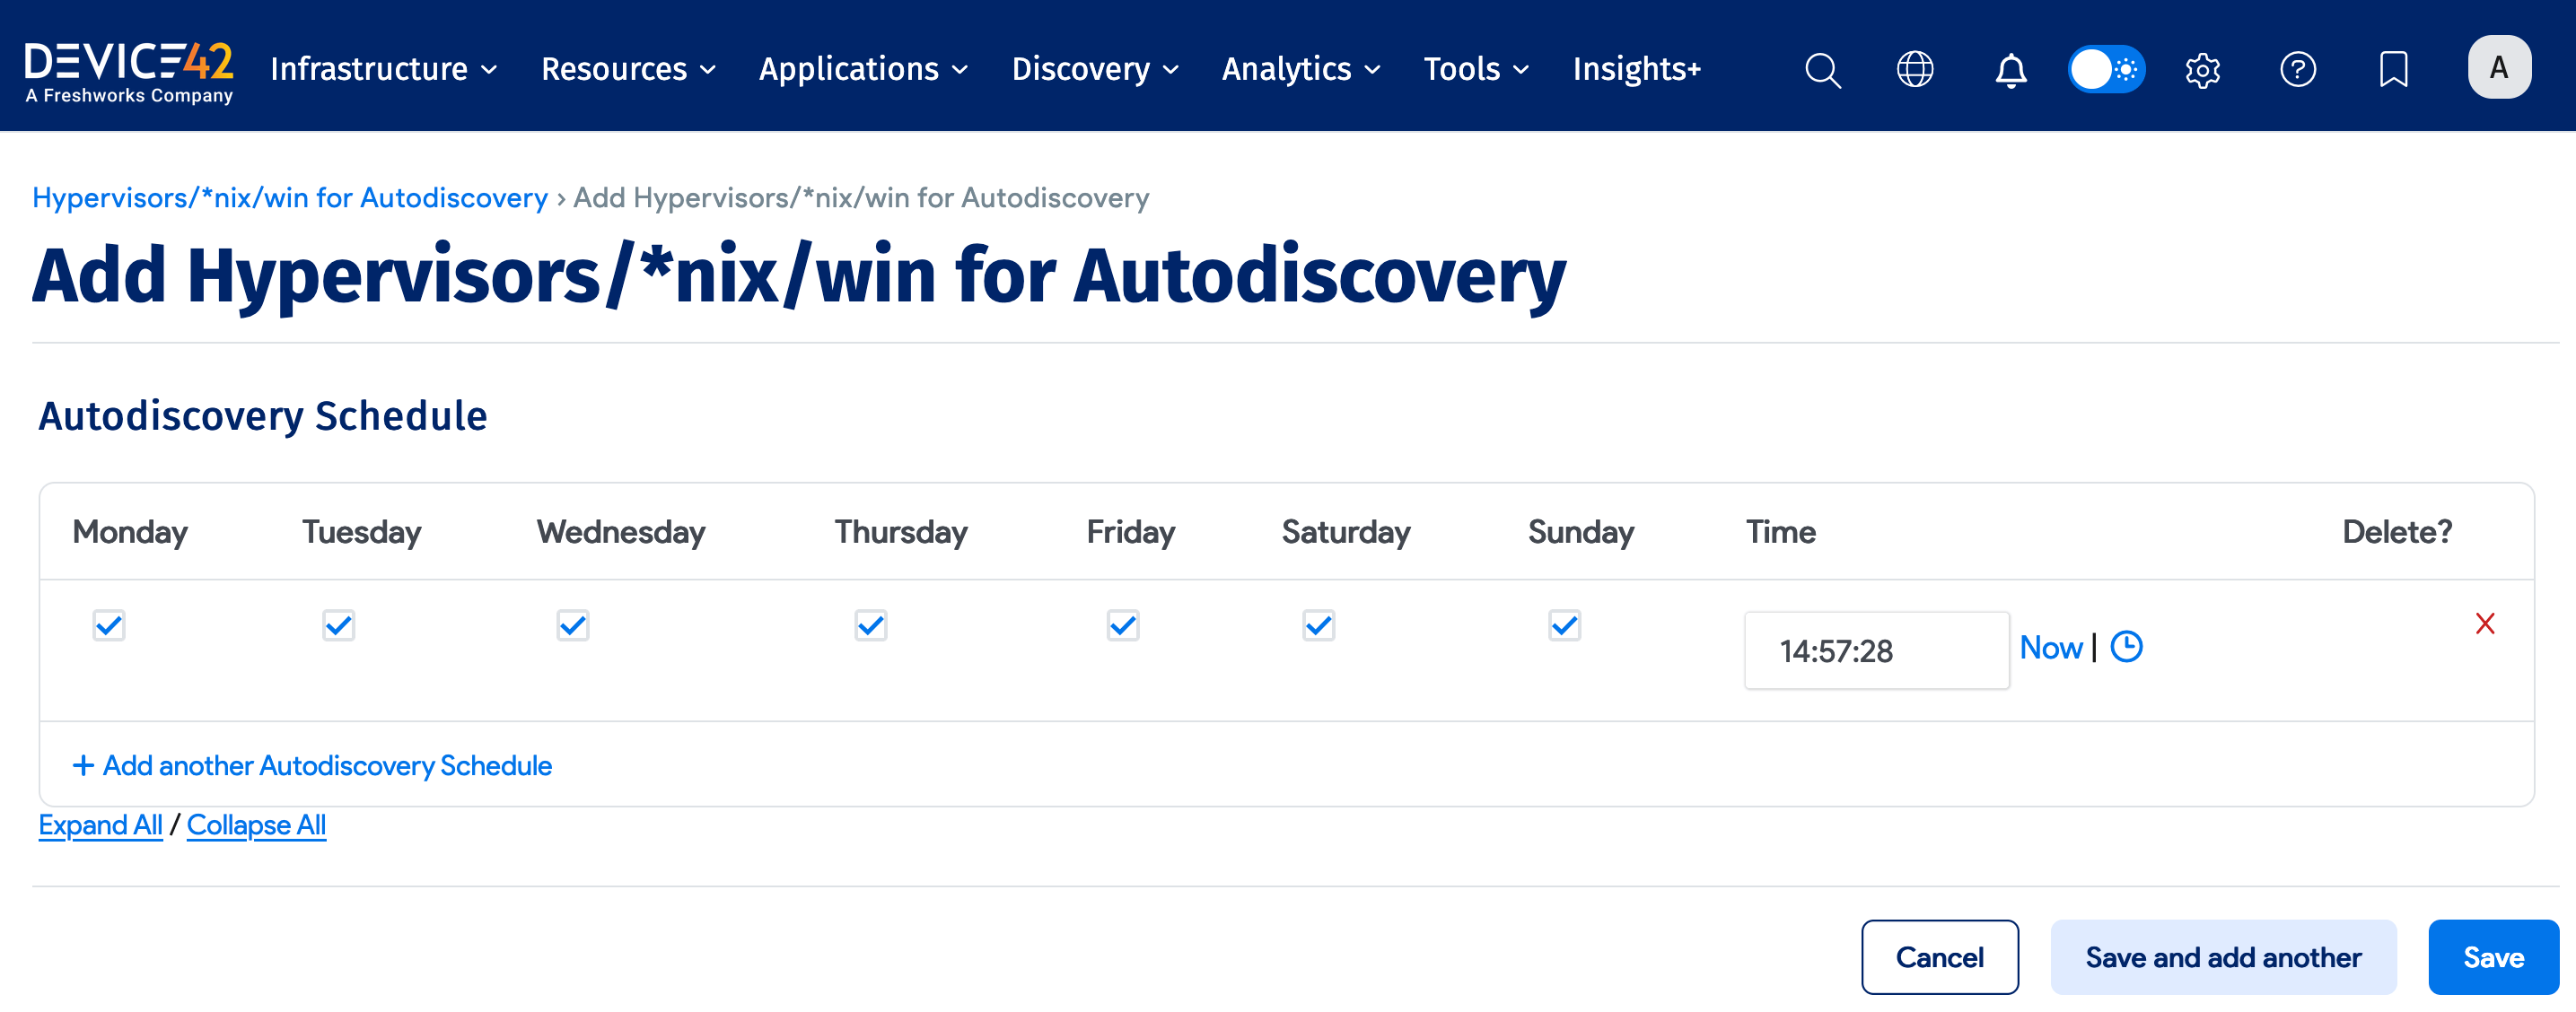
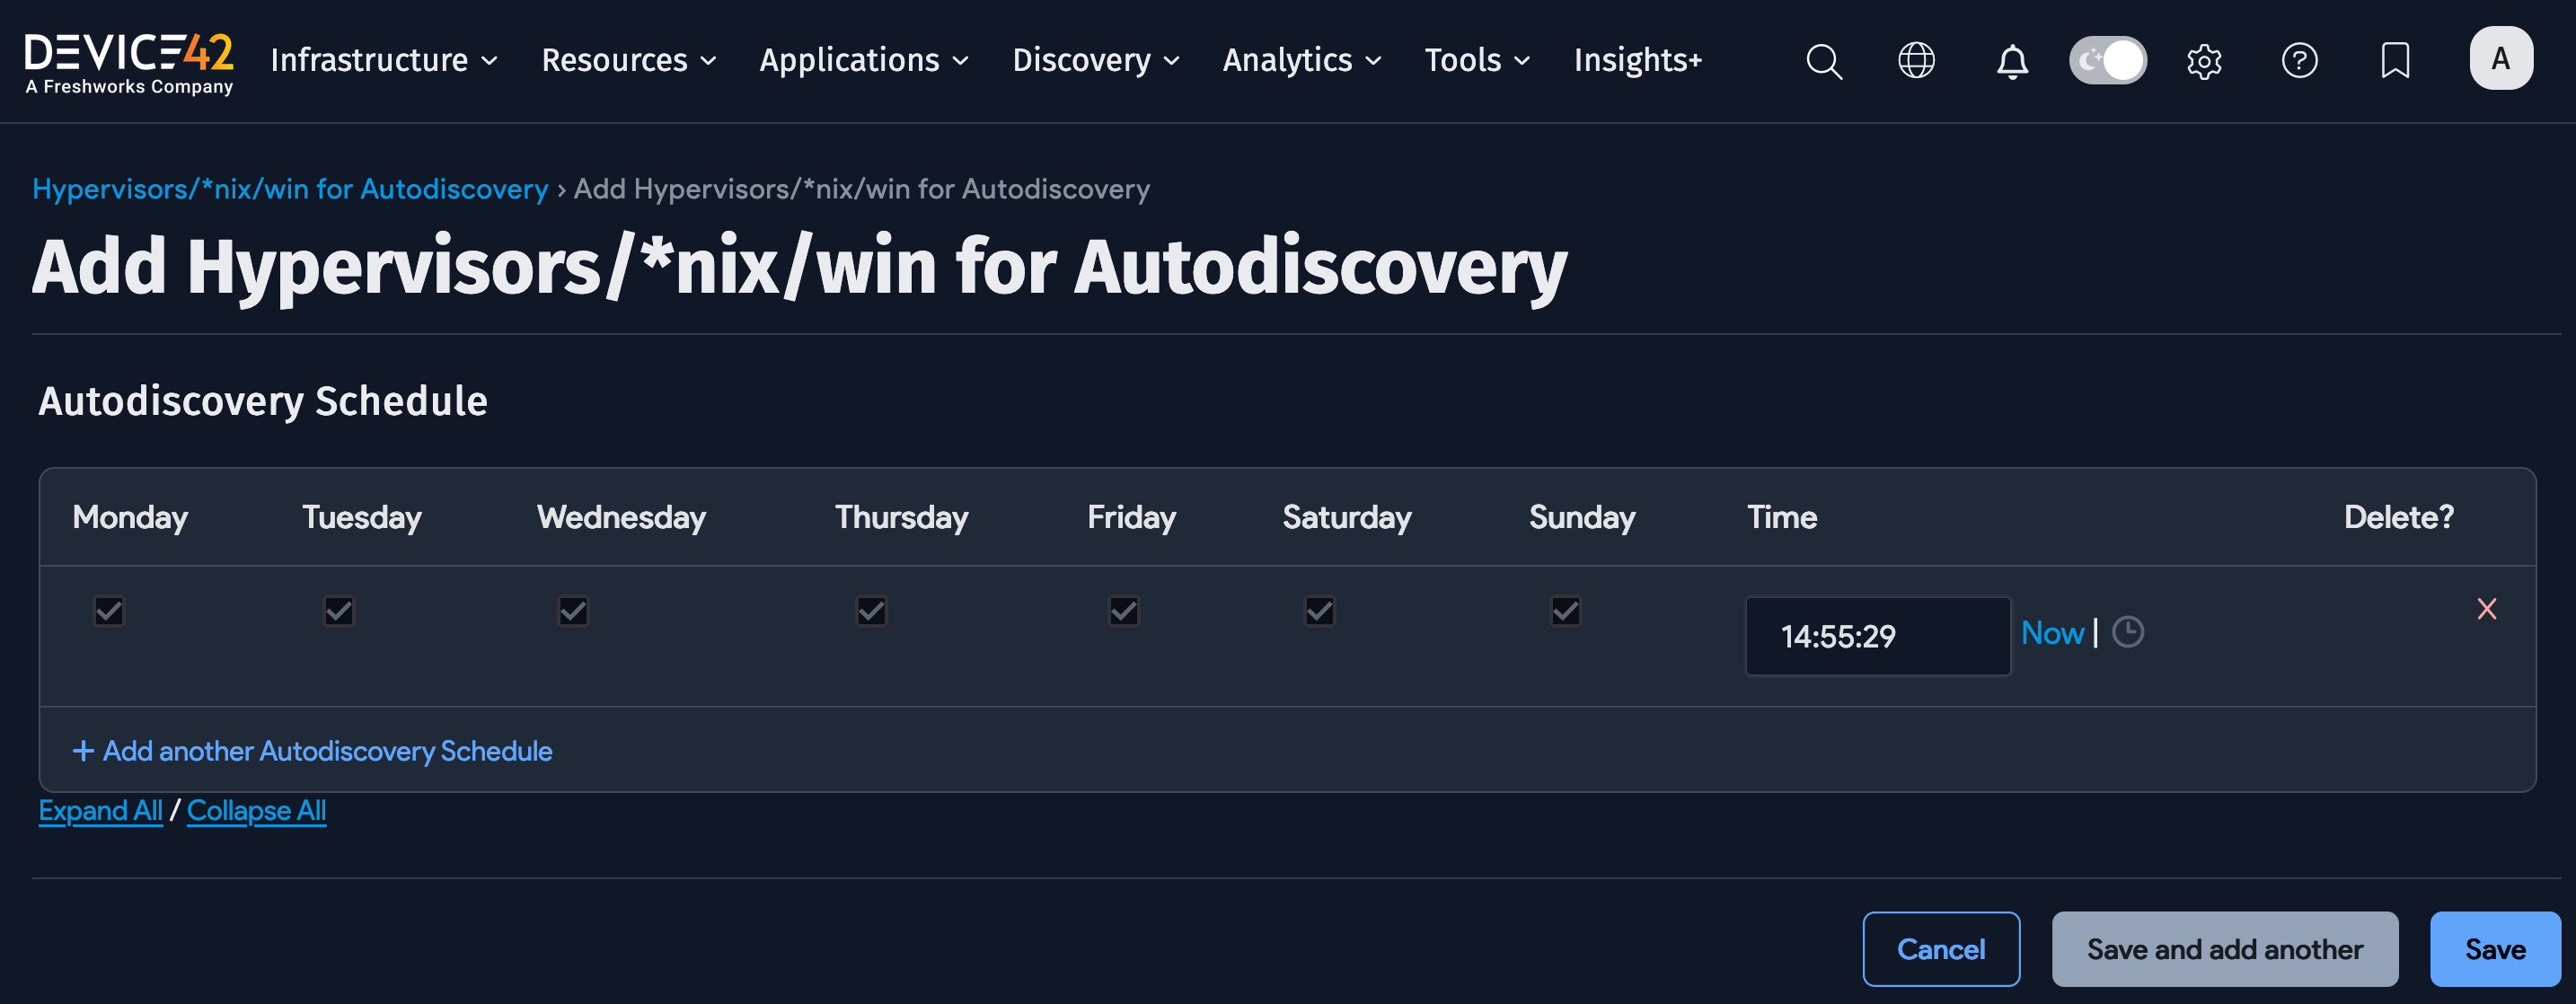
Select Add another Autodiscovery Schedule when editing a job to create a run schedule for the job.
Newly created jobs will not run on the day they are created to prevent an excessive number of jobs running simultaneously. To run a job after creating it, select the Run Now button next to the job.
Linux Considerations
Linux discovery has been tested against Redhat, Debian, CentOS, Ubuntu, and Oracle distributions and should work fine against just about all similar Linux distributions.
Confirm compatibility by checking to see if your platform supports the following commands:
-
Hostname:
/bin/hostname -
Manufacturer, Hardware, and Serial #:
sudo /usr/sbin/dmidecode -s system-manufacturersudo /usr/sbin/dmidecode -s system-product-namesudo /usr/sbin/dmidecode -s system-serial-number -
IP Info:
/sbin/ifconfig -a -
Memory:
cat /proc/meminfo -
CPU Info:
sudo /usr/sbin/dmidecode
Linux Permissions
Several commands run as part of the Linux discovery process typically require root privileges by default. Device42 does extensive testing to see which commands can run without sudo while still obtaining all available information.
The following table lists commands that Device42 sometimes or always runs with sudo. For the "Sometimes" commands, Device42 first tries to run the command without sudo. If the response is "permission denied" rather than "invalid command" or "command not found", Device42 attempts the command with sudo. This list also specifies whether the command runs on every Linux or UNIX flavor, or only certain platforms:
| Command | Run with sudo? | OS flavor |
|---|---|---|
adb | Sometimes | Linux |
cat | Sometimes | All |
cd | Sometimes | All |
chkconfig | Sometimes | Linux |
crontab | Always | All |
cstm | Sometimes | HP-UX |
dataserver | Sometimes | All |
dmidecode | Sometimes | Linux:Freebsd:OpenBSD:Mac |
dmesg | Sometimes | Linux:Debian:OracleLinux:HPUX |
docker | Always | Linux |
echo | Sometimes | Linux |
exportfs | Sometimes | All |
fcinfo | Always | Solaris |
fdisk | Always | All |
find | Sometimes | Linux:FreeBSD:OpenBSD |
format | Always | Solaris |
grep | Sometimes | All |
hadoop | Sometimes | All |
hdparm | Sometimes | All |
hdfs | Sometimes | All |
ioscan | Sometimes | HPUX |
iptables | Always | lxc |
kdb | Sometimes | Aix |
last | Always | MacOS |
ls | Sometimes | All |
lslpp | Sometimes | Aix |
lsof | Always | All |
lspci | Always | All |
lxc-attach | Always | Linux |
lxc-ls | Always | Linux |
netstat | Sometimes | All |
pfiles | Always | Solaris |
print_manifest | Sometimes | HPUX |
pwdx | Sometimes | All |
showmount | Sometimes | Linux |
ss | Sometimes | All |
su $oracle_user | Sometimes | Discovers Oracle application information by running necessary commands as the Oracle user |
su $sap_hana_user | Sometimes | Discovers SAP HANA application information by running necessary commands as the SAP user |
SYBASE.sh | Sometimes | All |
system_profiler | Sometimes | MacOS |
systemctl | Sometimes | All |
systool | Always | All |
swlist | Sometimes | HPUX |
virsh | Always | Linux |
vzctl | Always | Linux |
vzlist | Sometimes | Aix |
zlogin | Always | Solaris (For Zones) |
The following example shows how to allow a particular user or group to run a specific sudo command without being prompted for a password:
%your-group-here ALL = (ALL) NOPASSWD:/usr/sbin/dmidecode, /sbin/hdparm, /sbin/fdisk
Adjust the paths as needed to match the location of each program. If these permissions are missing, the discovery client cannot discover hardware, manufacturer, serial number, and so on, as well as service dependencies and application configuration information. You might also need to comment out Default Require tty in the /etc/sudoers file.
SUDO PATH in Non-Interactive Shells
If you have a Linux discovery where Device42 uses a non-interactive shell, Device42 may try the commands multiple times because the PATH is not set in non-interactive shells.
You can set that information in the sudoers file for the service account to prevent these commands from being executed multiple times. It should be there by default, but sometimes it's commented out or removed for security hardening.
This is not a bug, but some deployments may see security alerts for invalid commands being executed because of this.
The sudoers file should contain a line as follows:
Defaults secure_path="/usr/local/sbin:/usr/local/bin:/usr/sbin:/usr/bin:/sbin:/bin:/snap/bin"
You could alternatively make the defaults particular to just the discovery account like so:
Defaults:DISCOVERY_ACCOUNT

secure_path="/usr/local/sbin:/usr/local/bin:/usr/sbin:/usr/bin:/sbin:/bin:/snap/bin"