Database Discovery
Device42 database discovery detects and catalogs database instances running in your environment, including Microsoft SQL (MSSQL), Oracle, PostgreSQL, and DB2. Discovery runs through Windows and *nix-based discovery jobs and returns instance details, connection information, and schema data.
This page covers supported database versions, permission requirements, job setup for each database type, and how to view discovery results.
Database discovery requires an Application Dependency Mapping license. Go to Tools > Settings > Licensing to see if the license is enabled. Contact support@device42.com for licensing assistance.
By default, the target machine ports are defined by the database vendors as follows:
- Microsoft SQL (MSSQL): 1433
- IBM DB2: 50000
- Postgres: 5432
- Oracle: 1521
Dynamic discovery detects which ports to use. Device42 supports MSSQL and Oracle database discovery for customers with database instances configured to listen on non-standard ports, especially on shared database servers that host multiple instances. During database discovery, Device42 will identify and connect via the discovered active listening port.
If you want to specify database discovery details yourself, including the database server port, server IP address, and database access credentials, use Database Connections Discovery jobs to discover databases.
Discovery Exclusions
Configure discovery exclusions under Tools > Settings > Global Settings in the Discovery Exclusions section.
If you enable the Ignore DB Login Names setting, database login names will not be collected during database discovery.
You can also specify interfaces, IP addresses, and MAC addresses to be ignored during discovery.
MSSQL Server Database Discovery (on Windows and *nix Targets)
MSSQL server discovery requires a separate set of credentials to authenticate to the database instance. Ensure the discovery credentials have appropriate permissions to view the databases you want to discover.
Device42 supports discovery on Windows and *nix platforms for the following MSSQL versions:
- MSSQL 2005
- MSSQL 2008
- MSSQL 11 on SQL Server 2012
- MSSQL 12 on SQL Server 2014
- MSSQL 13 on SQL Server 2016
- MSSQL 14 on SQL Server 2017
- Cluster MSSQL 12
Minimum Permissions Requirements for MSSQL Discovery
To query the tables below, ensure you have View Server State permissions. For discovery to return detailed information about your database instance, you need read permissions to the following system views:
|
|
The following snippet is necessary for retrieving data from some of the preceding views, such as sys.master_files, even when the user has read permissions enabled:
USE [master];
GO
GRANT VIEW ANY DEFINITION TO [discovery_user];
GO
The discovery user must belong to the administrator's user group to discover databases successfully.
Set Up an MSSQL Discovery Job
Create a new discovery job under Discovery > HyperVisors /*nix /Windows to discover MSSQL databases. Use a Windows or *nix job type depending on your target platform.
Enable database discovery by checking the Collect database server information checkbox.
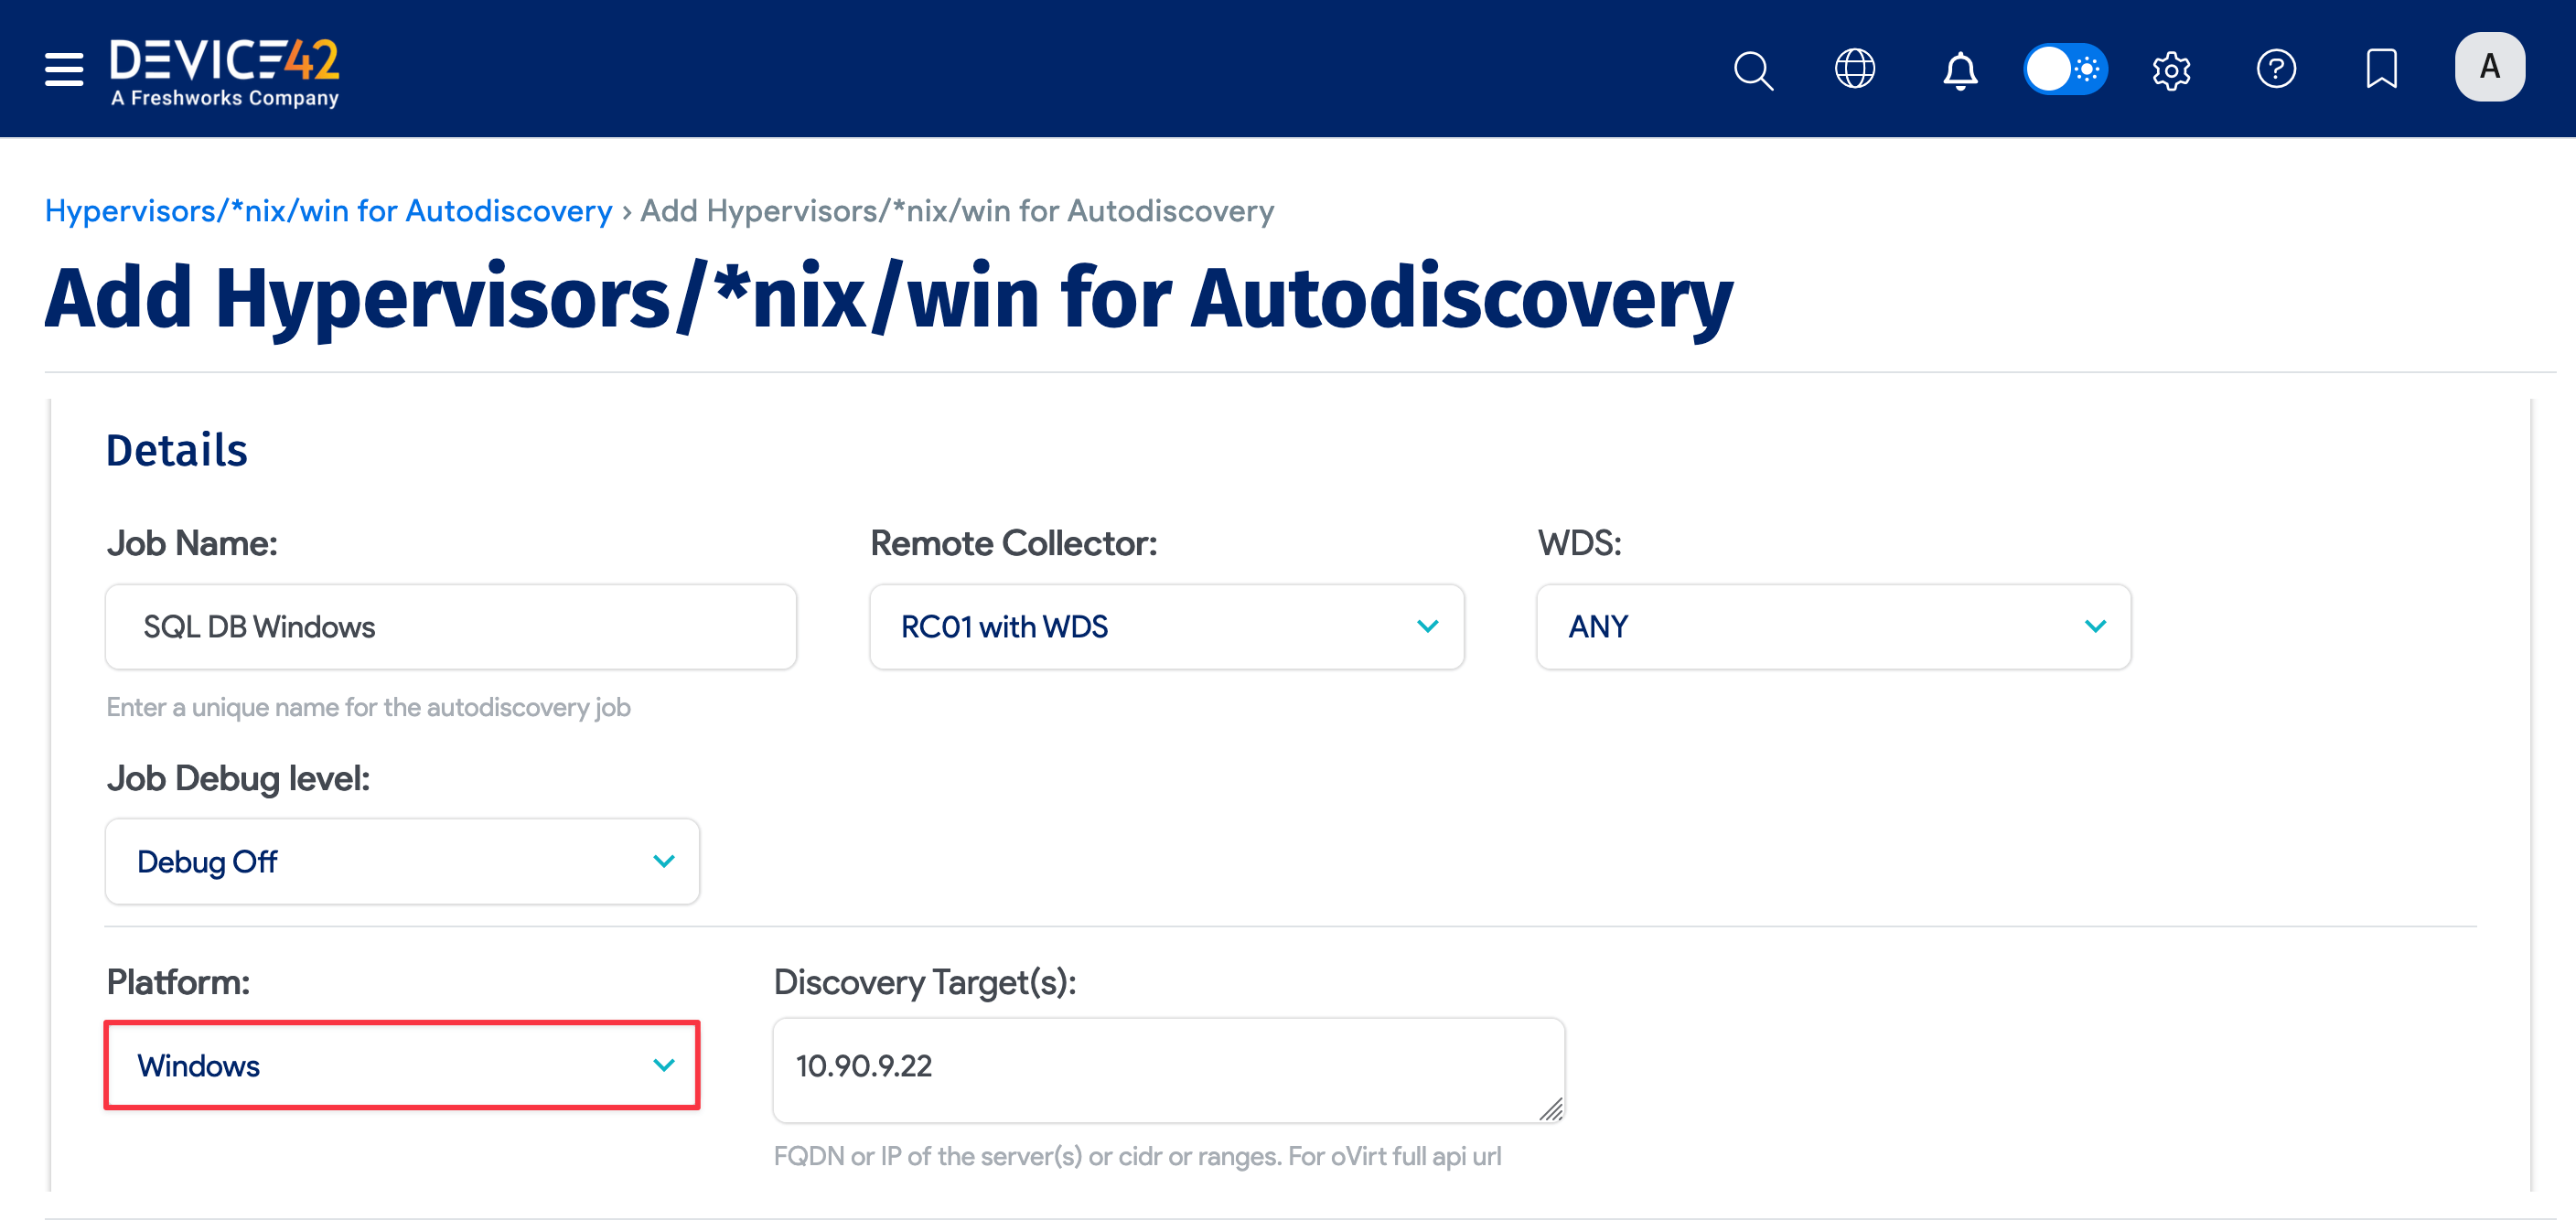
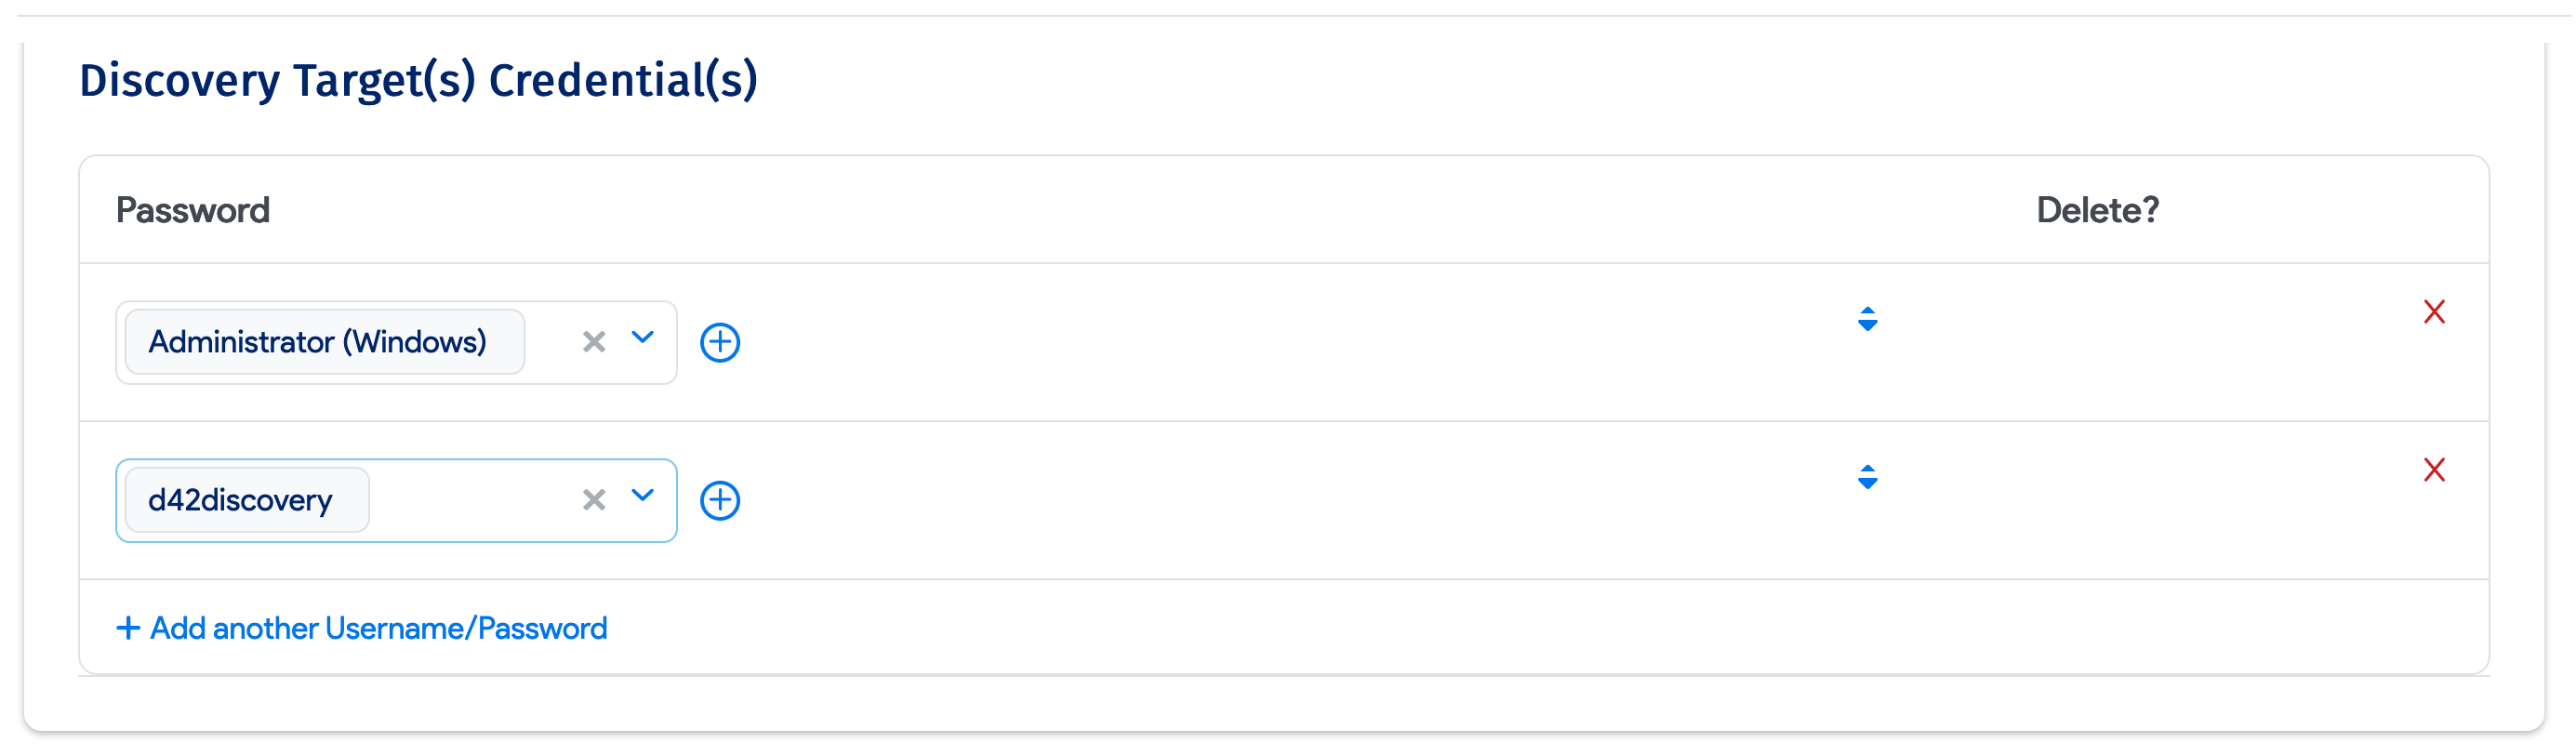
Be sure to fill out both sets of credentials. Two sets of credentials must also be filled out for regular Windows-based discovery targets.
-
Database Username / Password(s): Credentials for authenticating to the Microsoft SQL database itself.


-
Discovery Target(s) Credential(s): Credentials for authenticating to the Windows server. You can enter multiple credentials in a preferred order. The job tries each credential in order and stops at the first successful authentication. Subsequent runs start with the last successful credential.
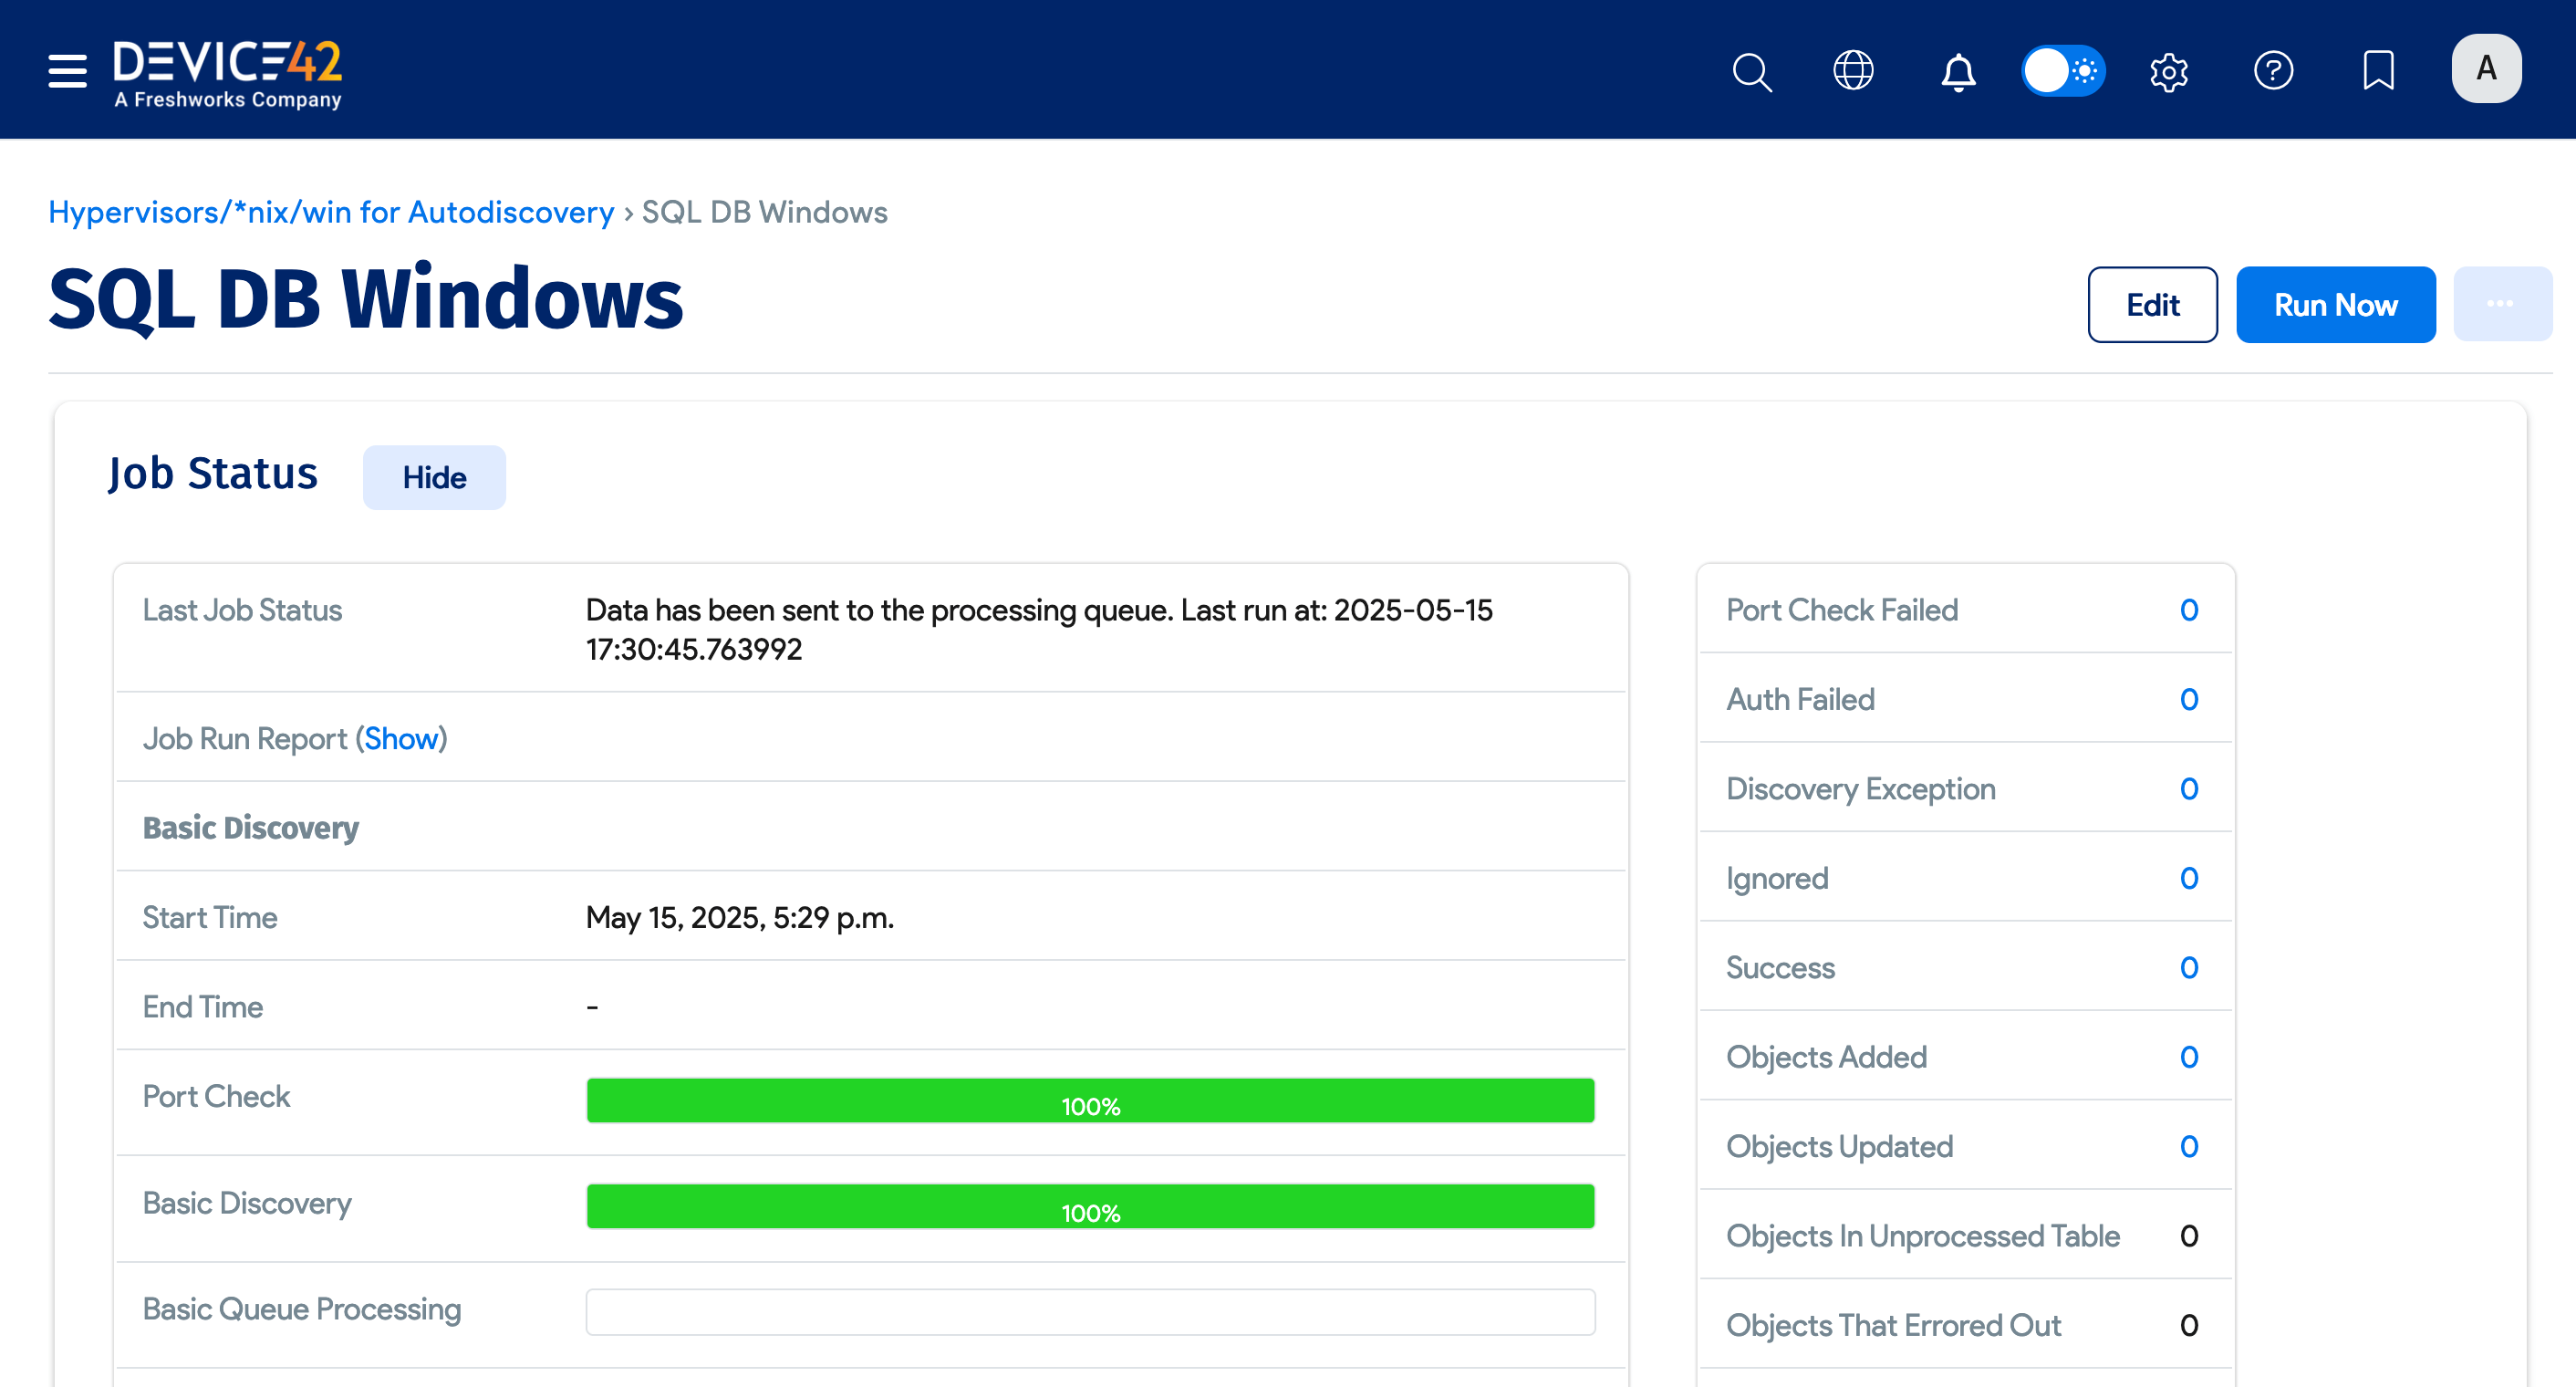
Run the discovery job to test it by clicking Run Now from the discovery jobs list.
As MSSQL databases are detected, discovery will import a list of all the instances, databases, and connection details it finds.
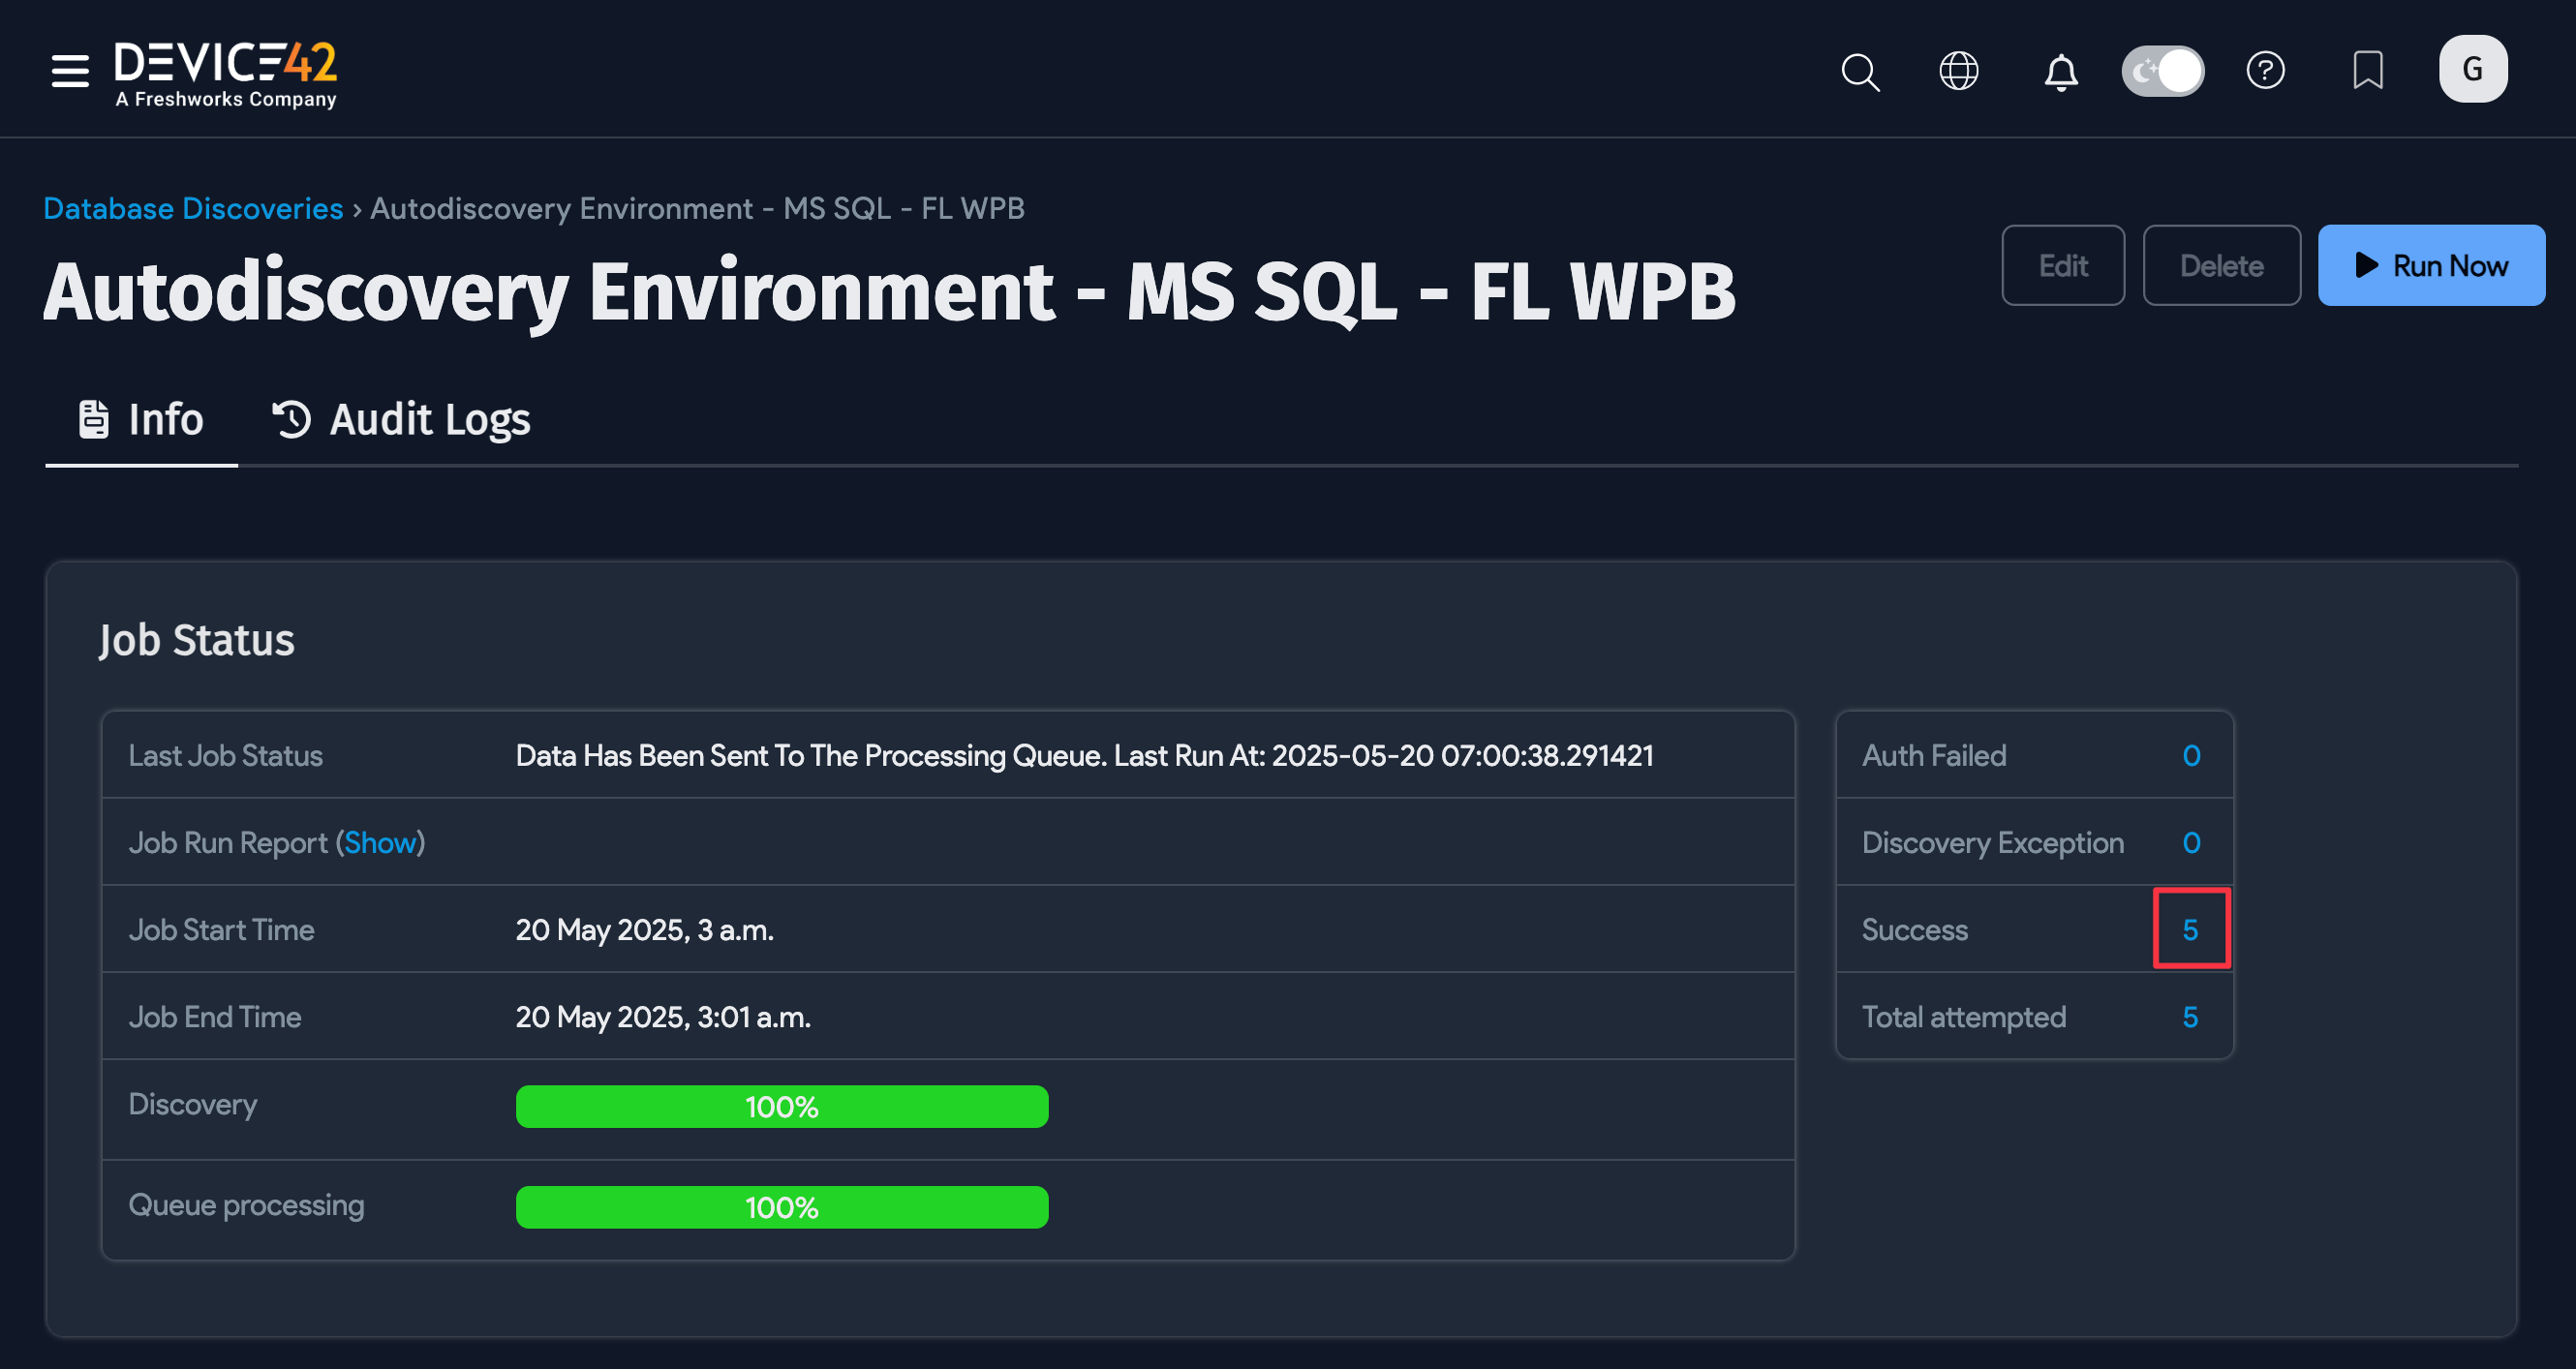
You can see the status of the discovery job on the job setup page. Scroll down to the Job Status section and look for the bar graphs.
View MSSQL Discovery Job Results
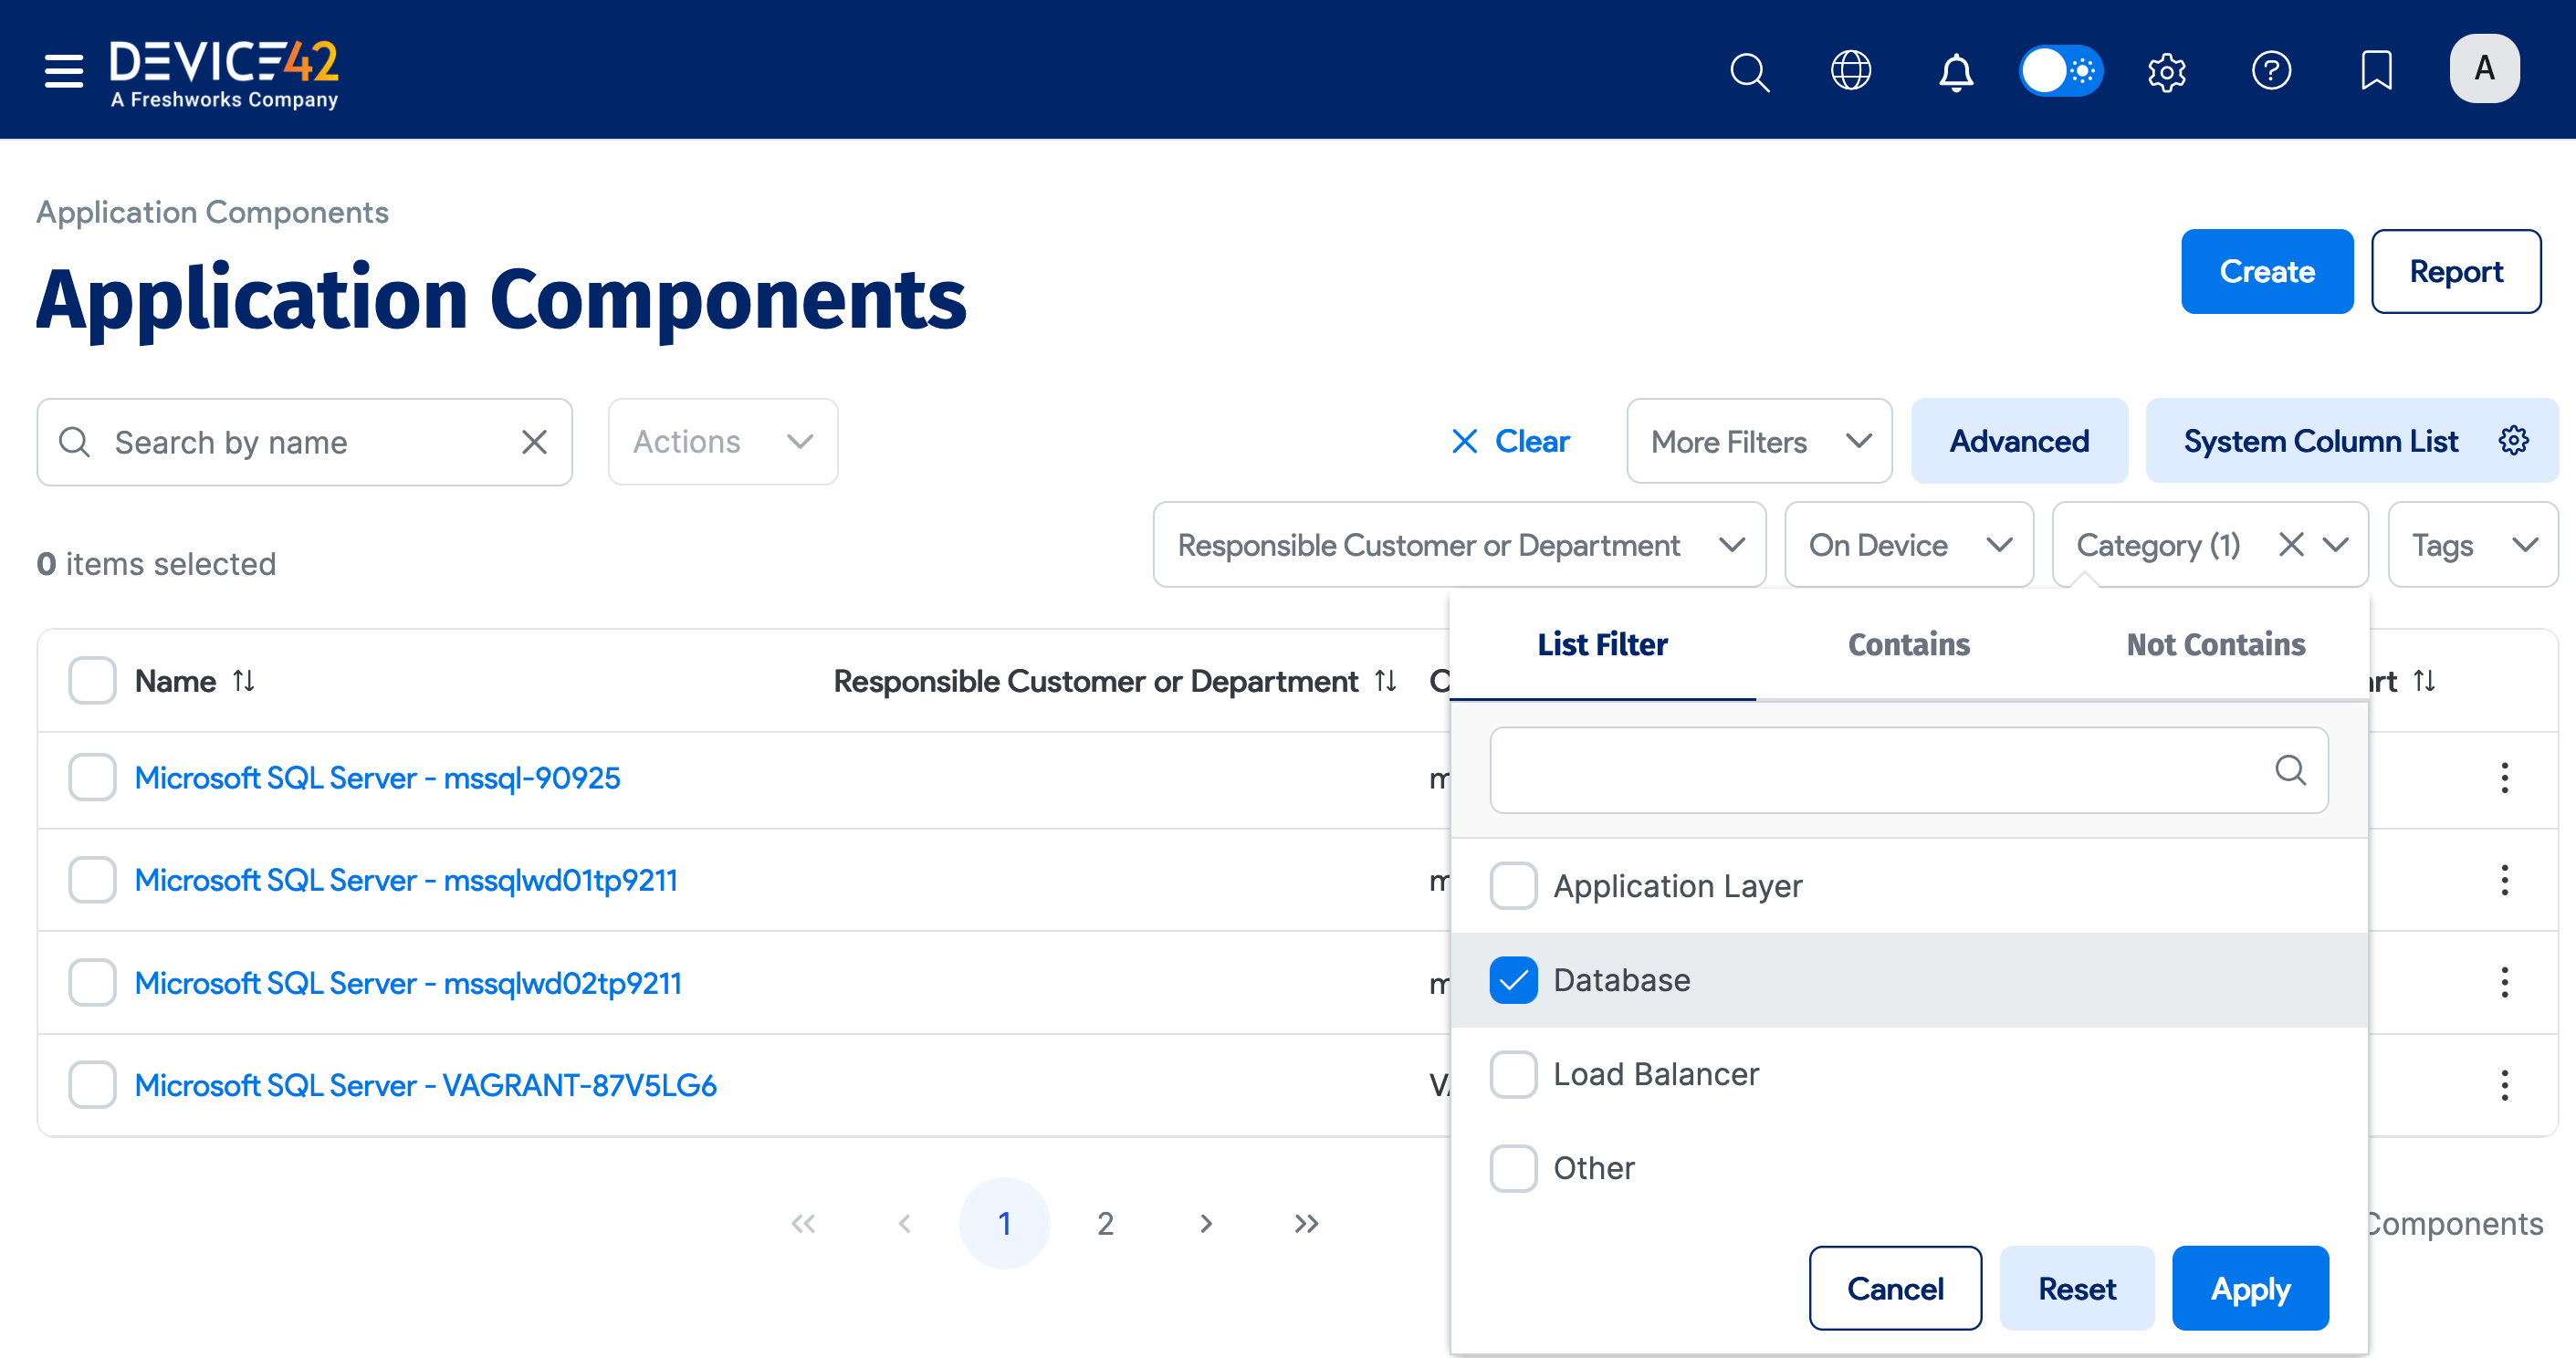
Once the job finishes, there are multiple ways to view the results. The most direct method is to view the discovered MSSQL application components. Navigate to Applications > Application Components. If you don't see your SQL Server instances at the top of the list, search for "SQL" to narrow down the list.
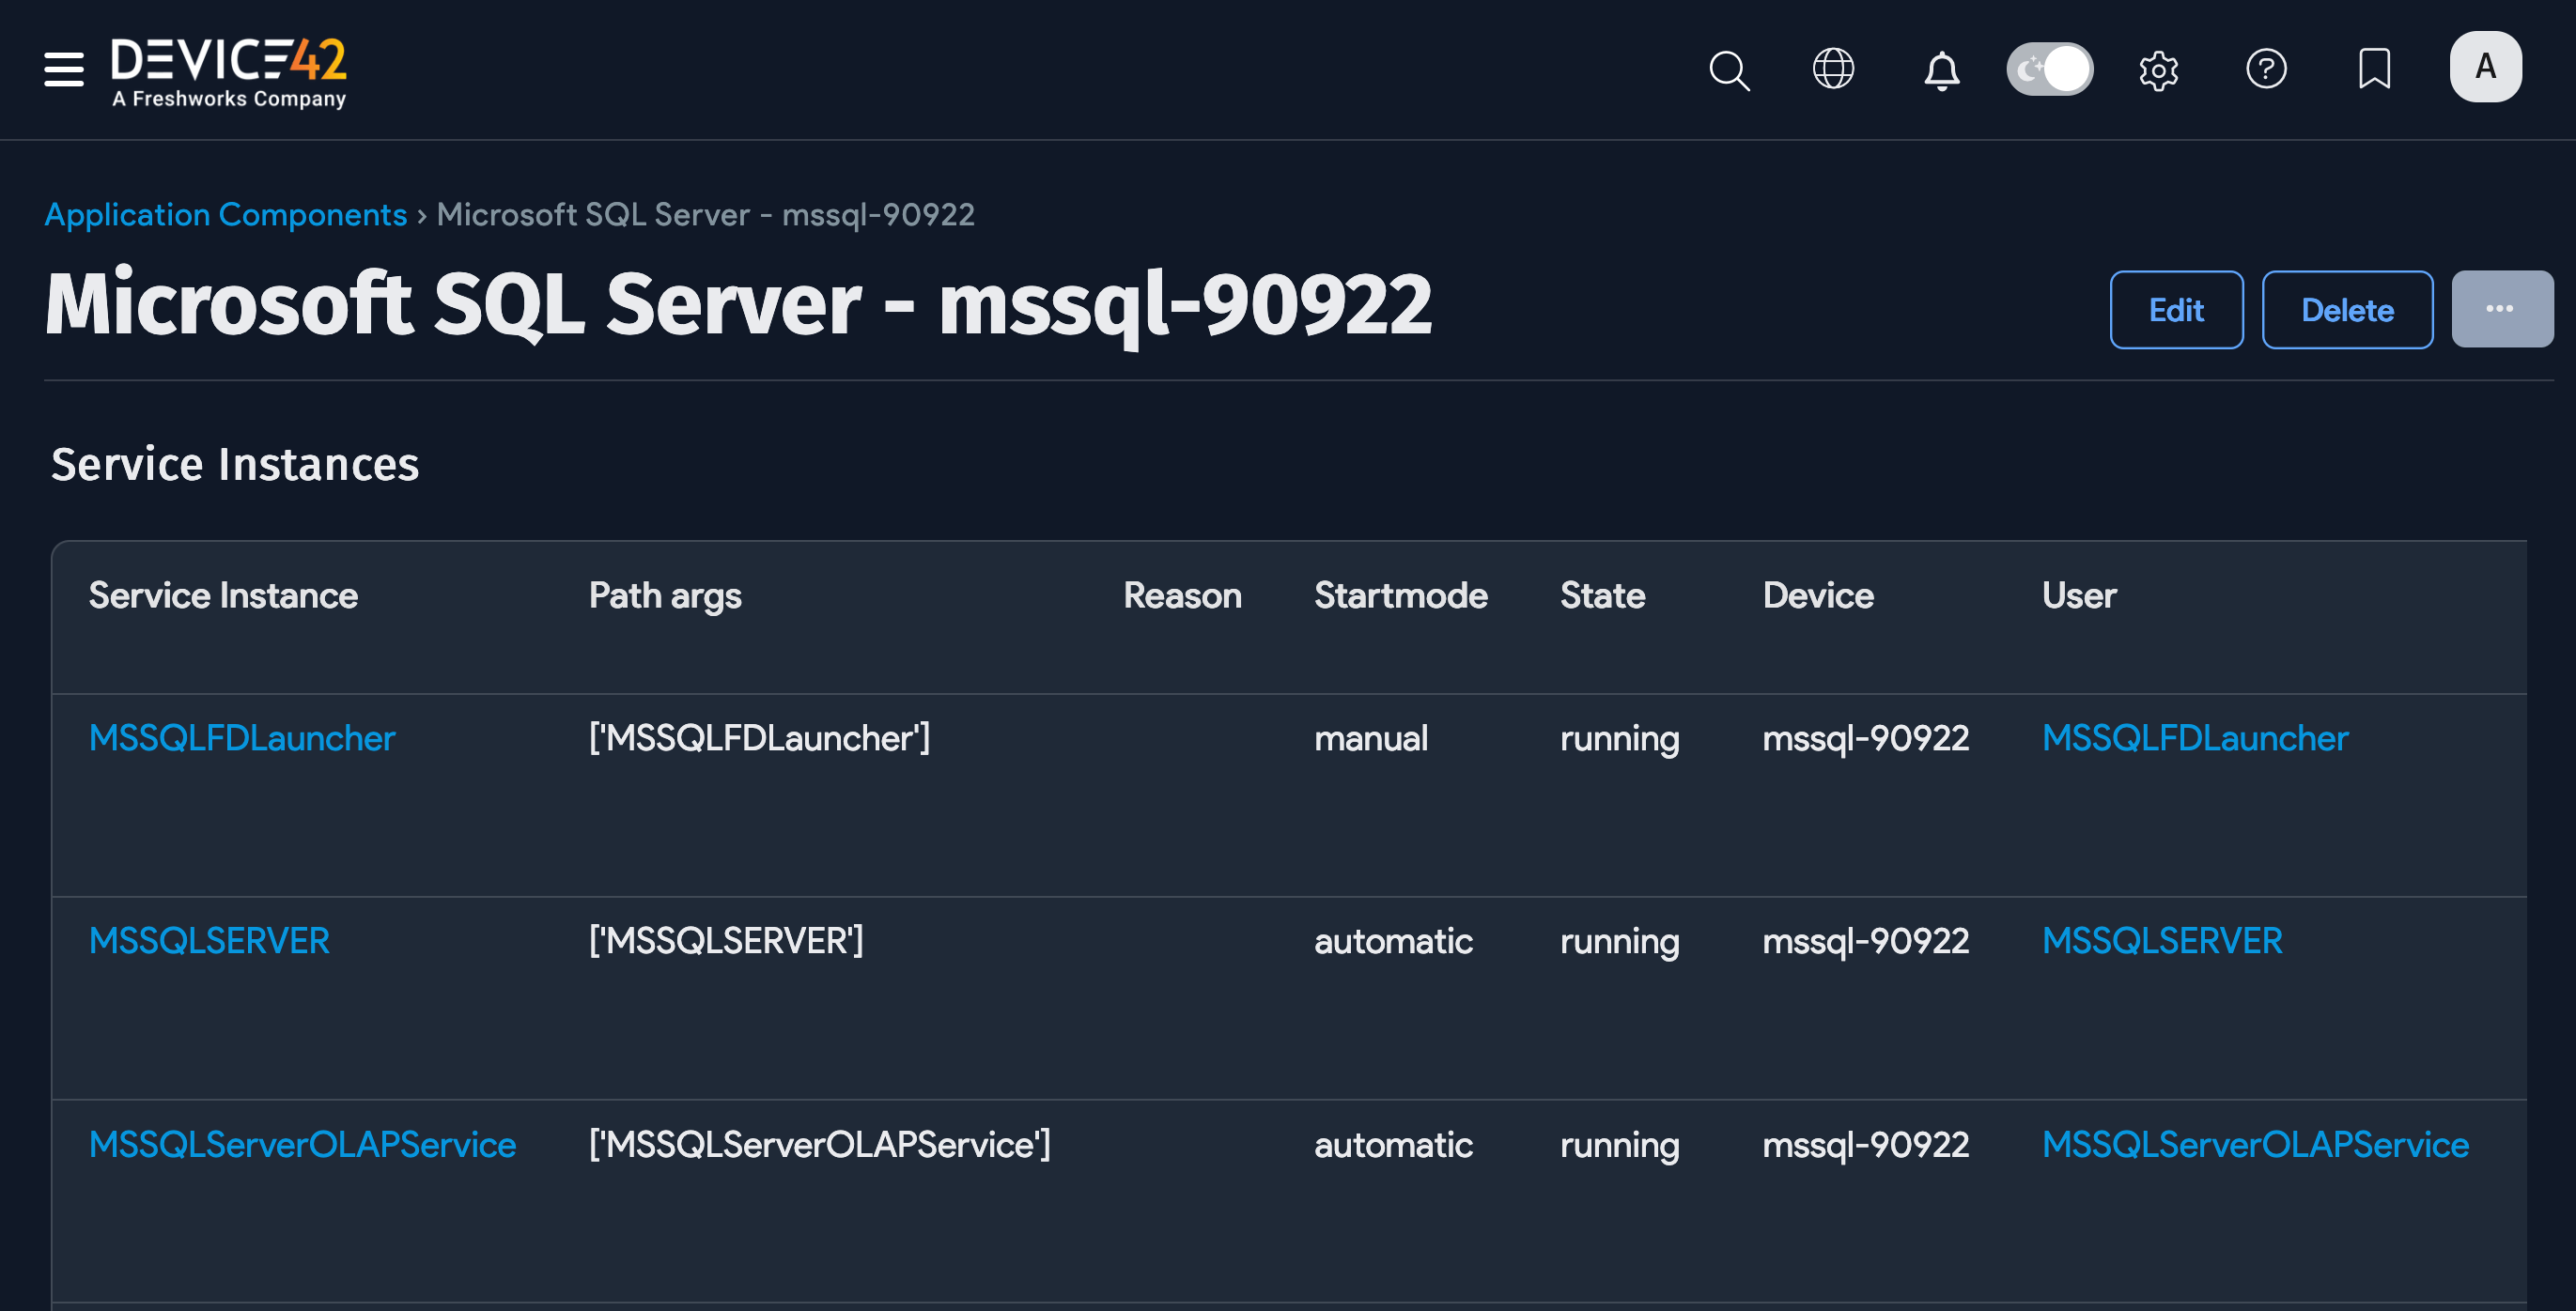
You can see the newly discovered SQL Server instances in the example below. Click on the Name of one of the application components to view more details.
Scroll to the Application Components section at the bottom of the page and click the database instance name to view database details.

For a rundown of the database details that discovery provides, jump to the Available SQL Database Instance Information section.
View SQL Database Details From the Device Record
You can also view results by navigating to the discovered Windows server instance's CI. Search for the device from the dashboard, via Devices > All Devices, or go to Analytics > Discovery Scores and search for your discovery job.
-
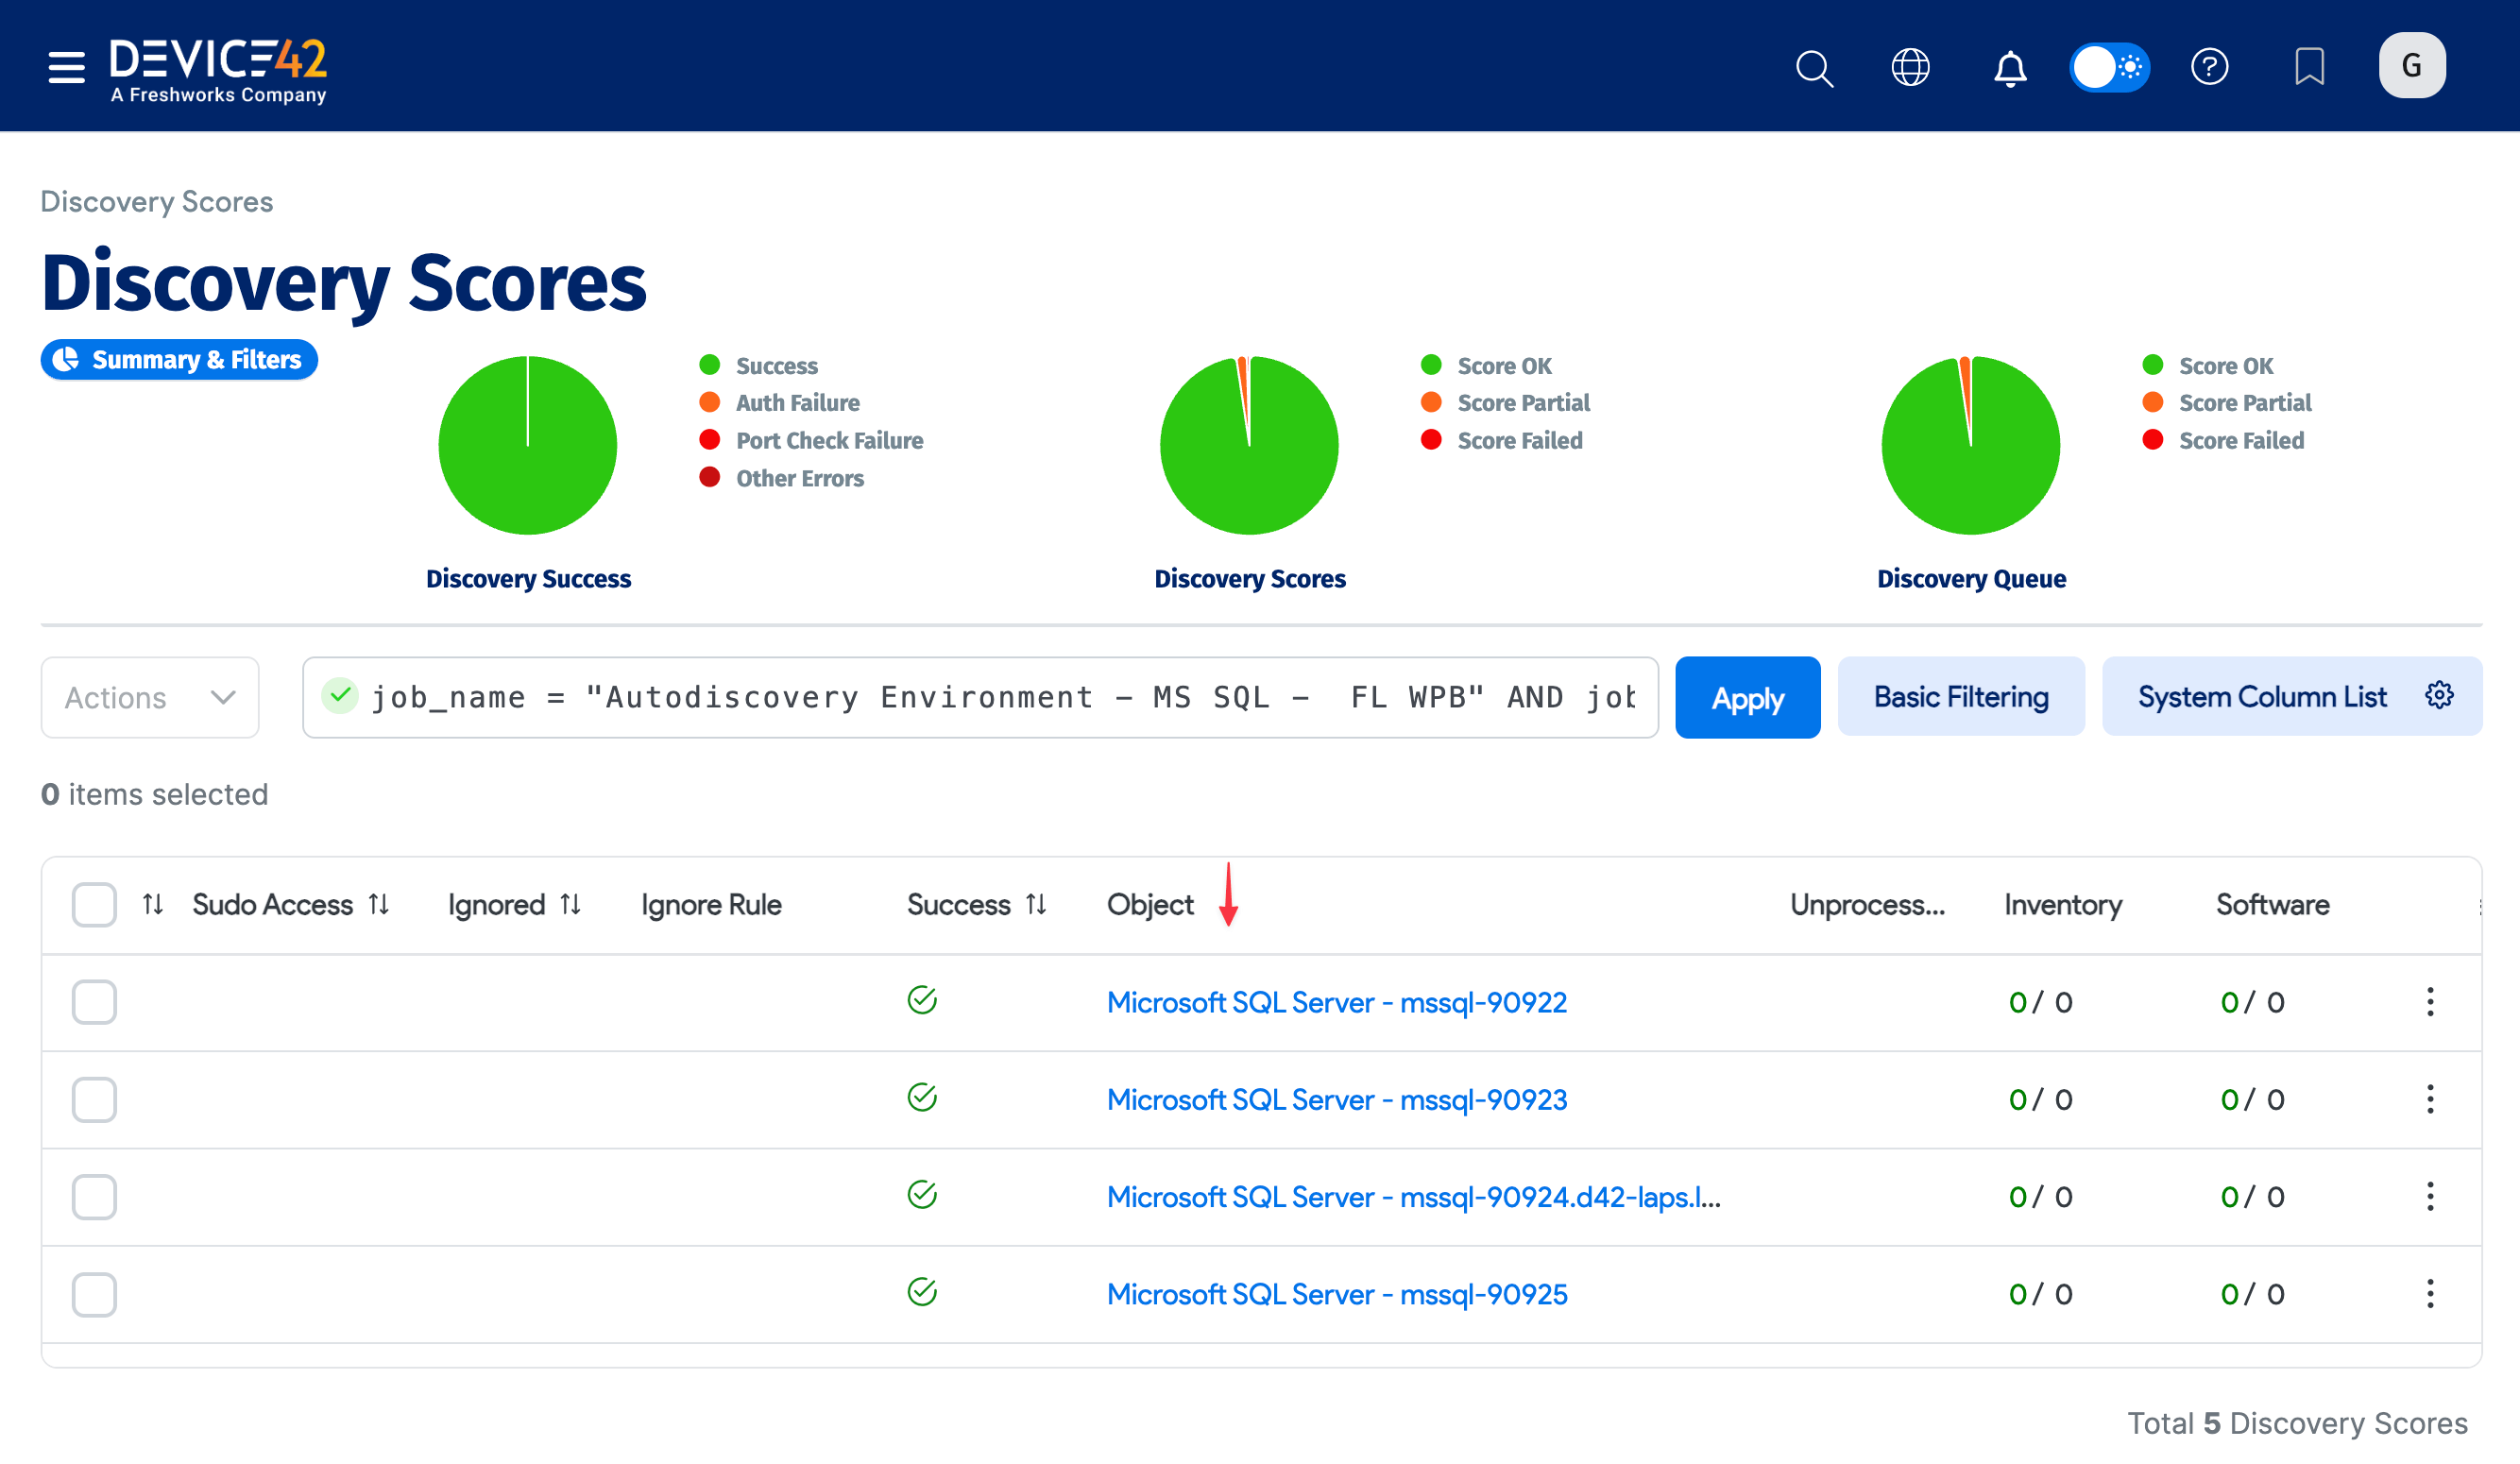
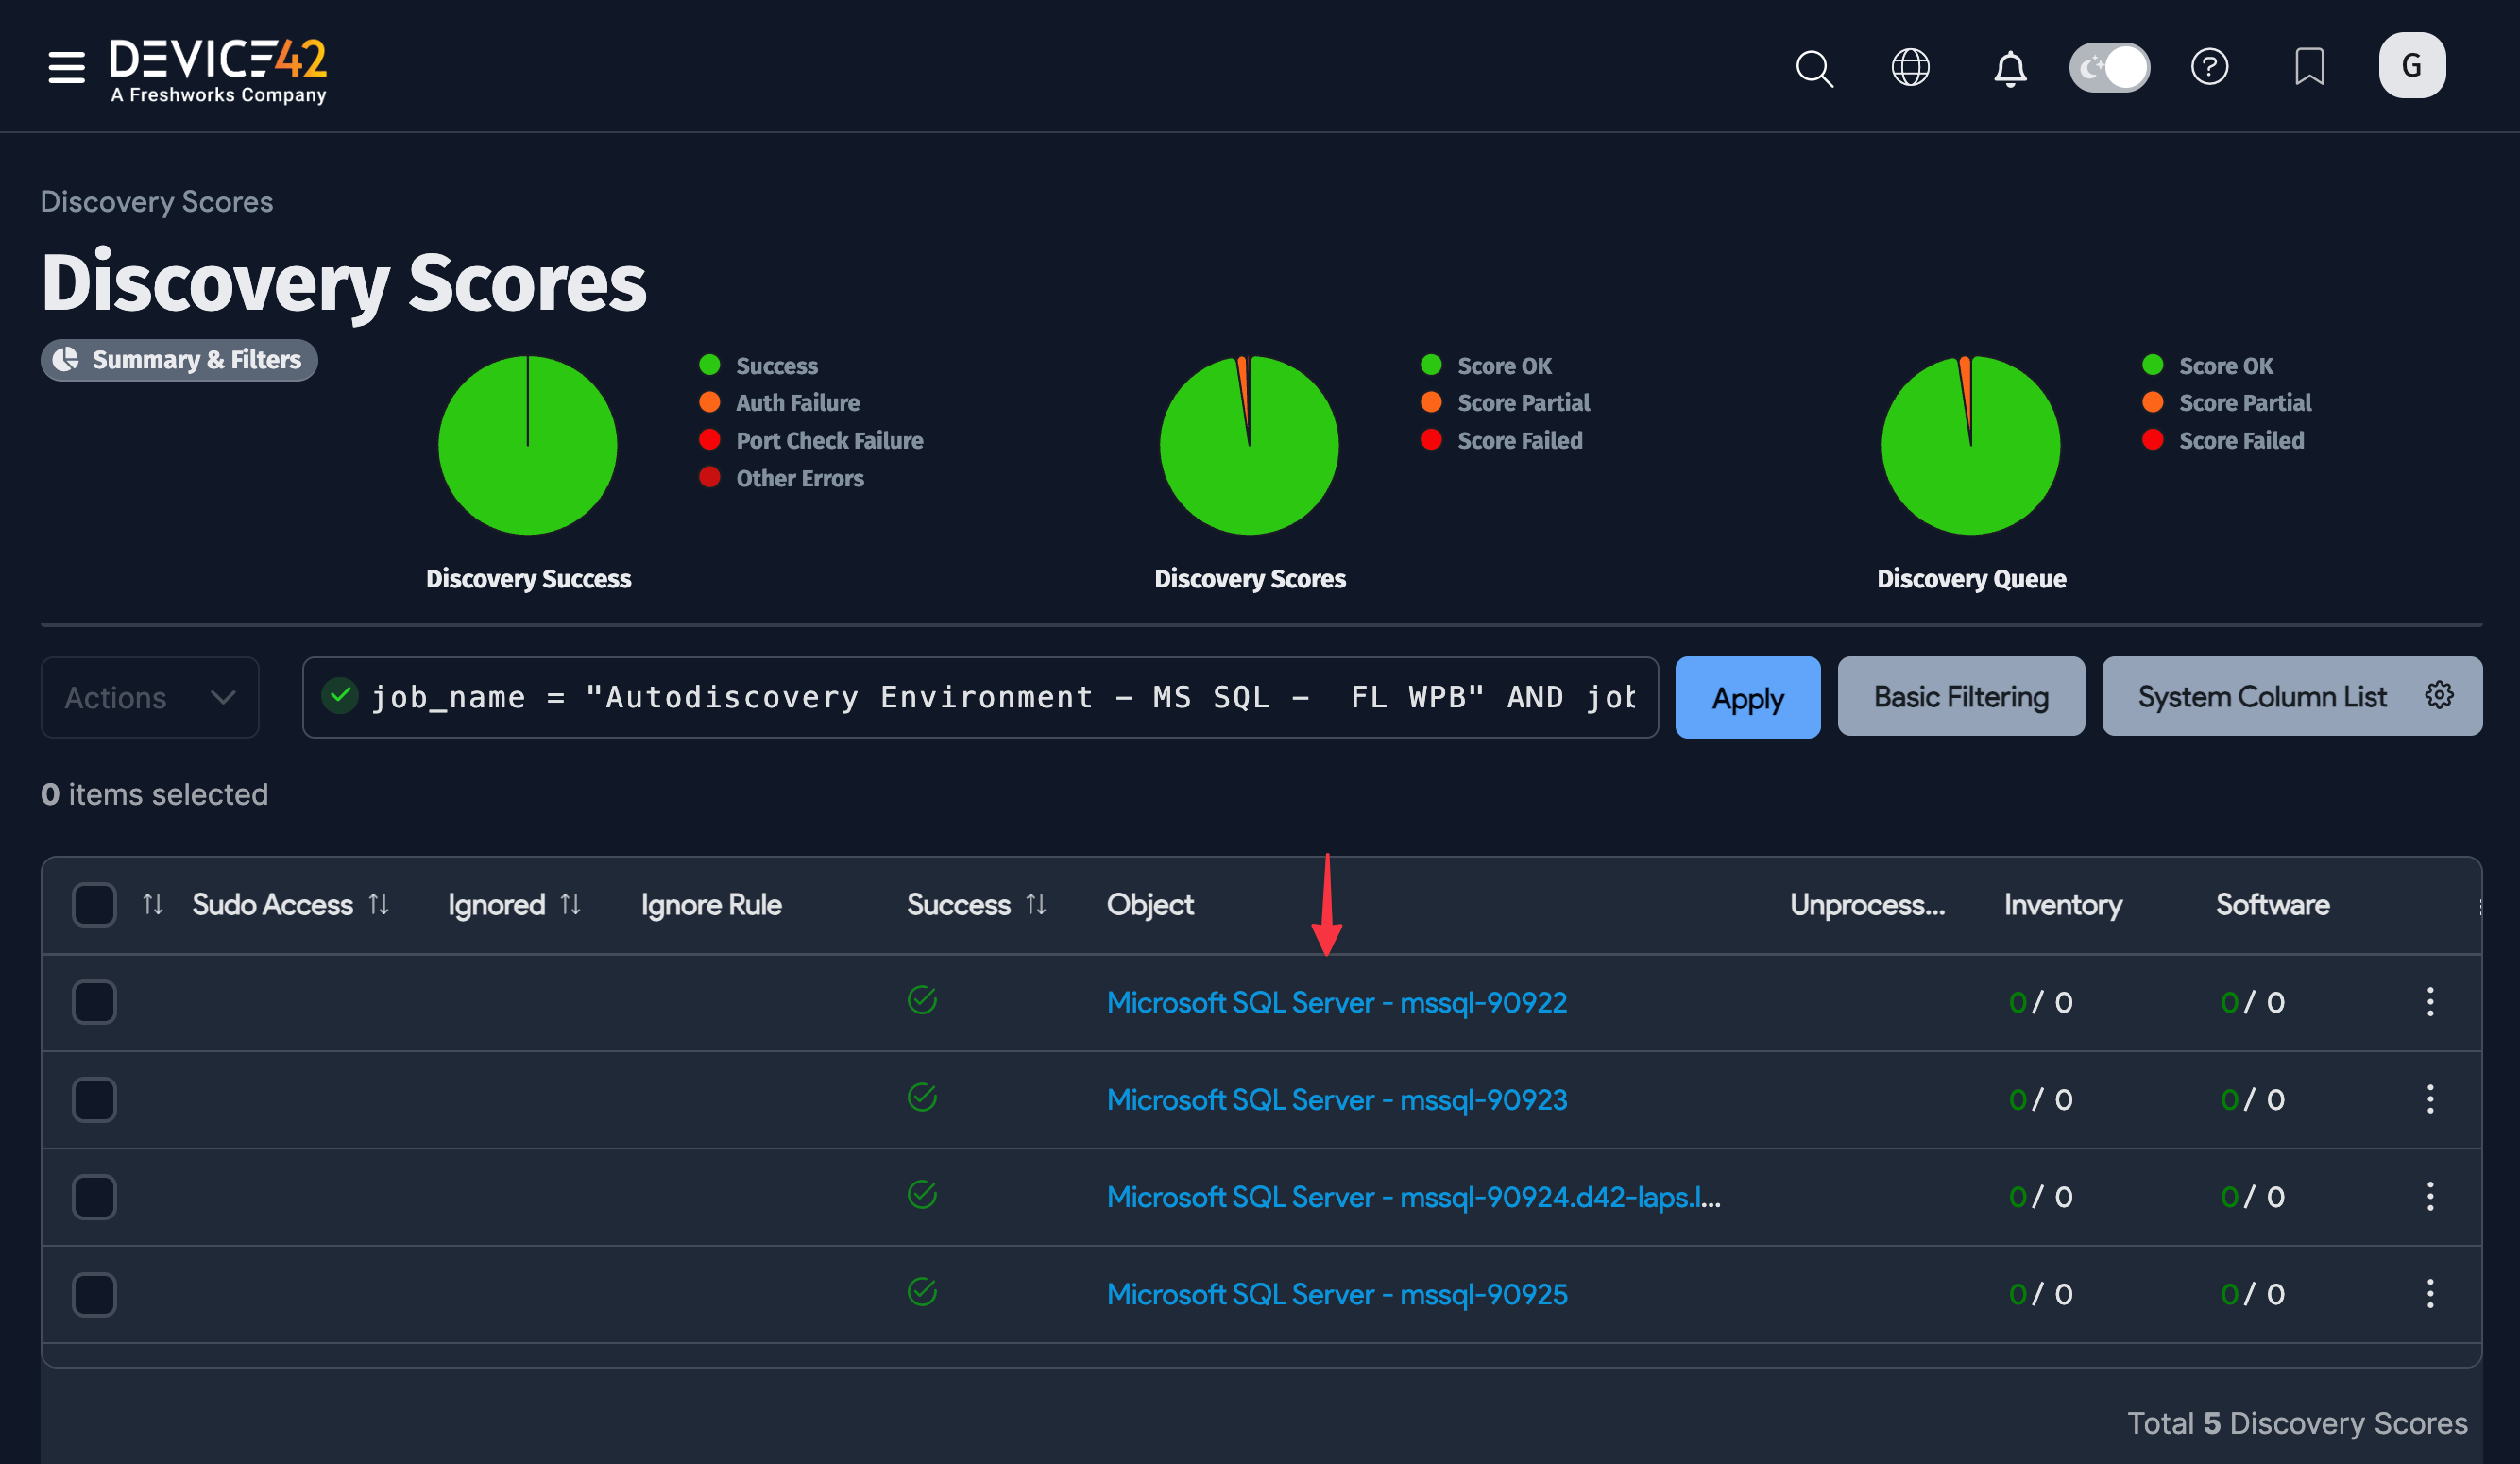
Click the success number to go to the Discovery Scores page and see the newly discovered items.
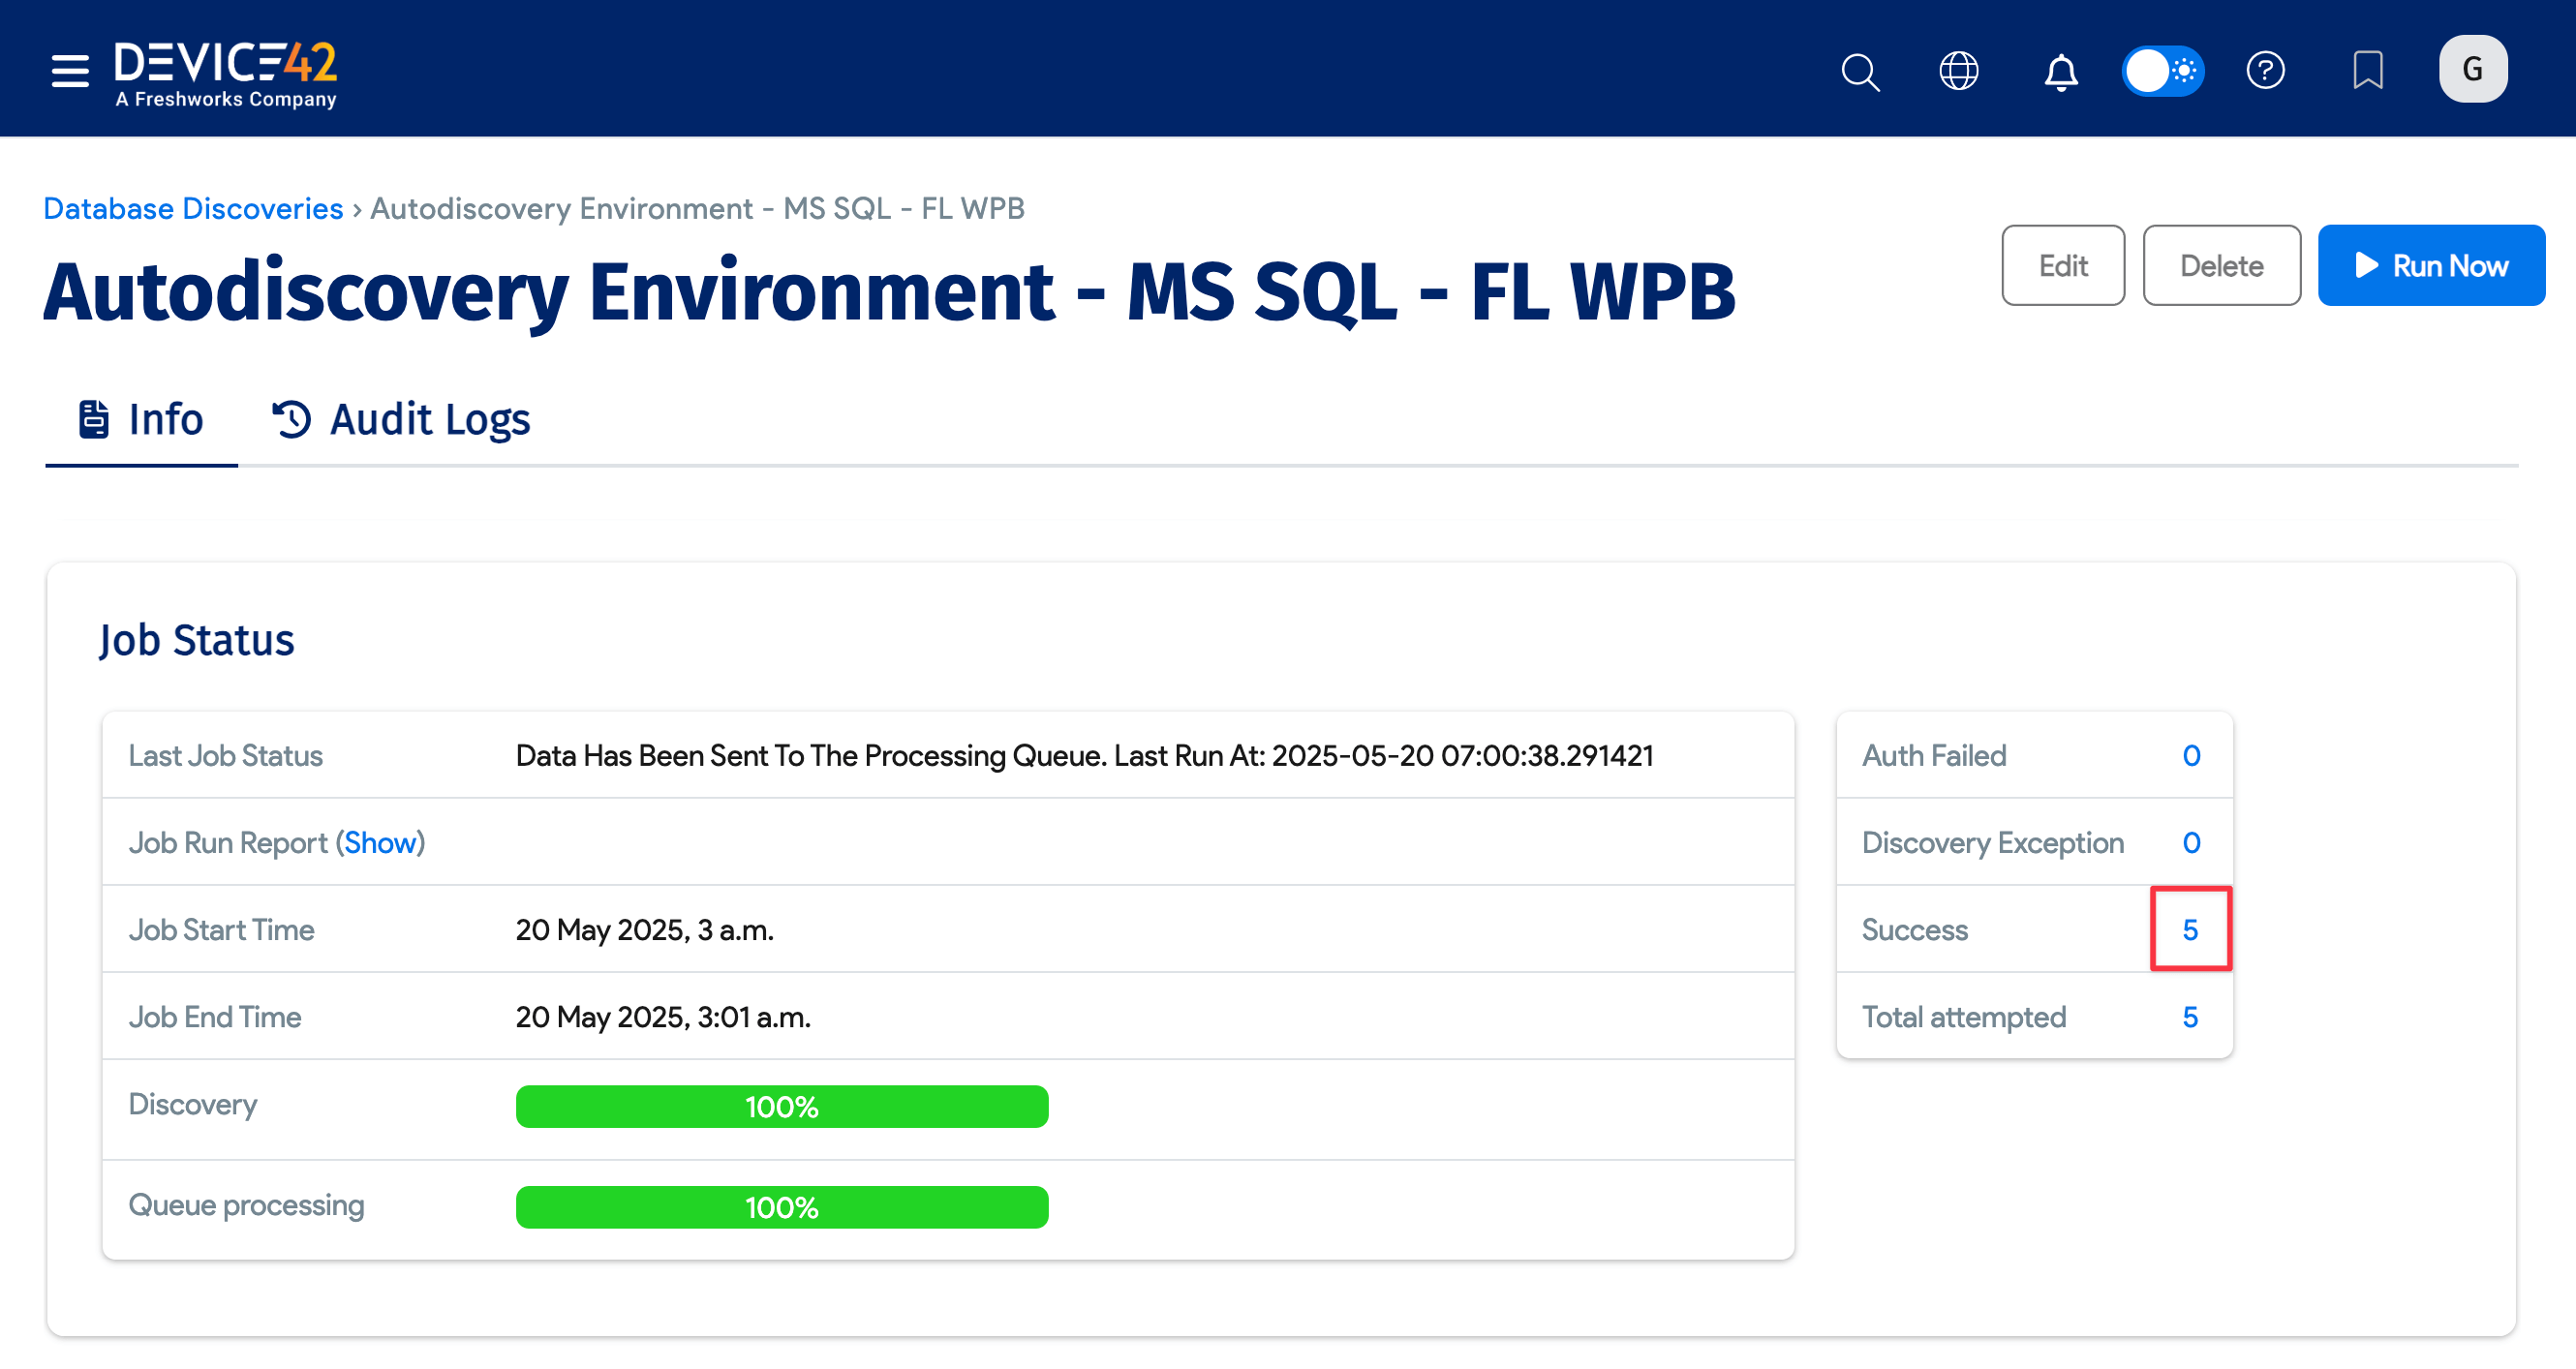
-
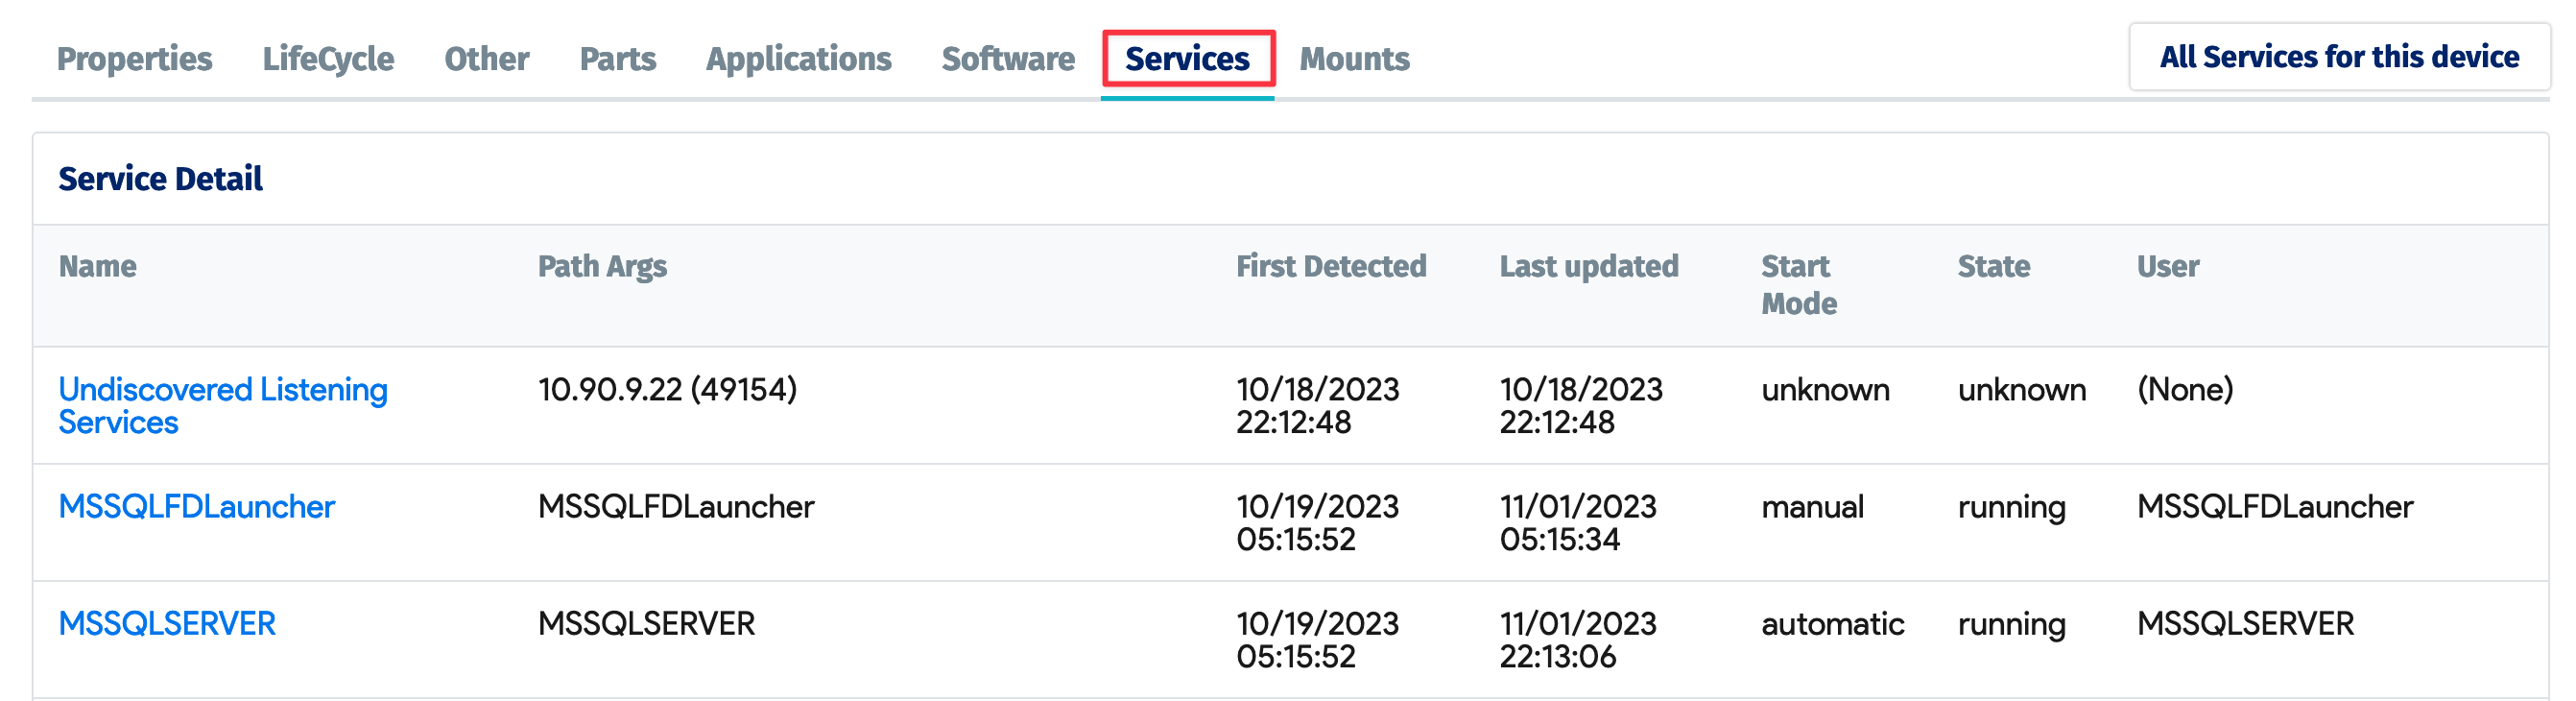
Click the links under the Object column to view the server details.
-
From the details view, you can see Service Instances, Software, Database Instances, and other information.
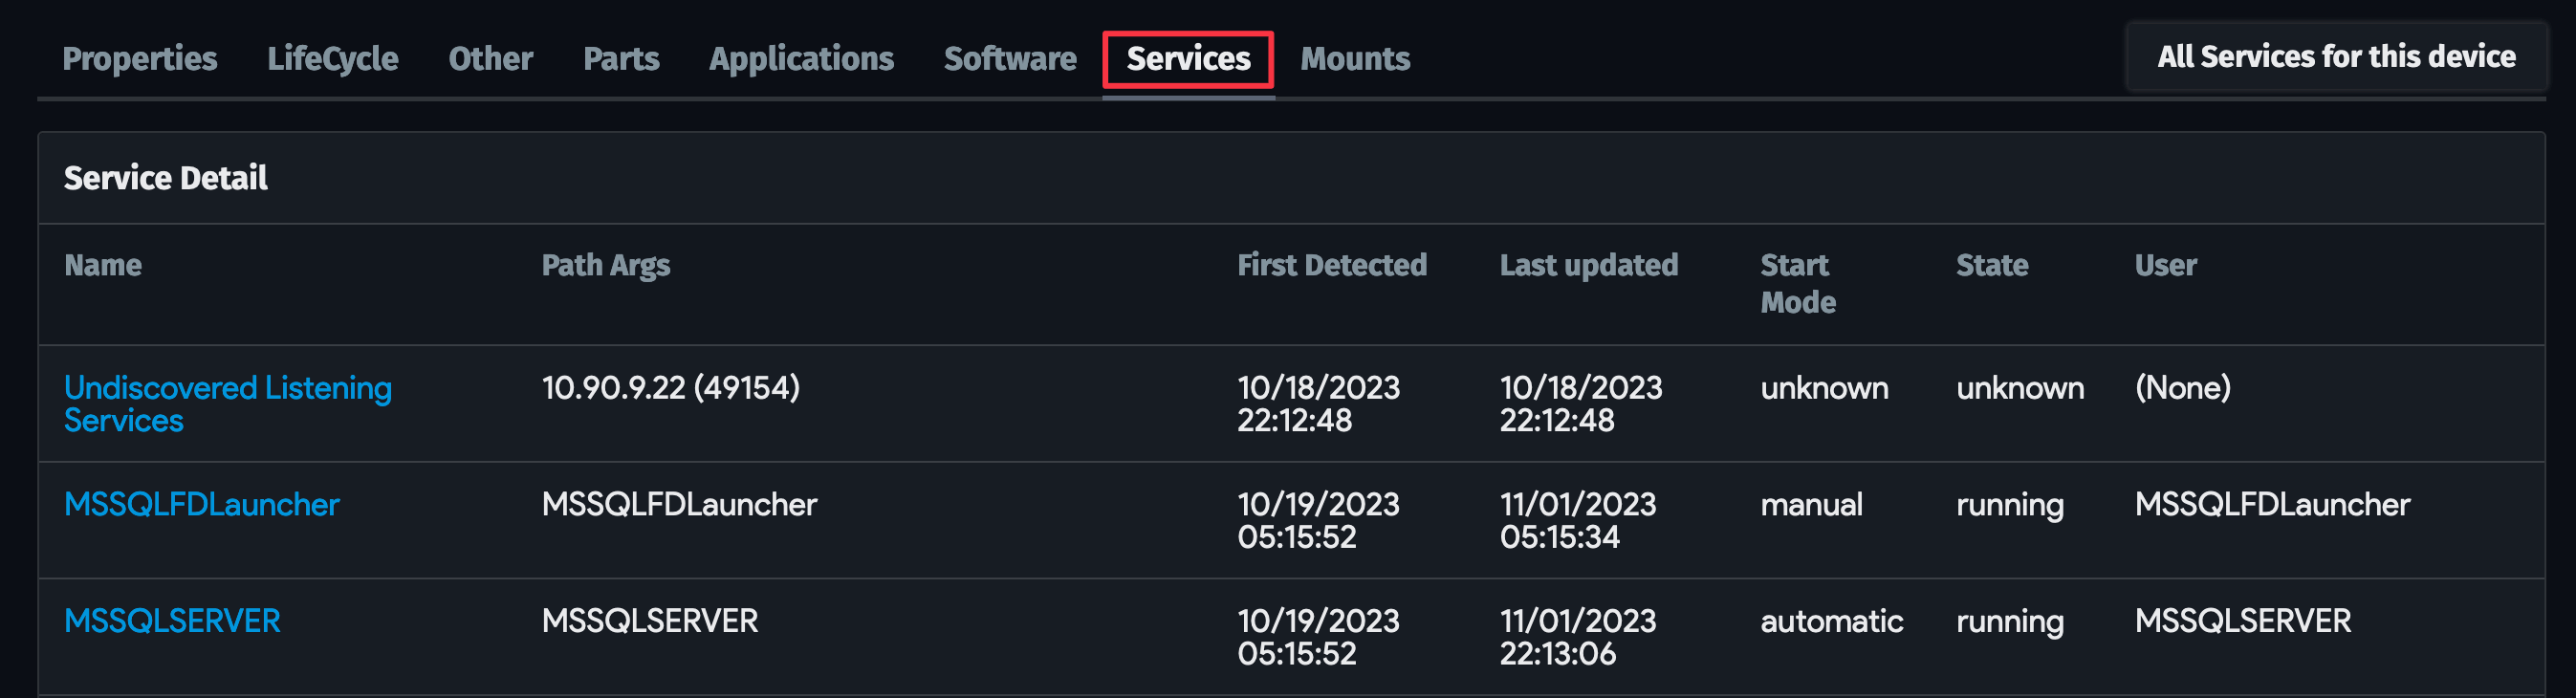
Available SQL Database Instance Information
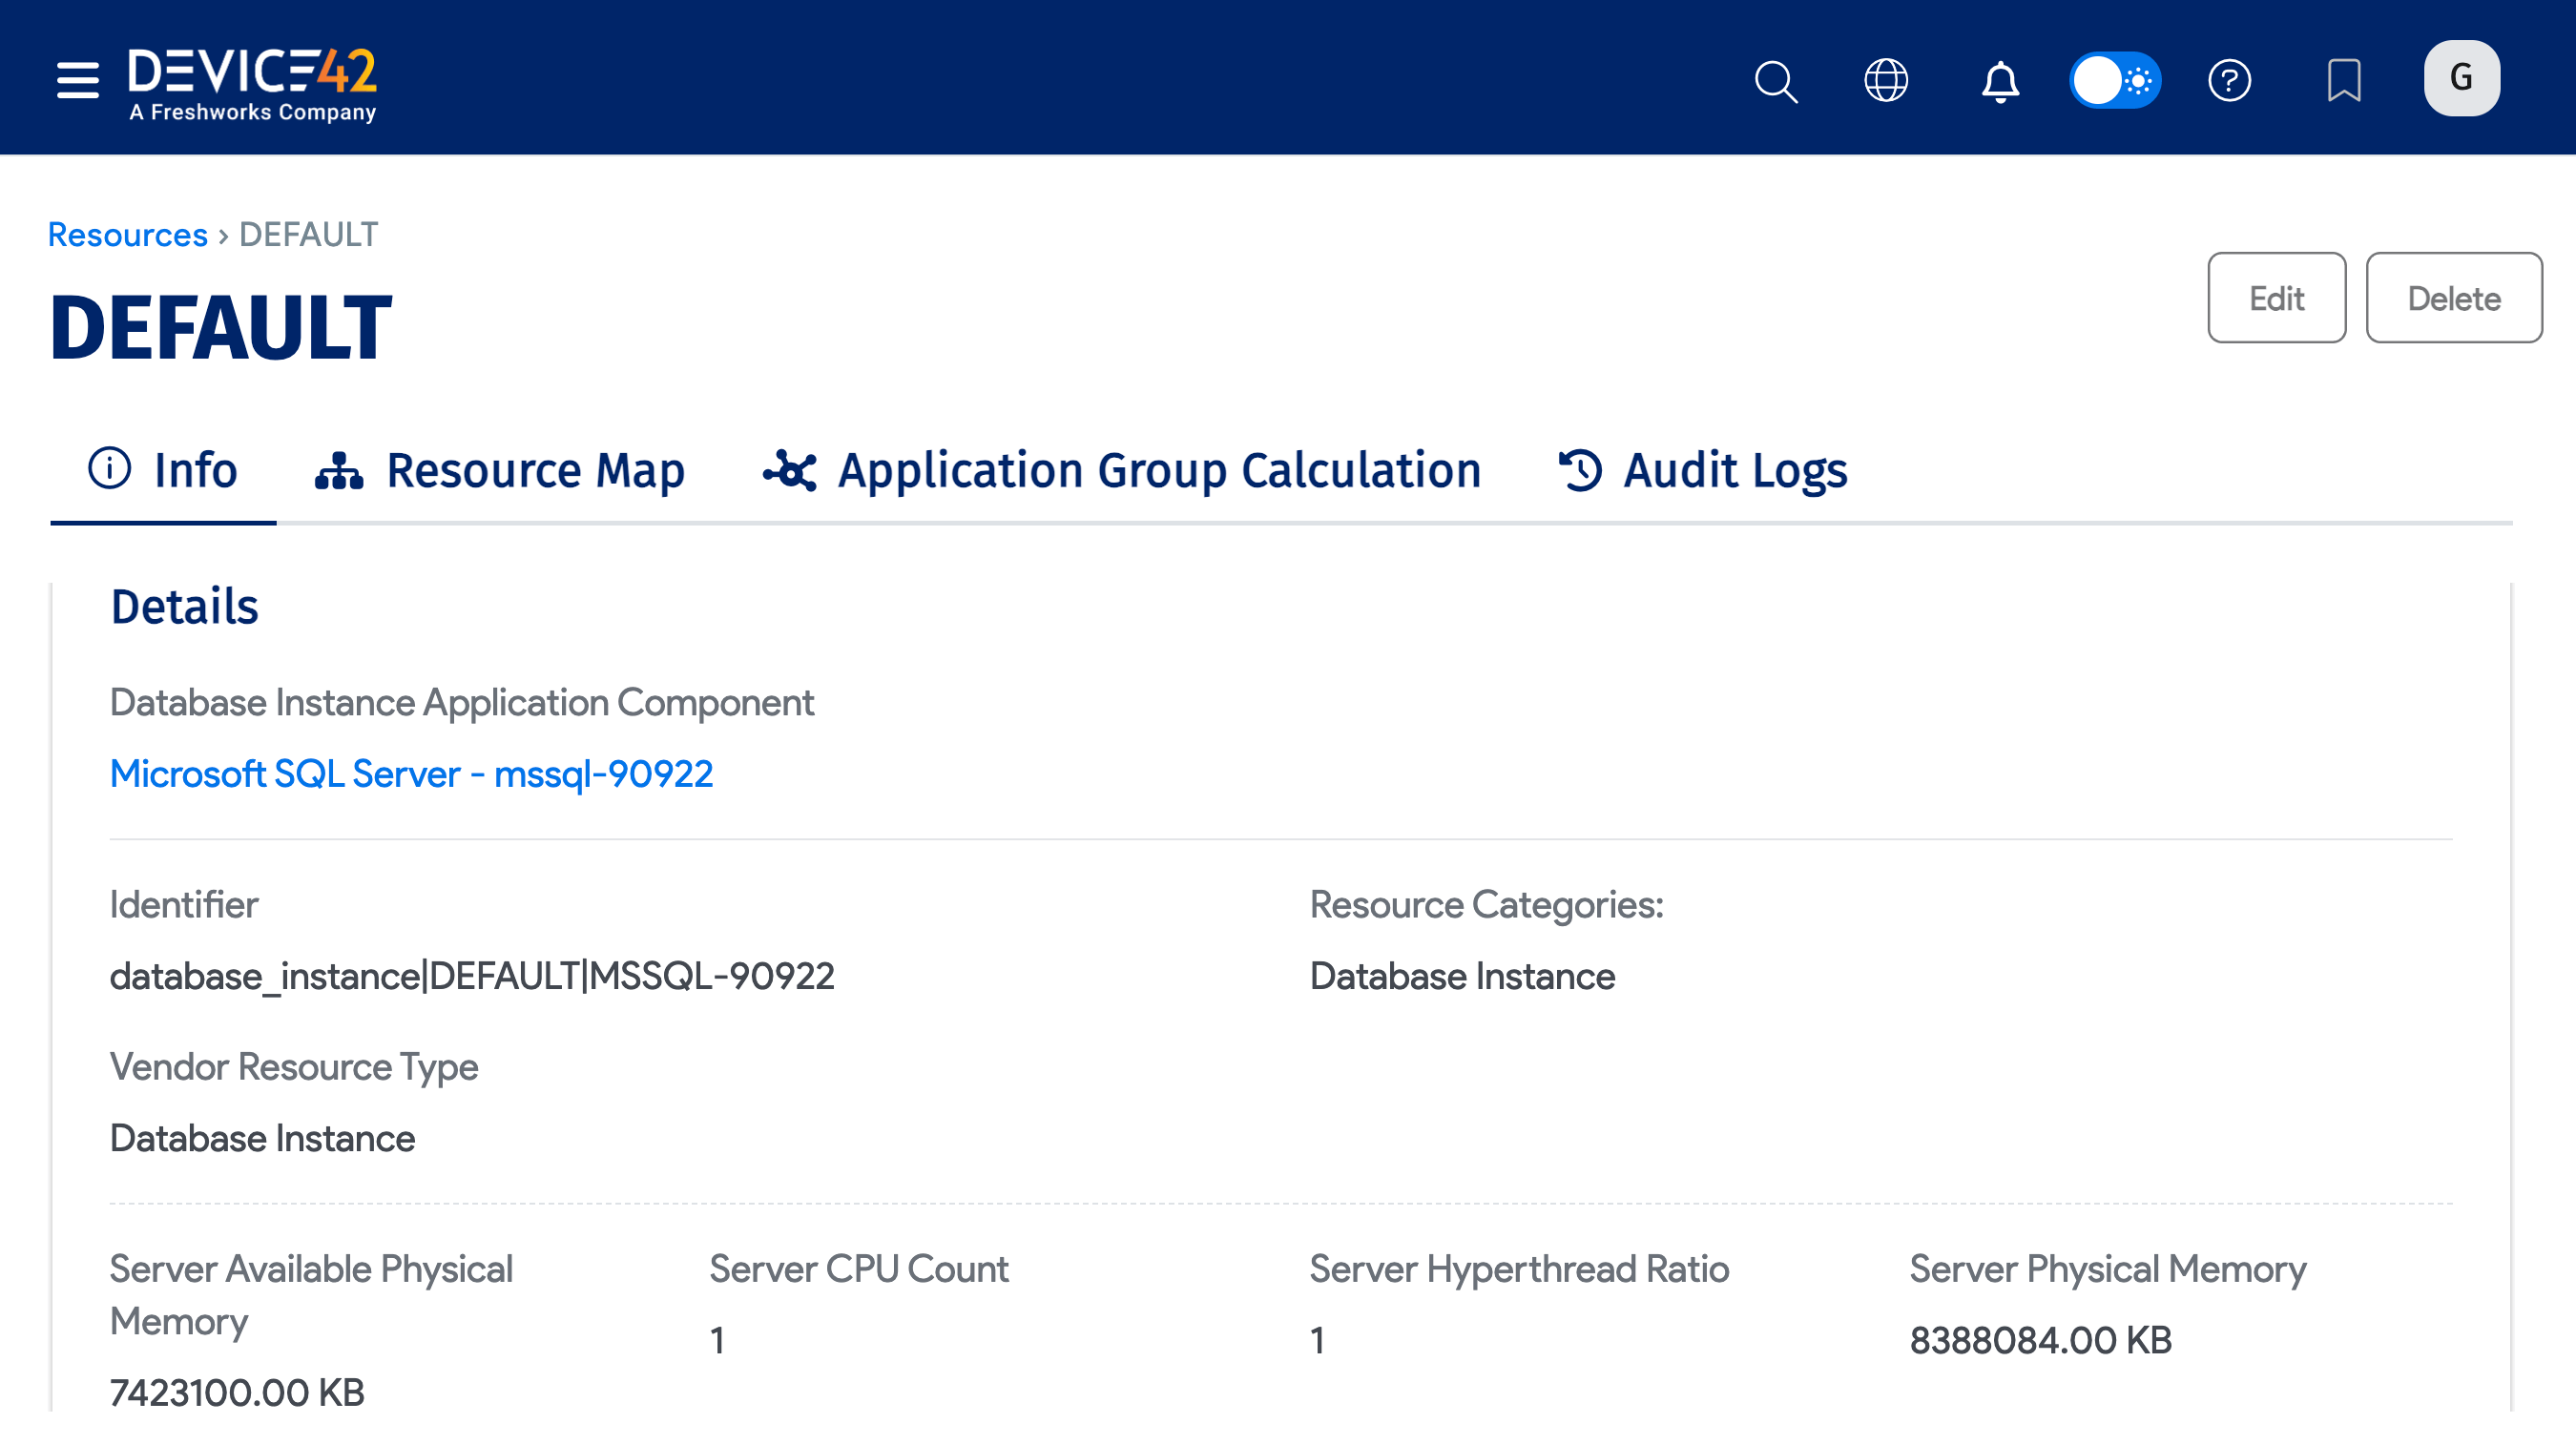
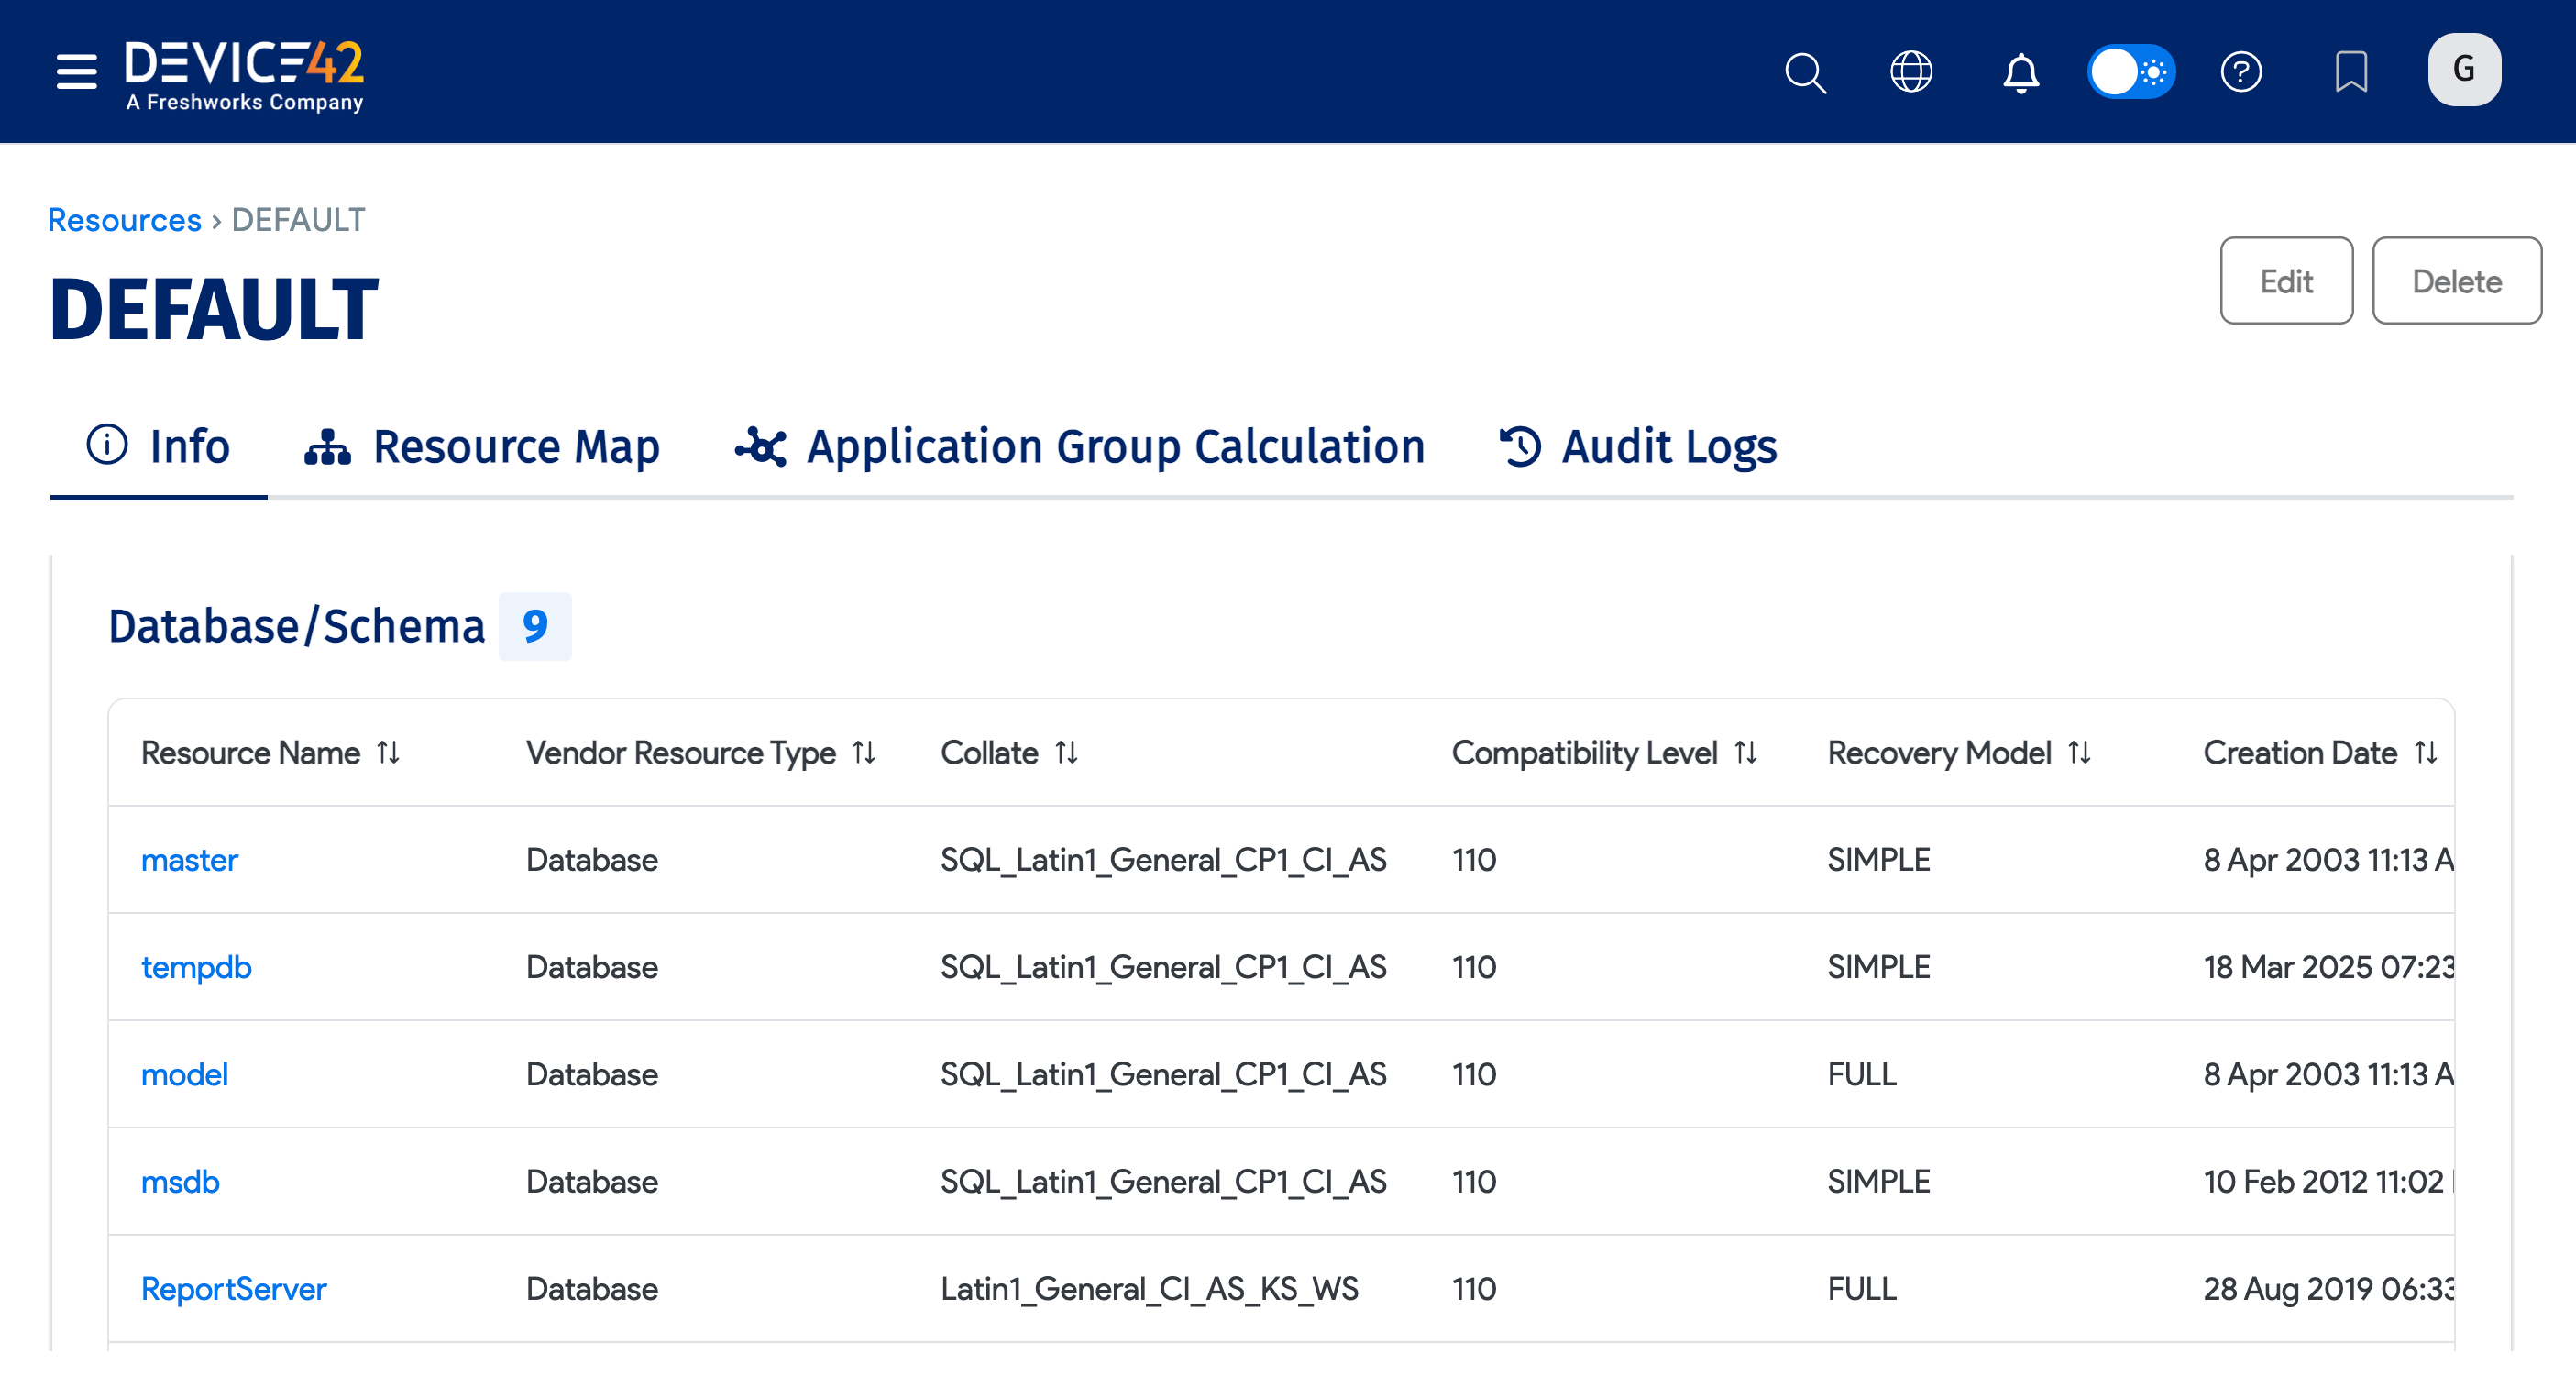
You can click the name of a Database Instance from the Application Component view, or from the Resources list page, to view the following:
-
The Resource Details of the MSSQL database, including the SQL Server Start Time and memory stats.
-
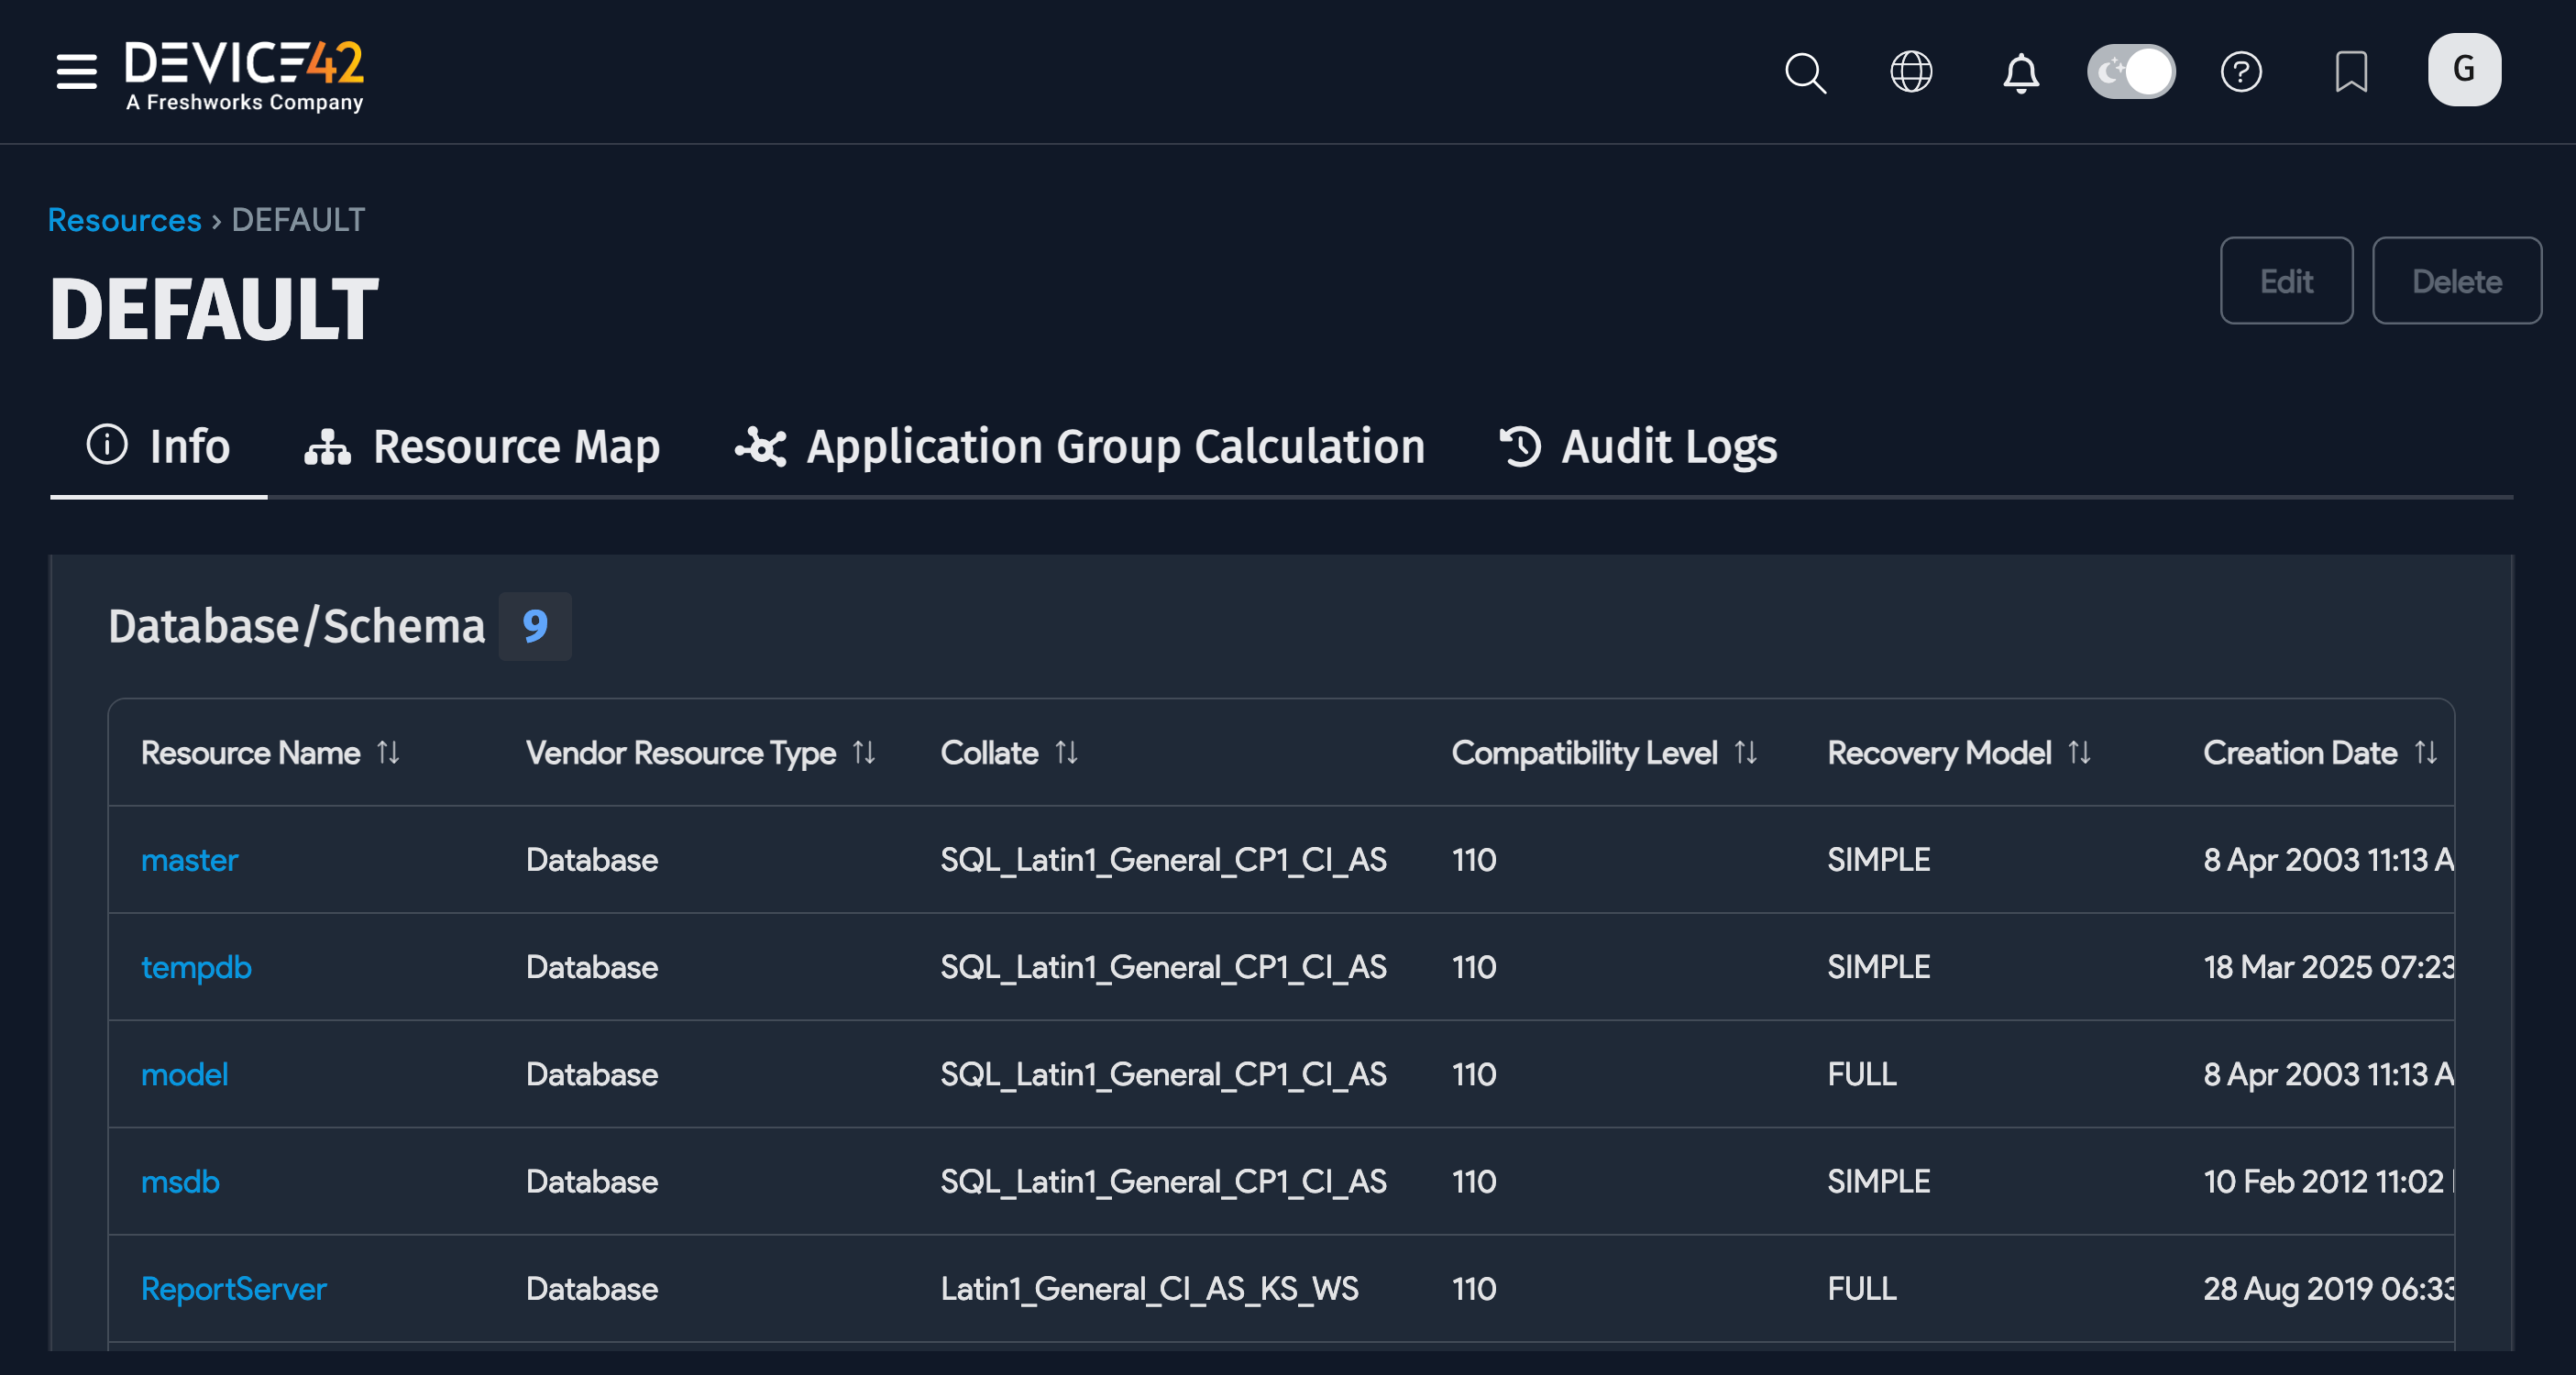
The Database/Schema of the instance. You can click on each database for more details.
-
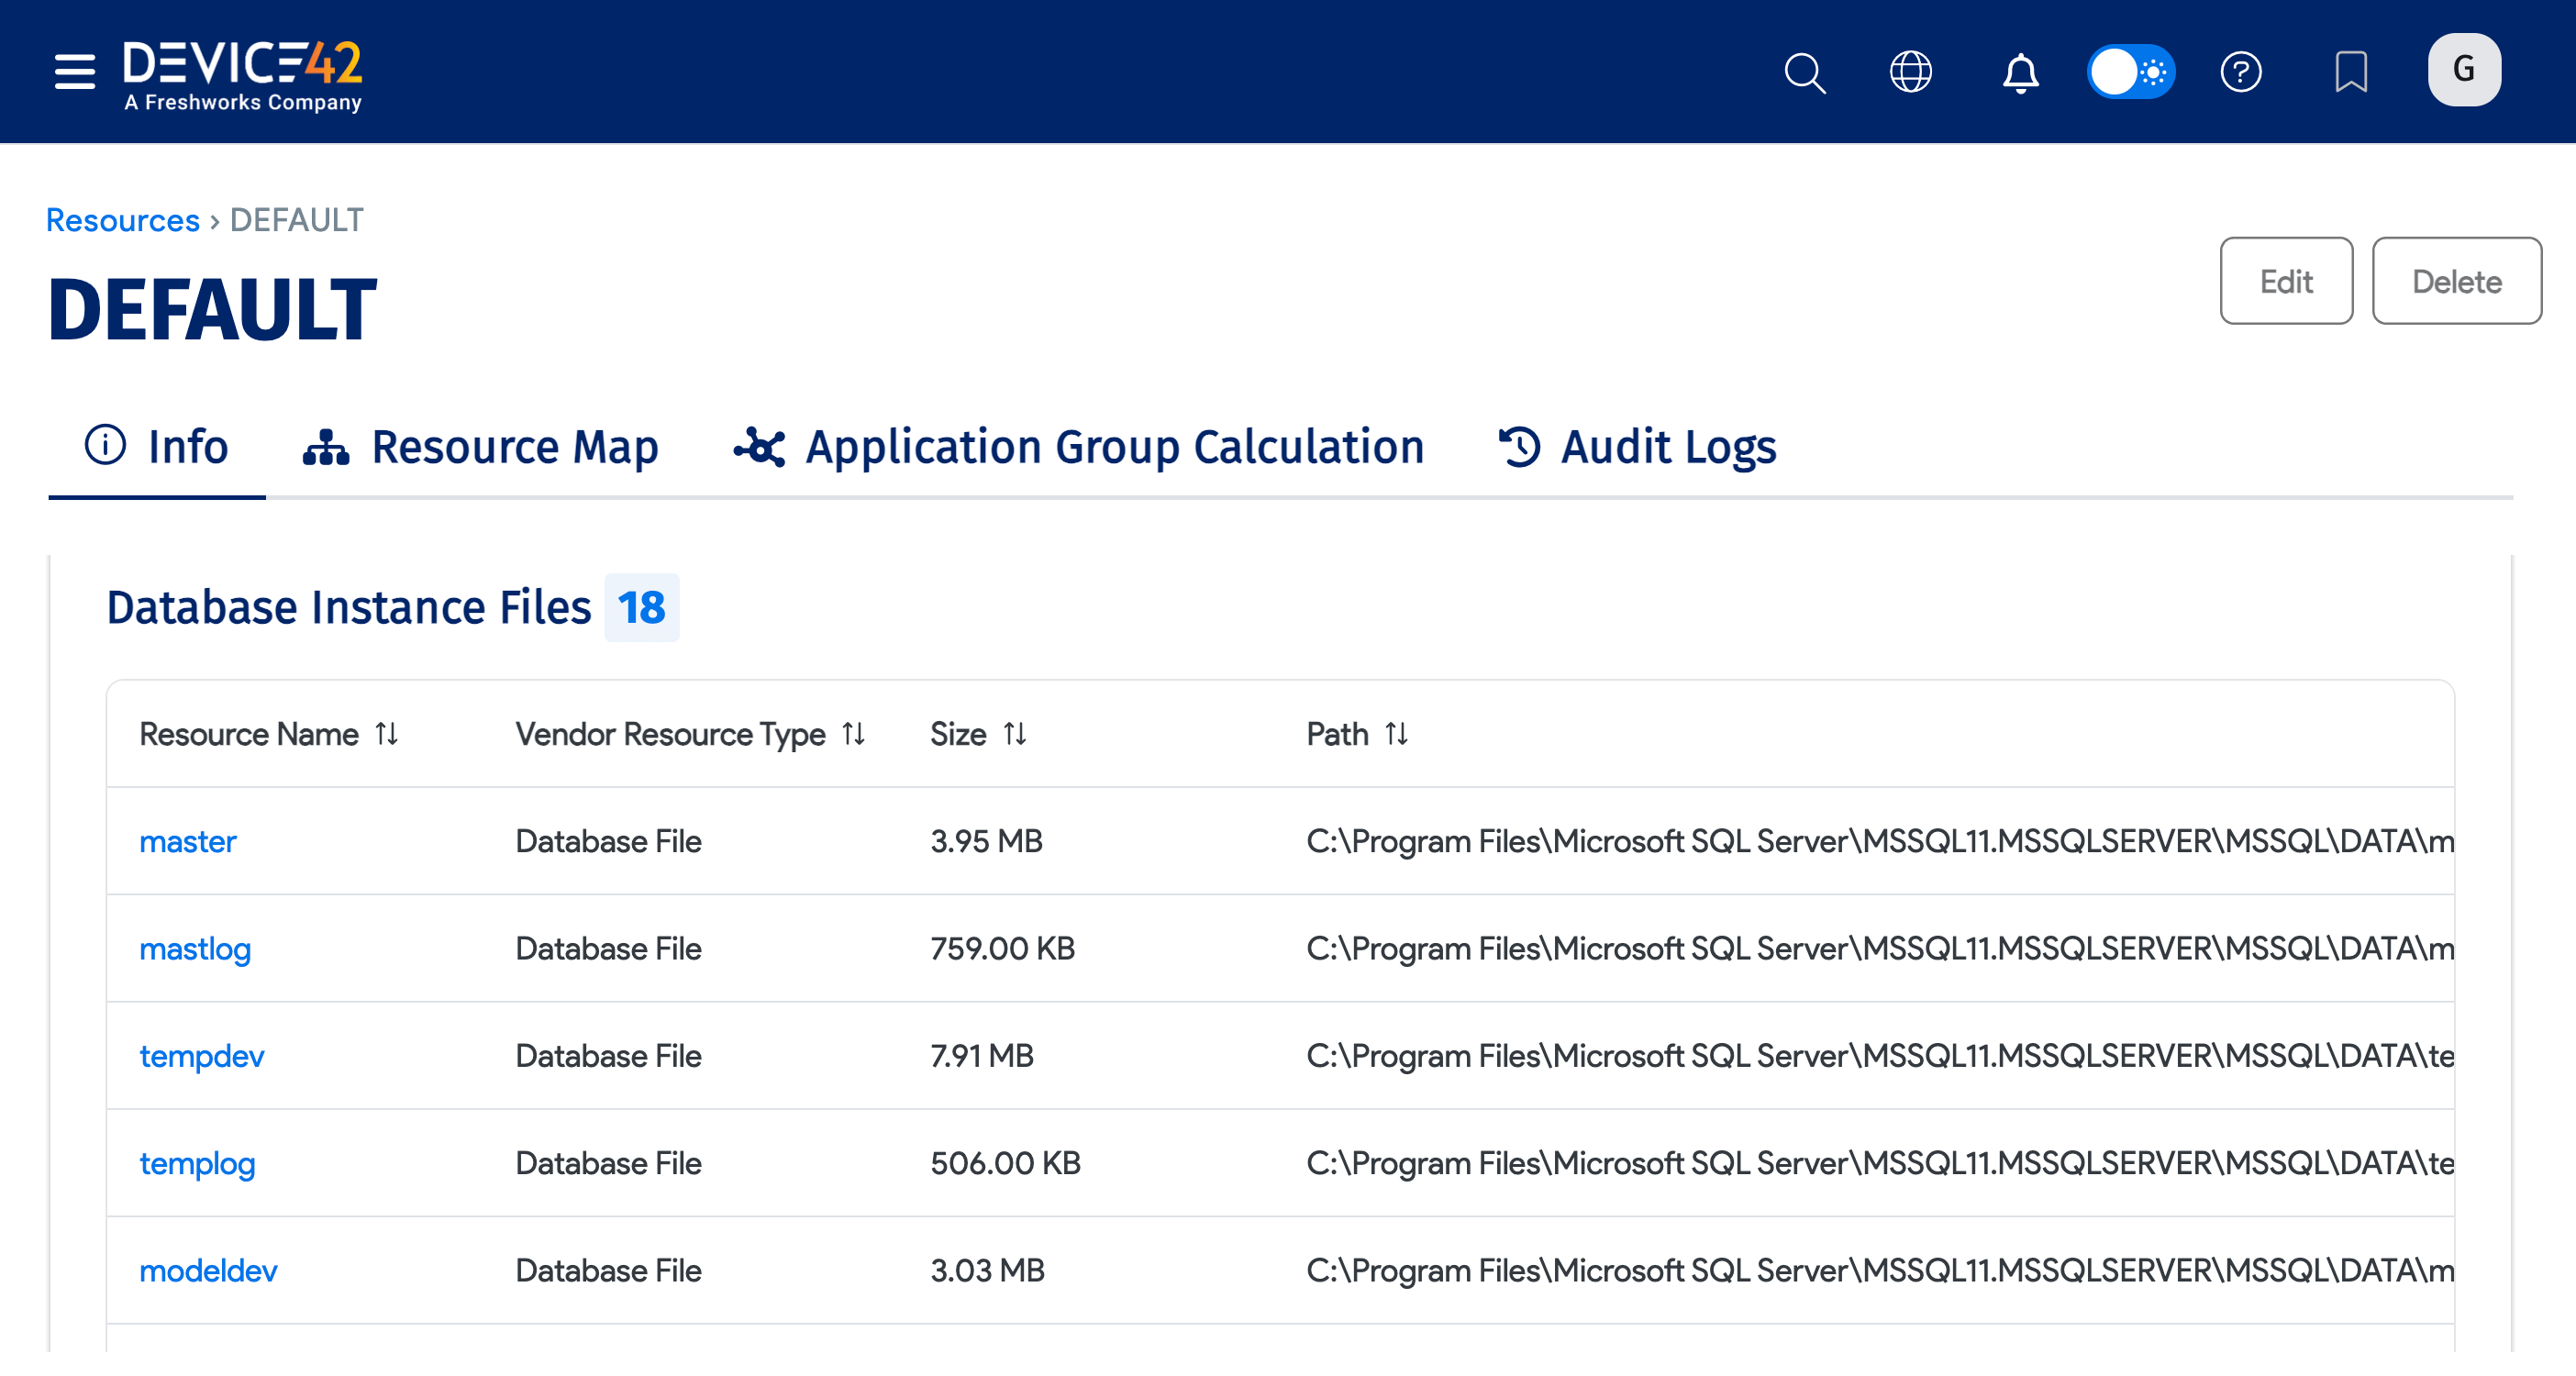
The Database Instance Files, including the Size and Path for each resource.
-
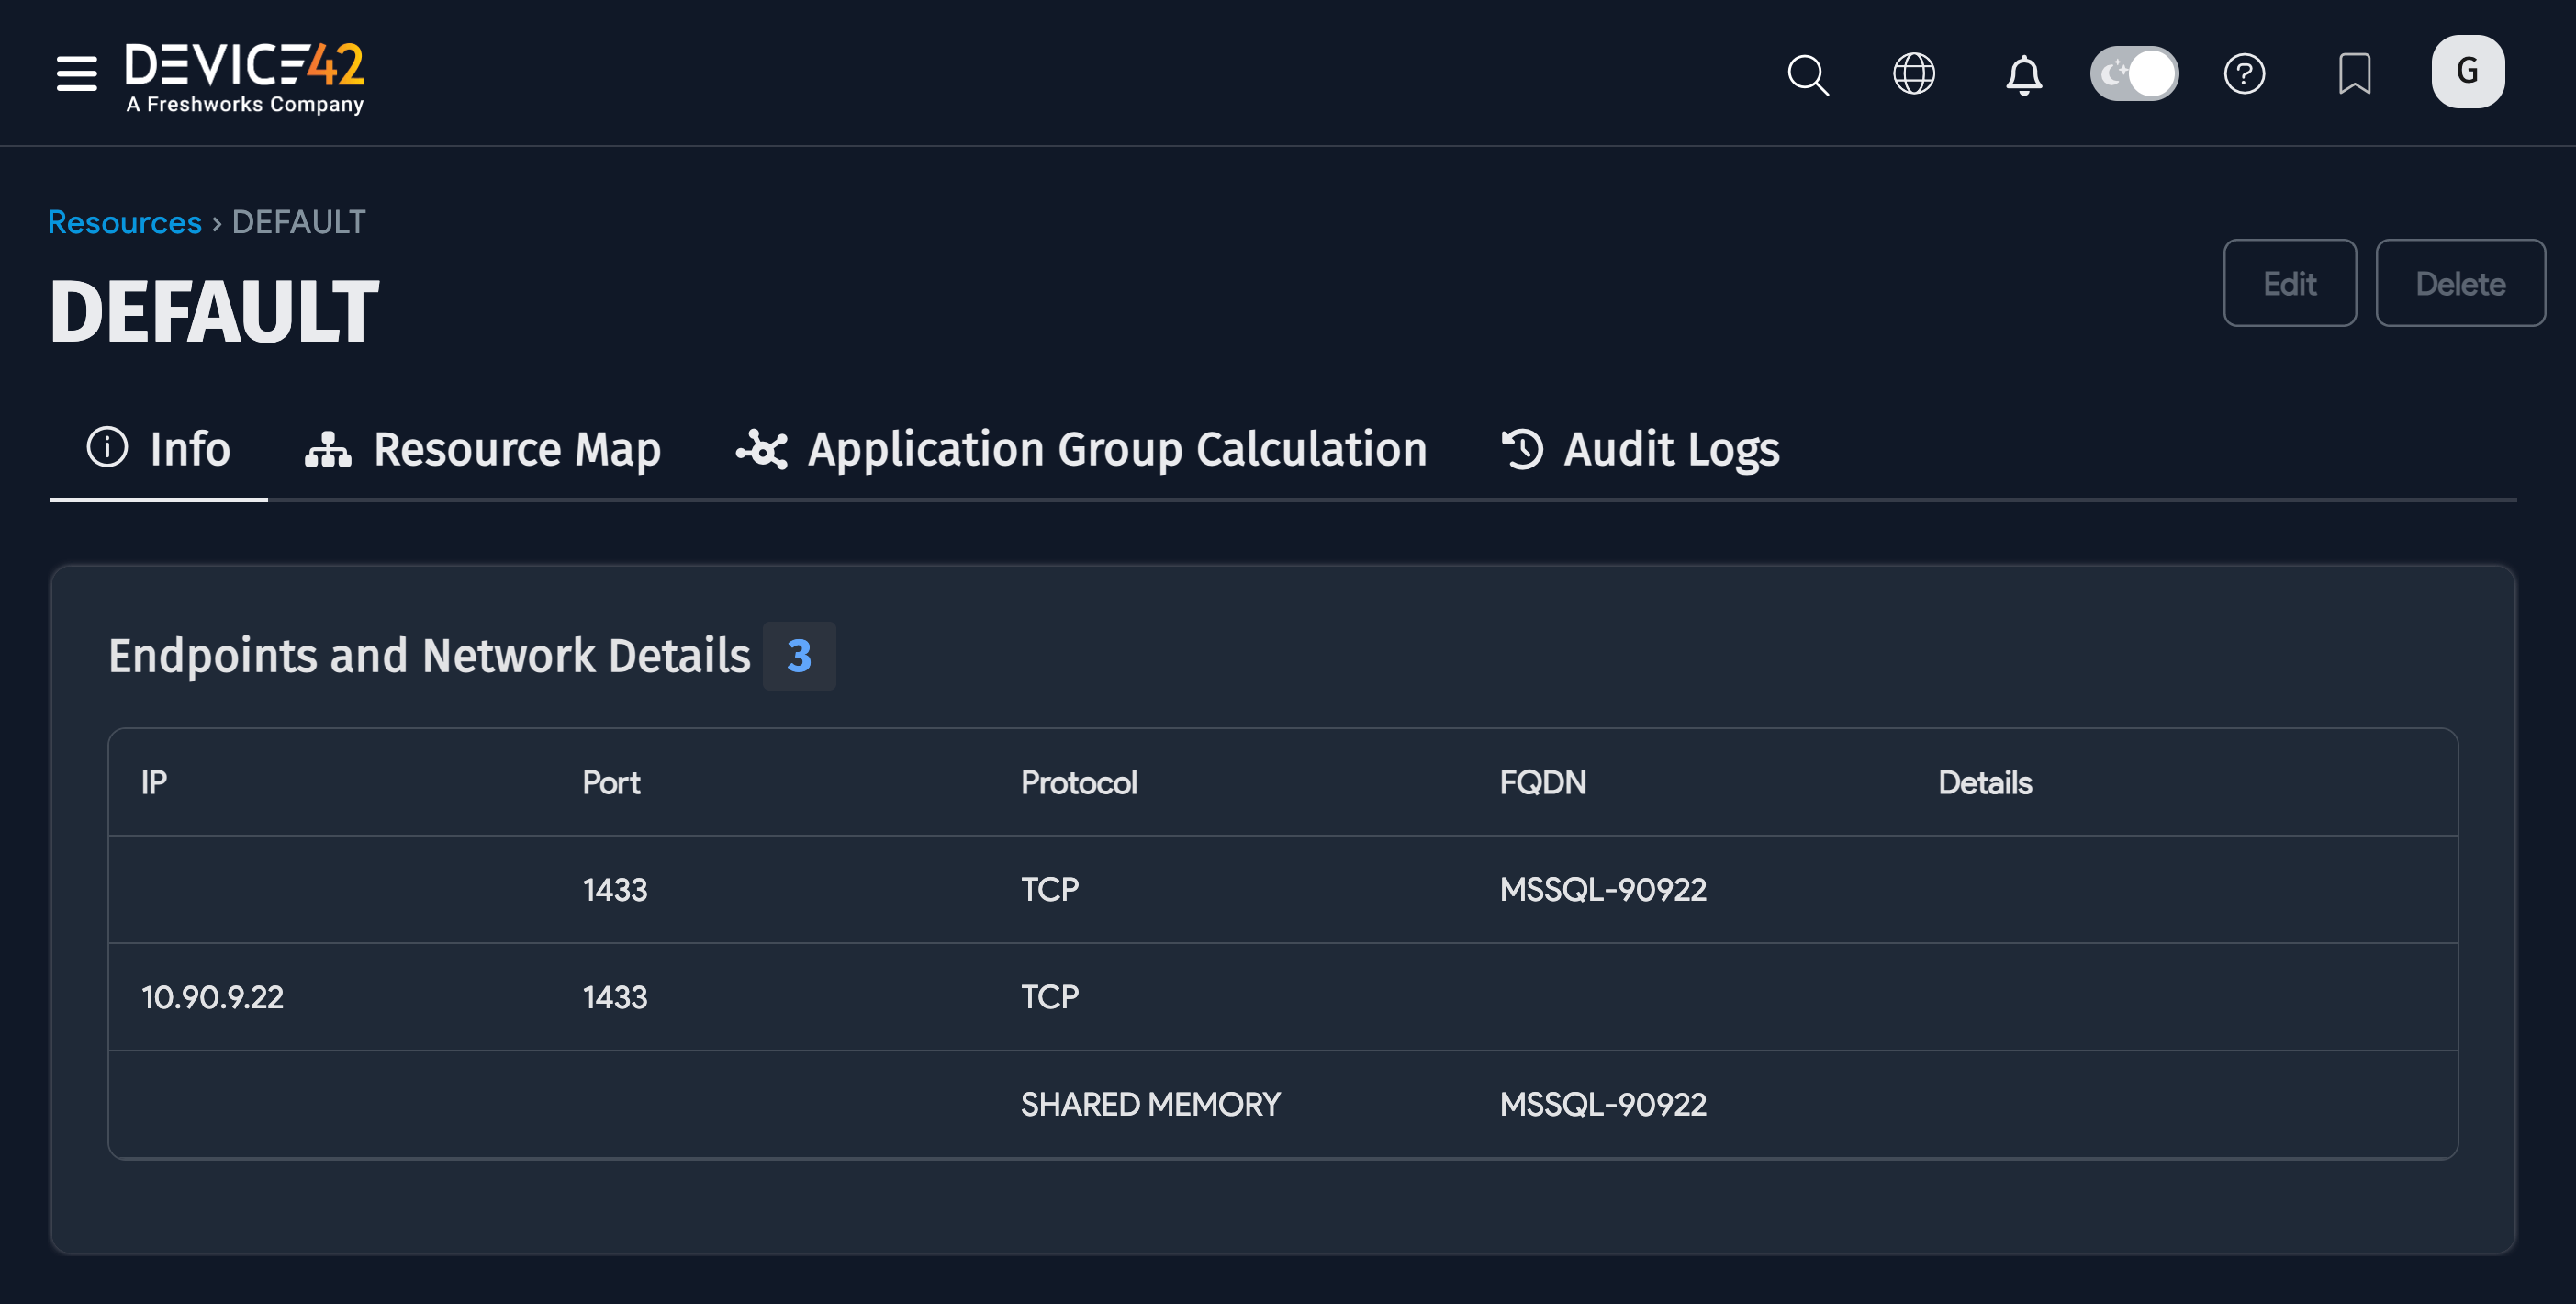
The Endpoints and Network Details.

If your environment includes SQL cluster databases, discovery returns the following information about the clusters:
- SQL Cluster name
- SQL Cluster Node Role
- Is Node Active or Read-Replica
- Does Passive Node use Log Ship
- Does Passive Node use DB Mirroring
Oracle Database Discovery (on Windows and *nix Targets)
Oracle database discovery is supported for Windows and *nix targets. Oracle discovery jobs require a separate set of credentials to authenticate to the database instance. Ensure these credentials have the appropriate permissions for viewing the databases you want to discover.
Device42 supports discovery on Windows and *nix platforms for the following Oracle database versions:
Oracle 10g
- Windows 32 bit
- CentOS 32 bit
Oracle 11g
- Windows 32 bit
- Windows 64 bit
- CentOS 32 bit
- CentOS 64 bit
Oracle 12c
- Windows 64 bit
- CentOS 64 bit
Oracle 18c
- CentOS 64 bit
- Windows 64 bit
Oracle 19c
- Windows 64 bit
- CentOS 7 64 bit
Device42 also supports discovery for Oracle RAC clustered database environments on Windows and *nix targets. Discovery returns data about the RAC configuration, the RAC database, and the nodes (physical servers) running the RAC software. You can run discovery against one or more nodes in the Oracle RAC to return information about all connected nodes.
Device42 requires the use of sudo for Oracle discoveries to mitigate the risk of lockout.
Minimum Database-Level Permissions
For discovery to return detailed information about your database instance, you need read or view permissions for the following system views and tables:
|
|
To get information about pluggable databases (PDBs) within an Oracle container database (CDB), two key permission configurations are required for non-DBA users:
-
SELECT permission on the
V$CONTAINERSview. -
Set
container_data=all container=currentfor context configuration. For example:ALTER USER c##<username>
SET
CONTAINER_DATA = ALL
CONTAINER = CURRENT;
System-Level Permissions
In addition to the minimum DB-level permissions above, discovery needs shell access to the target system to run OS-level commands to gather information about the Oracle environment.
For example, shell access is needed to read the tnsnames.ora file, which contains network connection details:
/usr/bin/cat: /dbprog/oracle/product/19.3.0.0.26/network/admin/tnsnames.ora
Another example is the lsnrctl status command, which checks the status of the Oracle listener:
oracle -c 'lsnrctl status'
To allow Device42 to run these commands securely, grant limited sudo access by adding the following to the /etc/sudoers file or by creating a separate sudoers file for Device42 Oracle discovery:
Click to expand the code block
# Basic Oracle Discovery Commands
Cmnd_Alias DEVICE42_ORACLE = \
    /usr/bin/ps -ef, \
    /usr/bin/pwdx *, \
    /usr/bin/su - oracle -c lsnrctl status, \
    /usr/bin/su - oracle -c echo "select * from product_component_version;" | sqlplus -L -S -M "HTML ON" / as sysdba, \
    /usr/bin/cat /etc/oratab, \
    /usr/bin/su - oracle -c /u01/app/19.1.0.0/grid/bin/lsnrctl status, \
    /usr/bin/su - oracle -c echo "select * from product_component_version;" | /u01/app/19.1.0.0/grid/bin/sqlplus -L -S -M "HTML ON" / as sysdba

# Oracle RAC Additional Commands
Cmnd_Alias DEVICE42_ORACLE_RAC = \
    /usr/bin/su - oracle -c /u01/app/19.1.0.0/grid/bin/olsnodes -c, \
    /usr/bin/su - oracle -c /u01/app/19.1.0.0/grid/bin/olsnodes -n -i -s, \
    /usr/bin/su - oracle -c /u01/app/19.1.0.0/grid/bin/olsnodes -l -n -i -s, \
    /usr/bin/su - oracle -c /u01/app/19.1.0.0/grid/bin/srvctl config scan_listener, \
    /usr/bin/su - oracle -c /u01/app/19.1.0.0/grid/bin/srvctl config scan, \
    /usr/bin/su - oracle -c /u01/app/19.1.0.0/grid/bin/crsctl stat res -t | grep *, \
    /usr/bin/su - oracle -c srvctl config database -d *

# Grant these permissions to your Device42 discovery user:
# username ALL=(ALL) NOPASSWD: DEVICE42_ORACLE, DEVICE42_ORACLE_RAC
Set Up an Oracle Discovery Job
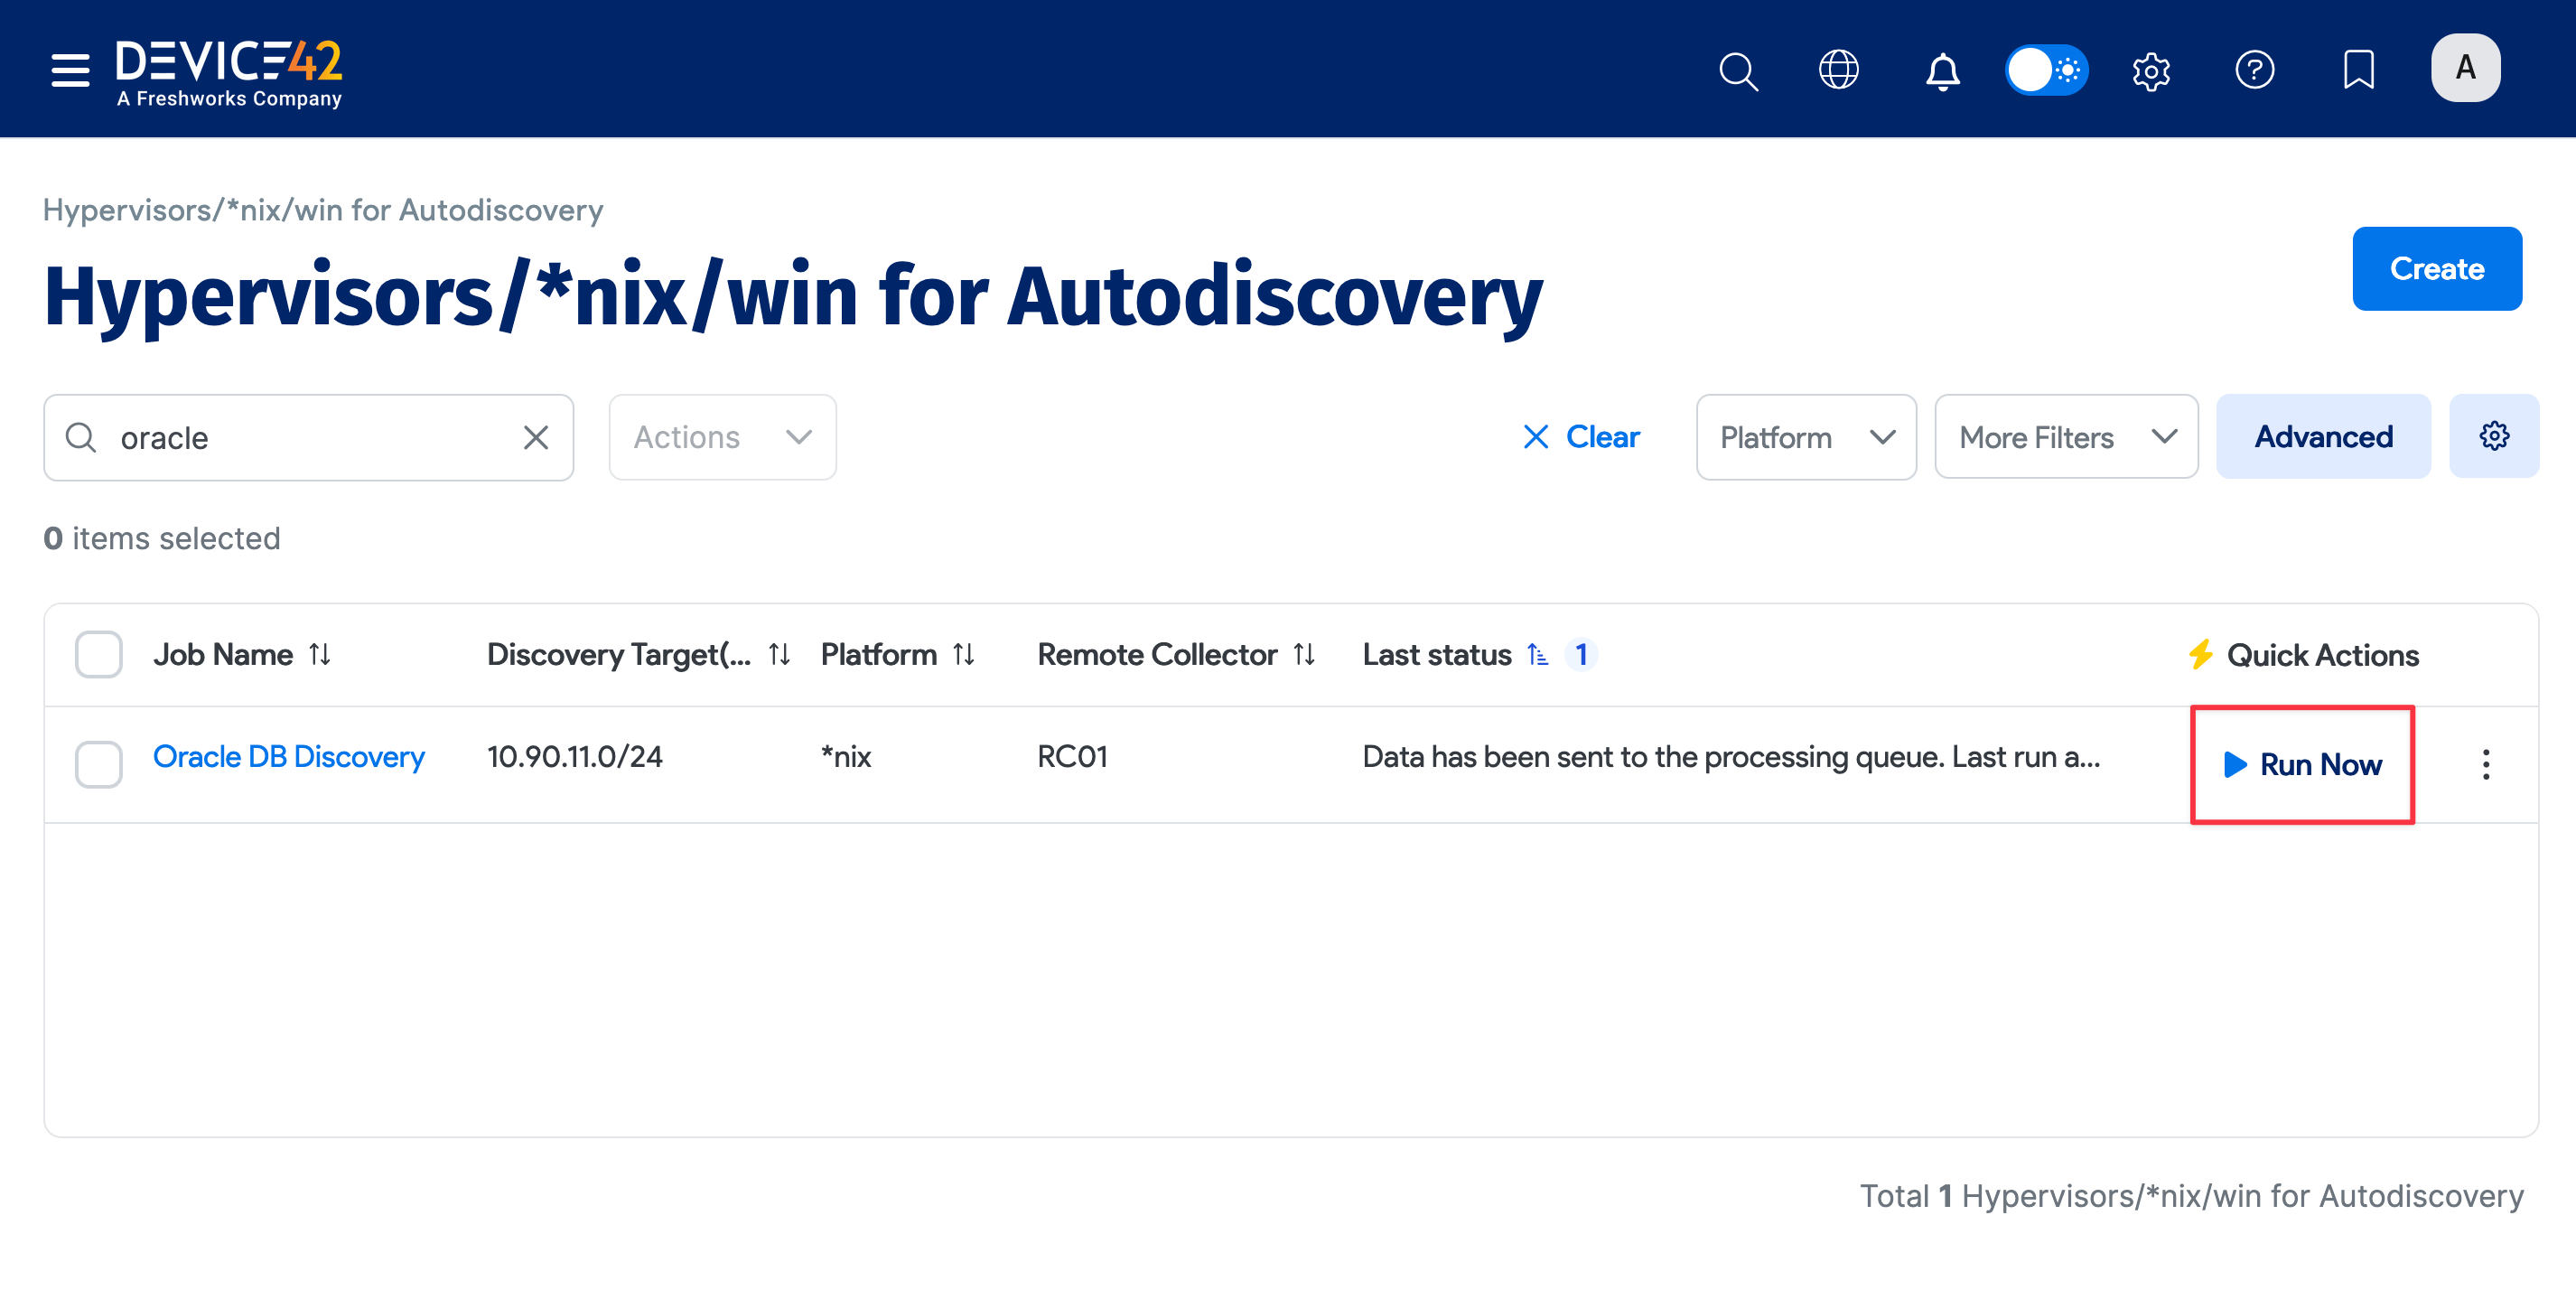
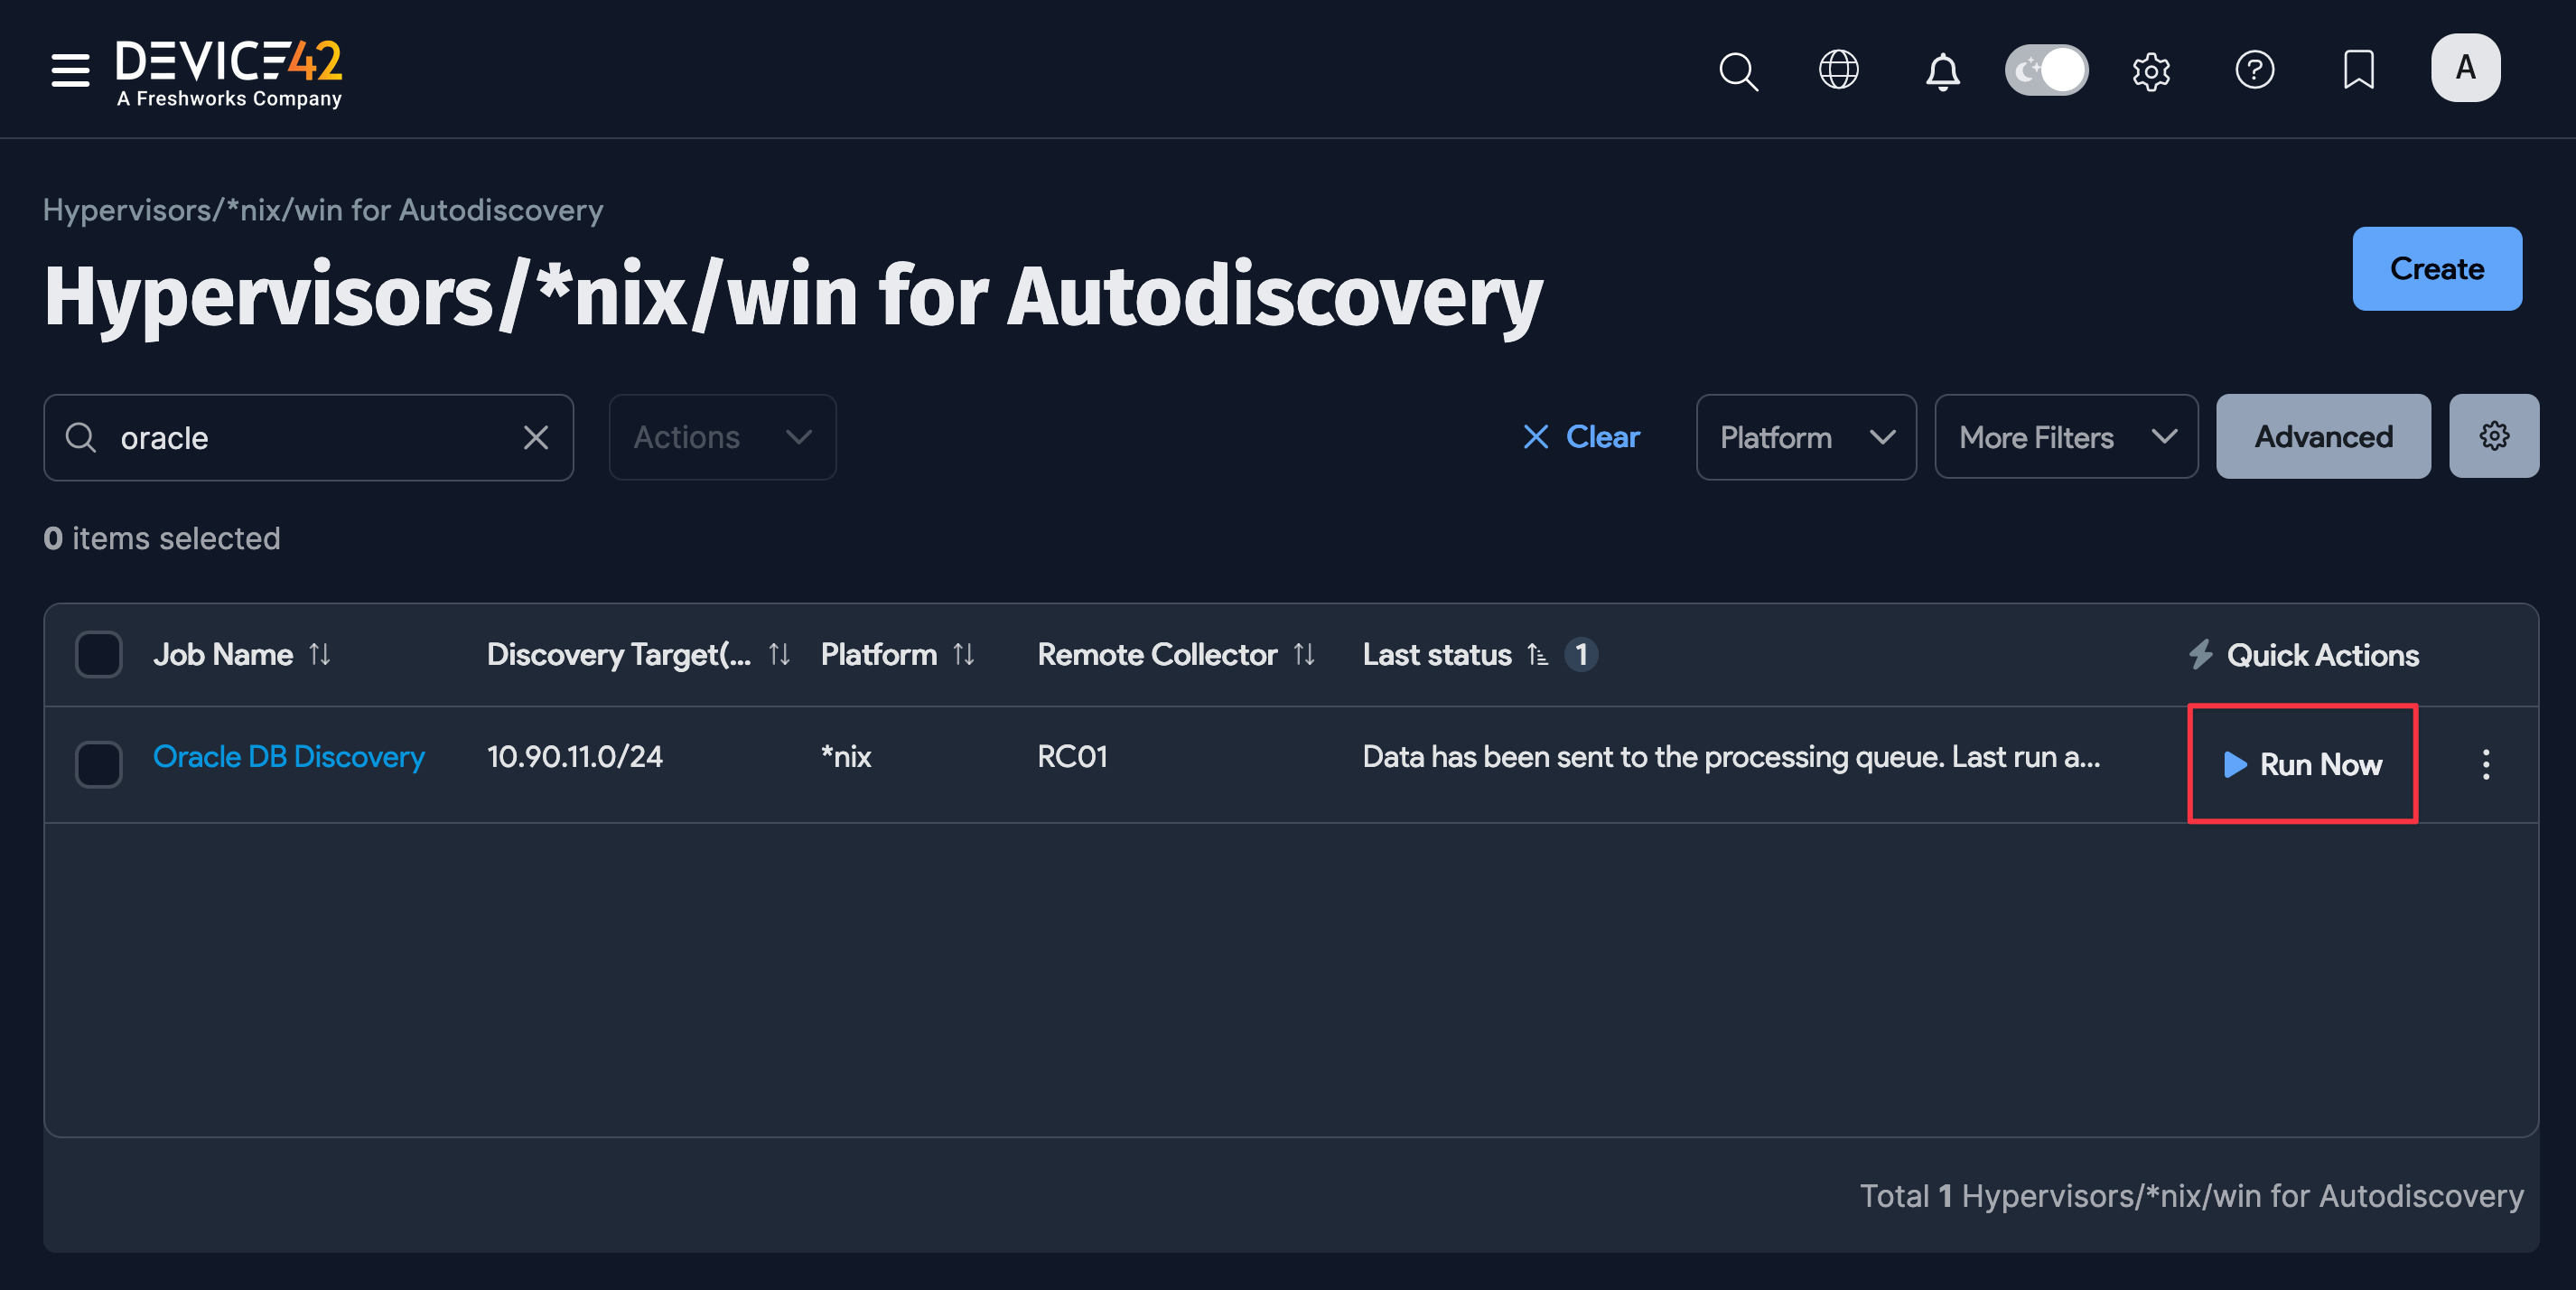
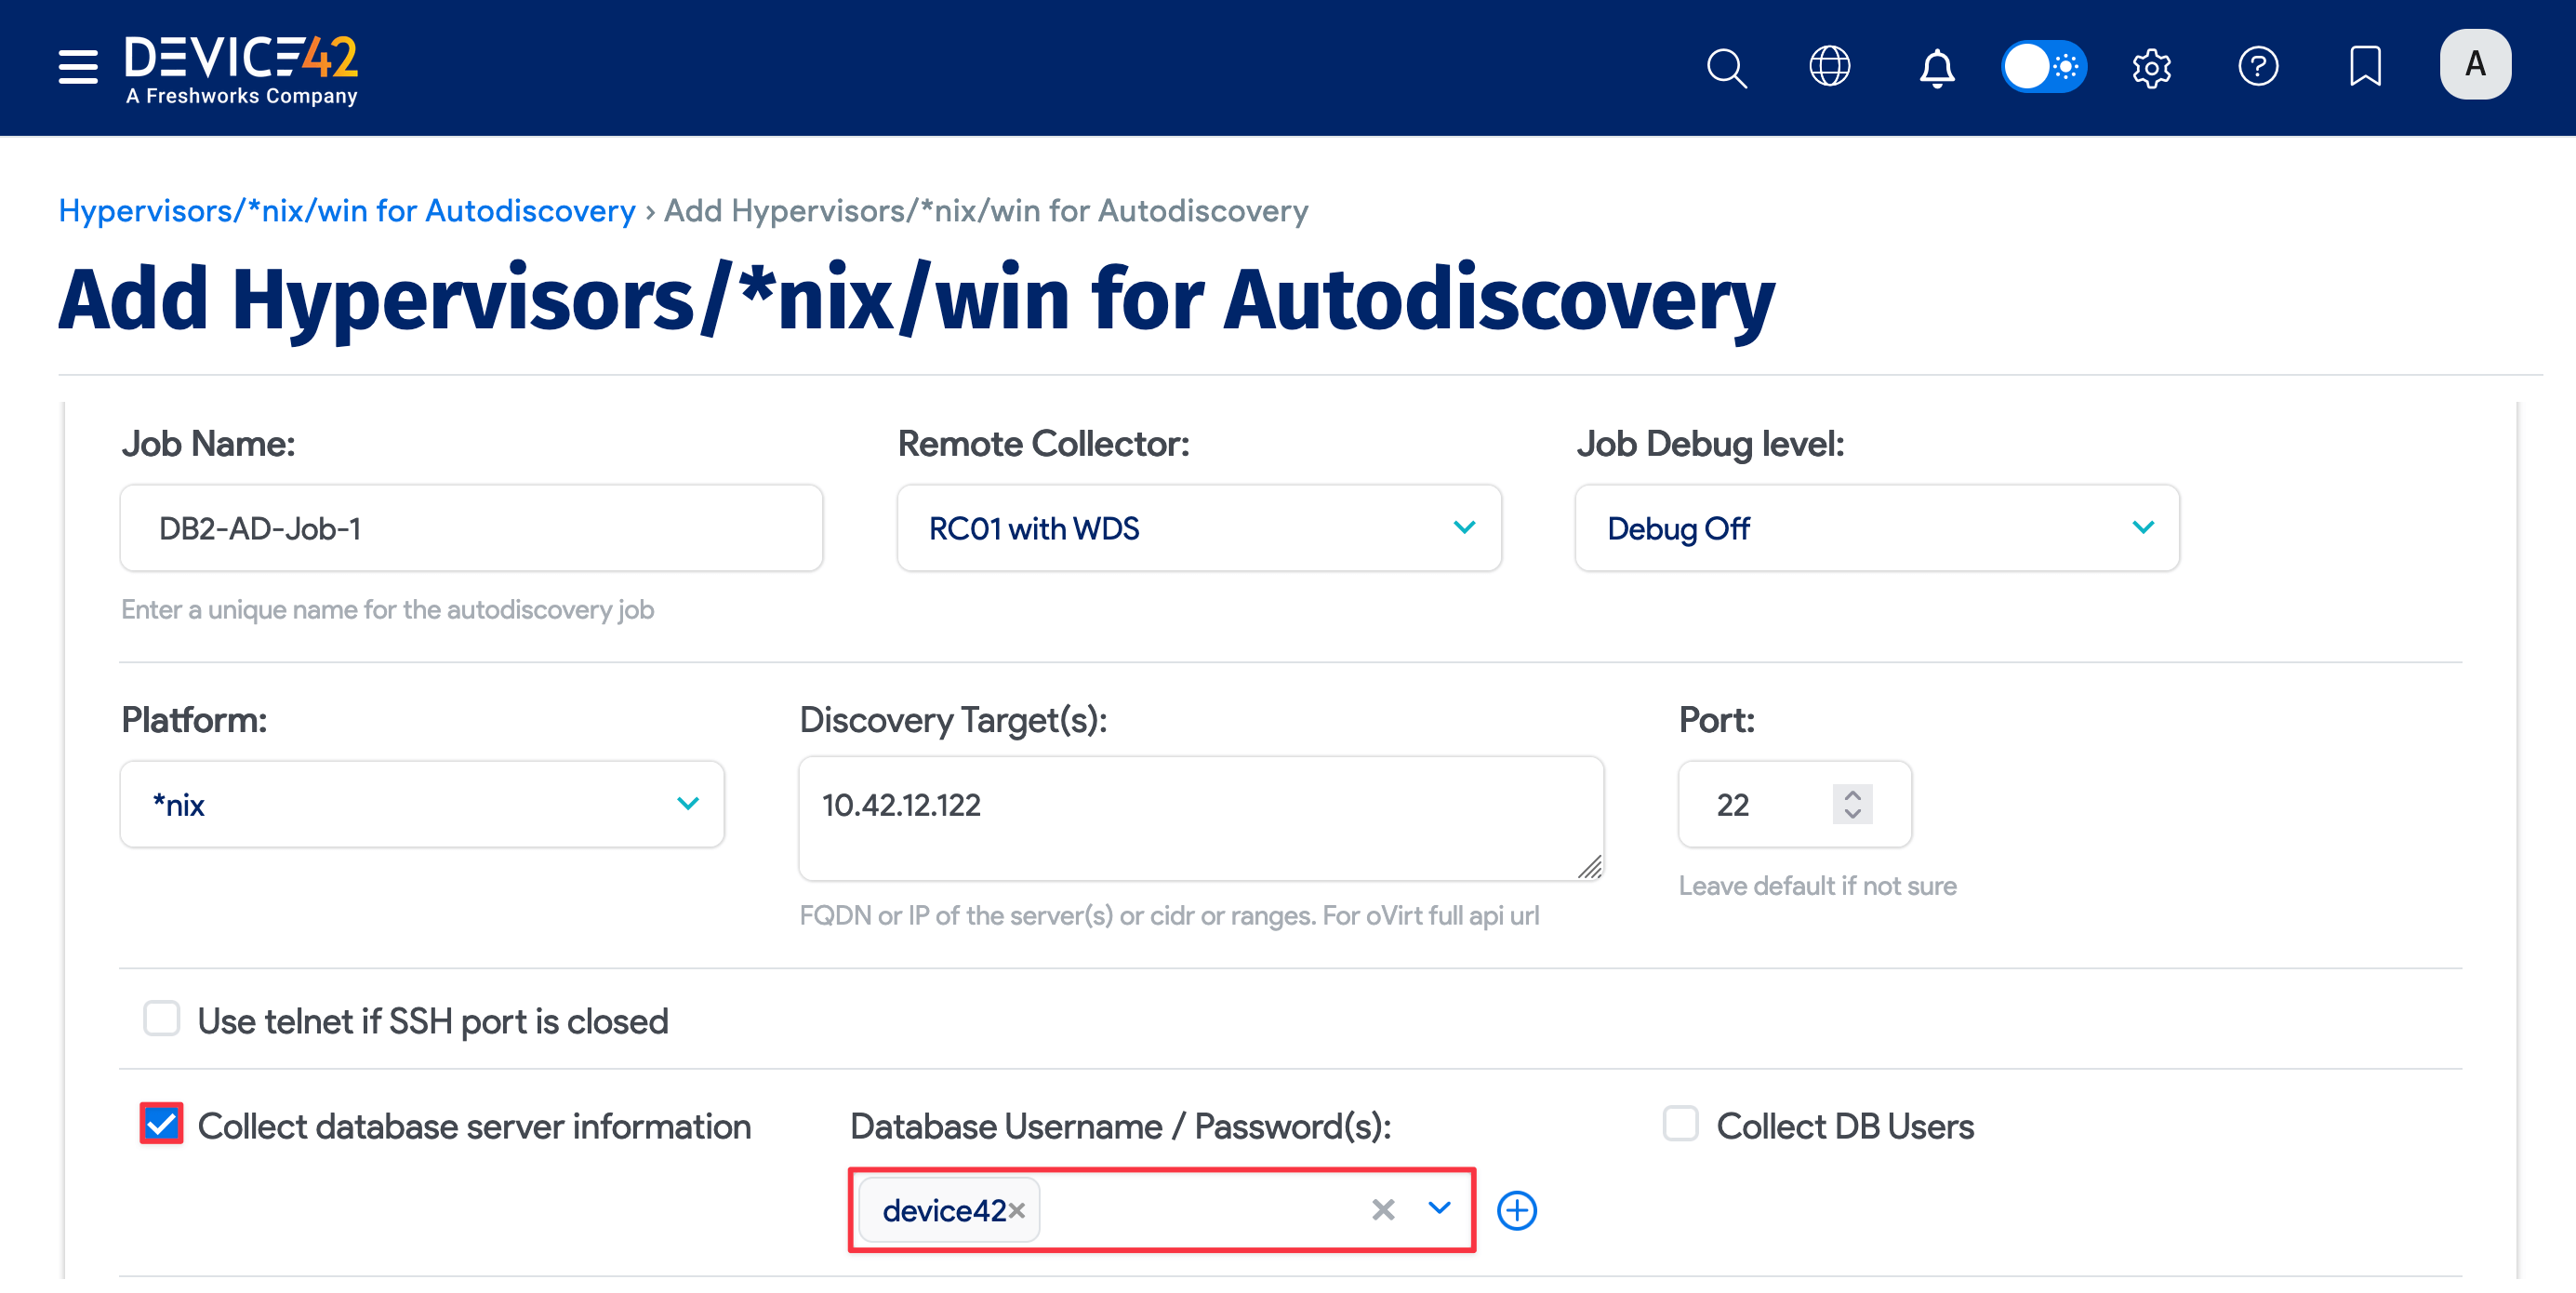
To discover Oracle databases, navigate to Discovery > HyperVisors /*nix /Windows. Create a new discovery job for Windows or *nix (or both) targets and check the Collect database server information checkbox.
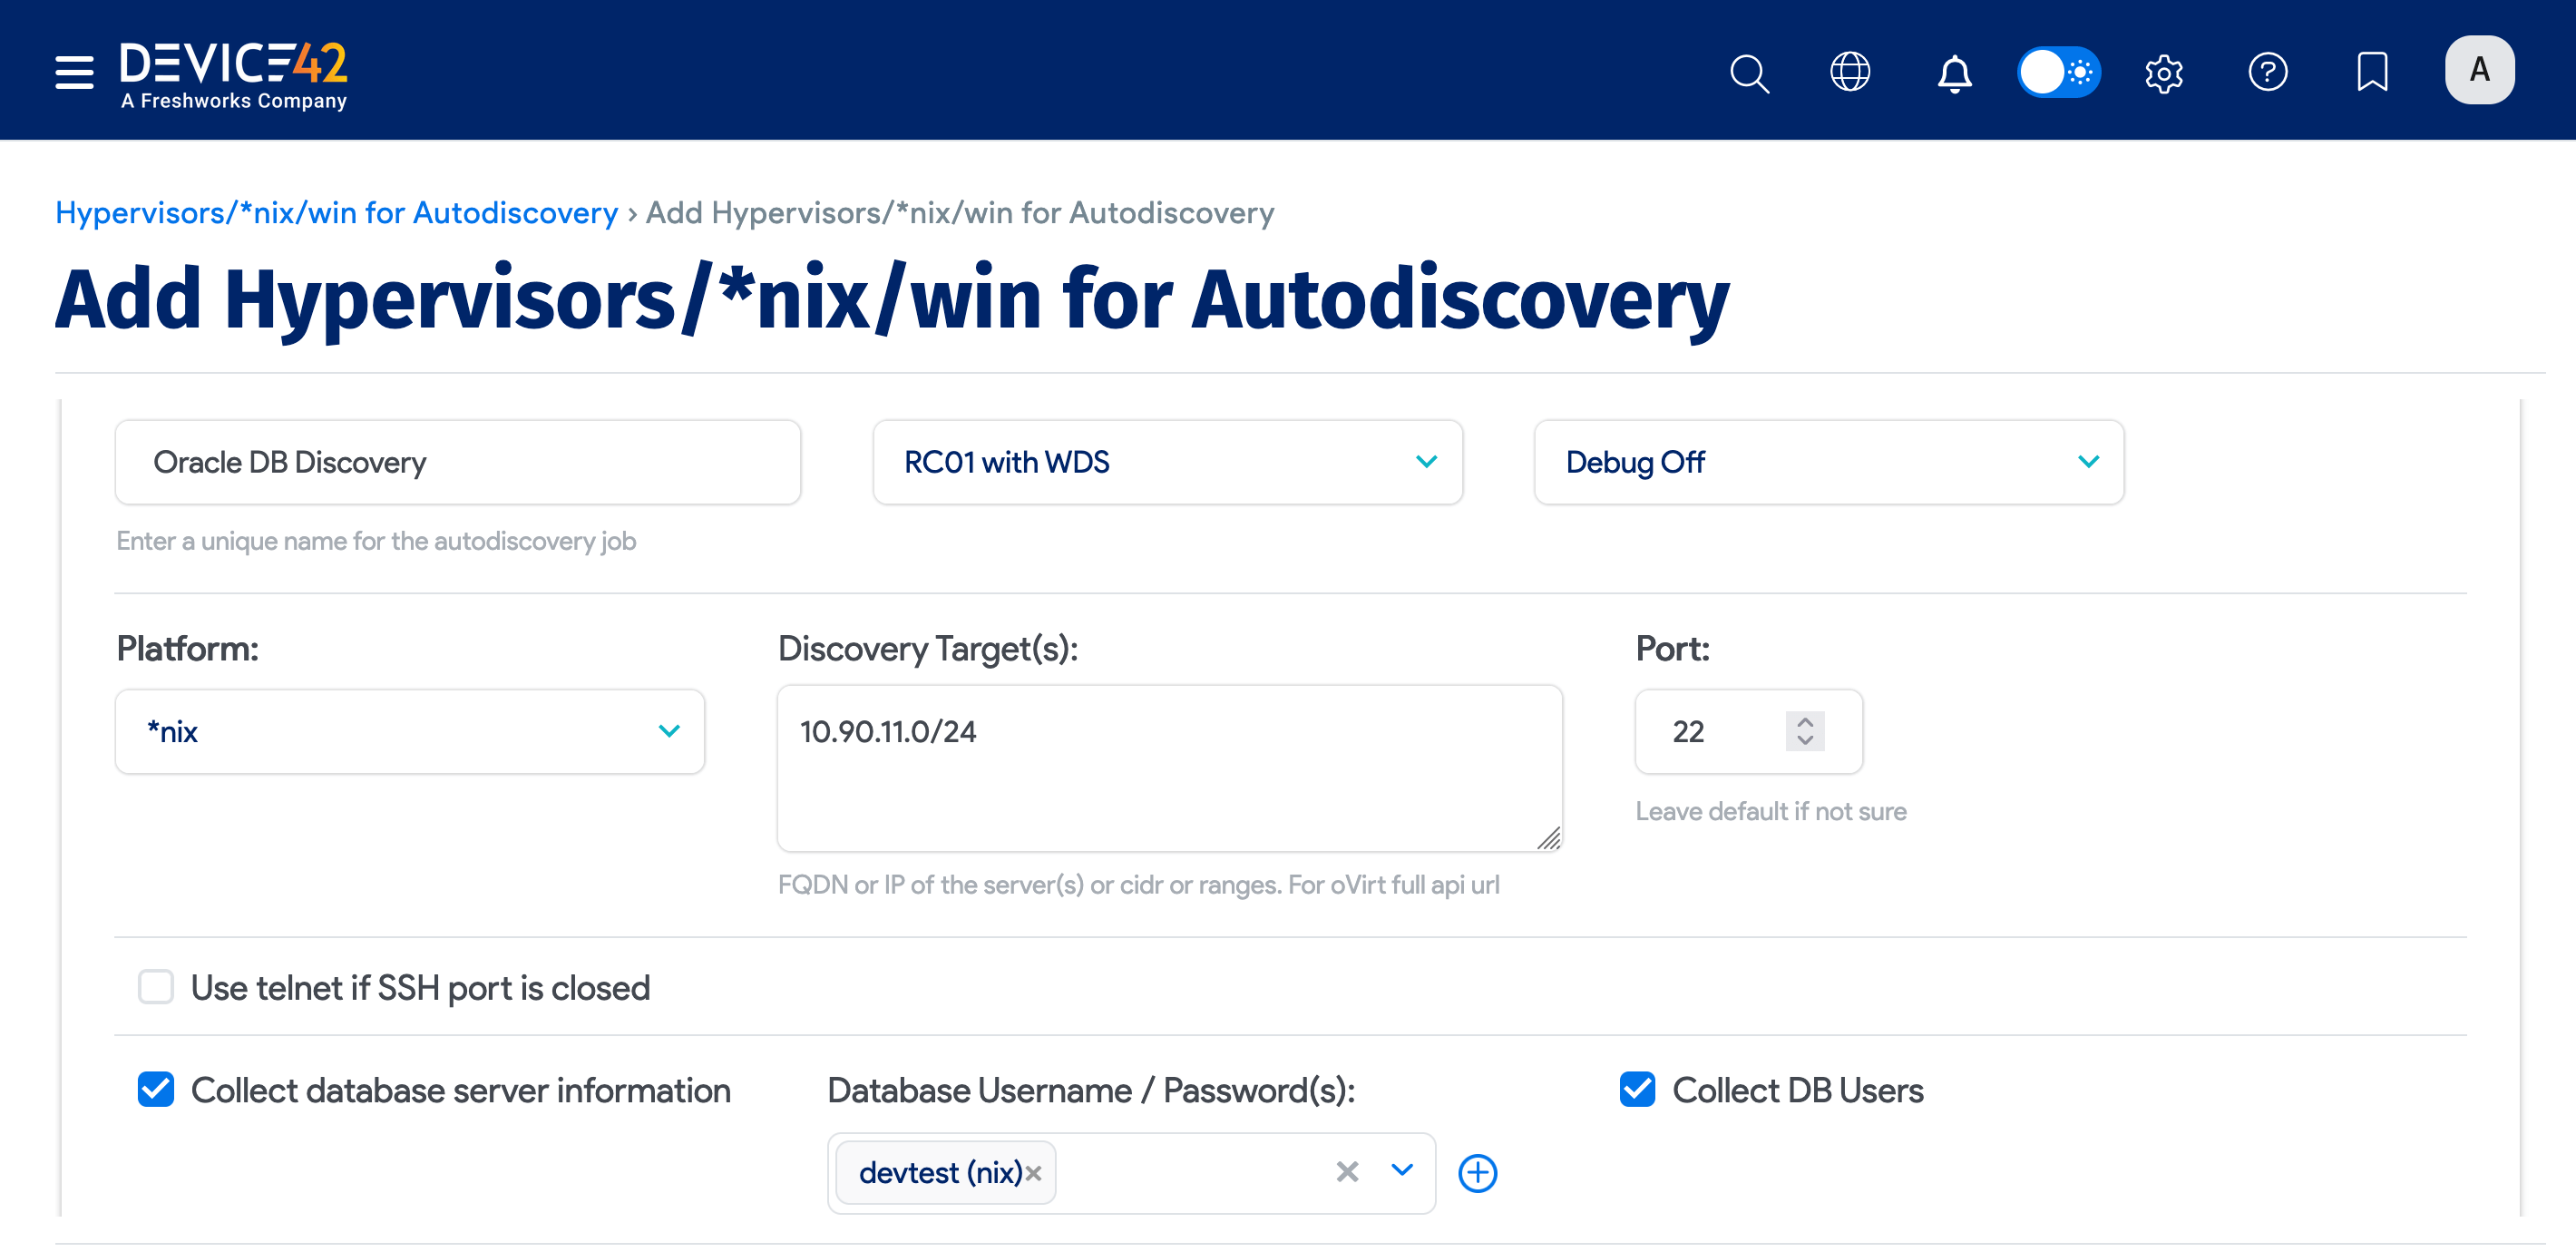
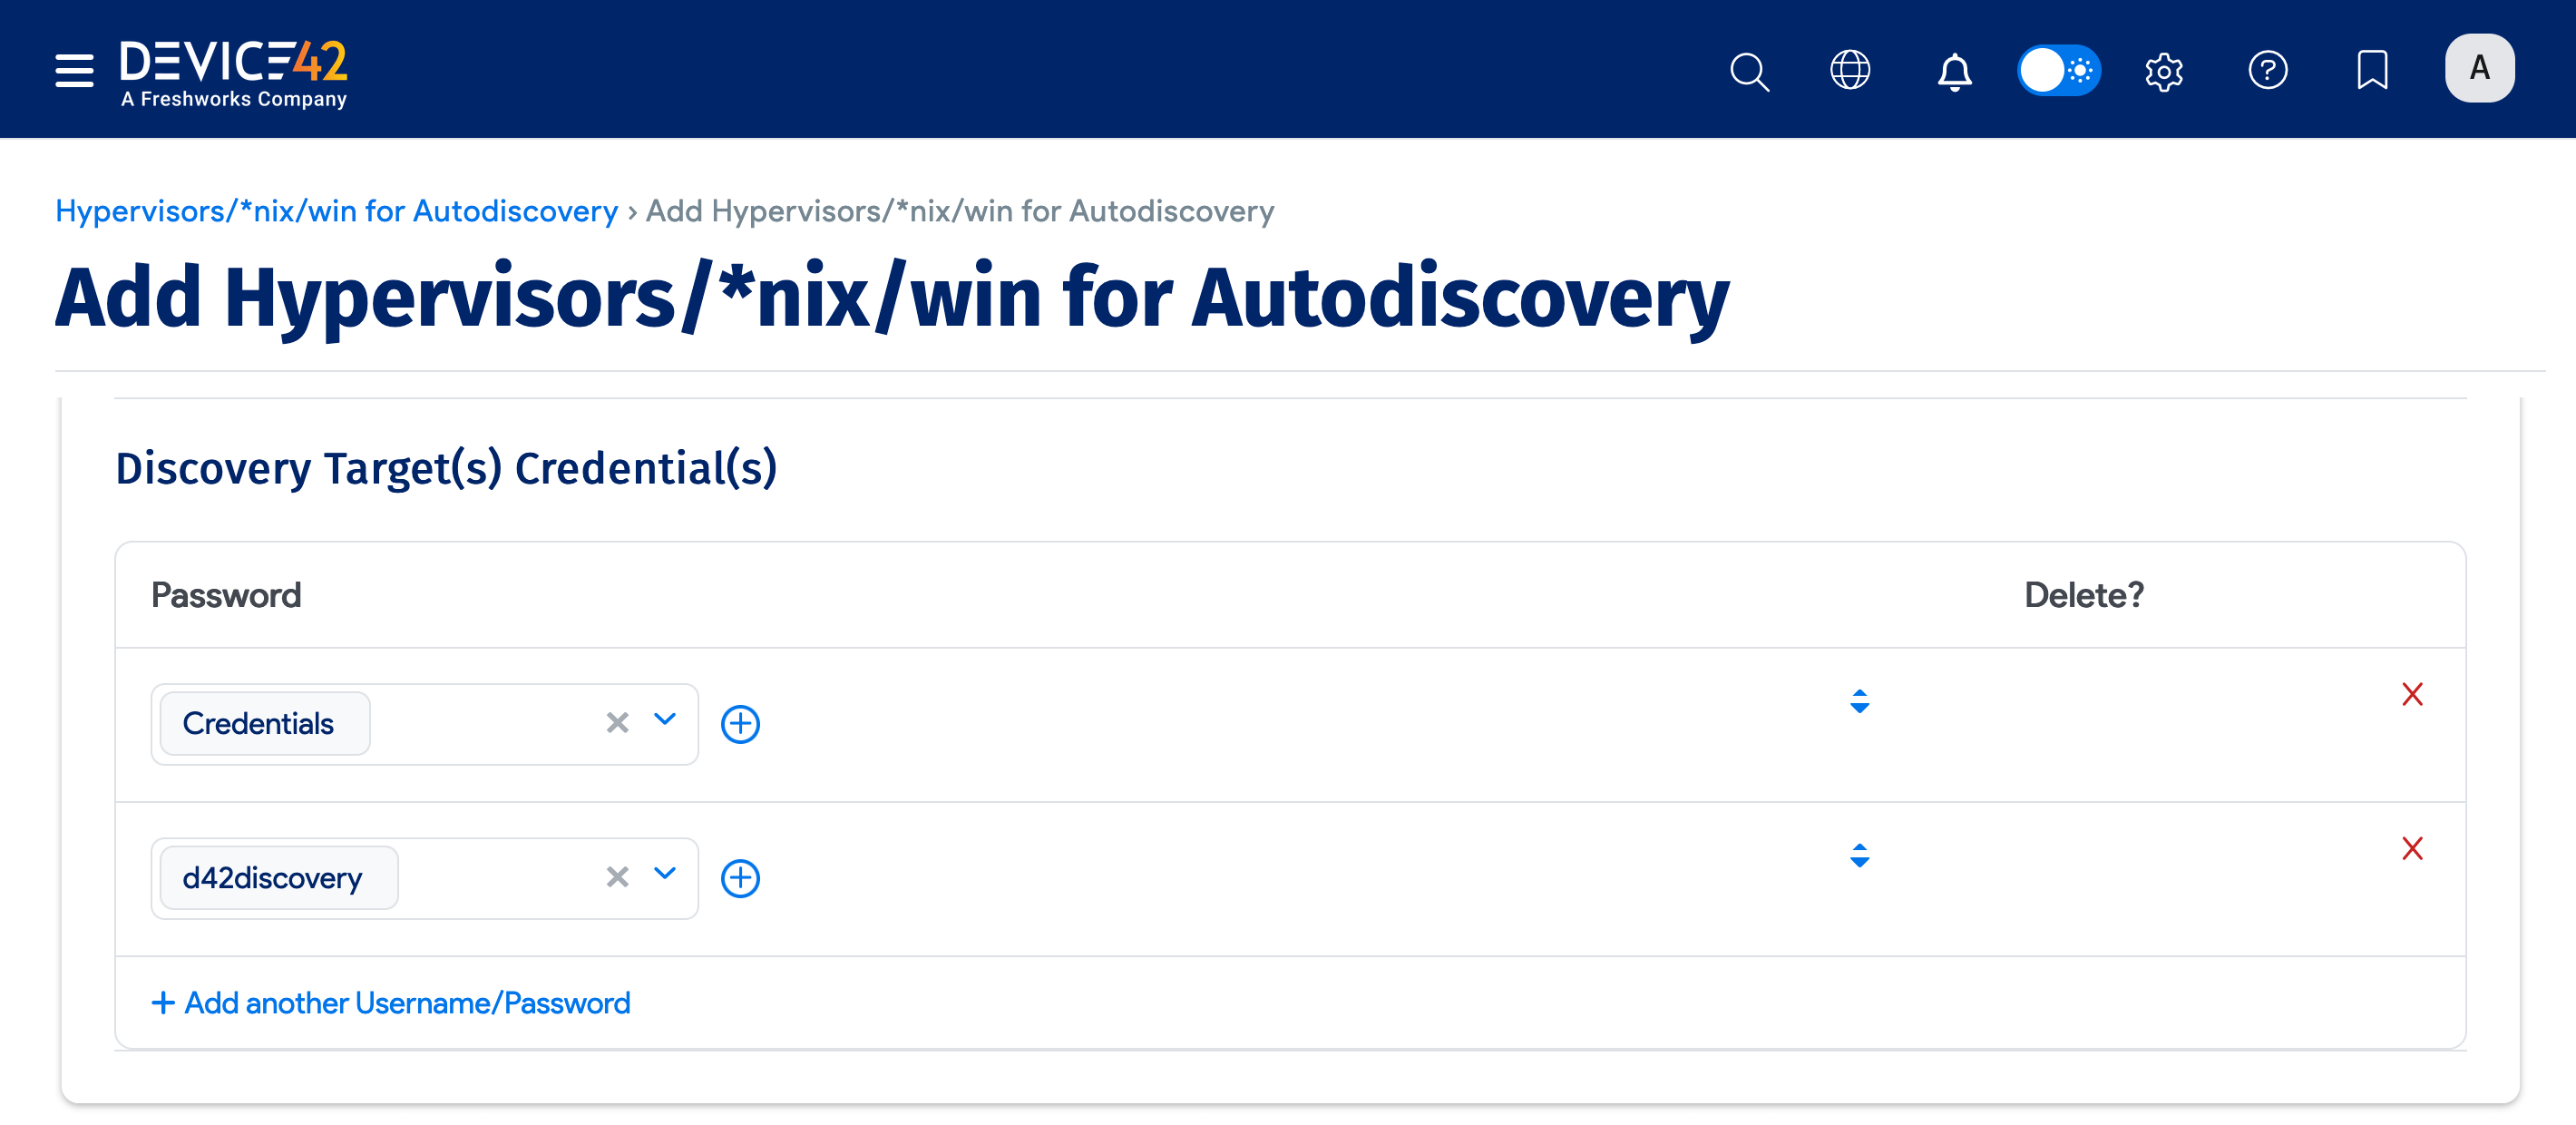
Be sure to fill out both sets of credentials:
- Database Username / Password(s): Credentials to authenticate to the Oracle database.
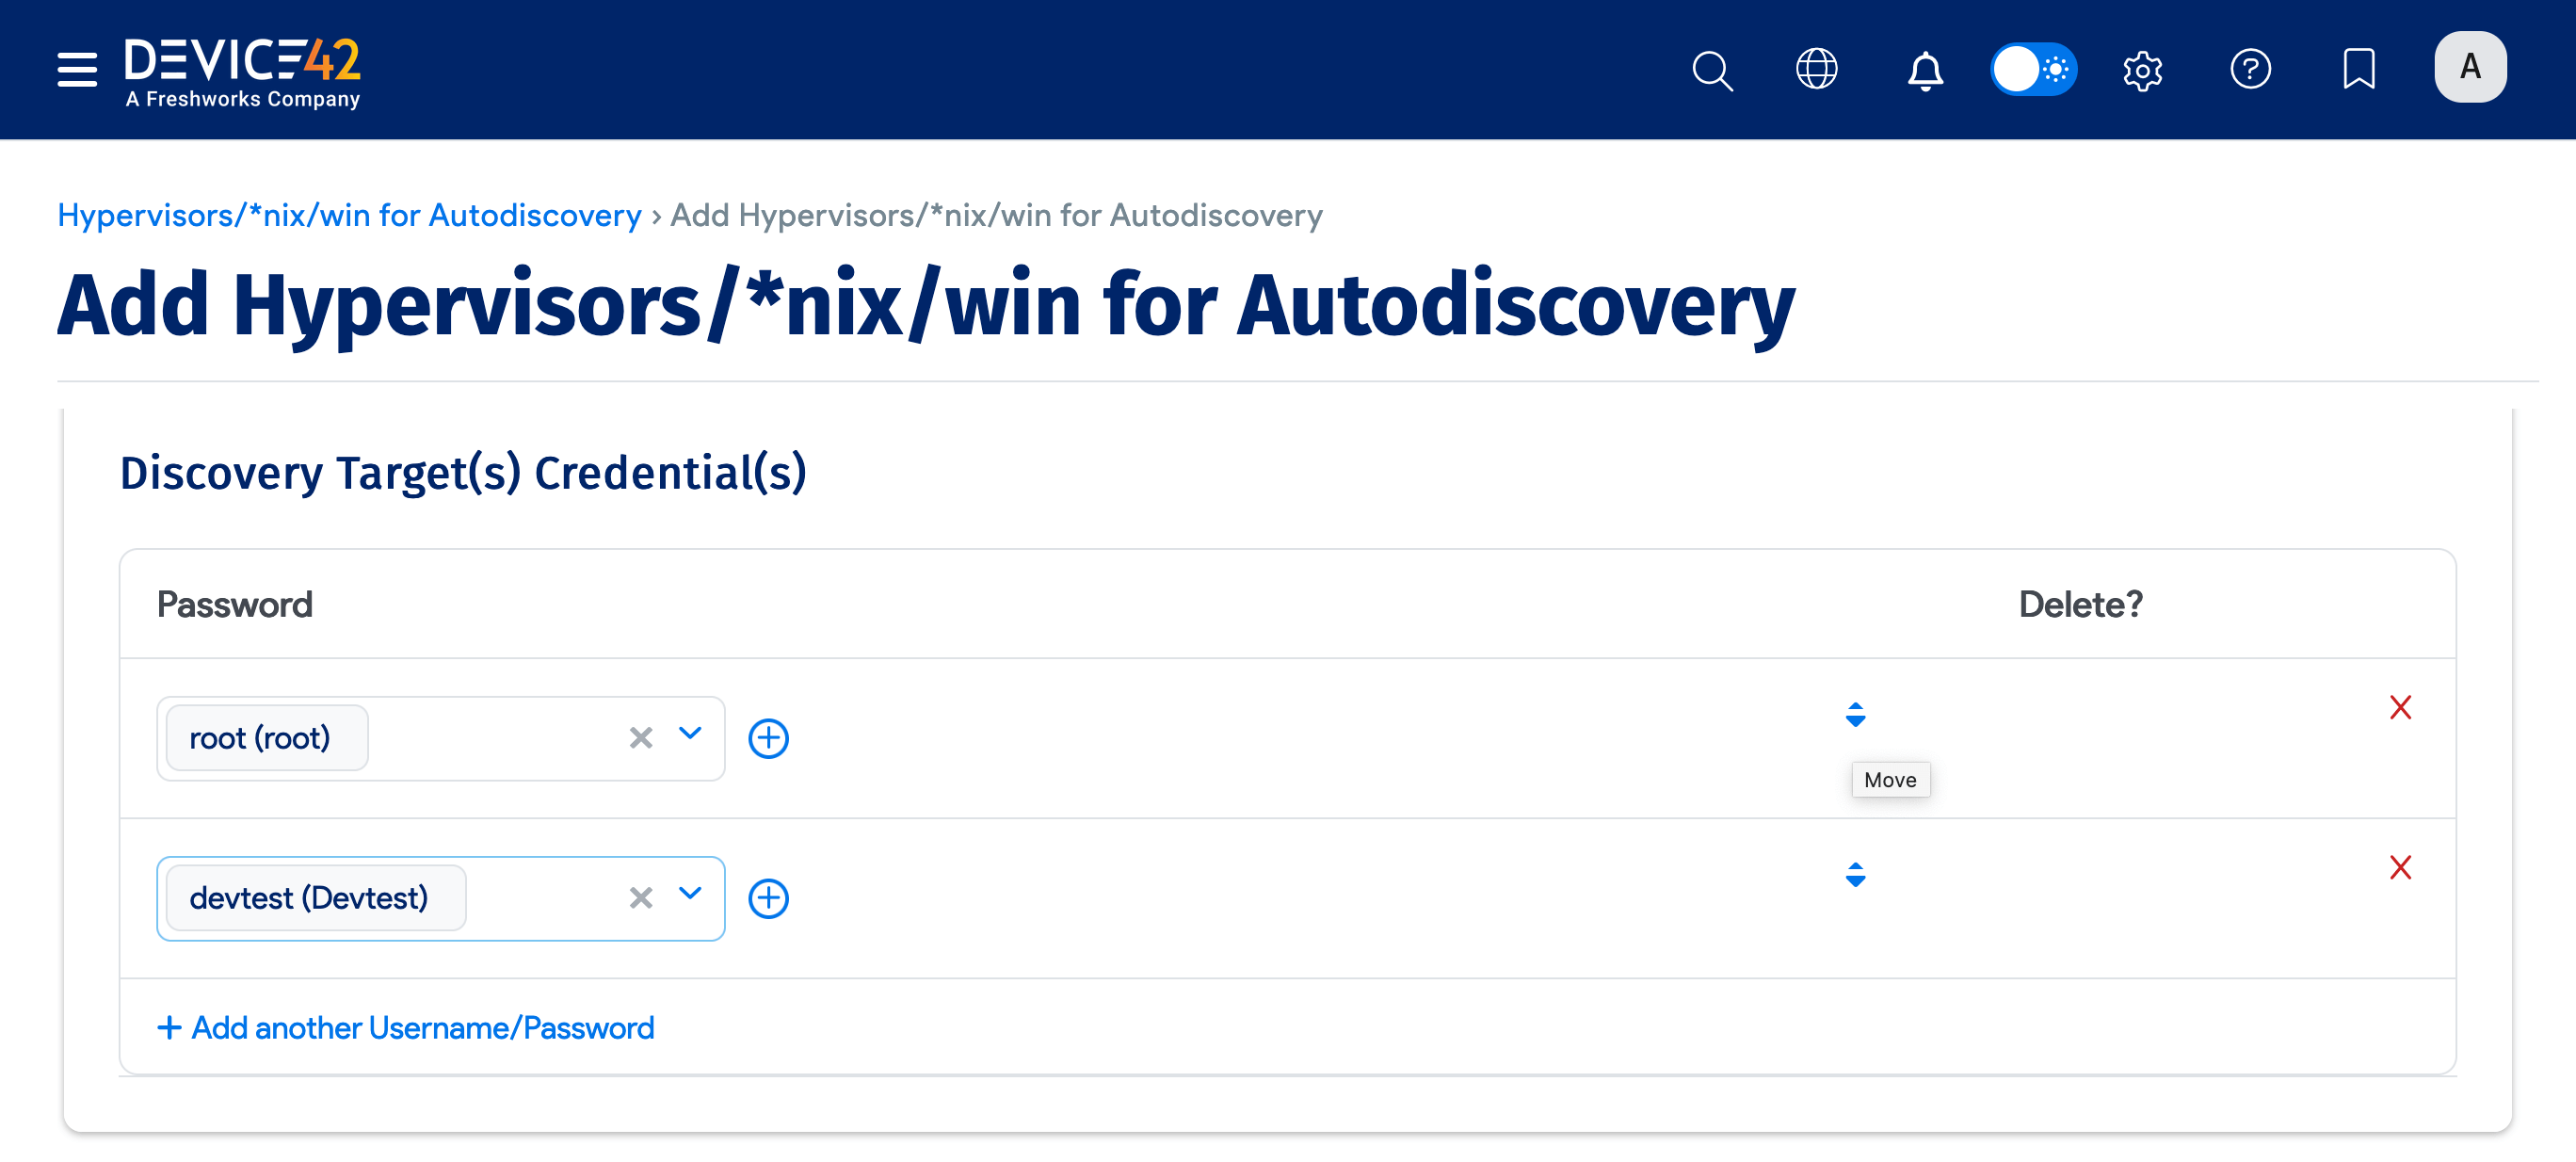
- Discovery Target(s) Credential(s): Credentials to authenticate to the Windows or *nix server.
You can enter multiple credentials in a preferred order. The job tries each credential in order and stops at the first successful authentication. Subsequent runs start with the last successful credential.
Run your new discovery job to test it. Click Run Now on the job details page or on the list page under Discovery > HyperVisors /*nix /Windows. As Oracle databases are detected, discovery will import a list of all the instances, databases, and connection details it finds.
View Oracle Database Discovery Job Results
When the job finishes, the most direct way to view the results of your database discovery is via the discovered Oracle Application Components.
On the Device42 main menu, select Applications > Application Components. If you don't see your Oracle database instances at the top of the list, you can search for "Oracle" to narrow down the list.
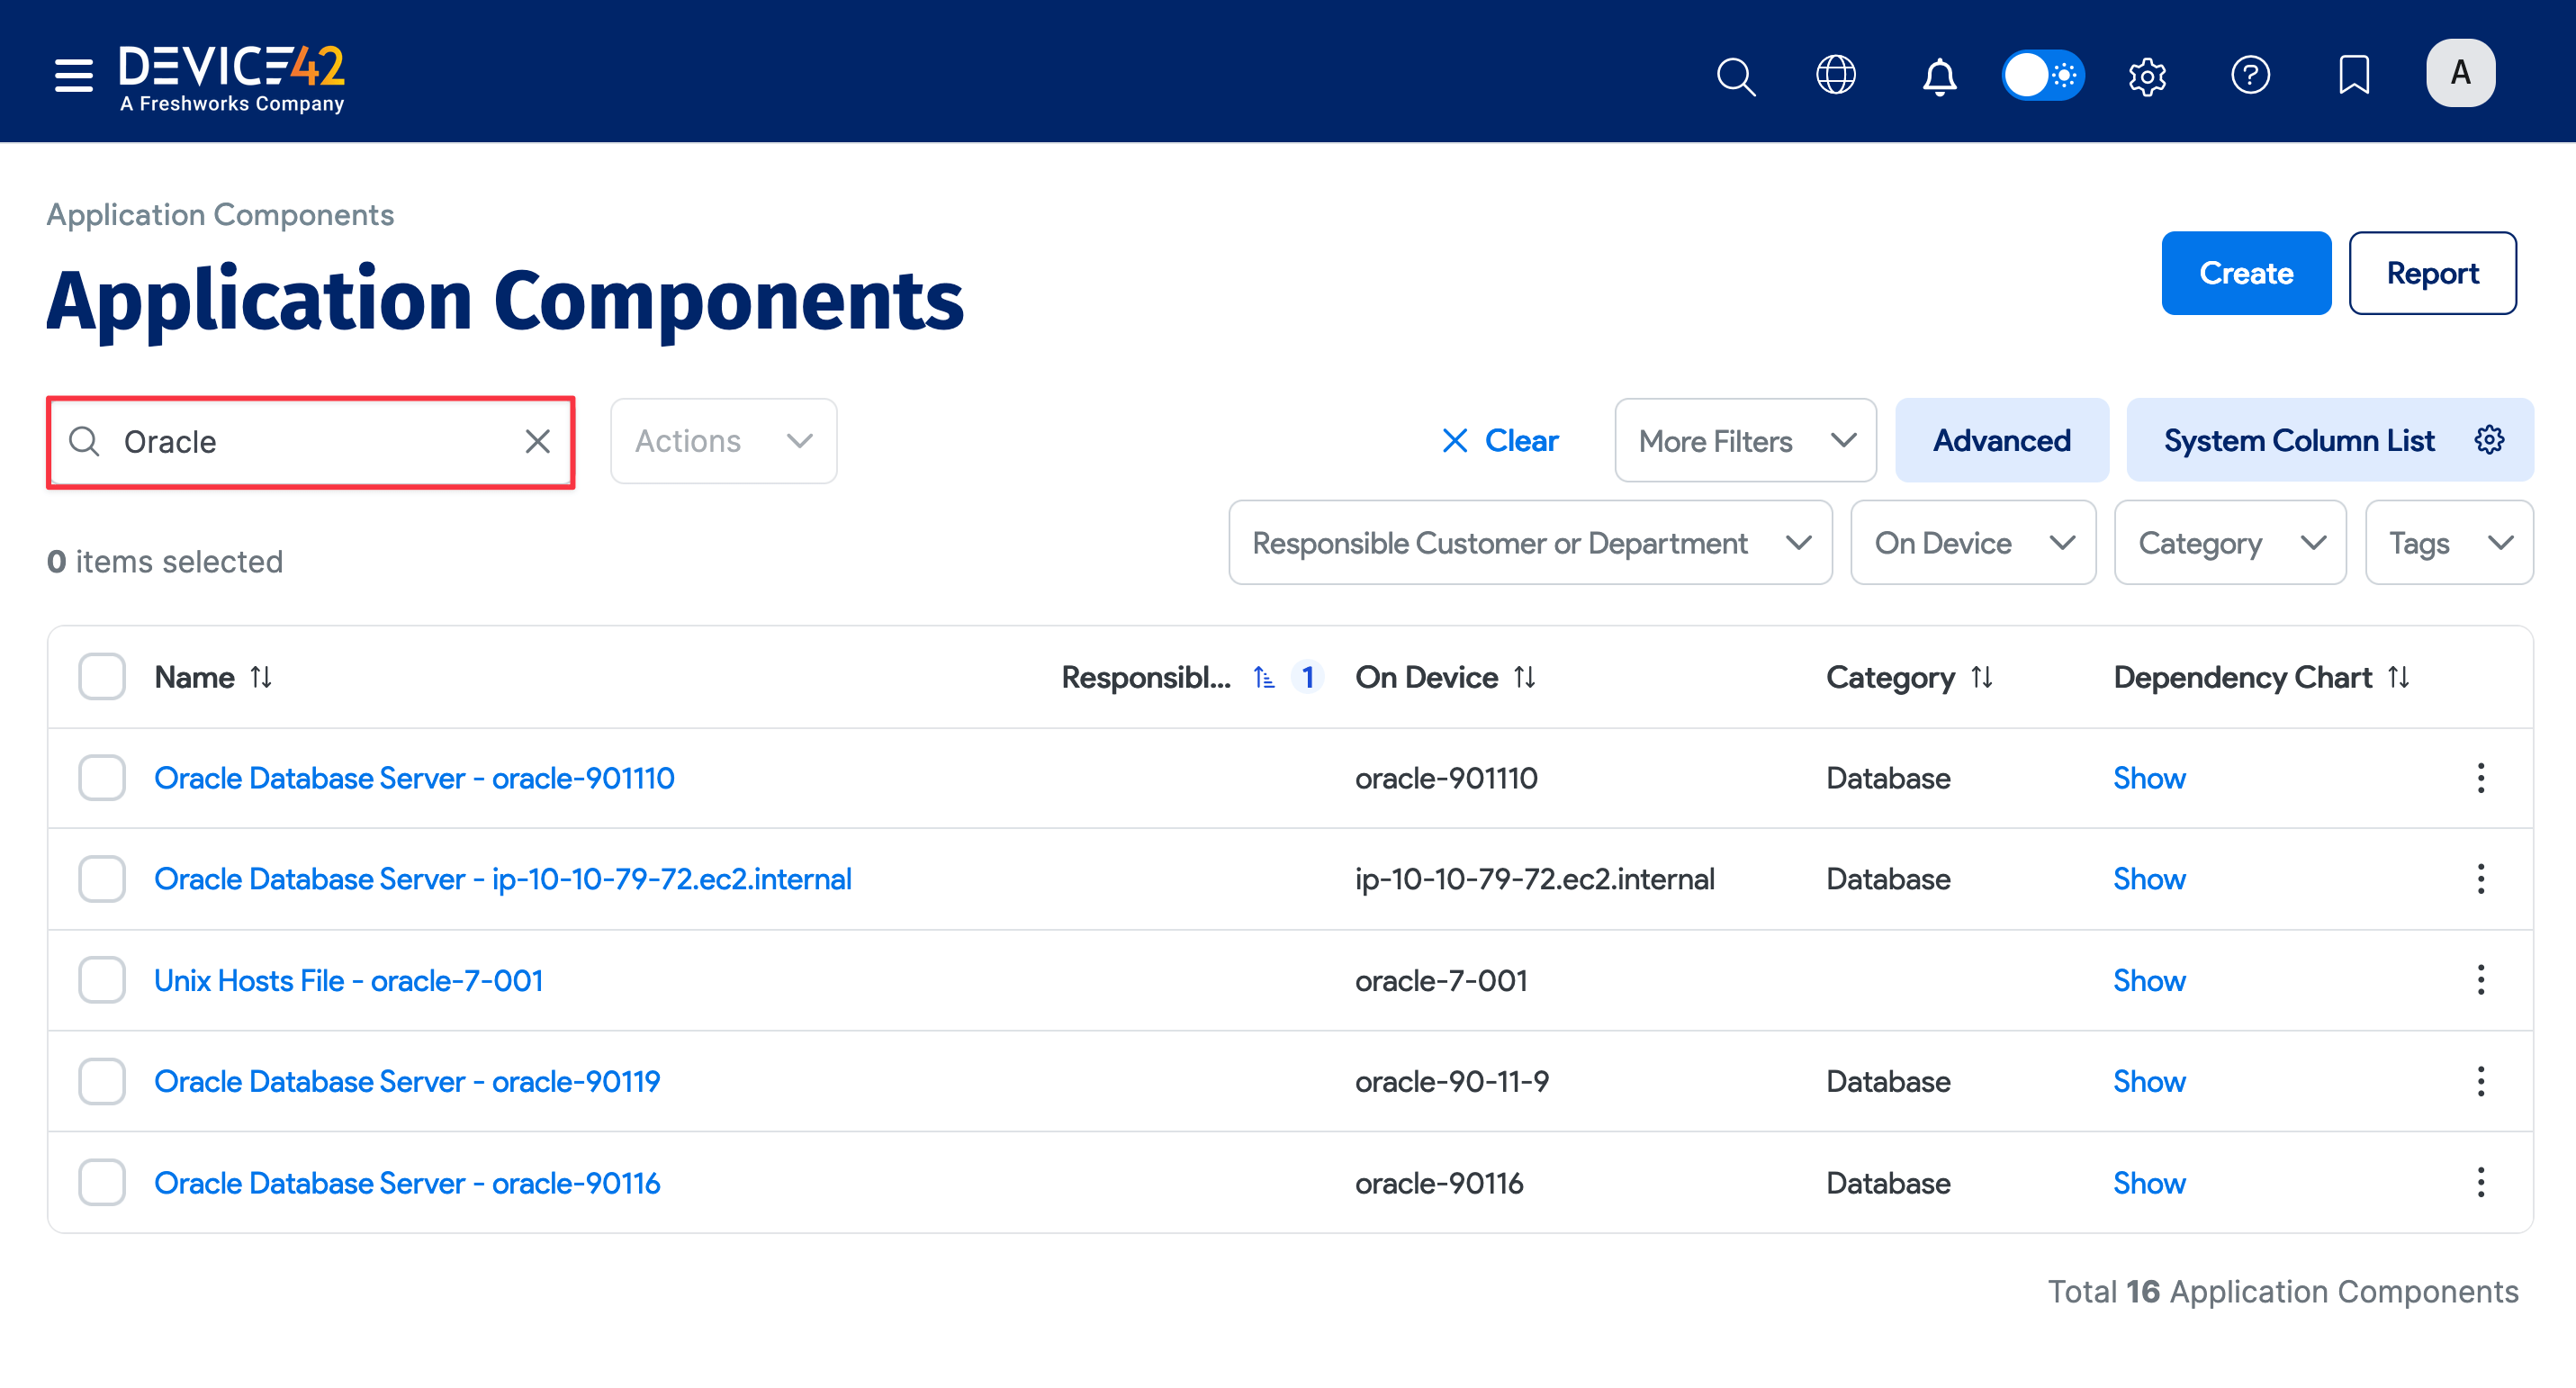

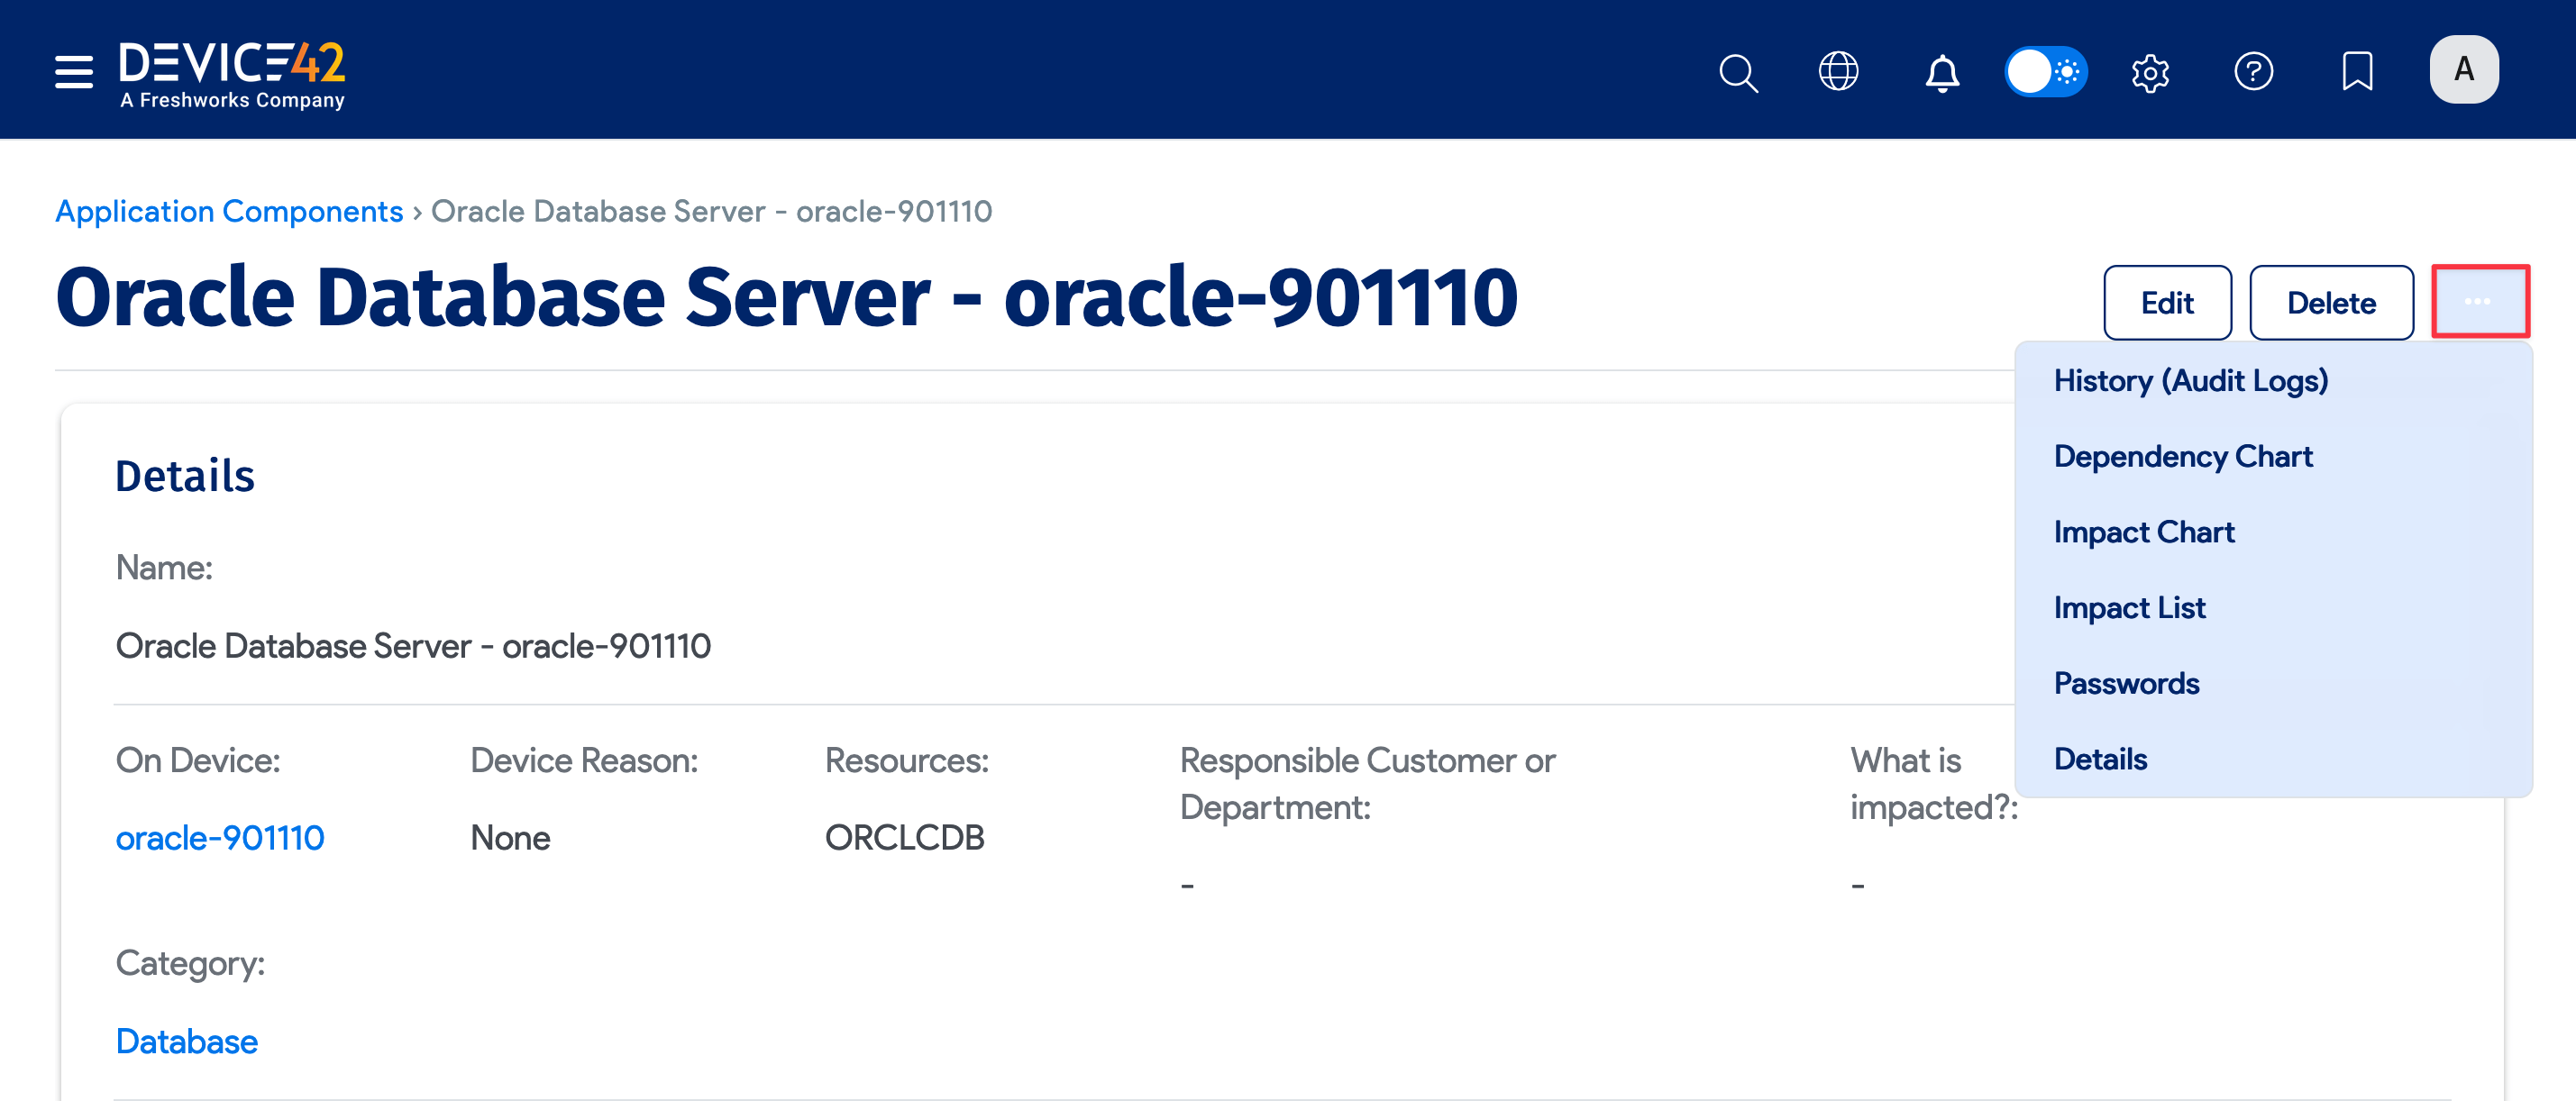
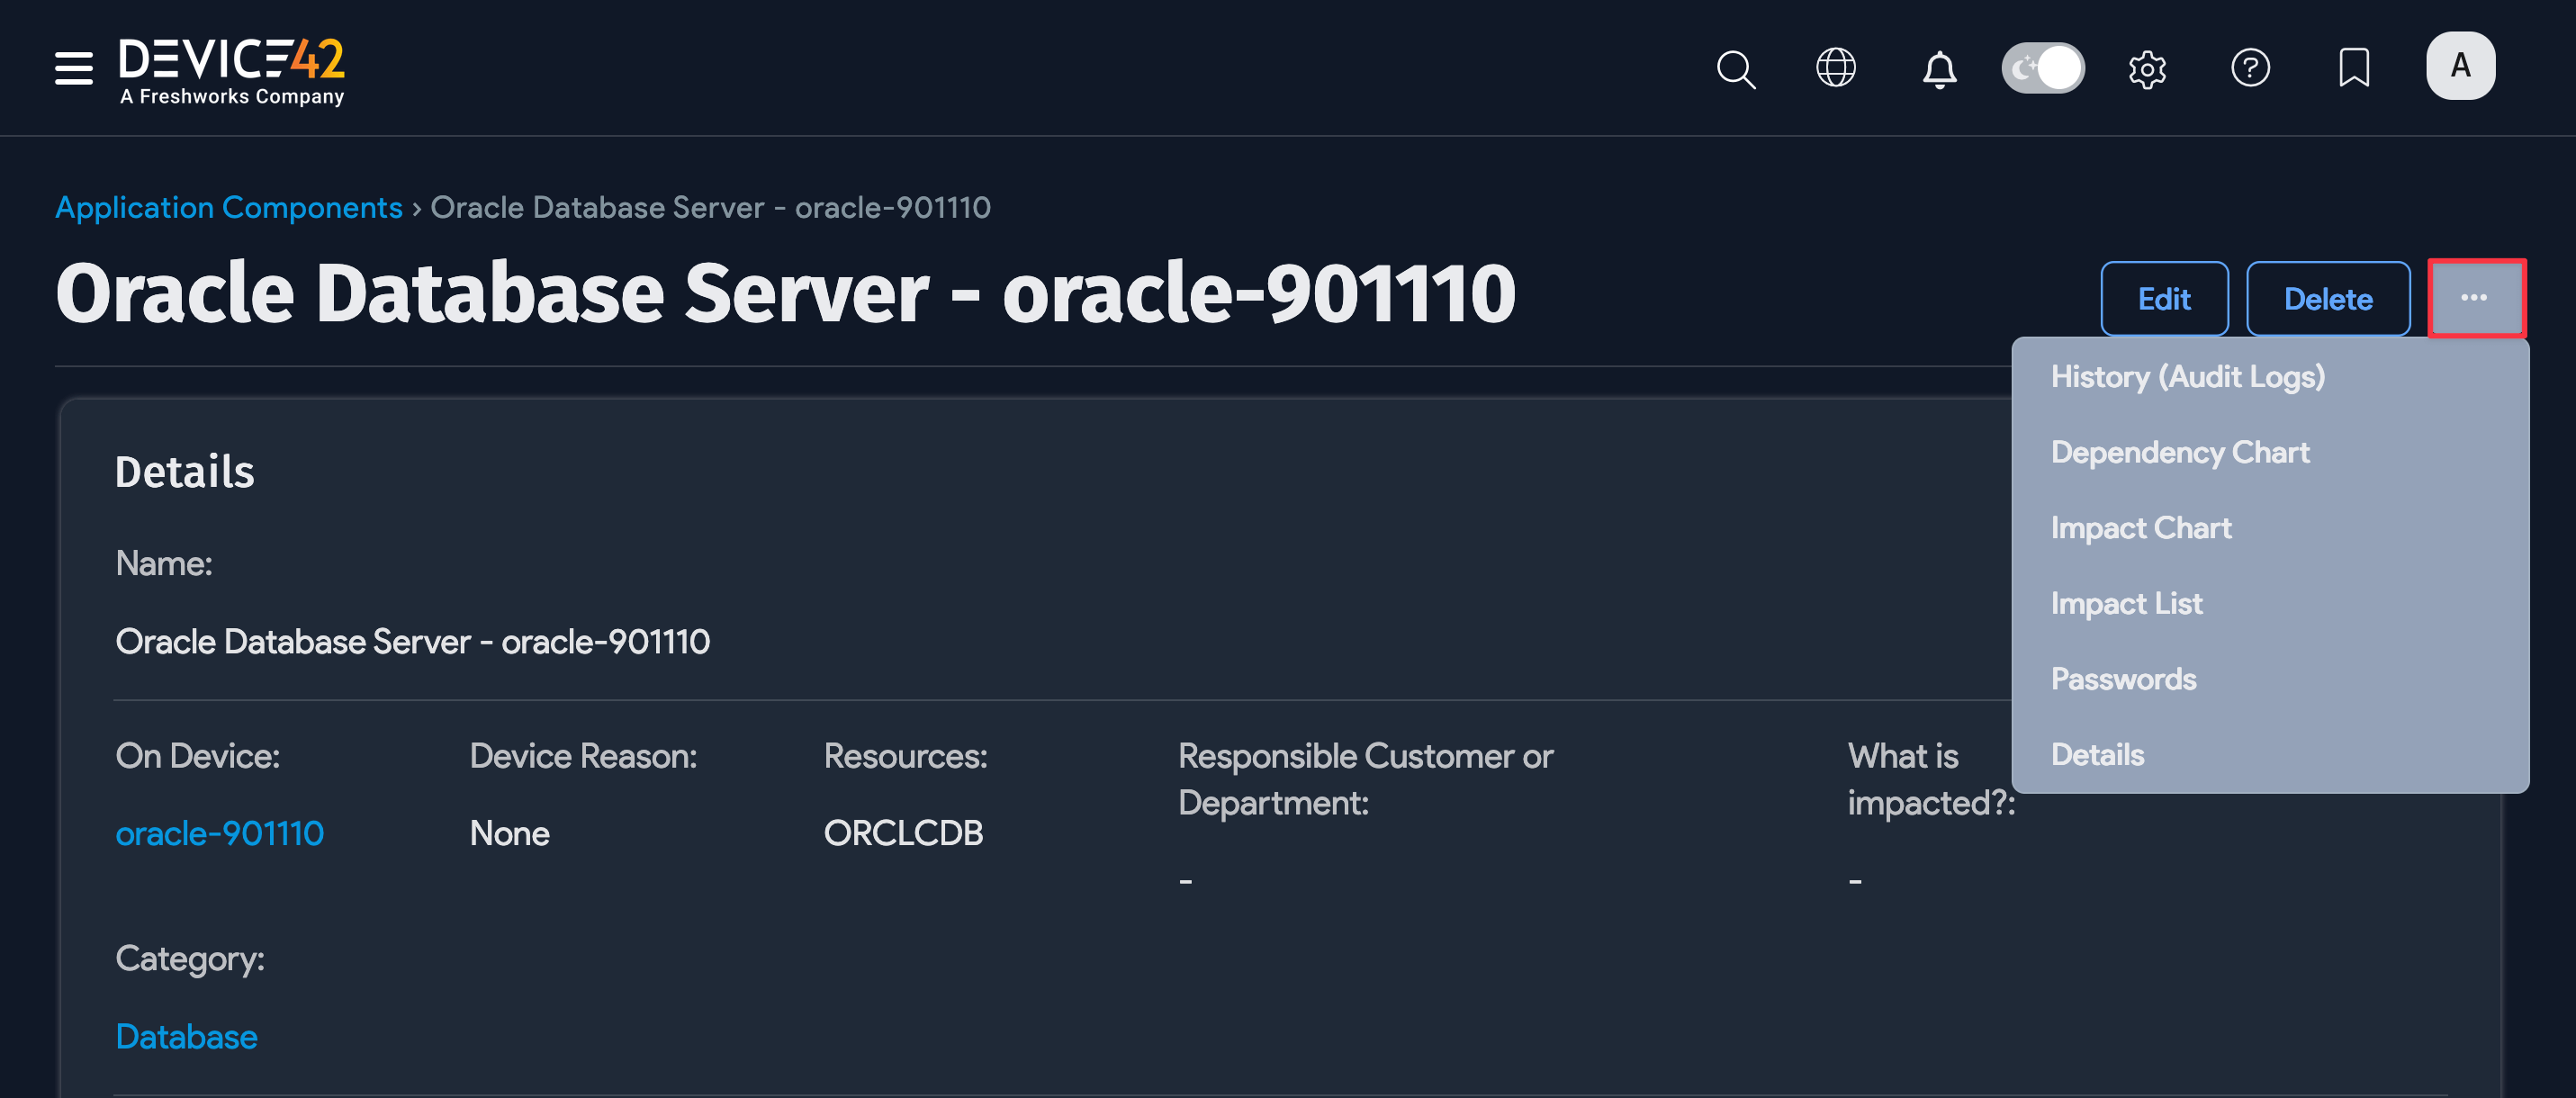
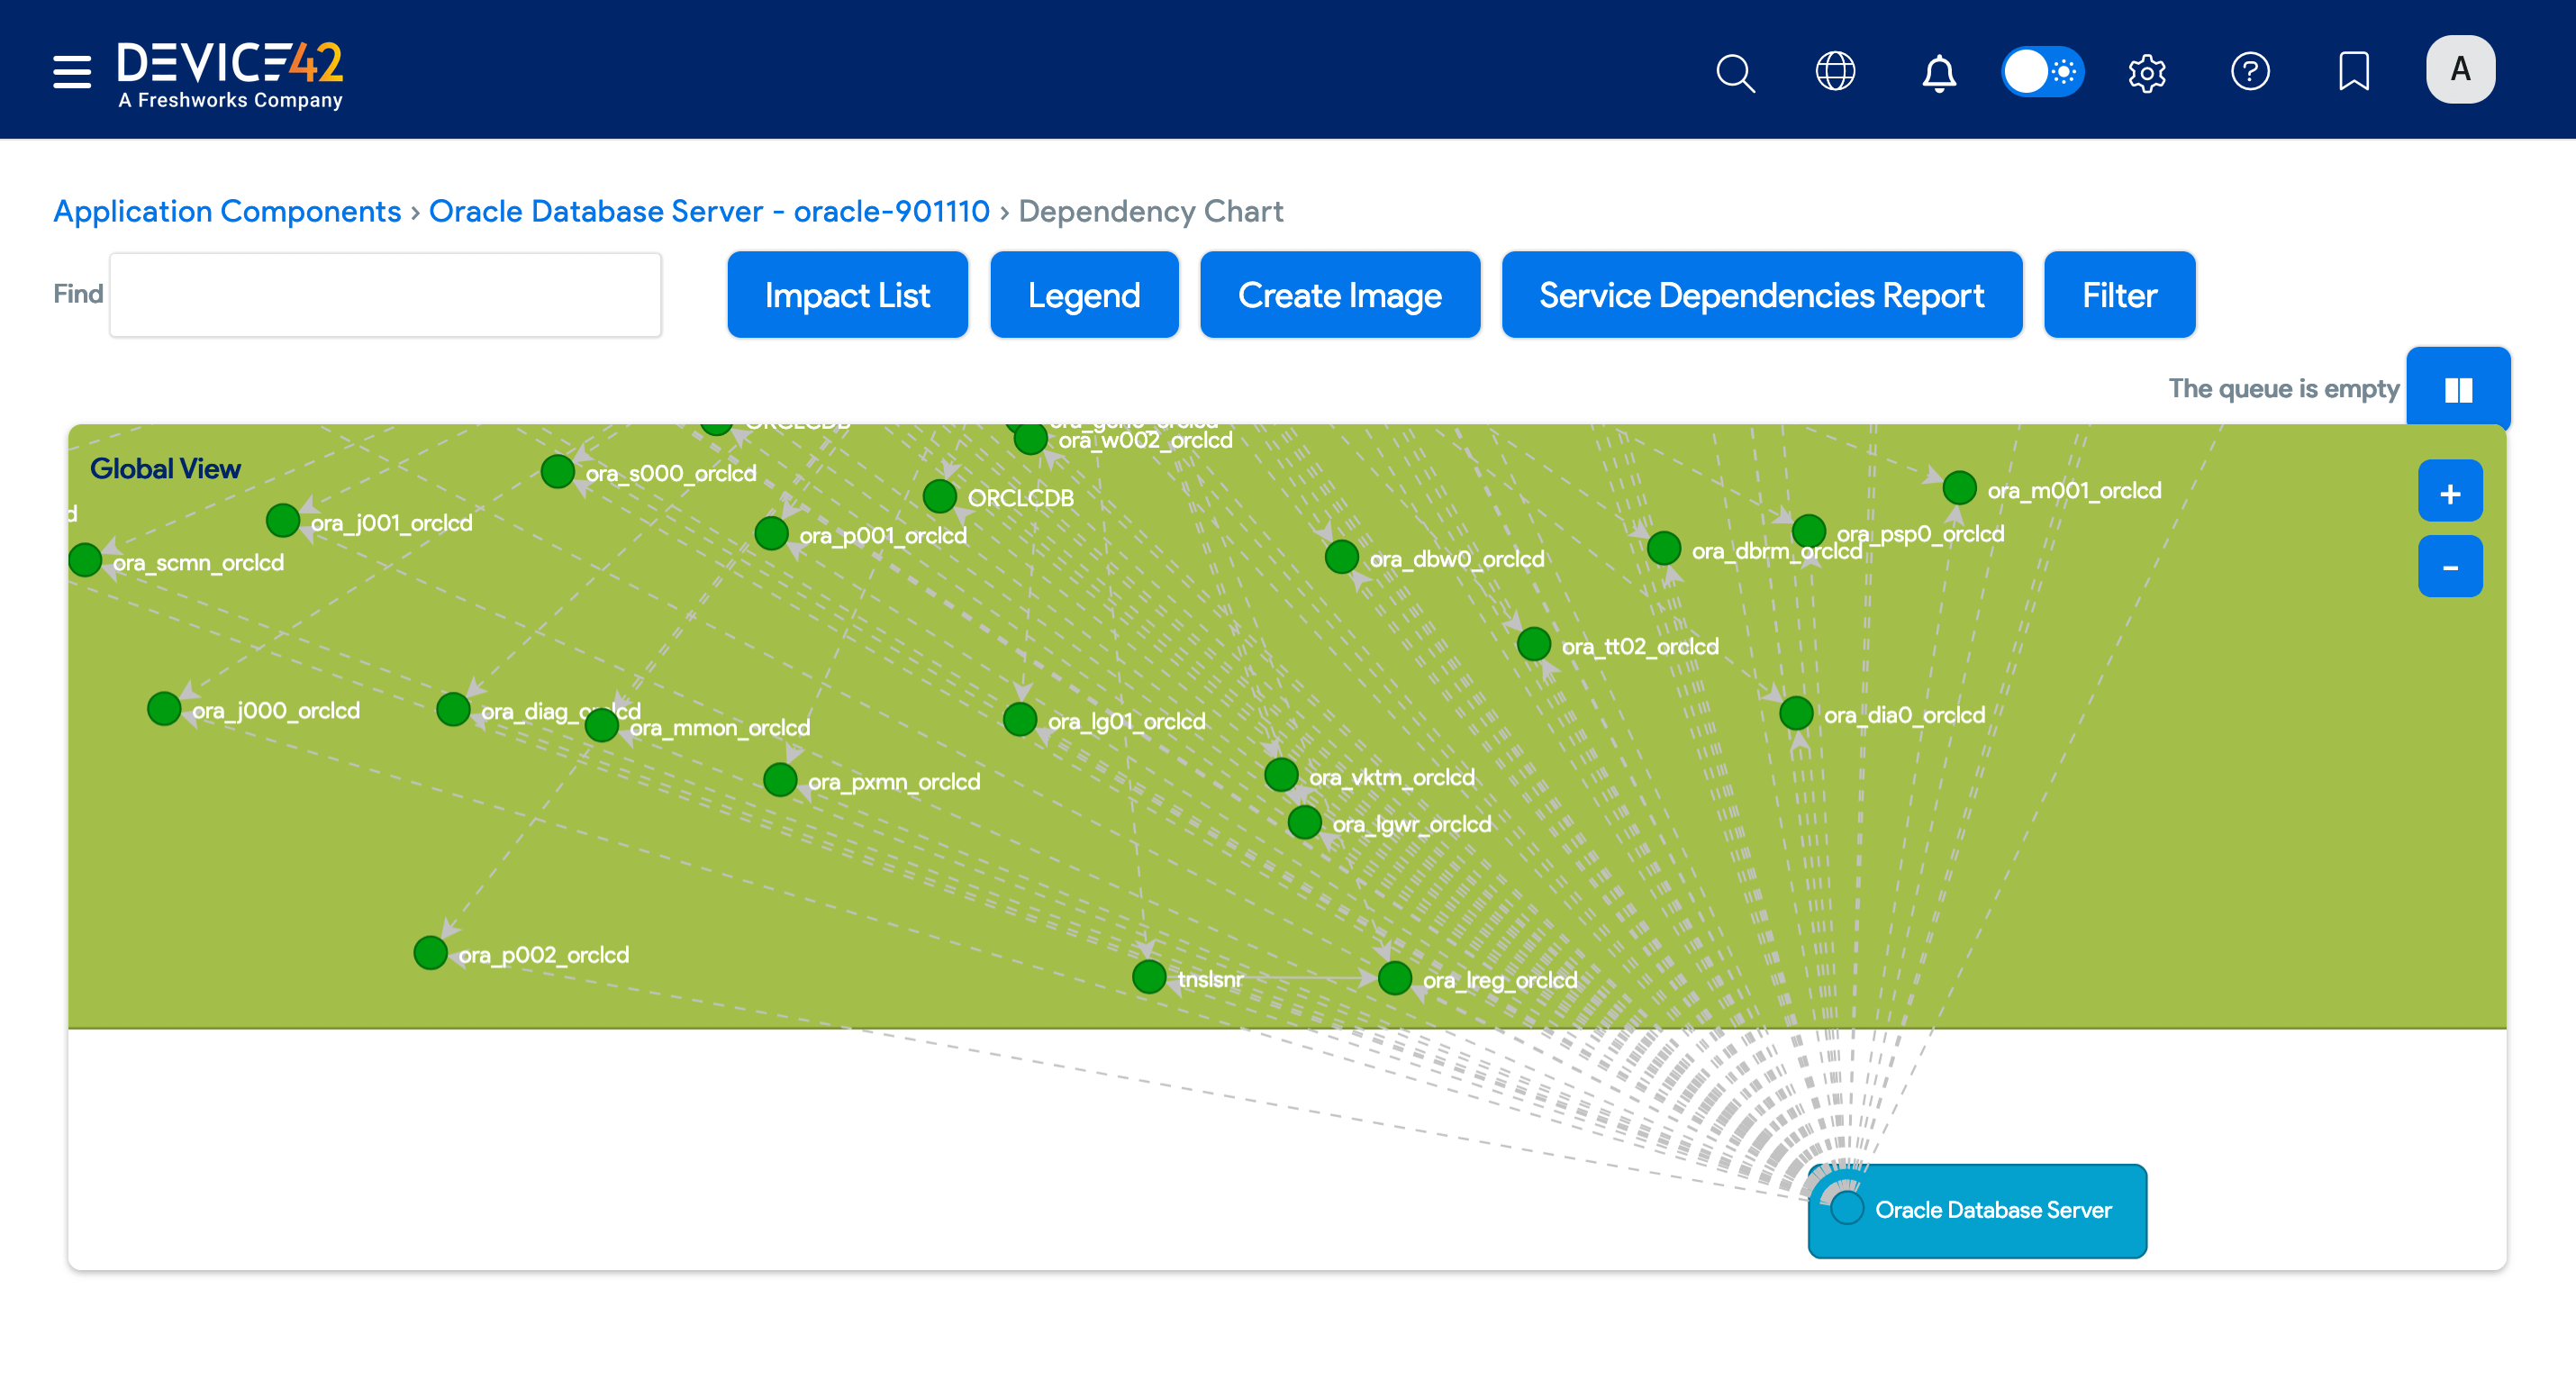
Click on a database name on the Application Components list page to view the details of that specific application component. On the View Application Component page, click the ellipsis icon to view the database Dependency Chart, Impact Chart, Impact List, Passwords, and Details.
Example Oracle database dependency chart:

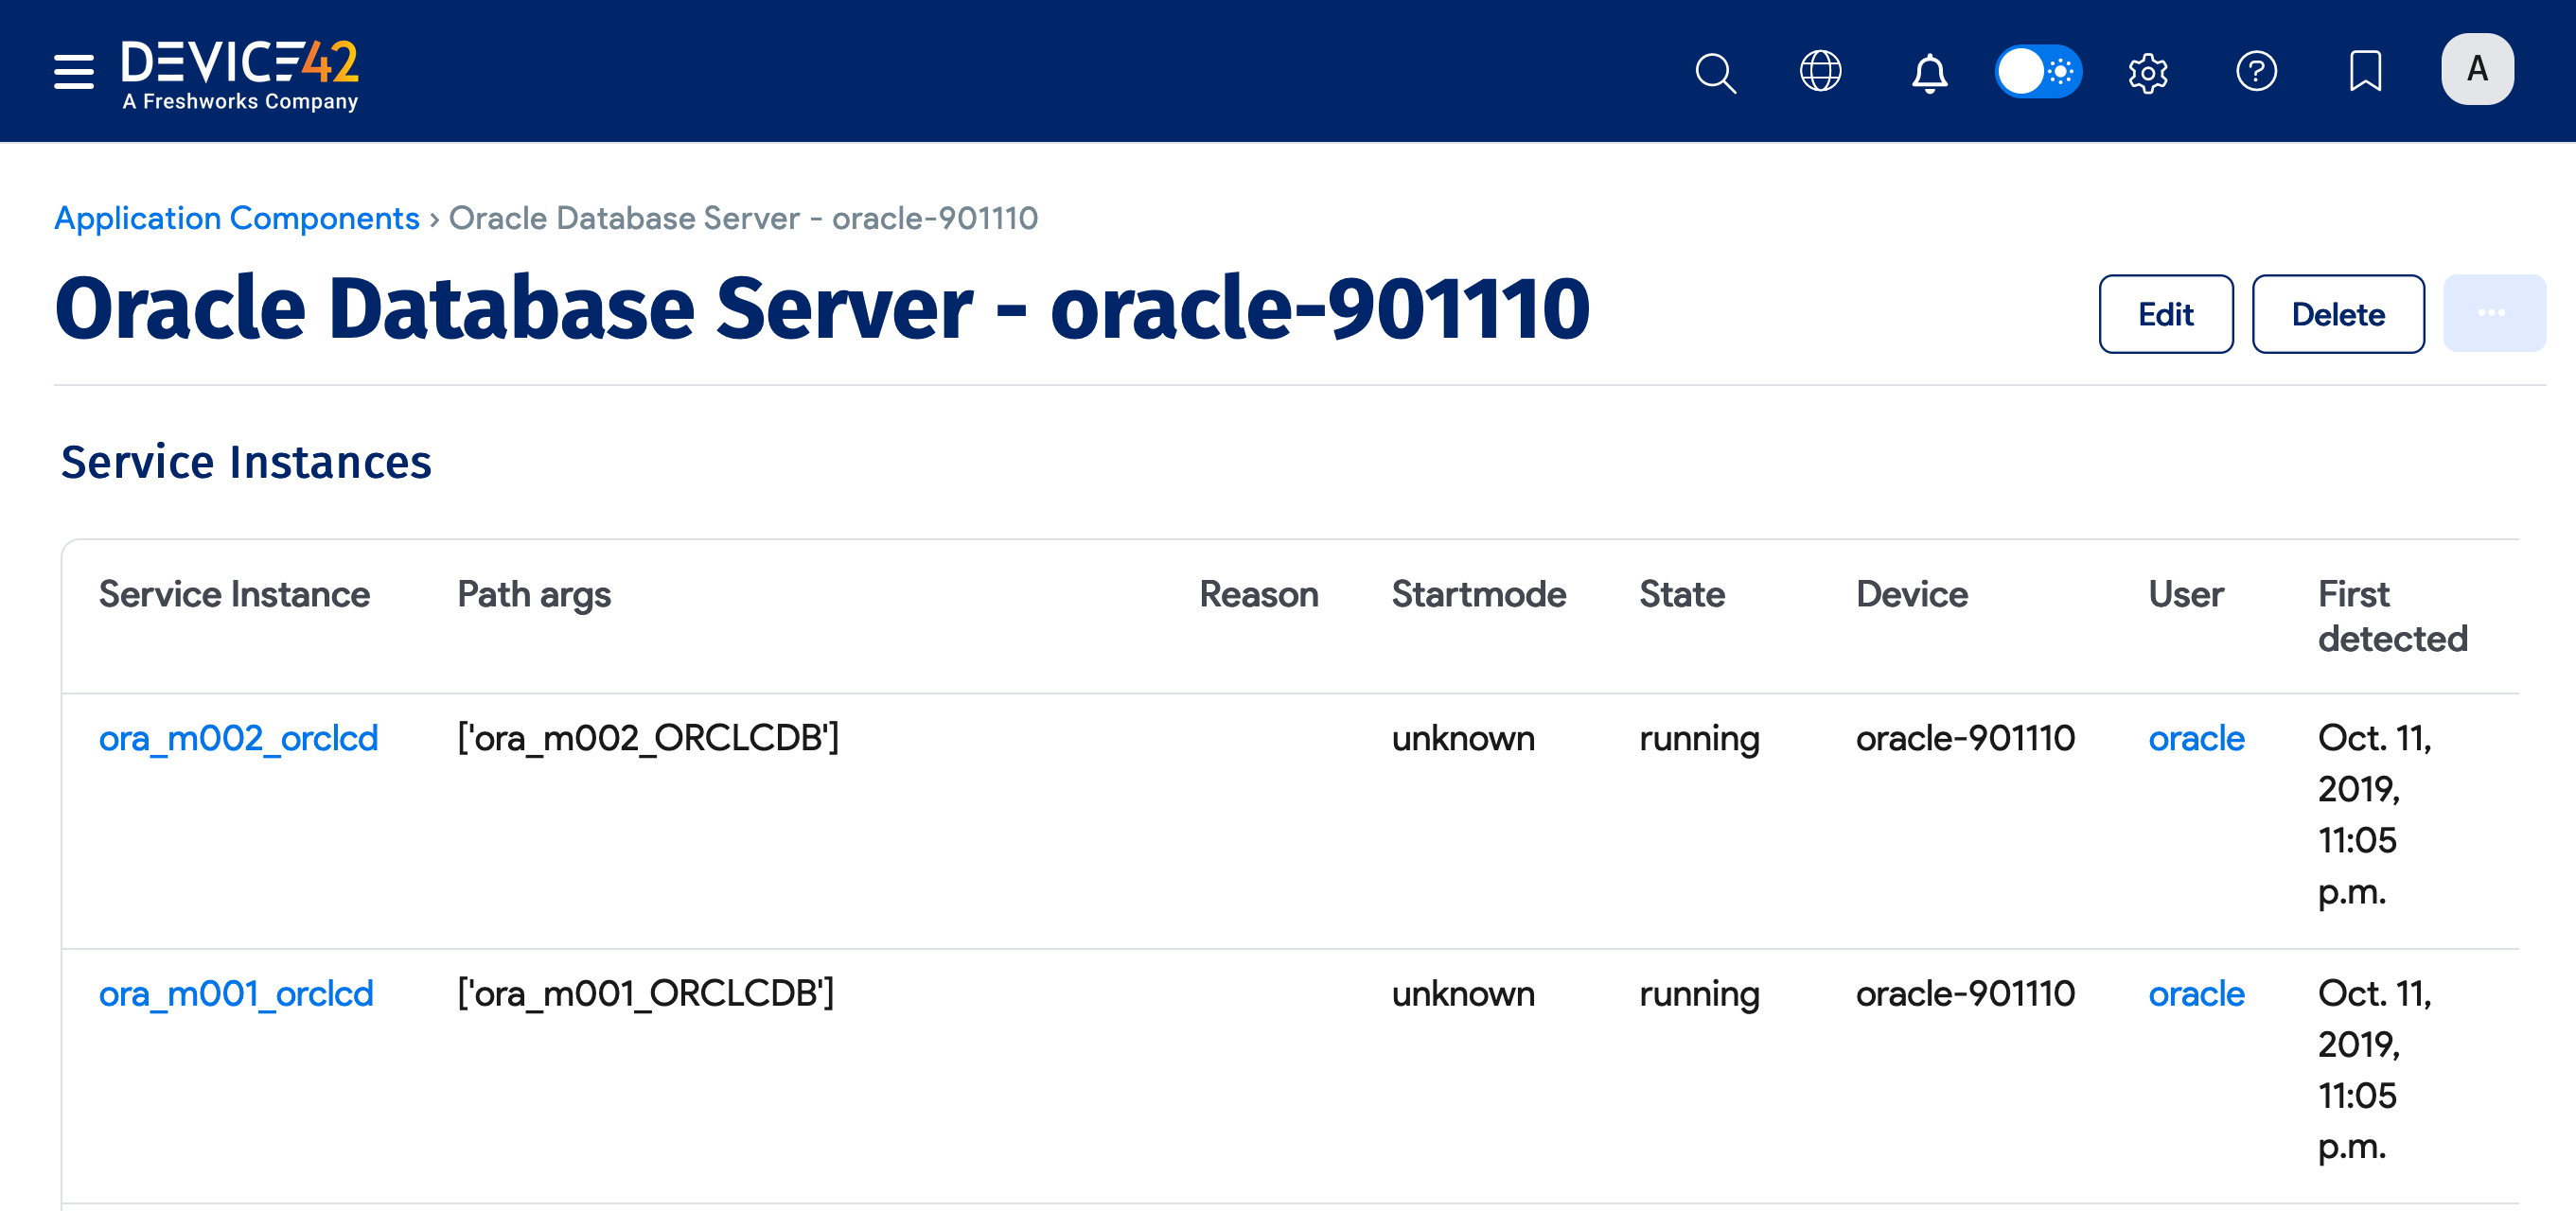
You can scroll down the View Application Component page to see a list of the Oracle database Service Instances.
Scroll further down to see Software and Database Instances associated with the Oracle database.
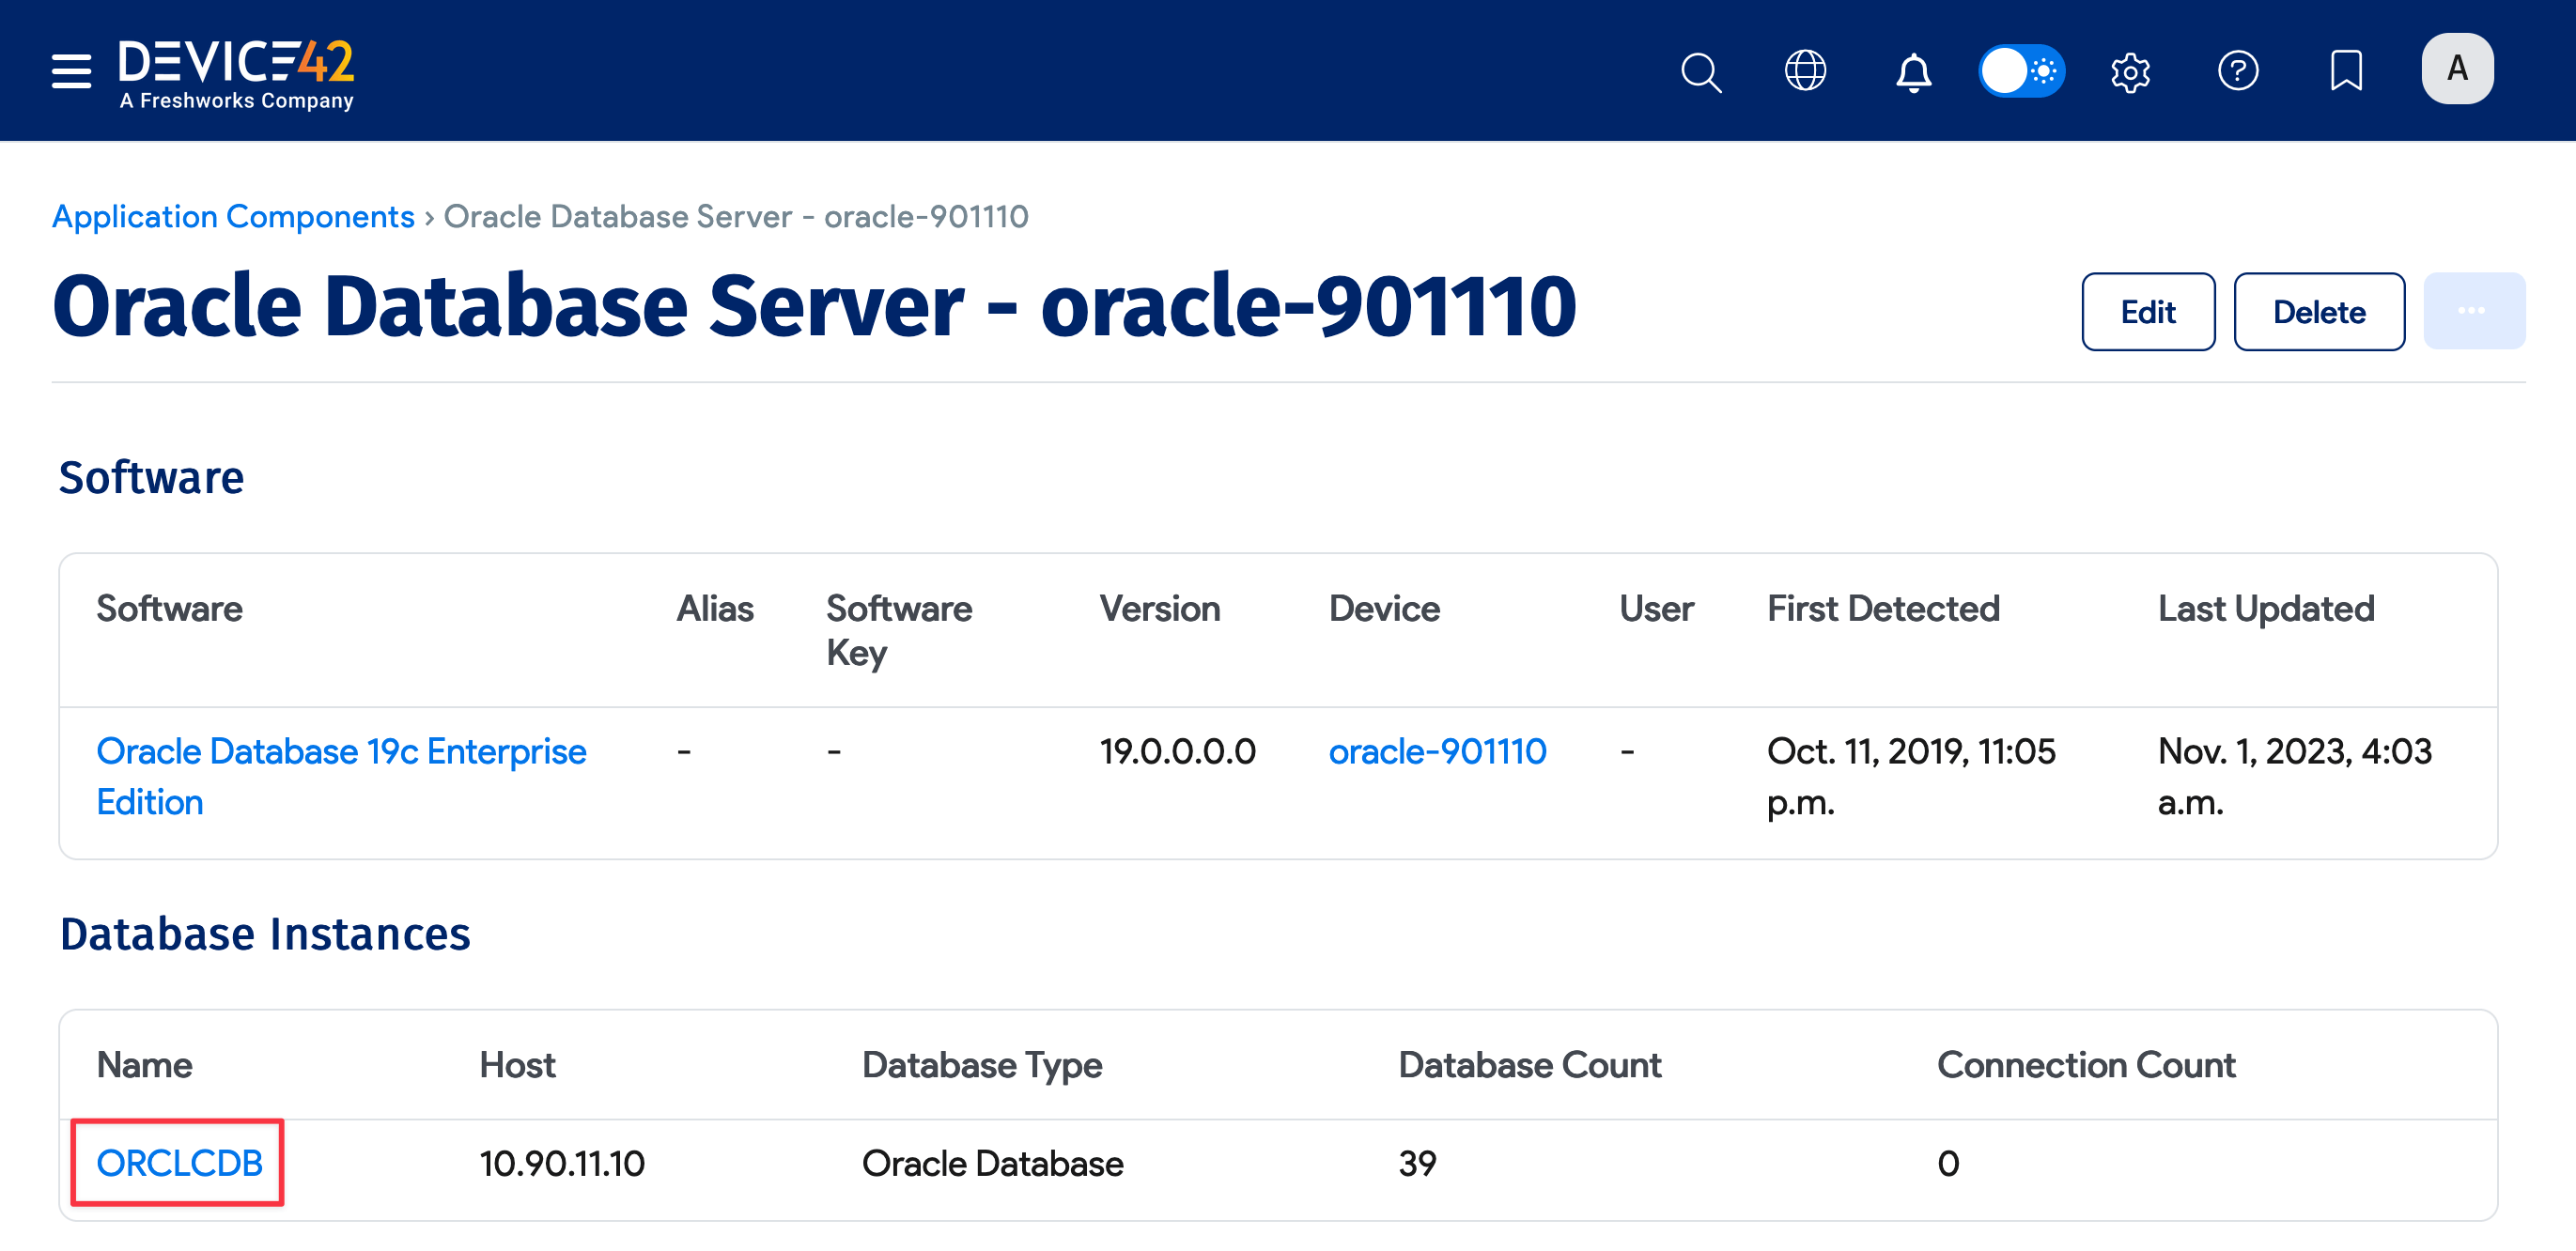
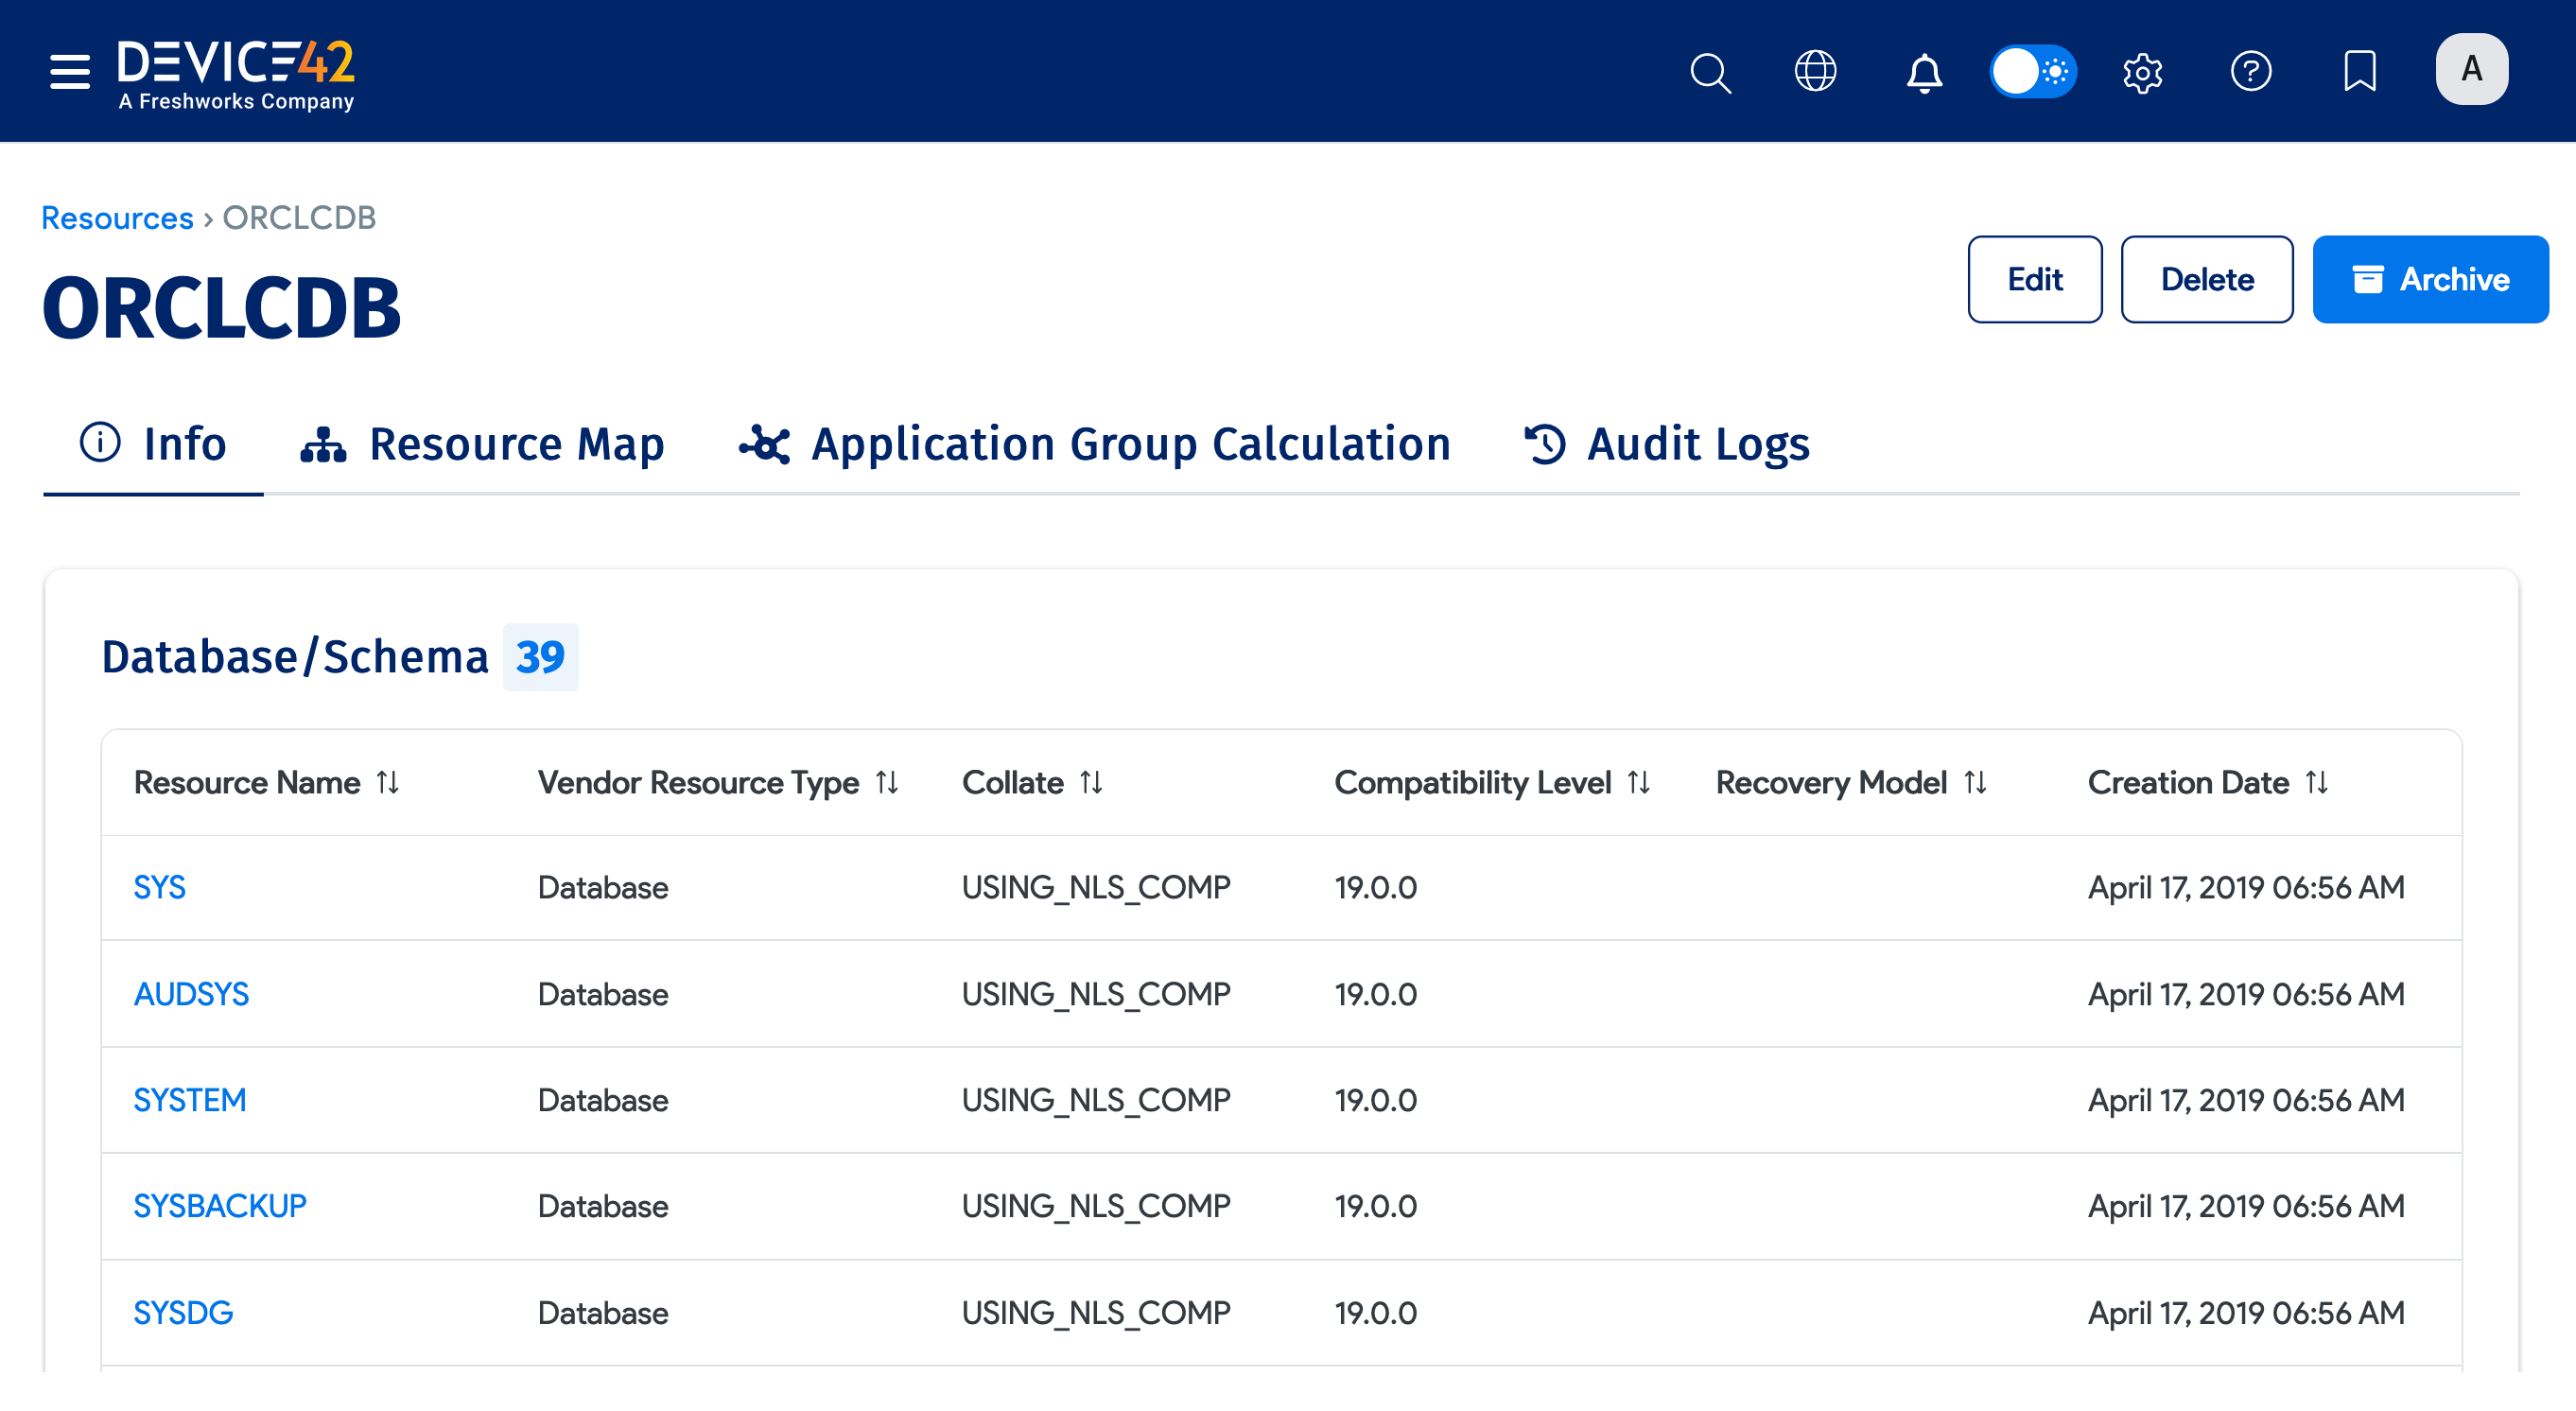
You can click on a database instance to view more details, including Containers and Database/Schema information.
Oracle CDB/PDB Matching Process
An Oracle database instance is created for each Container Database (CDB) and Pluggable Database (PDB), even when they share the same endpoint listener.
Device42 attempts to match any root database instance (CDB) with the same endpoint as the incoming resource (CDB or PDB). If a root database instance (CDB) is found, Device42 locates all related child databases (PDBs) and iterates through the child records. If any child database name matches the name of the incoming resource, that database instance is identified as the same and the existing record is updated with the new incoming resource data.
If no child database instance resources are found, the resource is matched to the root resource. If there is no match to the root resource, regular processing proceeds.
Orphaned PDBs are not matched to a CDB if a fresh CDB is incoming. If a candidate database instance is detected to be a child of a CDB, the matching process is skipped.
Oracle User Discovery Details
The Device42 UI displays:
- Database Instance Name under the identifier (generally the service name).
- Database/Schema showing only schemas with attached objects for Oracle.
Device42 discovers Oracle users that have at least one associated database object, ignoring empty user schemas. As a result, some Oracle database connections may not appear under specific user schemas. These database connections map to the main database instance instead of a specific Database/Schema resource. Key details like the user login and schema names are still preserved in the database instance details.
PostgreSQL Database Discovery (on *nix Targets)
PostgreSQL database discovery is supported for *nix targets and requires a separate set of credentials to authenticate to the database instance. Ensure these credentials have the appropriate permissions for viewing the databases you want to discover.
Minimum Permissions Requirements for PostgreSQL Discovery
For discovery to return detailed information about your database instance, you need access to the following tables:
pg_database(table)pg_tablespace(table)pg_stat_activity(table)inet_server_addr()(function)
Set Up a PostgreSQL Discovery Job
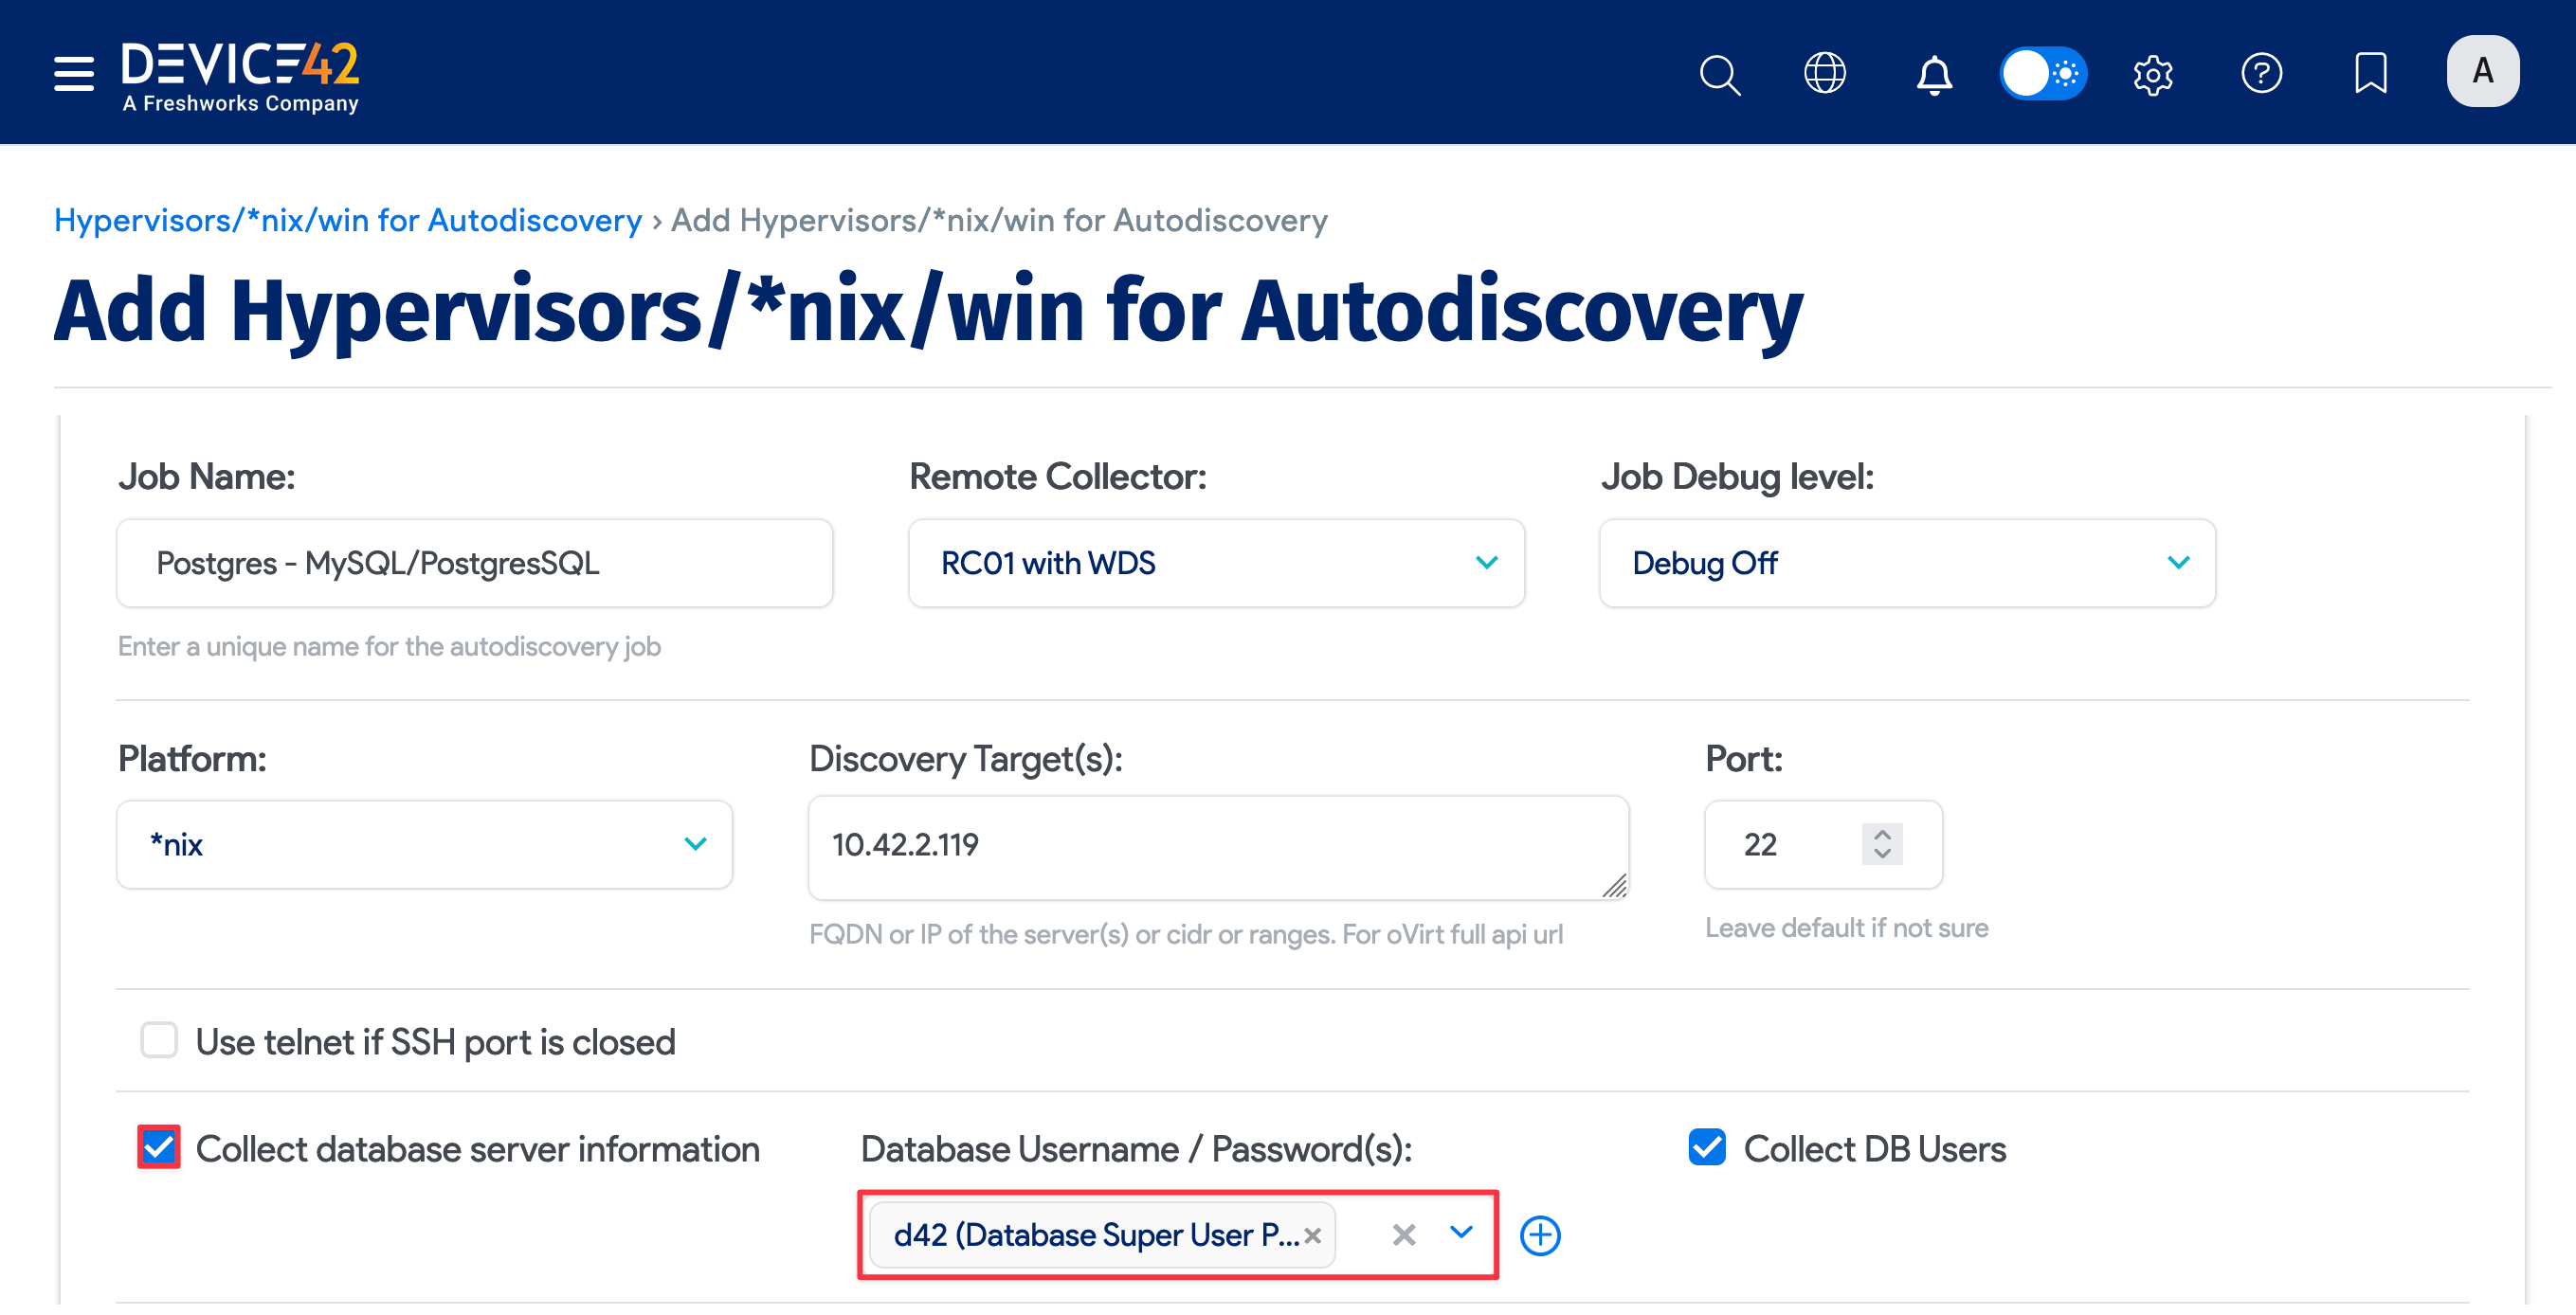
To discover PostgreSQL databases, create a new discovery job for *nix targets and check the Collect database server information checkbox.
Fill out both sets of credentials:
- Database Username / Password(s): Credentials to authenticate to the Postgres database.
- Discovery Target(s) Credential(s): Credentials to authenticate to the *nix server.
You can enter multiple credentials in a preferred order. The job tries each credential in order and stops at the first successful authentication. Subsequent runs start with the last successful credential.
Run your new discovery job to test it. Click Run Now on the job's details page or on the list page under Discovery > HyperVisors /*nix /Windows. As Postgres databases are detected, discovery will import a list of all the instances, databases, and connection details it finds.
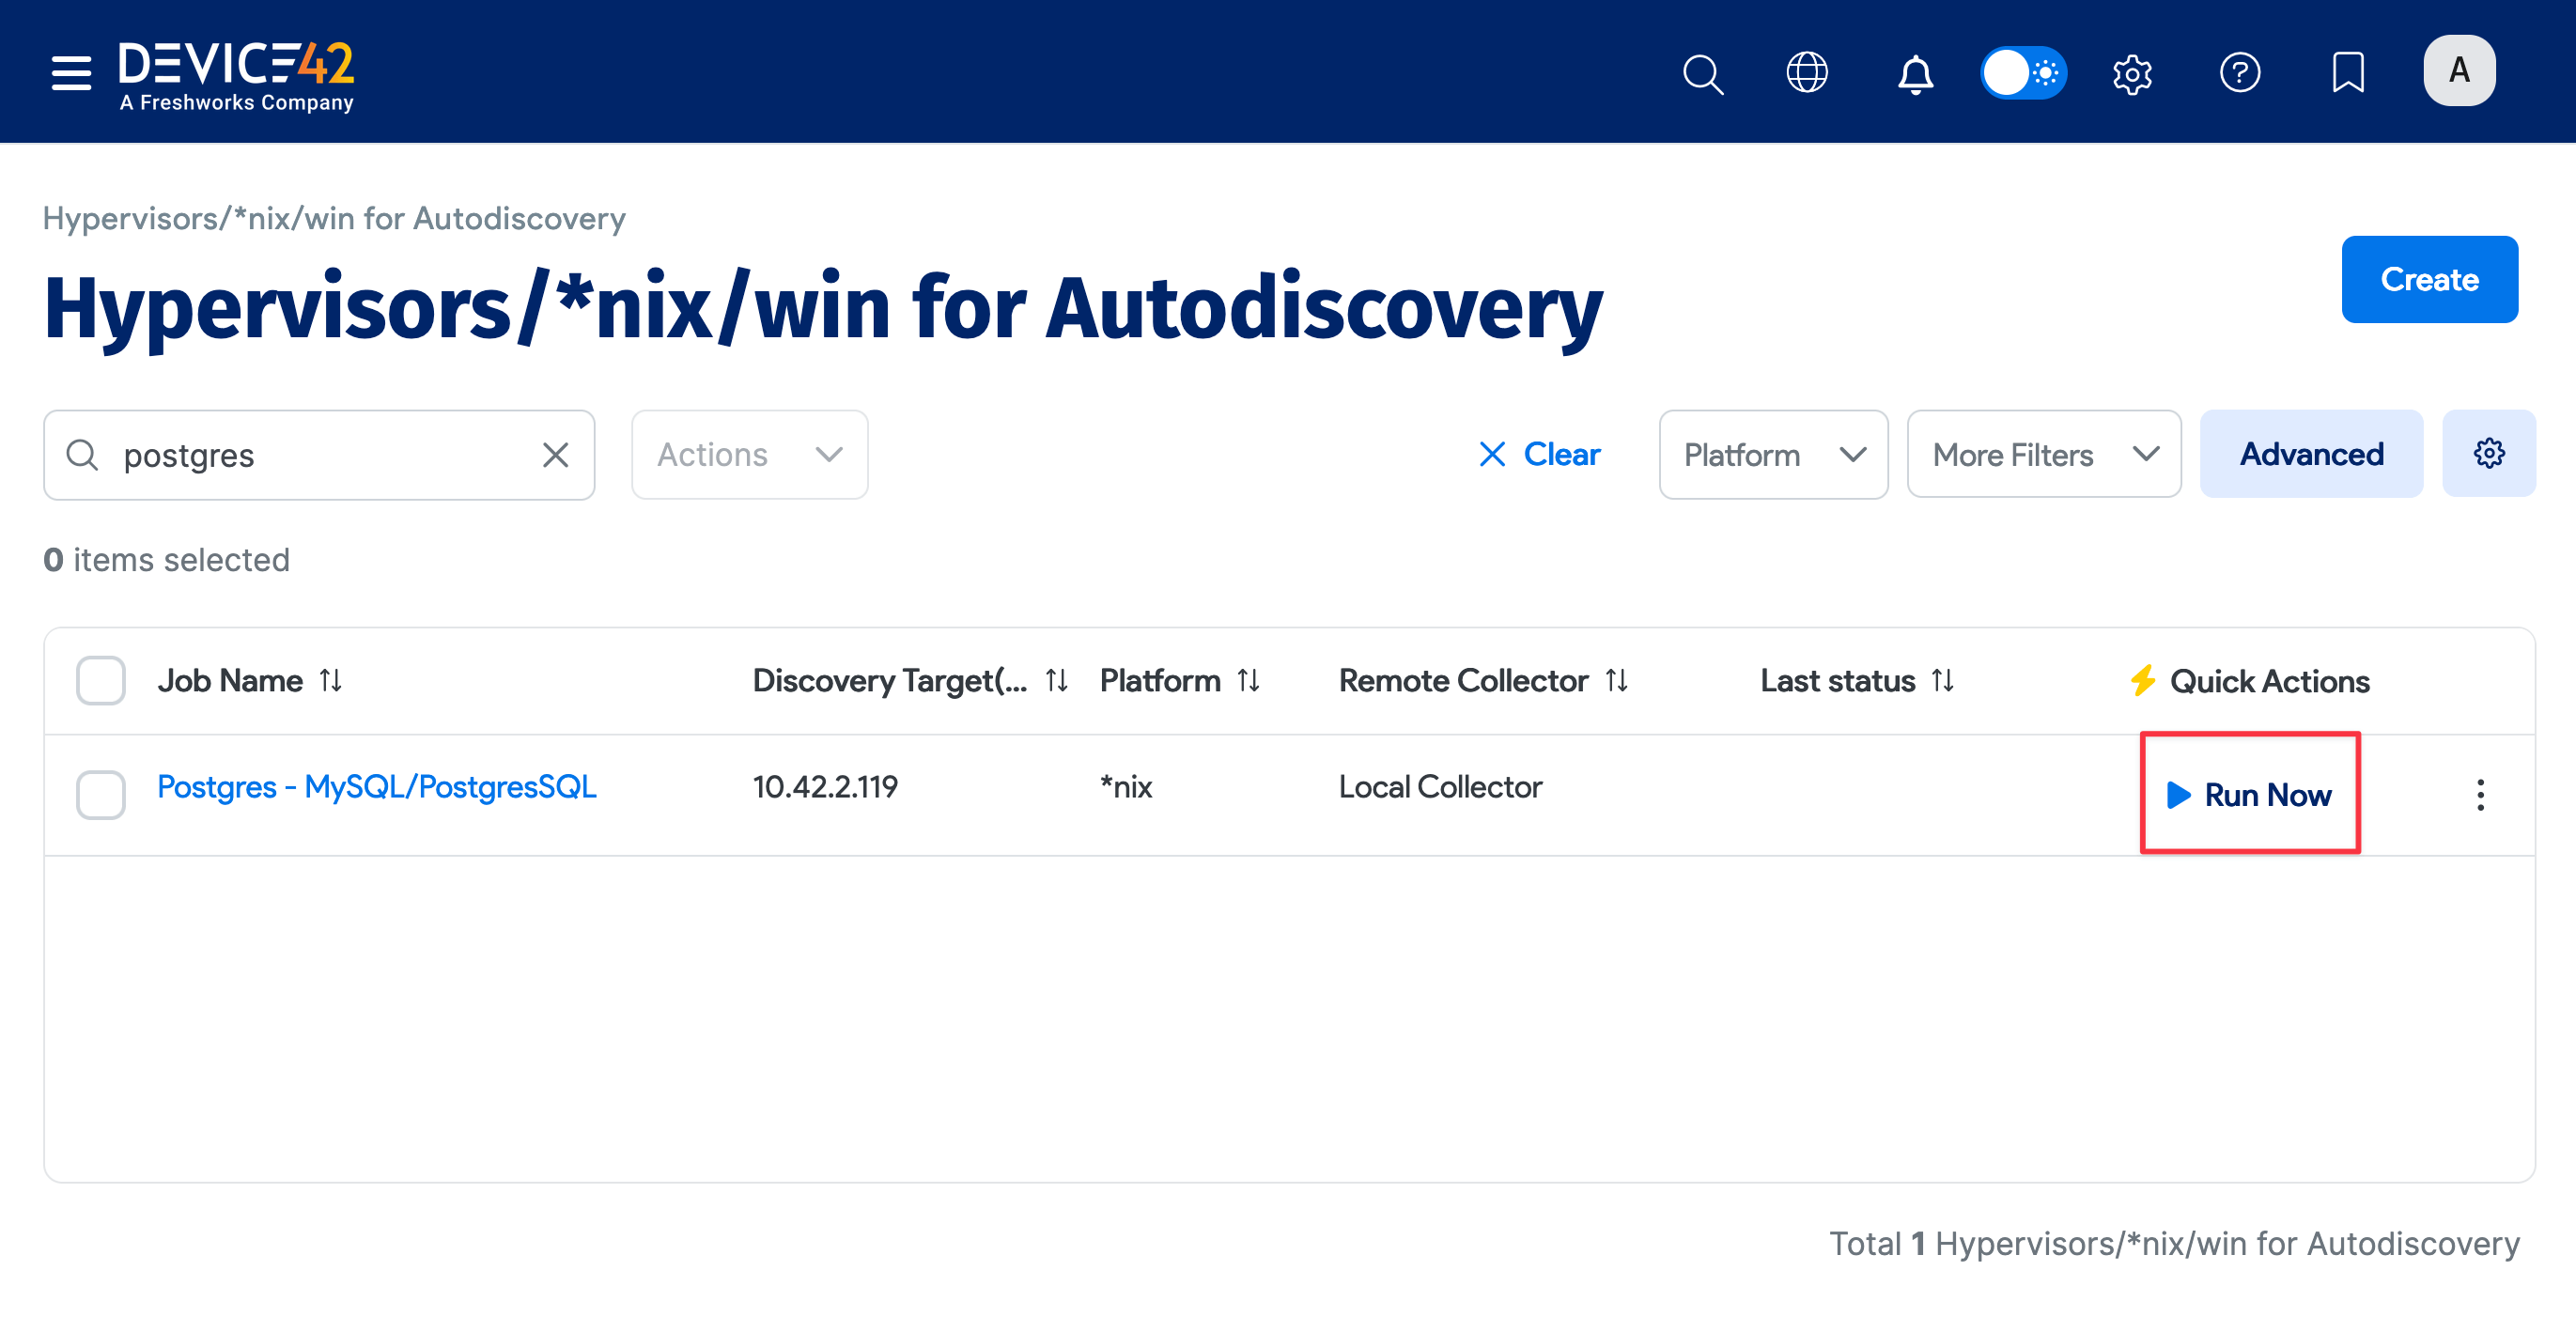
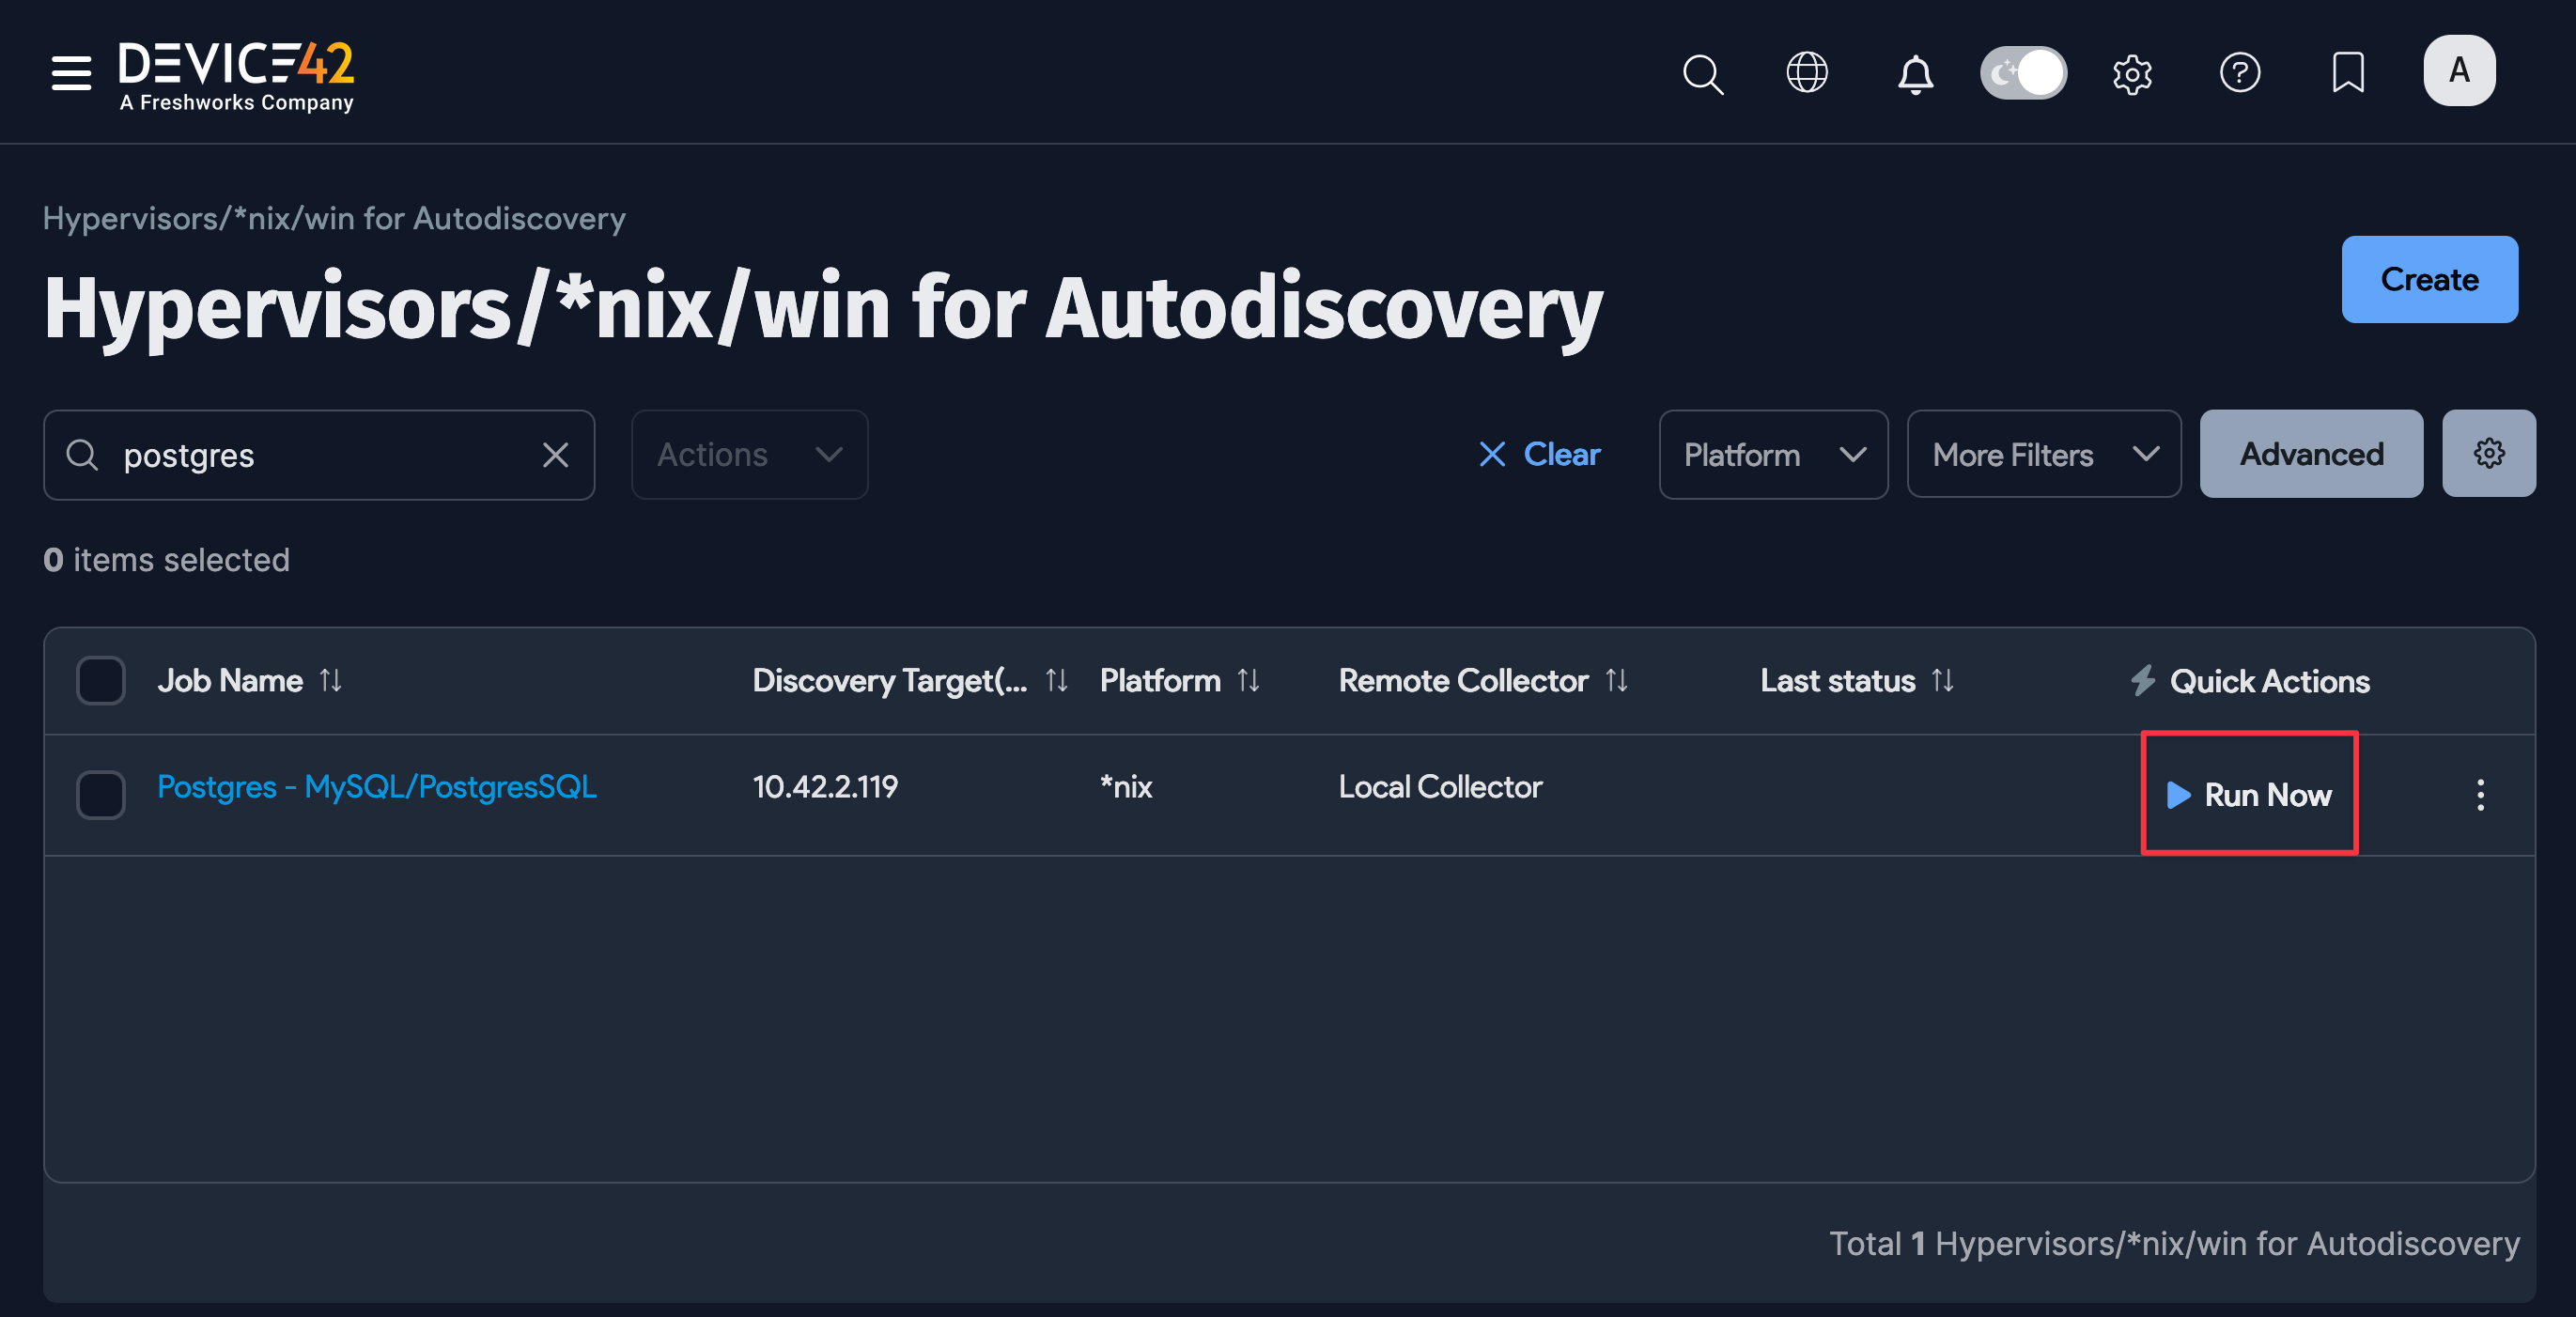
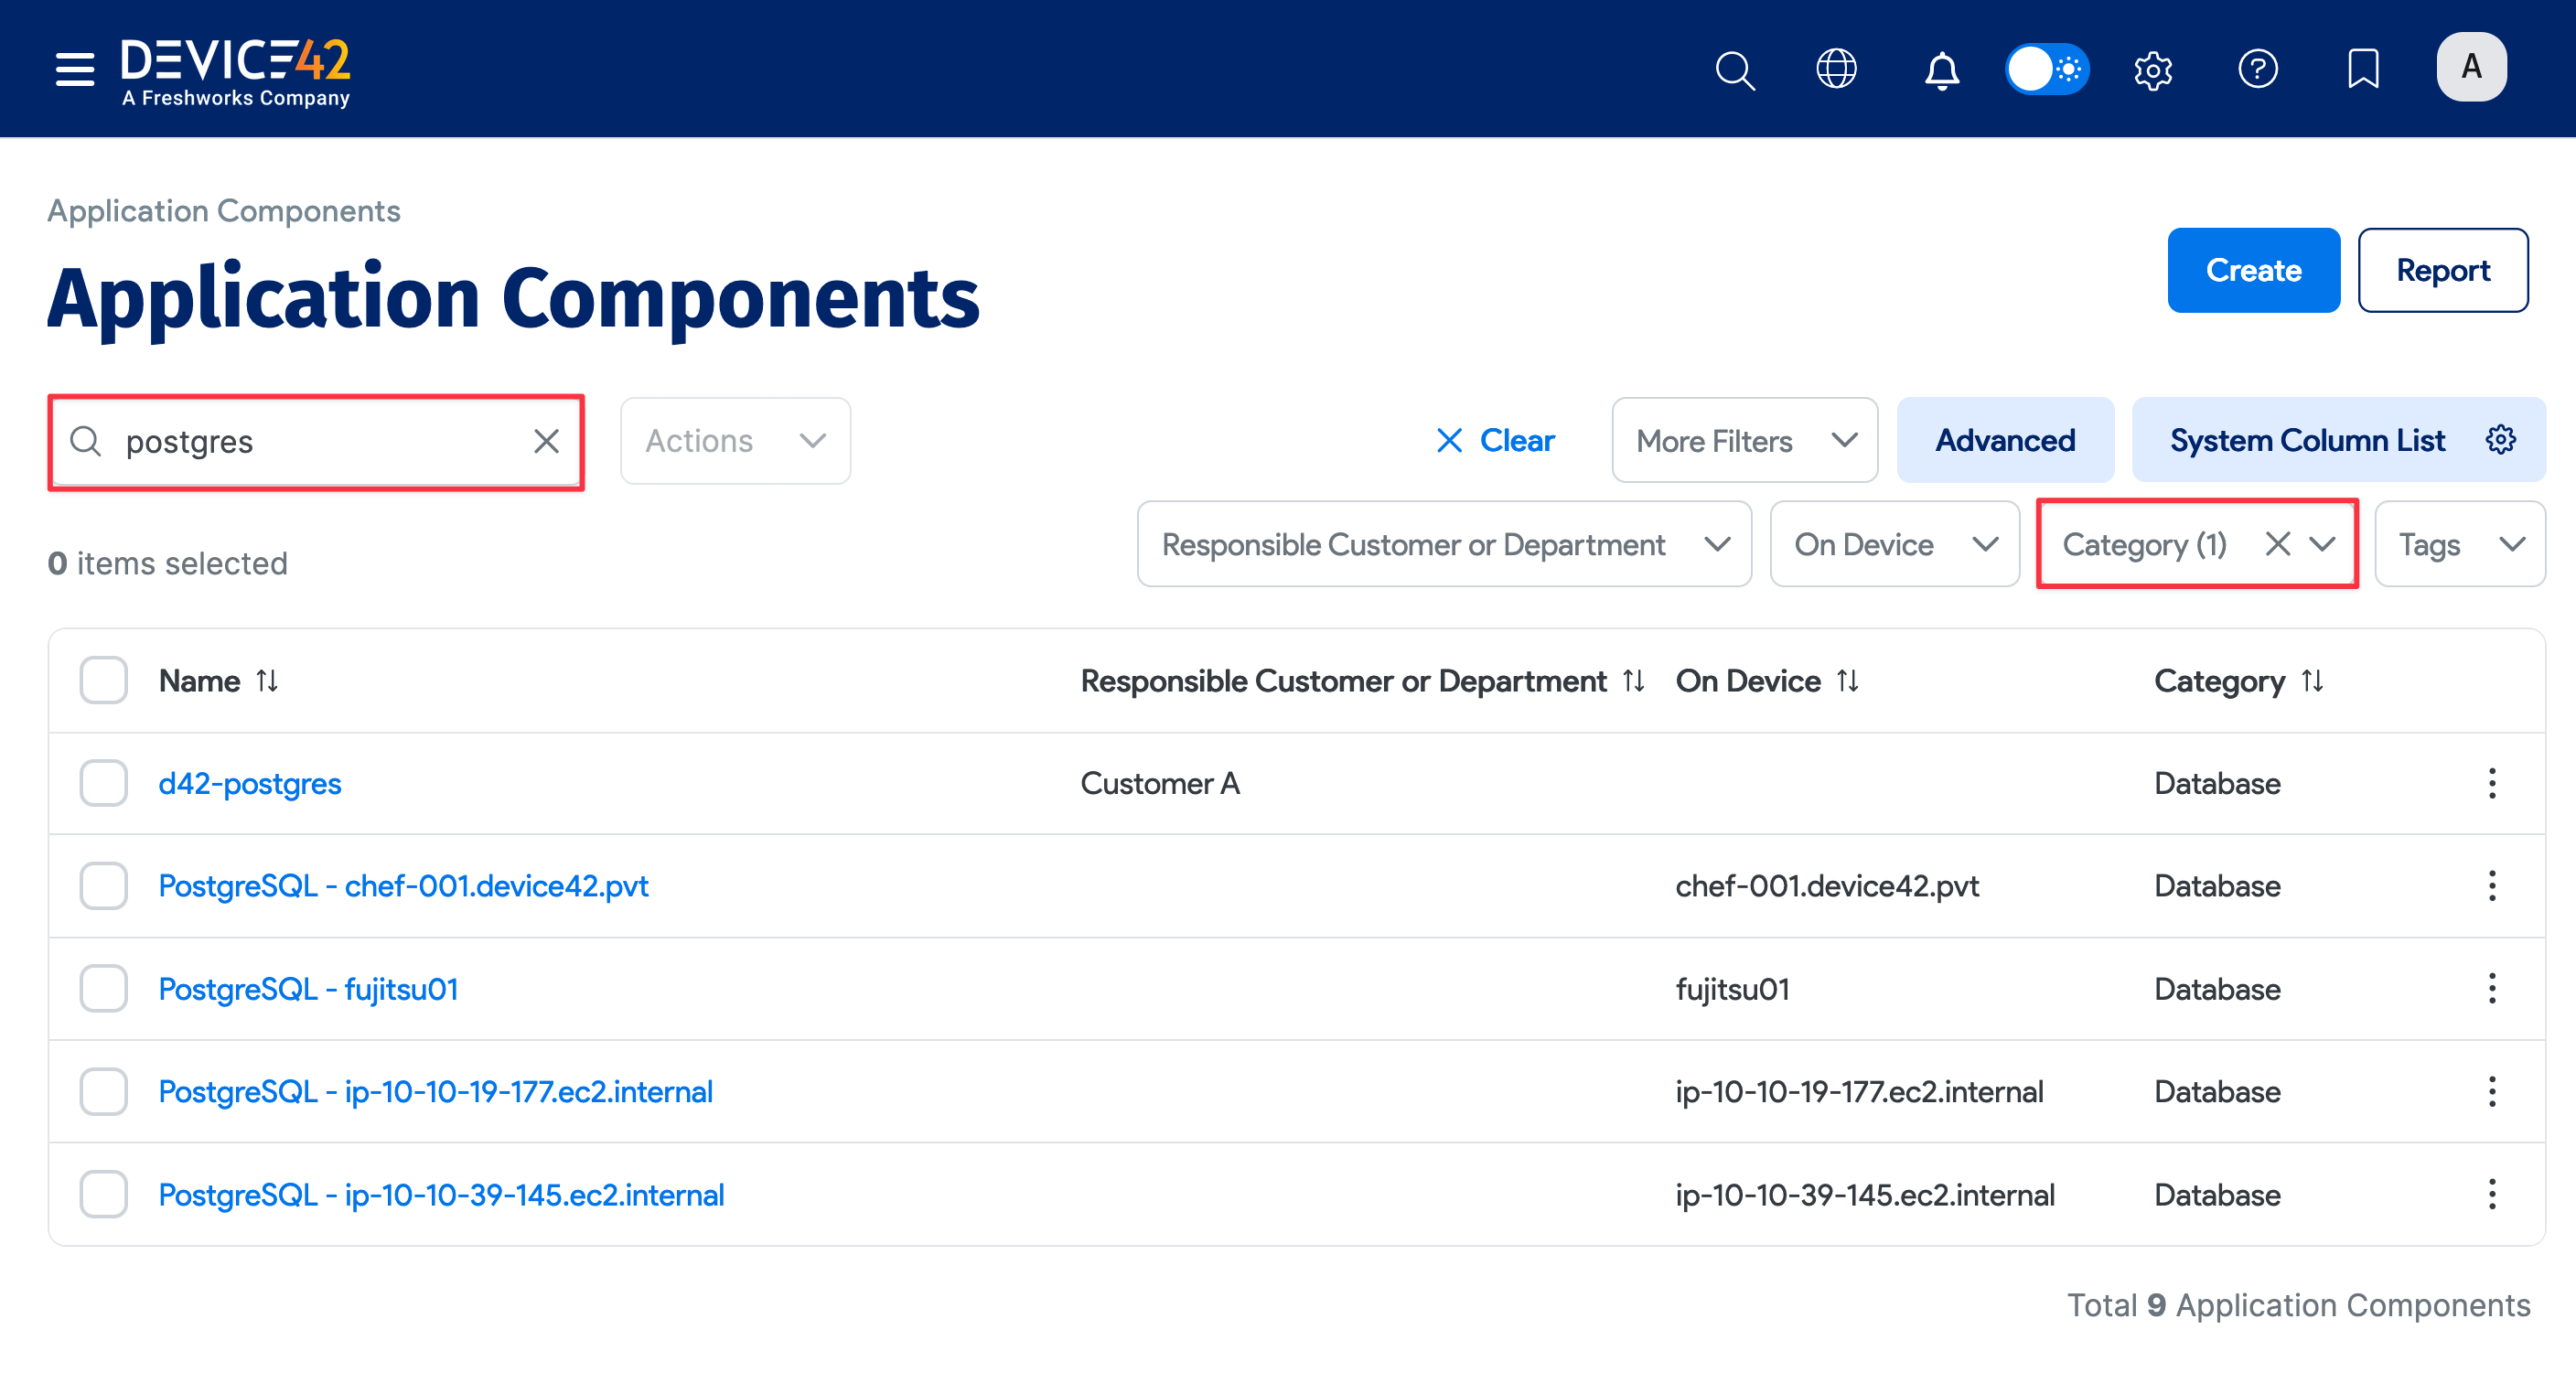
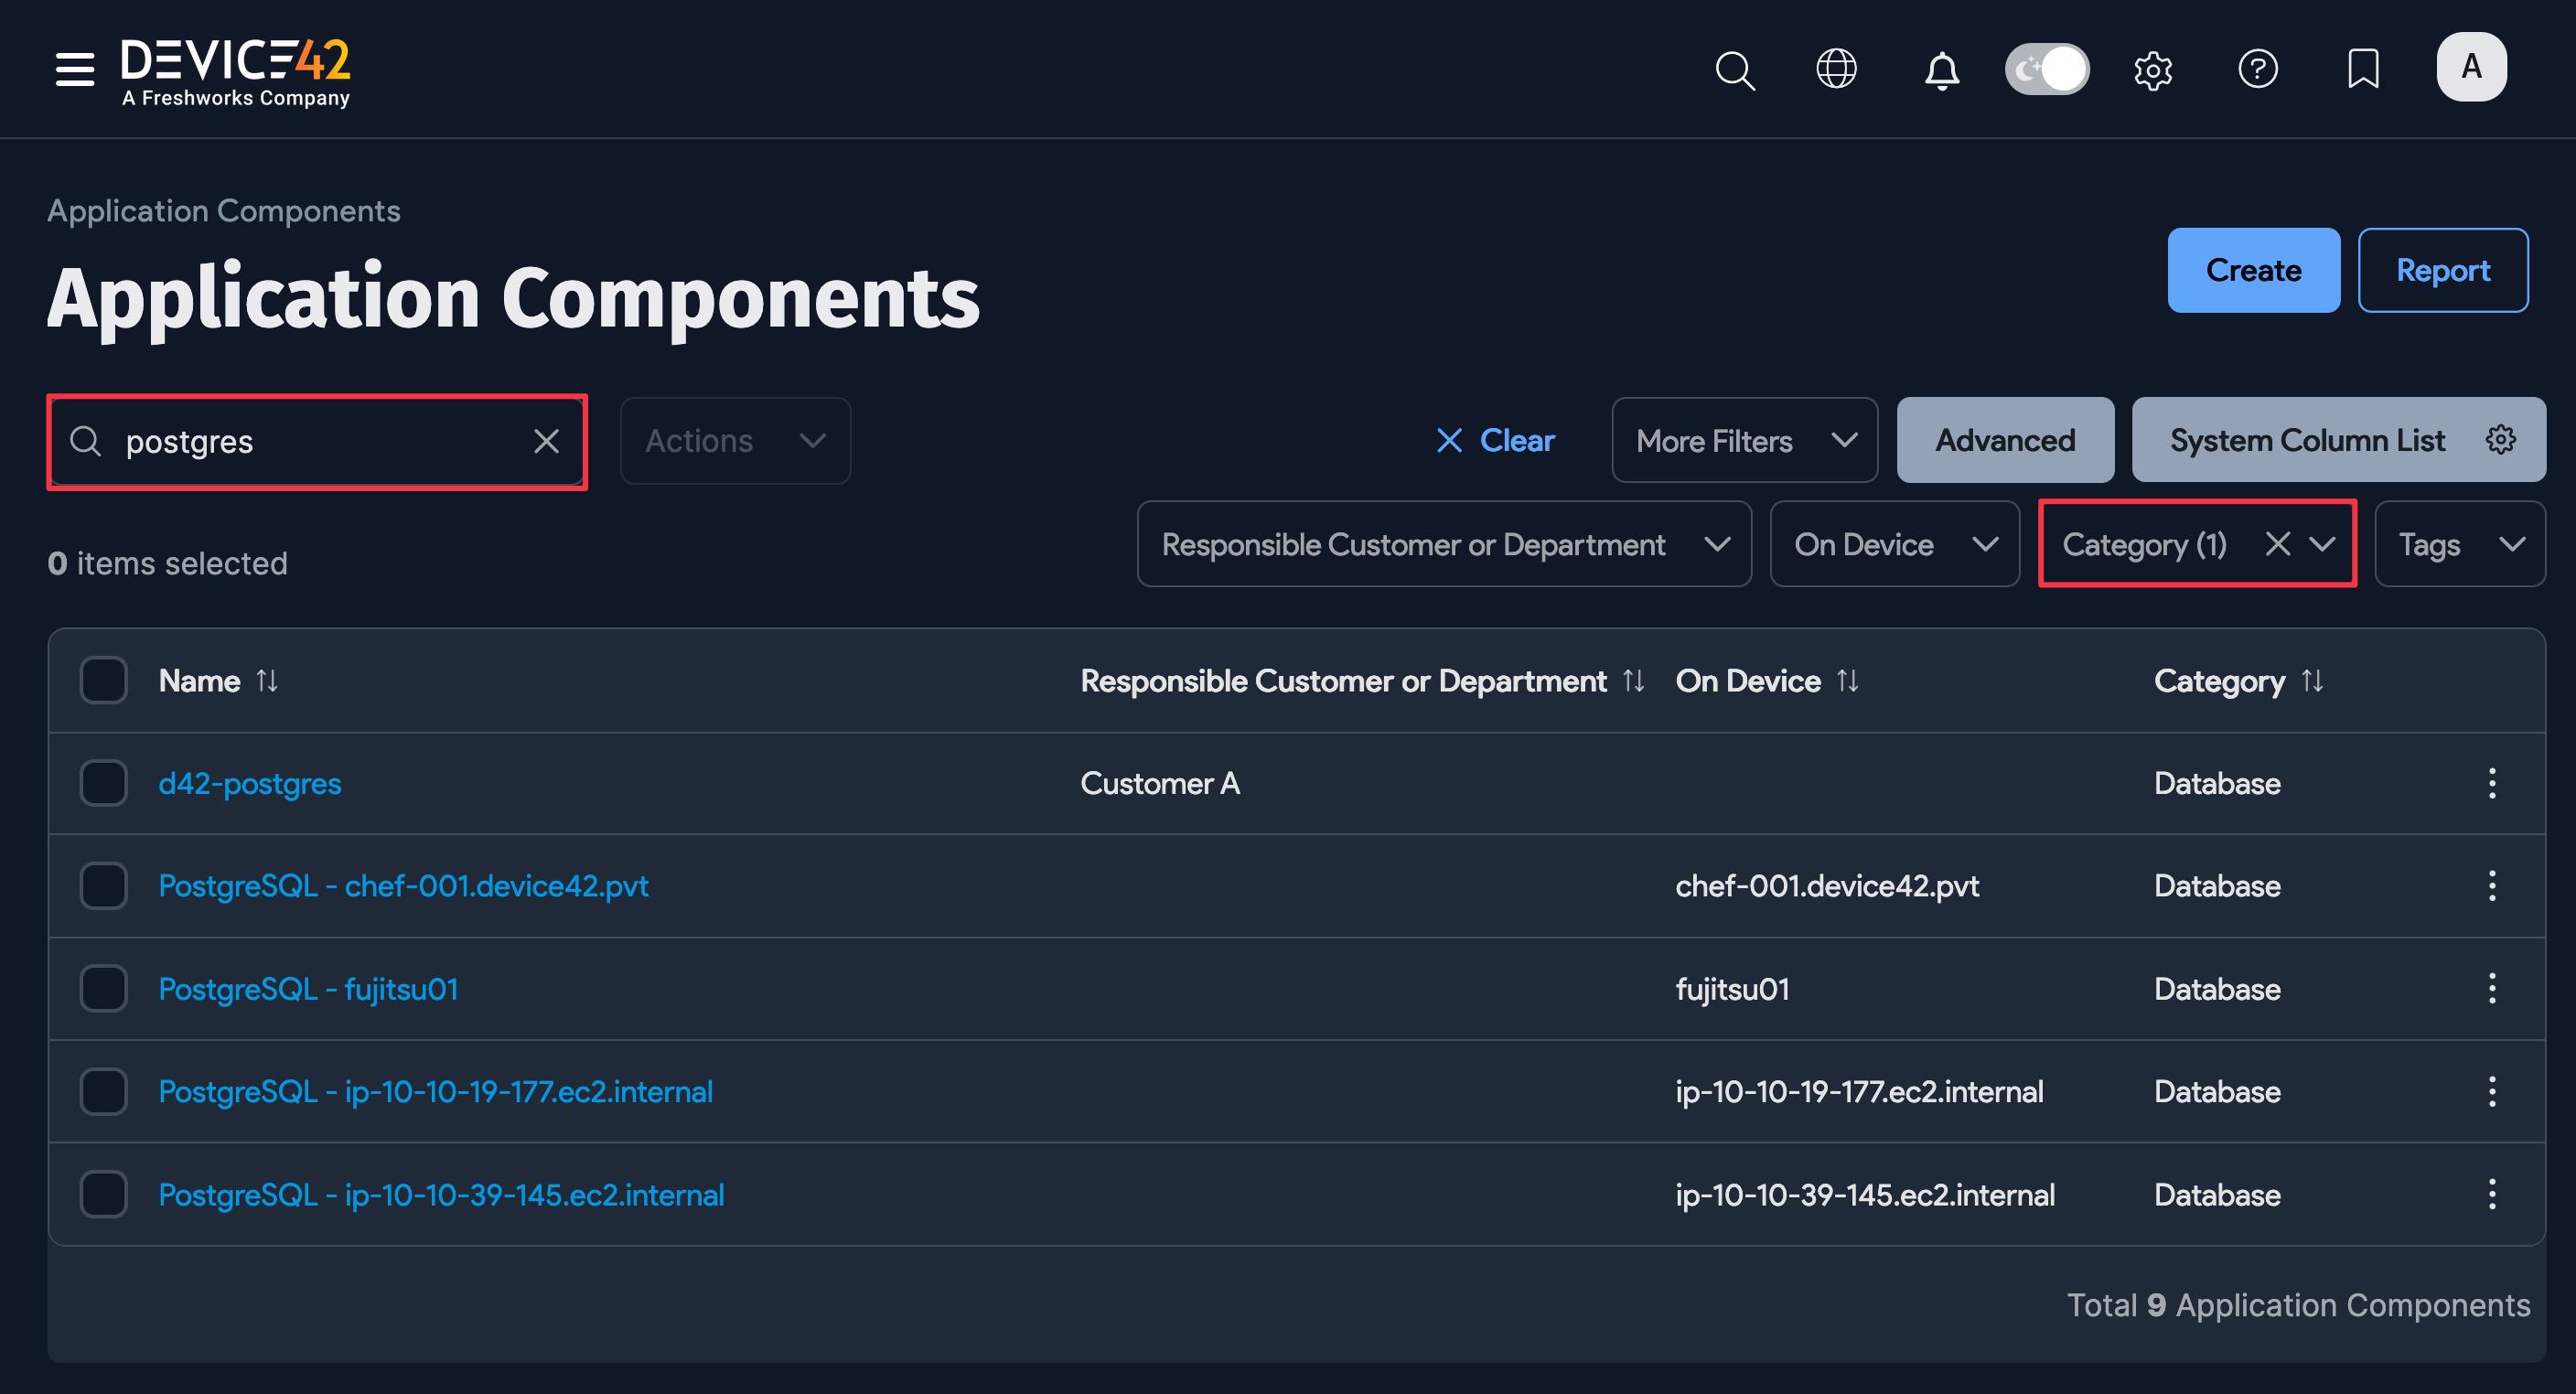
View PostgreSQL Database Discovery Job Results
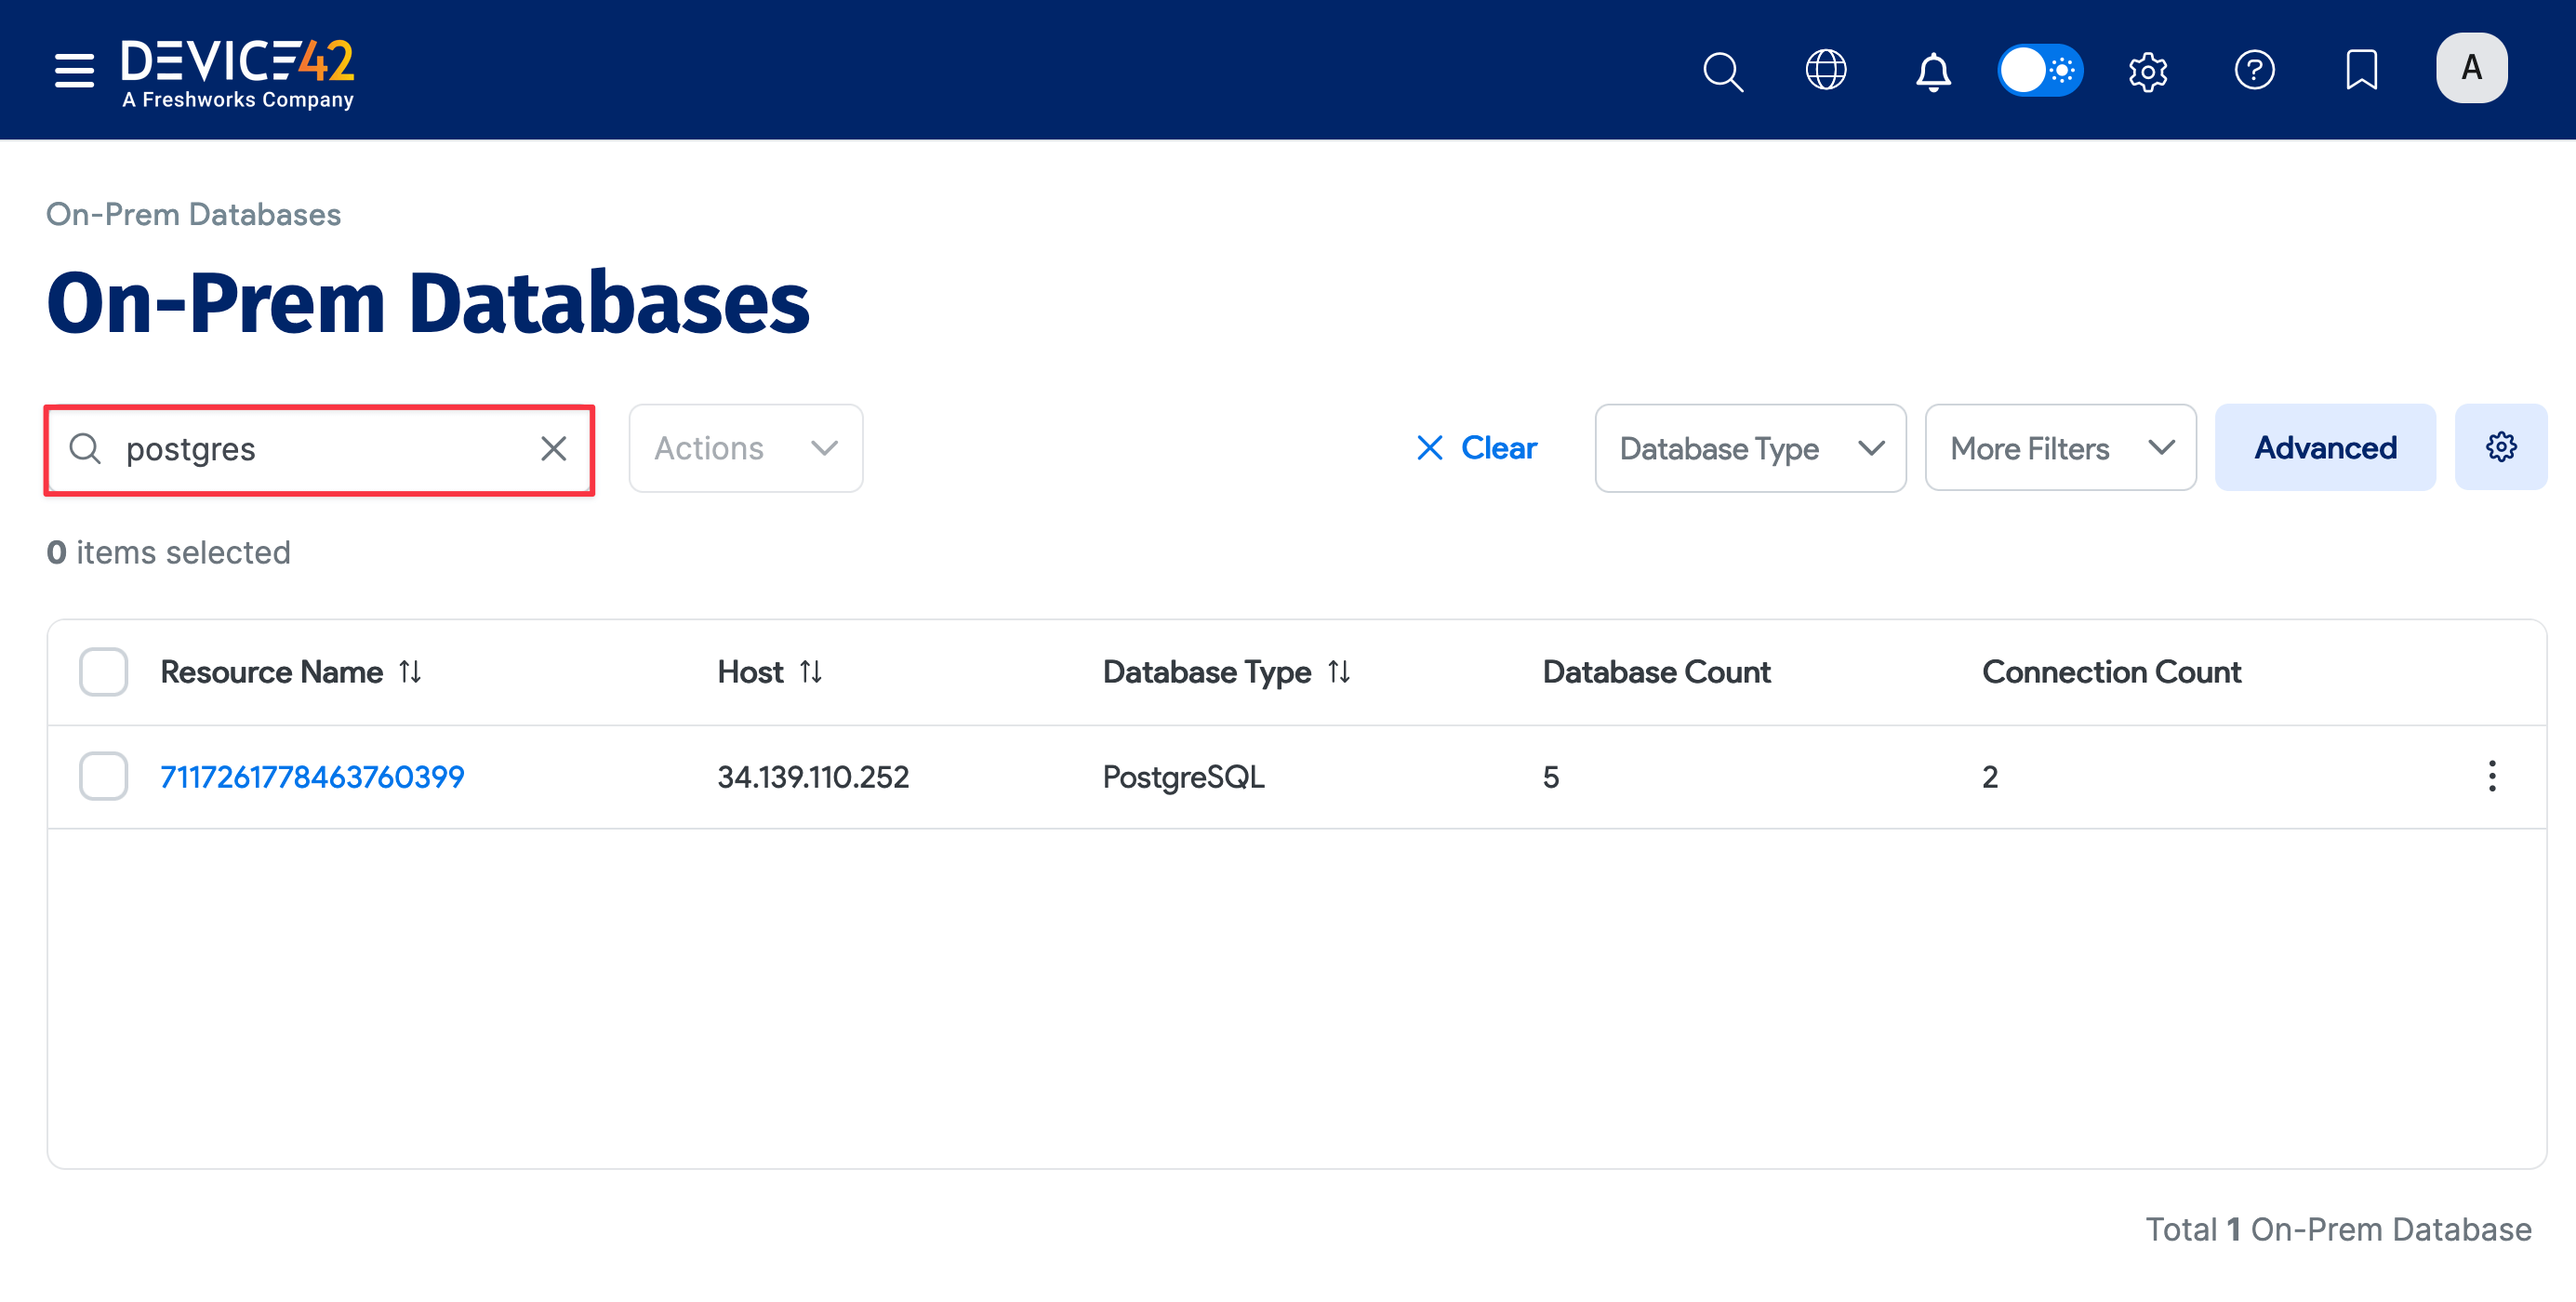
When the job finishes, the most direct way to view the results of your database discovery is via the discovered Postgres application components themselves. On the Device42 main menu, select Applications > Application Components. If you don’t see your Postgres DB instances at the top of the list, you can search for "Postgres" to narrow down the list, or filter the list By Category > Database.
You can also select Resources > Databases > On-Prem Databases and search for Postgres databases.
DB2 Discovery (on *nix Targets)
DB2 database discovery is supported for *nix targets and requires a separate set of credentials to authenticate to the database instance. Ensure these credentials have the appropriate permissions for viewing the databases you want to discover.
Permissions for DB2 Discovery
For discovery to return detailed information about your database instance, you need the following permissions:
1. Privileges for ENV_SYS_INFO:
- SELECT or CONTROL privilege on the
ENV_SYS_INFOadministrative view. - EXECUTE privilege on the
ENV_GET_SYS_INFOtable function.
2. Privileges for SNAPAPPL_INFO:
- SELECT or CONTROL privilege on the
SNAPAPPL_INFOadministrative view - EXECUTE privilege on the
SNAP_GET_APPL_INFO_V95table function or DATAACCESS authority.
3. Privileges for ENV_INST_INFO:
- SELECT or CONTROL privilege on the
ENV_INST_INFOadministrative view - One of the following authorities: DATAACCESS, DBADM, SQLADM, ACCESSCTRL, or SECADM.
4. Privileges for DBCFG:
- SELECT or CONTROL privilege on the
DBCFGadministrative view - One of the following authorities: DATAACCESS, DBADM, or SQLADM.
5. Privileges for CONTAINER_UTILIZATION:
- SELECT or CONTROL privilege on the
CONTAINER_UTILIZATIONadministrative view. - One of the following authorities: DATAACCESS, DBADM, SQLADM, ACCESSCTRL, or SECADM.
6. Privileges for Monitoring:
- EXECUTE privilege on the
MON_GET_CONNECTION. - One of the following authorities: DATAACCESS, DBADM, or SQLADM.
7. Privileges for Routines:
- EXECUTE privilege on the
GET_DBSIZE_INFO,WLM_SET_CONN_ENV,MON_GET_CONTAINER, andMON_GET_TABLESPACEroutines. - One of the following authorities: DATAACCESS, DBADM, or SQLADM.
Additional SELECT Privileges:
- SELECT privilege on the
SYSIBM.SYSTABLESPACES - SELECT privilege on the
SYSIBM.SYSDUMMY1 - SELECT privilege on the
SYSIBM.SYSVERSIONS
Required Authorities:
- One of the following authorities is required for overall access:
- SYSMON
- SYSMAINT
- SYSCTRL
- SYSADM
Set Up a DB2 Discovery Job
To discover DB2 databases, create a new discovery job for *nix targets and check the Collect database server information checkbox.
Fill out both sets of credentials:
- Database Username / Password(s): Credentials to authenticate to the DB2 database.
- Discovery Target(s) Credential(s): Credentials to authenticate to the *nix server.
You can enter multiple credentials in a preferred order. The job tries each credential in order and stops at the first successful authentication. Subsequent runs start with the last successful credential.
View DB2 Discovery Job Results
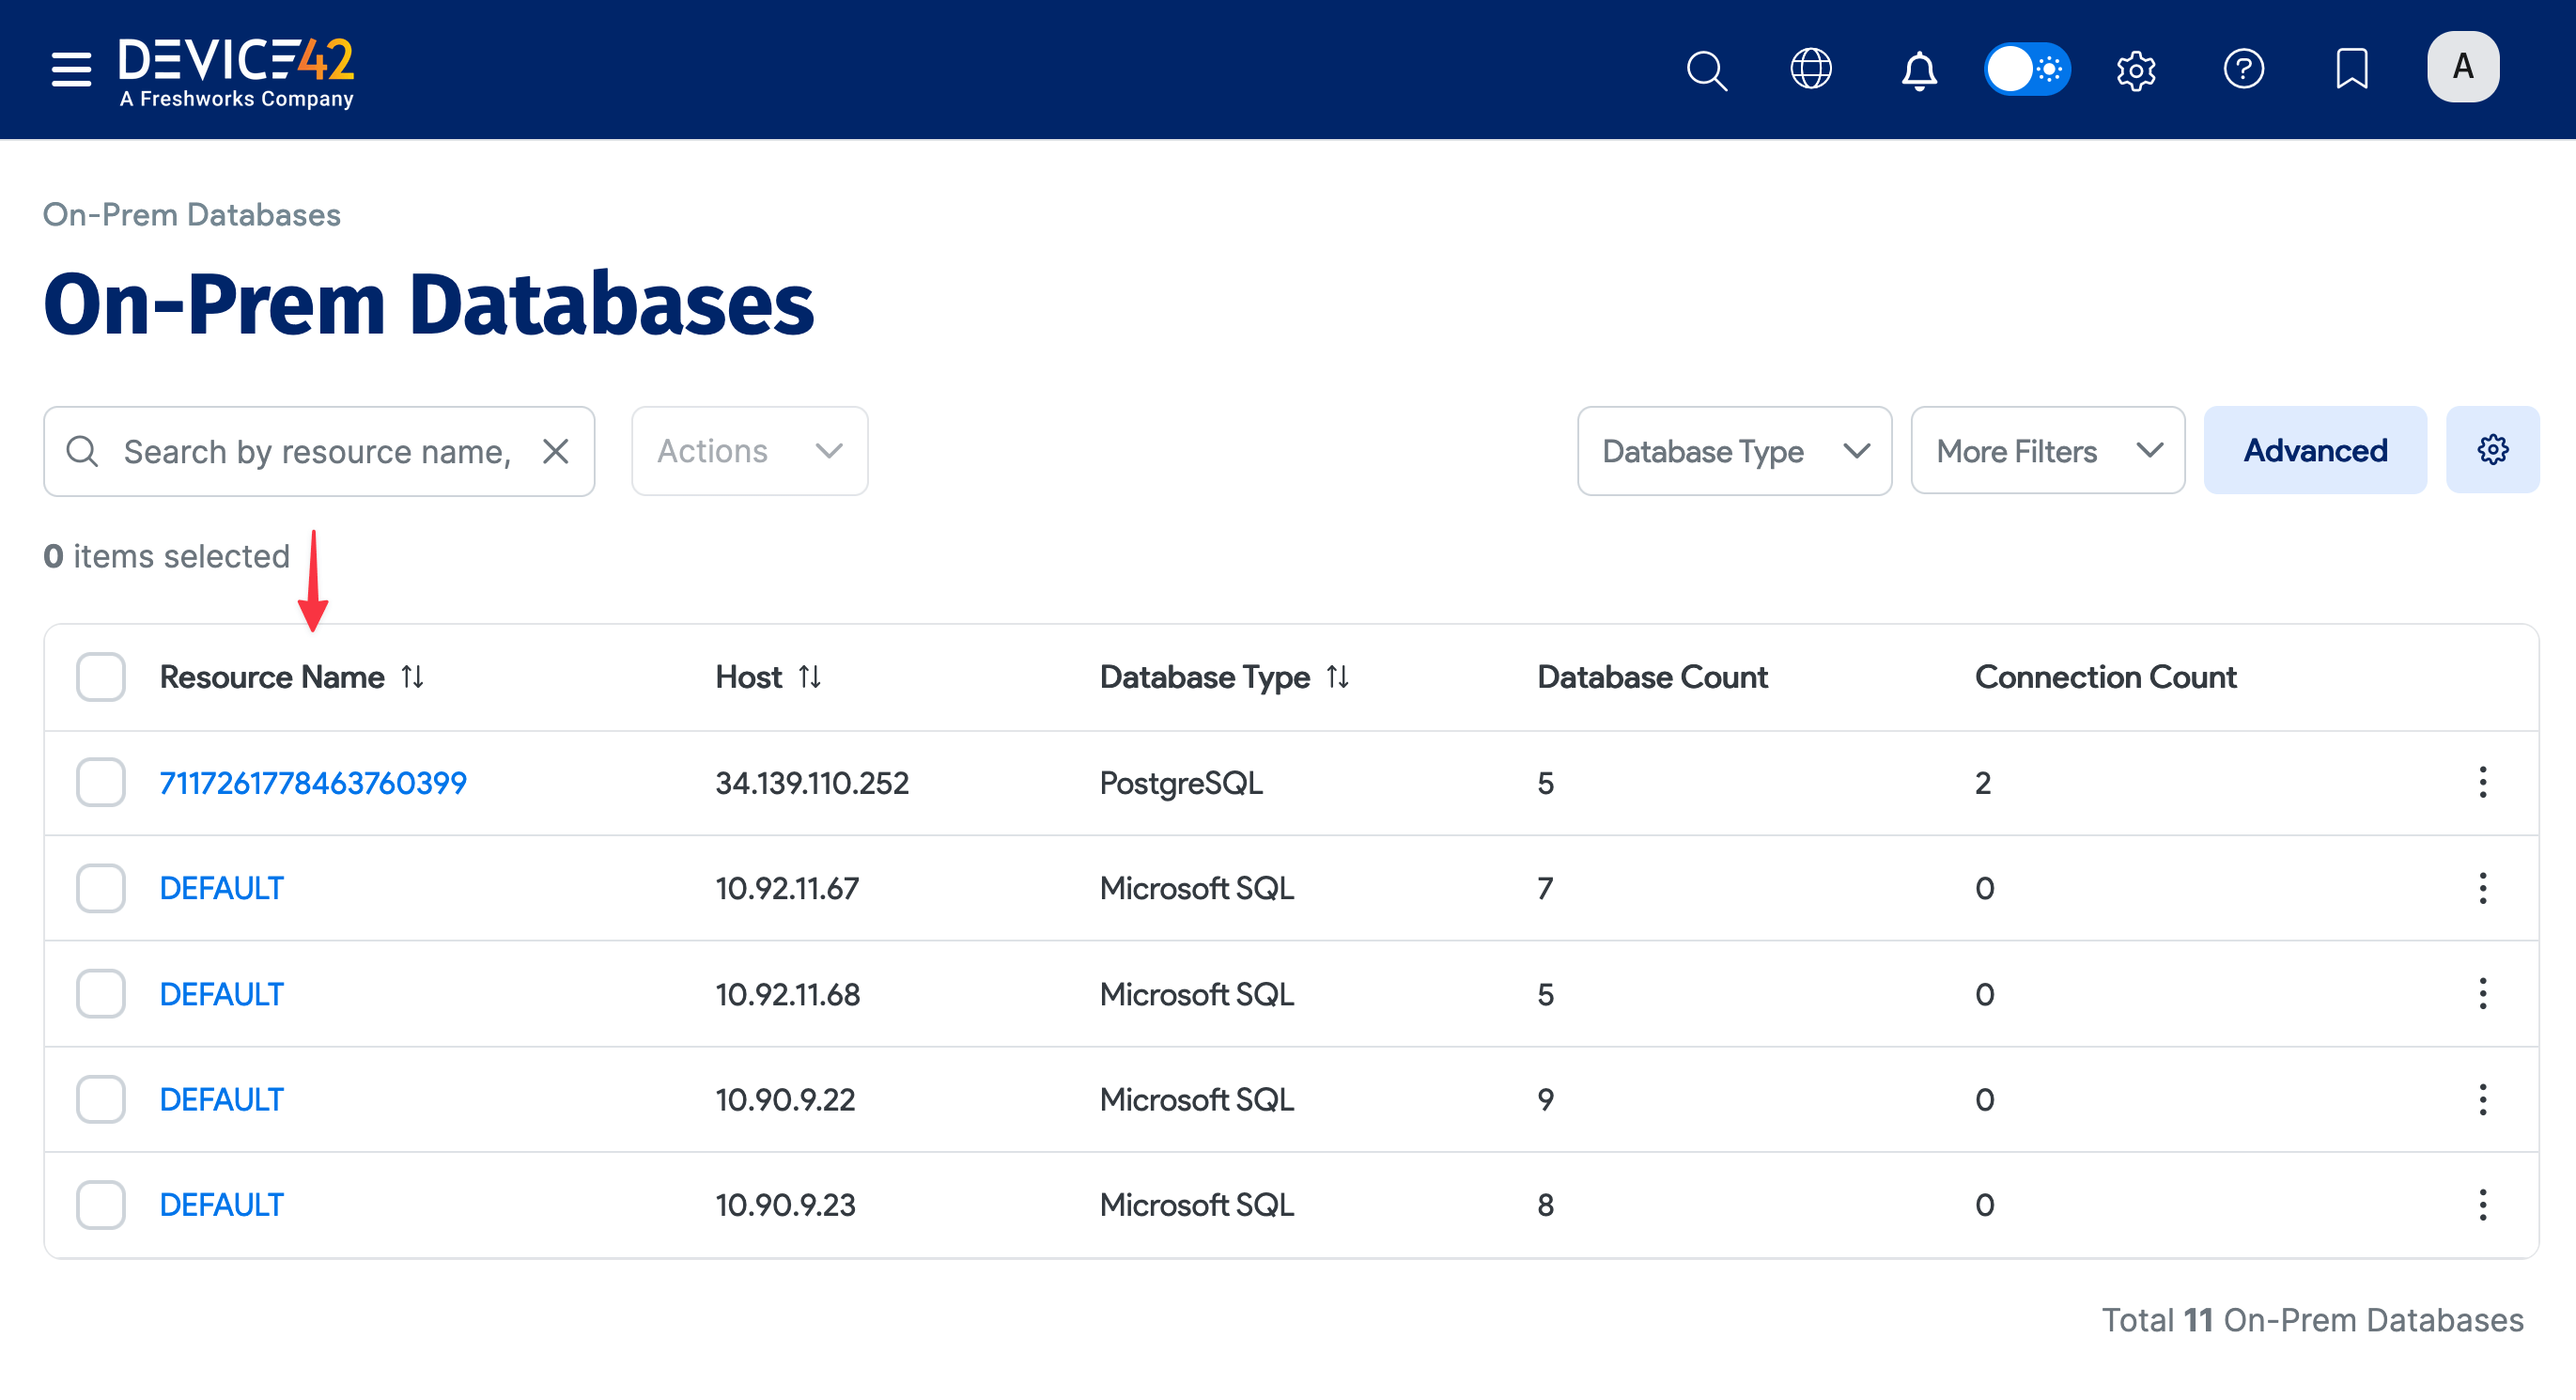
When the job finishes, you can view the results of your database discovery. Discovered DB2 databases are added to the On-Prem Databases list page.
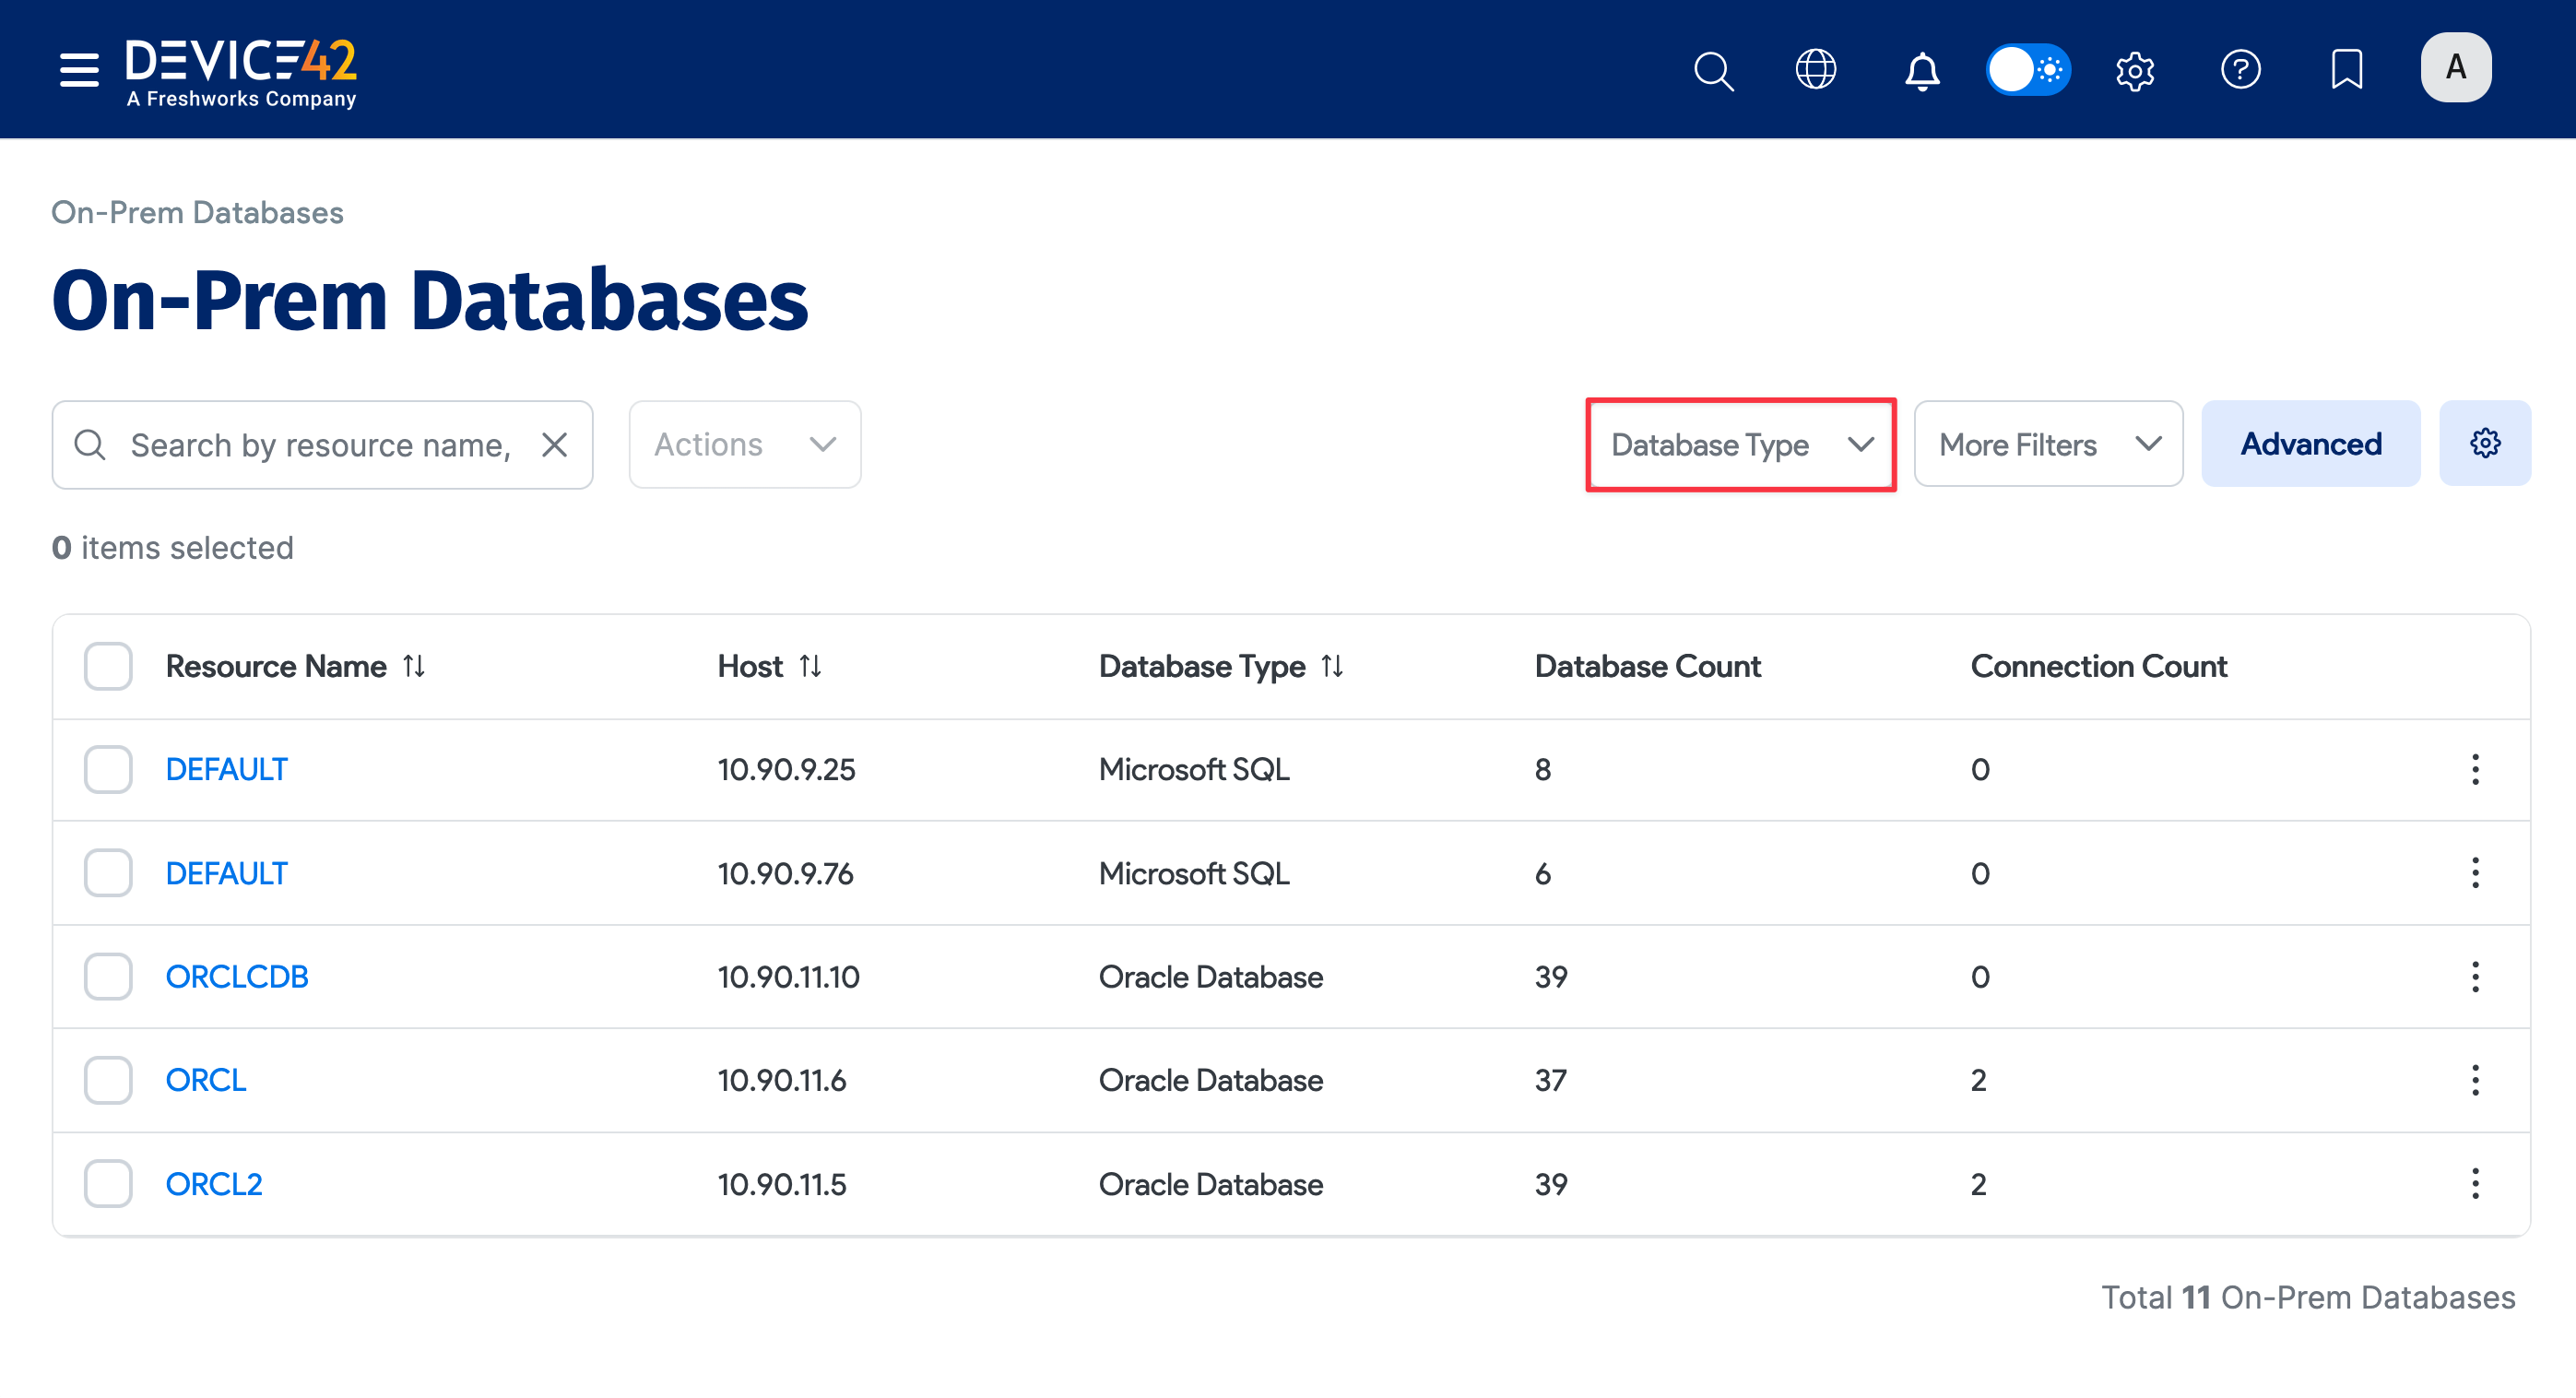
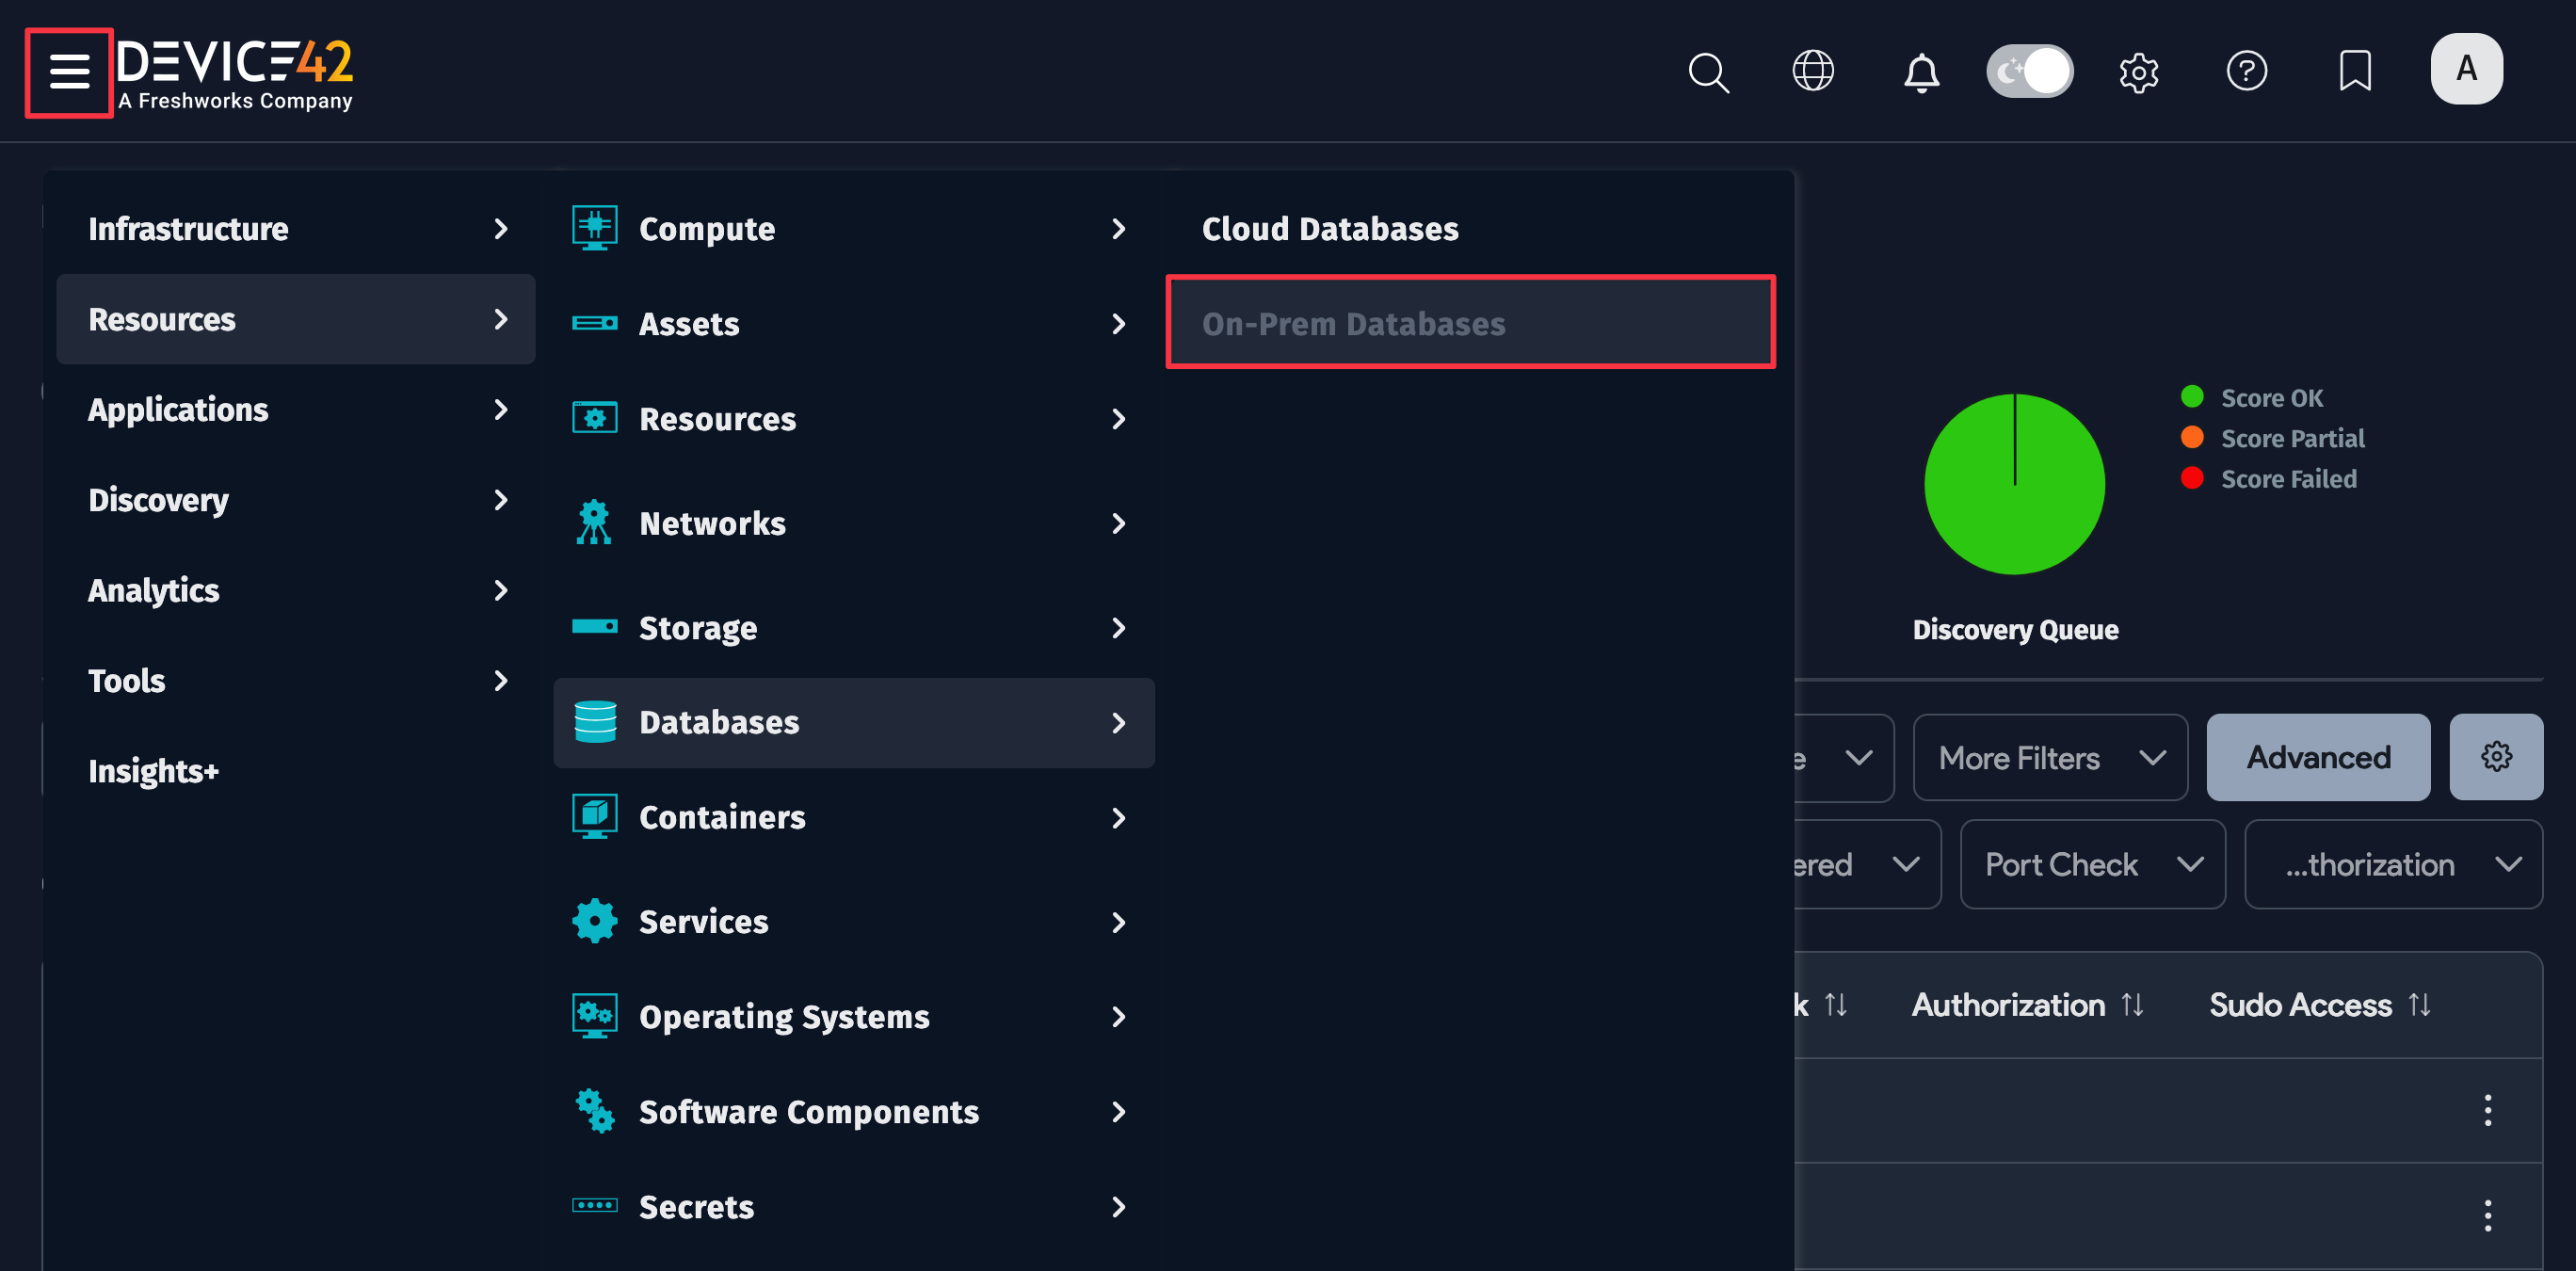
On the Device42 main menu, select Resources > Databases > On-Prem Databases to display the page. You can use the search bar and filters to narrow down the list.
Click on your DB2 instance name under the Resource Name column to view more information about the database.
Database Connections Discovery Jobs
Database connections discovery lets you manually specify connection details — such as application components, server IP, port, and credentials — for databases that the OS-based discovery jobs cannot automatically connect to. Returned database information is added to the On-Prem Databases list page.
This job type is useful when the main database discovery cannot determine the proper connection settings for a specific database, as it uses connection settings that you provide directly.
If you have already discovered cloud databases using cloud discovery jobs, performing a database connection discovery using FQDN will not create duplicate database entries.
Follow these steps to create and configure a database connections discovery job:
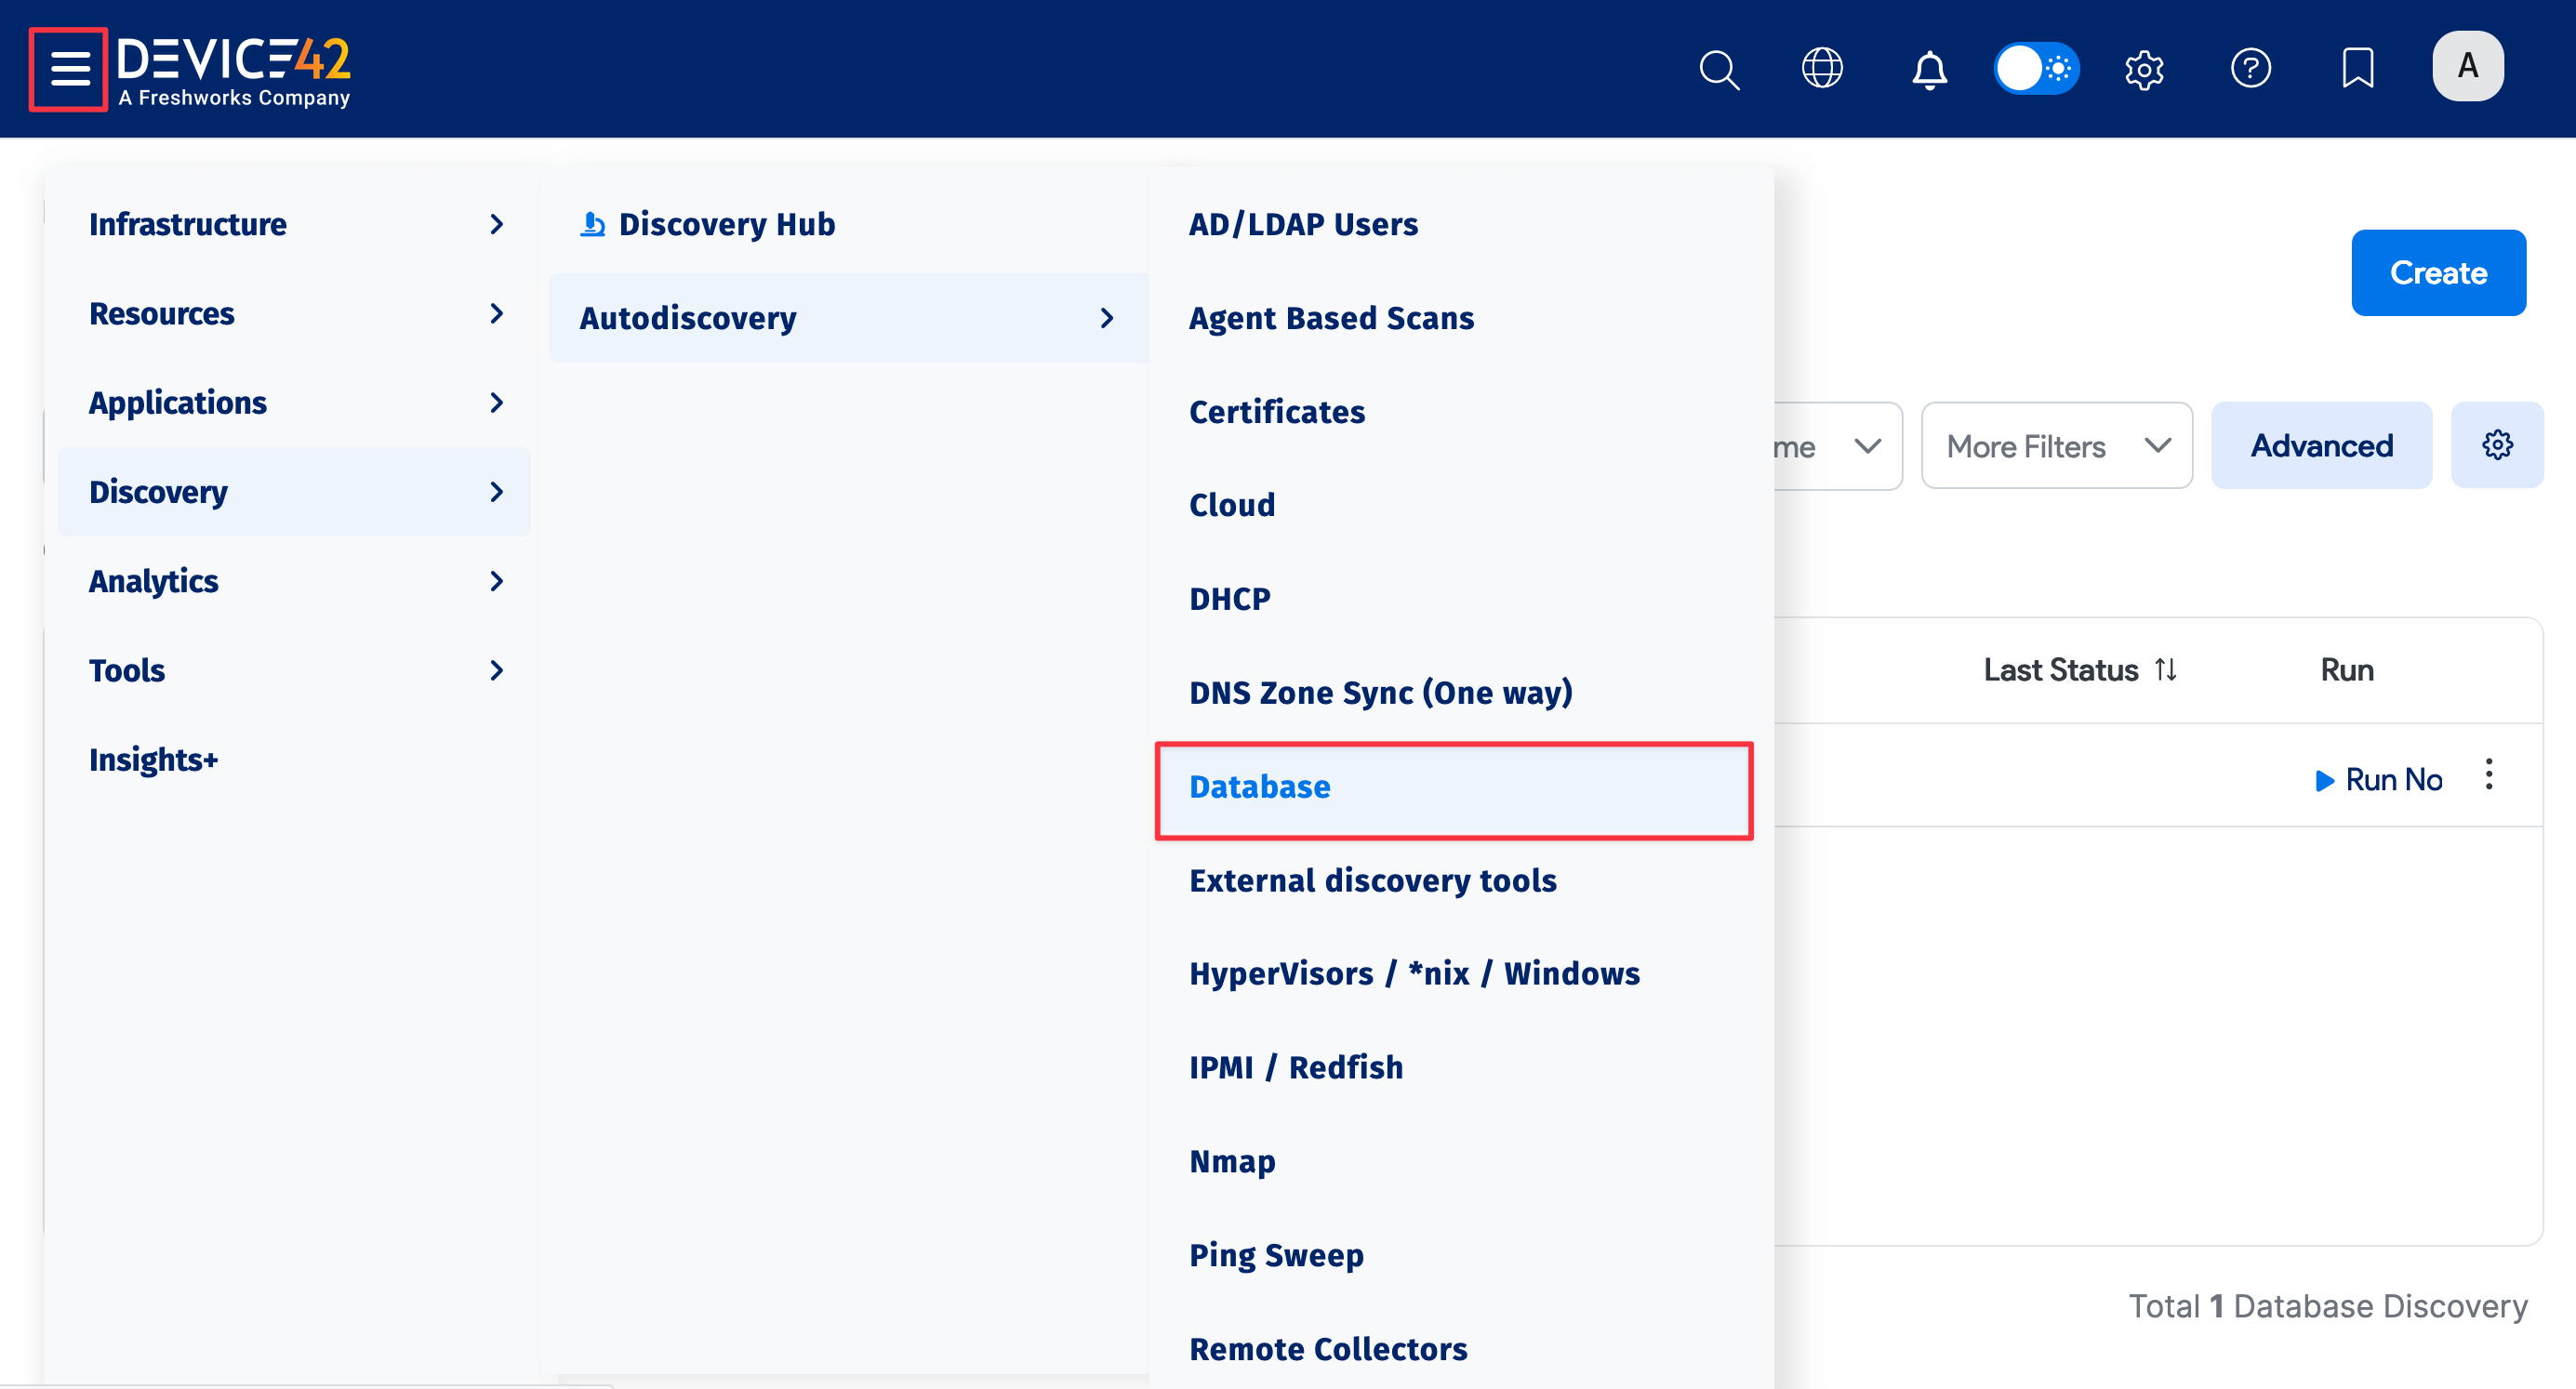
-
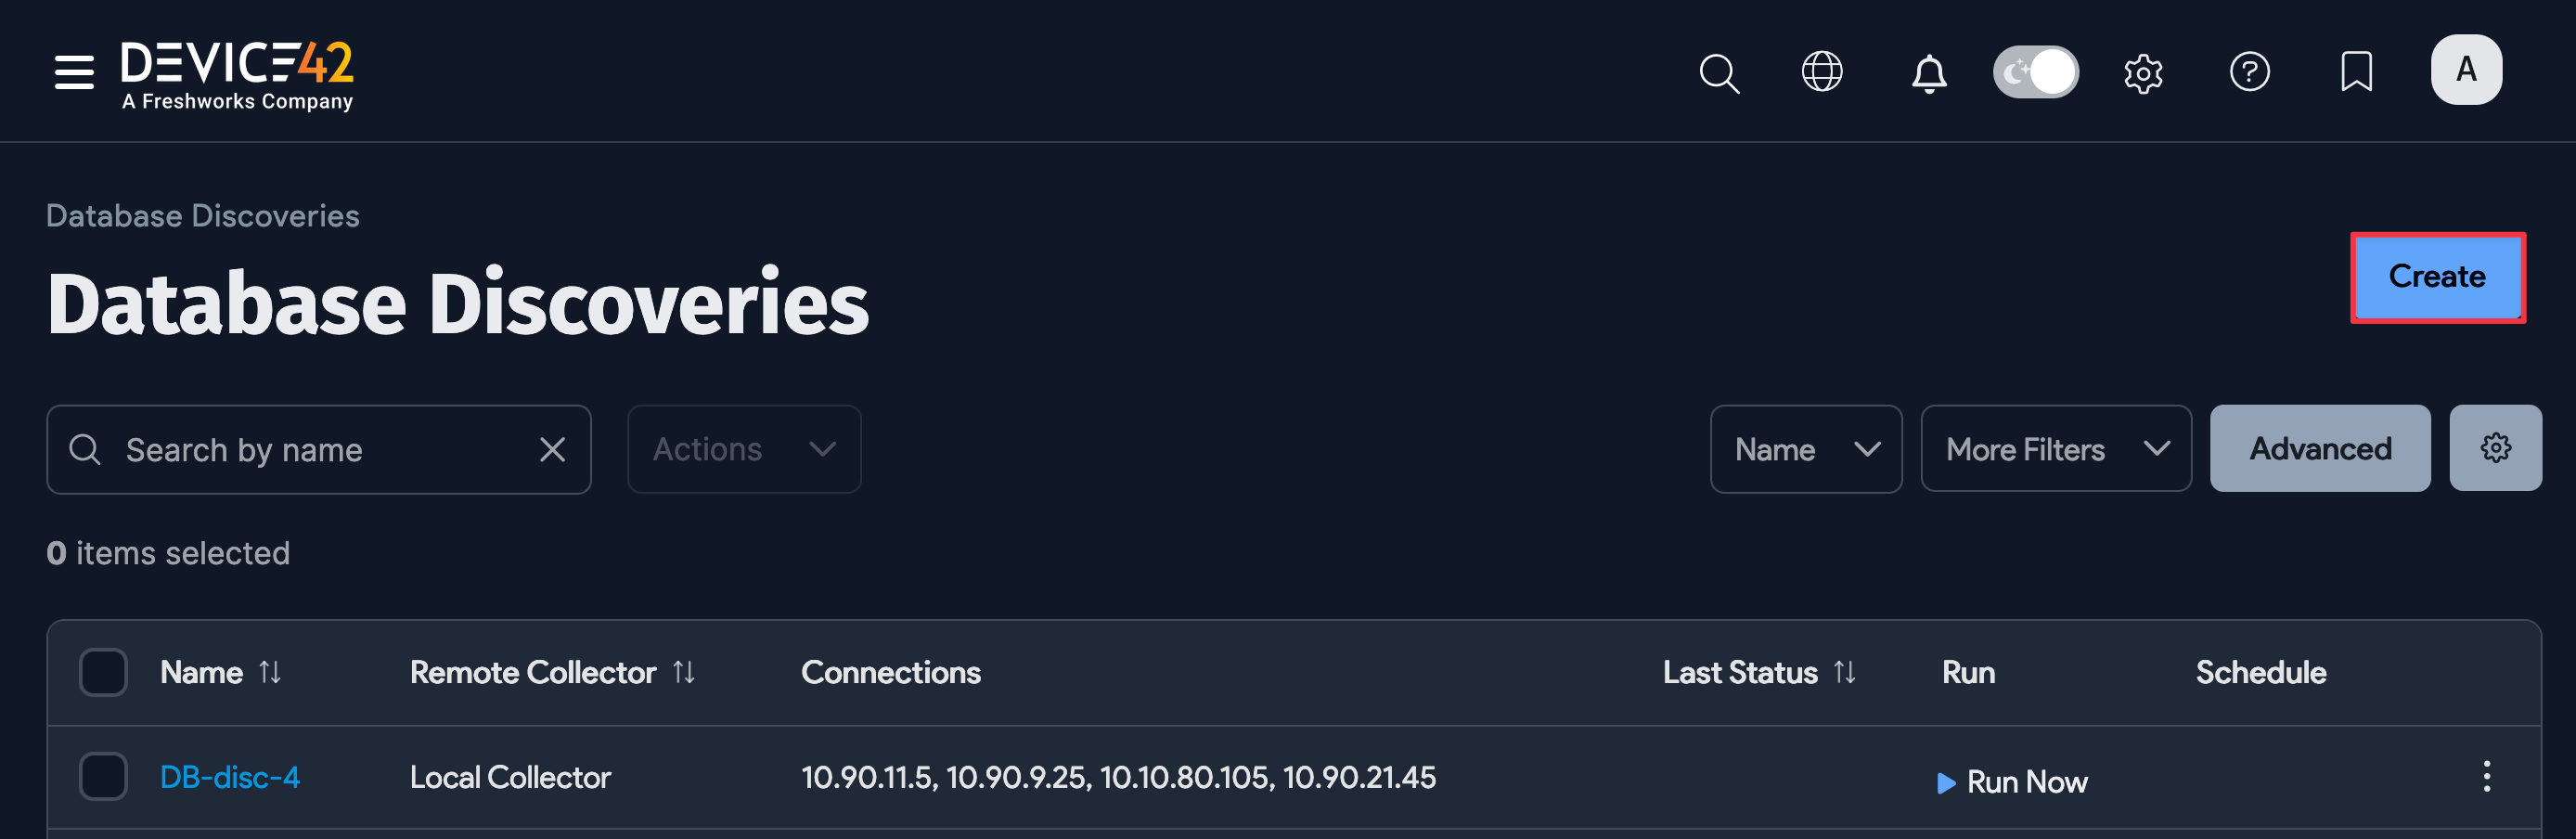
Select Discovery > Autodiscovery > Database from the main menu to display the Database Discoveries list page.
-
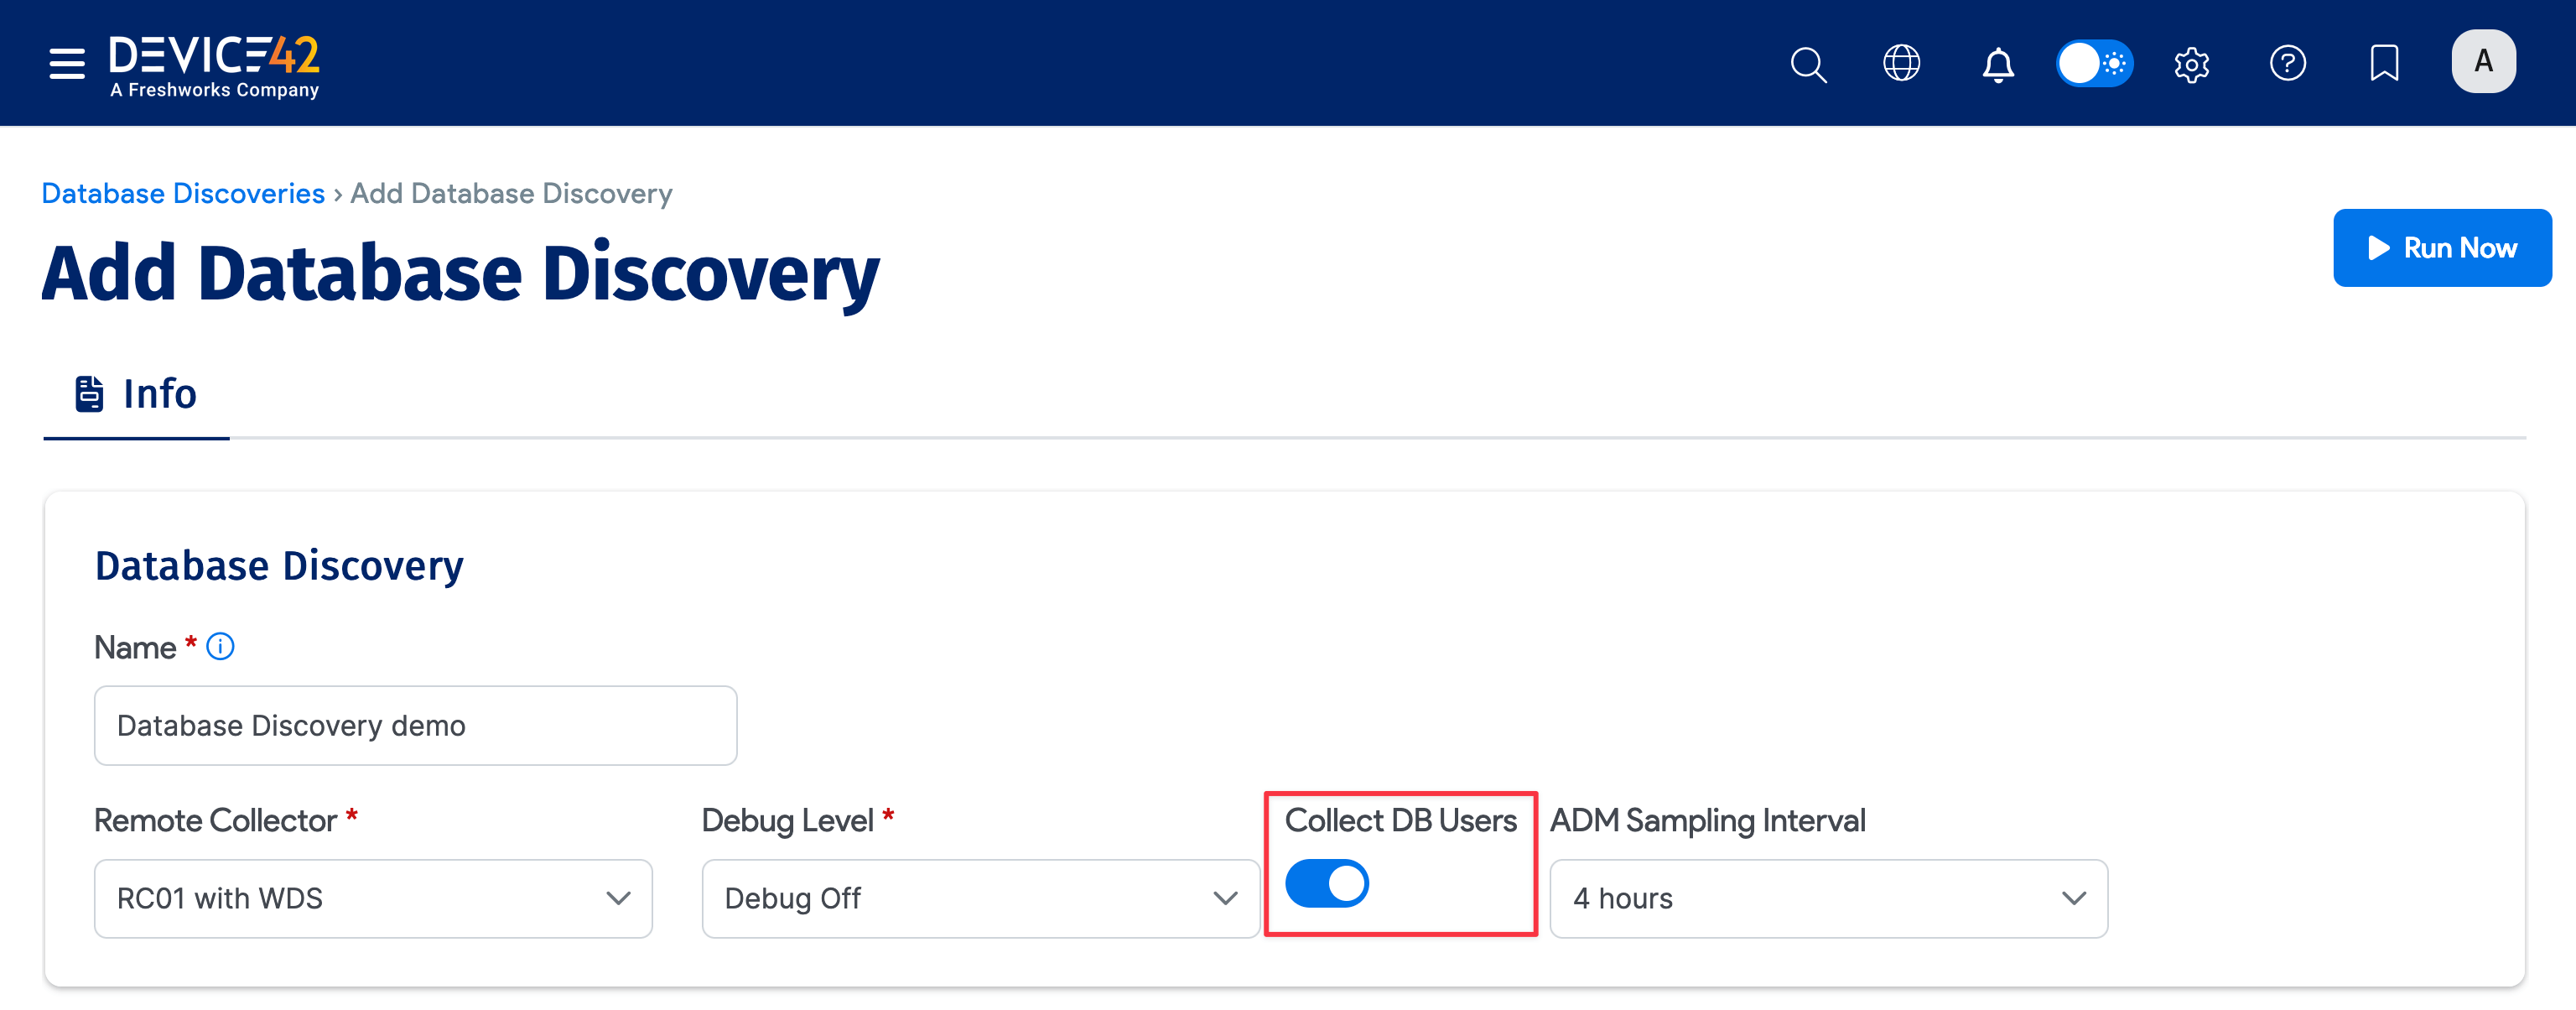
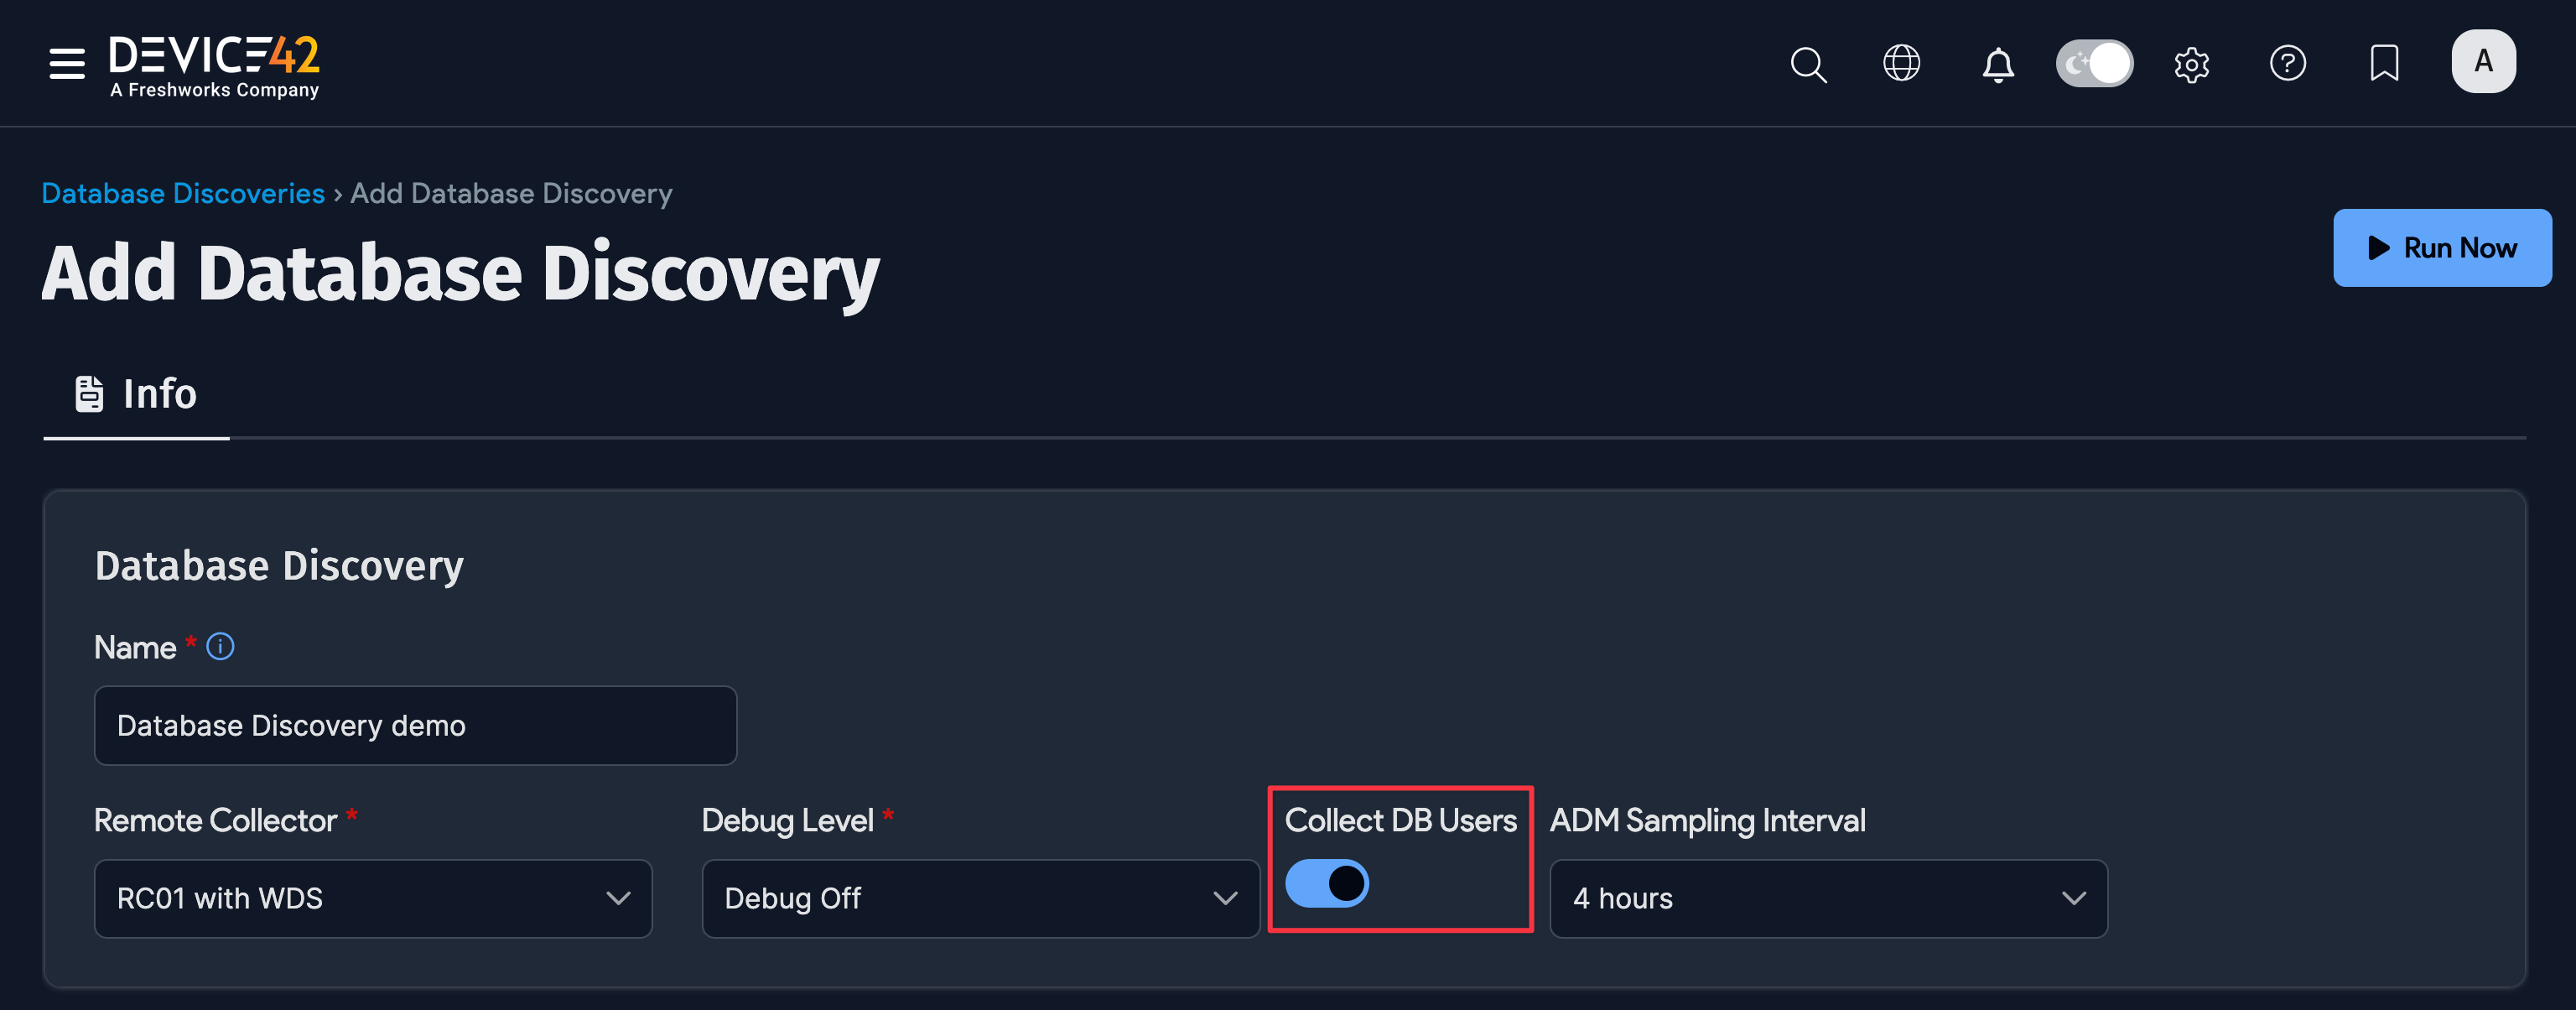
Click on a database discovery name to view that job and Edit to make changes to it. Click Create on the top right of the page to add a new database discovery job.

-
The Collect DB Users option applies to Oracle discovery. In Oracle, both databases and users are treated as schemas, and user schemas can exist without any database objects. By default, Device42 only discovers Oracle users that own objects, treating them as databases. Enable the Collect DB Users option to also include user schemas that don’t contain any objects.
-
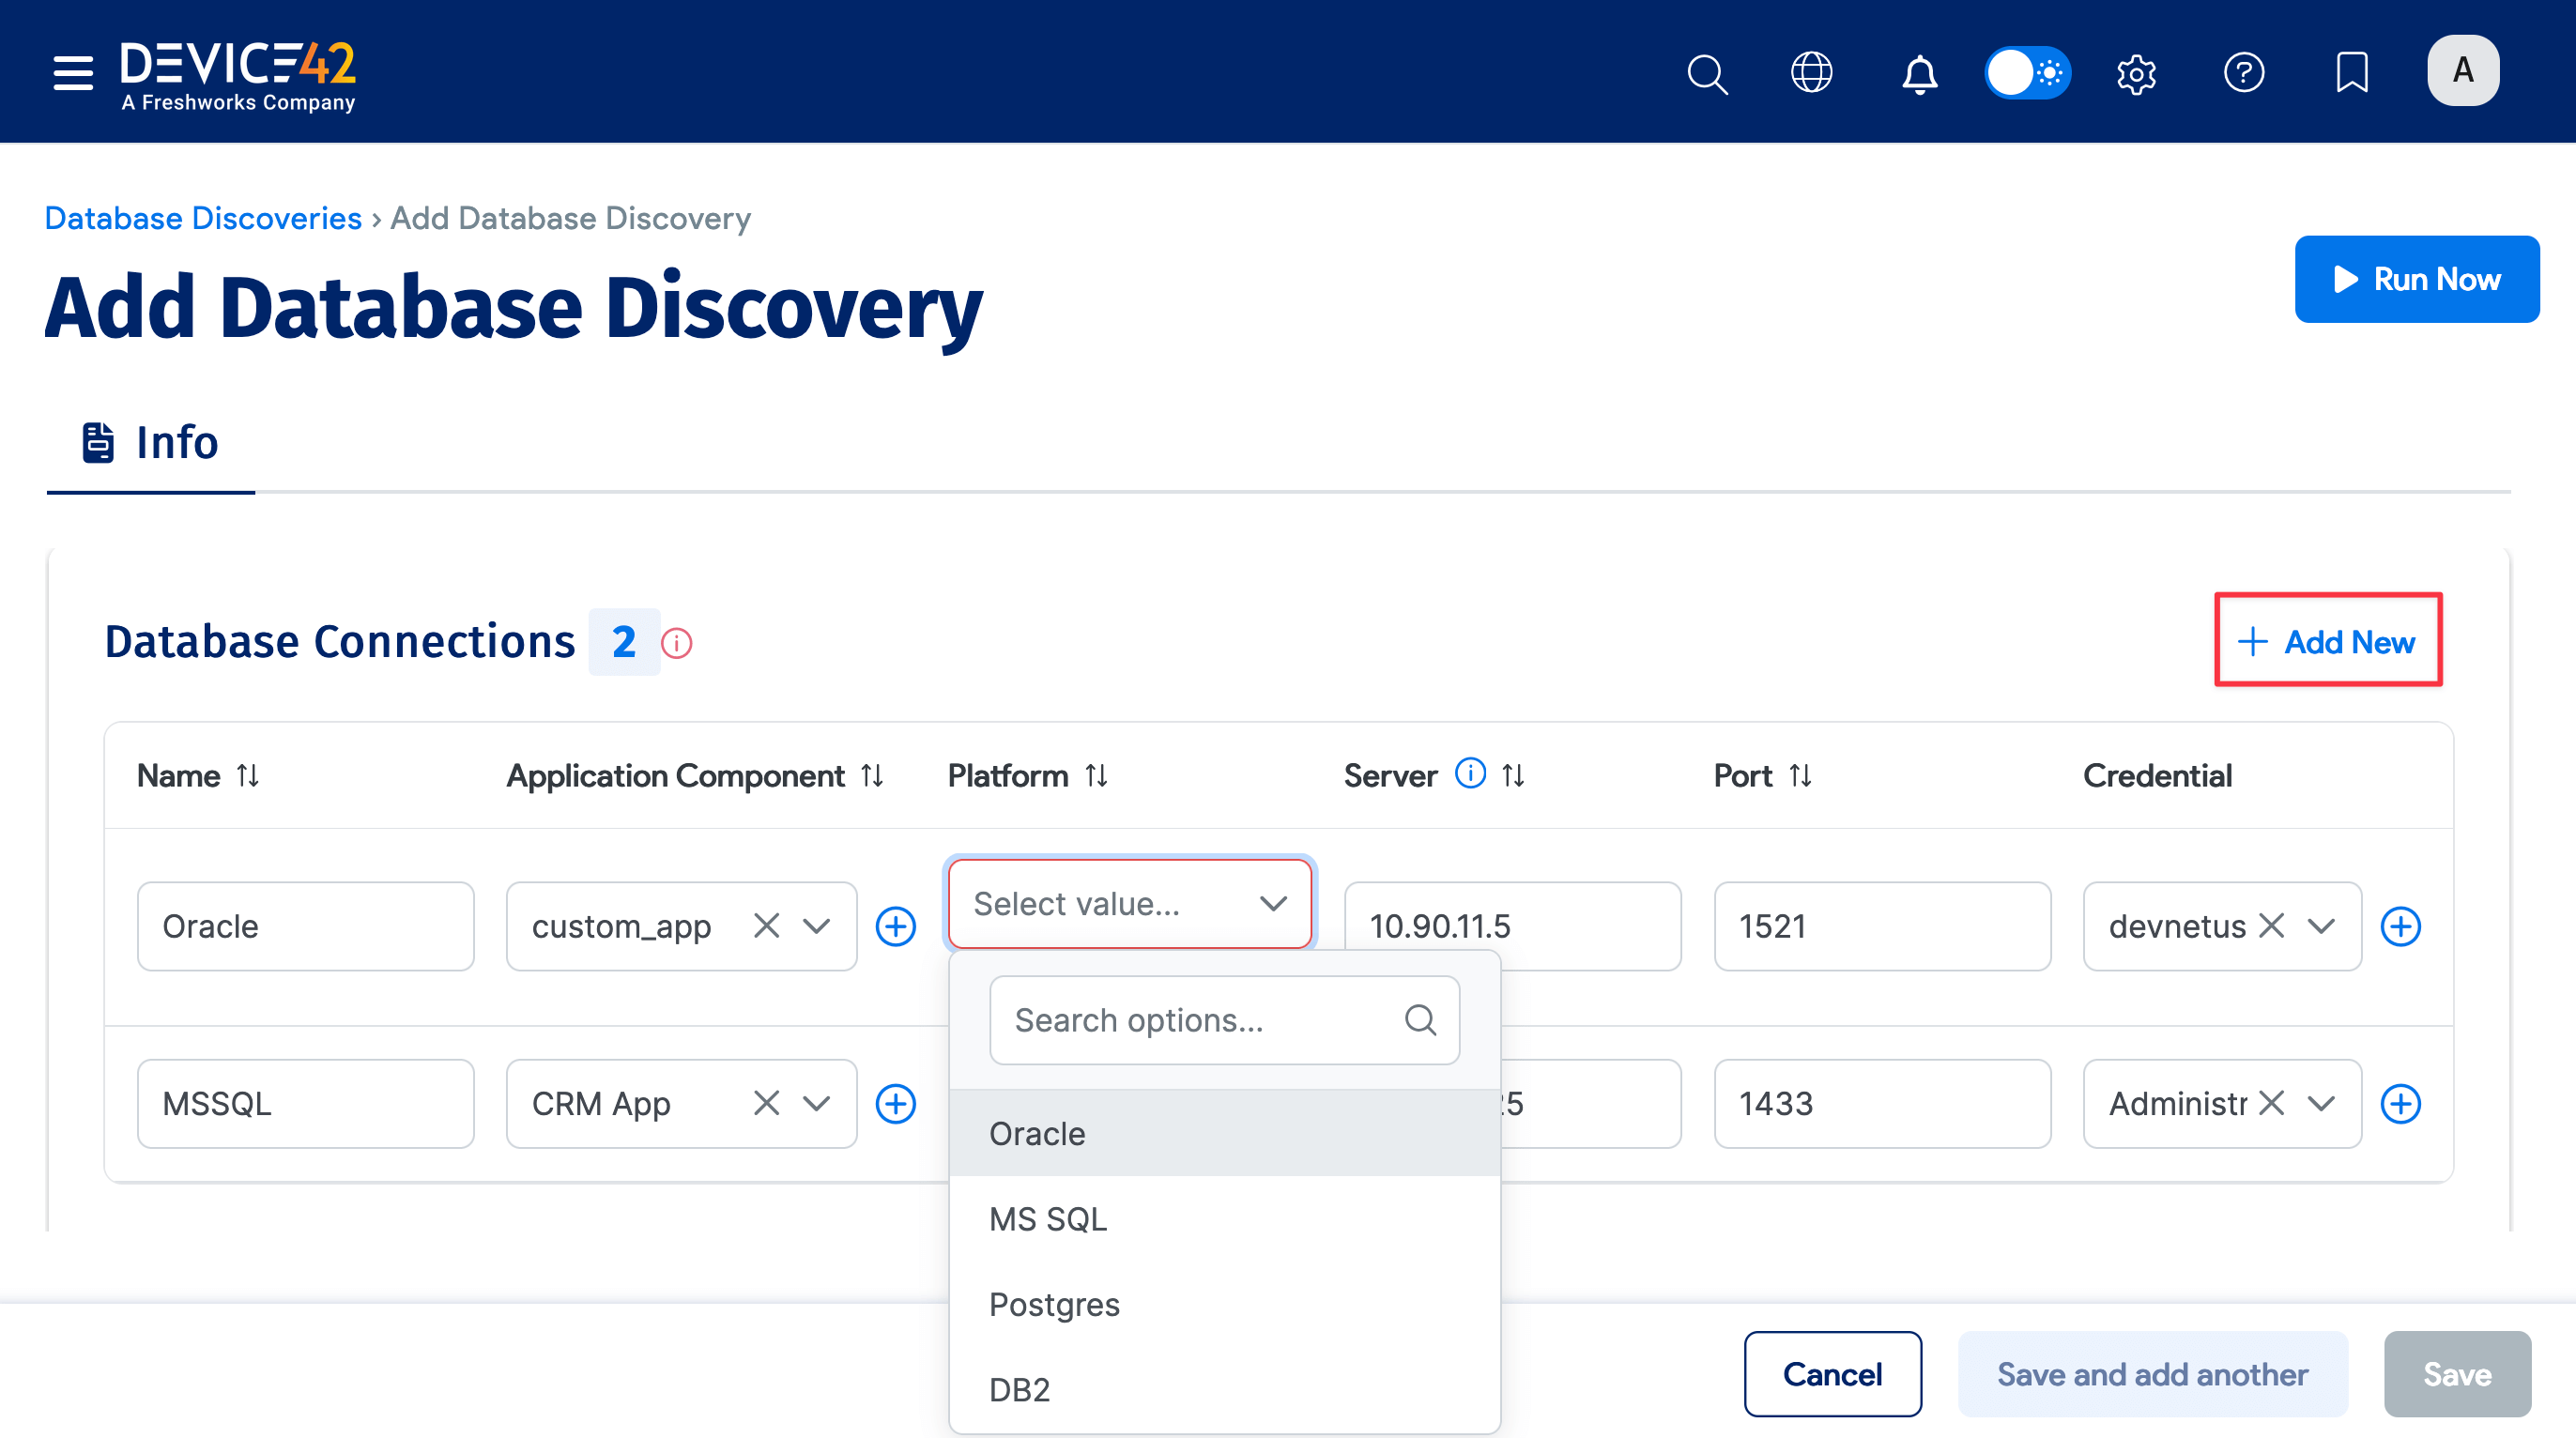
Click + Add New to add Database Connections.
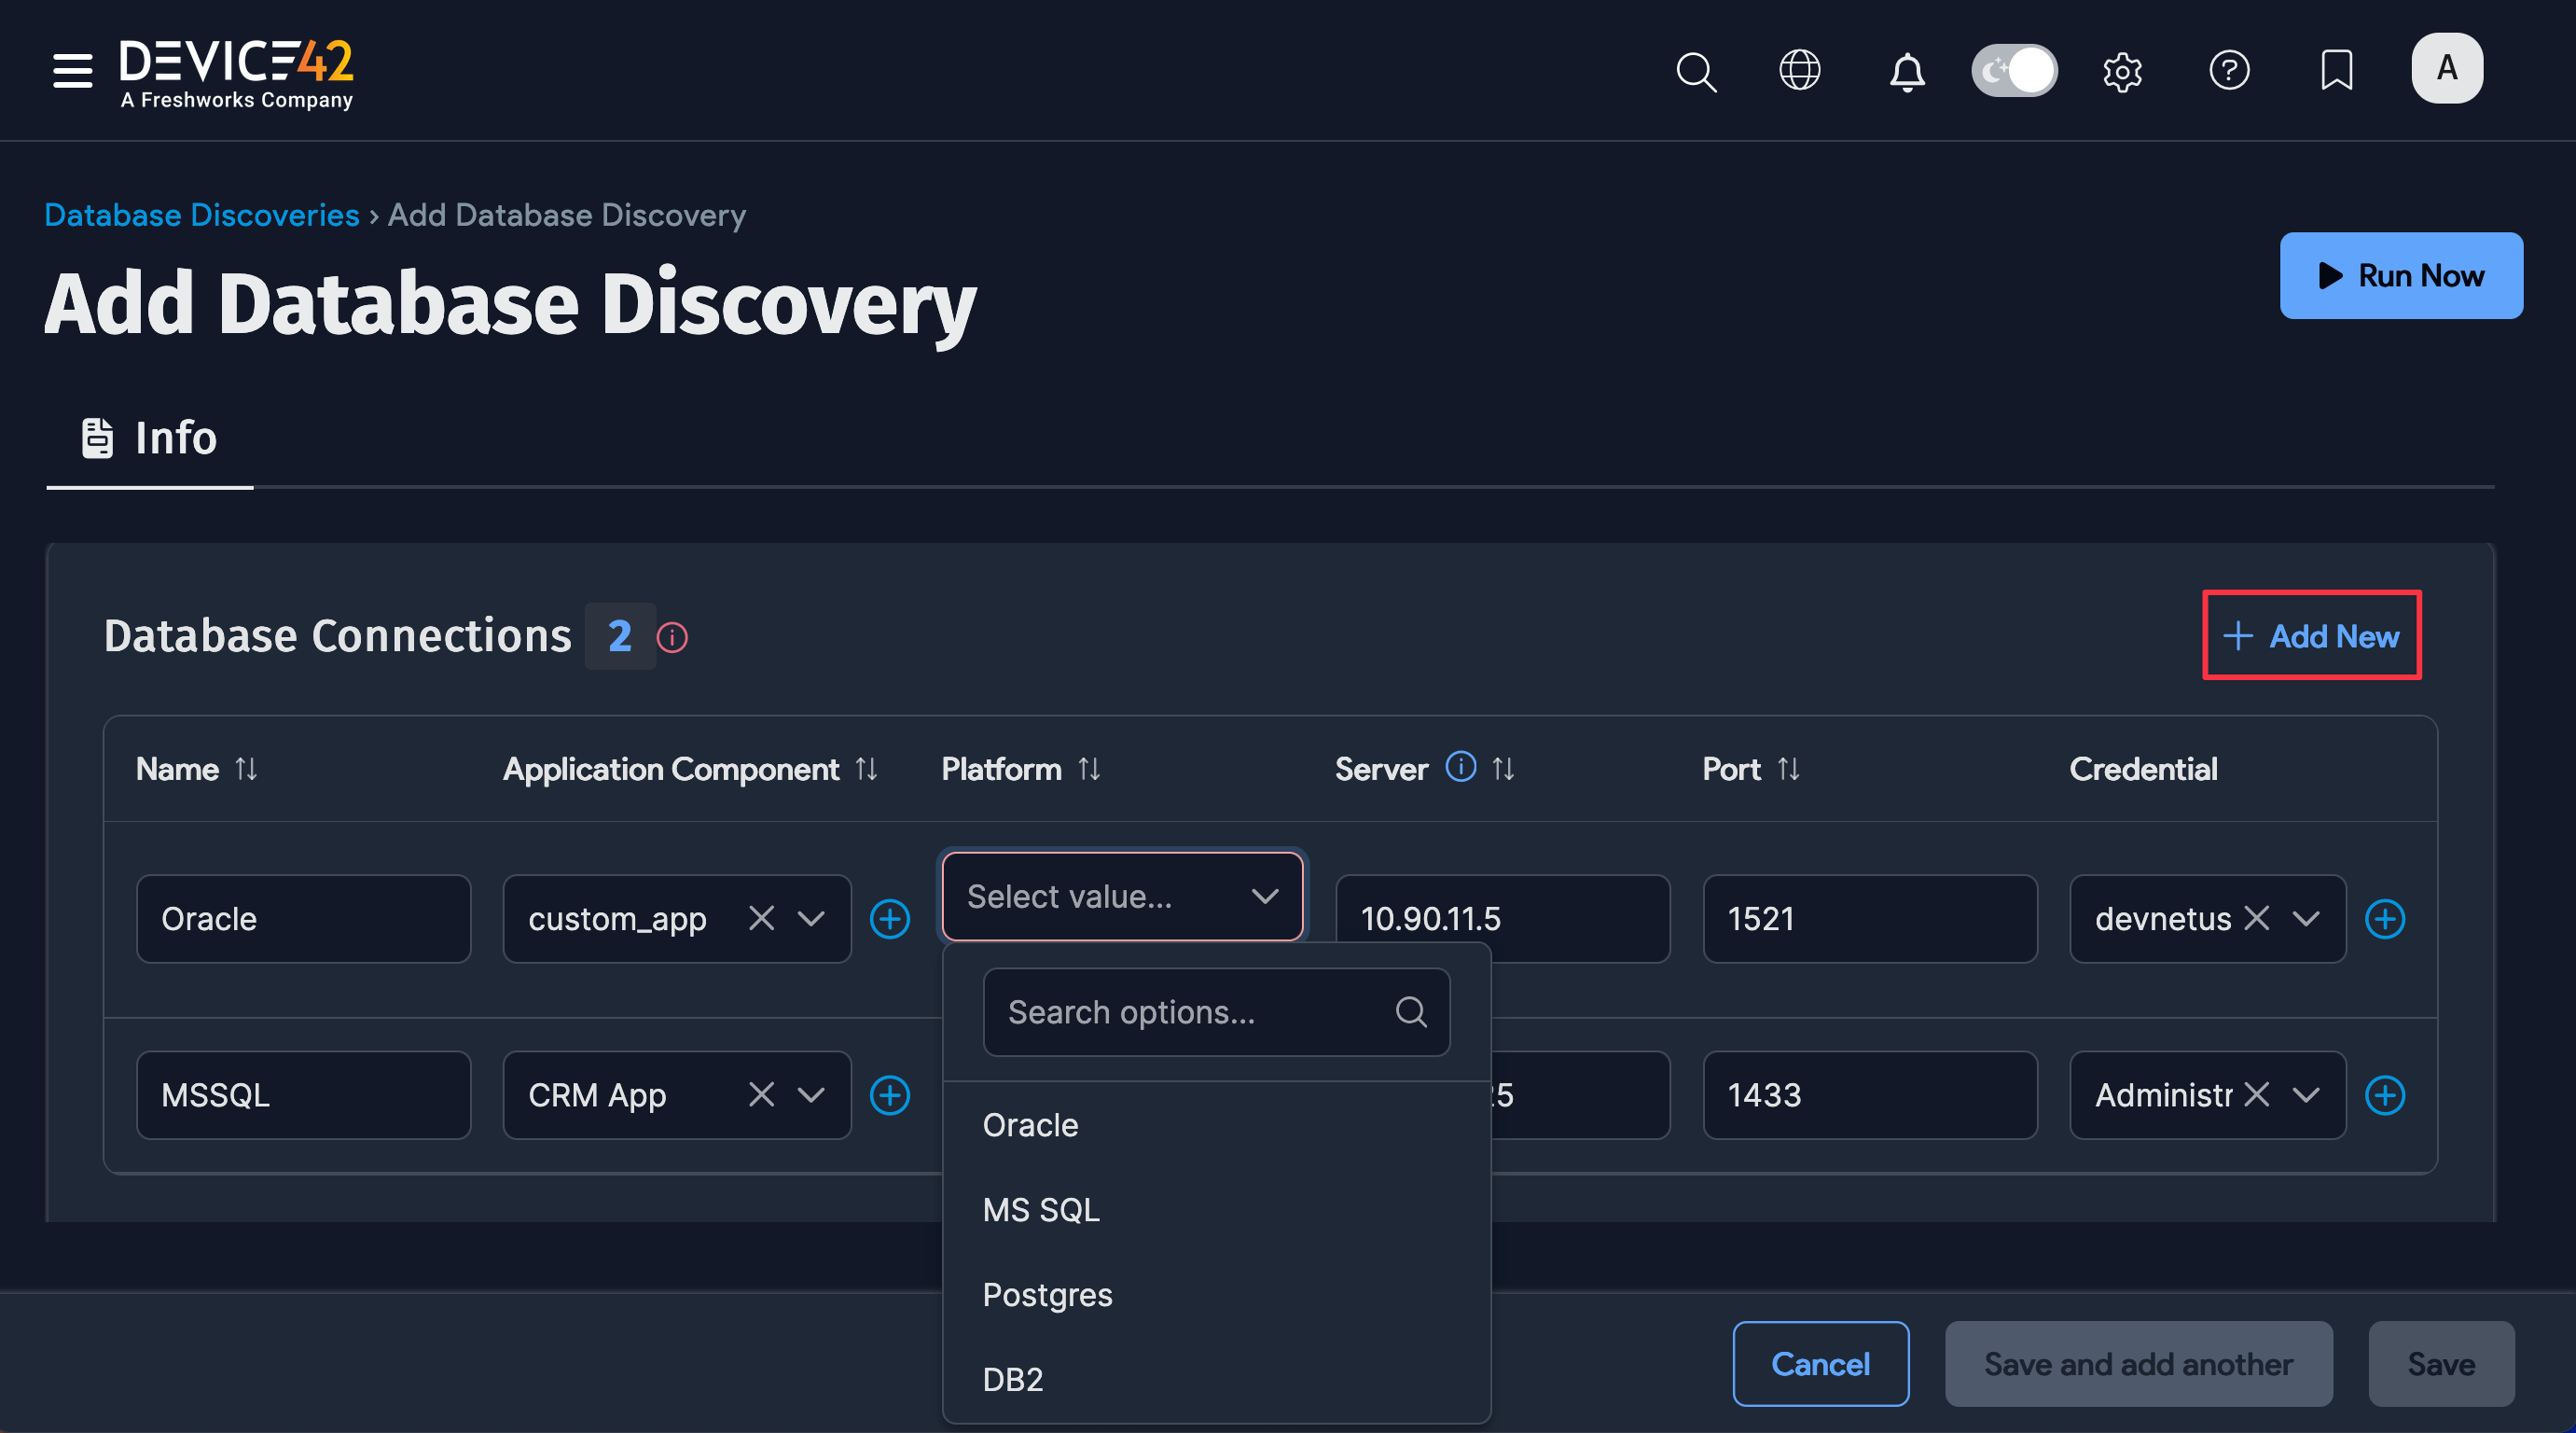
-
Enter or select the Database Connections information:
-
Name: Connection name
-
Application Component: Application component to link to
-
Platform: Database type: Oracle, MS SQL, Postgres, or DB2
-
Server: IP address of the DB server
-
Port: DB server port
-
Credential: DB server access credentials
-
Extra: Enter a name specific to the database type:
- Enter an Instance: name for Oracle (required)
- Enter a Database: name for Postgres and DB2 (required)
- Not required for MS SQL
-
-
Use the trash can icon to remove a Database Connections line.
-
Scroll down the page to add or edit the Discovery Schedule for the job.
-
Click Save to save the job.
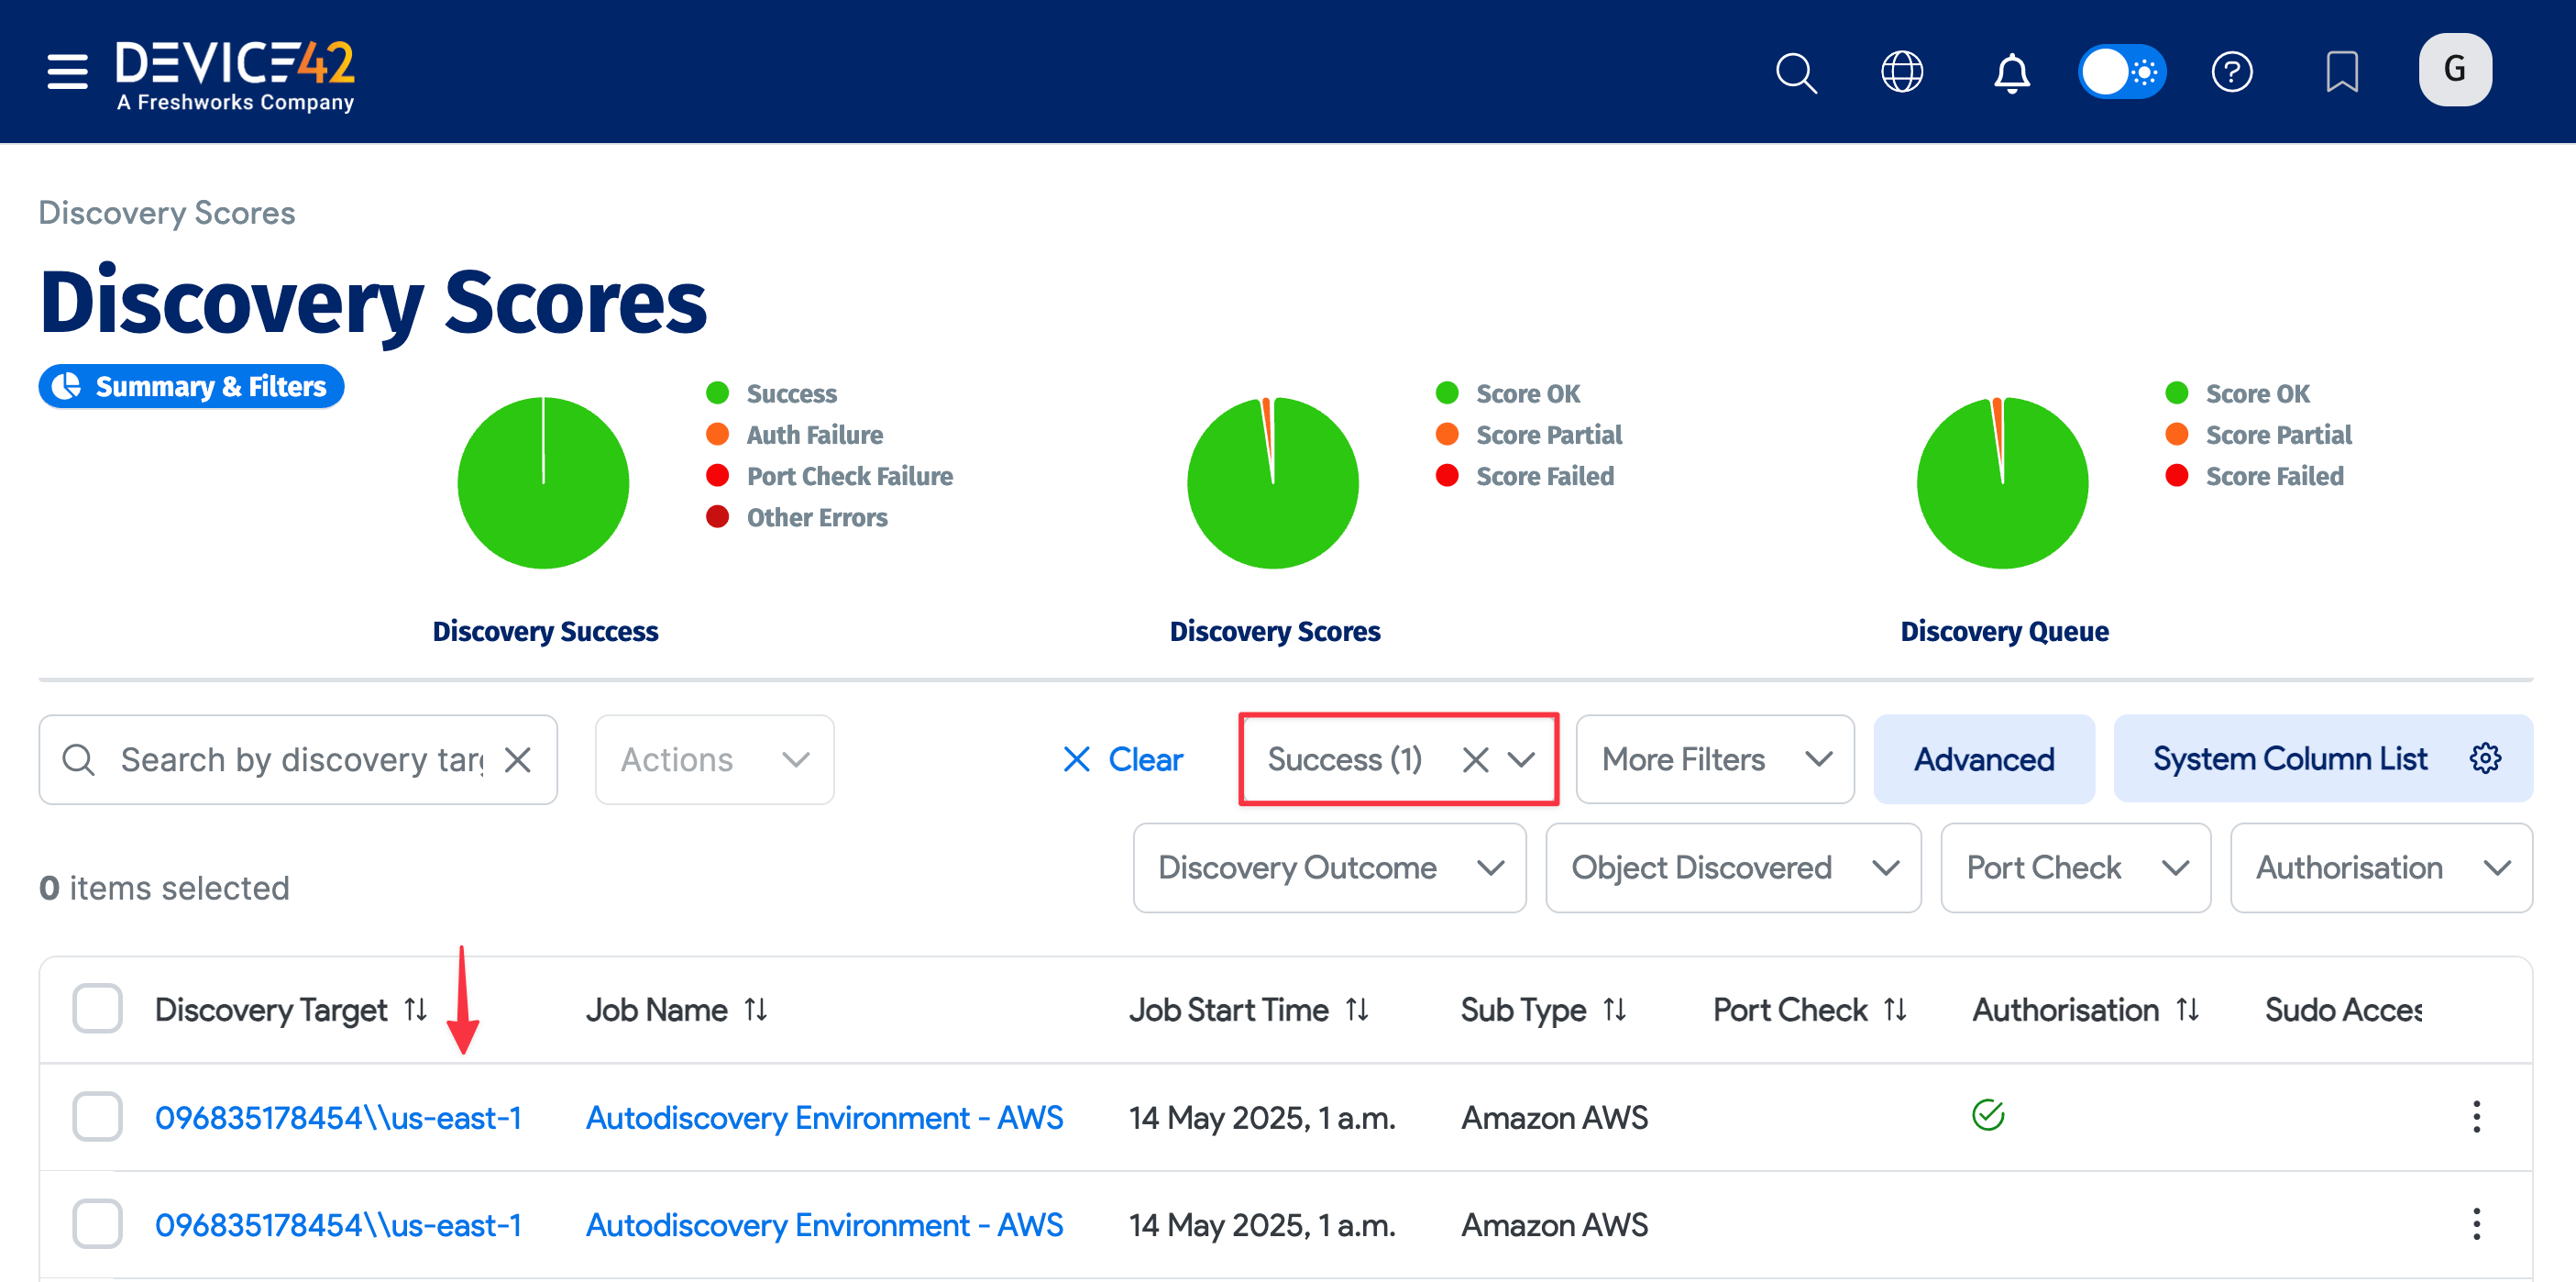
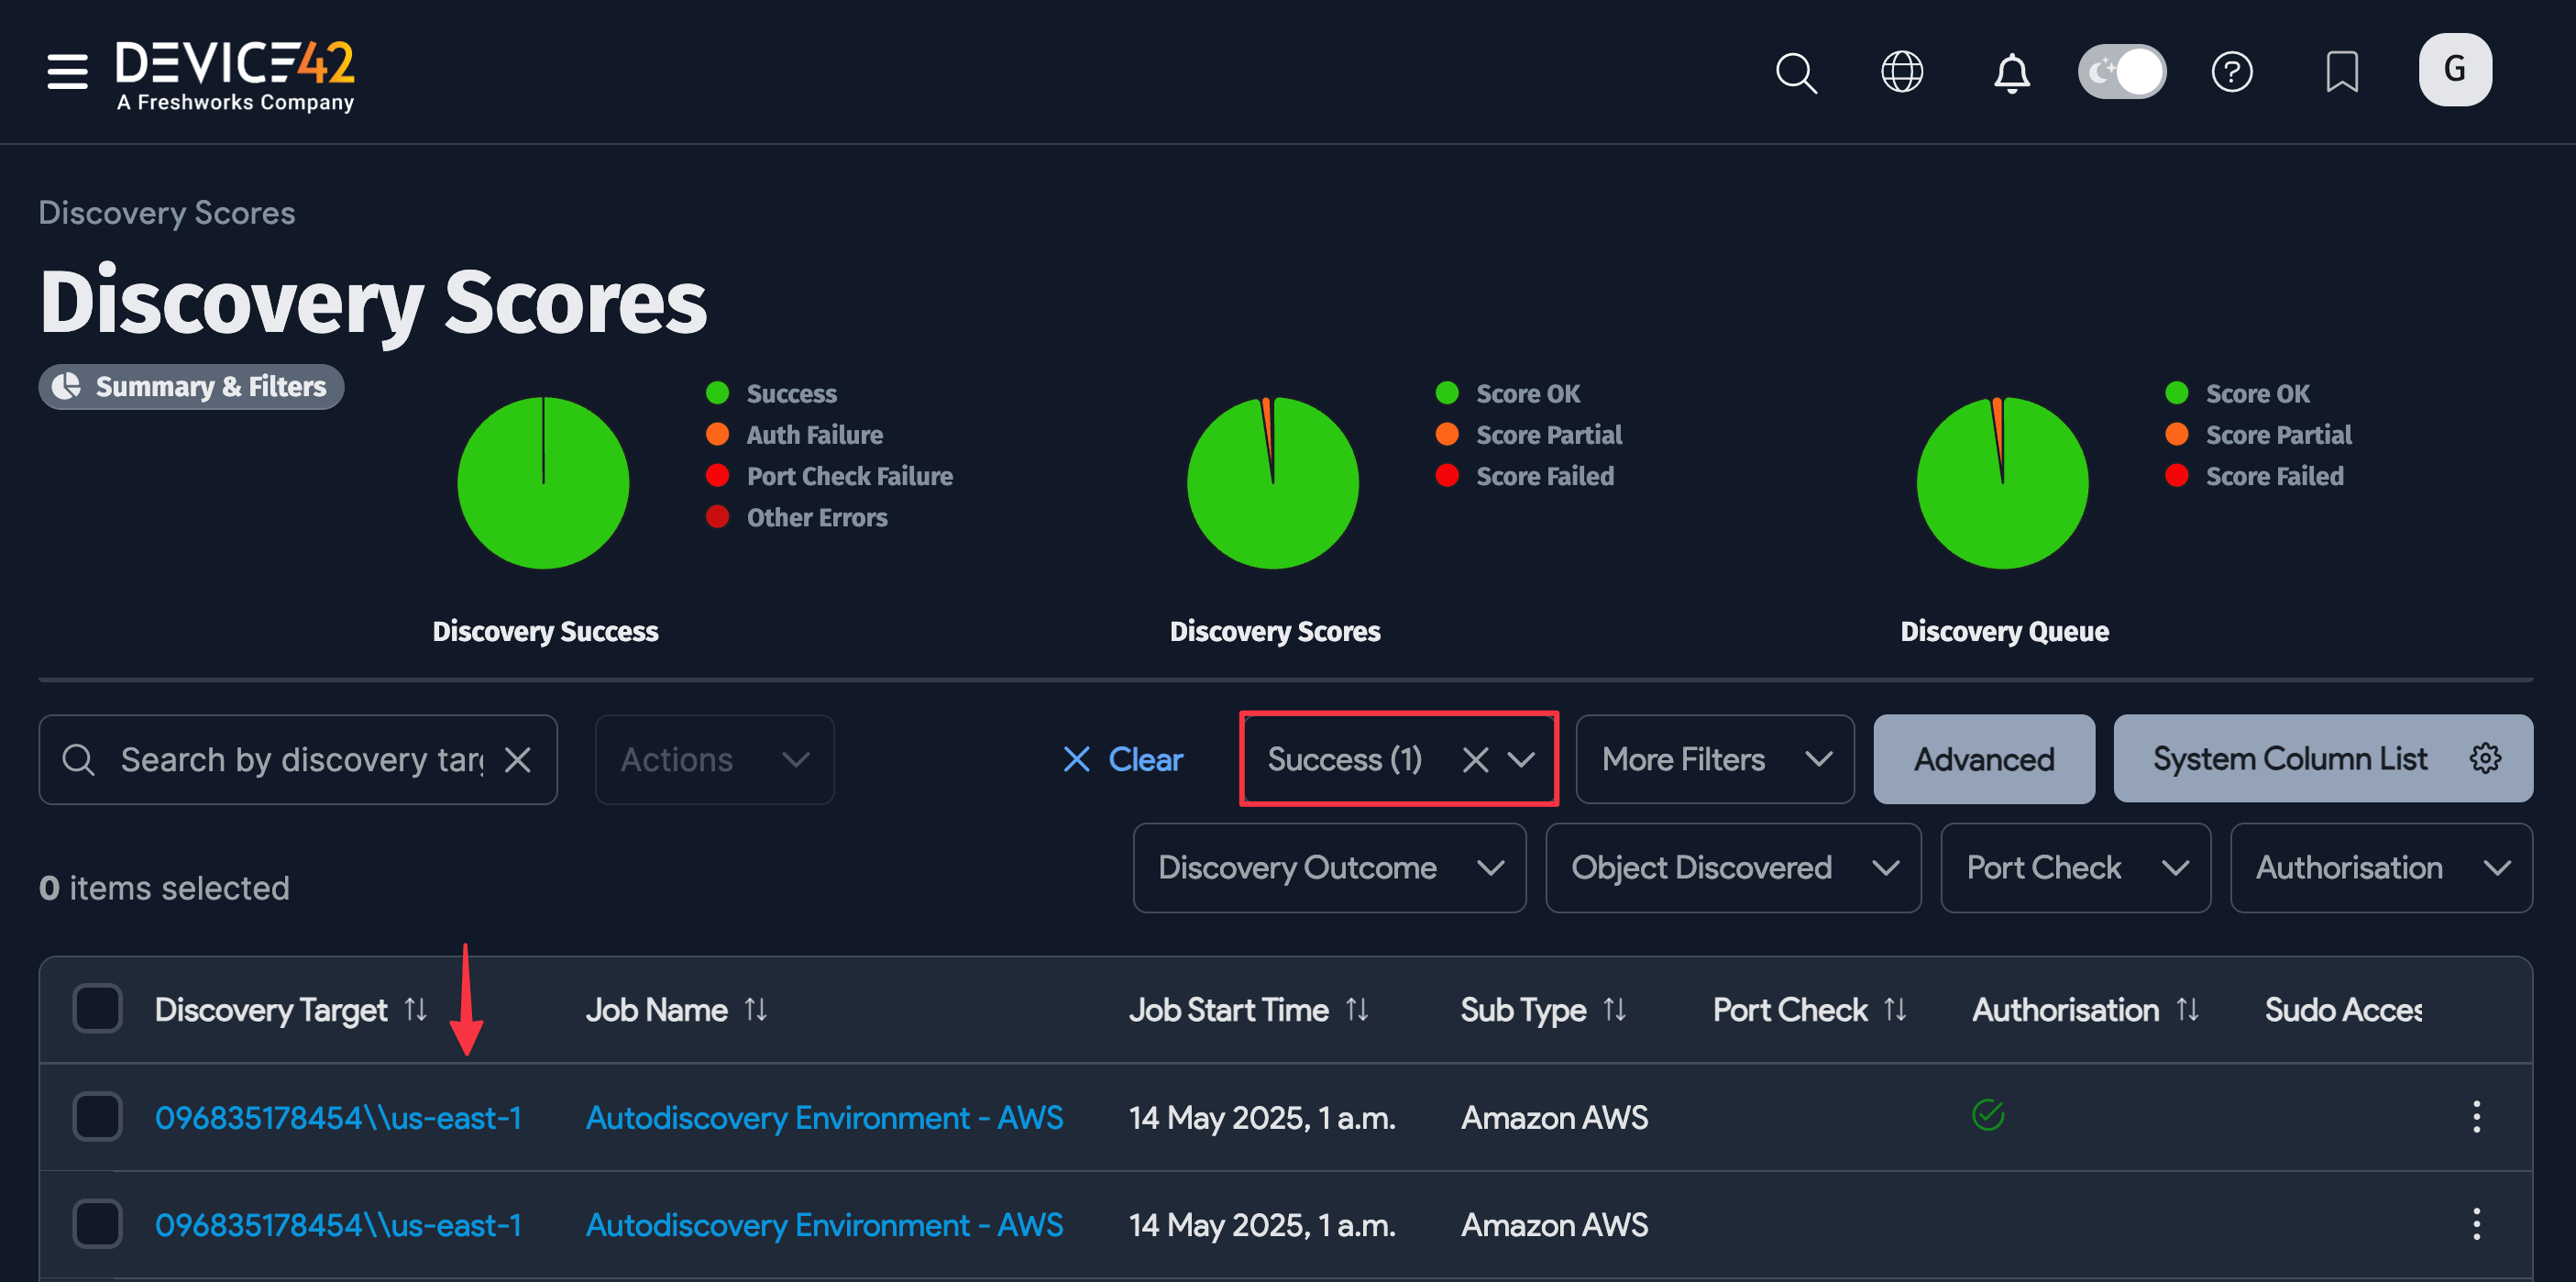
Database Discovery Job Scores
You can view Discovery Scores for the database jobs that have been run.
-
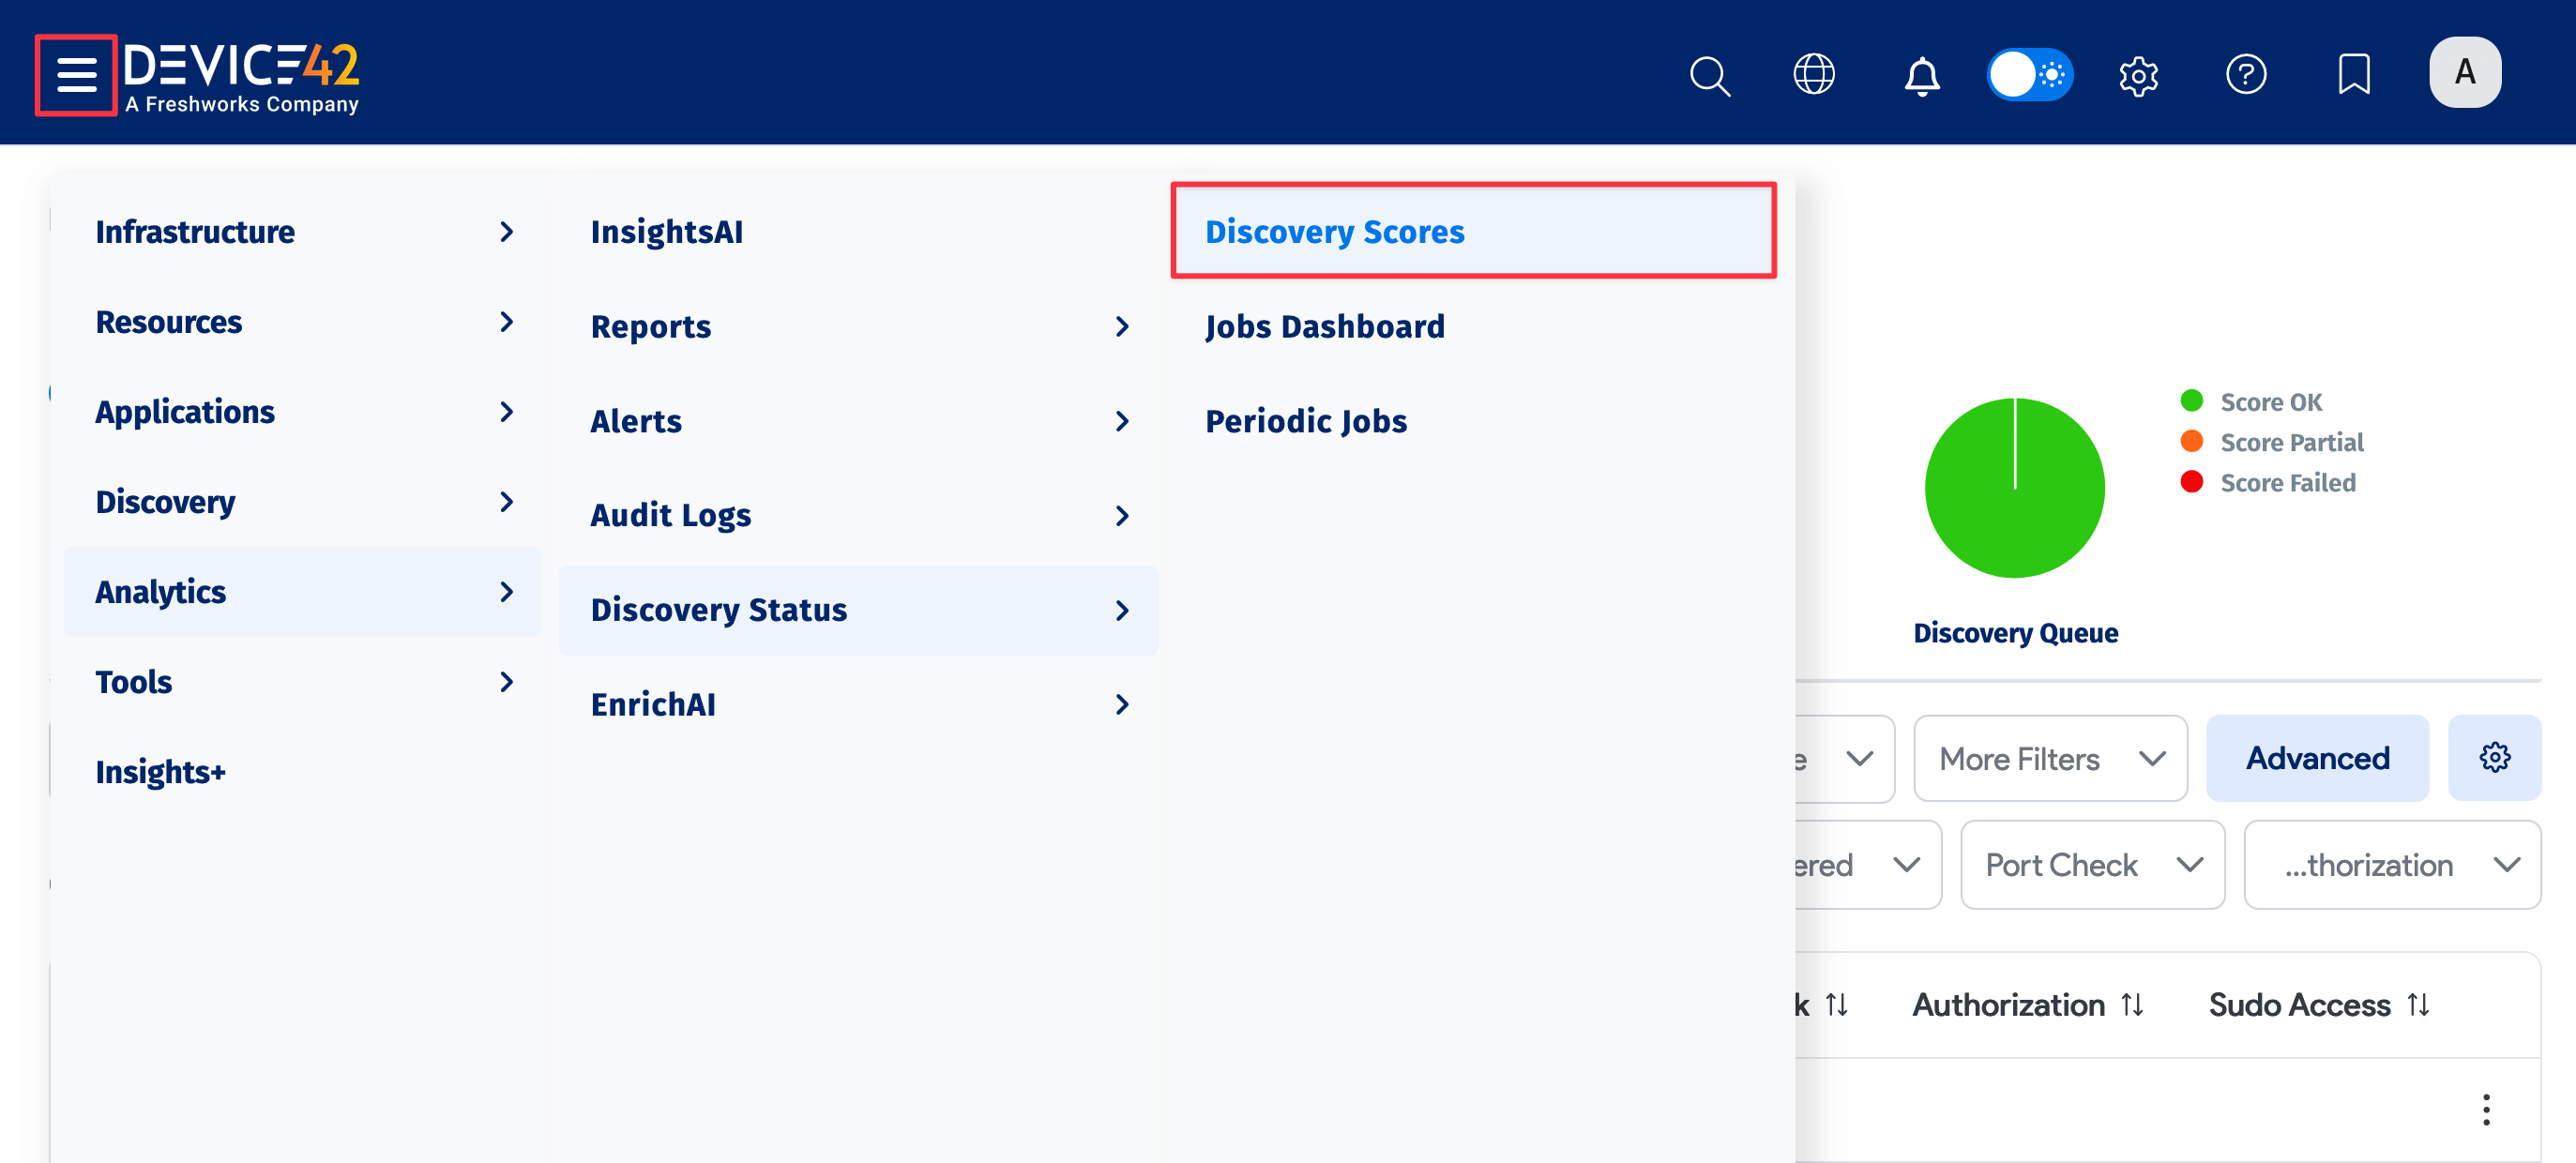
Navigate to Analytics > Discovery Status > Discovery Scores to display the Discovery Scores page.
-
Click on the job you want to view in the Discovery Target column. You can use the search bar and filters to find a specific database or narrow down your results.
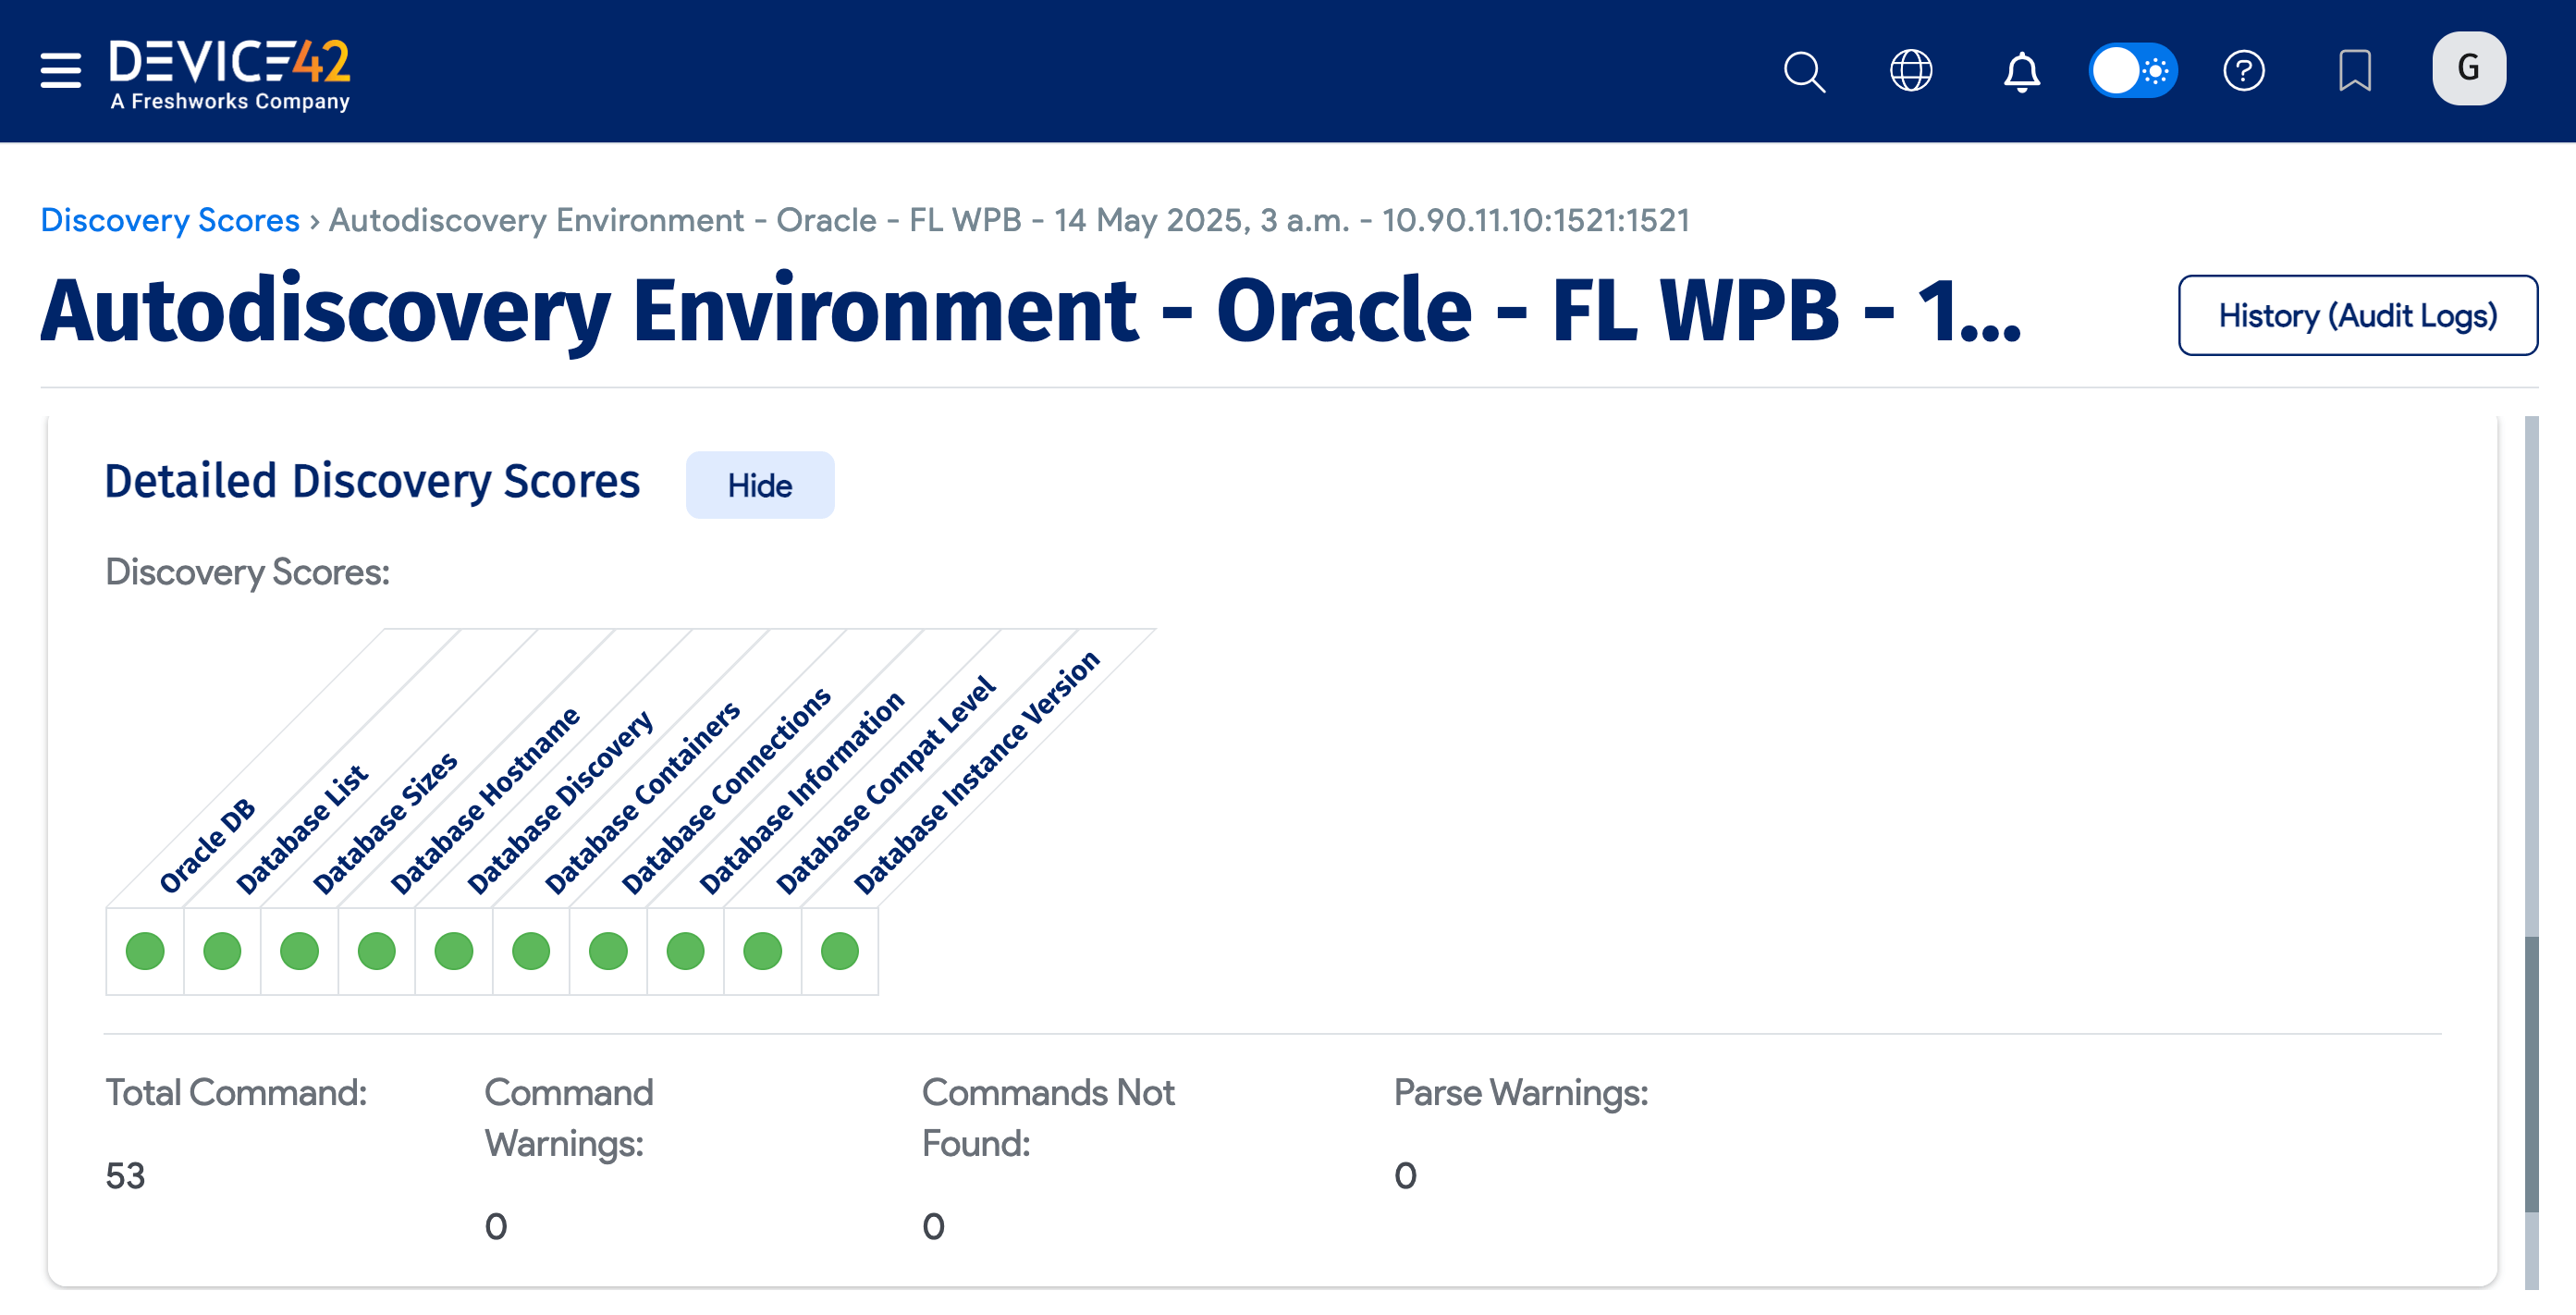
-
Click Detailed Discovery Scores to see additional information.
View Discovered Databases
Discovered databases are added to the On-Prem Databases list page.
- Select Resources > Databases > On-Prem Databases to display the list page.
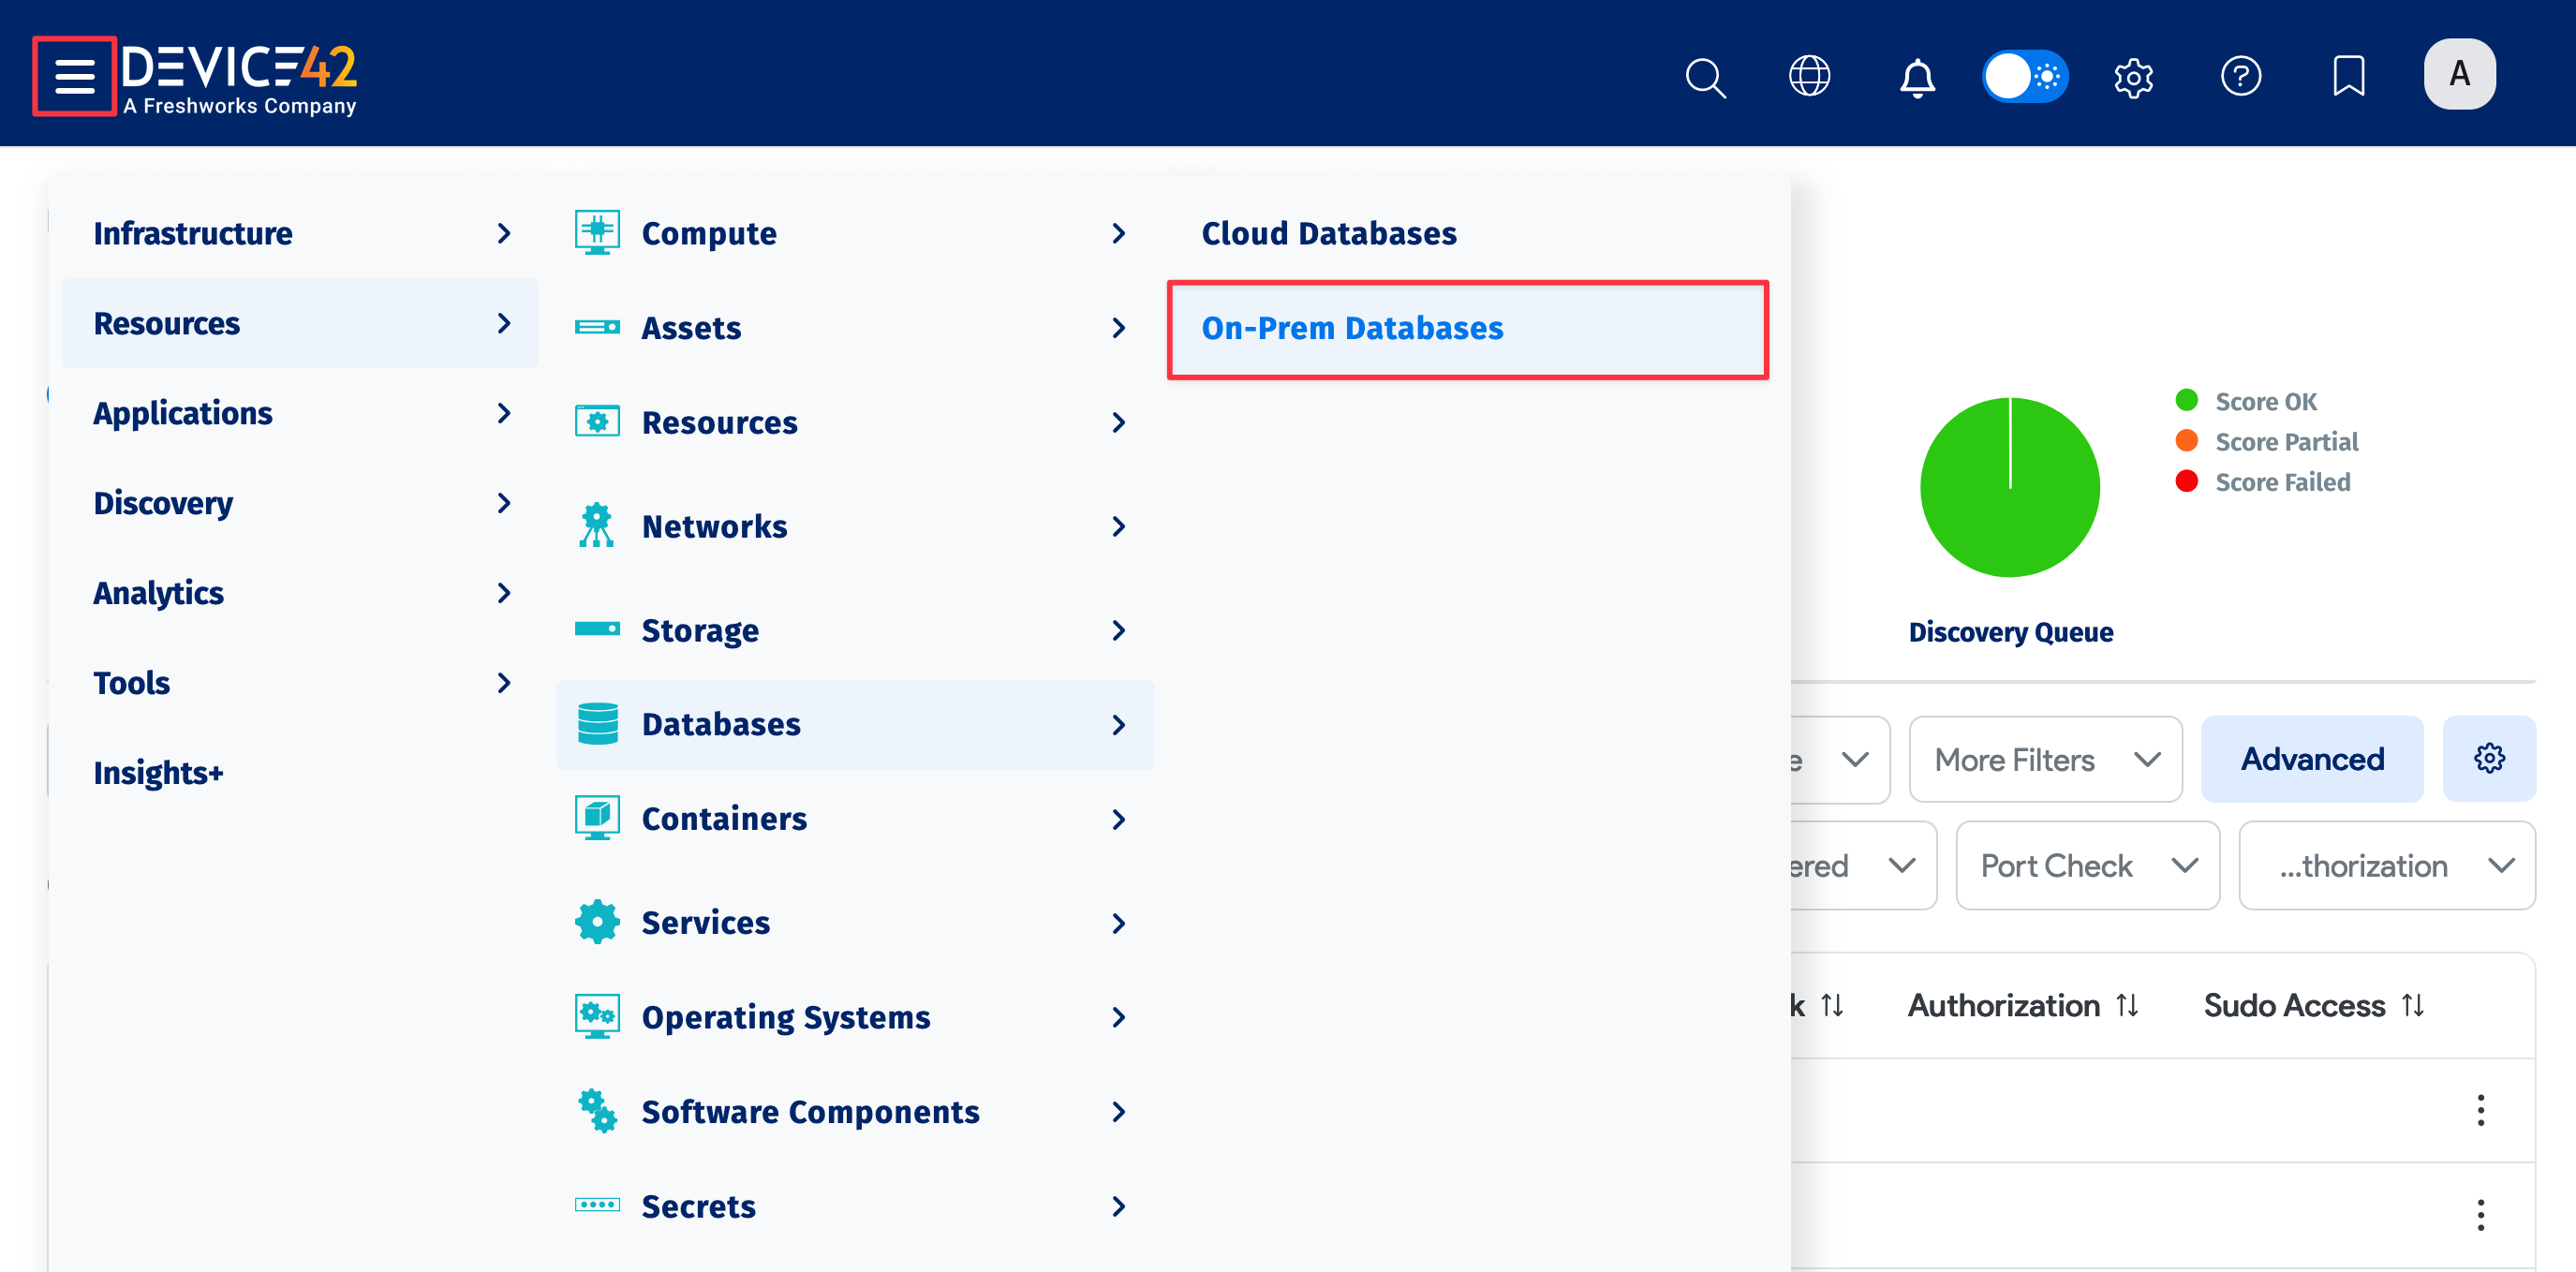
- Click on the name of the database you want to see in the Resource Name column.