DNS Autodiscovery
DNS discovery syncs DNS zone data into Device42, giving you visibility into DNS records, IPs, and related details.
This page covers how to prepare your Microsoft DNS server for DNS zone transfers and how to create and schedule a DNS zone discovery job.
Microsoft Setup
Configure your Microsoft DNS server to allow zone transfers to Device42.
Allow Zone Transfers
Select Allow zone transfers from your DNS server to your Device42 virtual appliance IP address.
Right-click on the zone name, go to Properties, and go to the Zone Transfers tab.

Allow the Device42 IP
Next, allow your Device42 virtual appliance's IP address.

You can enable zone transfers to your Device42 appliance's IP at your discretion.
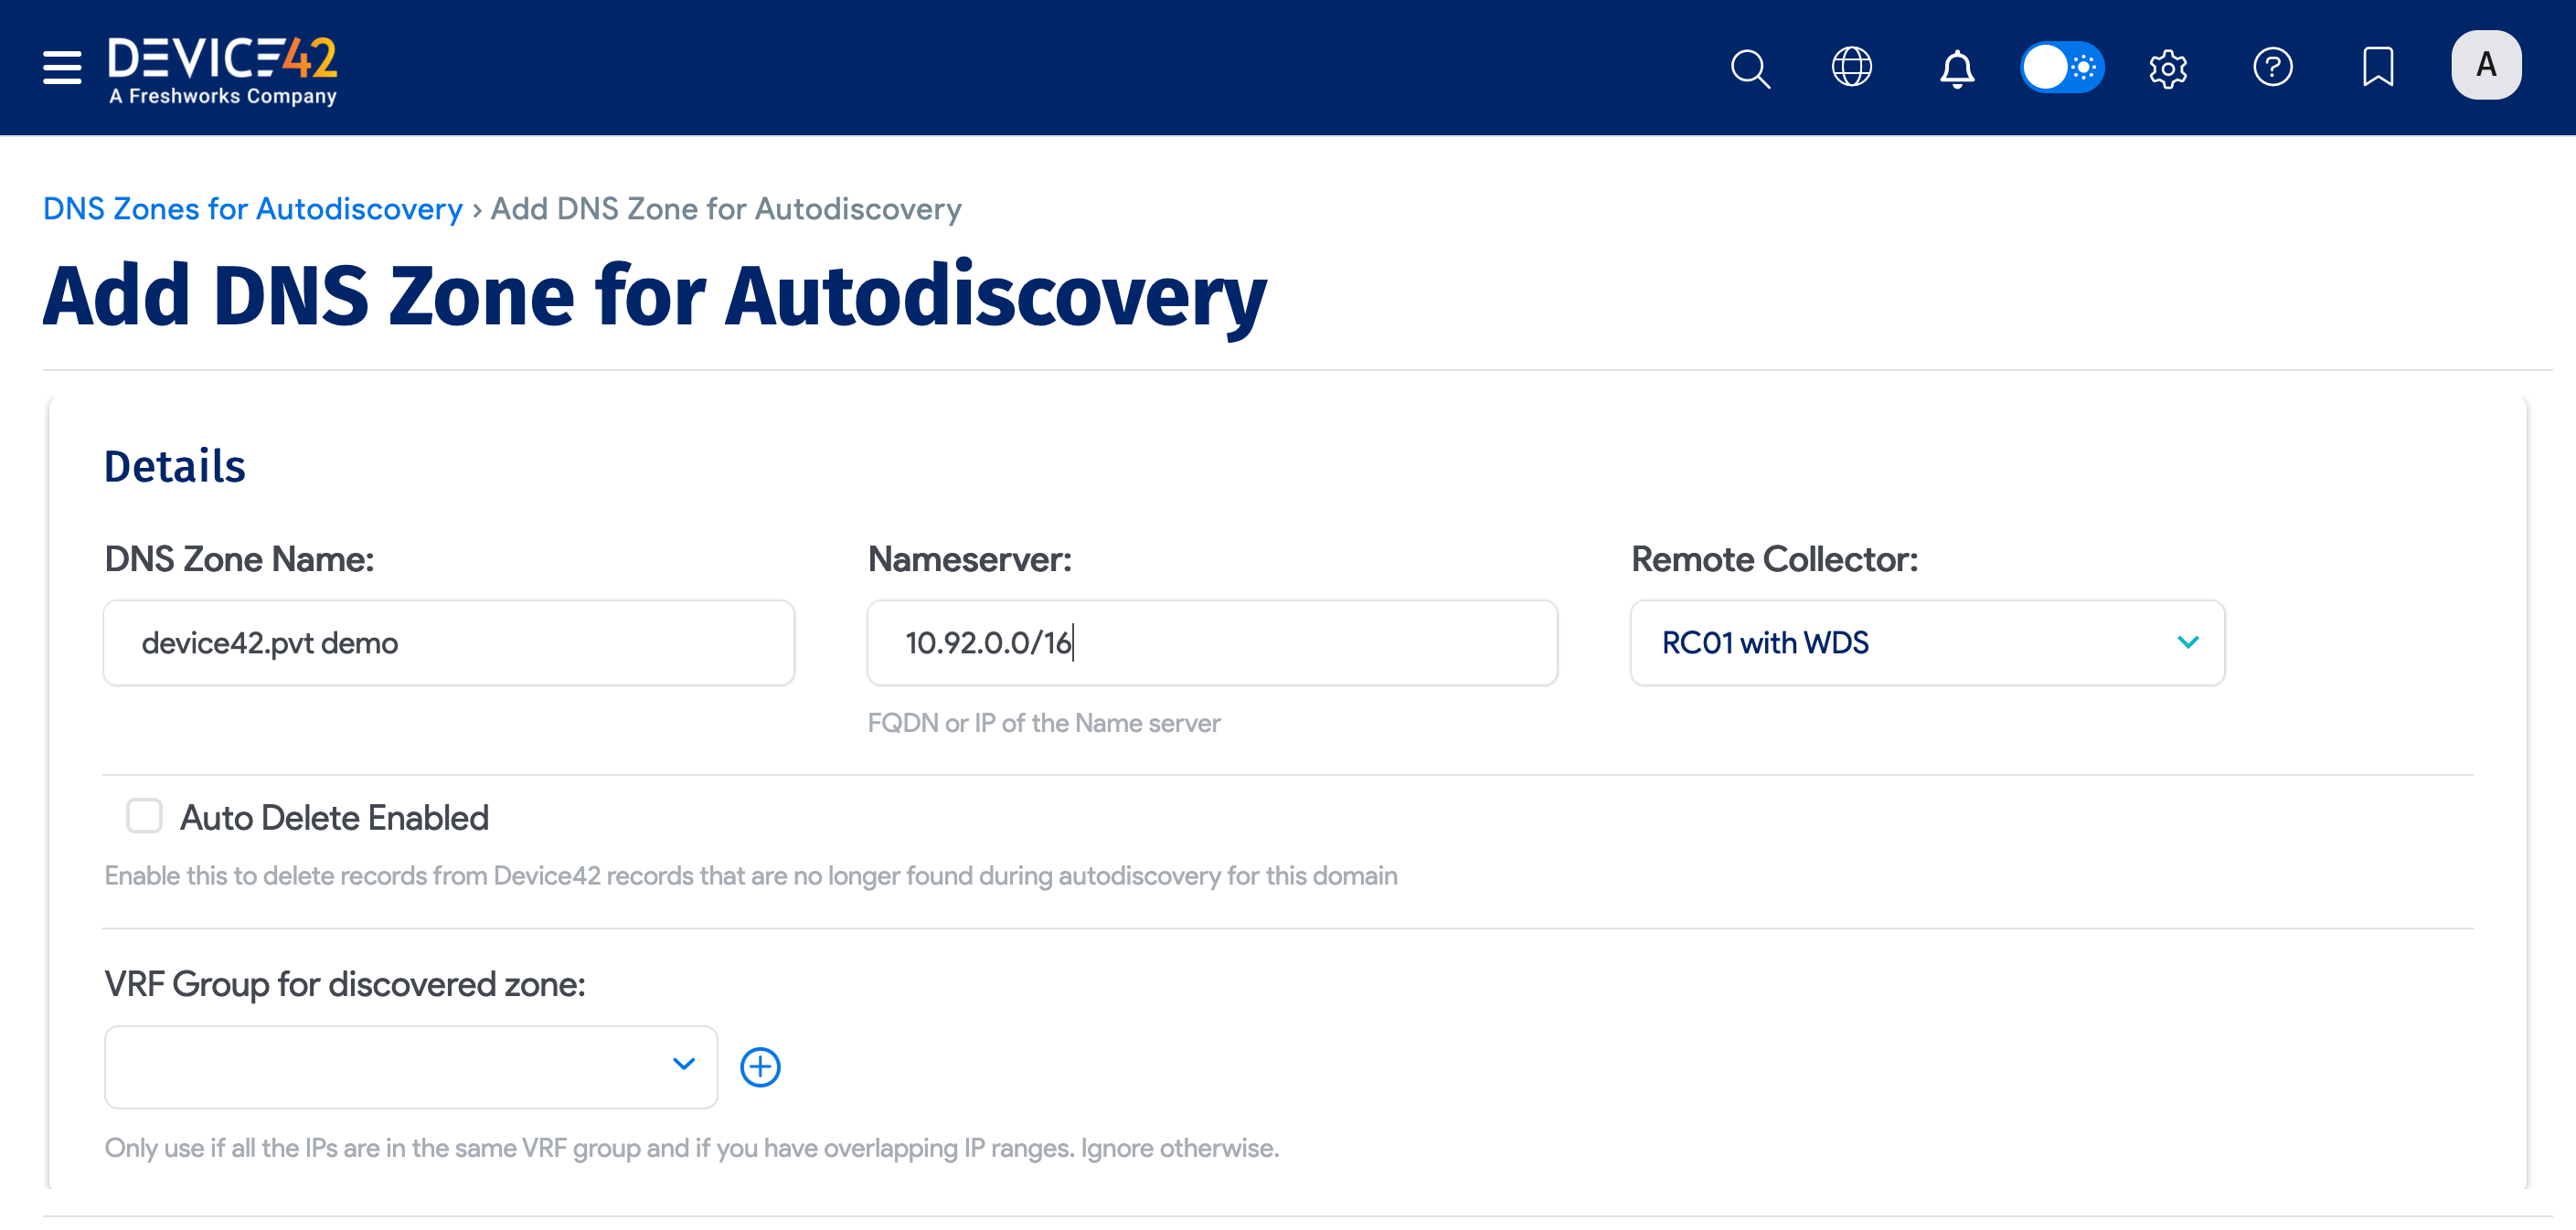
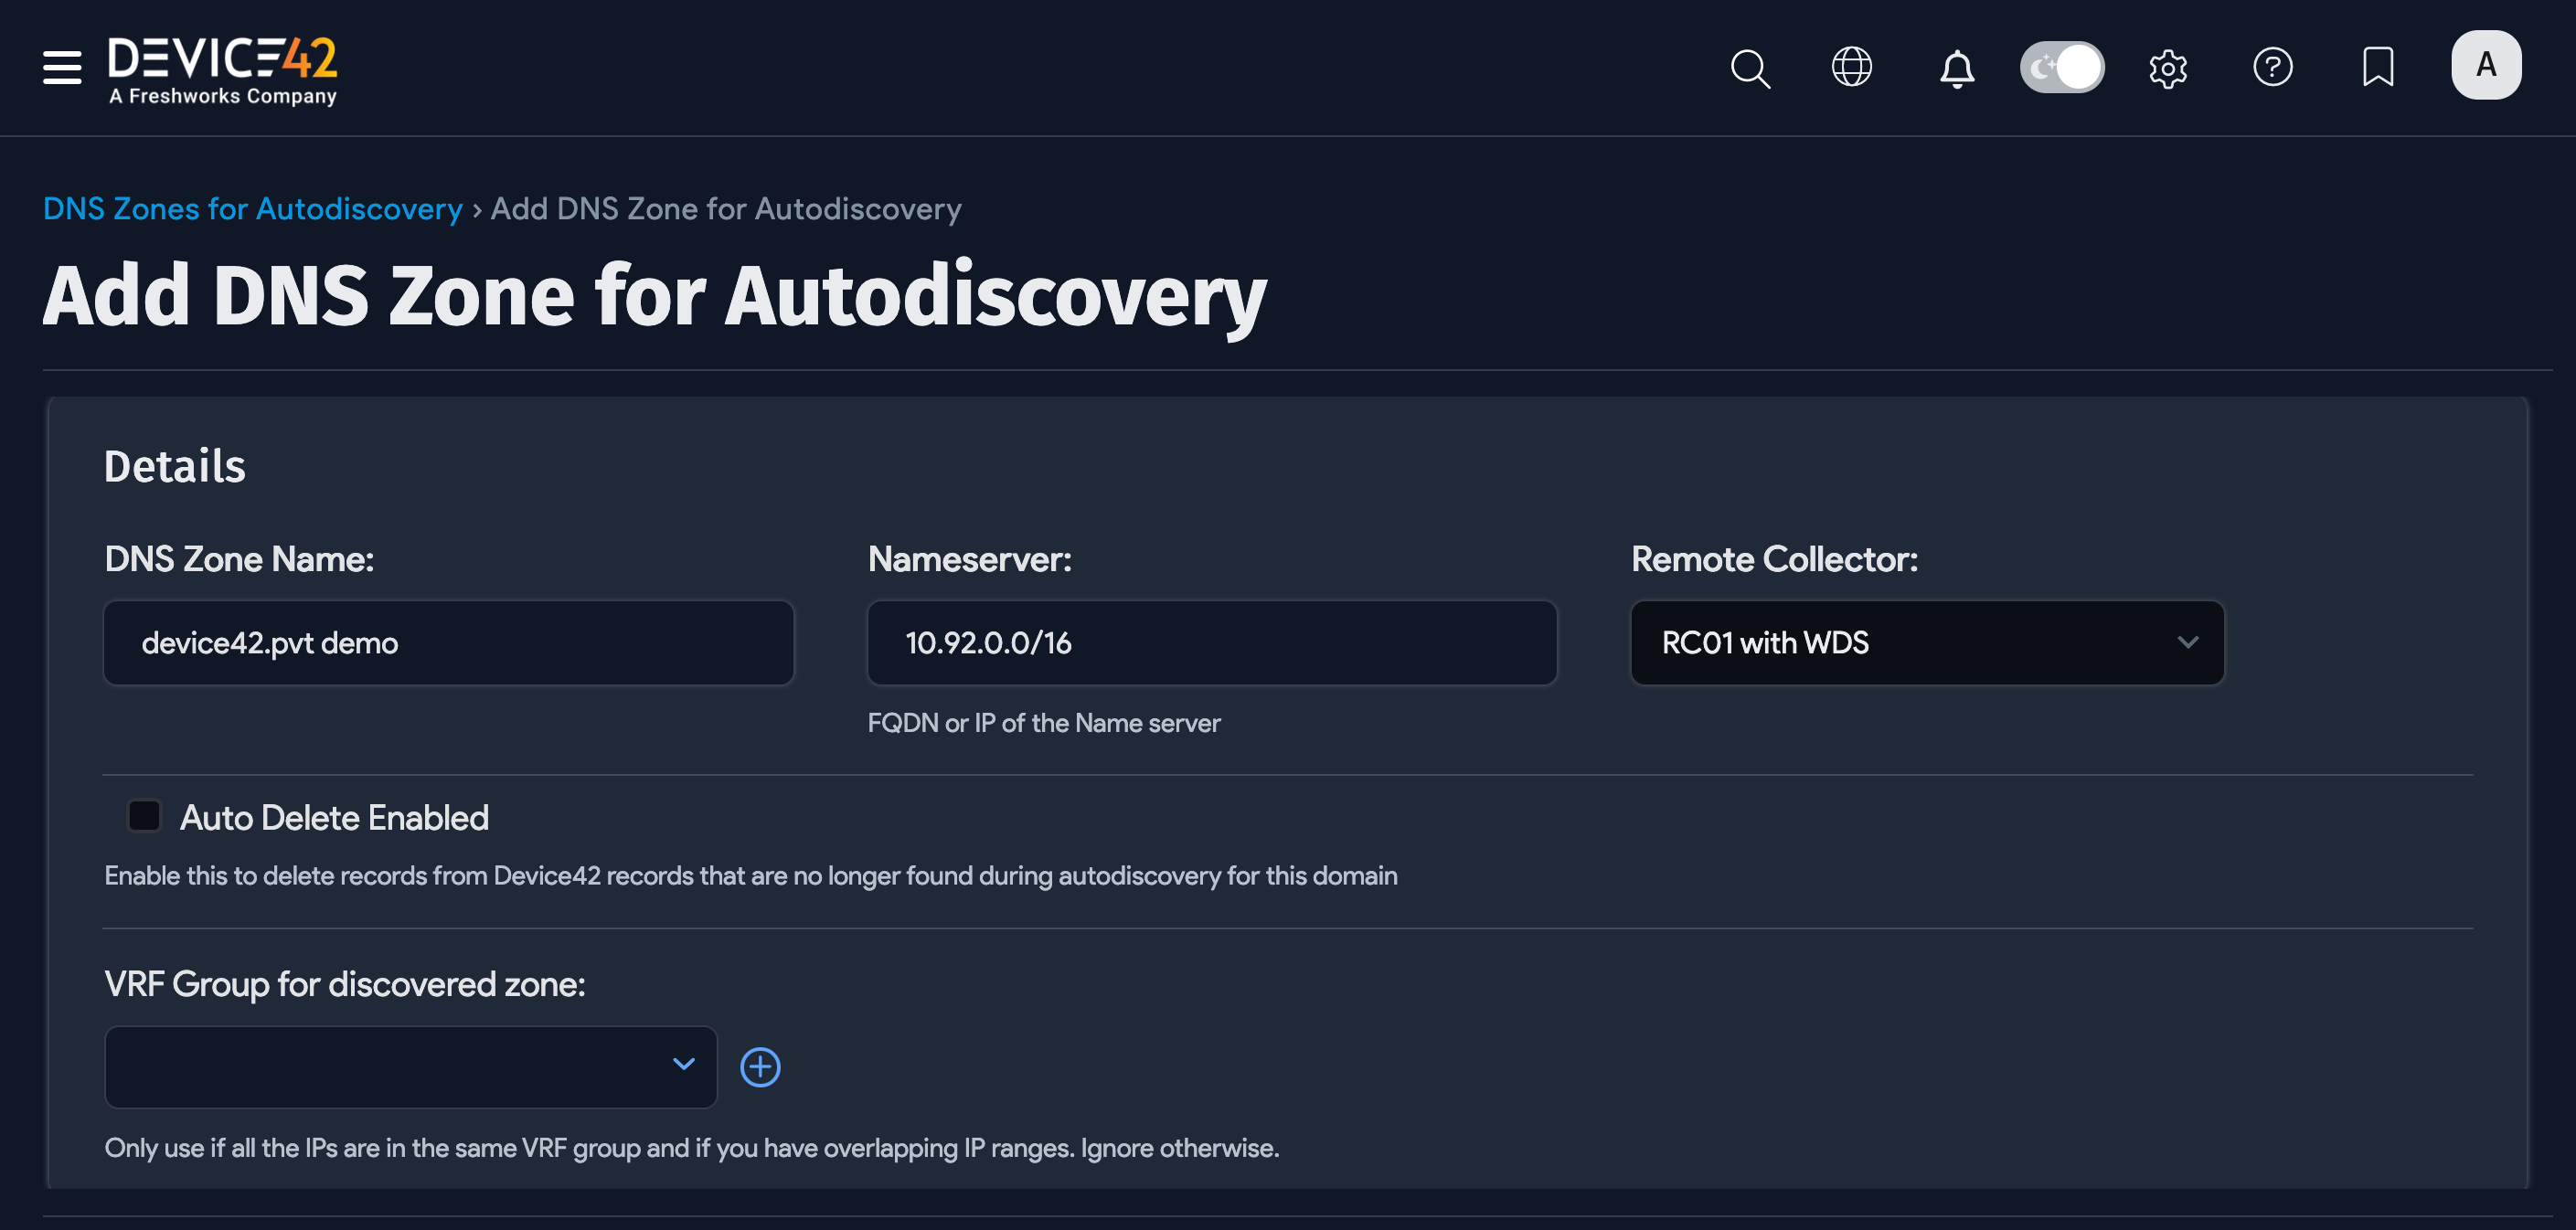
Create a DNS Zone Discovery Job
Navigate to Discovery > DNS Zone Sync (One way) and click Create.
Fill out the following fields:
- Name: The name of the zone to be transferred. This will likely be the zone you just enabled.
- Nameserver: The FQDN or IP address for the DNS server. The FQDN works only if DNS is configured correctly from the console.
- Auto Delete Enabled: Deletes records in Device42 that were not found in new transfers of the zone but were found in older transfers. This option also deletes any entries manually added in Device42 that have not yet been added to your DNS server.
Save the discovery job and click Run Now to test it. If you see "Success!" in the Last Status box, the new zone, IPs, and related details will be available in Device42.
Run or Schedule the Job
When creating or editing the job, select Add another Auto Discovery Schedule to schedule the job.


Newly created jobs will not run on the first day they are created to prevent an unintentionally large number of jobs from running initially. If you would like to run a job after its initial creation, click the Run Now button on the job details page.
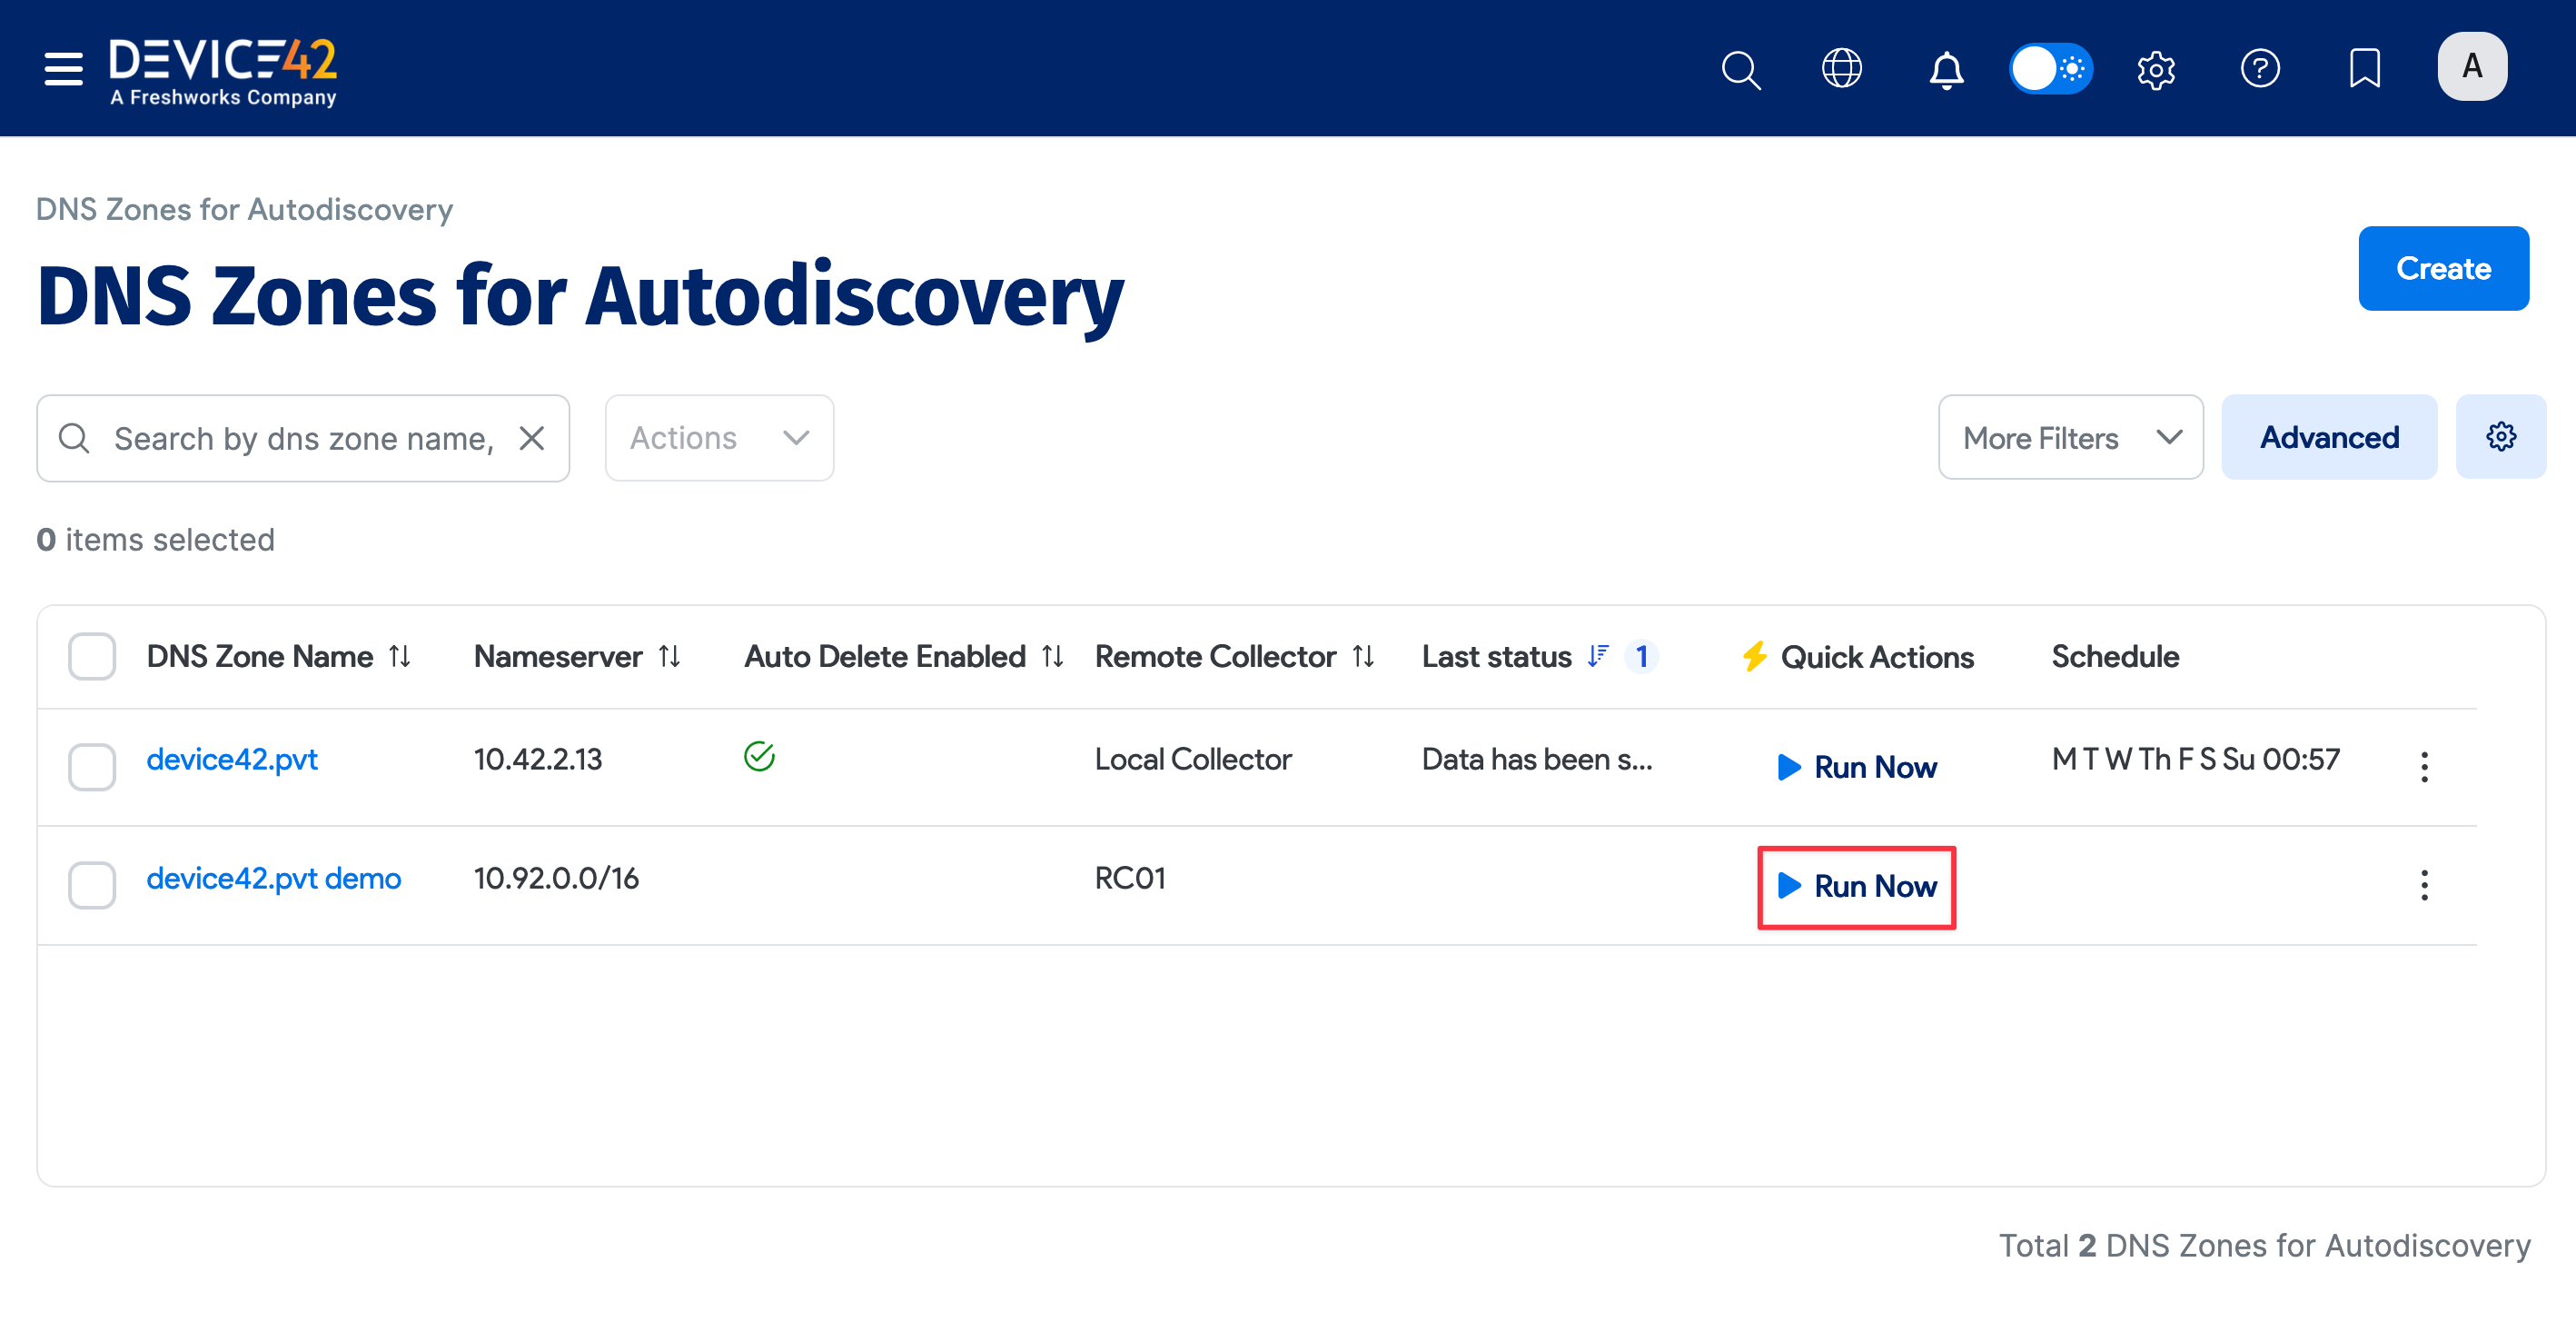
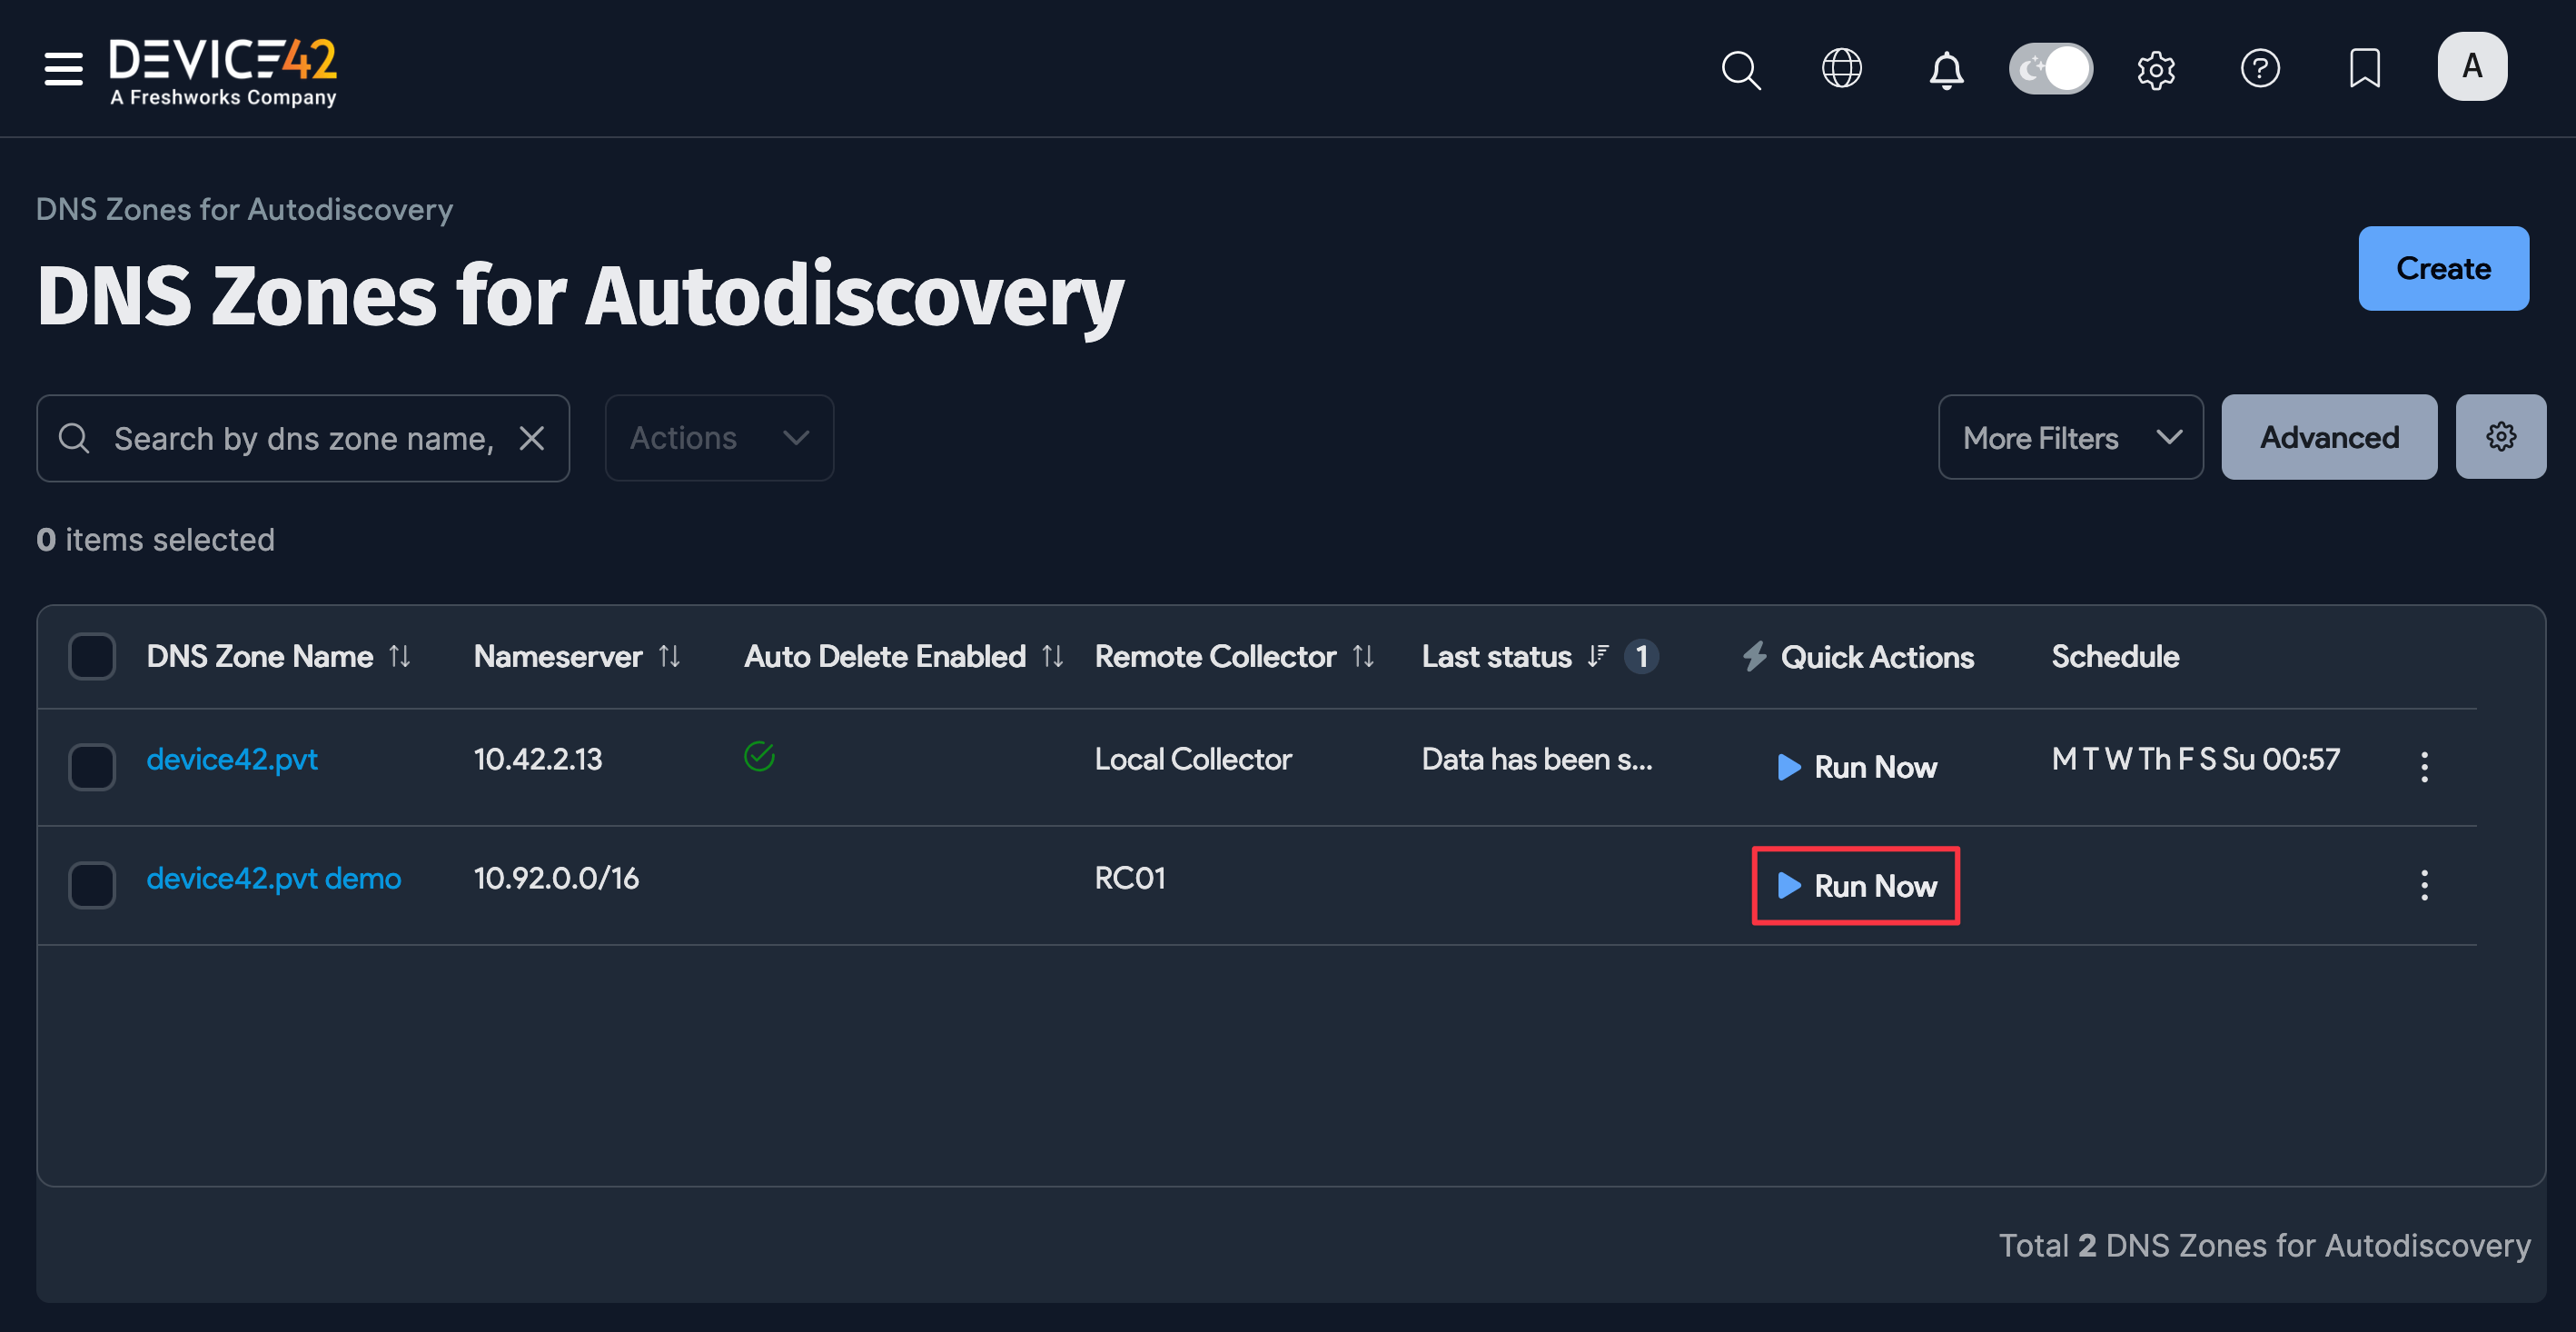
You can also select Run Now from the discovery list page.

