SNMP - Network Autodiscovery
This page covers how to configure and run Simple Network Management Protocol (SNMP) discovery across your network. Learn how to create SNMP discovery jobs, configure credentials, and manage discovered network devices.
See the list of supported hardware vendors for SNMP discovery for compatibility information.
Introduction to SNMP-Based Discovery
SNMP is a widely supported protocol and standard for managing network-connected hardware. There are three broadly deployed versions: SNMP v1, v2c (most commonly used), and v3.
SNMP is typically used in a read-only capacity, but it can support read and write permissions. By default, it uses port 161. SNMP exposes management data in the form of variables, which are organized in a Management Information Base (MIB). An MIB describes the variables available on a given system, each of which can be remotely queried via SNMP.
SNMP discovery supports IPv6 addresses for device discovery.
SNMP Discovery Items
Network devices can be discovered by Device42 using SNMP v1, v2c, or v3. If you're looking to do Storage discovery via SNMP, visit the dedicated SNMP SAN/Server Autodiscovery page.
SNMP discovery pulls in CDP/LLDP neighbors as long as SNMP credentials are the same across all neighbors. If the credentials are not the same, you can add those devices using separate discovery jobs.
Categories of Discovered SNMP Data
Depending on the device type and compatibility matrix linked above, the following data is discovered:
- Switch inventory: The switch name, serial number, model, and manufacturer.
- Stacked switches: Stacked switches are added as cluster devices and all physical devices as part of the cluster.
- Access Points: Access points are added as the device host with a device type other than controller device.
- VLANs: Layer 2 VLANs.
- Subnets: Layer 3 subnets.
- Switch IP and MAC address: The IP address and MAC address belonging to the switch.
- IP to MAC address association: The ARP table, if available. All IPs that are available with MAC association.
- MAC address to switch port association: Switch ports and MAC addresses found on that port (MAC table).
The MAC to switch port association brings only switch ports with MAC addresses. Use the Get all switch ports option to get:
- Port name
- Port description
- Port up/down status
- Port administratively up/down status
- Remote port connectivity, if any
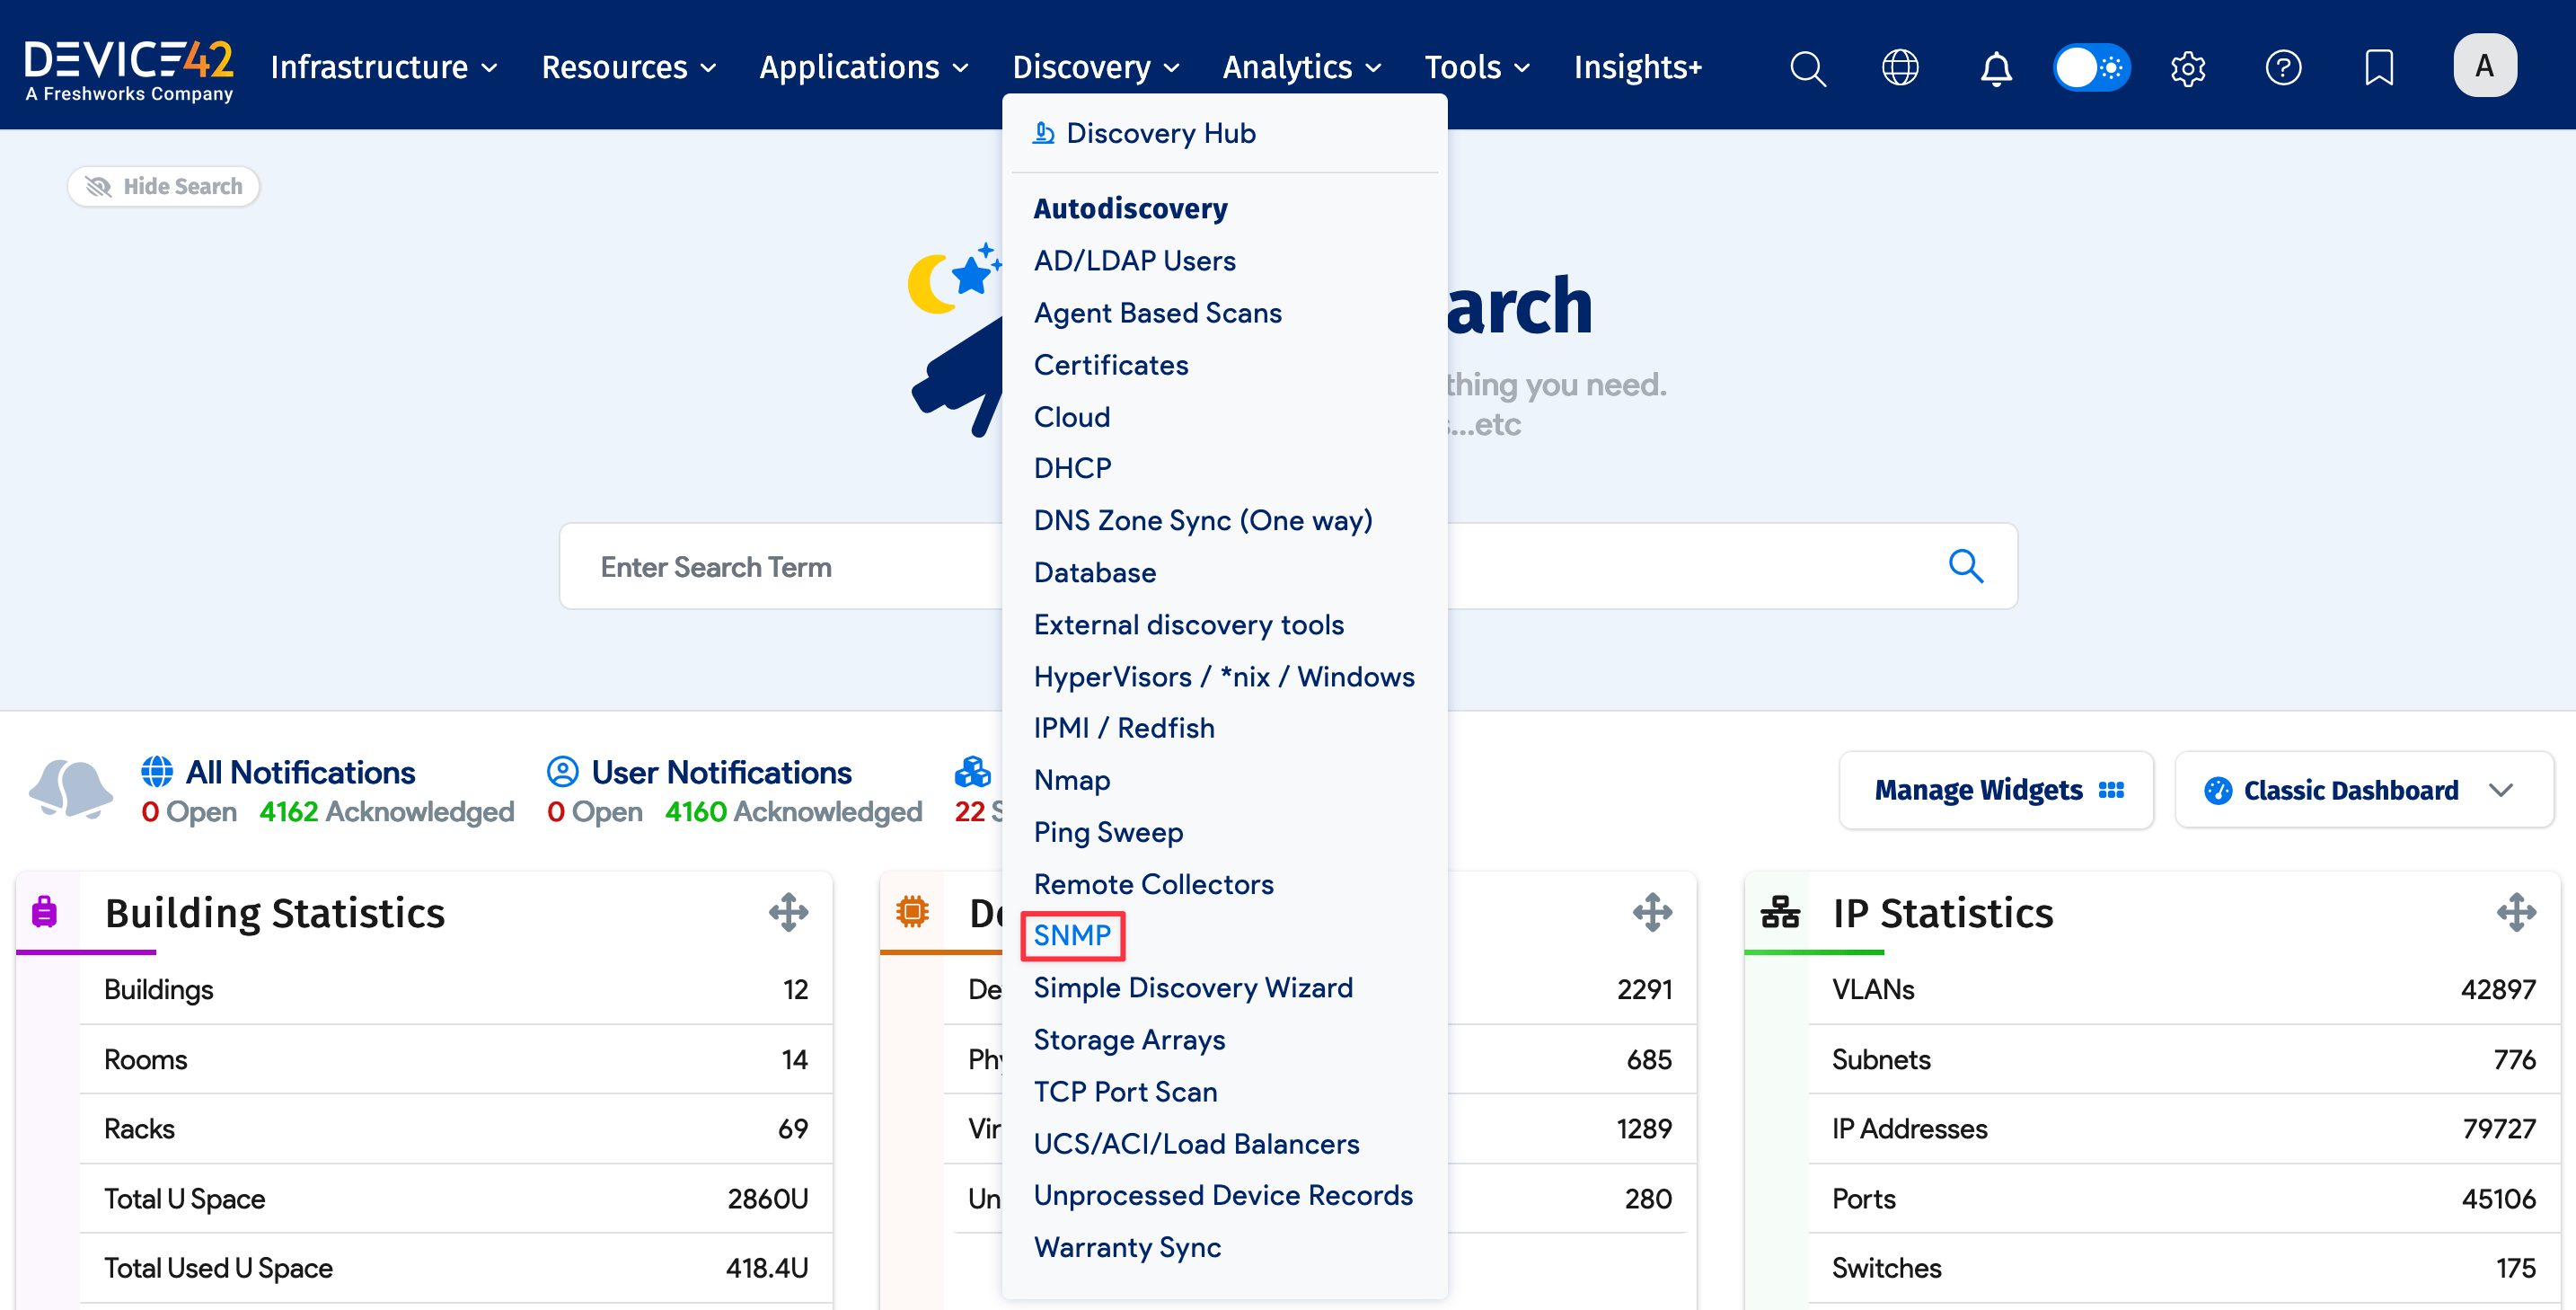
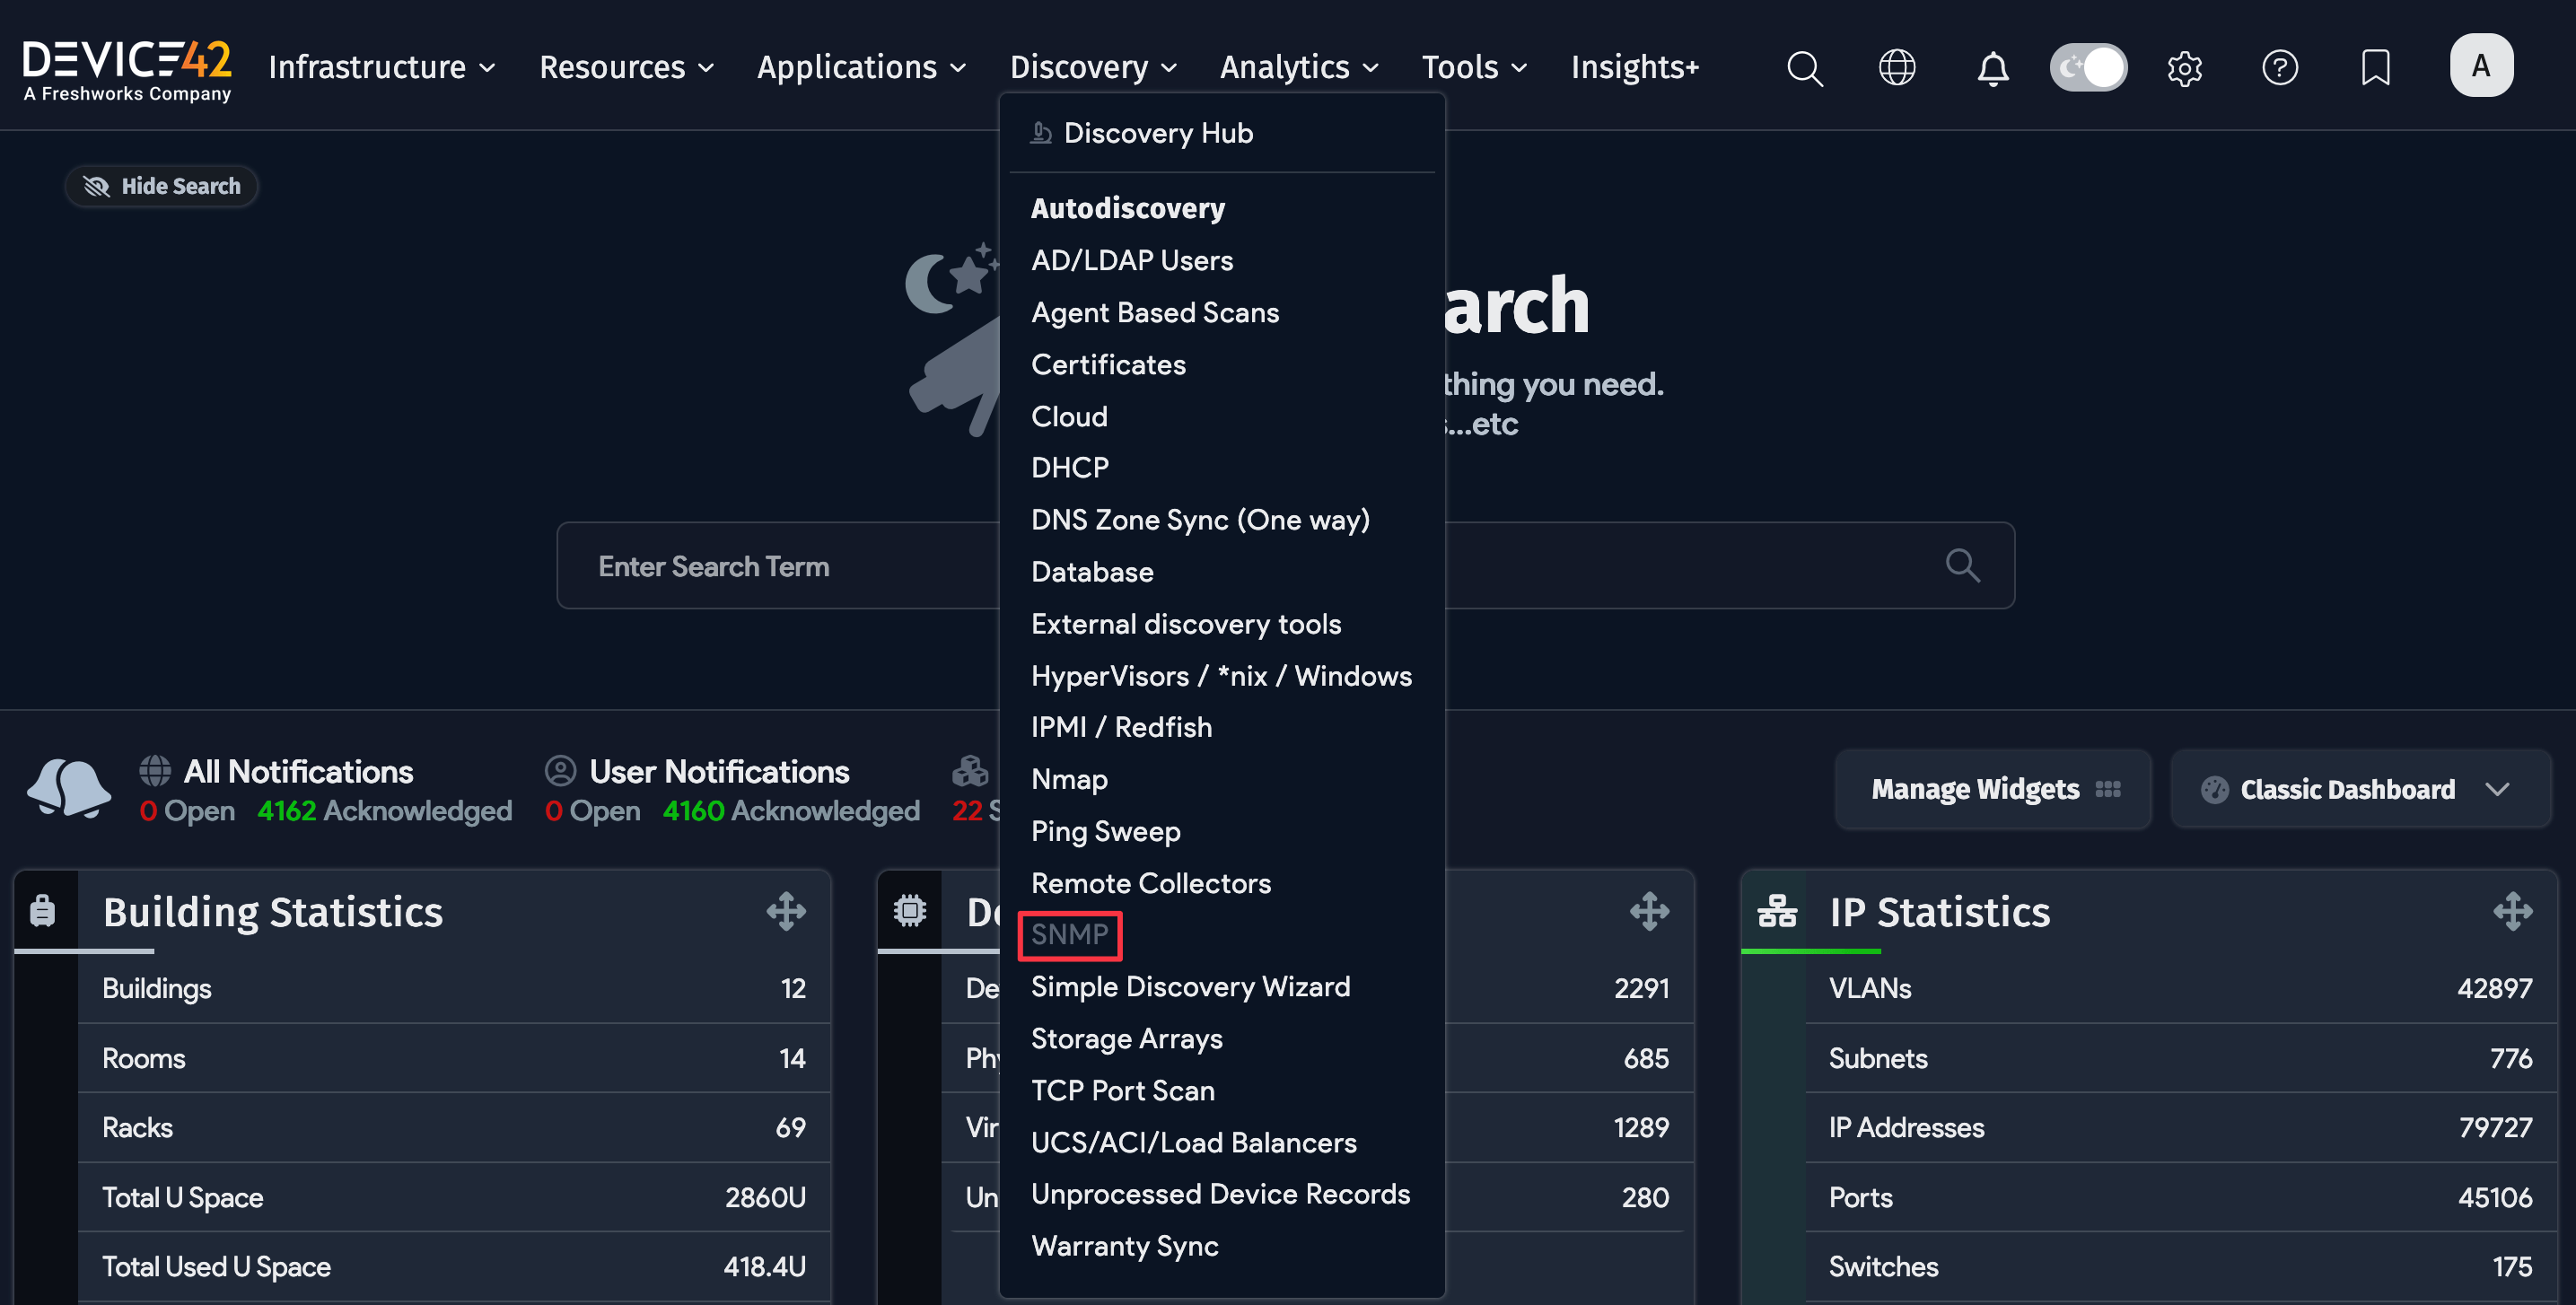
Create an SNMP Discovery Job
Go to Discovery > SNMP to add a new network discovery job.
When creating an SNMP job for Cisco Nexus, you must set up an SNMP server context for the management VRF. This needs to be done for any Cisco VRF contexts that you want to query over SNMP:
snmp-server context mymgmt vrf management
SNMP Discovery Job Options
Configure the following job fields:
-
Server(s): Enter the FQDN, the IP addresses of a network device, or an IP range.
noteWhen specifying a CIDR block, the job automatically excludes the network and broadcast addresses (the first and last IPs in the block). This is expected behavior. As a workaround, you can manually add individual network or broadcast addresses as targets in the SNMP job.
-
Port: Leave at 161 if you are unsure.
-
SNMP Version: Choose SNMP v1, v2c, or v3.
-
Community String: Save your community strings as passwords, and select them for v1 or v2c. See below for v3.
-
Run Autodiscovery on CDP/LLDP Neighbors: Find all CDP/LLDP neighbors that are reachable.
-
Strip Domain Name: Strip domain name from discovered switch name.
-
Get all Switch Ports: Retrieve all switch ports.
-
Delete Switch Ports Not Found: Delete any switch ports in Device42 that were not found in this discovery.
-
Use Alias/Name for port description: Choose if you prefer the Alias/Name for the port description.
-
Delete older MAC association after: Specify the number of days after which unfound MAC addresses are deleted.
-
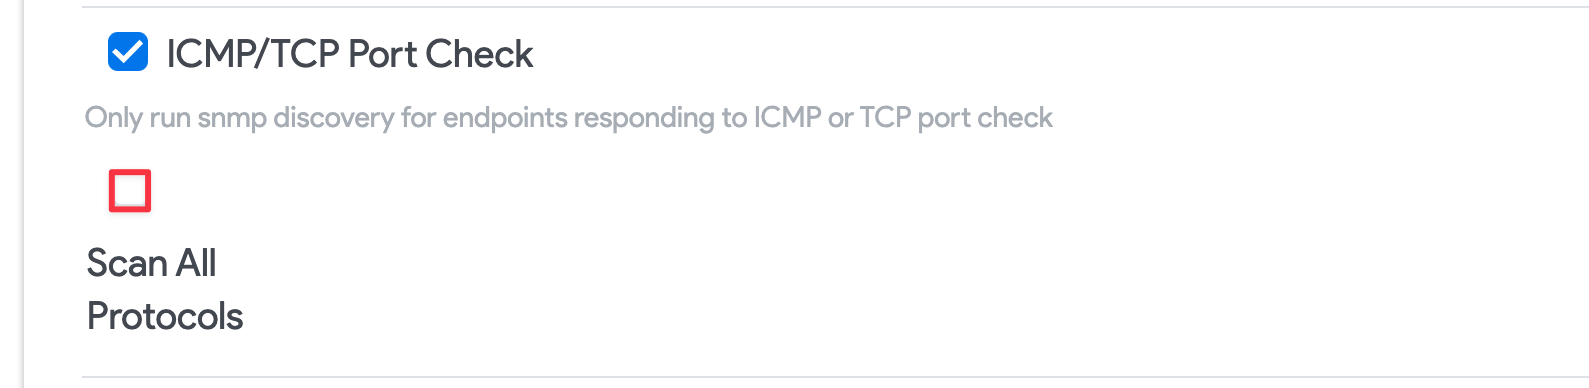
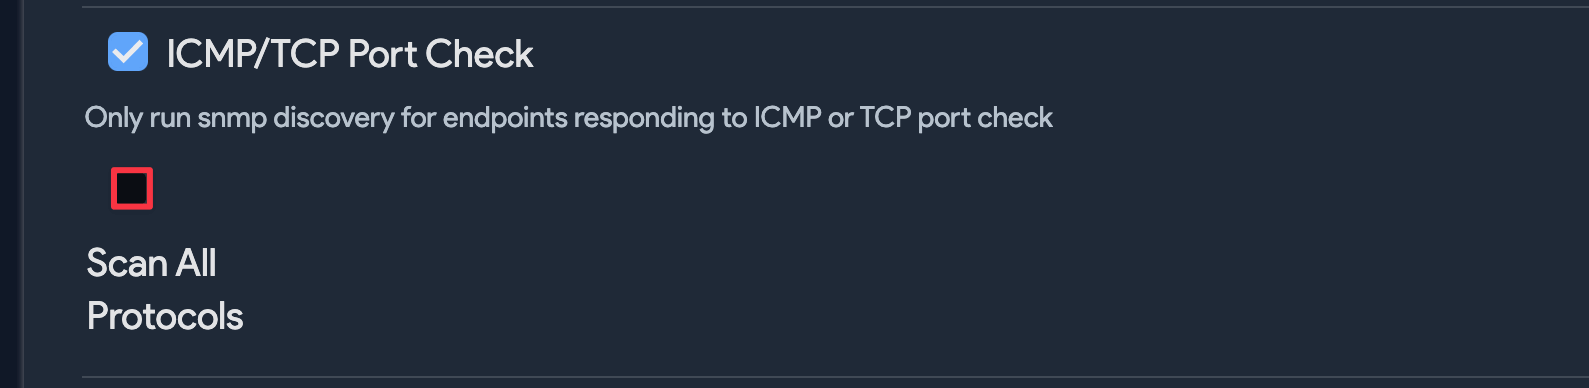
ICMP/TCP Port Check: Leave this option enabled to improve efficiency and reduce the execution time of the job. If you experience any issues with multicast IPs, uncheck this option.
- Scan All Protocols: When checked, this option expands the scan to include IGMP (Protocol 2) along with ICMP and IPv4. In most cases, you can leave this option unselected.
 note
noteJobs created prior to Device42 v19.06 will continue to run using the full protocol set by default.
Vendor-Specific SNMP v3 Information
Cisco Nexus 7K switches:
- The user for SNMP v3 discovery may need to be in the
network-operatororvdc-operatorgroup.
Huawei Switches:
- By default, some Huawei devices ship with LLDP (Link Layer Discovery Protocol) via SNMP disabled.
- You must switch it on by creating a new 'mib-view' and attaching the 'ISO tree' containing the Huawei LLDP MIB to the community.
- Consult the Huawei documentation for complete setup and management details.
Cisco Switches:
- Changing from SNMP v1 or v2c to v3 on many Cisco switches can cause SNMP polling of Netdisco to stop functioning, preventing the collection of the per-VLAN MAC tables.
- You will likely see an authorization error in the Macsuck log if this is happening.
- To fix this authentication error on Cisco hardware, an additional SNMP-server configuration is required on these switches that enables access to the per-VLAN/per-context MAC address table:
Switches running newer versions of Cisco IOS:
- Run this command once:
snmp-server group v3group v3 auth context vlan- match prefix
Switches with older IOS releases (that don't support "match prefix wildcard"):
- Issue the above command for newer IOS releases on EACH VLAN configured for the switch.
- Use
show snmp contextto list configured VLANs.
Preferred Credentials
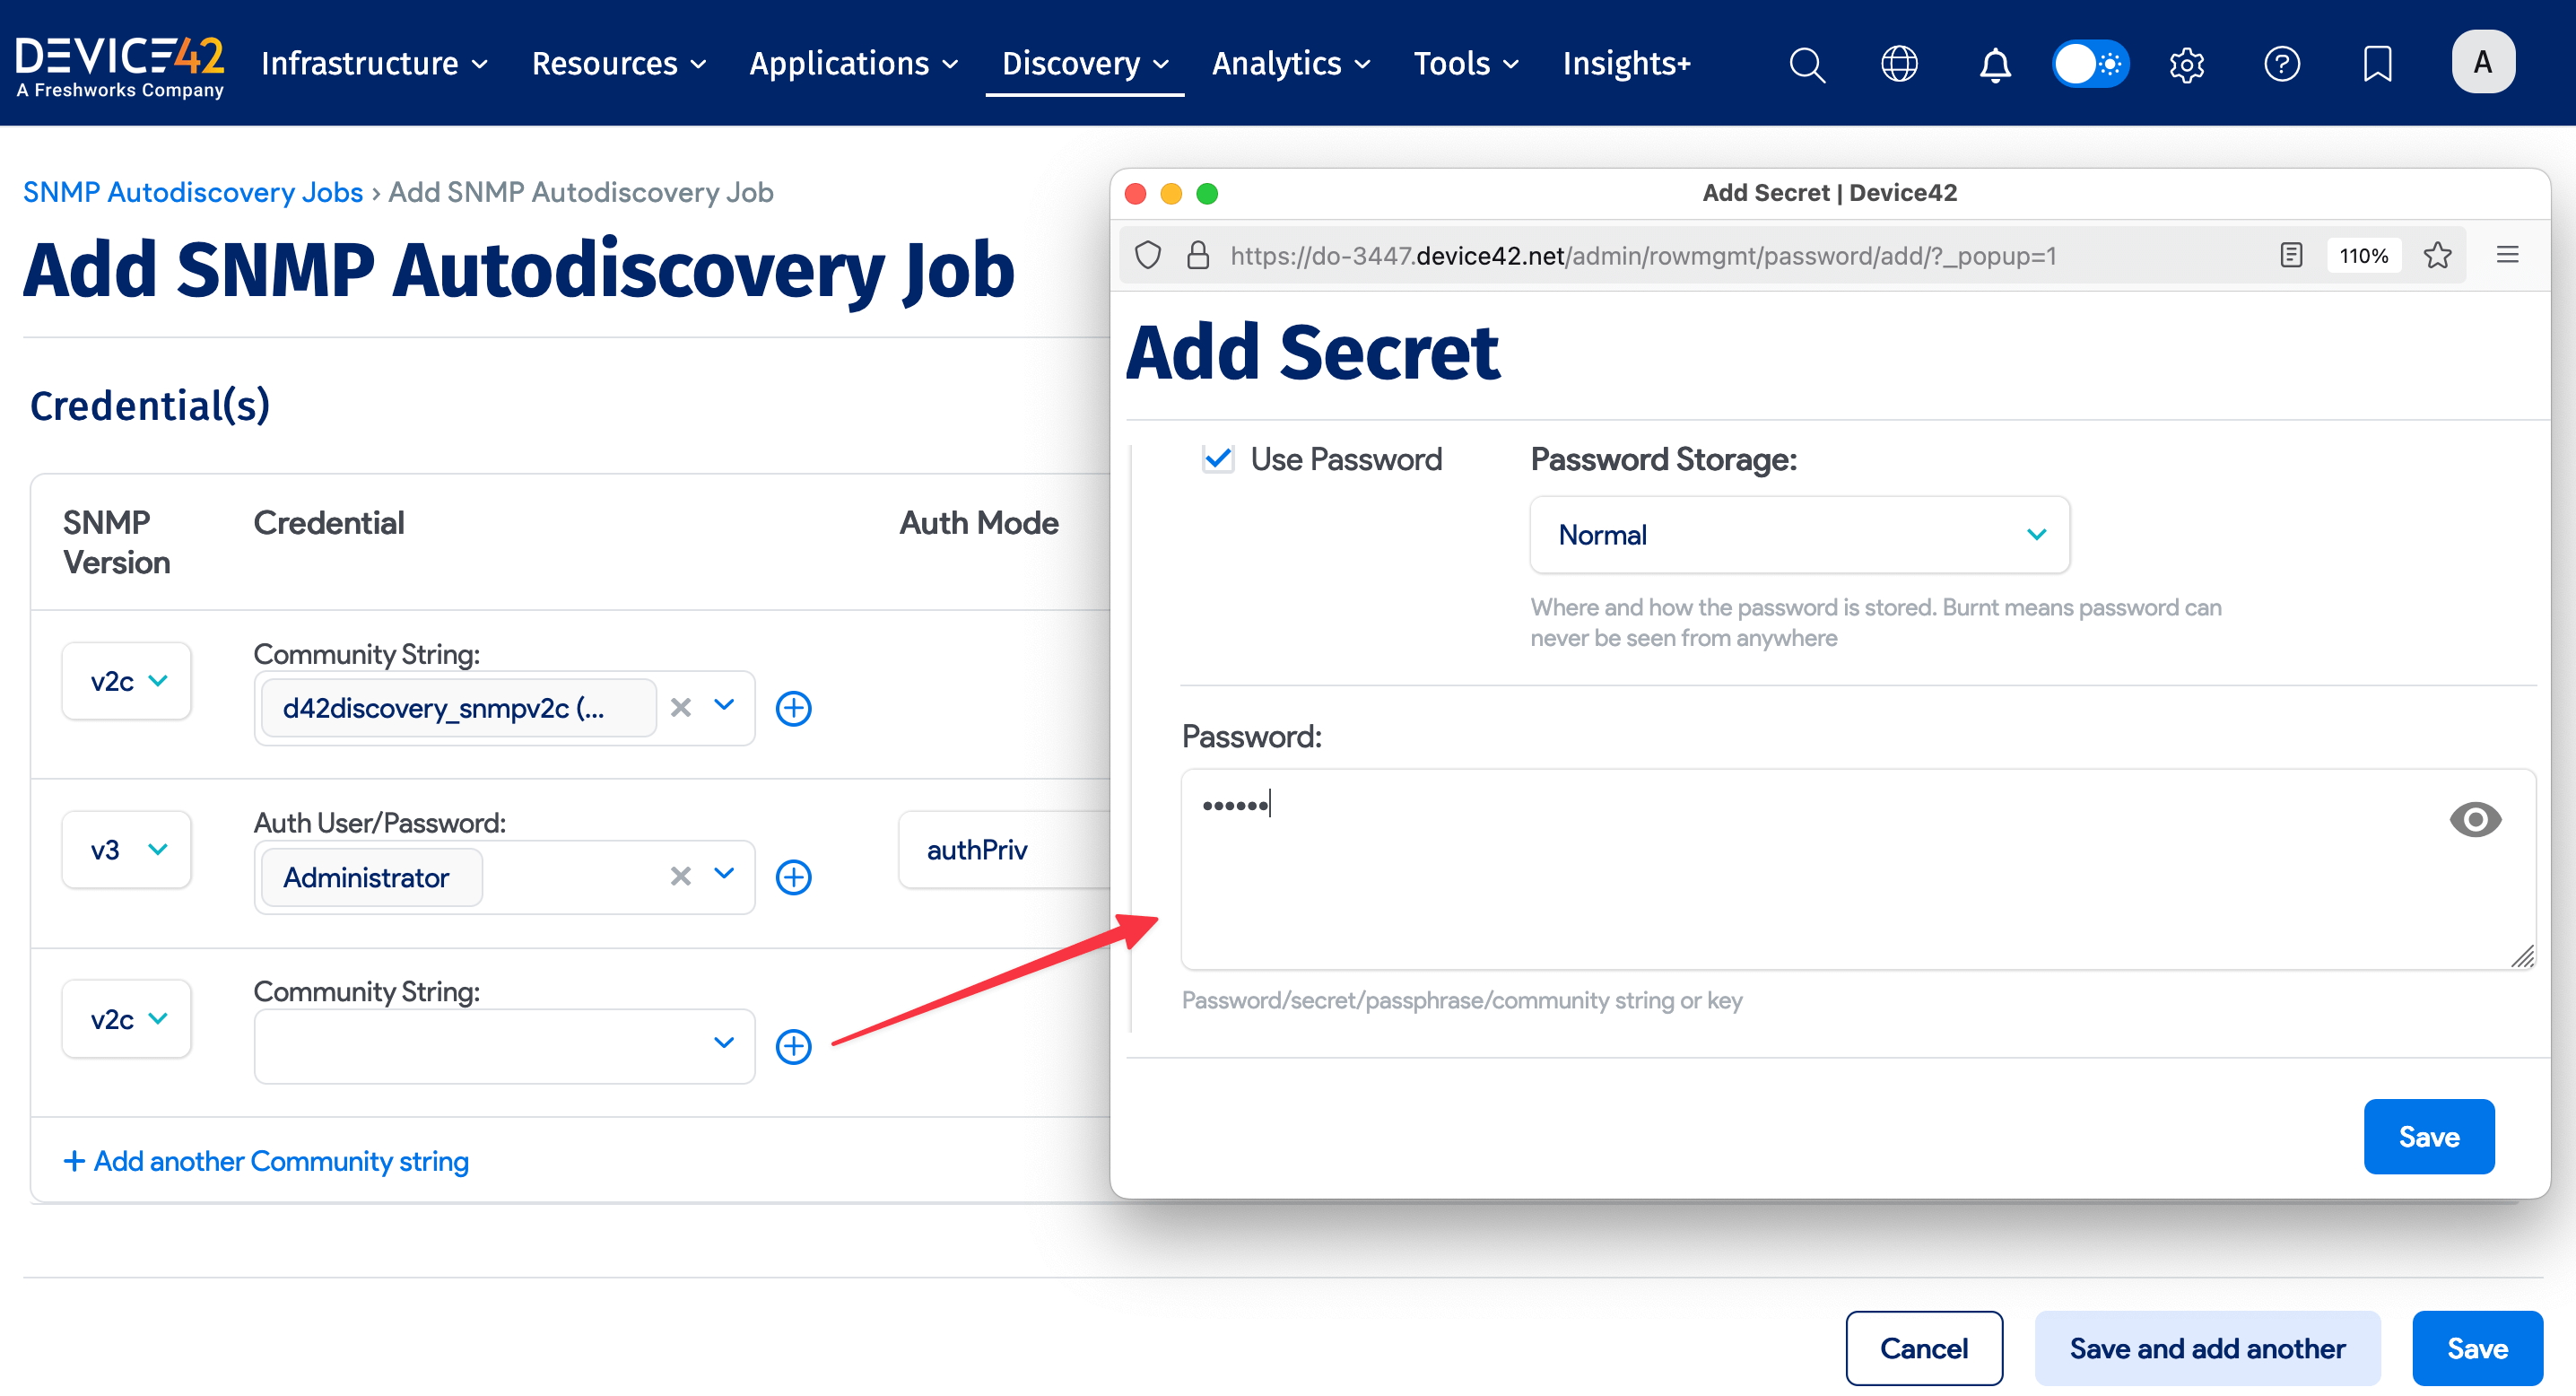
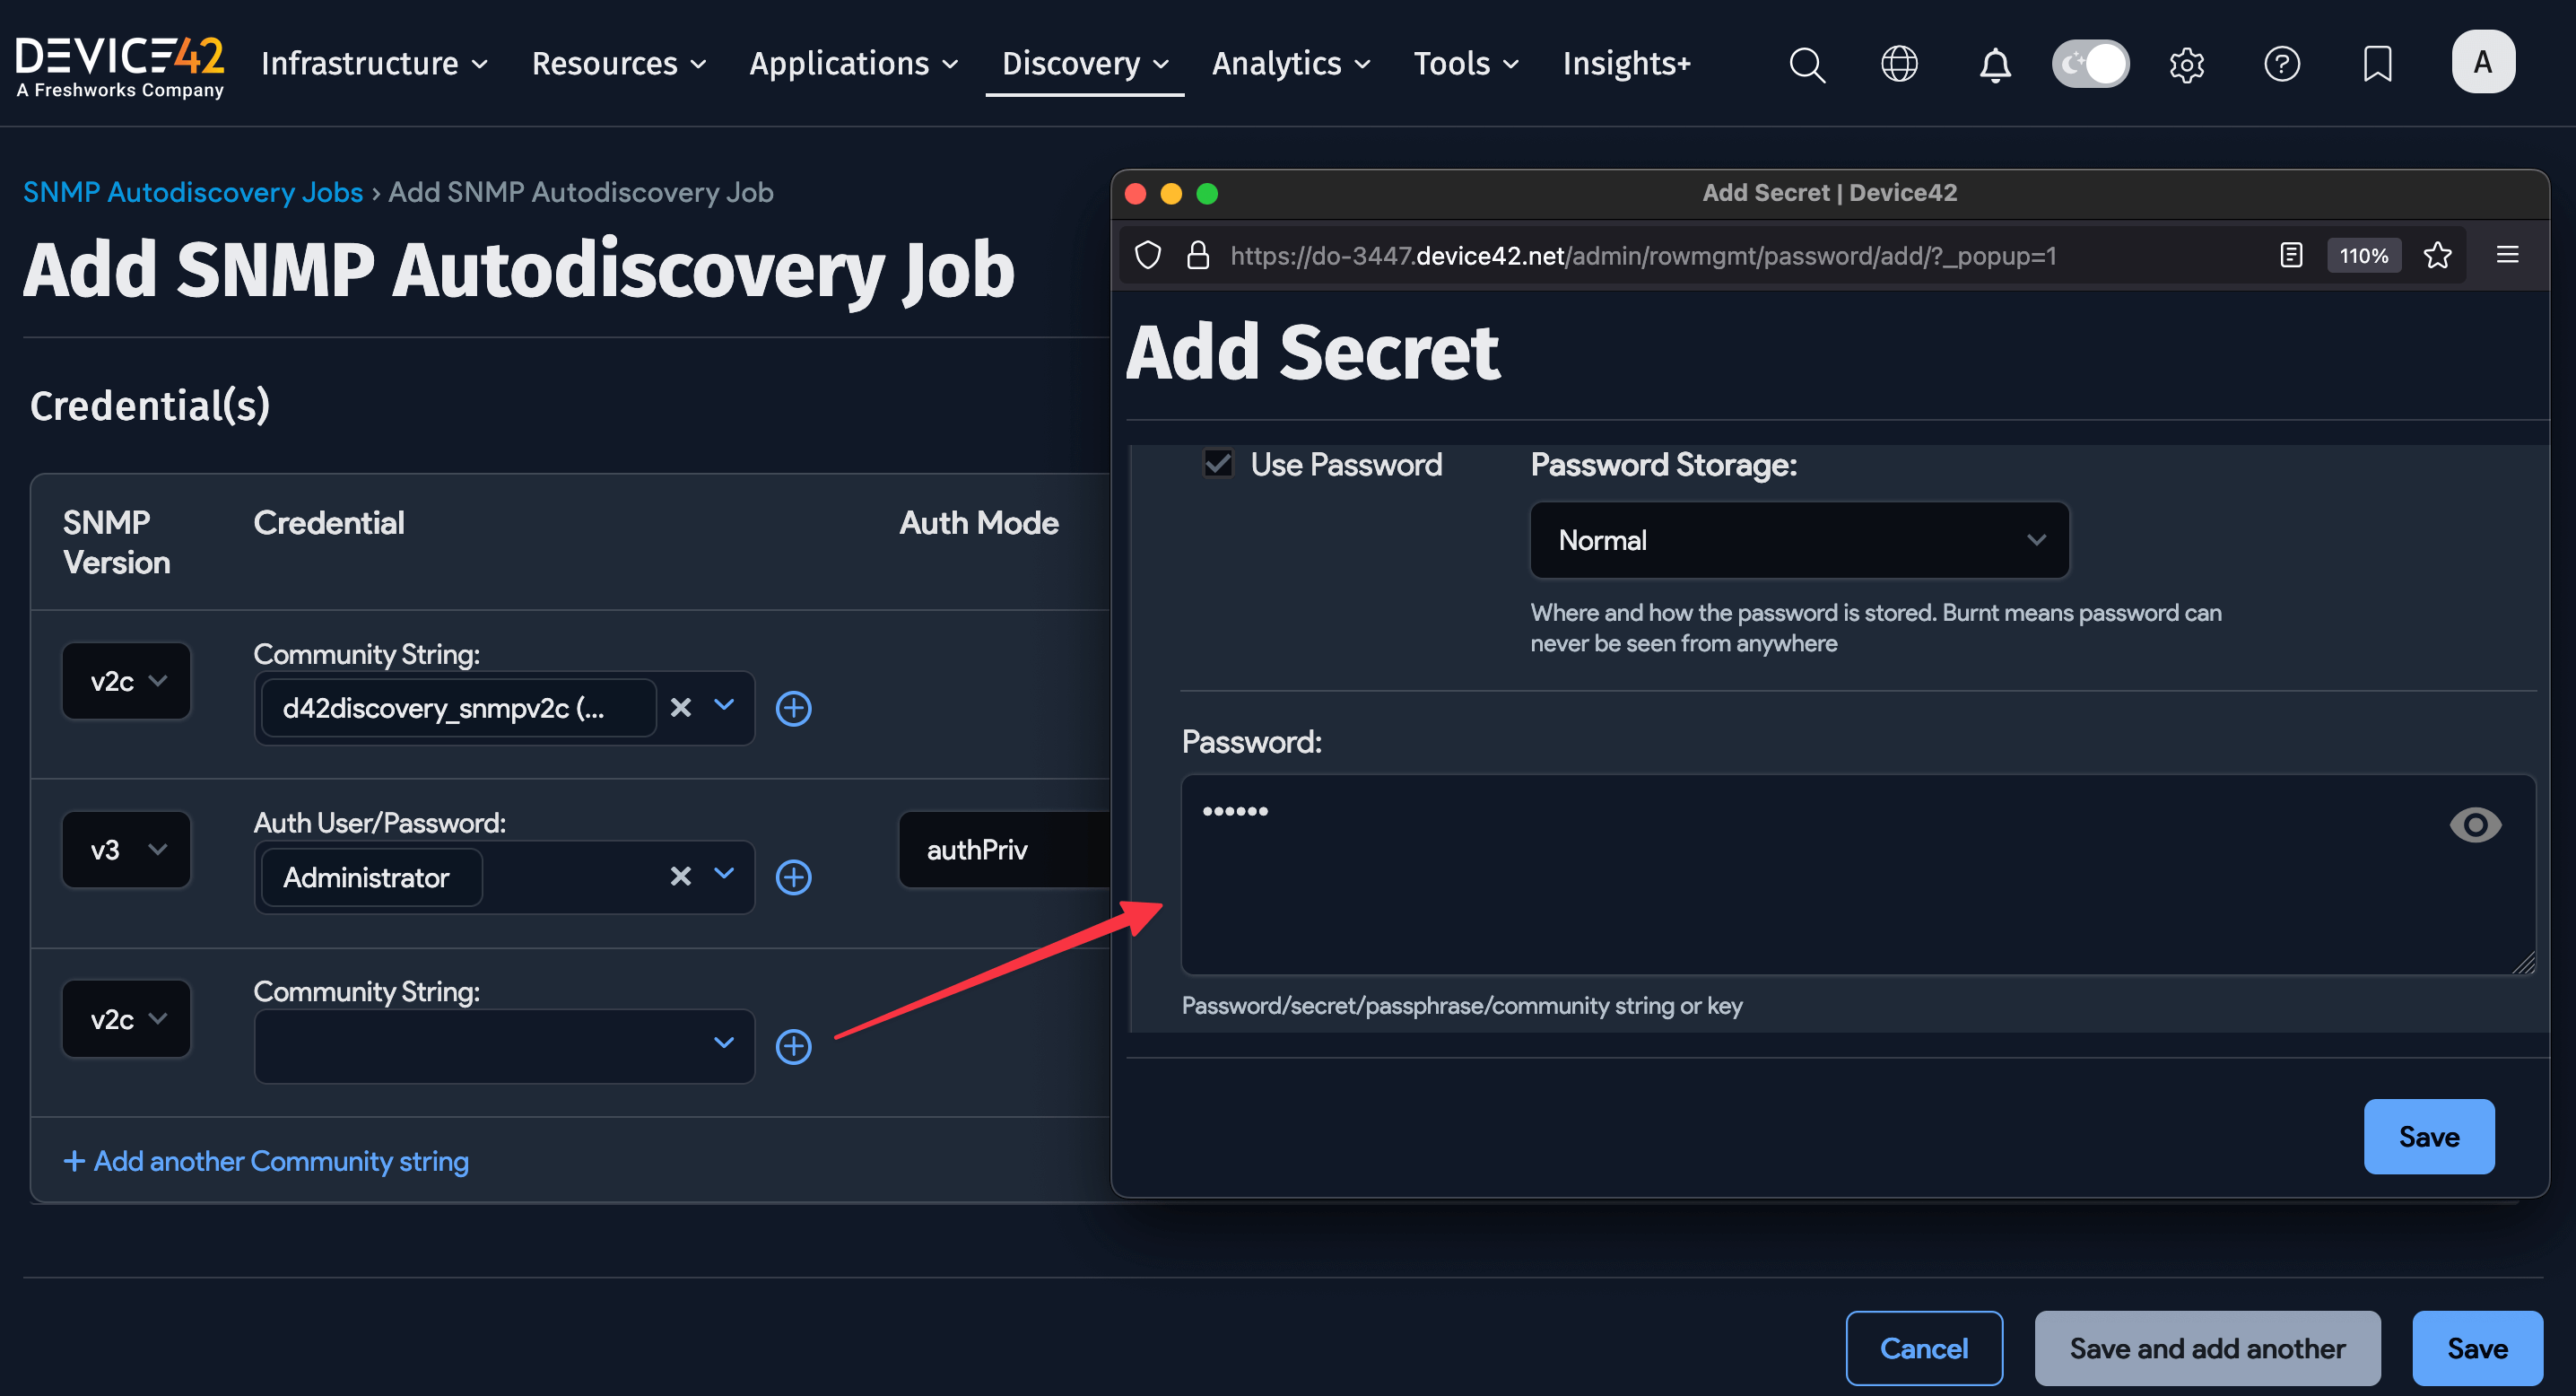
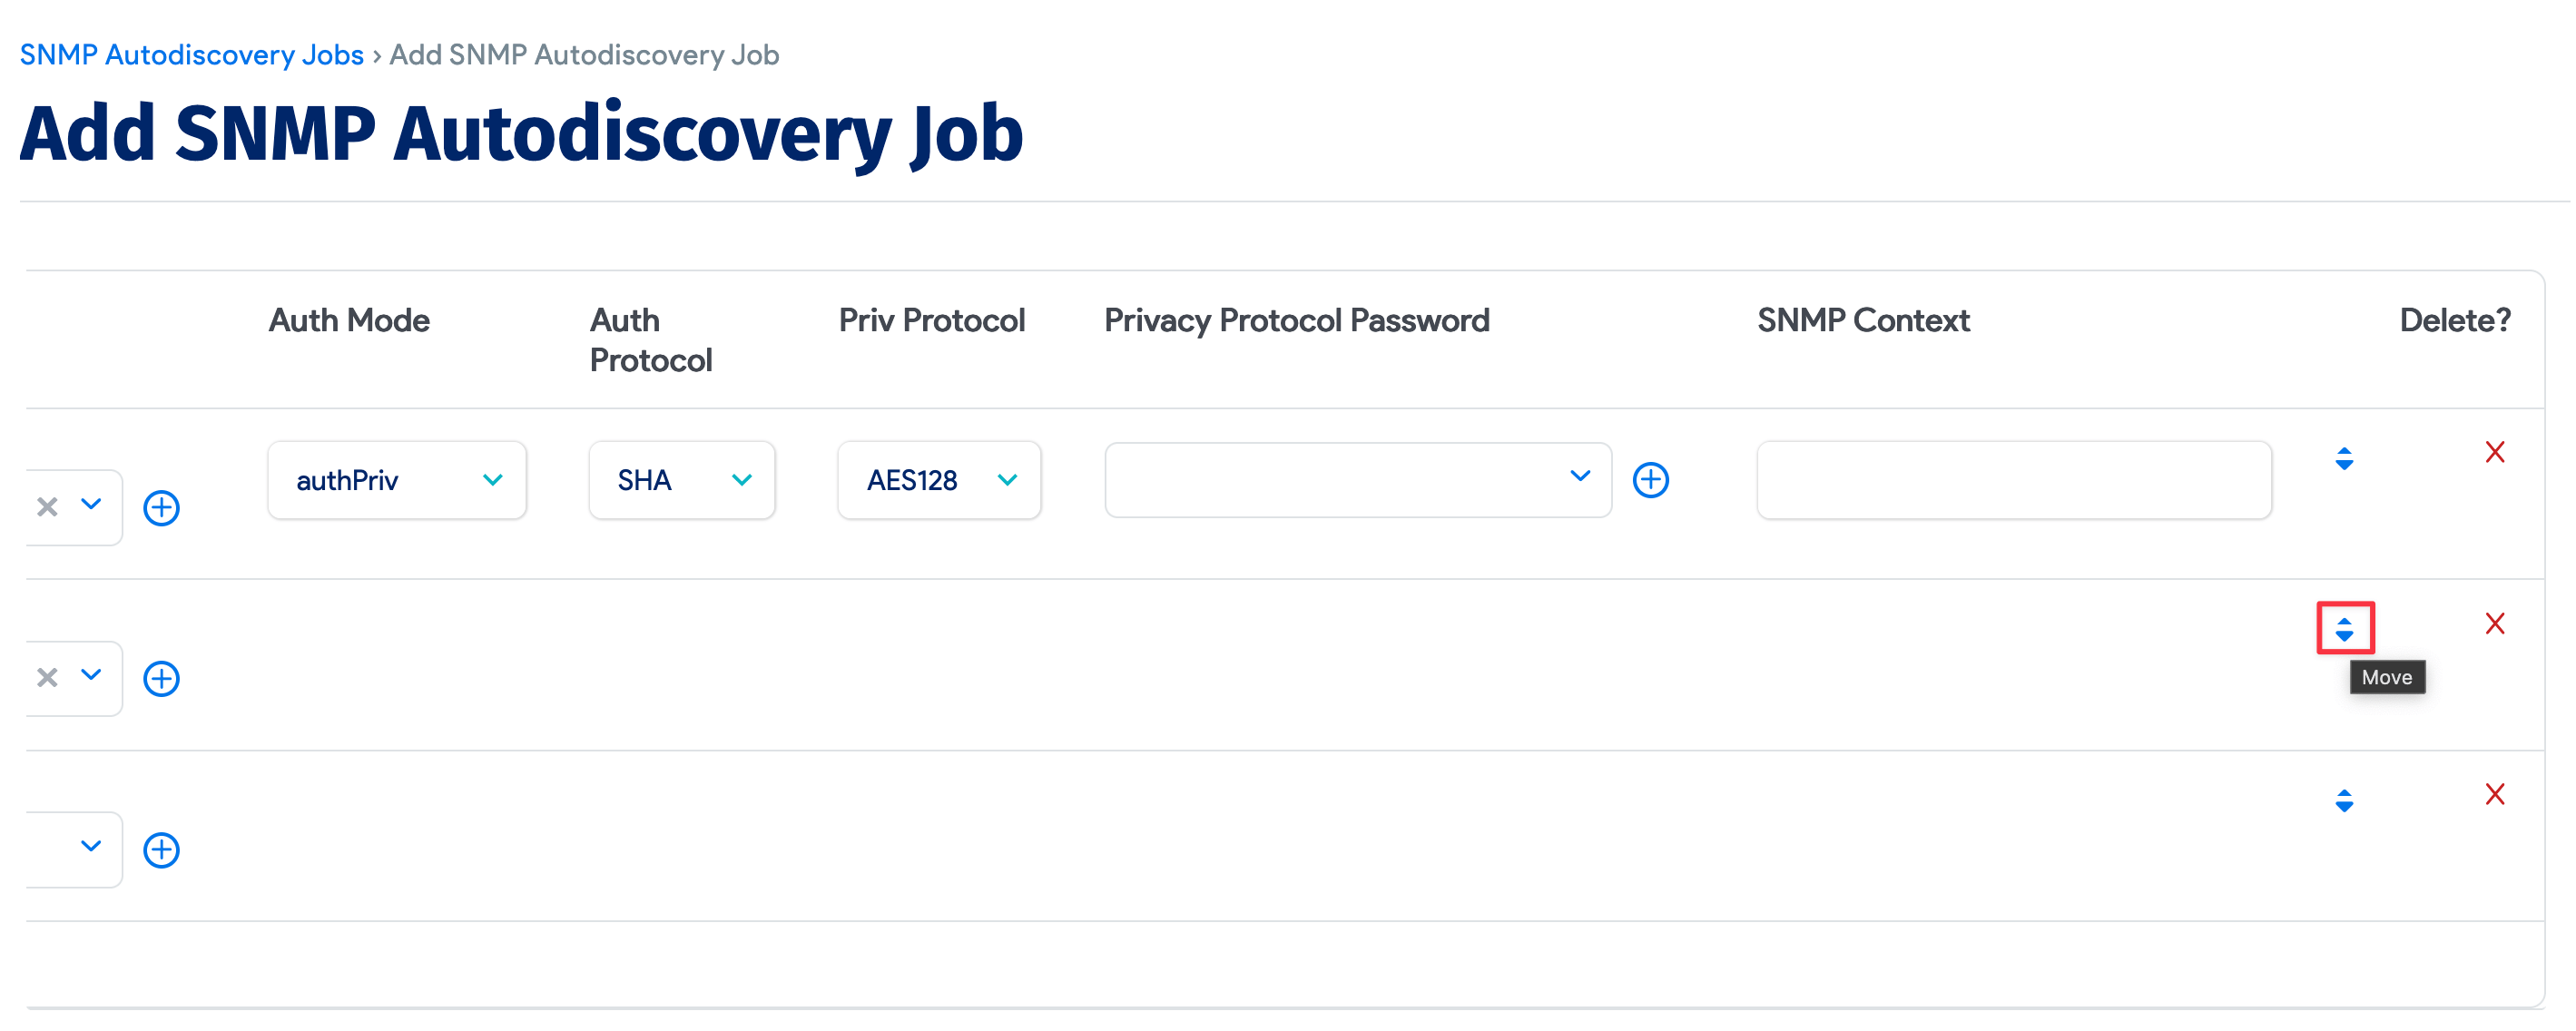
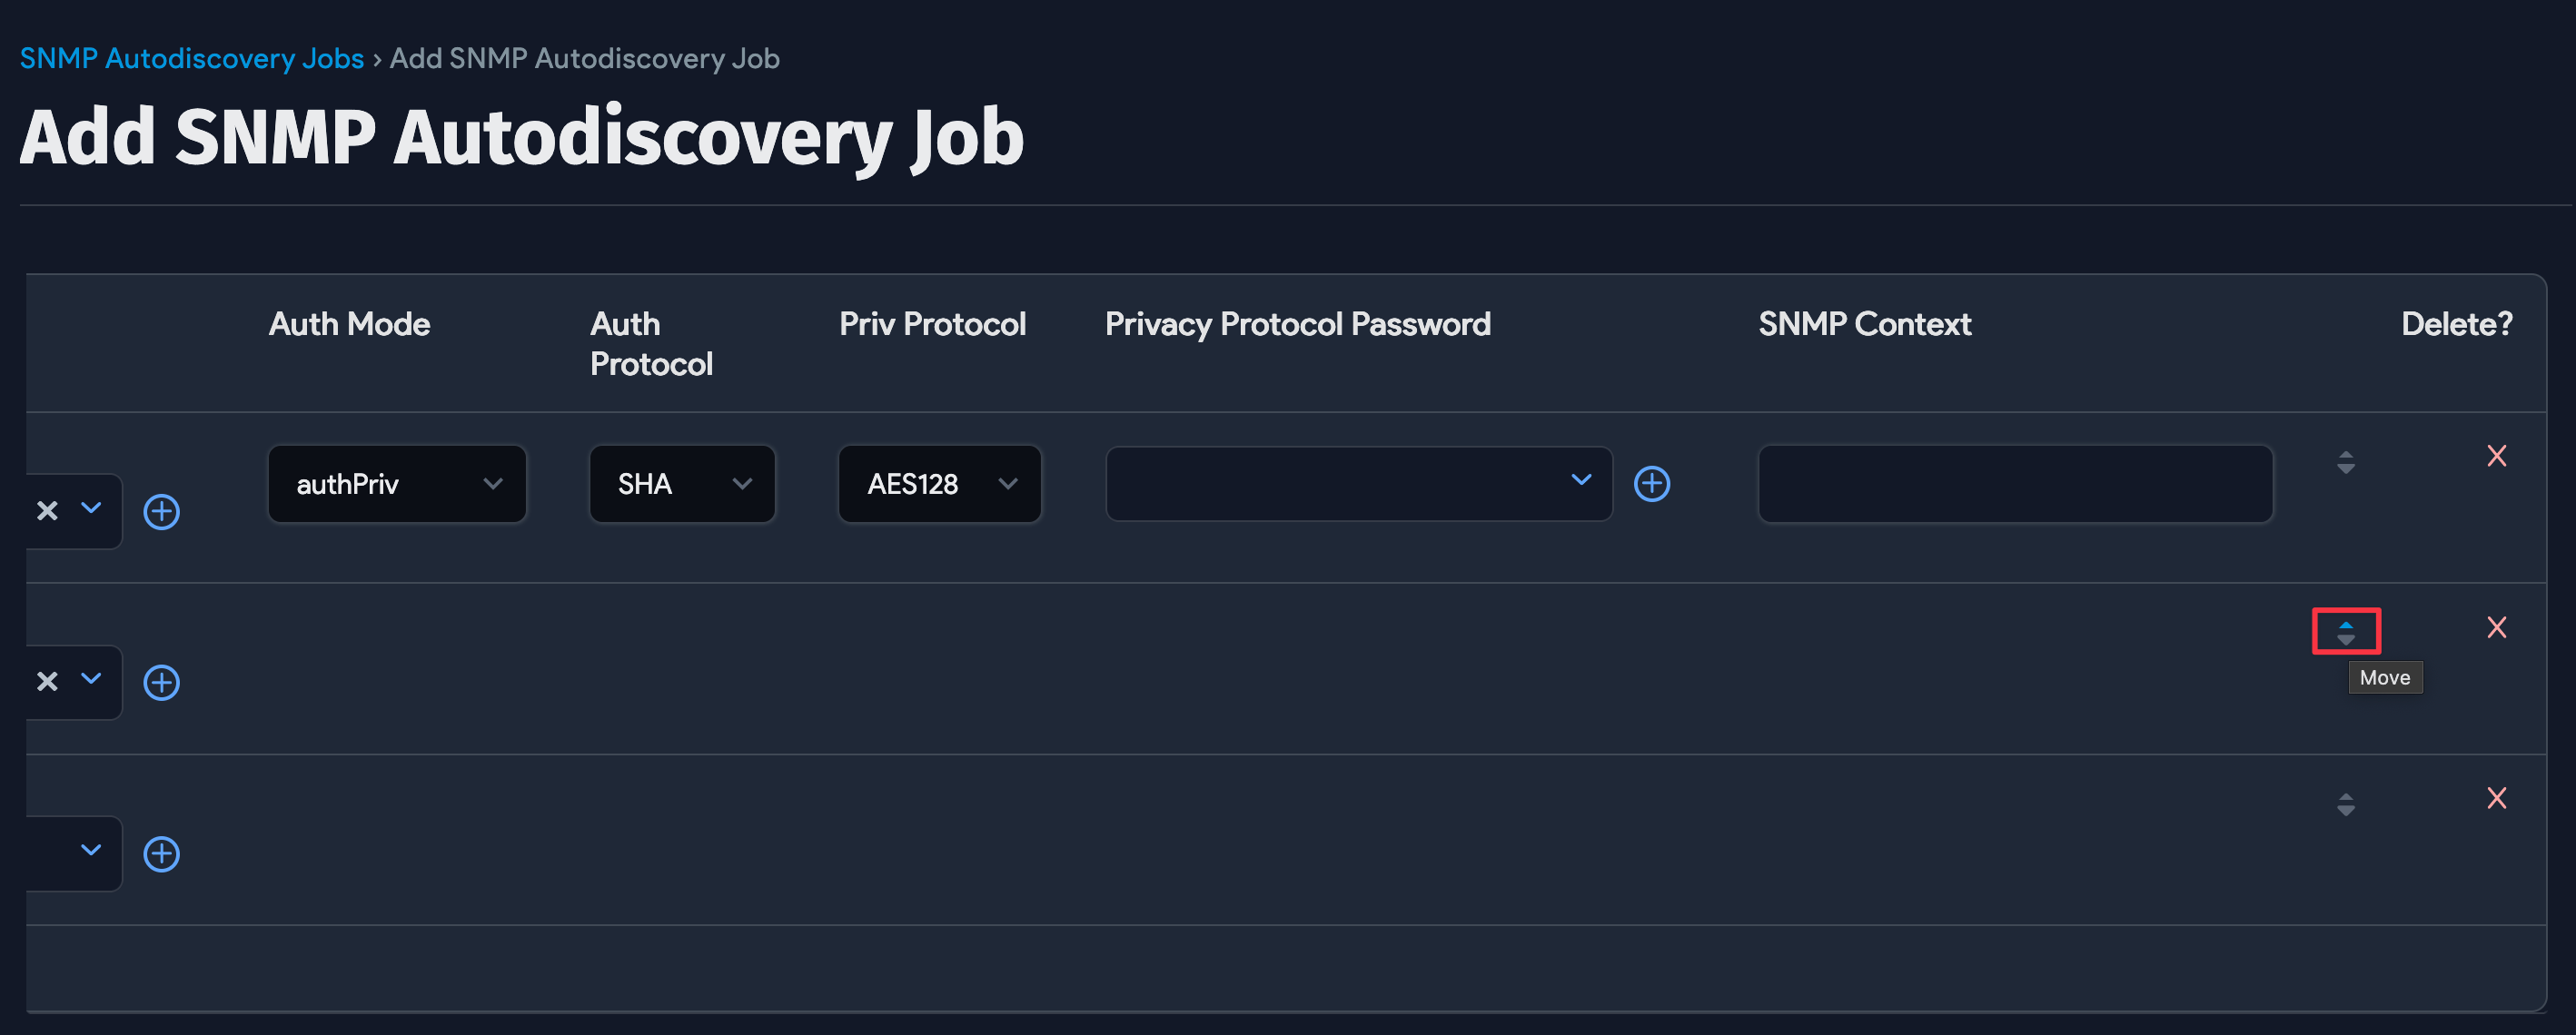
You can enter preferred community string credentials when you create an SNMP discovery job. When the job runs, it uses the credentials in the order in which you enter them, stopping at the first successful authentication. Subsequent job runs use the last successful credential and then the remaining credentials in the ordered list.
Click on the + Add another community string button at the bottom of the Credentials section. Then select the secret for the community string by clicking the plus icon.
For successful SNMP v3 discovery, use only one set of SNMP v3 credentials per username. Entering multiple credentials with shared passwords results in only one of the credential sets being used.
Reorder the credentials by clicking the up and down arrow buttons to the right of the screen.
Device42 supports the following SNMP v3 Auth Protocols:
- MD5
- SHA
- SHA256
- SHA512
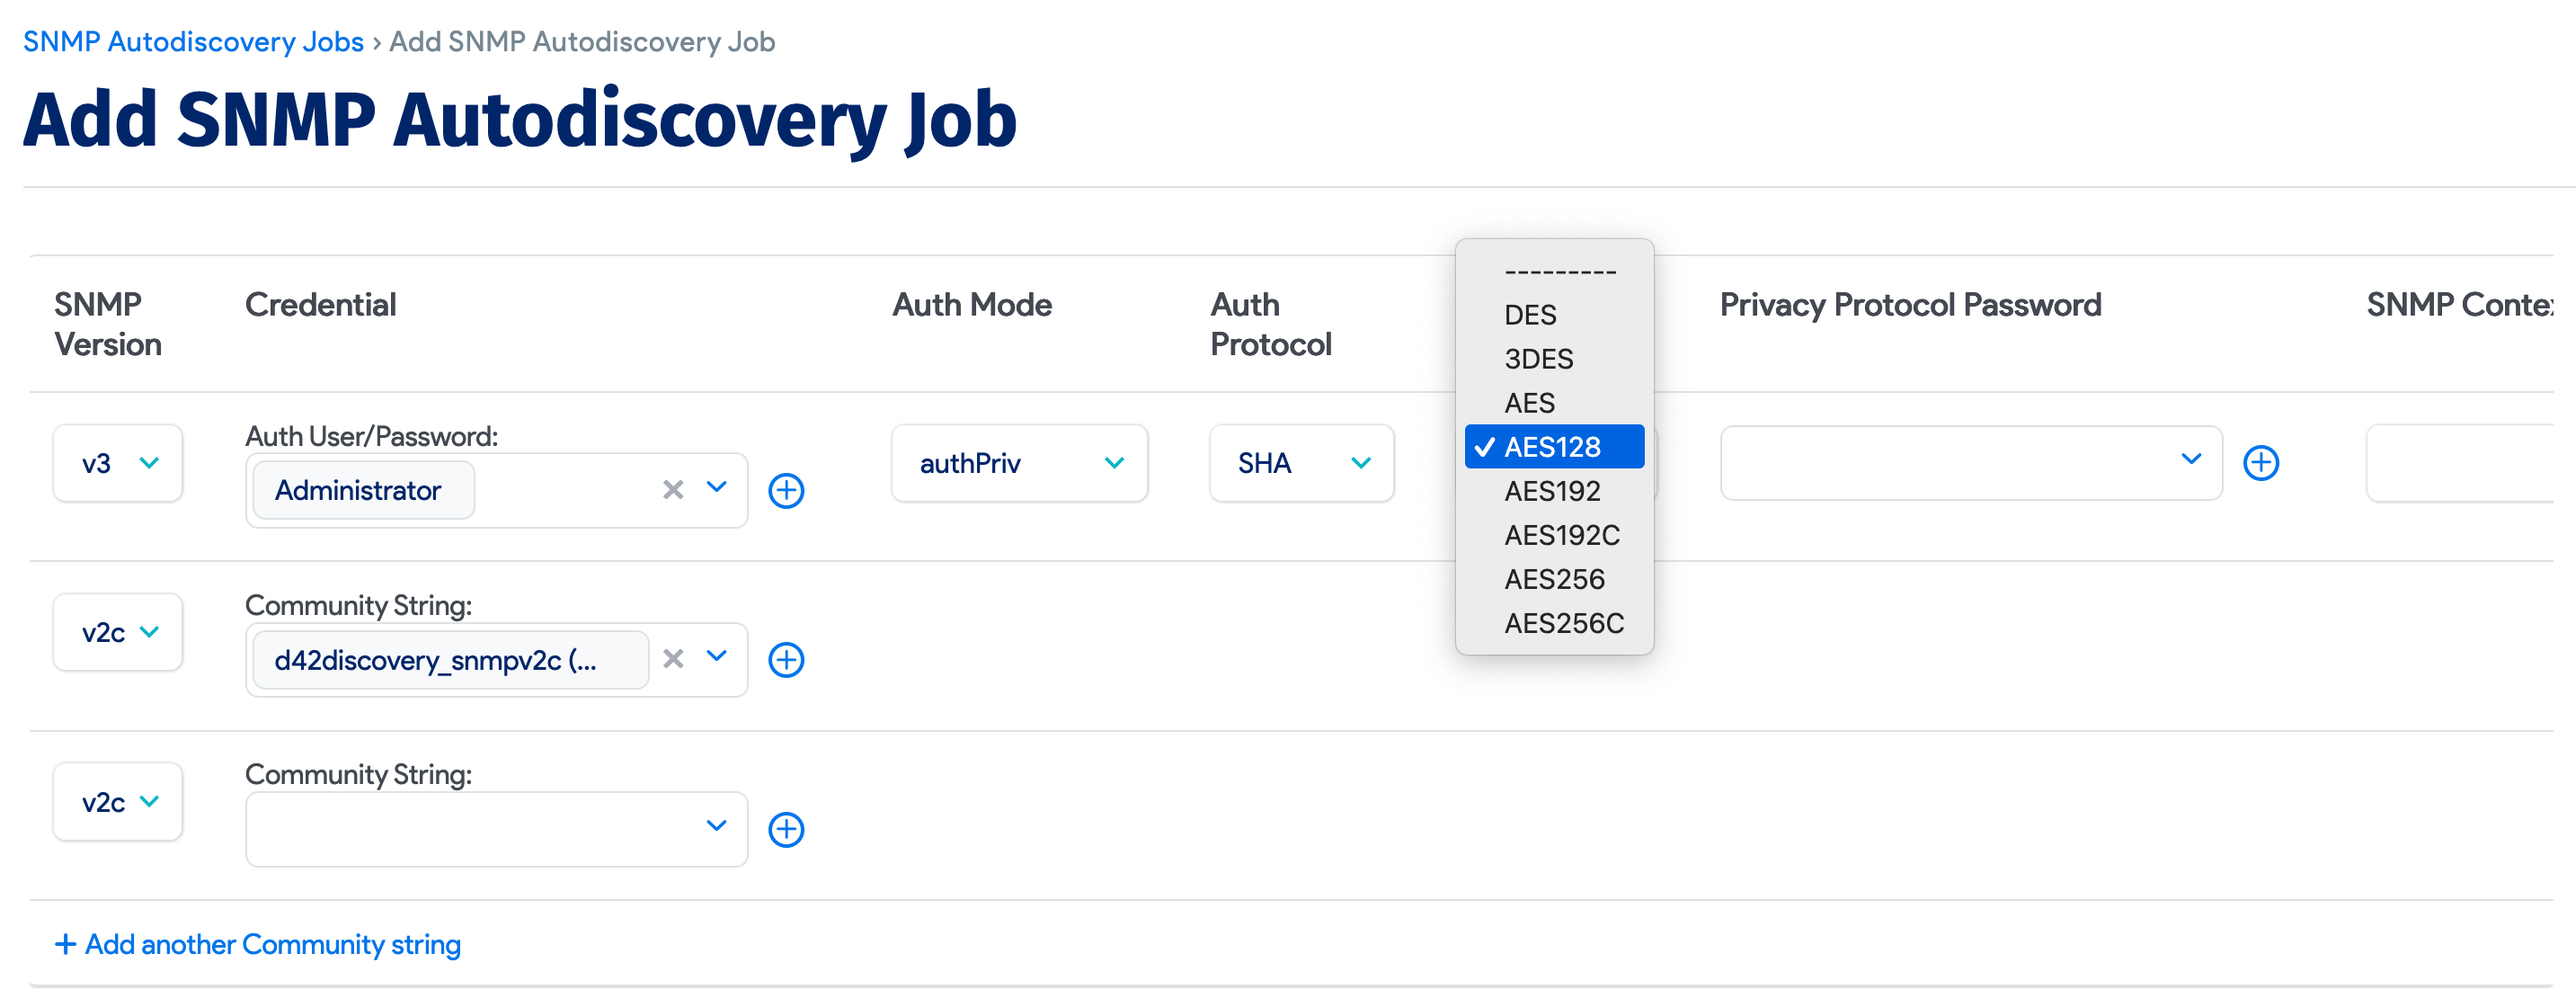
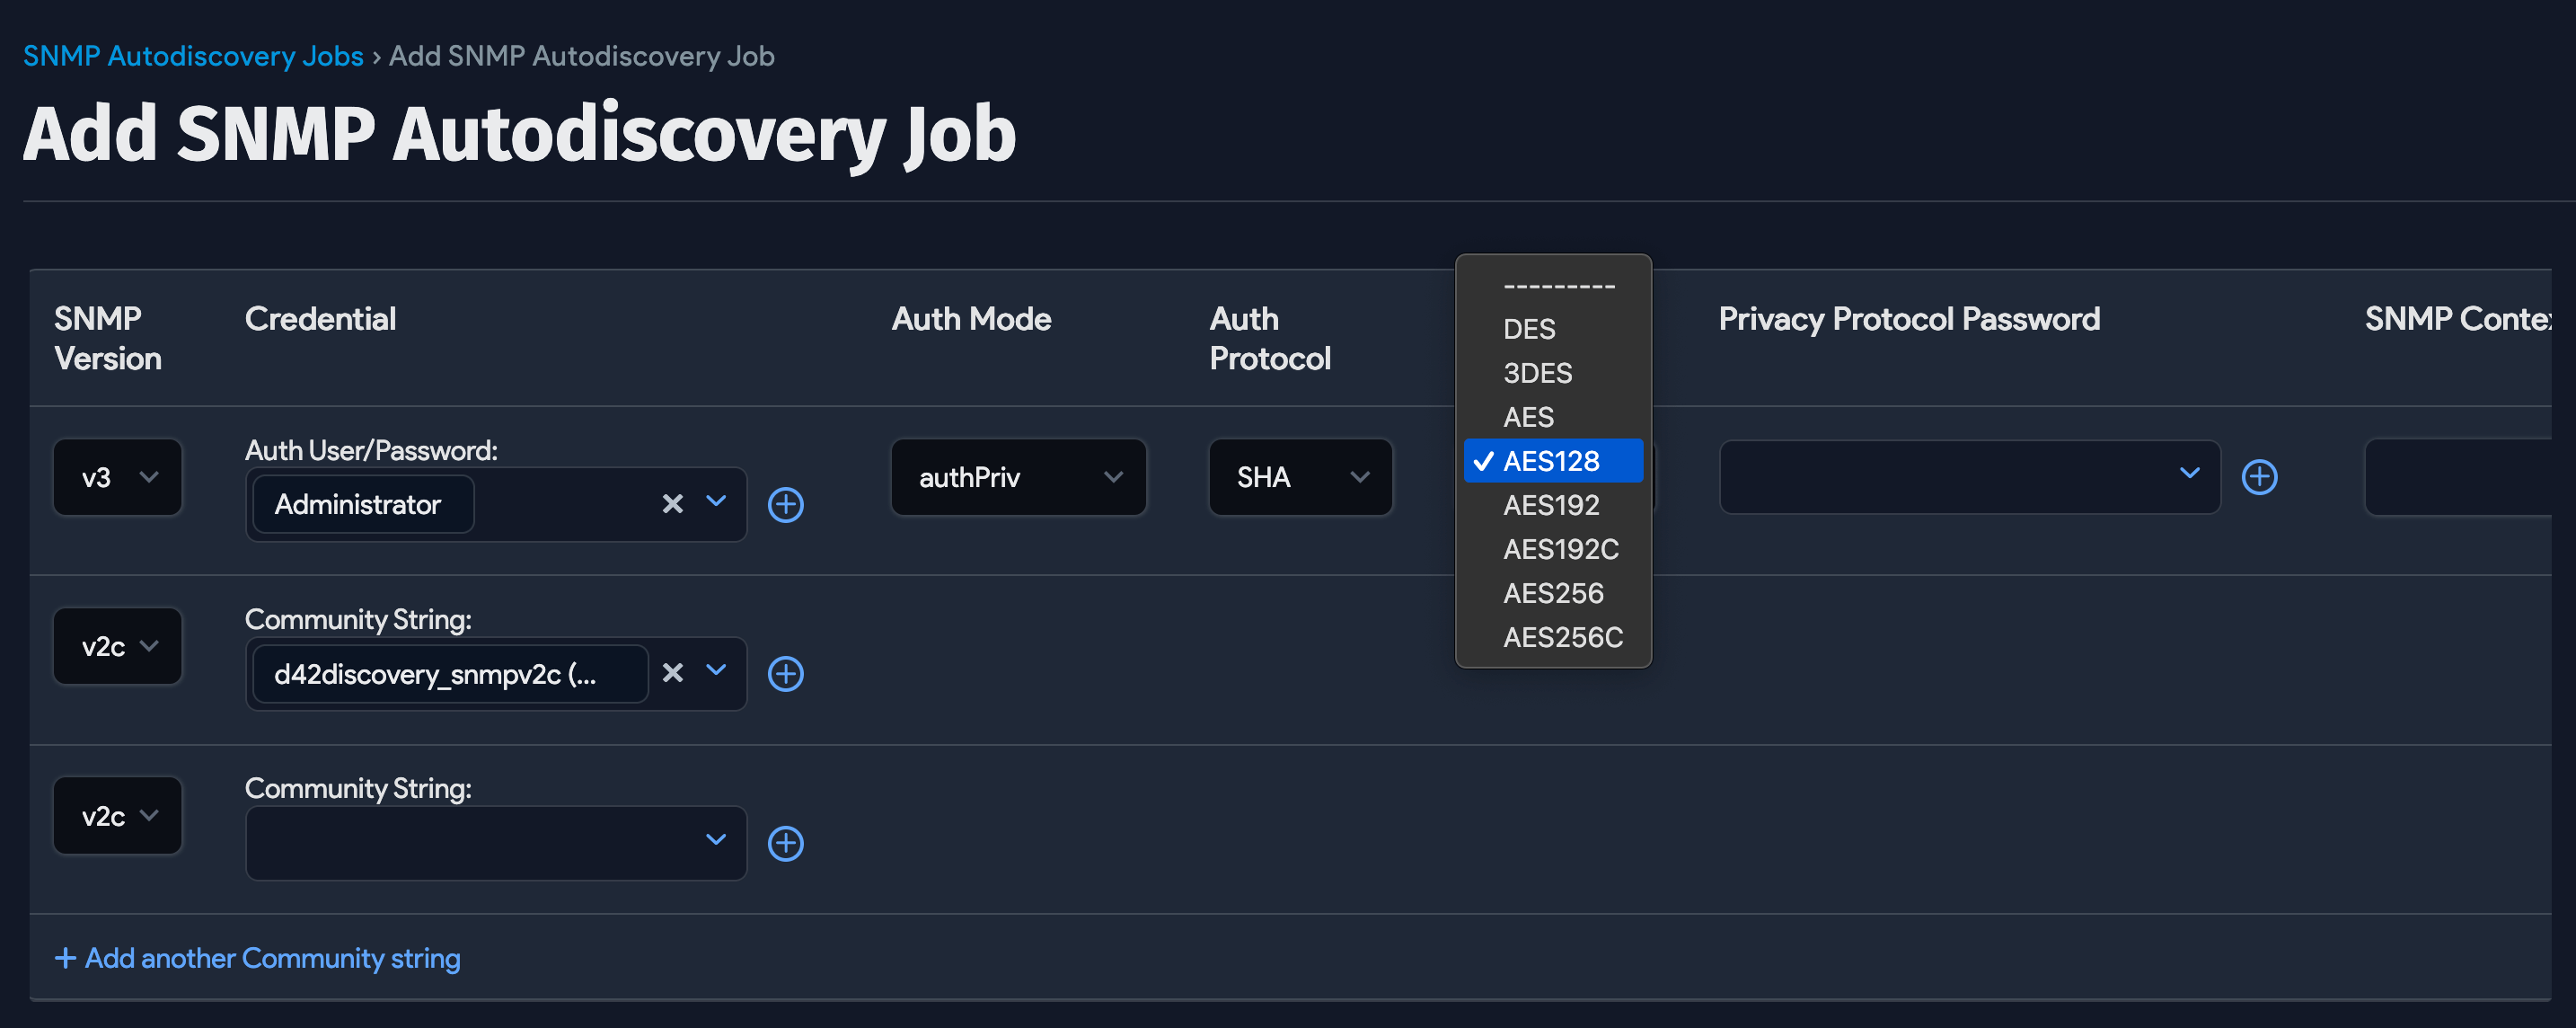
Device42 supports the following SNMP v3 Privacy Protocols:
- DES
- 3DES
- AES
- AES128
- AES192
- AES192C
- AES256
- AES256C
Network Device Options
Expand the Network Device Options section to reveal settings specific to discovering network-connected hardware.
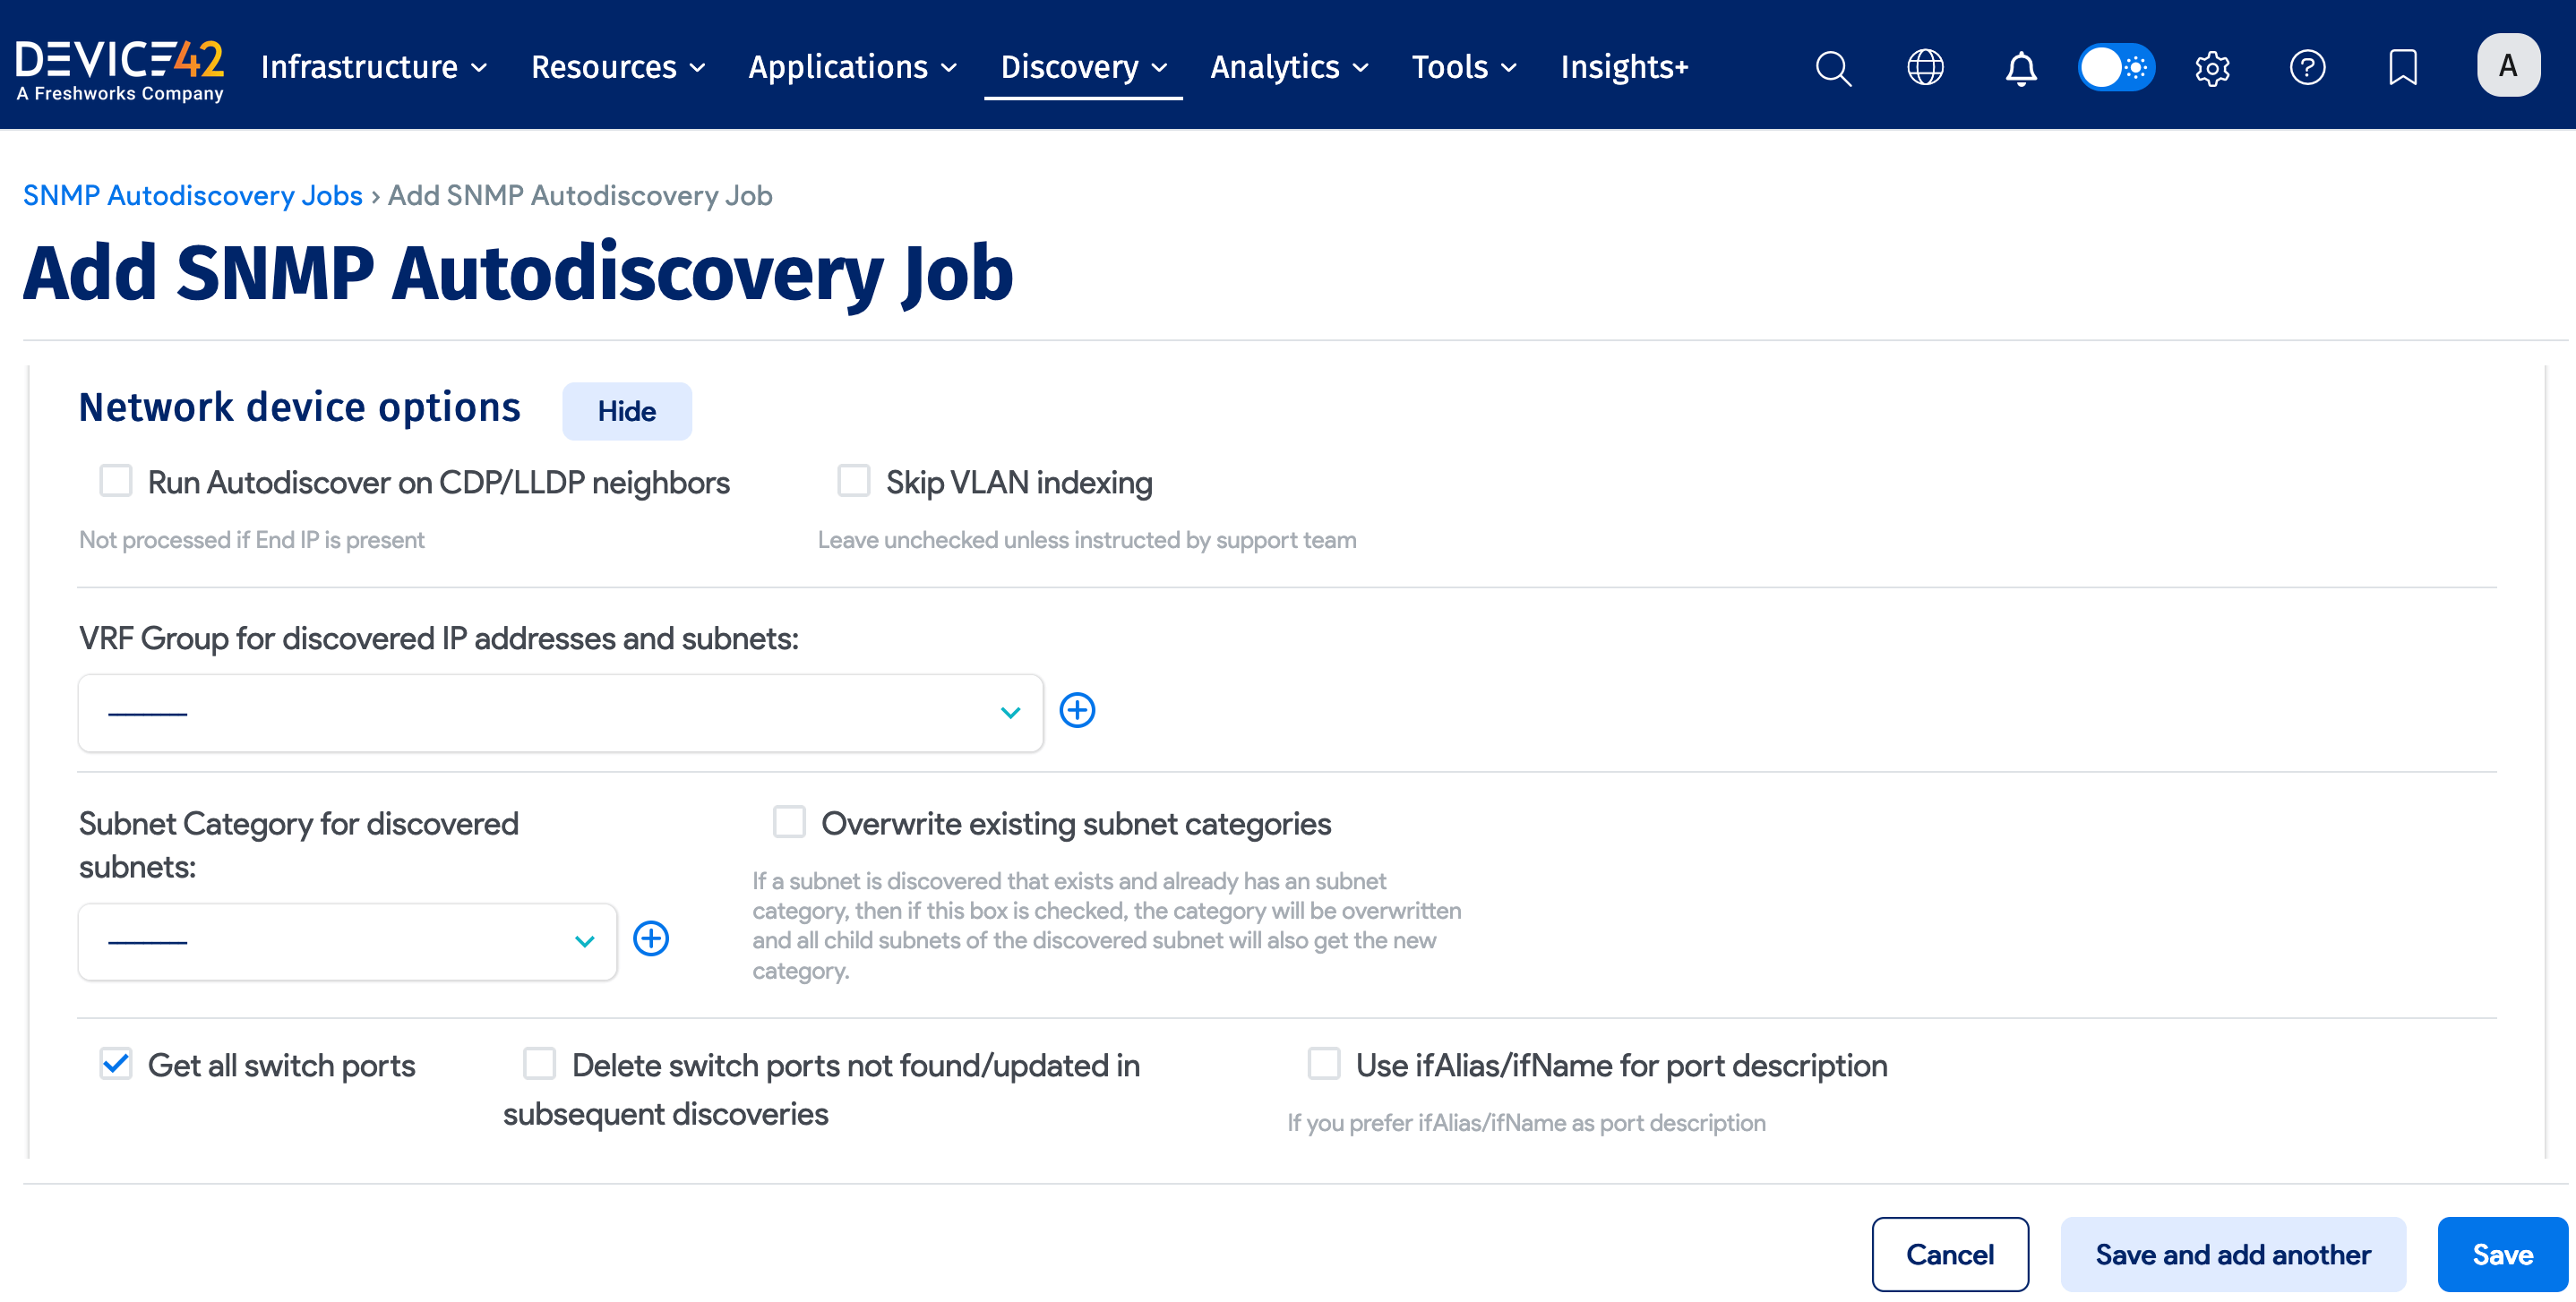
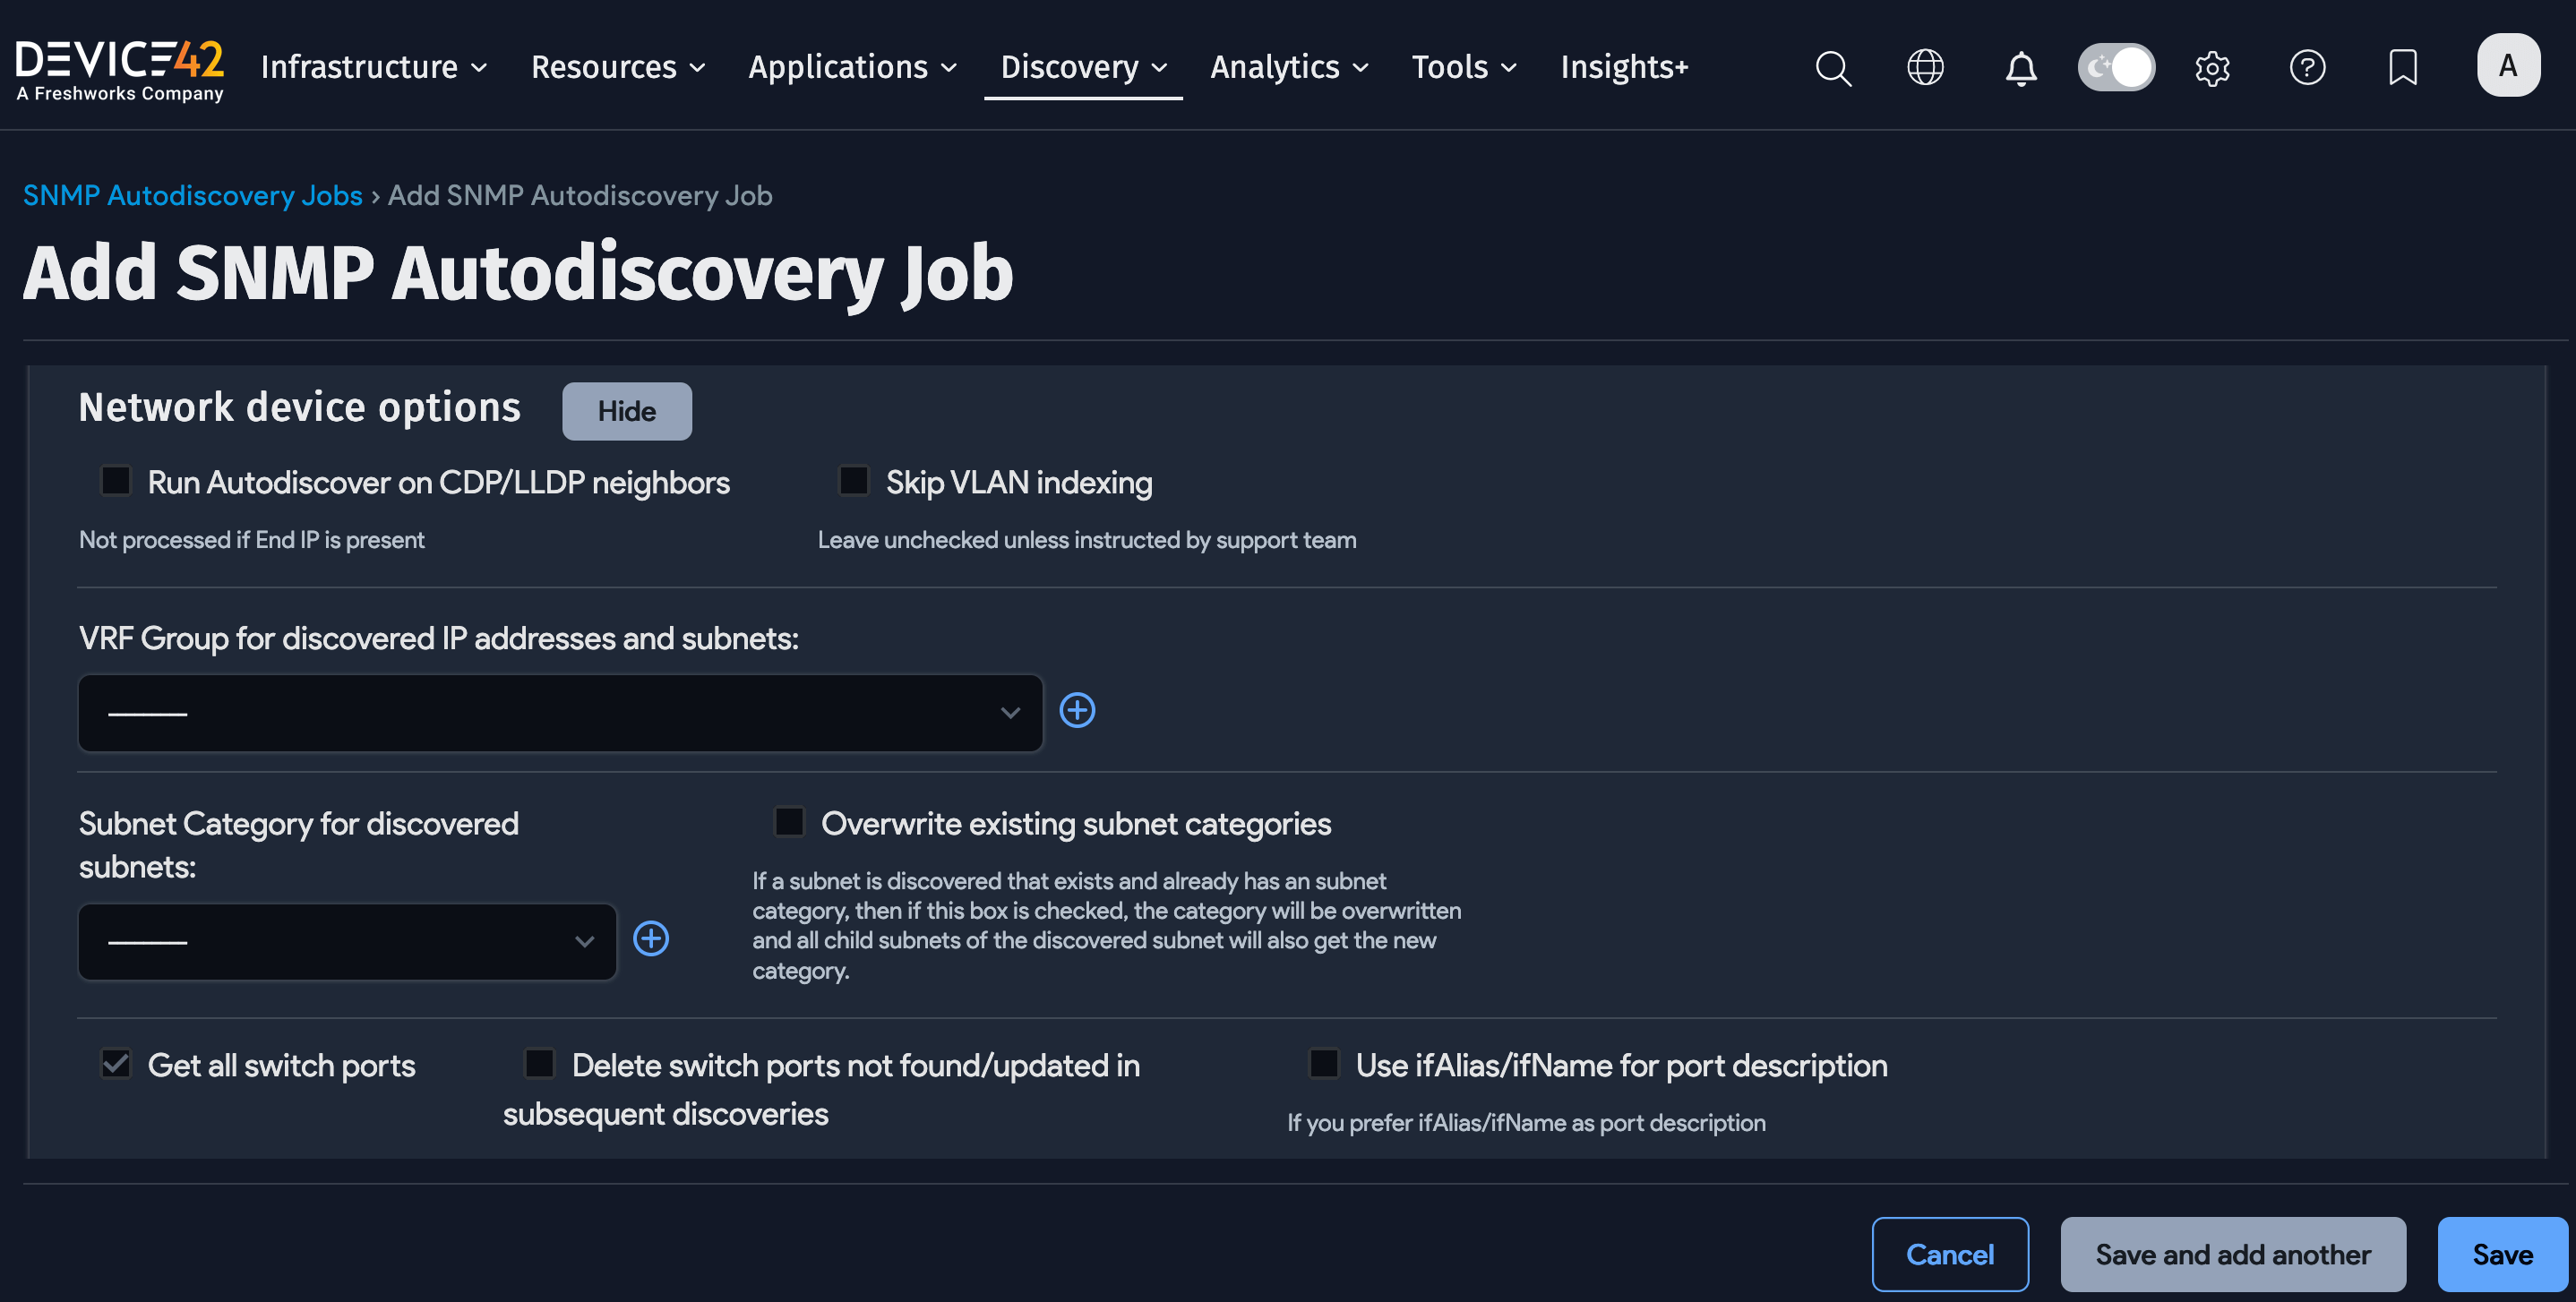
Get All Switch Ports
If you keep Get all switch ports selected, you will see extra form items:
- Port name prefix to ignore macs: Ignore MAC addresses from ports that start with this prefix.
- VLANs to ignore: Do not discover MAC addresses on these VLANs.
- Give precedence to hostname: Check this option to give precedence to the discovered hostname in the network device discovery.
- Delete older mac association after: To keep your MAC addresses and switch port connectivity up to date, leave this at "0". This deletes all stale MAC addresses not discovered on the switch port anymore. Otherwise, you can choose the number of days after which to delete the stale MAC association with a switch port.
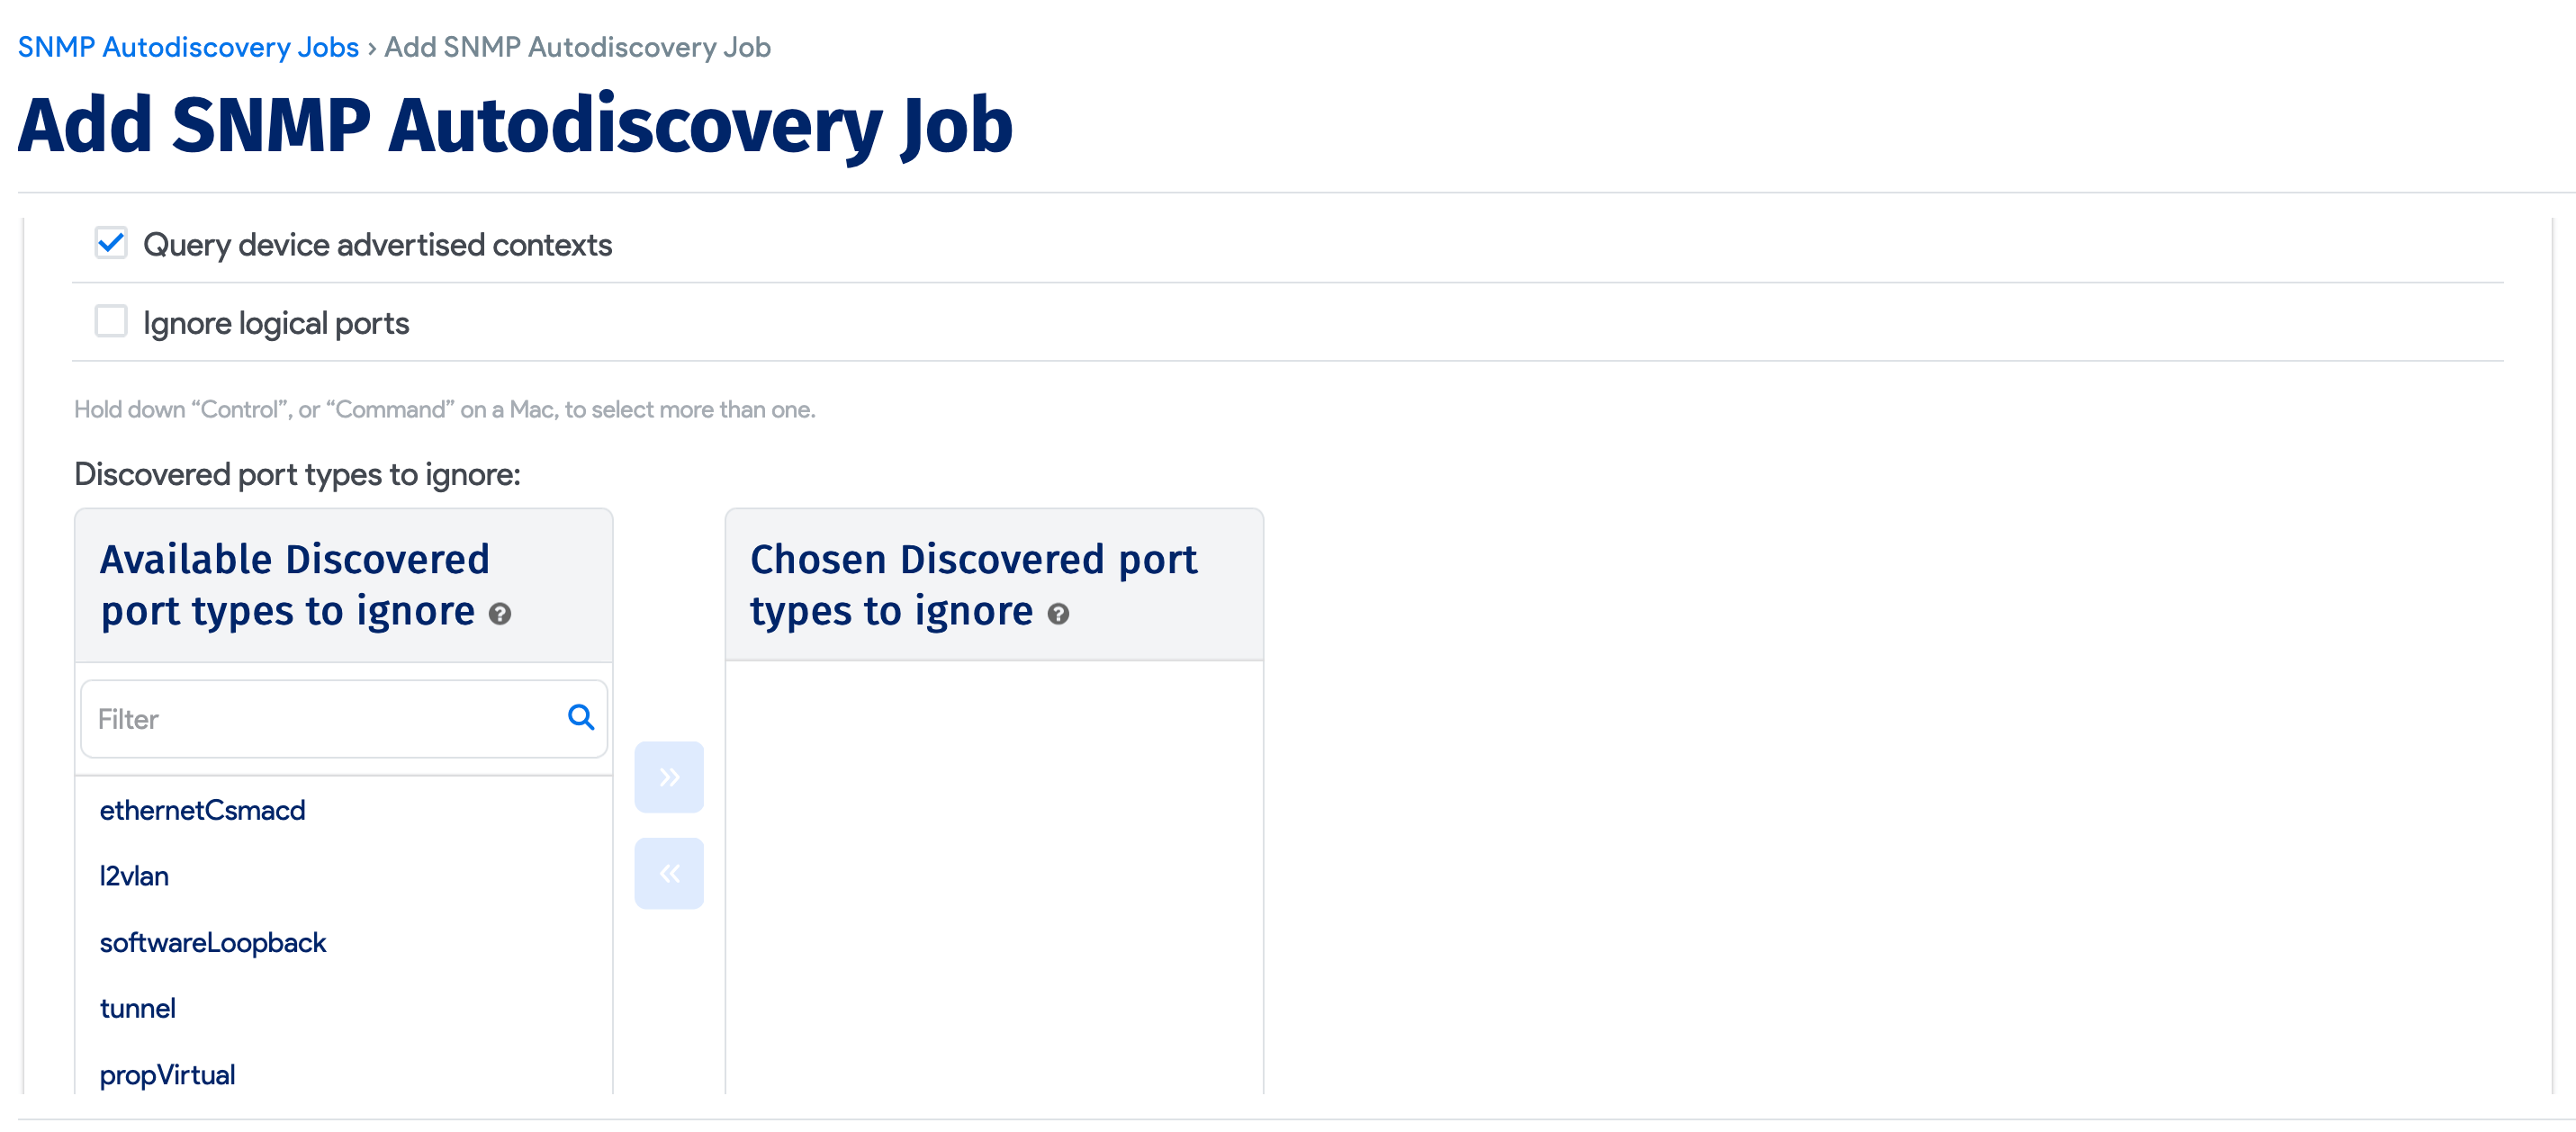
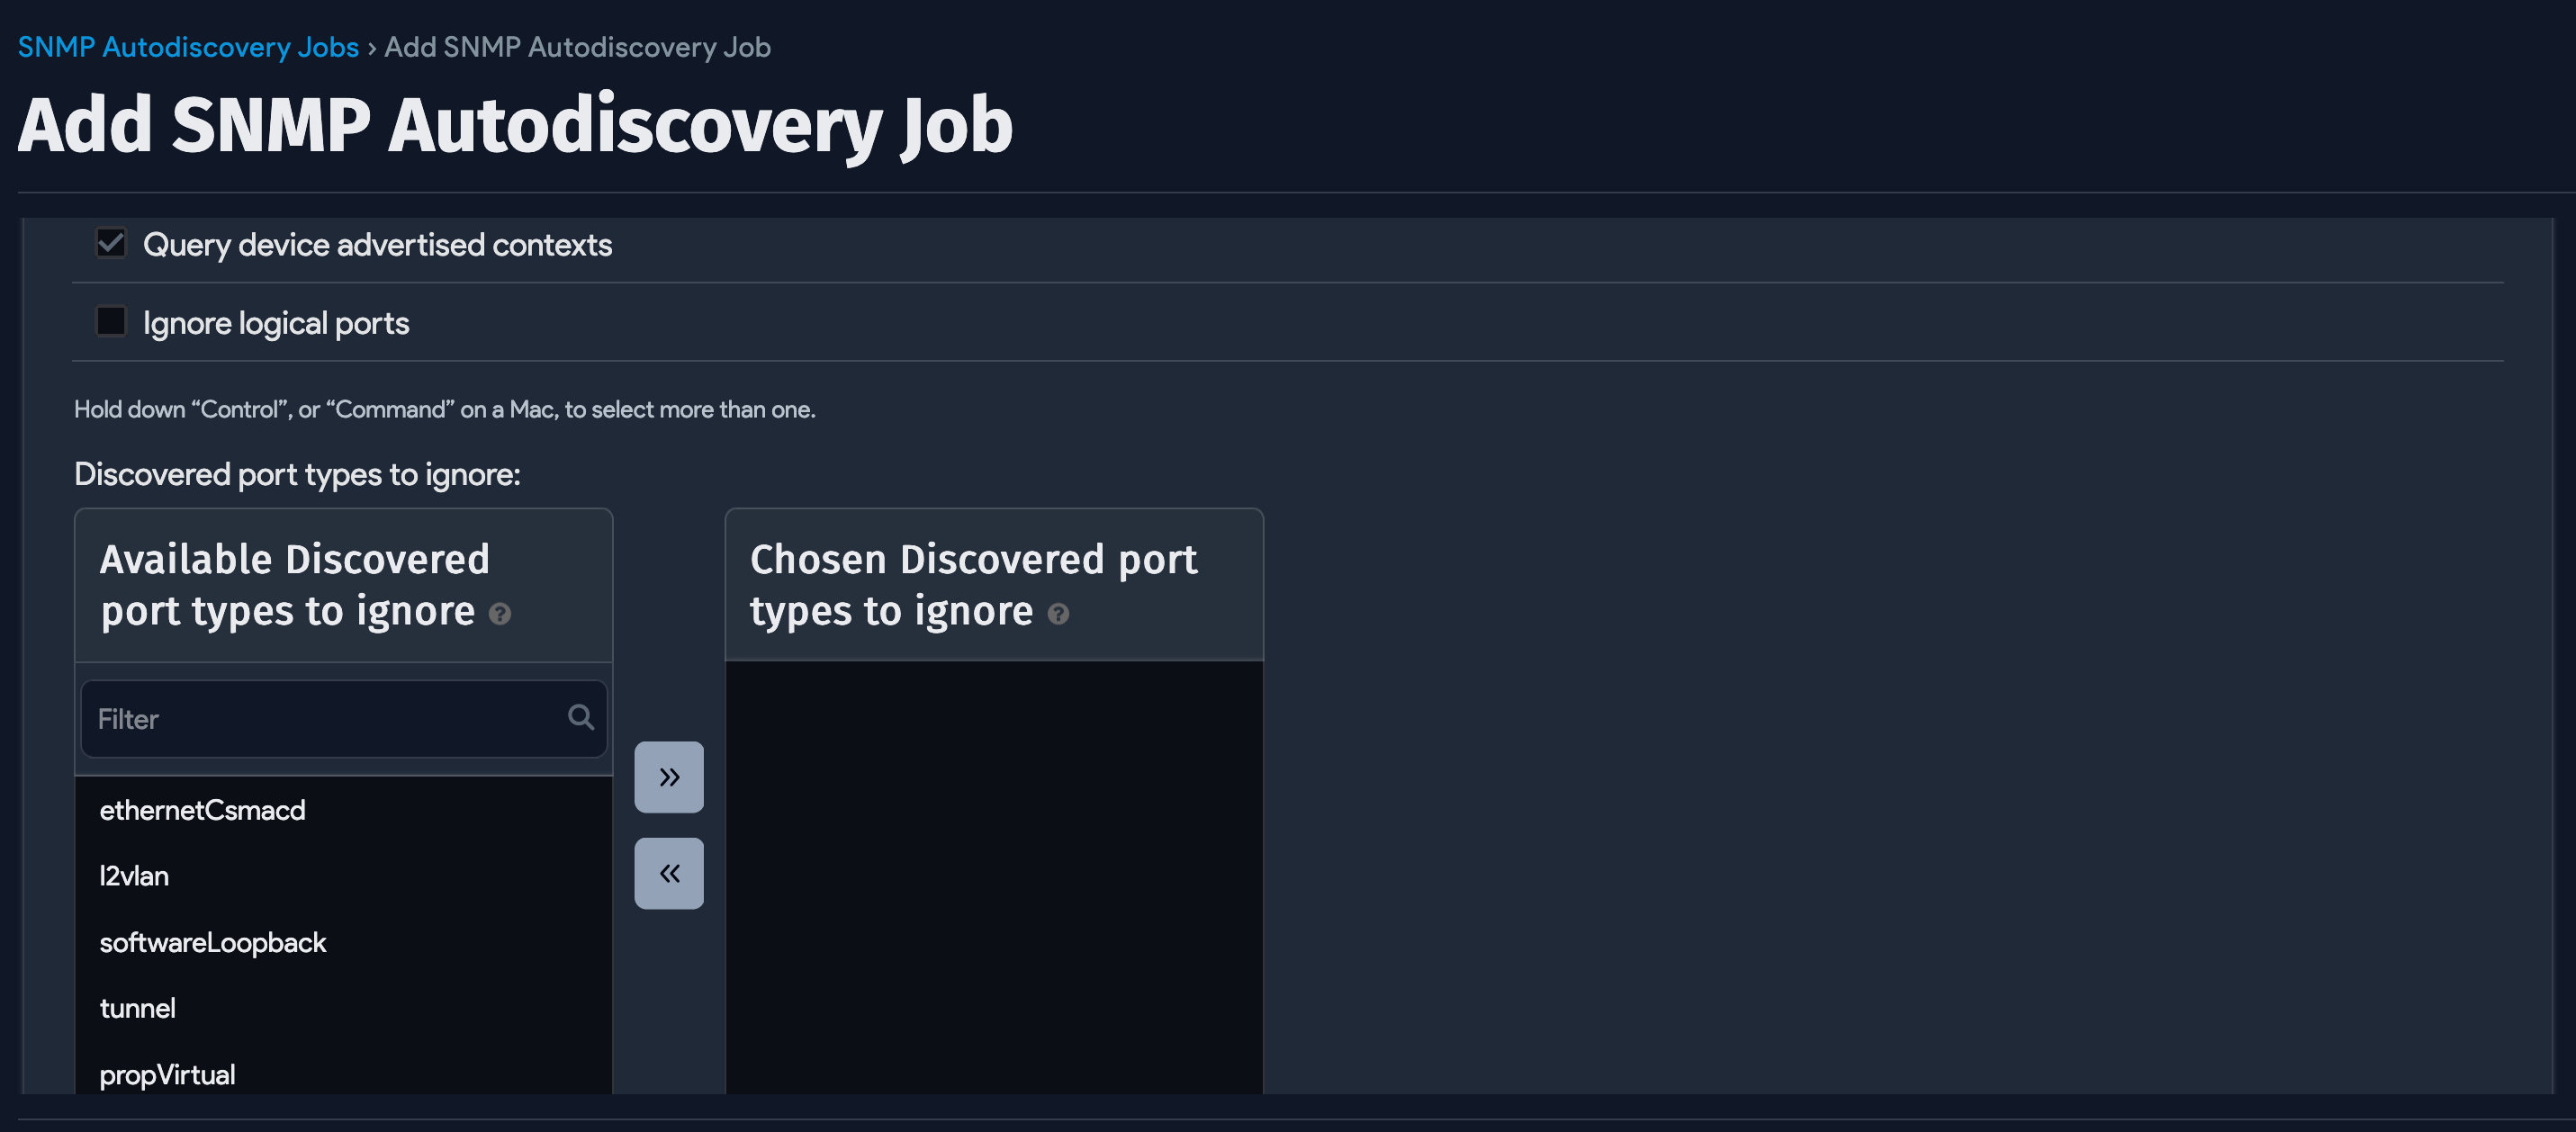
- Discovered port types to ignore: You might not want to see certain port types in your switch port list. Choose what port types to ignore. For the first time:
- Let the job find the port types first.
- If you want to ignore specific port types, you must manually delete the corresponding switch ports. You can filter by discovered type under IPAM > Switch Ports.
- Add the ports to the ignore list on the discovery page.
- Discovered port types not to count: Similar to above. This still brings the ports in, but excludes selected port types from the count.
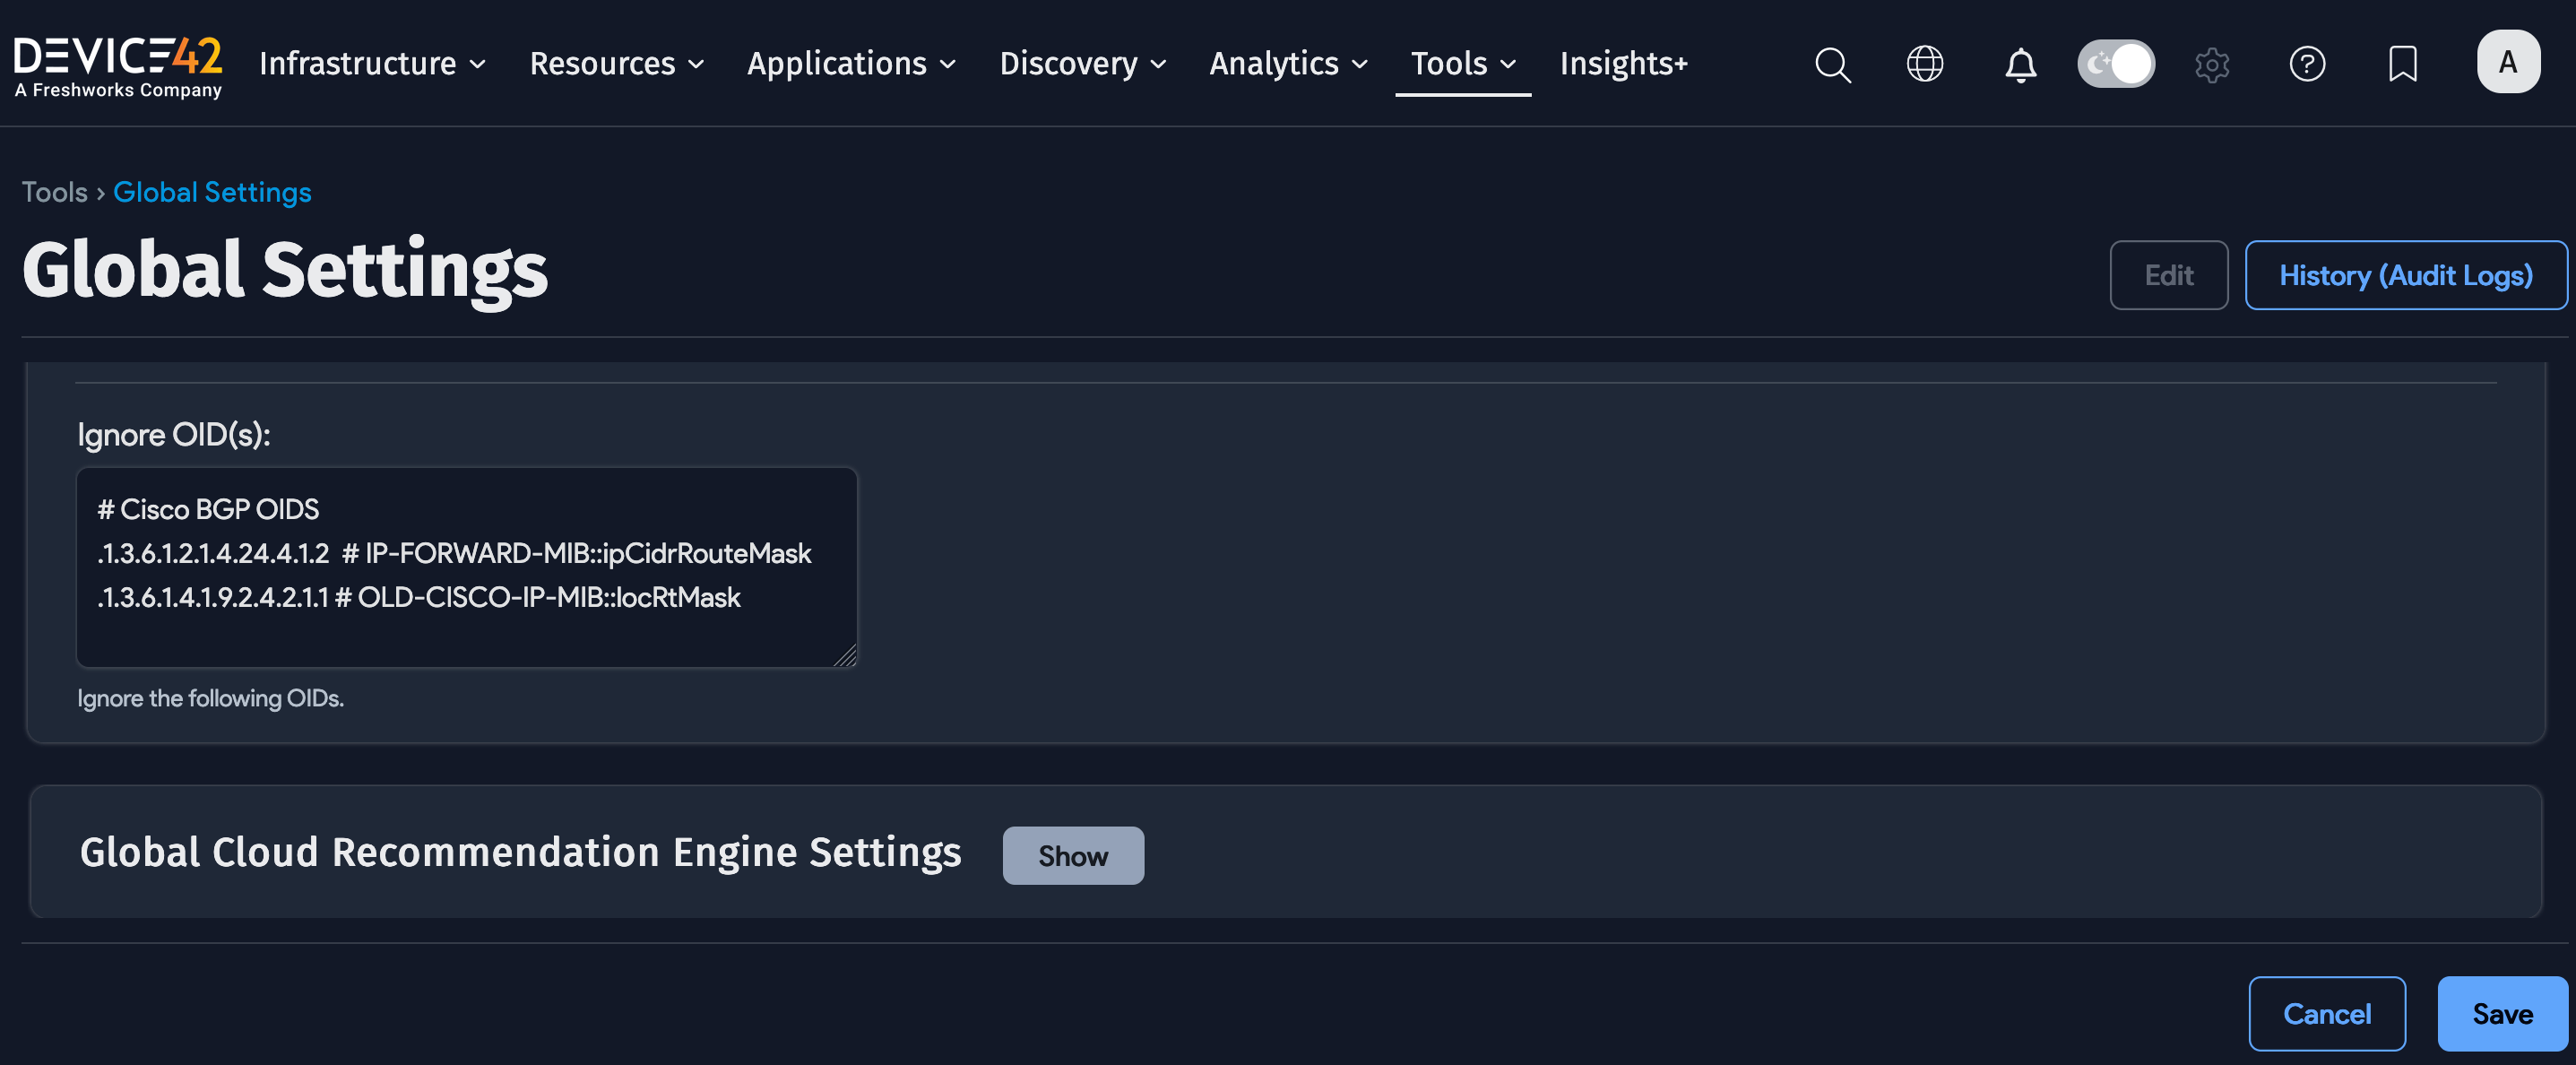
Globally Exclude OIDs
You can set certain OIDs to be ignored globally to prevent them from being collected during SNMP discovery. Navigate to Tools > Global Settings and scroll down to the Ignore OID(s) field.
Device42 supports two methods of exclusion: Use a trailing dot (.) to ignore entire categories of data, or omit it to ignore specific OIDs.
-
For an exact OID match, include the full OID without a dot at the end. For documentation purposes, you can optionally include a comment in text notation on the same line as the OID(s).
For example:
1.3.6.1.2.1.4.35.1 # ignore this OID
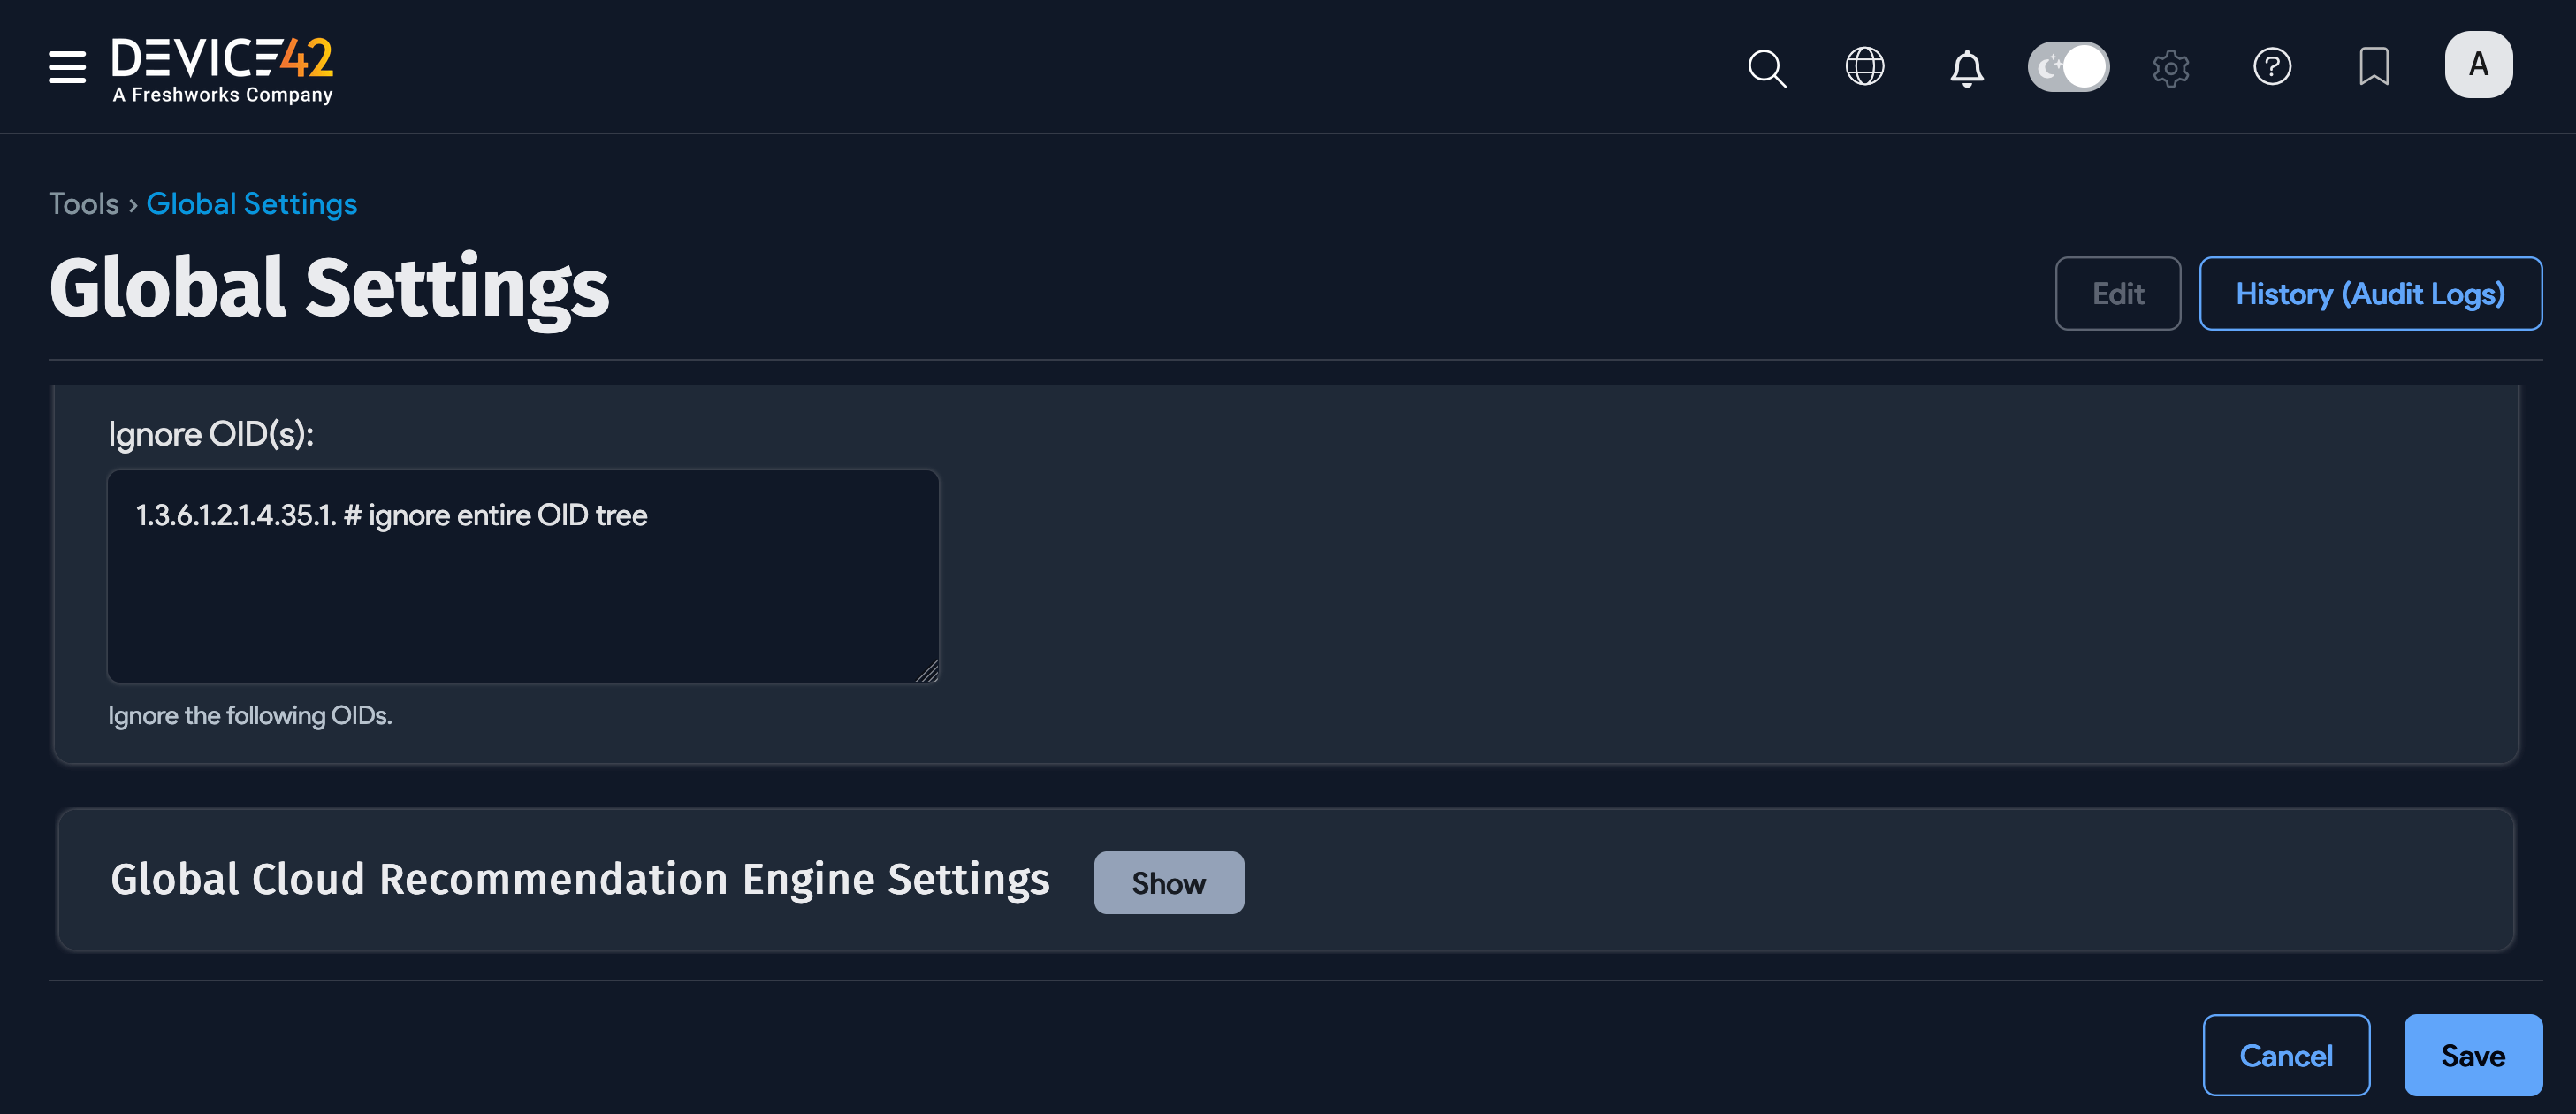
-
To exclude an OID category, include a period (
.) at the end of the OID.For example:
1.3.6.1.2.1.4.35.1. # ignore entire OID treeThis ignores
1.3.6.1.2.1.4.35.1.2,1.3.6.1.2.1.4.35.1.3, and all other OIDs that start with1.3.6.1.2.1.4.35.1.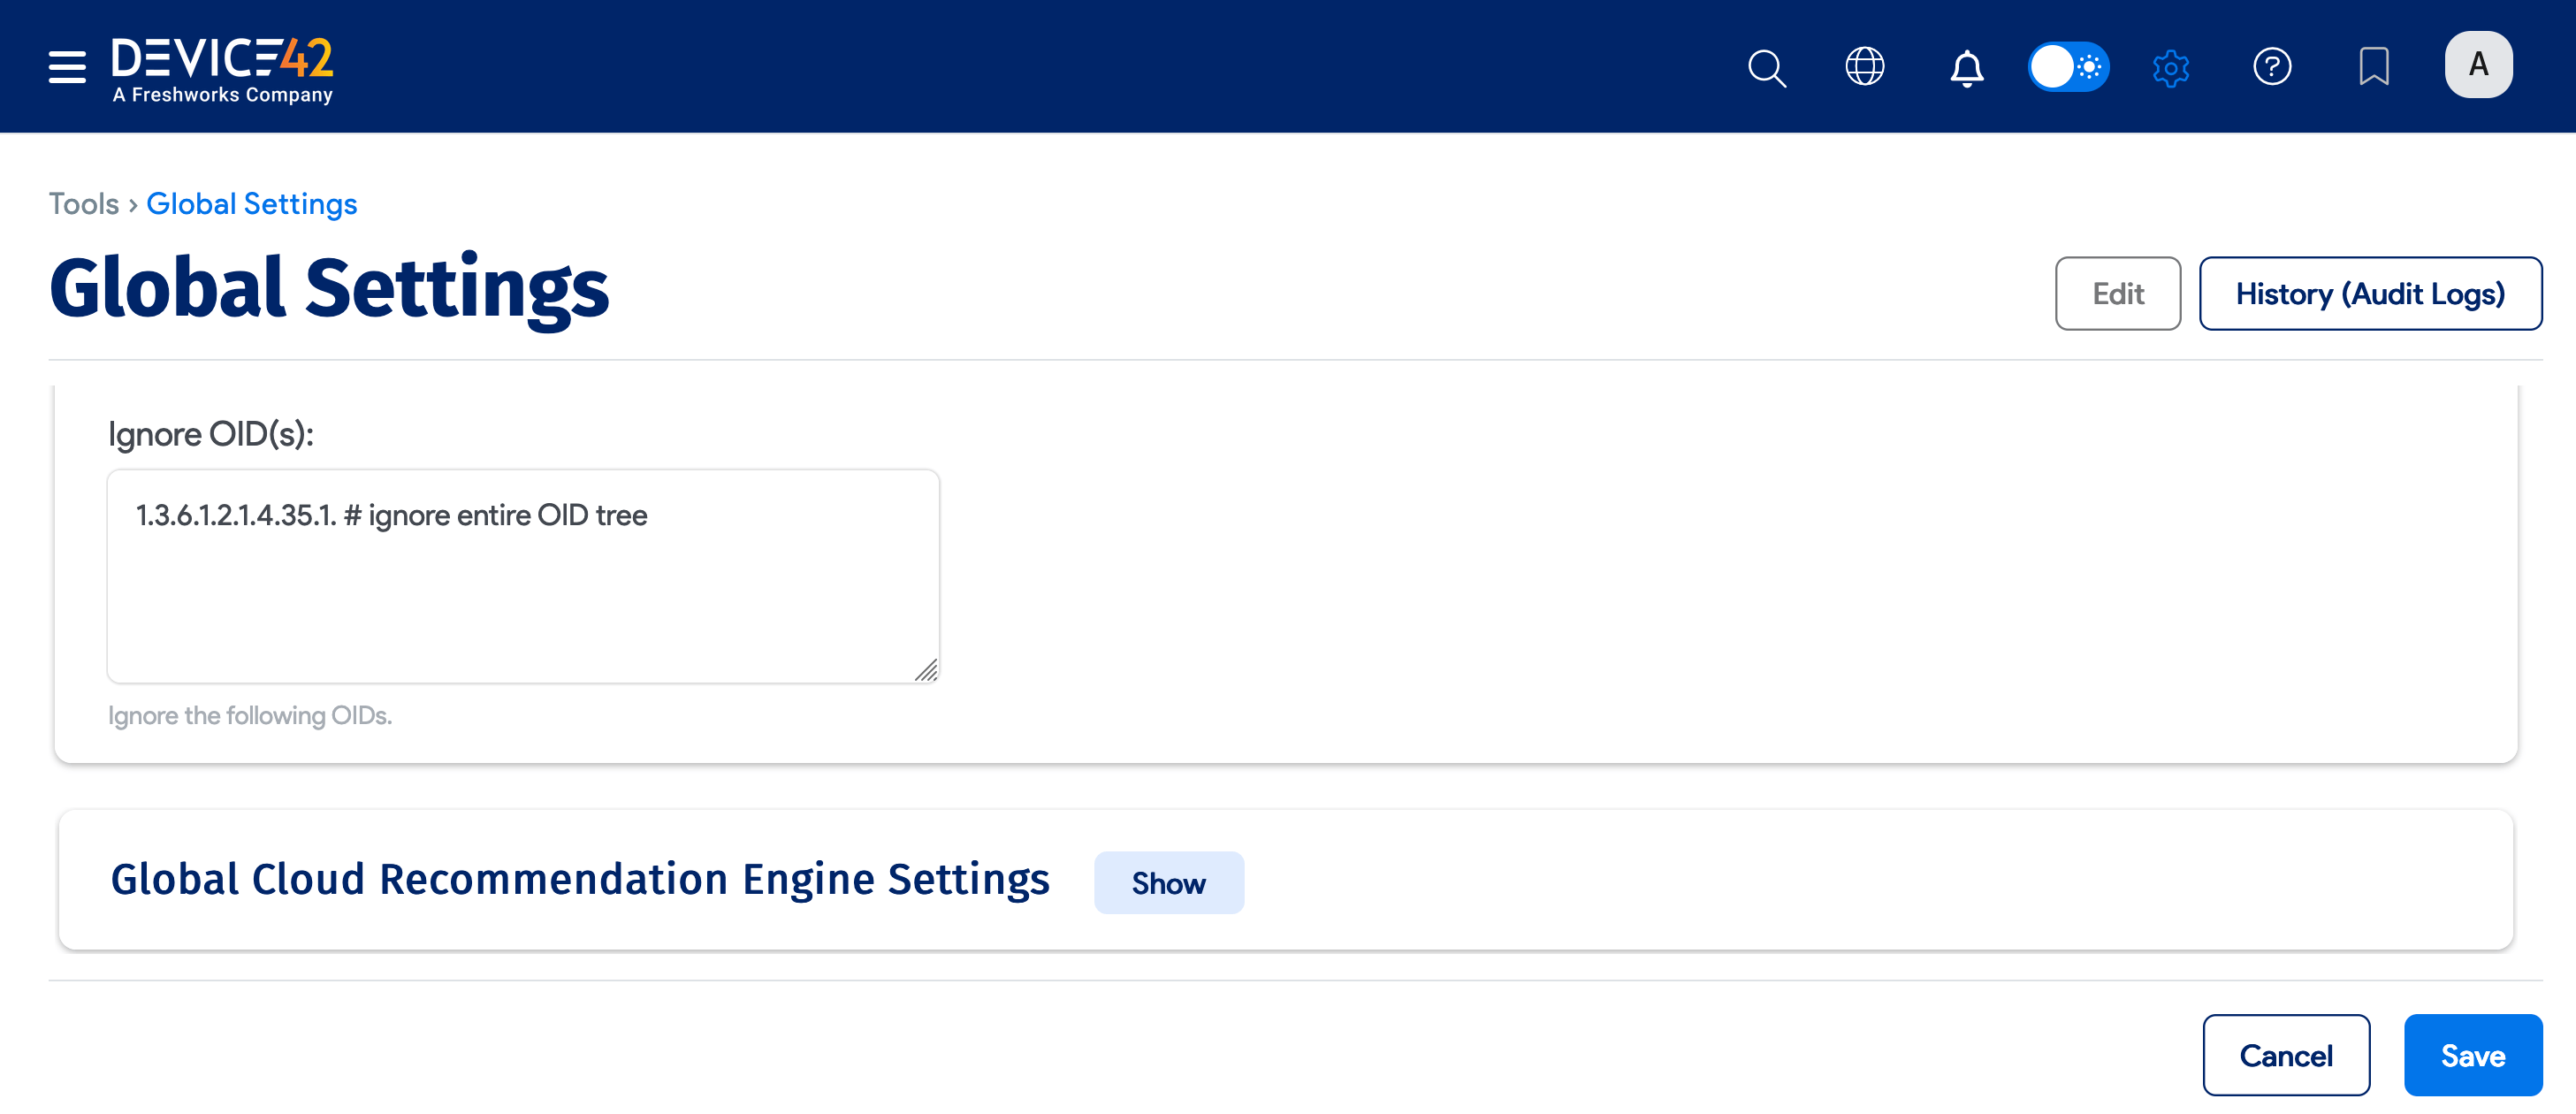
When OIDs are set to be ignored globally, existing discovery jobs do not automatically inherit these ignored OIDs. To apply the ignored OIDs to existing discovery jobs, create a new discovery job.
Run Now or Schedule
After saving the network switch for discovery, you need to run the discovery process. Select Run Now on the job's page after saving, or from the list page.
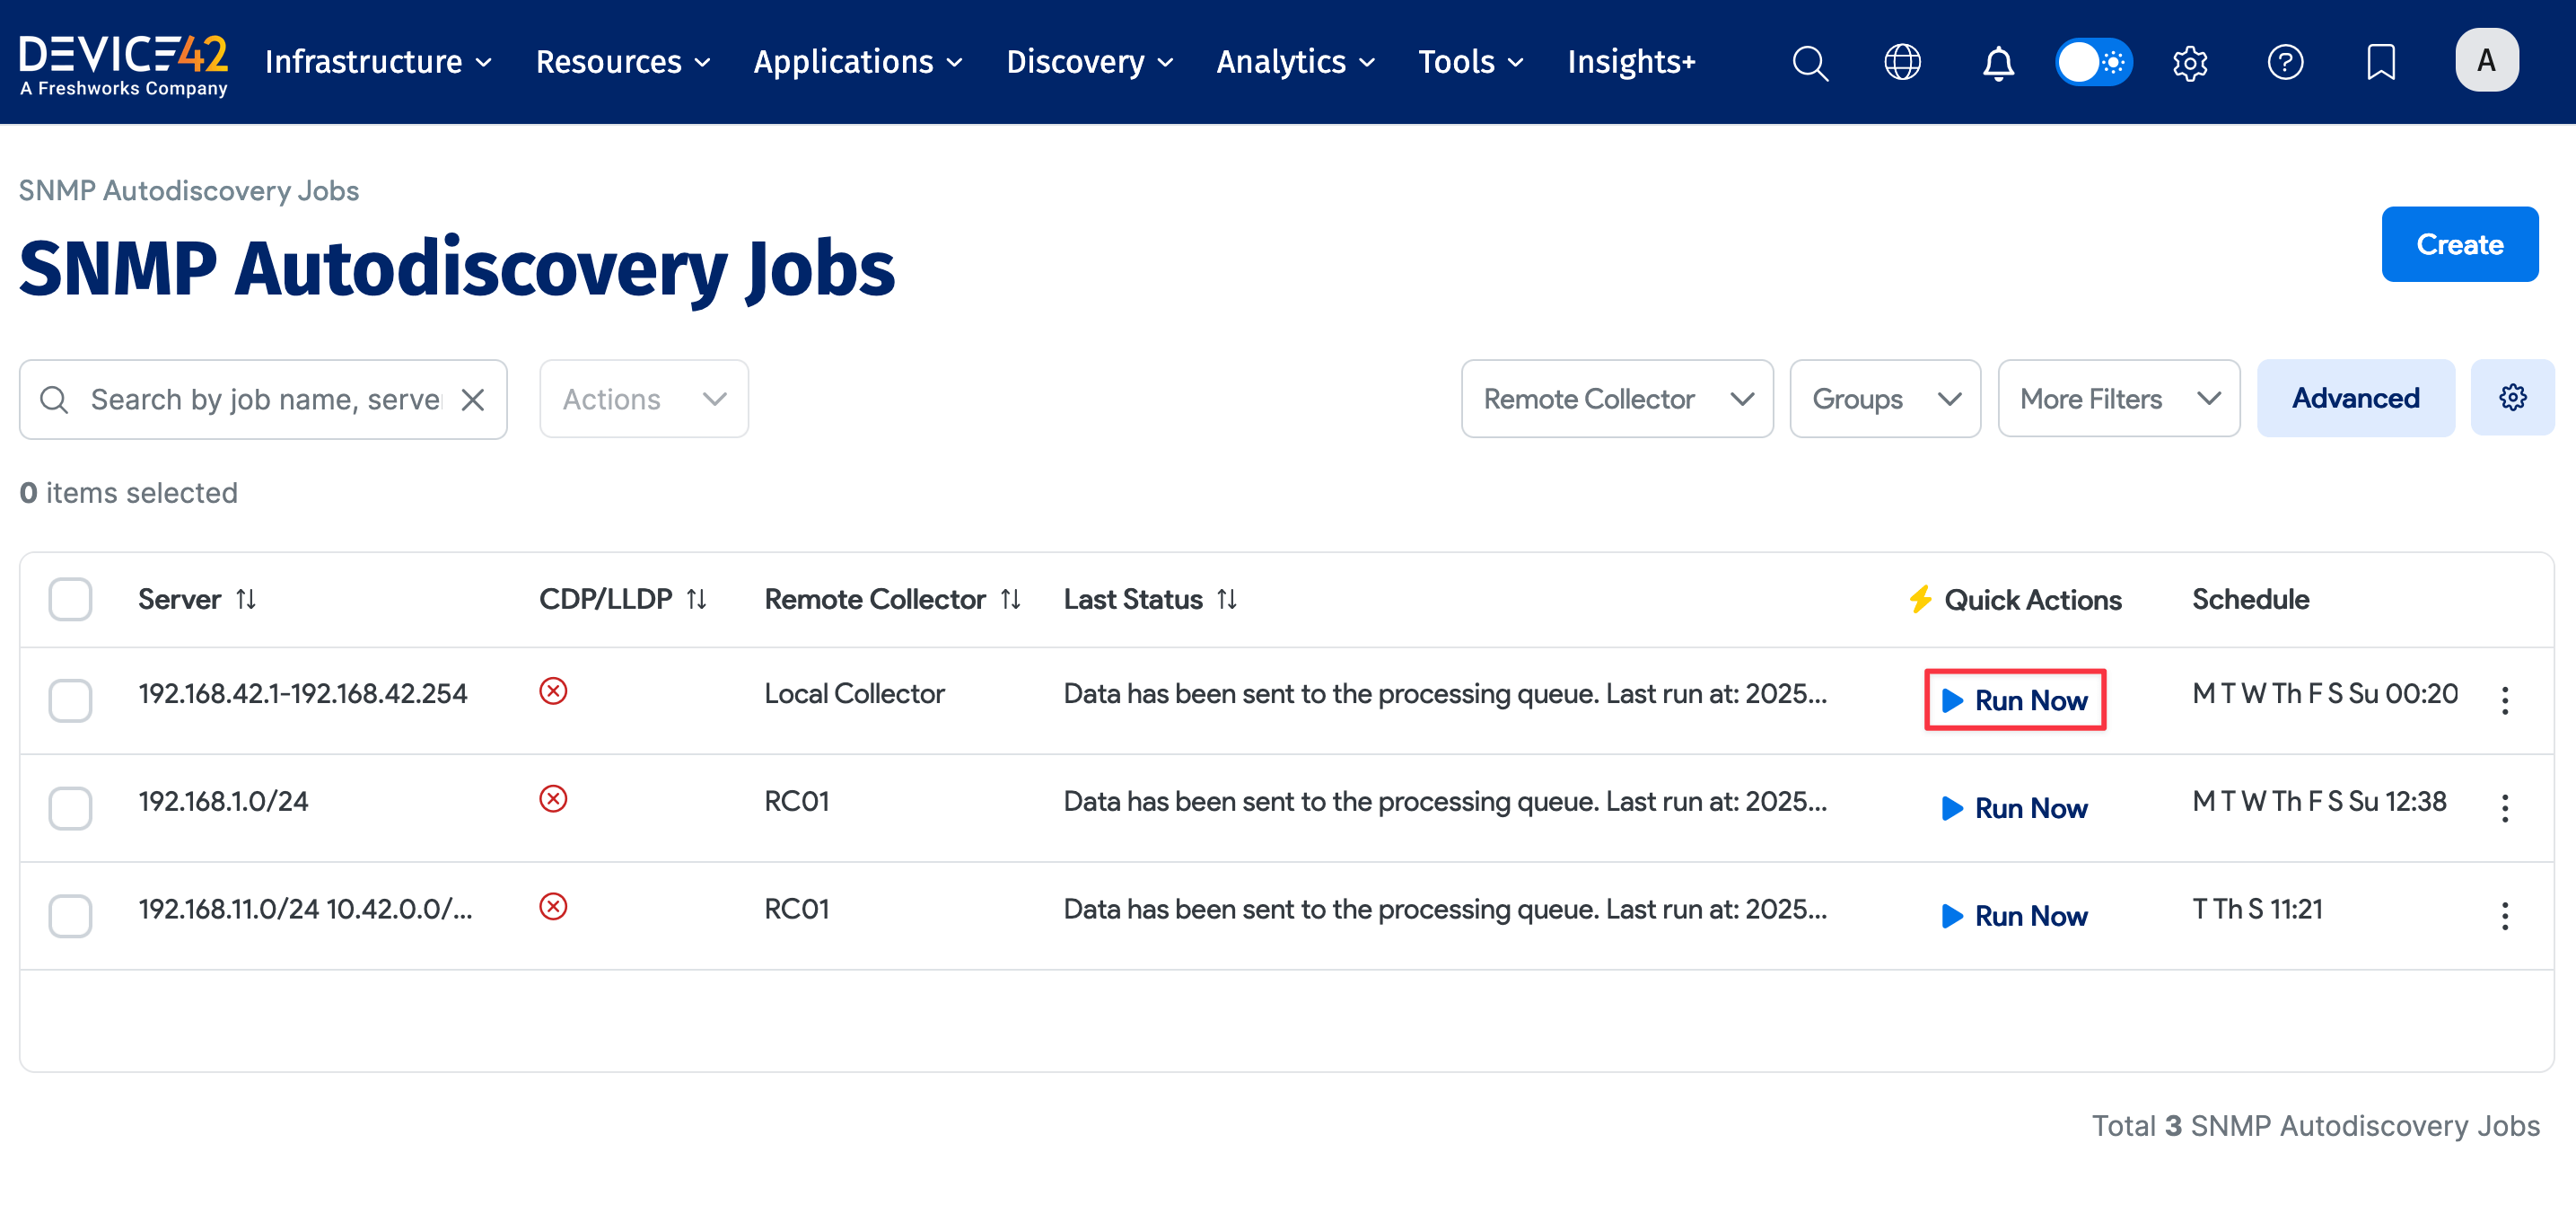
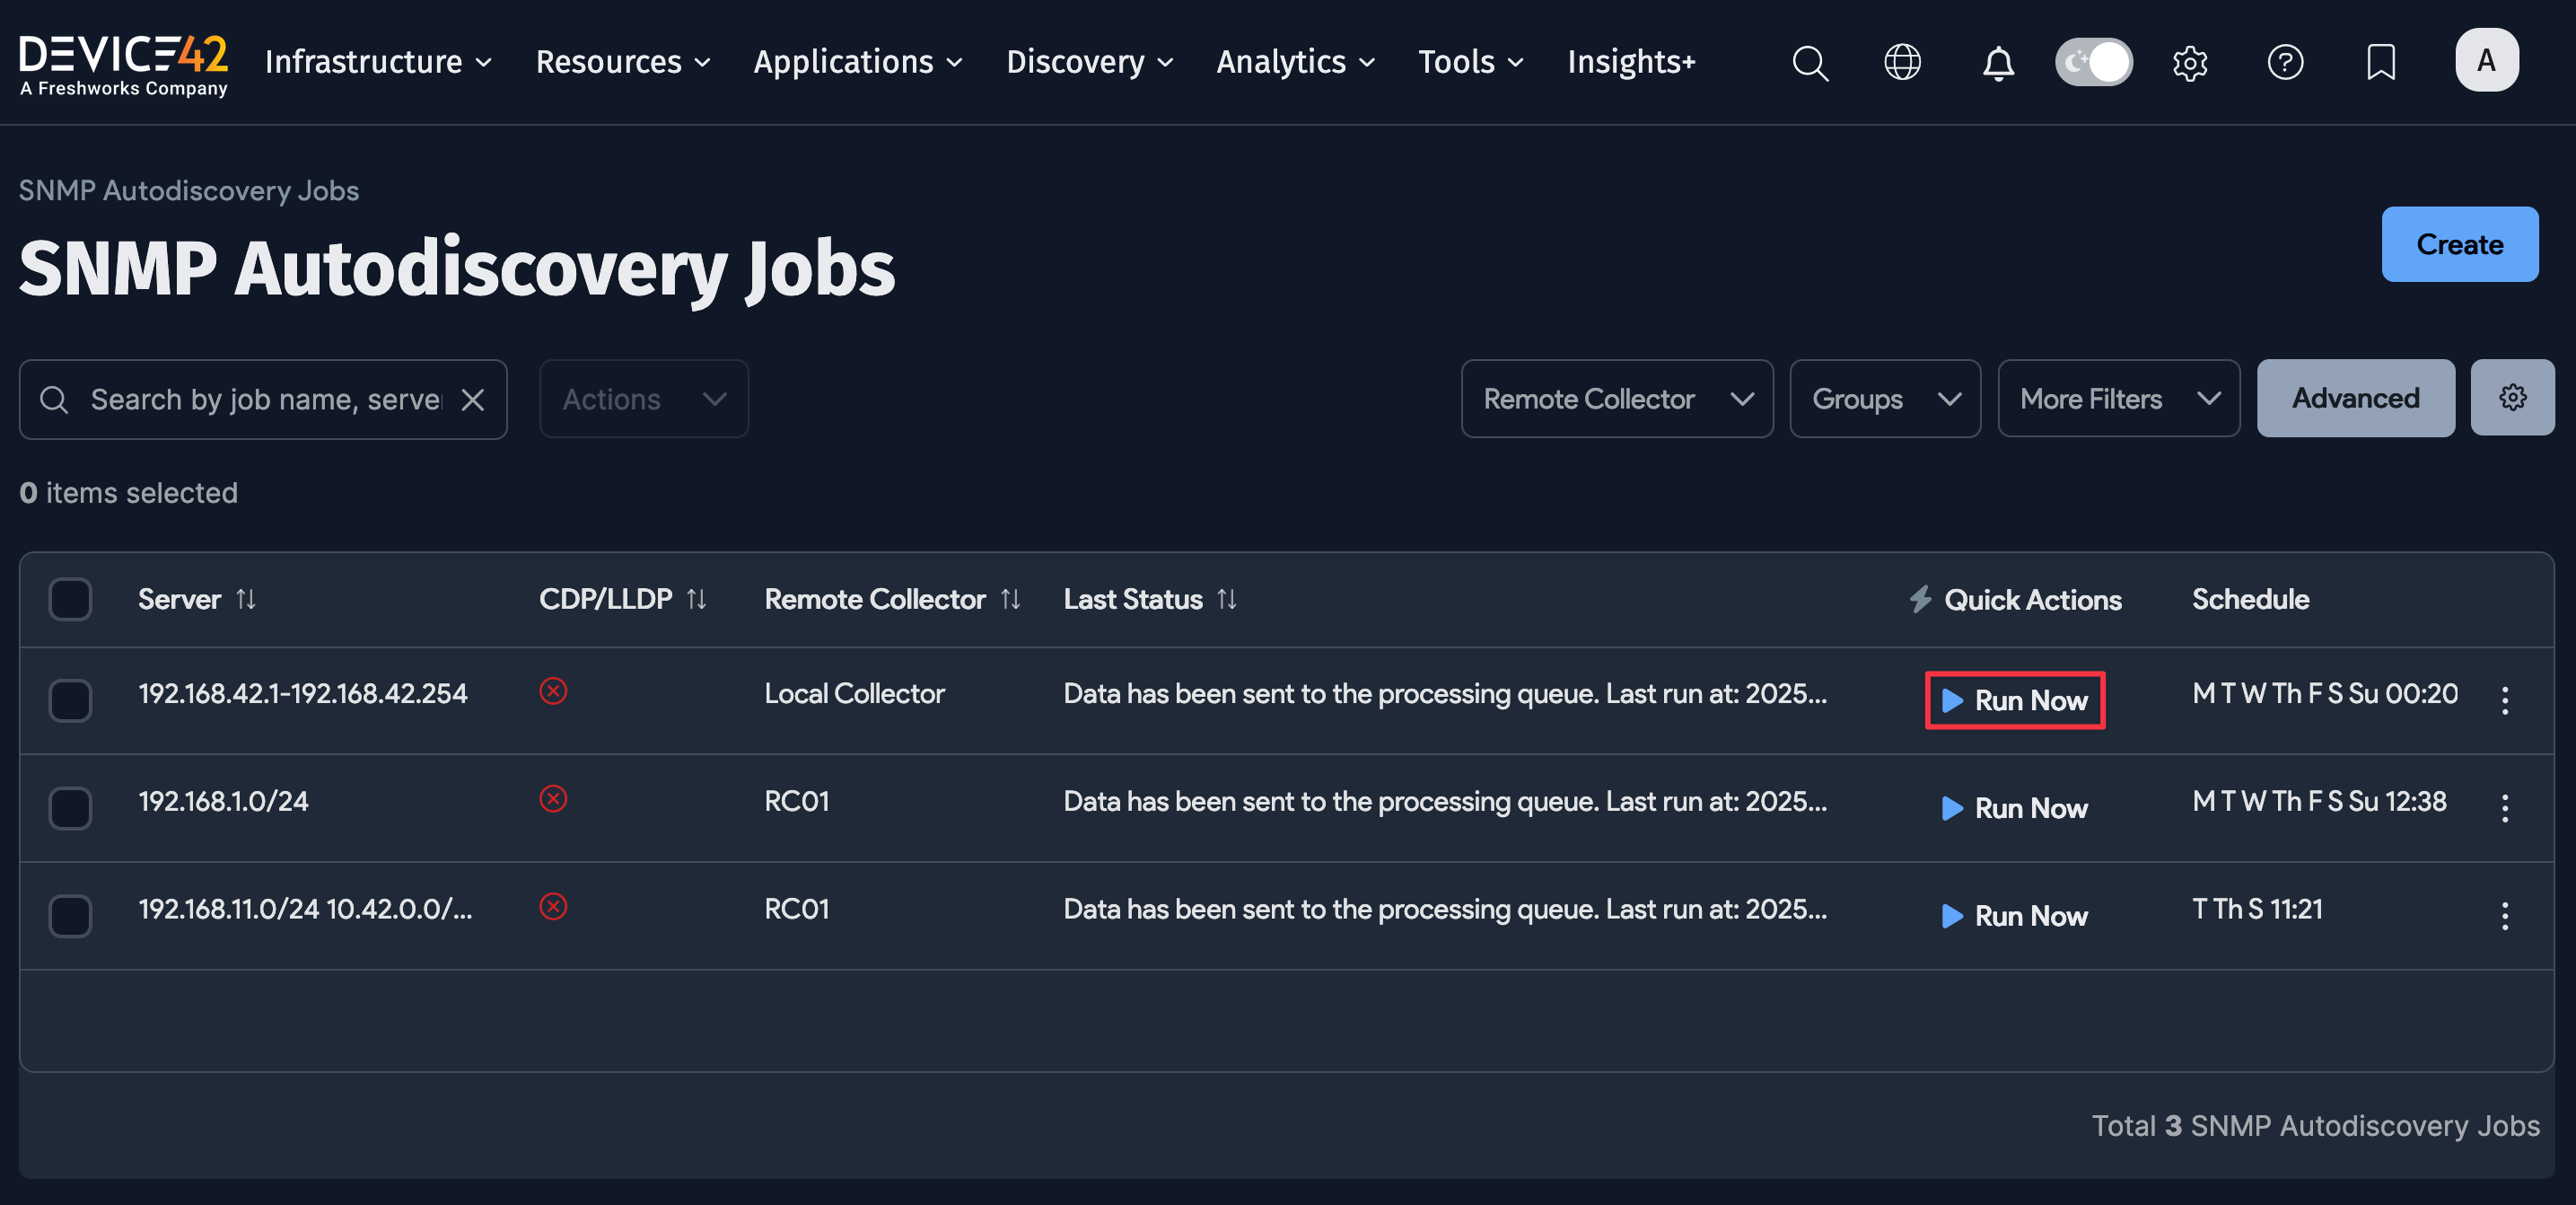
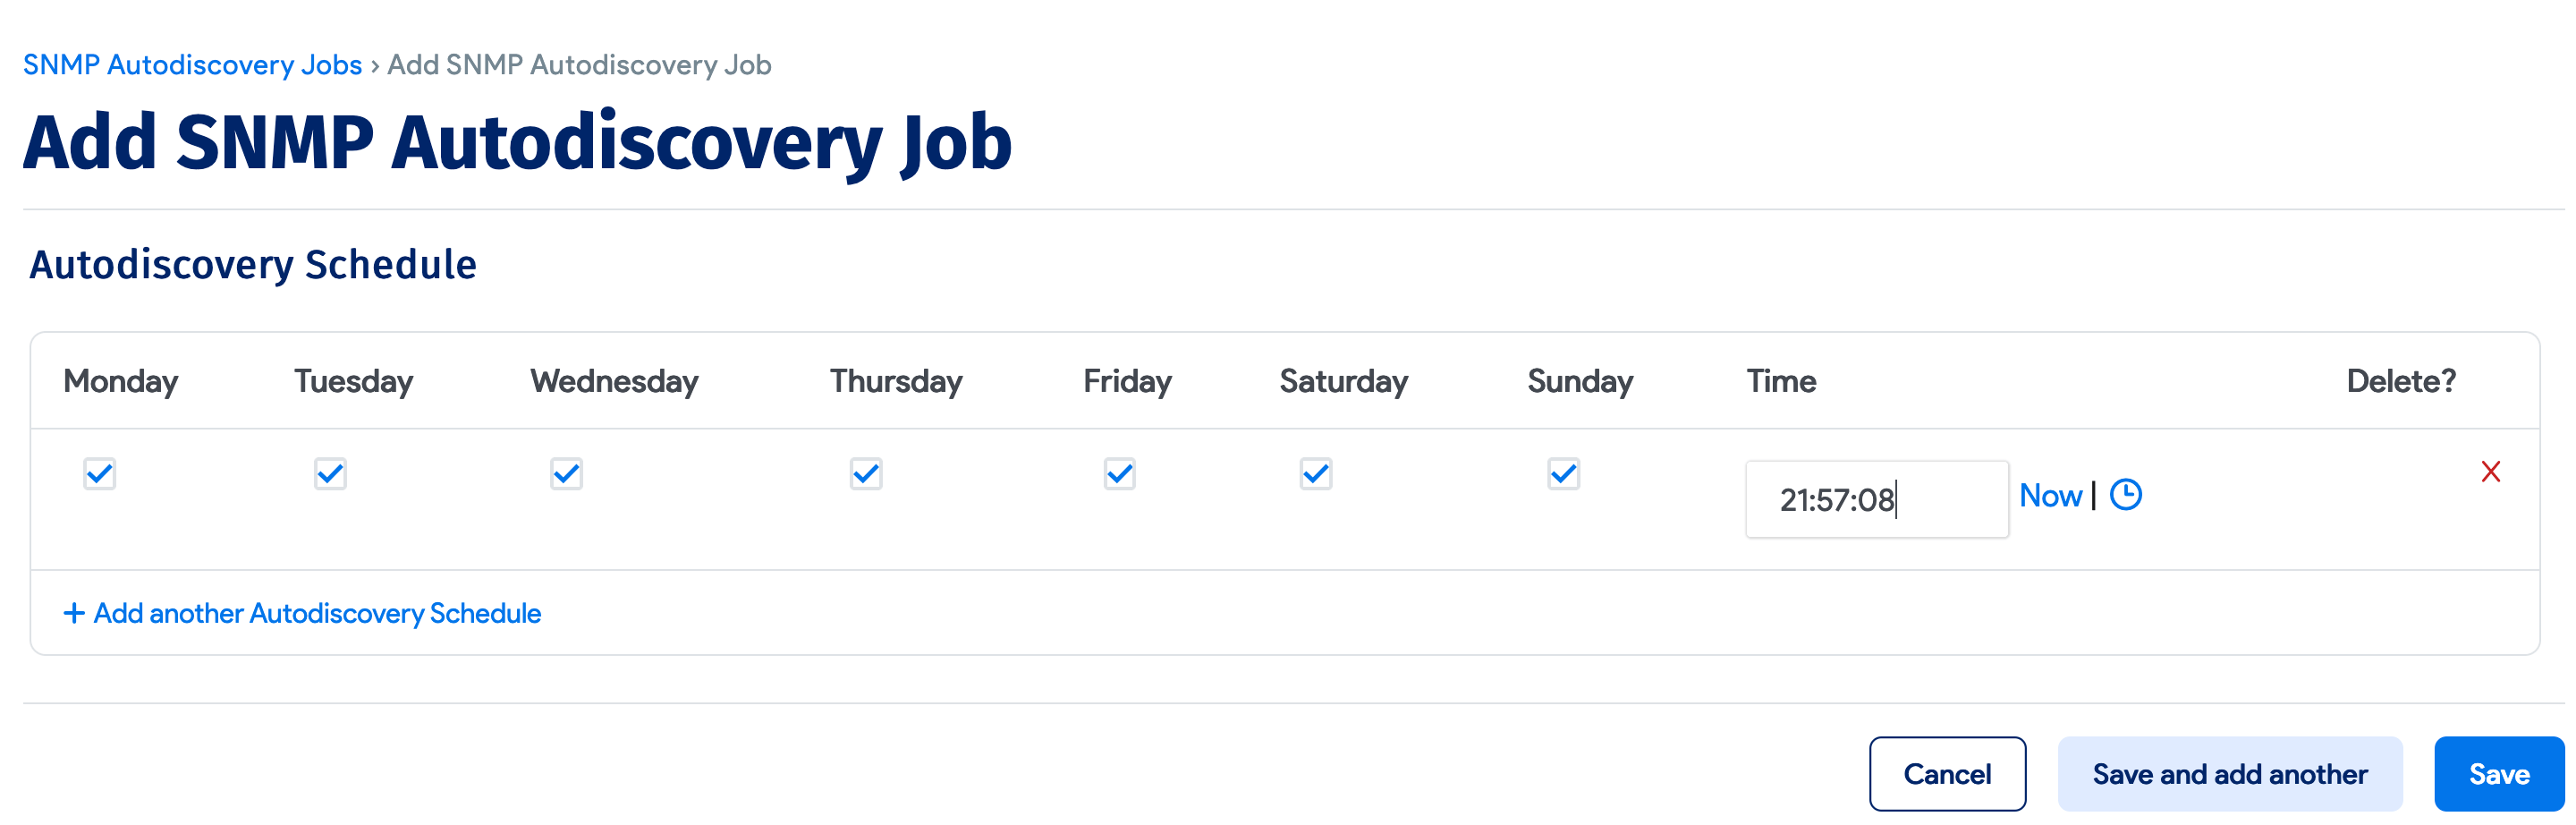
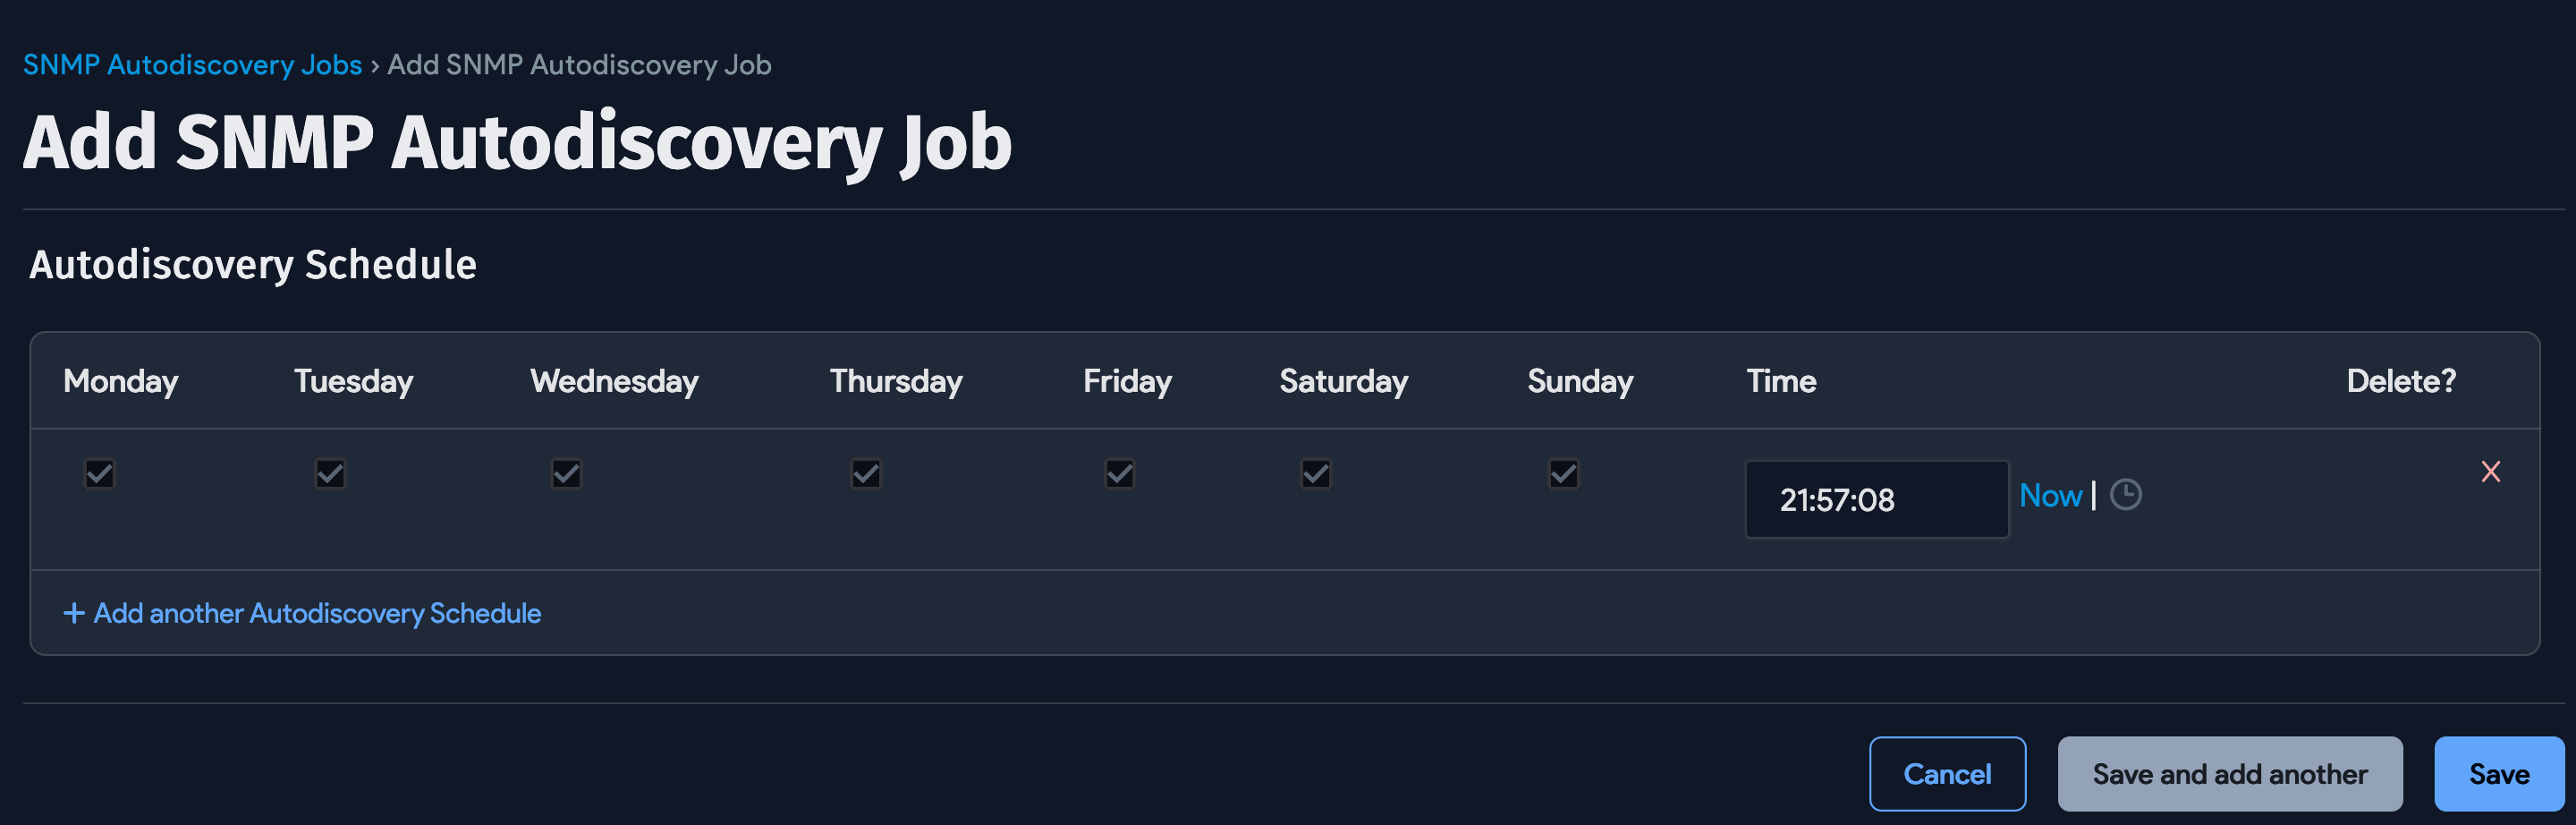
Select Add another Autodiscovery Schedule when editing the job to create a run schedule for the job.
Newly created jobs do not run on the first day they are created to prevent an unintentionally large number of jobs from running initially. To run a job after its initial creation, select the Run Now button next to the job.
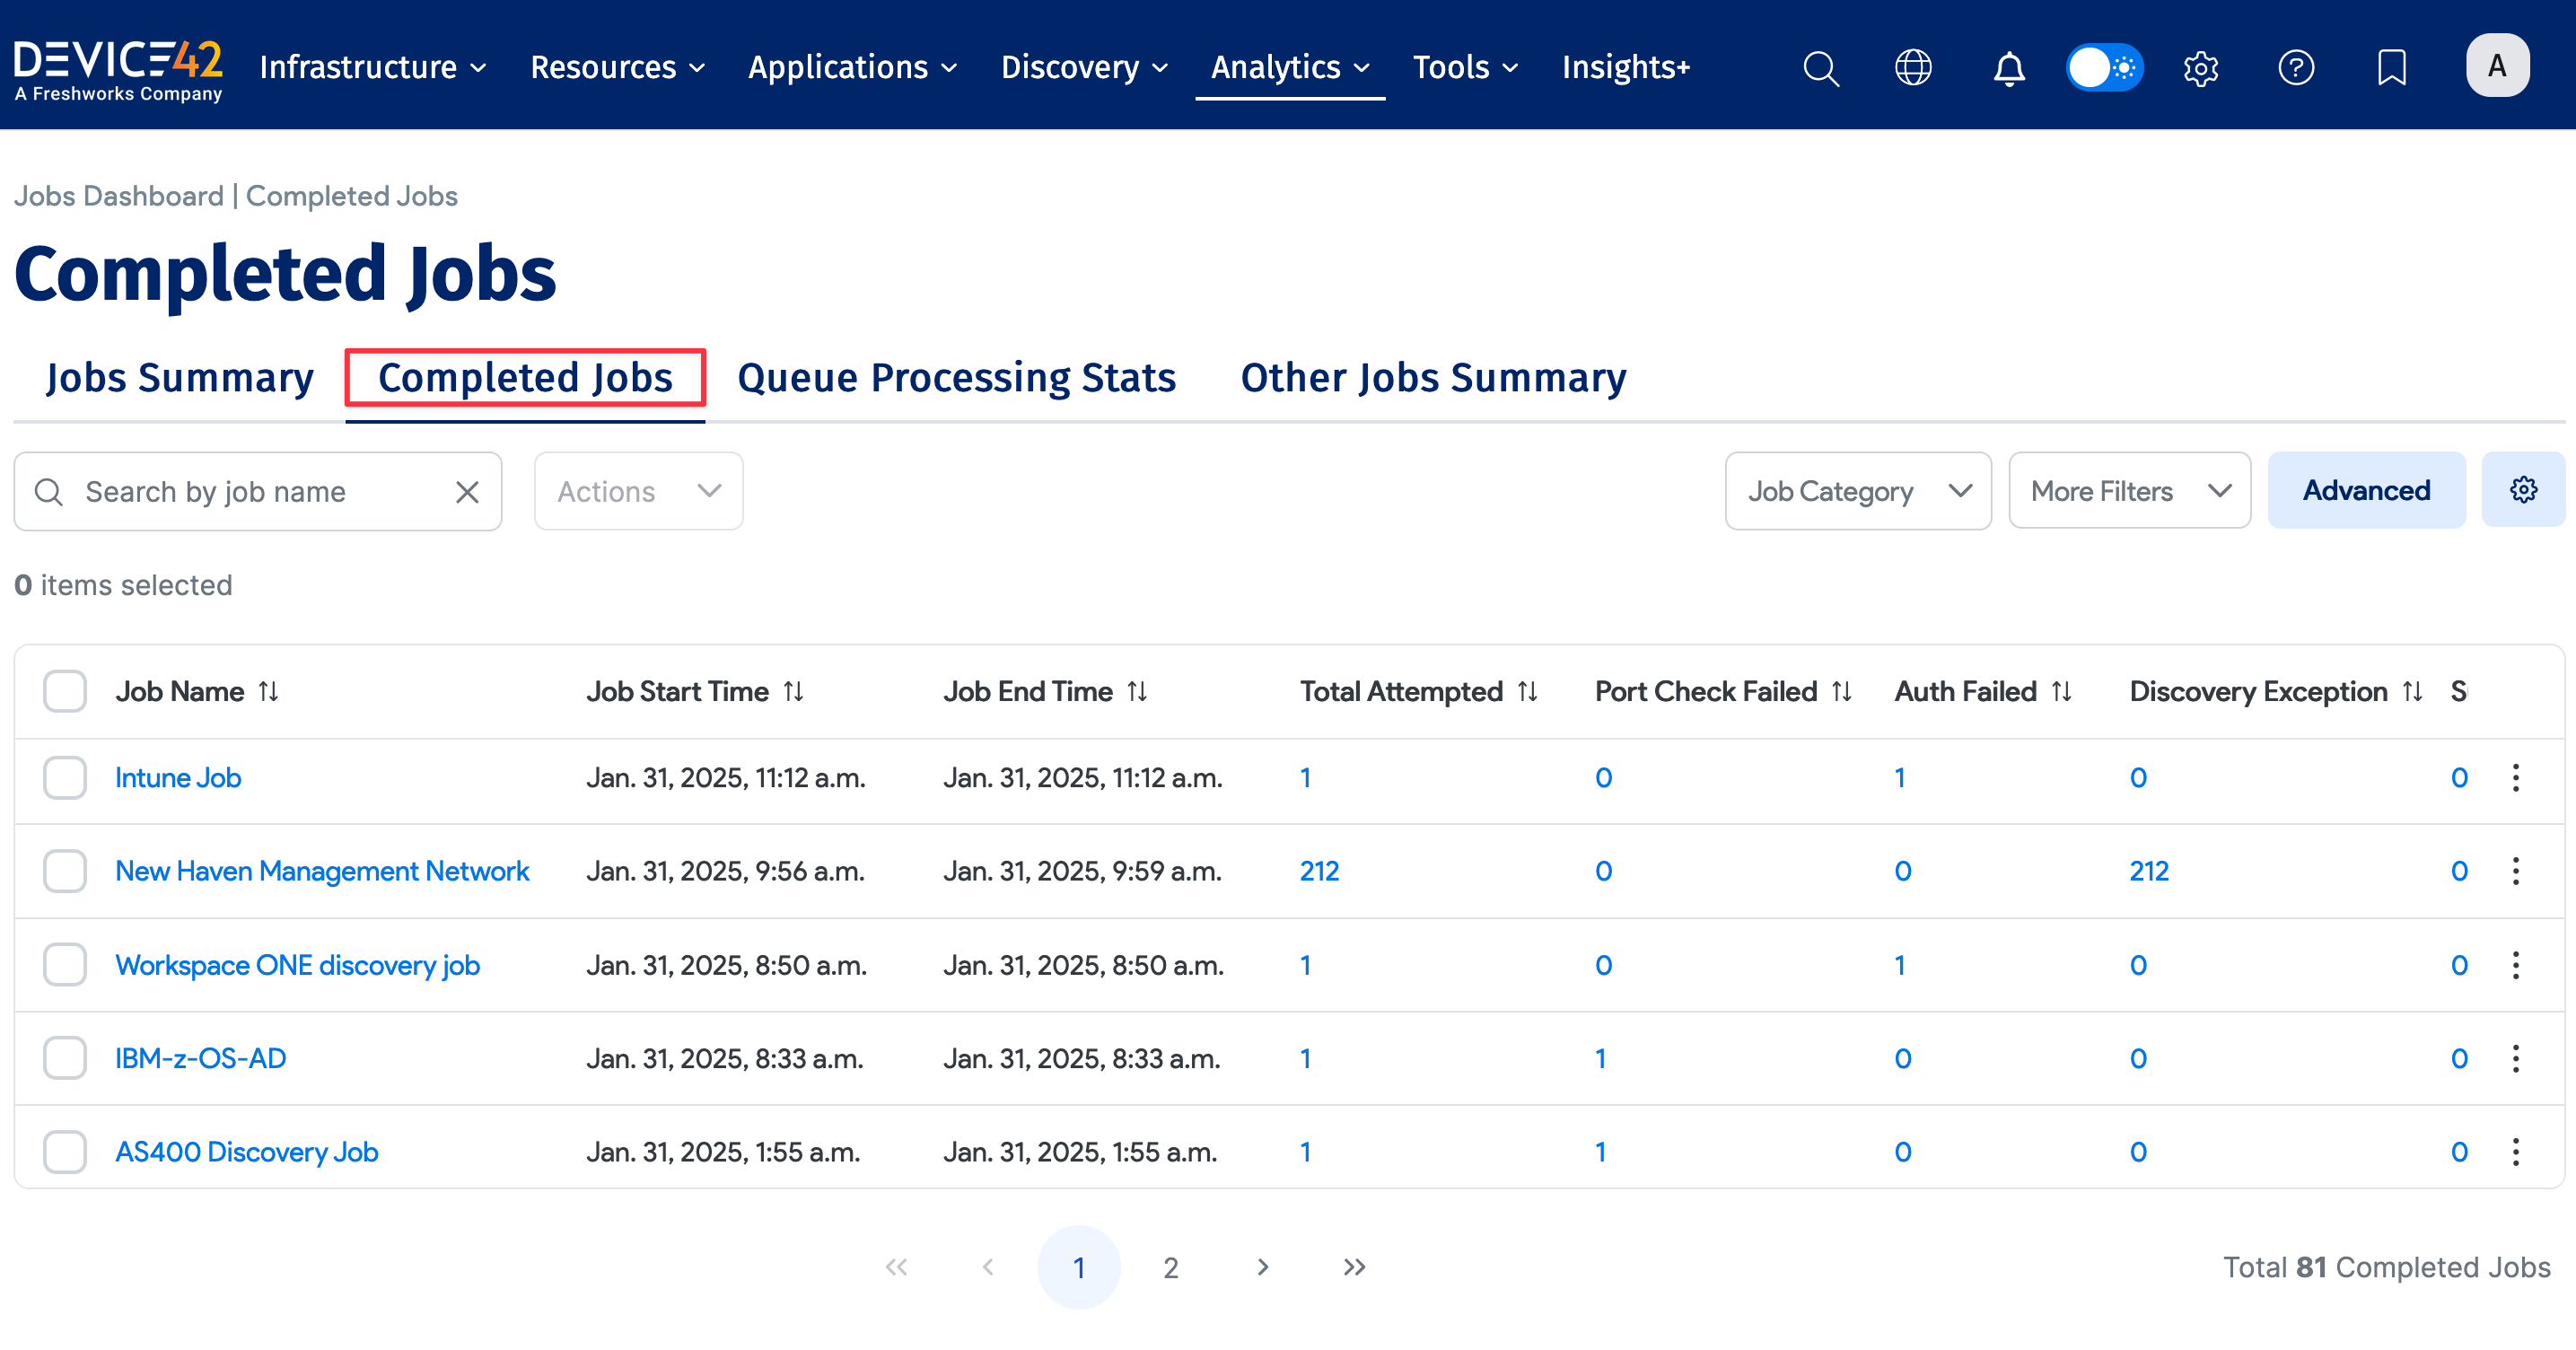
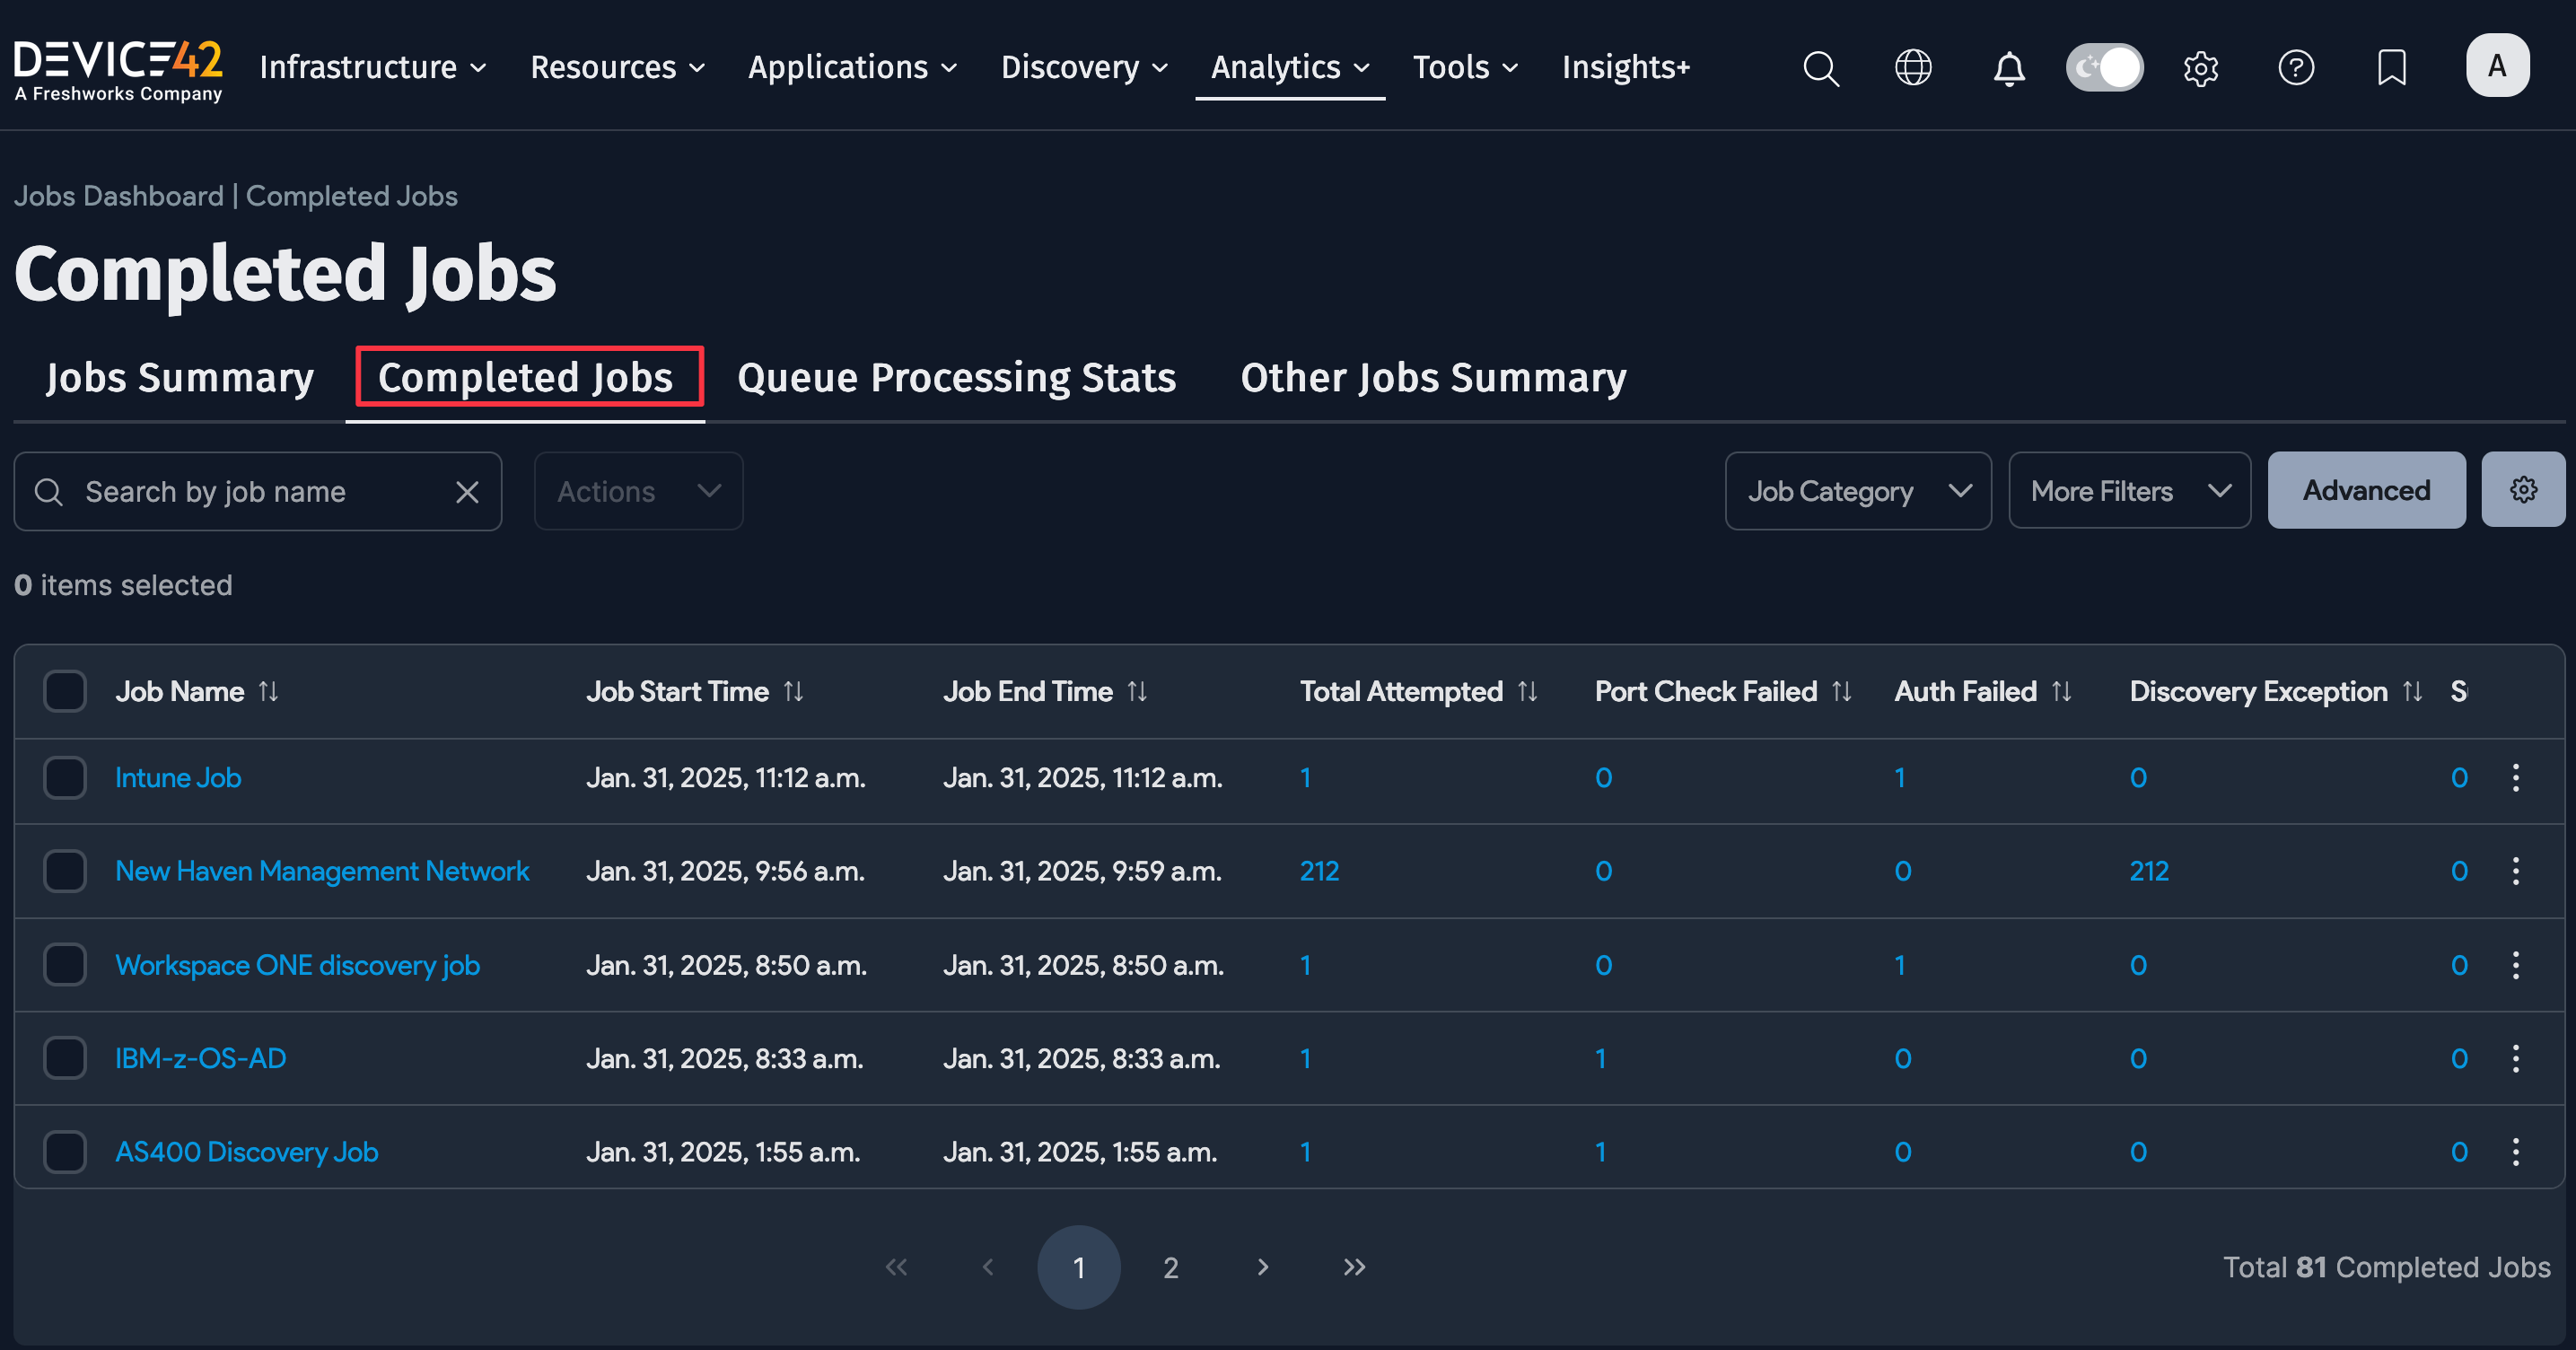
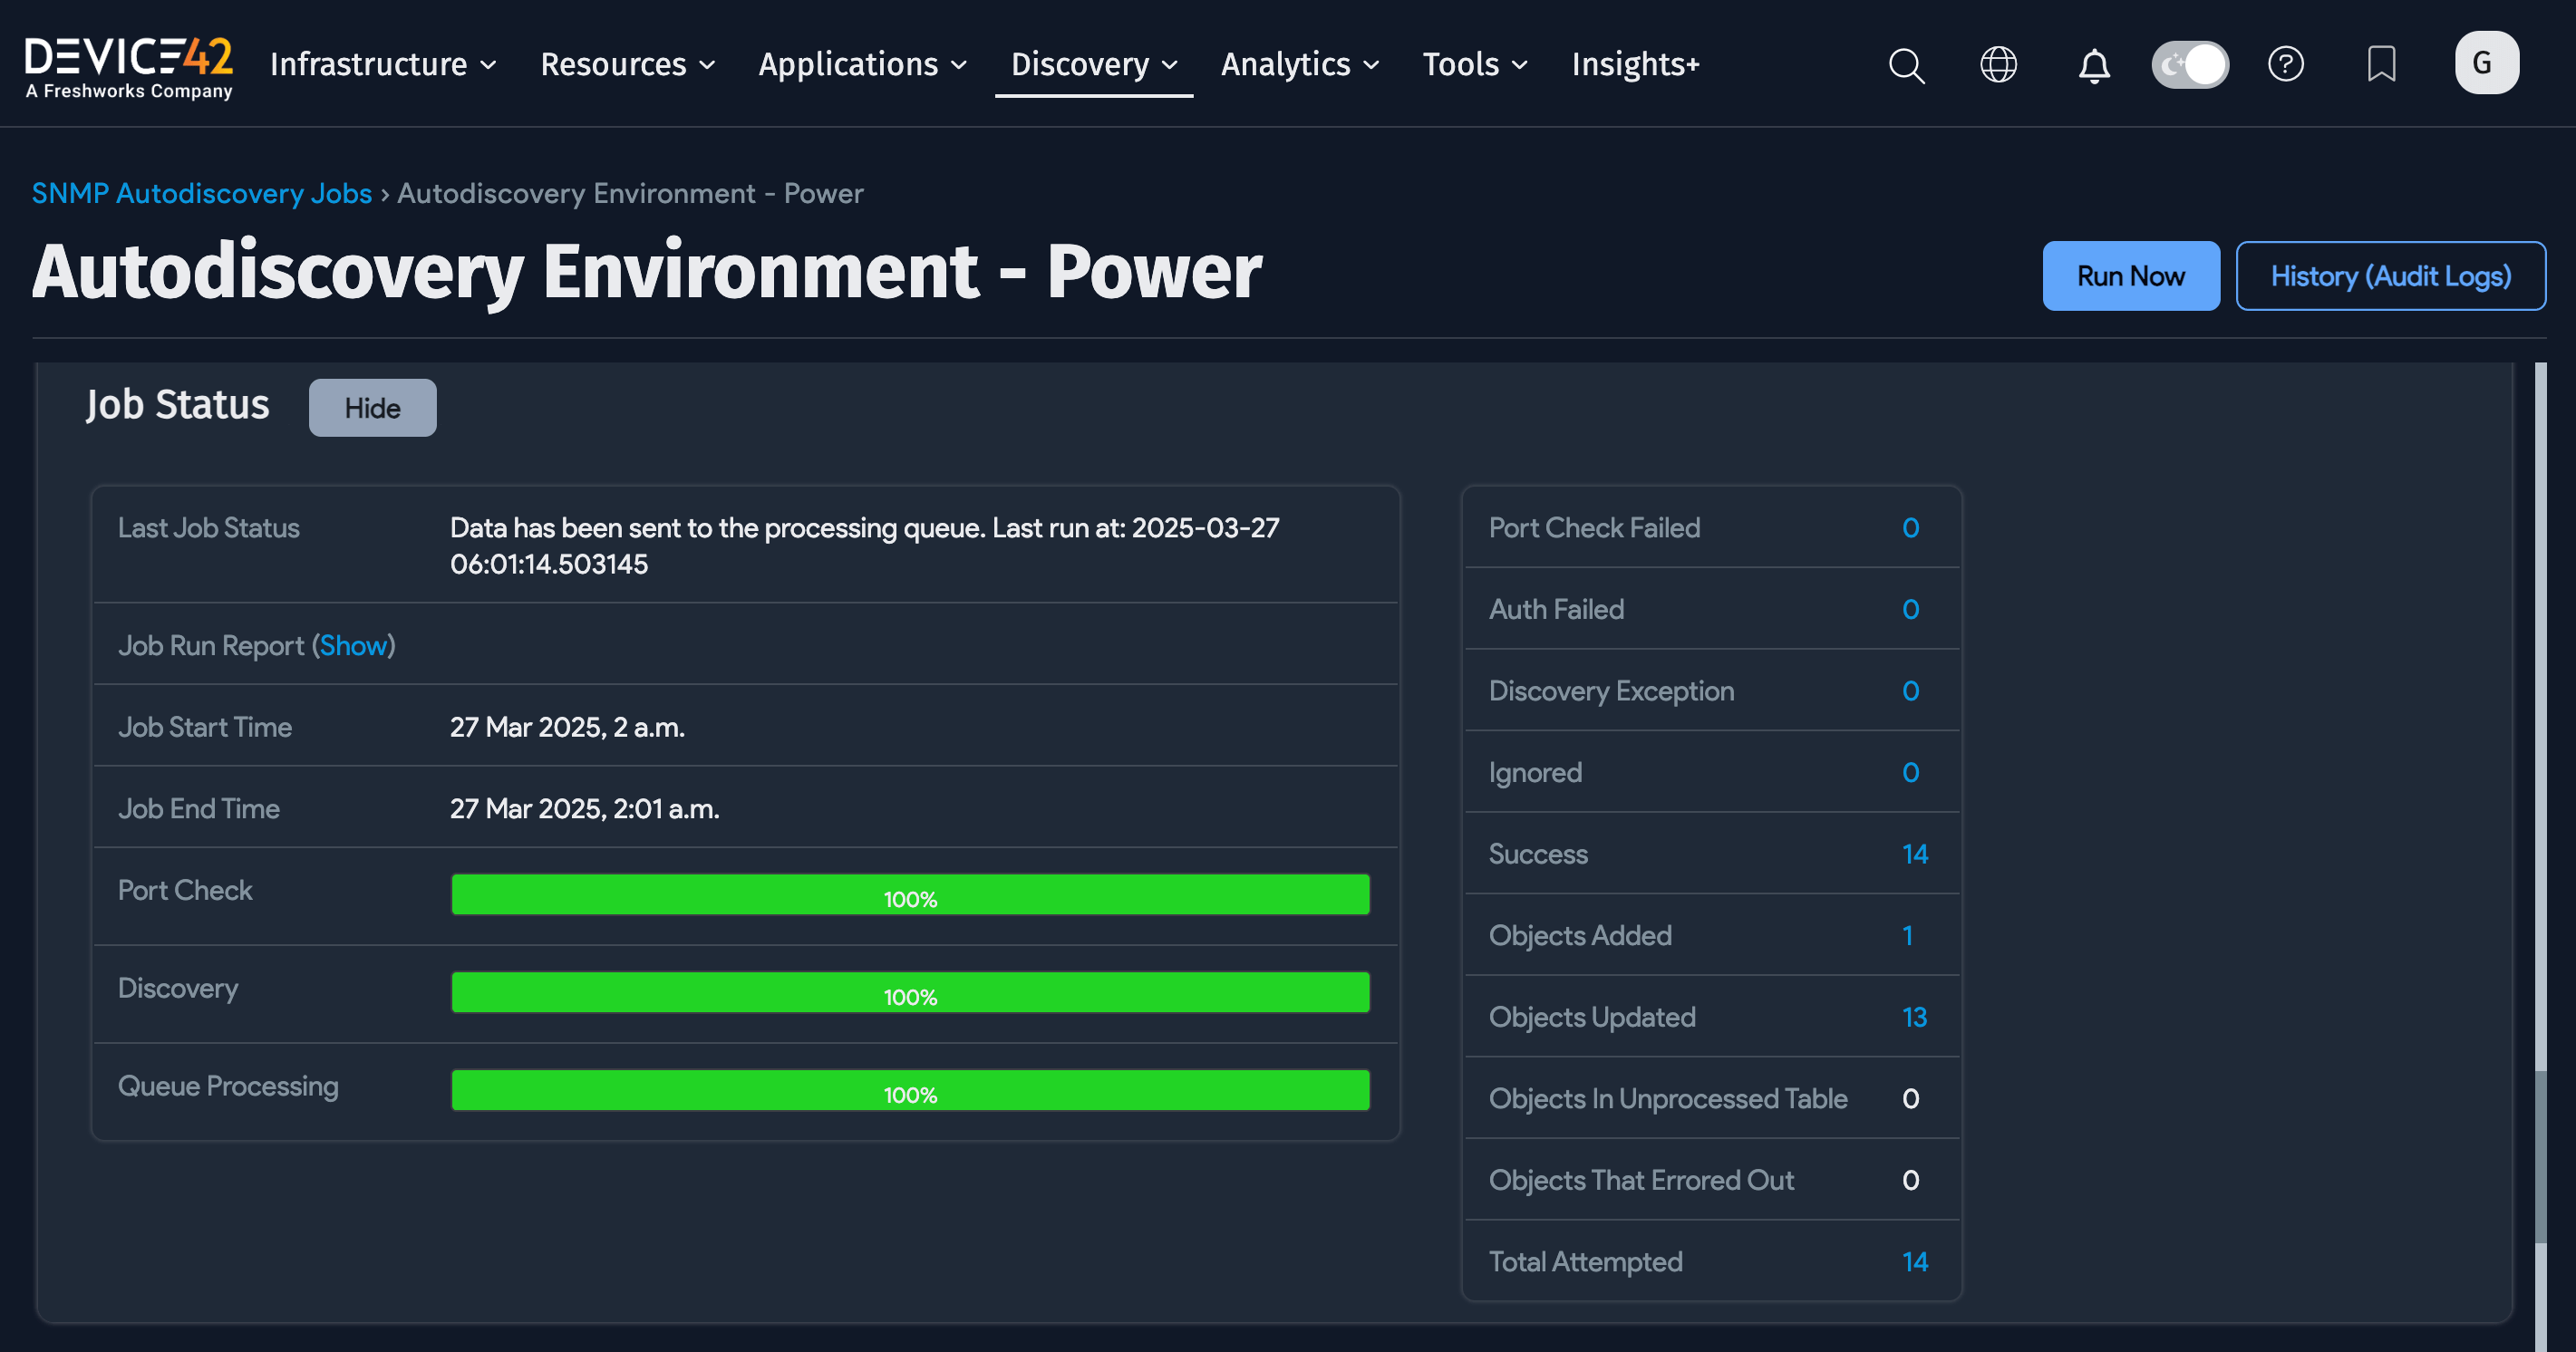
View Job Status
You can view the status and results of a discovery job during or after the job has run by visiting the job edit screen.
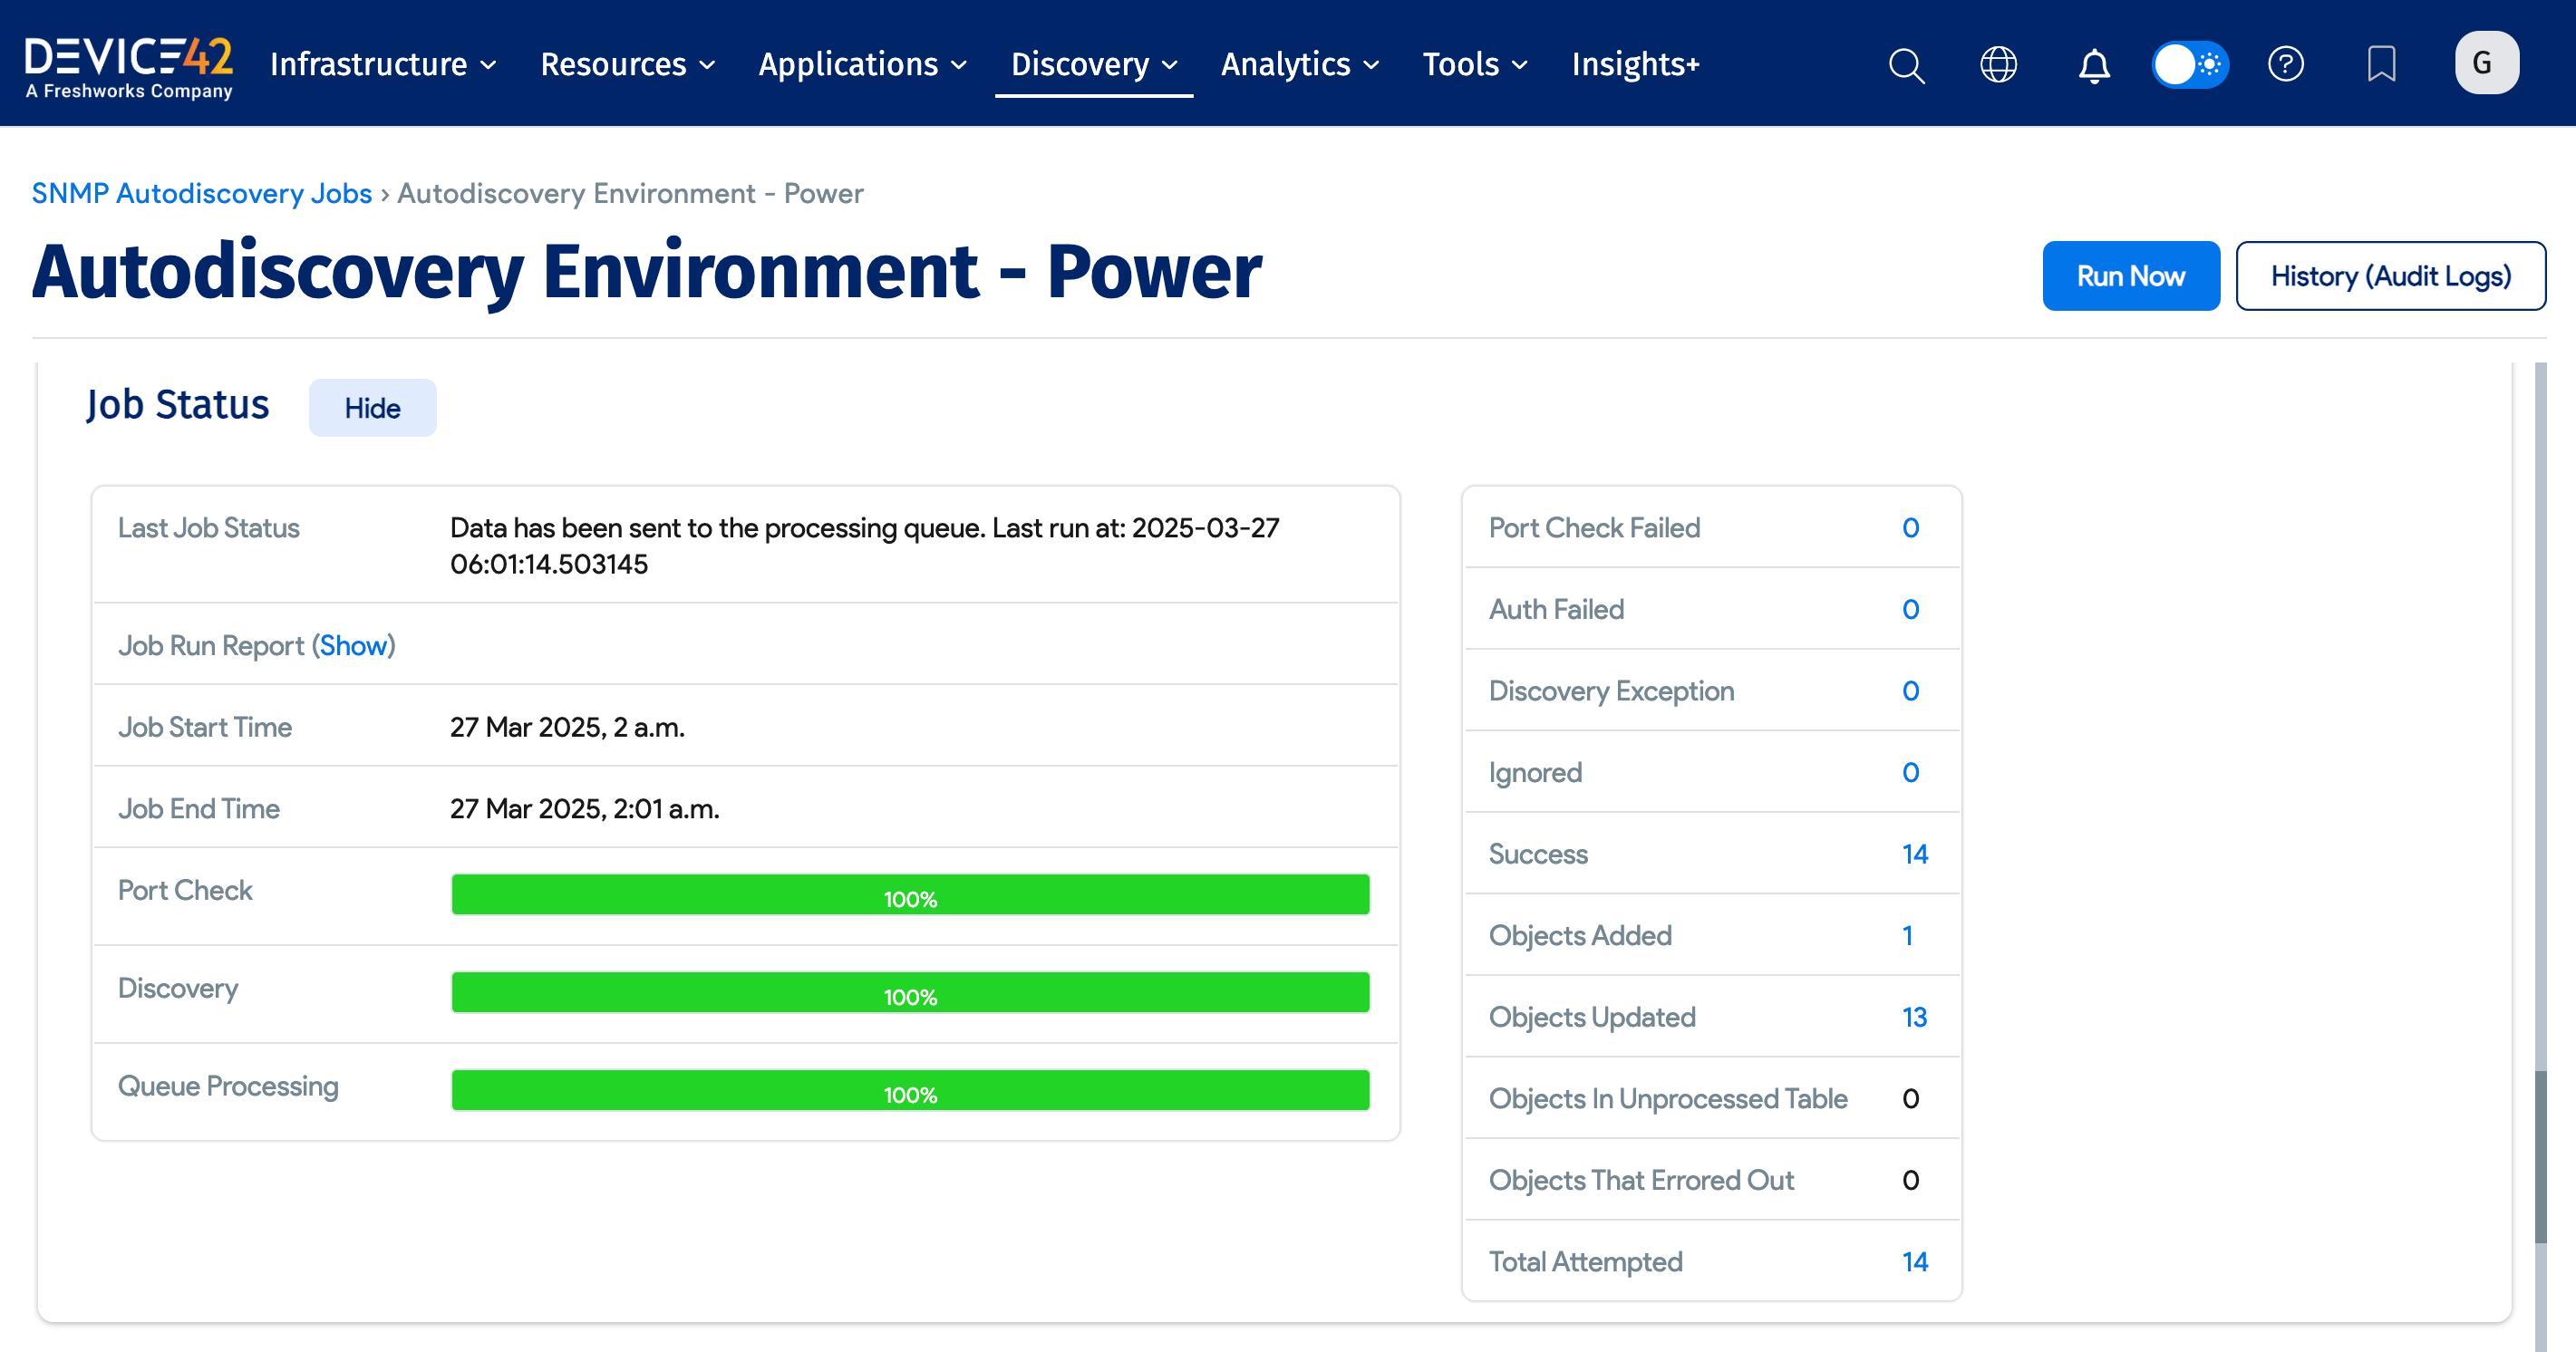
You can also see a real-time report of all running jobs and their statuses under Analytics > Jobs Dashboard, and of all completed jobs under Completed Jobs.