Subnet Tree View
A subnet tree view is available under Resources > Networks > Subnet Tree.
Subnet Tree View
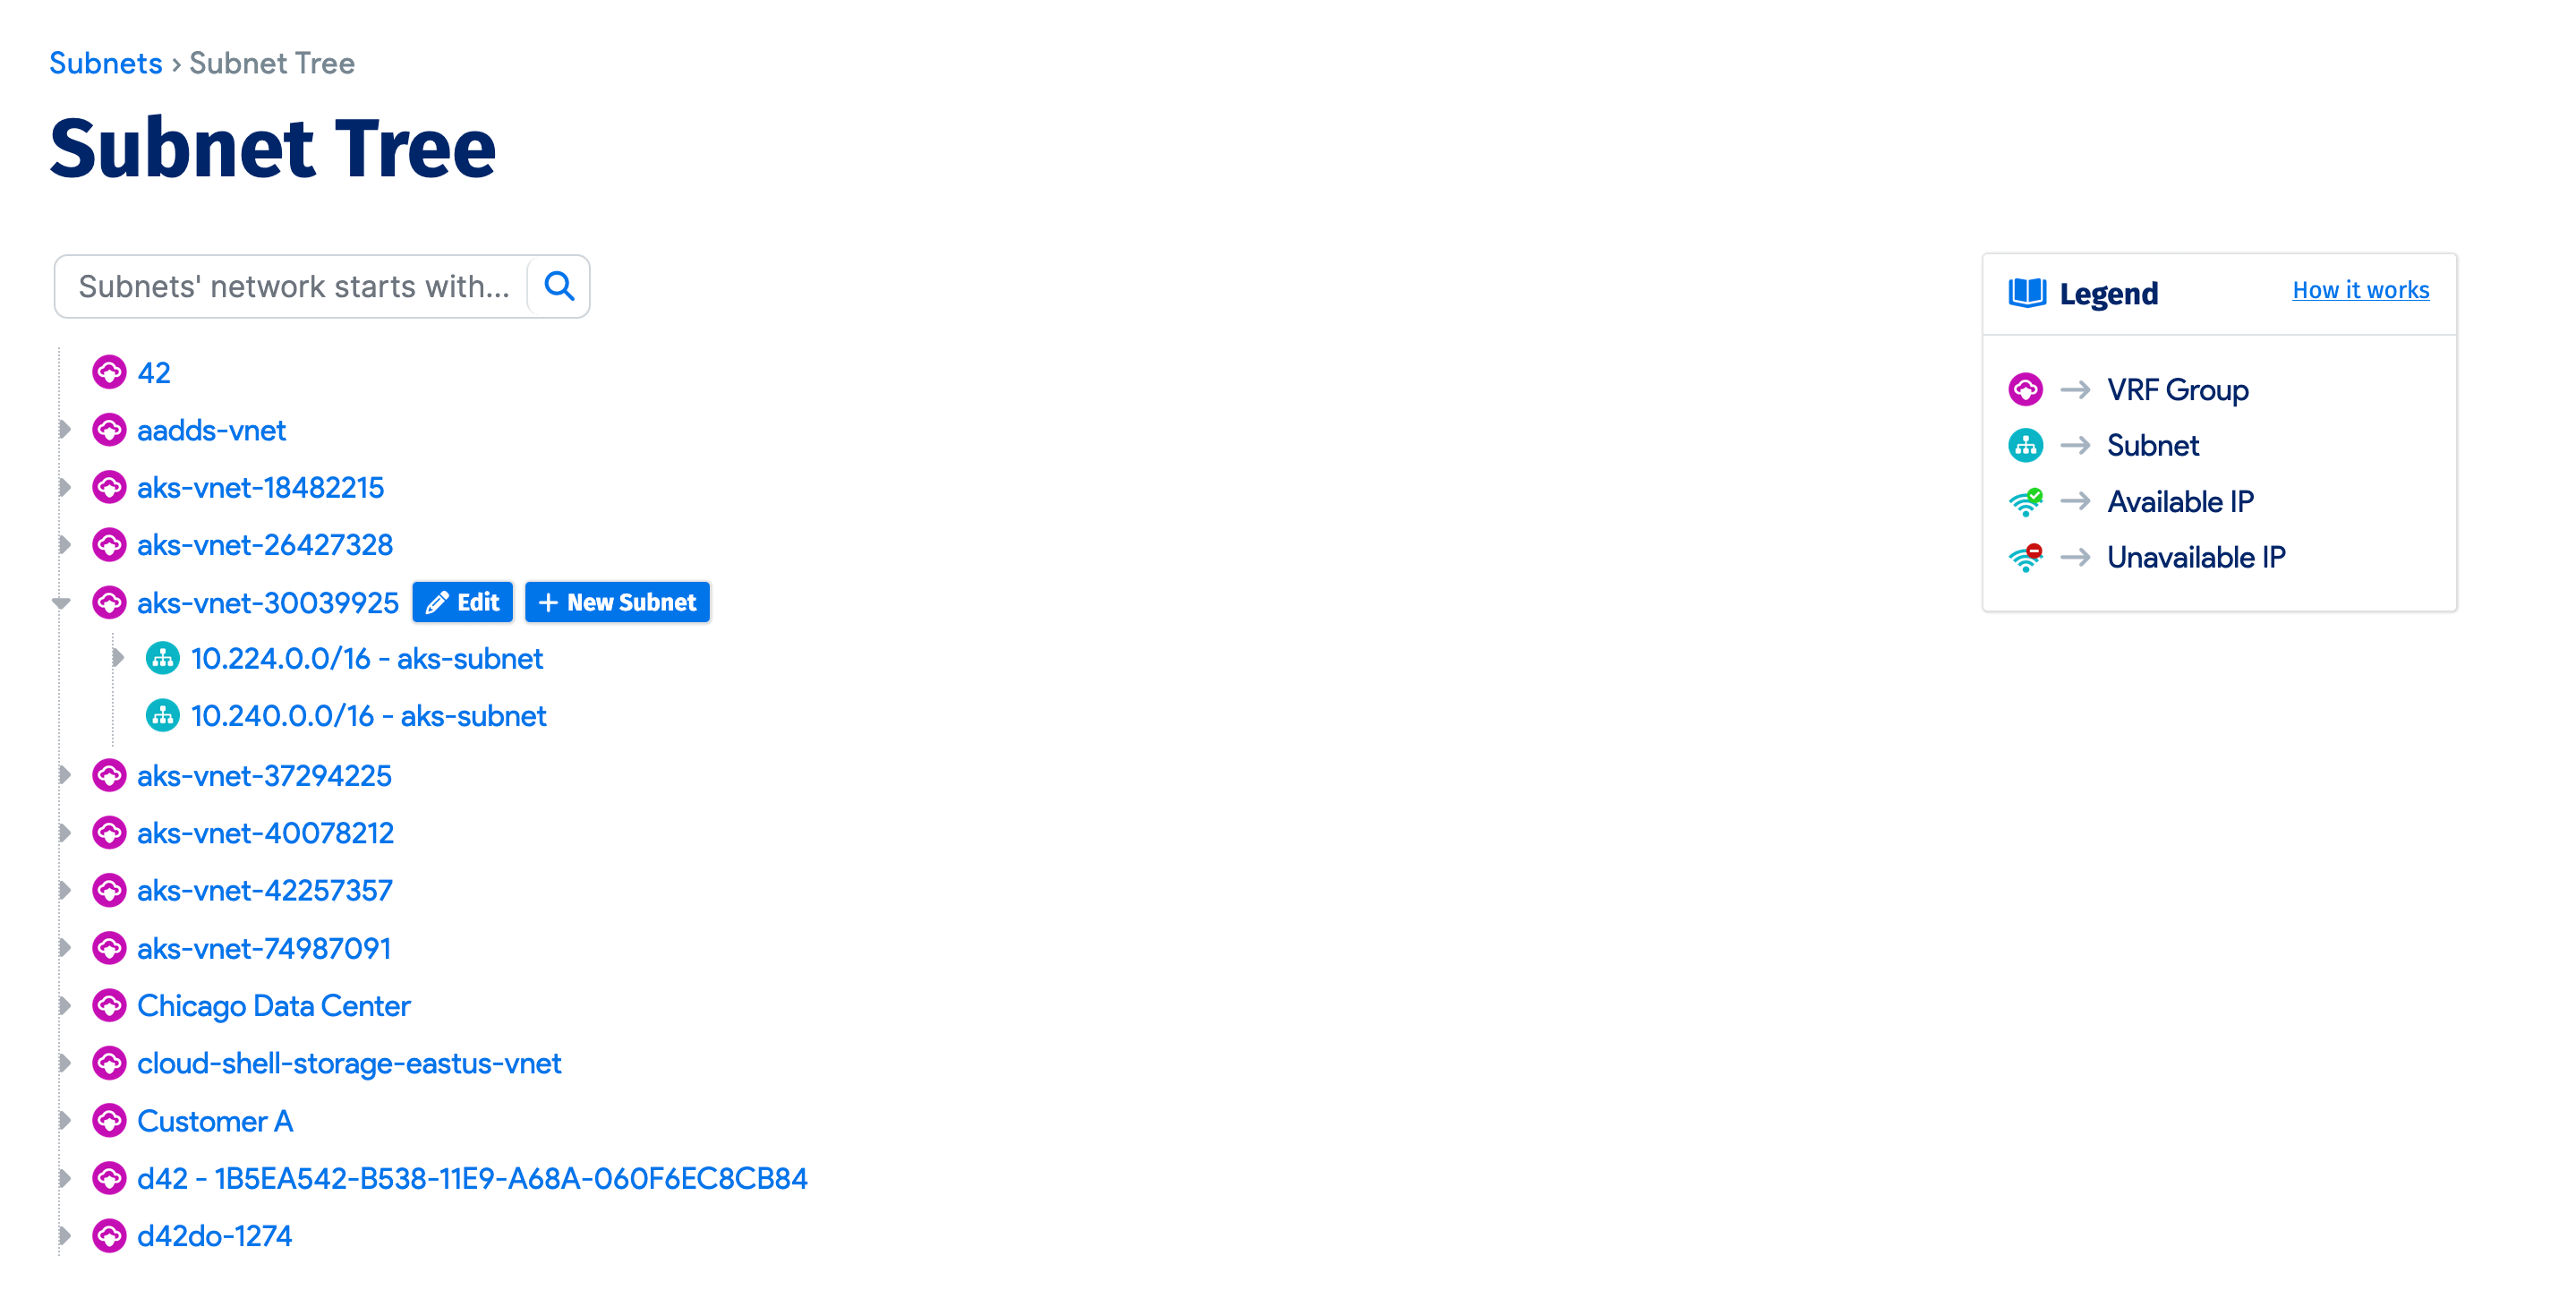

Subnets in the tree view are grouped into VRF groups. Because VRF groups have building associations, VRF group display also contains the building name.
New subnets can be added to a VRF group by hovering over a VRF group and clicking the + New Subnet button.
Hover for details pop-up
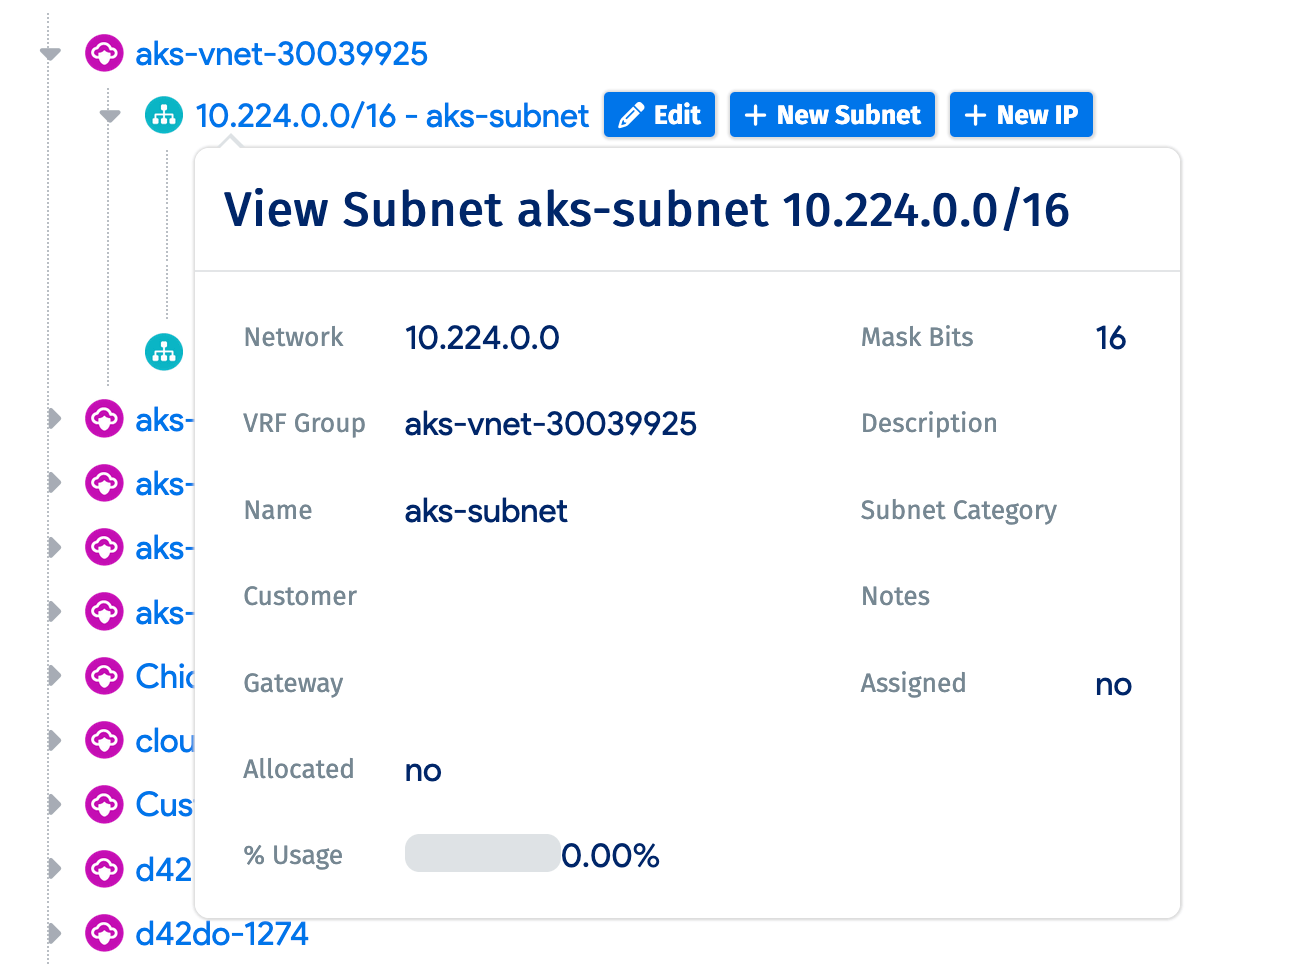
You can hover your mouse over any VRF groups, subnet, or IP and get more details on each. The subnet details includes a small graph that indicates the Percentage (%) of IP addresses used.
Each subnet and VRF group has an Edit button next to it. Click it to make changes from the subnet tree view.
Add / edit IPs per subnet
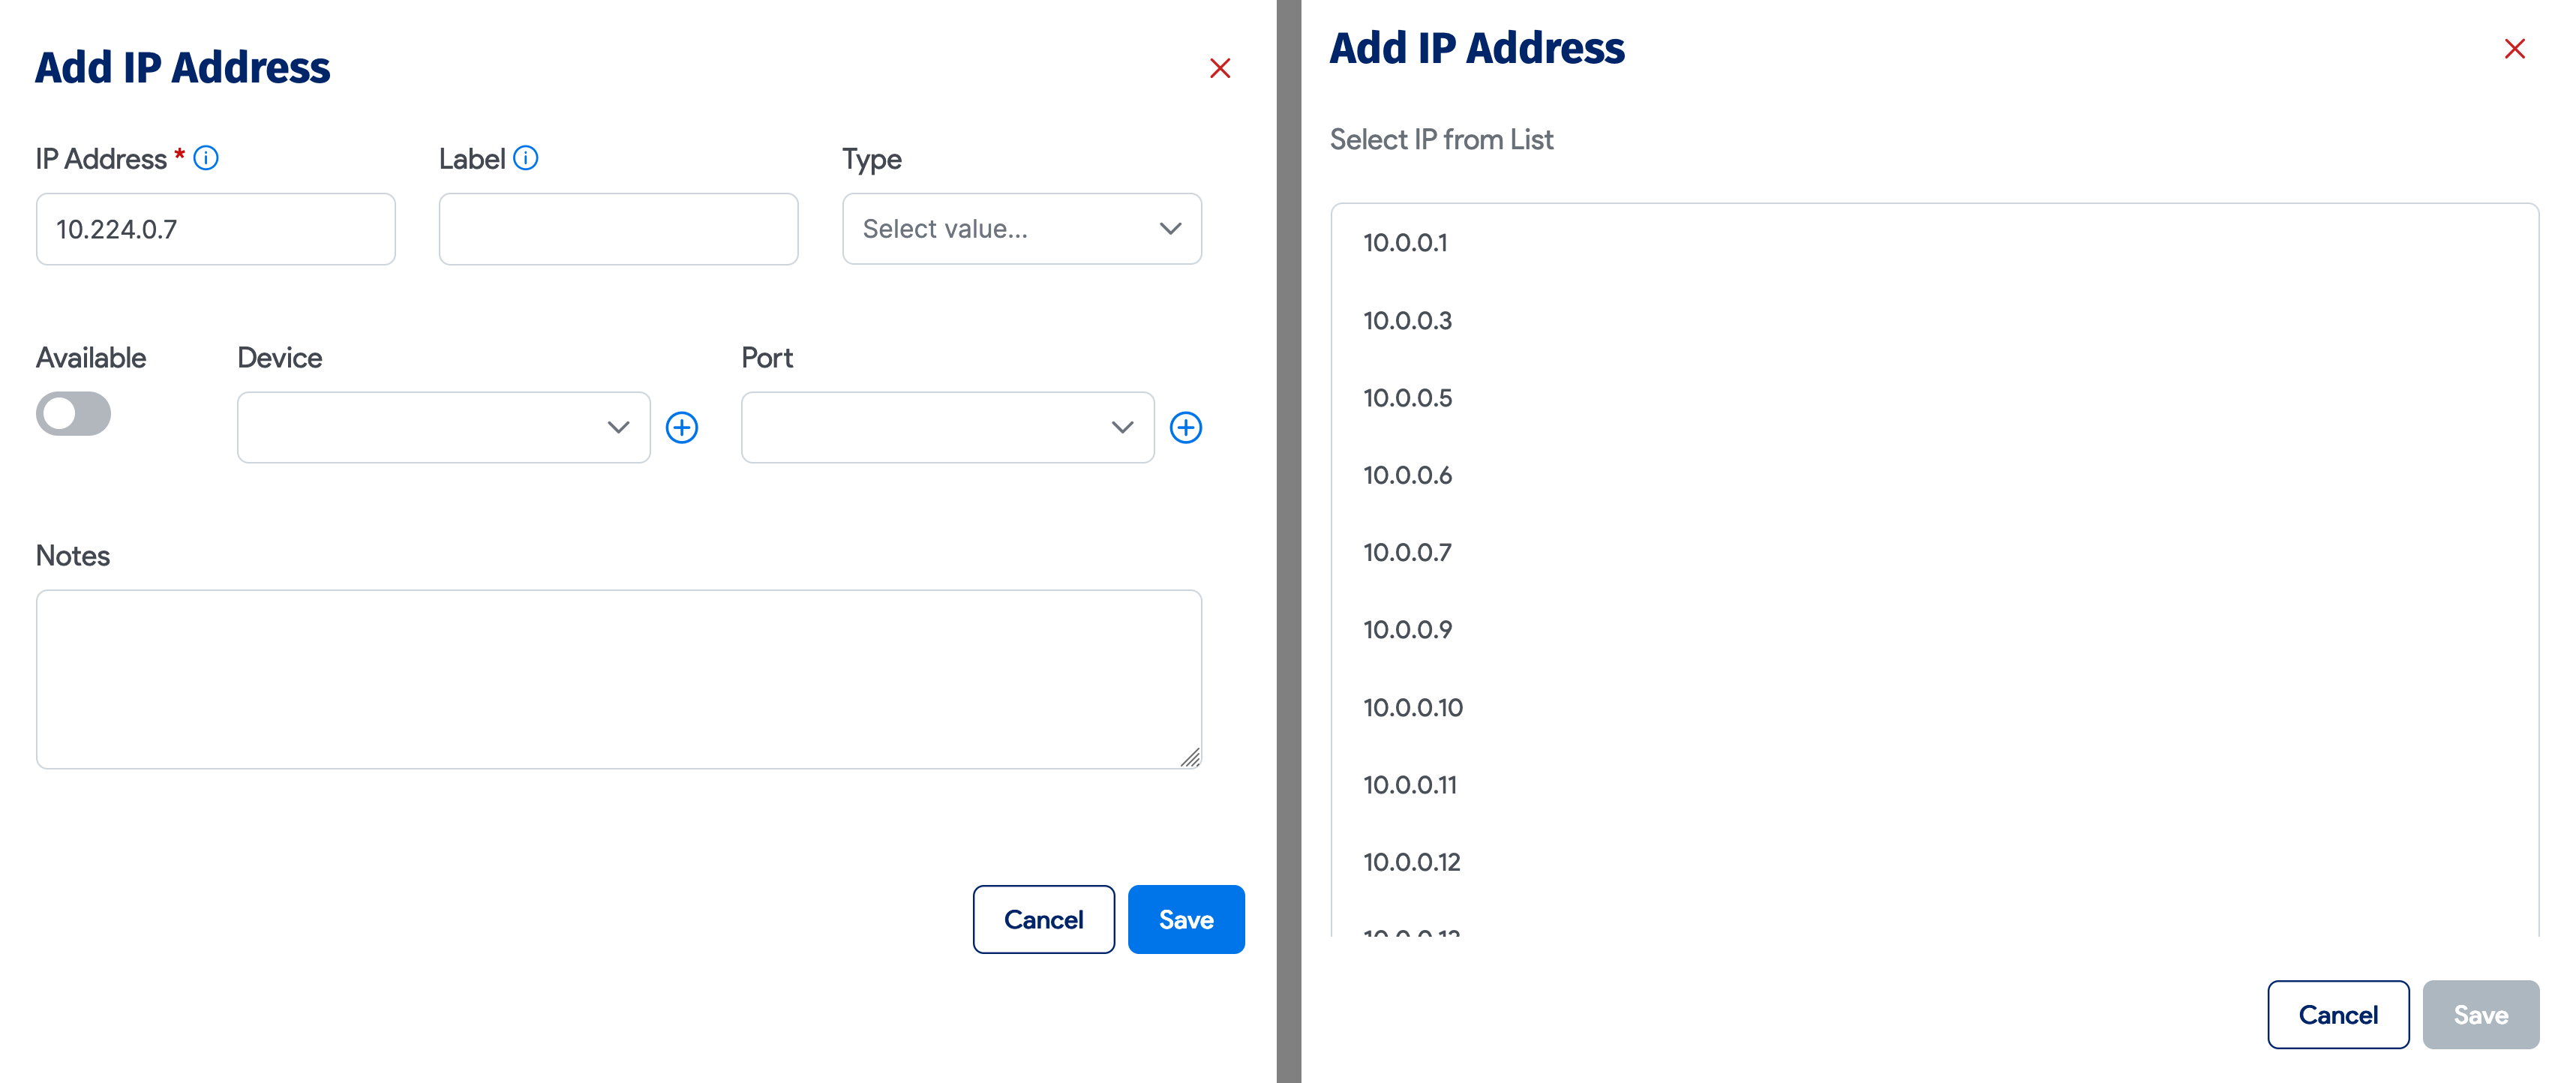
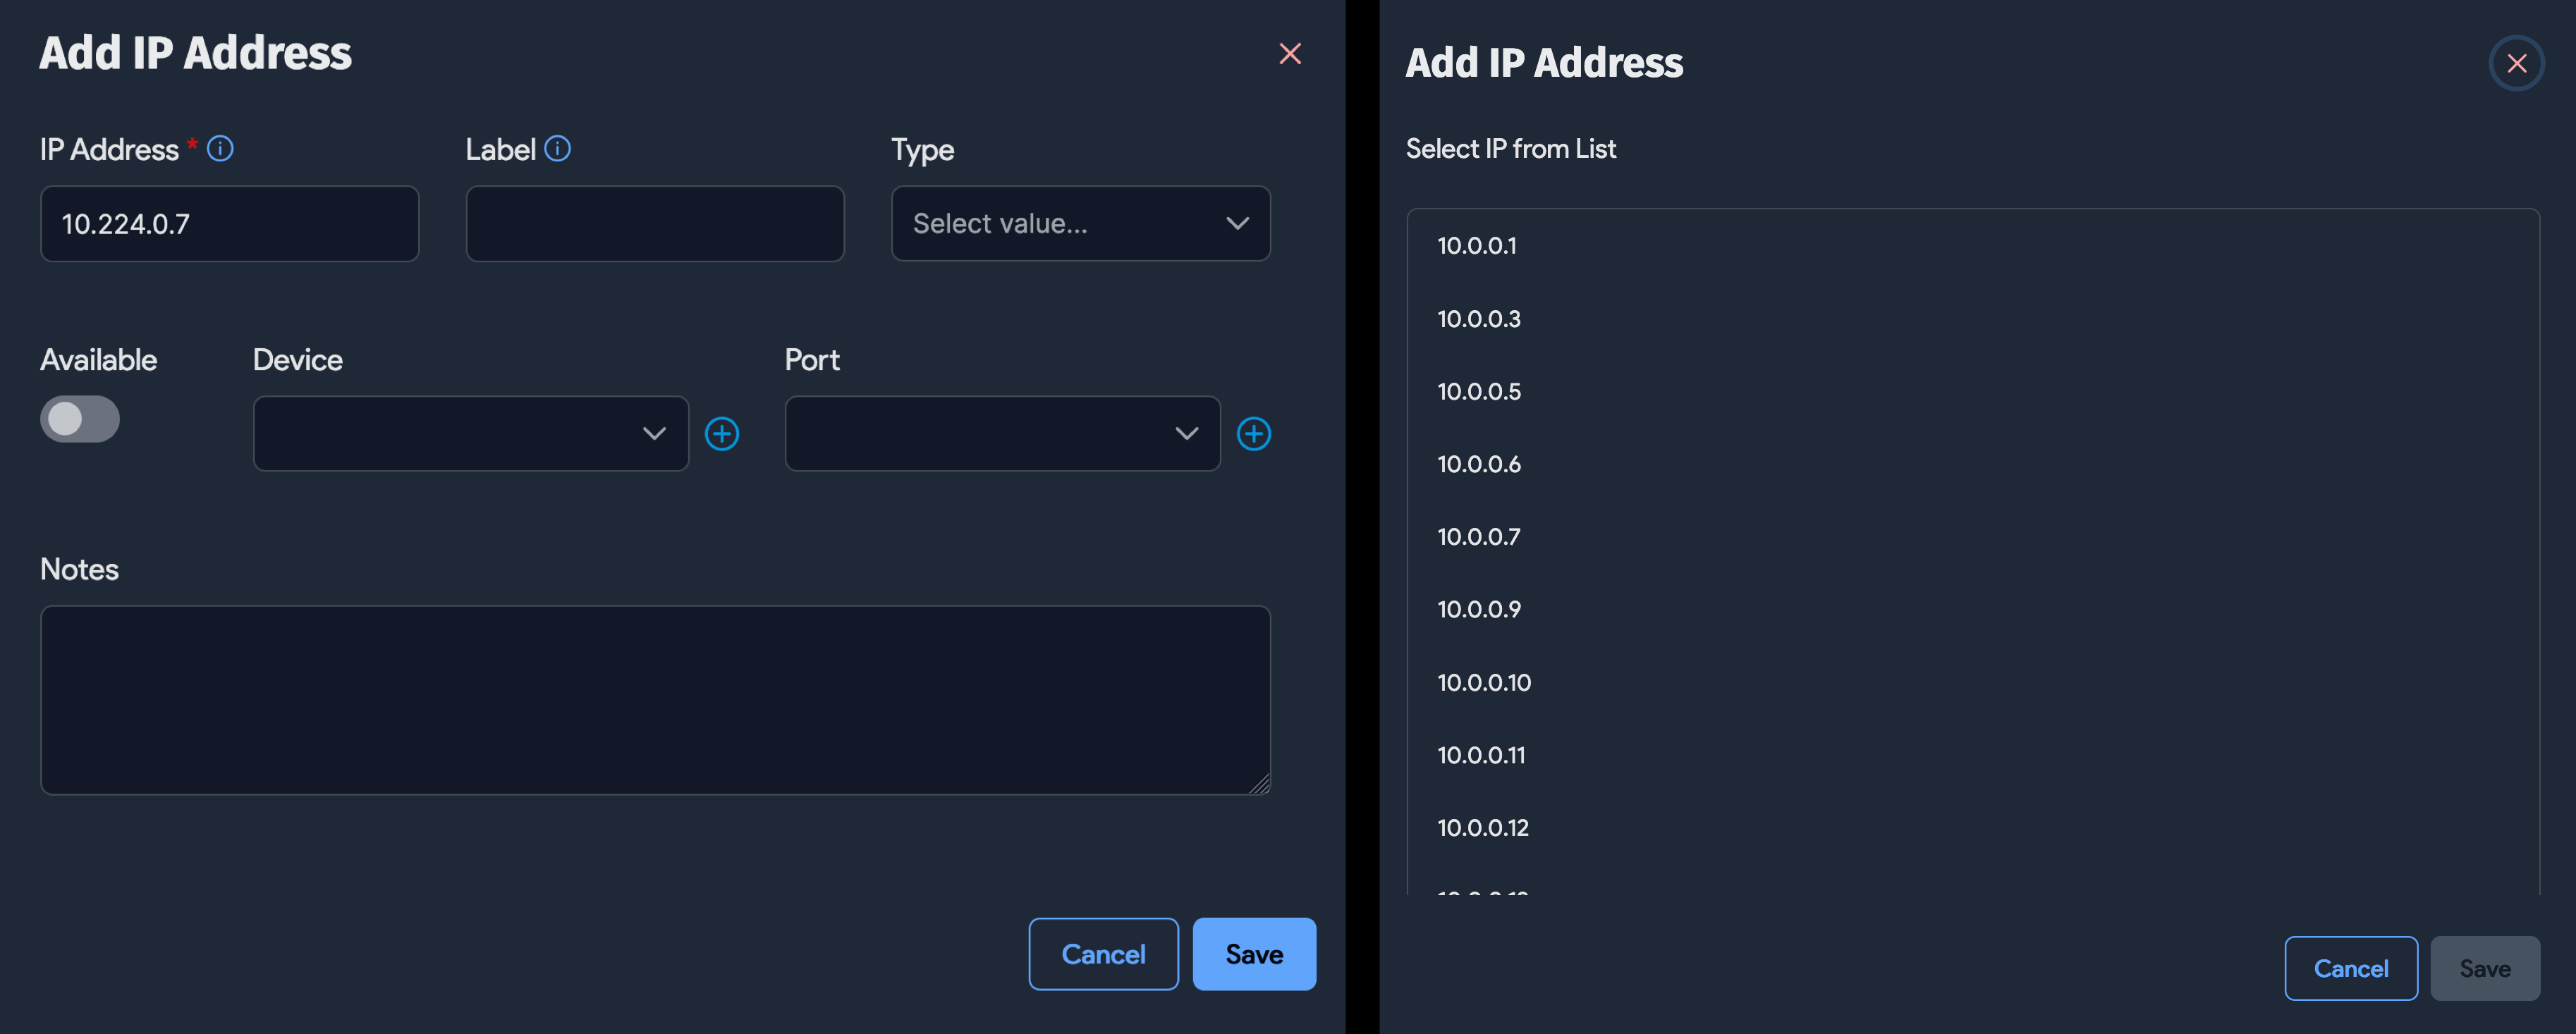
Using the + New IP button after each subnet, you can add a new IP. If the subnet is smaller than 24 mask bits, you will see a list of all IPs that don’t exist yet in that subnet and you can just pick one for the list. For larger subnets you will be presented with a dialog to let you enter the information directly.
Also, next to each IP, you will see an Edit button that will enable you to edit the IP right from this page.
Nest subnets right from the tree view
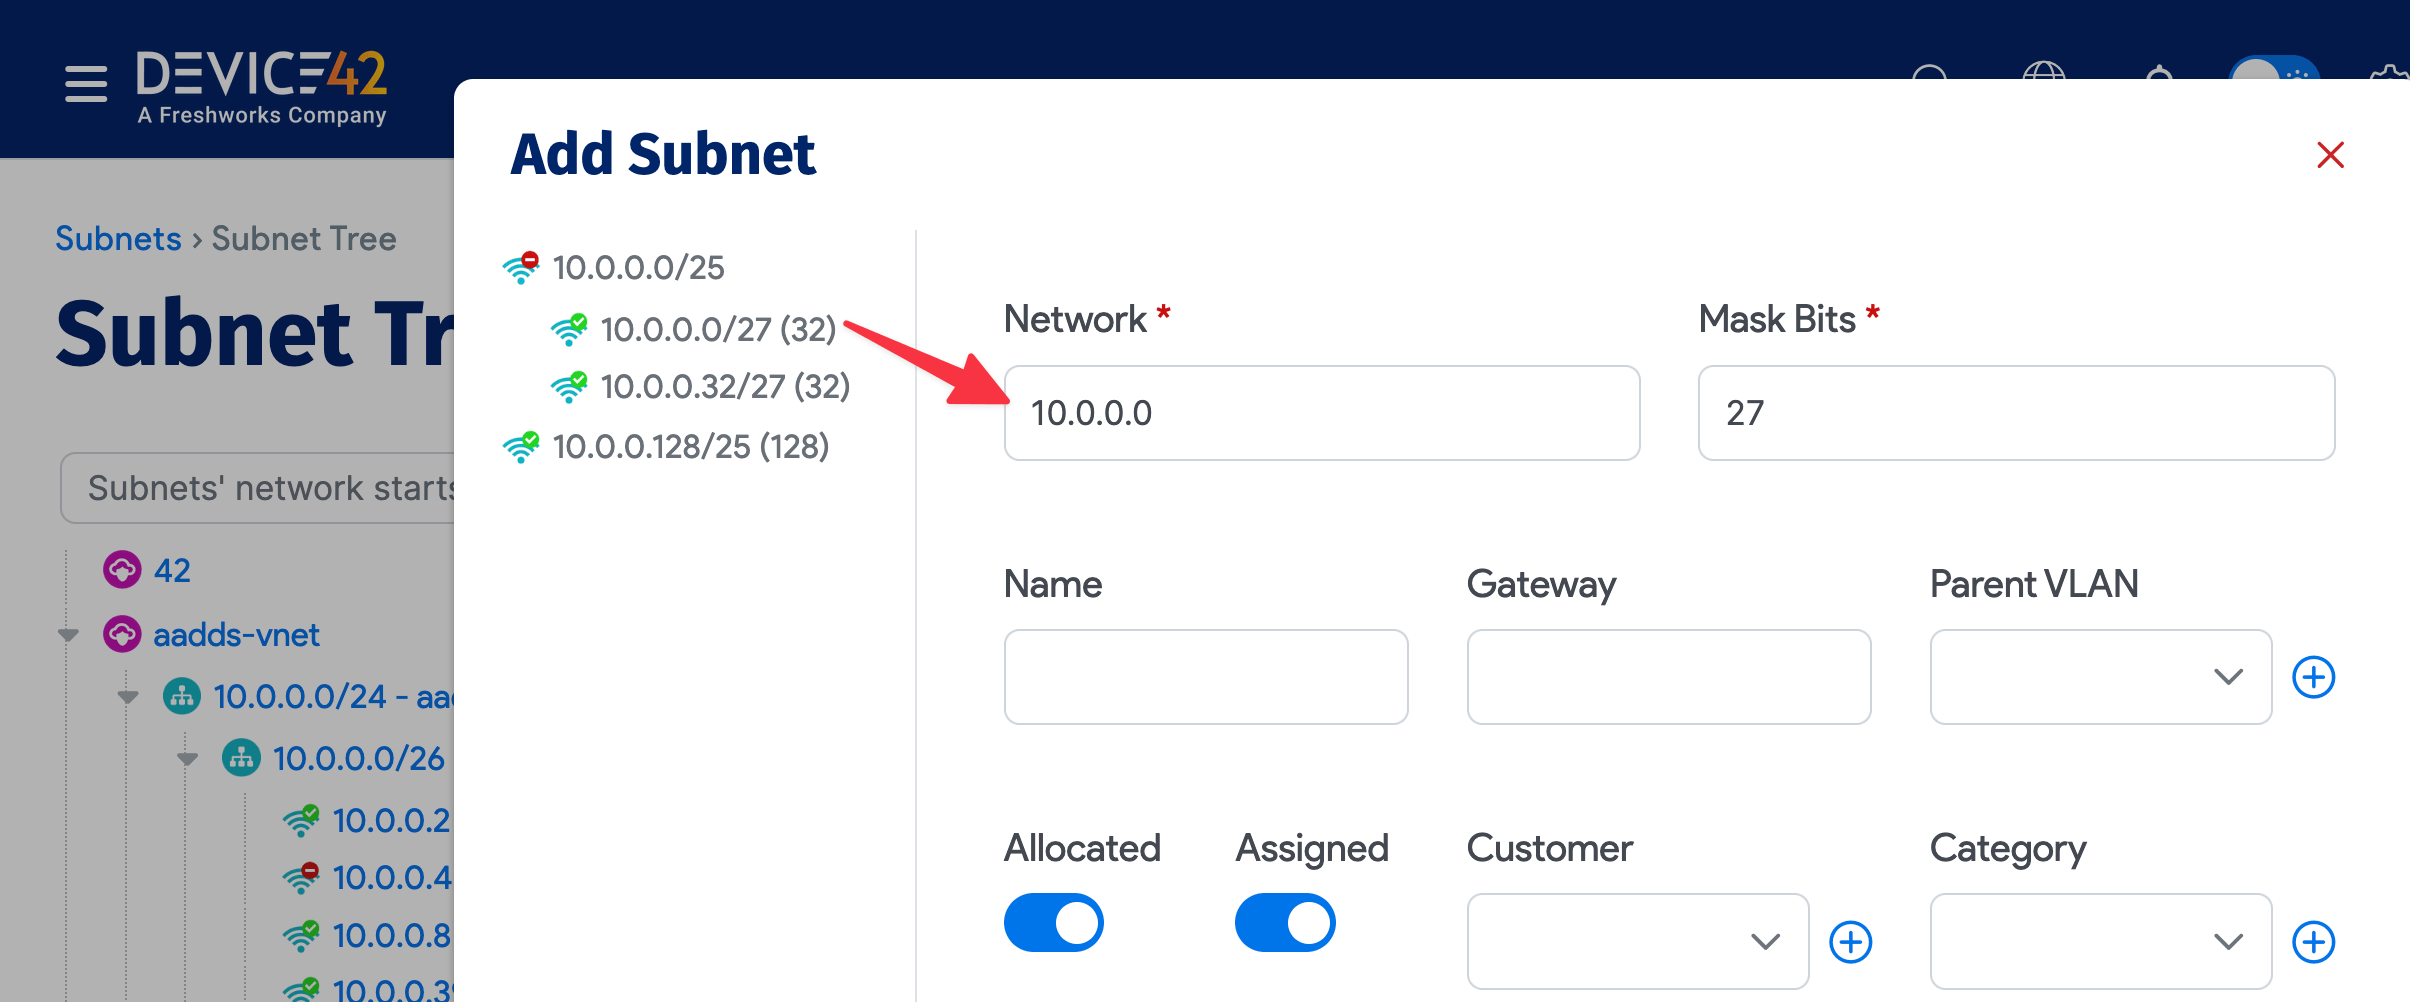
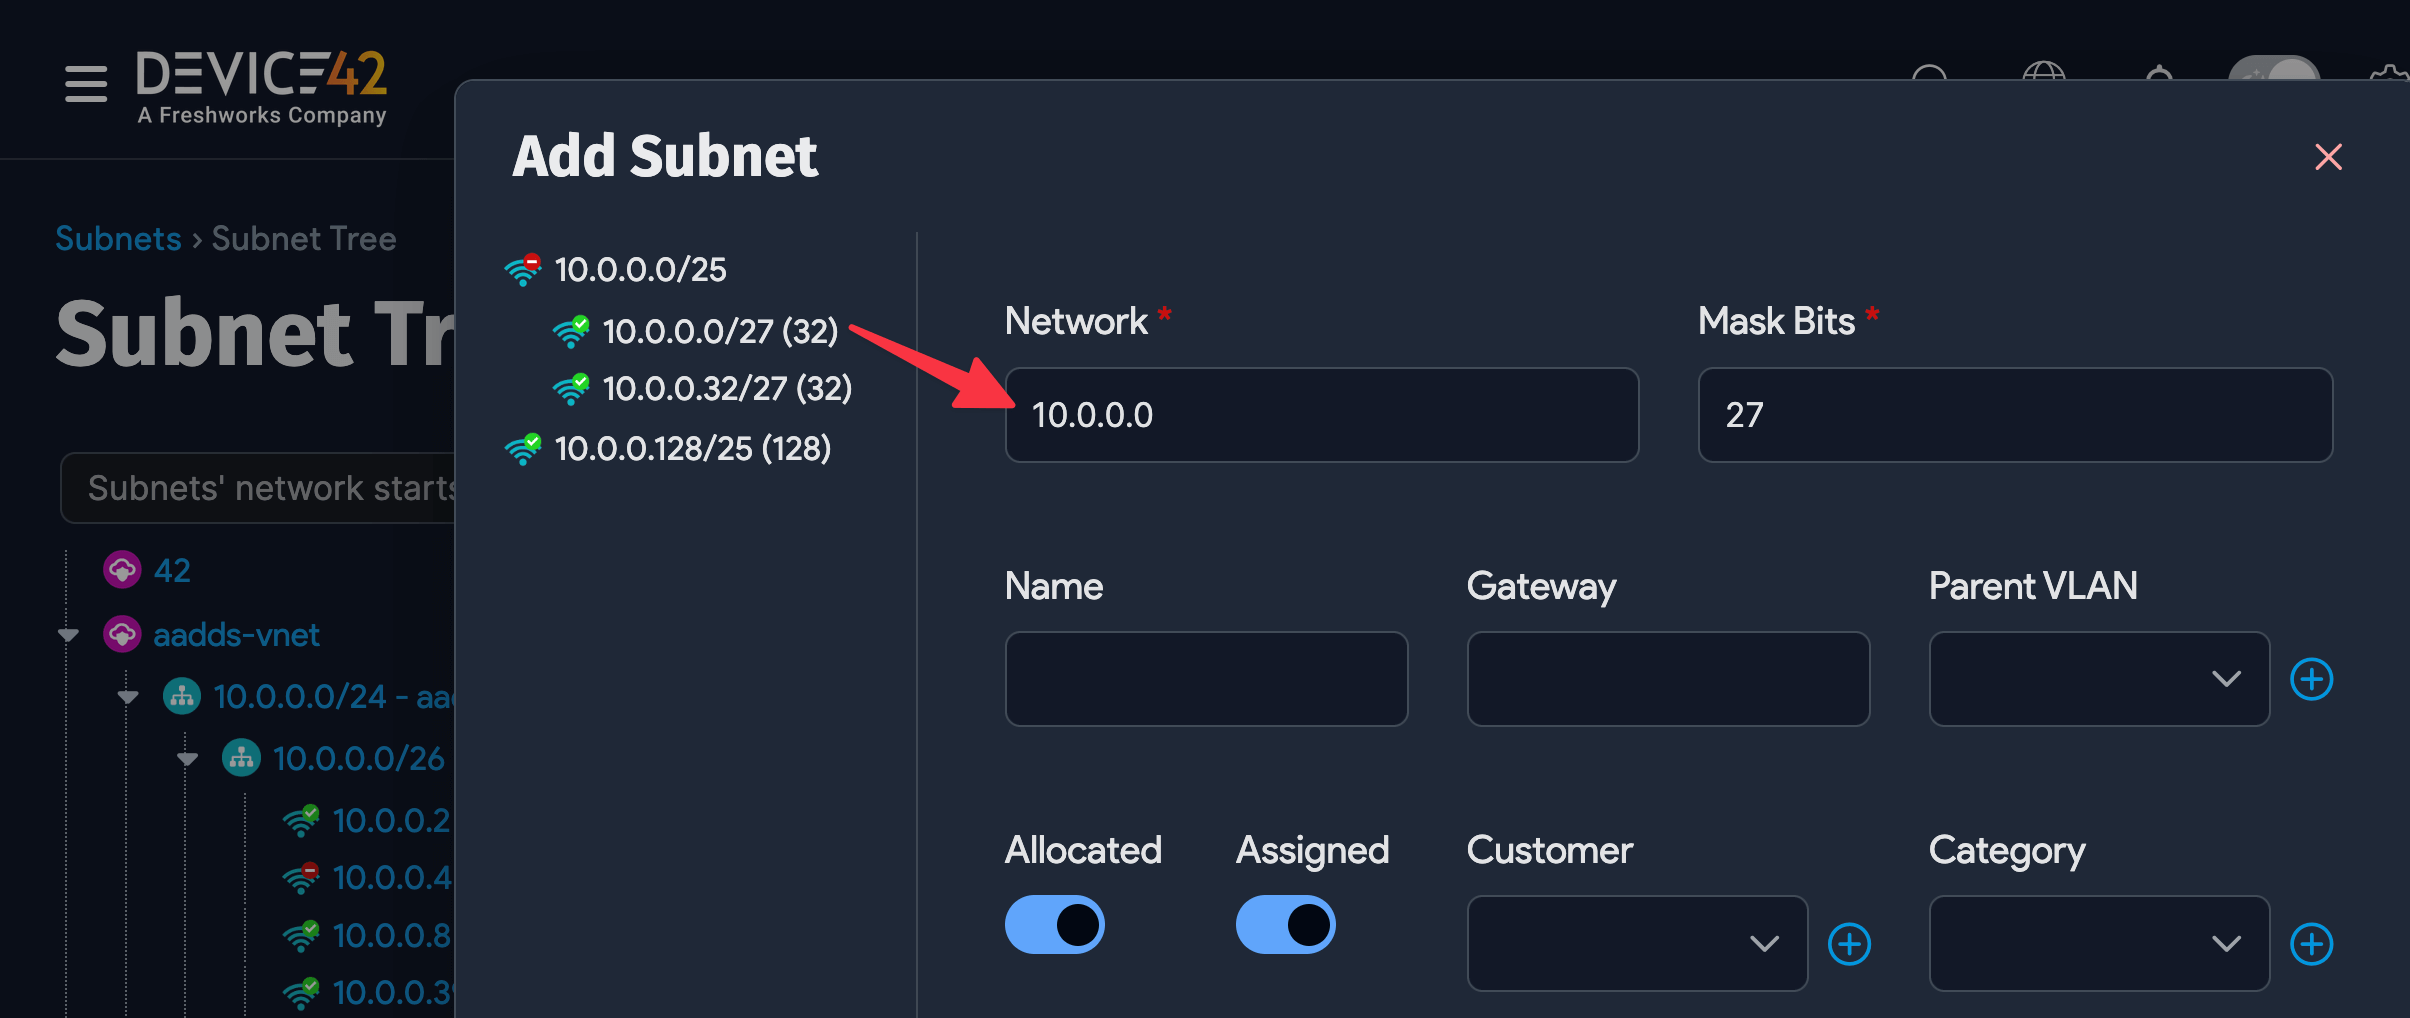
You can also nest subnets right from the tree view using the + New Subnet button after each subnet. If you click this button, you get a tree like view of available subnets within that subnet that you can click on and choose. You can also drag and drop subnets into another subnet or another VRF group.
Please note that the drag and drop functionality is disabled for trees with over 2000 subnets.
View Available Subnets
When adding subnets, you can view used and available subnets at a glance by clicking the Subnet Usage Tree button:
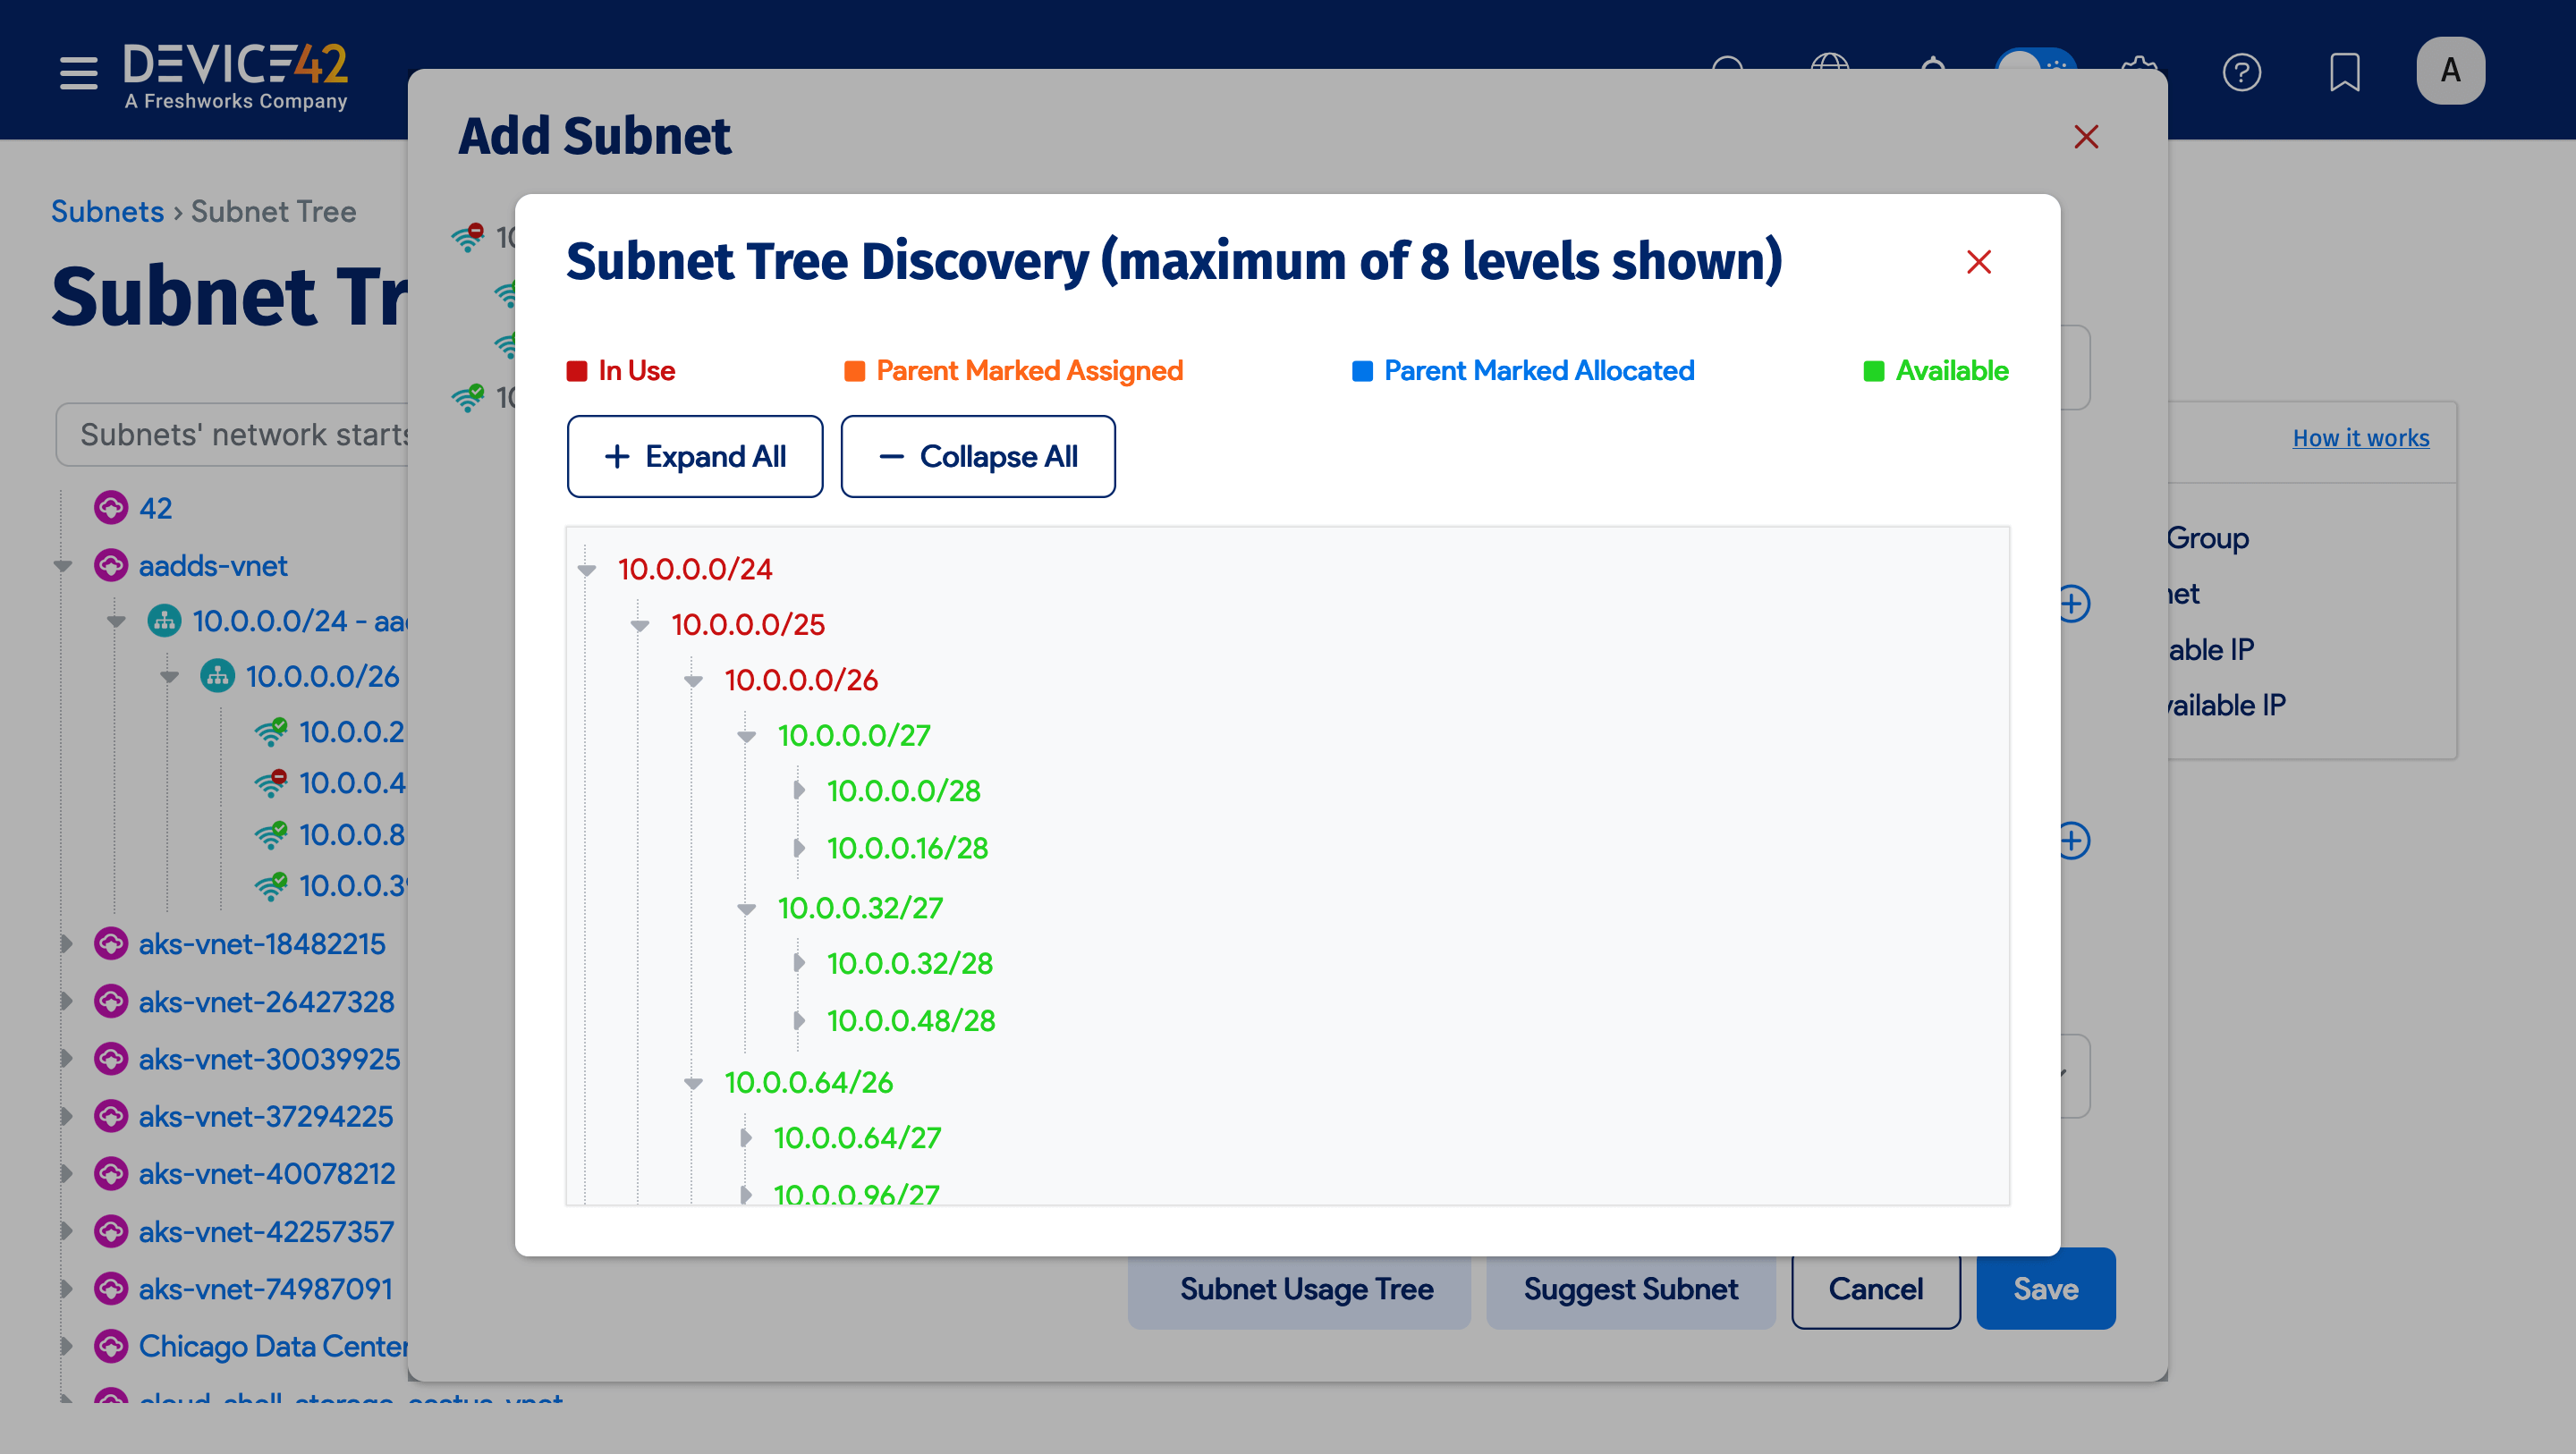
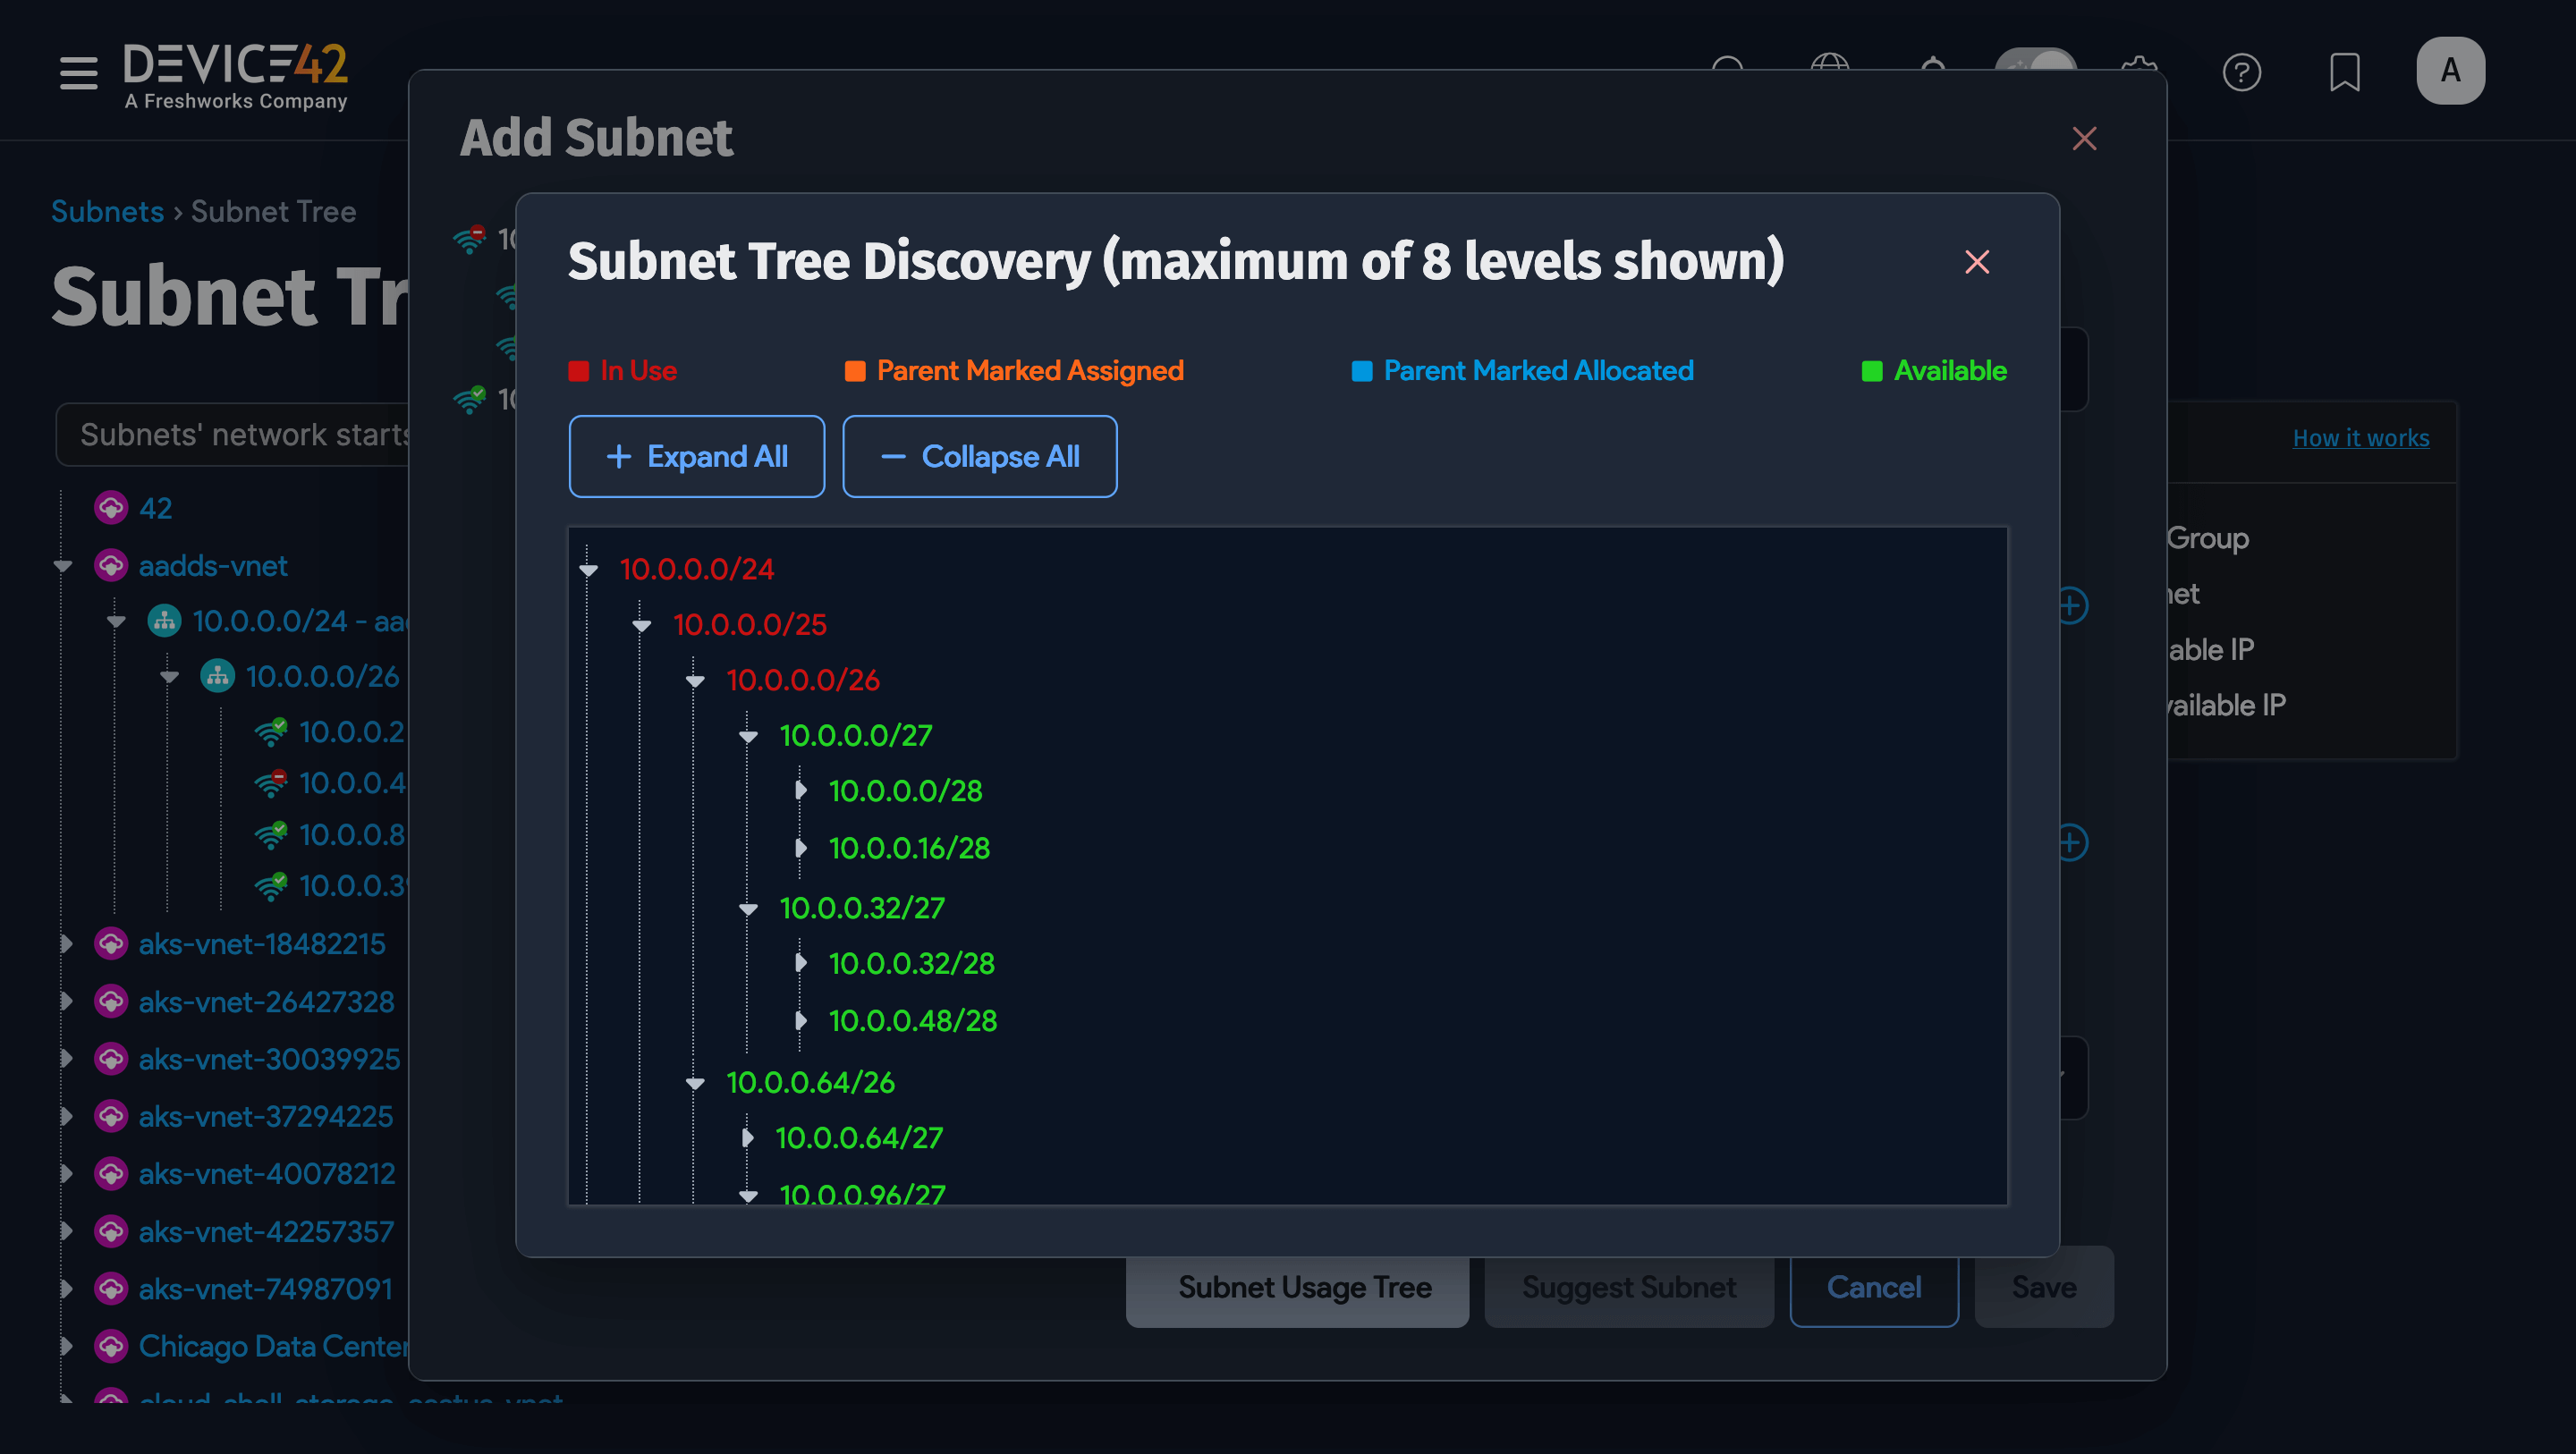
In the example above, you see the available subnets for the selected parent subnet. You will see the available subnets in green and the used (or partially used subnets) in red. You can drill further into the subnet tree by clicking Expand All:
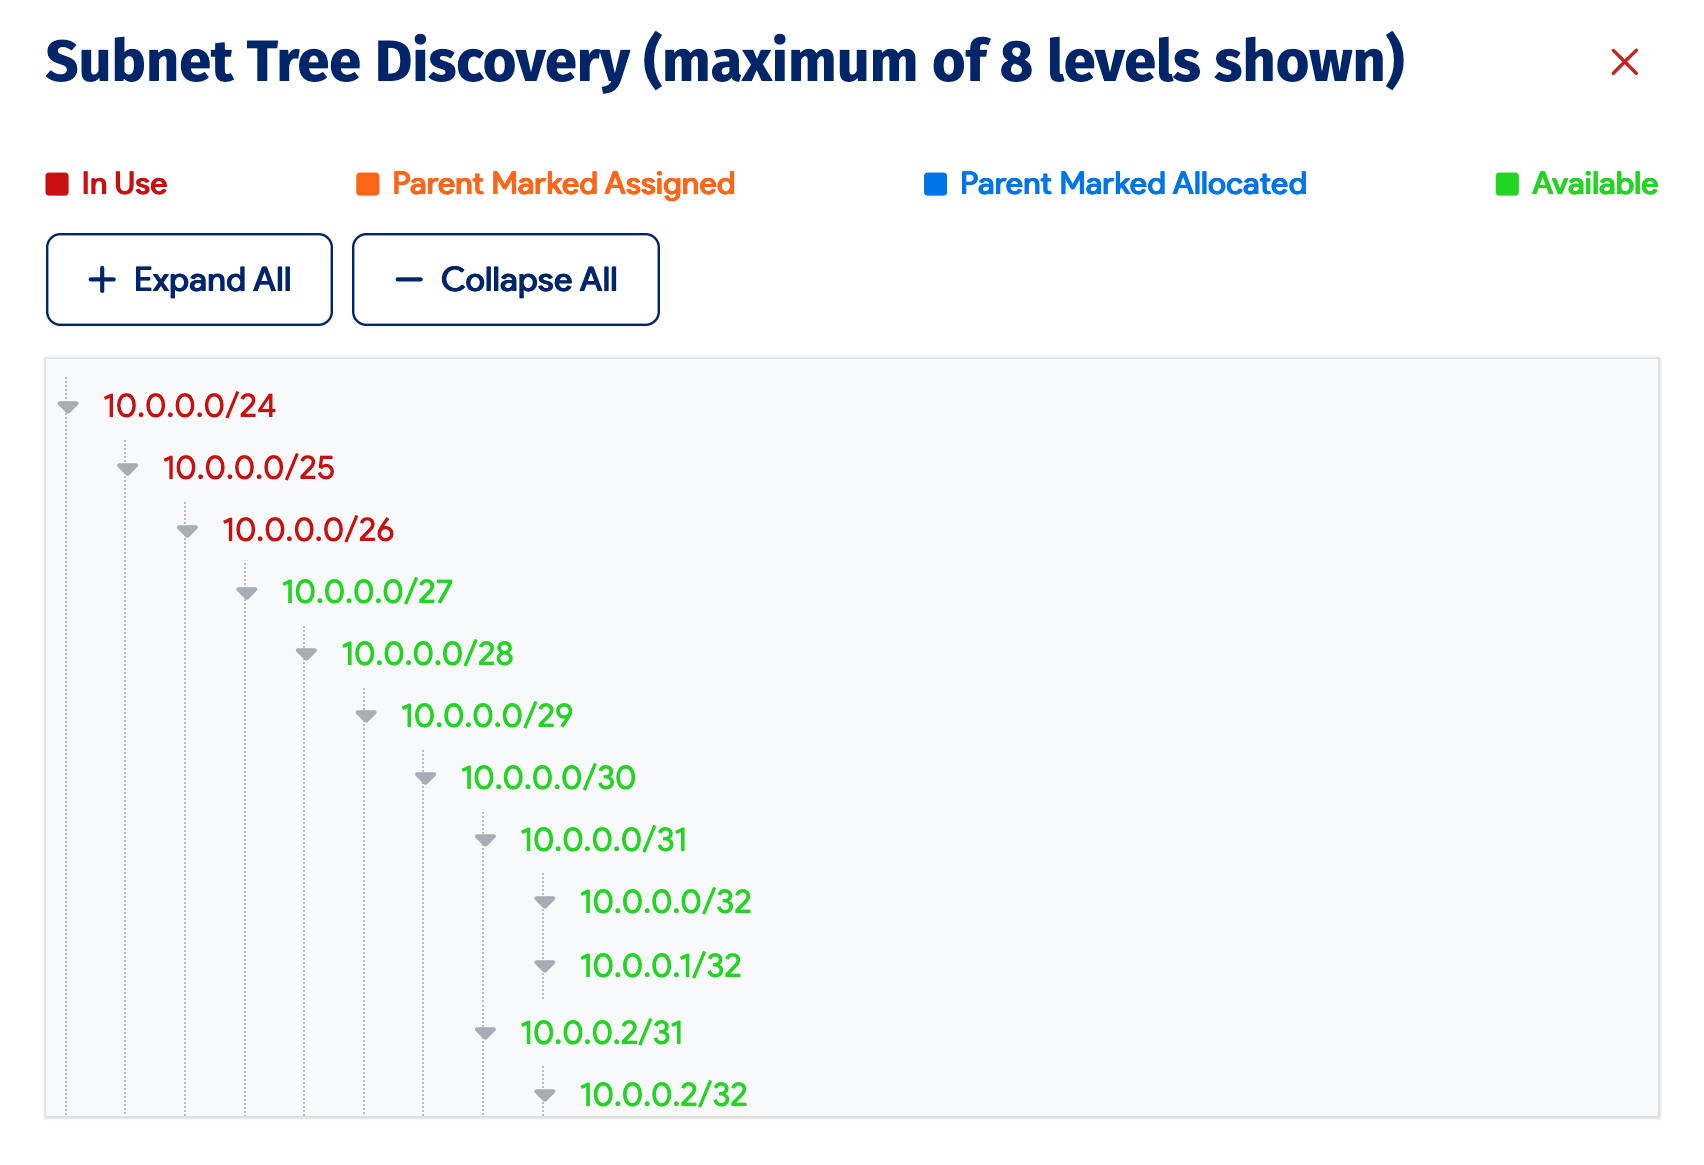
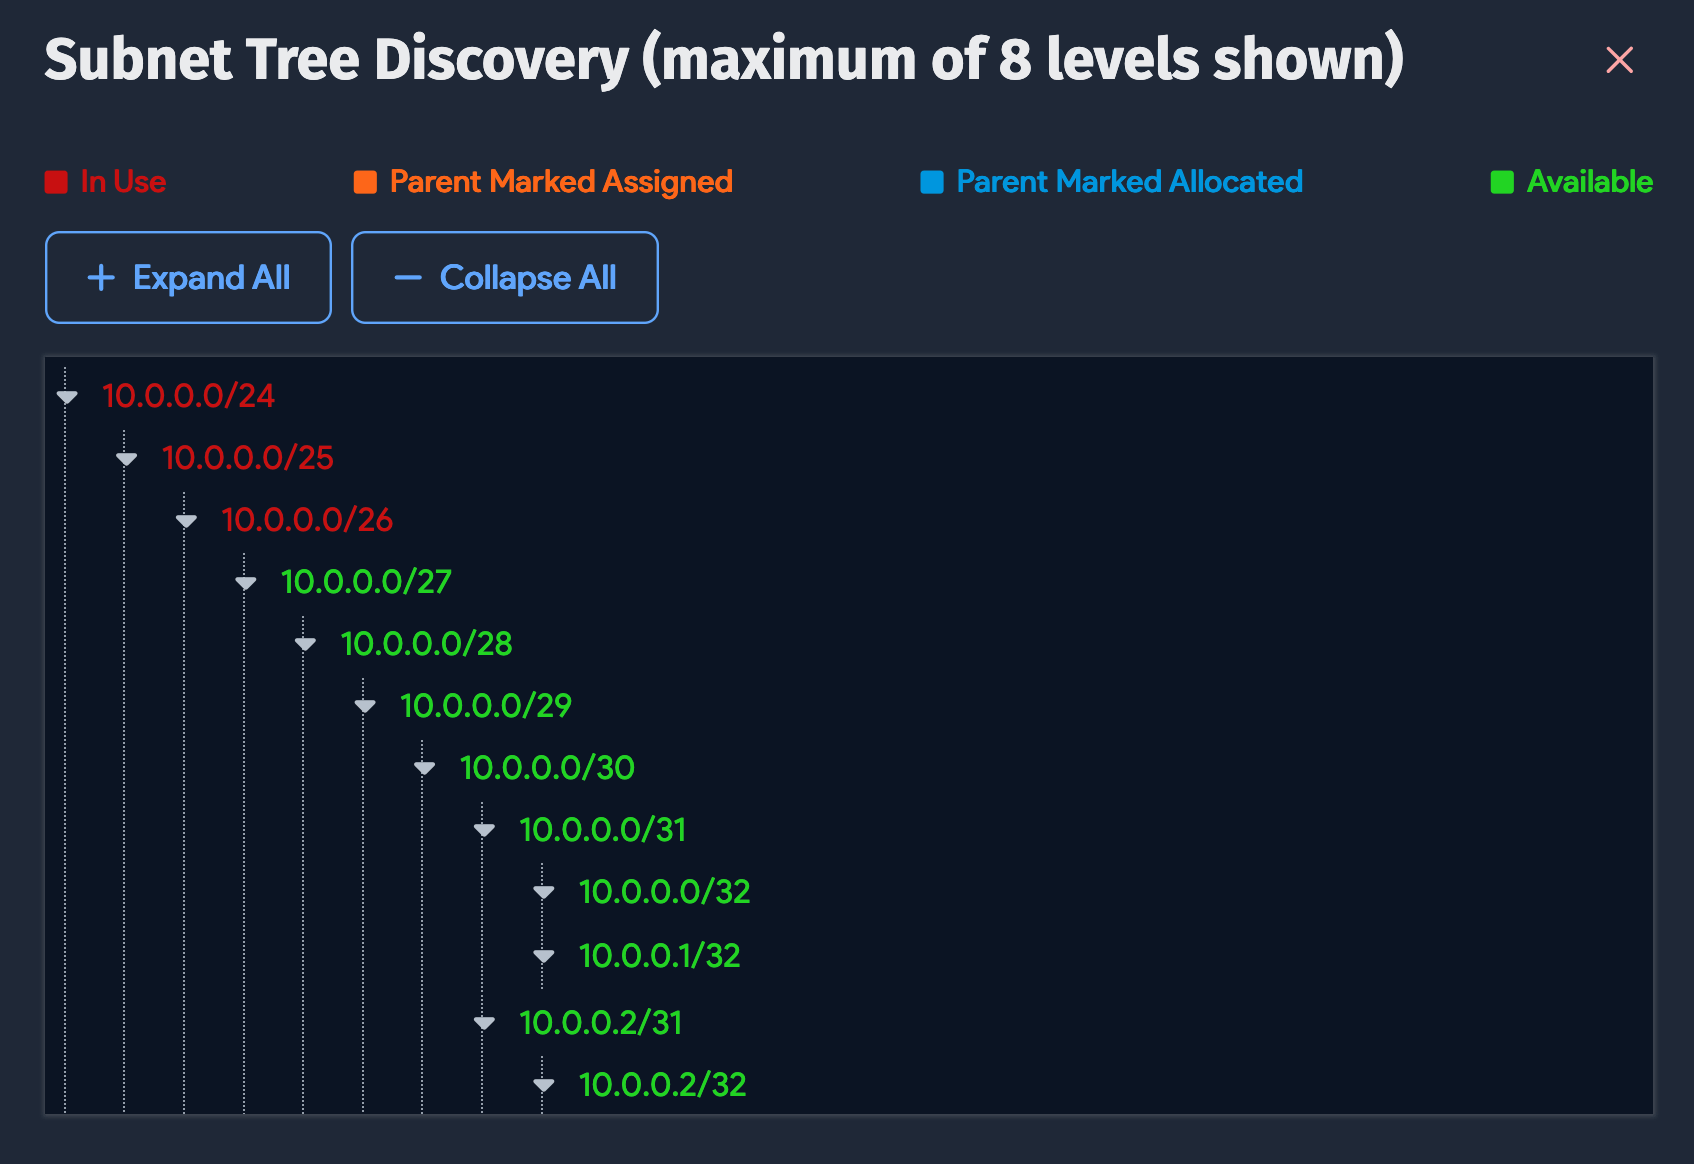
These views will help you decide which subnet to assign.
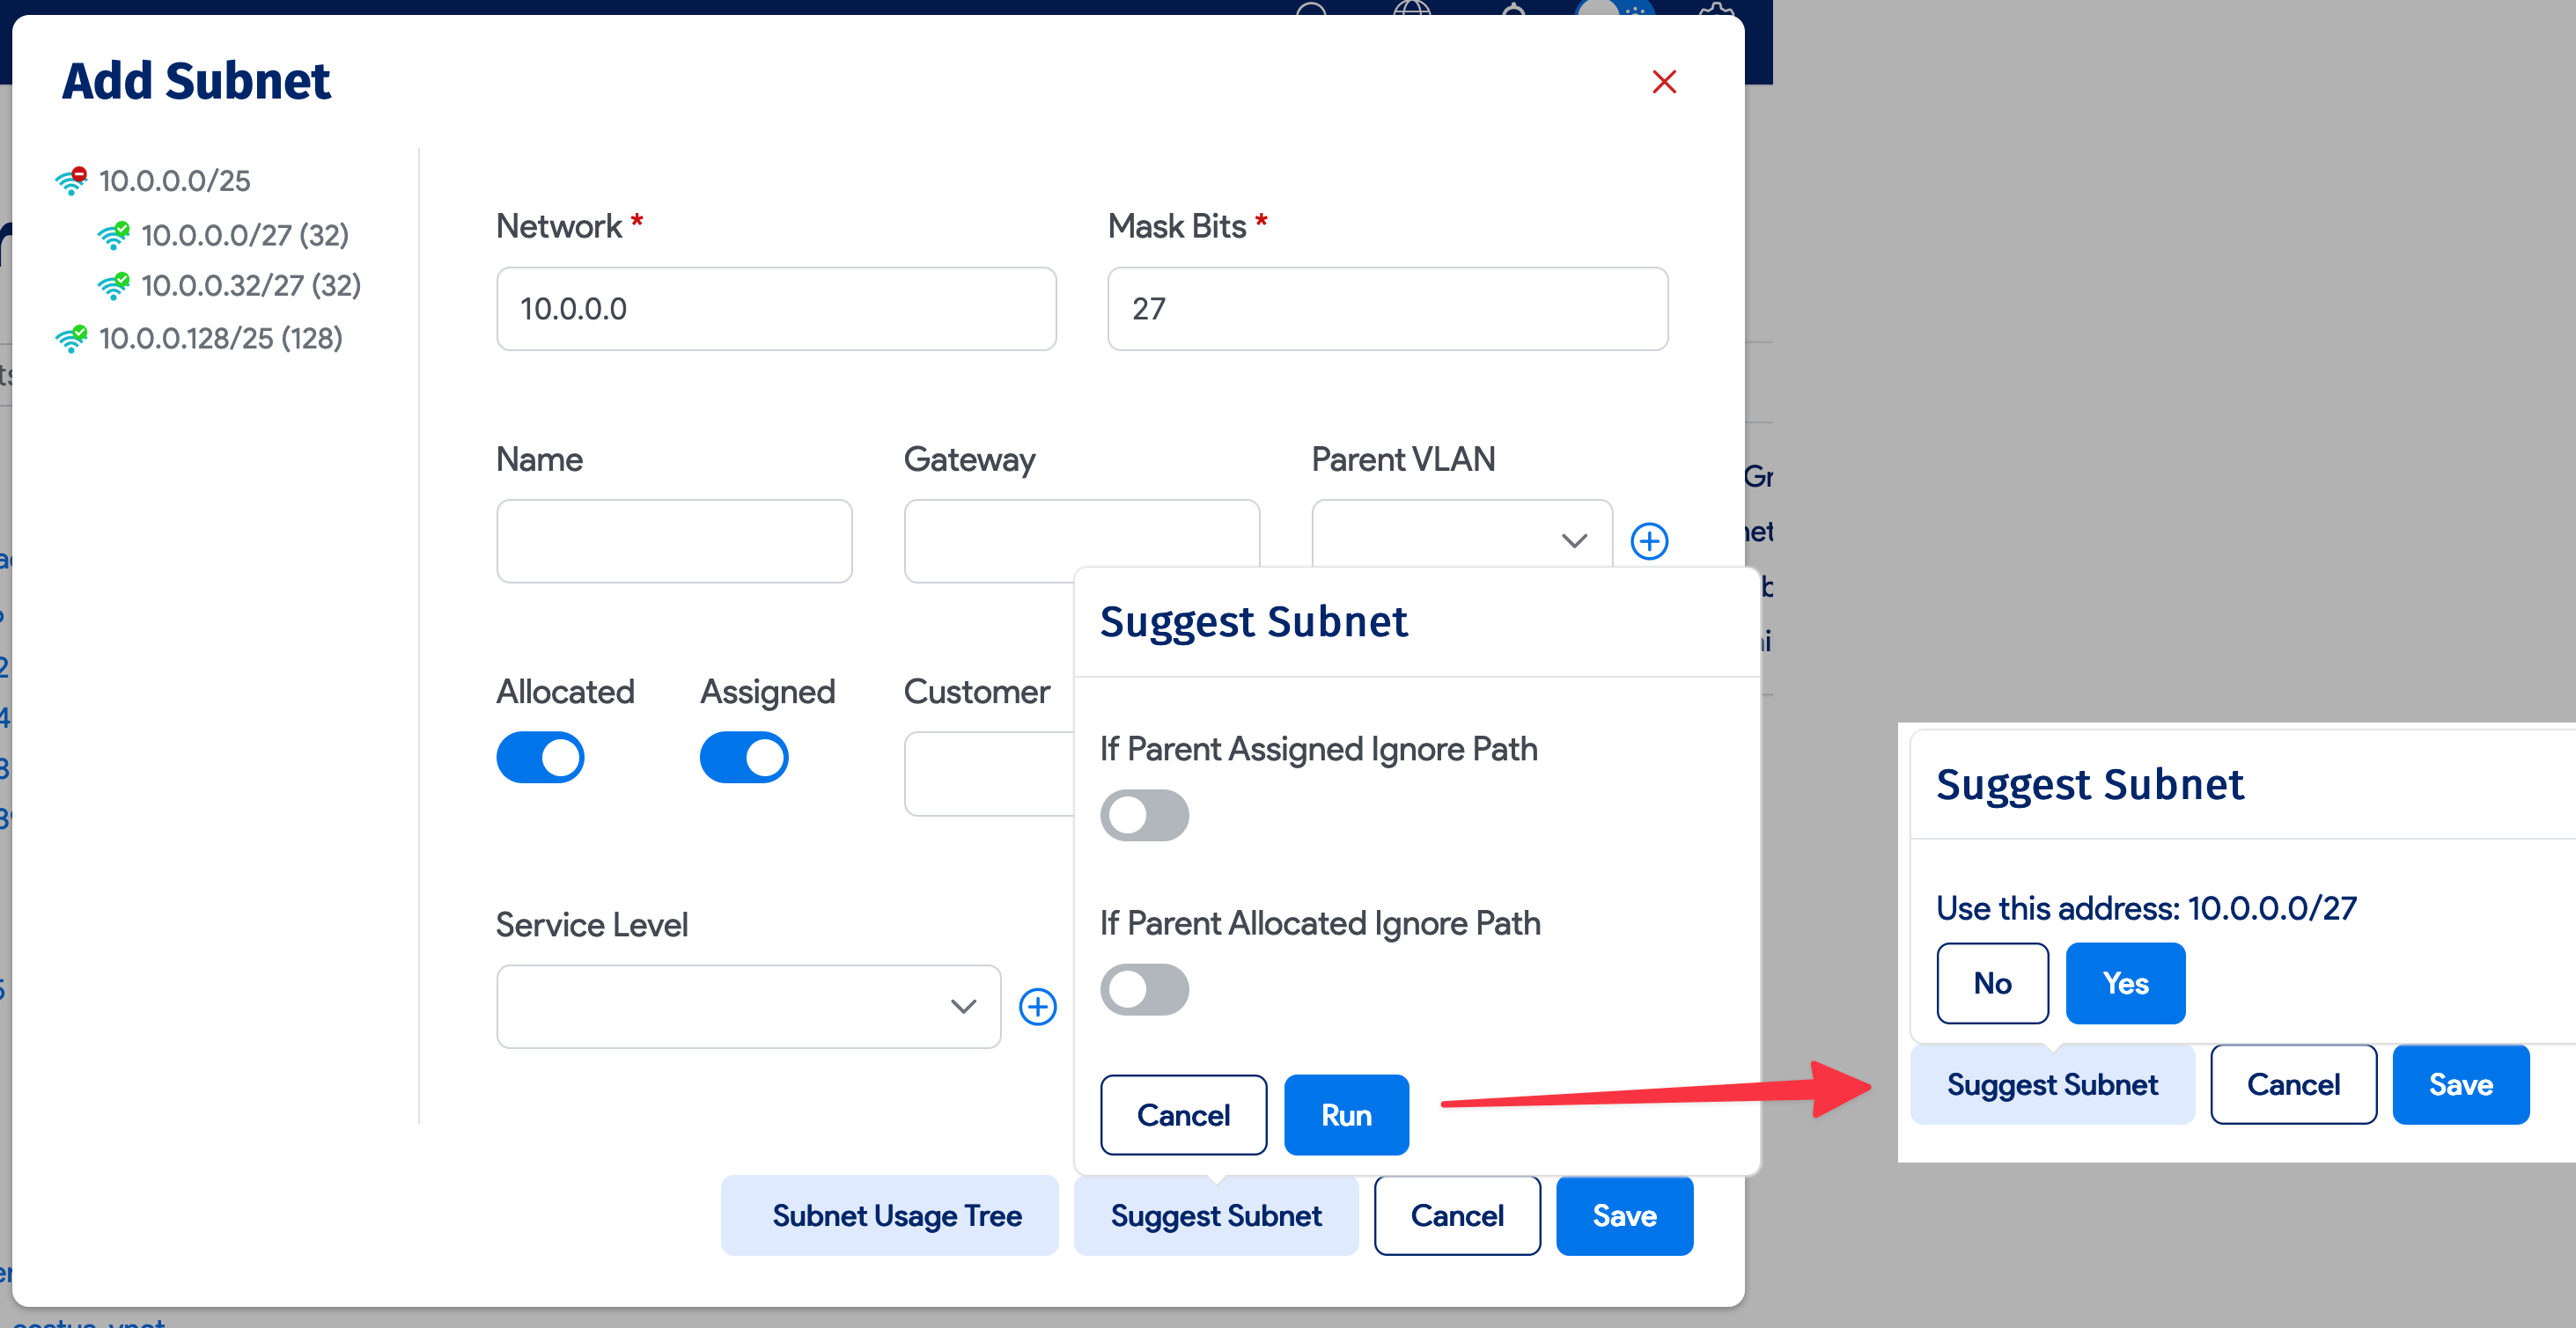
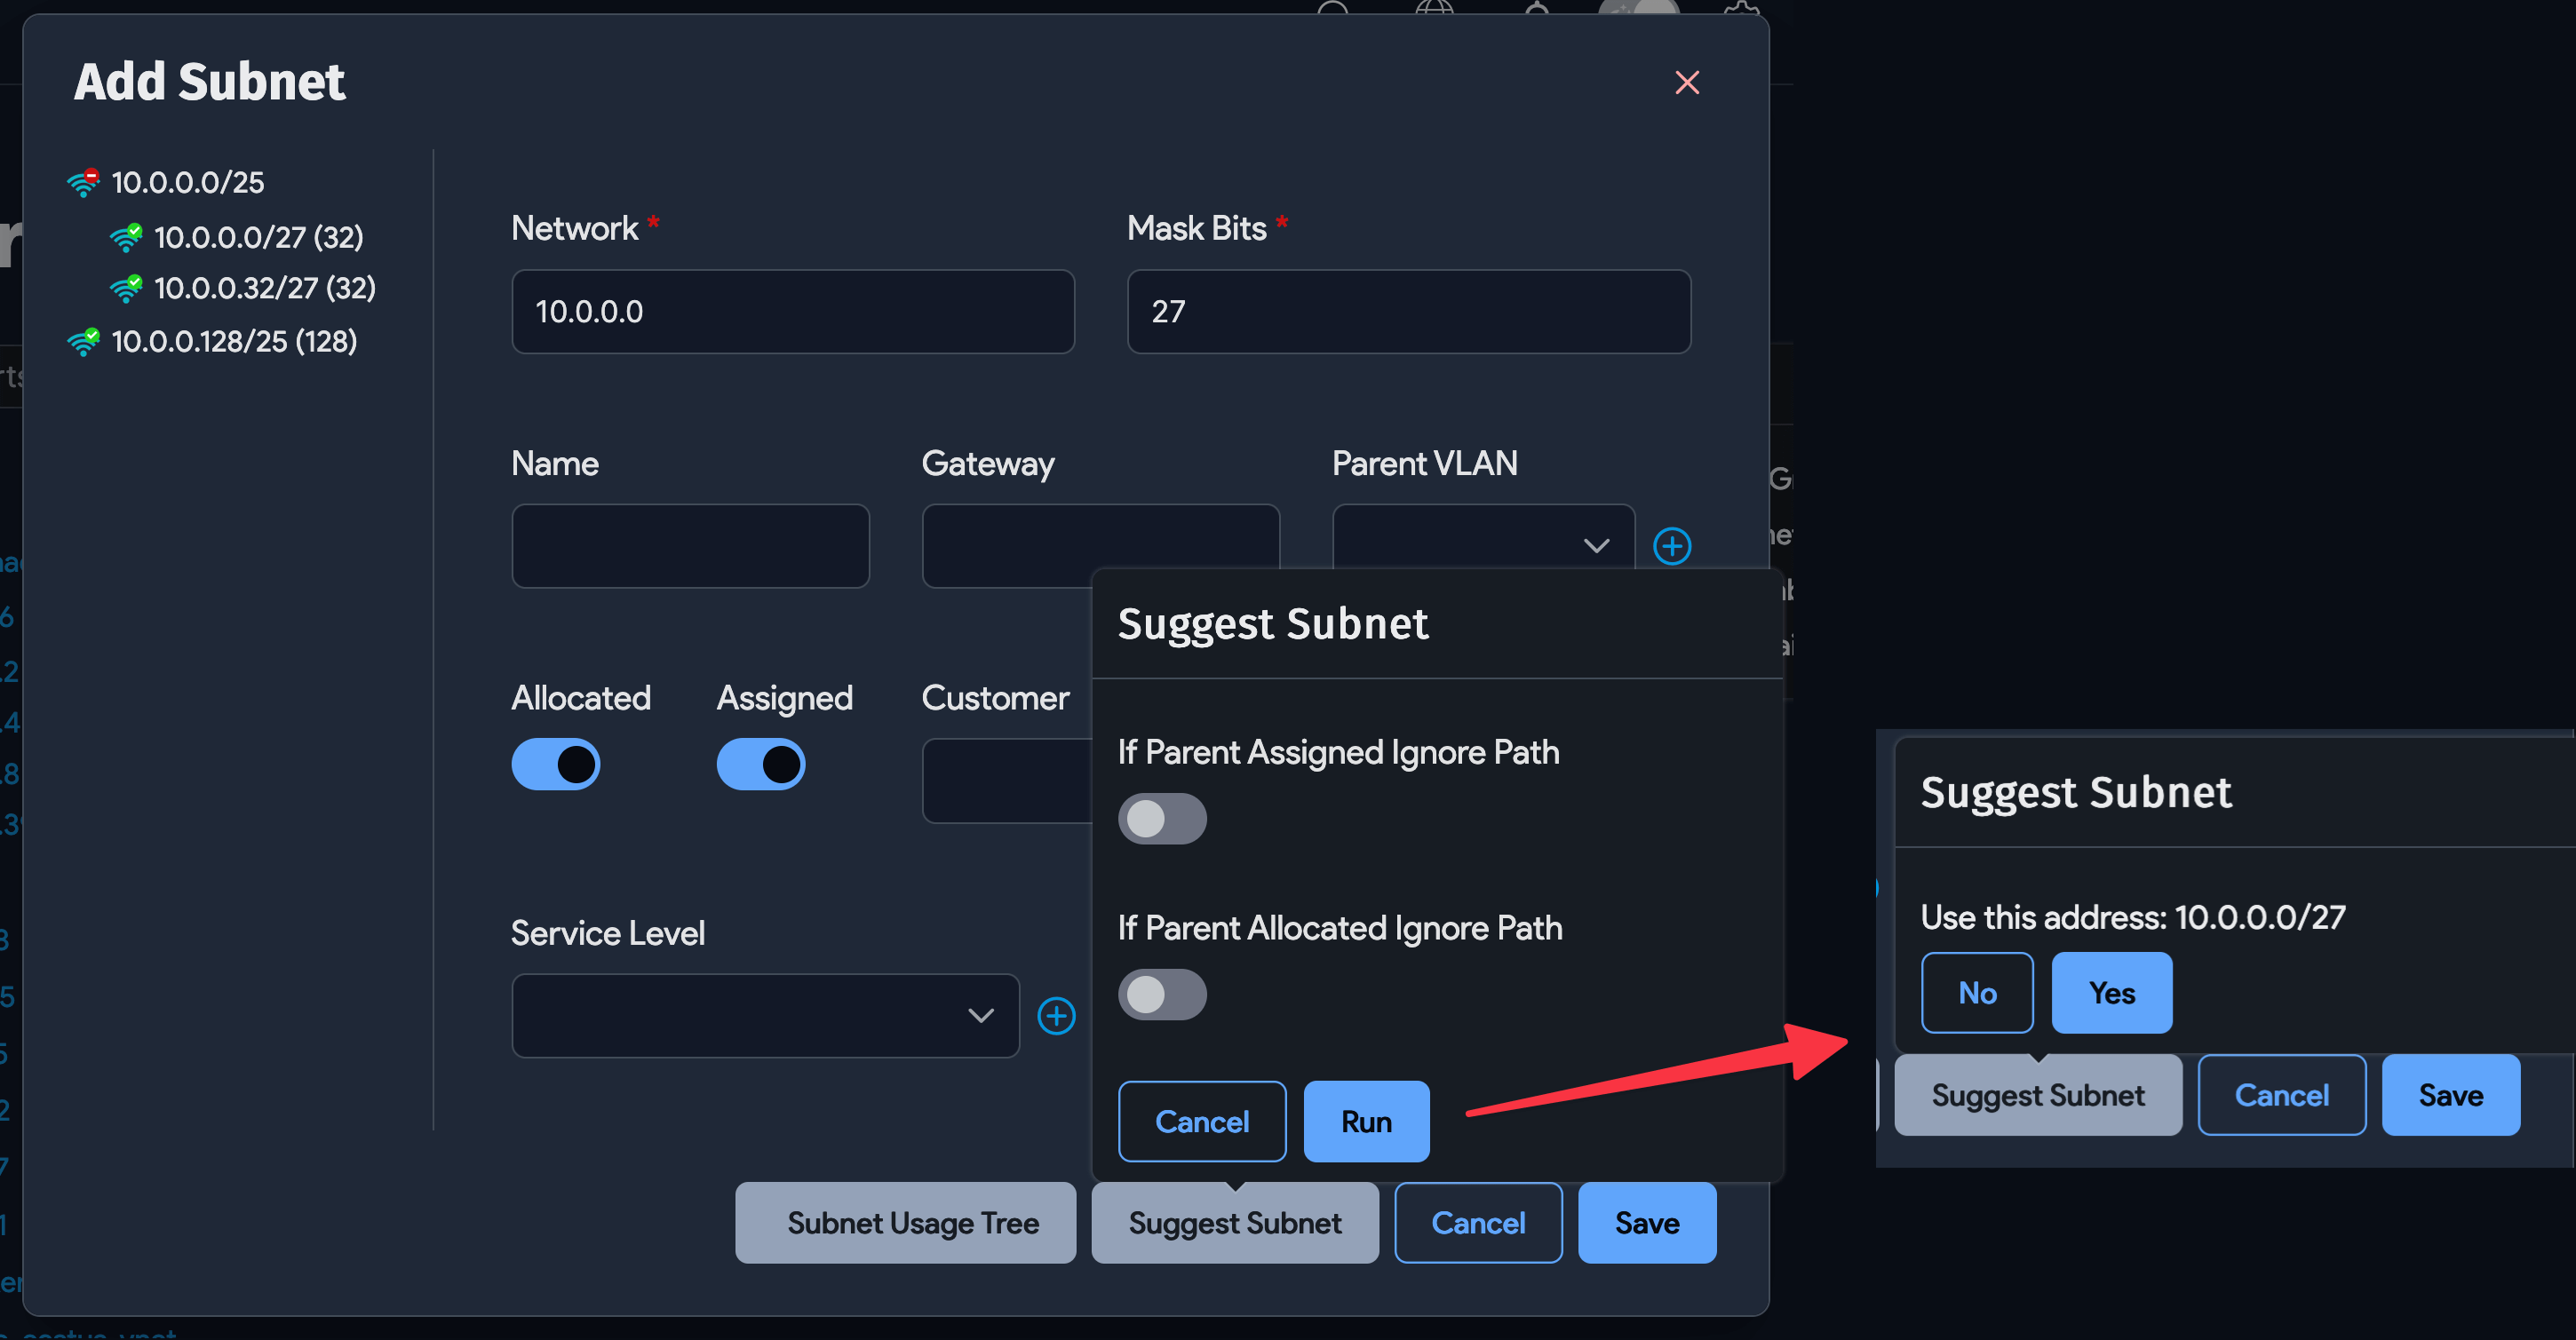
Suggest a Subnet
When you choose a subnet to assign, the subnet you choose will have a big impact on future subnets choices. If you choose a subnet that is much bigger than you need, then many of its subnet are in effect wasted. If you choose a subnet that is near another subnet but not directly adjacent, the available subnets in between may be too small to be used and are effectively wasted. The goal is always to choose subnets that maximize future flexibility in subnet selection and assignment.
Device42 offers a patent-pending recommendation engine for choosing subnets. Just enter the desired Mask Bits and click the Suggest Subnet button and Device42 will calculate the optimal subnet. You will be presented with two options to ignore parent subnets that are merged as Assigned or Allocated even if they are still empty. Once you click the Run button, Device42 will present its suggestion for you to accept or decline.
Add new IPs from the tree view
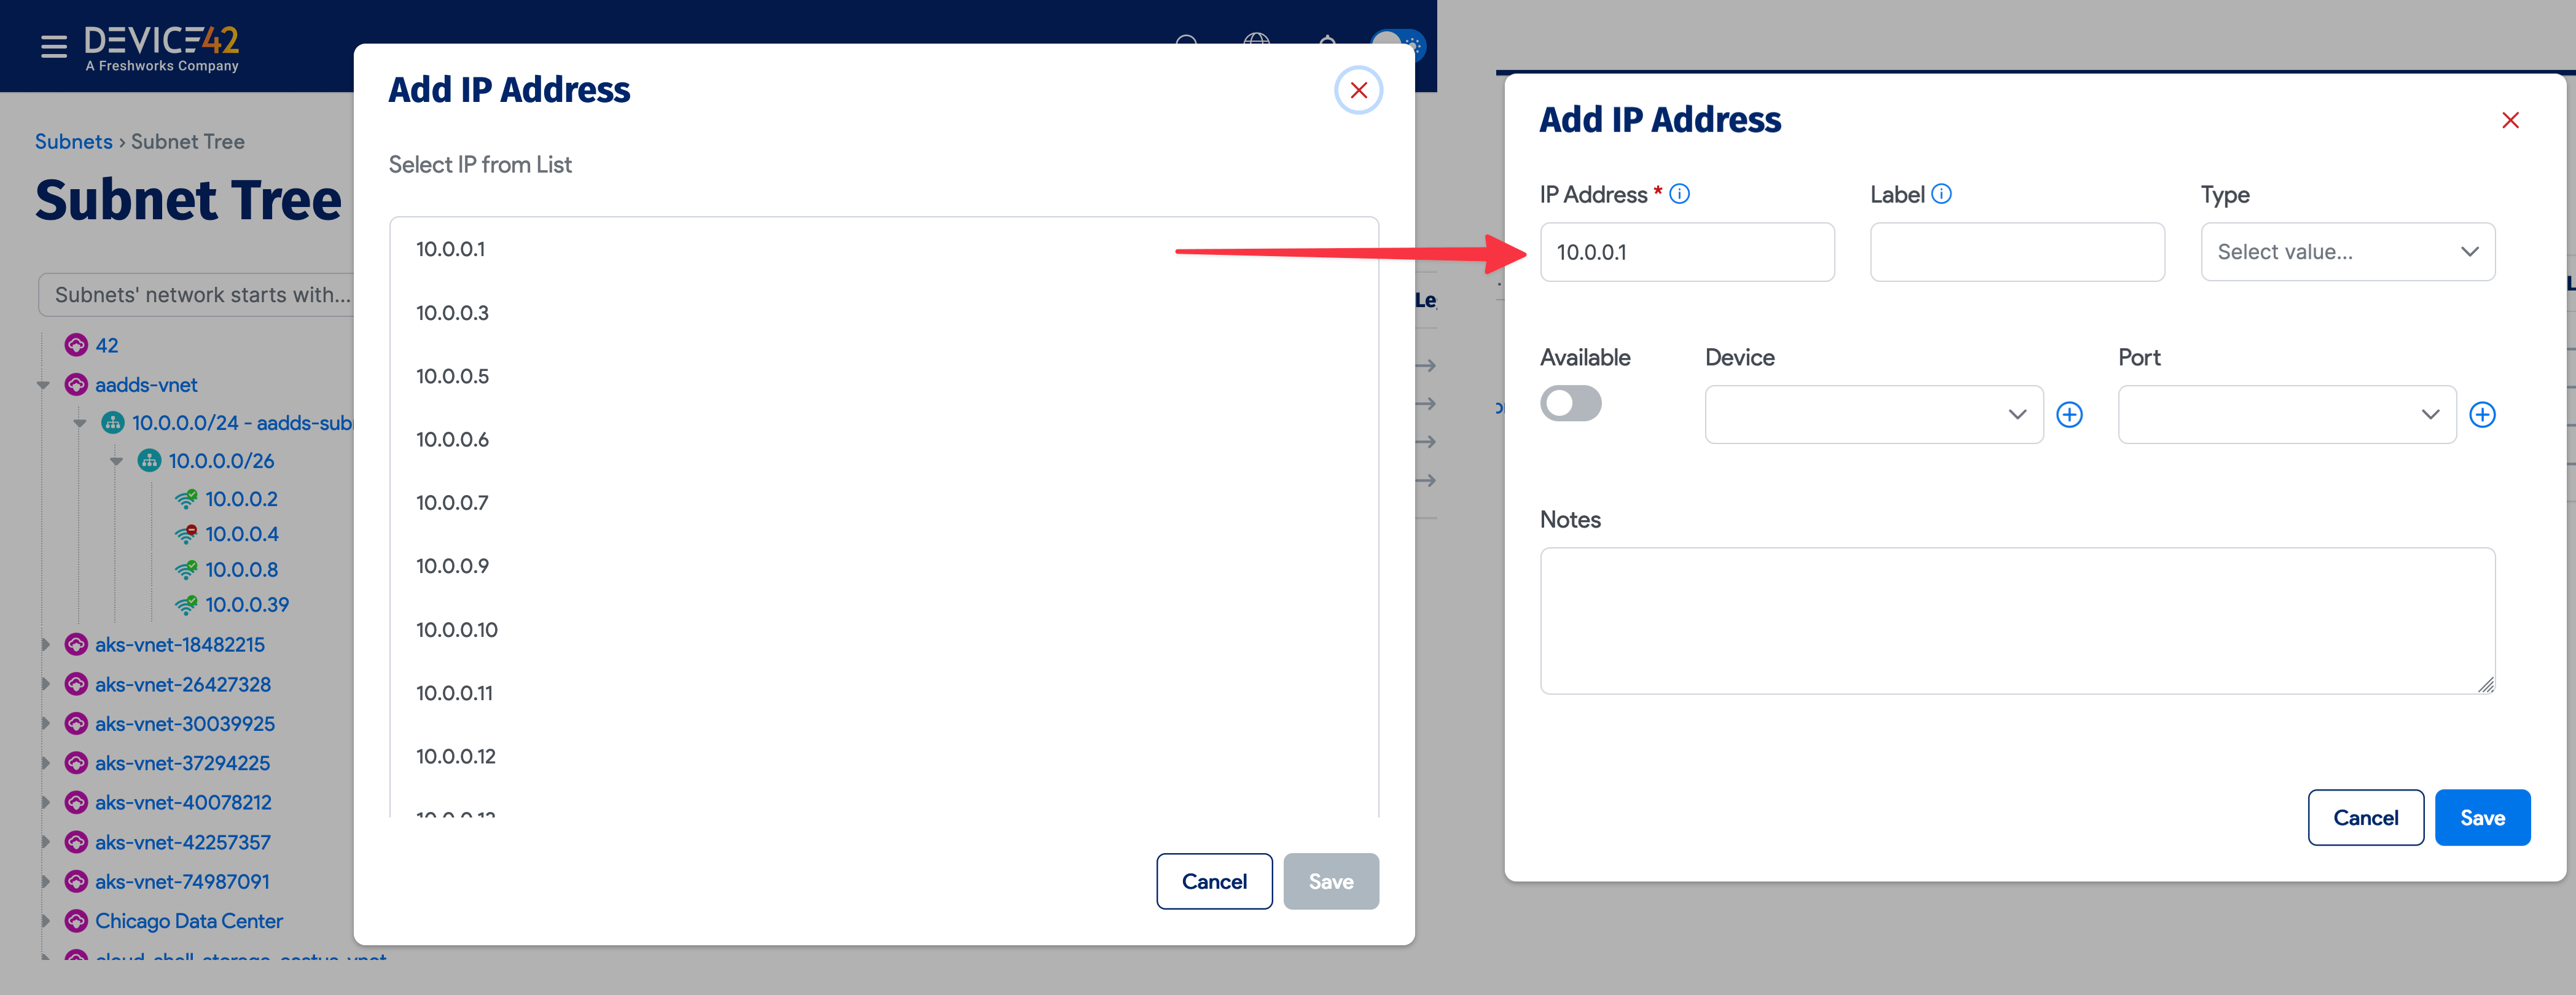
Using the + New IP button after each subnet, you can add a new IP. If the subnet is smaller than 24 mask bits, then you will see a list of all IPs that don’t exist yet in that subnet and you can just pick one for the list. If the subnet is larger, you will go directly to the Add IP Address dialog where you can enter all the details directly.
Also, next to each IP, you will see a Edit button that will enable you to edit the IP right from this page.