Citrix XenServer - Installation
This guide walks you through installing the Device42 Main Appliance on Citrix XenServer.
Outline of Installation Steps
- Download and unzip the compressed Device42 virtual appliance.
- From XenCenter, import the unzipped file.
- Follow the Citrix prompts and choose your server, storage location, and network card.
- Power on the newly deployed Device42 virtual appliance.
- Log in to the Device42 console using the default credentials and update the credentials.
- Configure the static IP address from the console.
- Set the time zone and configure NTP.
- Log in to the Device42 web interface from a browser:
https://FQDN (Fully Qualified Domain Name) or IP address. Update the login credentials here as well.
Illustrated Steps of Installing Device42 on Citrix XenServer
Set up your Device42 instance by following these steps.
Download and Unzip Device42
Download the compressed Device42 virtual appliance and connect to your XenCenter.
Use 7-Zip to decompress the downloaded Device42 virtual appliance image.
Import Device42 into XenCenter
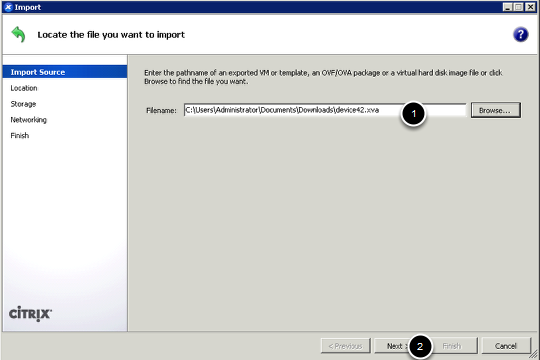
From XenCenter, right-click the server's name and select Import.

Choose the source file you downloaded.
Configure Server, Storage, and Network
Choose your server (or accept the default pool).

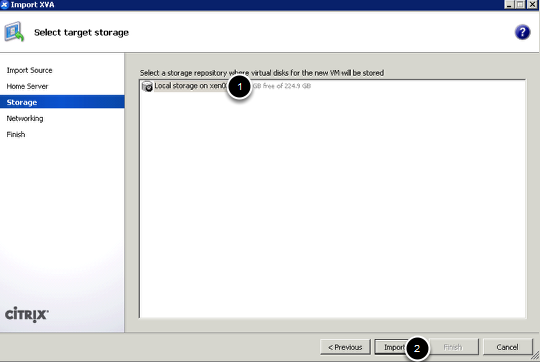
Choose a storage location for the VM.
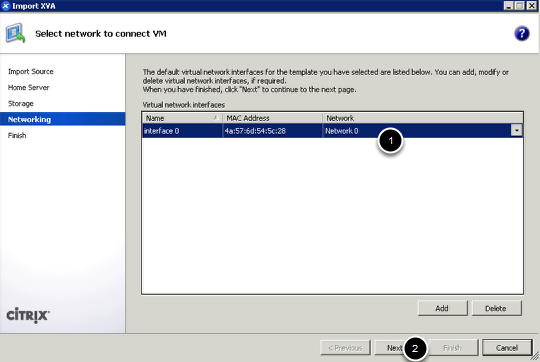
Choose the network card and click Finish.
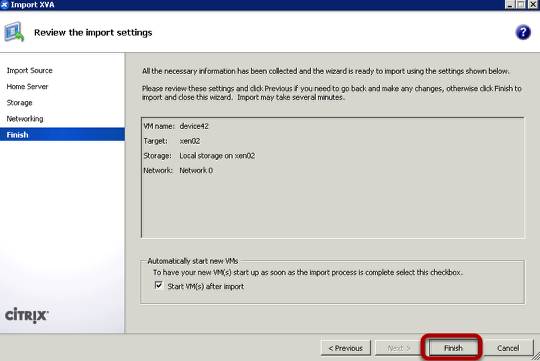
Start the Device42 VM
Power on your newly deployed Device42 virtual appliance.
Log In to the Device42 Console
From the XenCenter interface, open the VM console for your Device42 appliance. The Device42 console login screen will appear automatically.
Log in using the default credentials and change them after logging in:
- Username:
device42 - Password:
adm!nd42
(Deprecated appliance logins: 32-bit: ubuntu/adm!nd42 -- Power: ubuntu/default).
Configure the Static IP Address
From the console, configure the IP address. Use a static IP for all production Device42 VMs to avoid connectivity issues.

Enter your settings on the Device42 IP address configuration screen:

Create a DNS Entry
This is an optional step: Create a DNS entry for the new IP address of the virtual appliance.
Set the Time Zone and Configure NTP
After setting a static IP address, set the time zone and configure NTP to ensure autodiscovery scheduling and log history work correctly.
Log In to the Web Interface
Point your browser to https://FQDN (Fully Qualified Domain Name) or IP address.
Log in to the web interface using the default credentials:
- Username:
admin - Password:
adm!nd42
Please change the username and password as soon as you log in.


You should be up and running, and are now ready to go! If you have any questions that you can't find answers to in the docs, email support@device42.com.
Using SSH
You can apply updates and do other menu-related work using SSH port 404. Please note that root login has been disabled via SSH. Attempting to access the root will cause the VM to disable itself permanently and is not supported.
Next Steps
Install the Device42 Remote Collector and Windows Discovery Service before creating your first discovery job.
You can import data into Device42 using the Device42 API or the Import/Export (xls) tool.