Xen or KVM - Import Disk Alternate Install
These are special case installation instructions for installing the Device42 appliance on Xen- or KVM-based platforms if the Import existing disk image option is missing. Otherwise, please refer to the Device42 guide to Xen and KVM installation.
Outline of Alternative Installation
- Download the Device42 image and use bunzip2 to uncompress the image.
- Create a new virtual machine using the Network Boot option and complete the installation wizard setup.
- Disable Network (PXE) from the Device42 virtual machine Boot Options.
- Log in to the Device42 console and web interface as described in the Set Up the Main Appliance section and later of the Virt-Manager installation page.
Illustrated Installation Steps
The following alternative installation steps are similar to the standard Virt-Manager installation, except that you select the Network Boot option instead of importing the Device42 image and then disable the network boot.
Download and Uncompress with bunzip2
The raw image for Xen or KVM has been compressed using bzip2. When you get the file on the KVM host, run the bunzip2 command to uncompress the file:
bunzip2 device42-3.2.3-raw.img.bz2
Create a New Virtual Machine
Once you have uncompressed the downloaded raw image, create a new virtual machine.
Choose the Network Boot option. We'll add the disk later. Make sure you don't have some sort of automated network boot enabled for this machine. You will not see the Import existing disk image option.

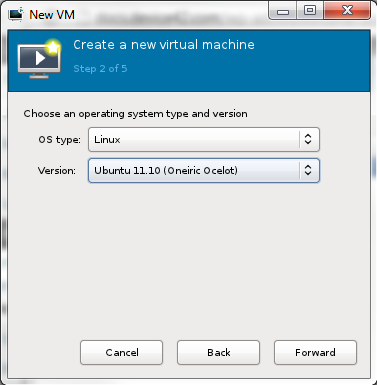
Choose OS and Version
Choose Linux as the OS type and the latest Ubuntu version in the Version field.
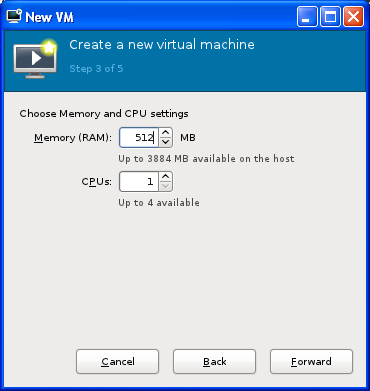
Allocate at least 8 GB RAM and 2 vCPUs for production appliances. See Sizing Recommendations.
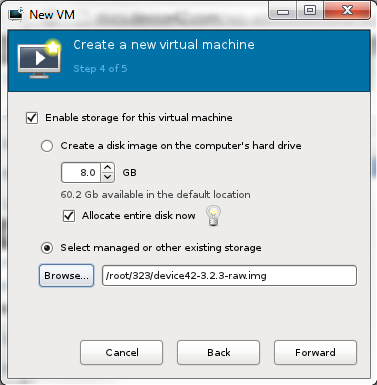
Choose Disk
Choose your virtualization type under the Advanced options and select i686 as the Architecture.
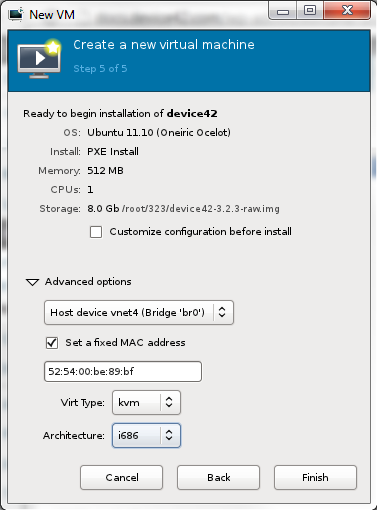
Disable Network Boot
Go to Details (1), Boot Options (2), uncheck Network (PXE), and click Apply (4).

Complete the Setup
Follow the steps outlined in the Set Up the Main Appliance and Log In section of the Xen or KVM Using Virt-Manager - Installation page to complete the installation of the Main Appliance.