Adding PDUs
Add a new PDU by heading to DataCenter > Power Units > Power Units. Relevant PDU-related fields are listed and defined below.
Note that PDUs (like almost all Device42 CIs) can also be added and manipulated via the API.
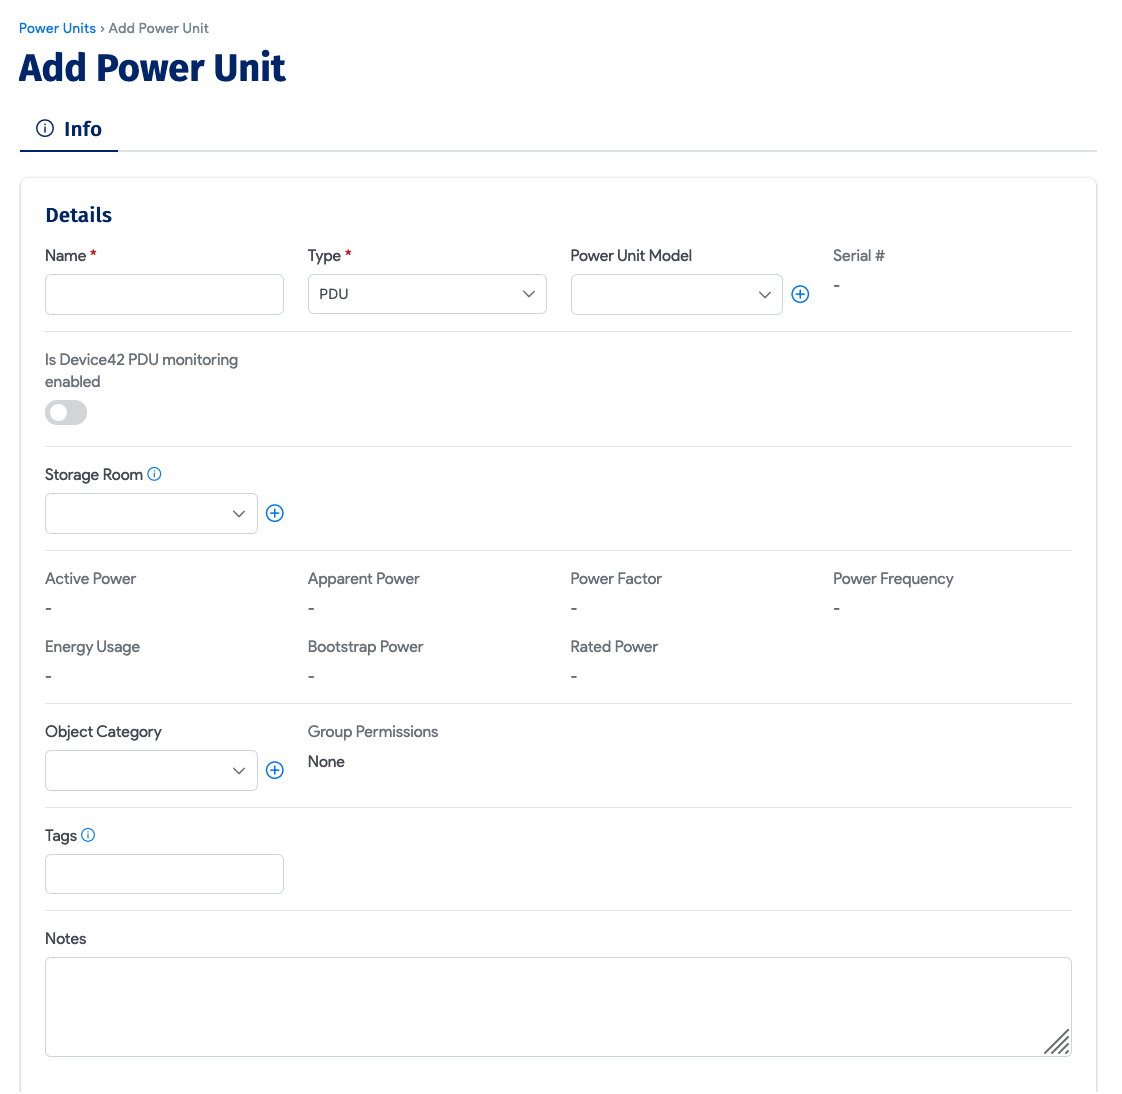
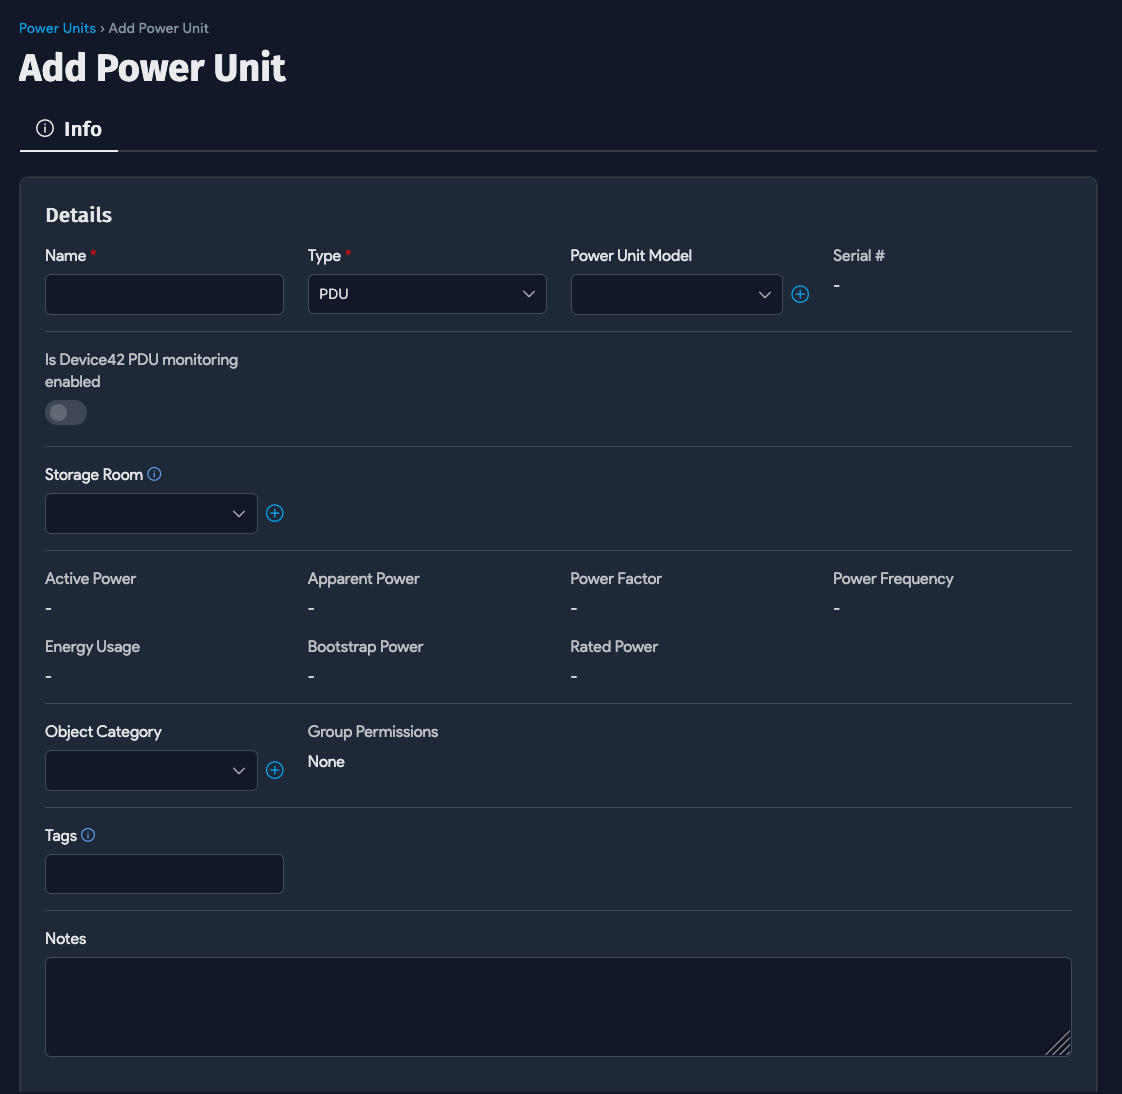
PDU Field Descriptions
- Name: Name your PDU (required).
- Type: Choose between PDU, UPS, ATS, and Environmental Monitor (required).
- Power Unit Model: Choose the PDU model (required if the PDU is rack-mounted or used to track individual ports on the PDU).
- Is Device42 PDU monitoring enabled: Flag this PDU as being monitored by Device42.
- Storage Room: If the power unit is not stored in a rack or server room, provide the storage room where the PDU is located. Note that selecting a storage room will remove existing rack and server room information.
- Object Category: Select an object category to which this PDU belongs. This field is visible if Role-Based Access Control (RBAC) is enabled under Tools > Settings > Global Settings.
note
The Set Object Category option on the Actions menu of the Power Units list page is only visible if RBAC is enabled.
- Tags: Include a comma-separated list of tags to categorize this power unit.
- Notes: Optionally add notes regarding this power unit.
Device Mapping Section

Device: Associating your PDU with a device is required only if you want to track IP address, life cycle, or other asset information for the PDU; IP and asset info is tracked via the chosen device (optional).
- Serial #: If PDU is mapped to a device, the serial number of the mapped device is shown here.
- Asset #: If PDU is mapped to a device, the asset number of the mapped device is shown here.
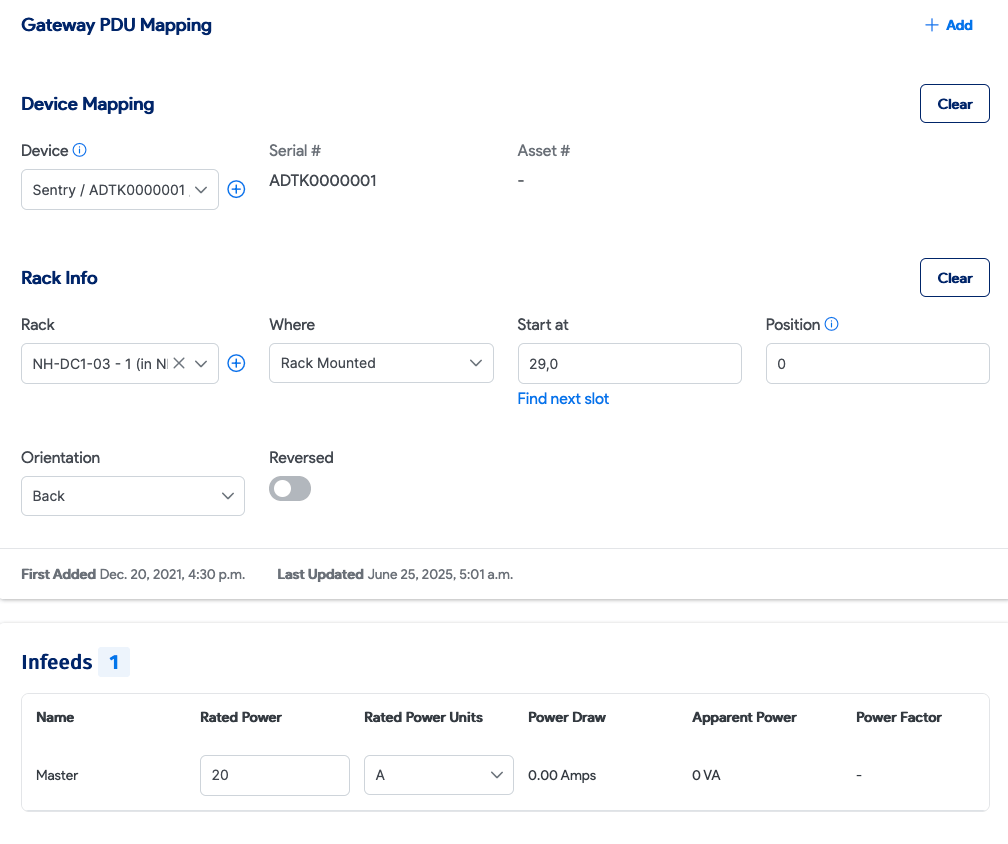
Gateway PDU Mapping Section
Gateway PDU: If this PDU is plugged into another PDU (aka daisy chained), identify the "Gateway PDU" it is plugged in to, if any (optional).
Infeeds: Power infeed information will display here (n/a; auto-discovered).
Custom Fields: Any custom fields you have created for PDUs will display here (optional).
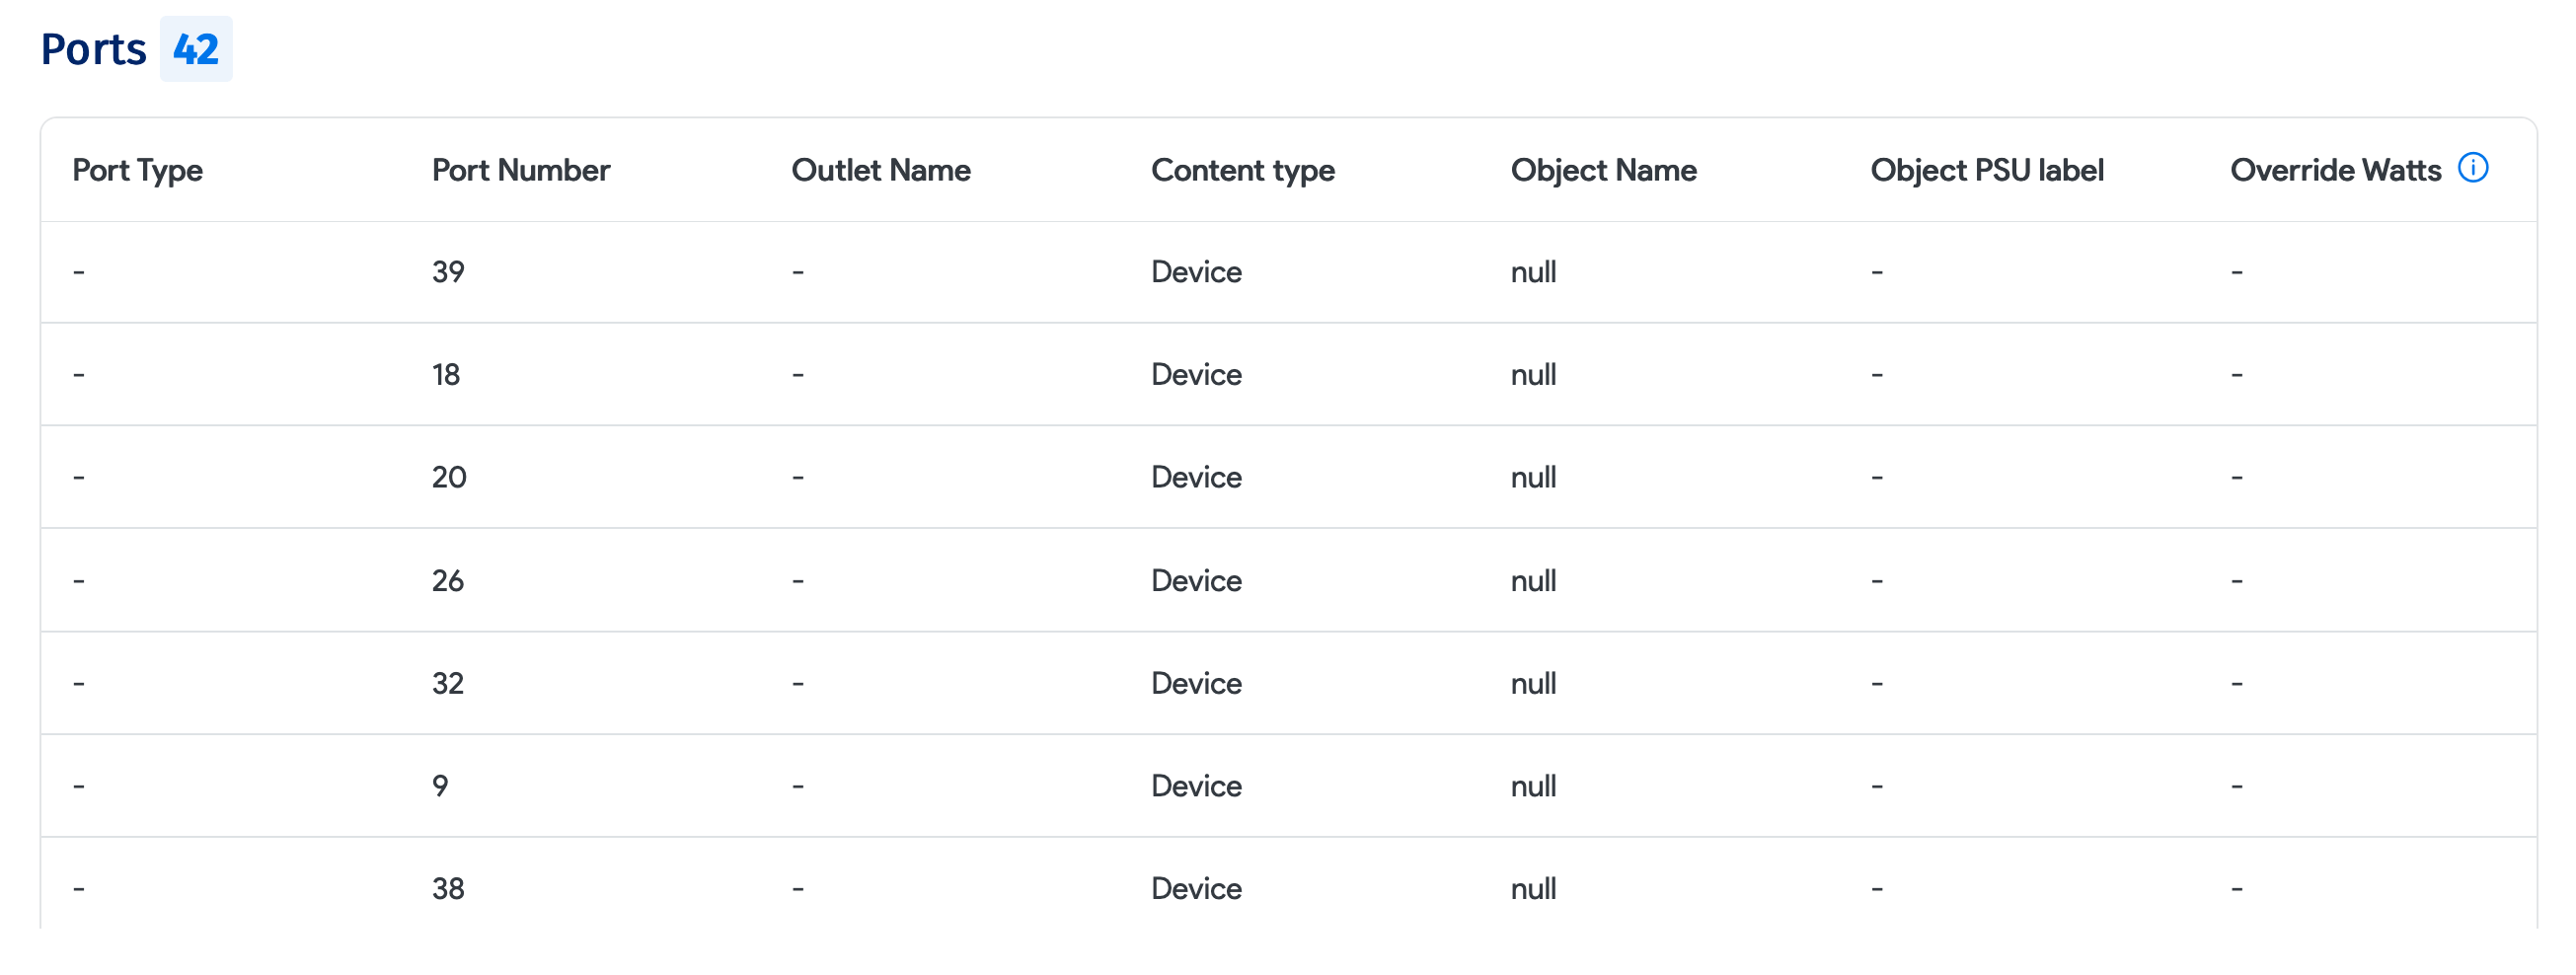
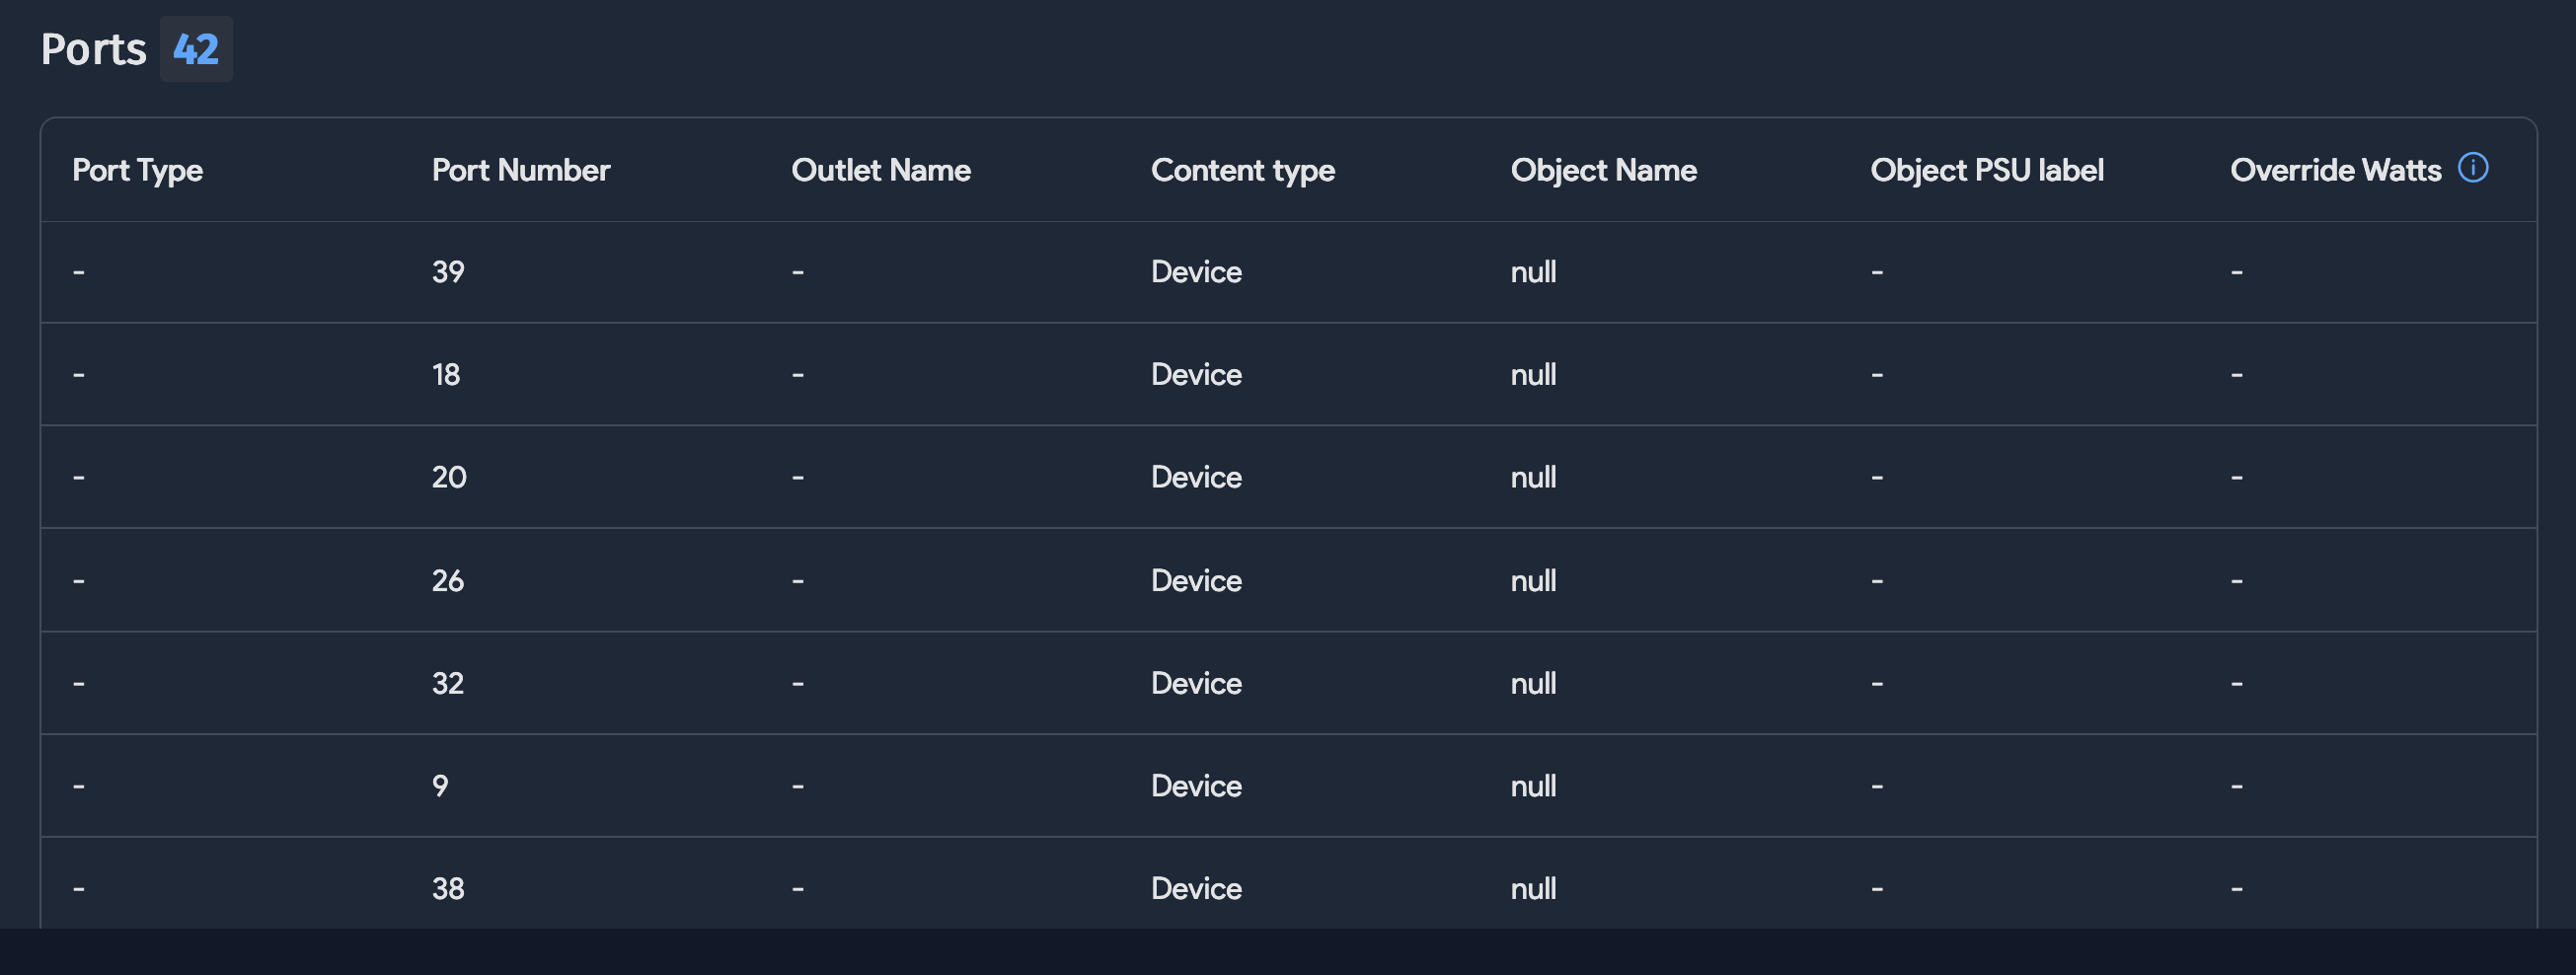
Upon saving your new PDU, Device42 will automatically add ports based on the selected PDU model. Note that ports can only be added at the time of PDU creation and cannot be altered later!
Automatically Created Ports
When you click Save, the new PDU is created and PDU ports are automatically generated based on the port layout defined by the chosen PDU model. For information on defining your PDU model(s), see the Defining PDU Models section of the Device42 Docs.
Map PDUs to a Device
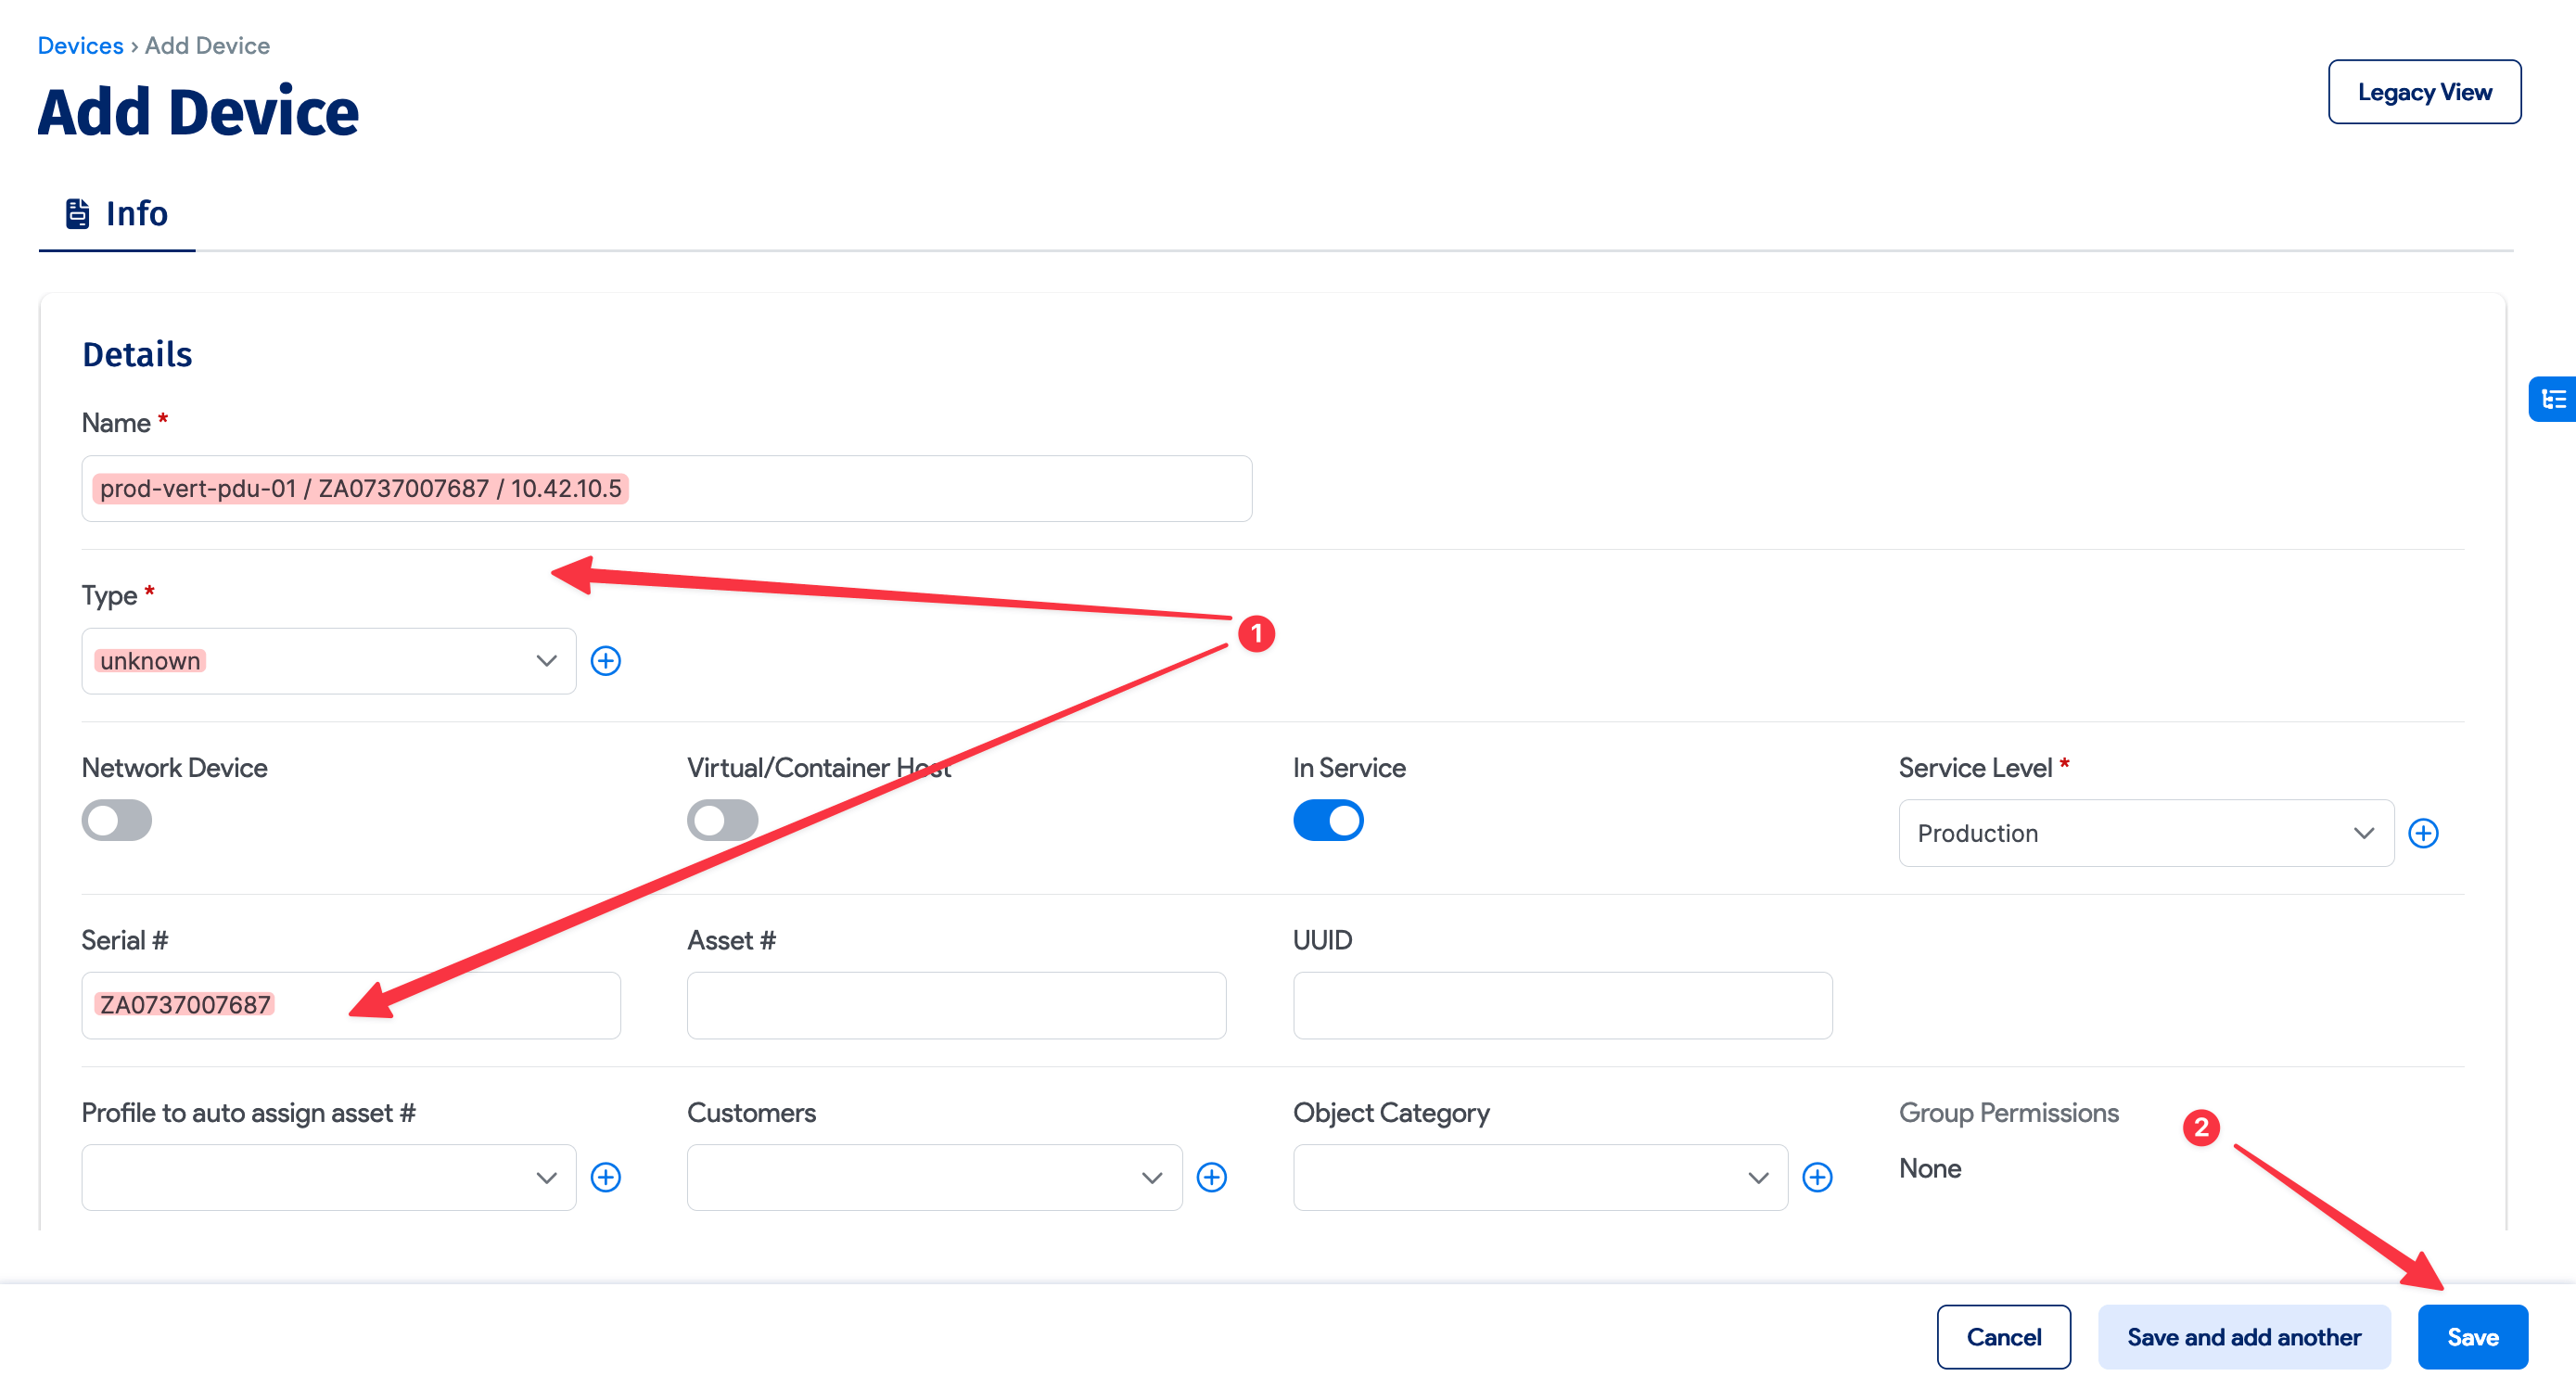
To track details about a PDU (for example, its serial number, asset number, IP address, purchase information, and life-cycle management), map the PDU to a device. Create a device for the purpose of PDU mapping as follows:
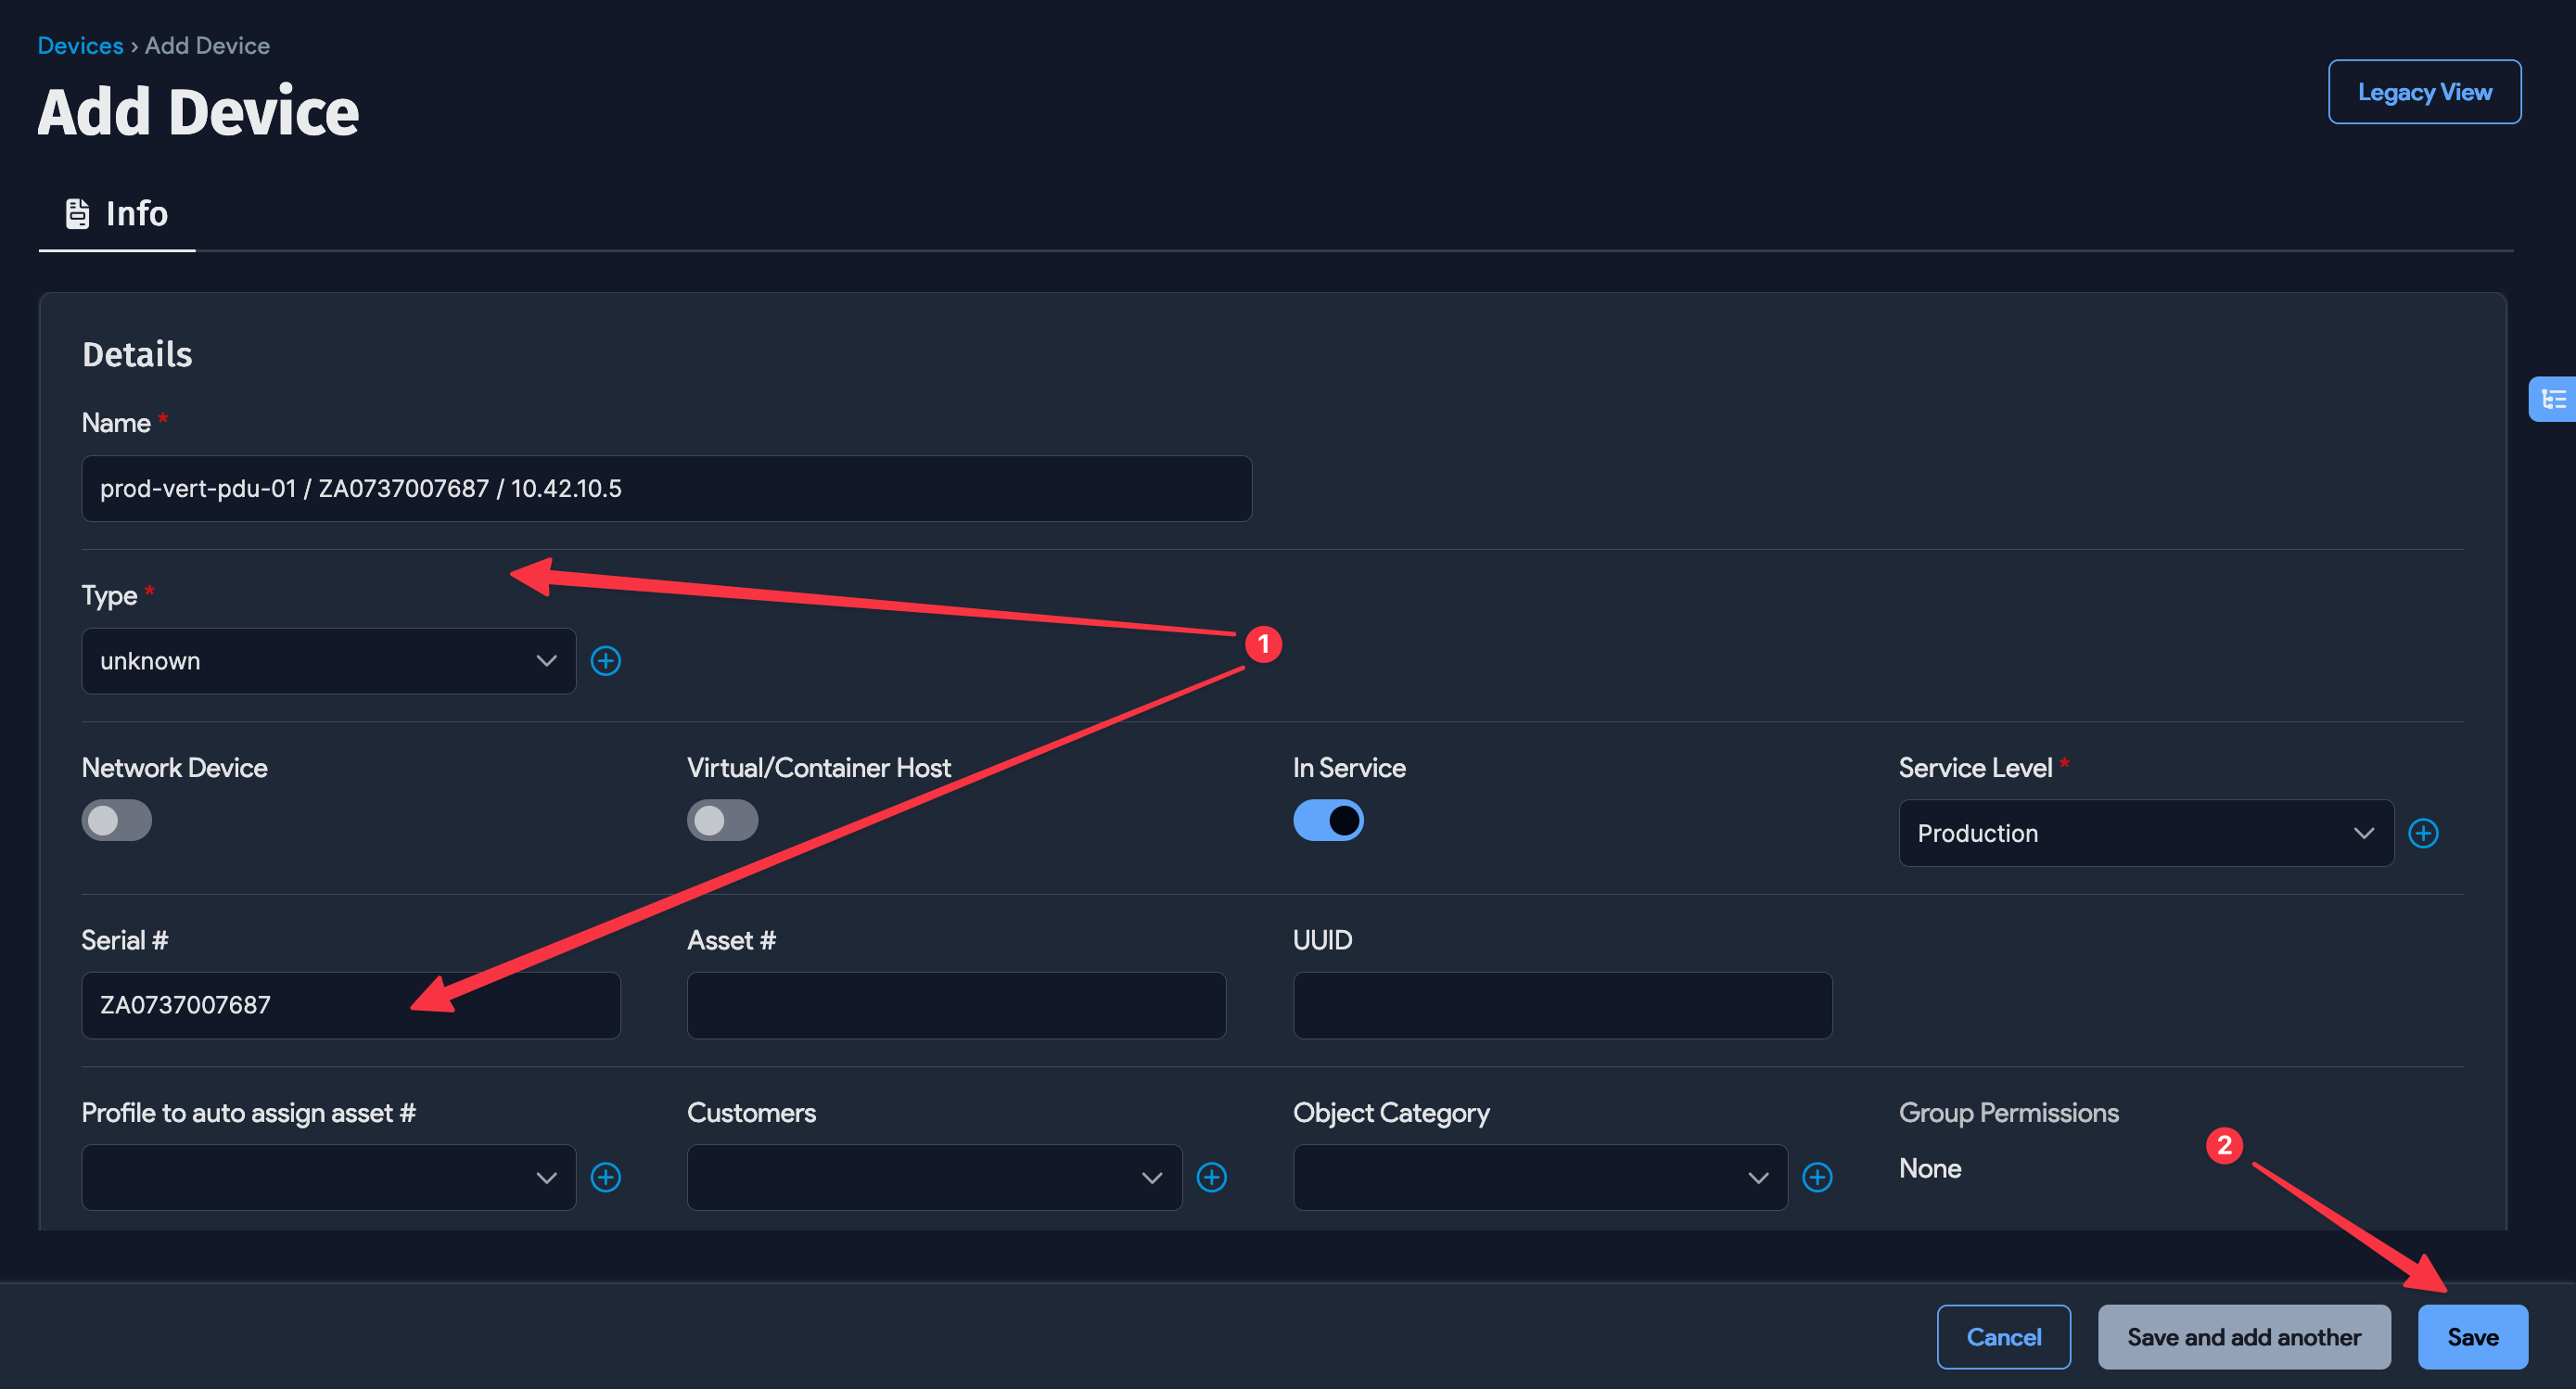
- Create a new device, setting its Type to unknown (see image above). For better organization, we recommend (but do not require) that you give the device the same name as the PDU that you will be mapping it to.
- Set the new device's subtype to PDU (see the above image). There is no need to define hardware, and all other fields are optional.
- Save the new device.
- Head back to the PDU CI that will be linked to the device you just created. Edit the PDU by clicking the edit button, and click the magnifying glass on the Device Mapping option (see the image below). Choose the device you created in Steps 1-3 by clicking on its name in the Select Device popup.
- Save the changes to the PDU.
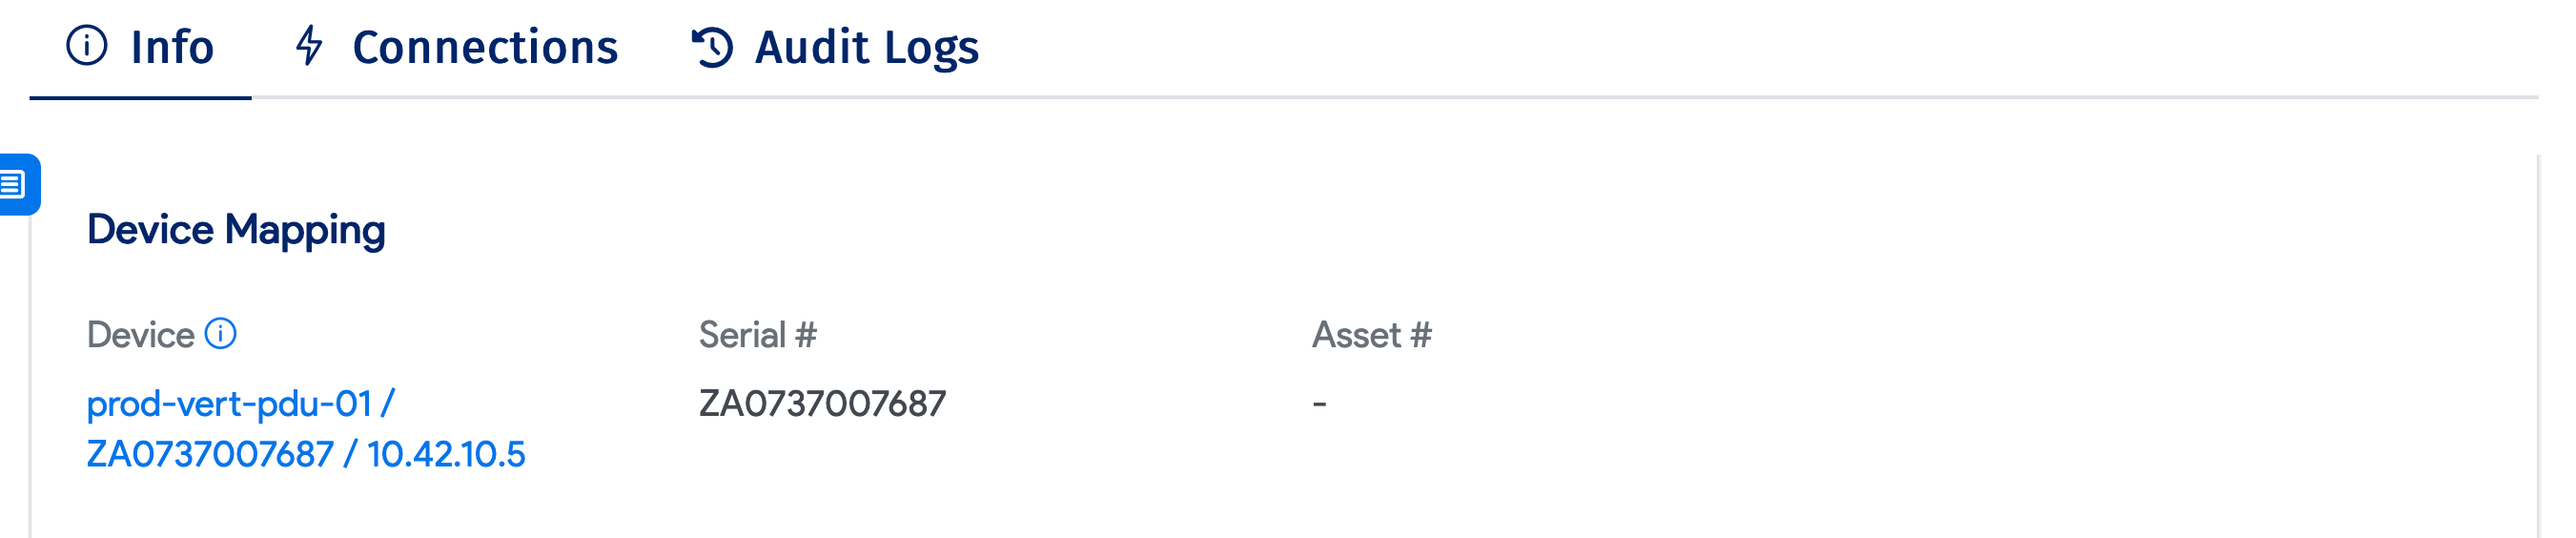
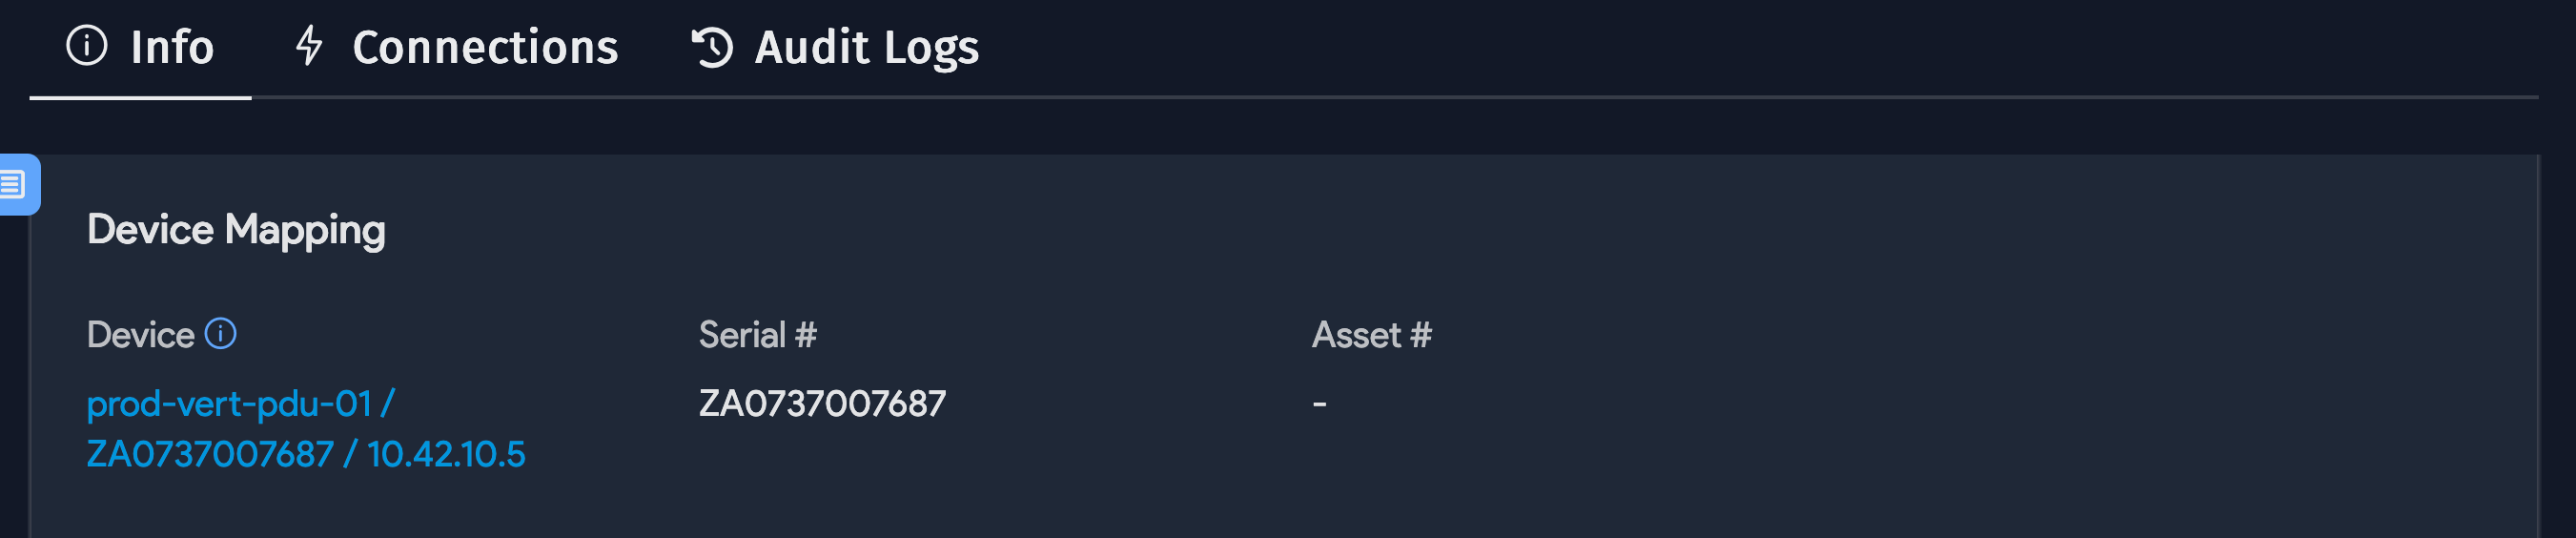
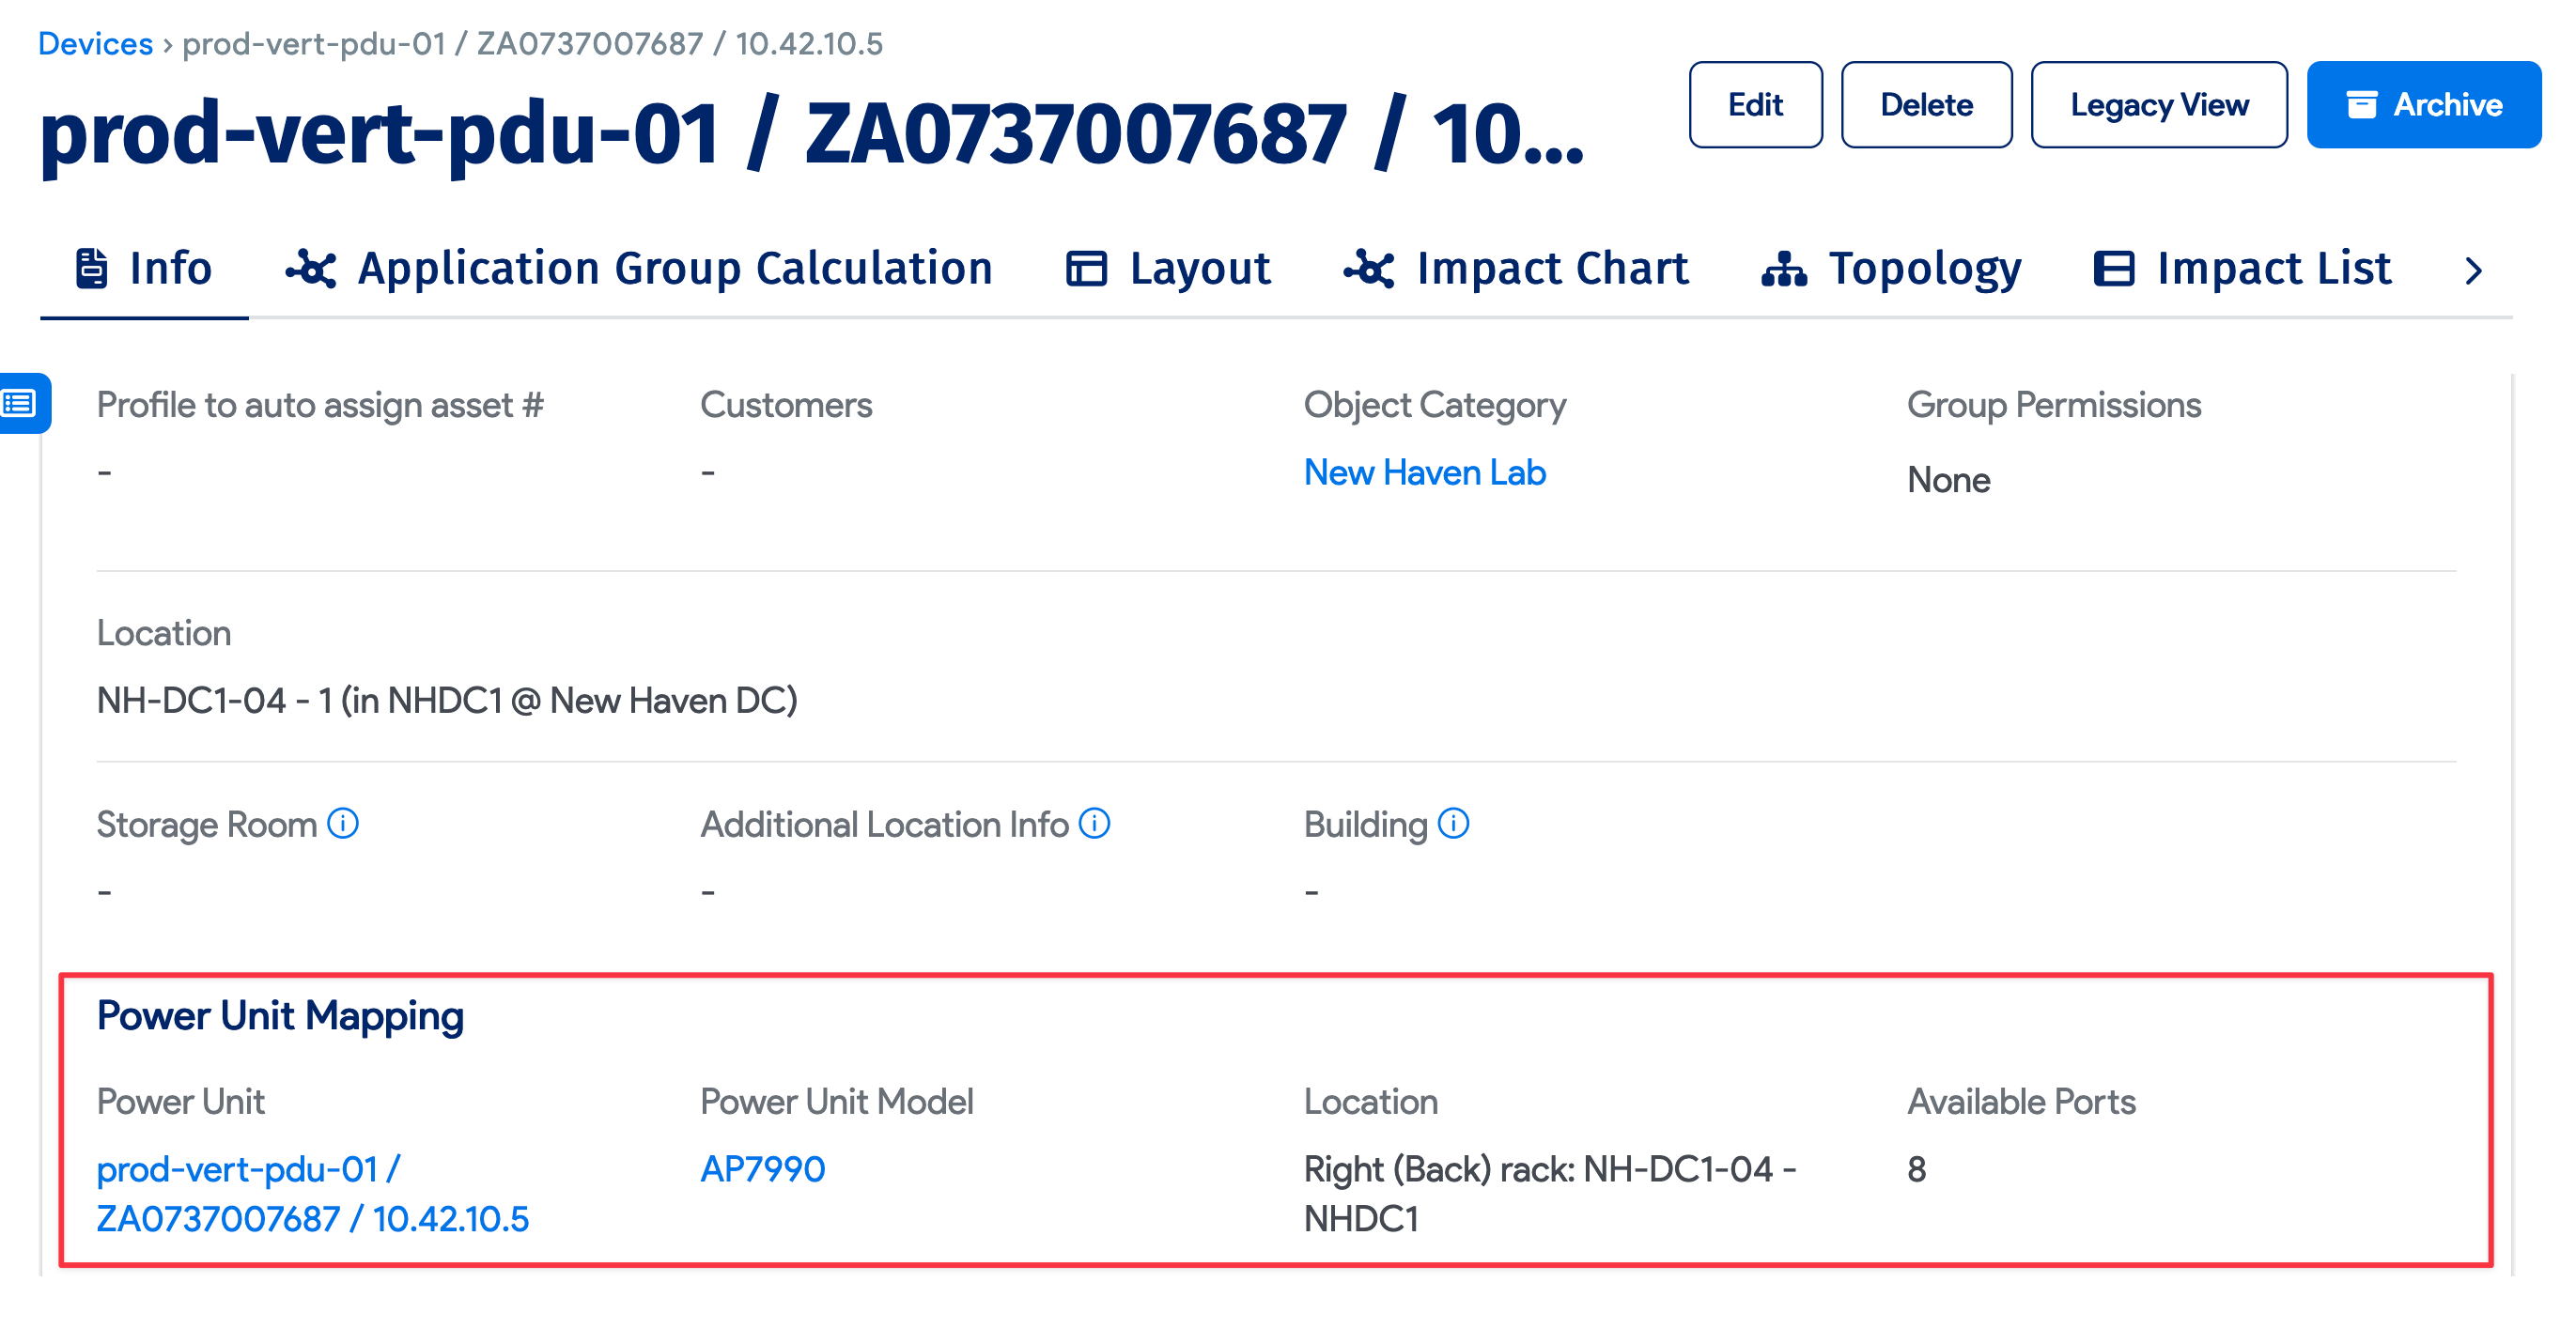
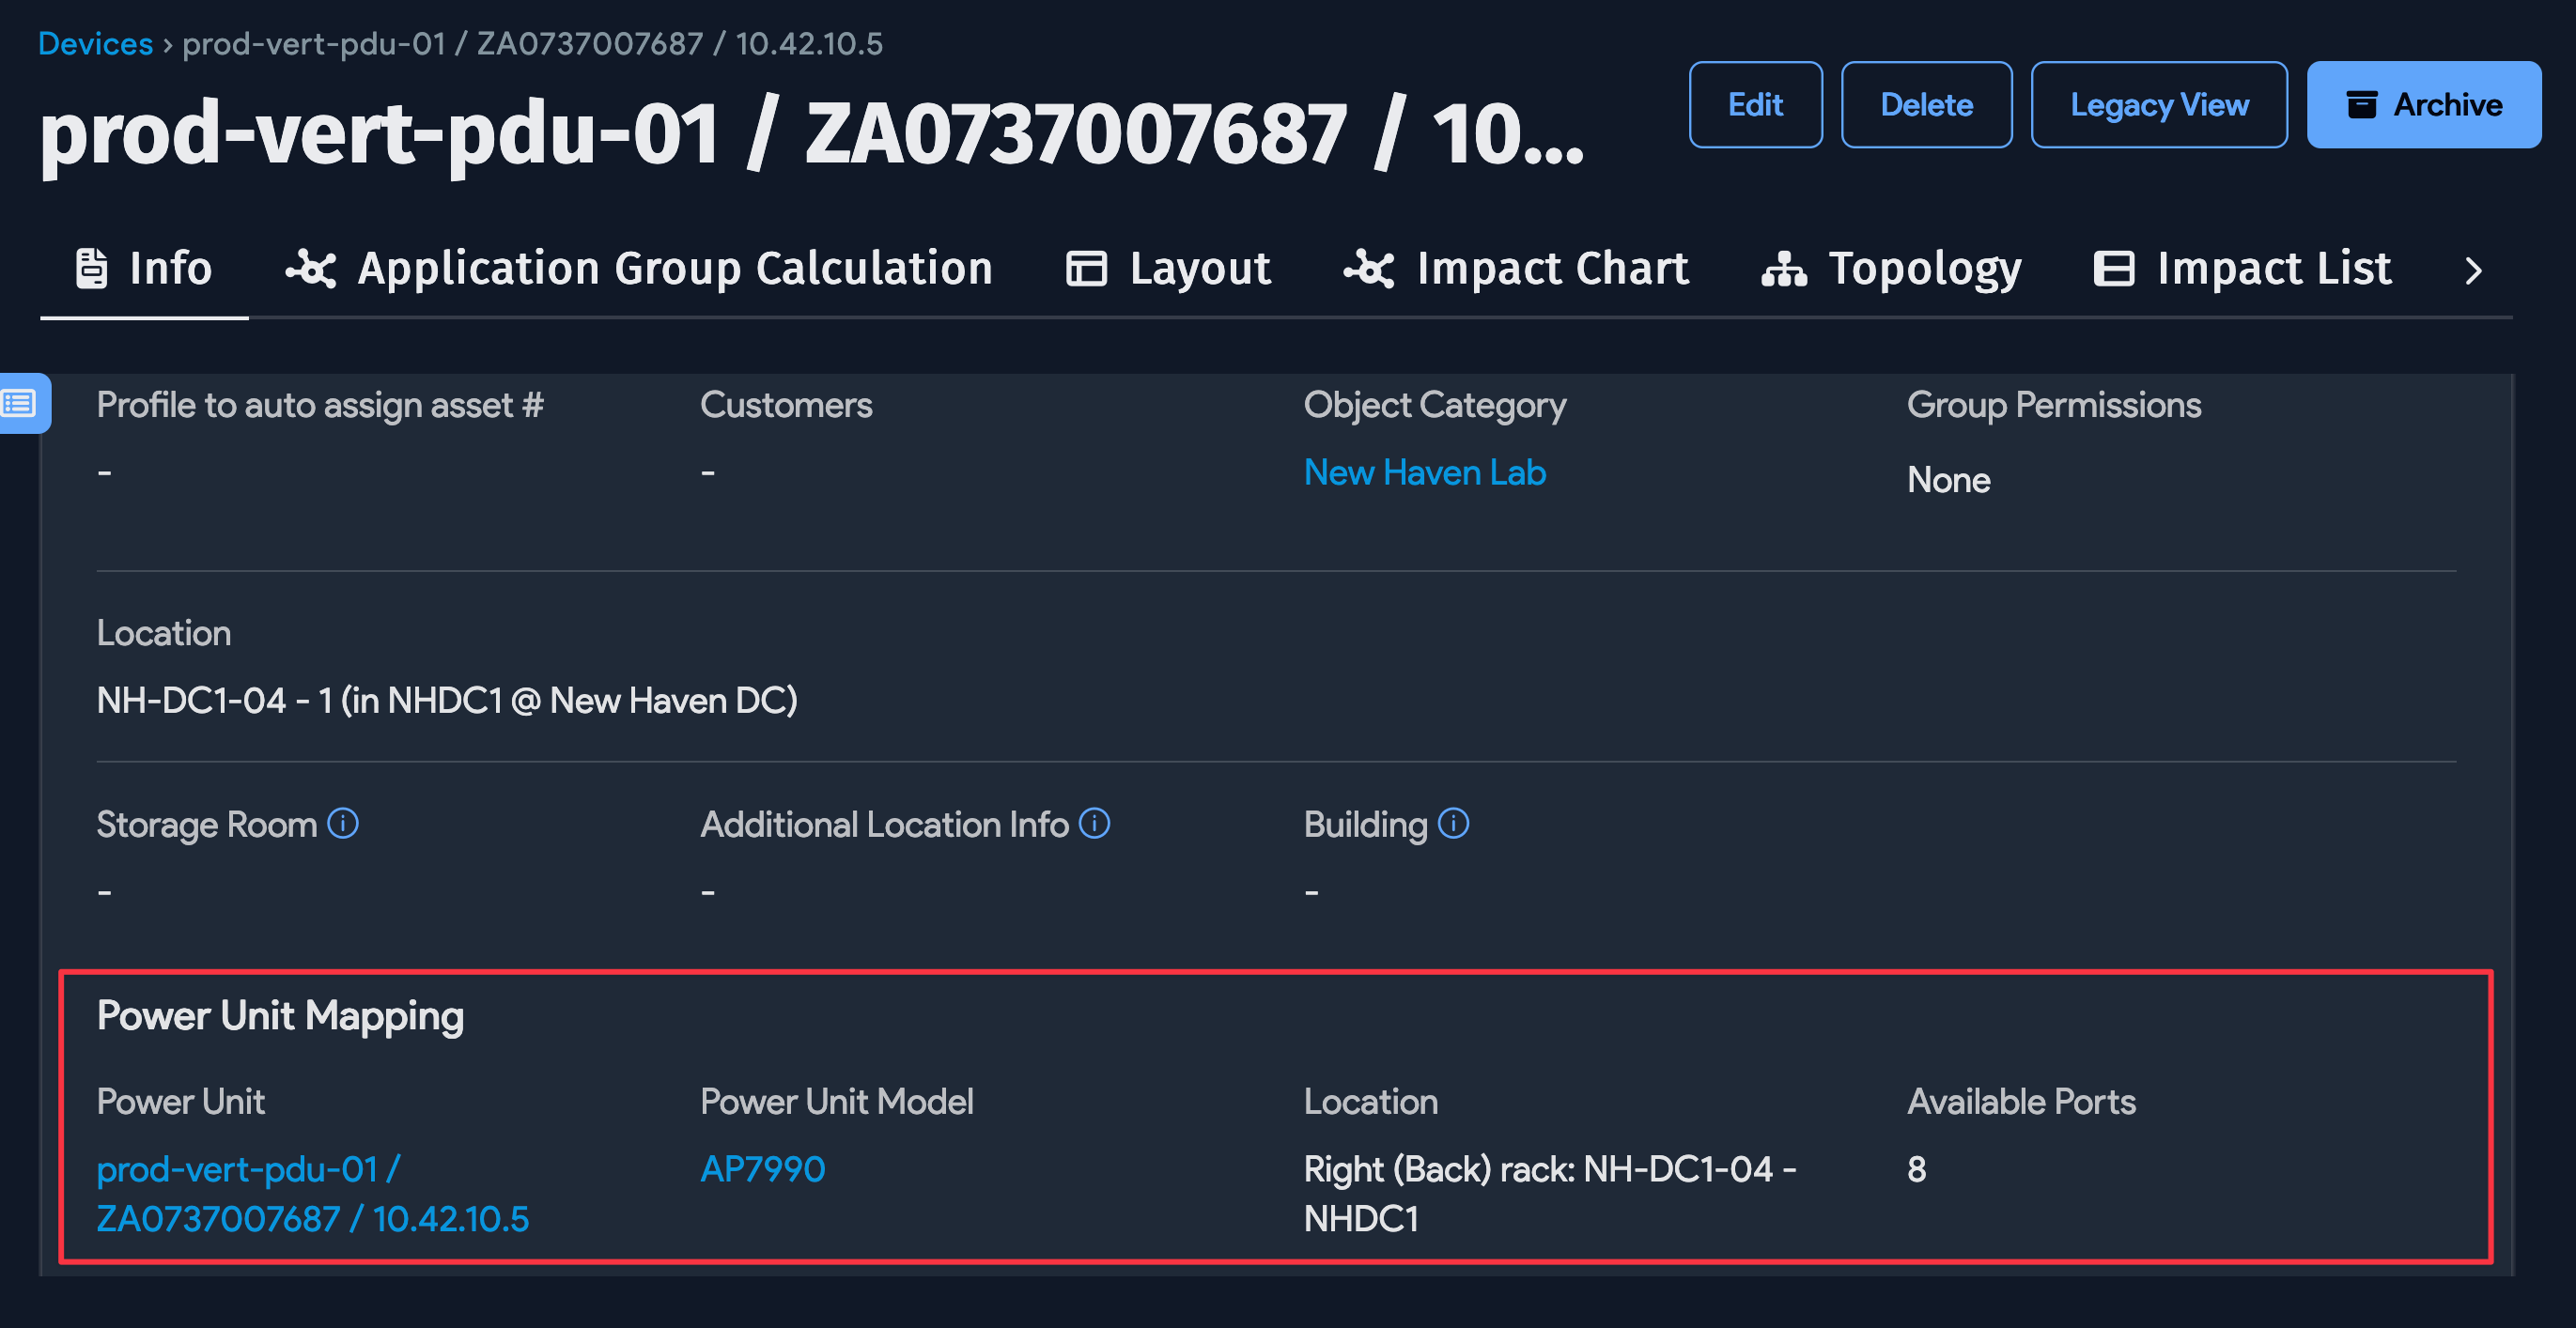
View and Navigate Between a Mapped PDU and Device
You can easily navigate from a device to the PDU it's plugged into or from a PDU to the device page of the device that's plugged into it. The PDU mapping page links to the device details page (see the above image) and the device mapping page links back to the PDU details page (see the image below).