Manage Parts
This page explains the part model and parts structure in Device42 and how to create and manage parts manually. It also covers part assignments, inventory counts, and setting up low-stock alerts.
Parts Overview
A part model is a template that holds information describing a type of hardware component, such as the model number, size, and type (for example, HDD or RAM). Parts are specific instances created from that template — for example, an individual hard disk with a serial number and a storage room assignment.
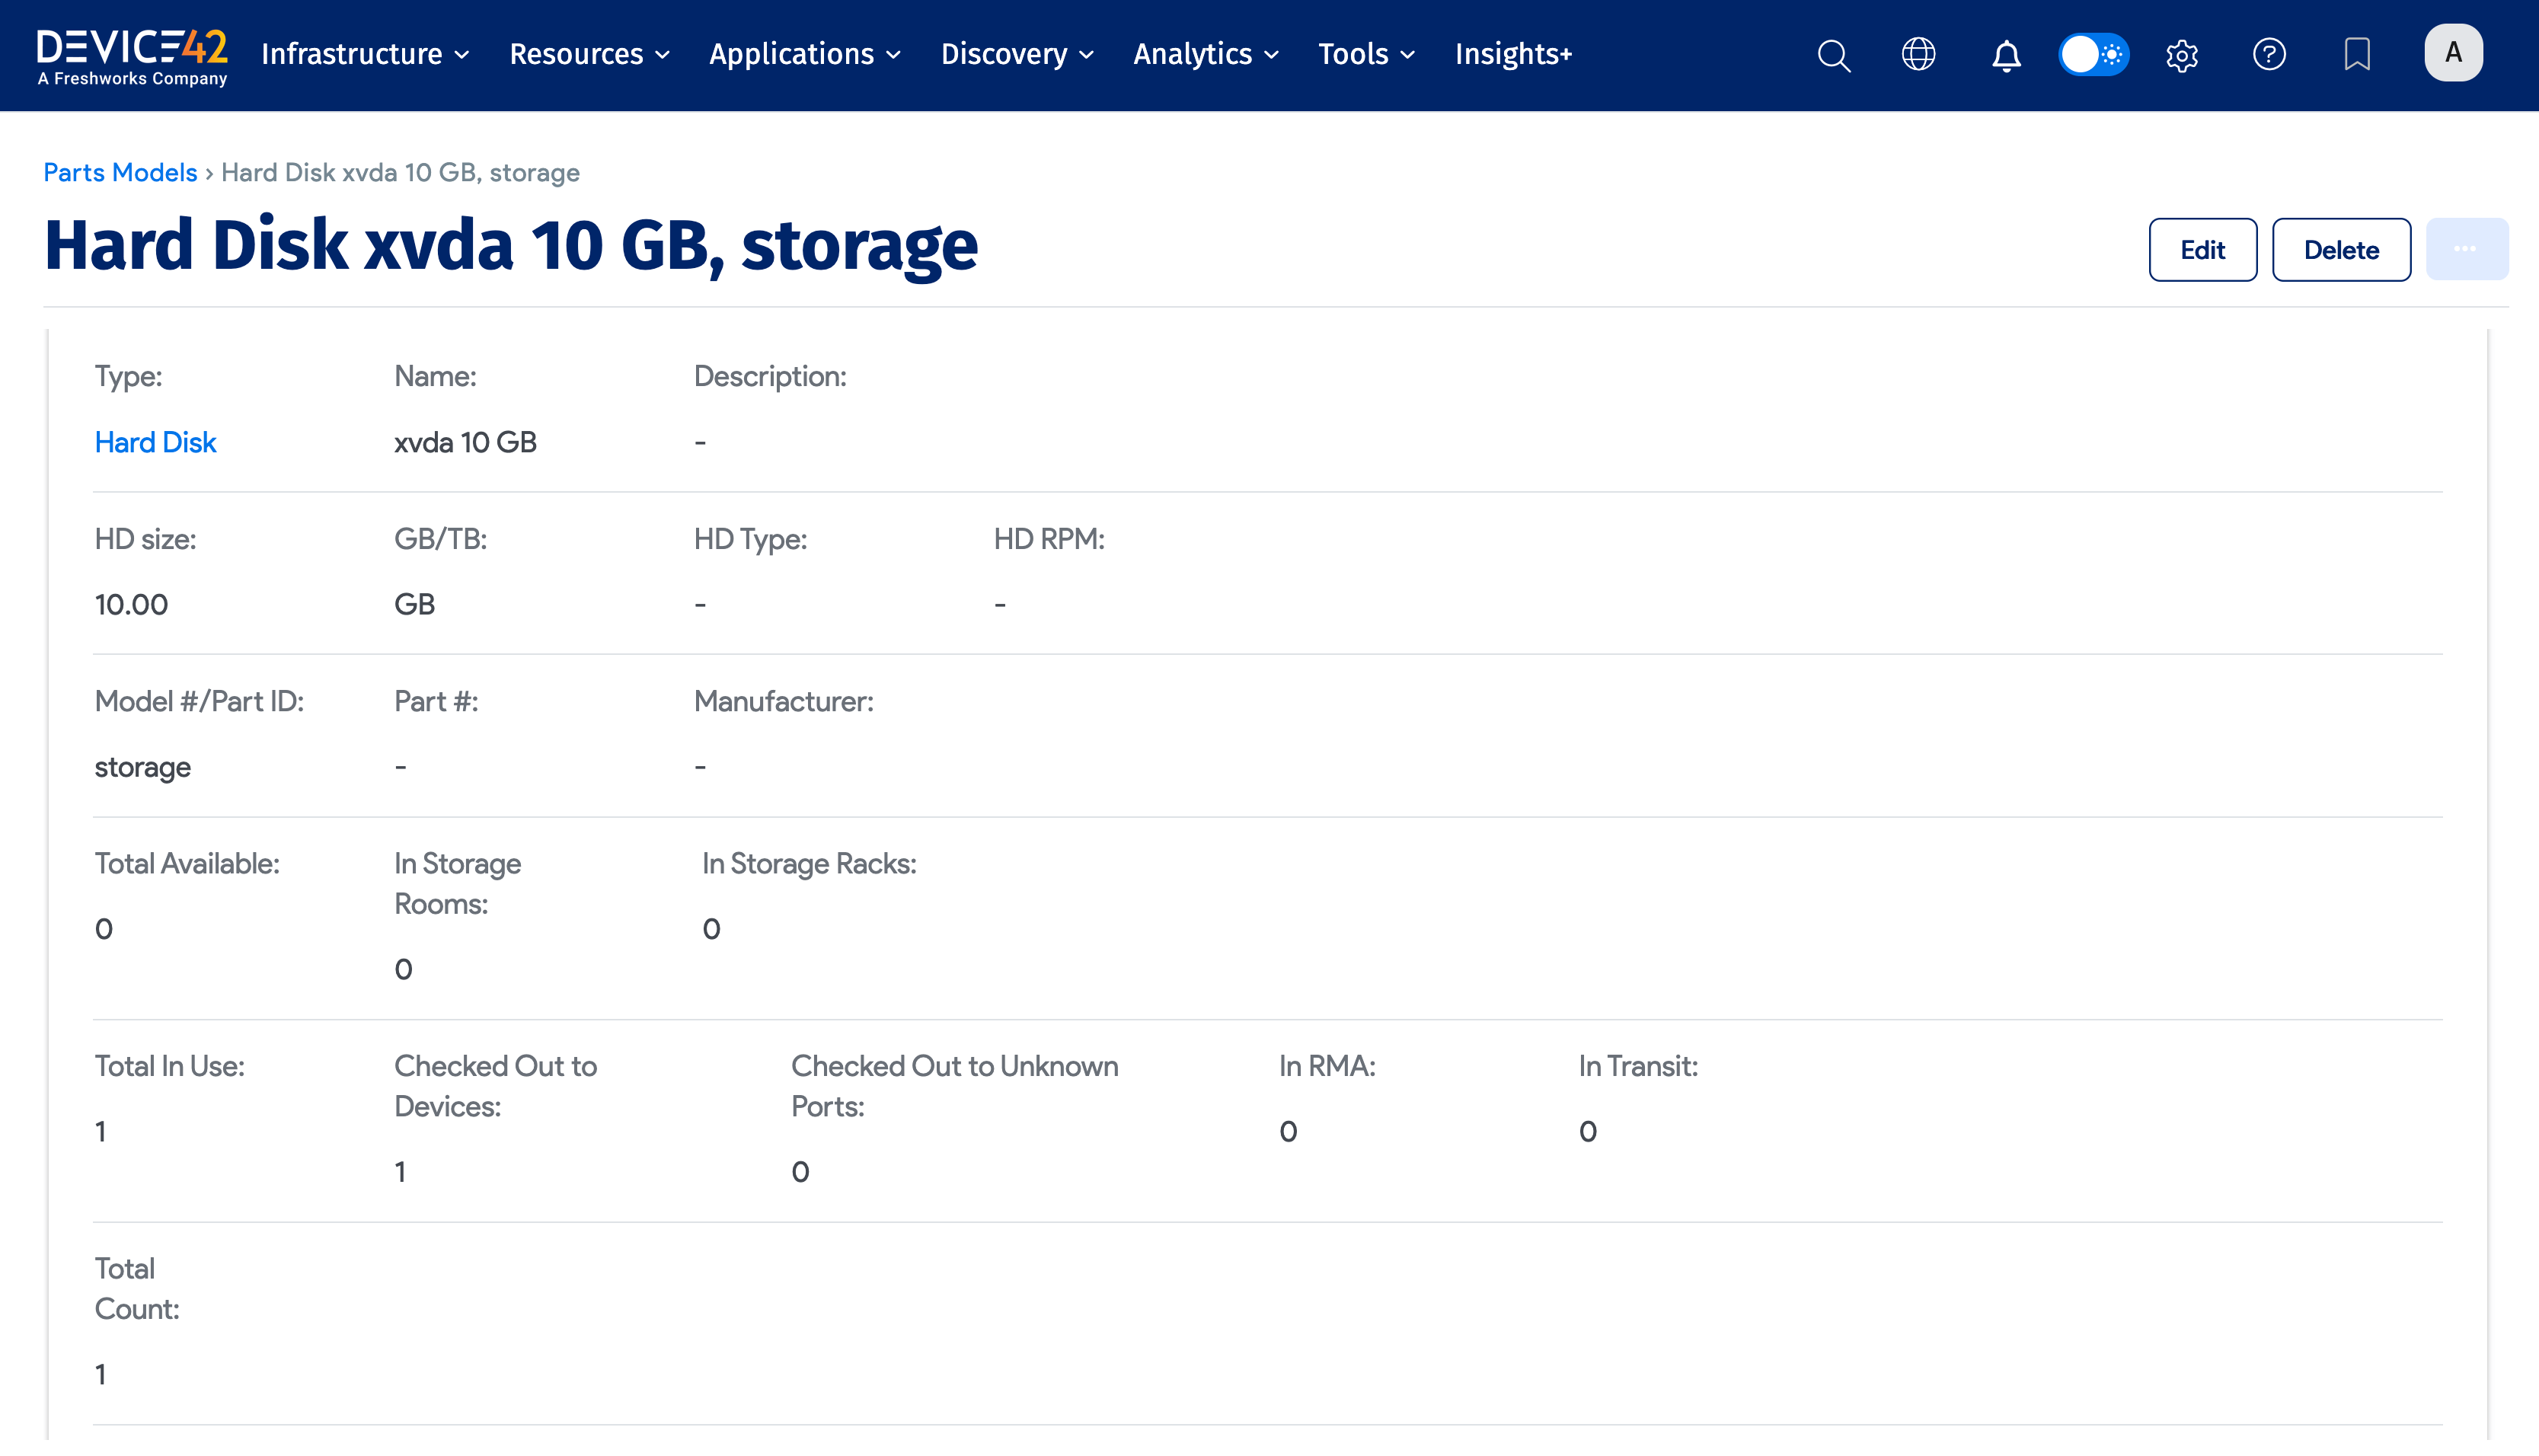
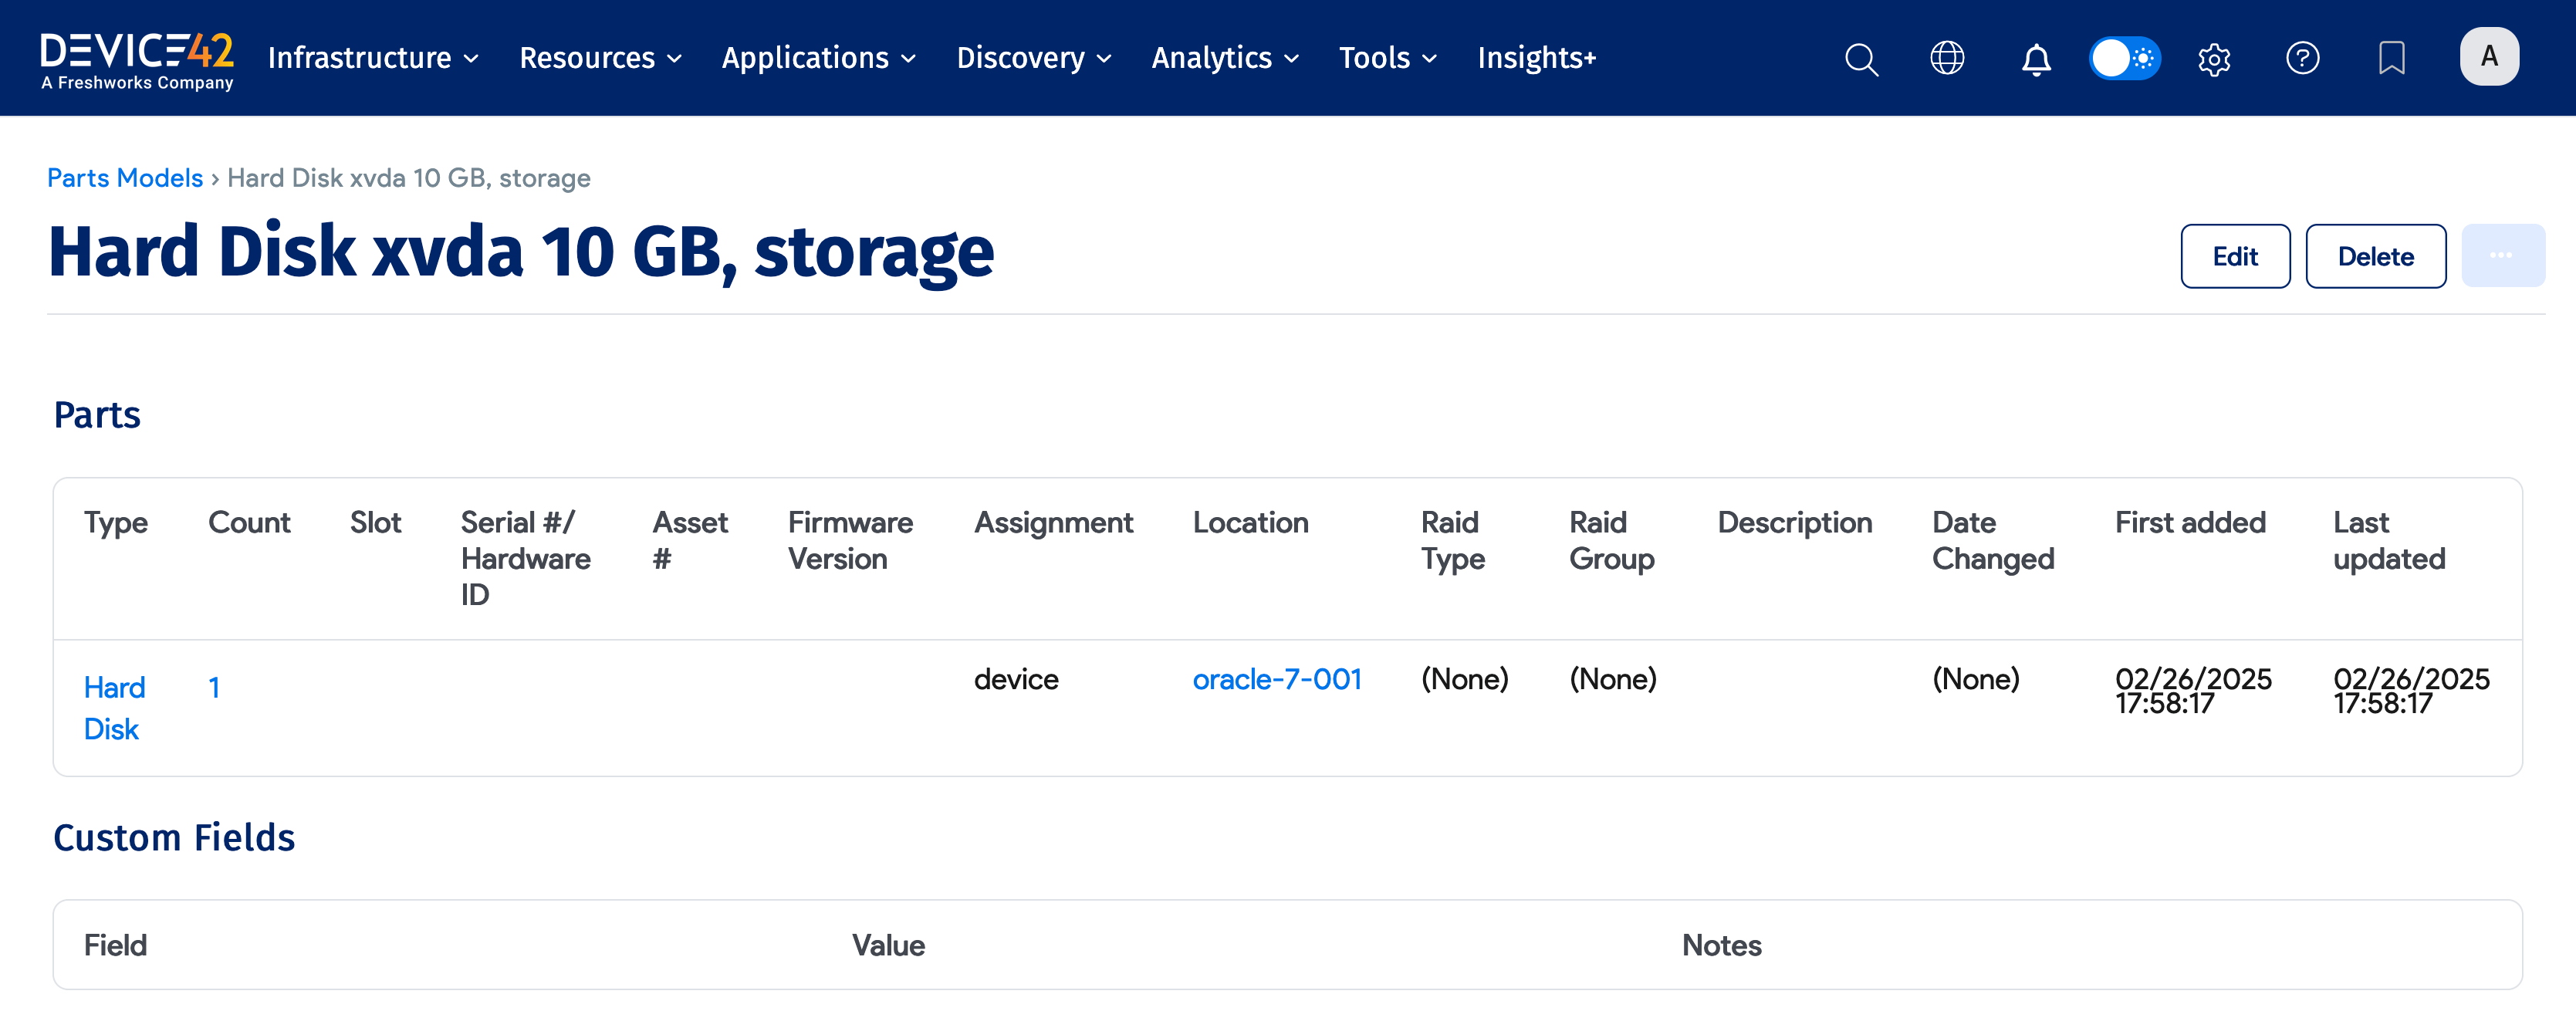
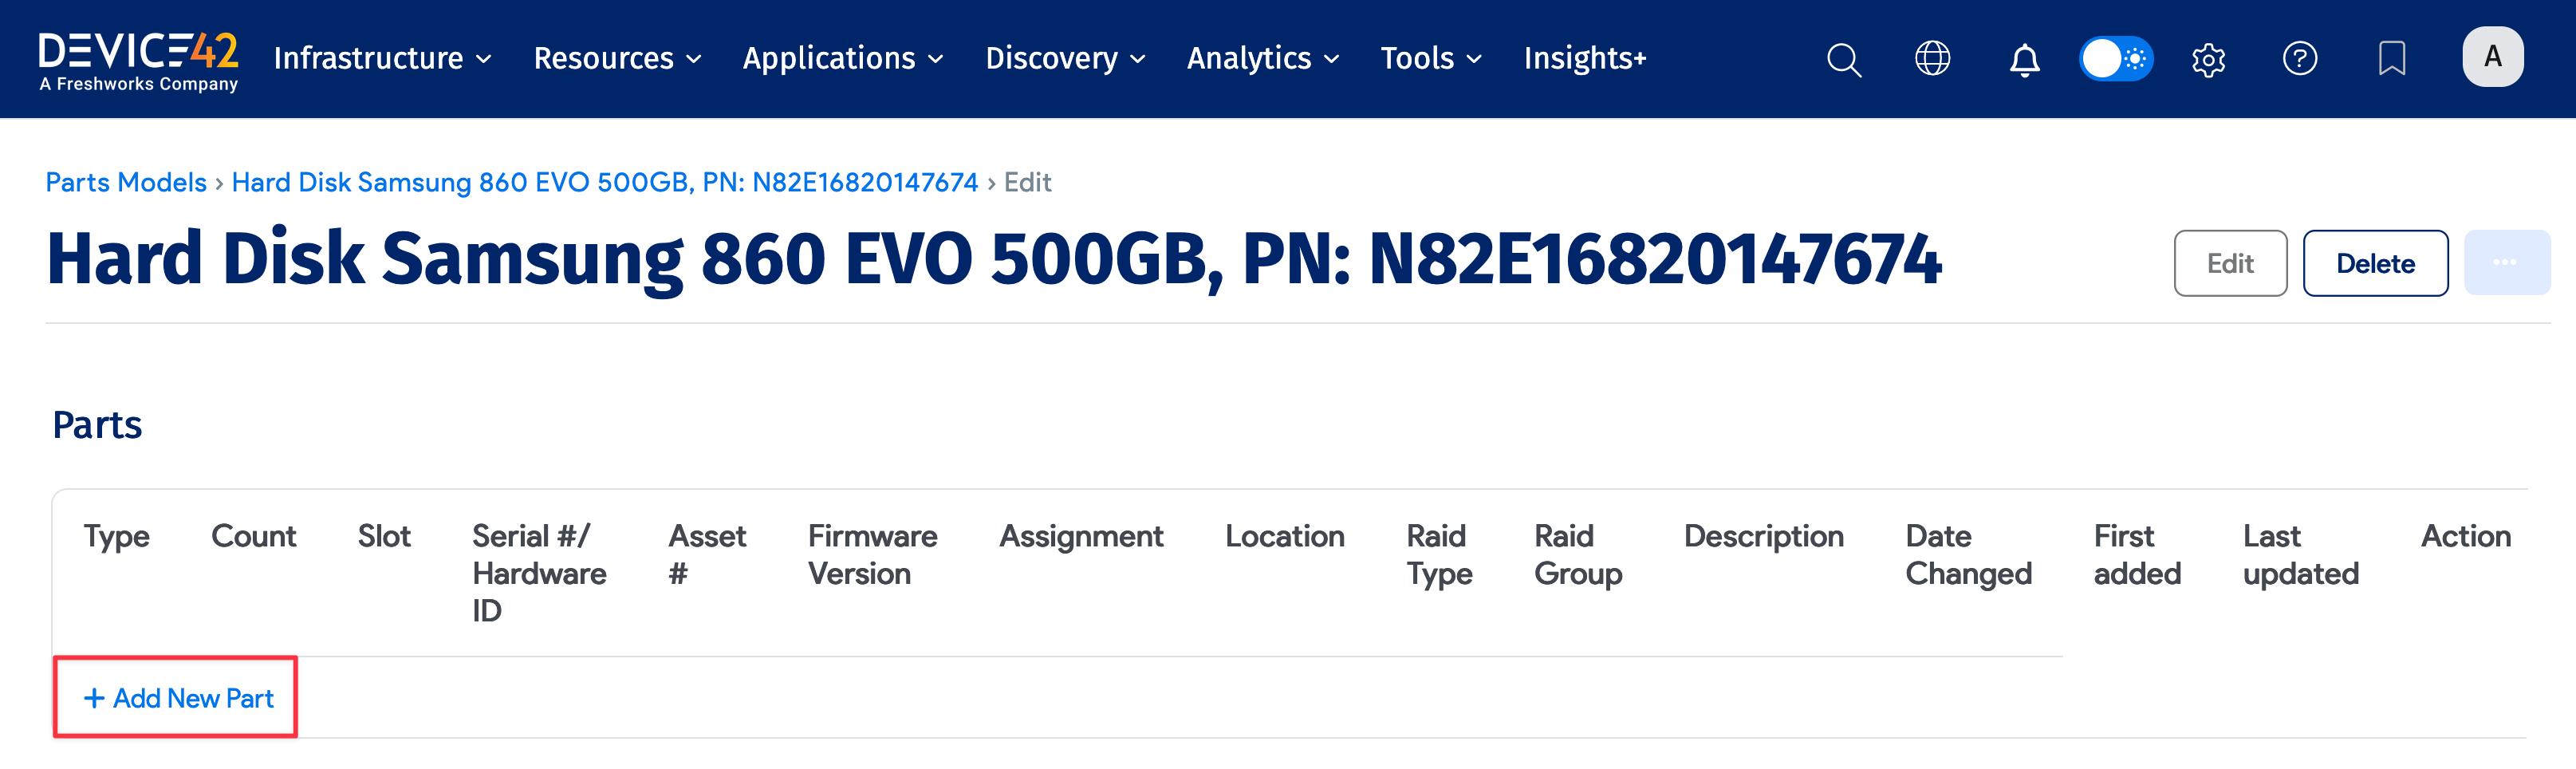
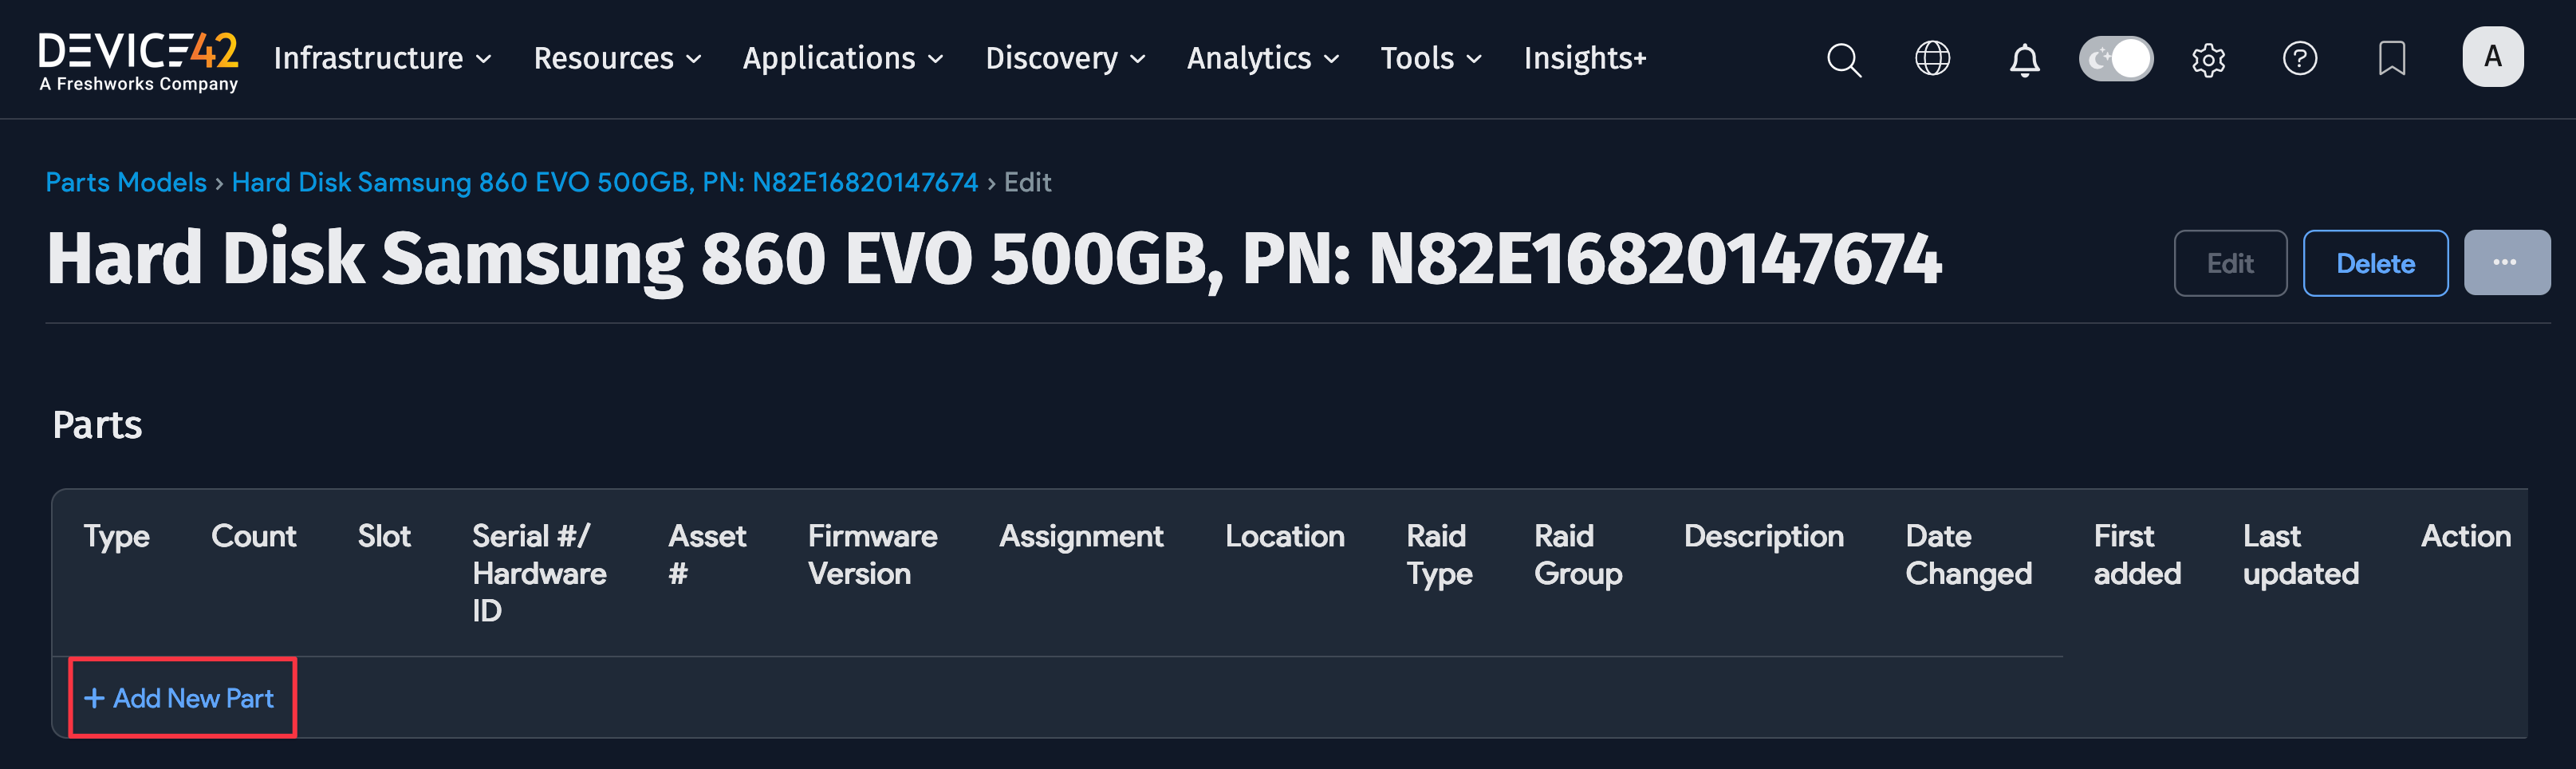
In this example, the parts model has one part.
Part assignments can be tracked so you can record where a part is located or in use. Before adding a part, a part model must exist first. For the full list of assignment options, see Add Parts to Inventory.
Parts Counts
Every part has a count that tracks the number of units in stock. When you assign a part to a device, the count decreases by one (or more, if multiple units are used). Before assigning a part, ensure the count is greater than 0. If you have trouble assigning a part, verify the inventory count and increase it if needed.
Add a Part Model
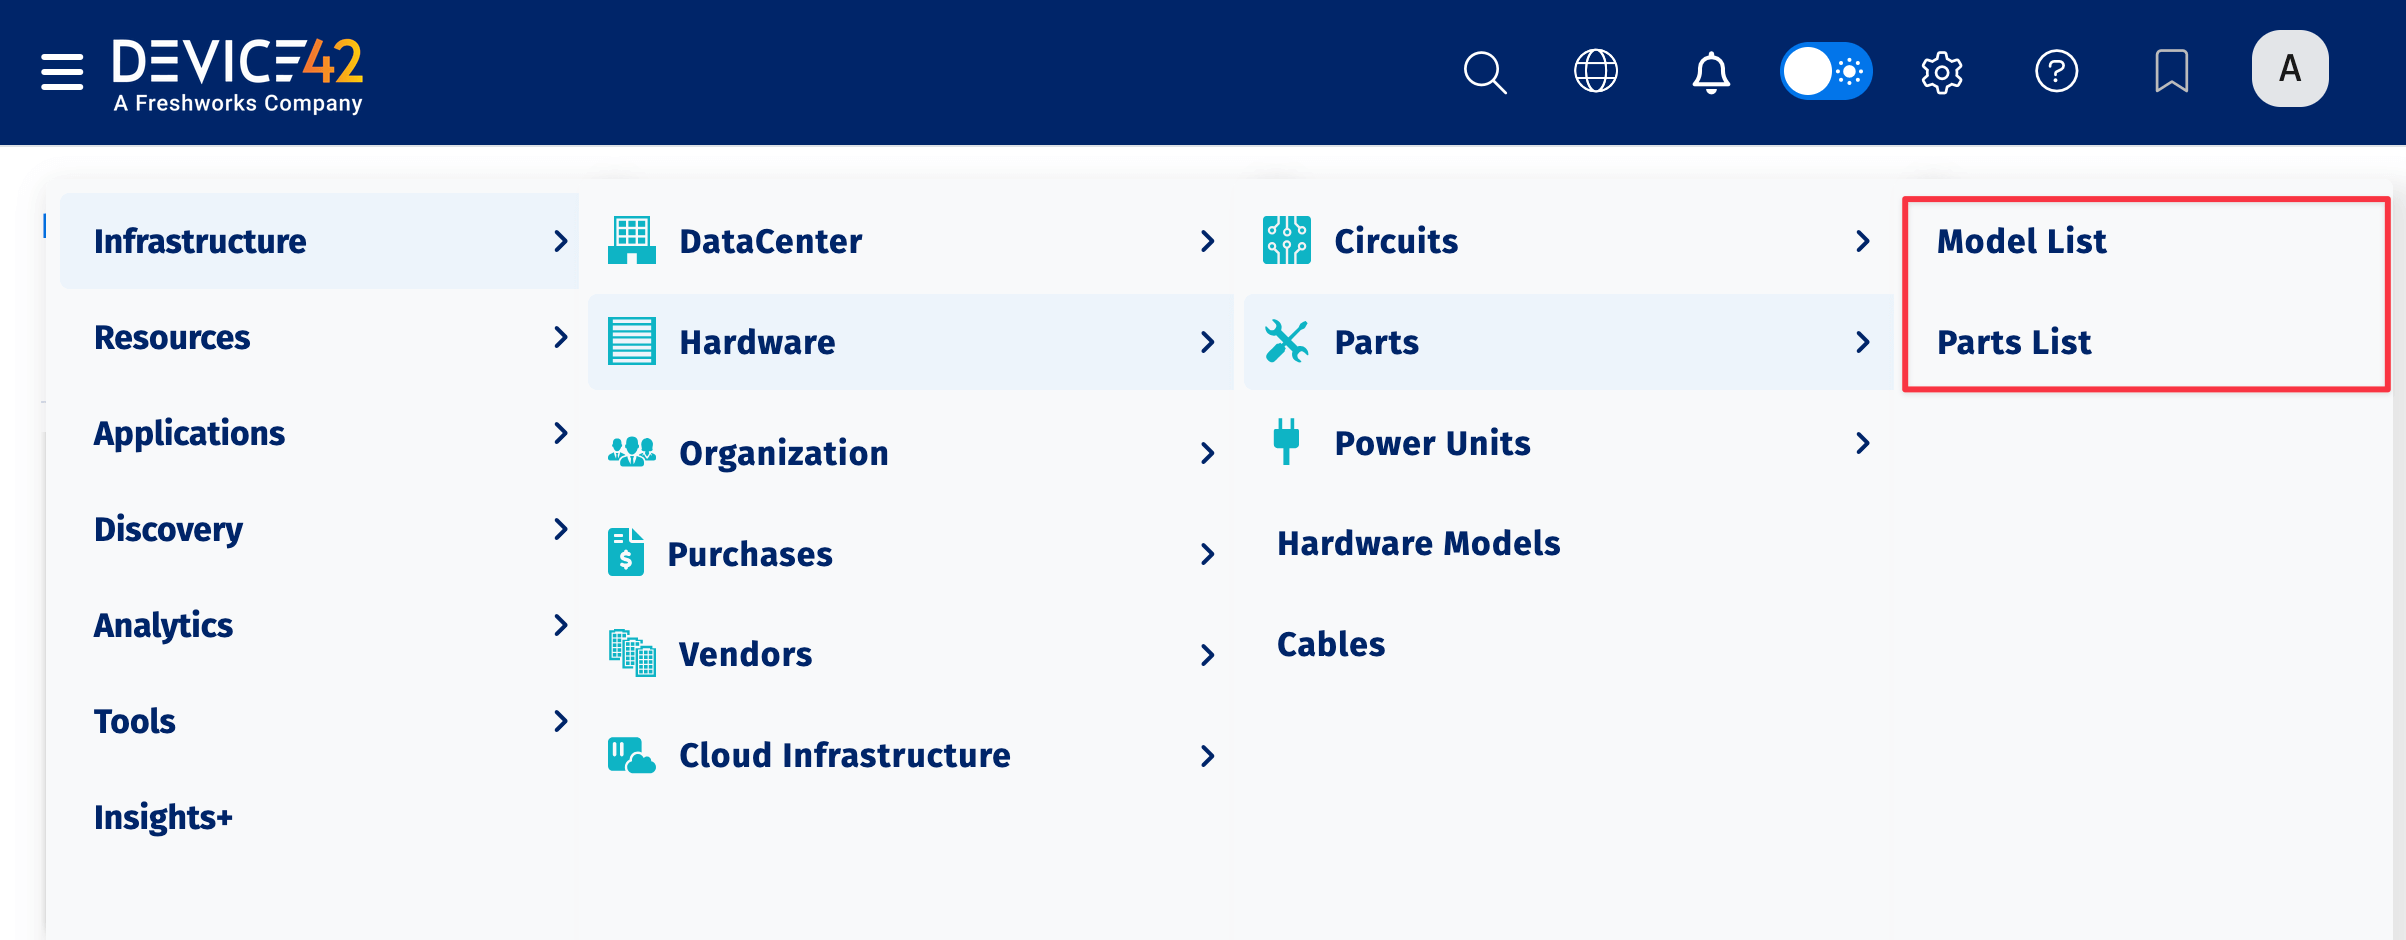
The management features for parts and parts models are located under Infrastructure > Hardware > Parts.
-
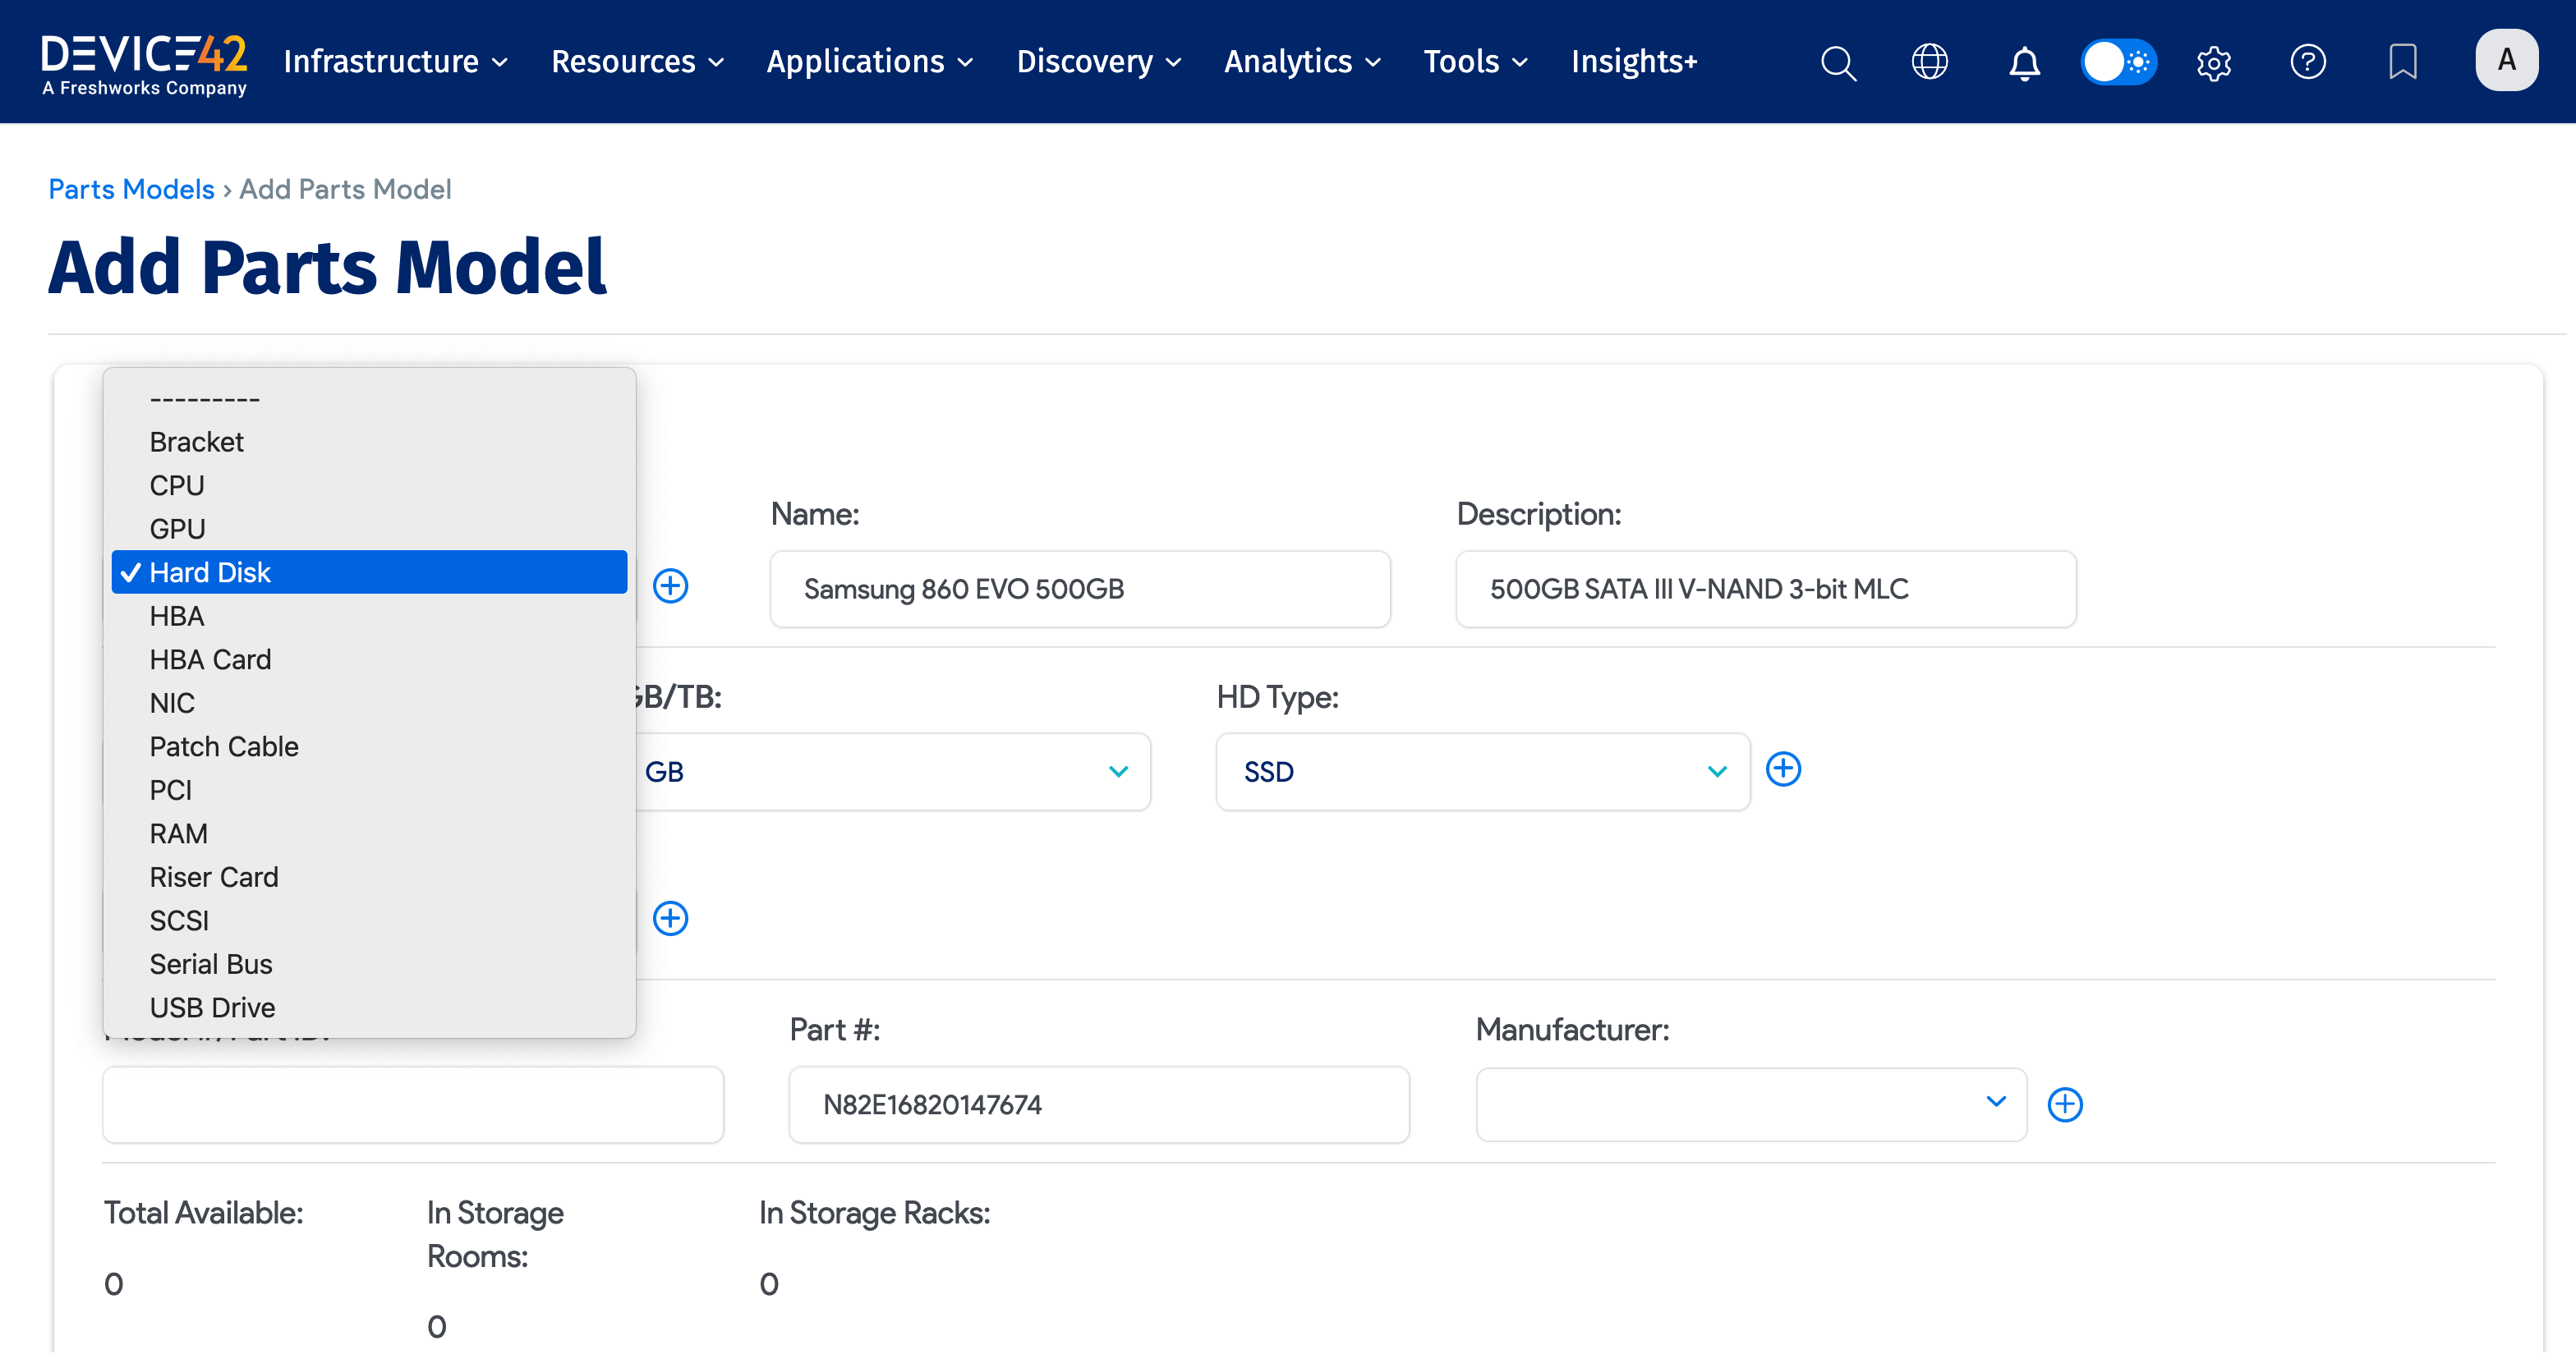
From the main menu, navigate to Infrastructure > Hardware > Parts > Model List and click Create in the top right.
-
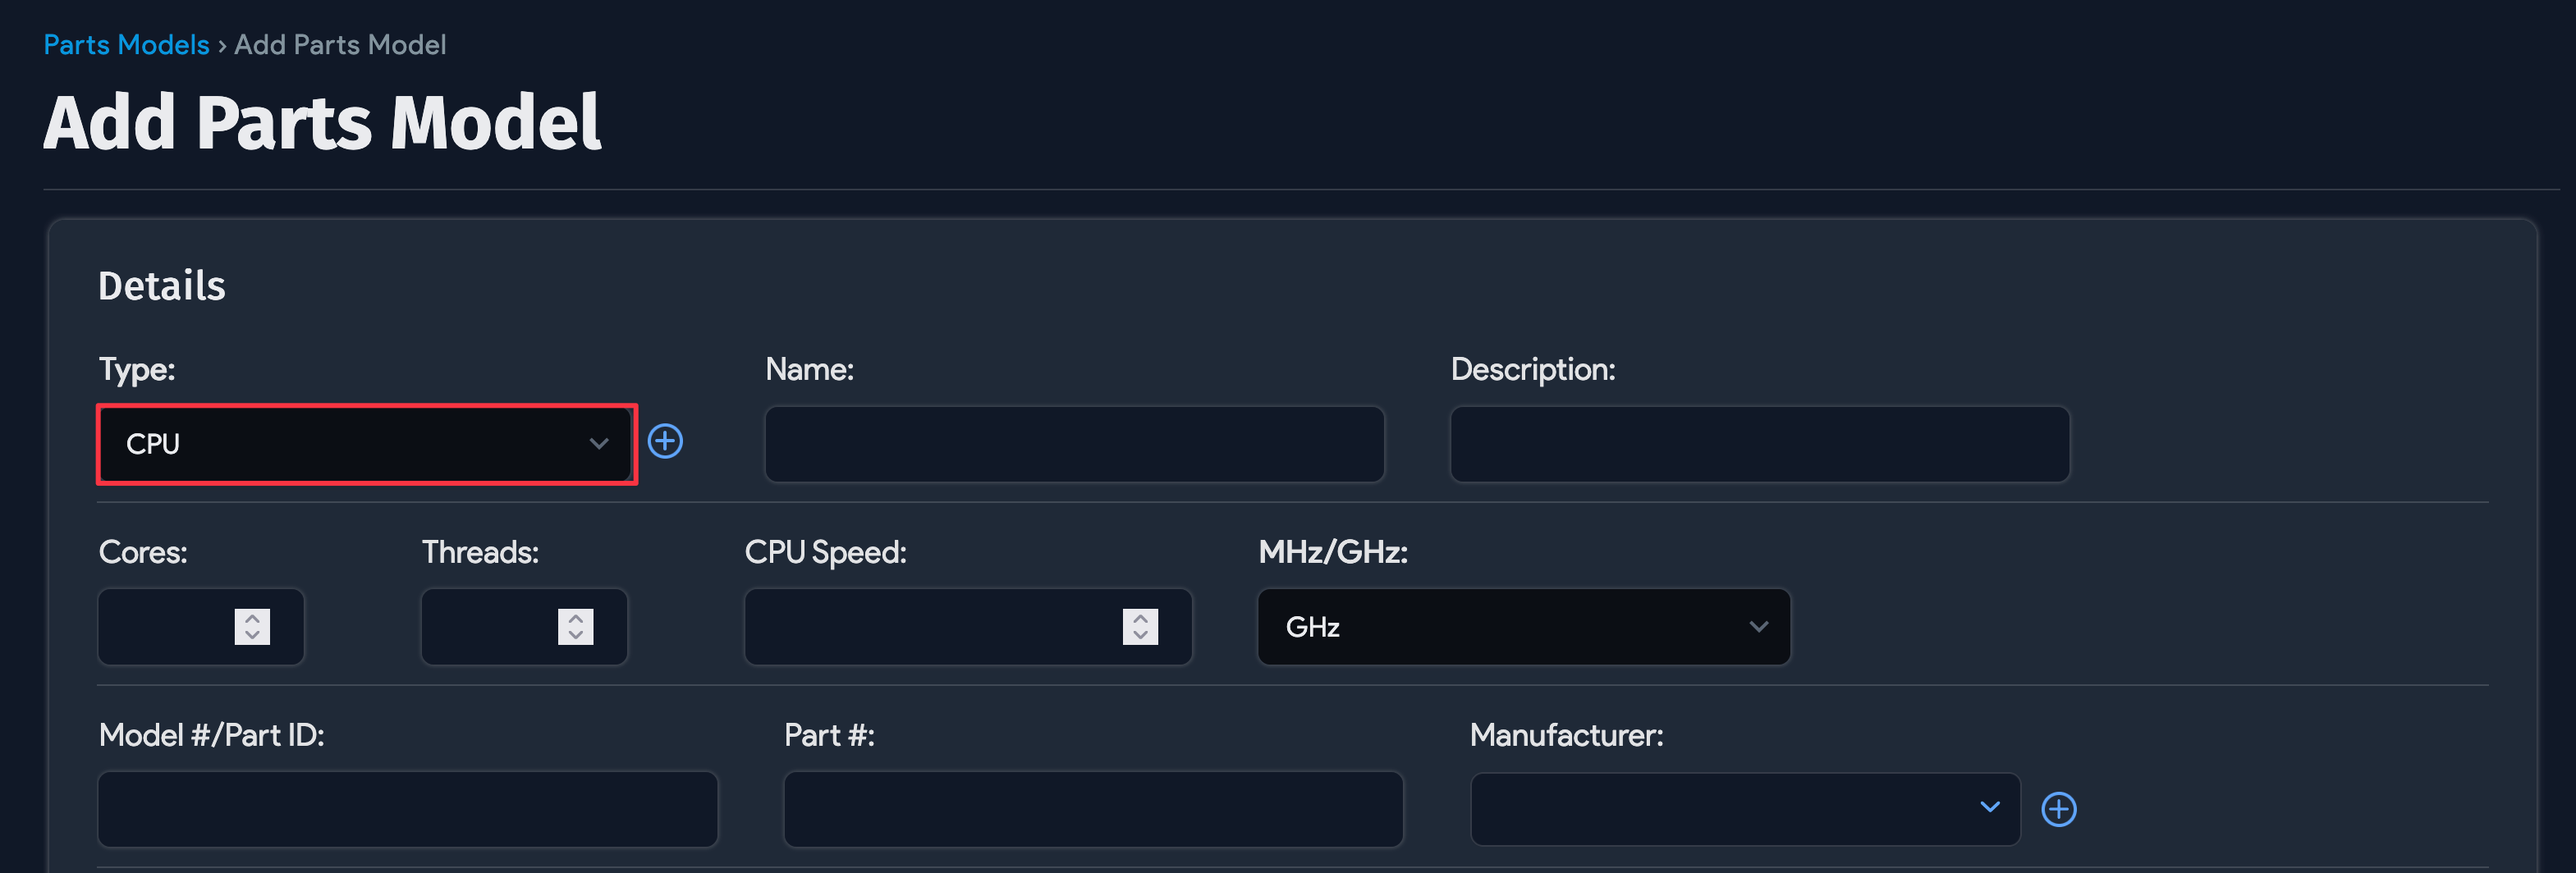
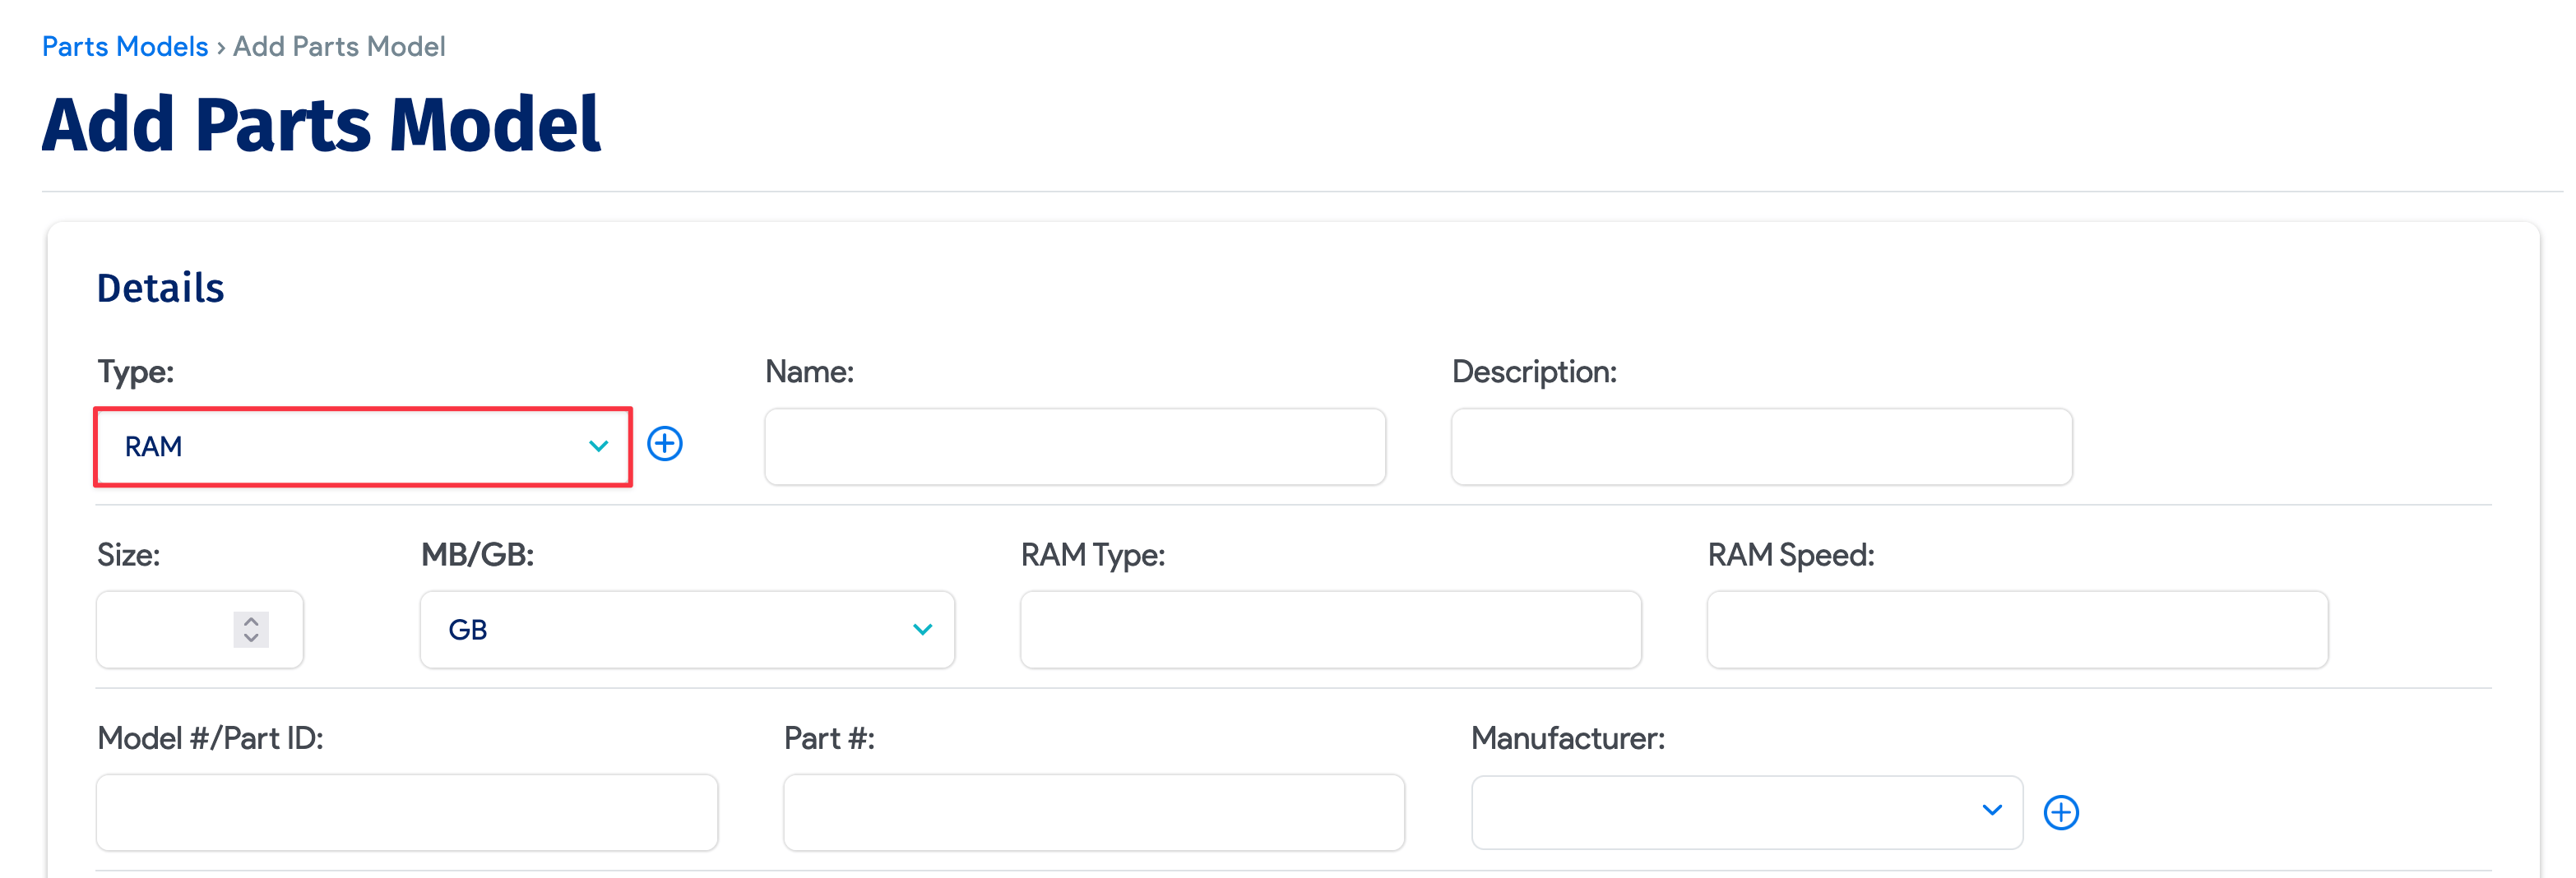
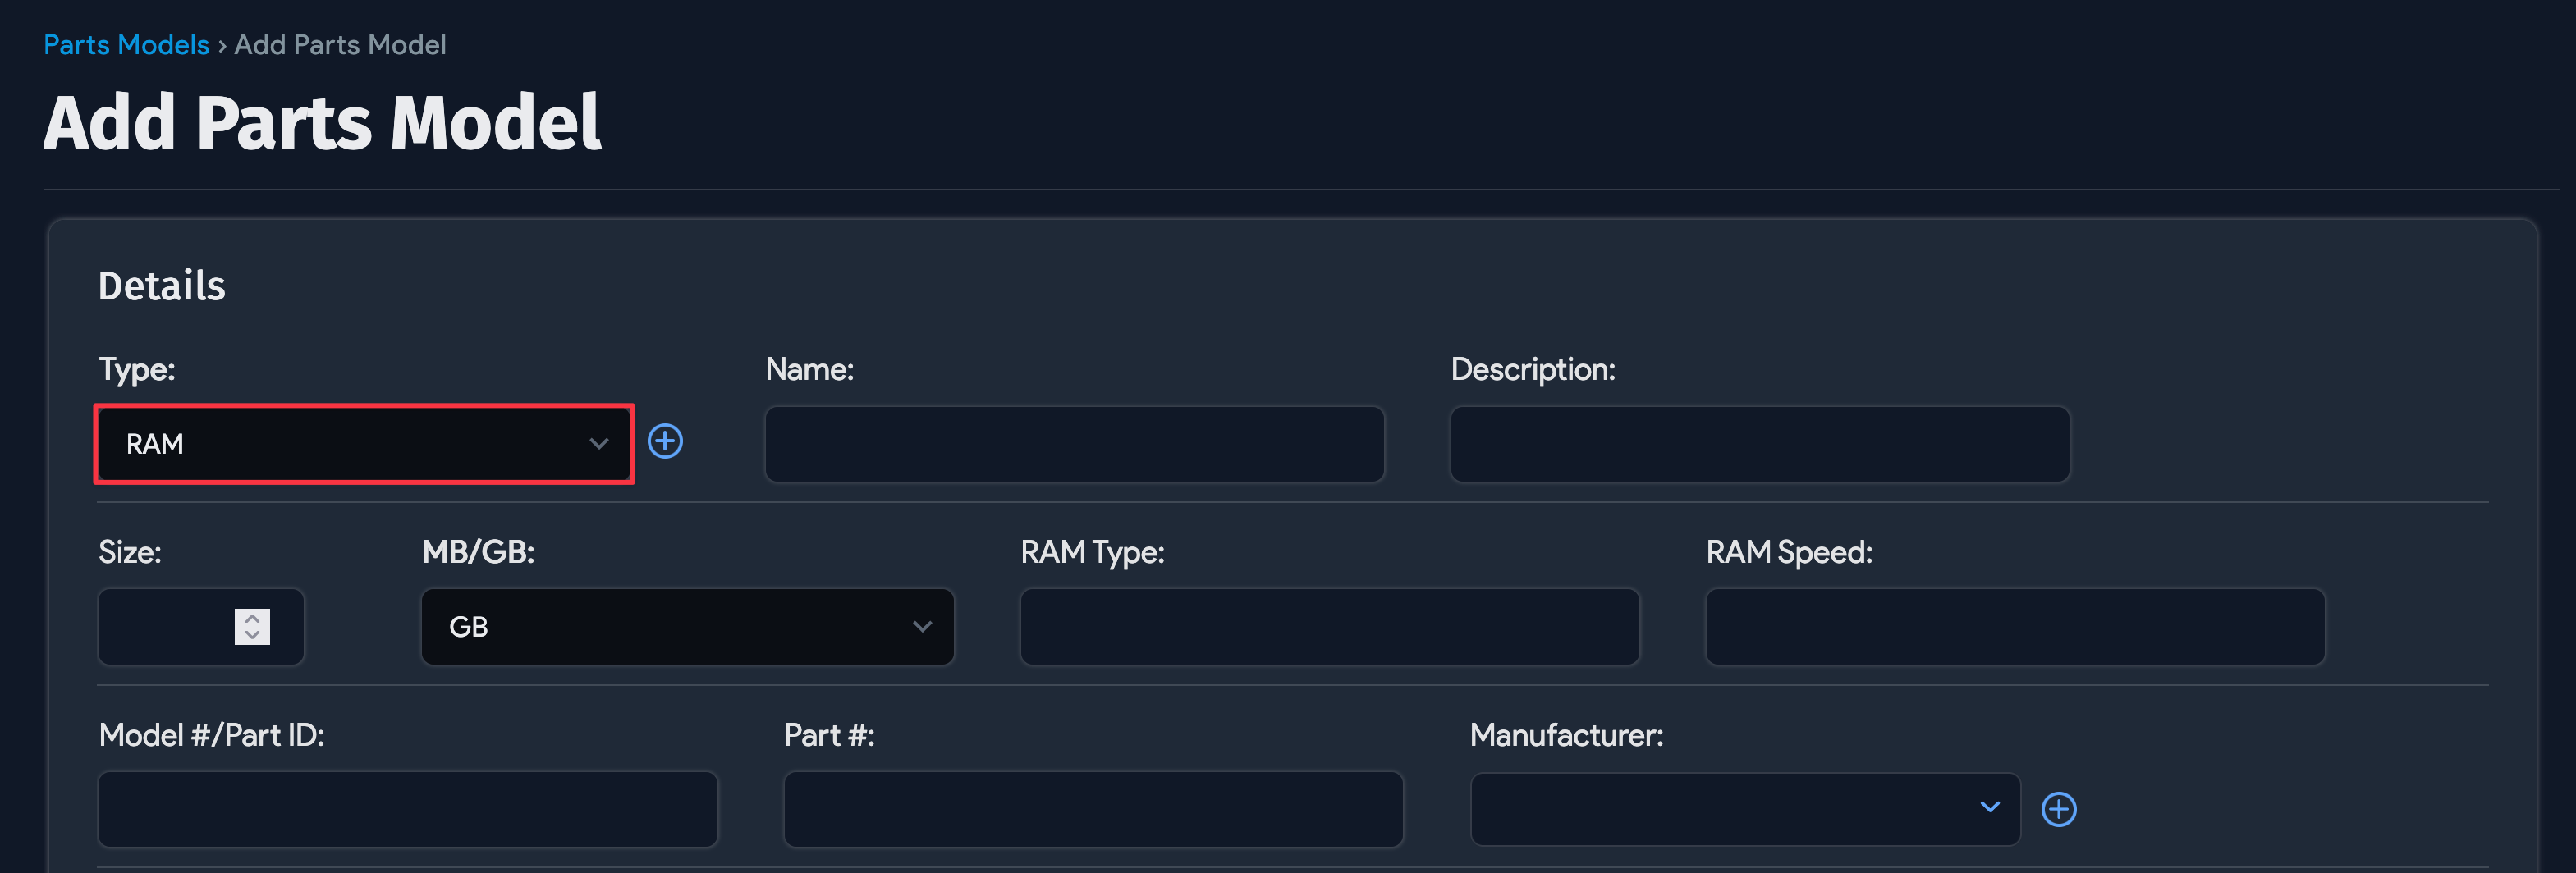
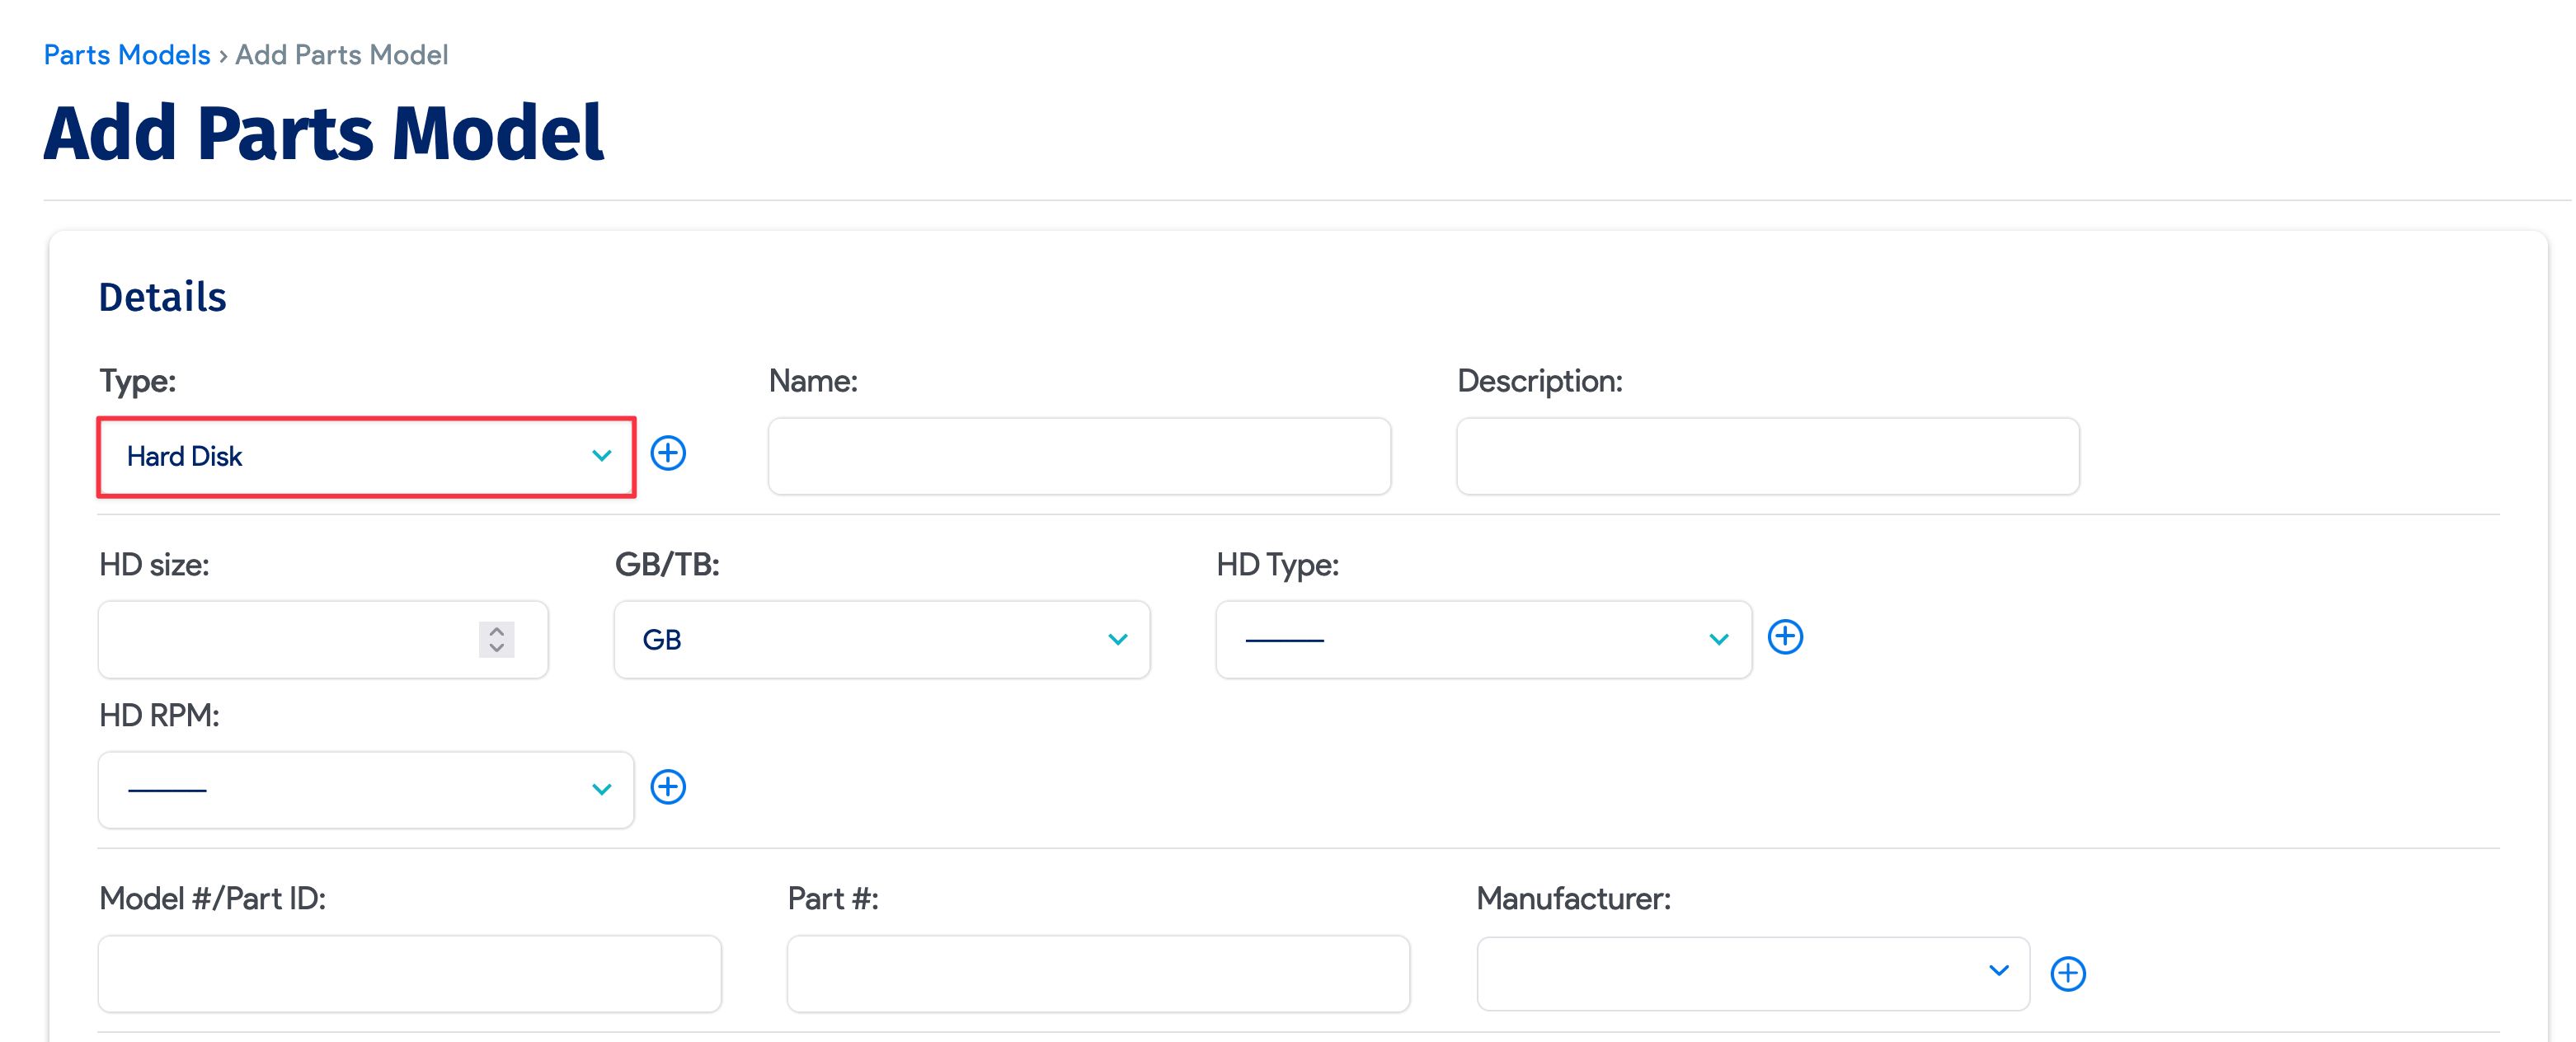
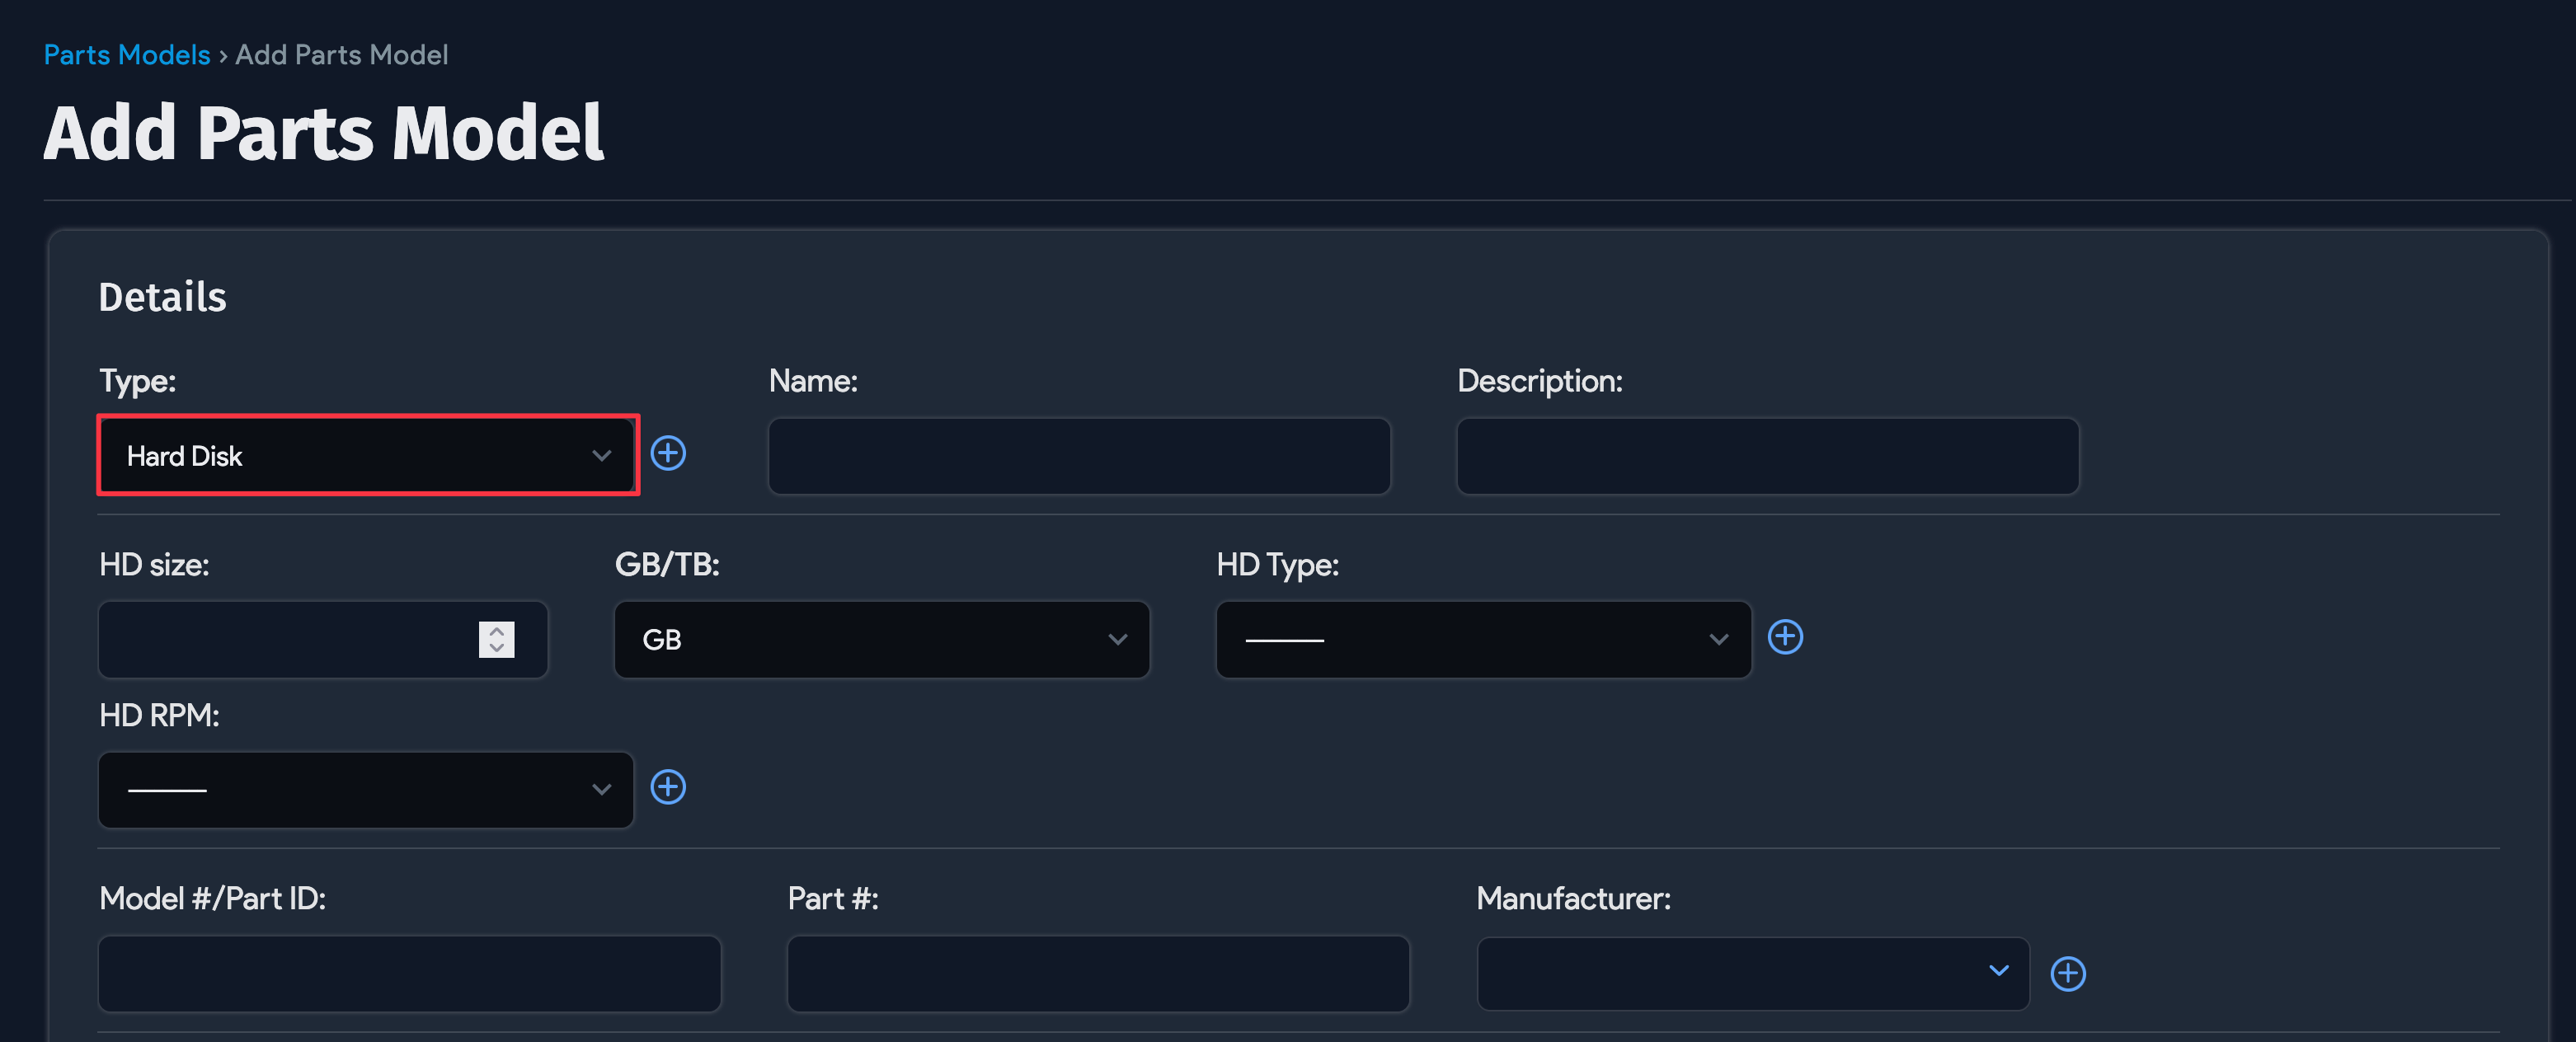
Choose a part Type or create a custom type by clicking the plus sign icon (to the right of the dropdown). The available types are CPU, RAM, Hard Disk, Disk Drive, Physical Memory, NIC, HBA, SCSI, Serial Bus, Riser Card, FPGA, Cable, and PSU.
noteCPU, RAM, and Hard Disk types have custom type-specific attributes (see CPU, RAM, and Hard Disk Attributes below). NIC, HBA, SCSI, Serial Bus, and custom types have a Connectivity attribute.
-
Give the parts model a Name and fill in any appropriate information you have, such as the Model Number, the Part Number, and the Manufacturer.
-
Click Save. To add inventory for this part type, see Add Parts to Inventory.
CPU, RAM, and Hard Disk Attributes
Each part type has type-specific attributes. The CPU, RAM, and Hard Disk types each have their own fields:
CPU

RAM
Hard Disk
Add Parts to Inventory
After creating a part model, add parts using the + Add New Part link.
-
Navigate to Infrastructure > Hardware > Parts > Model List and click an existing part model. At the bottom of the screen, click the + Add New Part link in the Parts section.
-
Fill out the Add Part dialog that appears with a part Count (number in inventory), Serial #, Asset # (if available), Firmware Version, Assignment, Location, and optionally, a RAID Type, RAID Group, and Description:
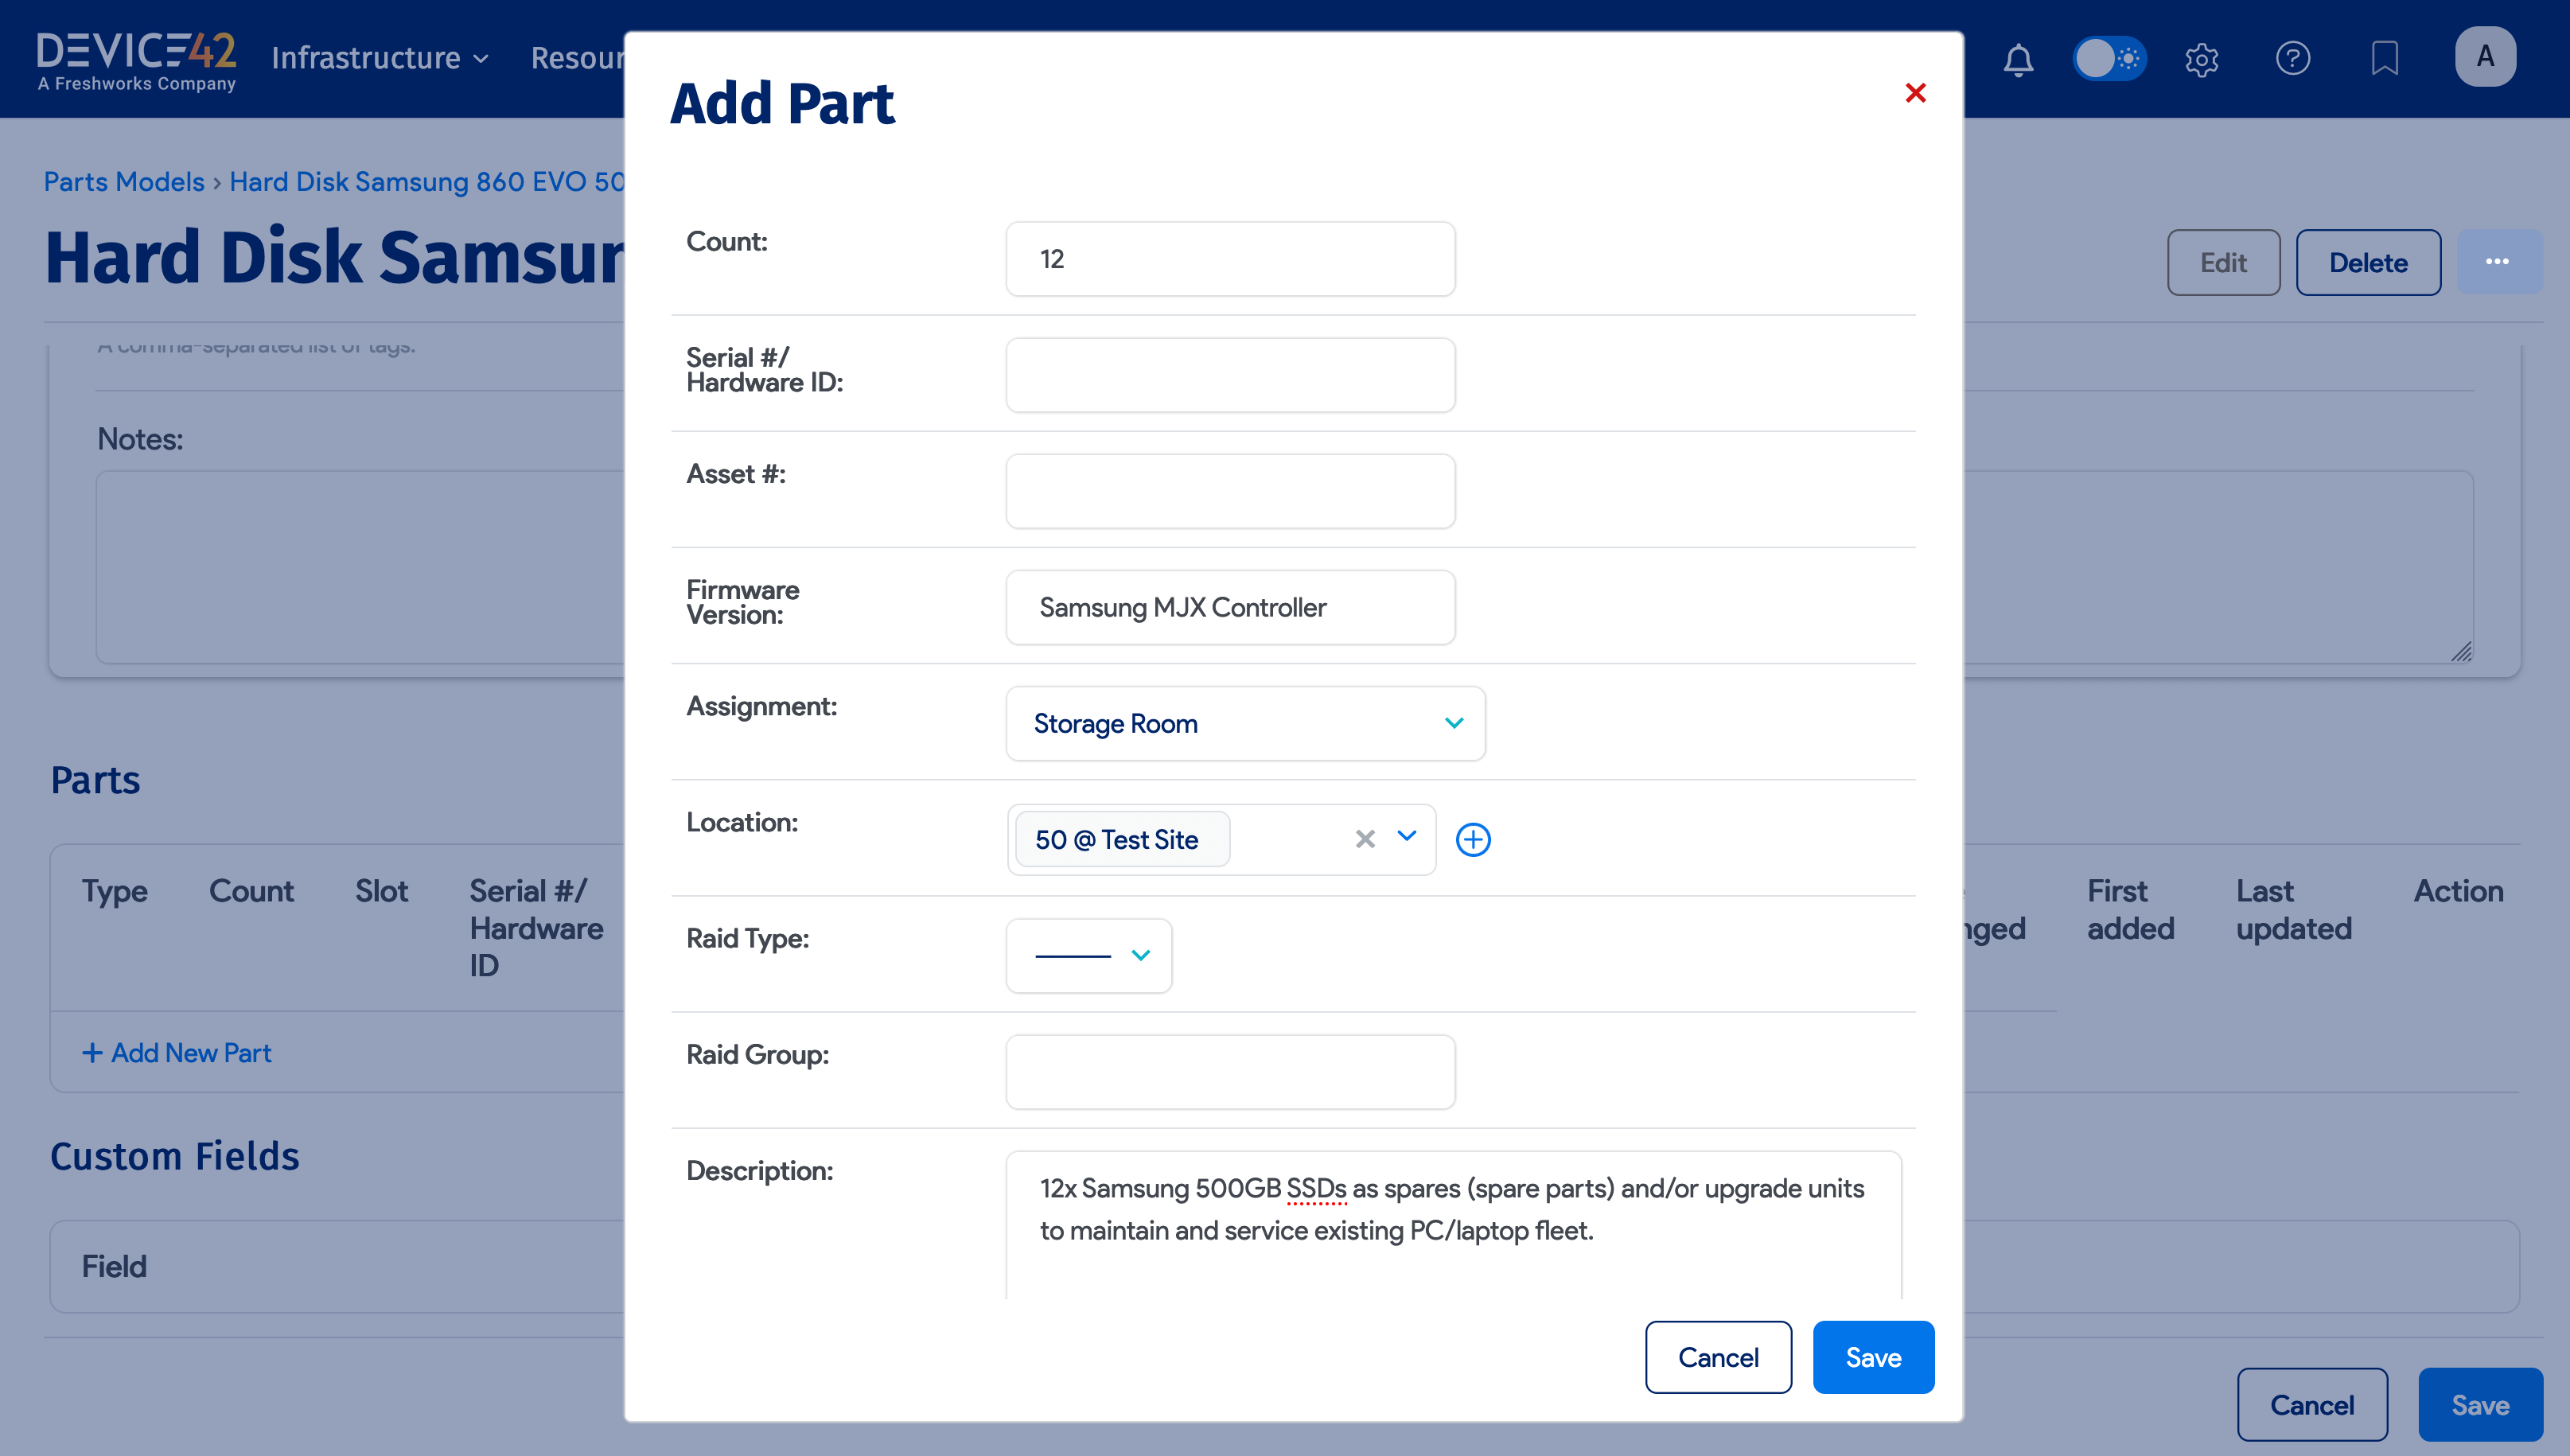
Note the following about the Add Part form:
- Each line item added can contain an inventory of one or more of a given part, and must have an Assignment (specifying where the part is checked out or stored).
- All the parts in a given line item must share the same Assignment.
- The Assignment choices are:
- Storage Room
- Device
- In RMA
- In Transit
- Storage Rack (or Cabinet)
- Port
- Asset
- If you choose Storage Room or Device assignments, you can select an existing storage room or device, or create a new one.
- If you are tracking serial numbers, you can only have one part per line.
The Parts List Screen
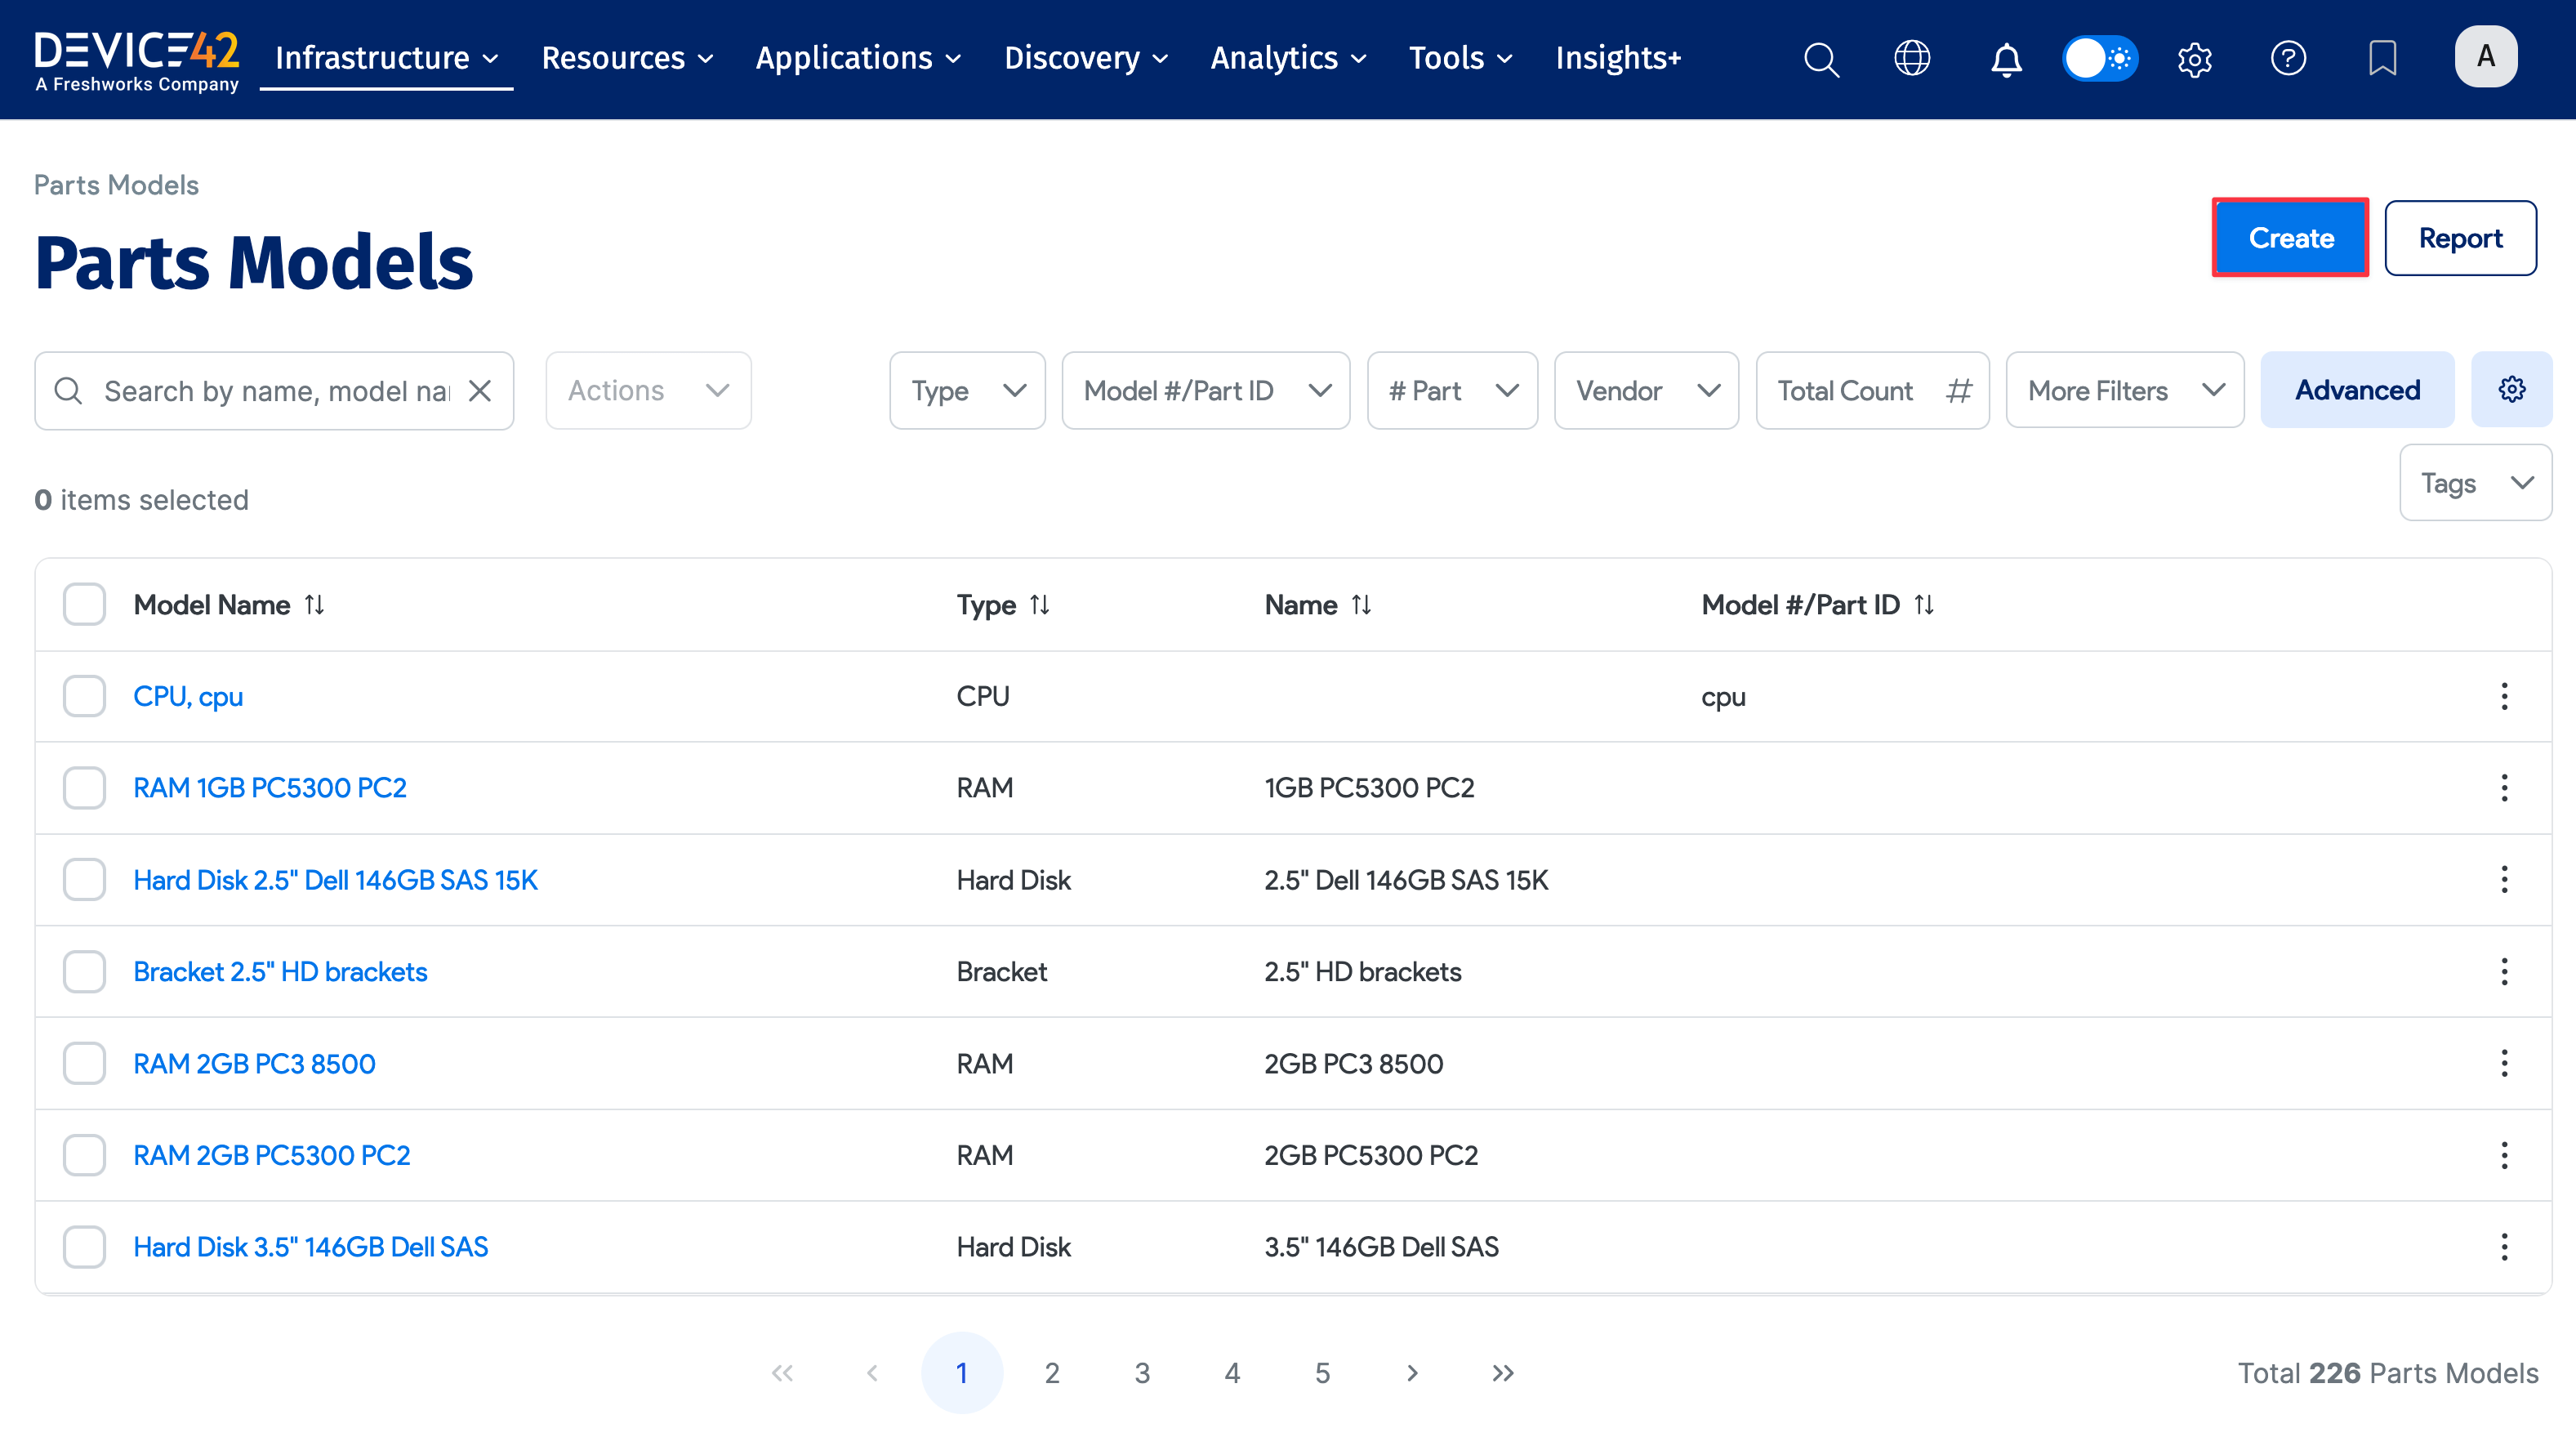
Navigate to Infrastructure > Hardware > Parts > Parts List. From here, you can see the details of any parts you've already created.
Click any entry to view the details of that part.
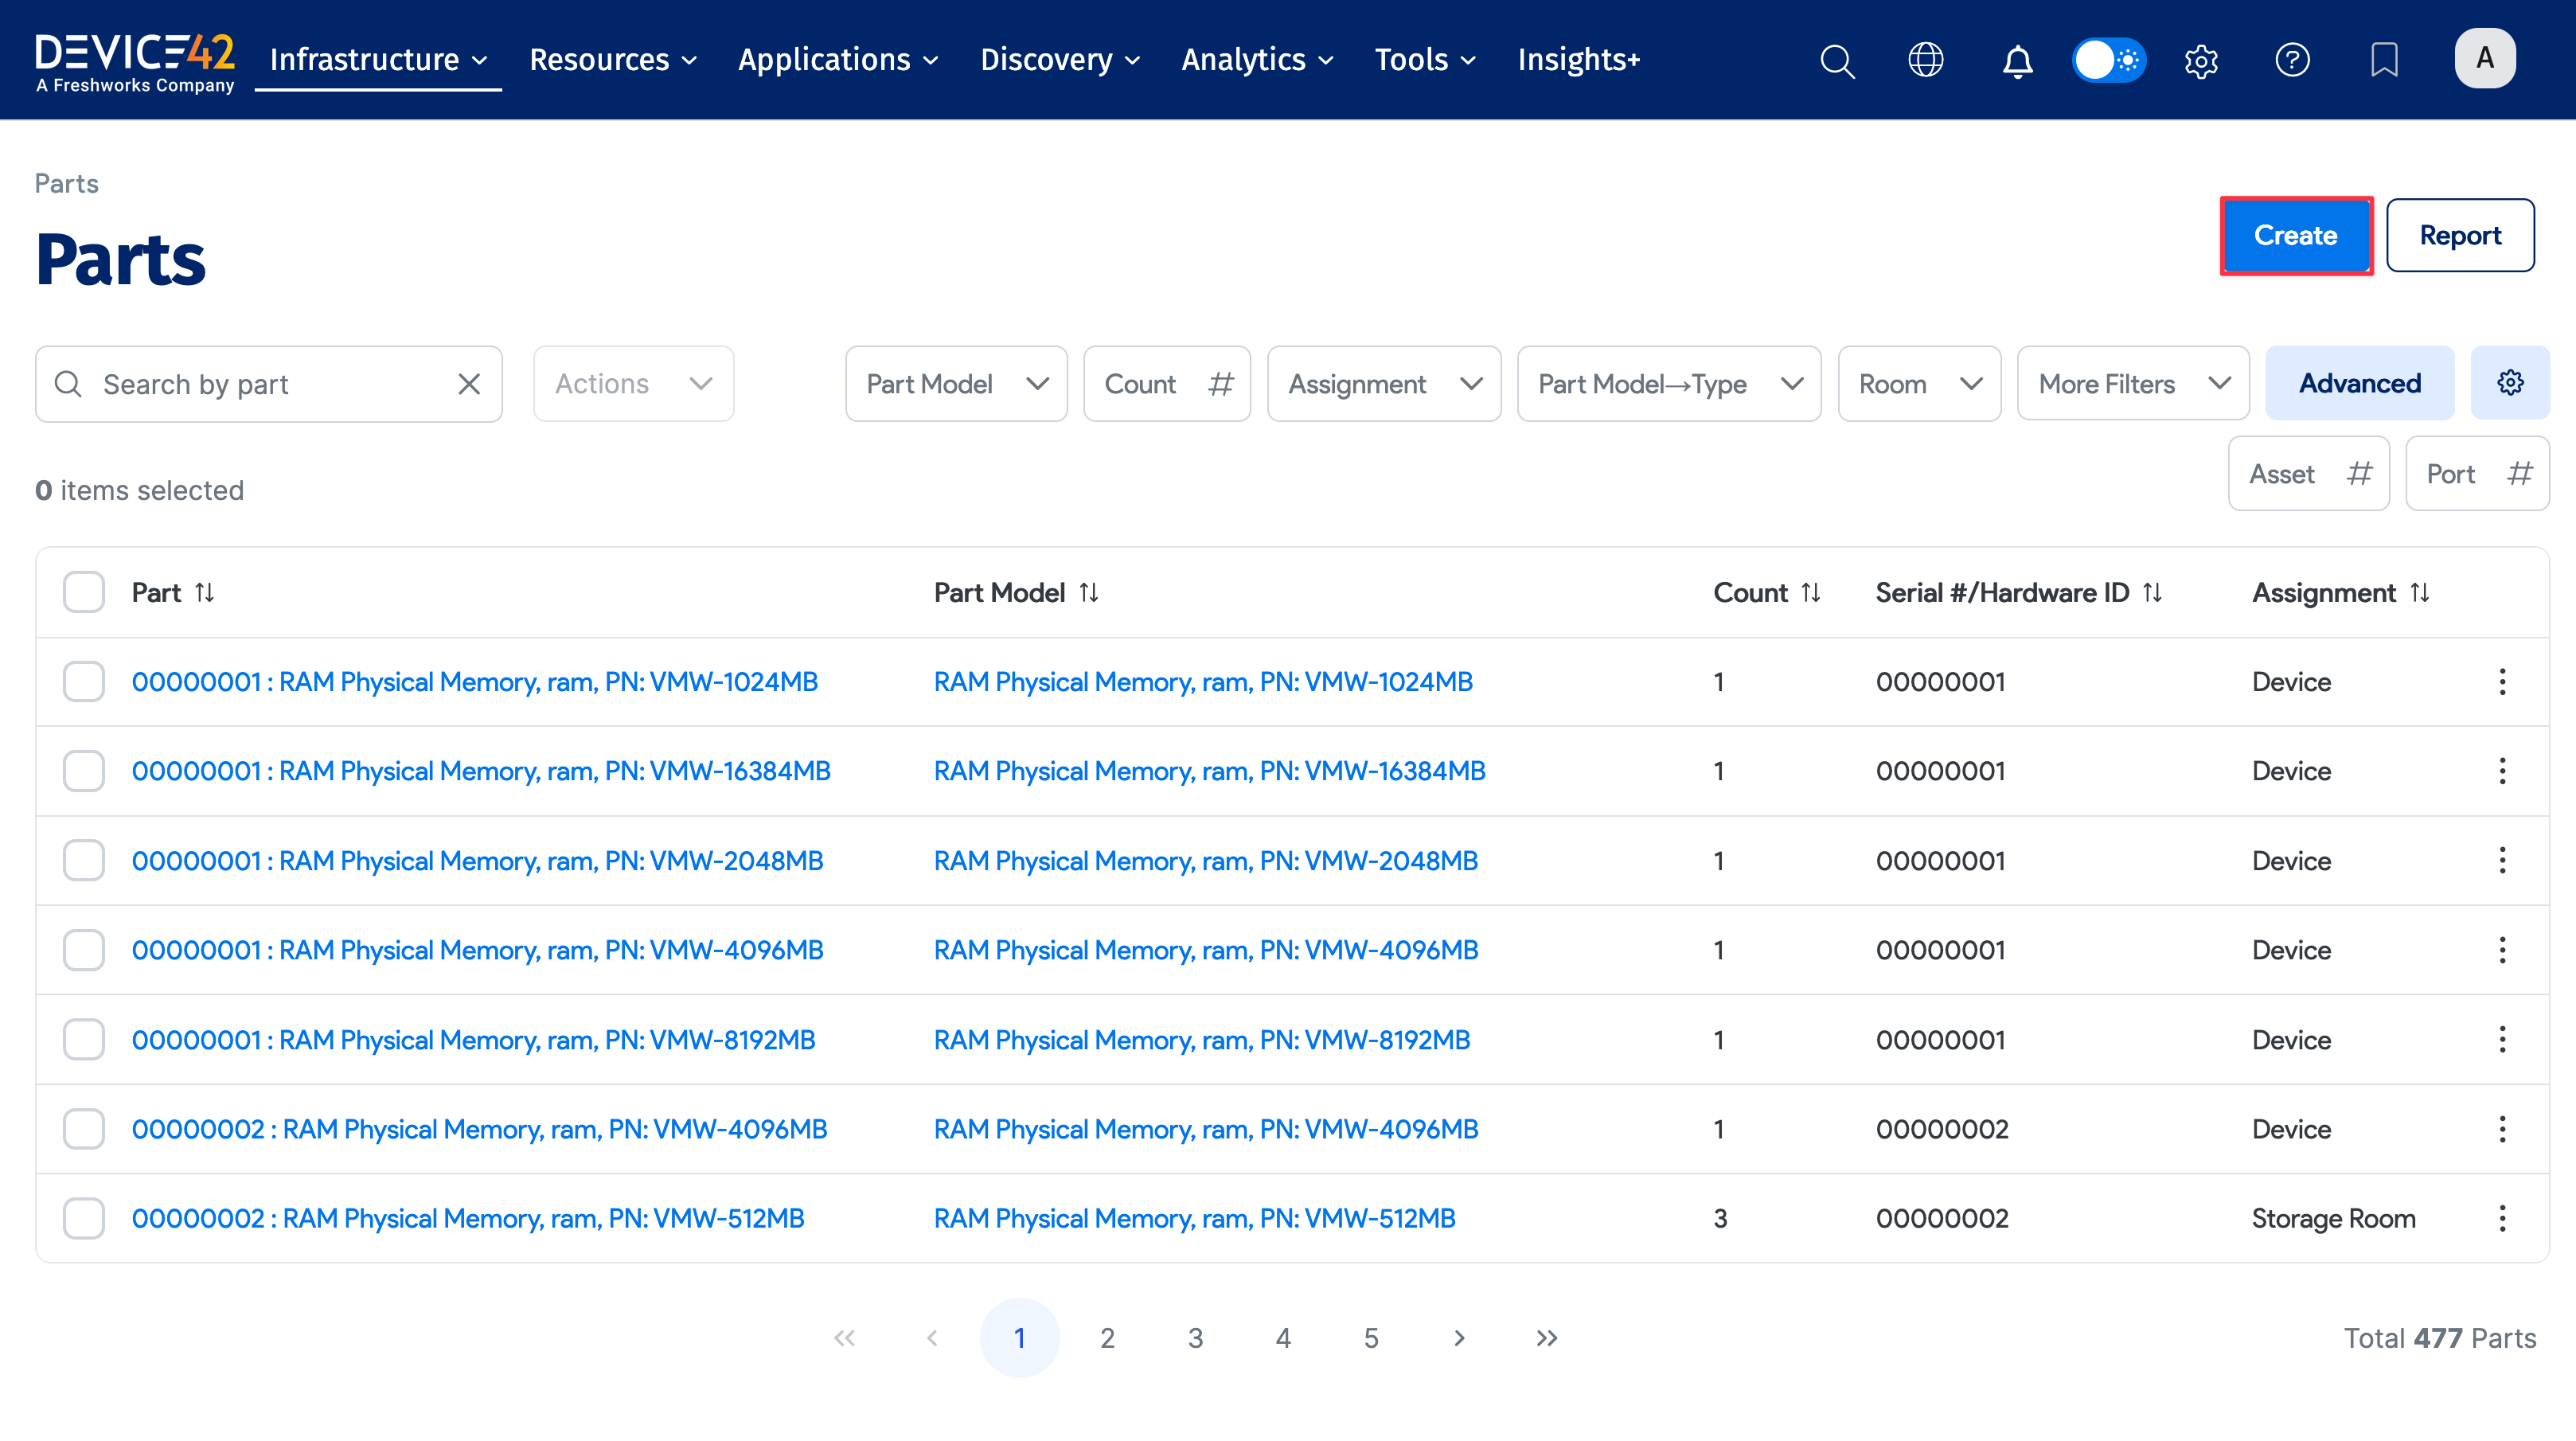
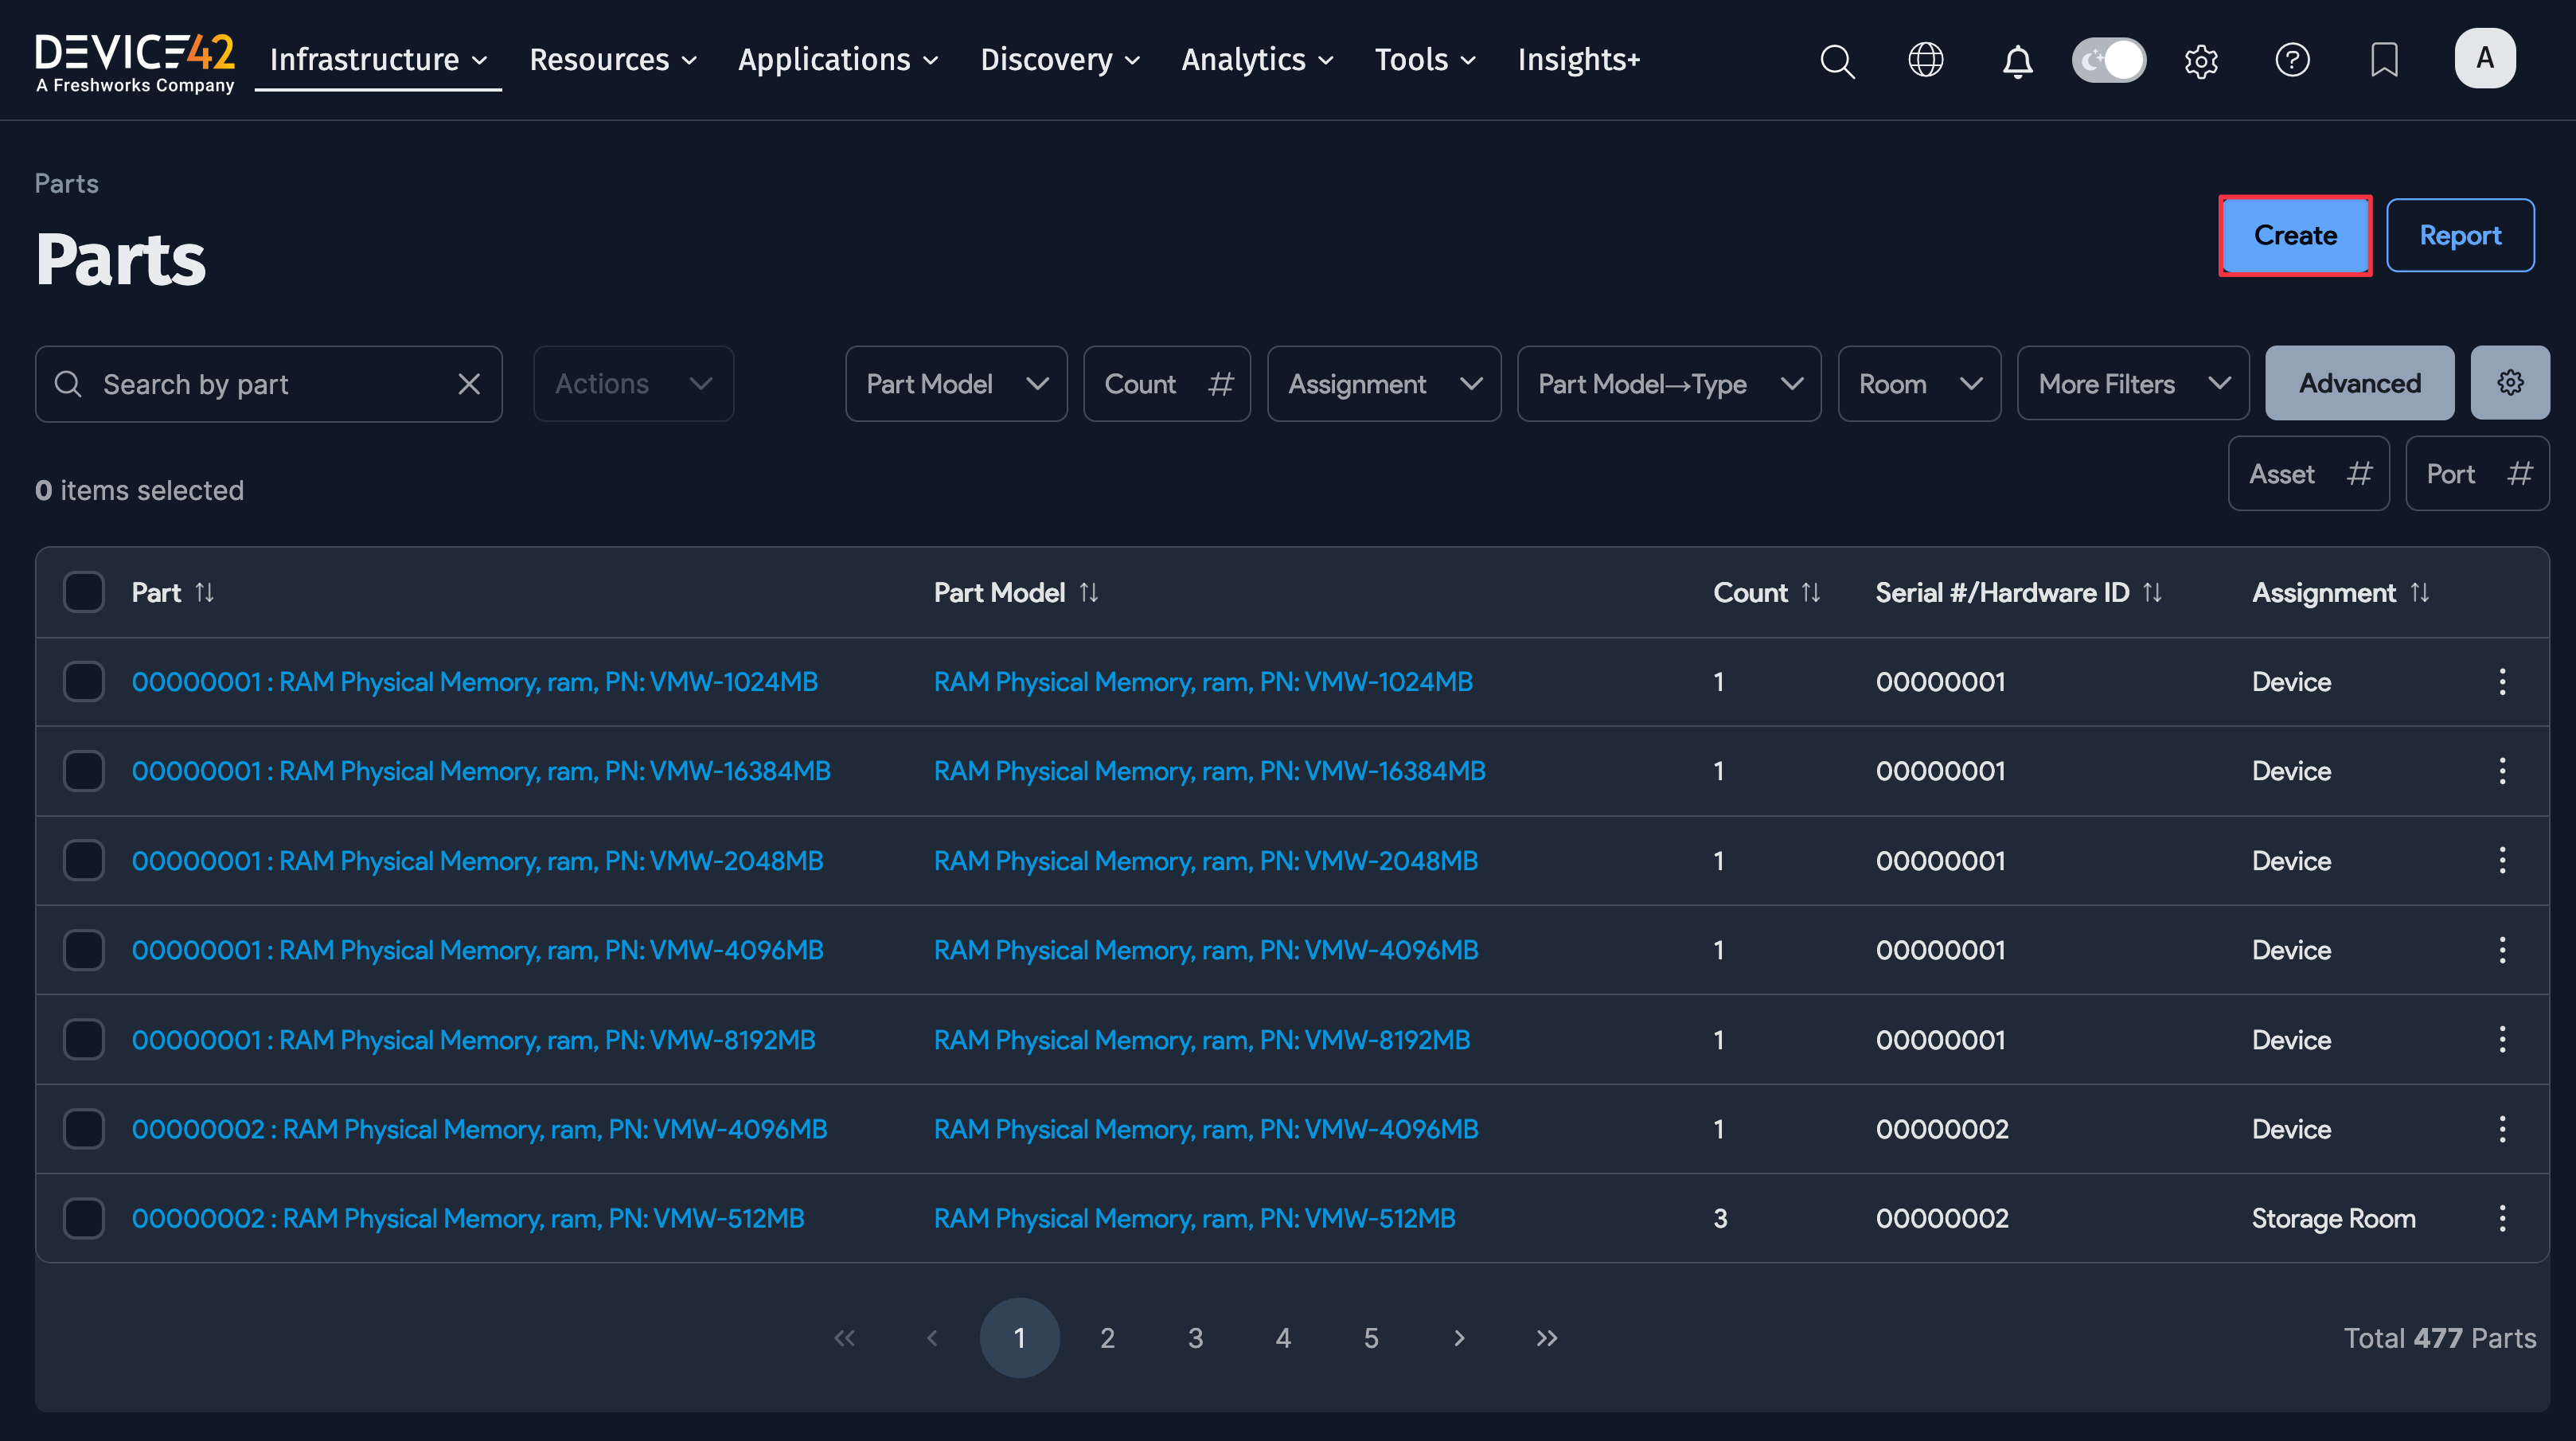
The Parts List is the master inventory view, showing each part being tracked by Device42. The list is similar to other lists in Device42, including an Actions menu and the ability to search, sort, and filter for specific list items.
You can also add parts from the Parts List by clicking Create in the top-right corner.
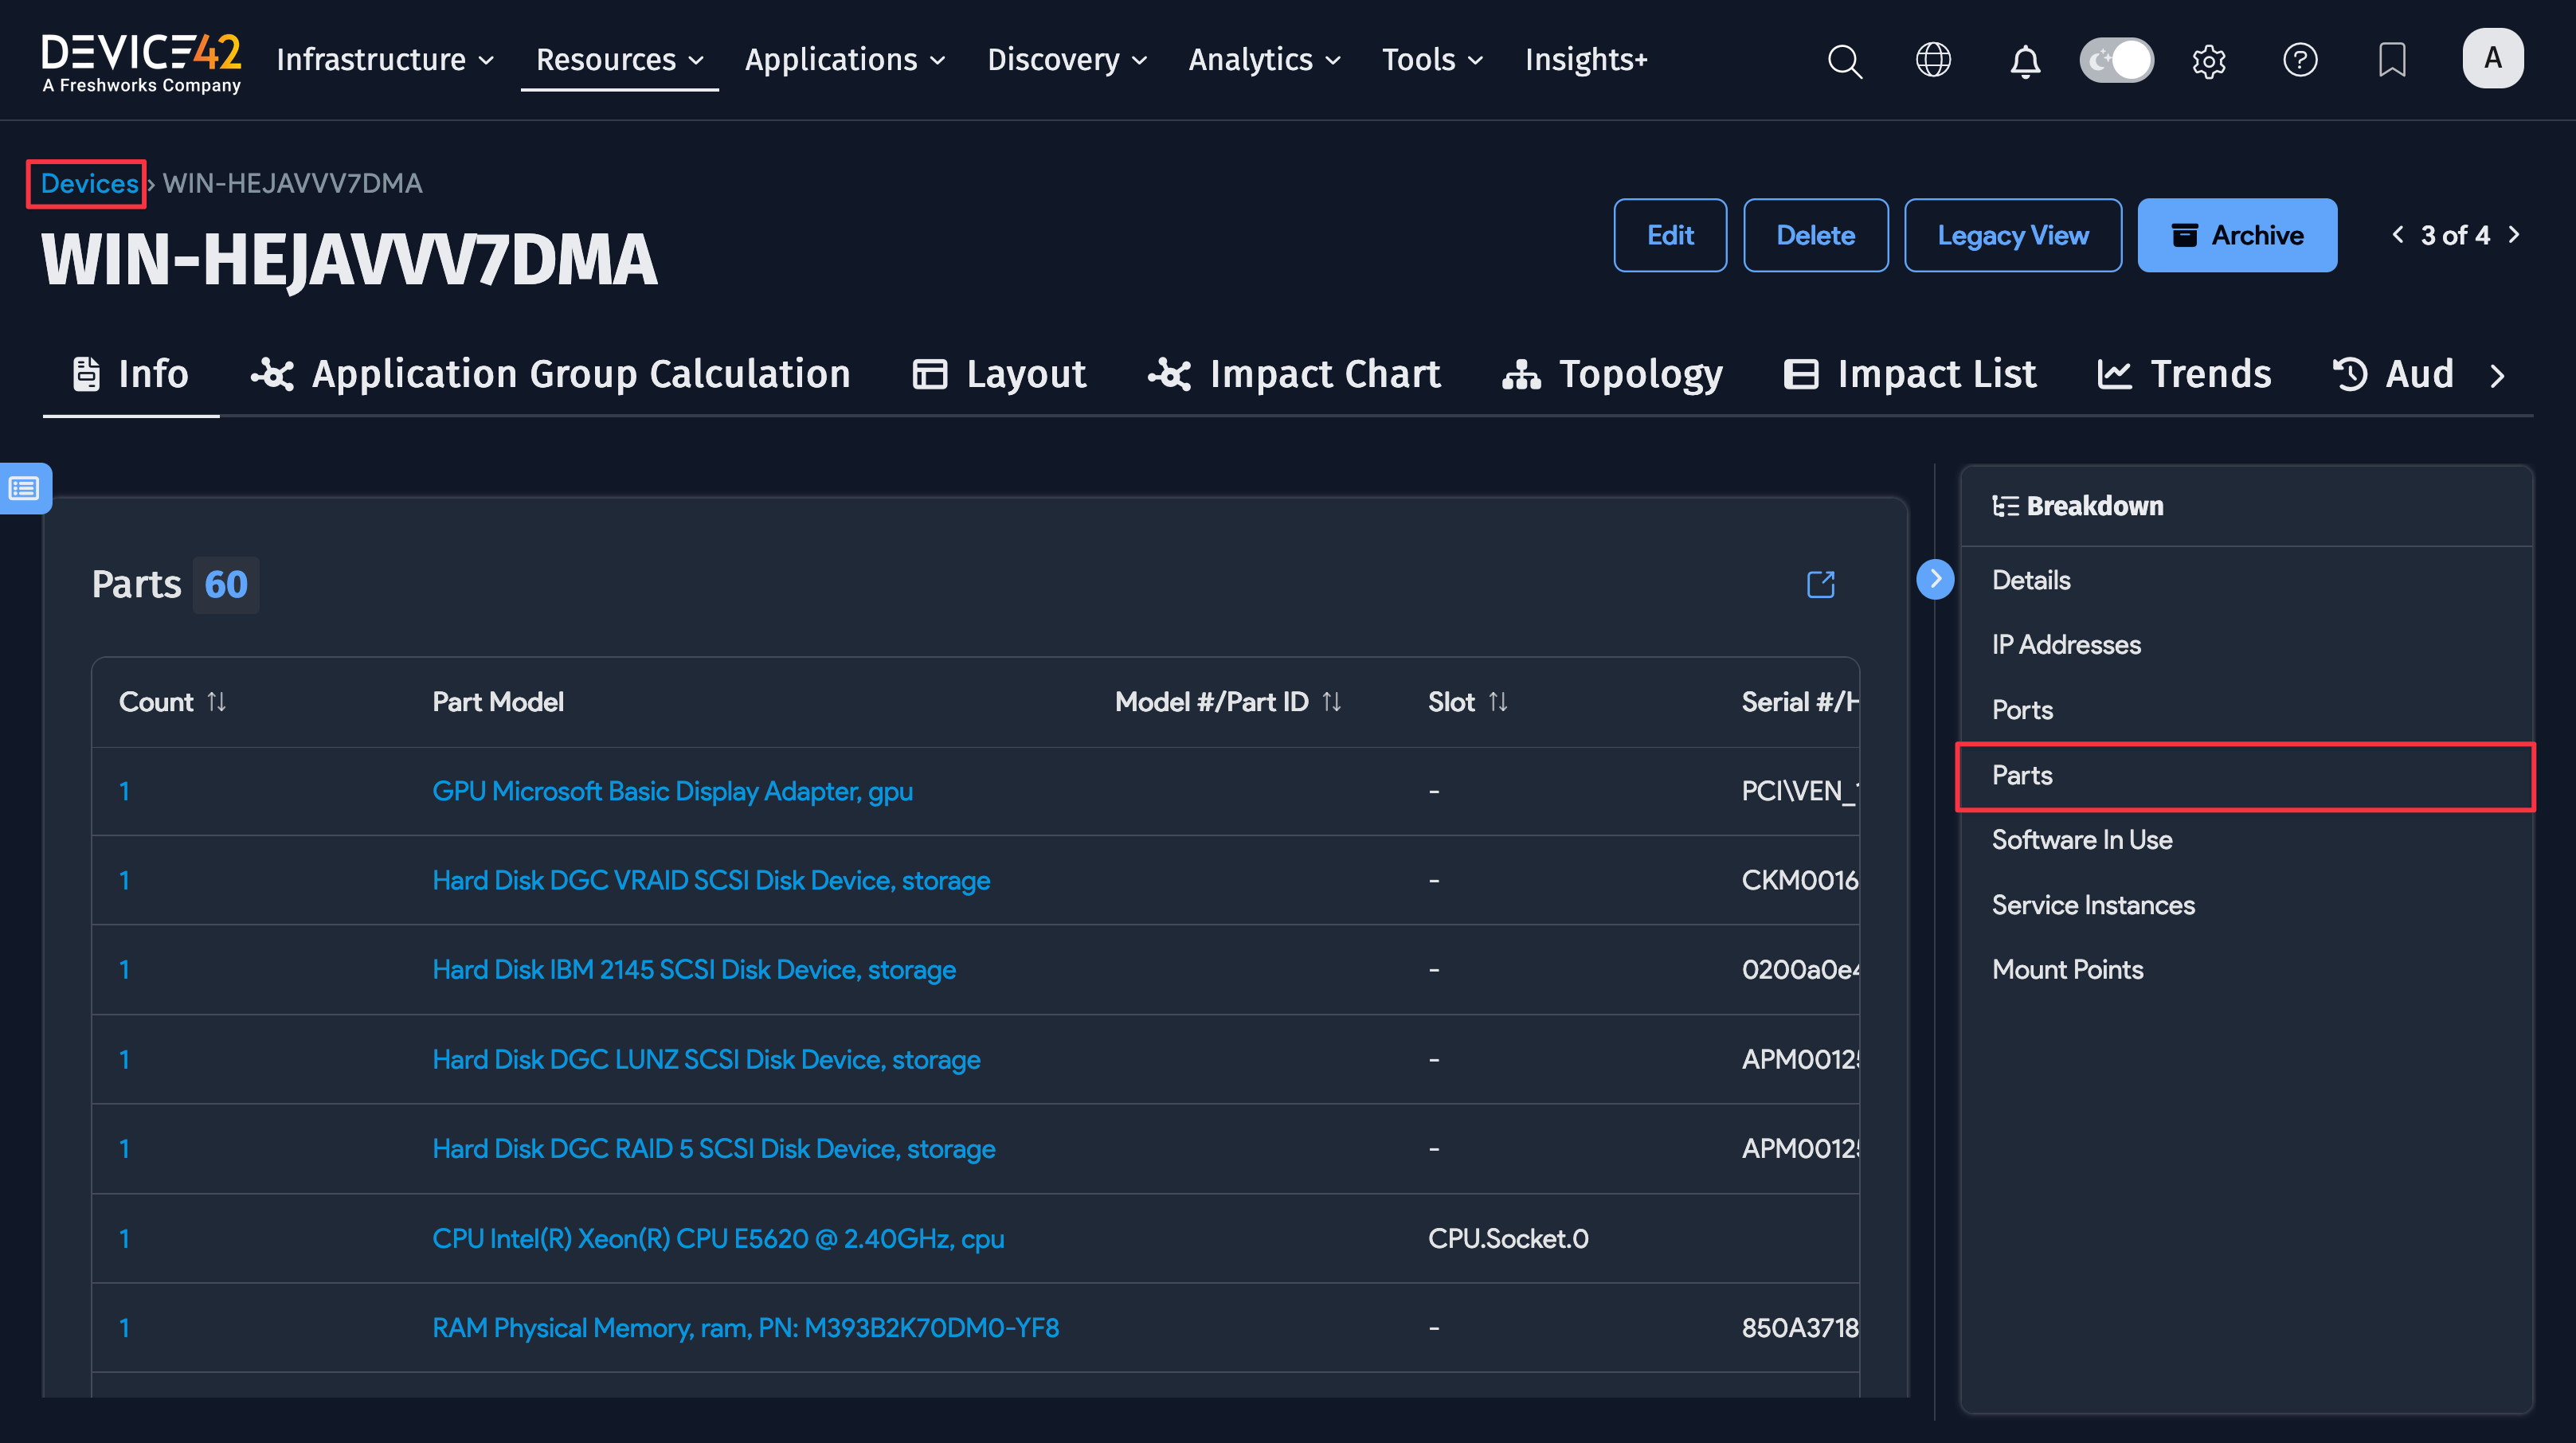
Parts Associated With a Device
Parts associated with a device can be viewed from the Parts section of a device record. From here, you can edit the fields of associated parts and use the Add another Part link to add or create a part assigned to the device.

Set Up Alerts for Low Inventory Levels
To set up an alert, navigate to the main menu, Analytics > Setup Alerts, and click the Create button in the upper right. You can set up alerting rules for either an individual part model (as in the example below) or against any parts model (that is, the rule will trigger if any parts model has an inventory level that meets the rule condition).
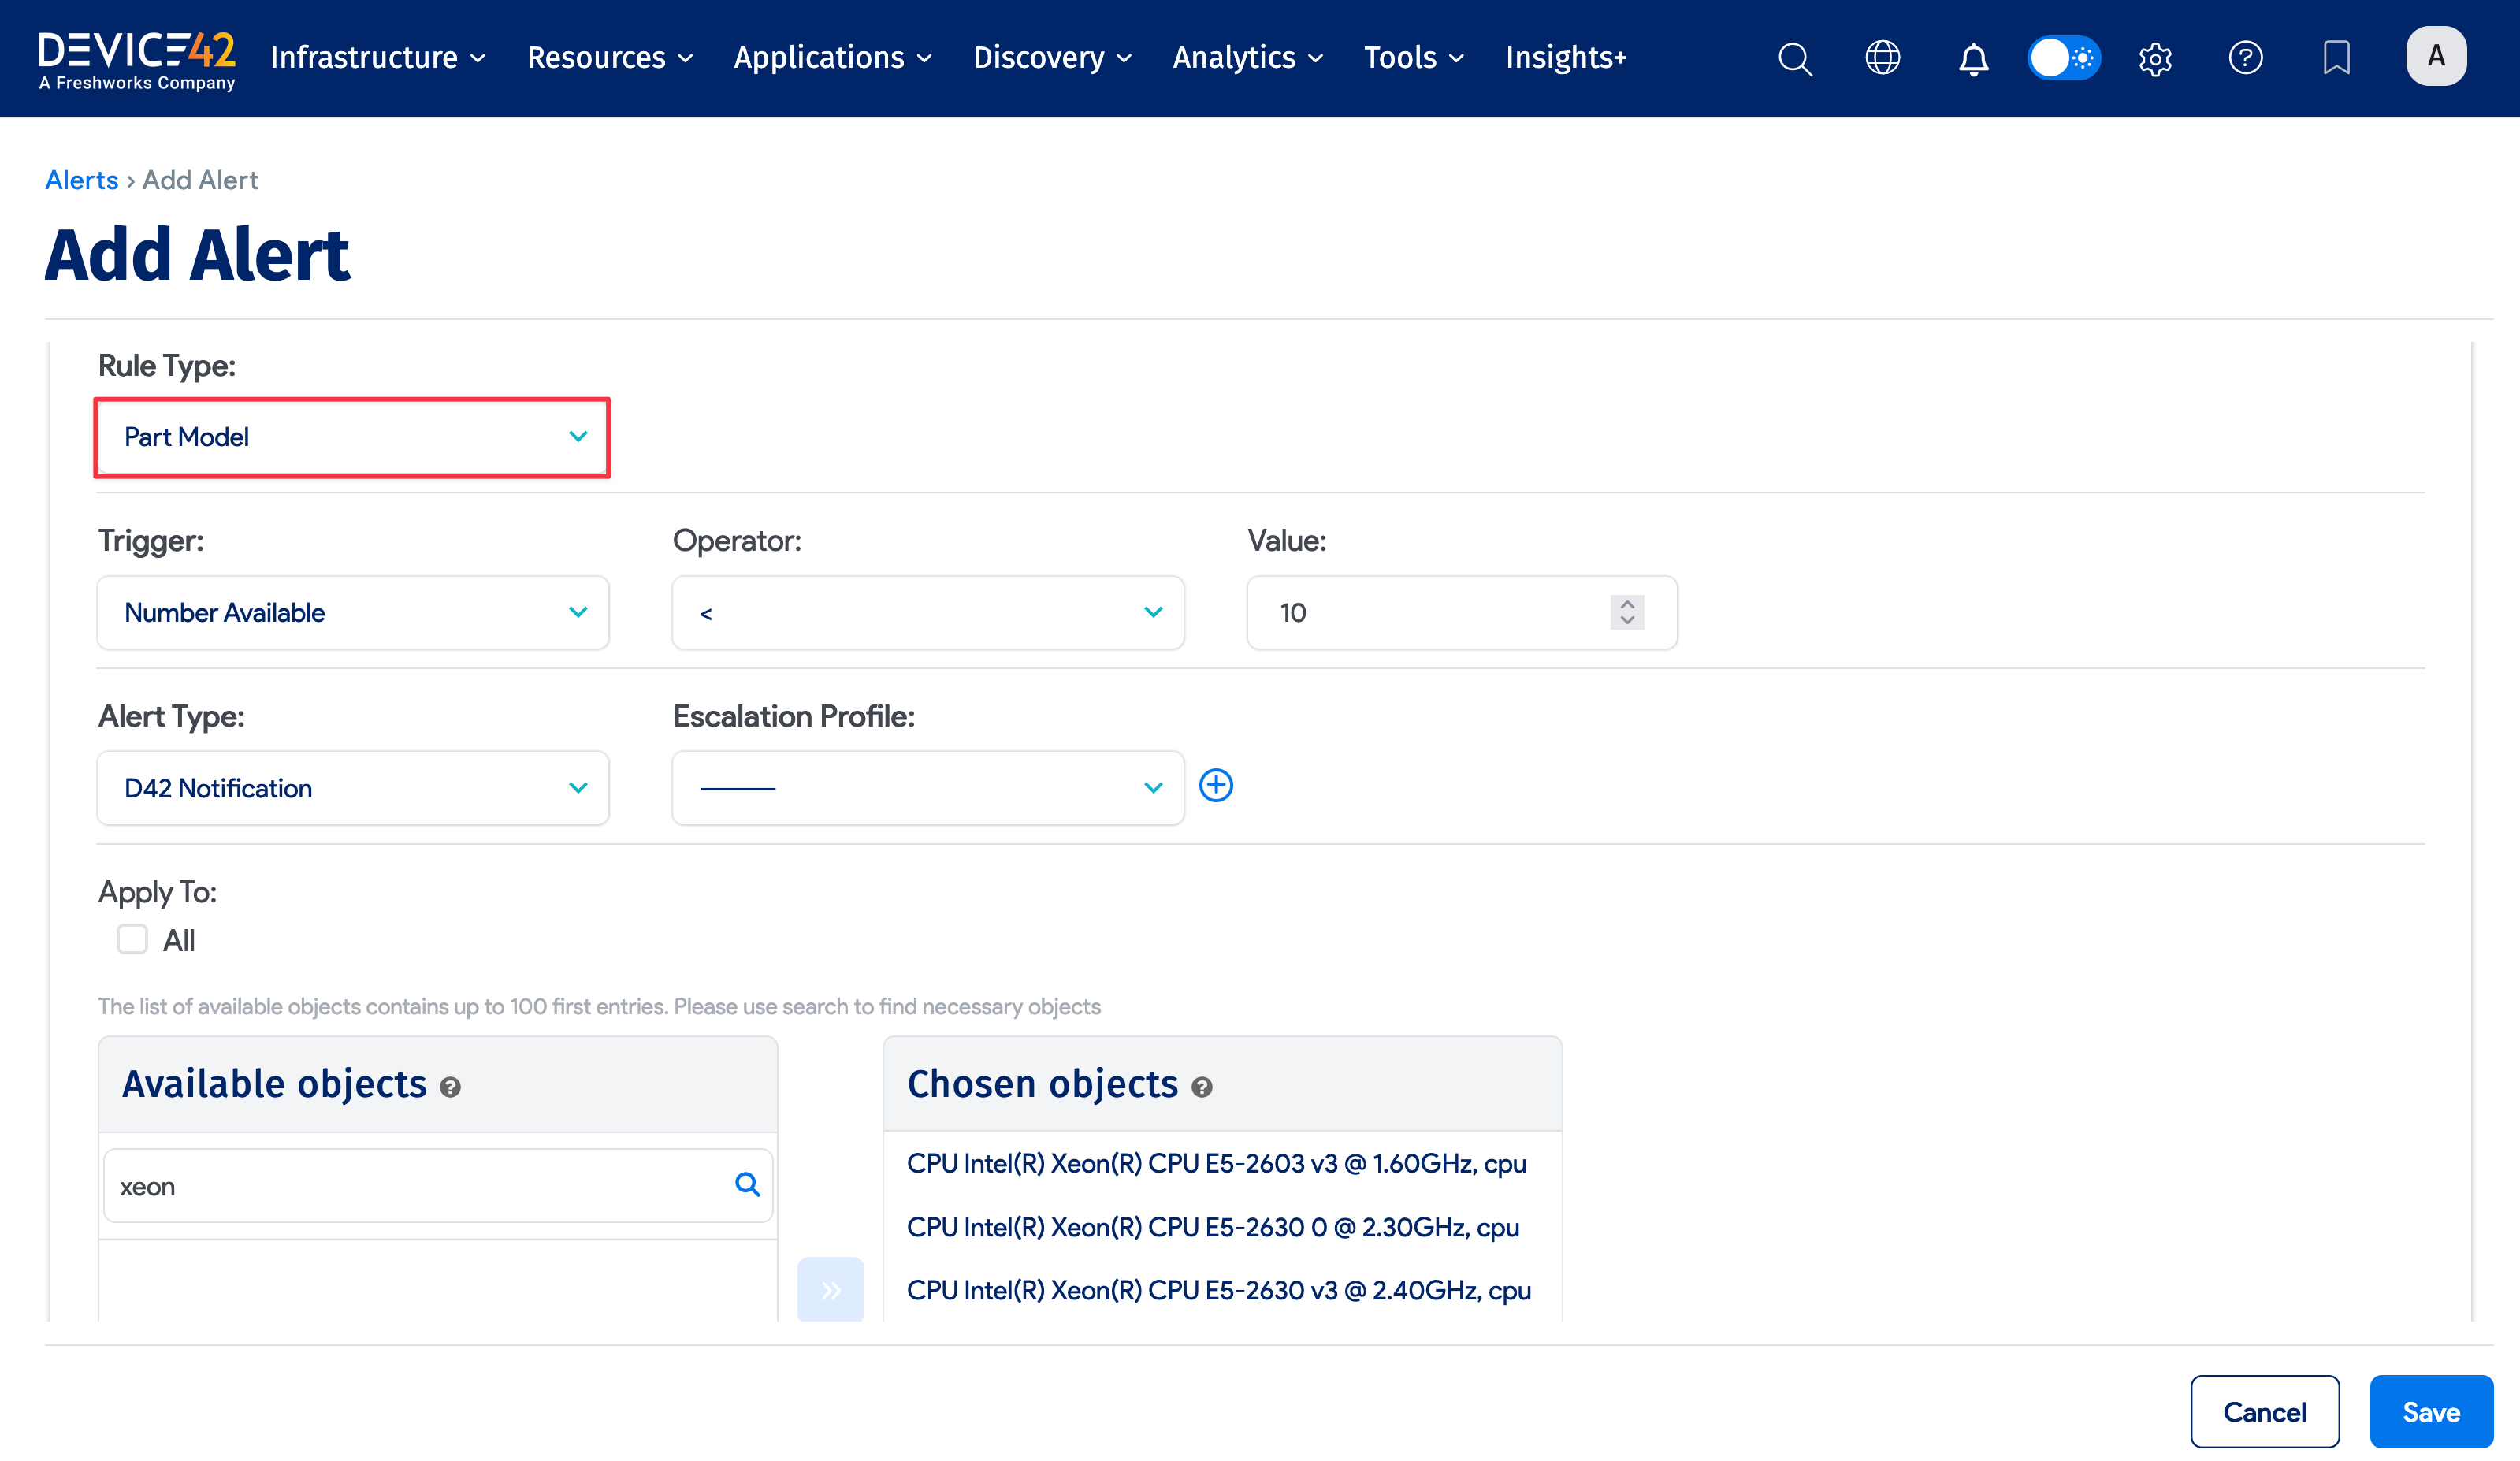
In the example above, the rule will trigger if the inventory count of Intel XEON machines falls below 10. (For rules that apply to parts, leave the Seconds Before Action at the default of 0.)
In this case, an email will be sent to hal@device42.com when the rule triggers. You can add multiple emails separated by commas or semicolons. You can also set the rule up so that an email is sent if enough parts are added to bring the inventory count back above the trigger level or so that escalation emails are sent if no one acknowledges the alert.
To import parts or part models in bulk, see Import Part Models and Import Parts.