Importing Parts
This document explains how to import parts using the Spreadsheets Import tool found under Tools > Imports/Exports (xls).
Importing Part Models vs. Importing Parts
Please see Managing Spare Parts for an explanation of part models vs. parts in Device42.
Both parts and part models can be created using the Parts - Create/Update Parts import, whereas the Part Models - Create/Update Part Models import only creates models.
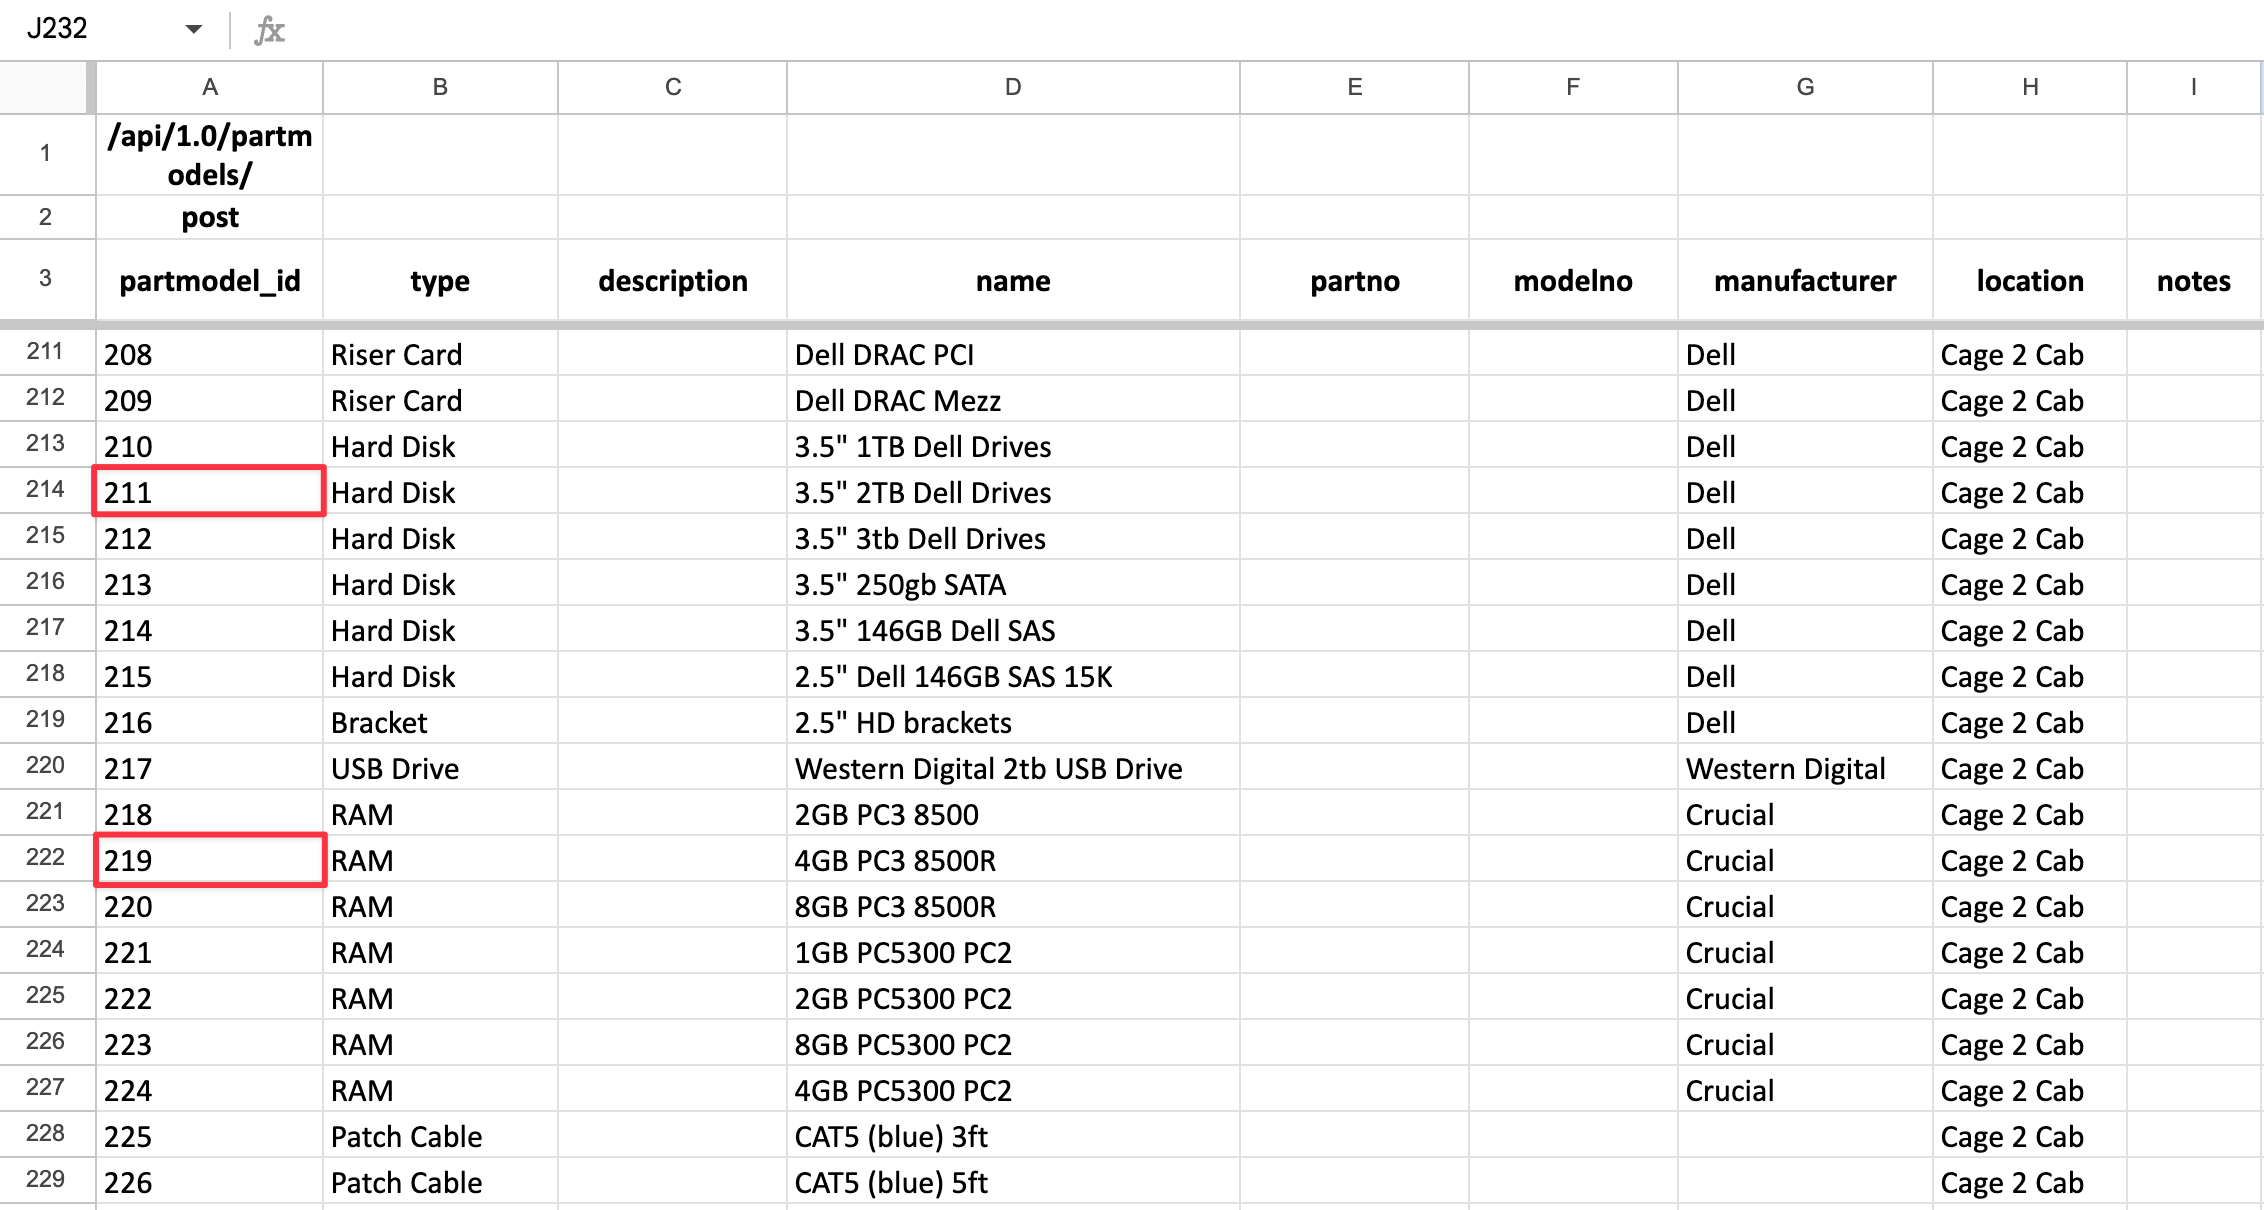
Download Current Data
This document demonstrates how to add parts to existing part models, building on the imported models covered in the Importing Part Models document.
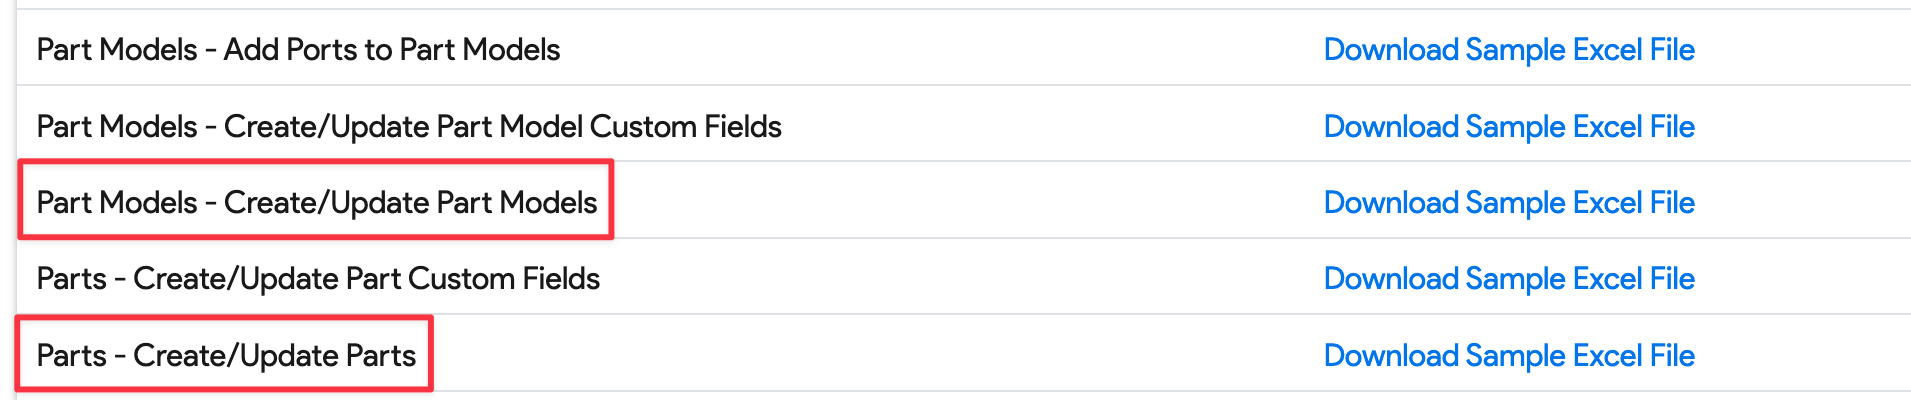
Go to Tools > Imports/Exports (xls) and download the current data for spare part models as highlighted below.


A current data export sheet is shown below. Creating parts from existing part models requires the part model ID. Keep this sheet open.
Download Sample File
Next, download the Create or update spare parts sample sheet by going to Tools > Imports/Exports (xls).


Use the data from the current data export to help populate the parts import.
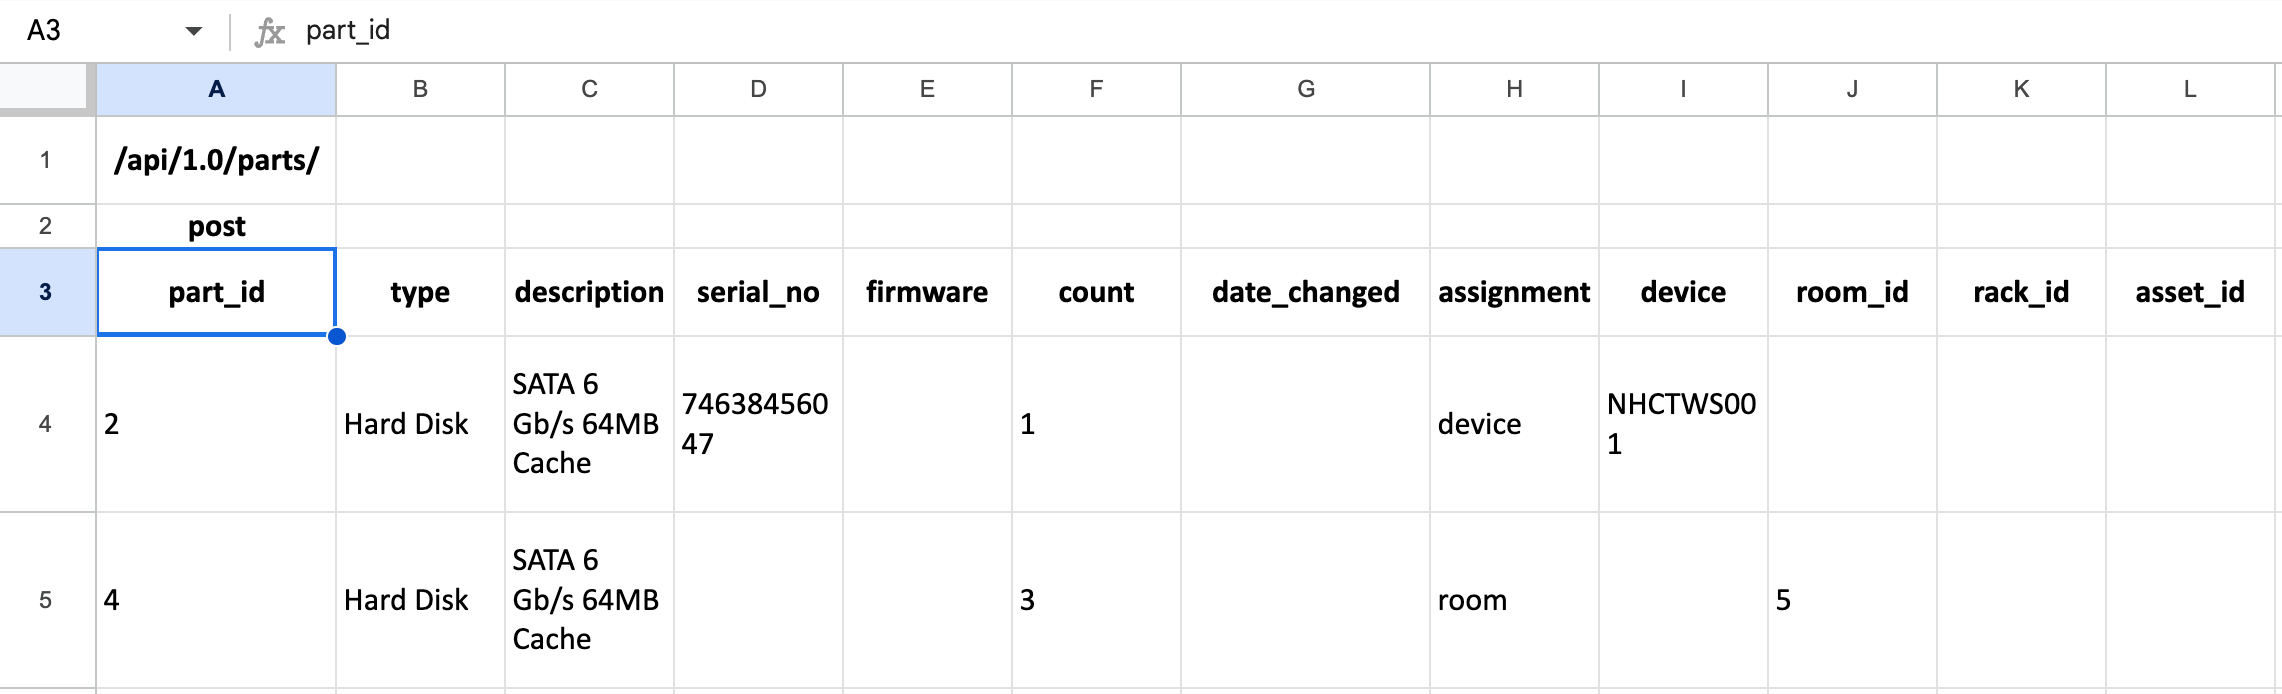
Populate the Sample Sheet
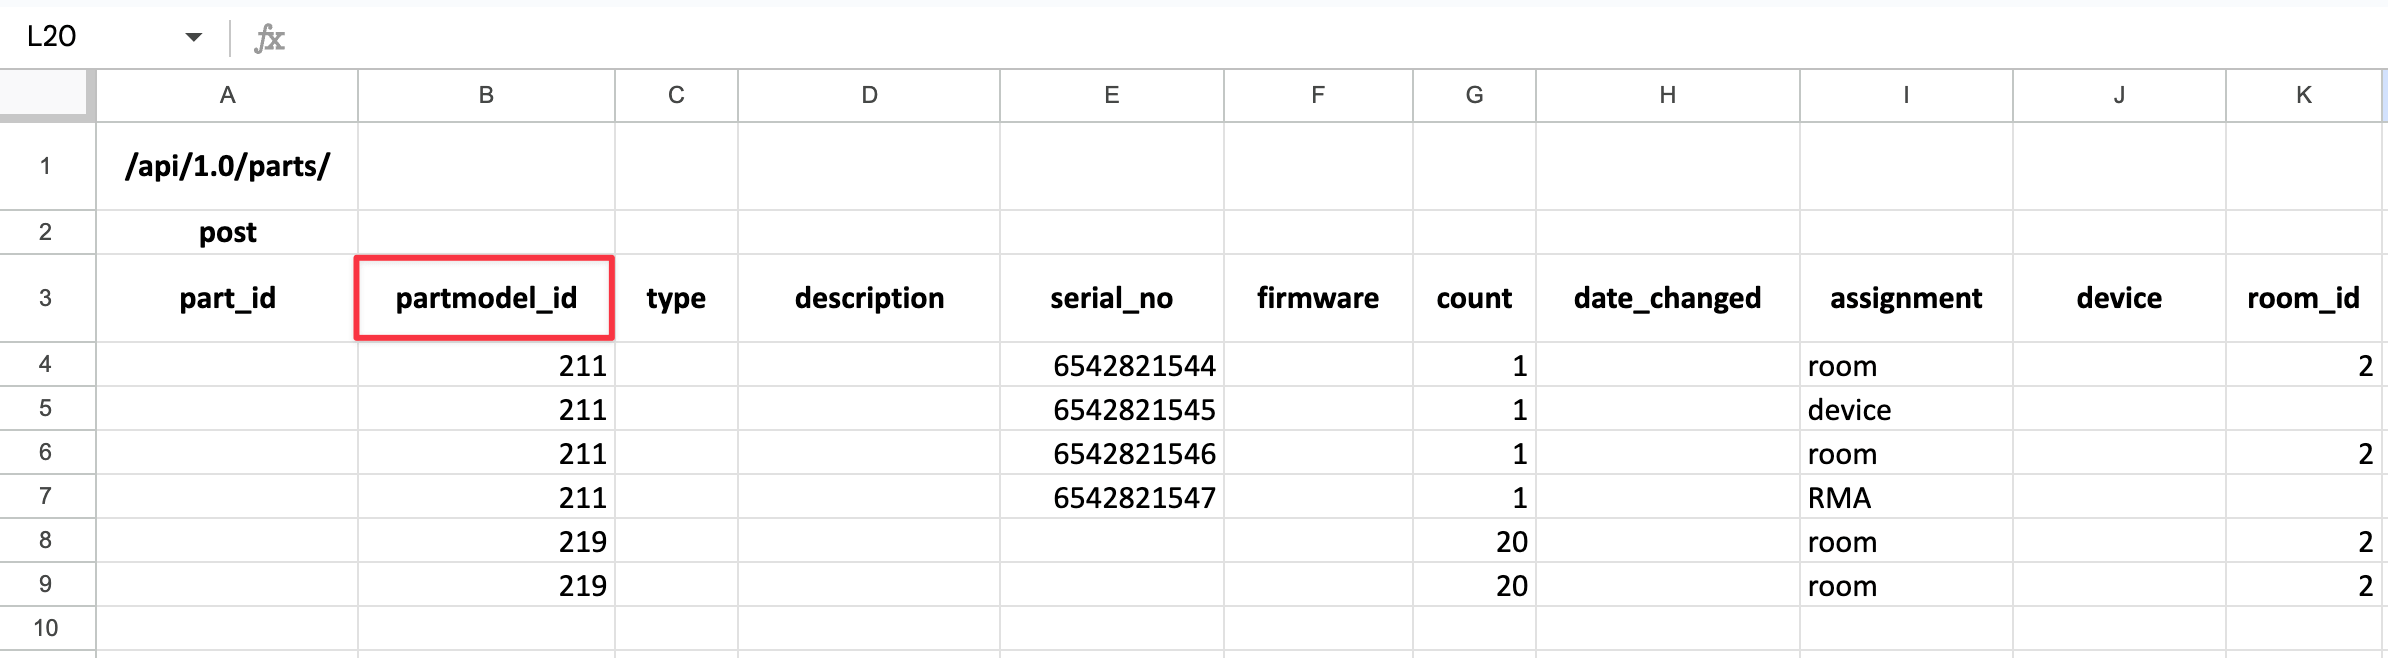
Add a column for partmodel_id and populate the sample spreadsheet to add new parts to two of the existing part models you created. Add the serial numbers manually or using a laser handheld scanner (see below).
This import creates the following:
-
For
partmodel_id211(name3.5" 2TB Dell Drives): Four line items with assignments and serial numbers (unique line items are required to track serial numbers) -
For
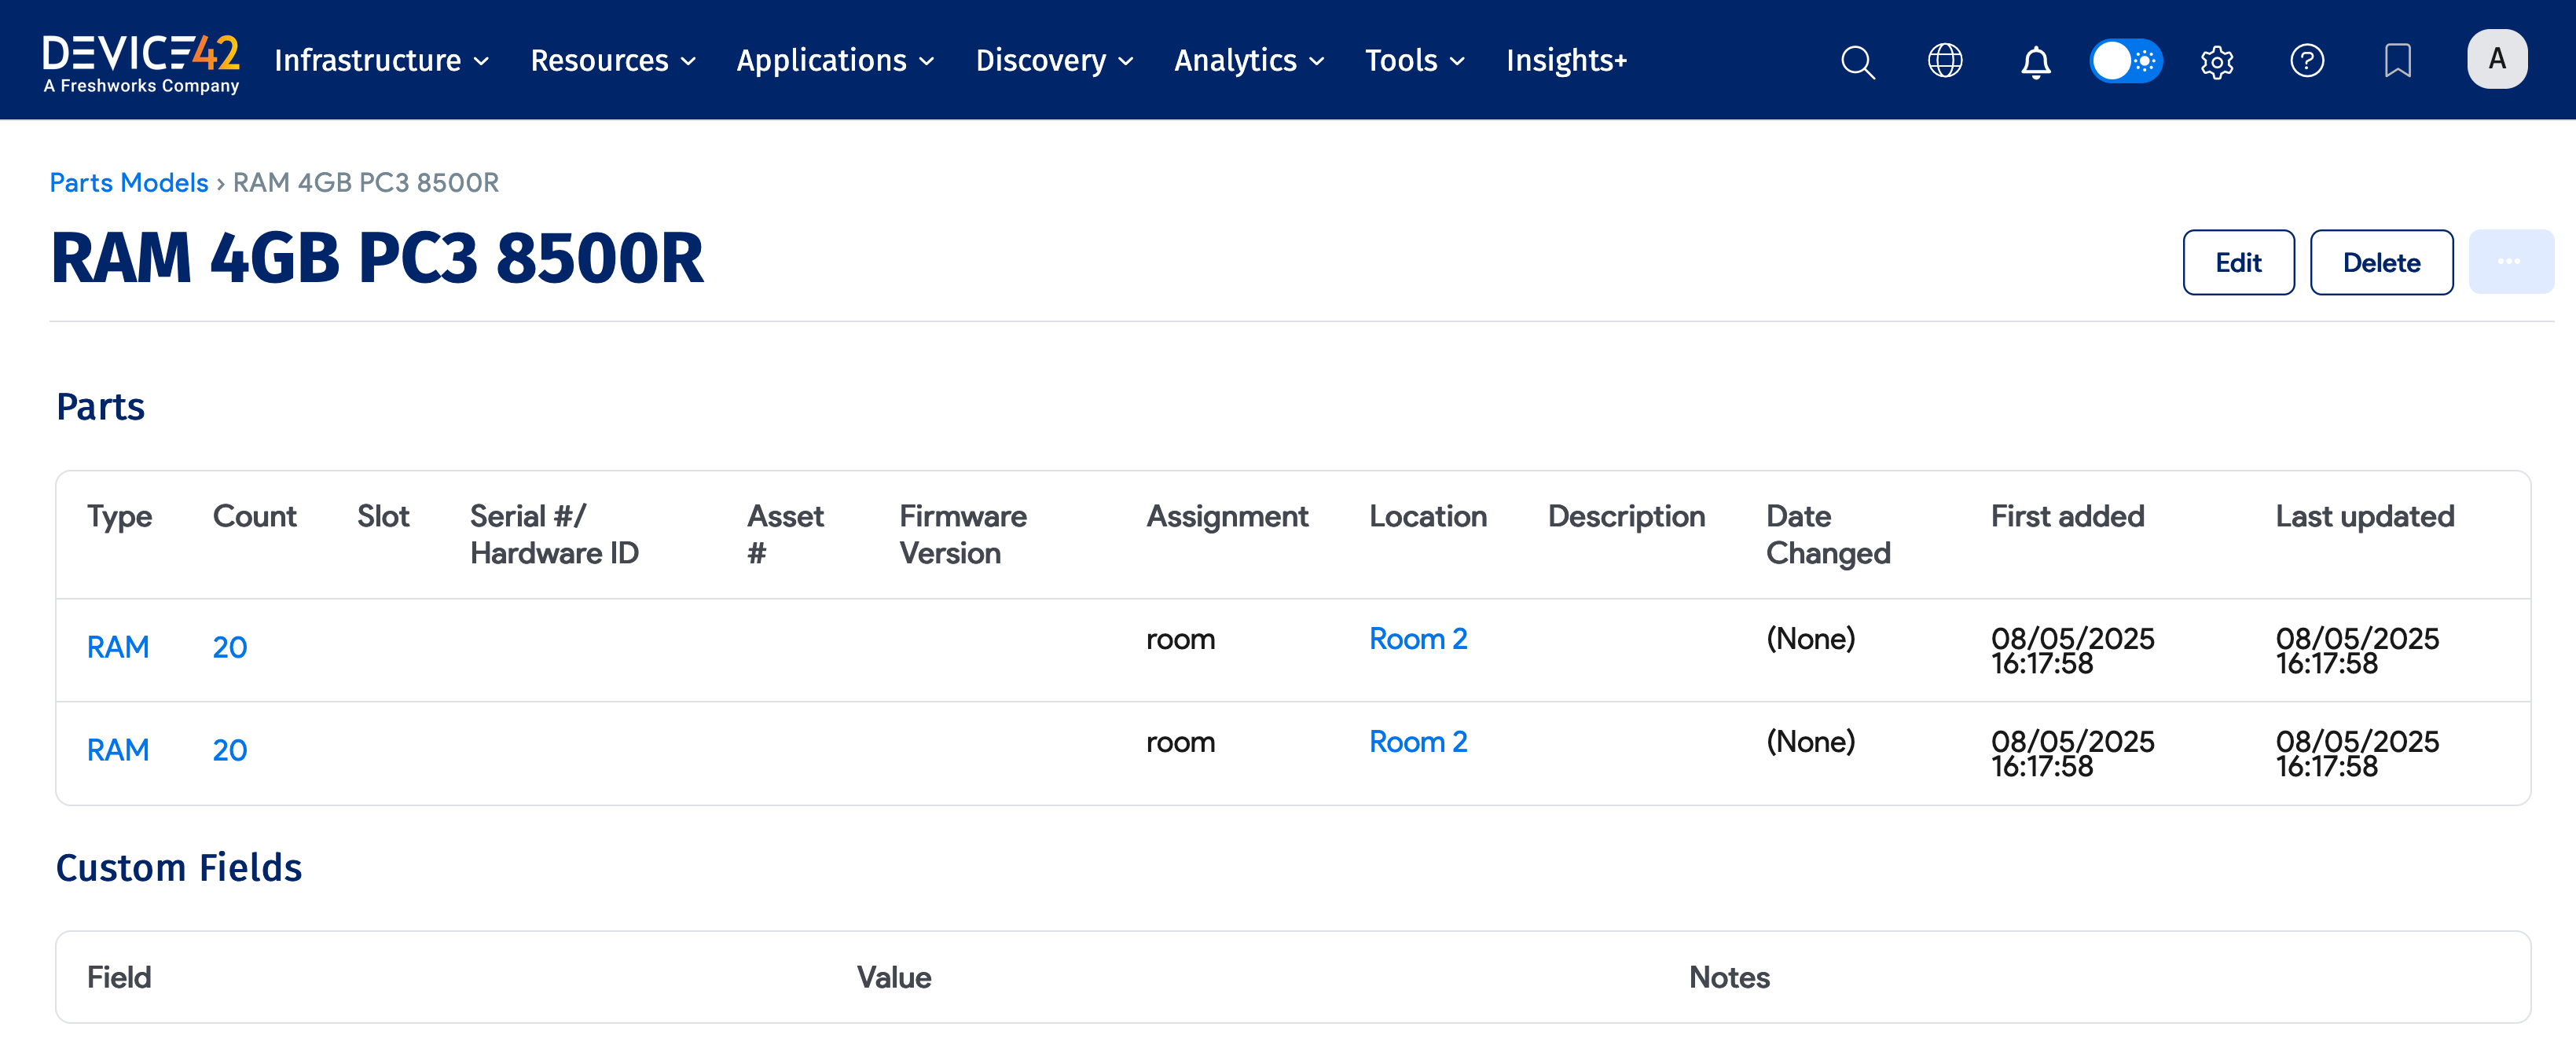
partmodel_id219(name4GB PC3 8500R): Two line items with assignments (since you don't need to track serial numbers for these items, you are only tracking room assignment and count)
Save the file and import it.
Handheld Scanner
You can use a DBPOWER scanner purchased on Amazon, which works well for this purpose. It comes with a USB receiver and can be programmed to automatically go to the next row in Excel, making it very quick and easy to capture serial numbers or other bar codes.
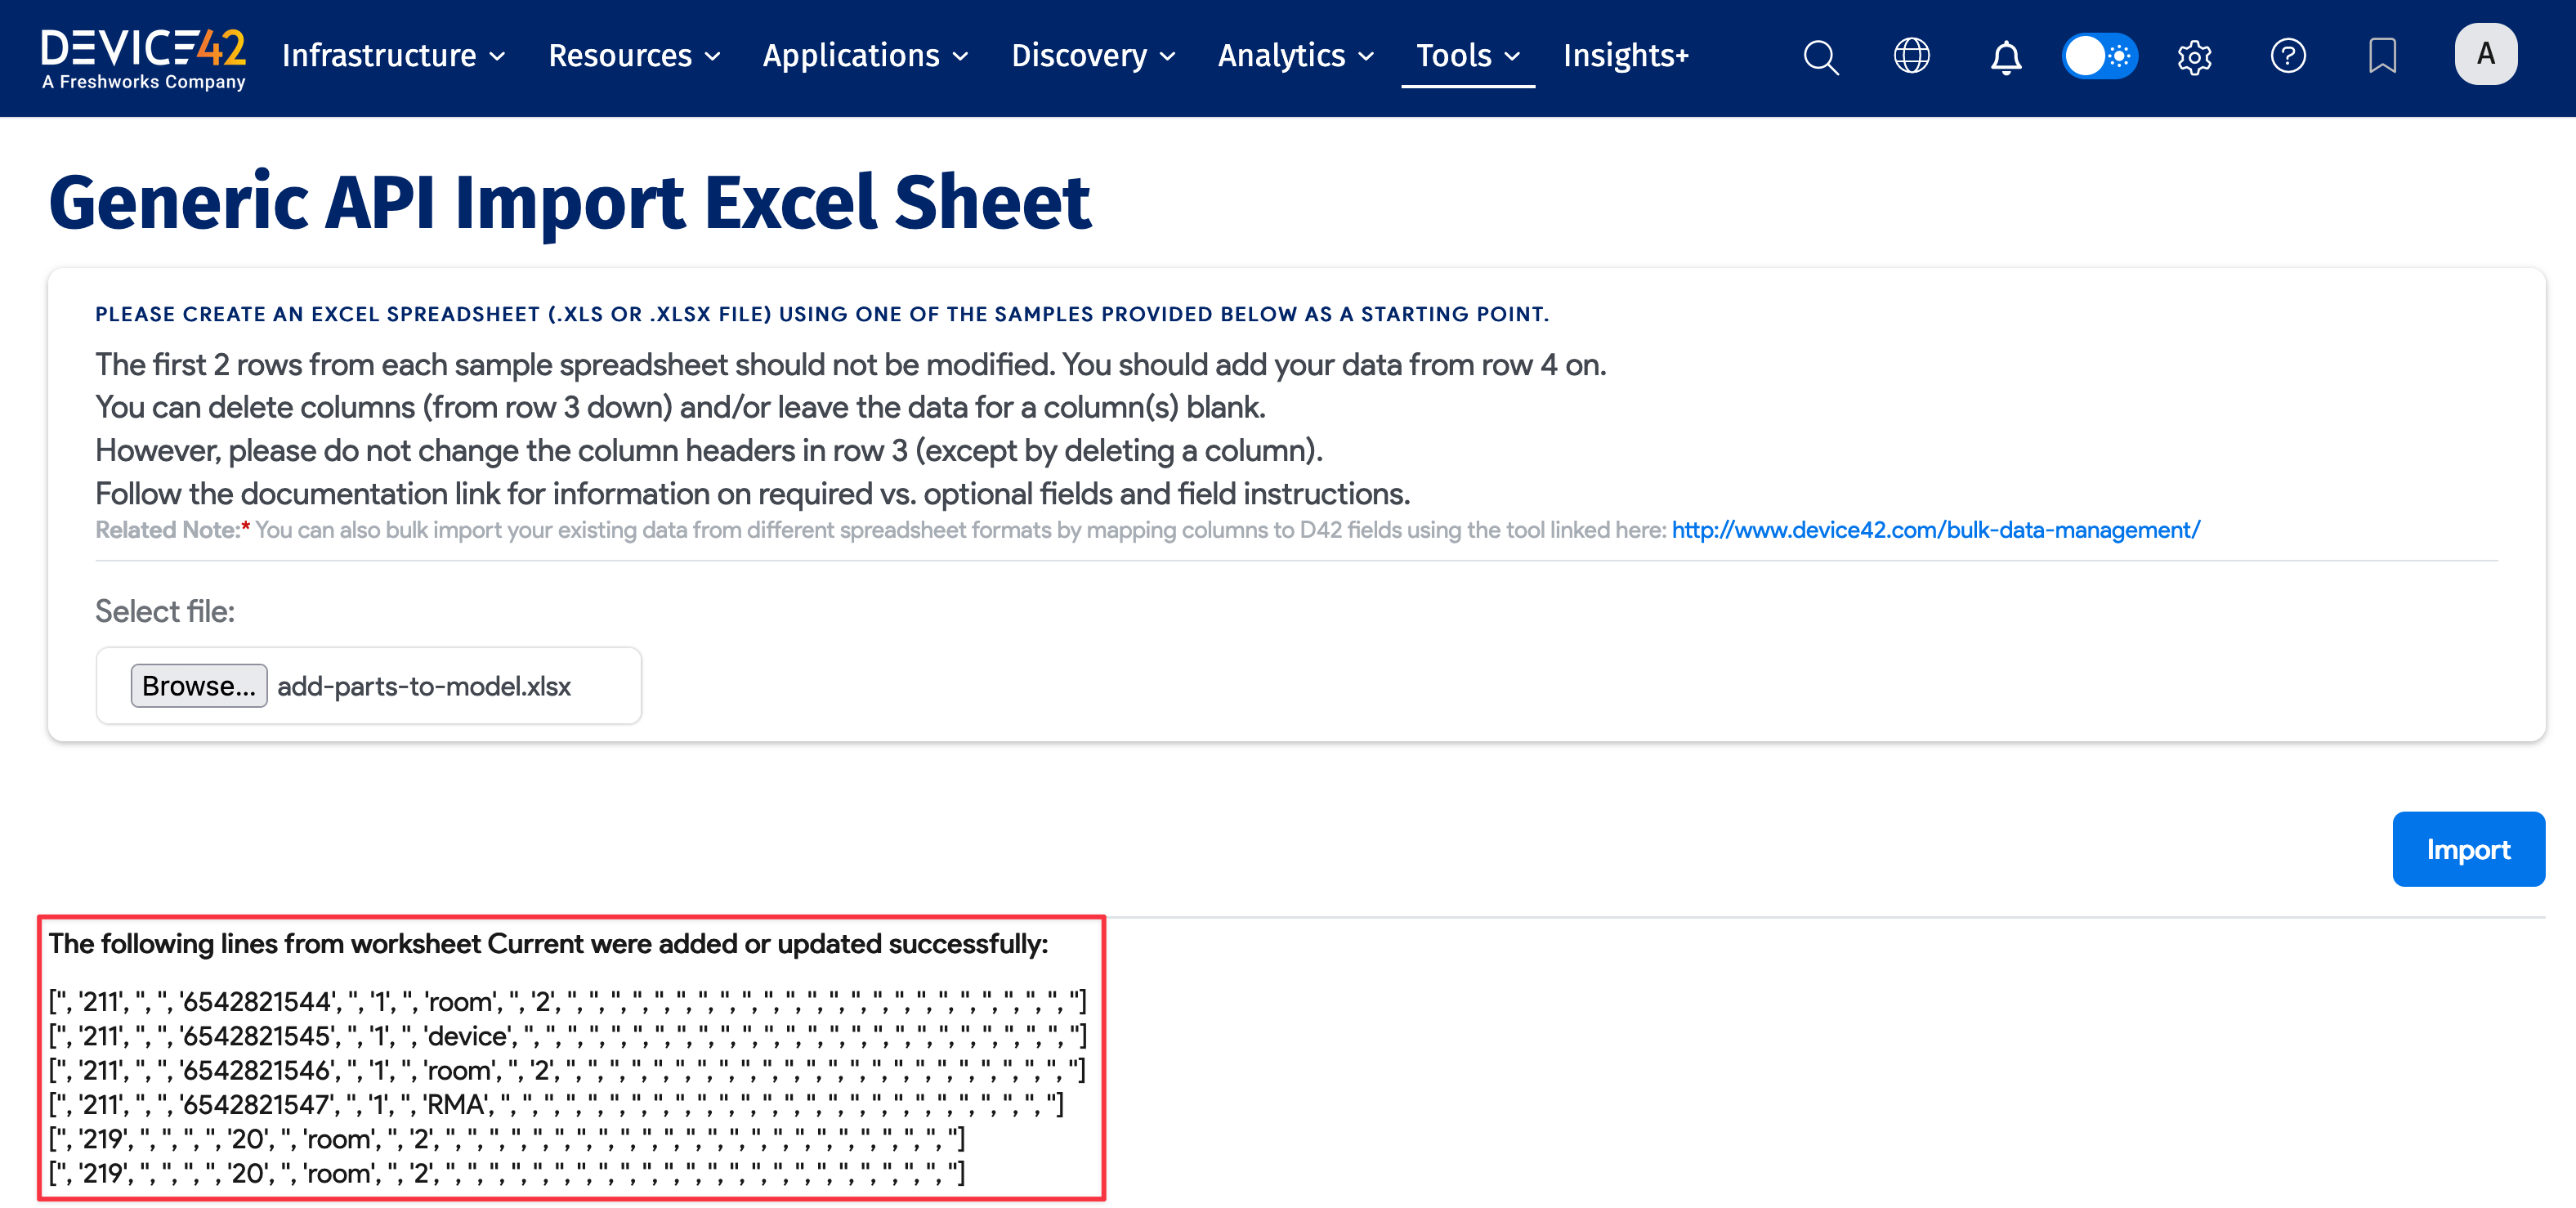
Import Results
Go to Tools > Imports/Exports (.xls), choose your file, and click Import. The results of the import are shown below.
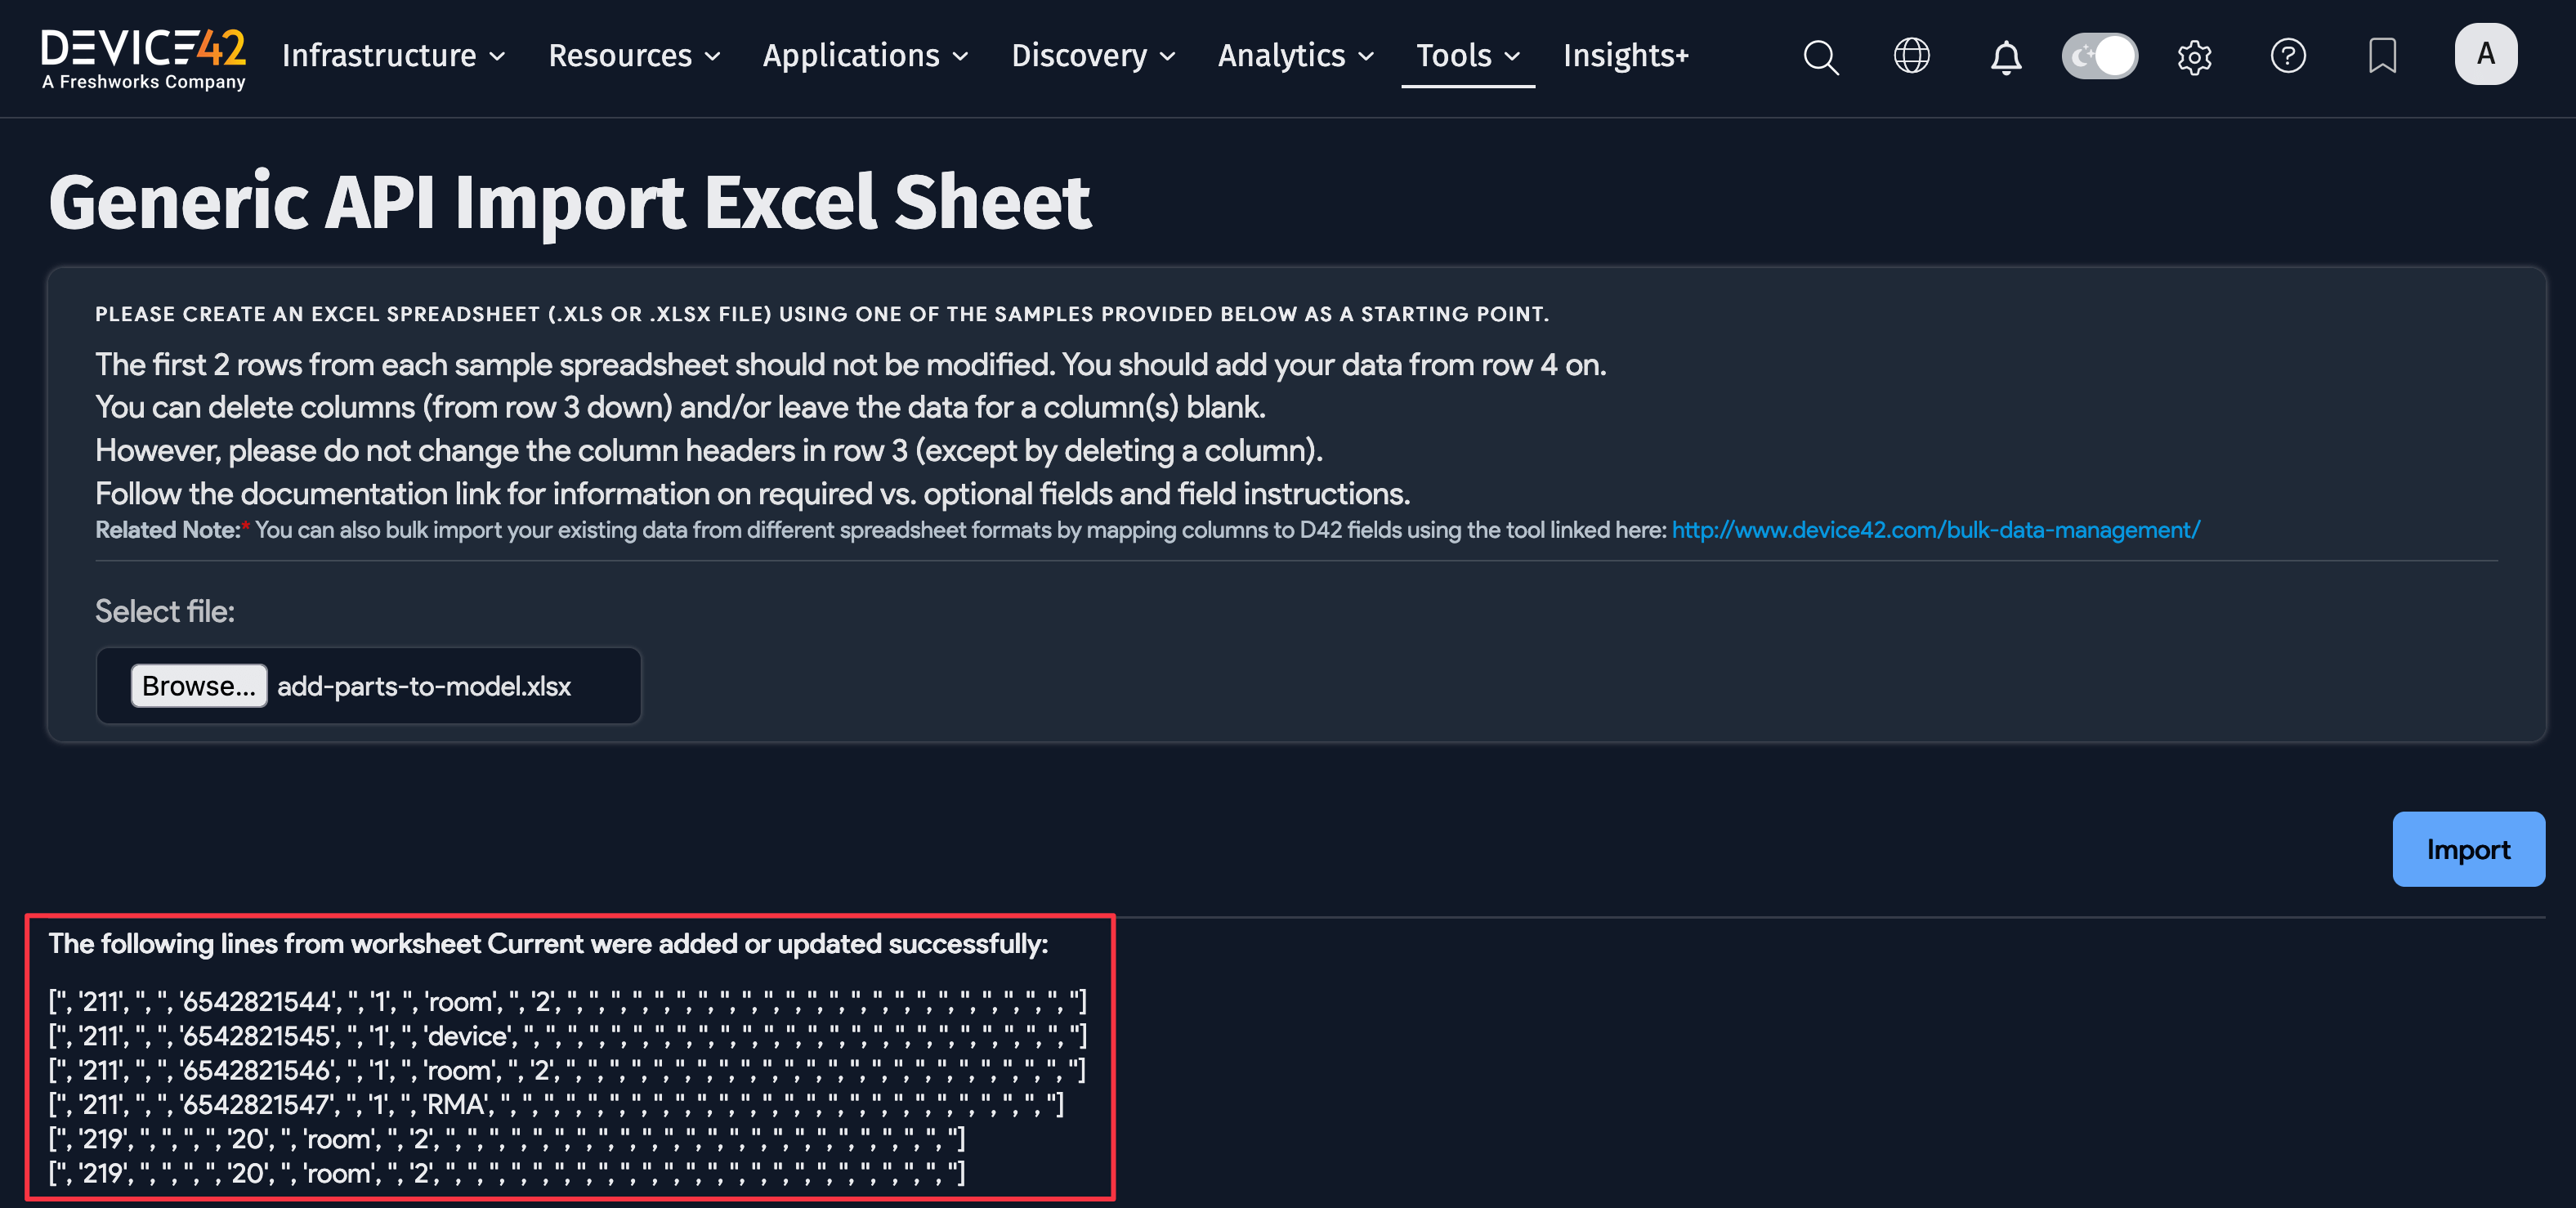
Let's look at these new parts in the UI.
The new parts appear on separate line items, as these are the unique line items needed for tracking serial numbers.
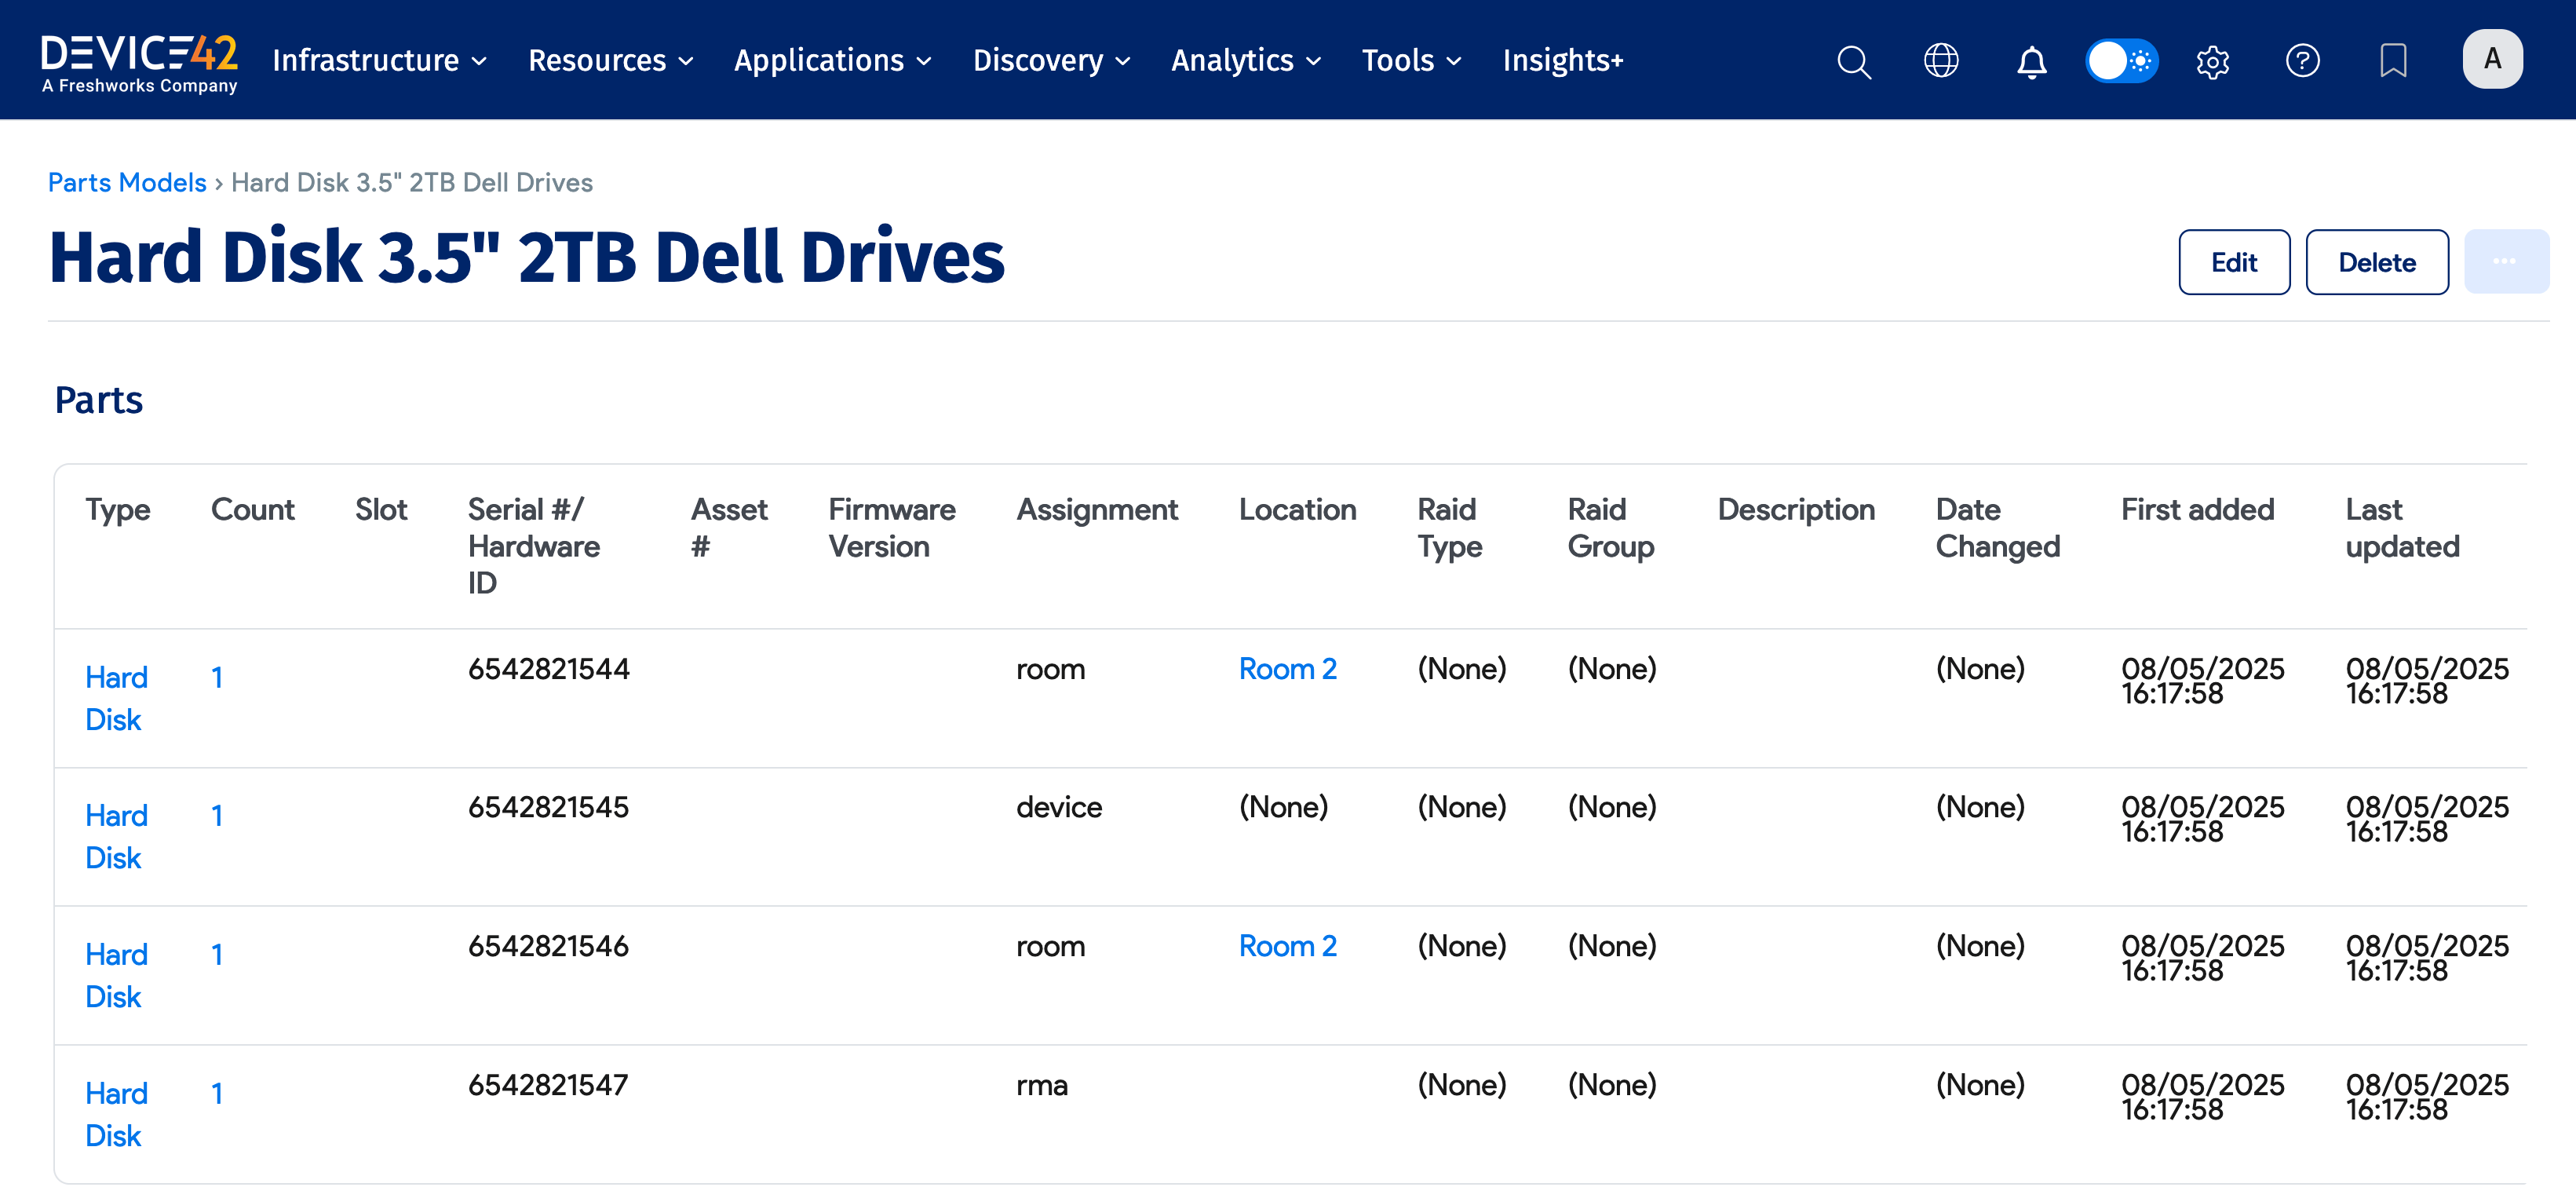
The new parts appear on two lines. Since you're not tracking serial numbers, you only need two lines to track the room assignments for these RAM modules.