Racks
To get a list of your racks, go to Infrastructure > DataCenter > Racks to display the Racks list page.
Like the list view pages for other objects, you'll see your racks and several sortable columns of information. Use the available filters and search box to narrow down the list of racks displayed.
Get a quick look at where there is available space in the racks with the Available Us column that displays the availability heatmap of each rack.
Select one or more racks to activate the Actions dropdown. For example, you can use the Show Front Layout of selected racks action to open a view that shows the layouts of the selected racks. From this layout view, you can drag and drop devices from one rack to another (see the Visually Move Devices Between Racks section below).
Add a new rack by clicking the Create button from the Racks list page and fill in the details outlined below.
Rack Details
Provide the details for the new rack or edit an existing rack (by selecting the rack from the list page and clicking Edit).
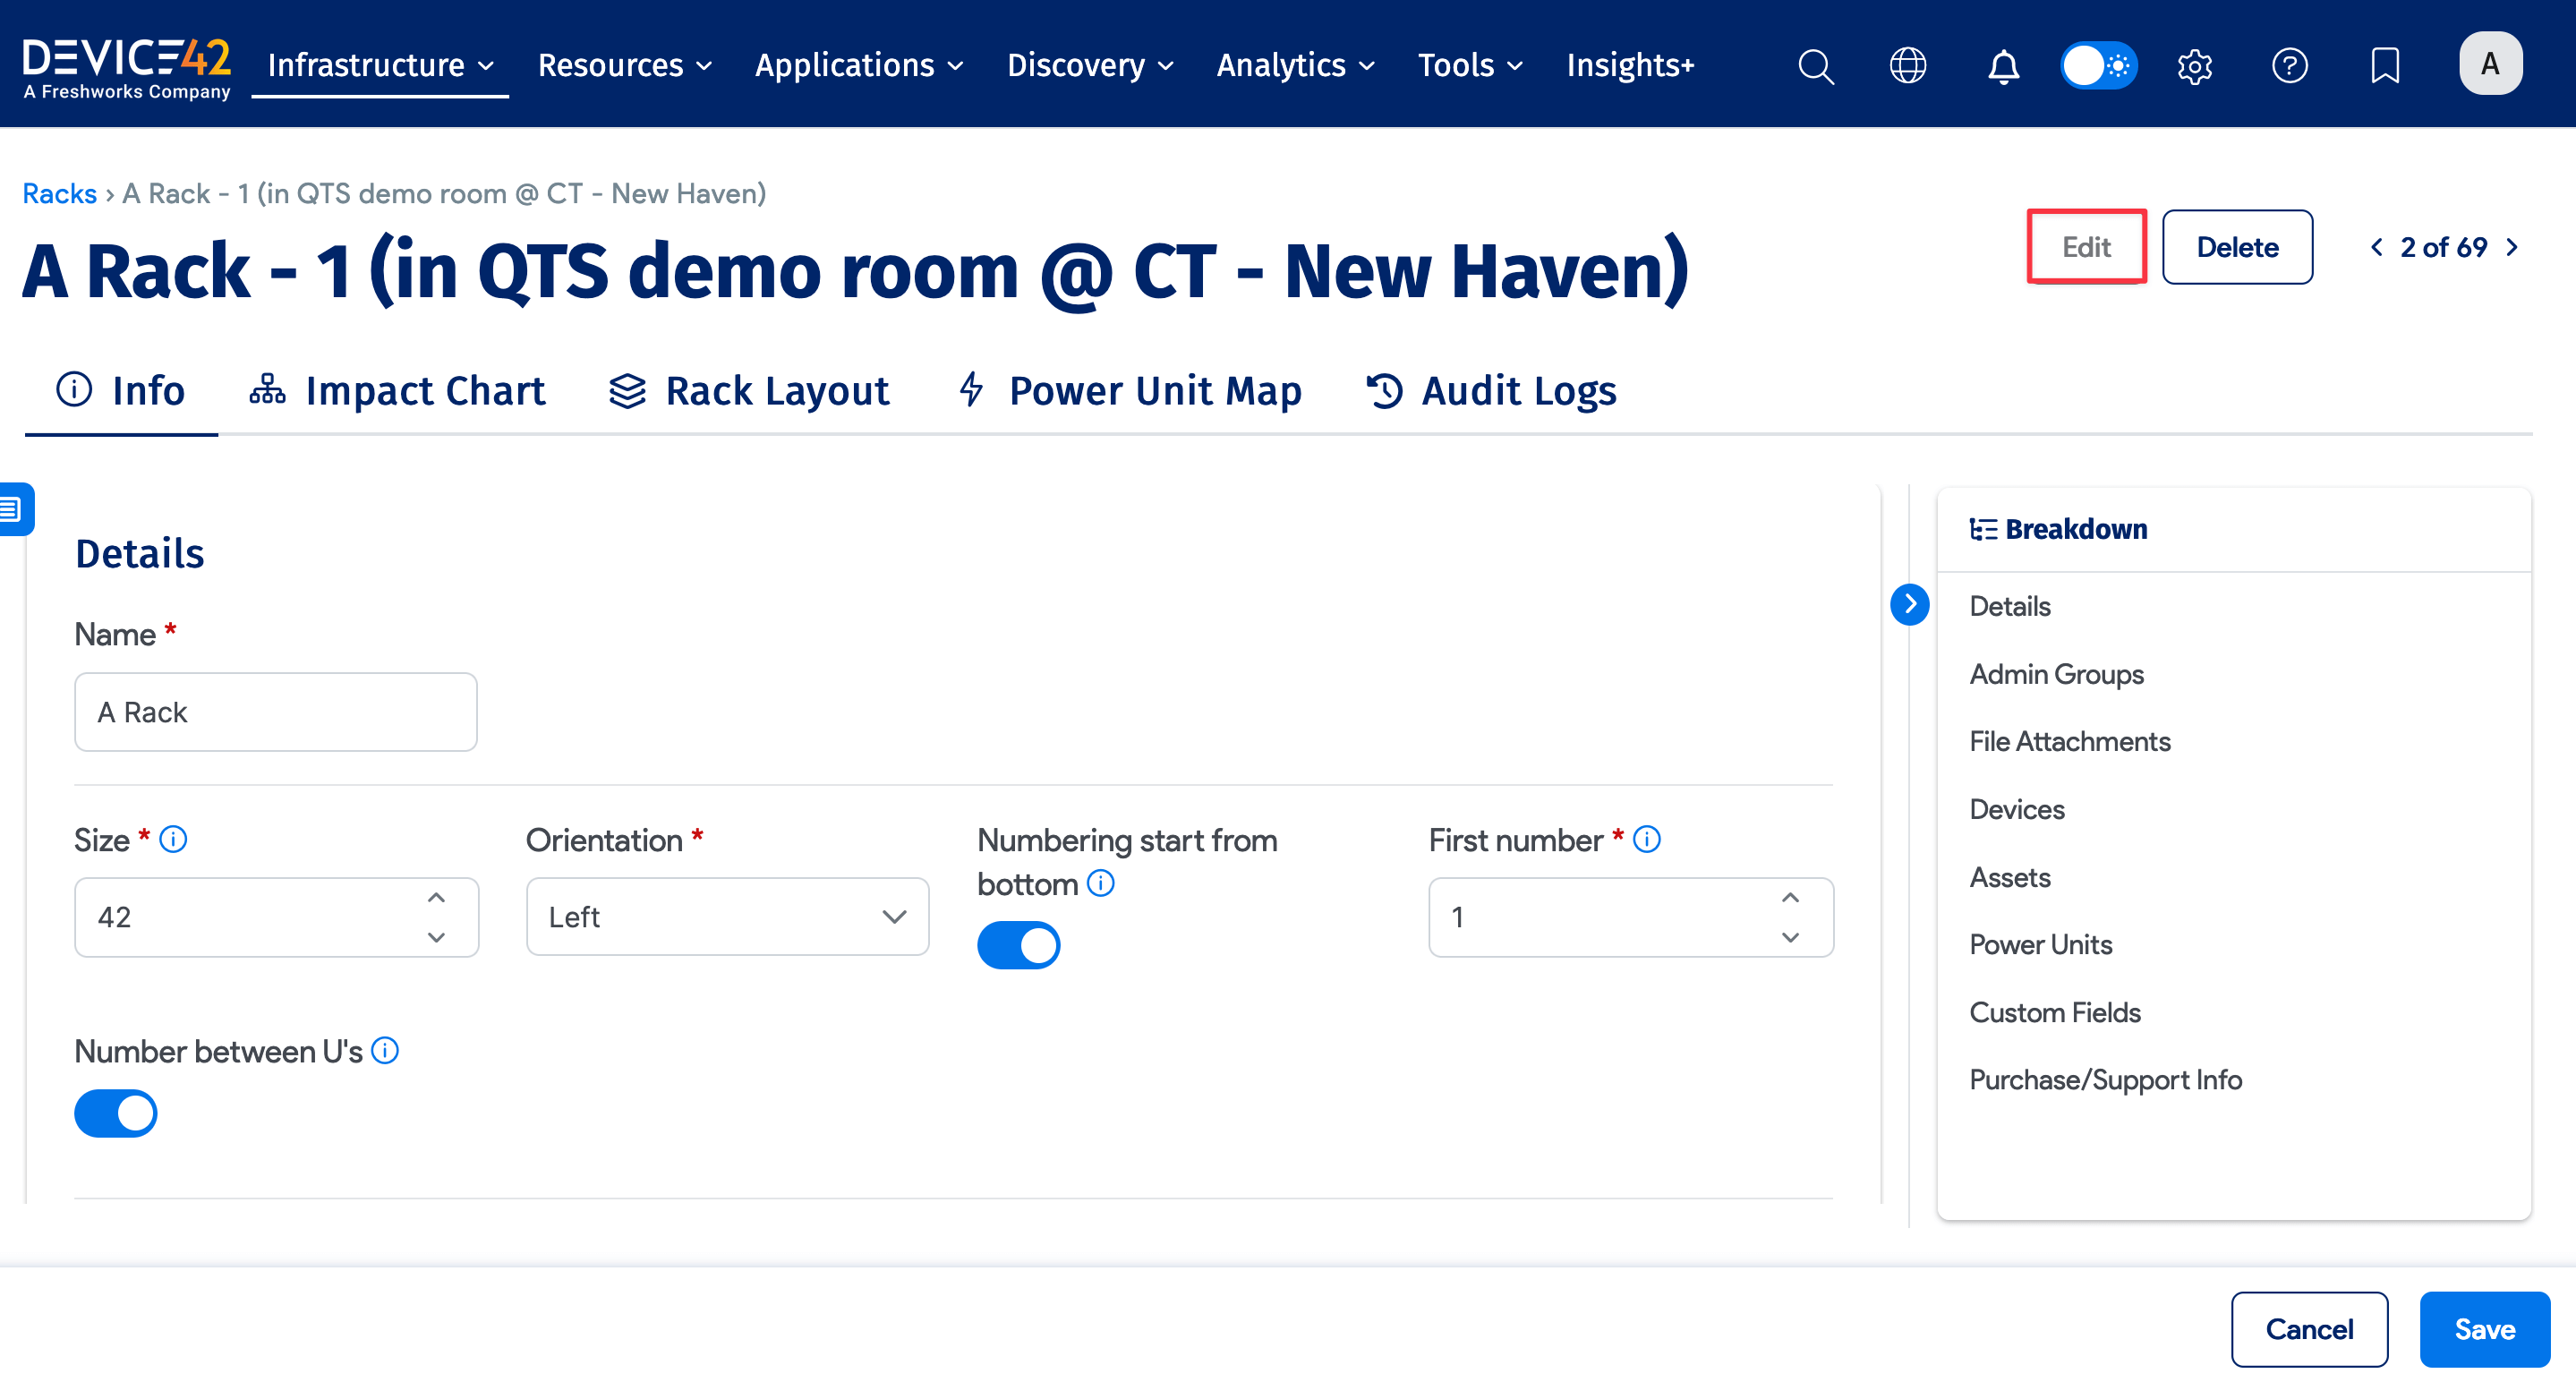
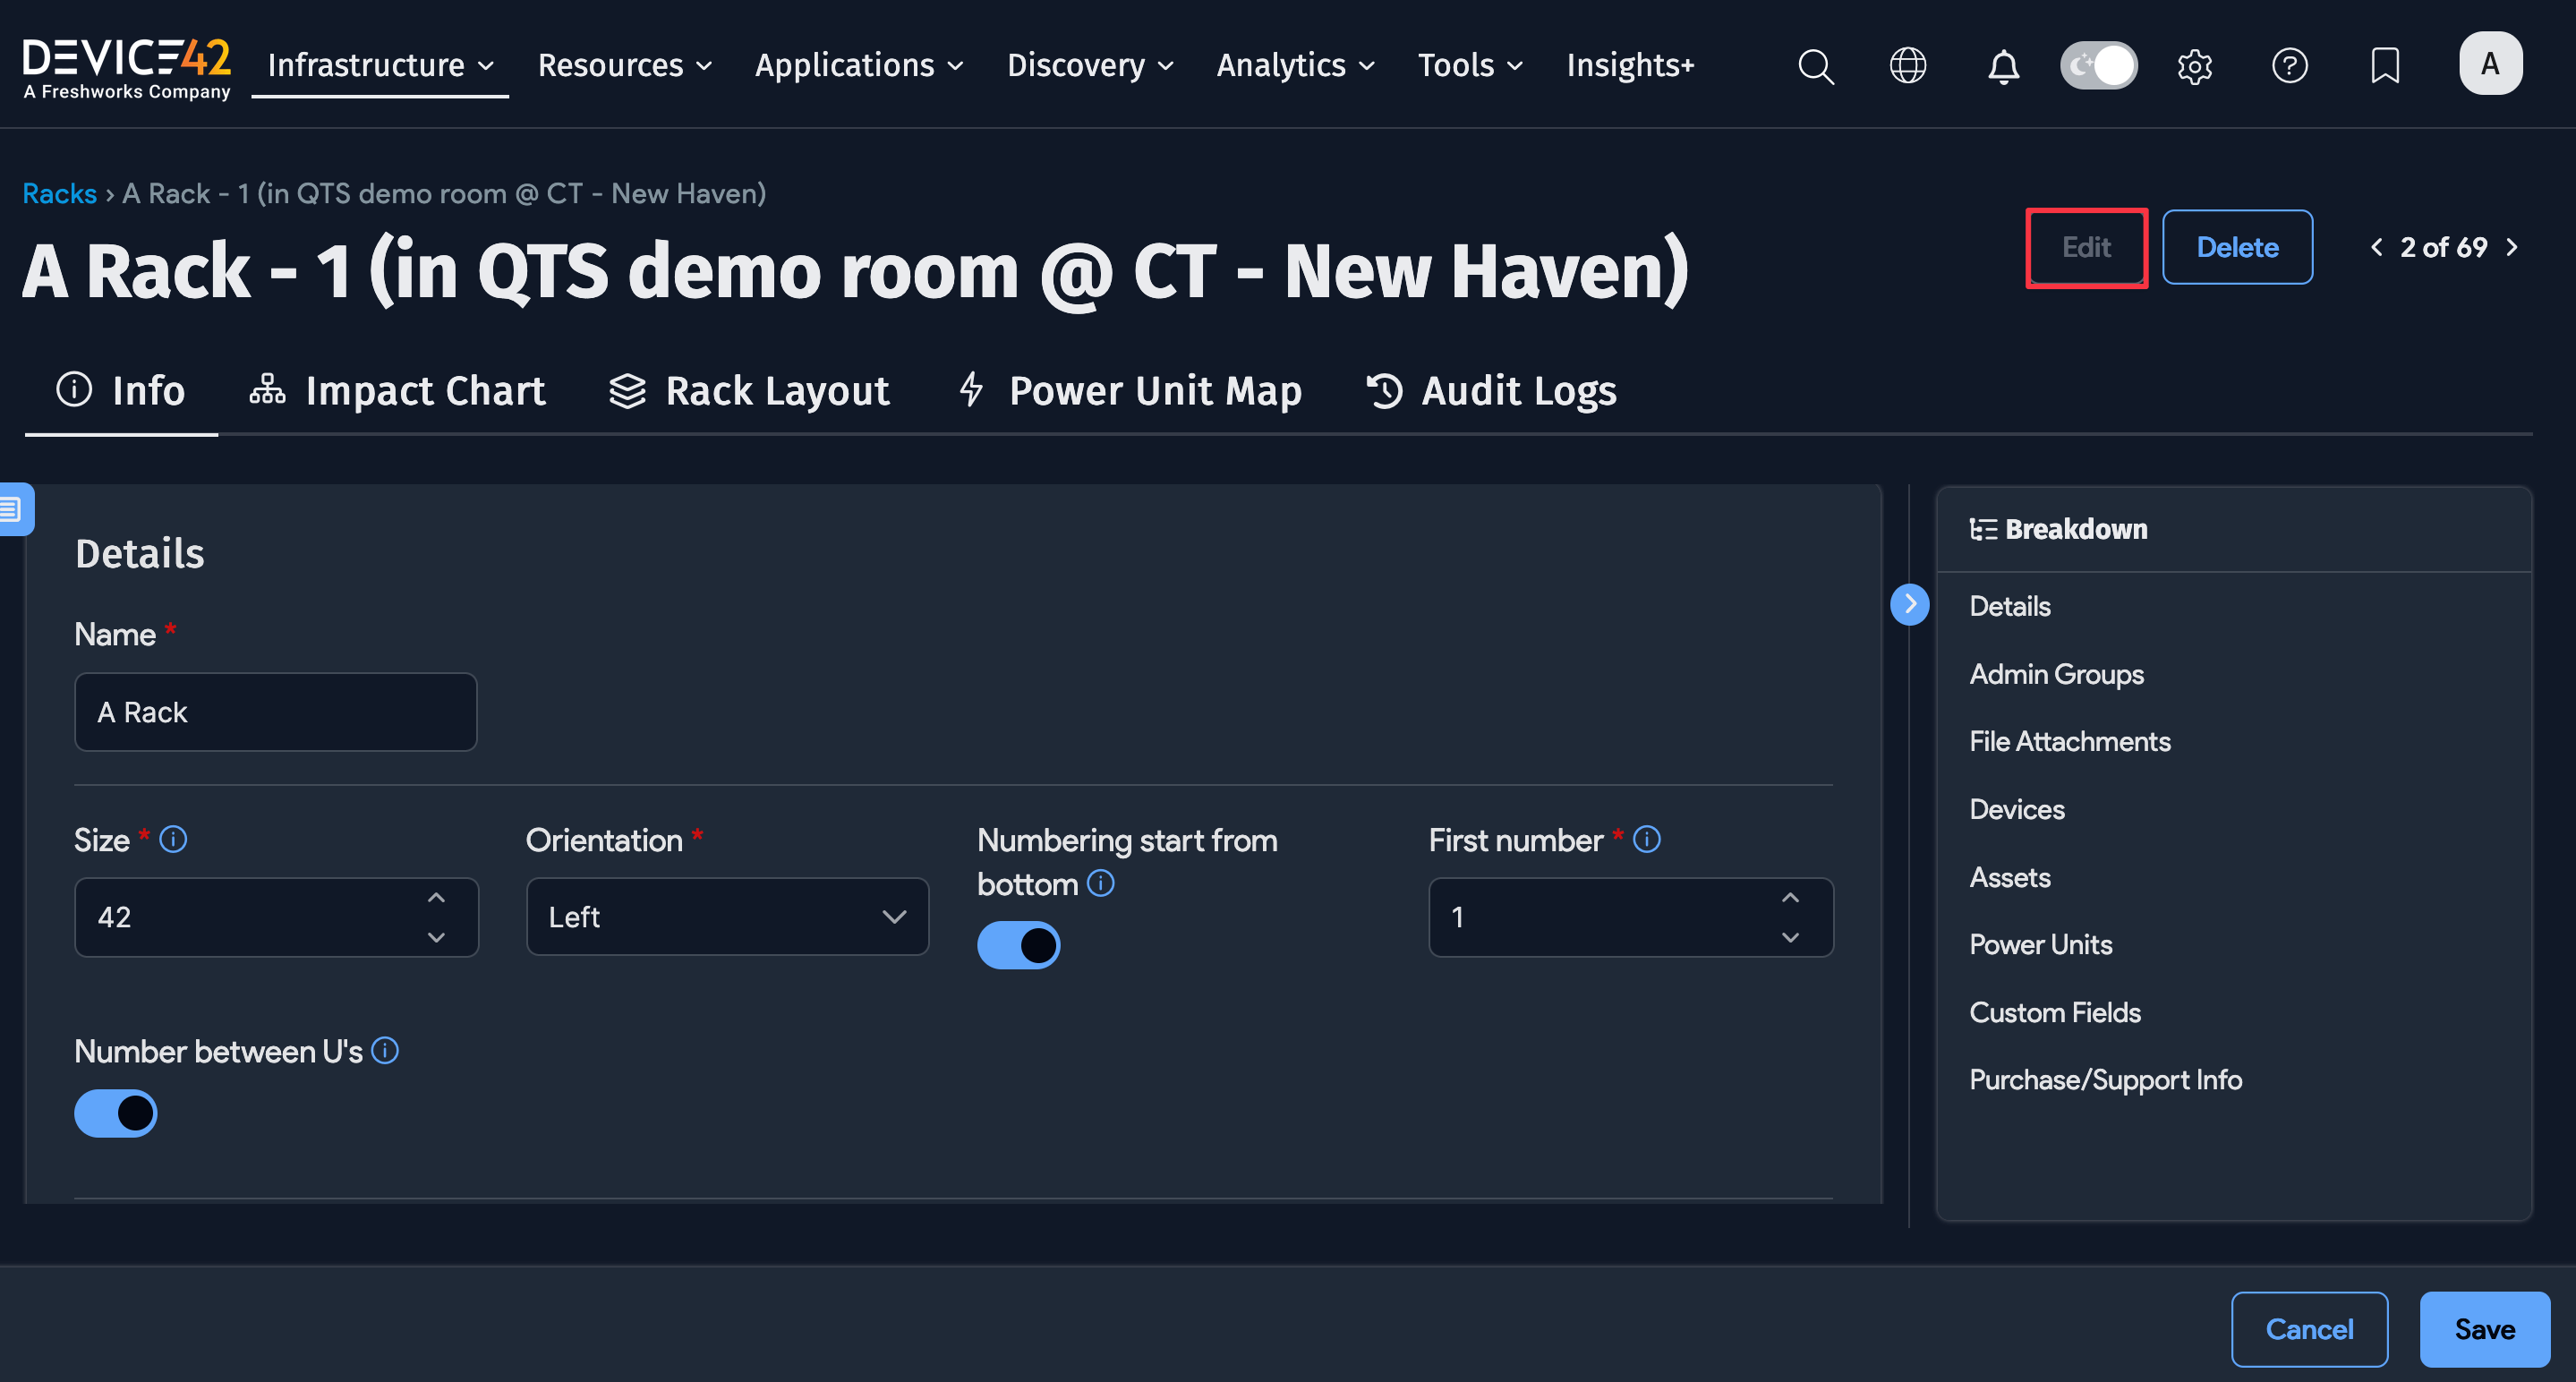
The Details section includes the following fields:
-
Size: The size of rack in Us. The default is
42, which is the standard rack size. -
Numbering start from bottom: By default, slot 1 is at the bottom of the rack in the visual layout. Toggle this option off if you prefer the numbering to start from the top of the rack in the visual layout.
-
First number: By default, rack numbering starts at
1, but you can change it here to customize the rack numbering (for example, you might want the first number to be0). -
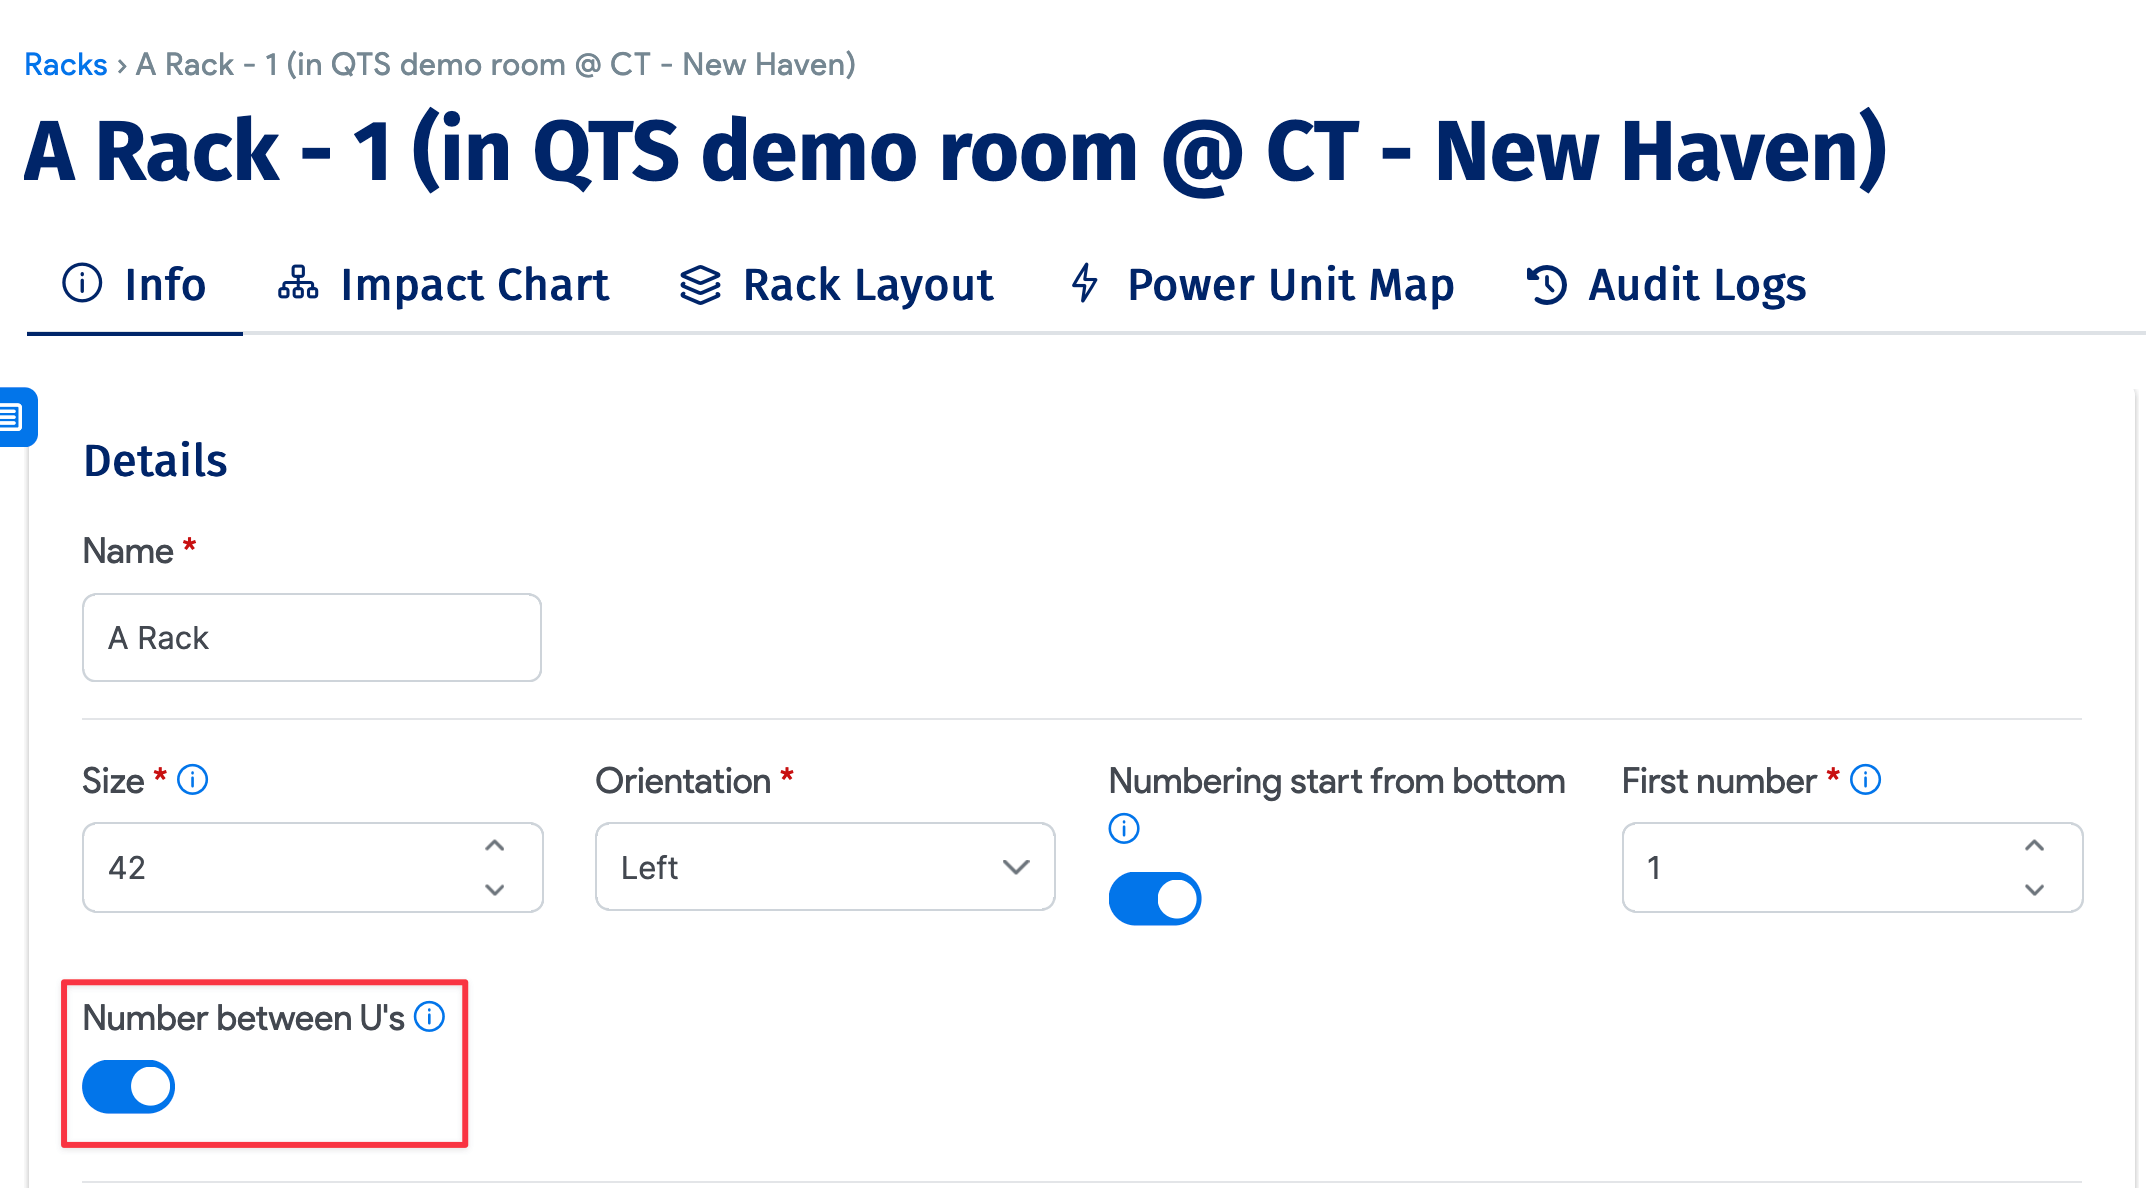
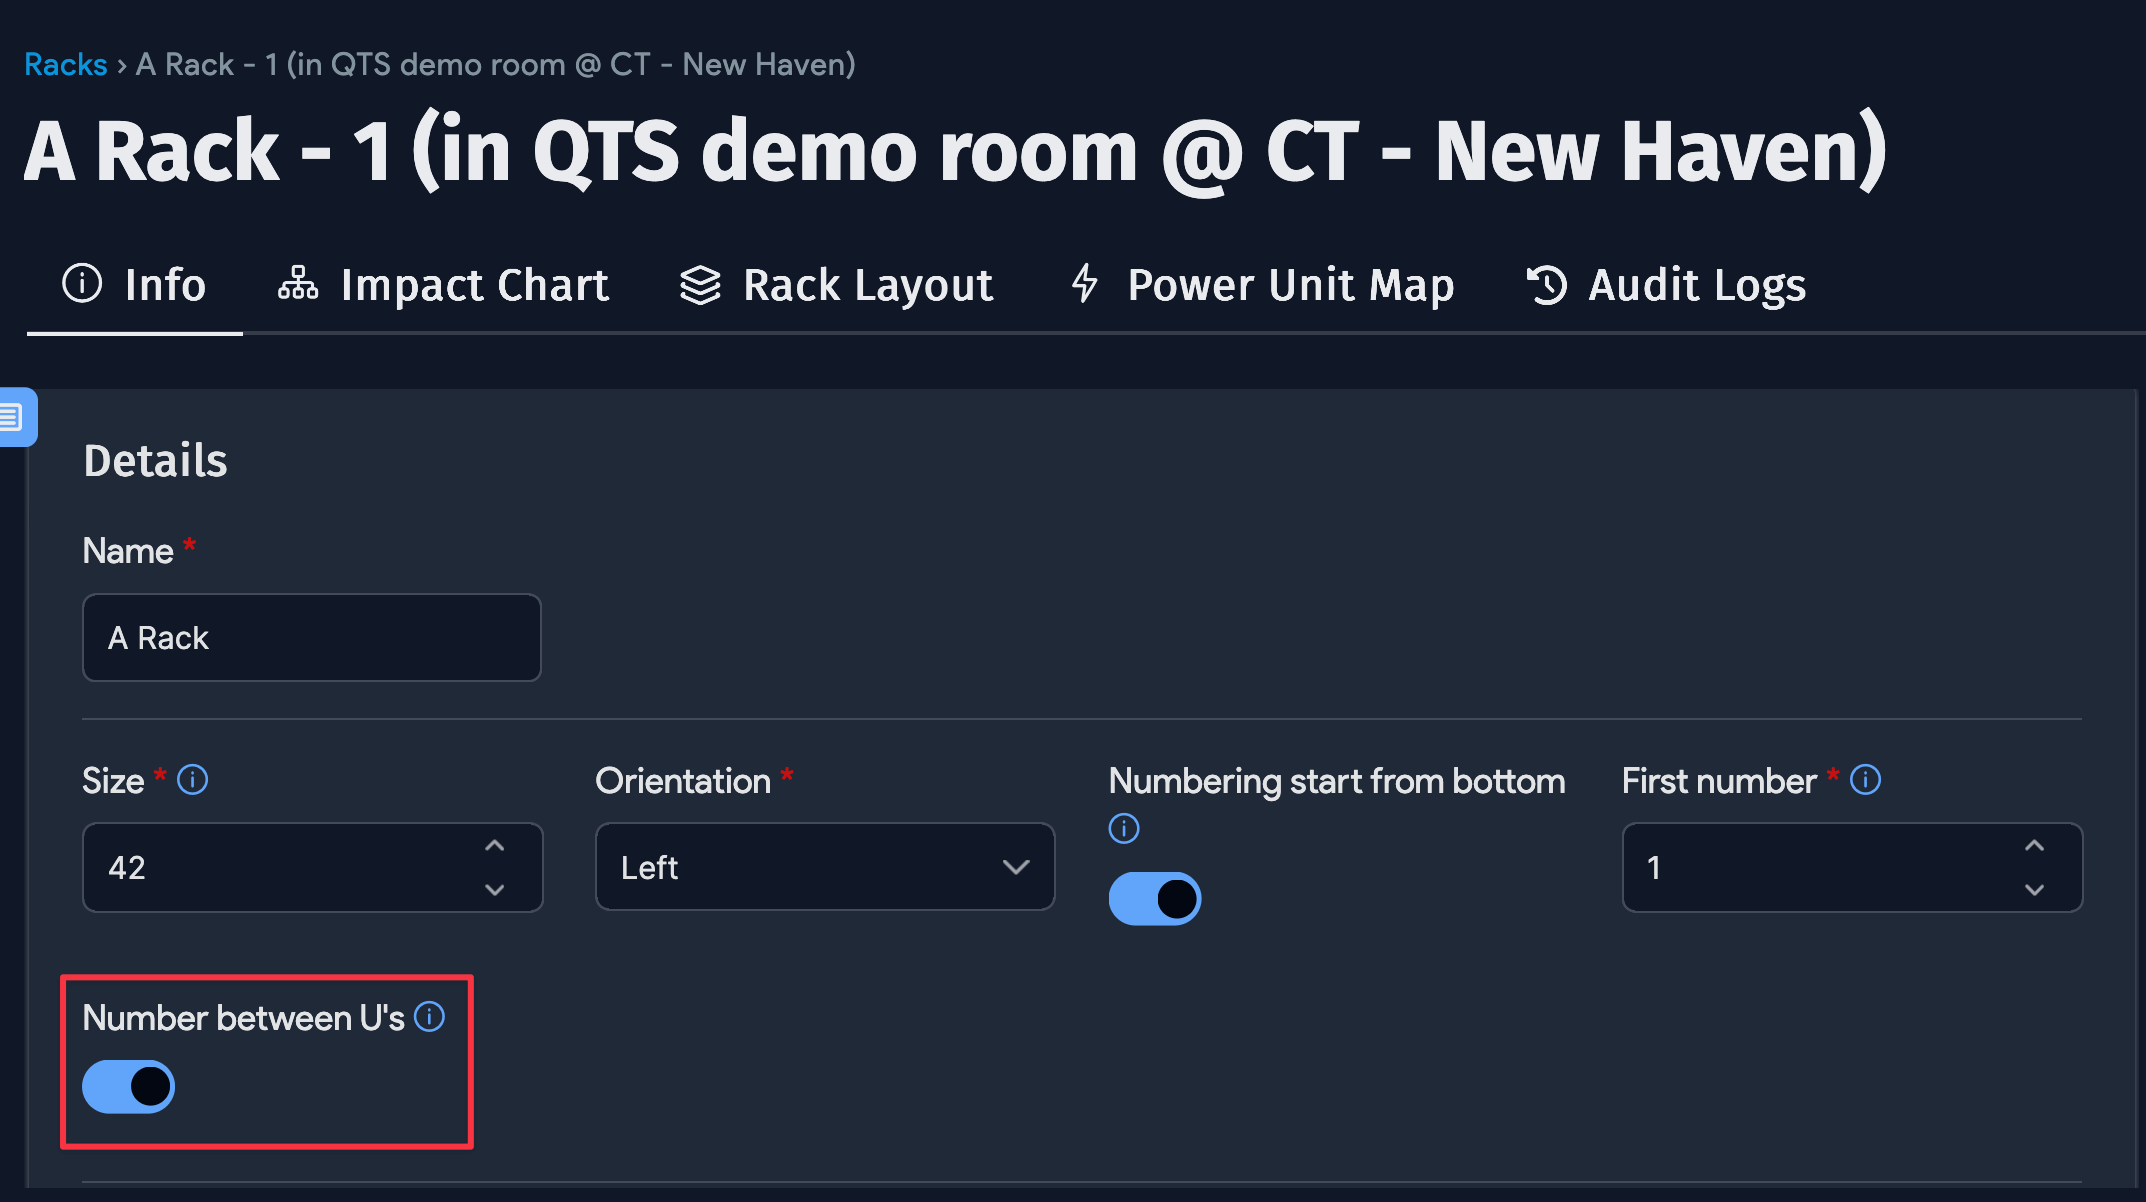
Number between U's: By default, the visual rack layout will display U numbers between Us. Toggle this option off to display U numbers at the Us.
-
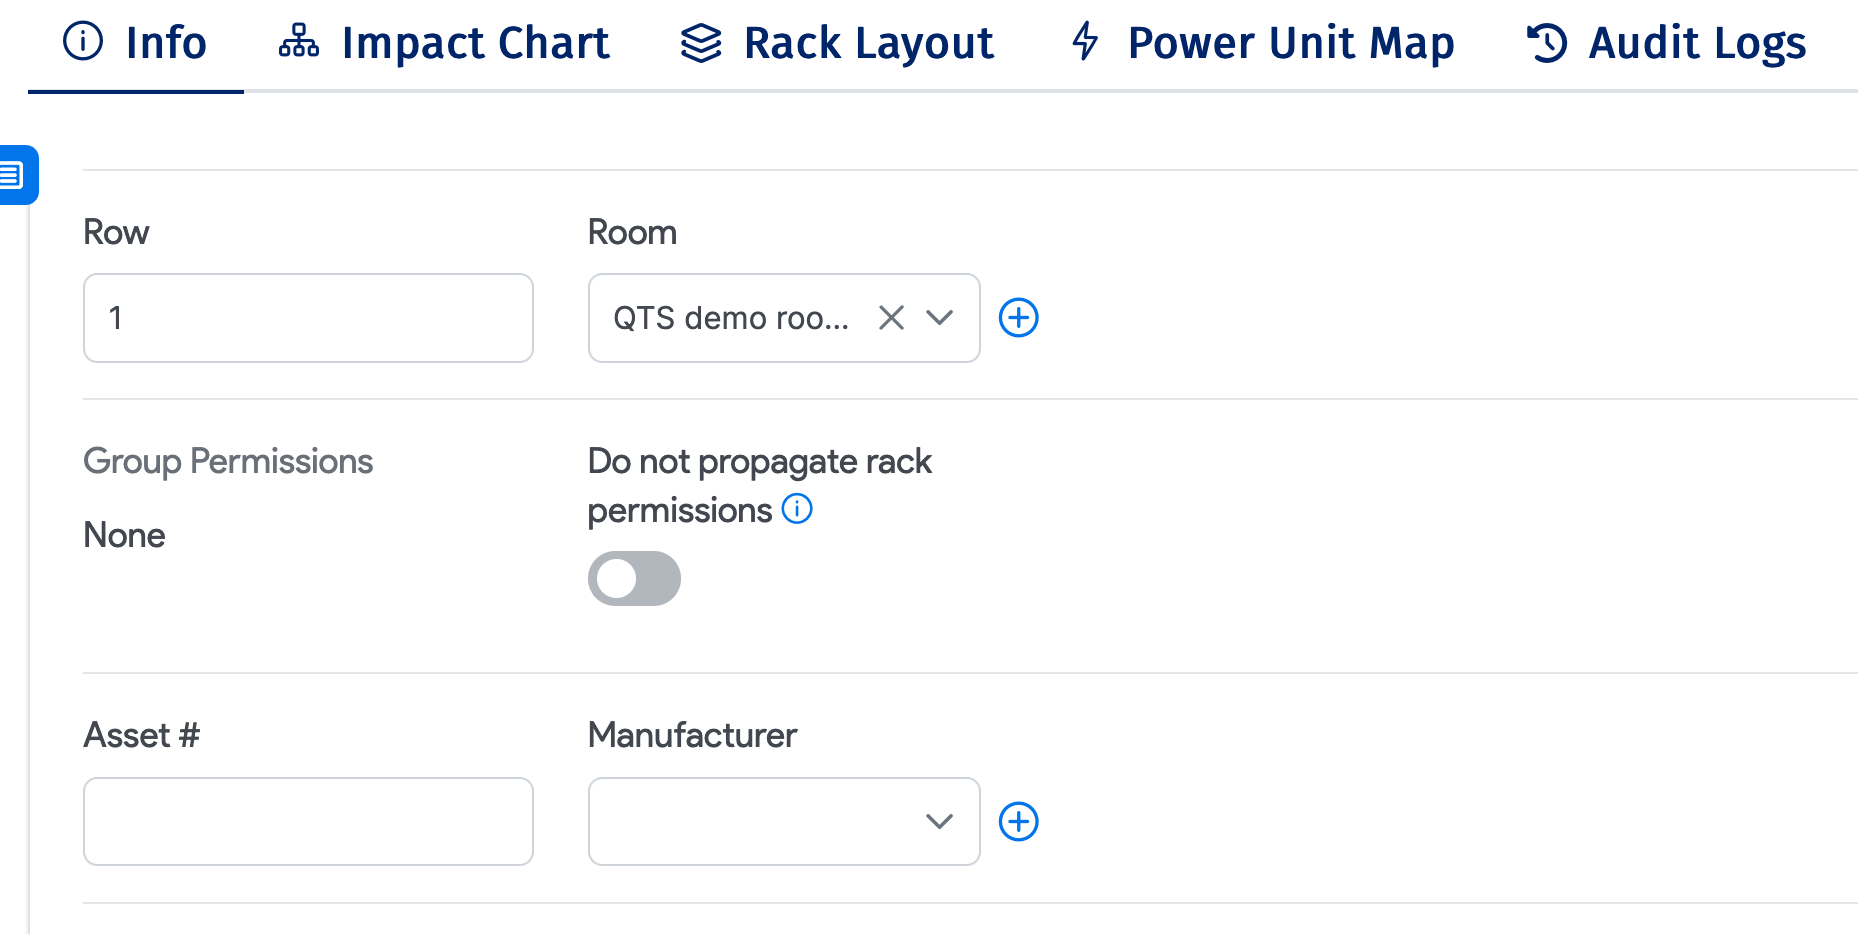
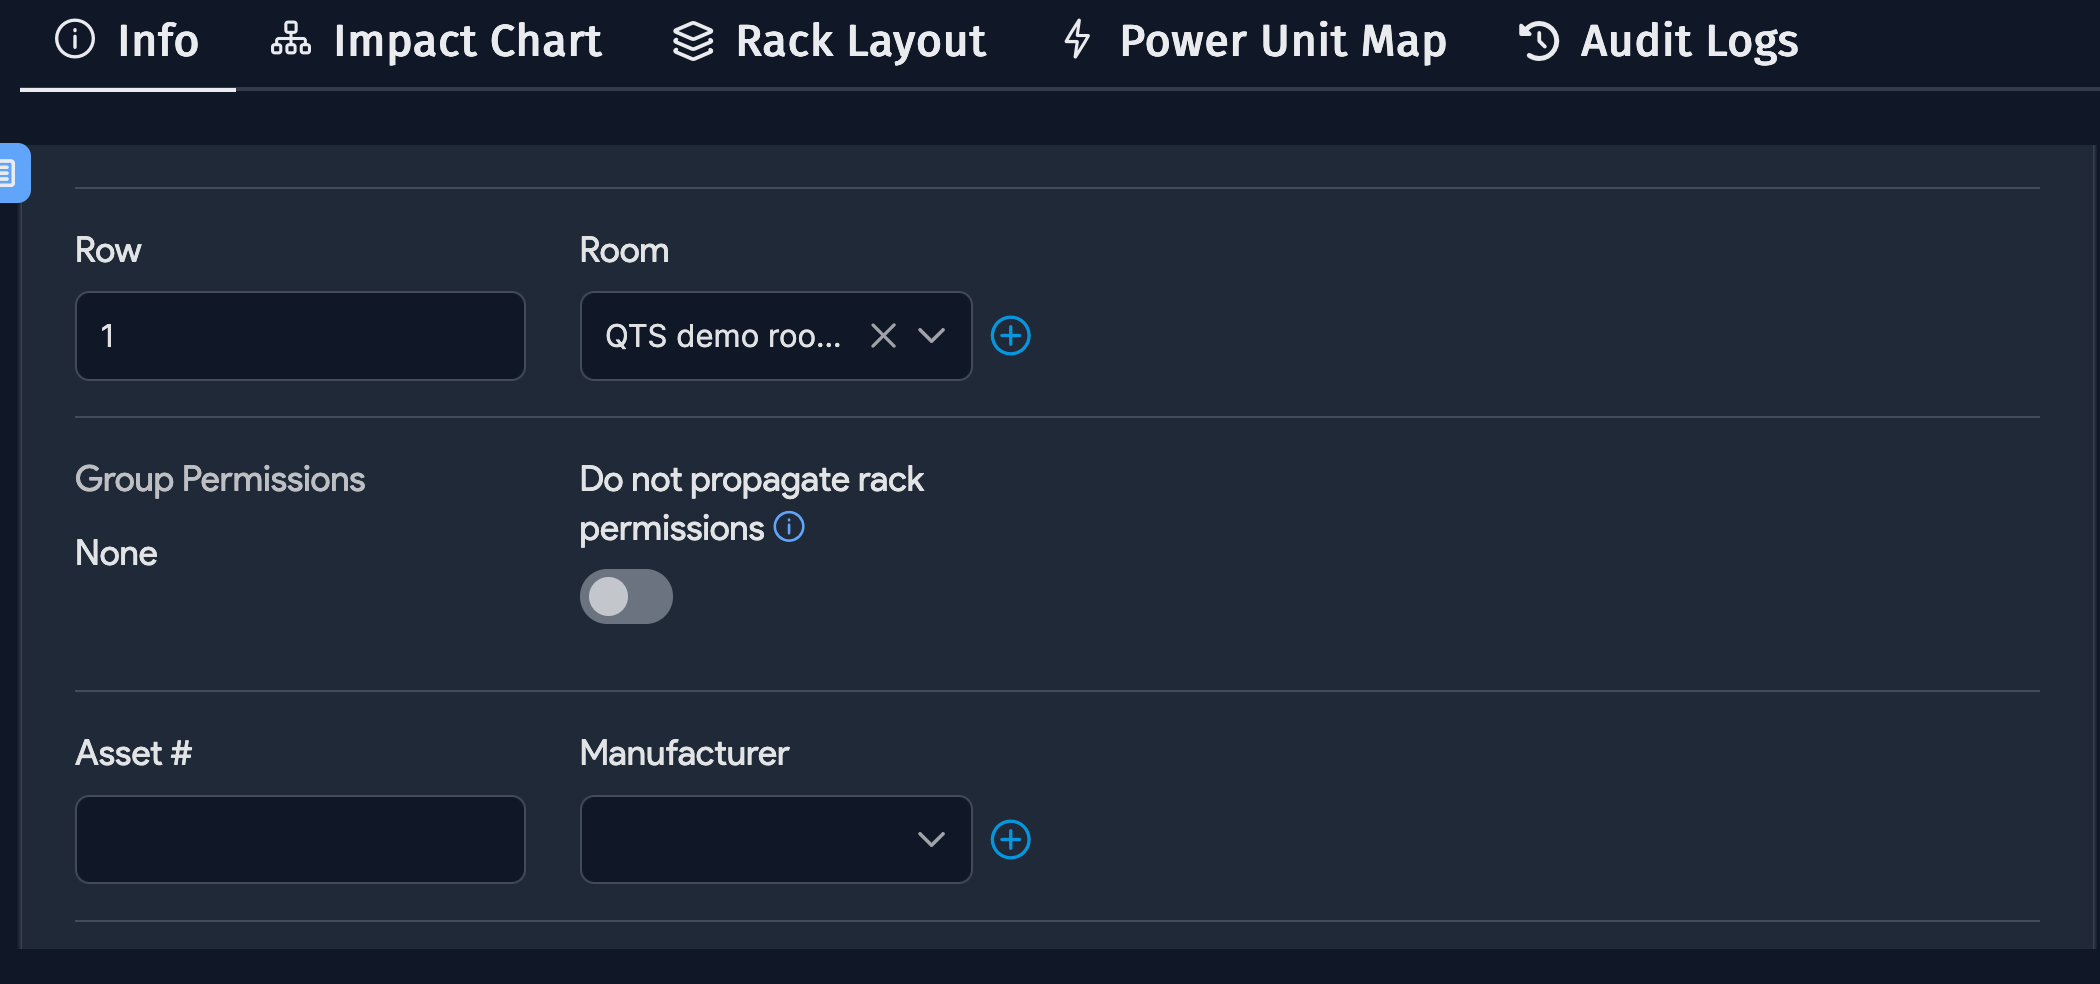
Row: If you have a name for the row, put it here. Please note that the row name is for information only and won't affect the layout of the room. In the visual room layout, rows are initially created automatically and won't use this setting. You can then drag and drop racks to create rows. If all racks in a given row in the visual layout have the same Row value, the value will appear to the left of the row. The same applies to columns in the visual layout – if all the racks in a given column have the same Row value, the value will appear at the top of the column.
-
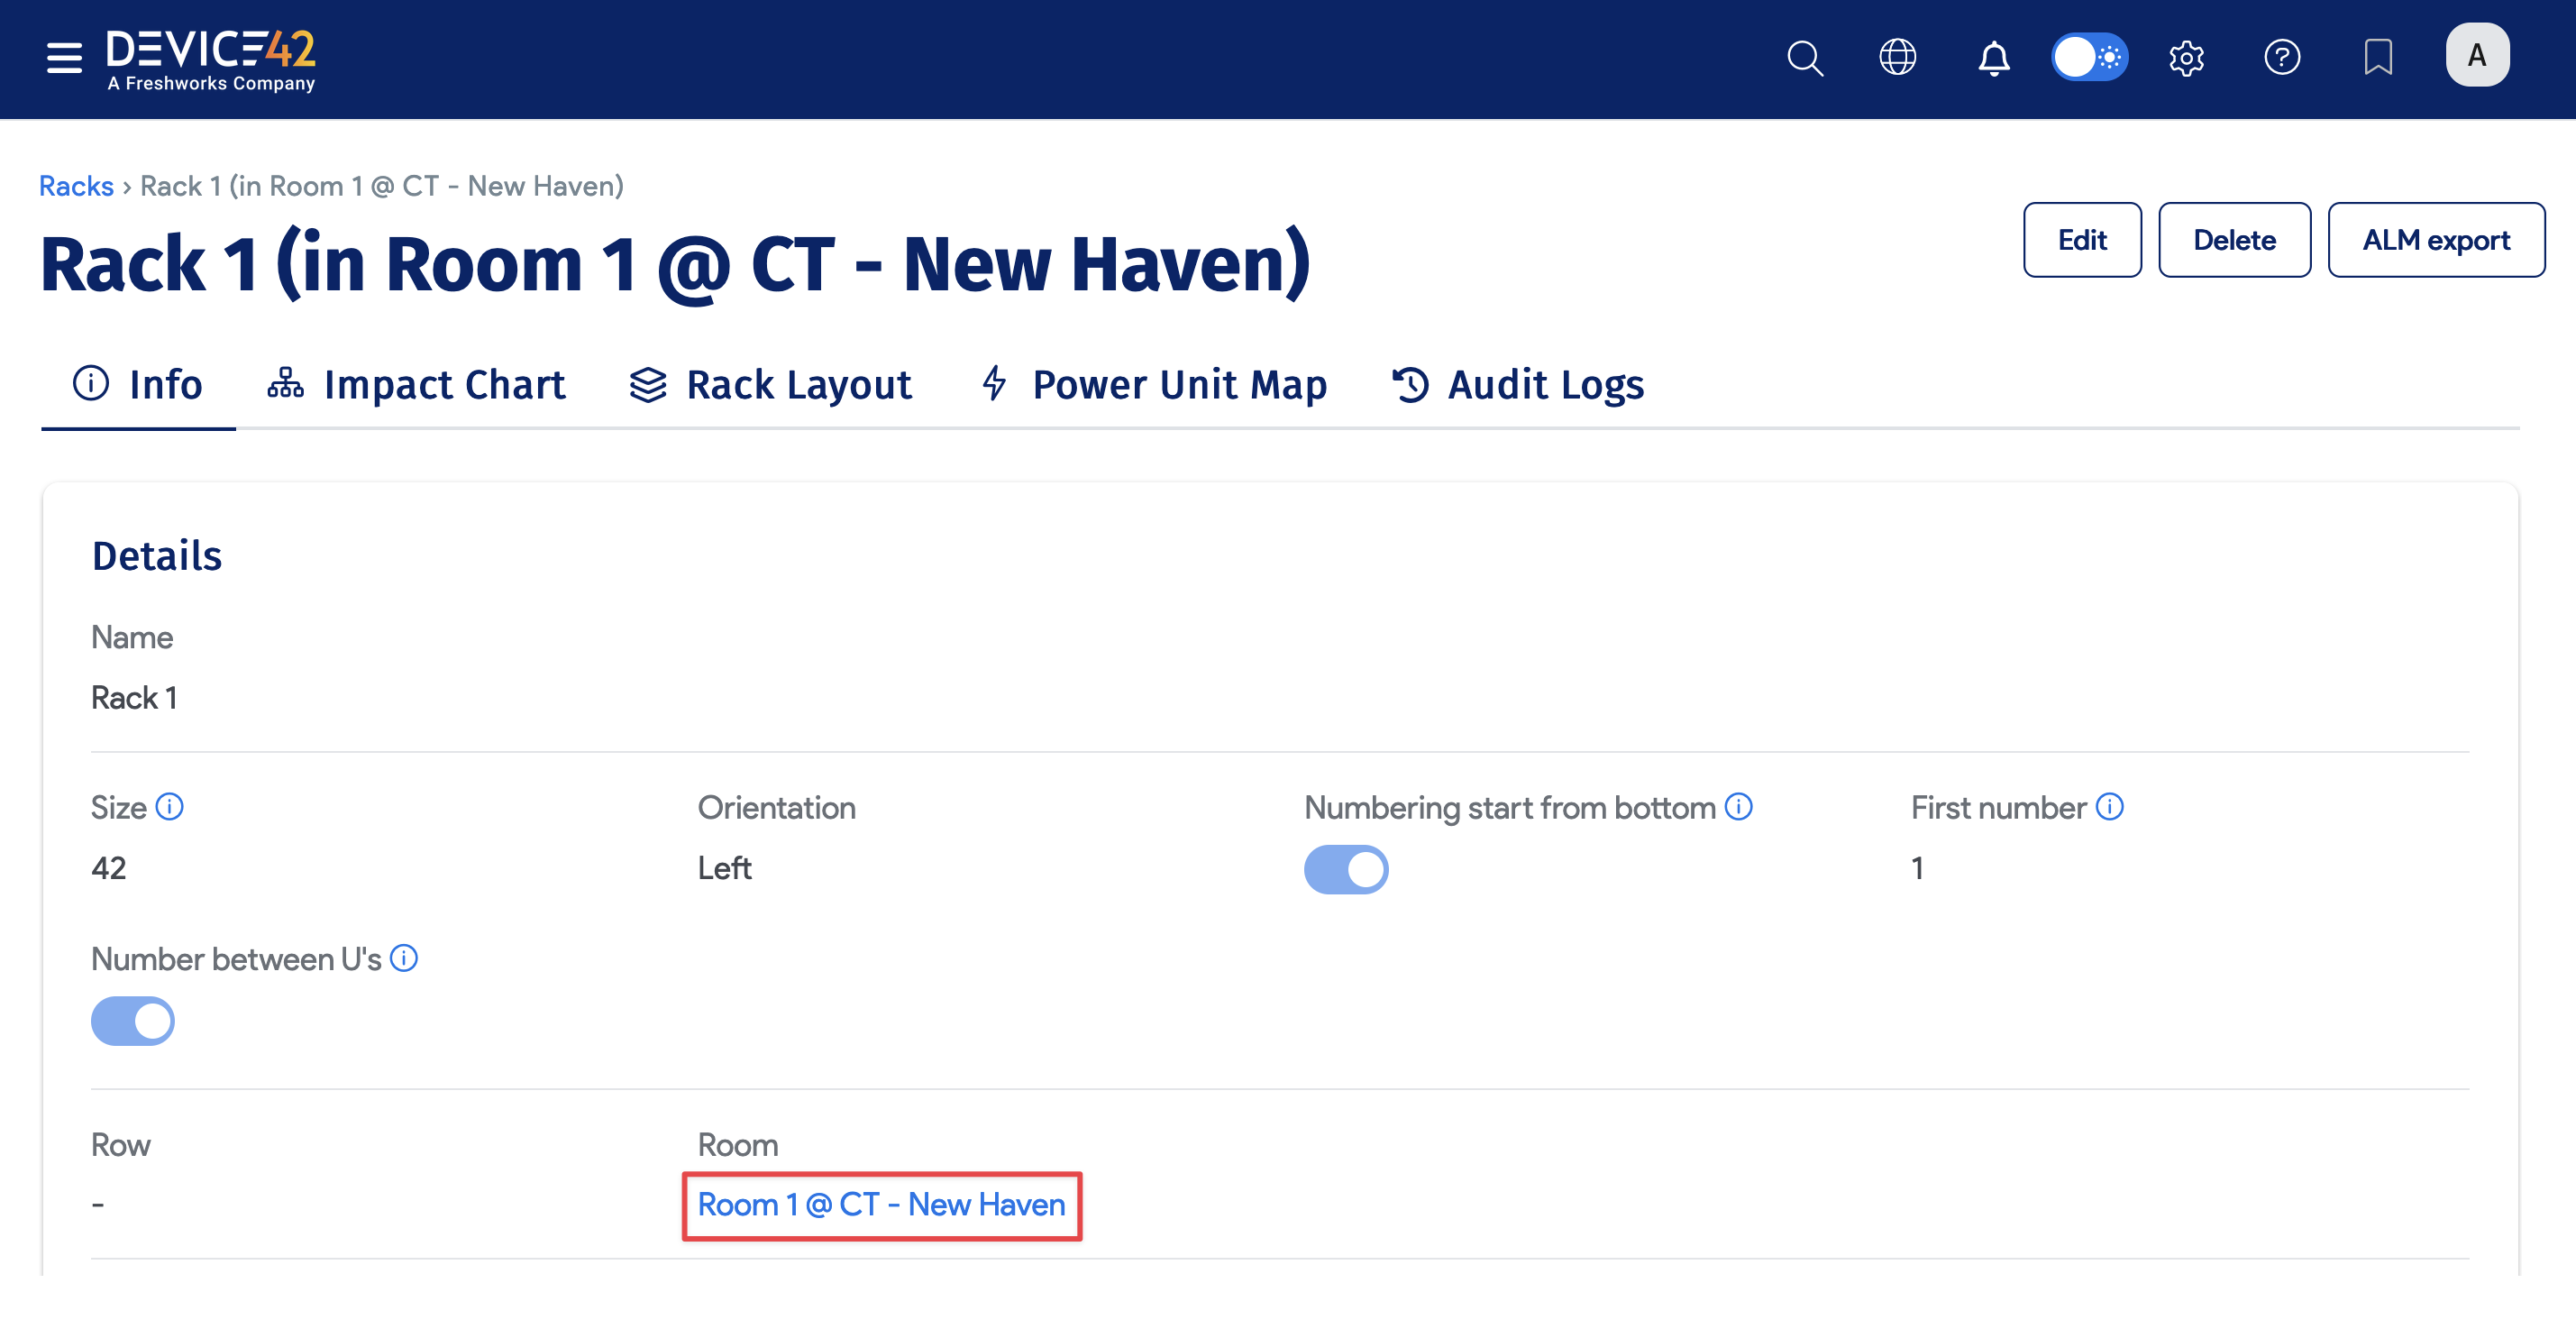
Room: The Room the rack belongs to is displayed on the Rack view page and is a clickable link. You can assign an existing Room, or create a new Room from this page by clicking + (the plus sign icon).

-
Manufacturer: Select the rack manufacturer.
-
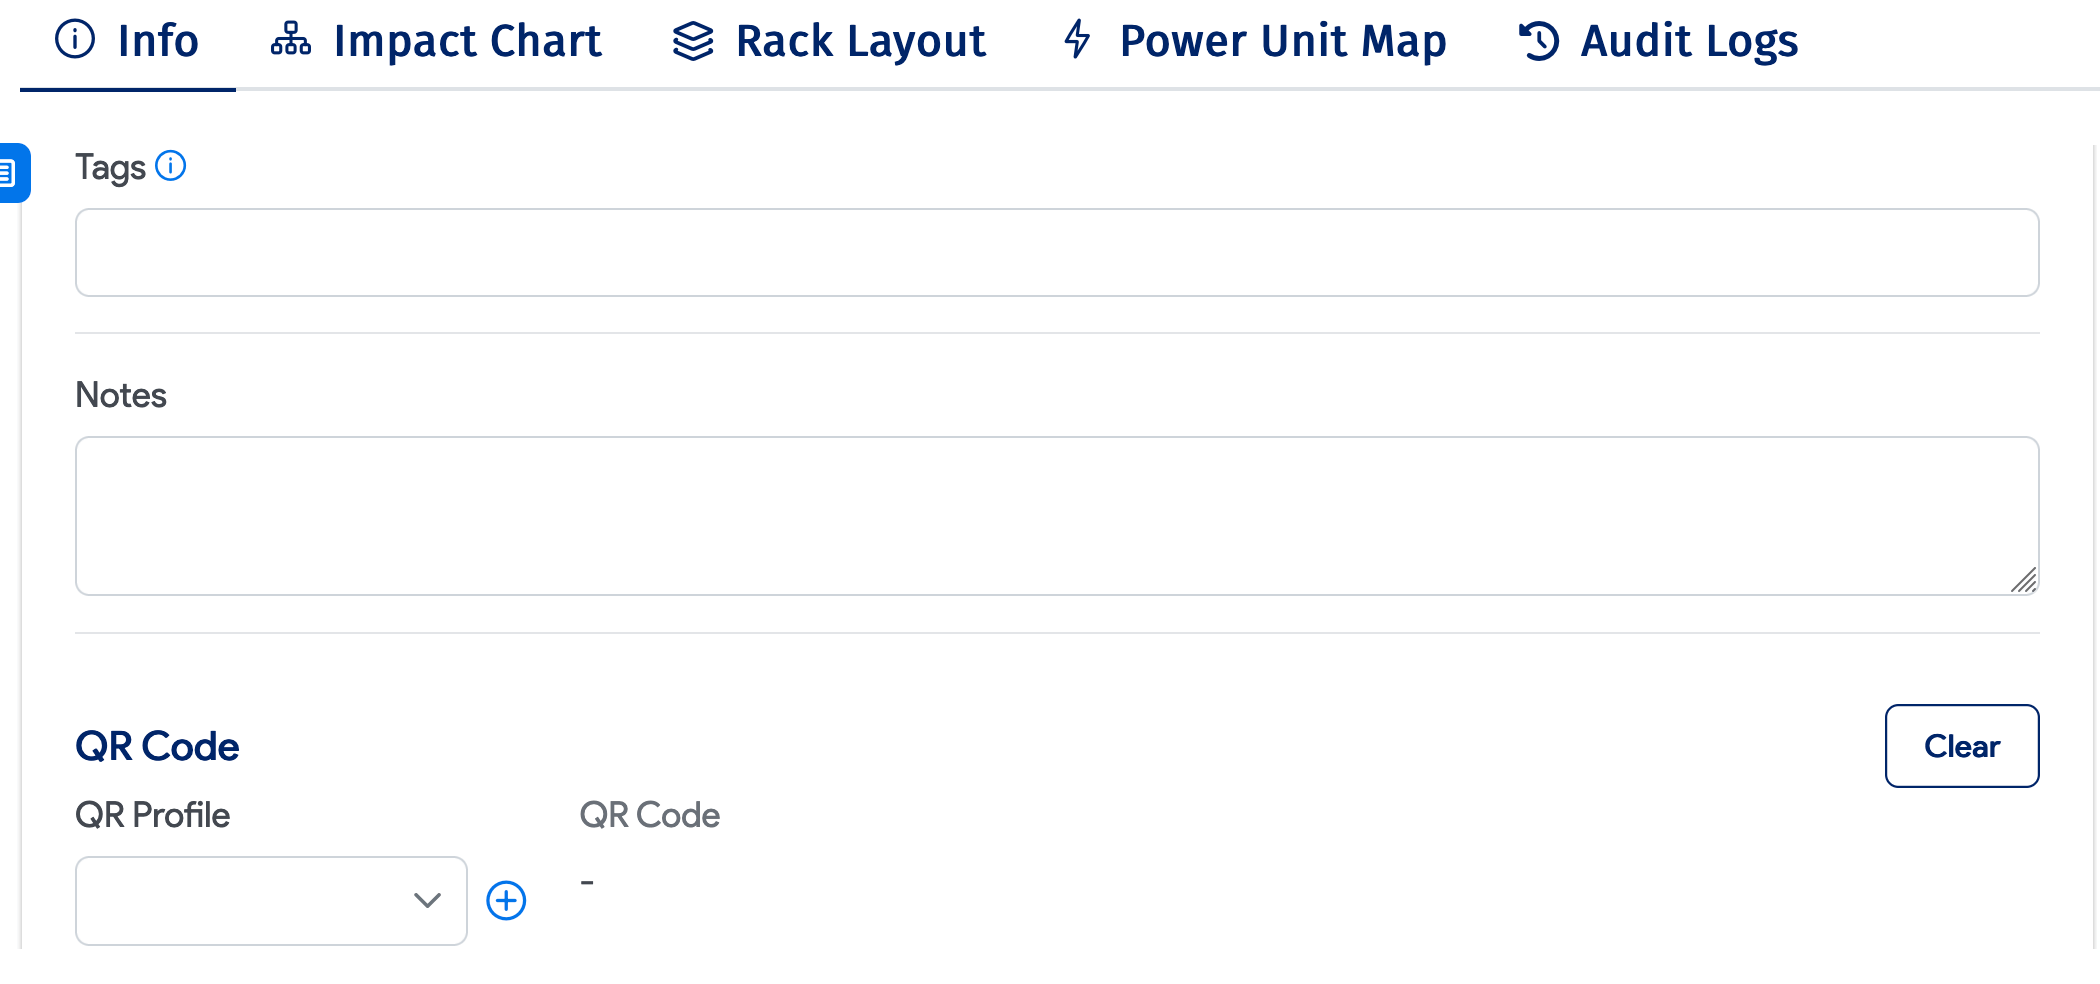
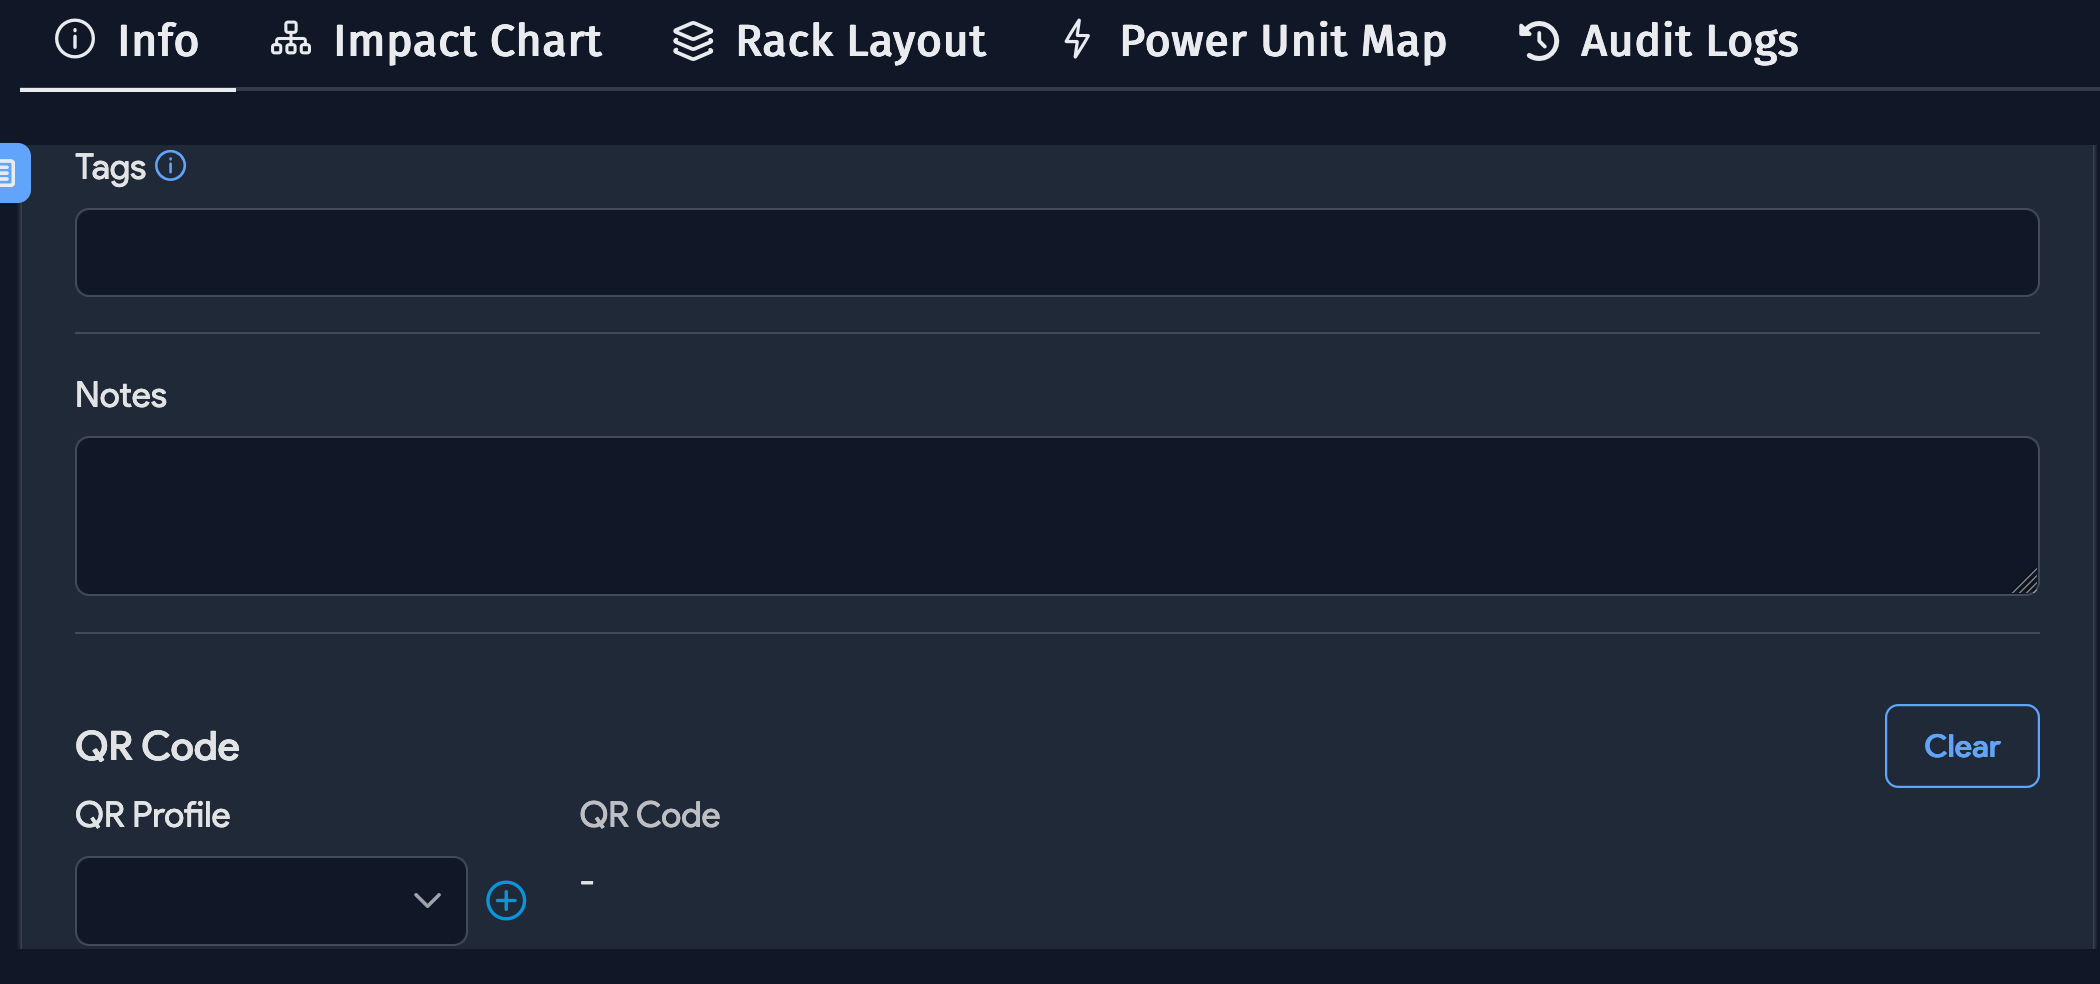
Tags: Tags are used to categorize racks for convenient searching.
-
Notes: Store any additional notes here.
-
QR Code: If you have a QR code for the rack (for asset tracking), you can add it here.
Add Devices to the Rack
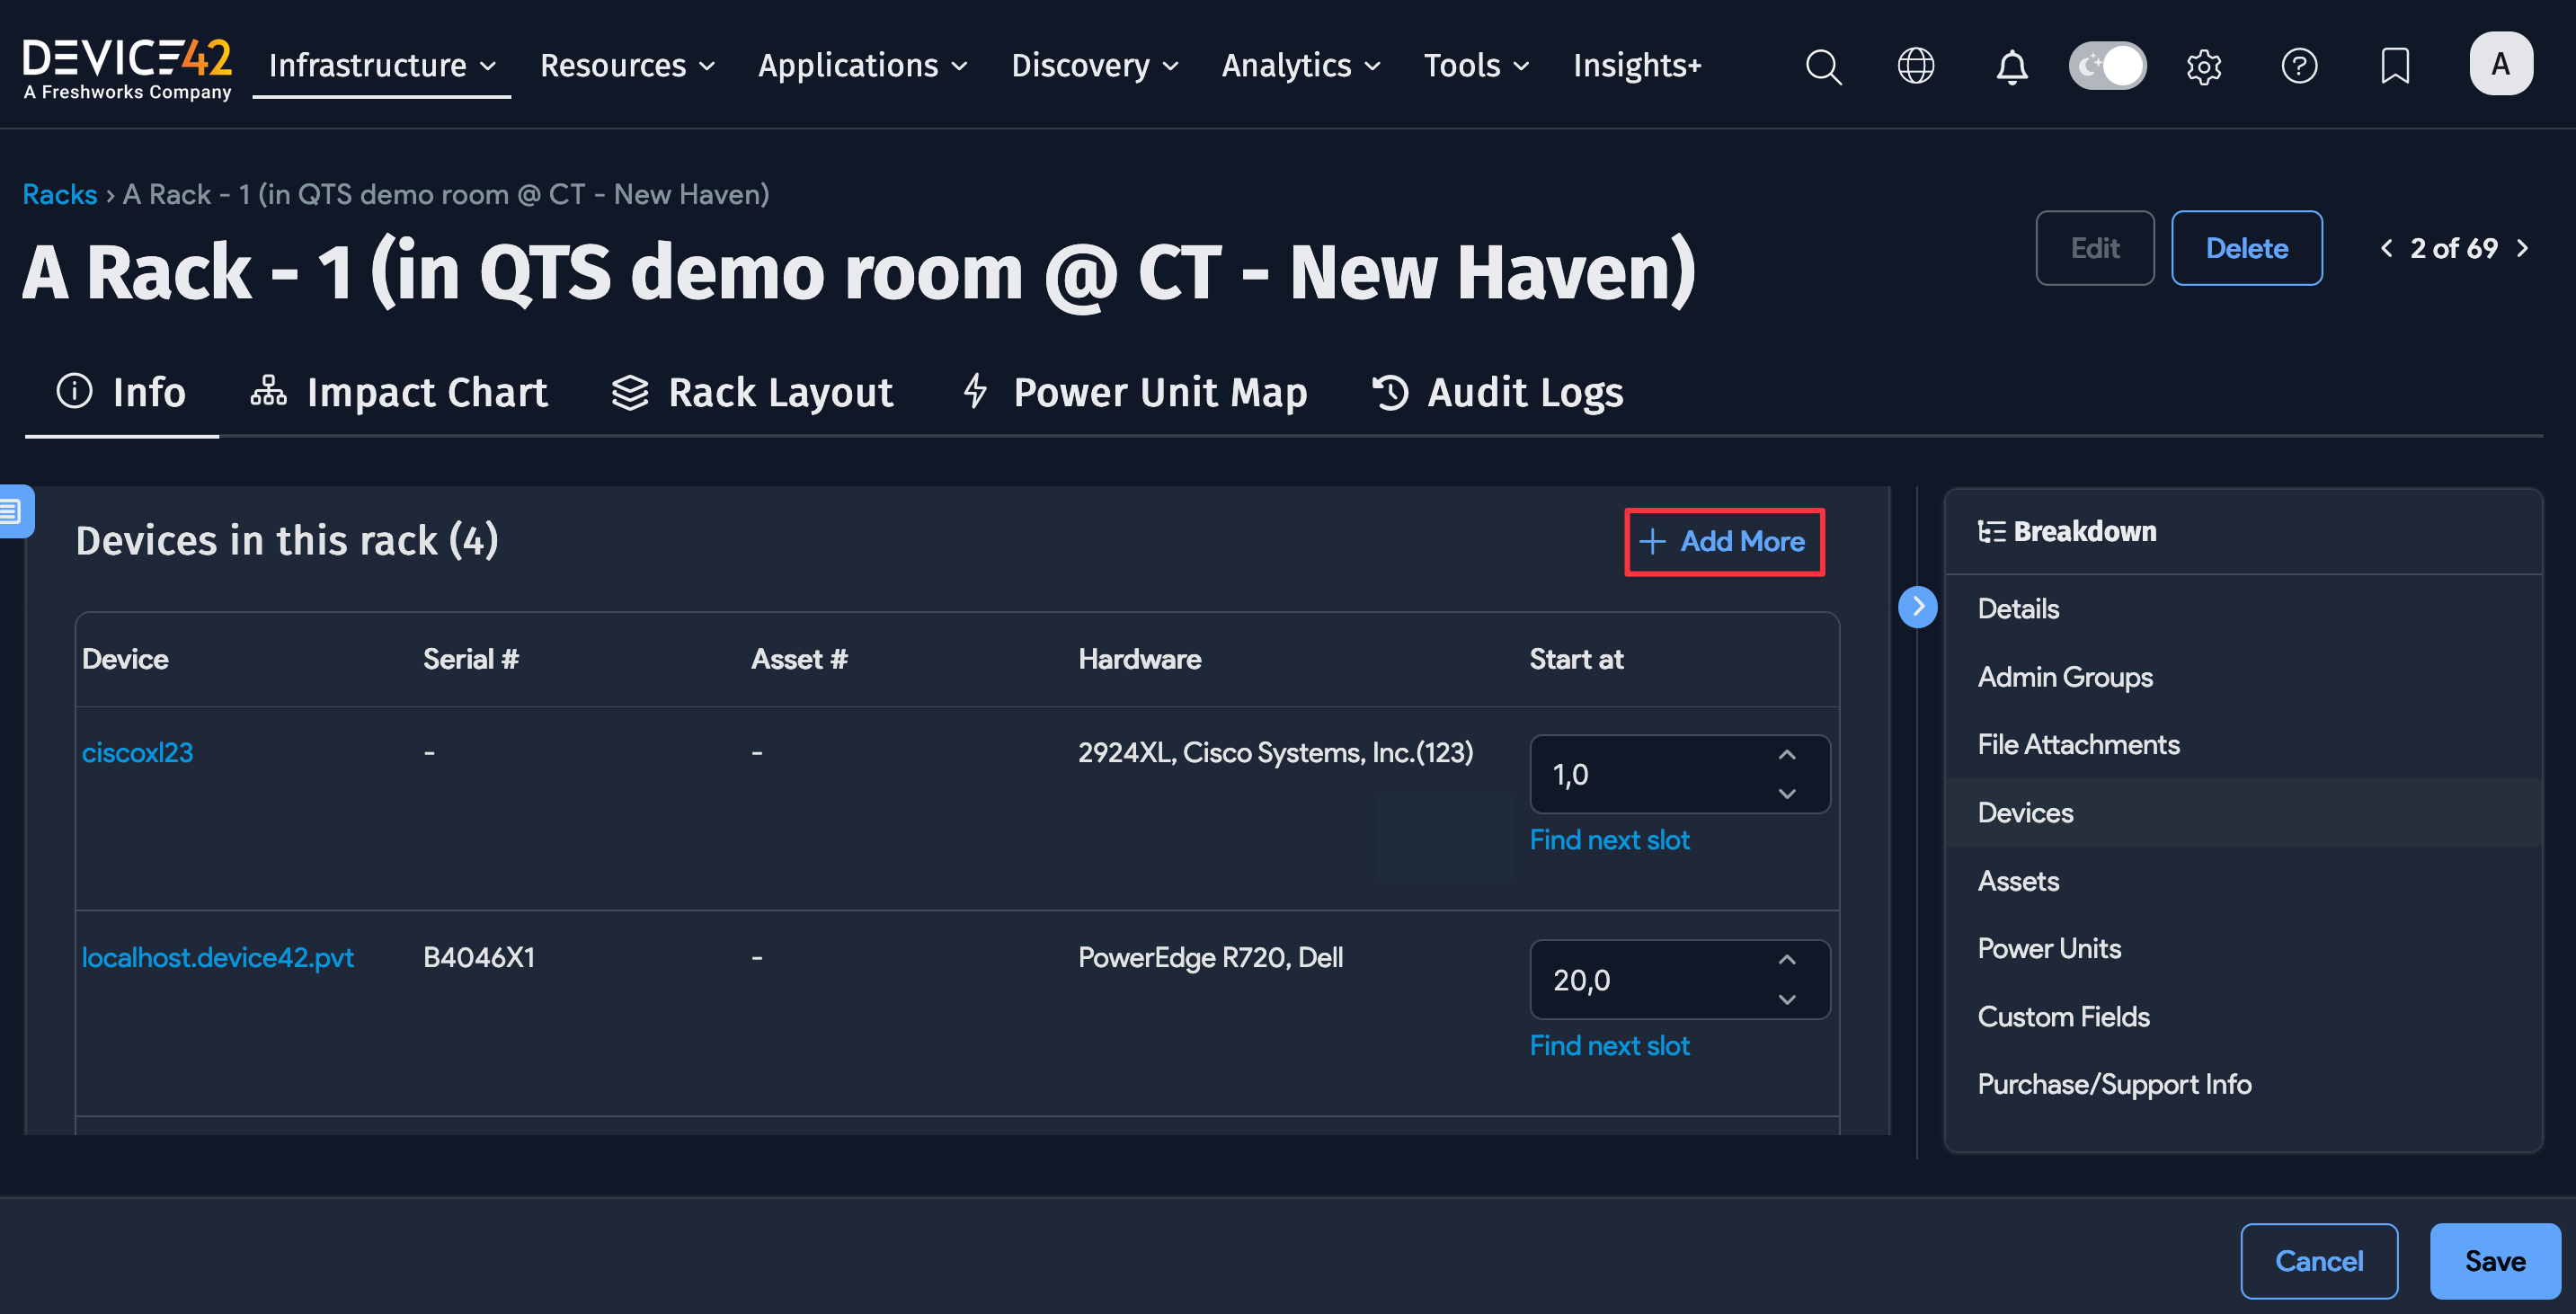
You can easily add devices, assets, and PDUs to the rack directly from the rack edit page. Click + Add More, and next to the empty Device field, click + (the plus-sign lookup indicator) and search and filter the list of physical devices to find the device you want to add.
There are three other ways to add devices, assets, and PDUs to racks:
- From the device, asset, or PDU edit pages
- By uploading Excel spreadsheets under Tools > Import/Export (xls)
- Via the Device42 API
- From the Rack Layout screen.

-
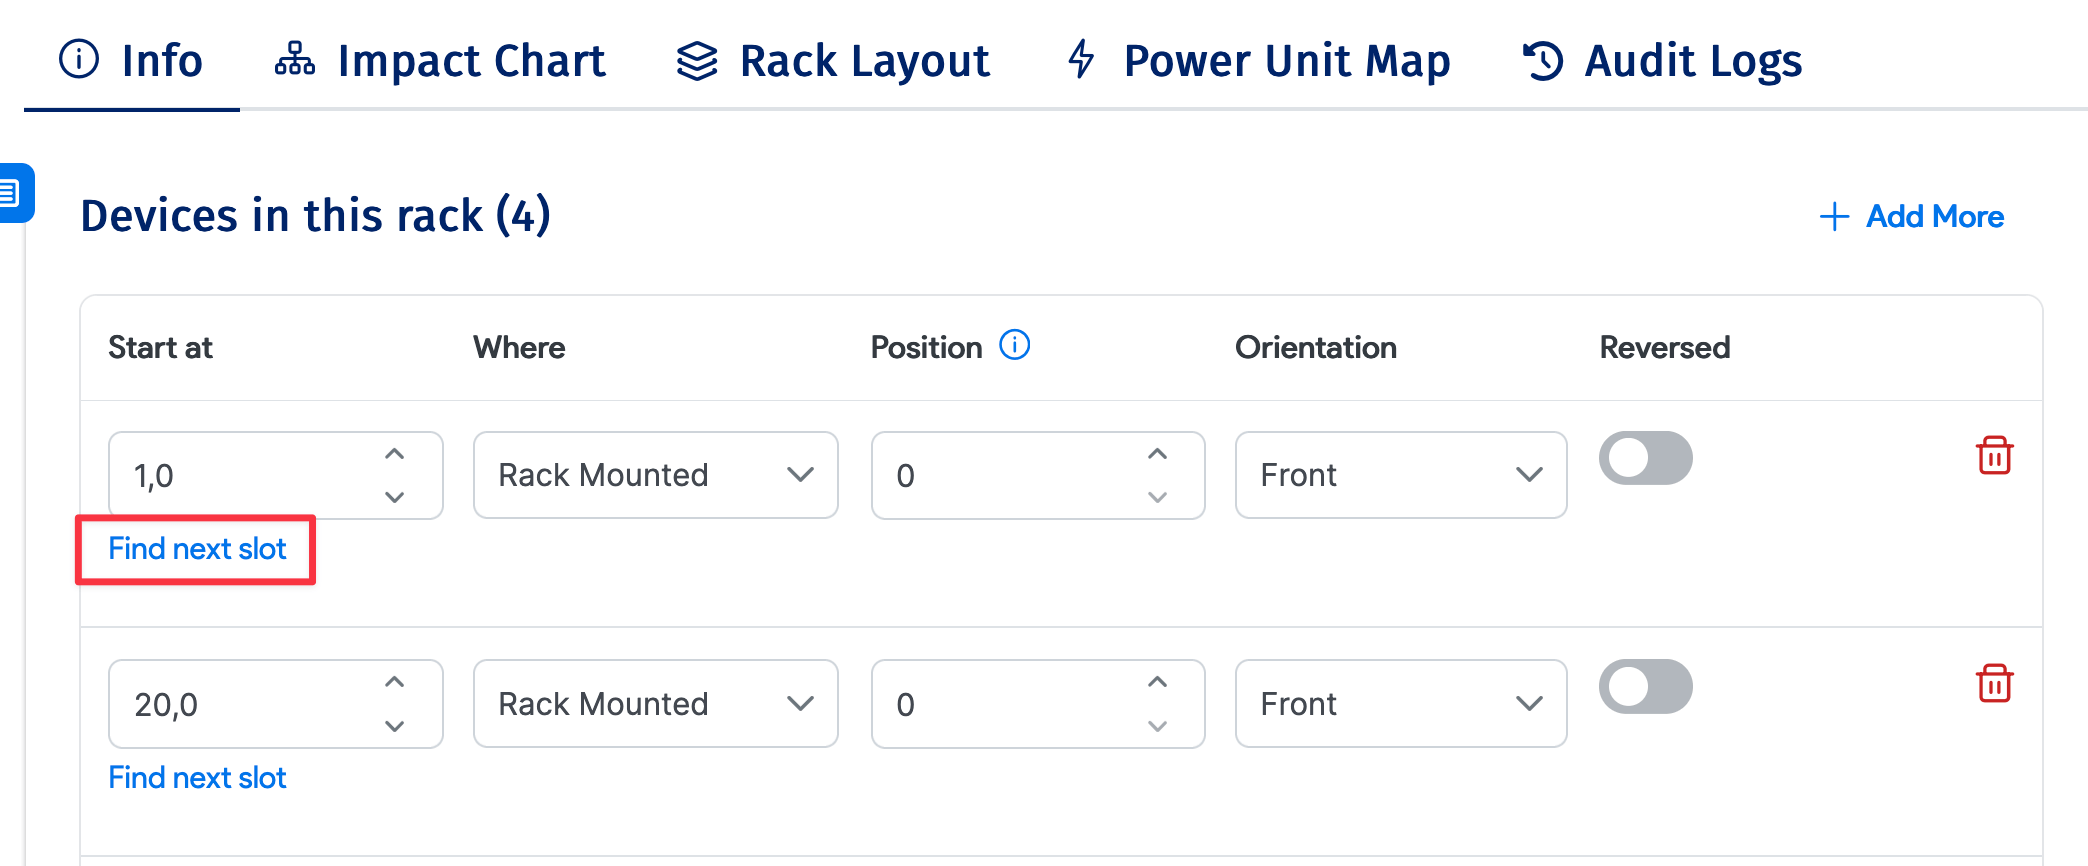
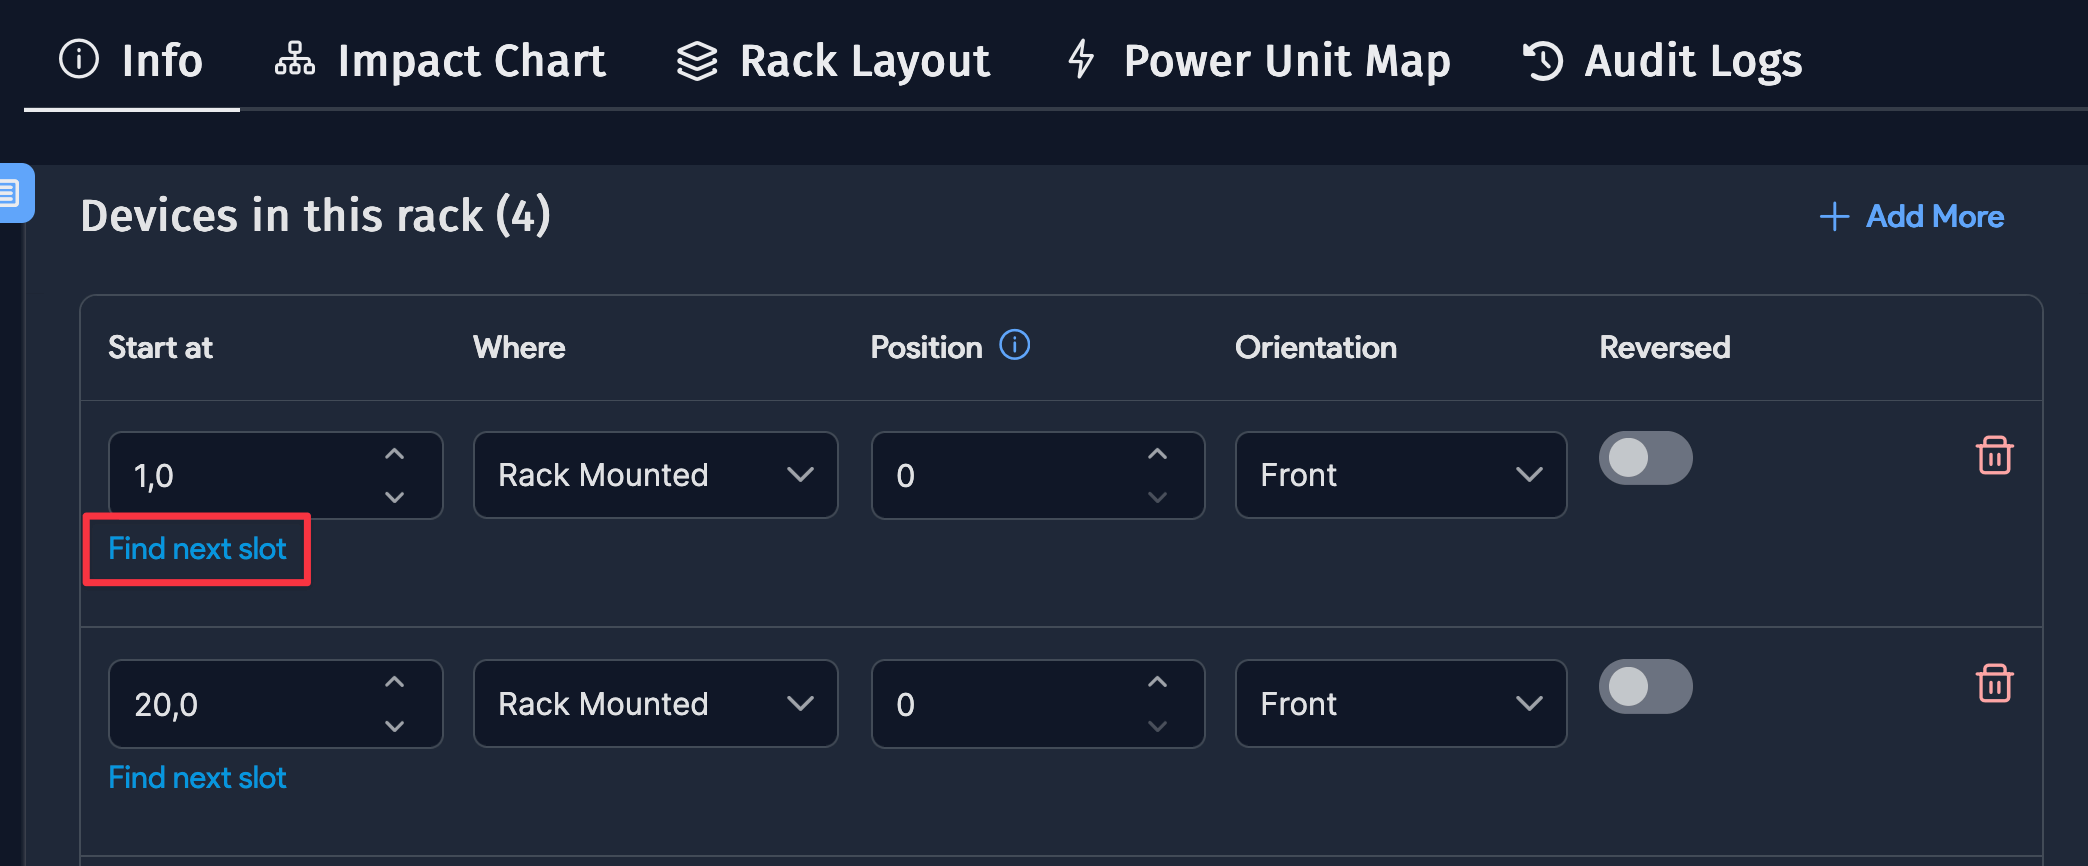
Where: Indicate where the device is.
Devices must have a Hardware Model with a defined size to give them the Rack Mounted designation. You can add devices to the Left, Right, Top, or Bottom without a Hardware Model.
-
Start at: Enter a starting U location for the device.
-
Orientation: Choose the orientation of the mounted device. Device depth is determined by the Hardware Model properties.
Use the Find next slot option pictured below to find an available space in the rack automatically, based on the device U size.
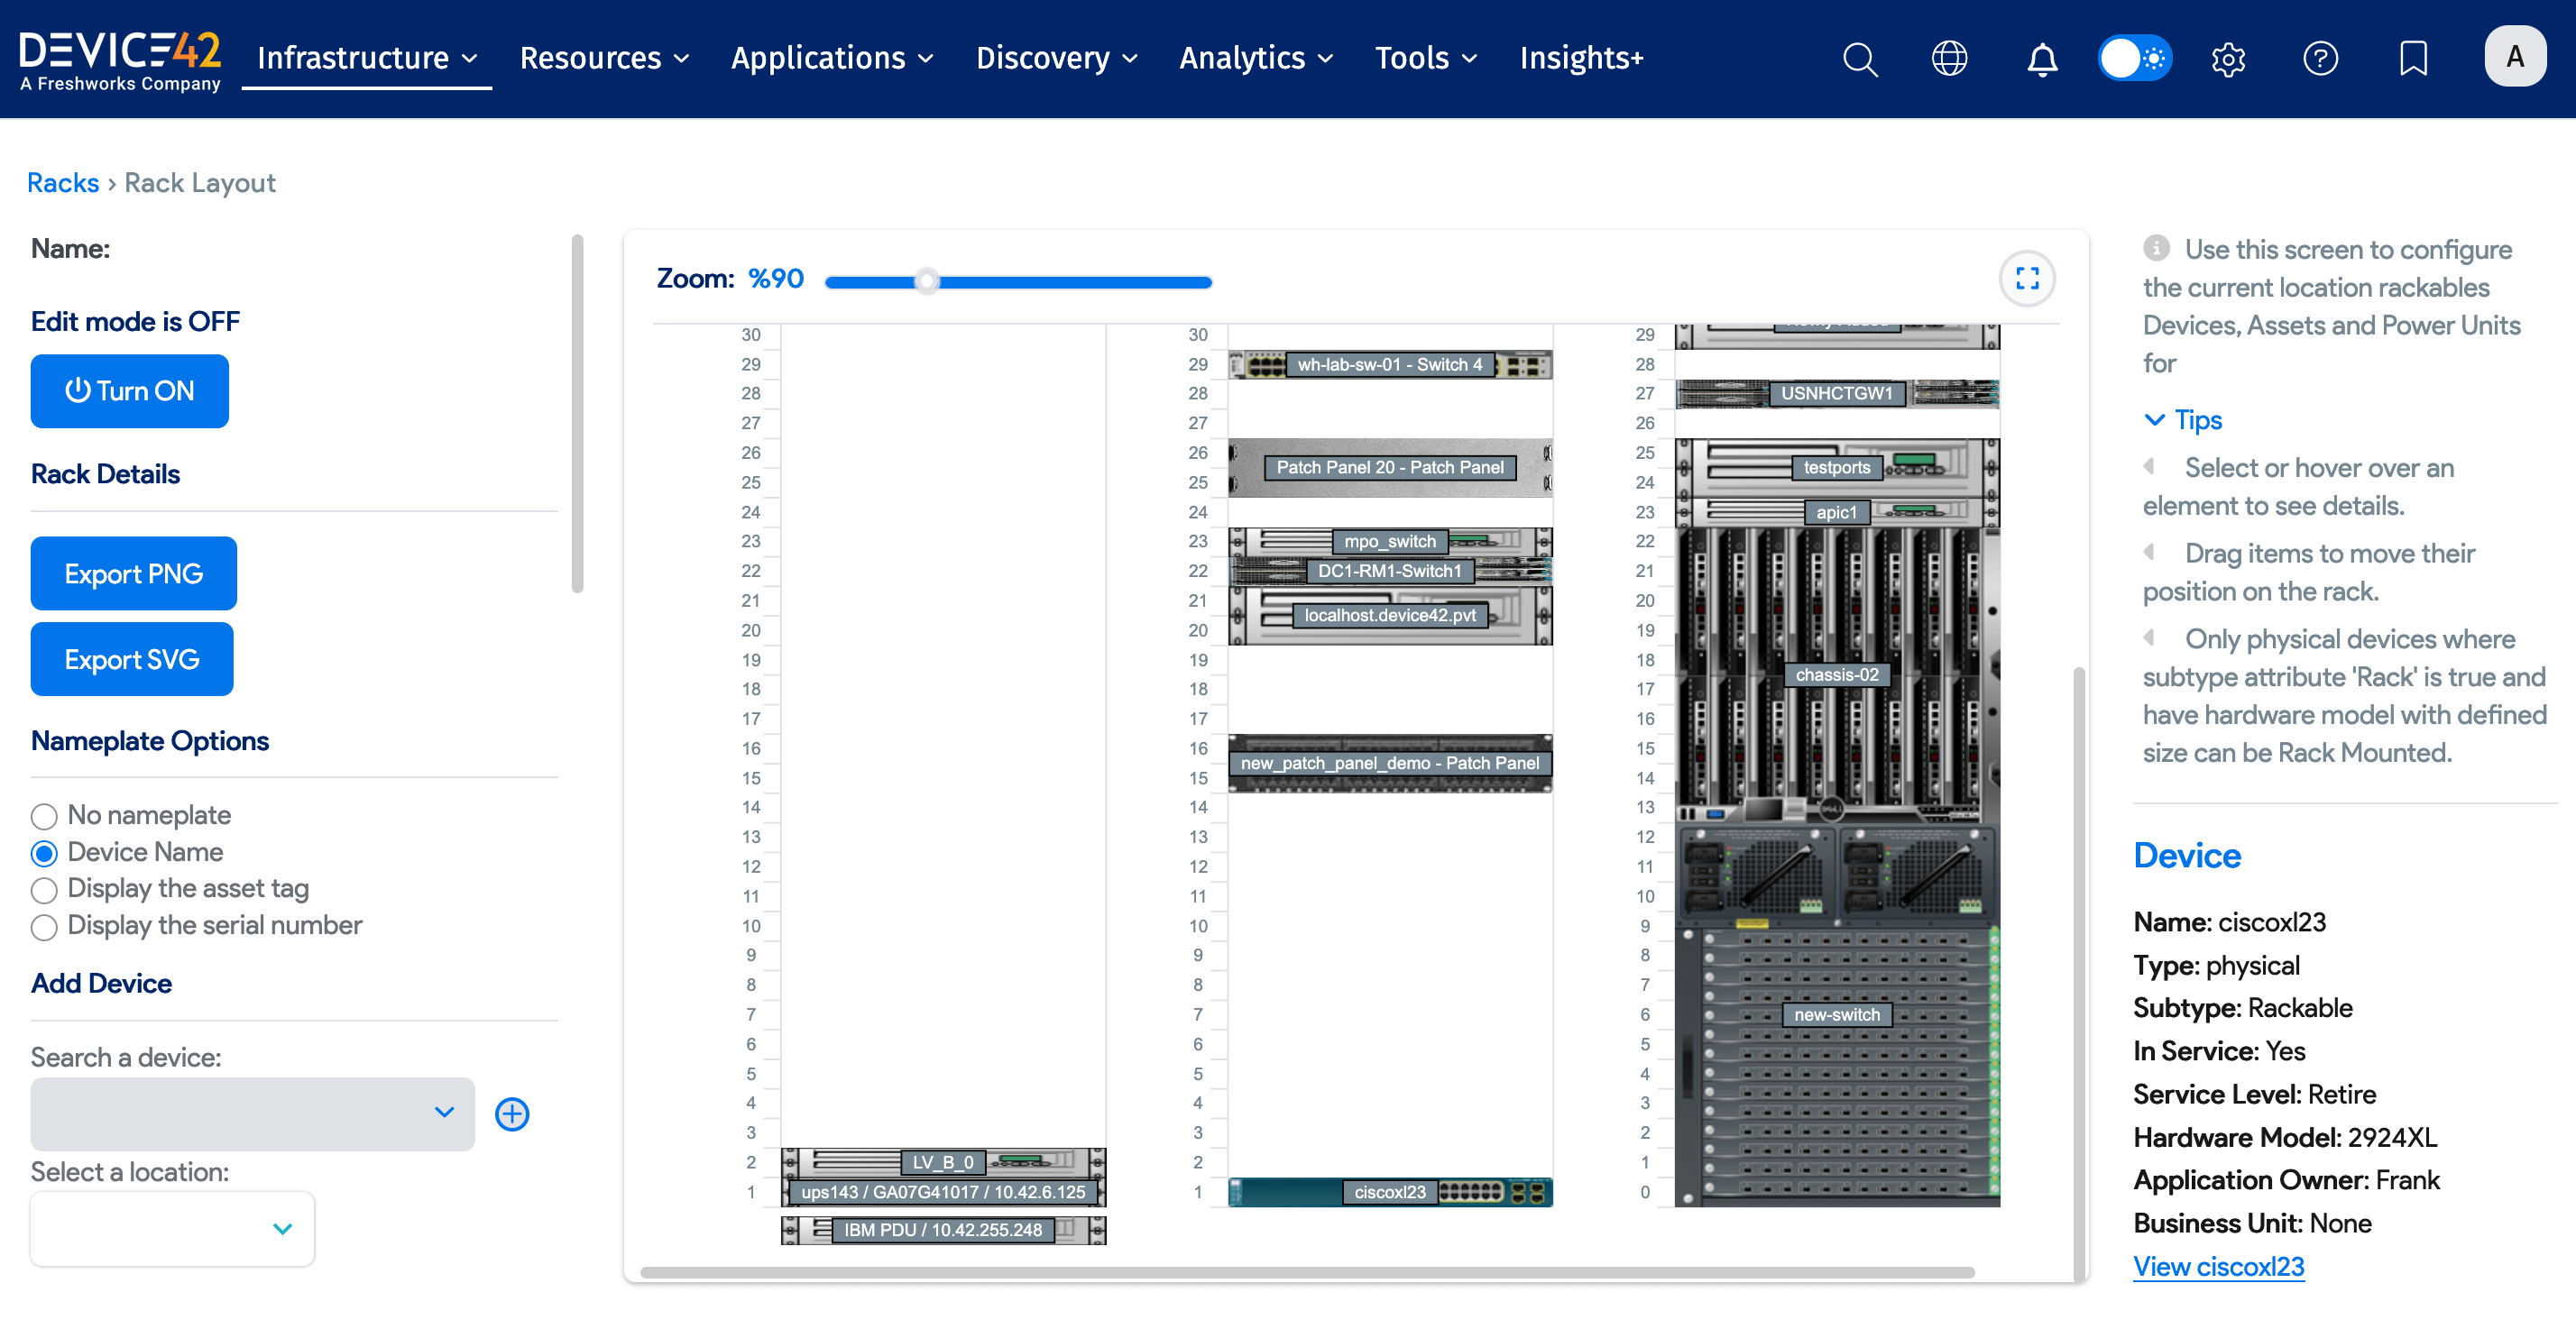
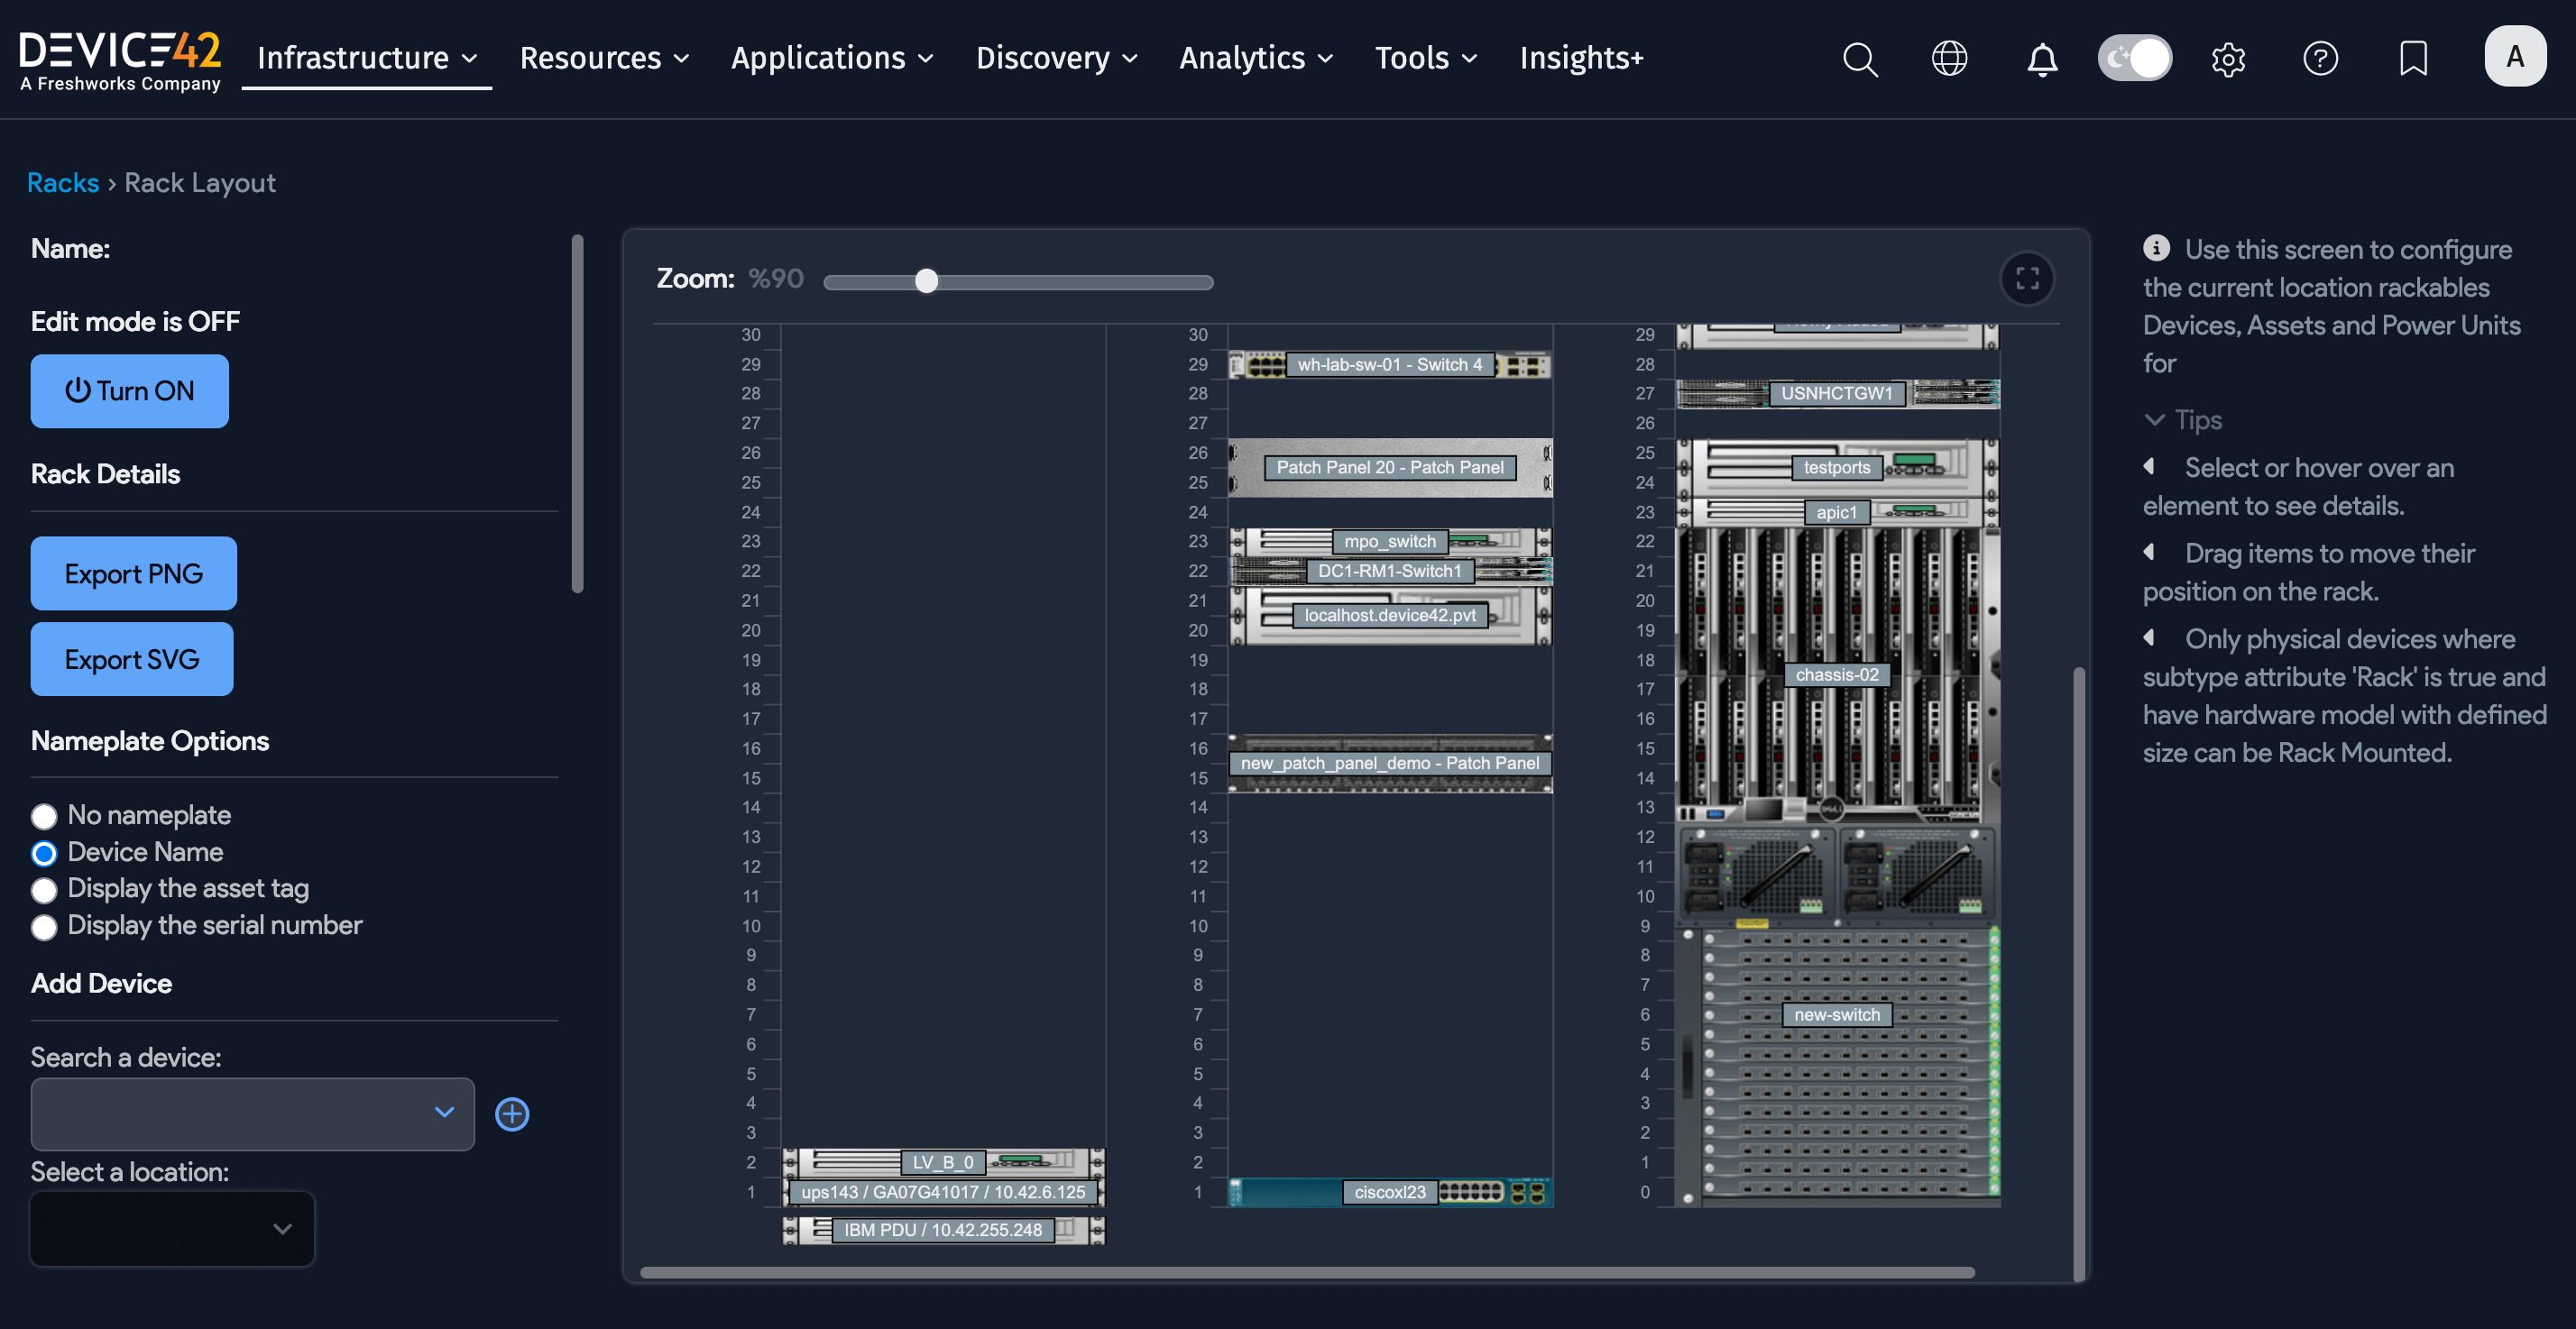
Visually Add Devices to the Rack
Click Rack Layout from the rack details page and turn on edit mode using the button at the top of the left sidebar. From the Add Device dropdown, you can search for devices by name. Click + (the plus-sign lookup indicator) to add a new device.
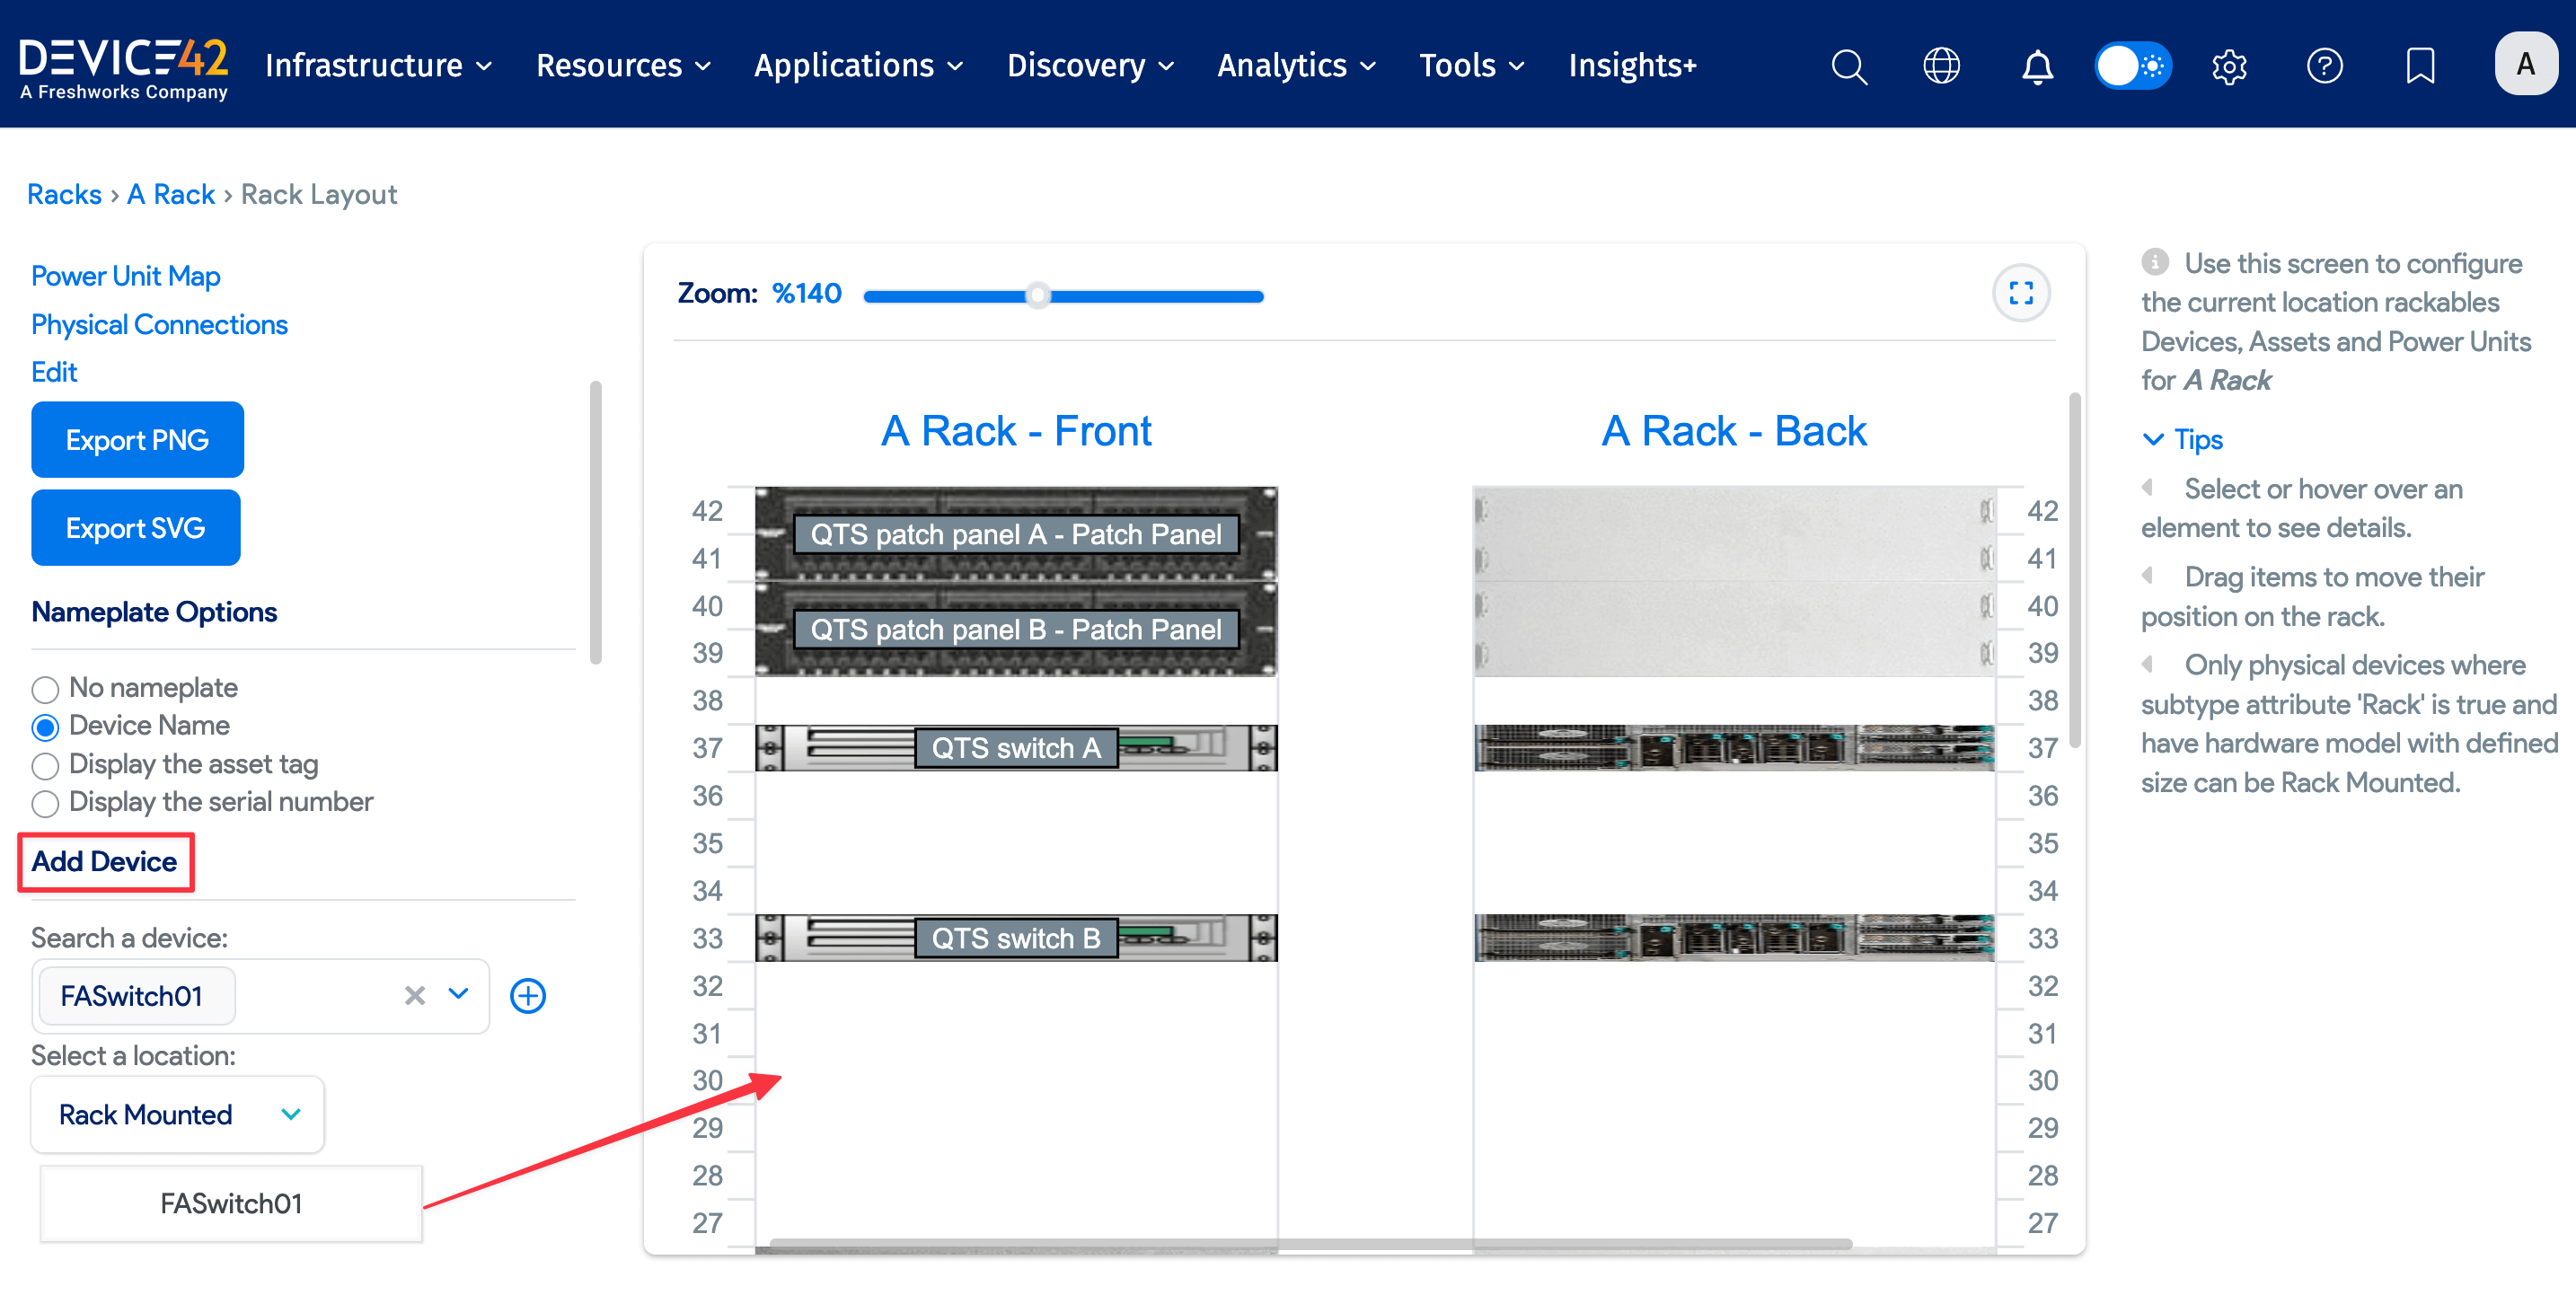
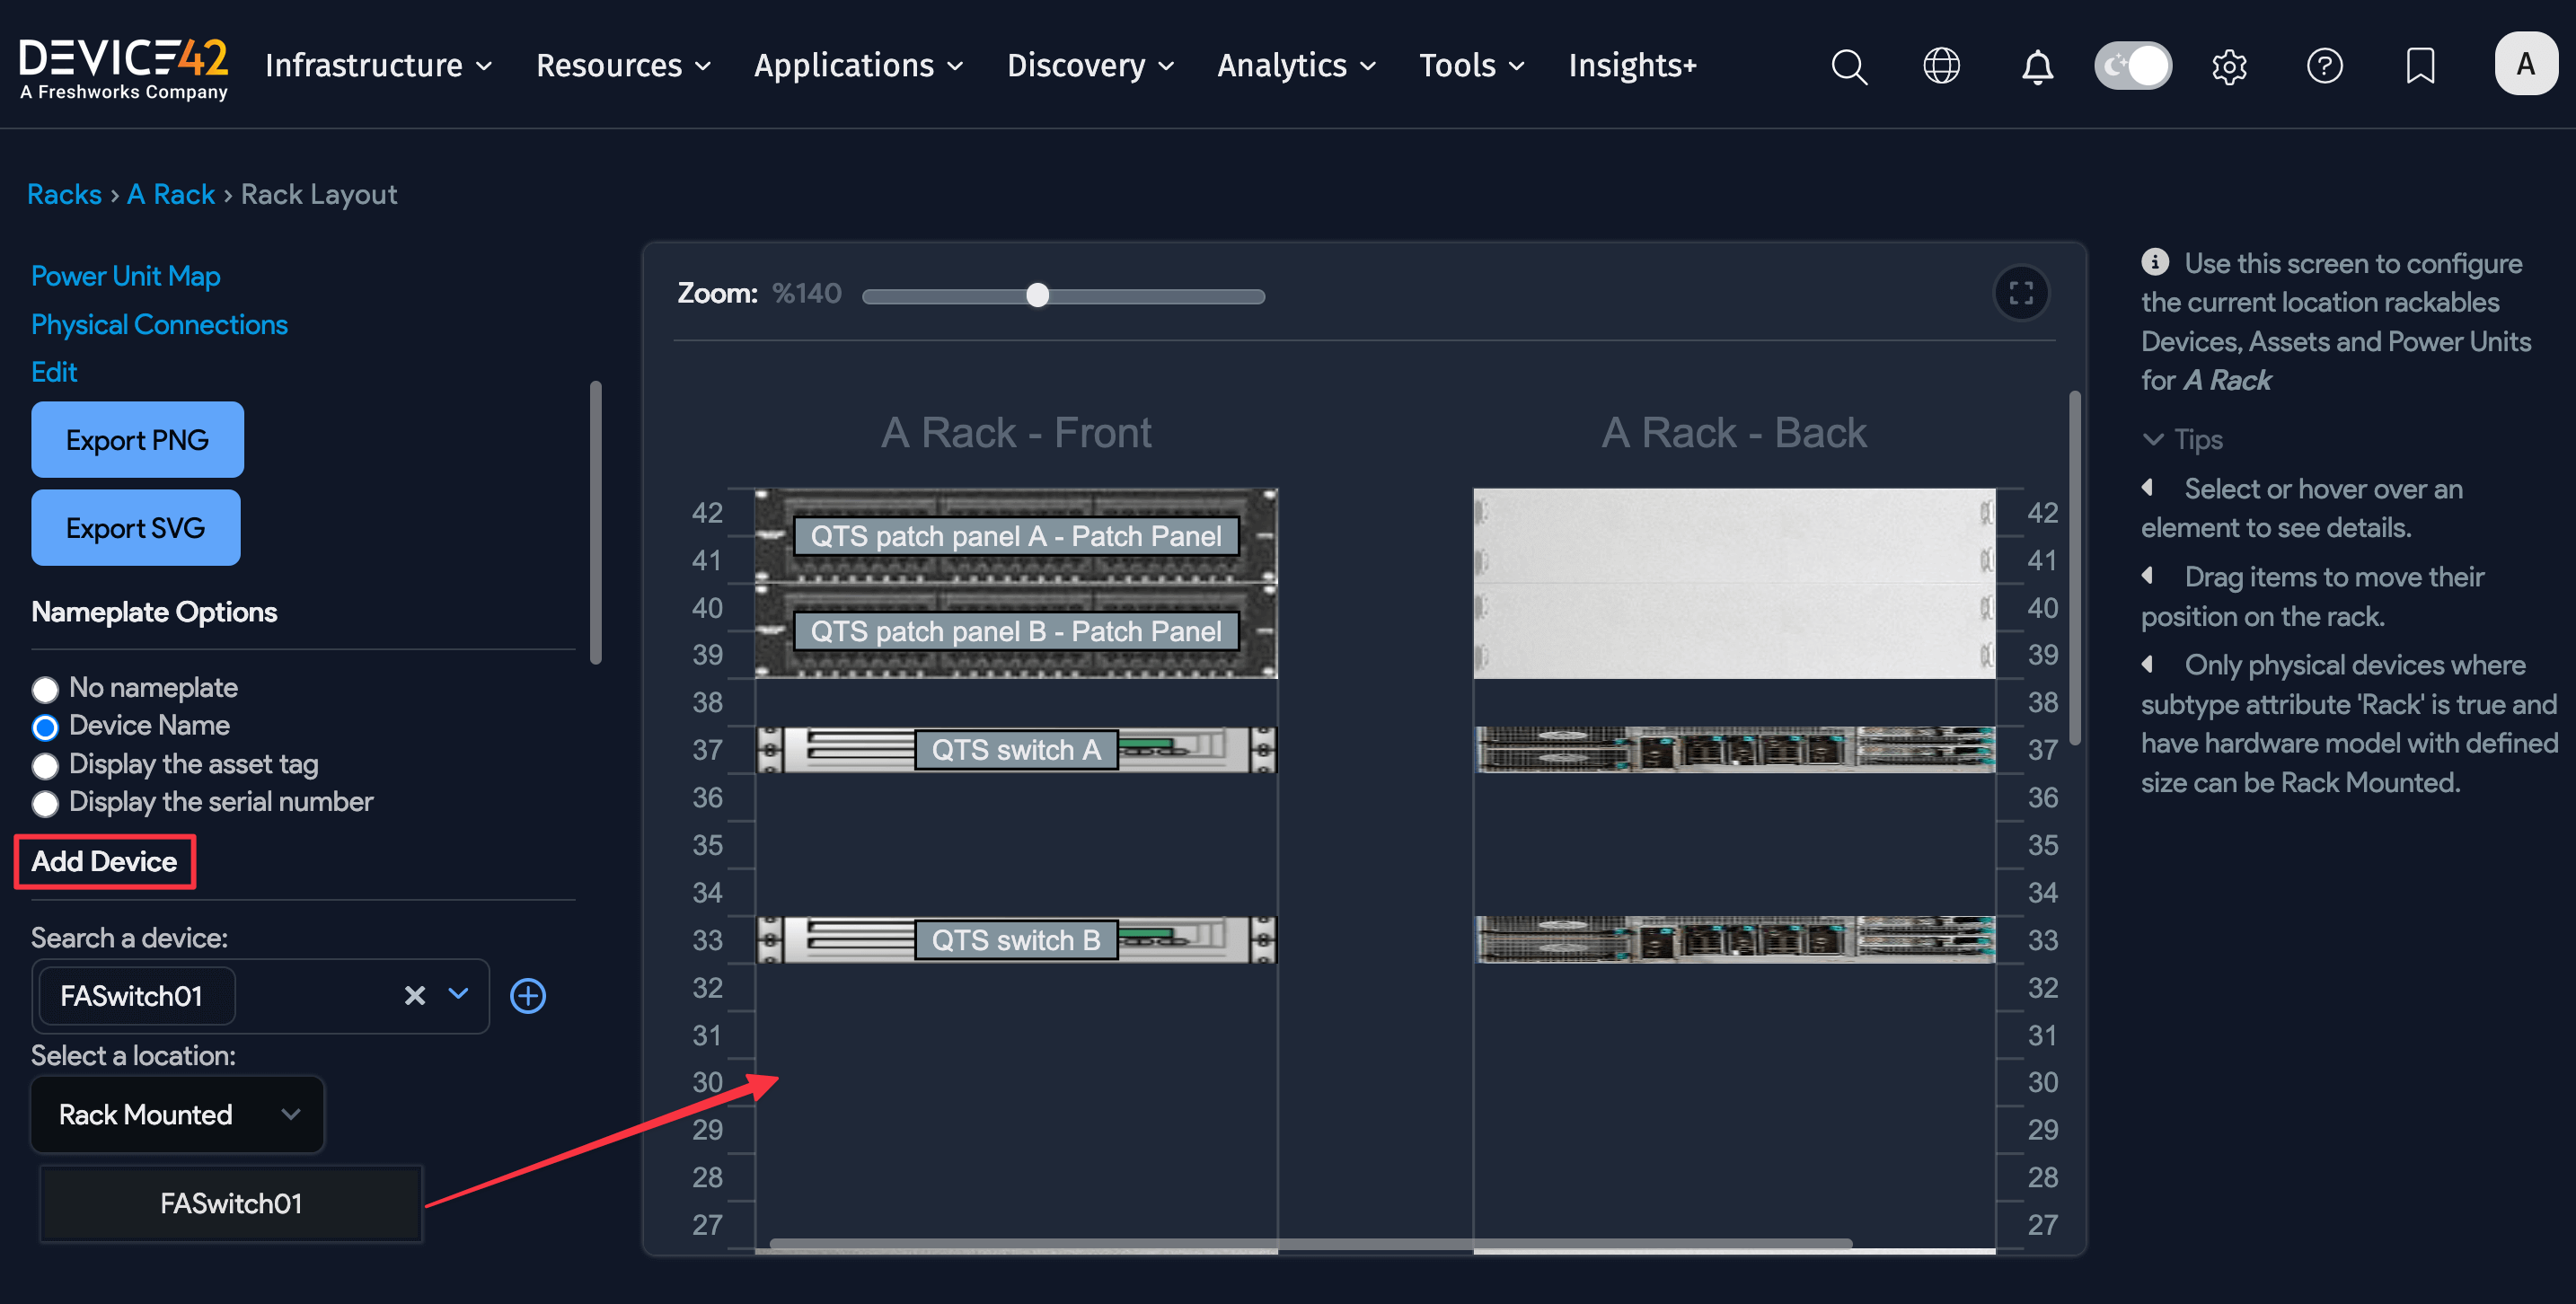
Drag and drop the device from the sidebar onto the rack layout.
Rack Unit Numbering Layout Options
By default, the option to display rack unit Numbers between the U's is toggled on when creating a new rack. To rather display the rack unit numbers at the Us, turn this option off.
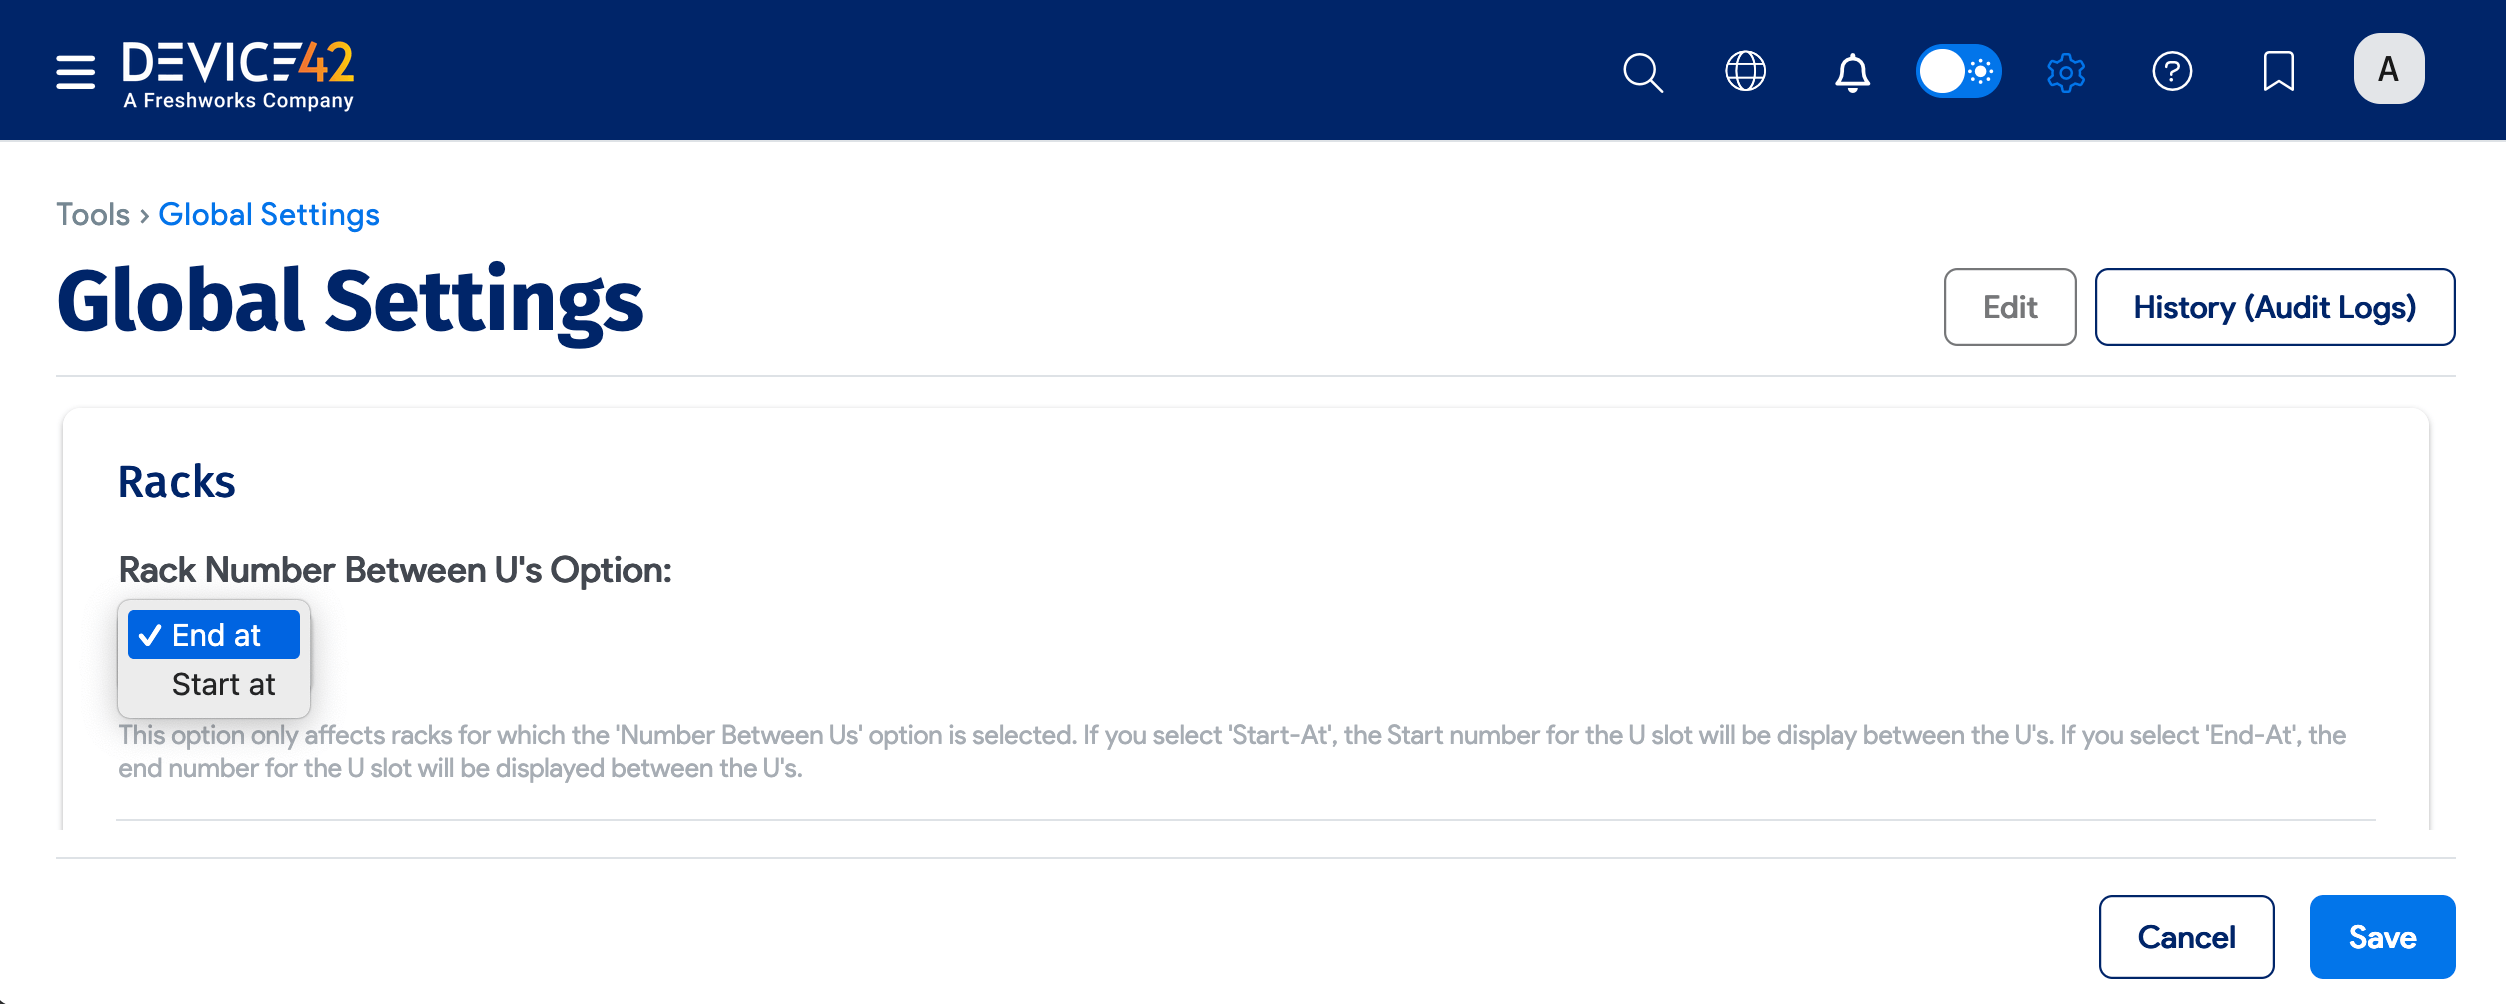
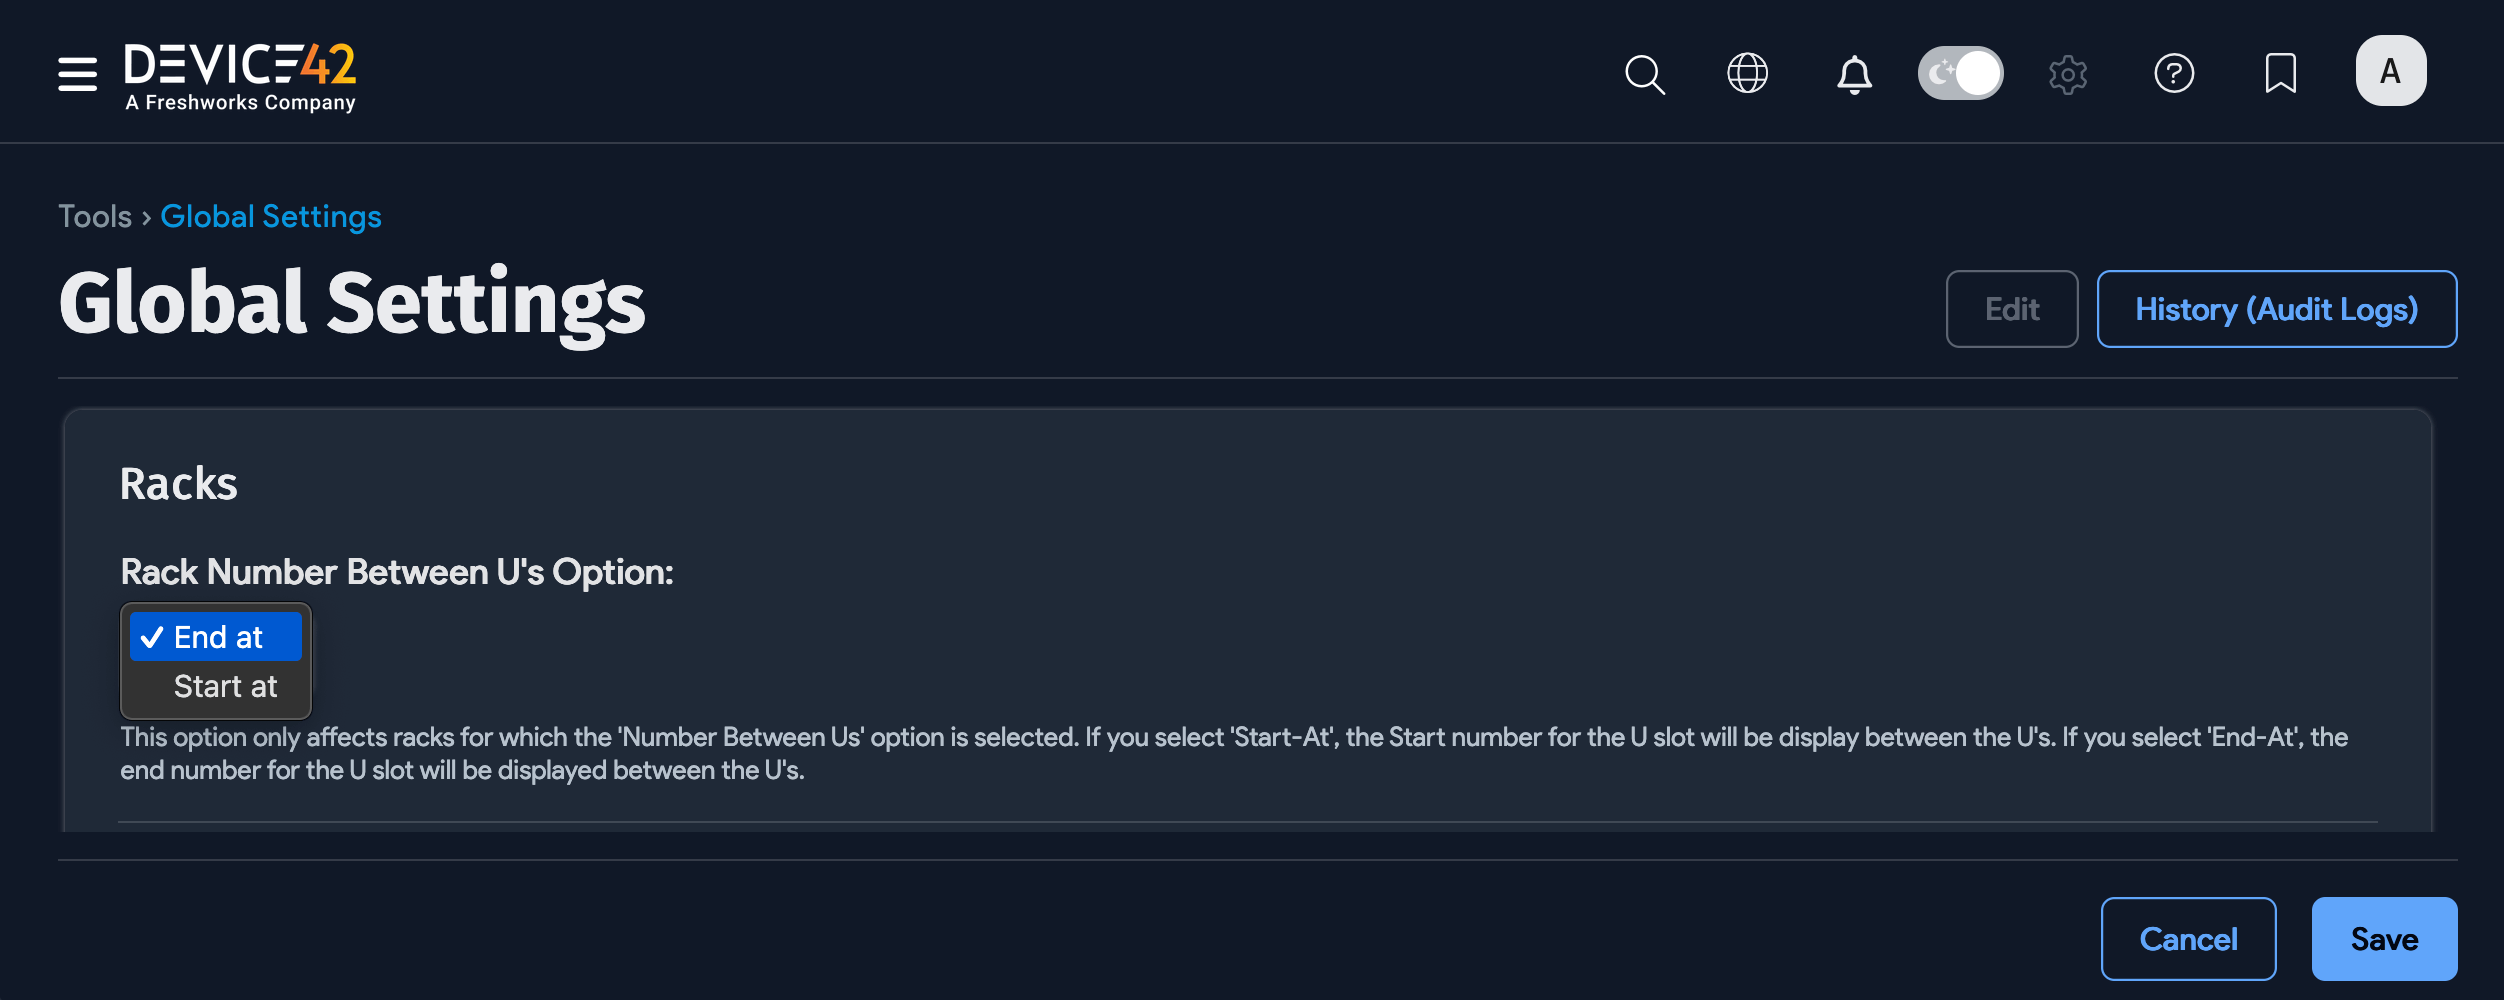
You can set whether the starting or ending number is displayed between the Us. Navigate to Tools > Settings > Global Settings and select one of the following options in the Racks section:
- End at: Display the slot number of the ending U between the Us.
- Start at: Display the slot number of the starting U between the Us.

Add Assets to the Rack
Assets include items, such as patch panels, filler panels, and fans, that take U space or power in the rack. You can add assets to racks from the rack edit page or associate assets with racks via the Assets list page under Resources > Assets.
Asset sizes are measured in U units and rounded to one decimal place.
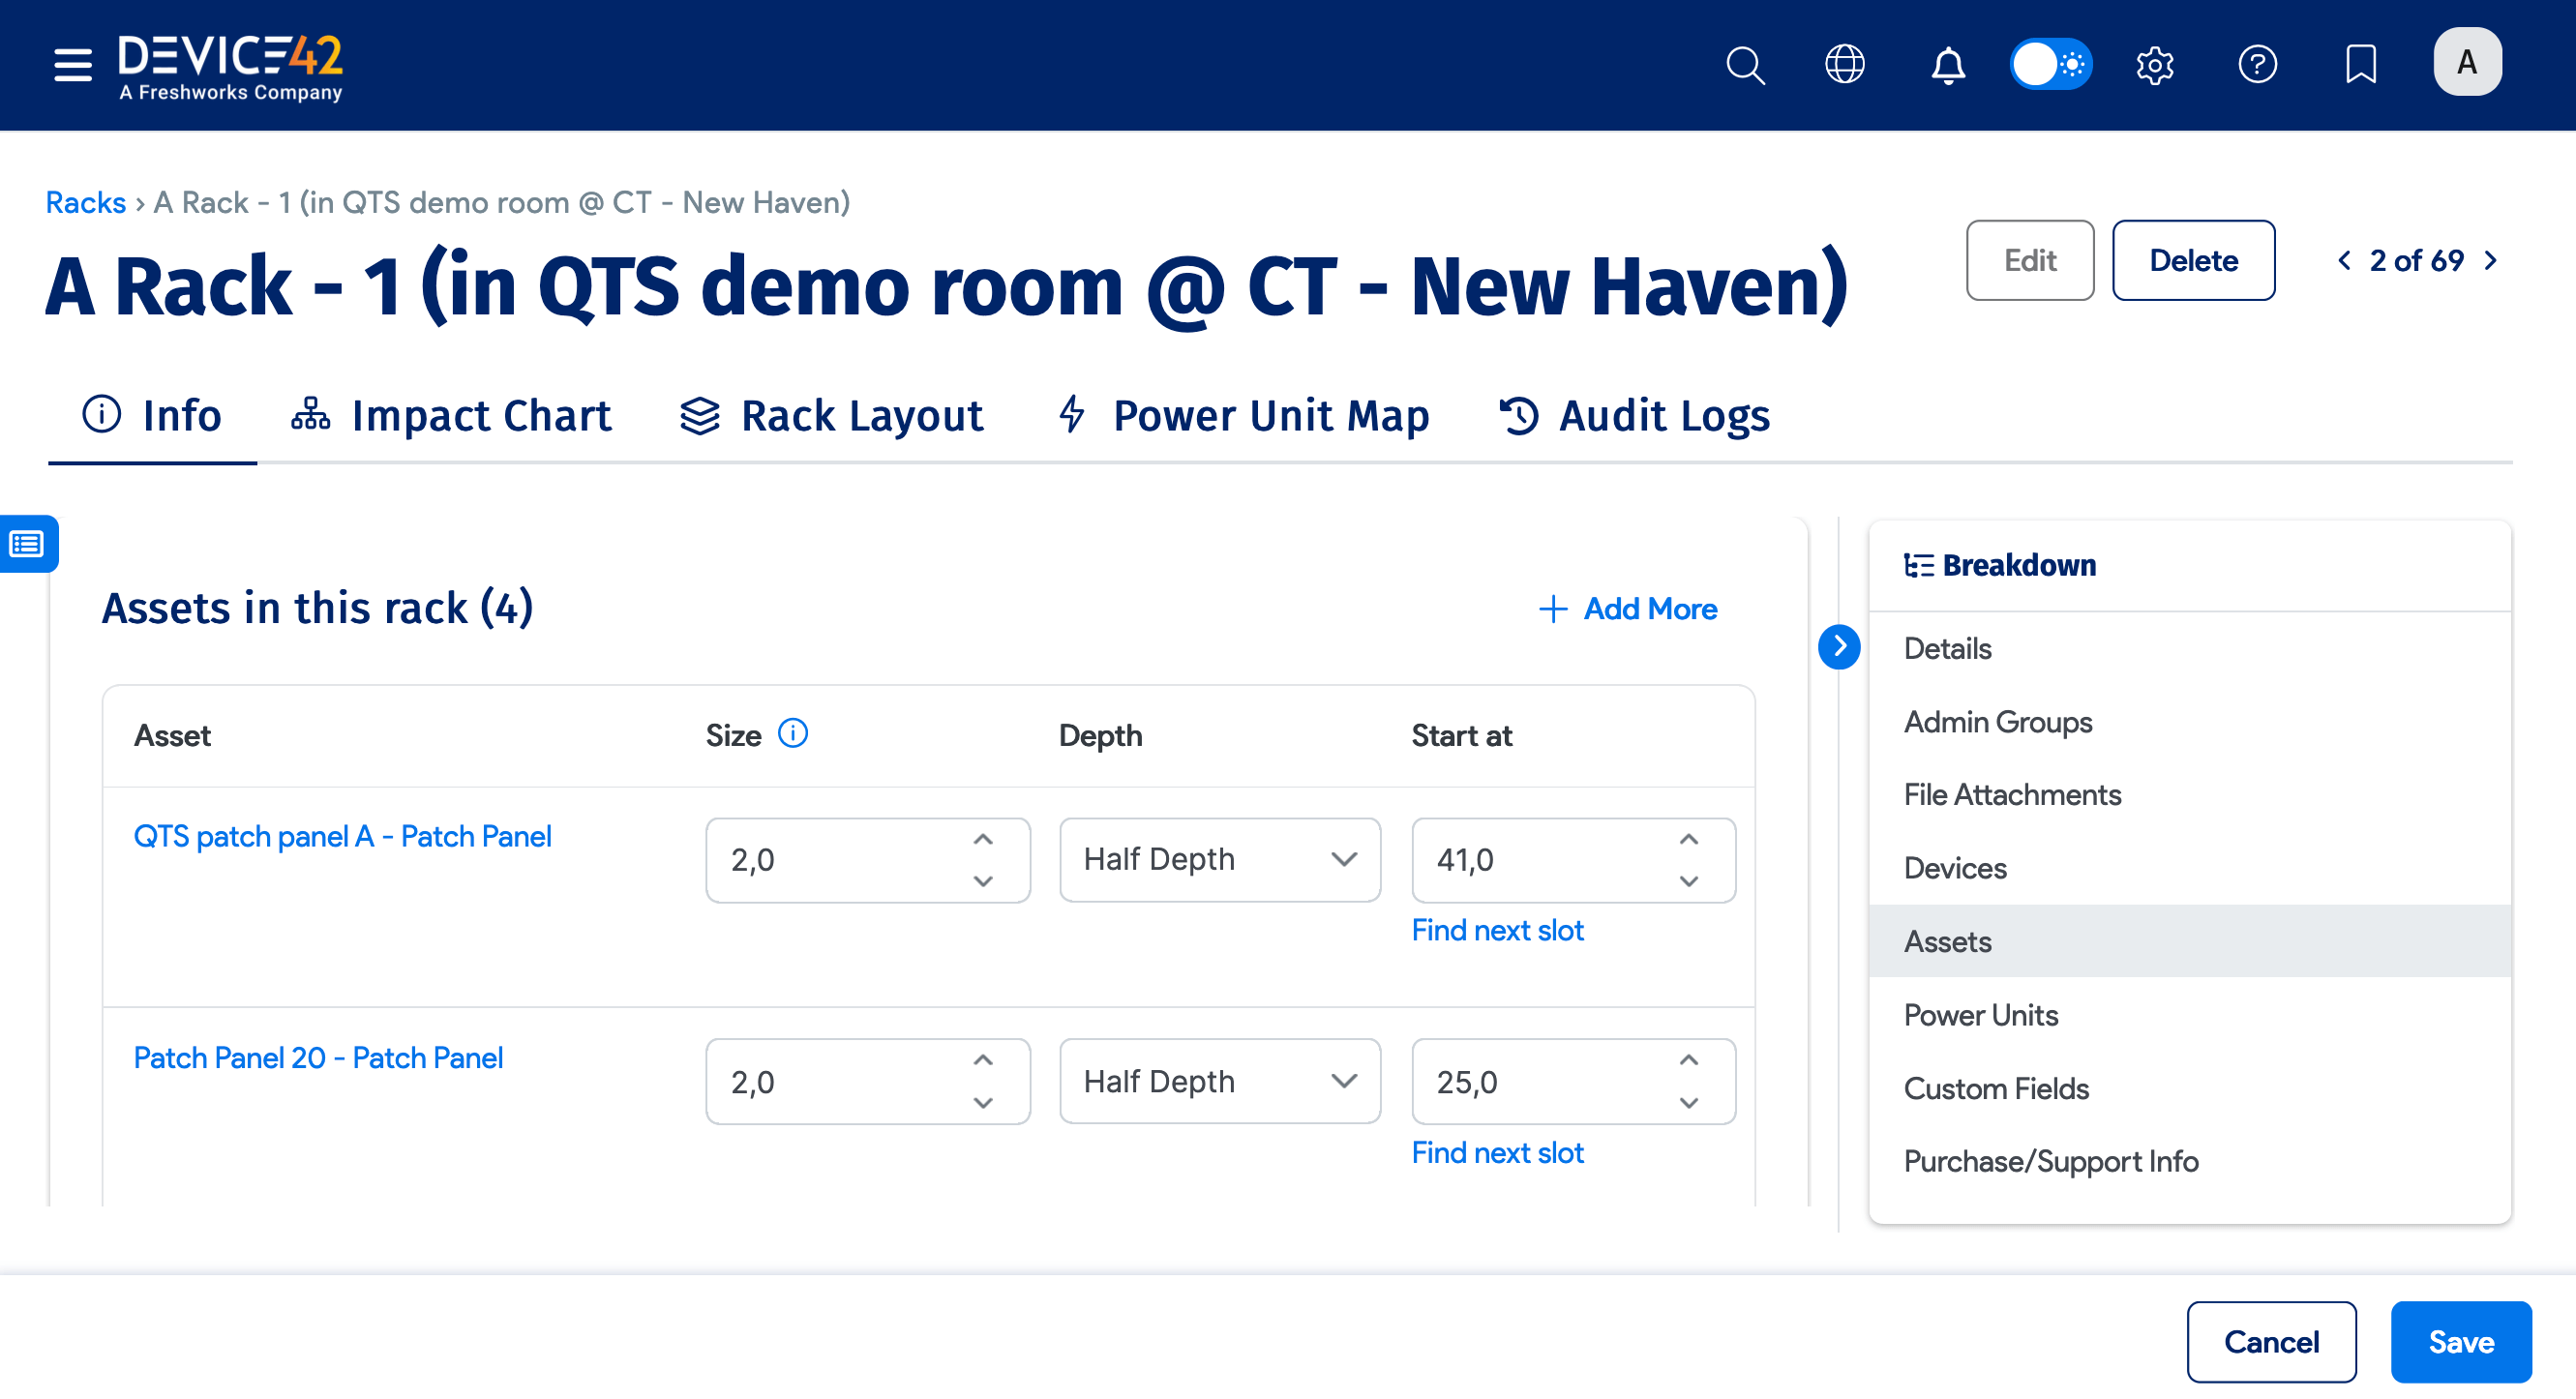
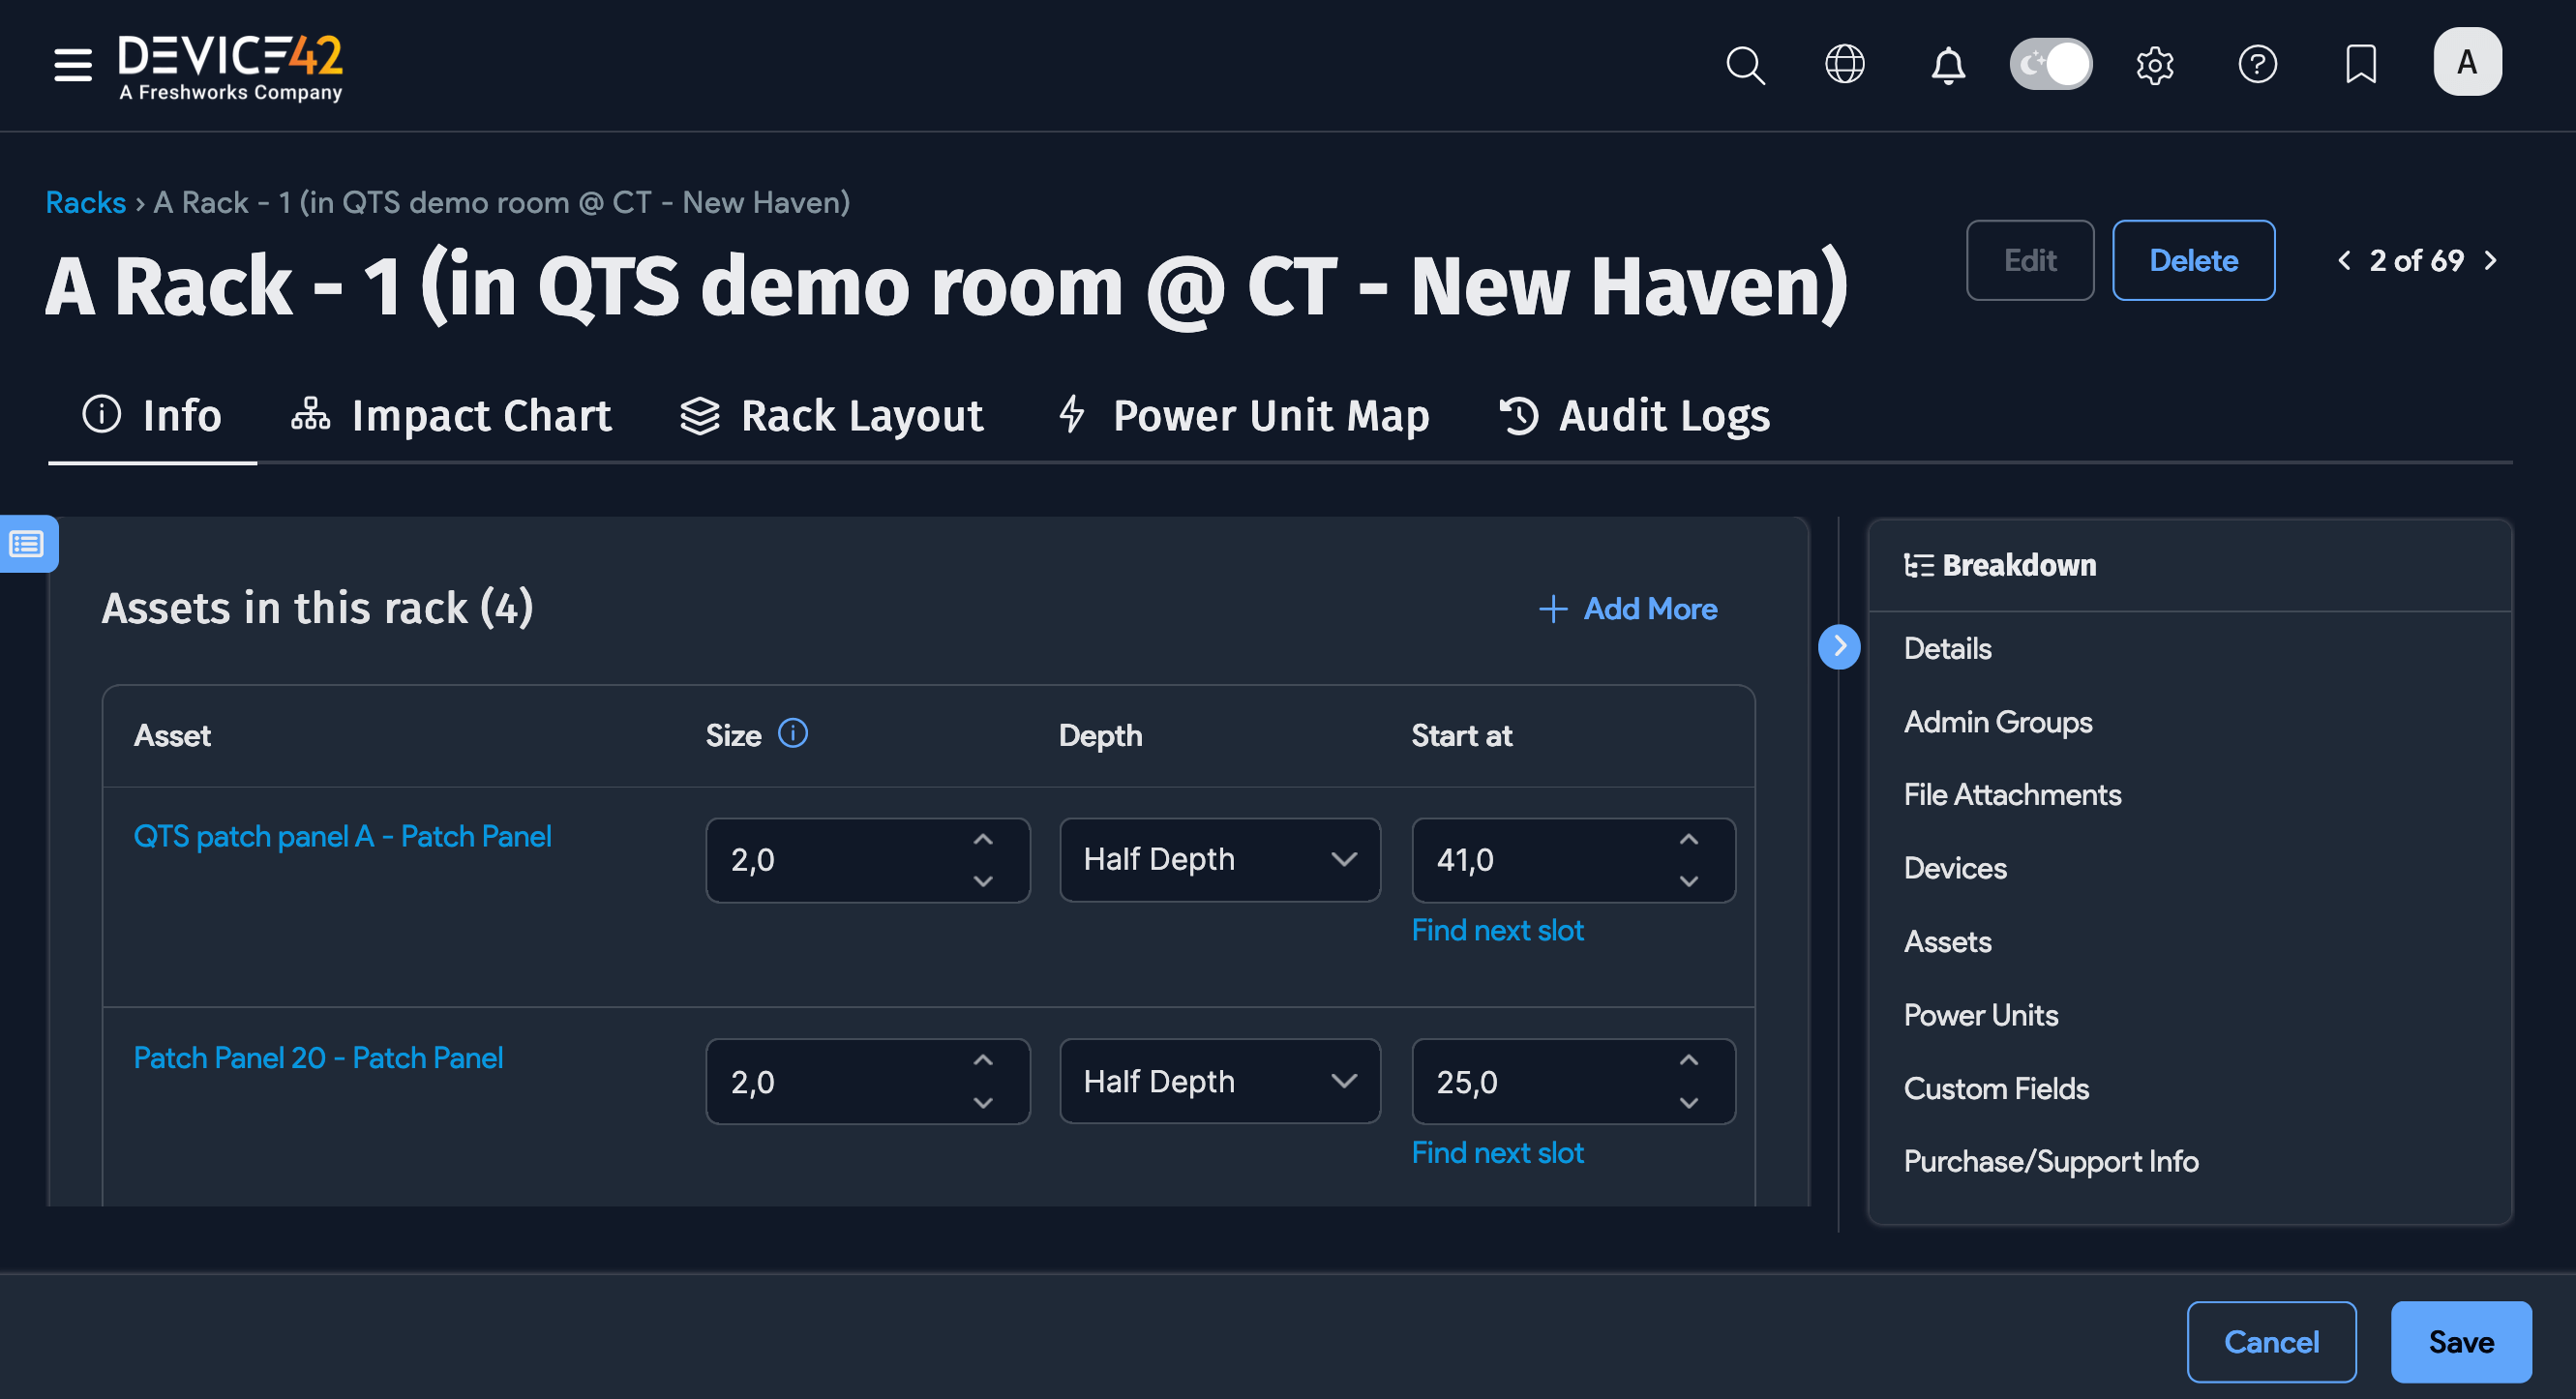
You can choose an existing asset or add a new asset using the lookup button. Provide the size and starting location of the asset, along with its depth and orientation.
Unlike devices, multiple assets can have the same name. Even blank names are allowed (but not recommended).
Visually Add Assets to the Rack
Click Rack Layout from the view screen of the rack and turn on edit mode in the left sidebar. Under Add New Asset, choose the asset type and provide the size, depth, and location of the asset. If needed, you can add new asset types when creating a new asset under Resources > All Assets.
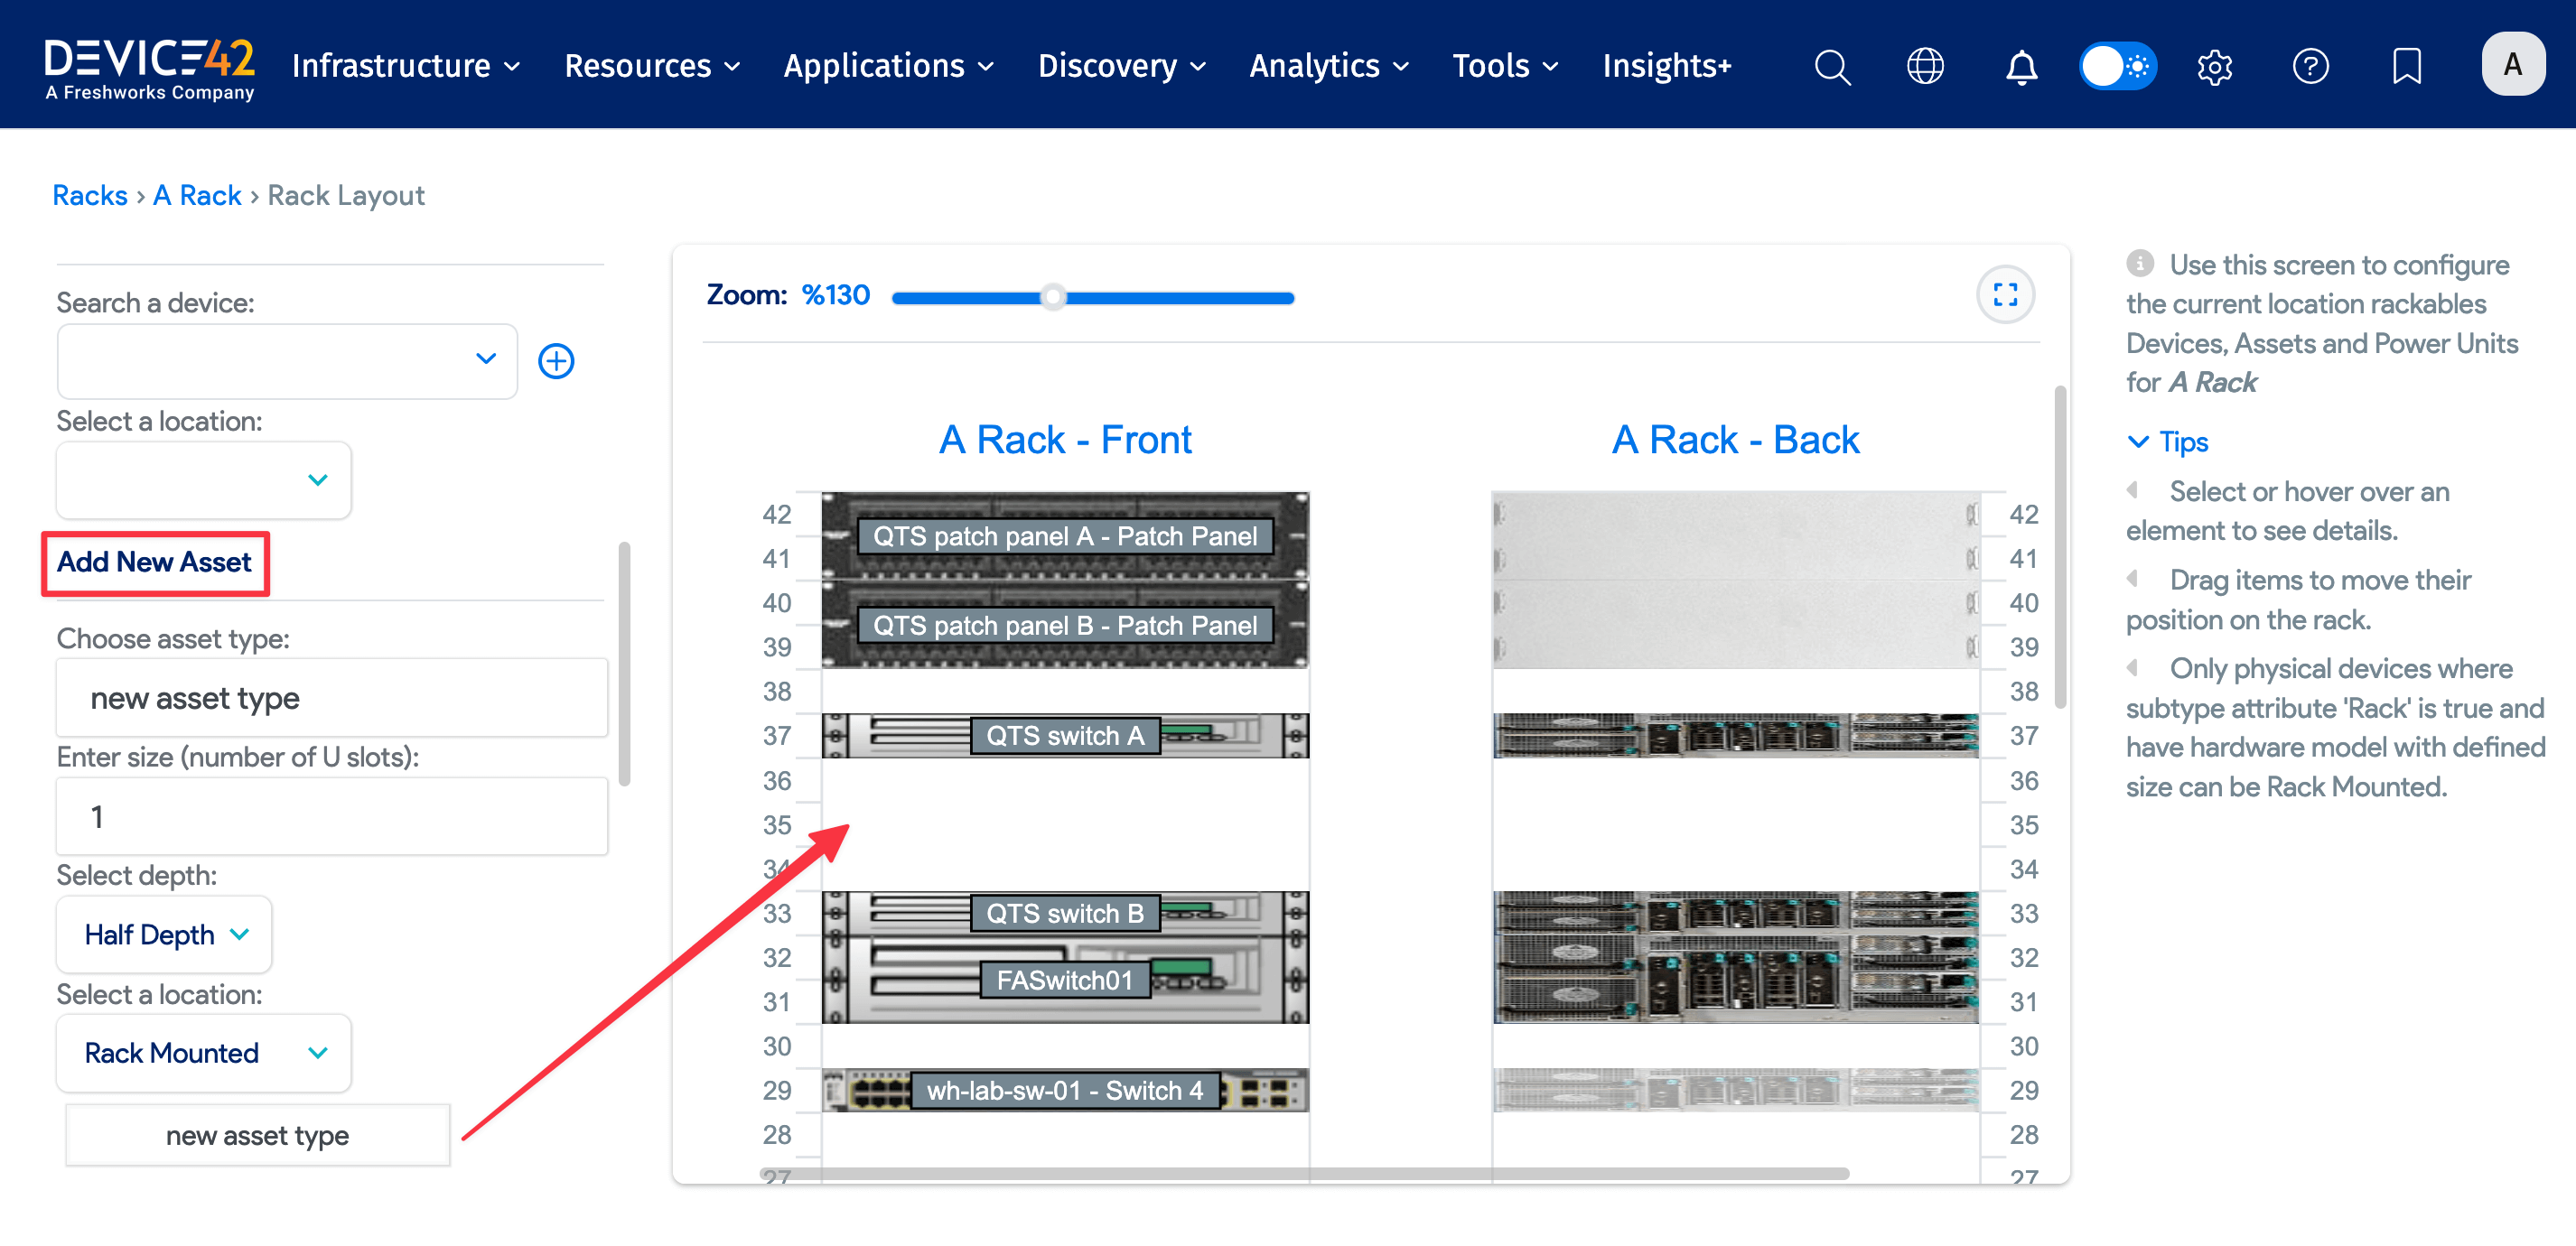
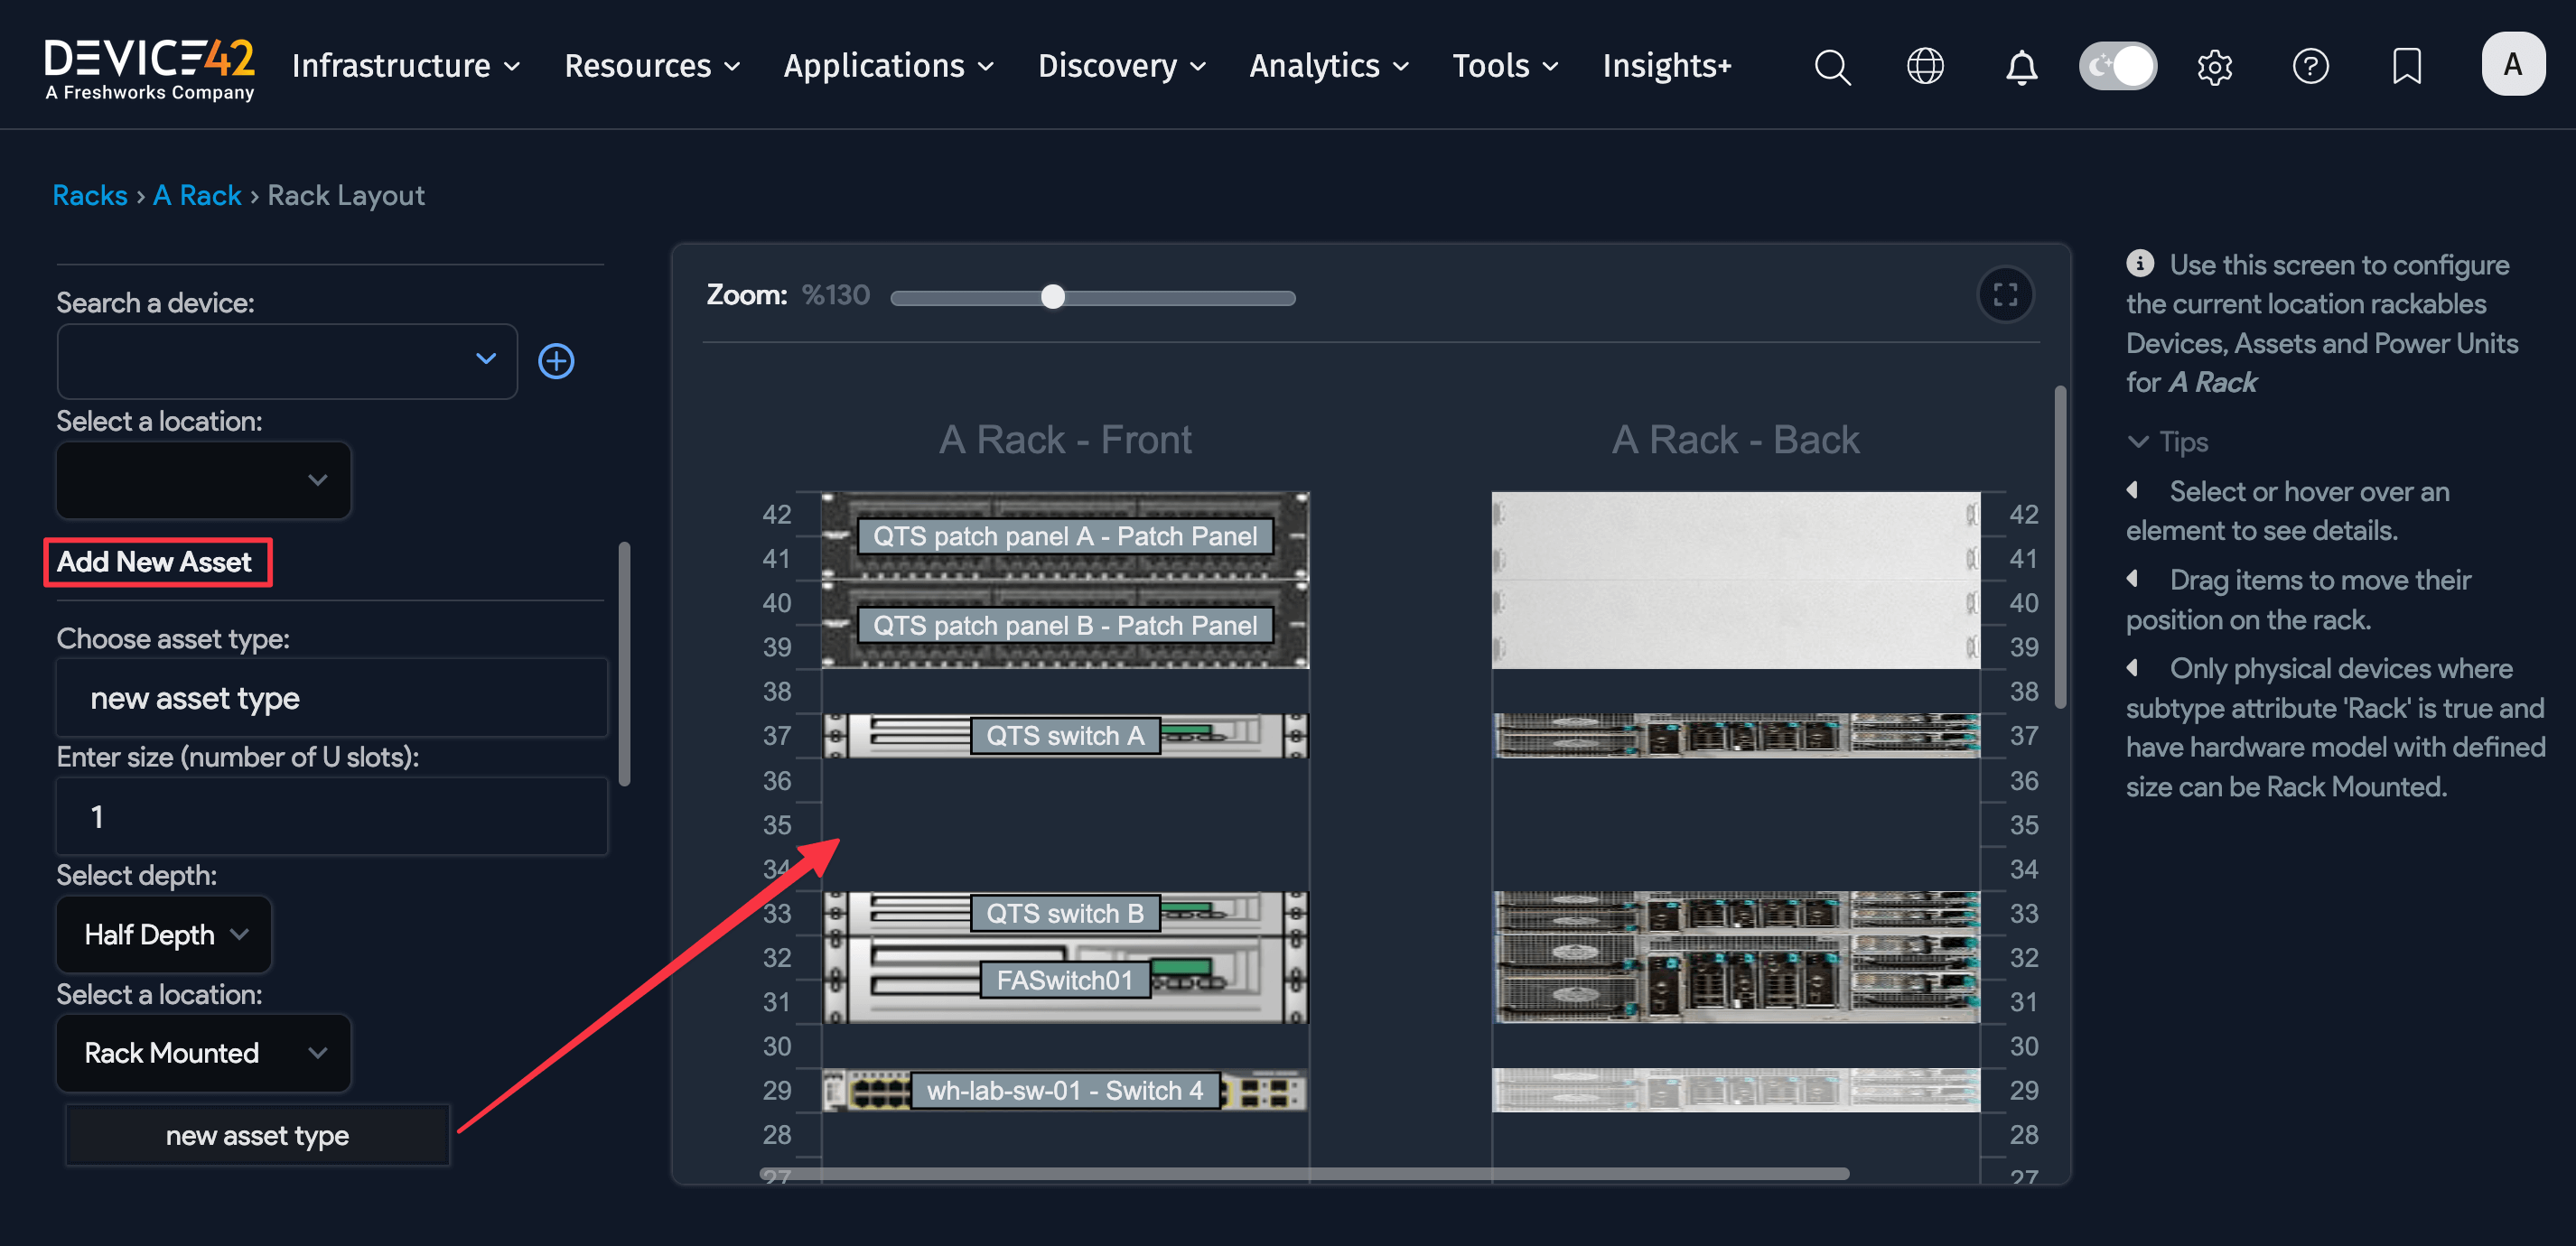
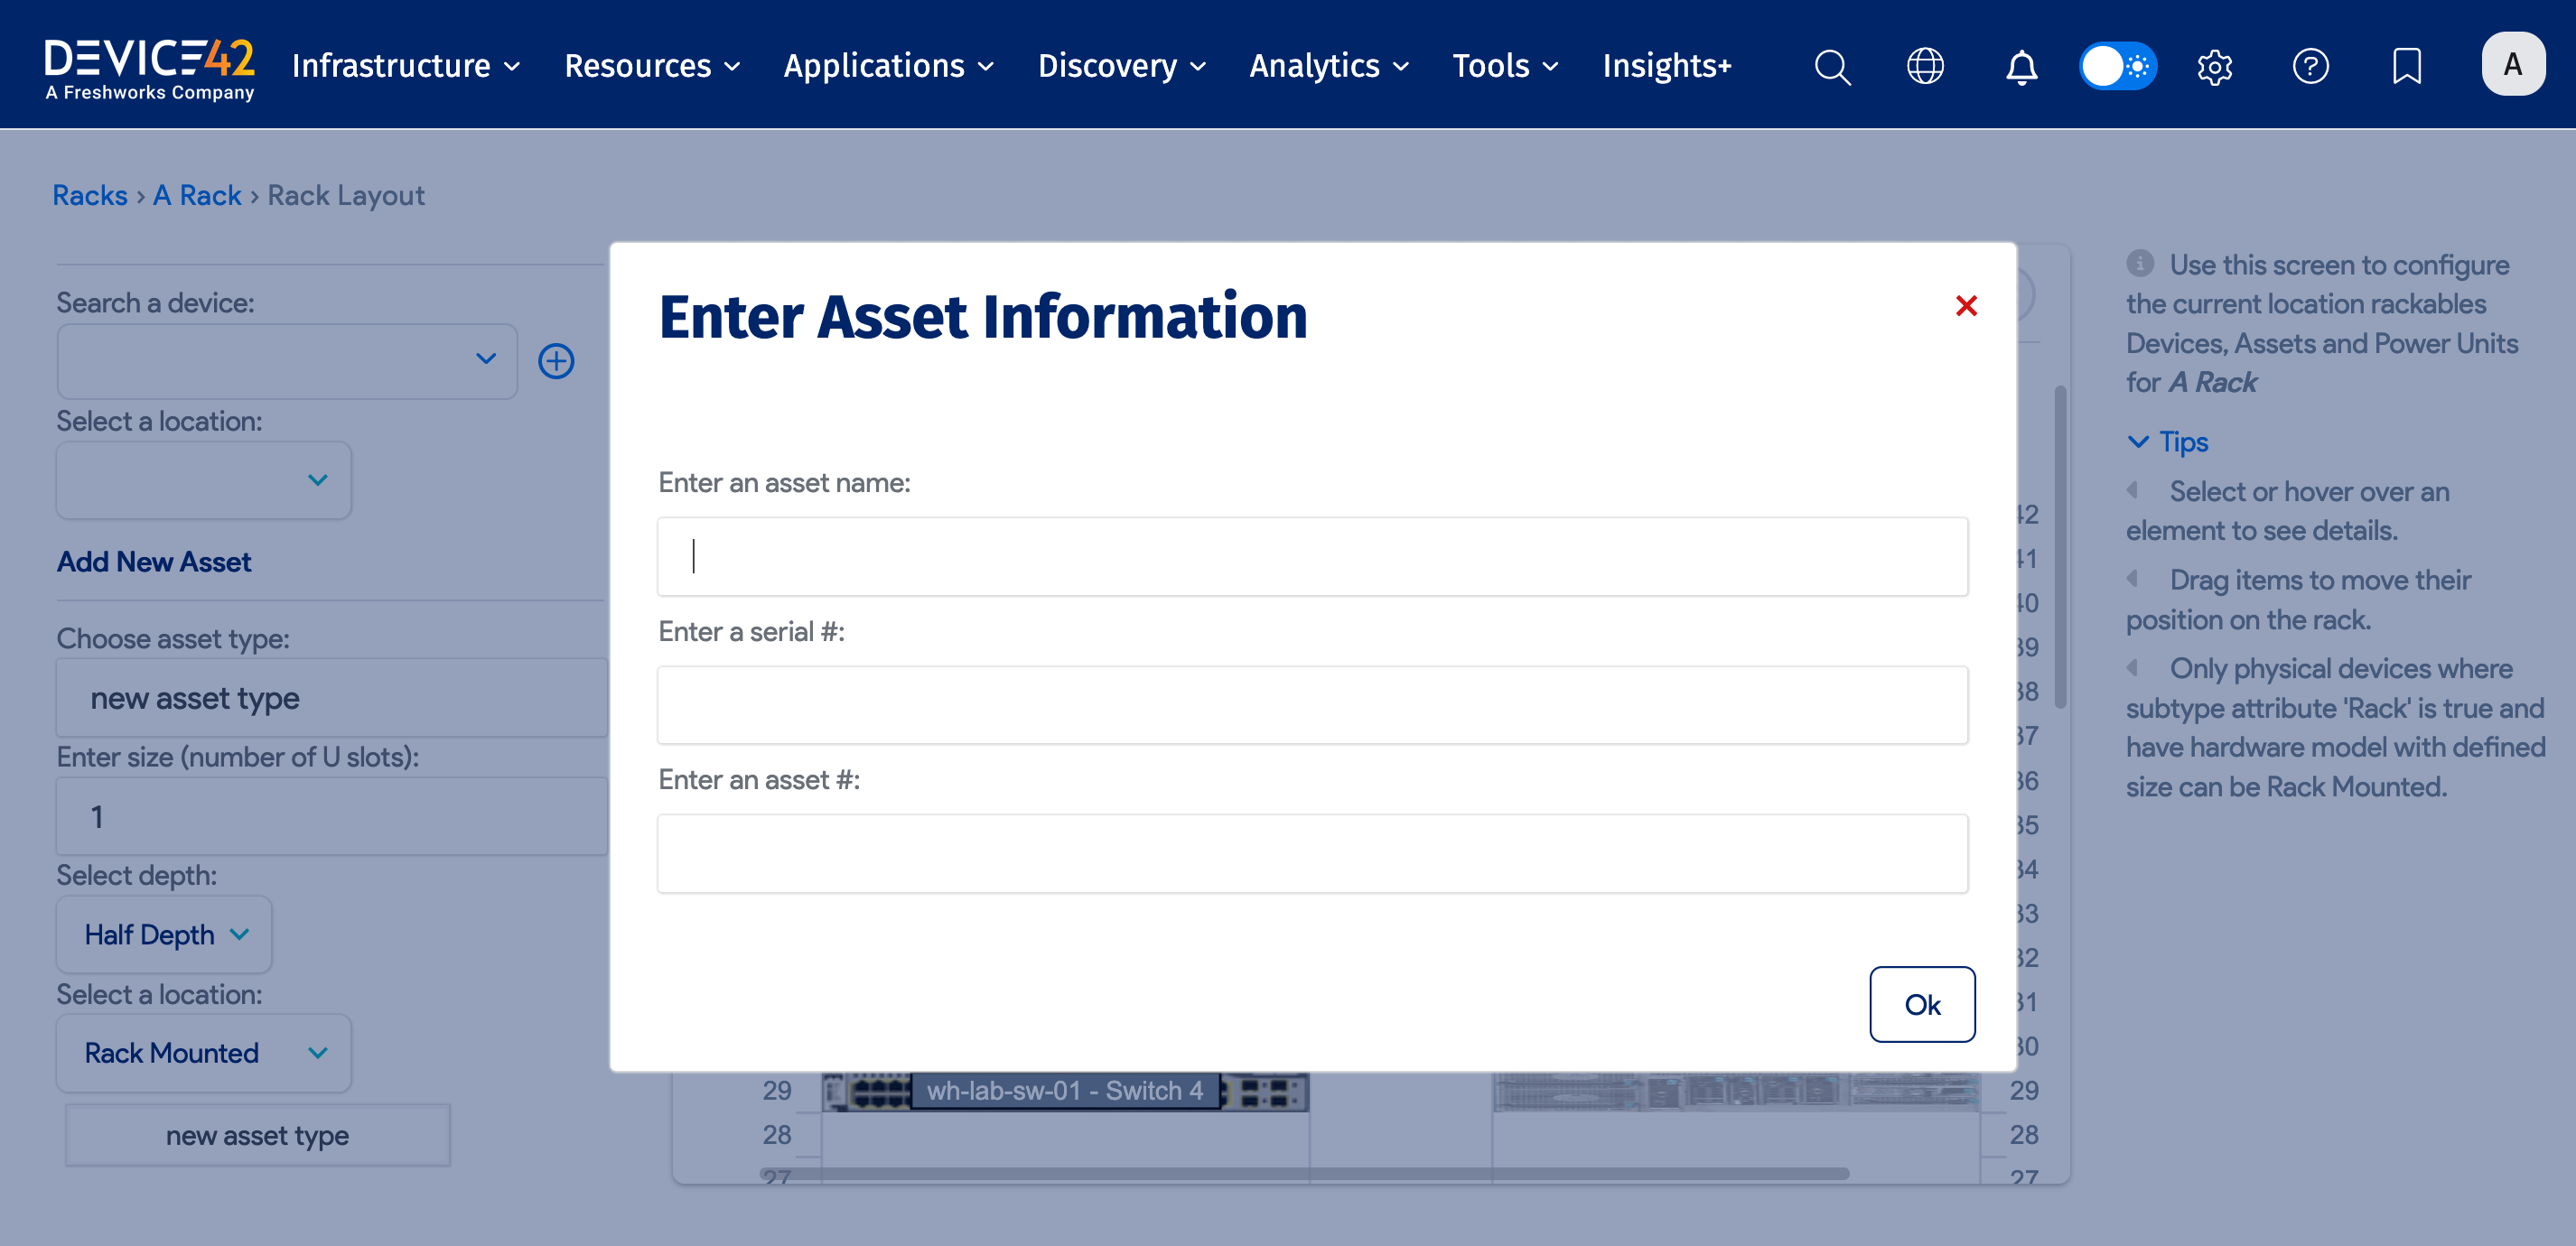
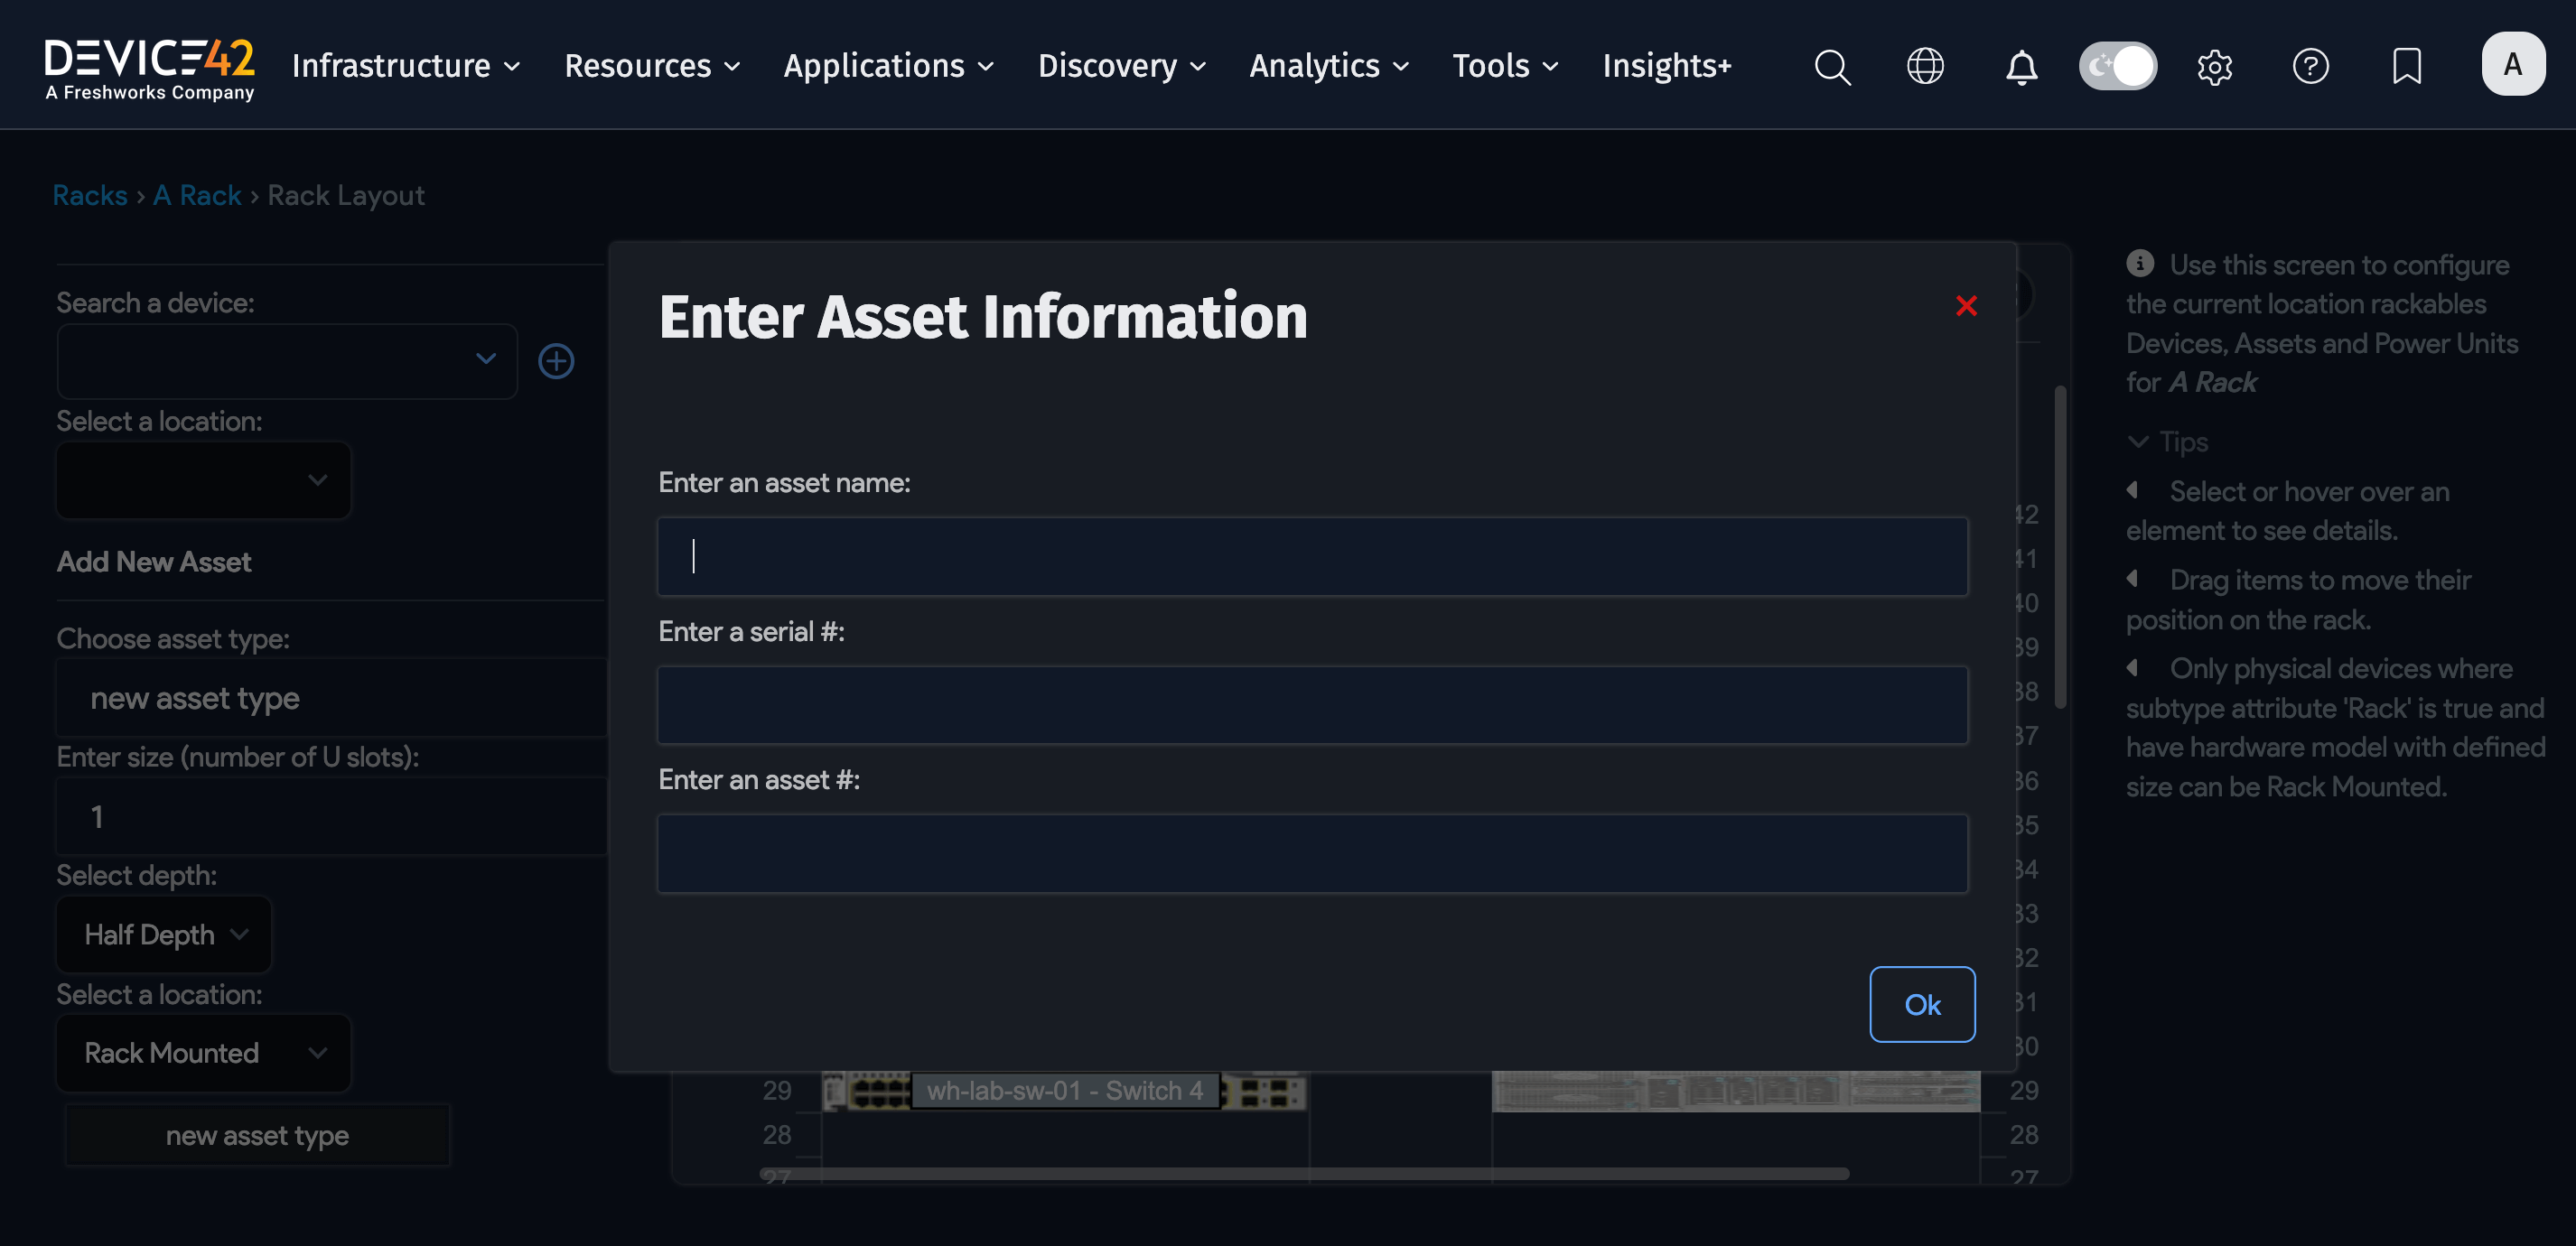
Once you have added the asset details in the sidebar, you can drag and drop the template from the sidebar to the rack position where you need it to be. A modal window will prompt you to enter the asset details.
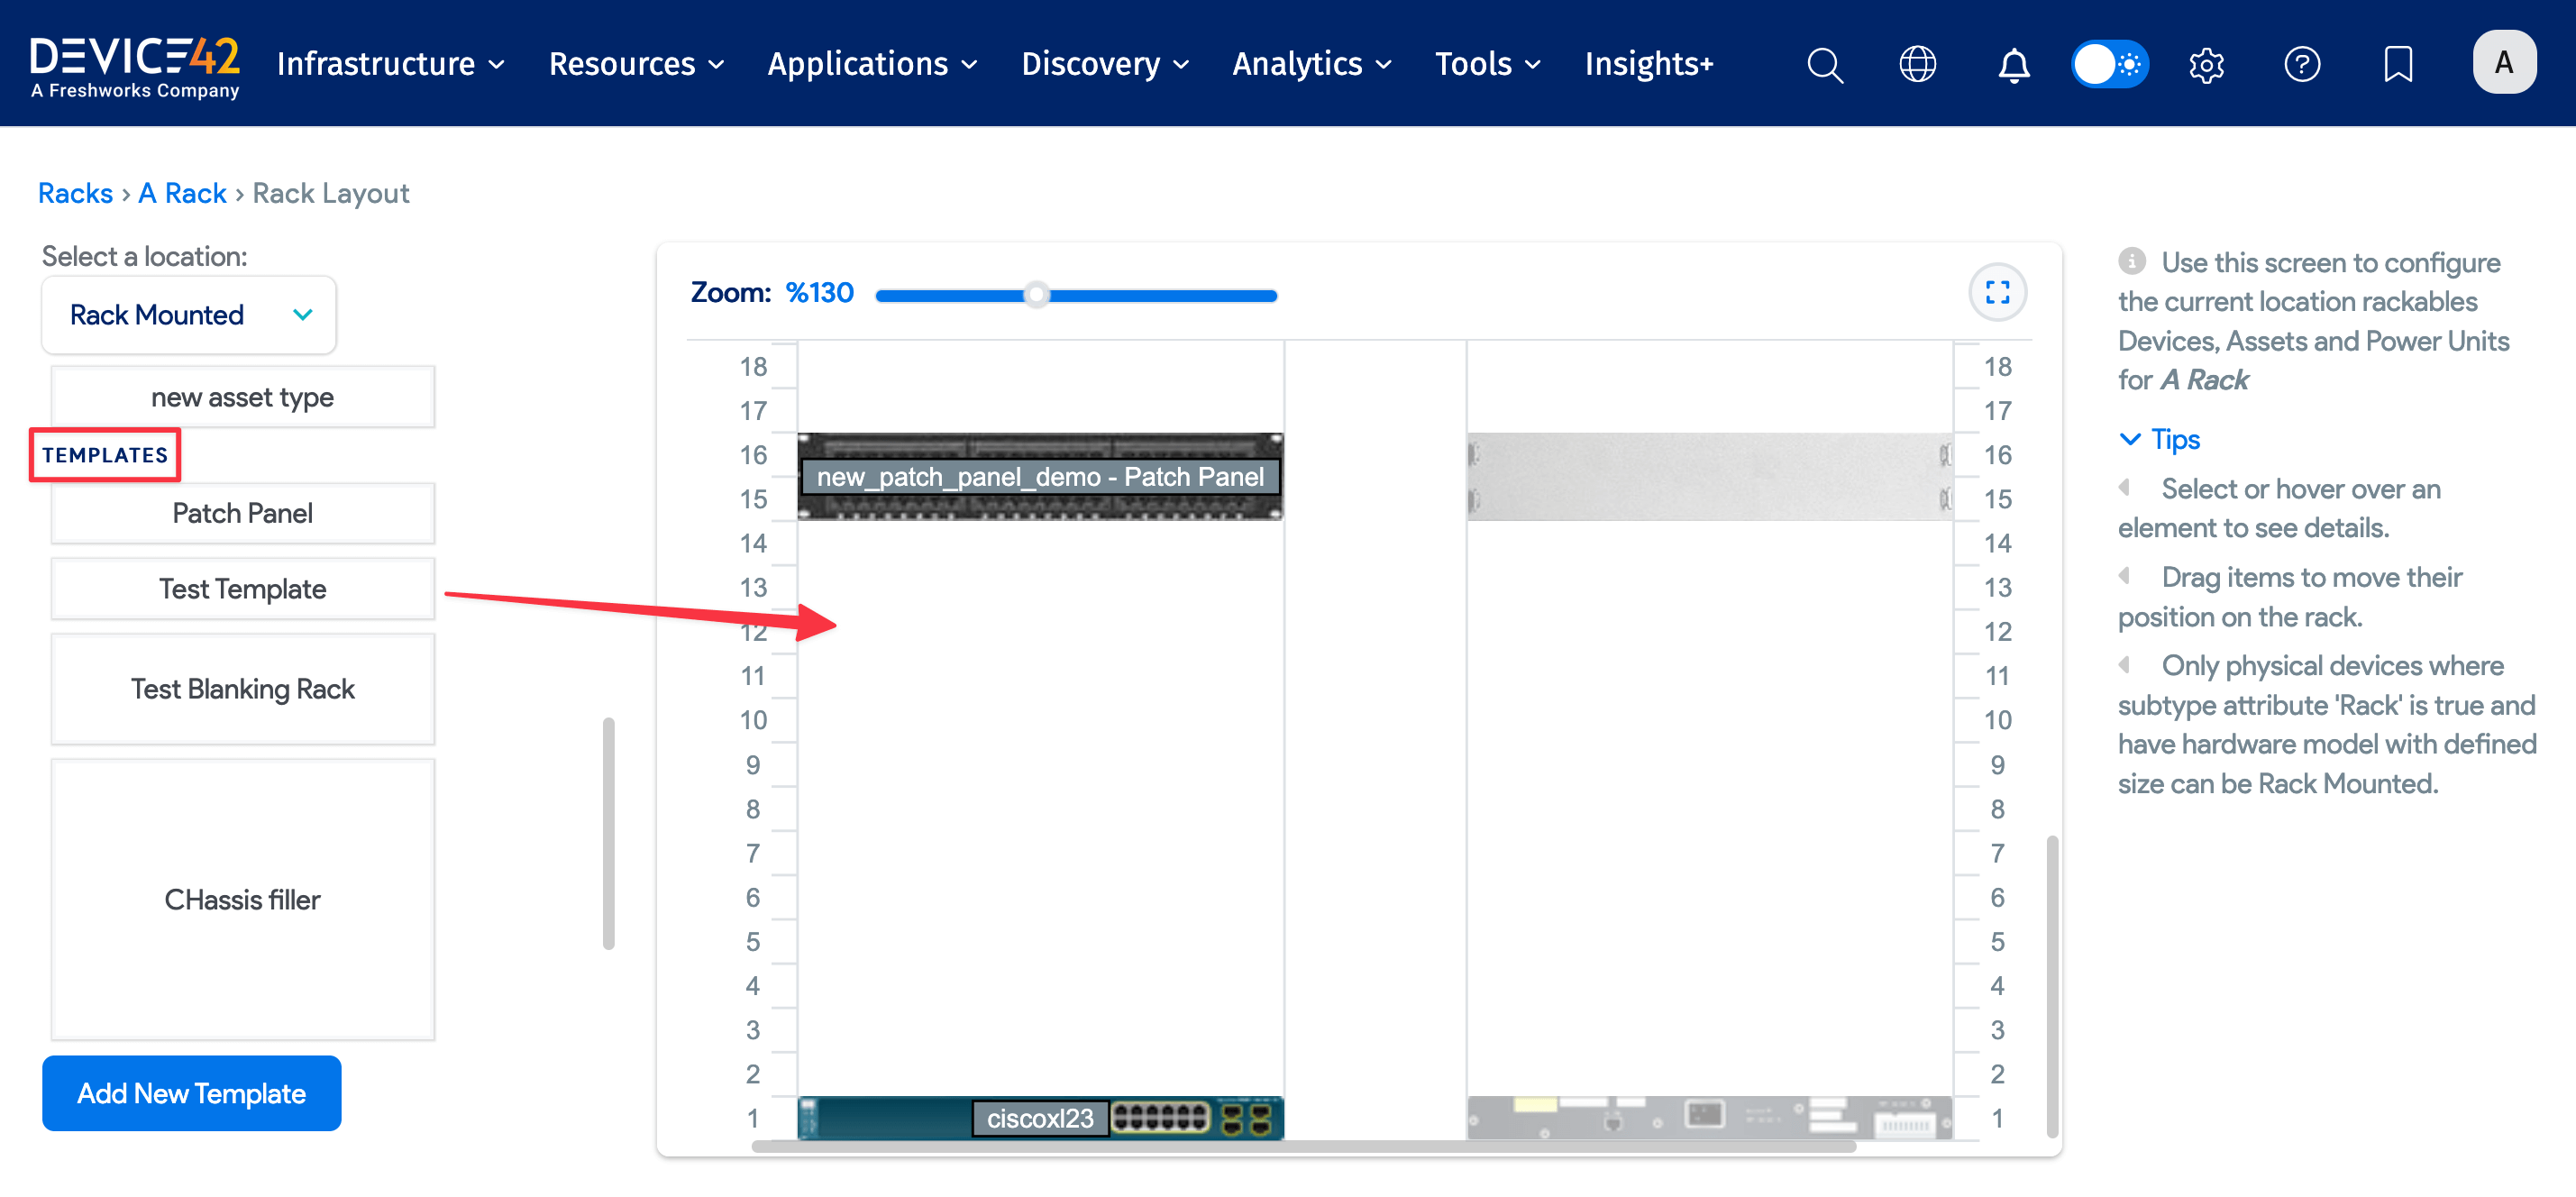
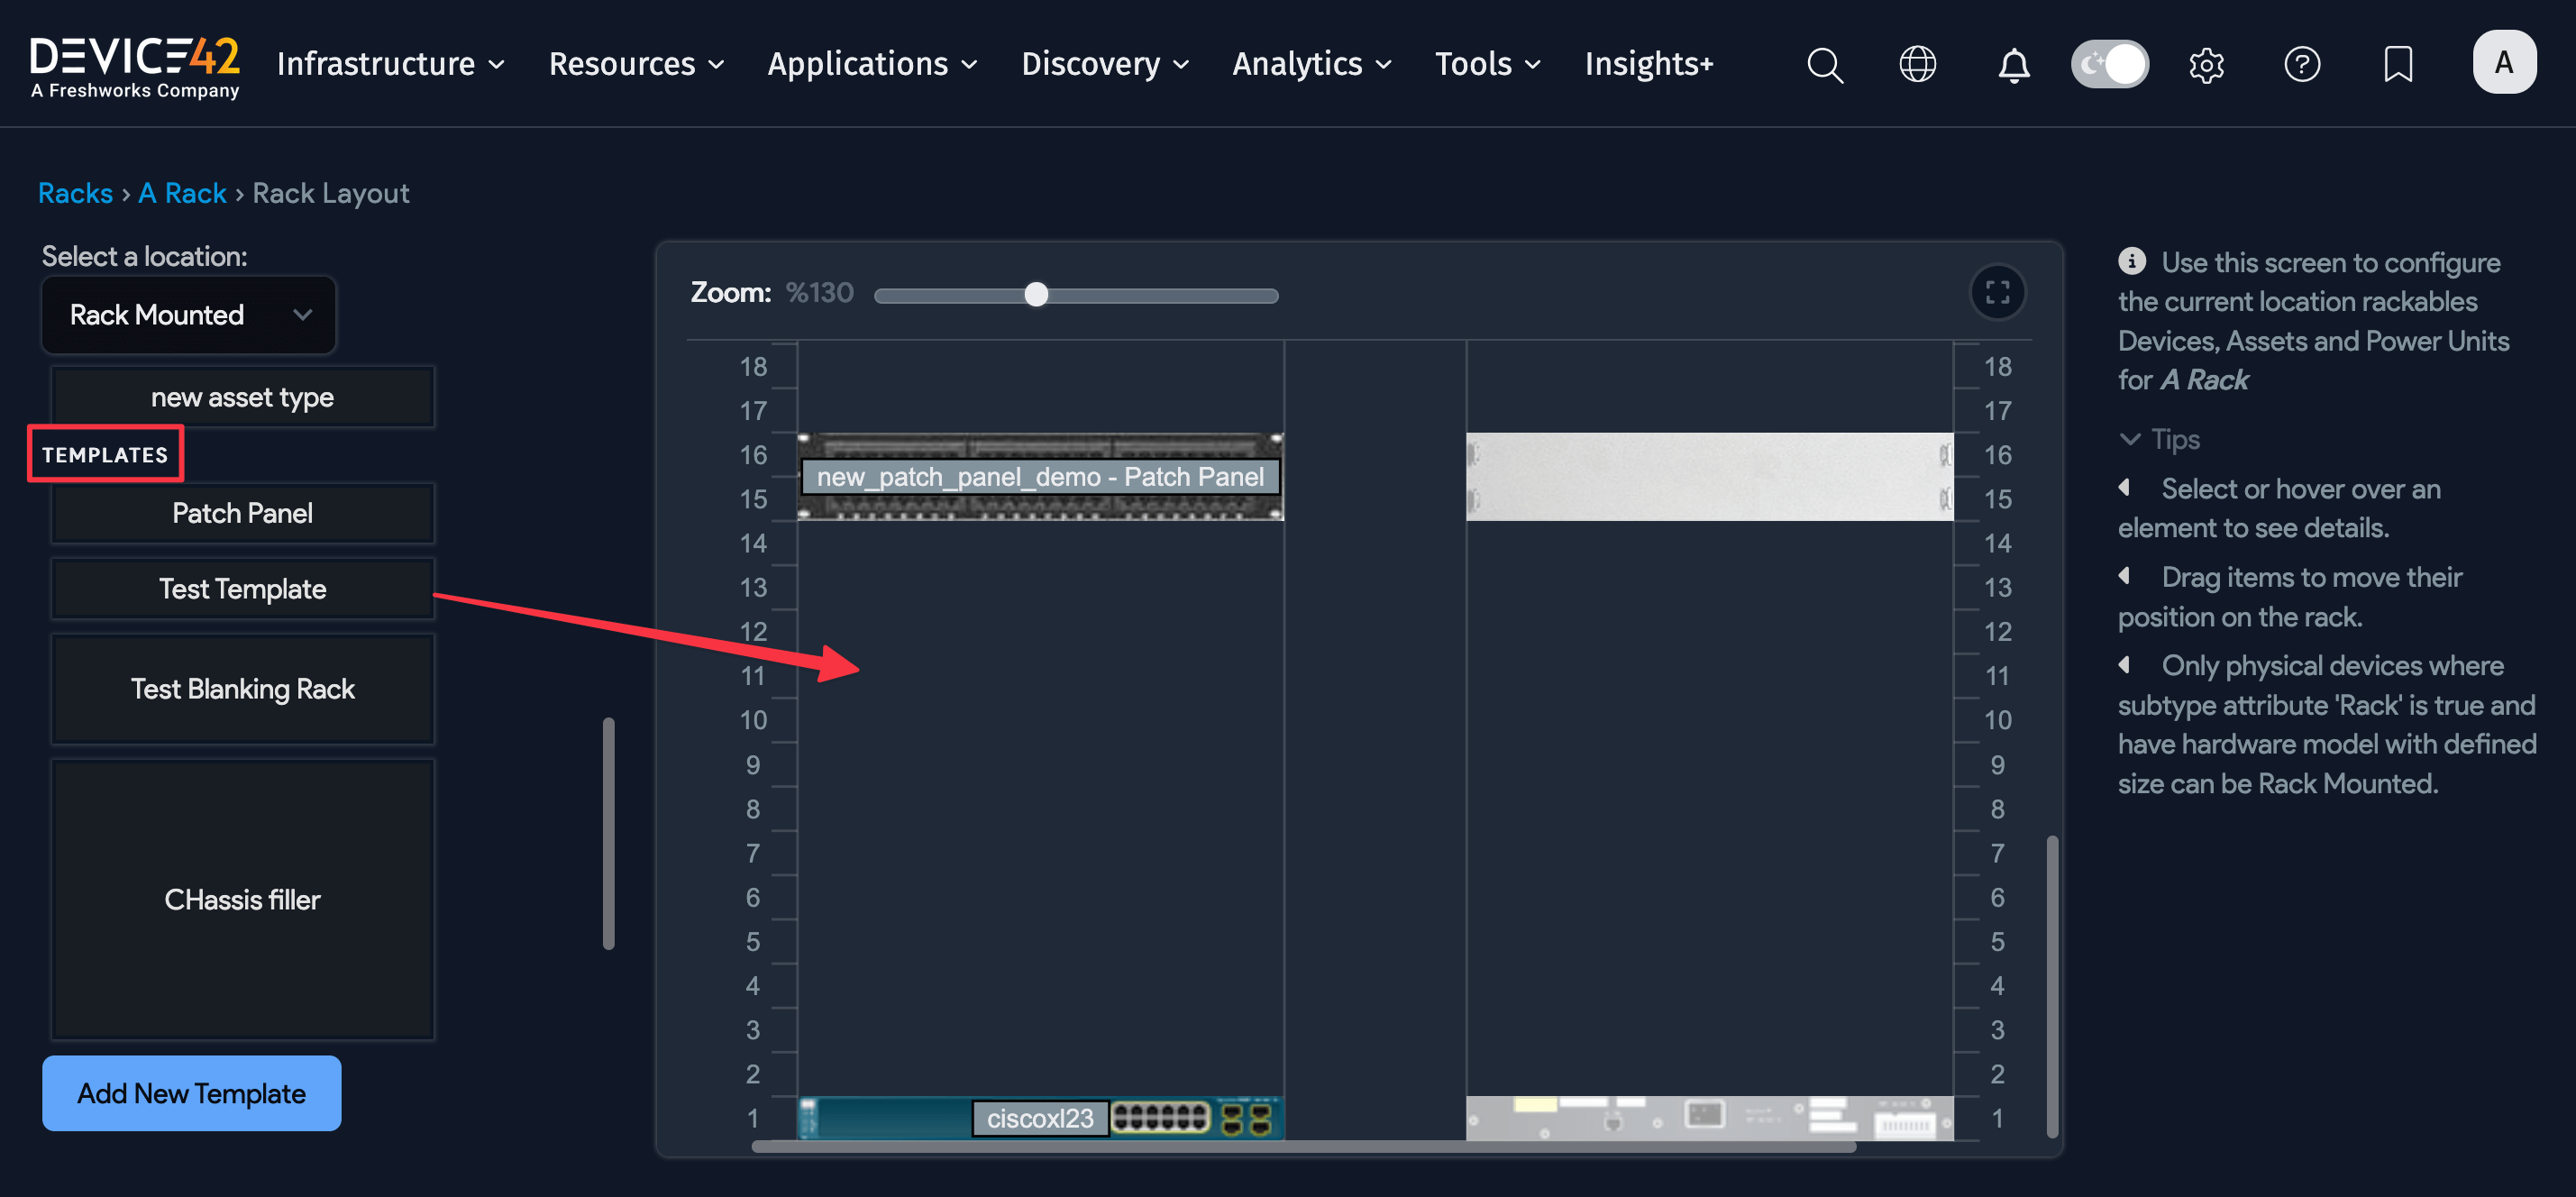
Add a New Asset Template
Click Rack Layout from the view screen of the rack and turn on edit mode in the left sidebar. Drag and drop the predefined asset template blocks from the sidebar (under Templates) to the rack layout screen.
Click the Add New Asset Template button or navigate to Resources > Racked Asset Templates to create a new template.
Rack Elevations: Physical Connections With Drag-and-Drop

From the Rack Layout page, you can go to Physical Connections and visualize power and network connectivity from this page. You can optionally turn off either of the connections to see only the power cables or only the network cables. In edit mode, drag-and-drop is also available for PDU ports and network ports (between patch panel ports or switch ports).

When you view the physical connections, you will see outlets that resemble the outlet receptacle type. Examples of the receptacle types are shown below:

Highlighted Paths and Port Label Display

In the physical connection layout, you can select a port for a device, and the display will highlight the path.
Add PDUs to the Rack
You can add PDUs in and around the rack. The steps for adding and displaying PDUs are discussed in detail on the PDU Rack Display page.
Rack Actions
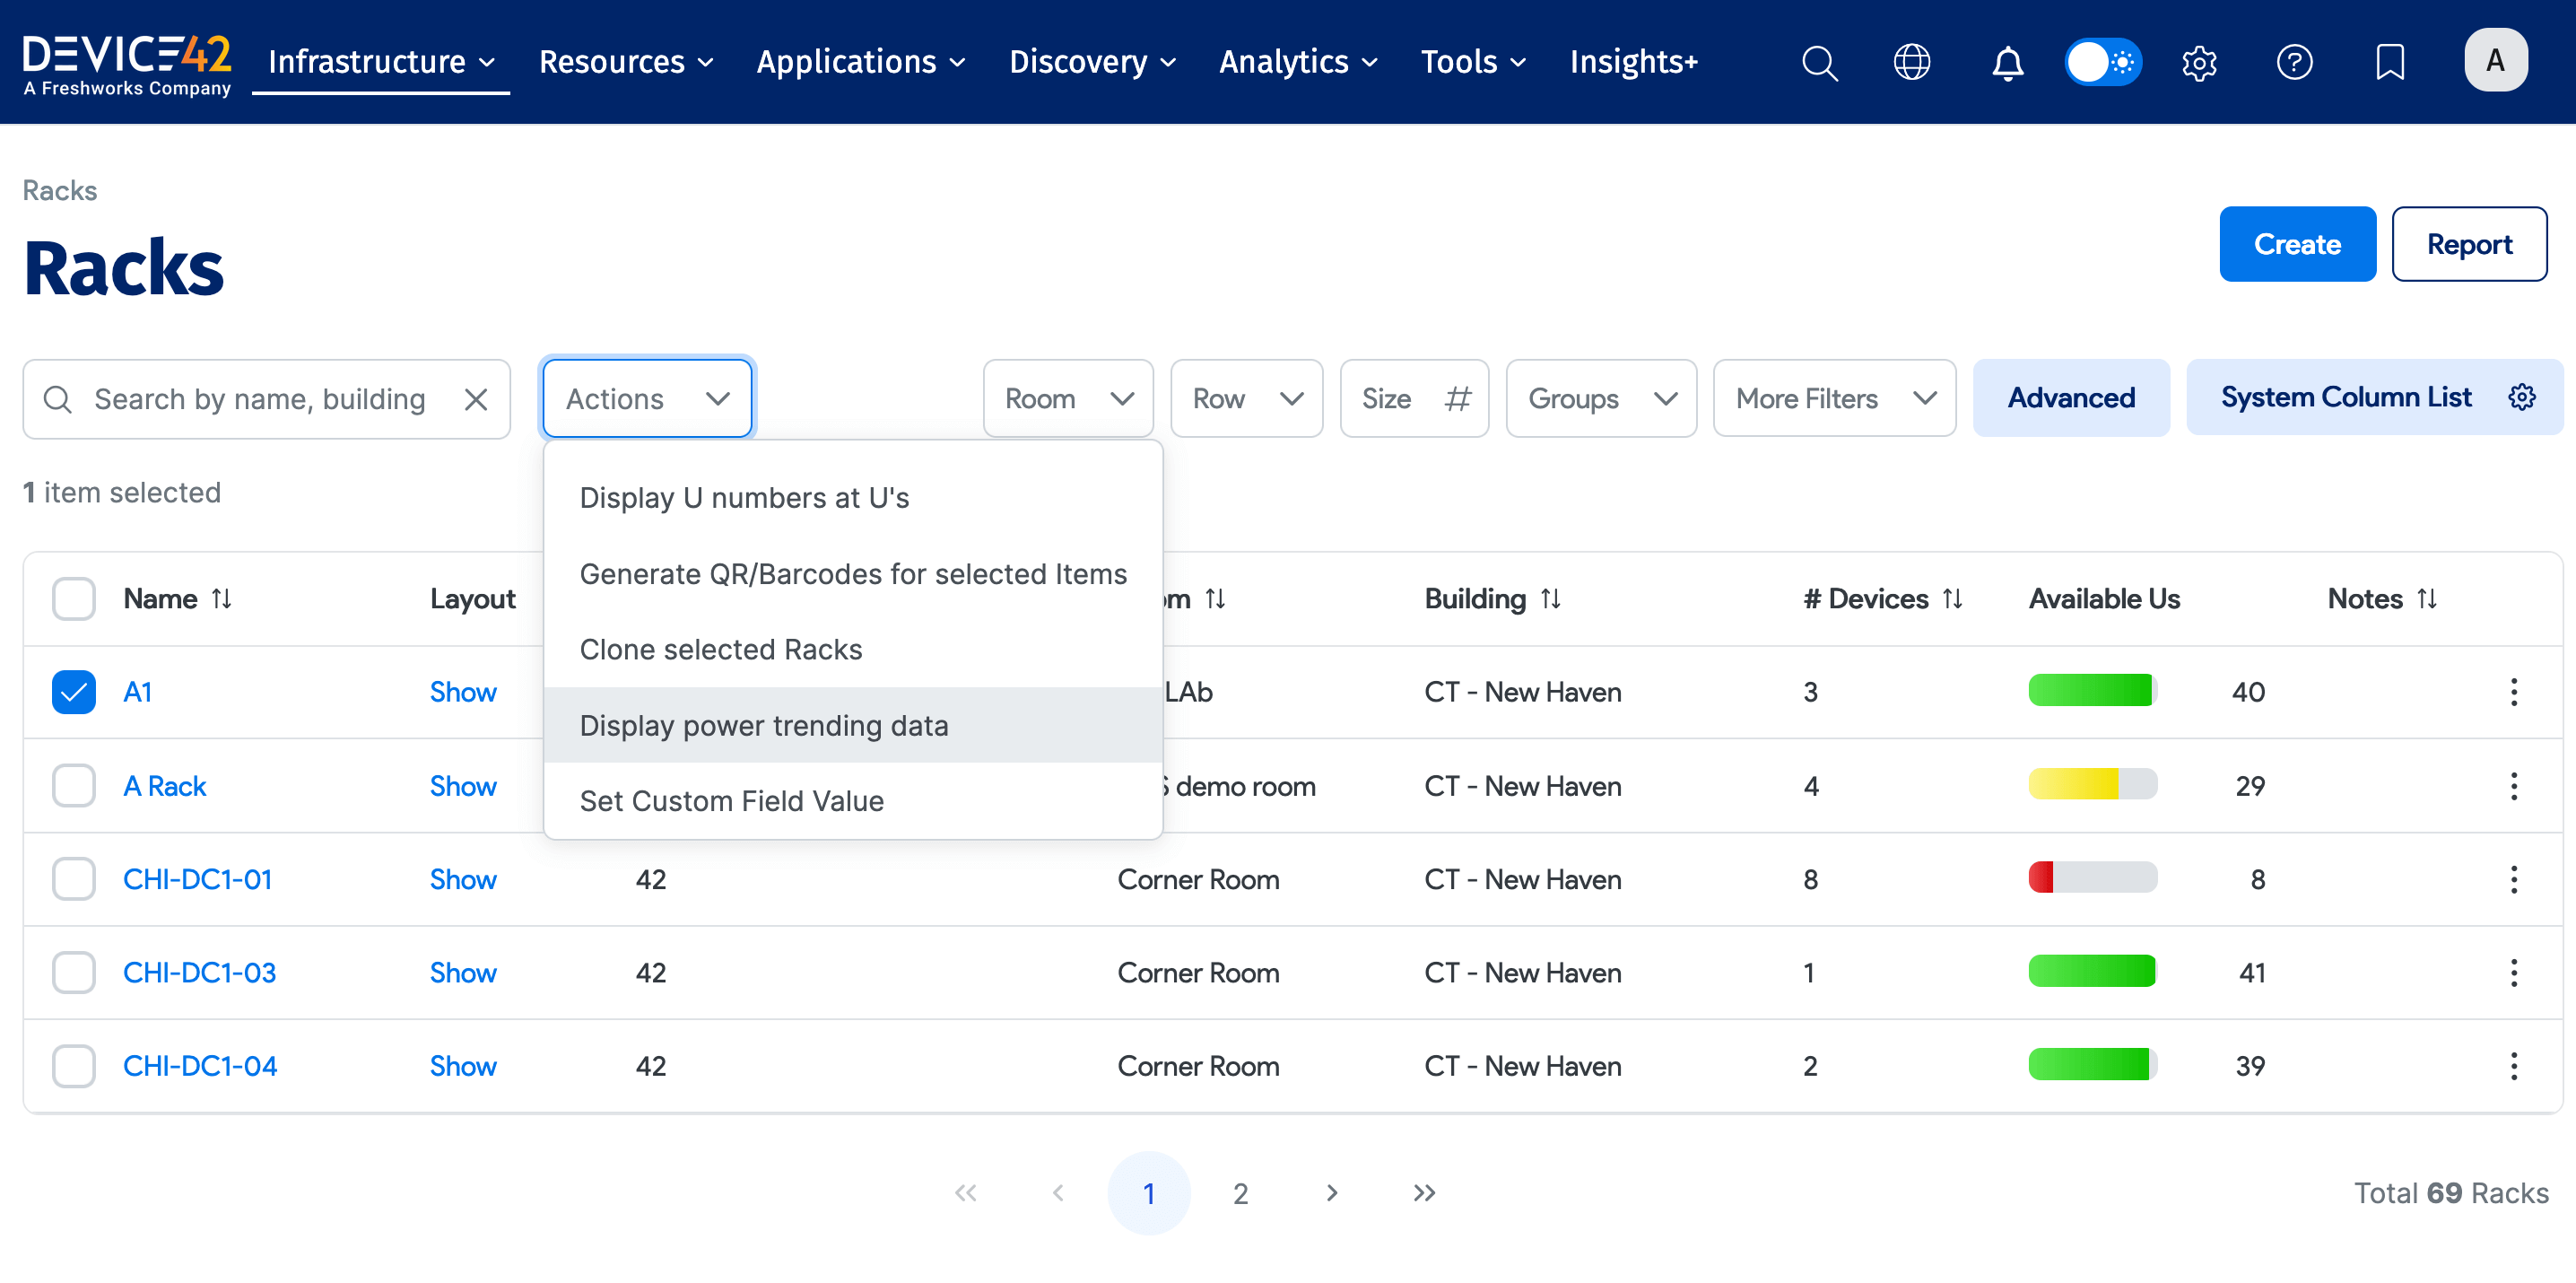
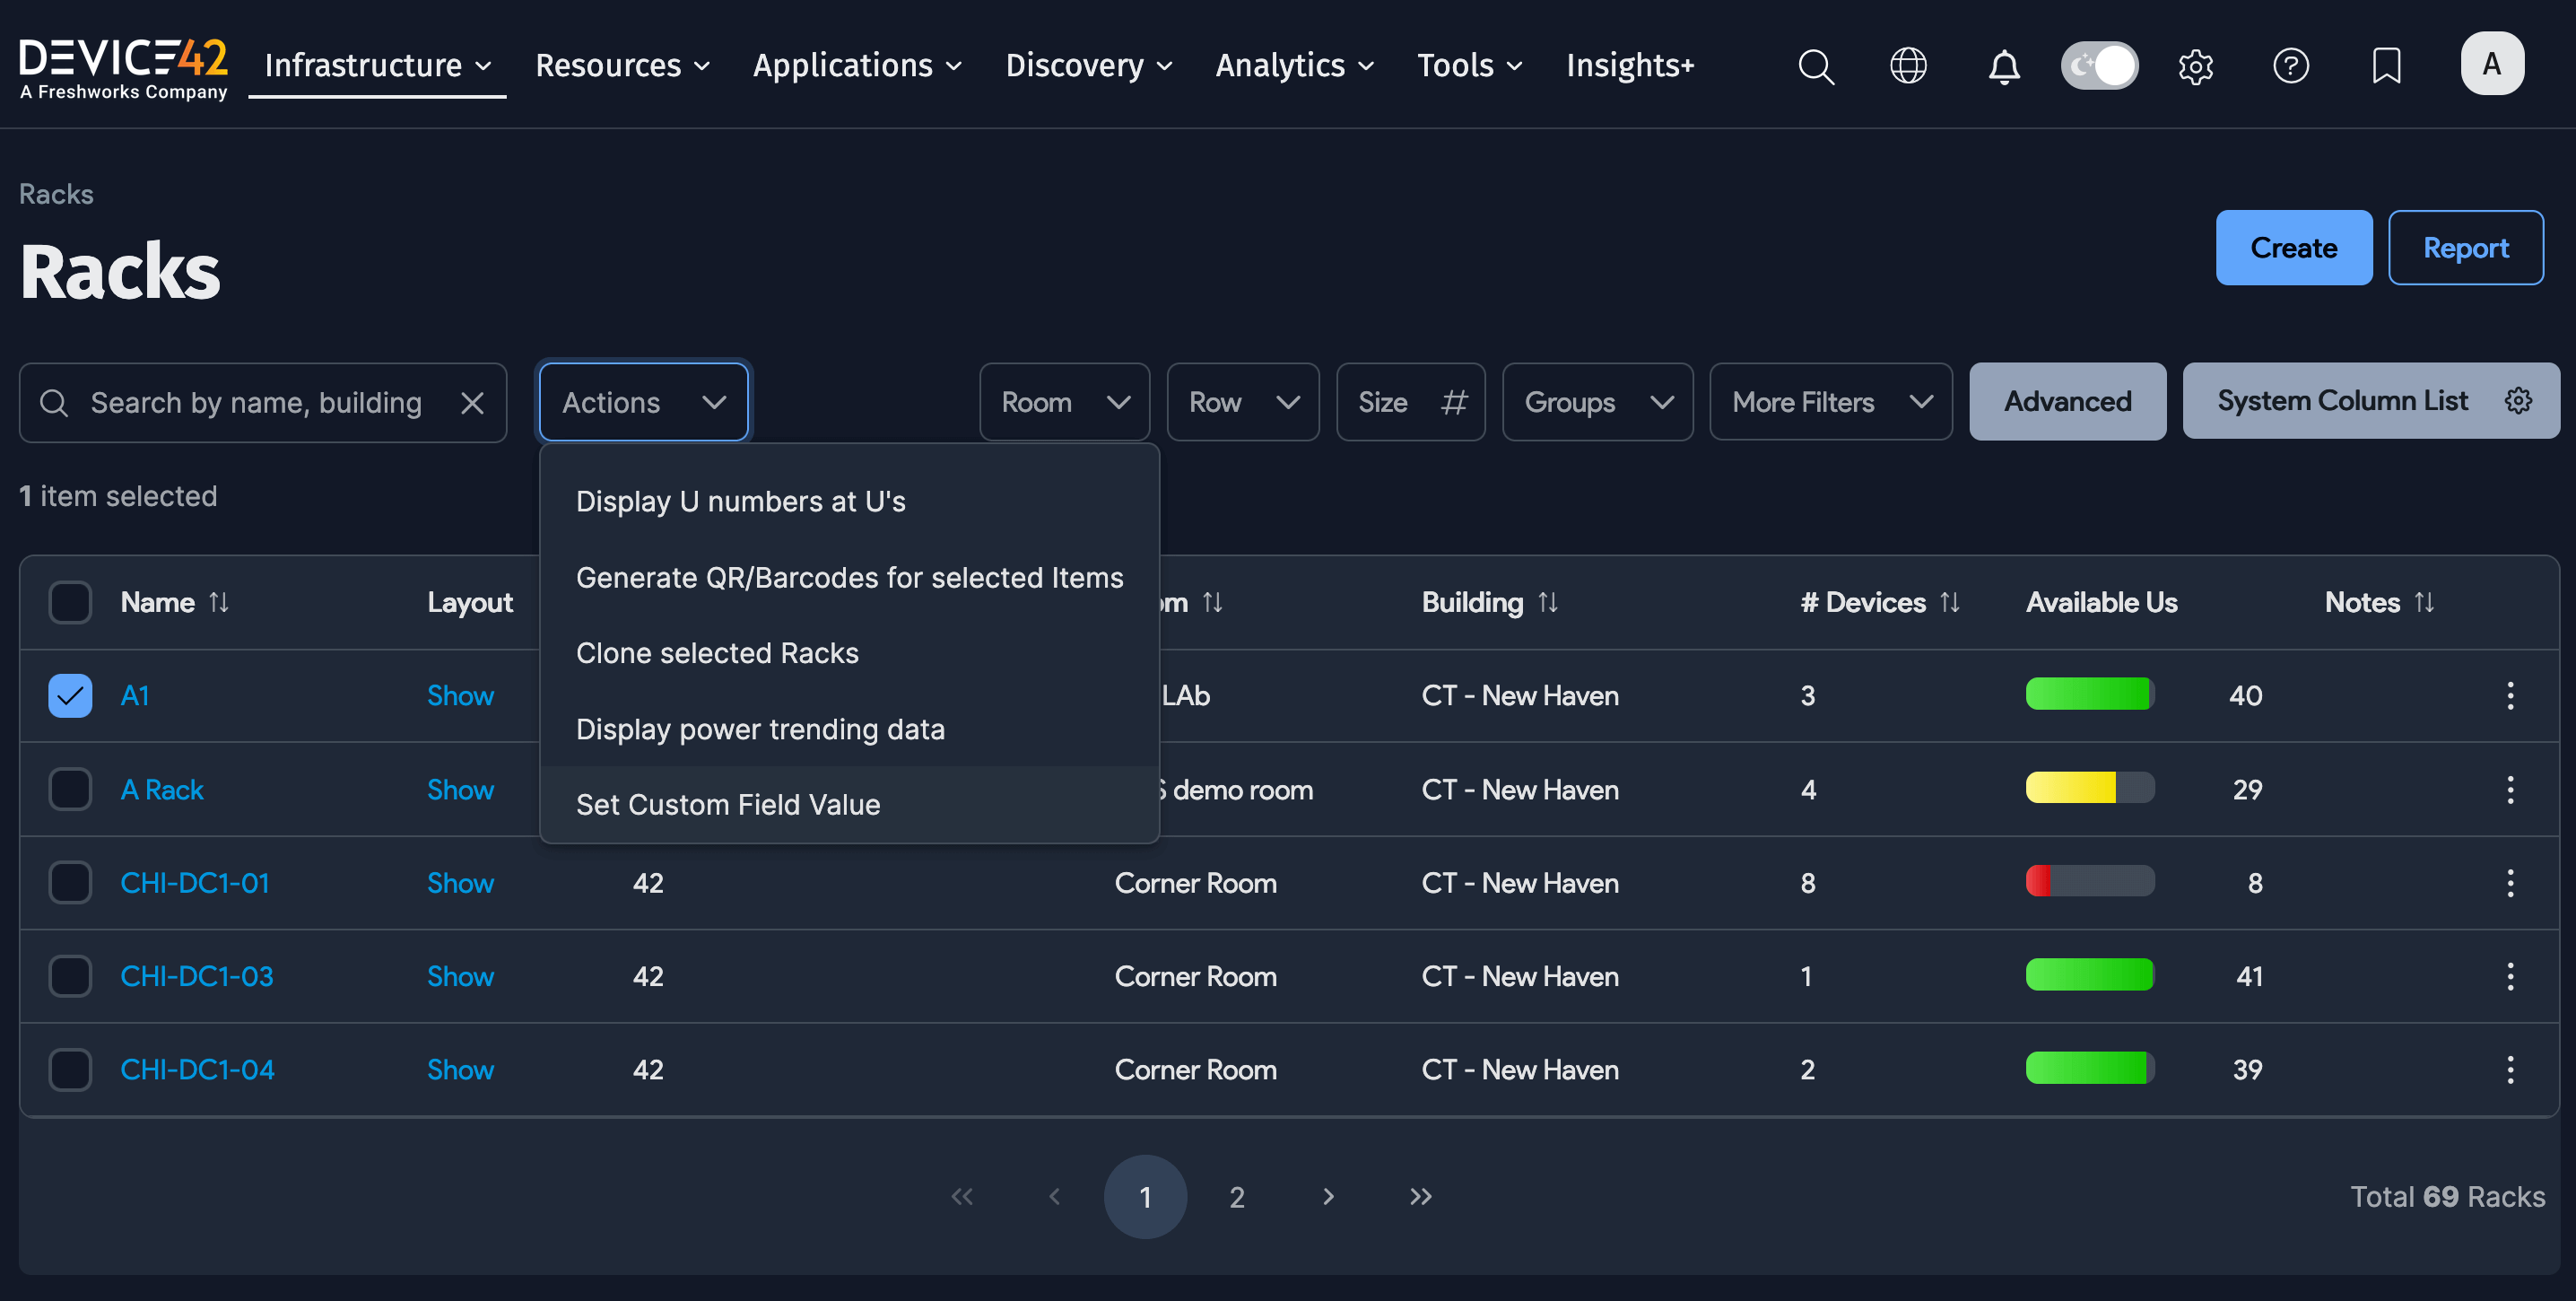
From the Racks list page, you can select one, several, or all racks and apply a number of operations from the Actions dropdown menu. The same options are available from the ellipsis menu located at the end of each rack row.
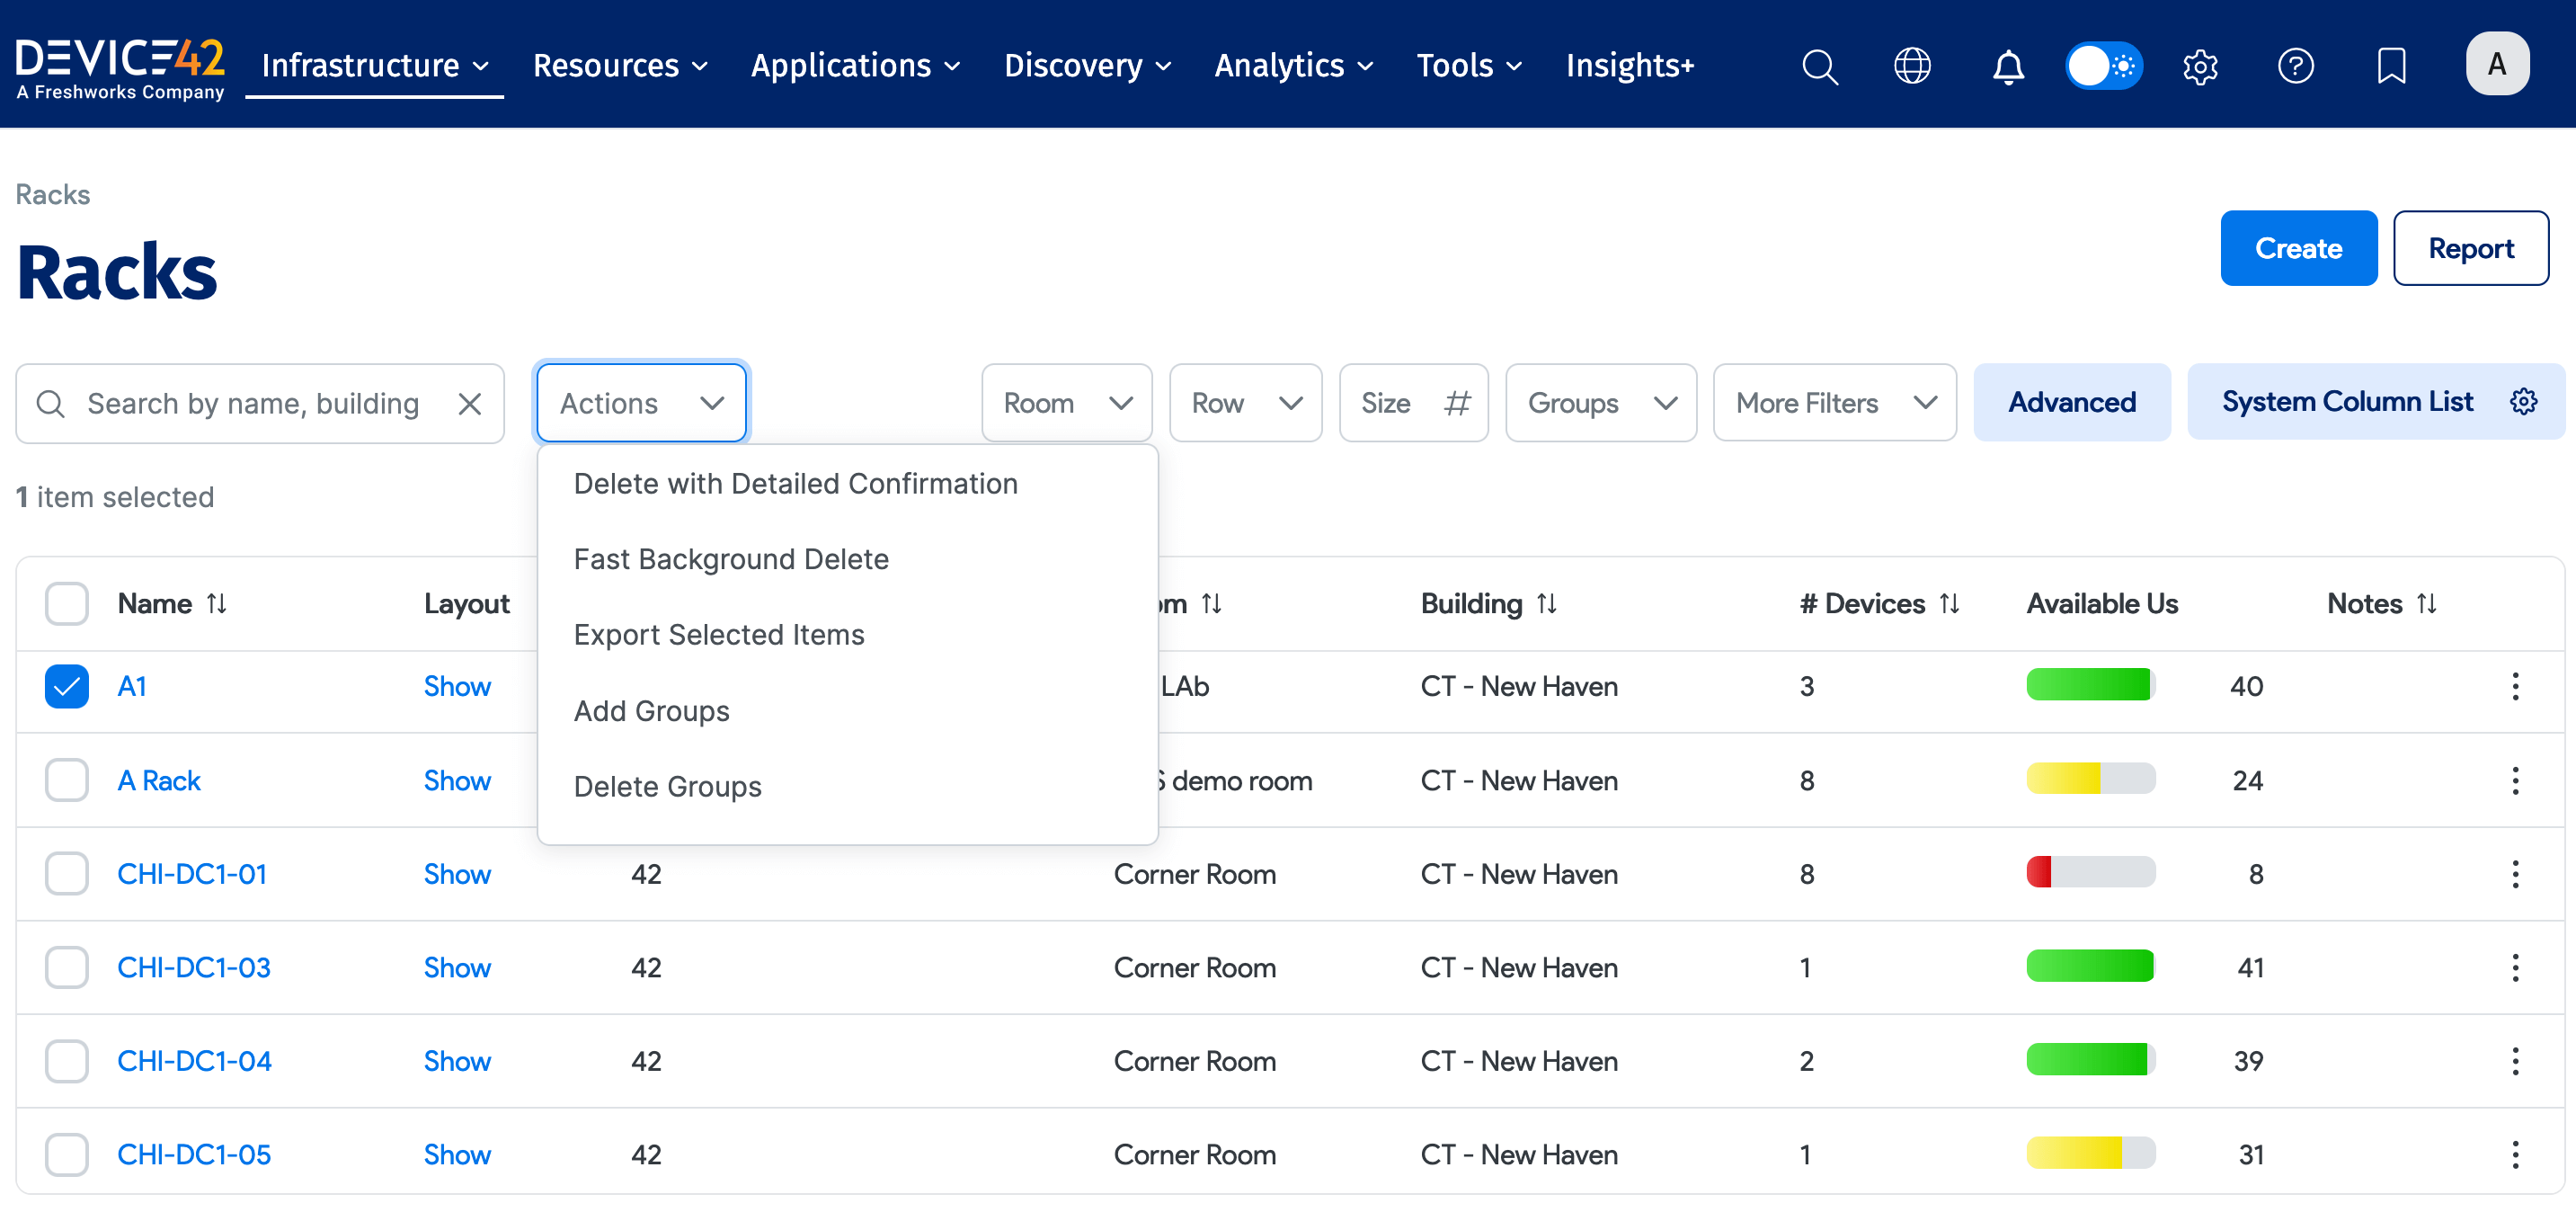
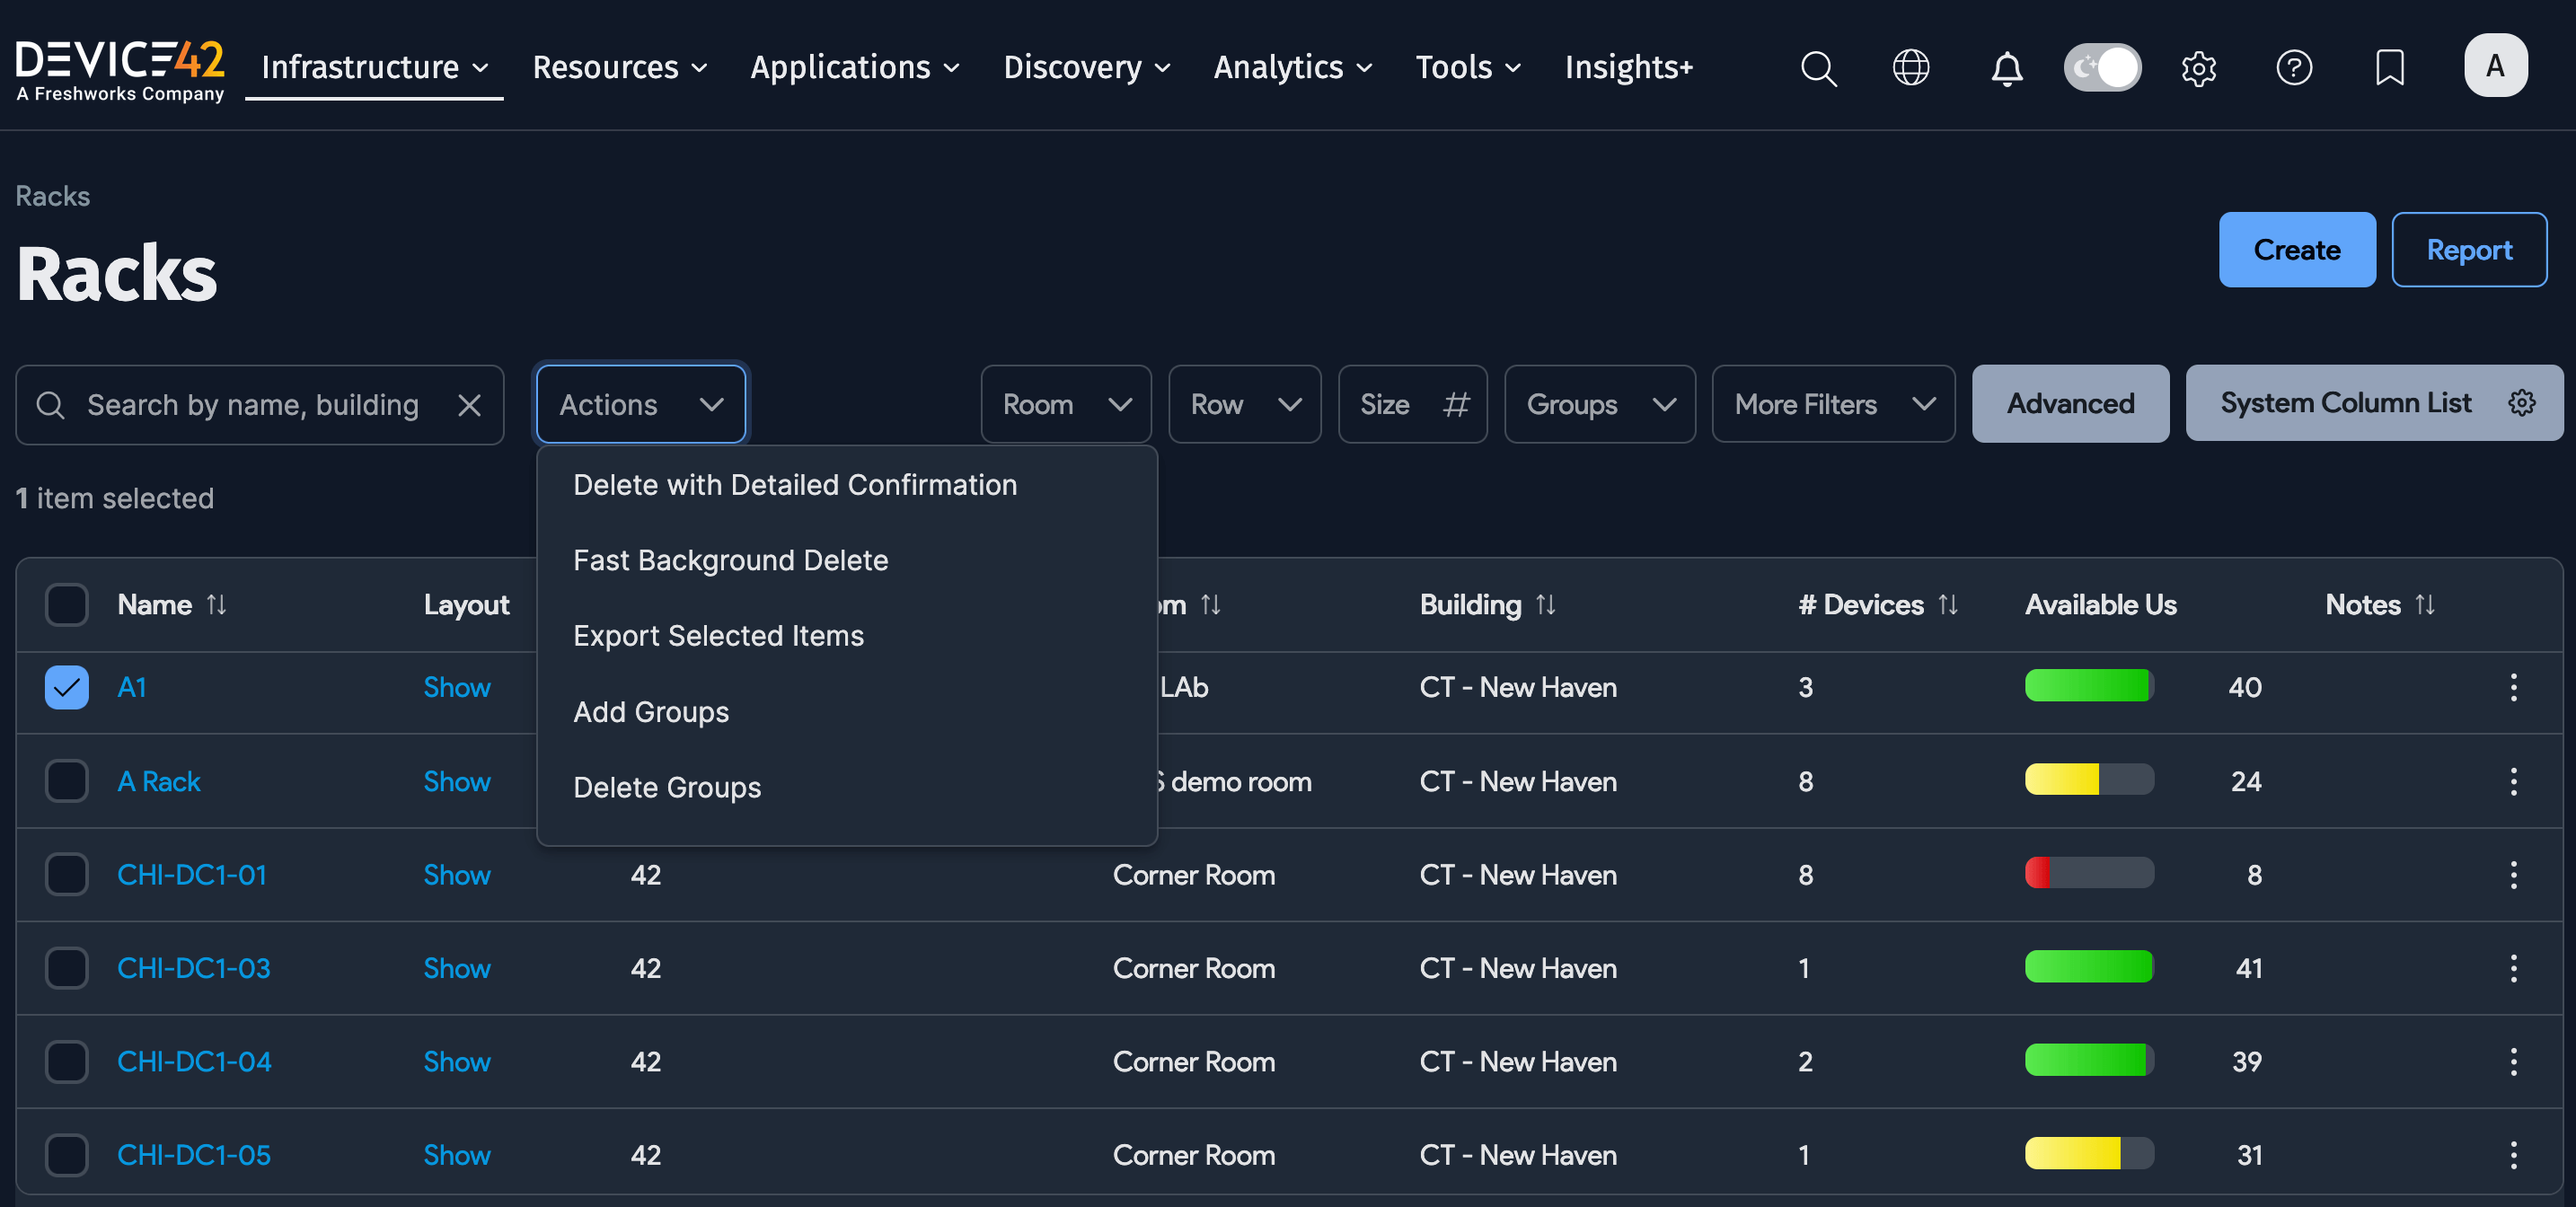
The following Actions are available:
- Delete with Detailed Confirmation: View all items related to the rack before determining whether you want to delete the rack.
- Fast Background Delete: Quickly delete the selected racks without viewing the detailed breakdown first.
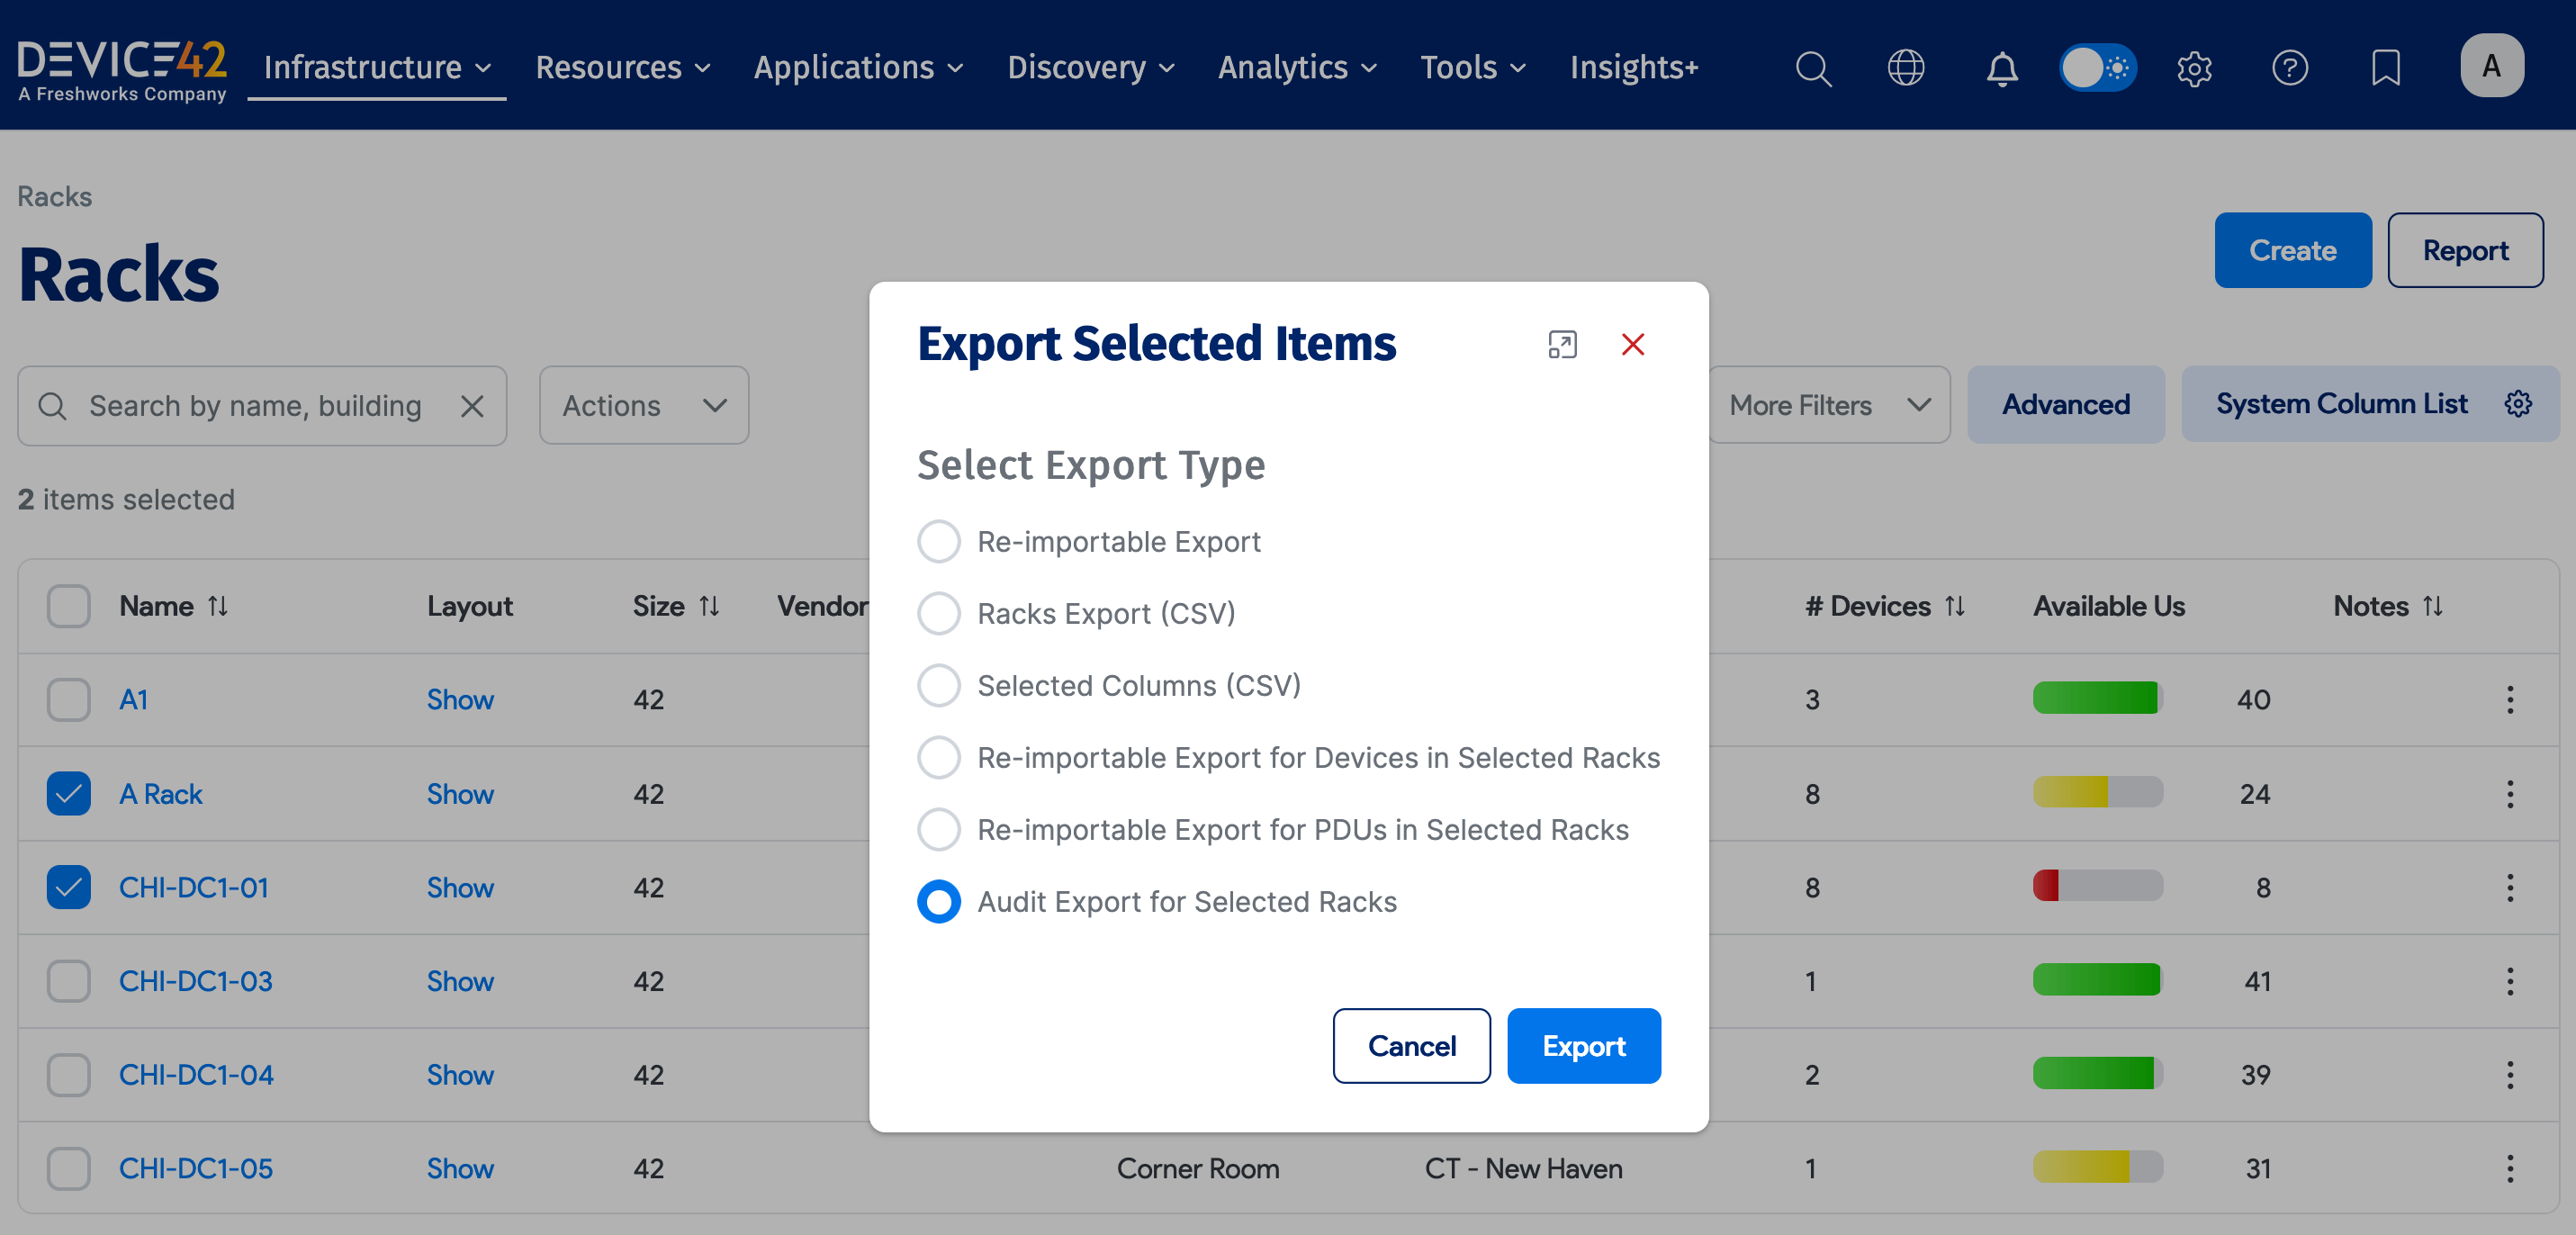
- Export Selected Items: Export the selected racks as a re-importable export, as a racks export, as a selected columns export, as a re-importable export of the devices or PDUs in the selected racks, or as export audit data.
- Show Front Layout of selected racks: Show the visual layout (front view) of all the selected racks on one screen.
- Show Back Layout of selected racks: Show the visual layout (back view) of all the selected racks on one screen.
- Multiple rack connections: Show the layout of the multiple connections in the selected racks.
- Change orientation to left: Change the orientation of the selected racks so that they are left-pointing in the visual layout.
- Change orientation to right: Change the orientation of the selected racks so that they are right-pointing in the visual layout.
- Display U numbers between U's: Place the U numbers between the Us in the visual layout of the selected racks.
- Display U numbers at U's: In the visual layout of the selected racks, place the U numbers at the Us.
- Generate QR/Barcodes for selected Items
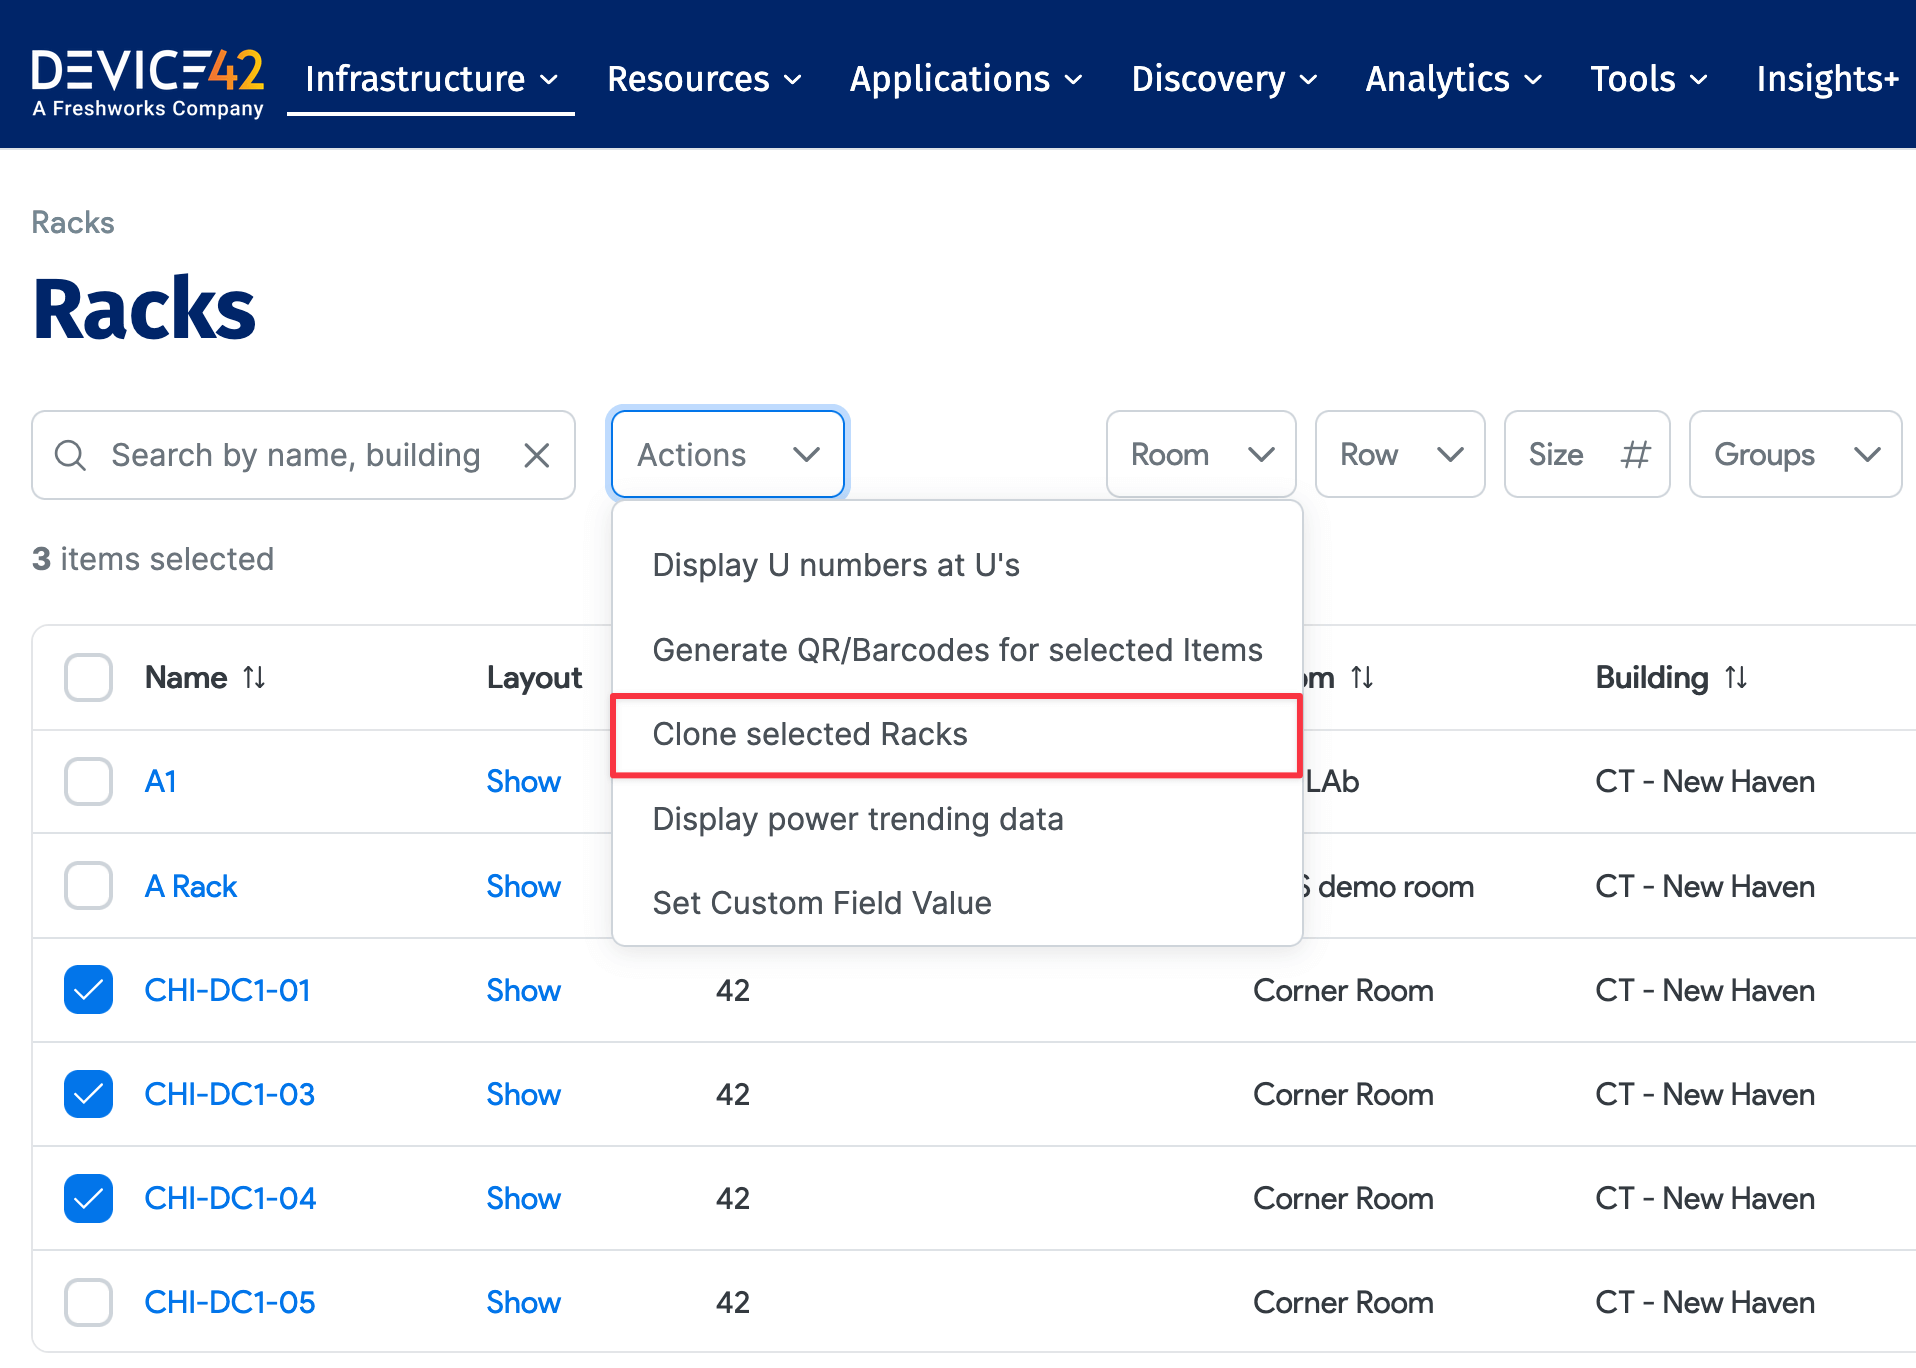
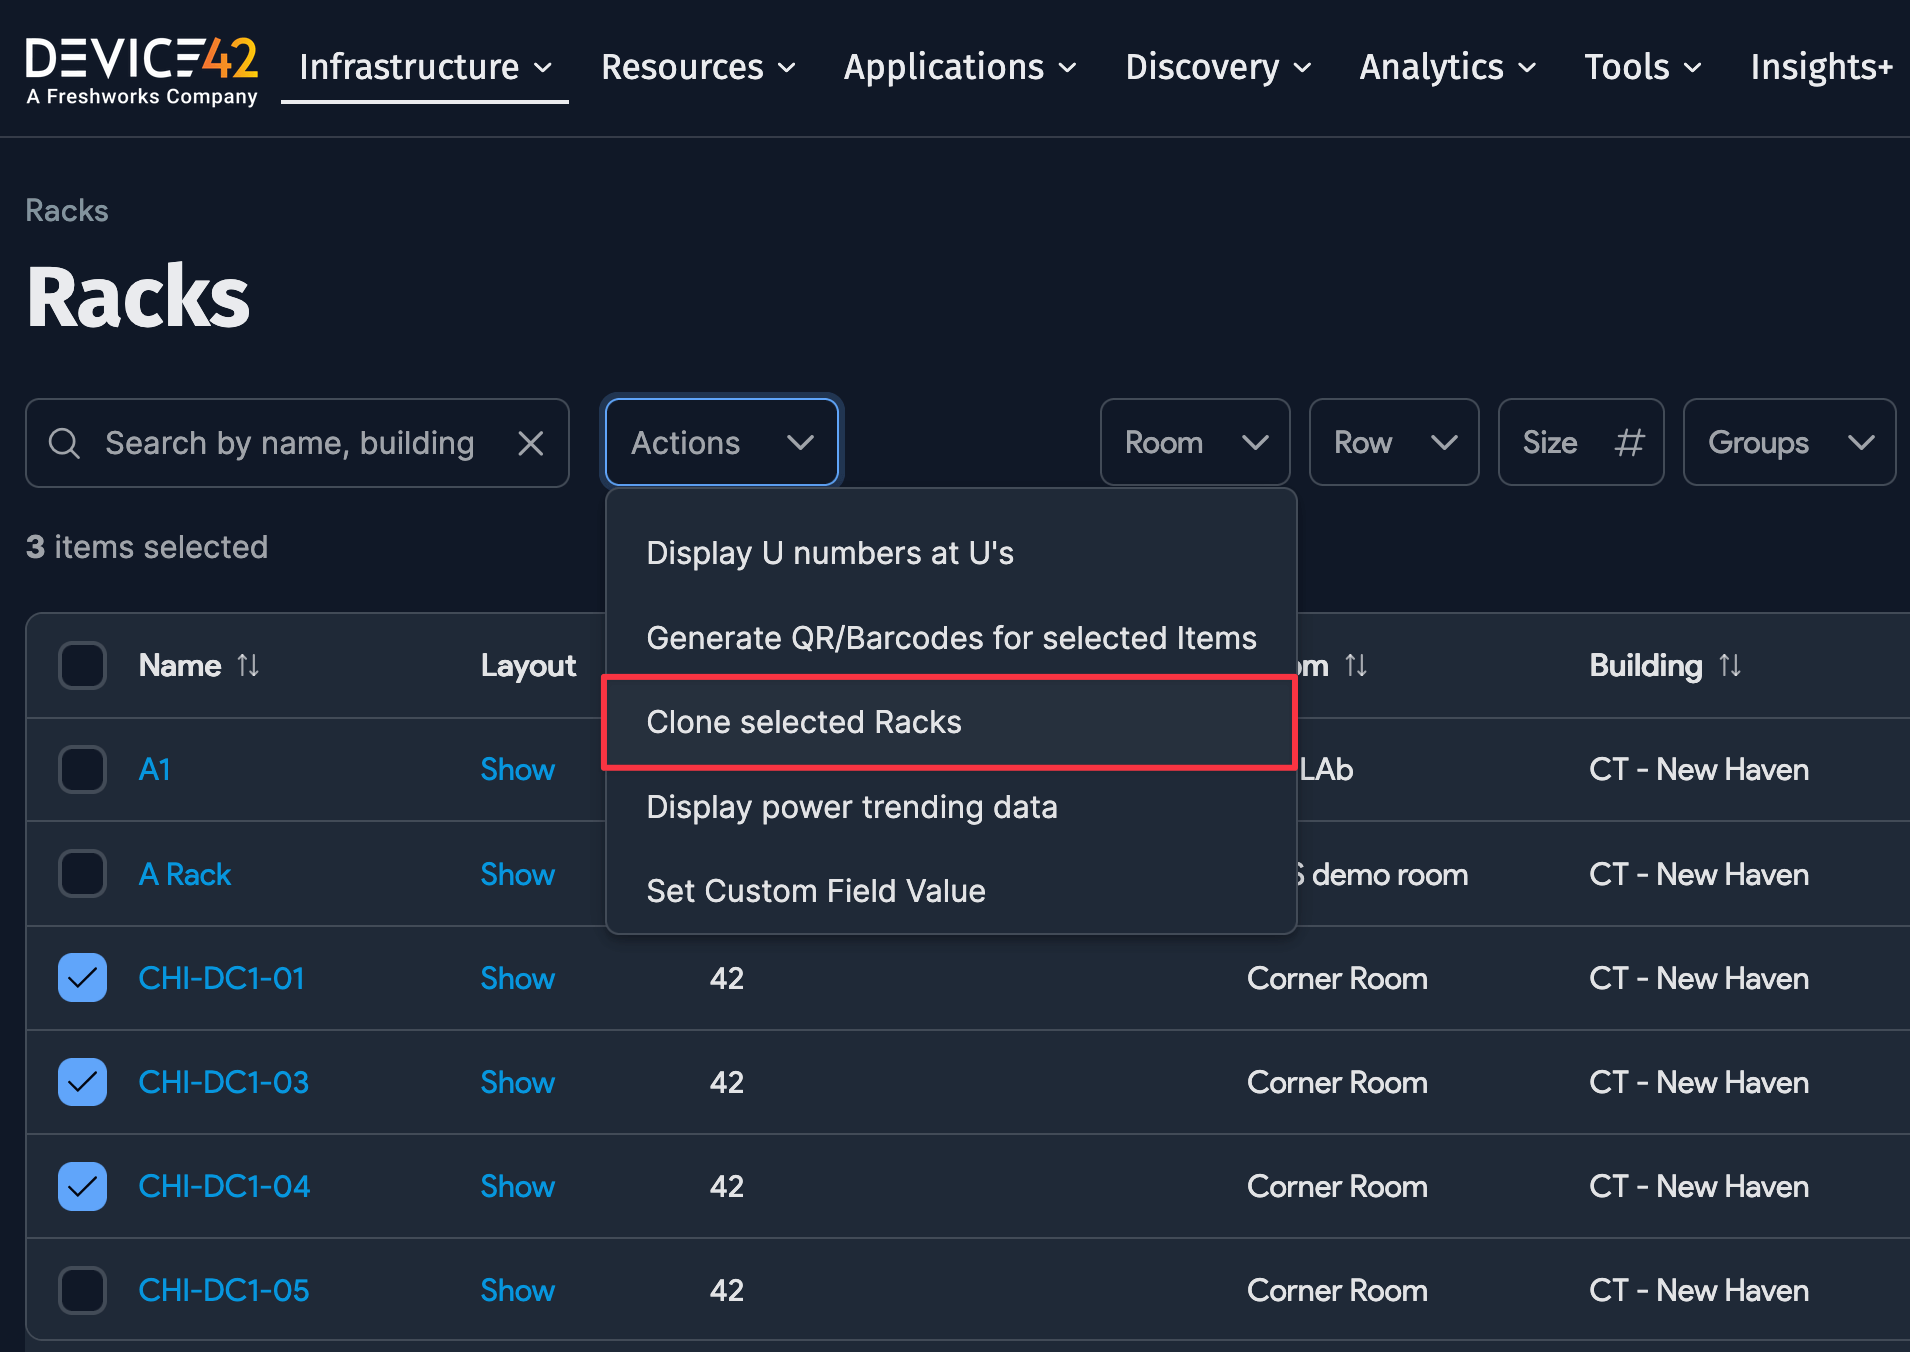
- Clone selected Racks: Clone the selected racks and all their devices, PDUs, and connections. This is a useful feature for quickly creating multiple racks with largely the same configuration.
- Display power trending data: View the power data for the selected racks over time.
- Set Custom Field Value: Add a specific value from a user-defined field to the selected racks.
Visualize Multiple Racks Together
To see multiple racks in the same view, select the relevant racks from the Racks list page and choose Show Front Layout of selected racks or Show Back Layout of selected racks from the Actions dropdown.
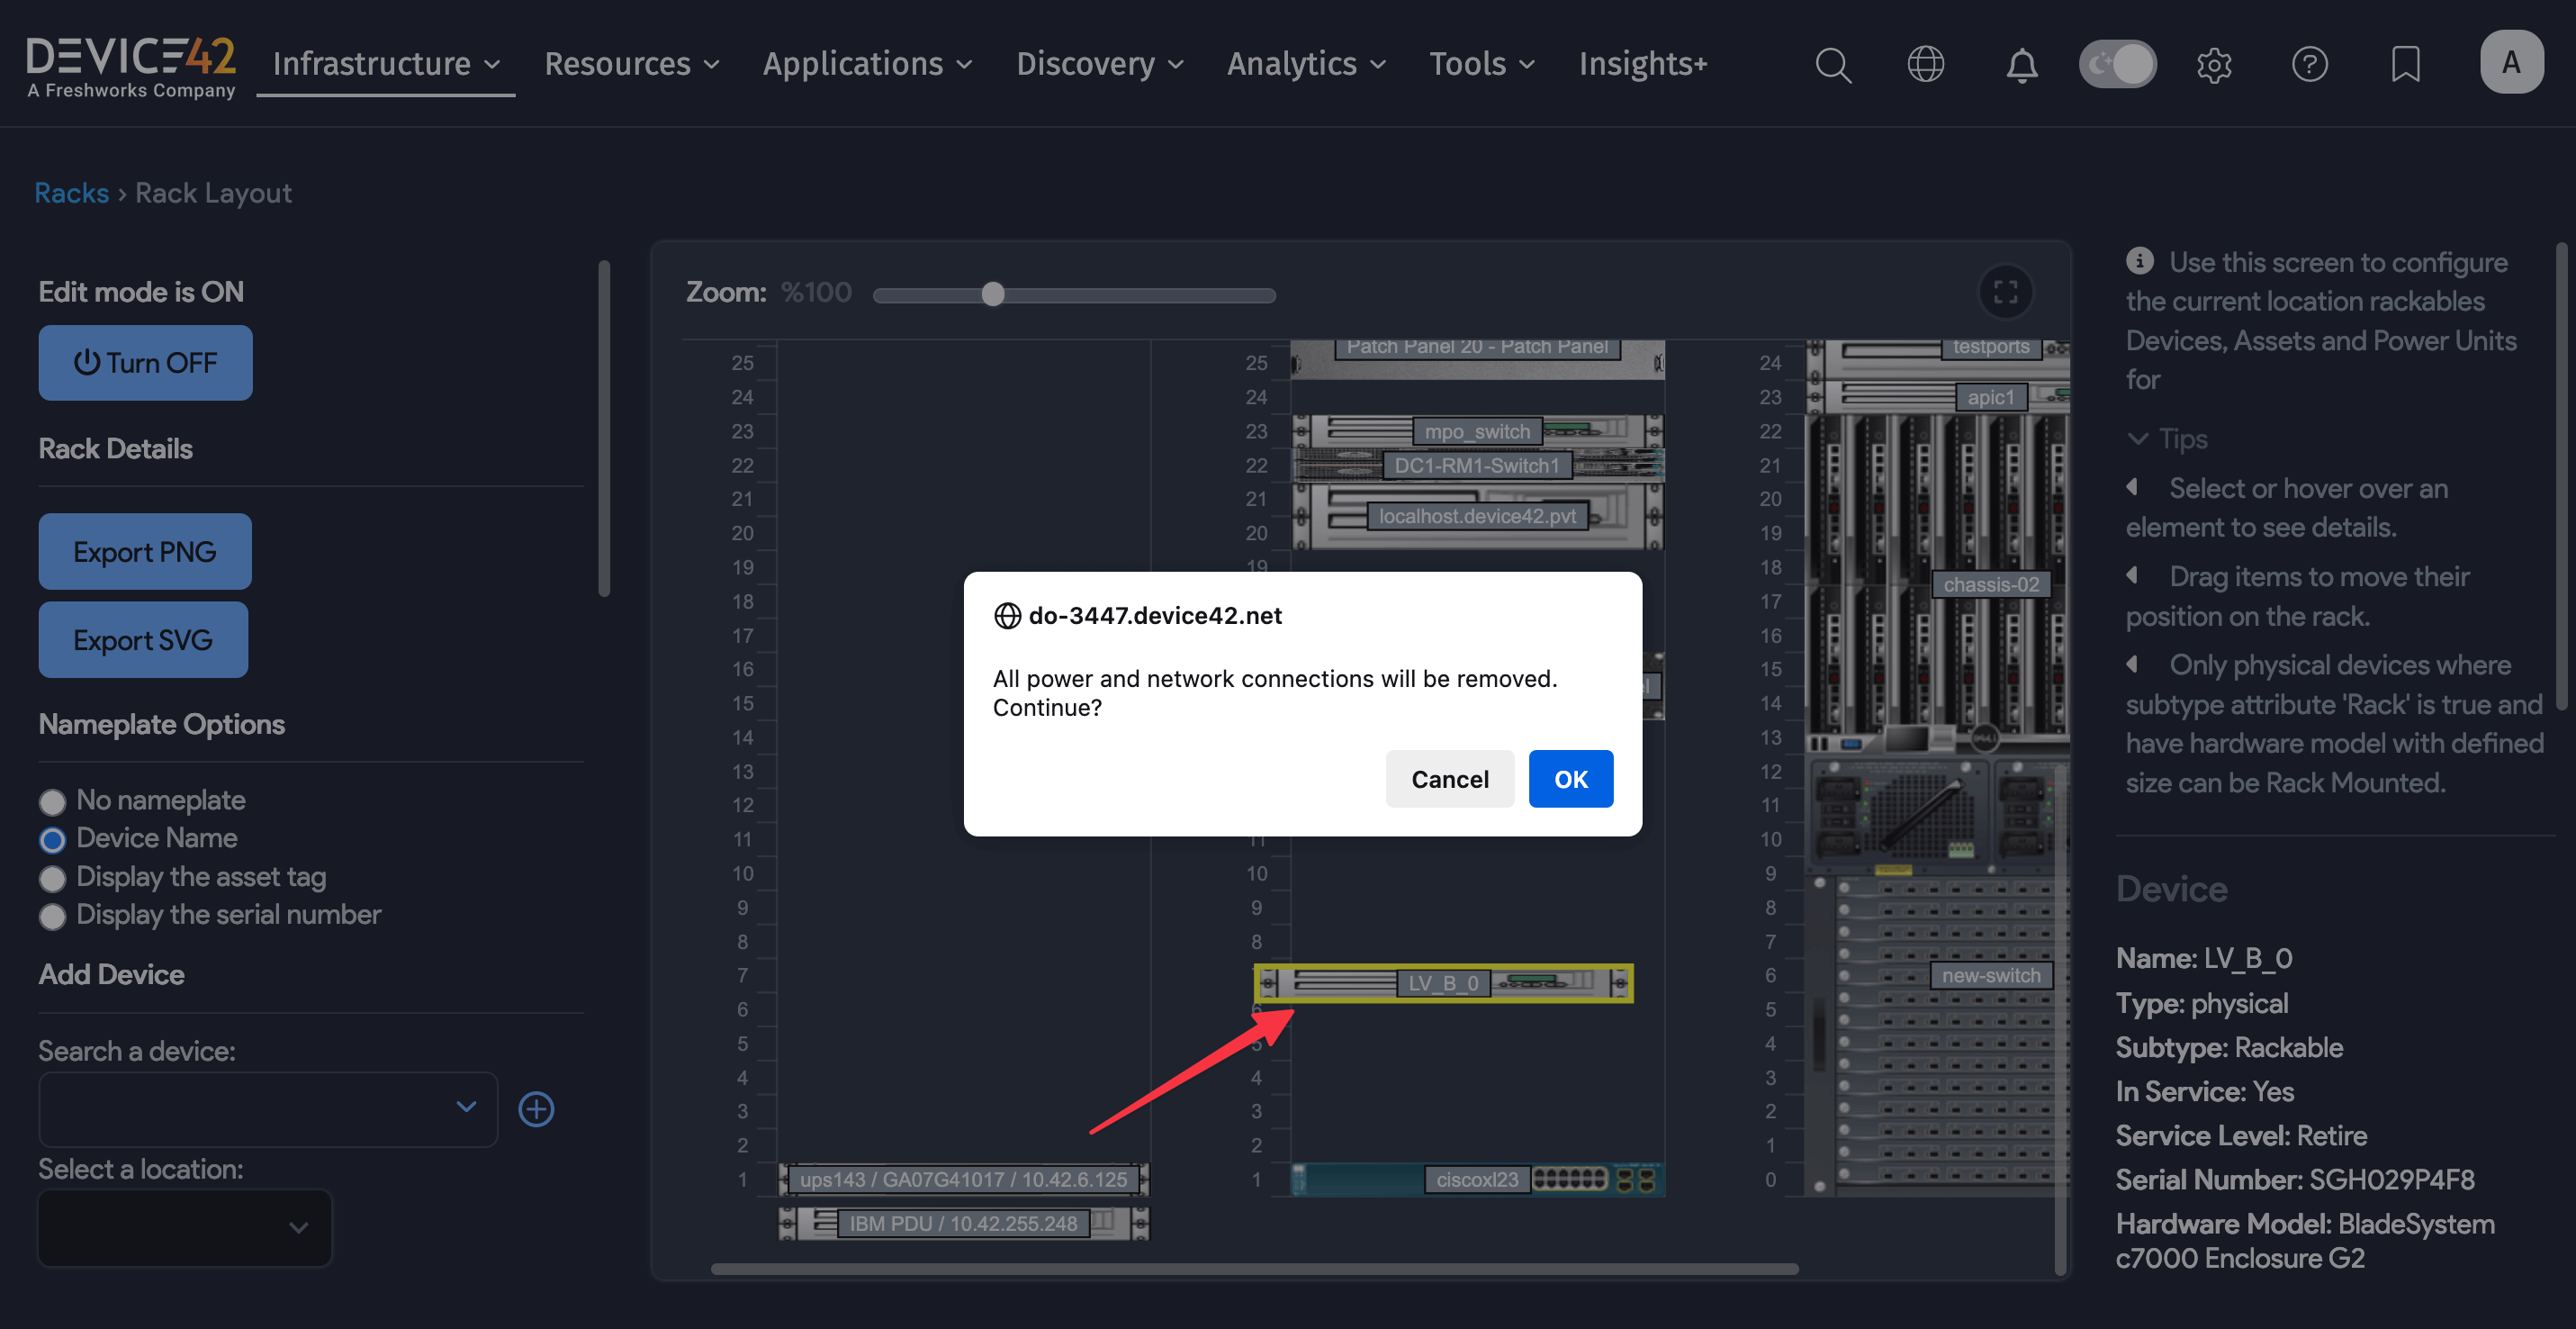
Visually Move Devices Between Racks
From the multi-rack layout view described above, you can drag and drop devices between racks. On a tablet, you can do this with a swipe of your finger.
When you drag a device from one rack to another, the power and network connections to the device are removed.

Clone Selected Racks
Choose the Clone selected Racks action to clone the selected racks as well as the PDUs and devices in those racks and the device-to-PDU outlet connections.
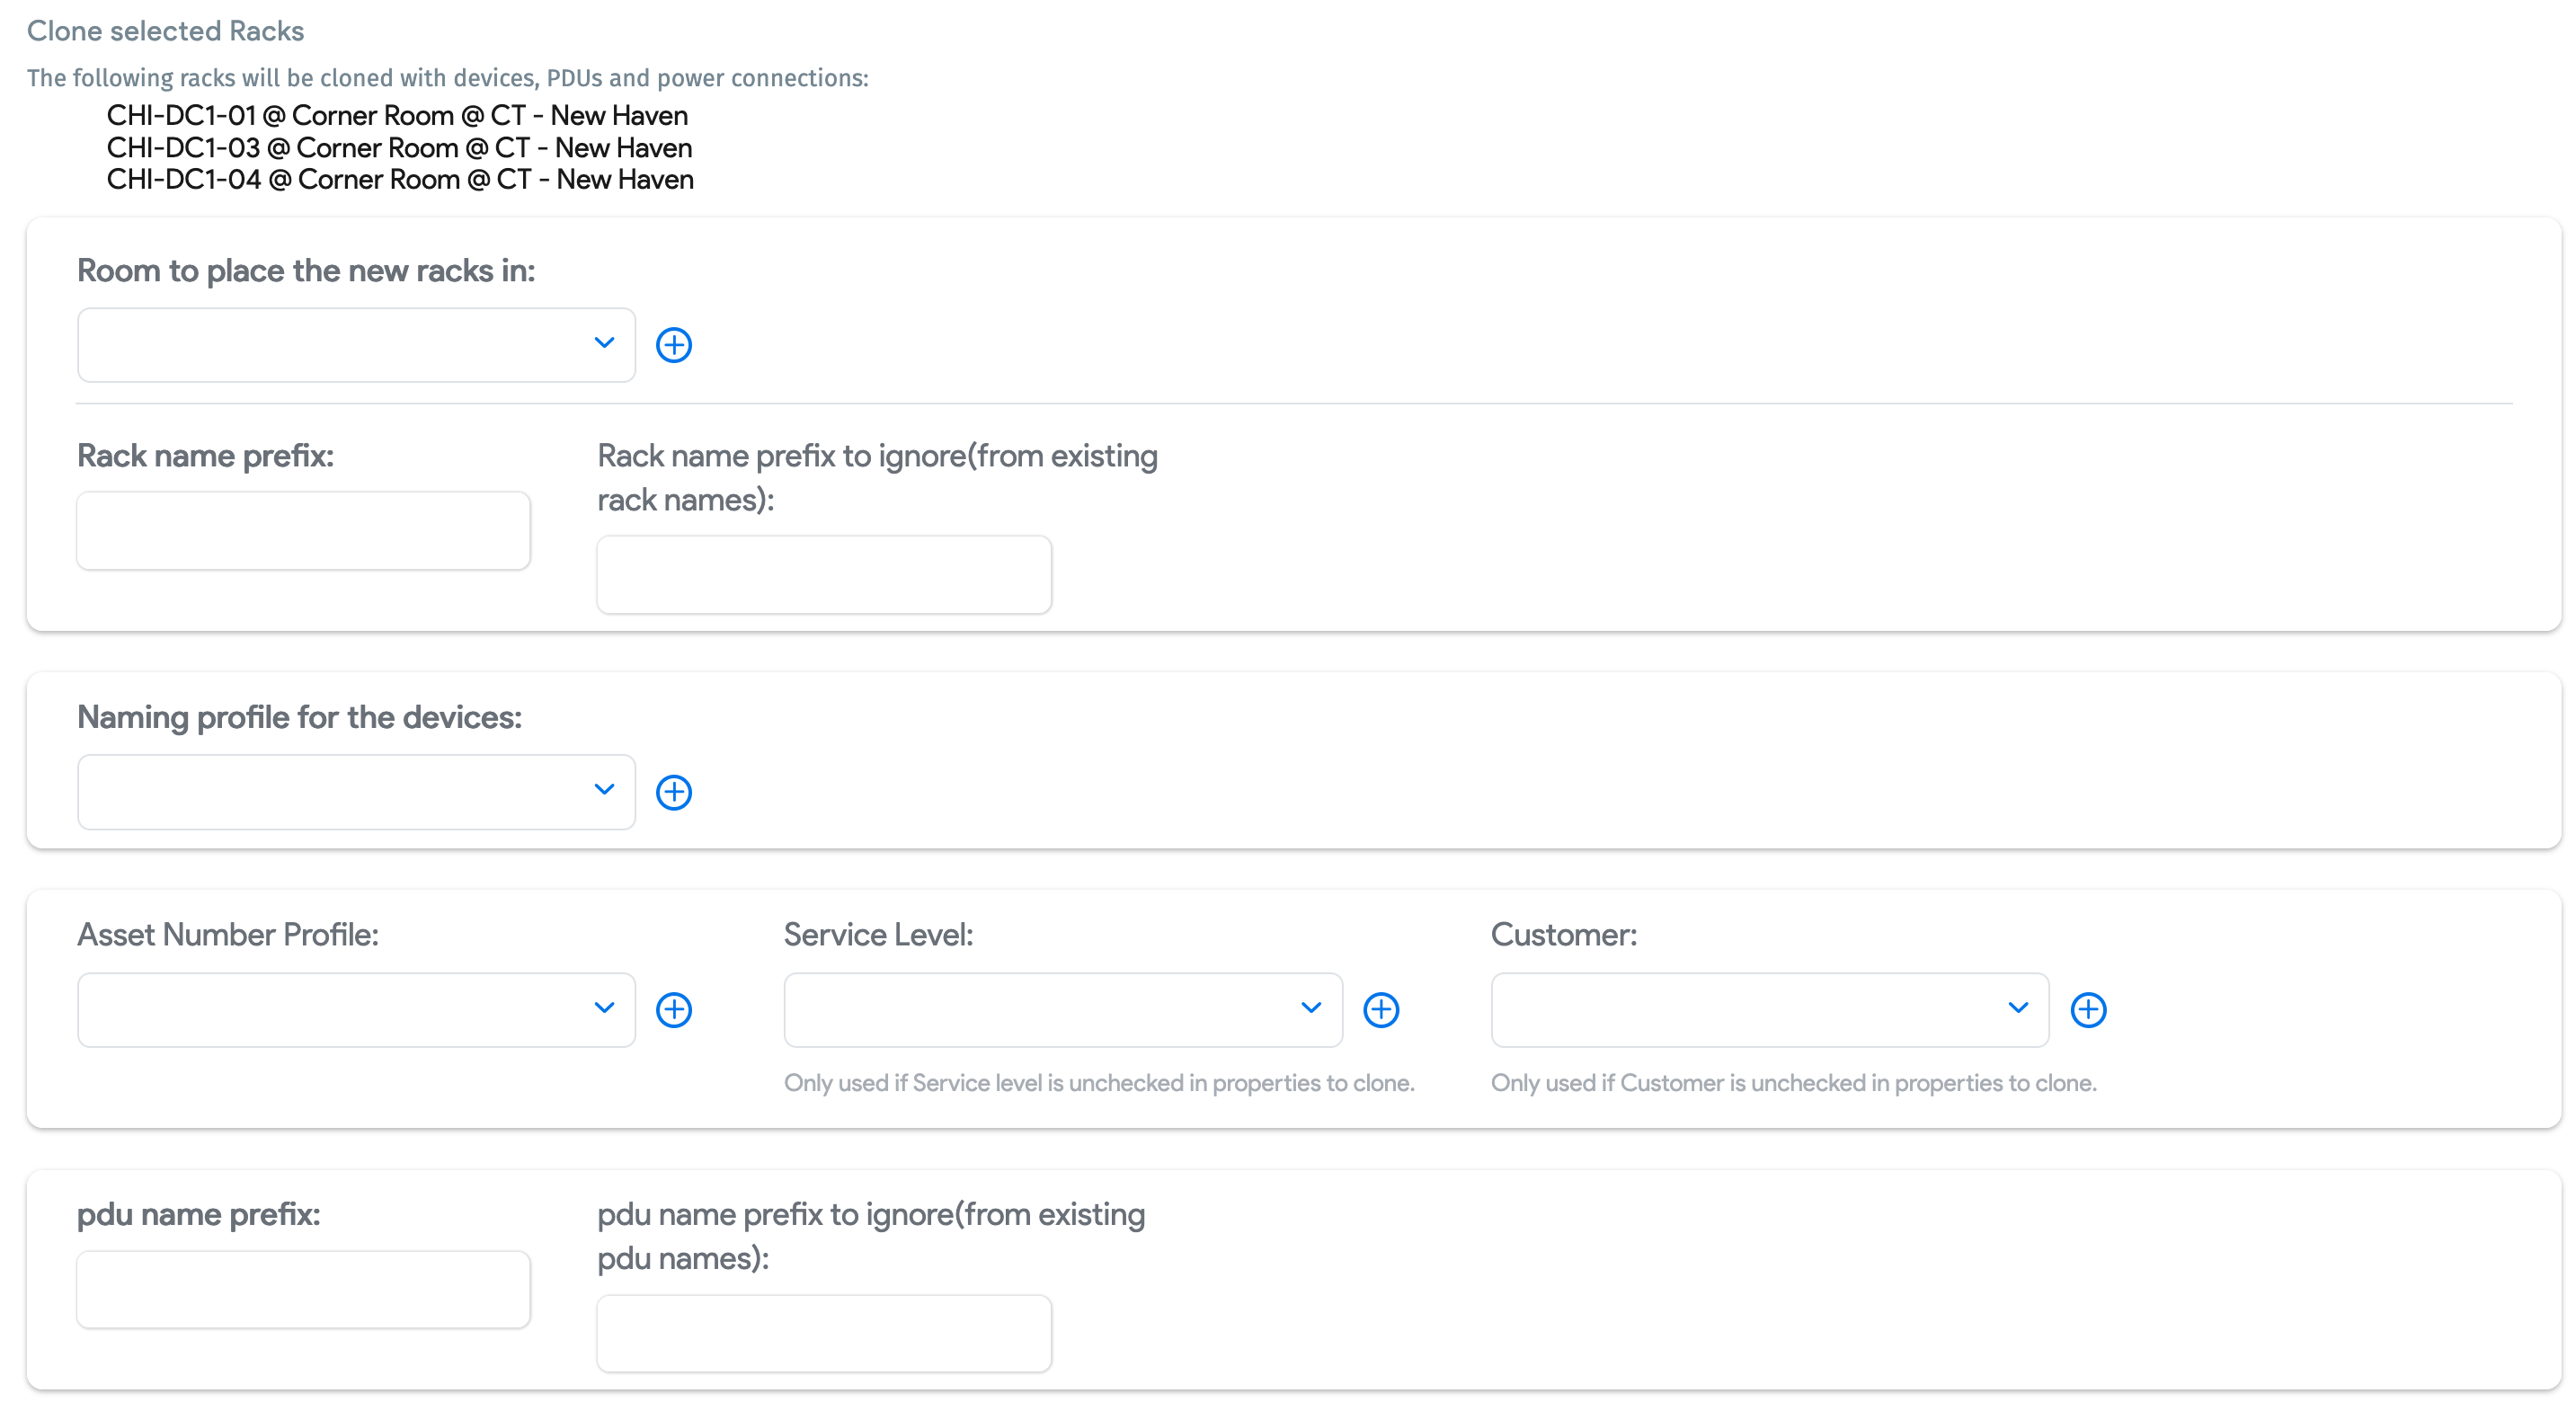
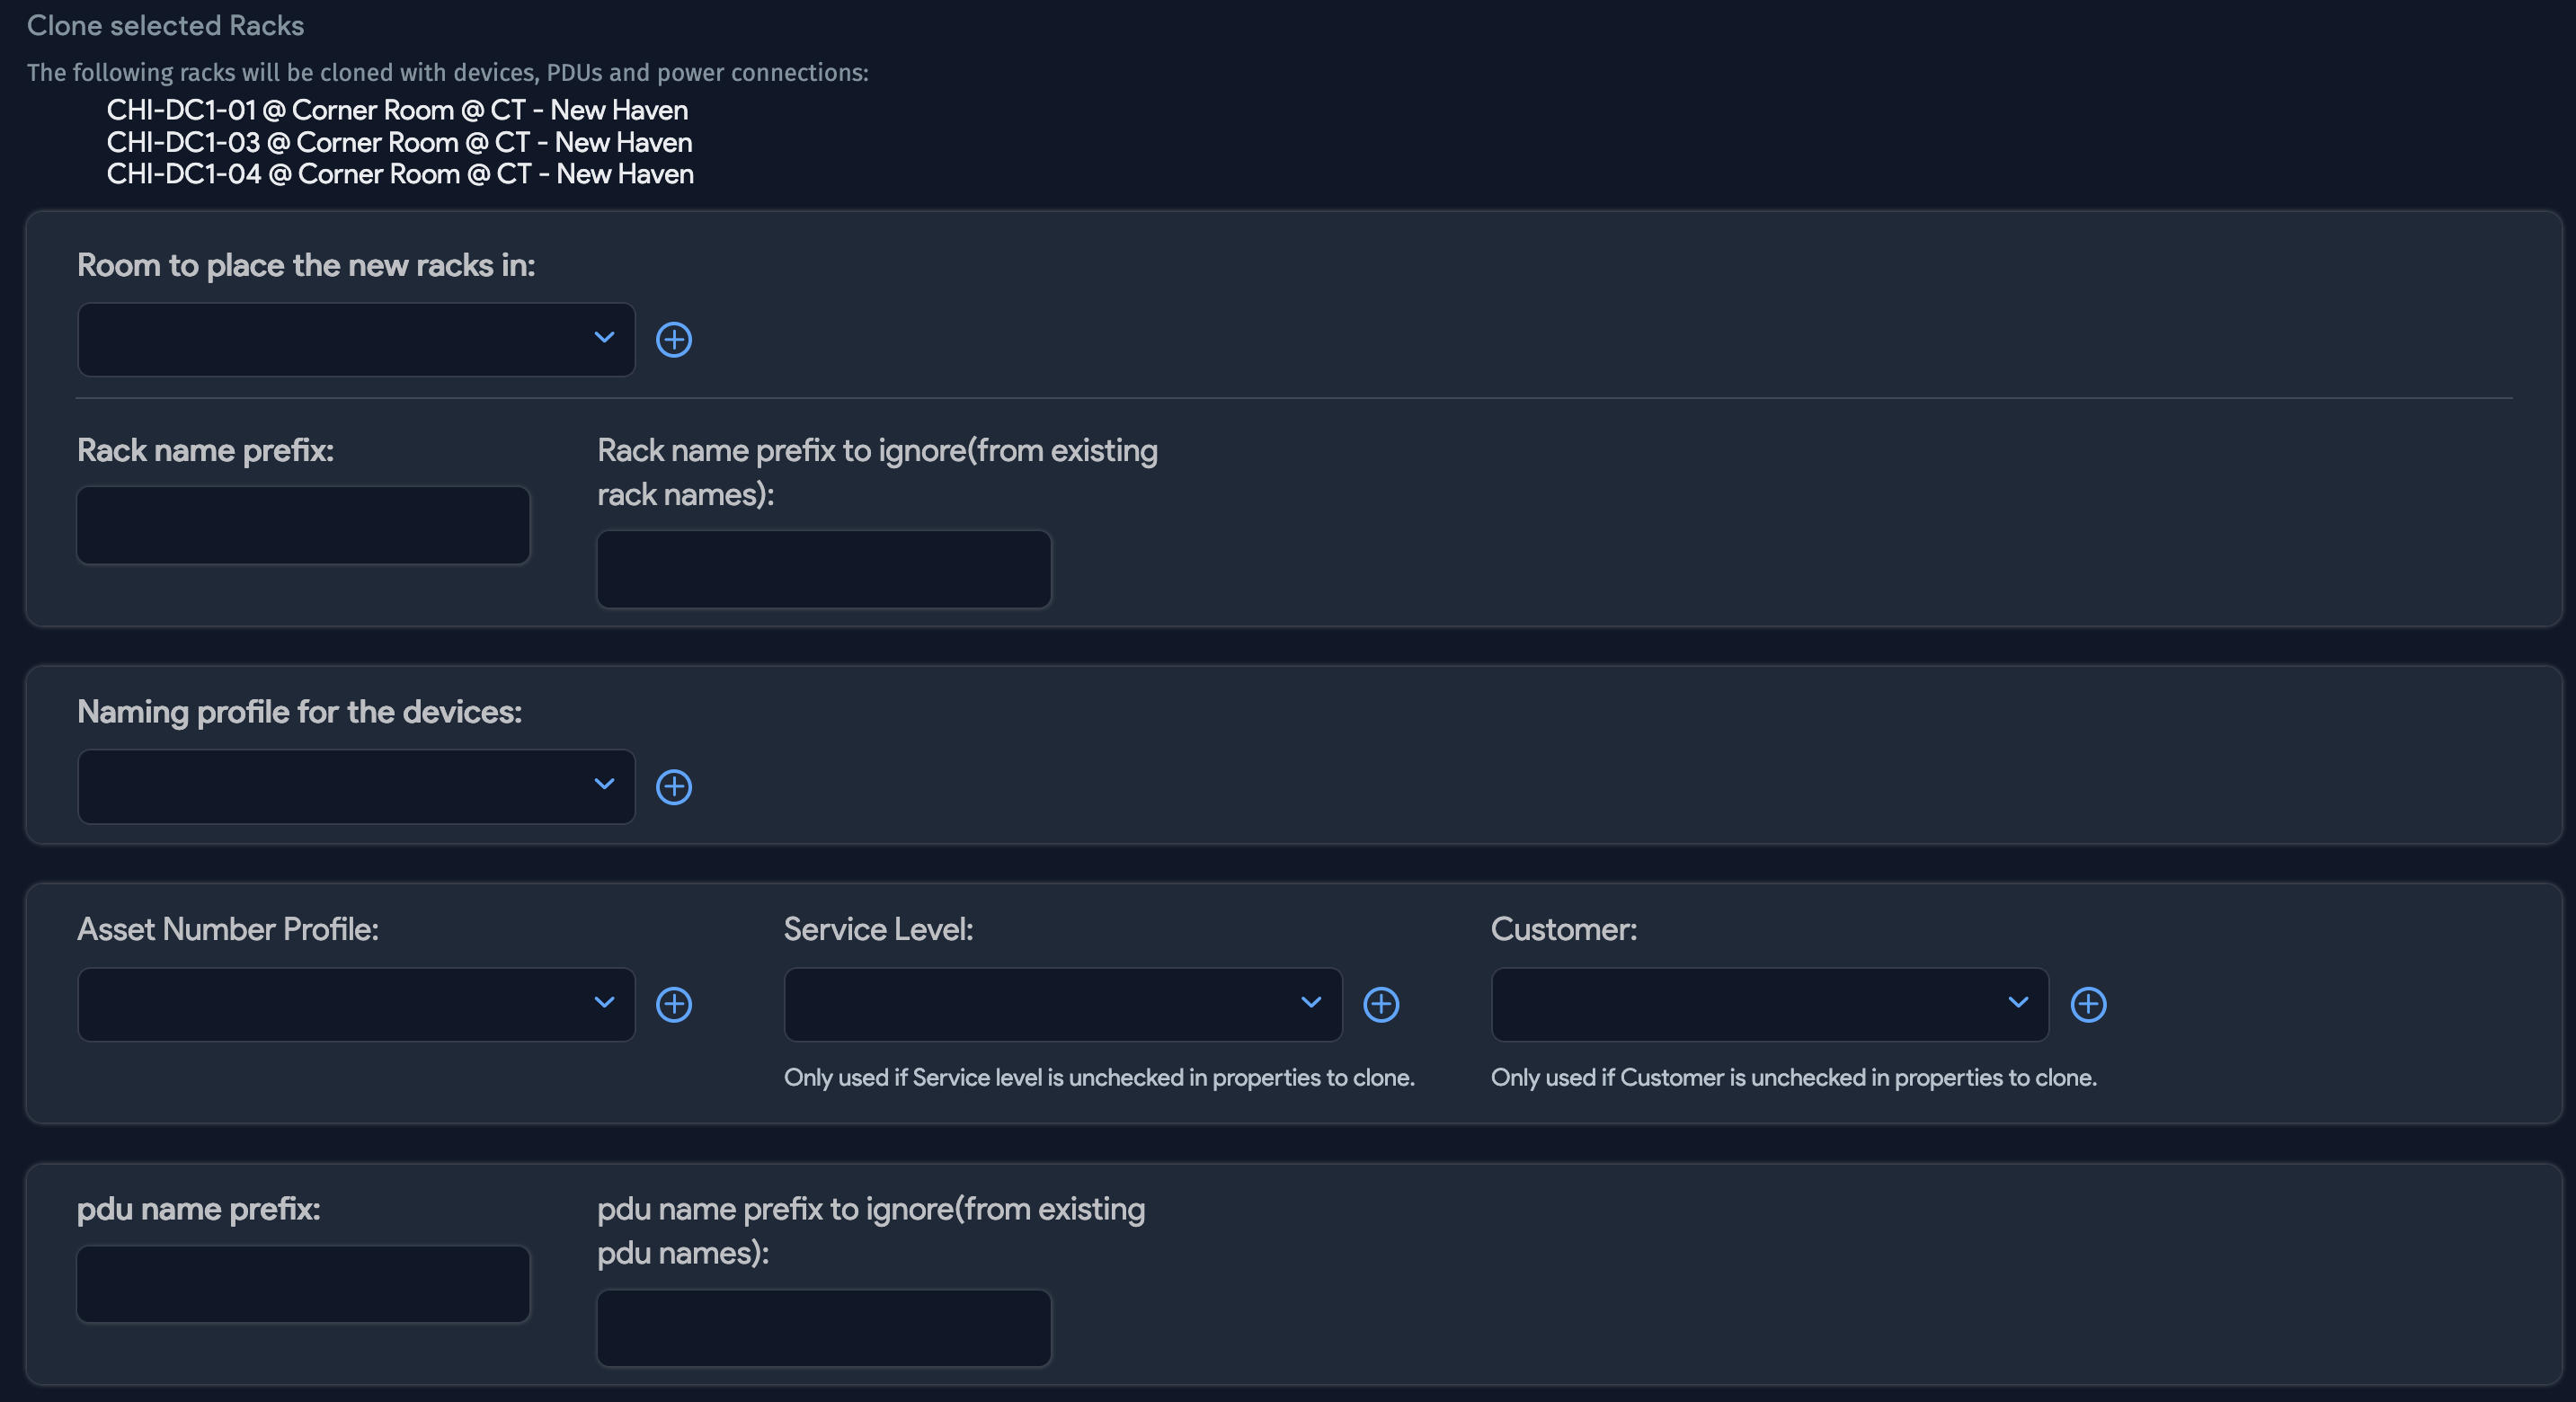
You can choose which room the cloned racks go to, select a device naming profile, specify a prefix for rack and PDU names, and fill in some other optional fields, as shown below.
Note: The Rack name prefix will be prepended to each rack name, whereas the Rack name prefix to ignore will be removed from the rack name.
Export Rack Audit Data
Looking to audit your racks in a jiffy? Download the ready-to-go Audit Excel file for selected racks to inventory or audit all assets, like PDUs, devices, and assets in the rack.
Choose the Export Selected Items action and select Audit Export for Selected Racks
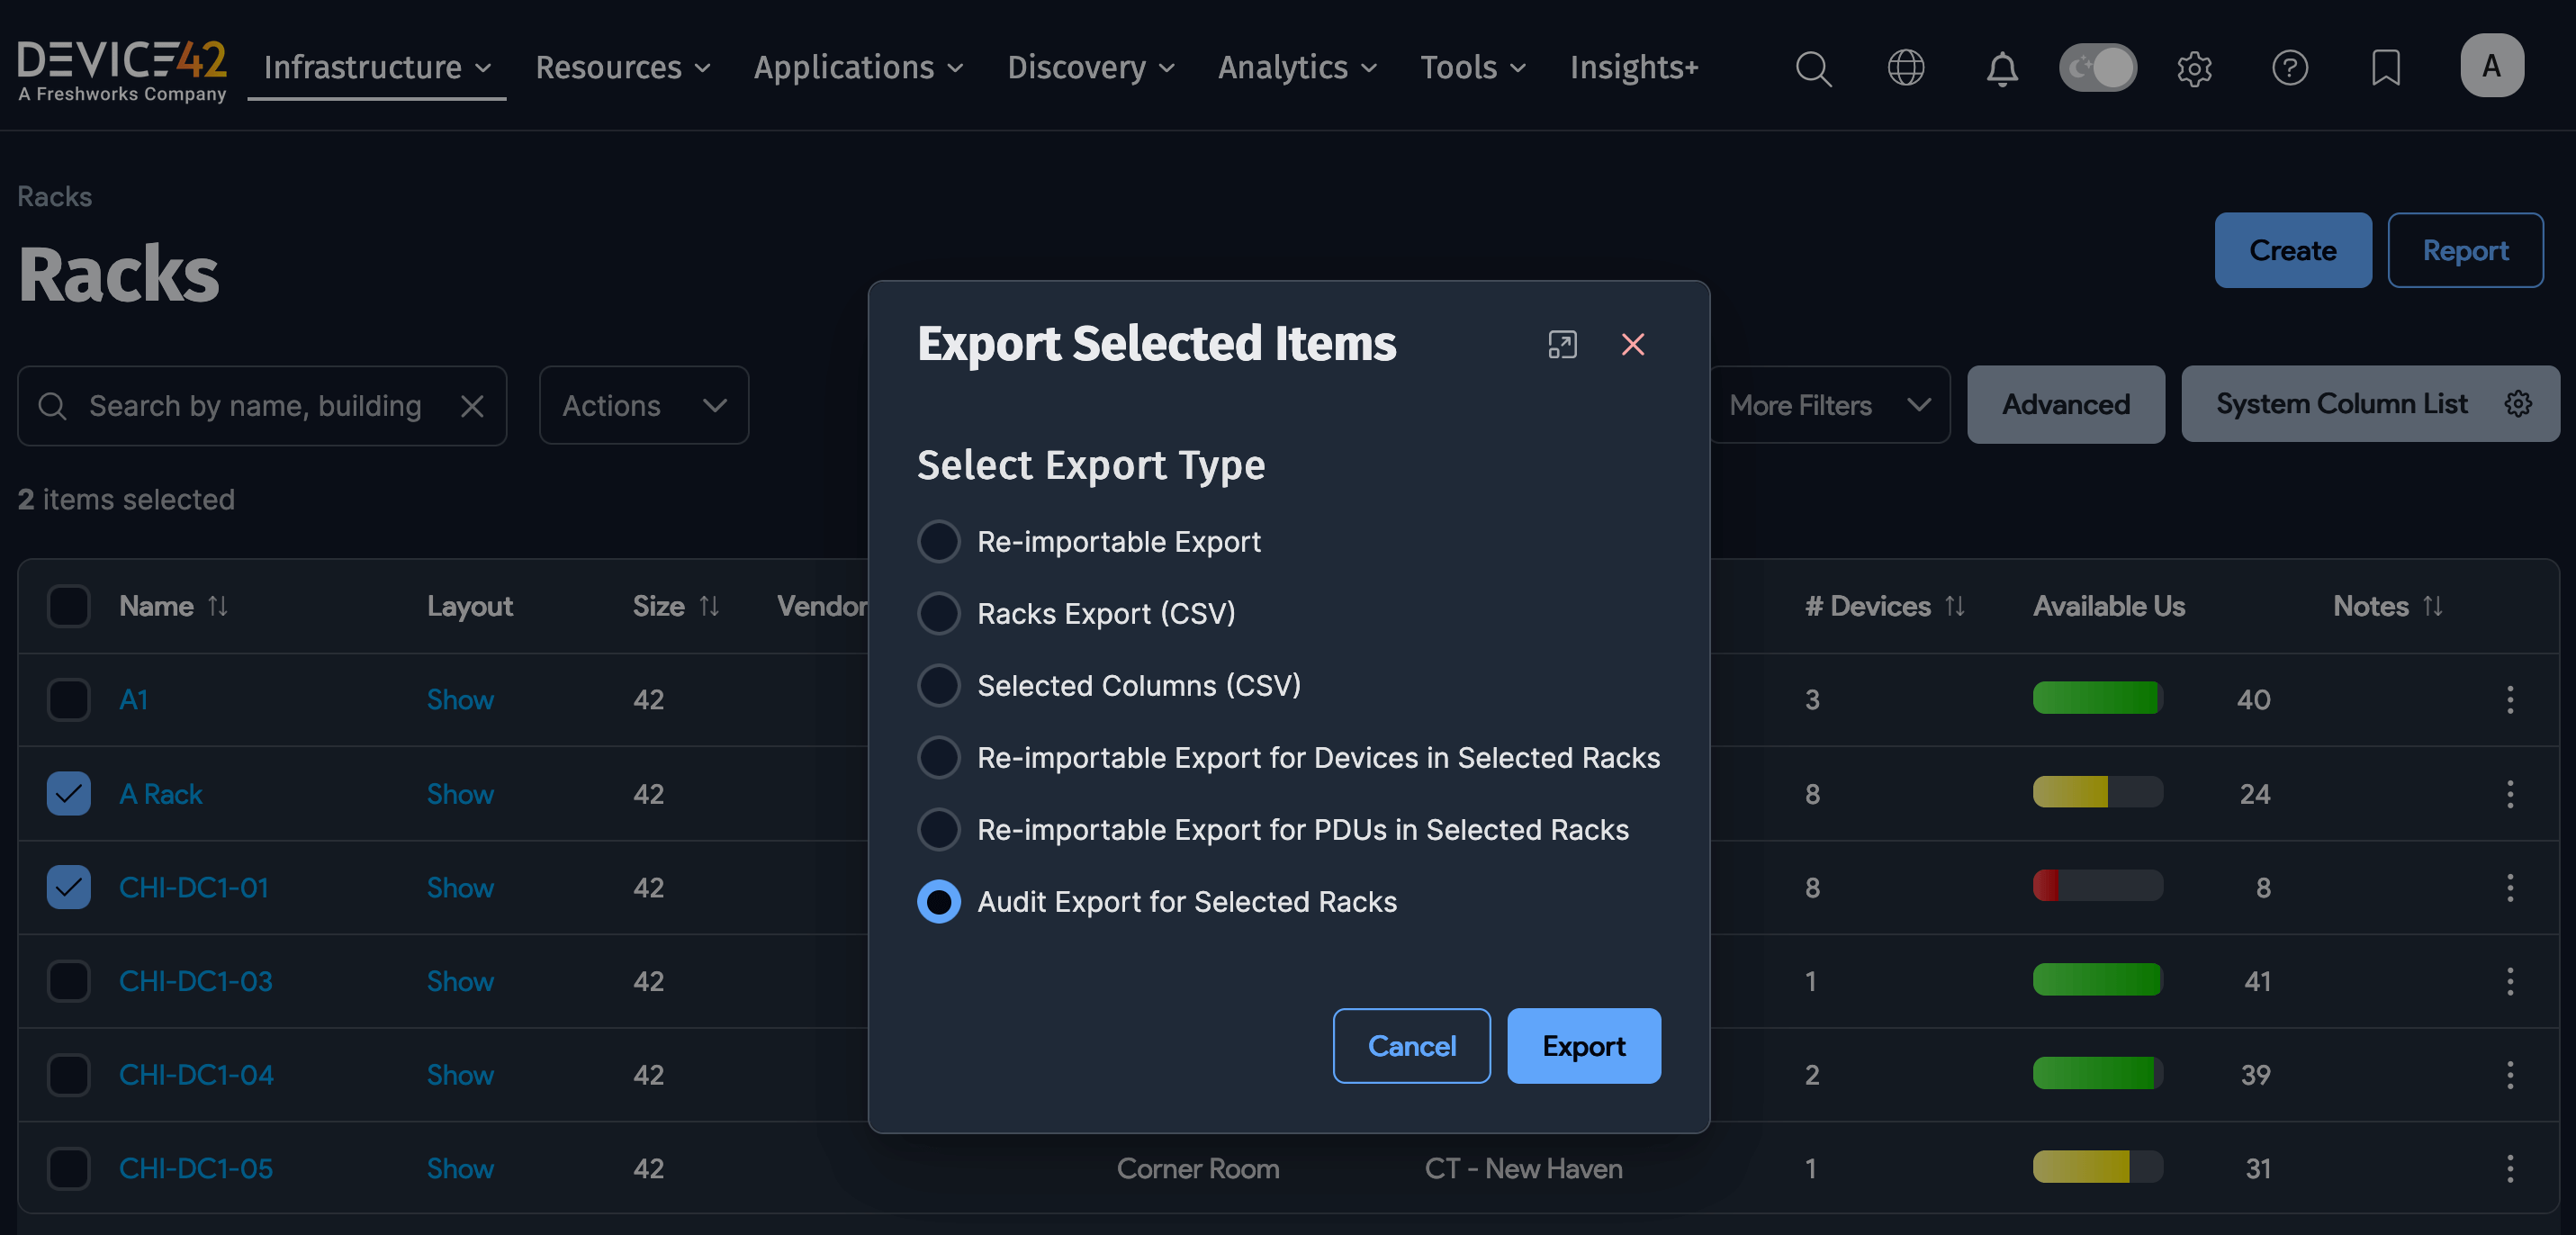
The export sheet is sorted by rack name, includes PDUs on the side, and then lists the devices, PDUs, and assets from top to bottom in the rack. With this sheet, you can use a handheld wireless scanner to read the asset number (from barcode labels) to the sheet and quickly verify the correctness of your inventory.
Visualize PDU Connections

You can visualize PDU connections by clicking the PDU Map button. Quickly see what is connected where with respect to power and visualize dual or single connected servers from the rack level. You can zoom in and out using the mouse wheel and drag the layout around.
What-If Simulation
To do what-if simulations, navigate to Tools > Templates & Bulk Operations > What if. Here, you can enter device and power information for devices that need to be racked and choose a simulation based on racks in a building, in a room, or chosen from a list.
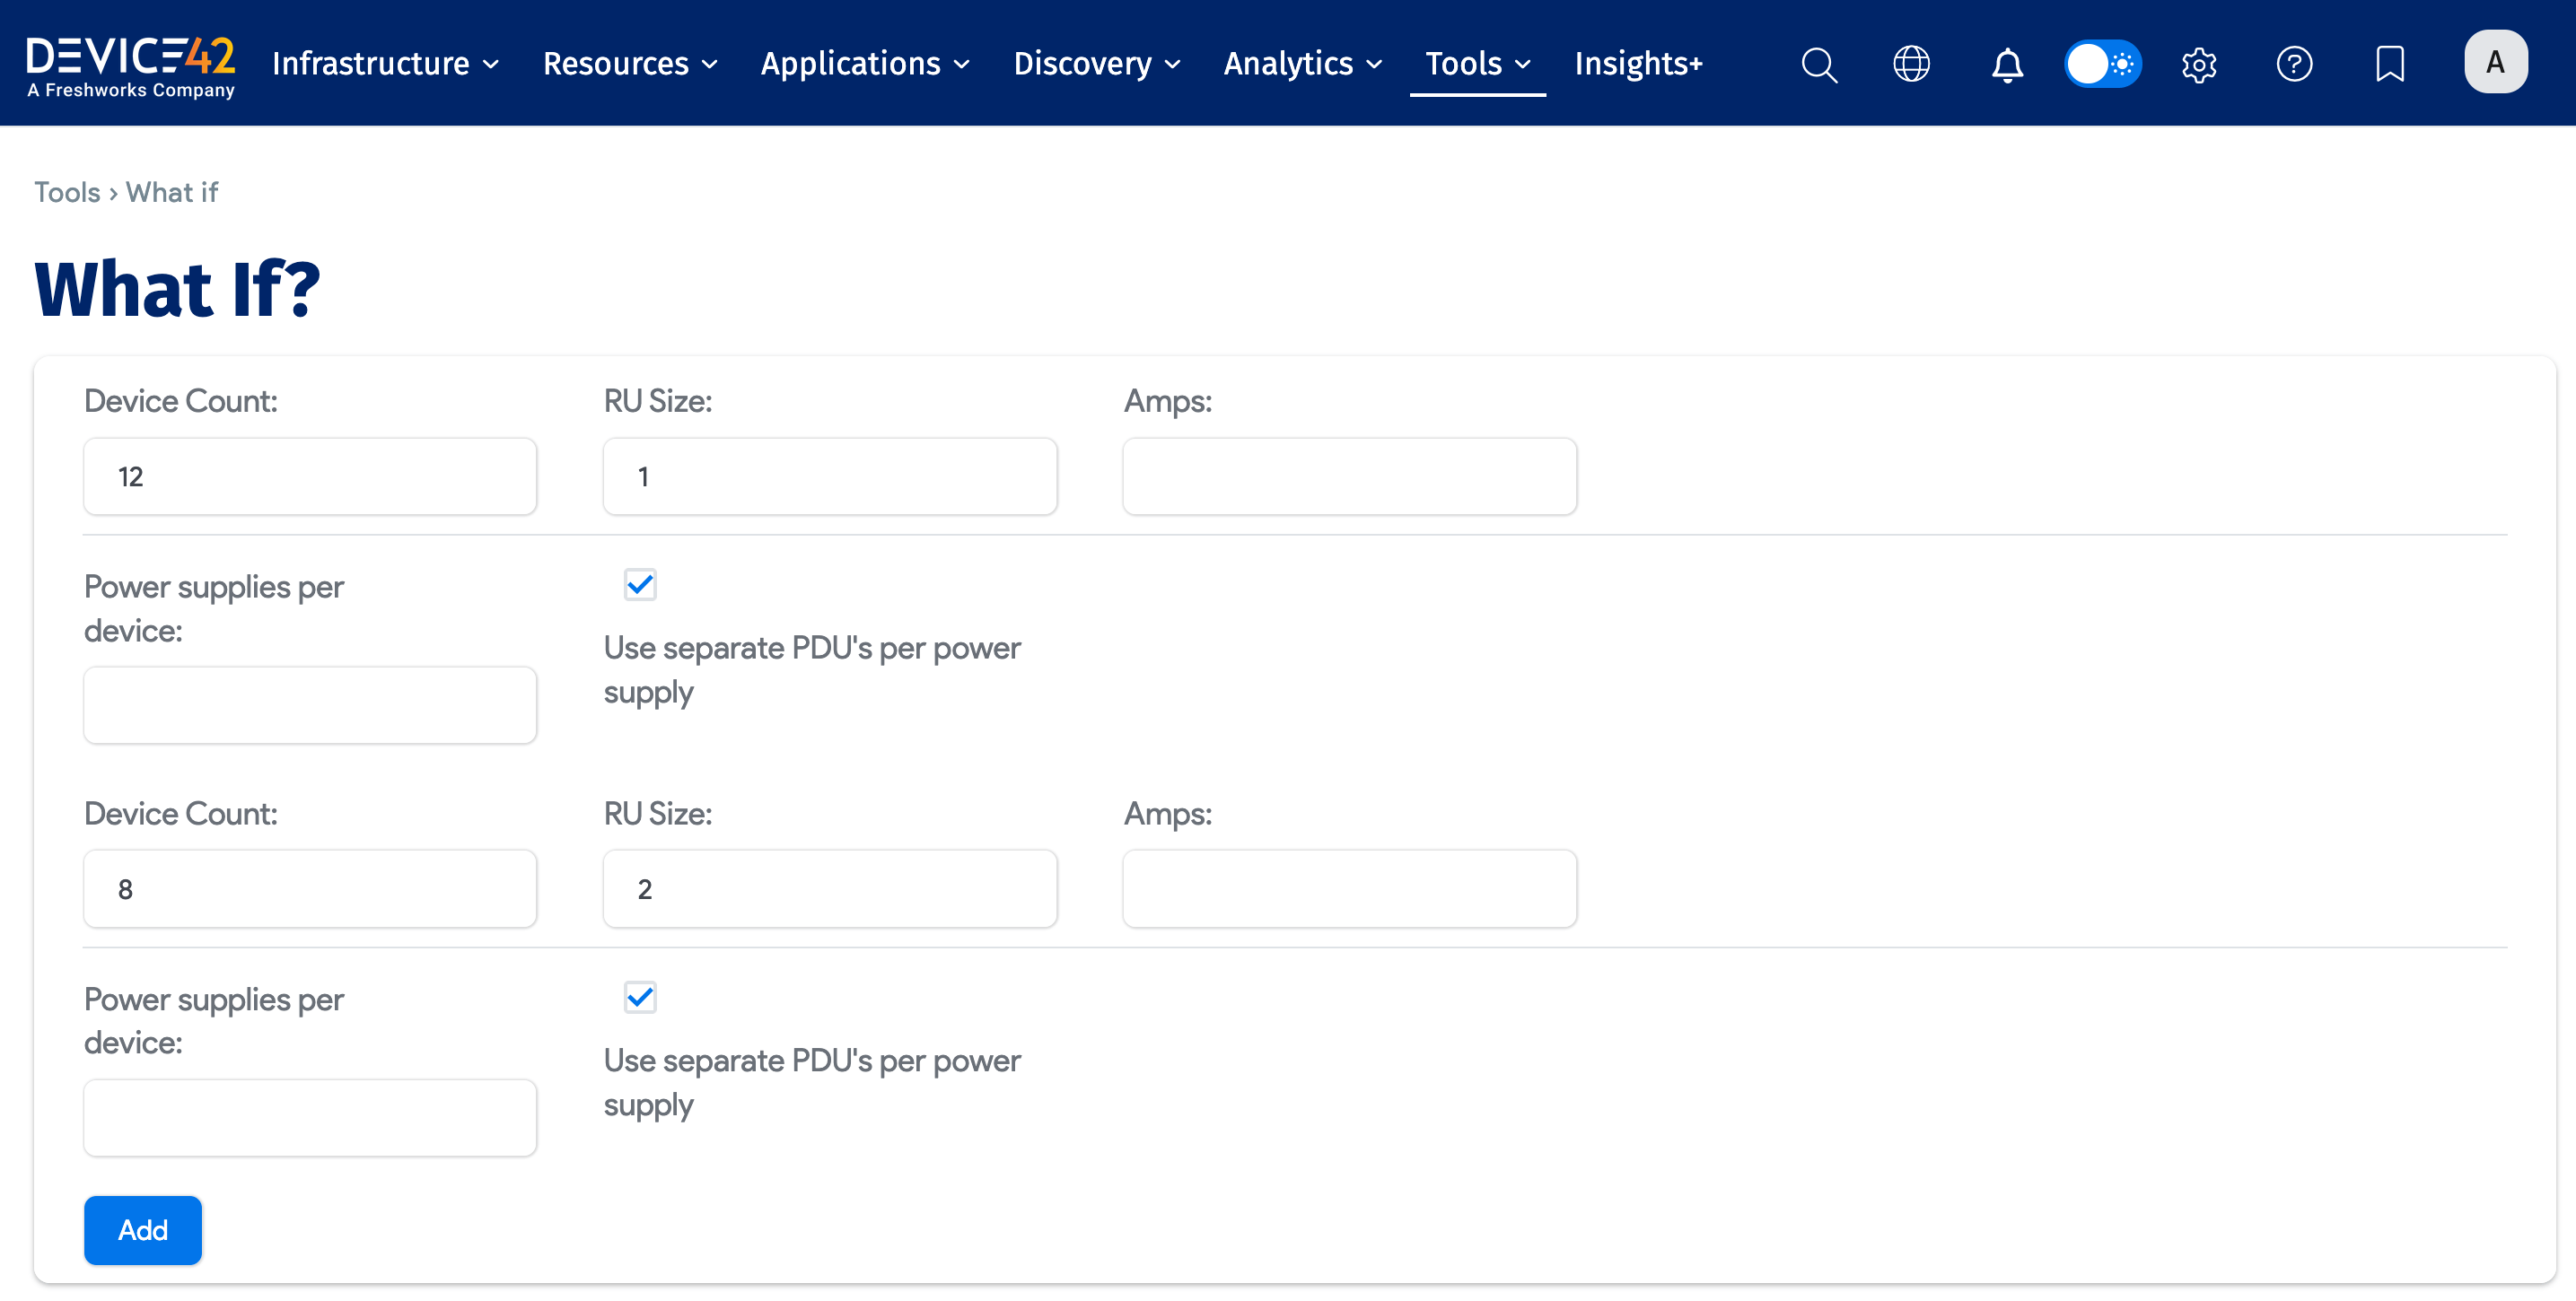
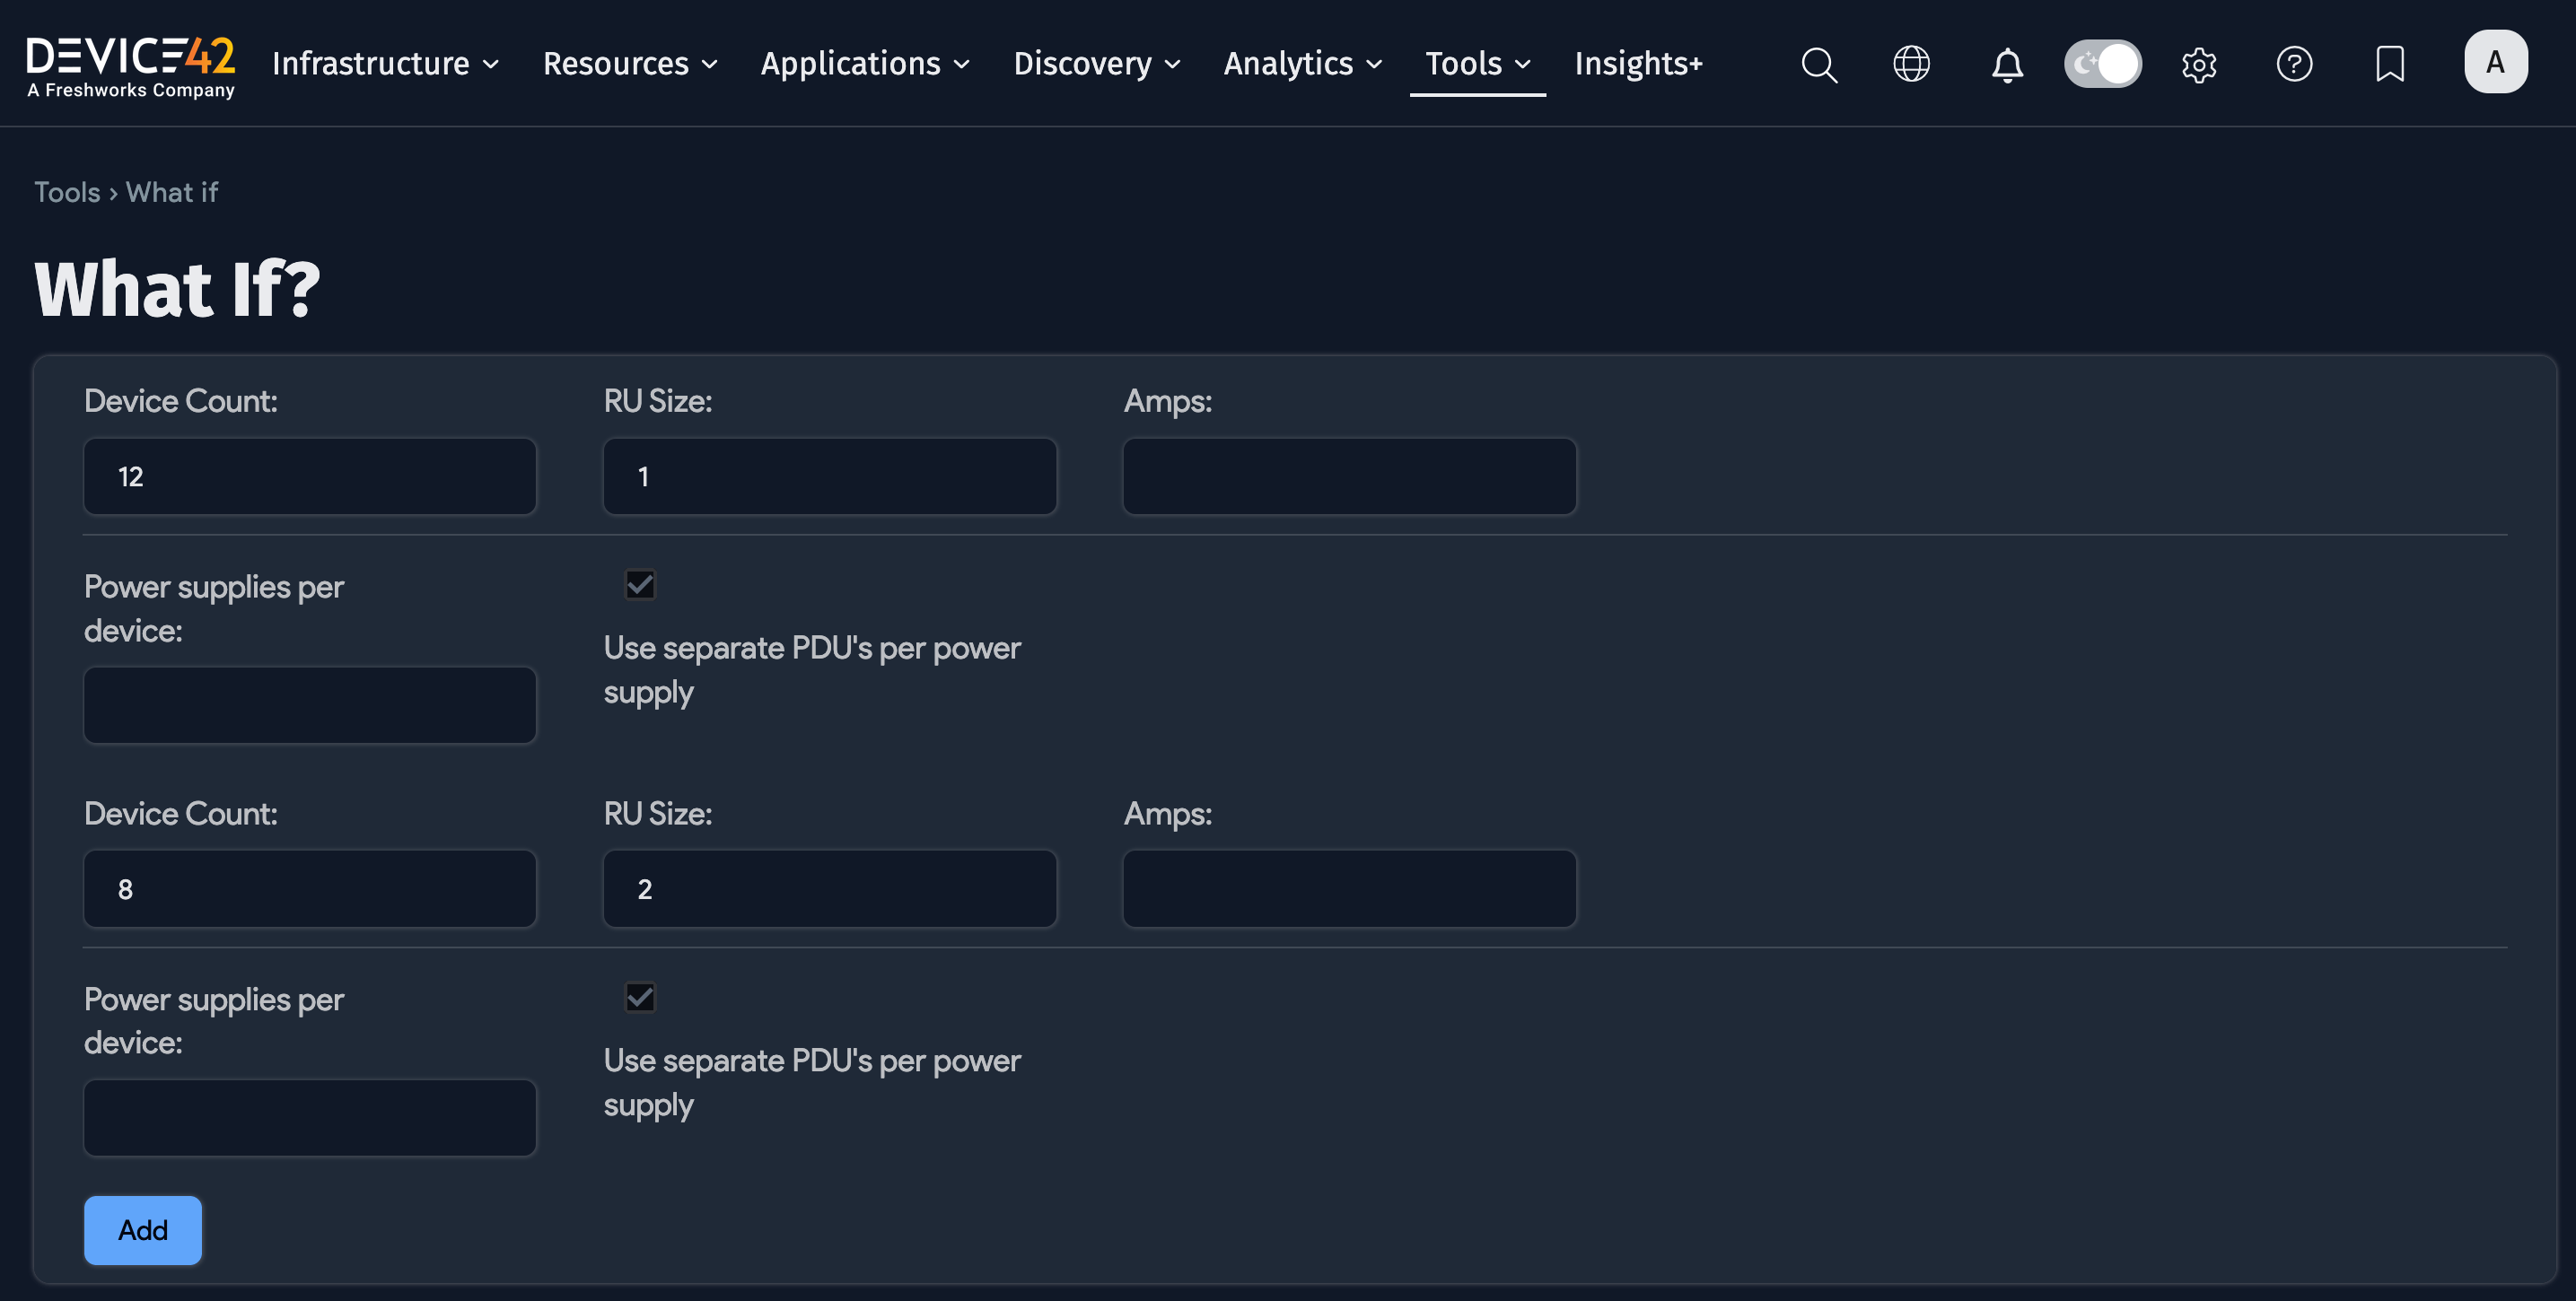
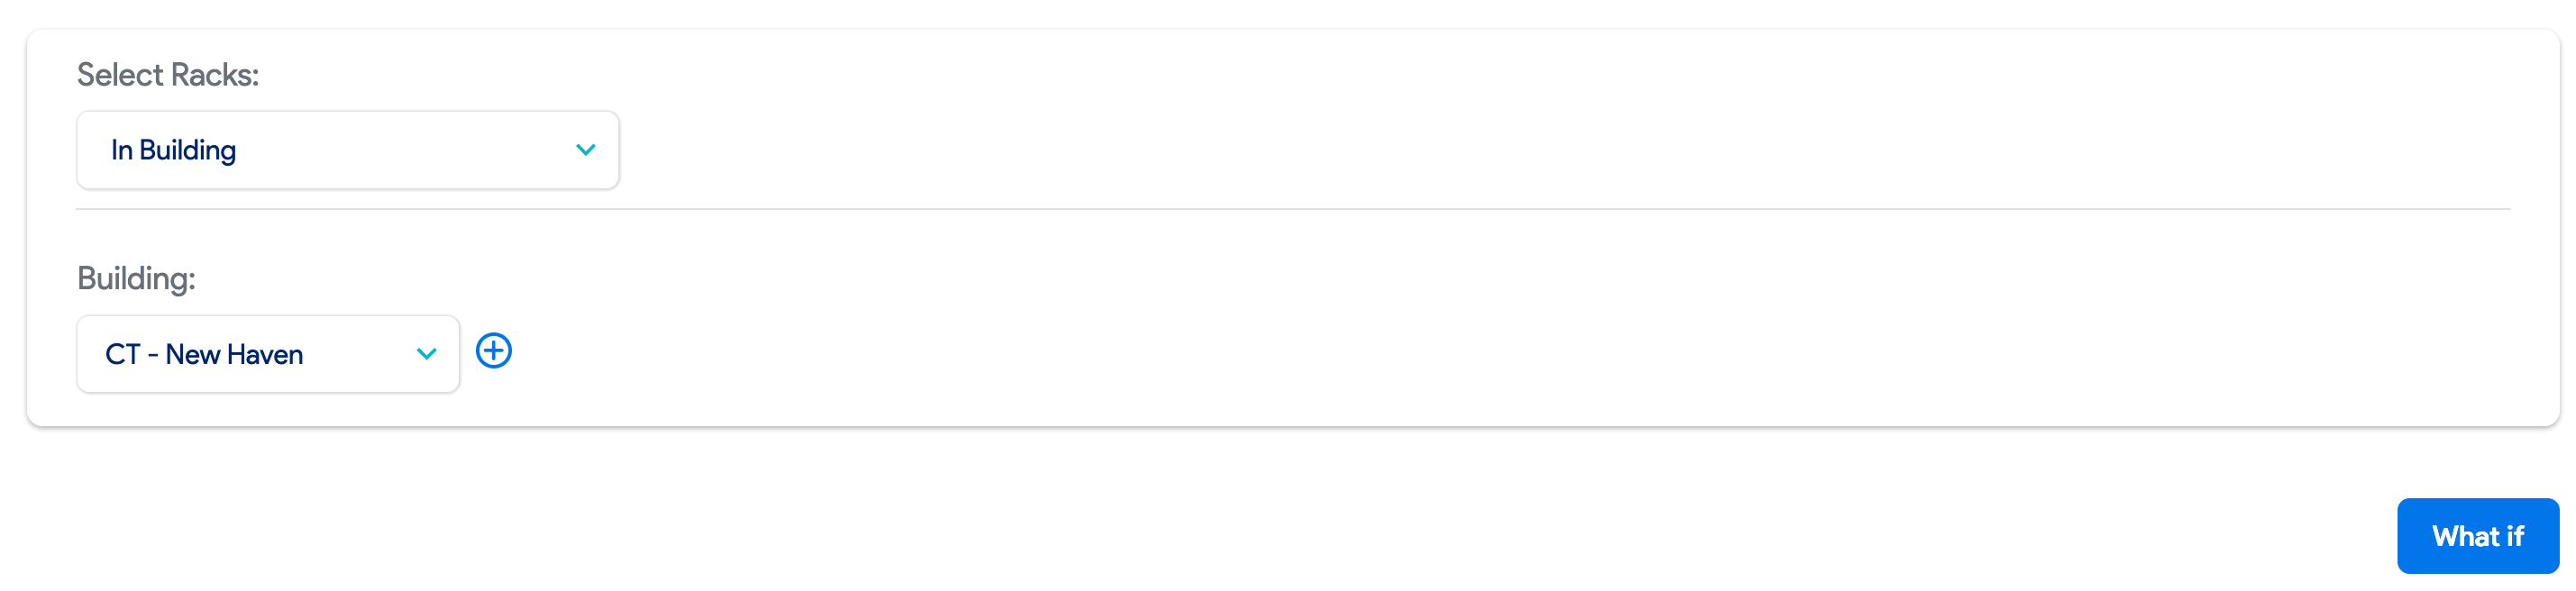
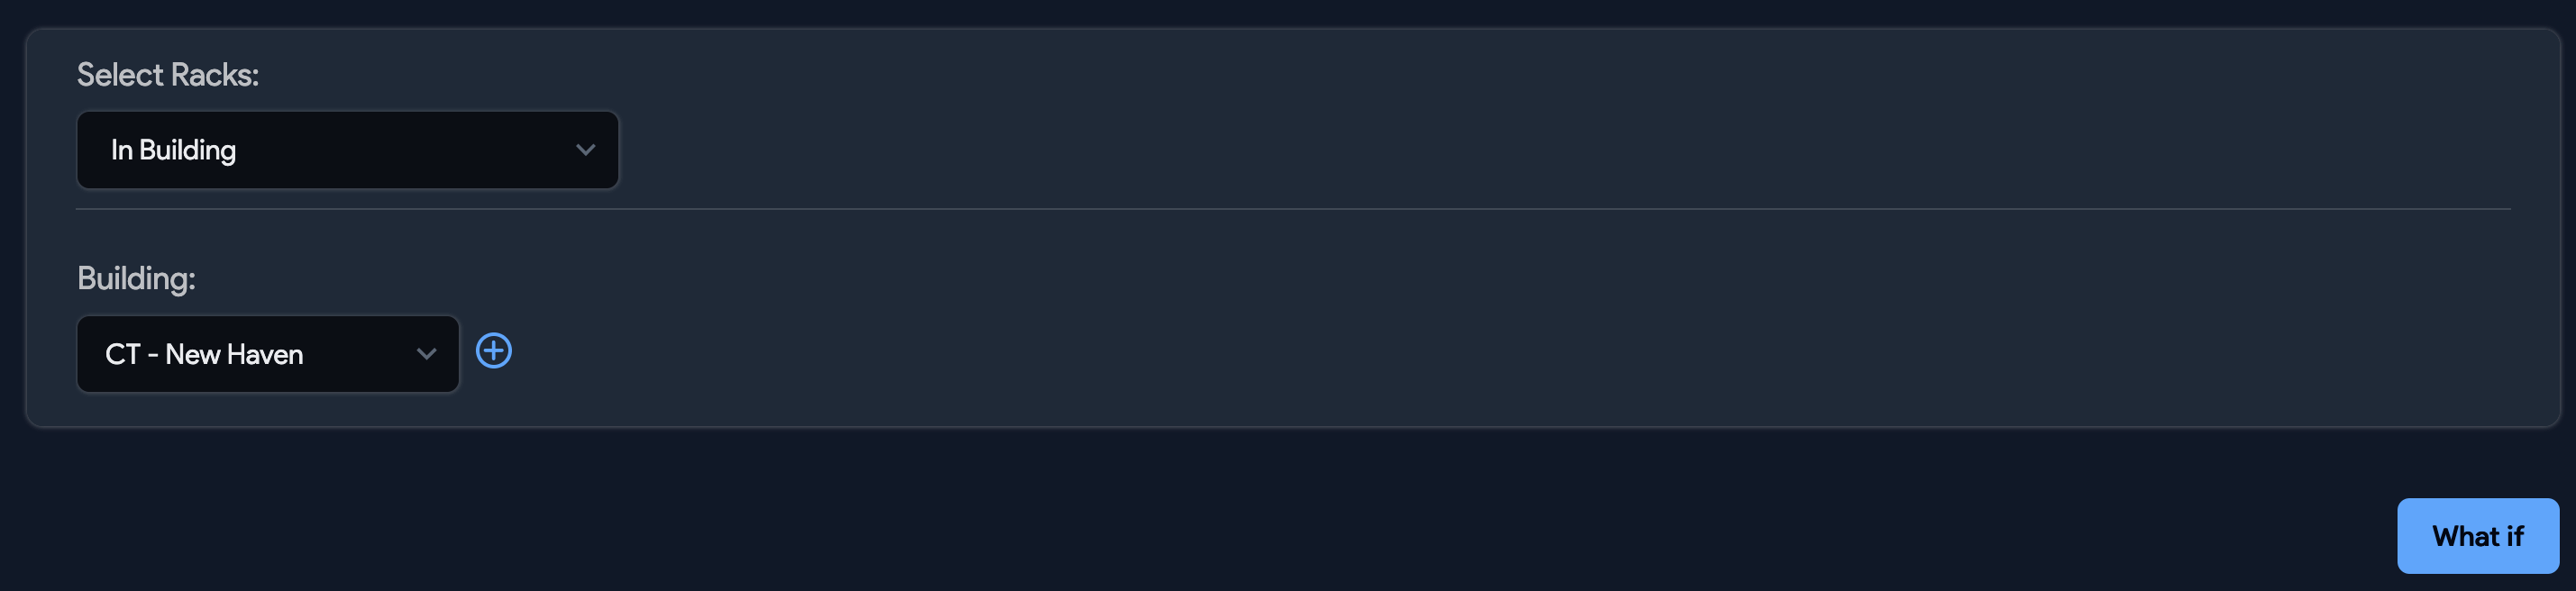
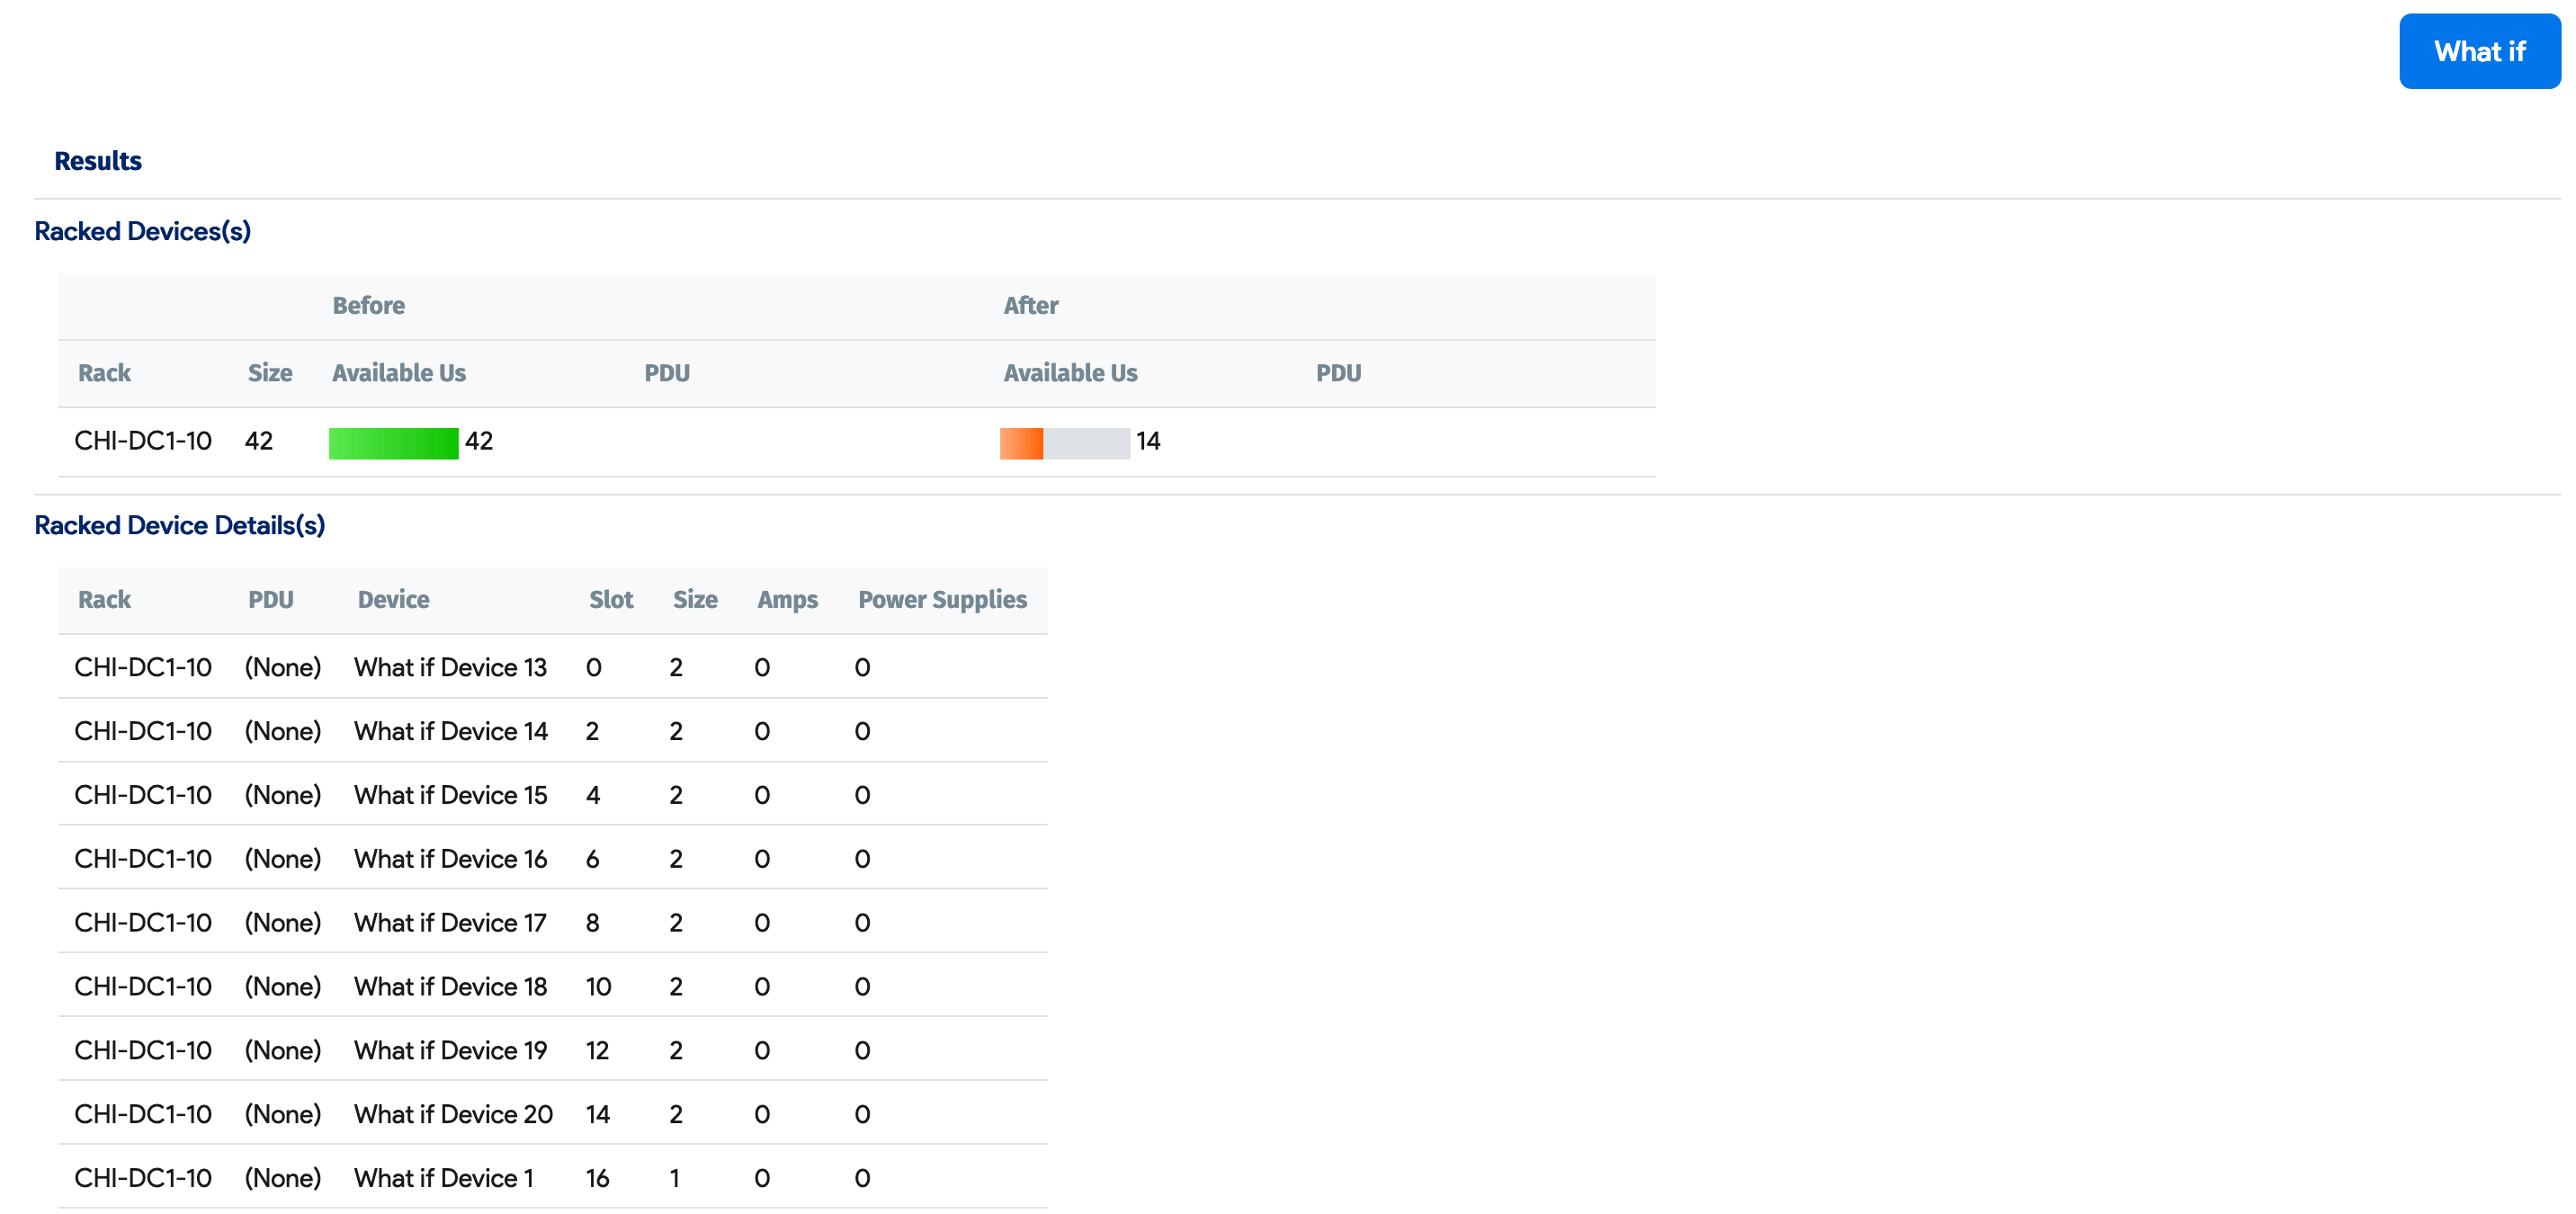
Click What if and scroll down to see a list of simulated results.

Bulk Add and Update Racks
Add and update racks in bulk using the Device42 API or using spreadsheets via the import and export feature under Tools > Import/Export (xls).


Additional information can be found here:
Bulk Add Devices, Assets, and PDUs to Racks
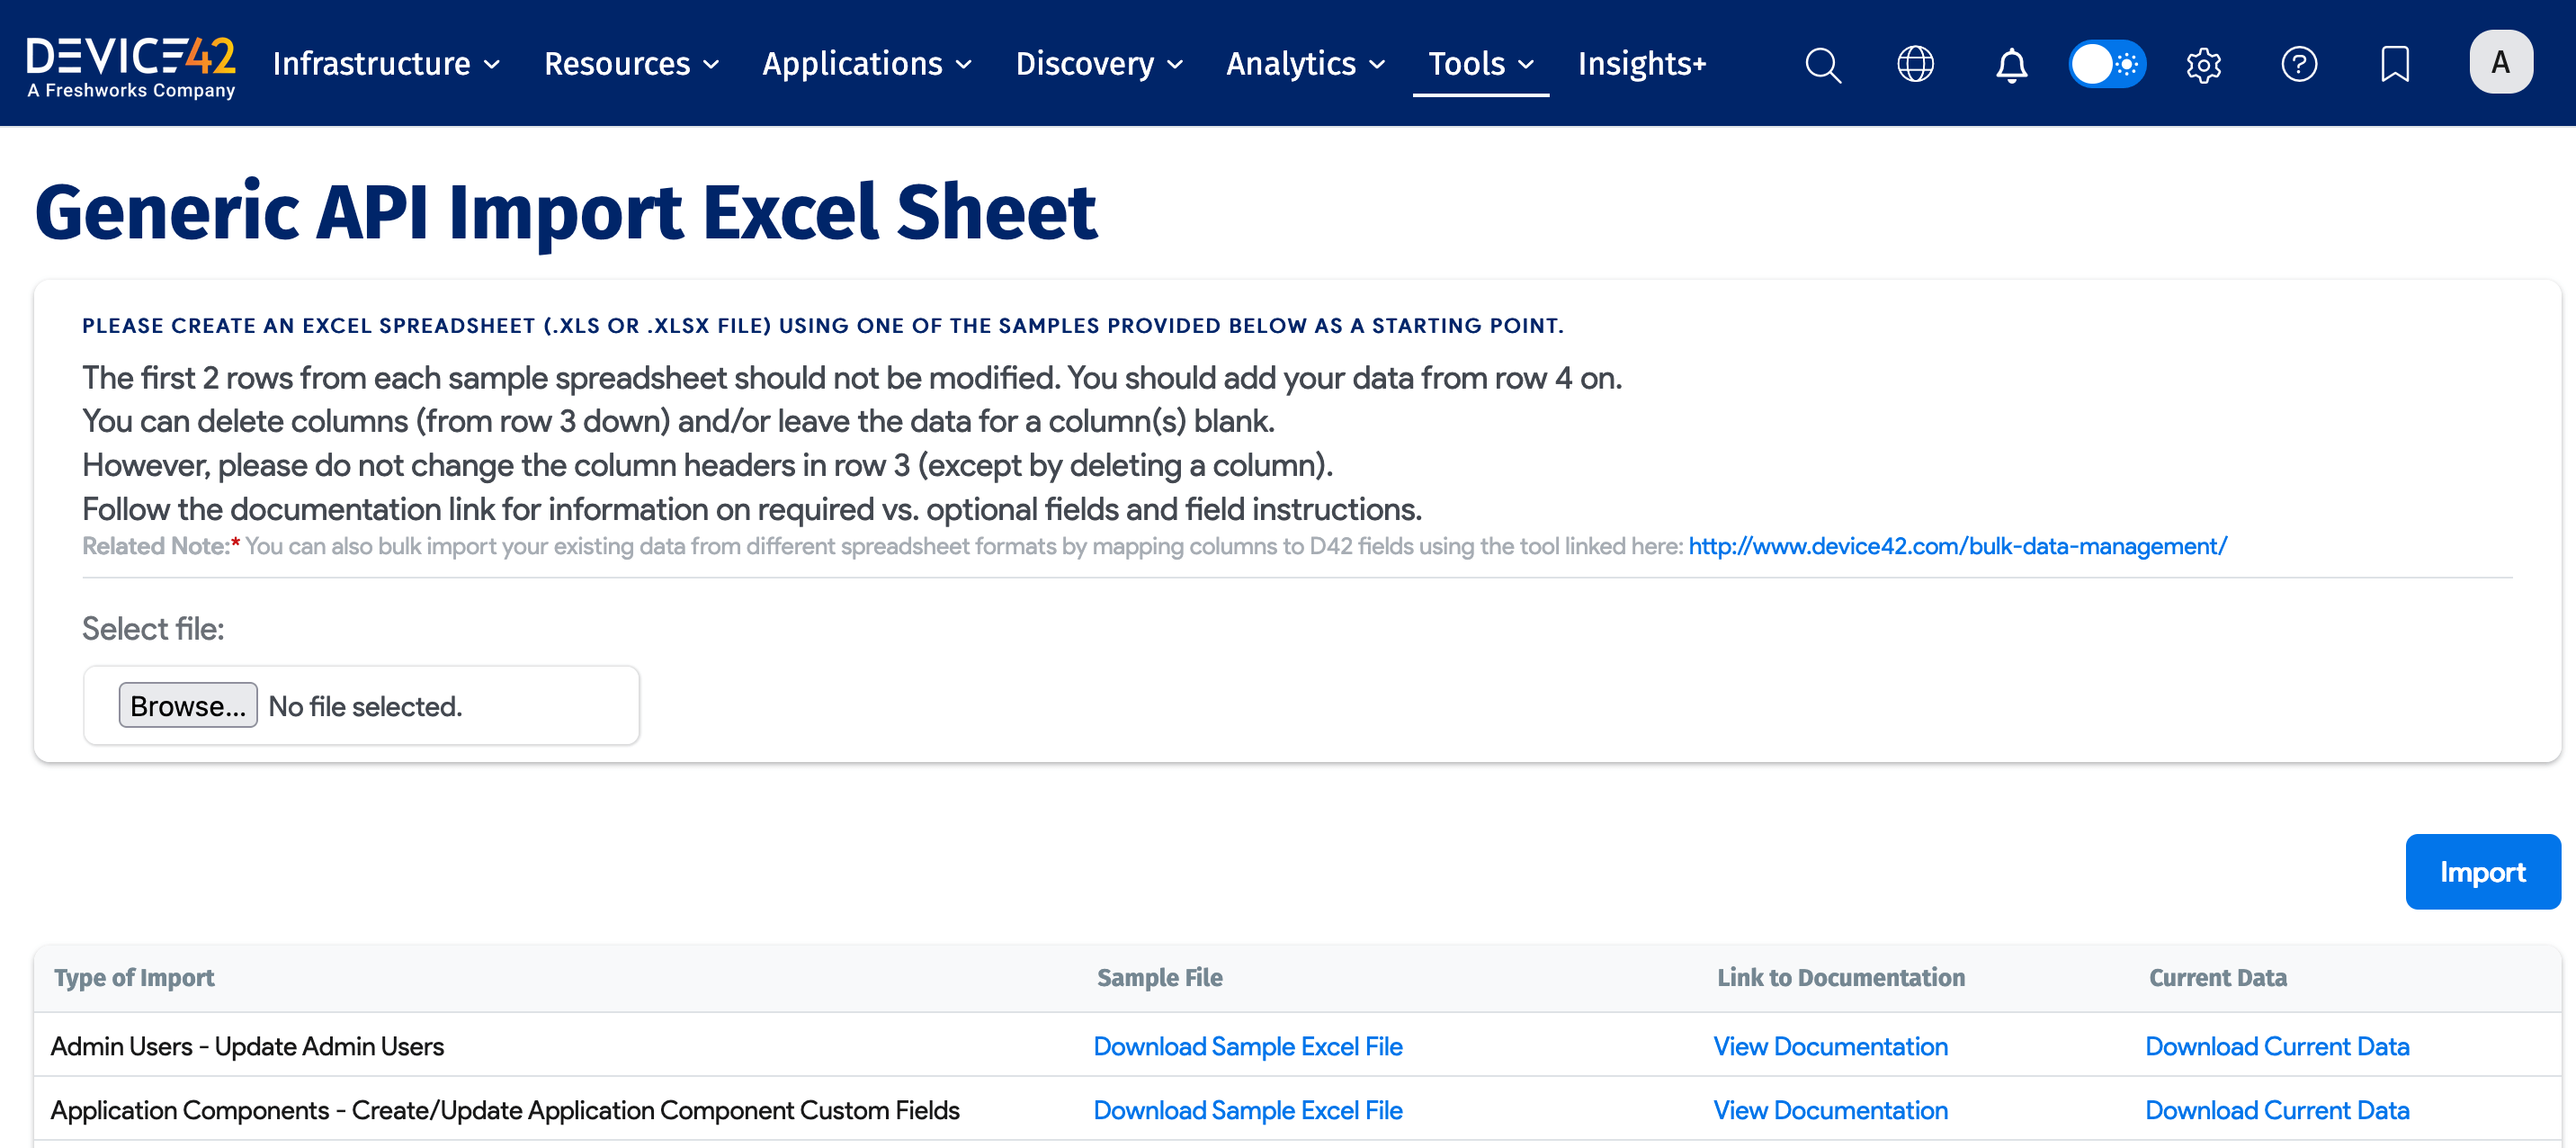
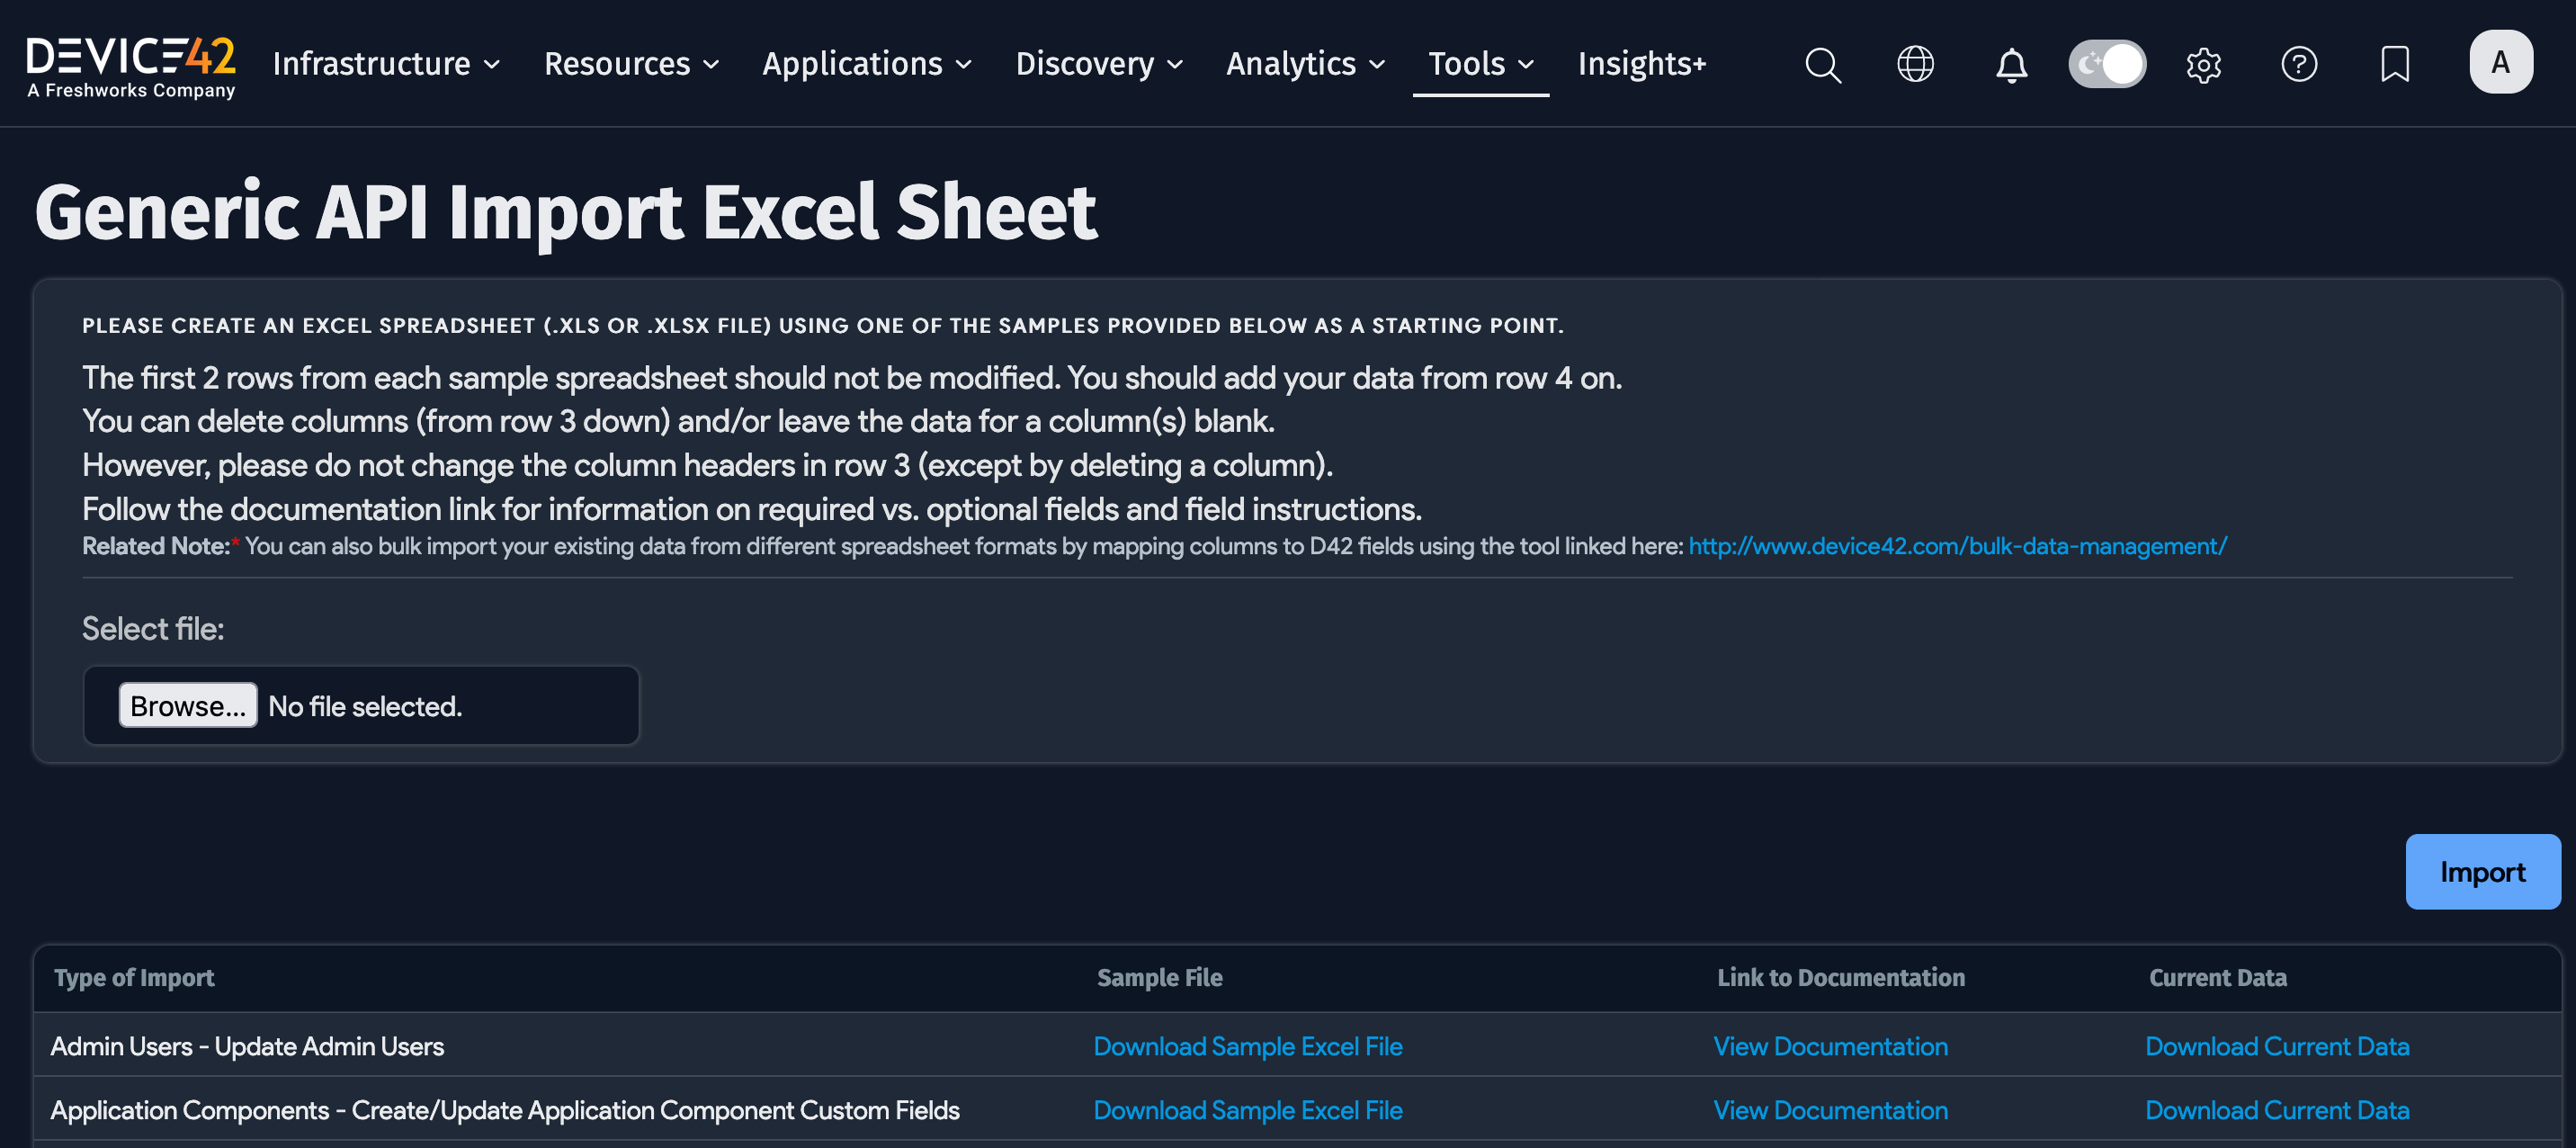
Devices, assets, and PDUs in racks can be added and updated in bulk via the Device42 API or using spreadsheets via the import and export feature under Tools > Import/Export (xls).
Do a text search (Ctrl + F or Cmd + F) on the Import/Export page to download spreadsheets for the following options:
- Devices - Add Devices to Racks
- Power Units - Add Power Units to Racks
Watch API Imports, the how-to video for adding devices to racks via the Device42 API.