Creating Wall Jacks
One method for documenting the connections and the patch from a patch panel to a wall jack, to a switch, to devices is to create a patch panel model for wall jacks.
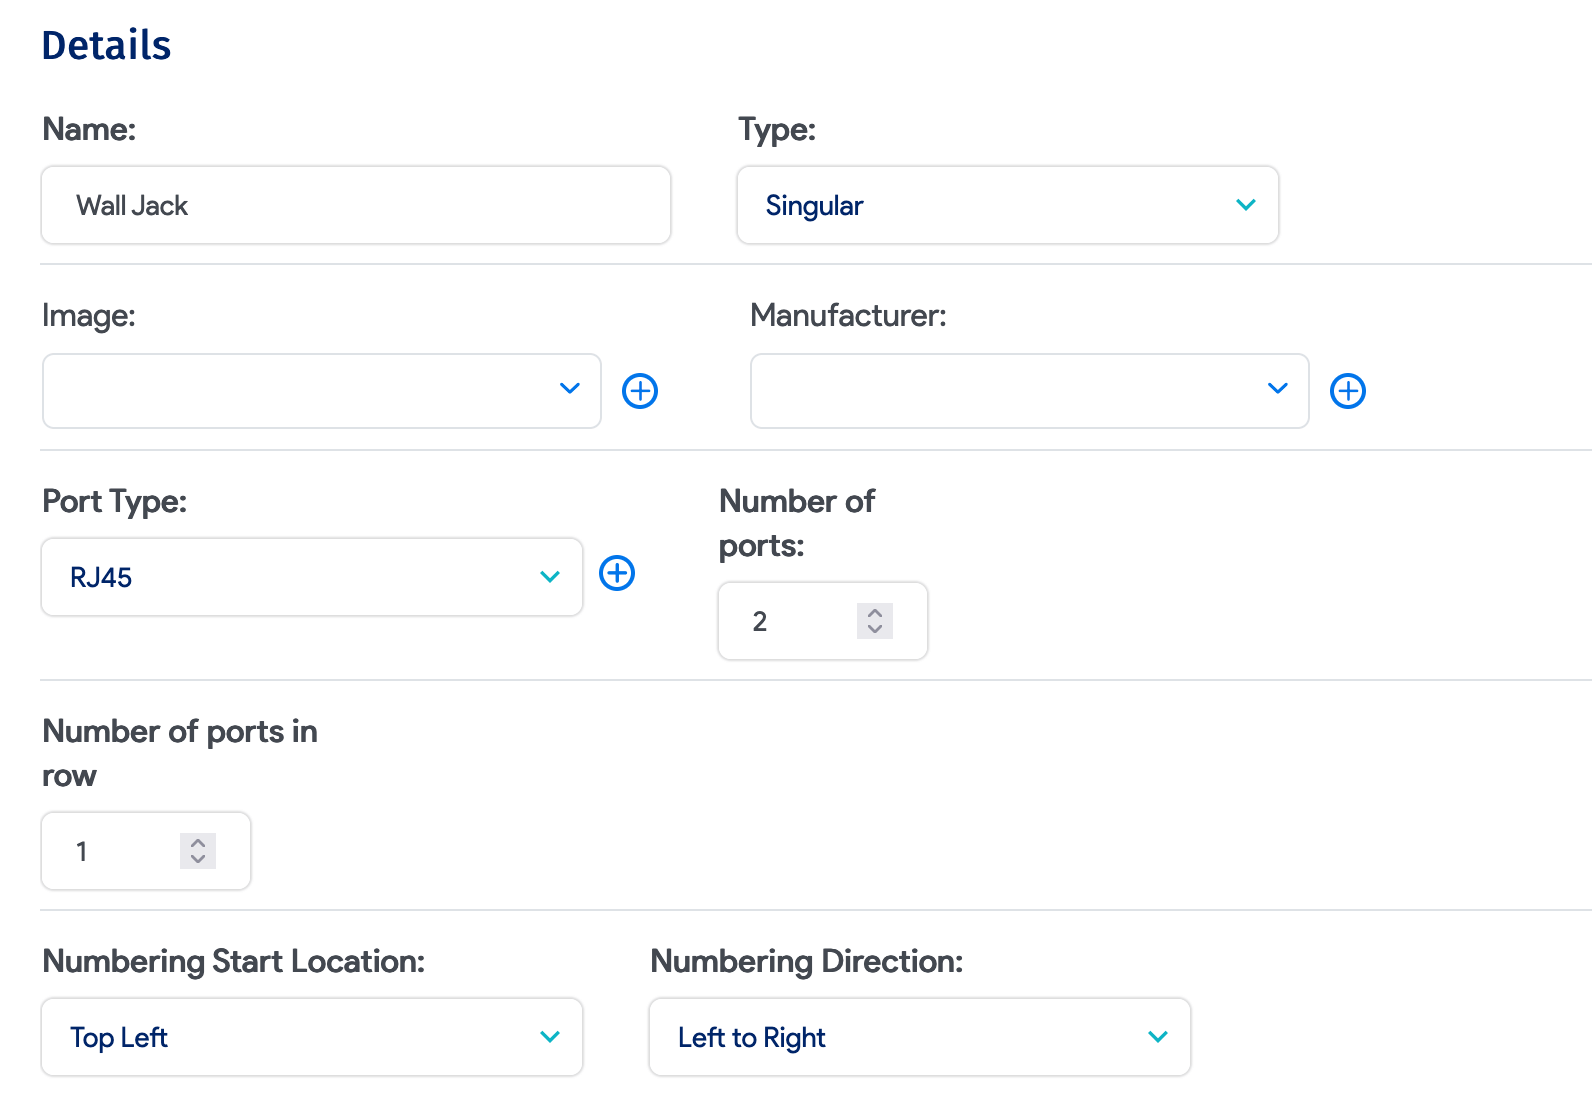
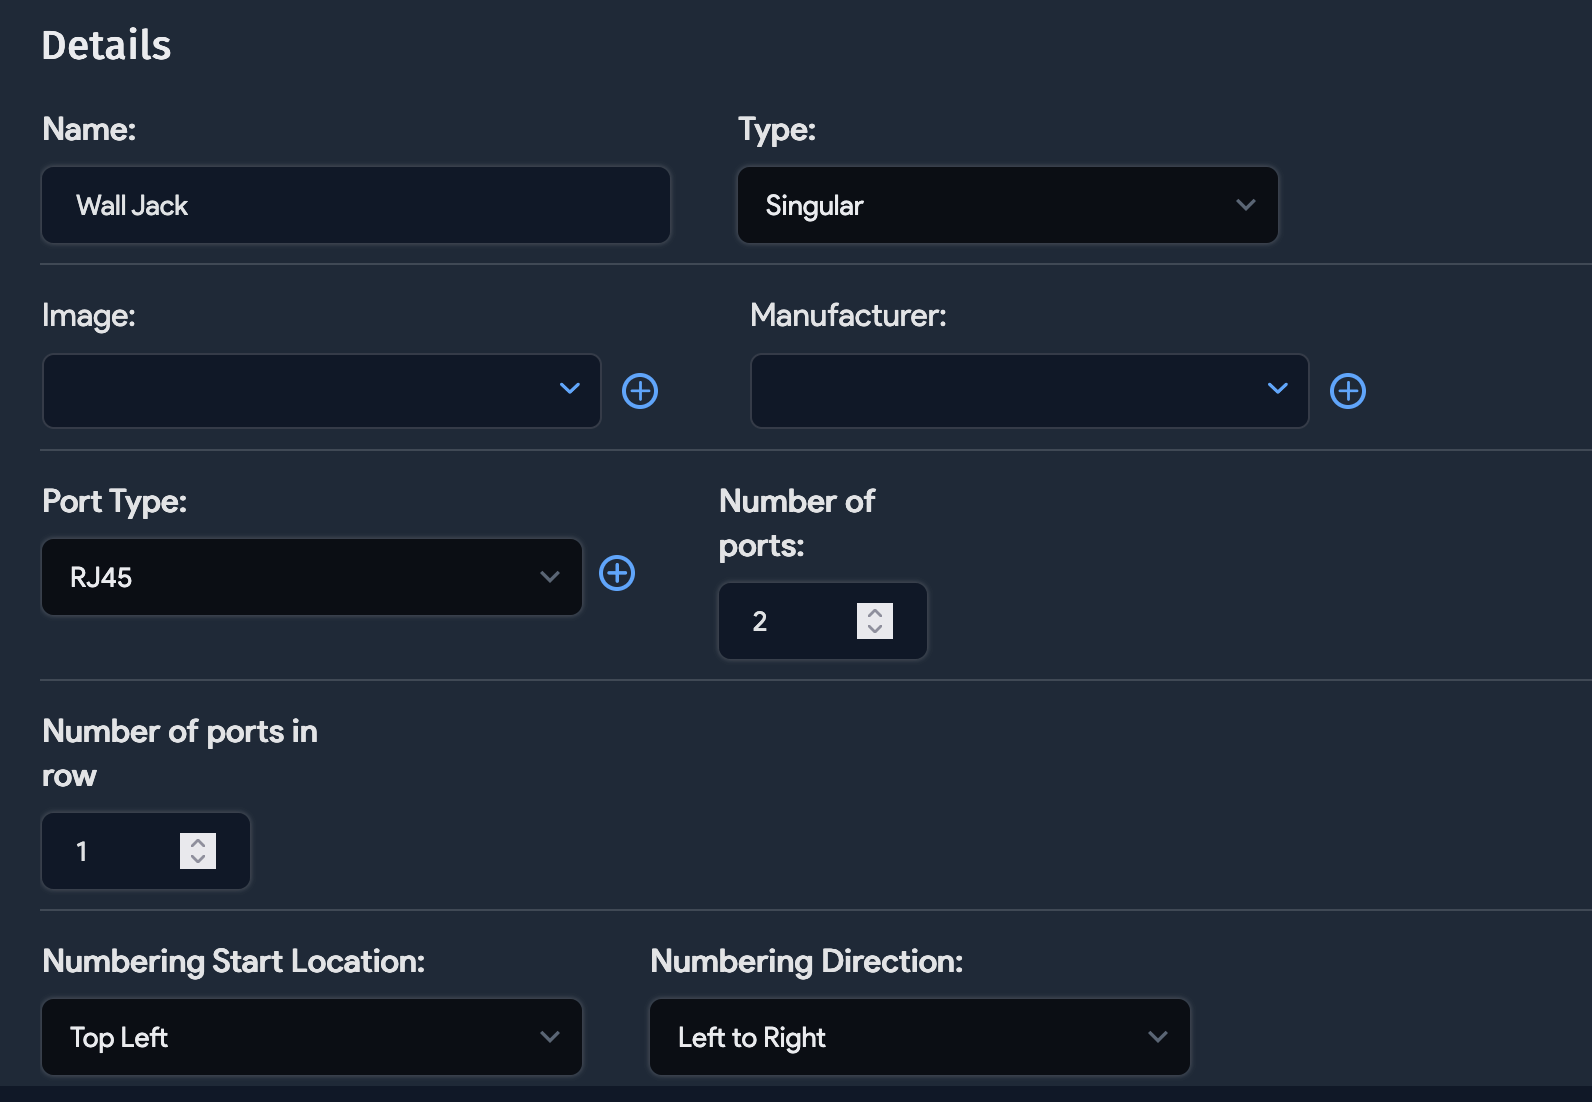
Navigate to Resources > Assets > Patch Panel Models and create a model with the appropriate Port Type and desired Number of ports on the panel of the wall jack.
Once you've created the model, make specific assets for the wall jacks via Resources > All Assets > Create. When creating the asset, select the type Patch Panel, then select the wall jack model for the patch panel model and the Back connection type, which can be either Patch Panel or Switch, and can go to the patch panel or the unmanaged switch you are documenting.
You will then want to create an unmanaged switch:
-
Do this by going to Tools > Templates & Bulk Operations > Switch Templates, then create a template that reflects the switches that are part of this connectivity by selecting a switch type and adding a ports switch template with the desired ports prefix and a template that includes the type and number of ports.
-
Once you've created the switch template, select the template and click the Create/Edit option under the Ellipsis menu in the top right corner of the template's details page. Here, you can add the desired amount of unmanaged switches needed.
Once you've created assets for the wall jacks and created switches from the template, you can start creating the connections:
- Go to the desired wall jack asset you want to work with and open the edit details page of the asset. There will be a section for patch panel ports on this details page, with a line for each port contained on the wall jack panel (defined by the previously created patch panel model).
- First, define the front connection as either the patch panel or the switch, whichever is desired.
- Define the Connection Type, then enter the Object ID or search for and select the switch port or the patch panel port for the connection.
- You can also enter a Label for the connection that corresponds with the wall jack label in the room (if it is labeled). Then, define the Back connection, which can also be the patch panel port or the switch port (whichever you did not use for the front connection).


This should complete the connection path from the patch panel to the wall jack to the switch. Next, you can locate the unmanaged switch by searching for it by its given name. Select the switch port in the top right corner of the switch's details page. You can select each switch port and edit or add the connections of any relevant devices.