Jira Service Management Integration
Please note that the JSM Assets app is the currently supported Device42-Jira integration app. It is available on the Atlassian Marketplace.
Support for the 'external' JSM Assets integration app ended on December 30, 2024, as Atlassian has implemented asset capabilities that are 'internal' (native) to its premium Jira platform.
Integrate your Device42 instance with Jira Service Management (JSM) to manage your team's tasks, linking them directly to the impacted assets.
Installation and Configuration
Integration Prerequisites
To integrate Device42 with JSM Cloud, you need:
- A running Device42 virtual appliance, populated with configuration items (CIs) to sync to Jira.
- Administrator access to a Jira Cloud account to install and configure the Device42 Jira Service Management app.
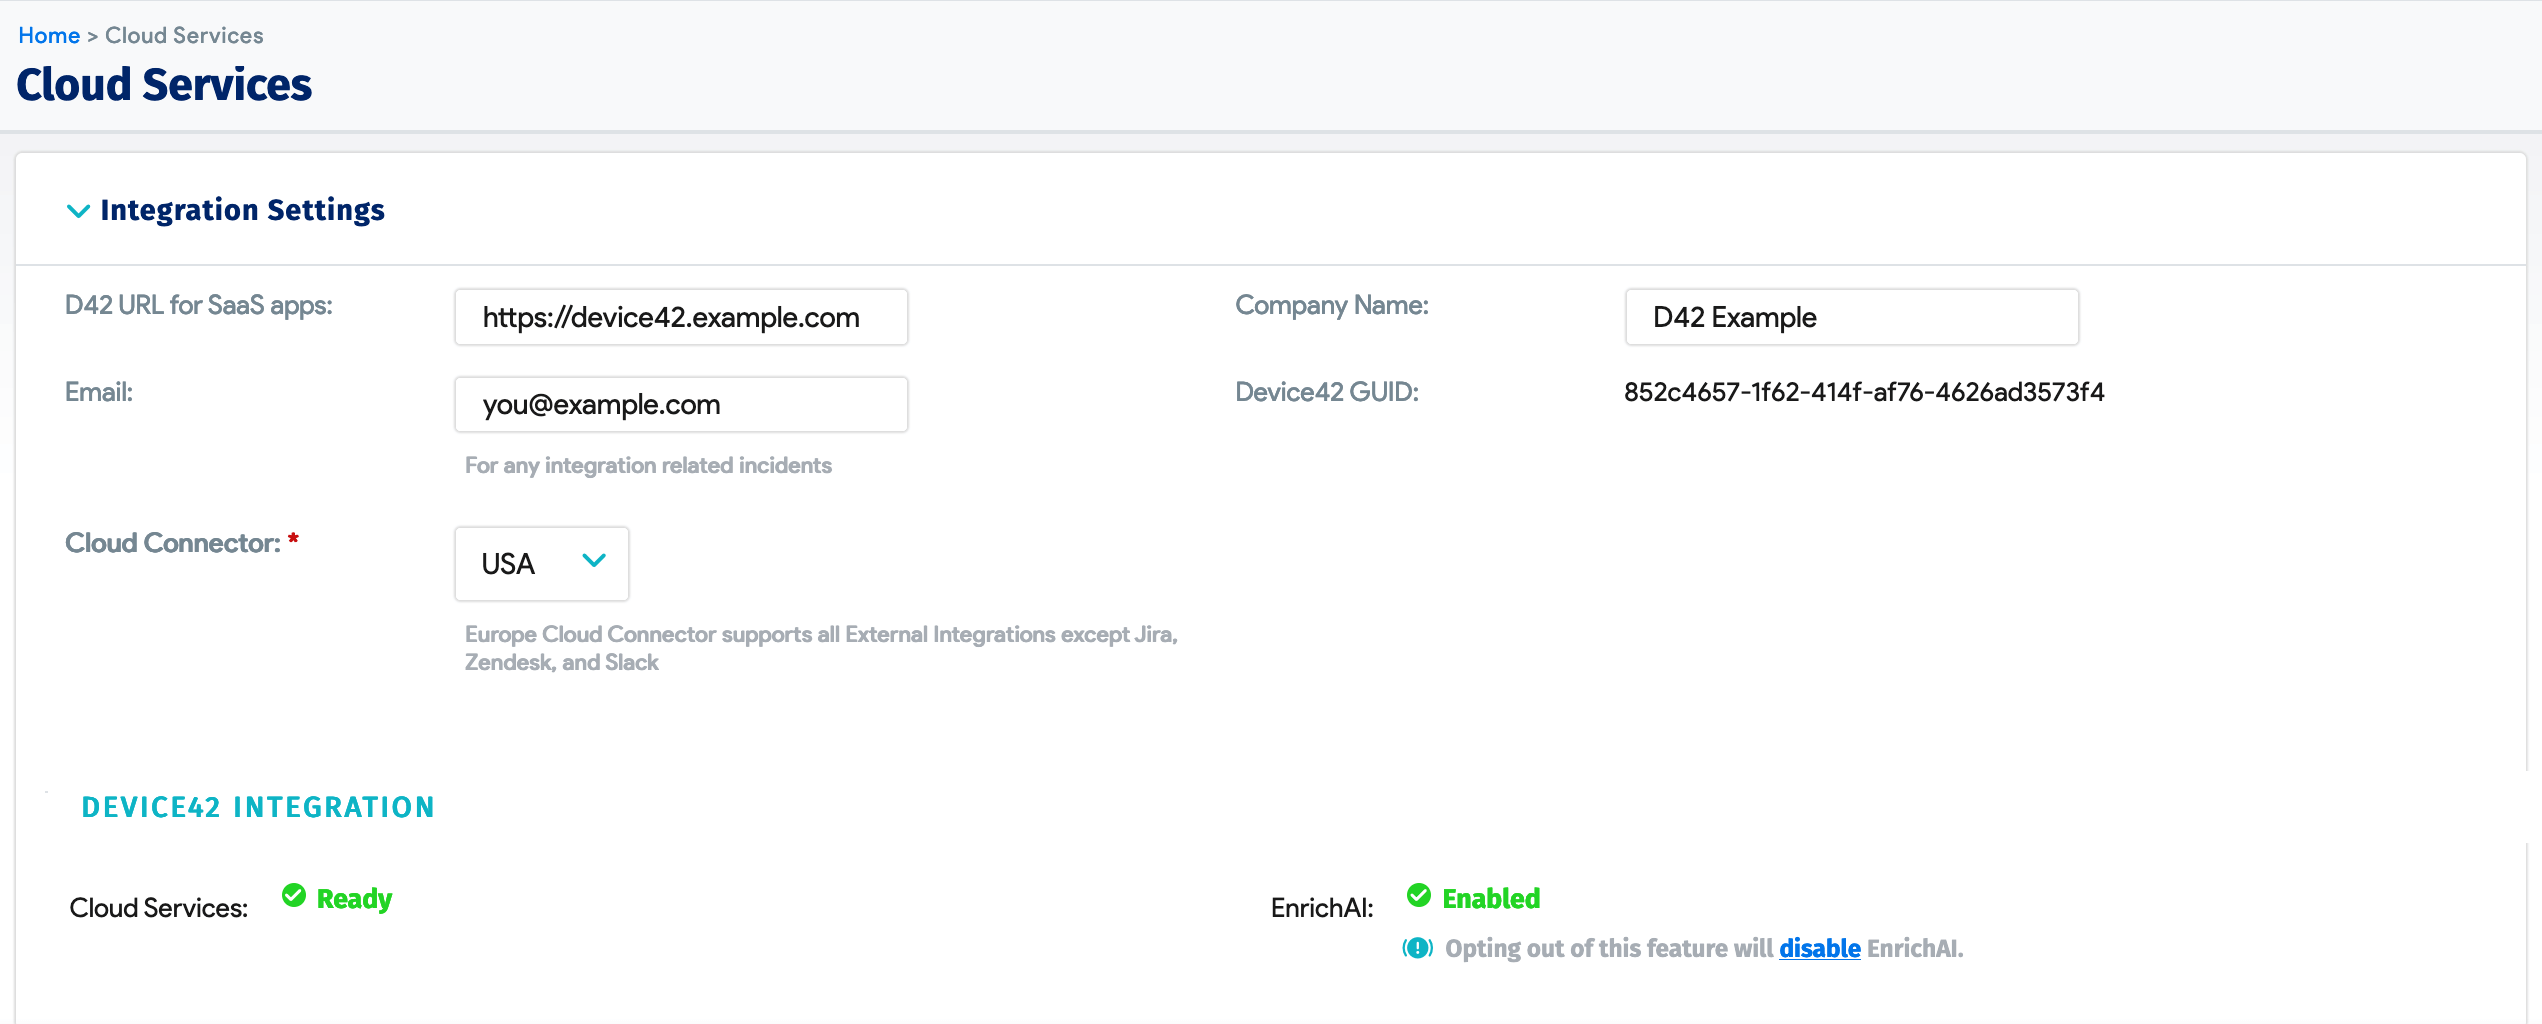
Set Up Device42 Cloud Services
Prepare your Device42 instance for cloud service integration by navigating to Tools > Integrations > Cloud Services. Fill in the D42 URL for SaaS apps field with the hostname for your Device42 instance, and add your Company Name and Email.

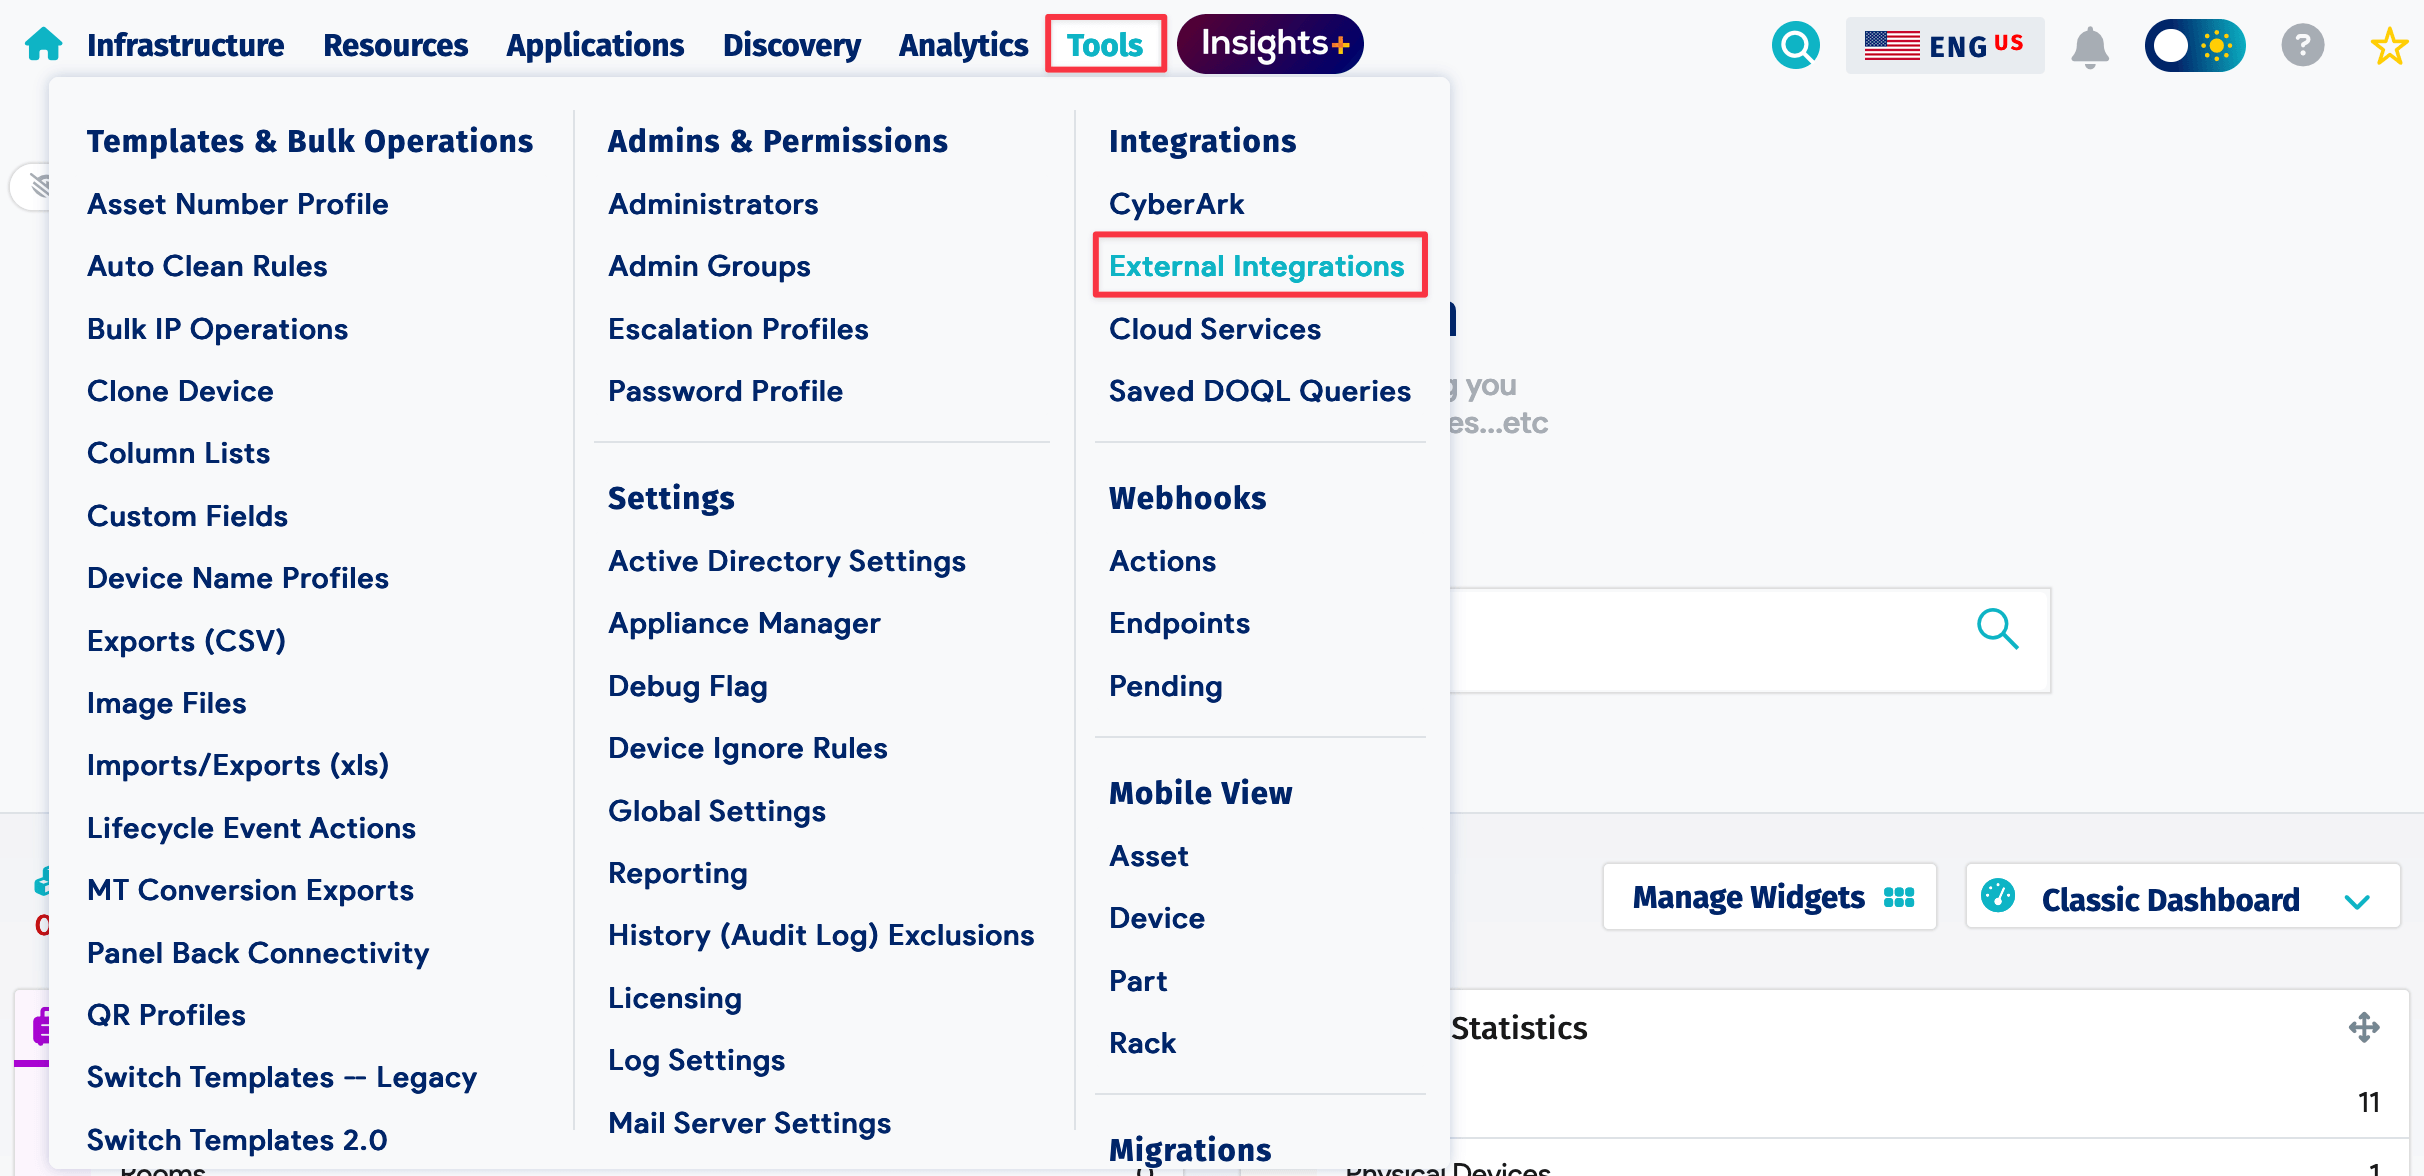
Configuring Device42
-
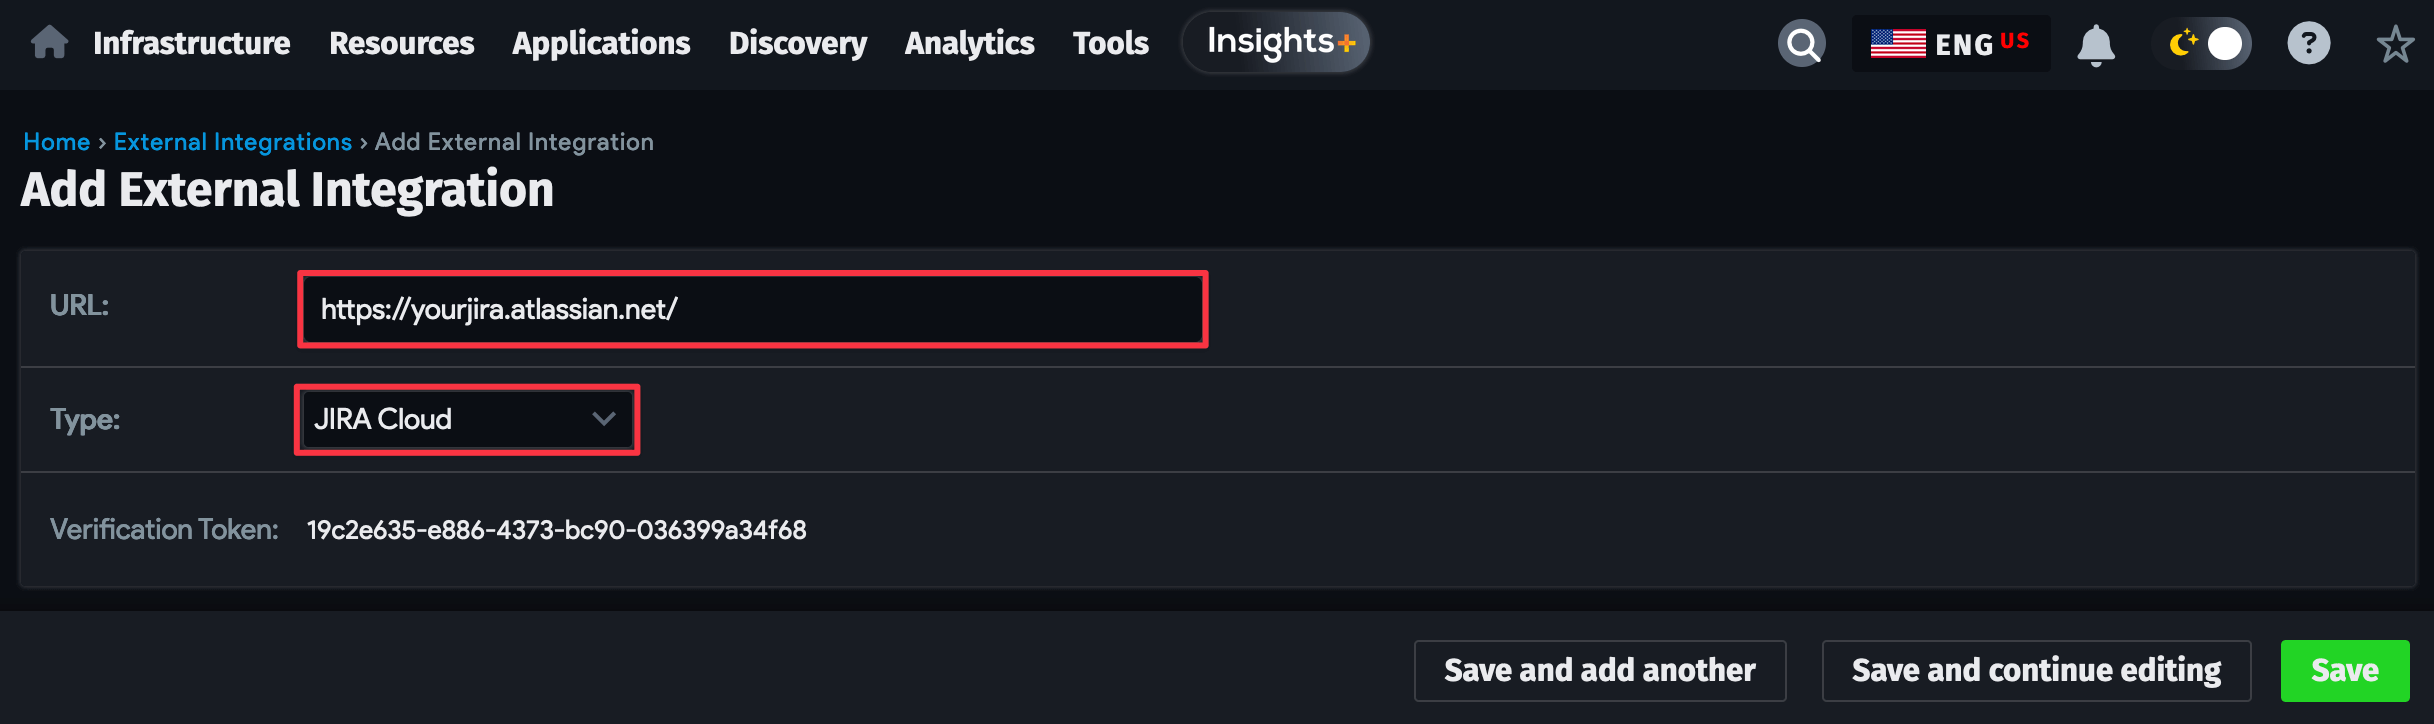
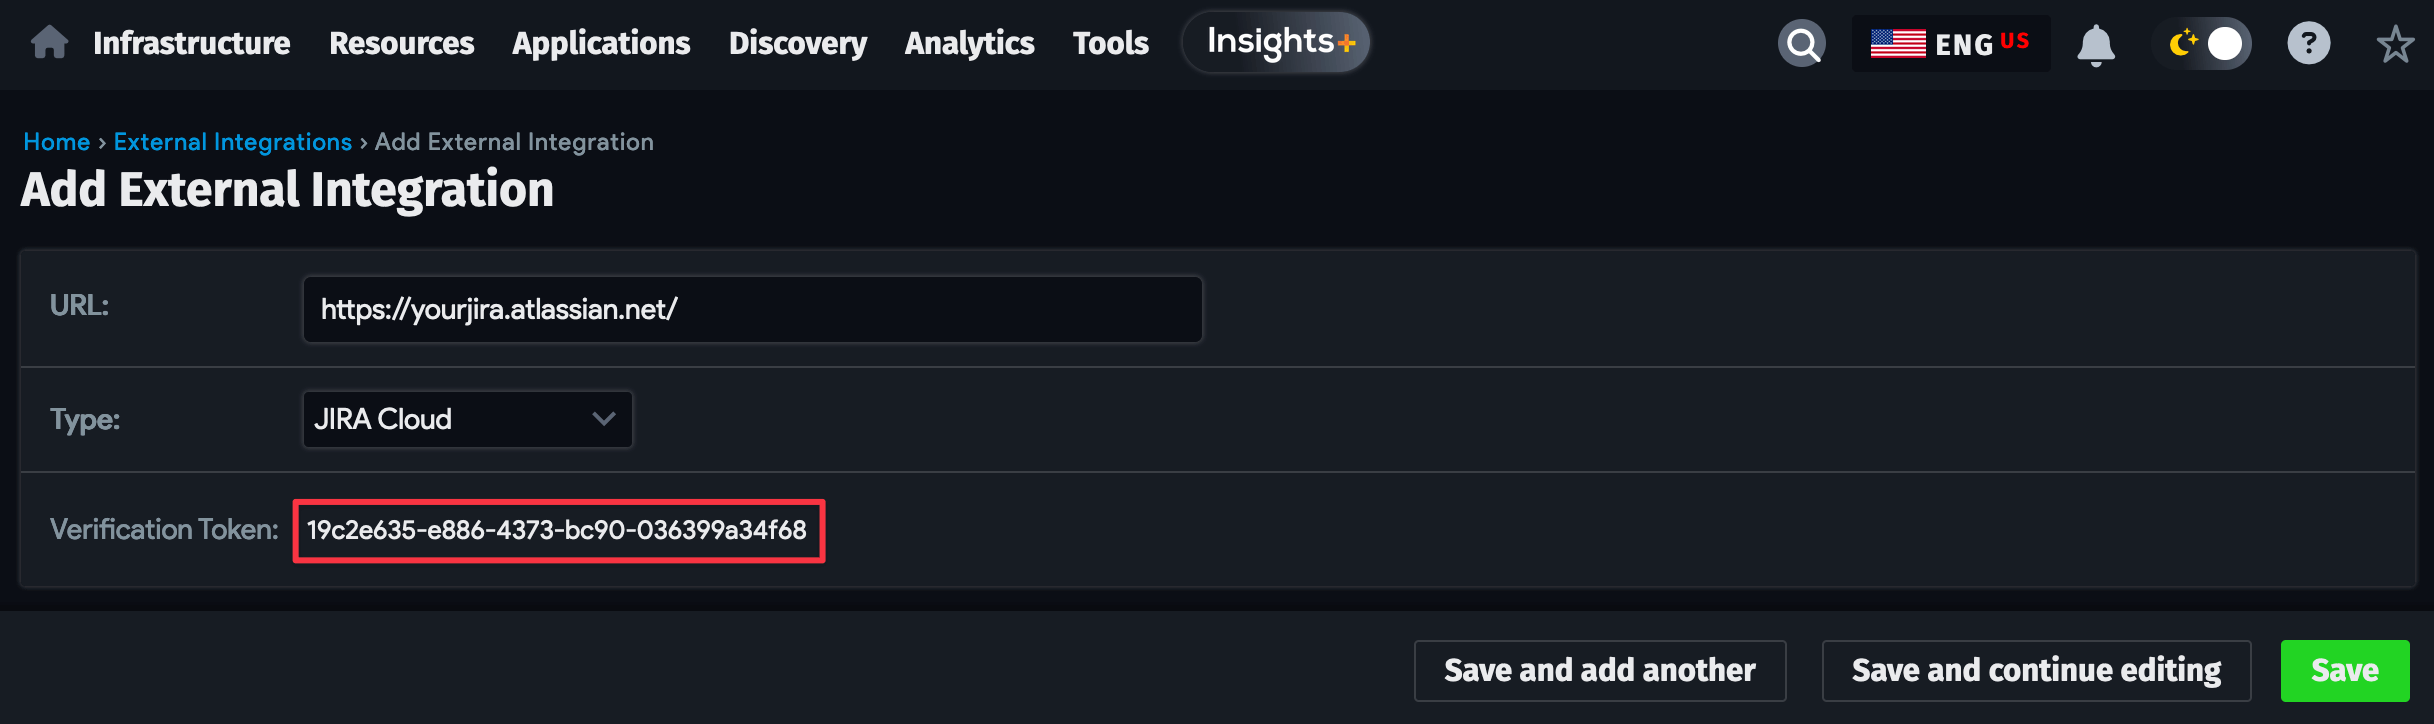
From the Device42 menu, go to Tools > Integrations > External Integrations and click on the Add External Integration button.

-
Input the URL of your Jira Cloud instance (for example,
https://YOURURL.atlassian.net/) and select "Jira Cloud" as the integration Type.
-
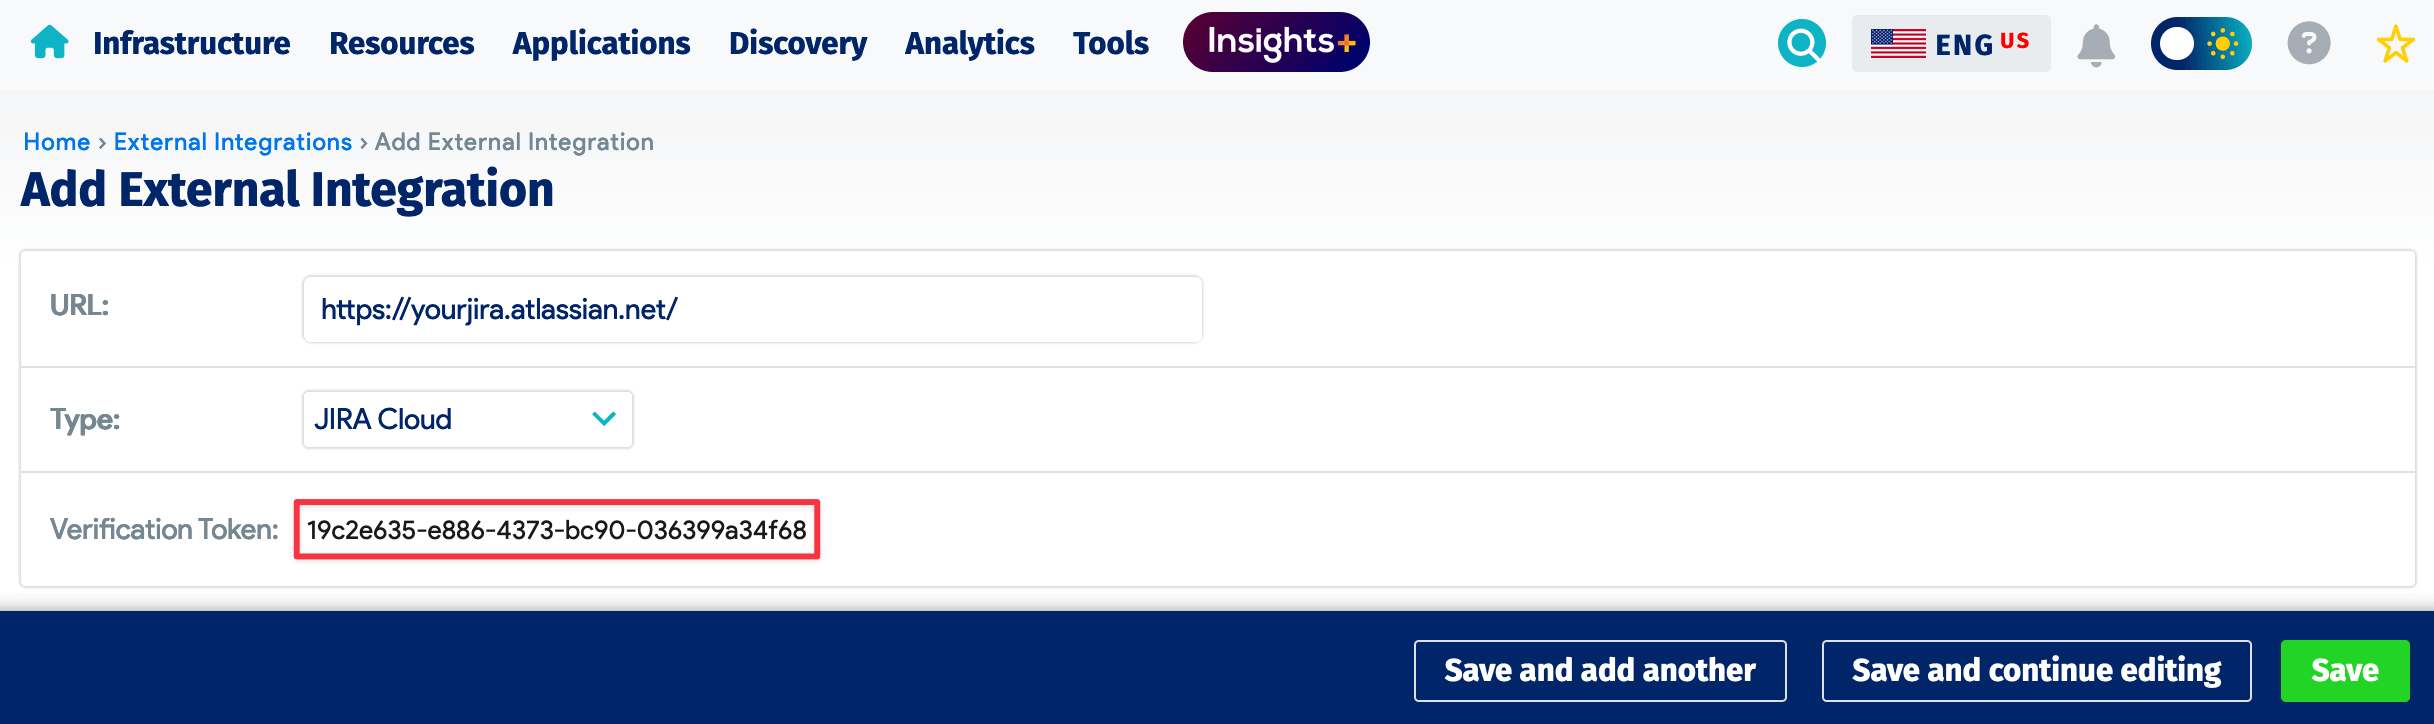
Copy the Device42 Verification Token, which you'll use to configure the JSM app in the next section.
Configuring Jira
To install and configure the Jira-side integration, log in to your Jira Cloud account and proceed as follows:
-
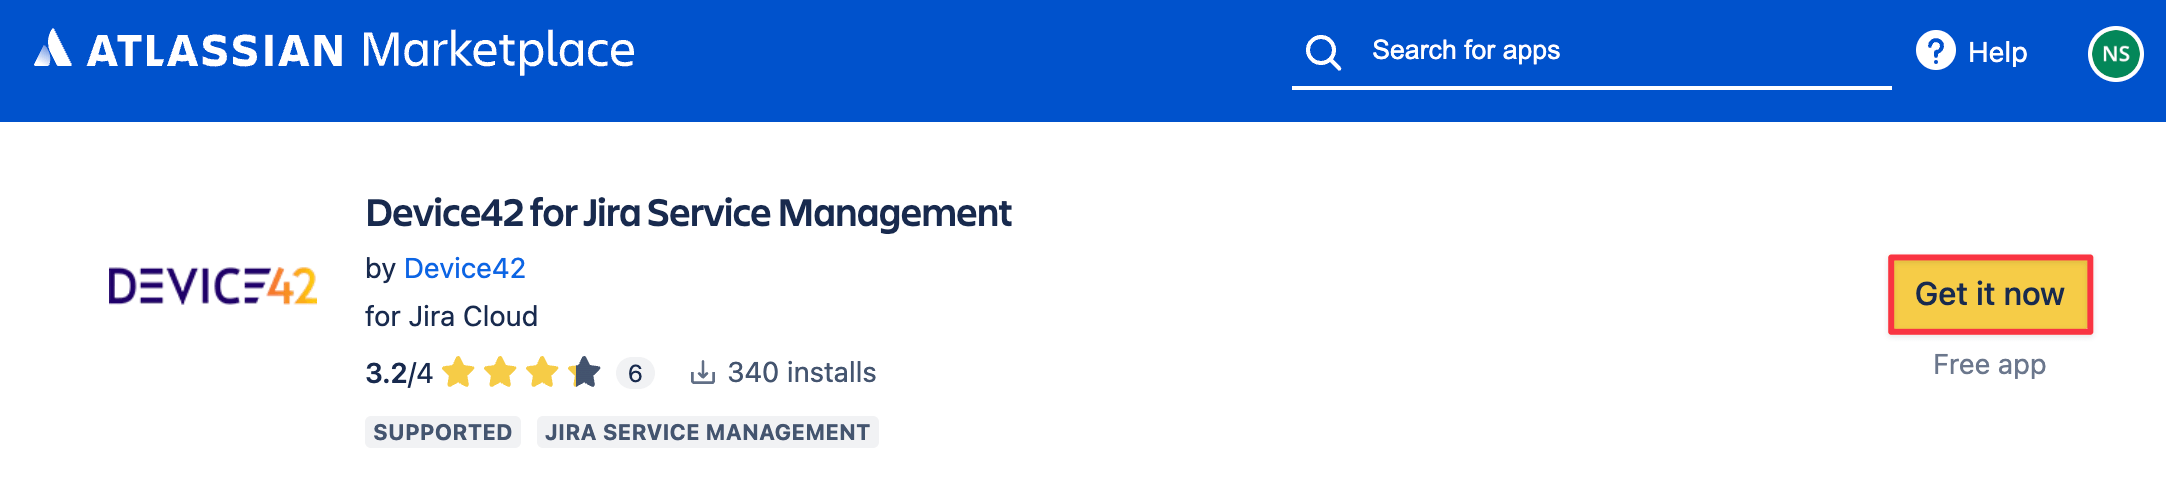
Locate the Device42 for Jira Service Management app from the Atlassian Marketplace and click on the yellow Get it now button to install it.
-
Navigate to Apps > Manage Your Apps > Device42 Jira Service Management > Configure. Paste your verification token in the Linking field and click the Link to Device42 button. The account status will display a green "Linked" label once complete.

-
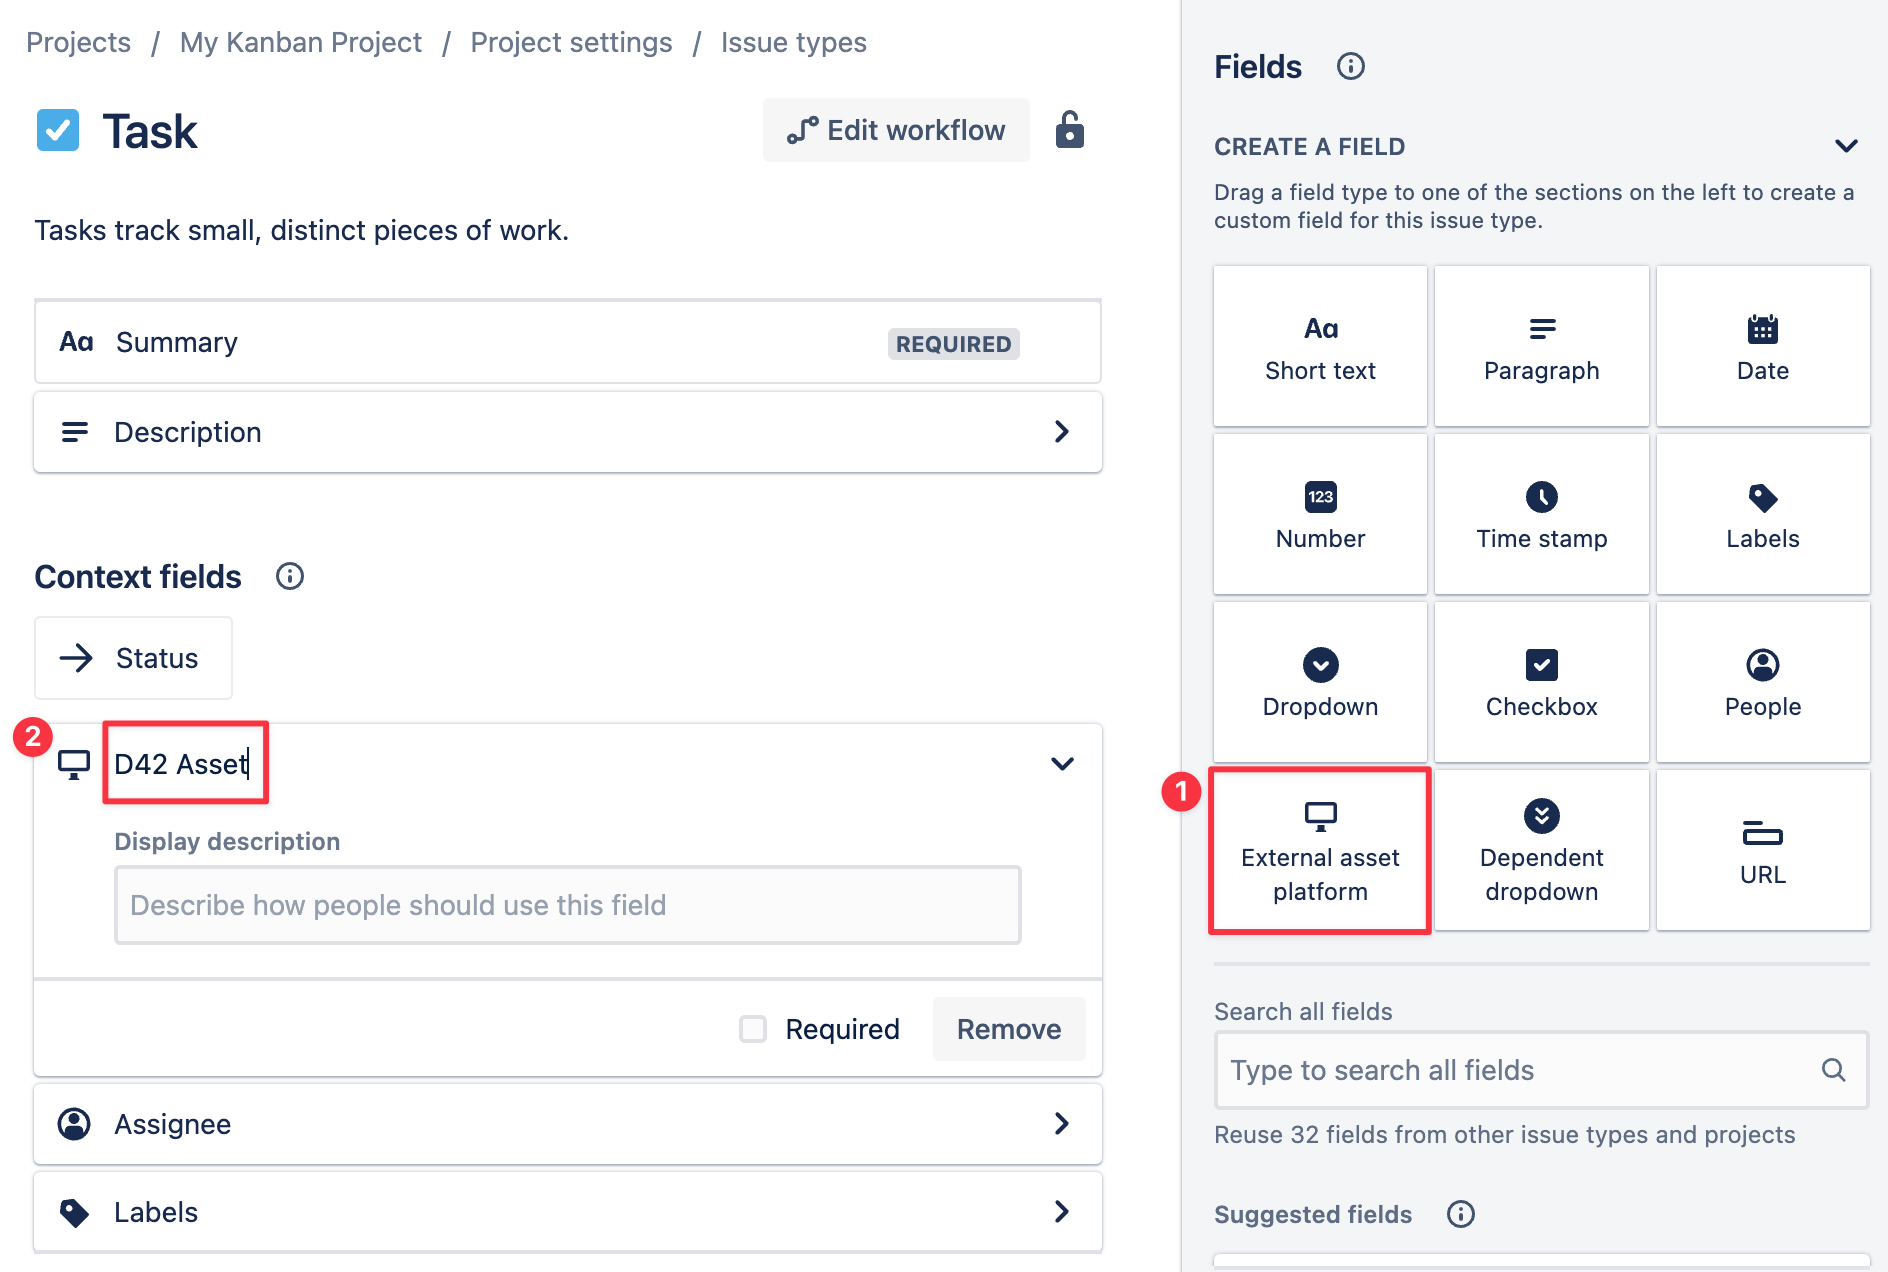
Now add the Linked Assets field as an issue type in Jira; your Device42 data is related to Jira using this field. Go to Projects > Project Settings > Issue Type and select the "External asset platform" option. Provide a relevant name for this field in the textbox to its left.
Configuring, Uninstalling, or Verifying the Installation of the JSM App
-
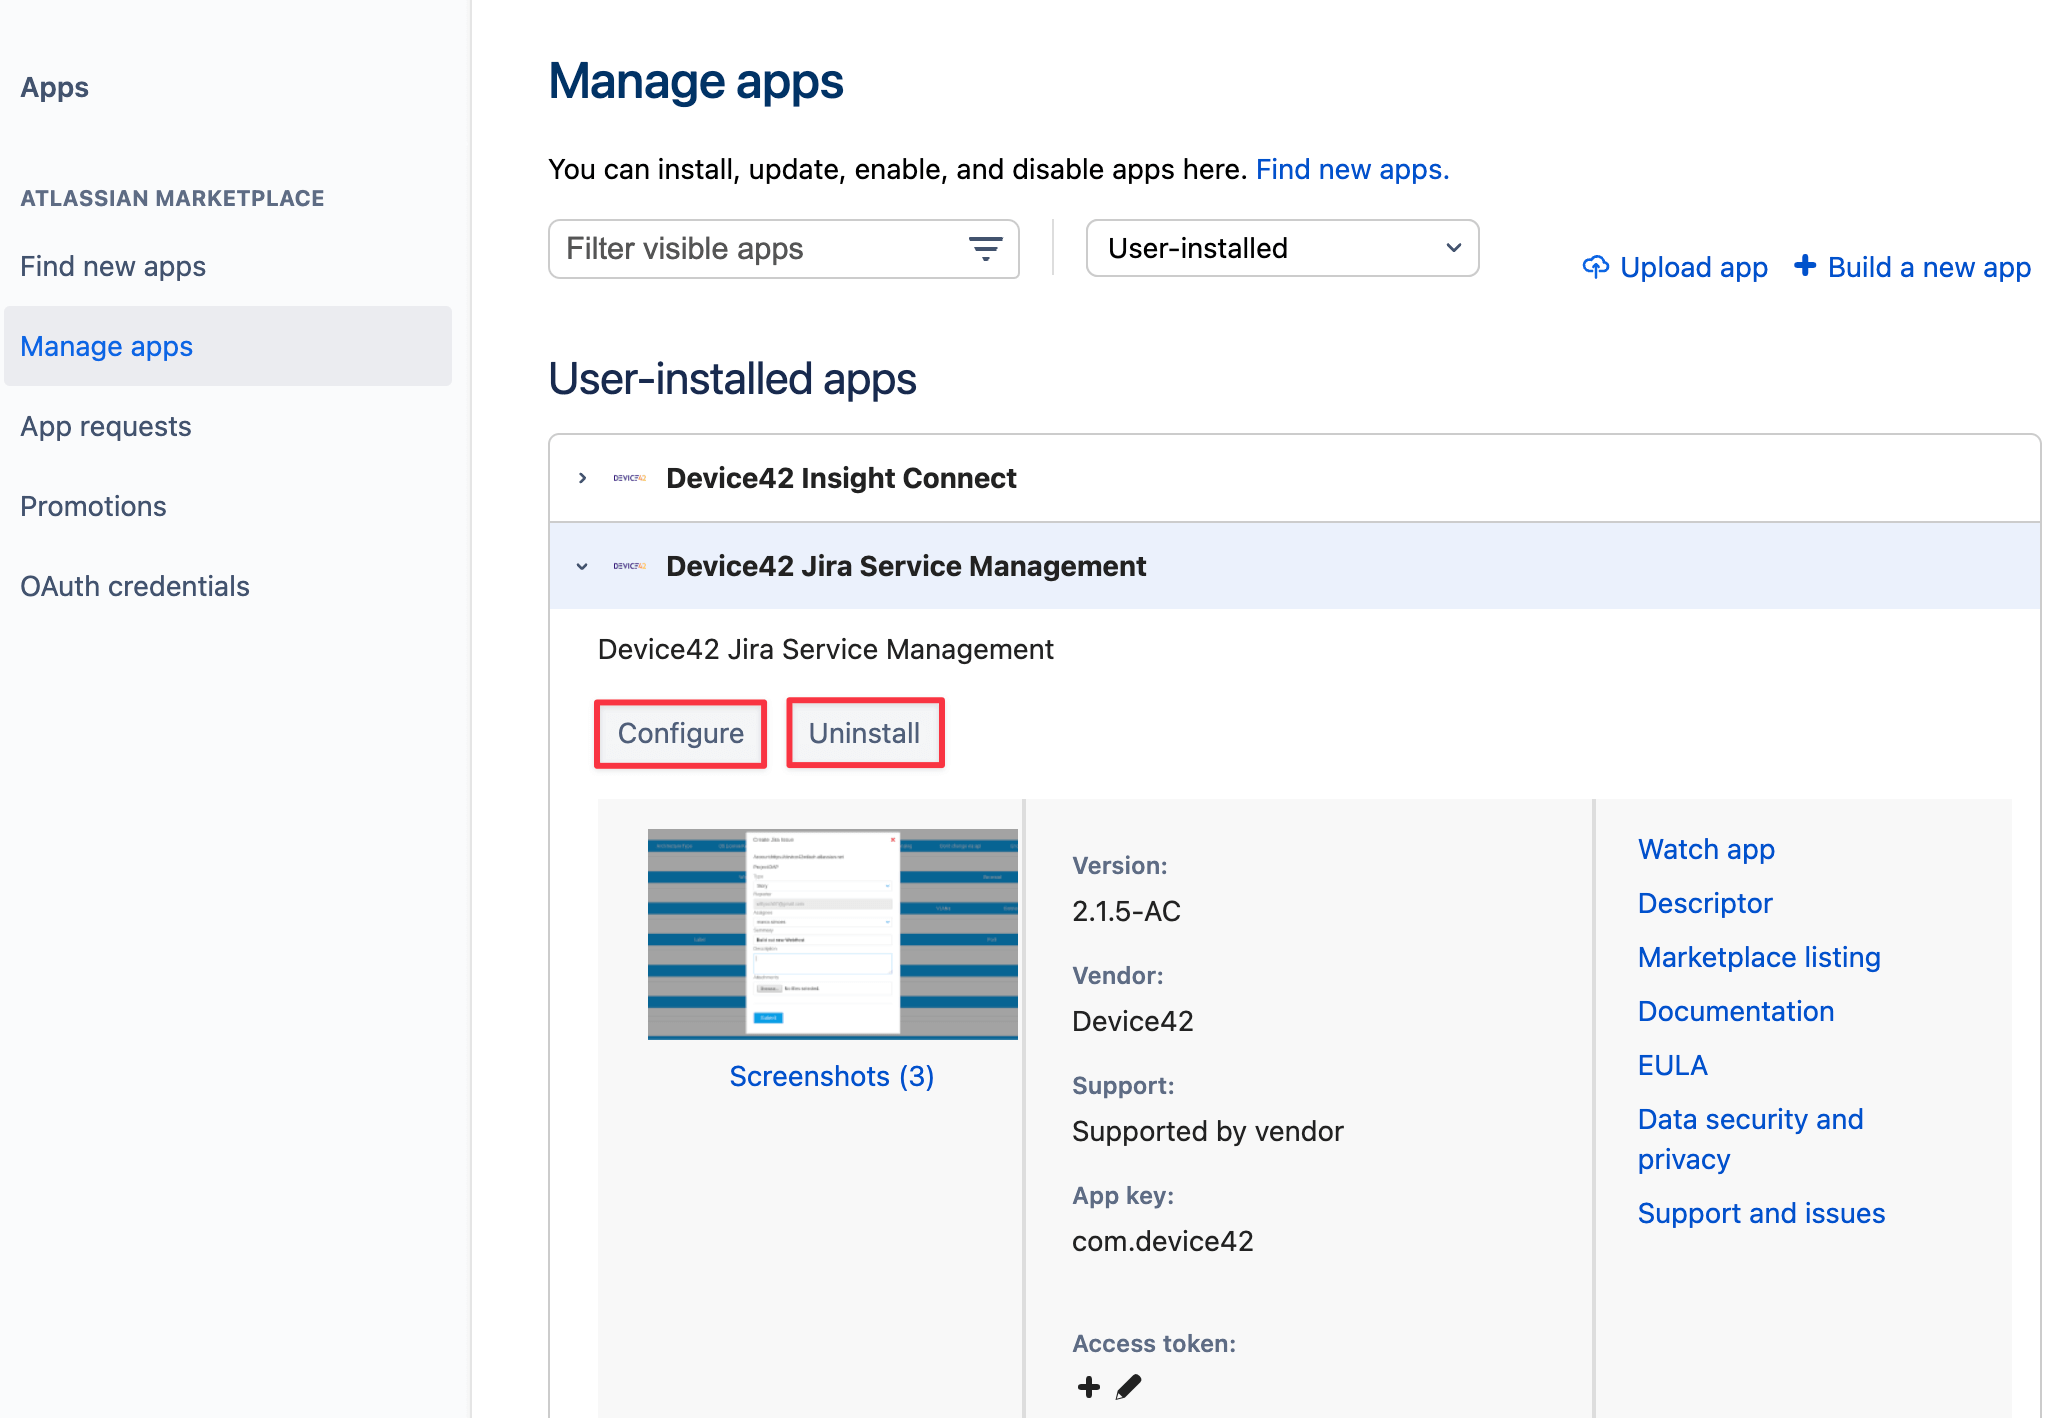
You can view and manage the JSM app from your Jira instance. Go to Apps > Manage your apps and click on the Device42 Jira Service Management app under the "User-installed apps" heading.
-
Click on Configure to link your Device42 instance as detailed in the previous section.
-
Click on the Uninstall button and confirm that you want to remove the app from your Jira product instance.
Integration Usage and Features
The JSM Interface in Device42
Once the Device42 for Jira Service Desk app has been installed and configured, you will see a new entry for Jira - your-Jira-instance-address (for example, Jira - https://d42product.atlassian.net) at the bottom of your Device42 assets pages. You can go to Resources > Compute > All Devices and select an asset or search for one from the list of devices.
-
Jira issues linked to a given CI will display information about the issue Reporter, Assignee, and Status.
-
Under the Action column, click on the red x to the right of a linked issue to remove that issue from the asset. Note: This will not delete the issue from Jira.
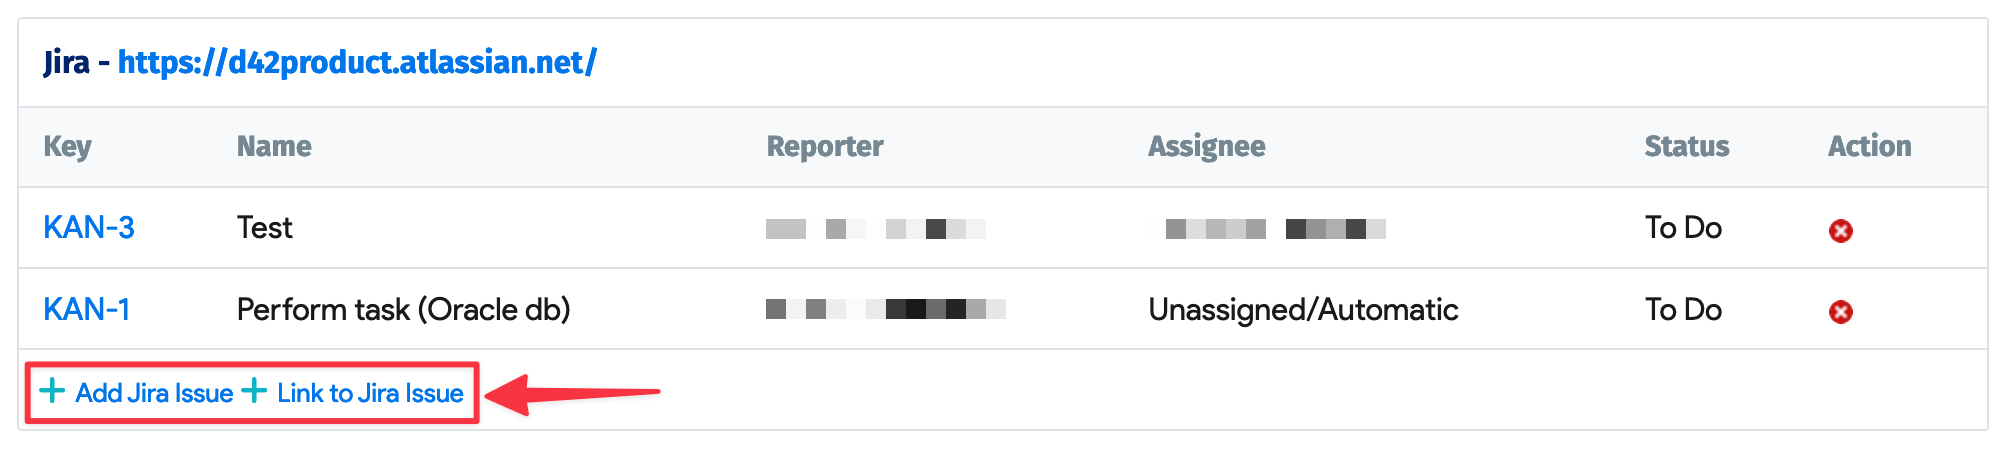
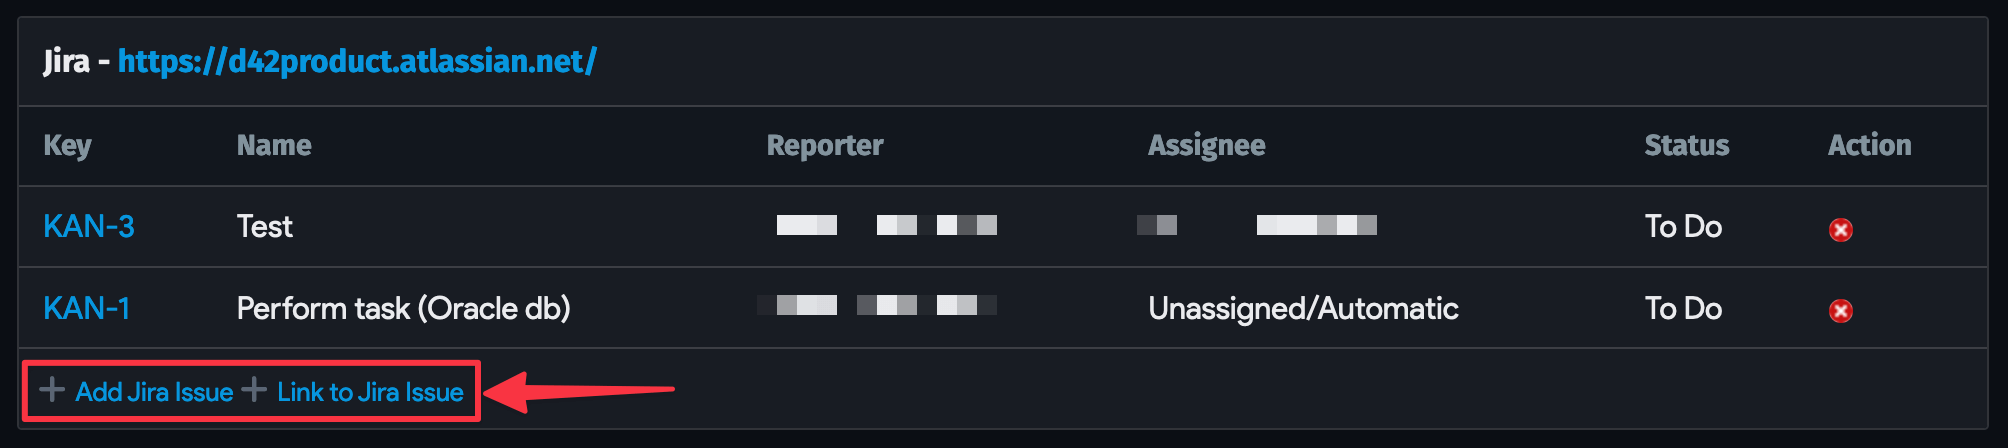
You can create a new Jira issue or link an existing issue using the control links located at the bottom of the interface. Refer to the Create a New Jira Issue or the Link an Existing Jira Issue sections for more information.
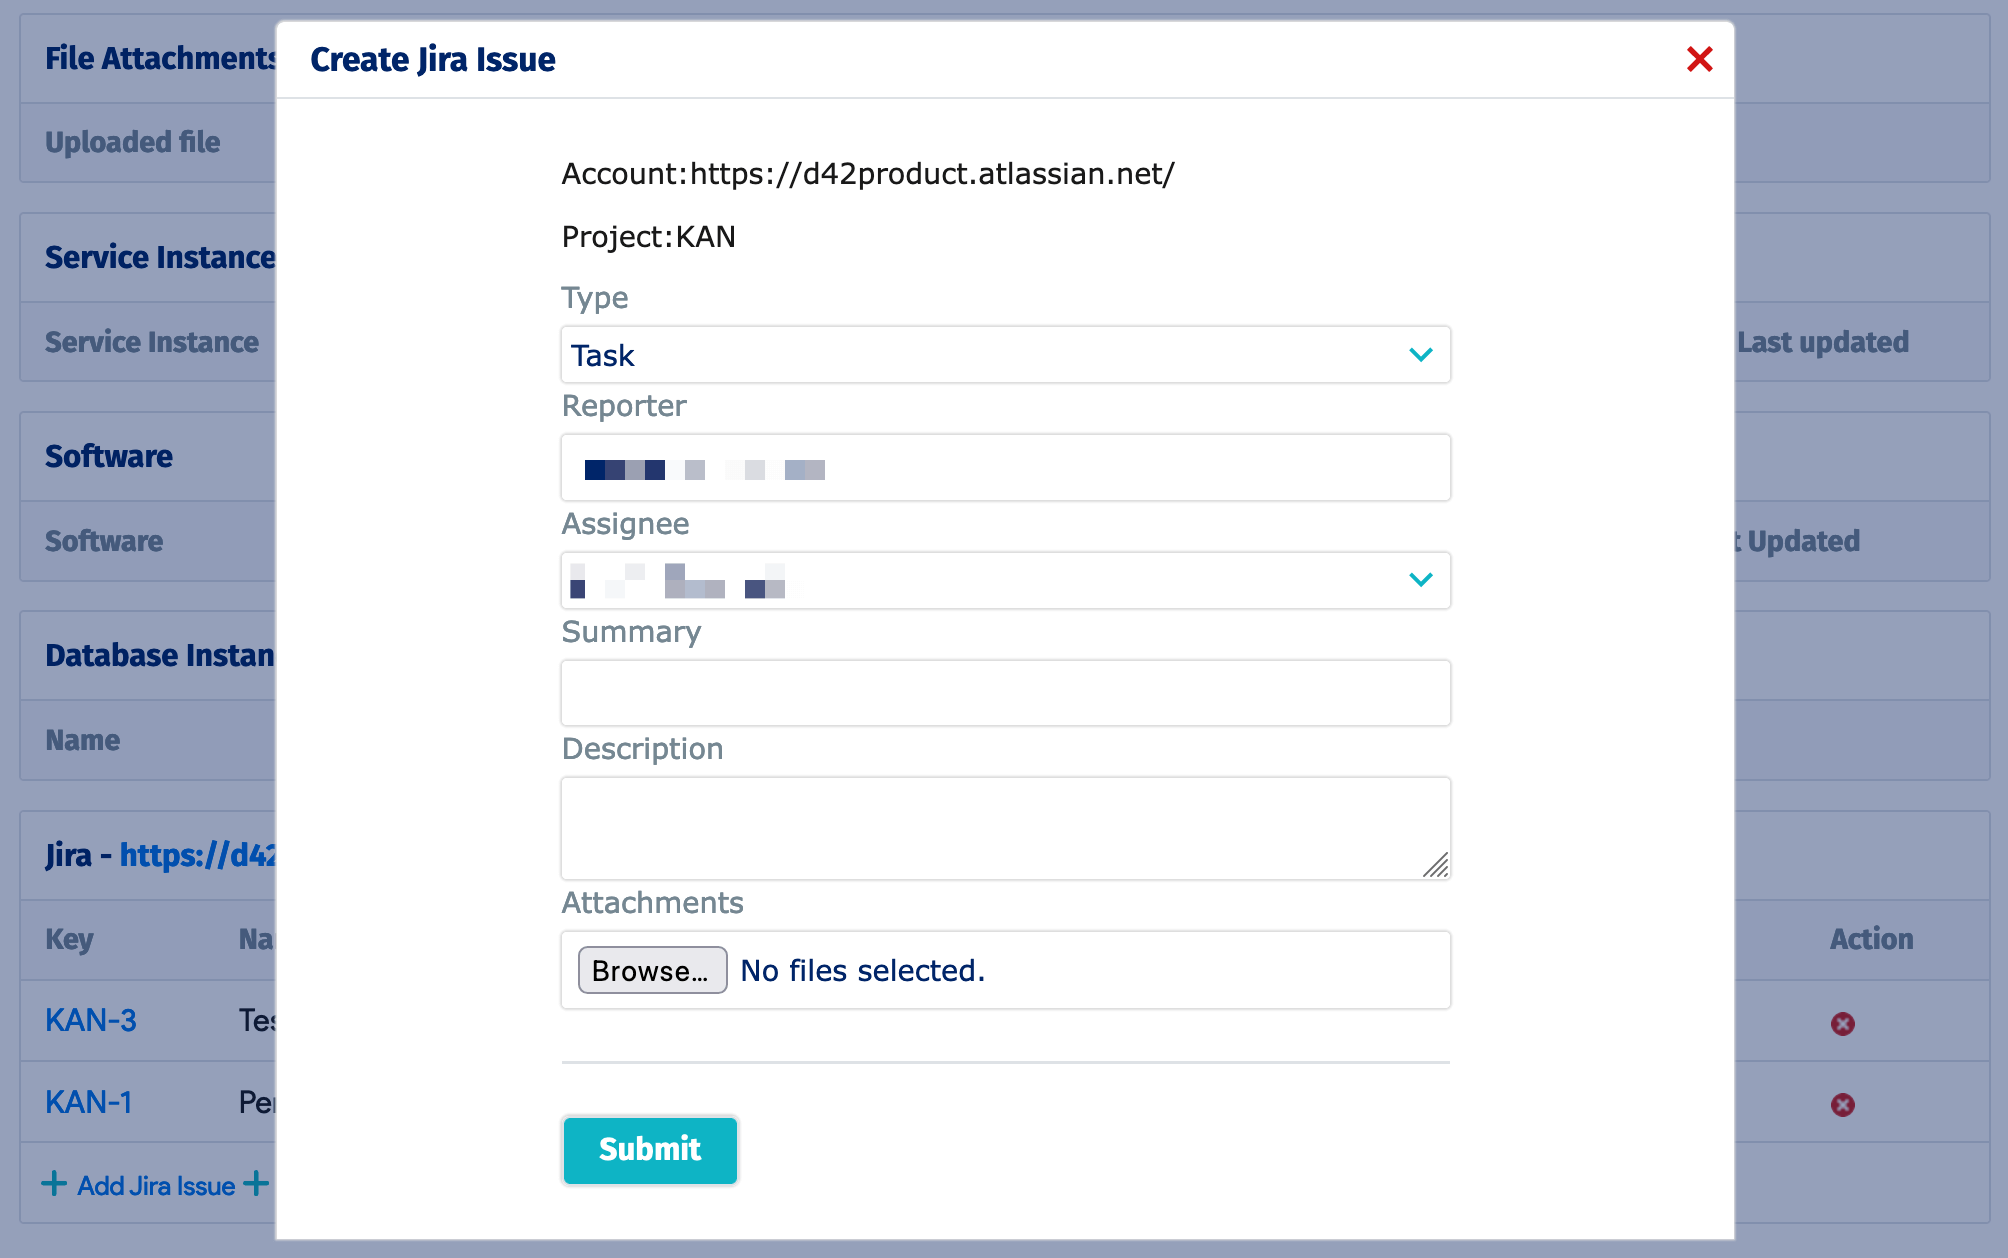
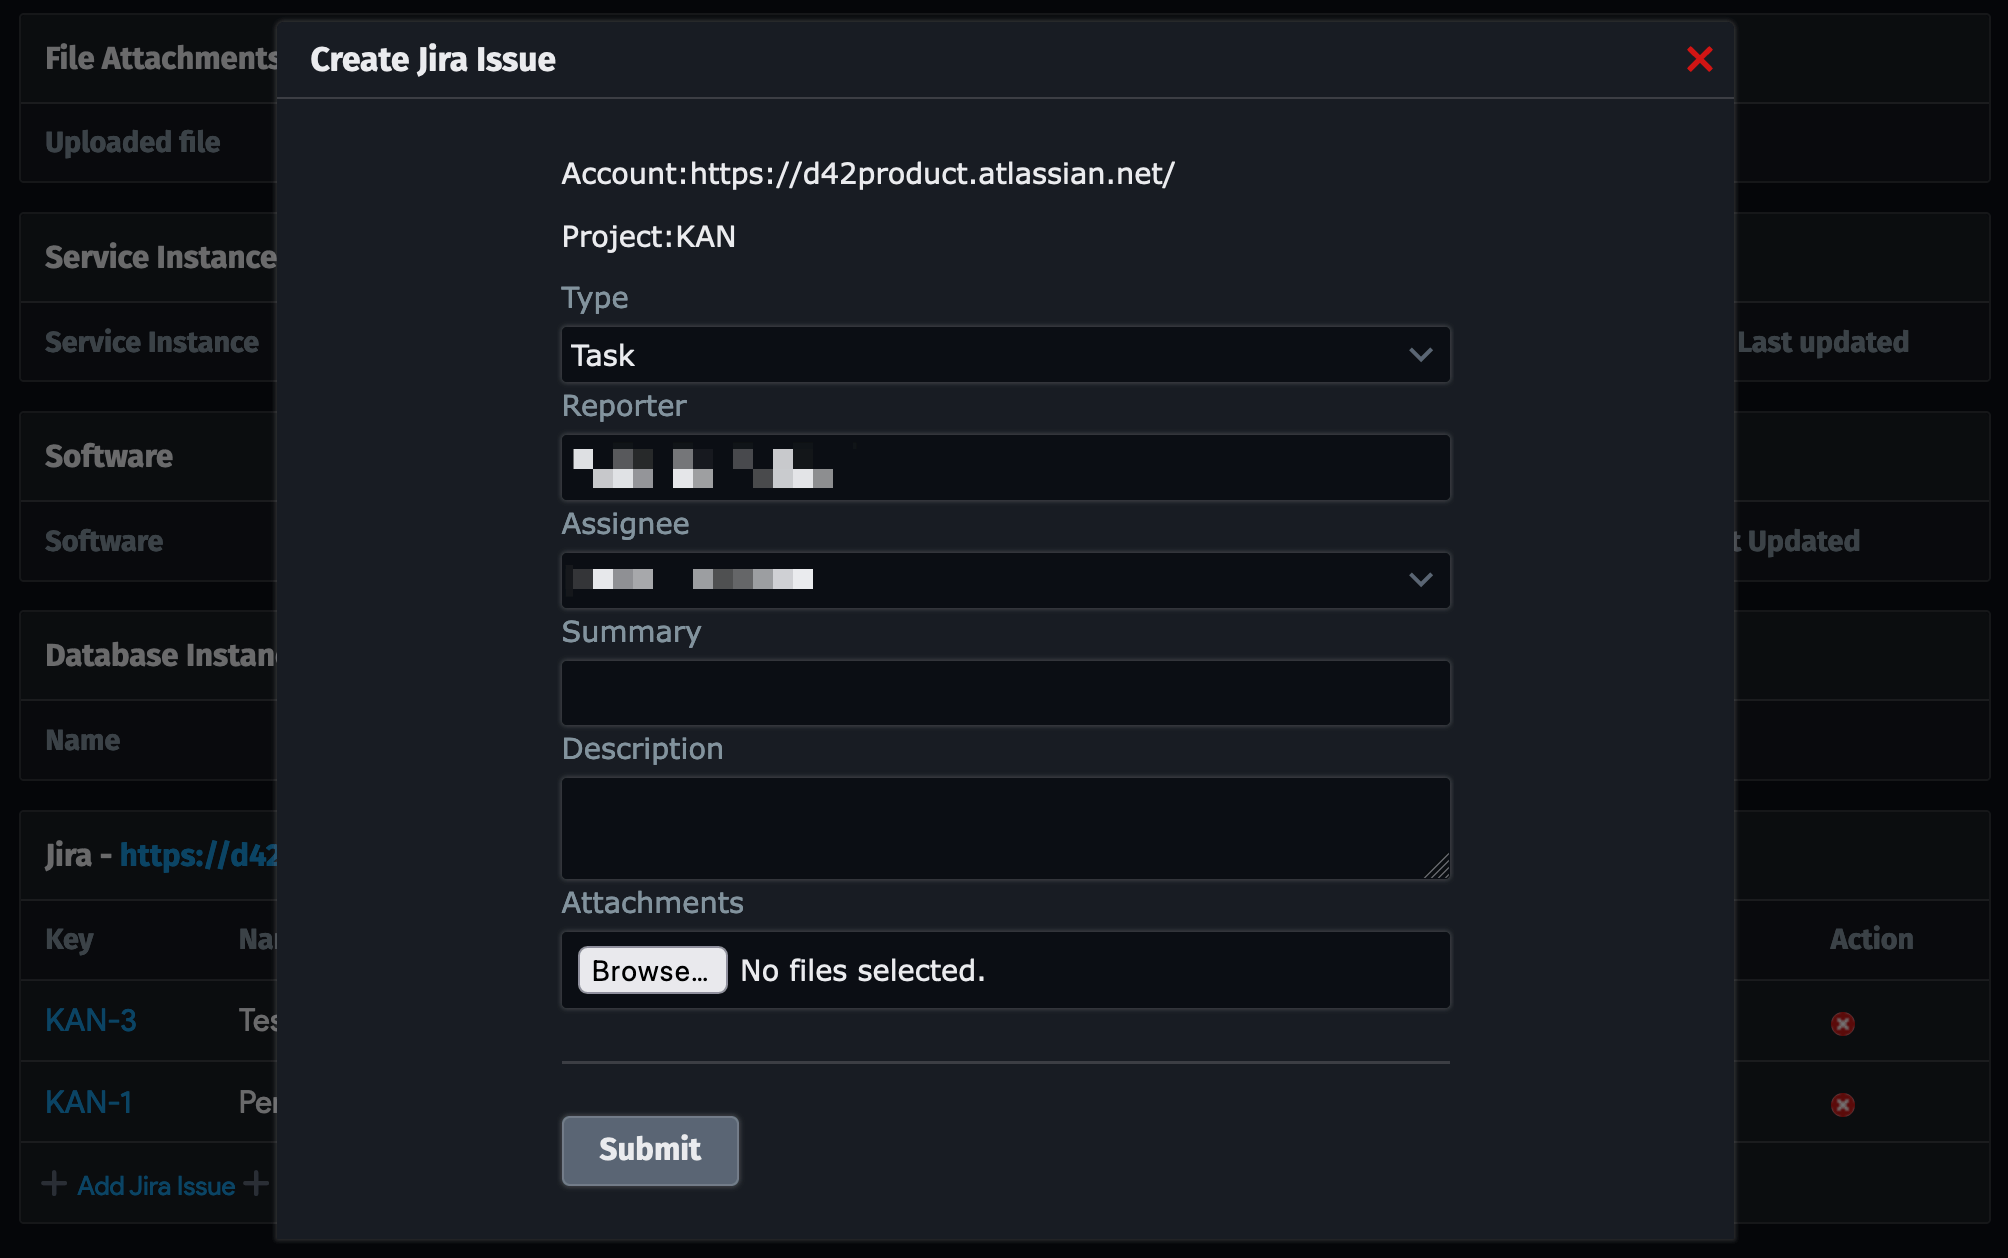
Create a New Jira Issue From Device42
-
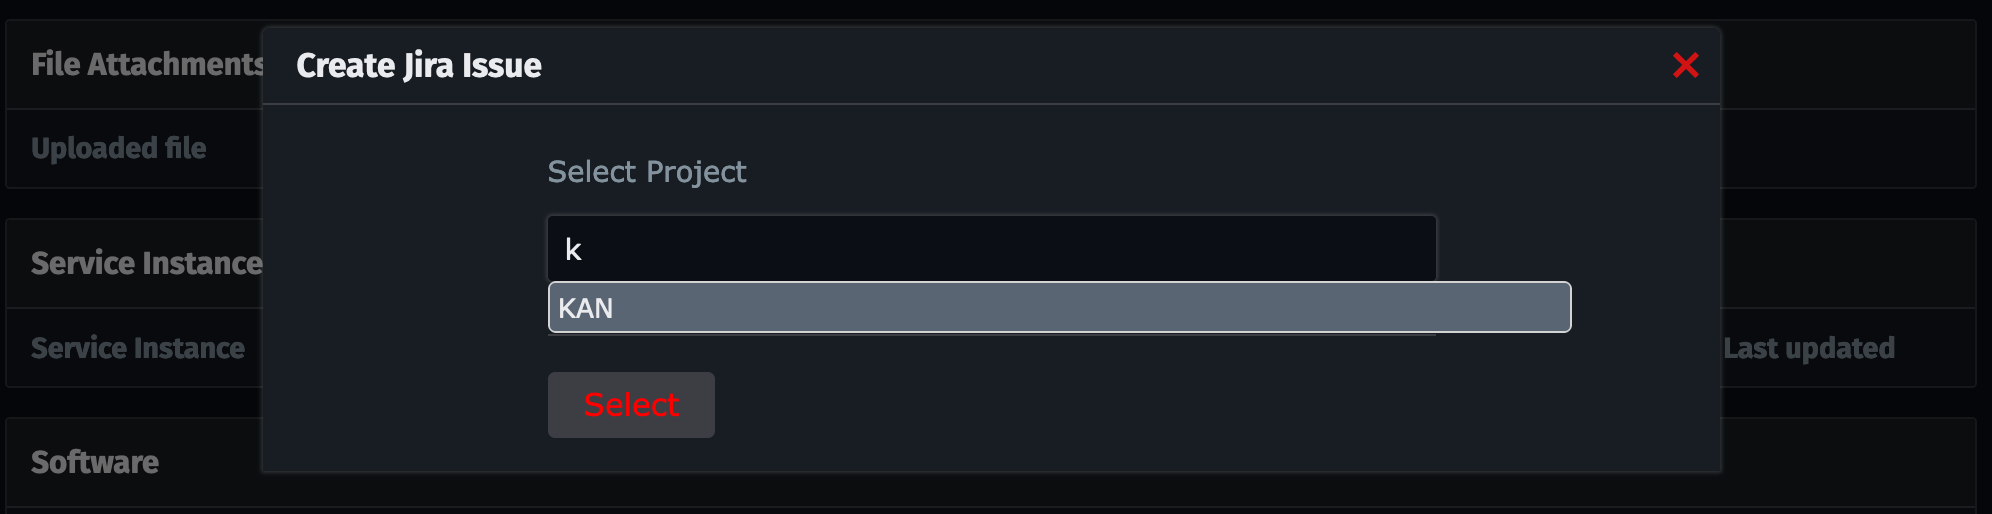
Click on Add Jira Issue and search for your Jira project name. By default, a Jira project name is the first three letters of the automatically assigned issue keys (for example,
KAN-3).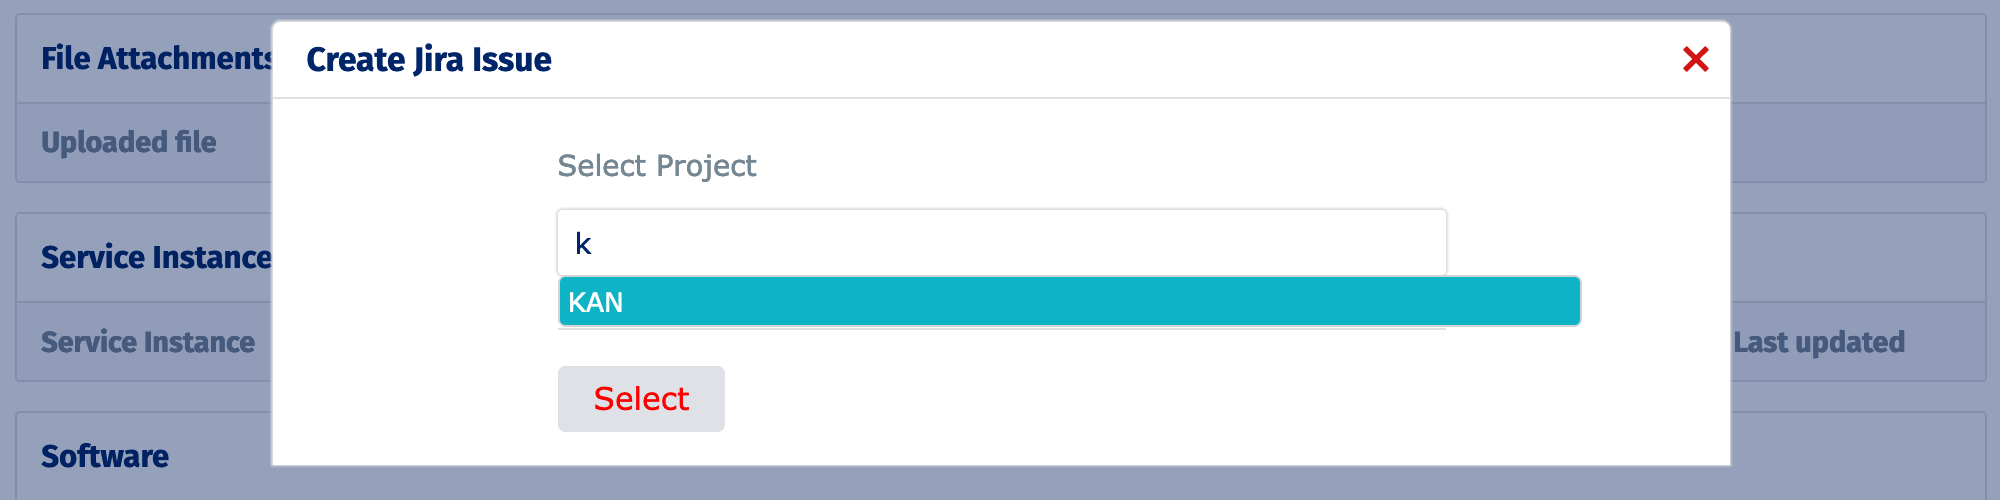
-
Choose a Jira issue Type from the dropdown menu.
-
The Reporter value is visible but is fixed by the Jira integration configuration process.
-
Fill in the Assignee, Summary, and Description fields, and add any attachments if needed.
-
Submit the issue. A confirmation box will display the new Jira issue ID.


The new issue is now attached to the CI.
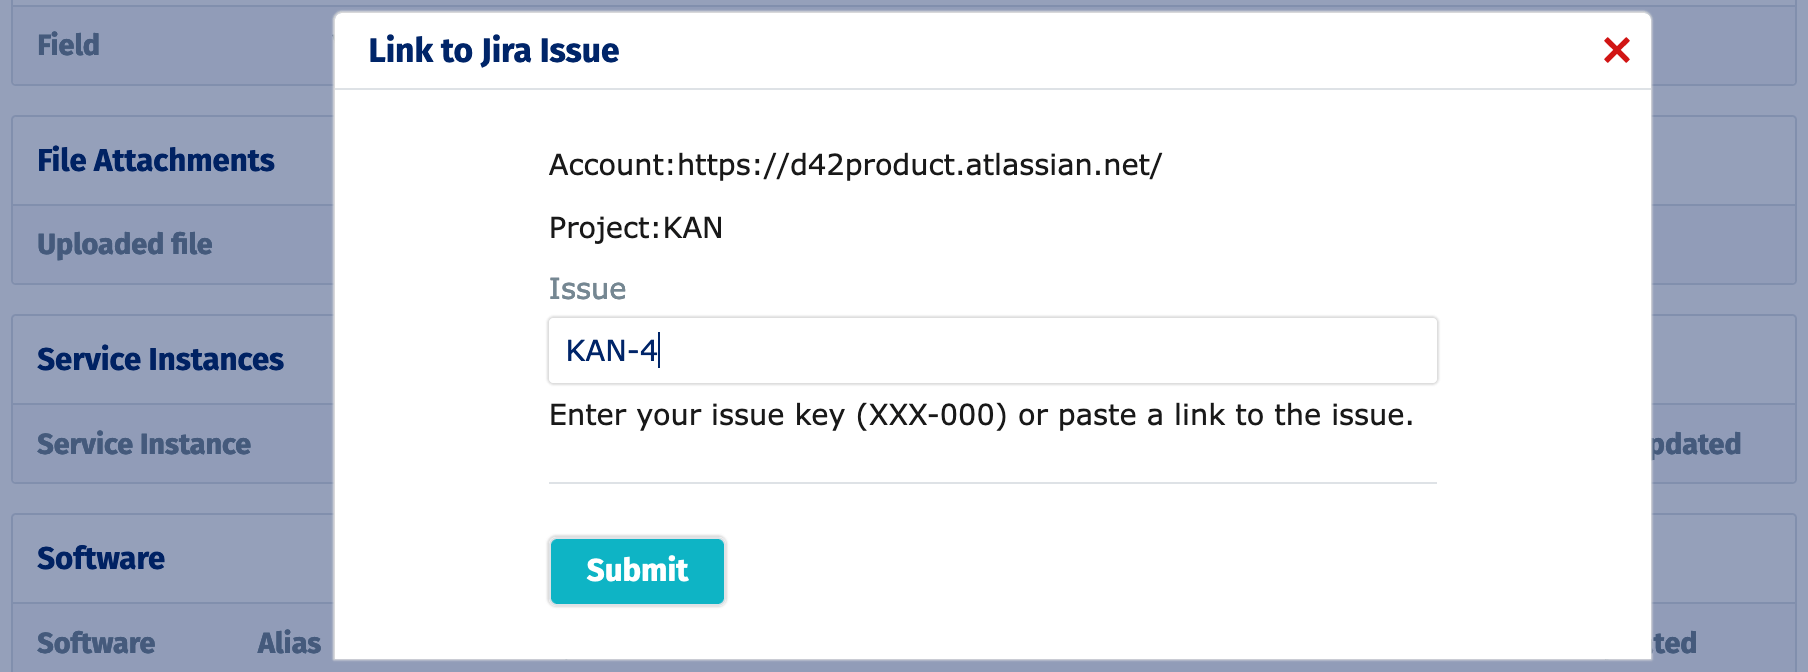
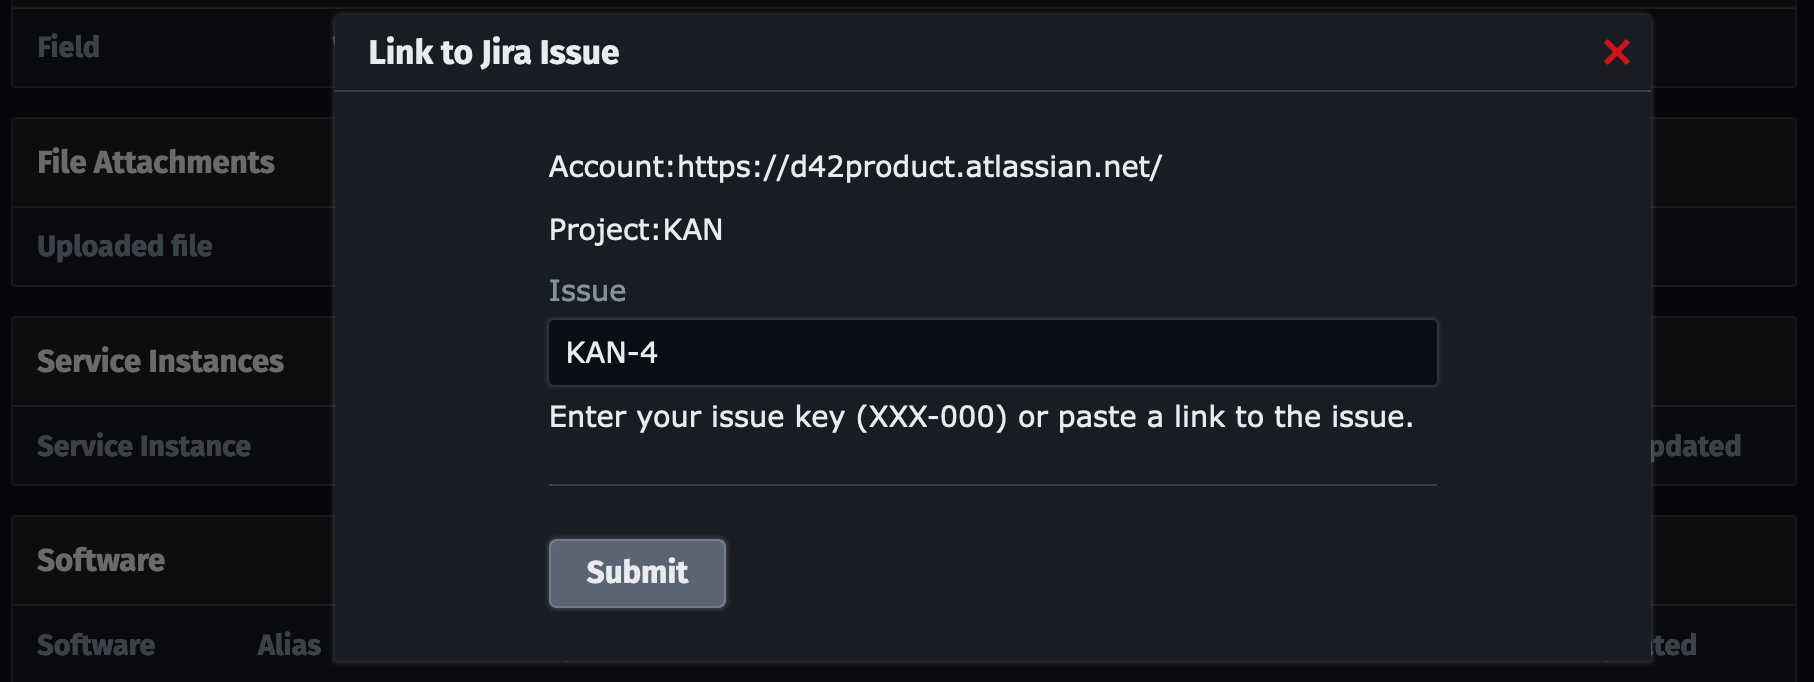
Link an Existing Jira Issue From Device42
-
Click on the Link to Jira Issue option and input your Jira project name. Note that the project name is the first three letters of an issue ID by default.
-
Provide the issue ID or a link to the issue you want to link to the CI.
-
A confirmation notification will open displaying the linked issue ID.
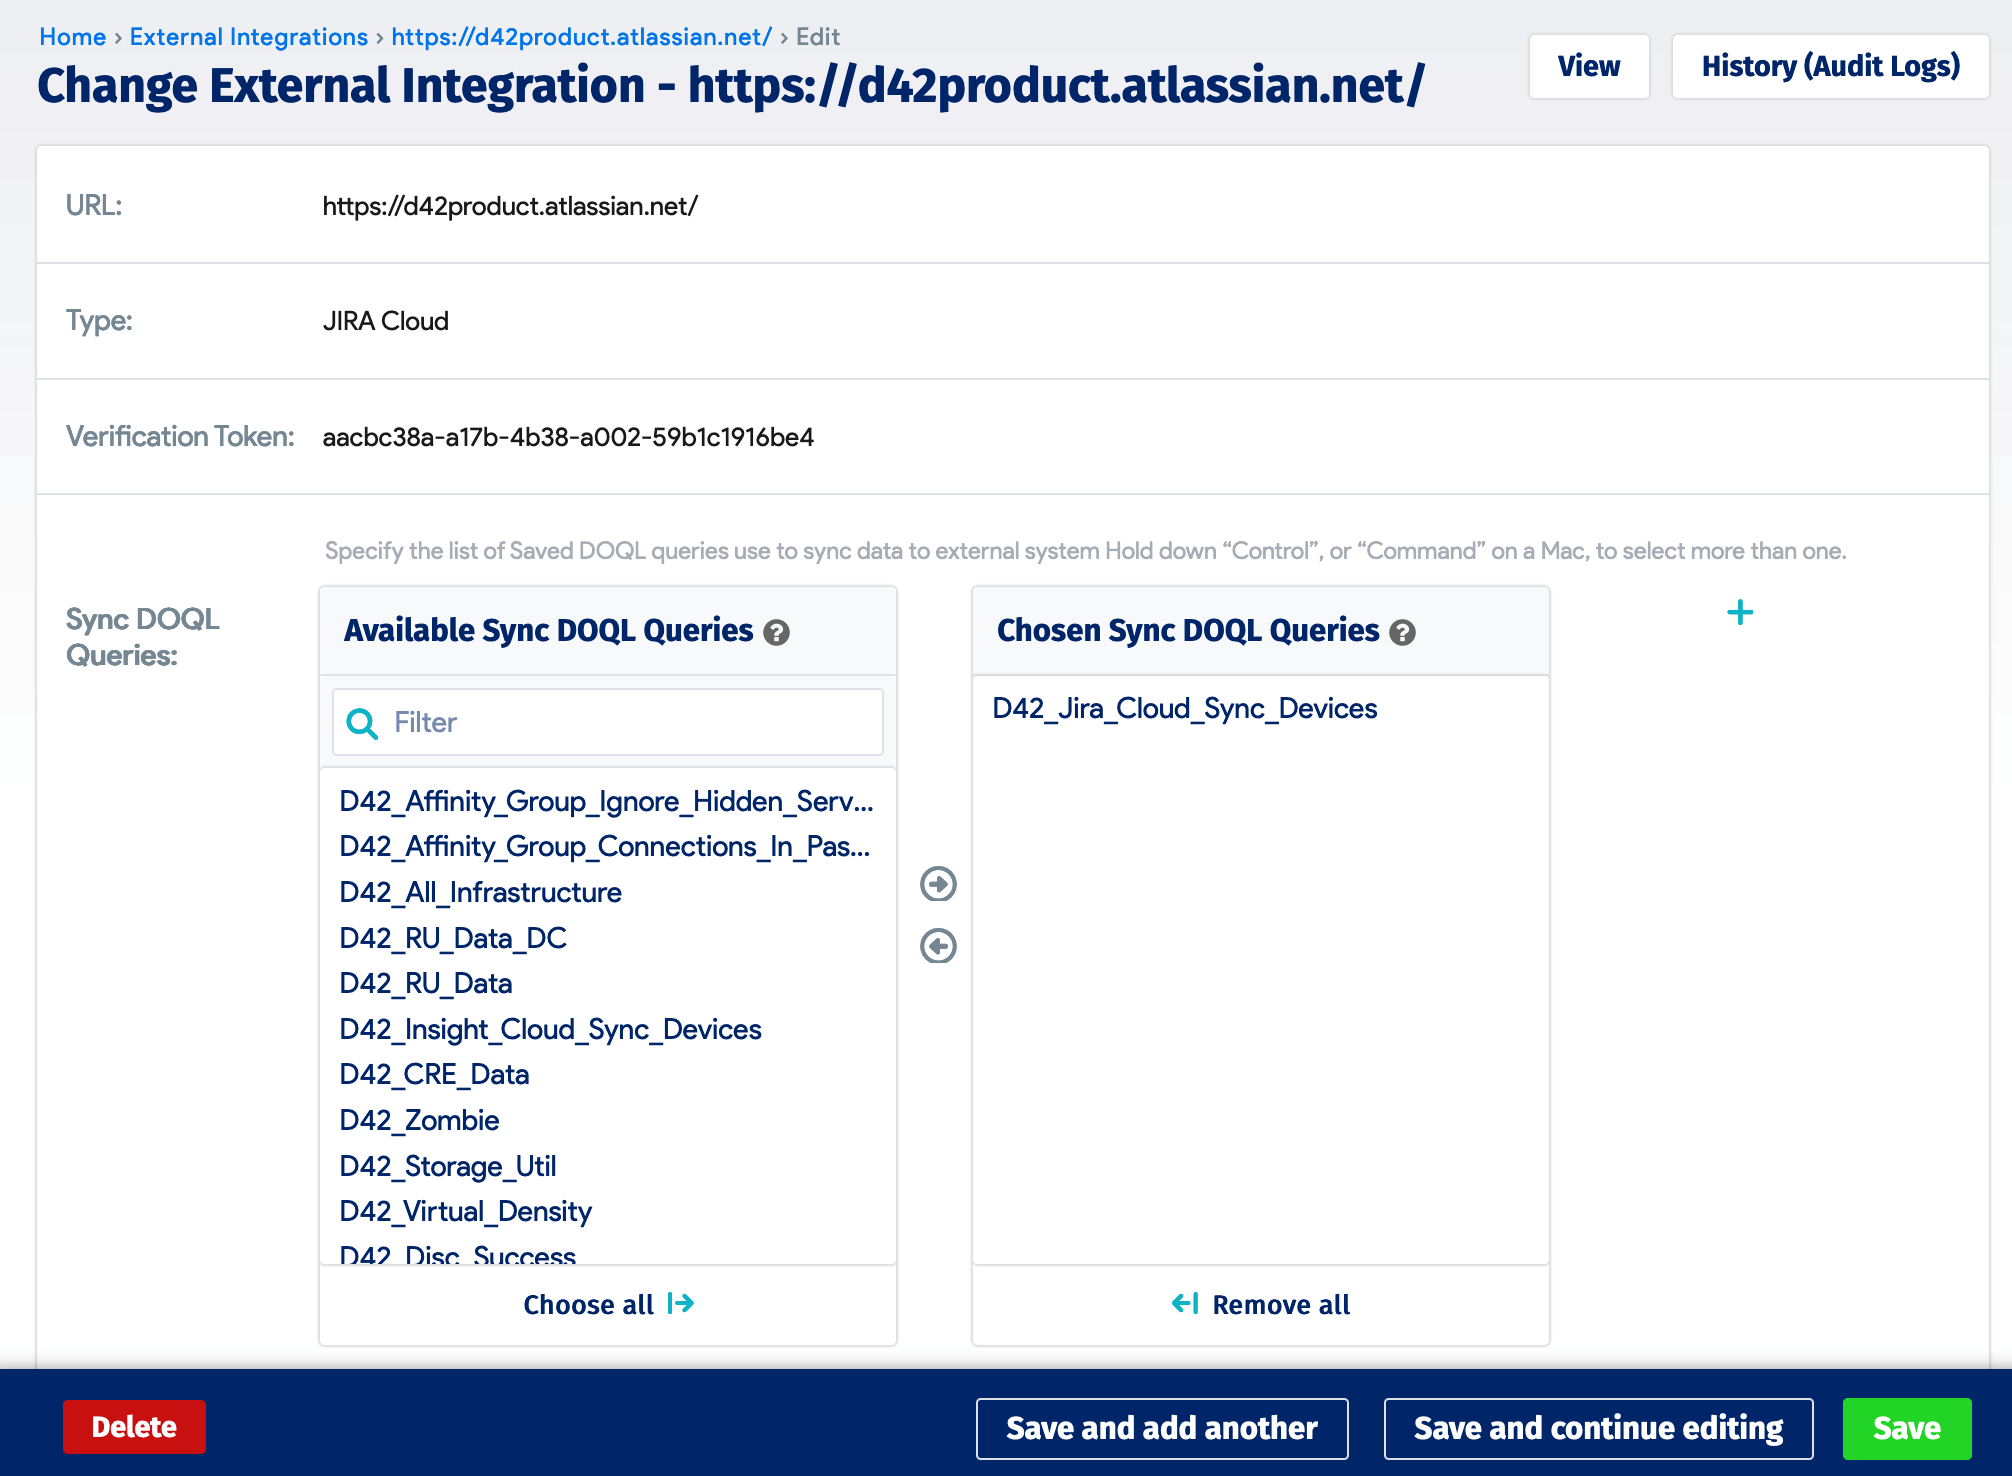
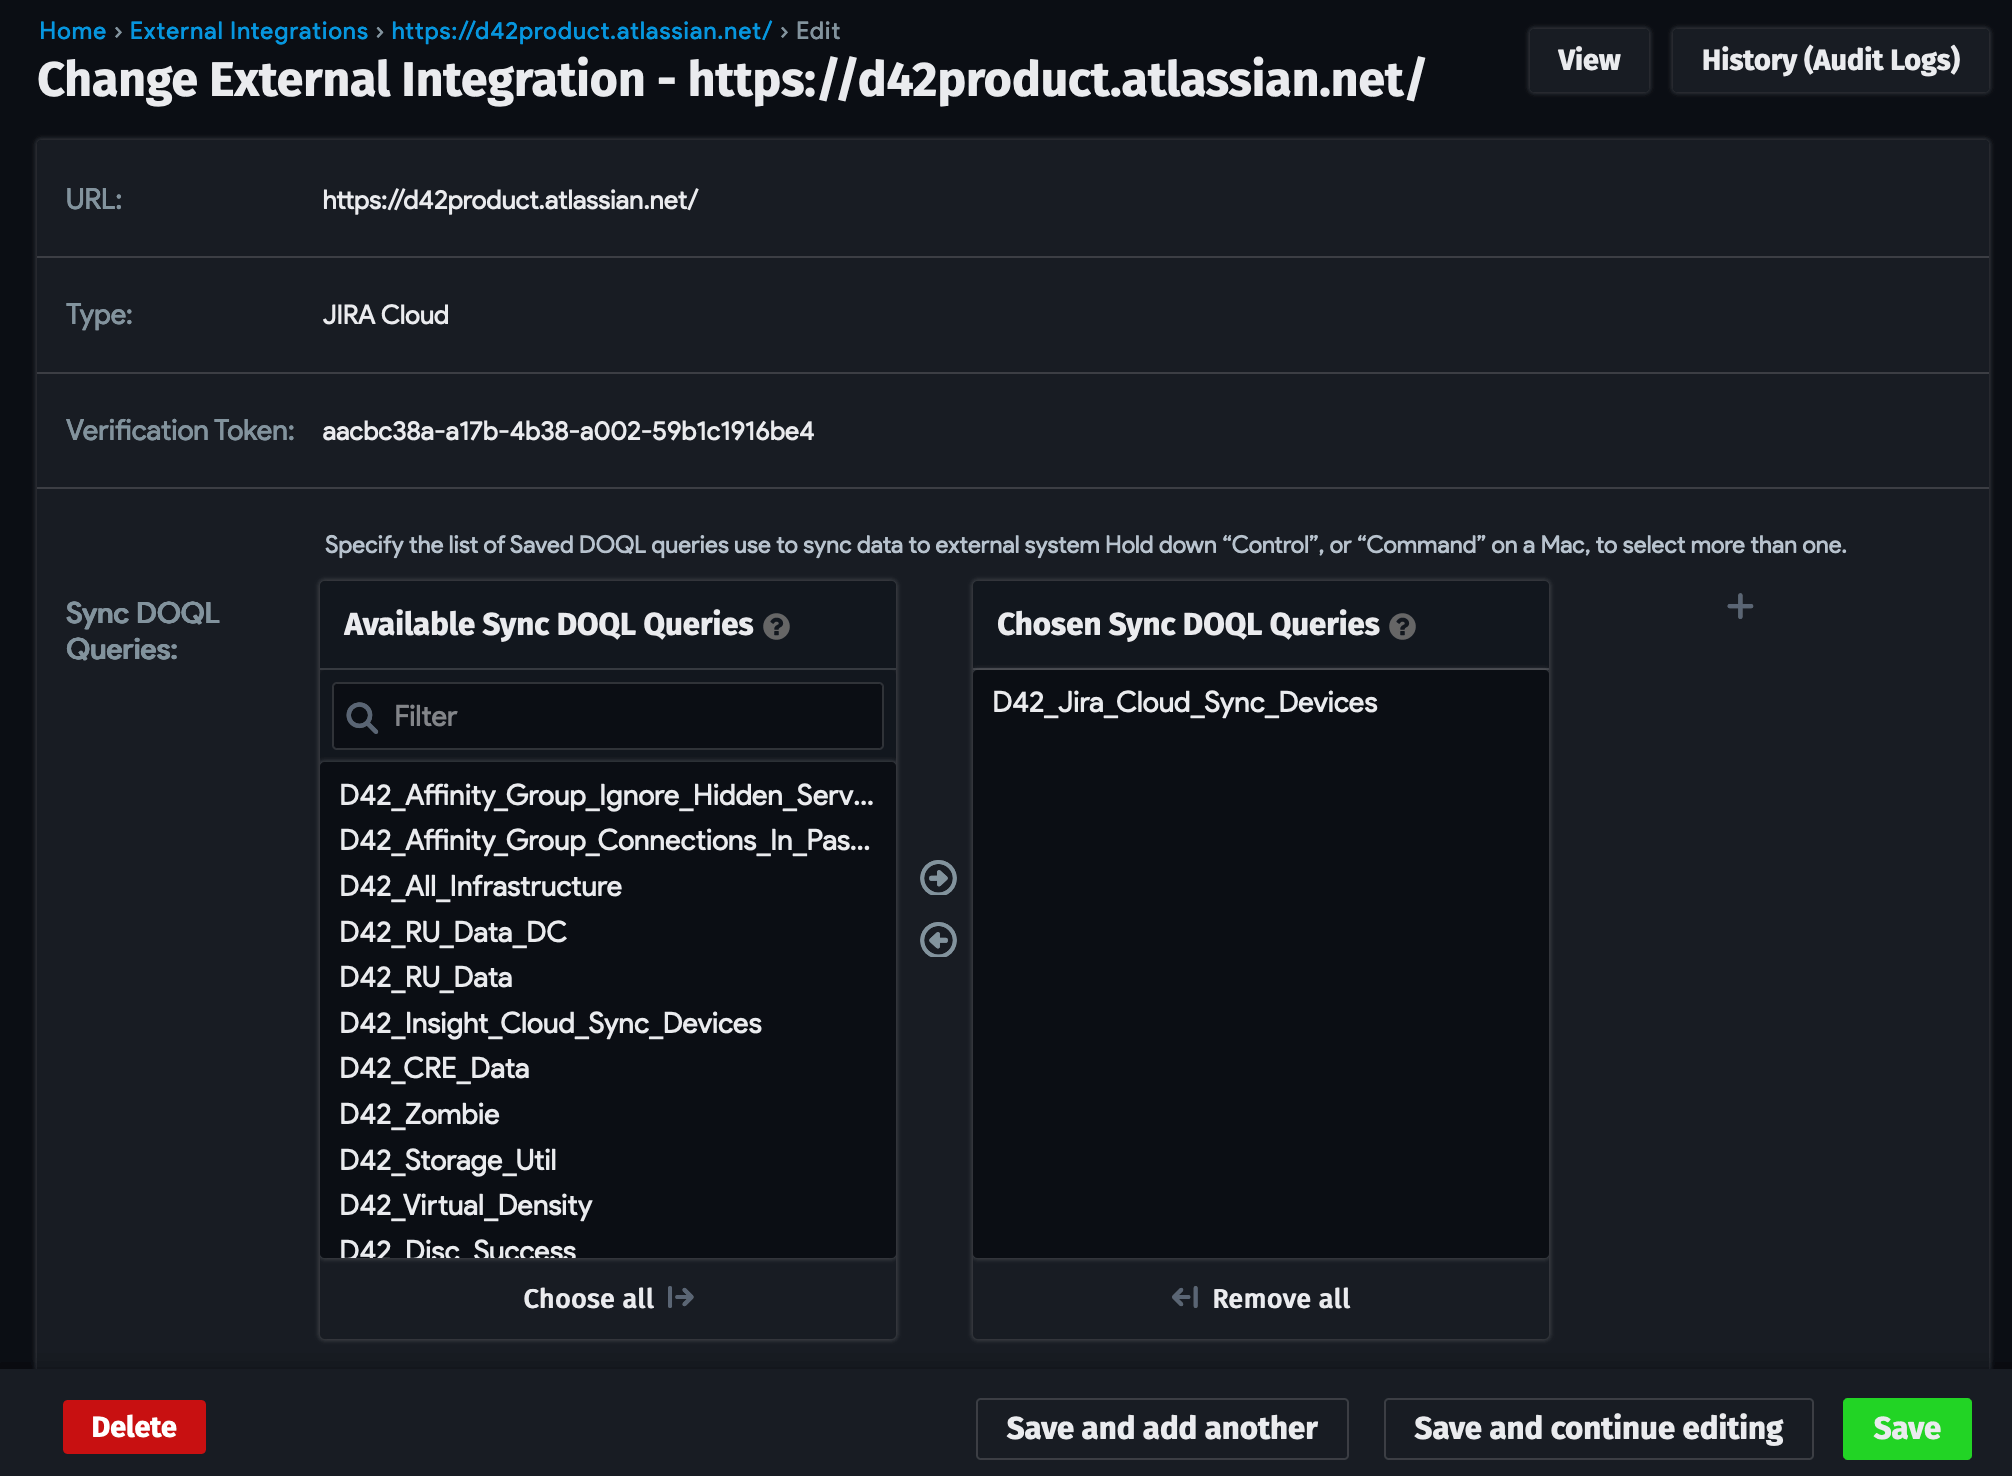
Customizing Which Assets Sync
By default, syncs run daily at 2 AM and only sync "Devices". You can customize the data synced from Device42 by adding new Sync DOQL queries, customizing existing queries, or writing your own.
Edit the DOQL selection for sync by going to Tools > Integrations > External Integrations and selecting the JSM external integration.
The following data element types can be synced with the default saved DOQLs:
- Application Components
- Buildings
- Customers
- Devices
- End Users
- Parts
- Power Units
- Purchases
- Racks
- Rooms
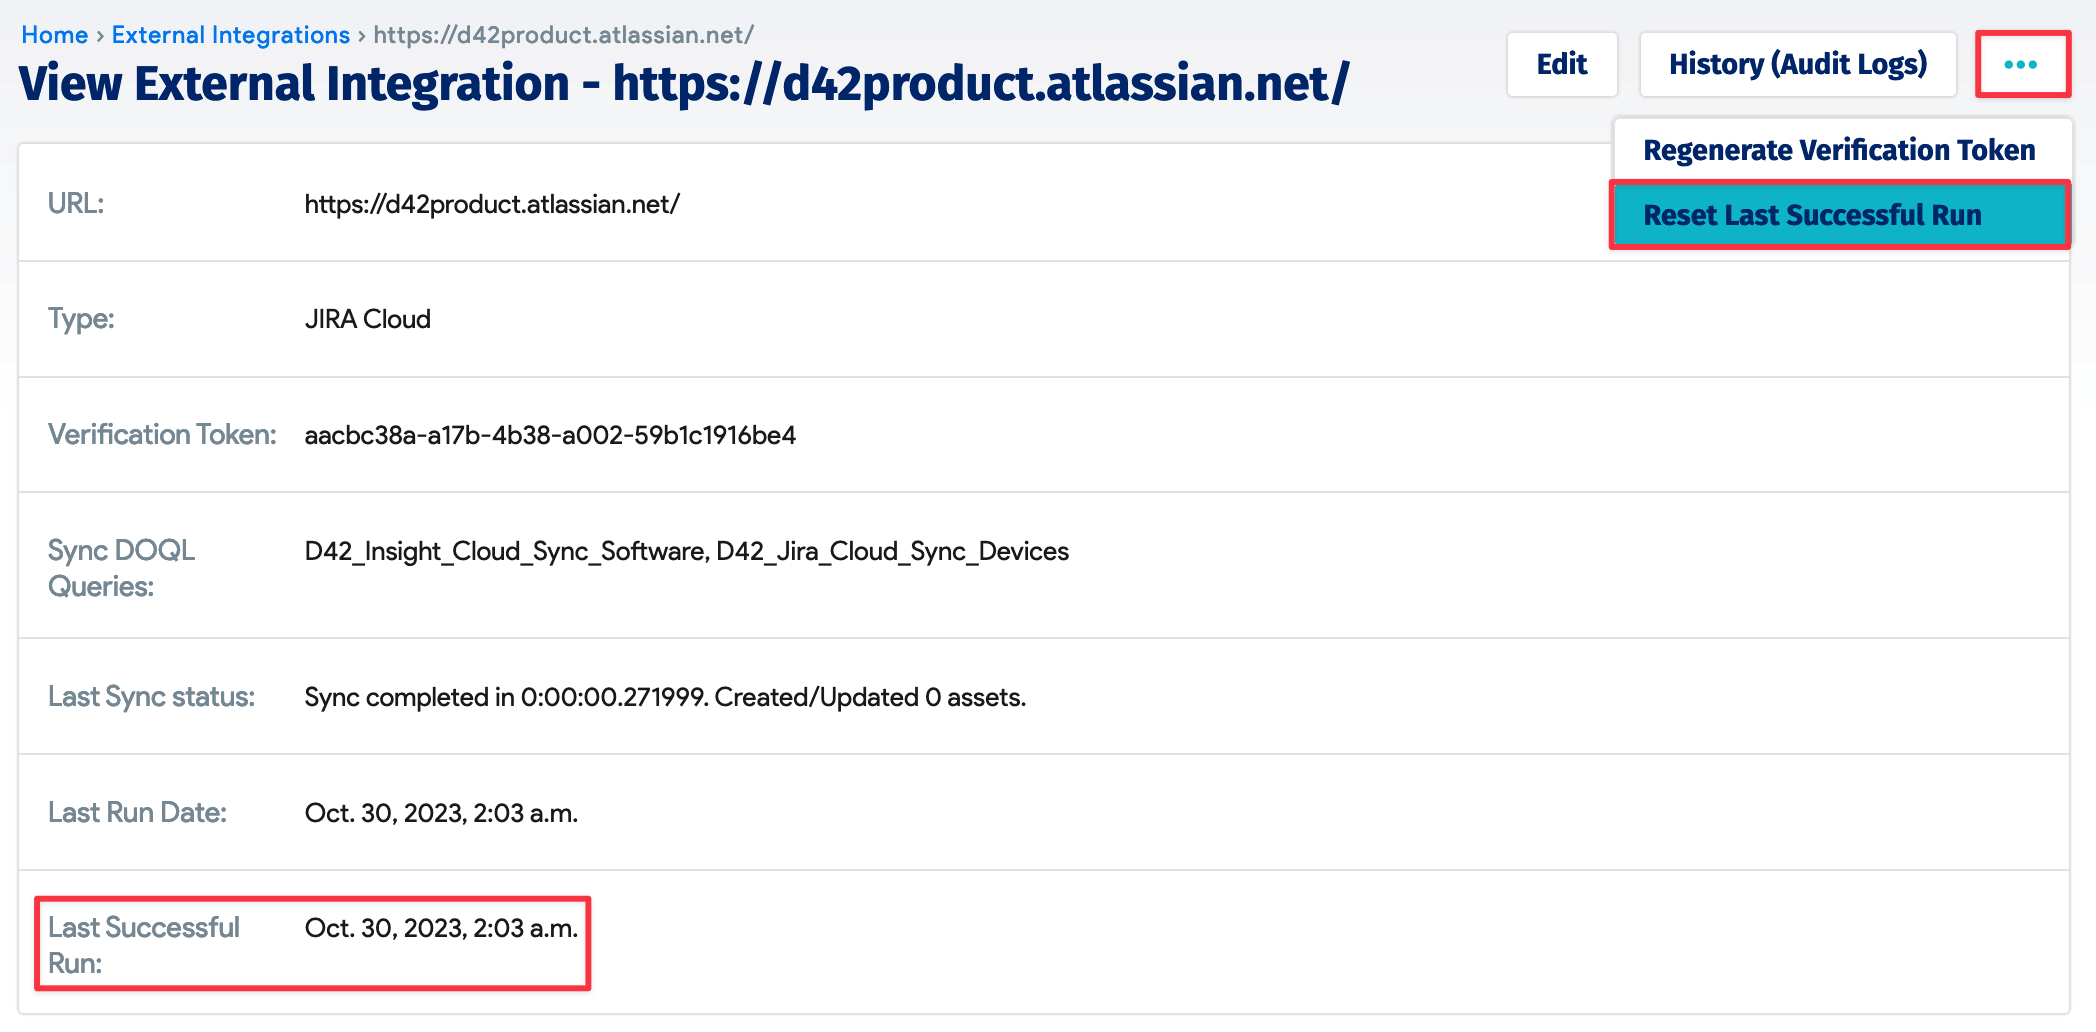
When adding or modifying DOQL settings or queries, be sure to reset the last synced time. Default queries are time-constrained, and if not reset, newly selected categories will NOT sync.

Working With Device42 Assets From Jira
Add a Device42 asset to an existing Jira issue as follows:
-
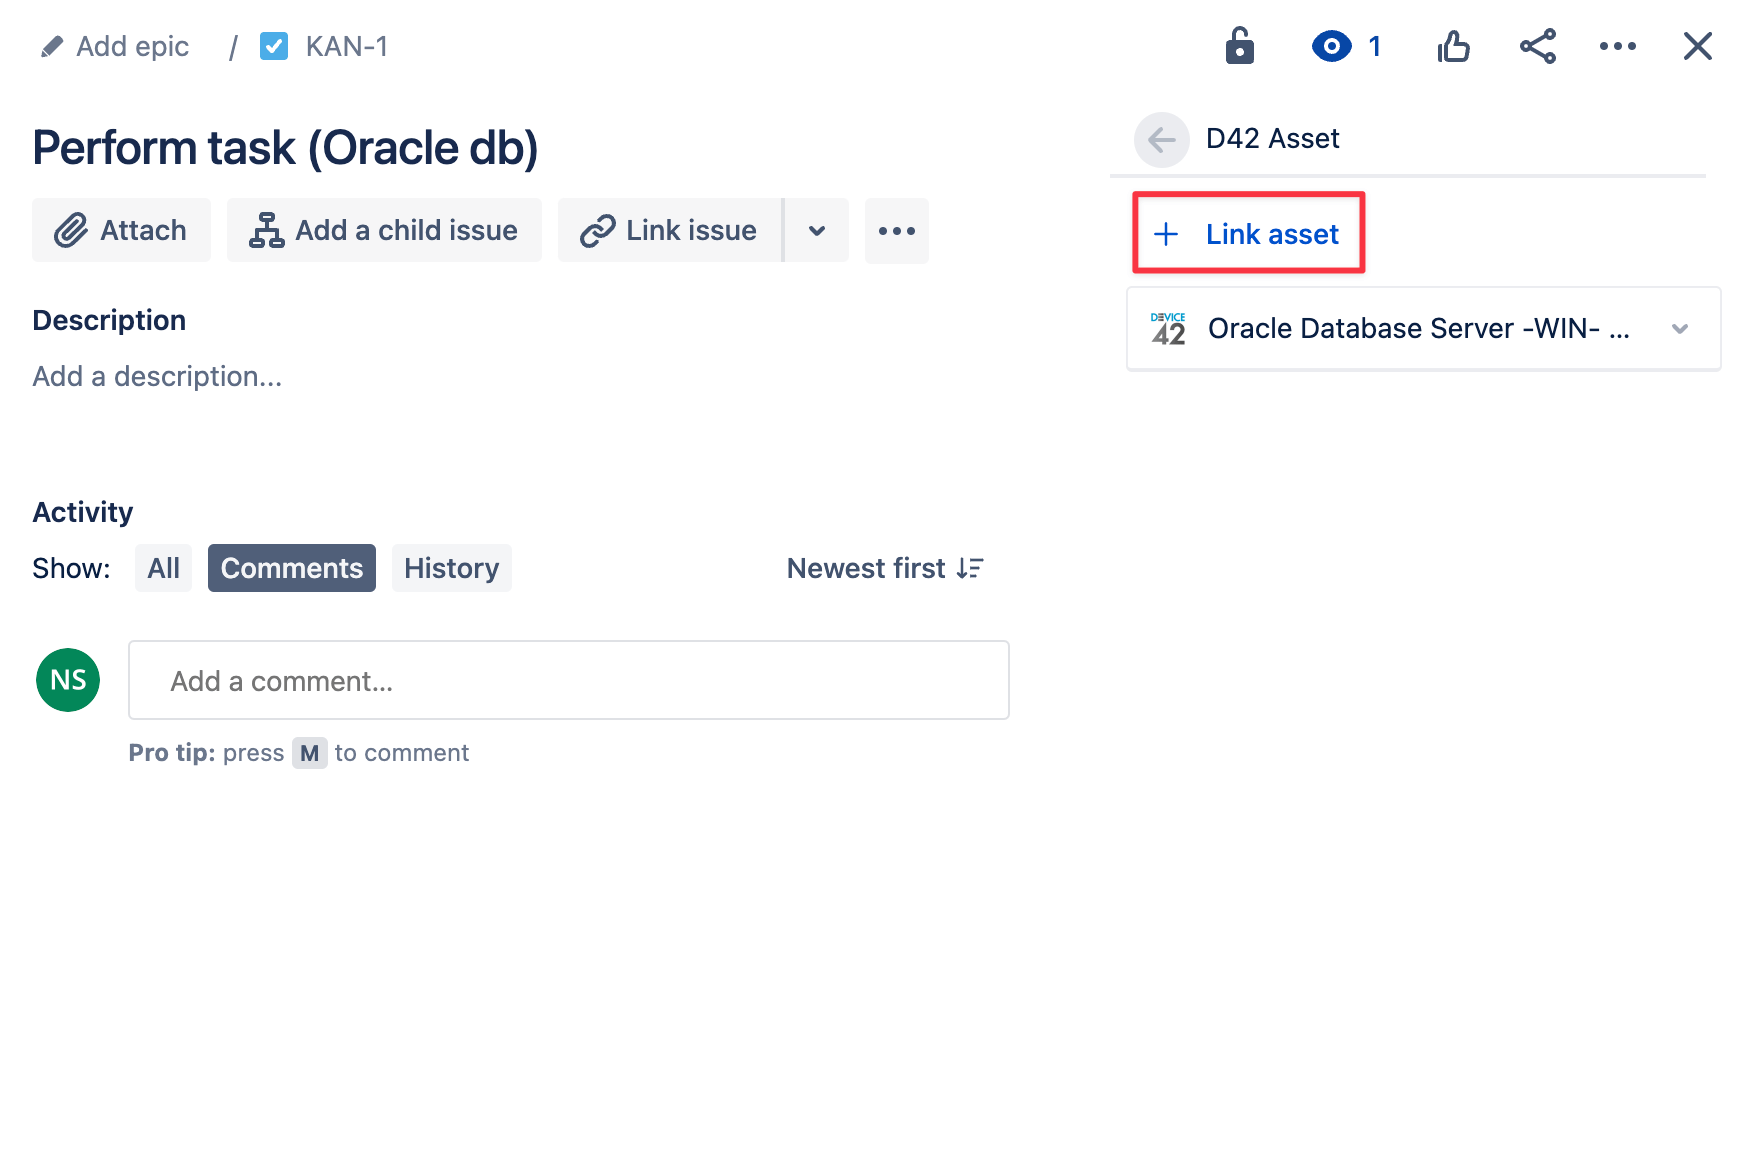
In the issue Details box, click on the link under the name of the issue type you created when you configured the integration. If multiple assets are already linked, the link will display "View linked assets". If that issue already has one linked Device42 asset, click on the asset name.
-
Next, click on + Link asset to open a search bar. Start typing the name of the asset you would like to add, and select the asset from the search results. Repeat this step to attach another asset:
-
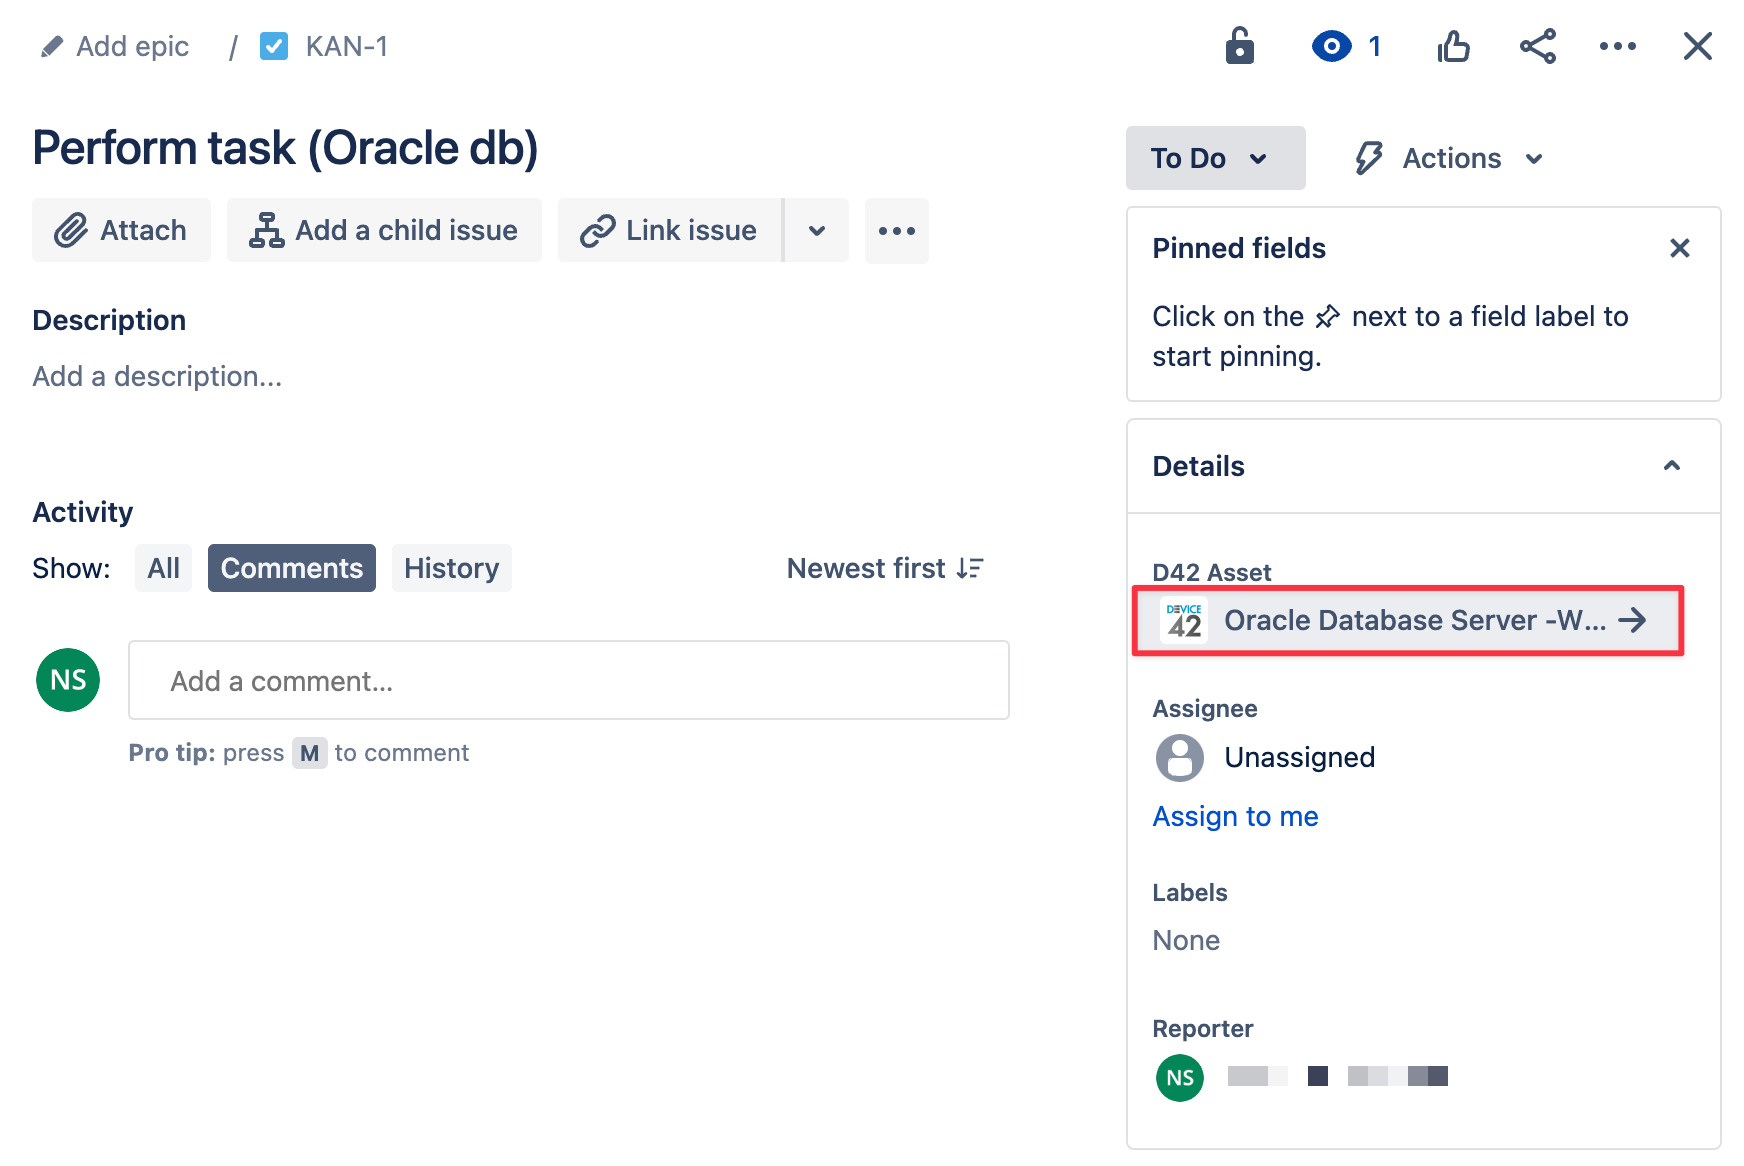
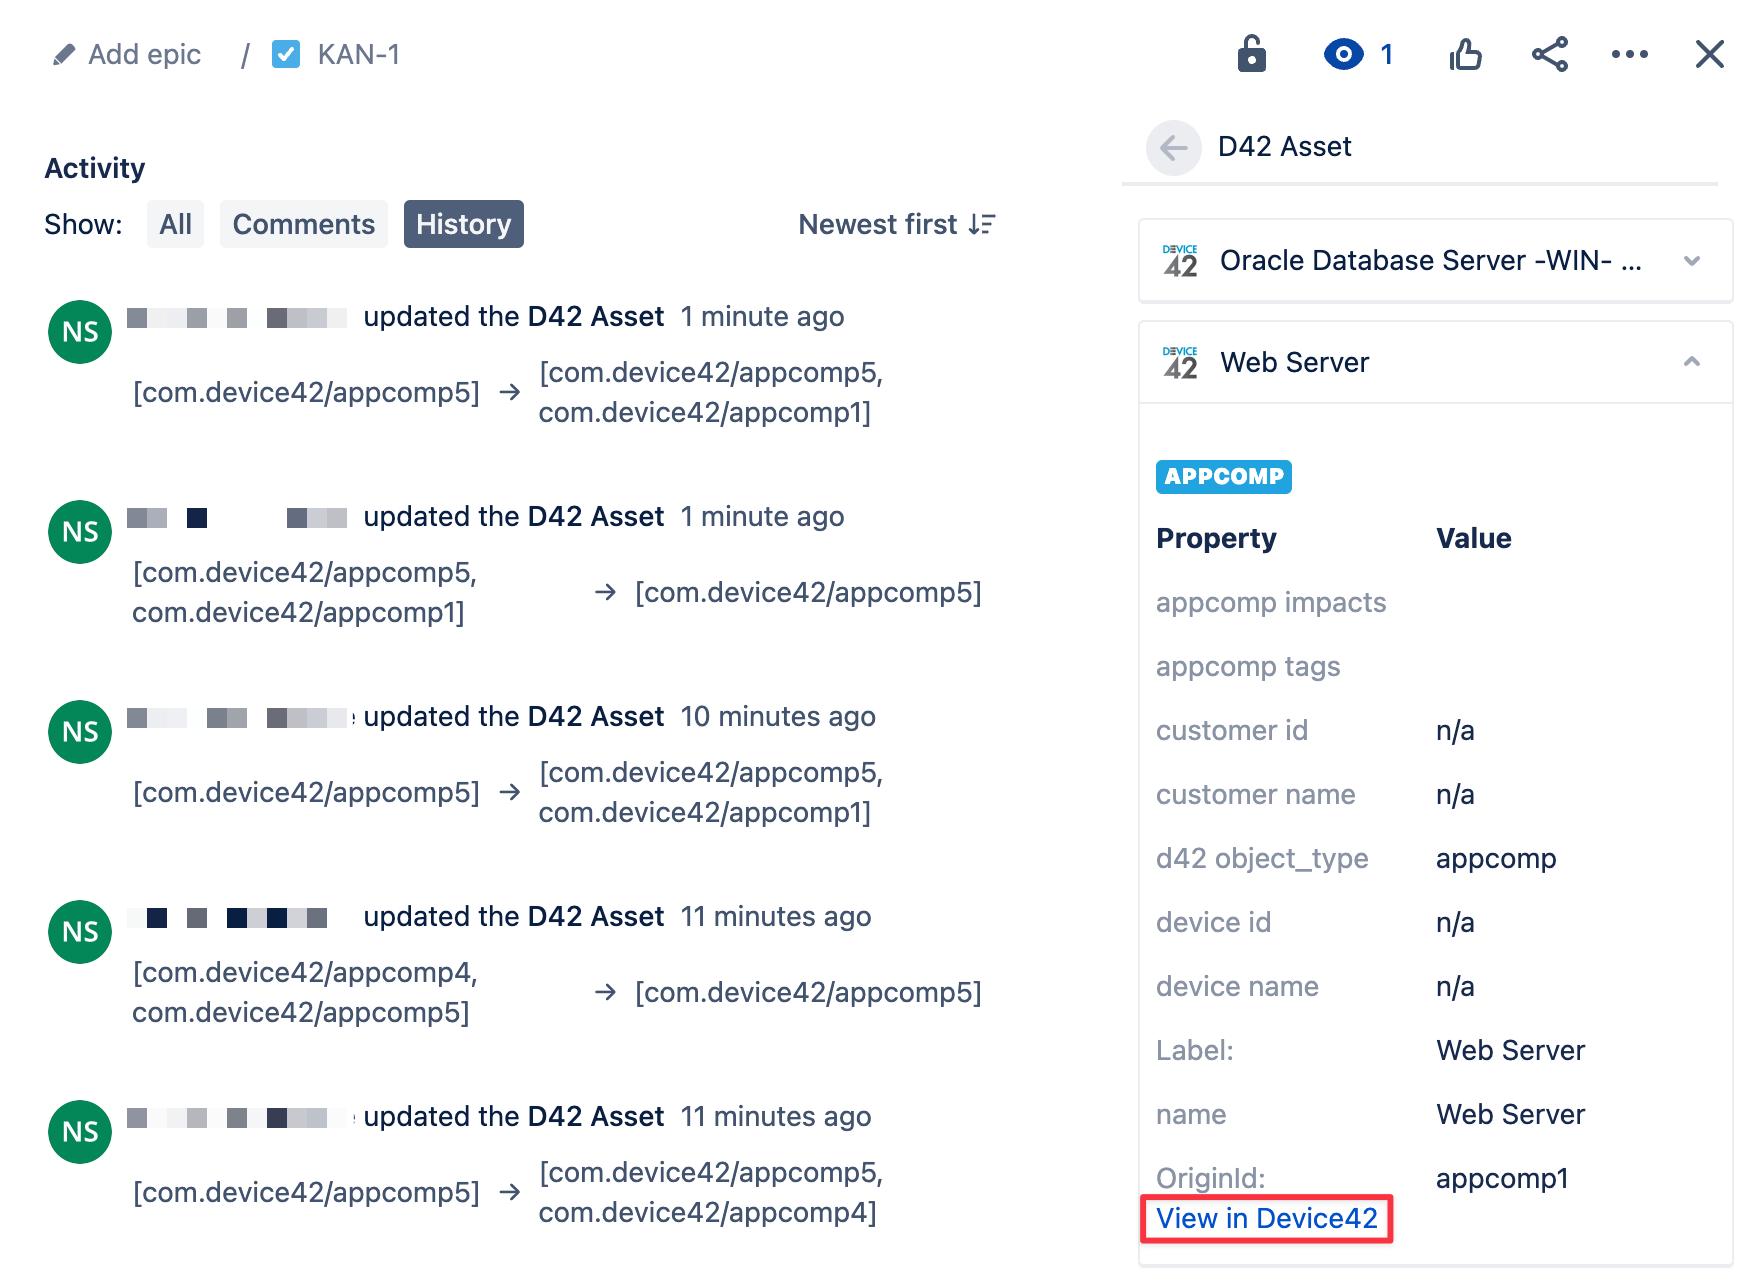
Once a record is linked, it will be present on the Jira record. Selecting the record will display its associated information present in Device42. Click on View in Device42 to be directed to the asset record in your Device42 instance.
-
To unlink an issue from an asset in the Jira Cloud interface, hover your cursor to the right of the name of the CI you want to detach to reveal an ellipsis icon. Click on the ellipsis icon and select Unlink asset to confirm.

JSM Integration Feature Highlights
Integrate Device42 with your Jira Service Management account to do the following:
- Attach Device42 assets directly to Jira tickets (known as issues).
- Create new Jira tickets and attach existing tickets in the Device42 interface, from any device or asset CI detail view.
- See all Jira issues associated with a particular device or asset CI.
- Filter a set of Device42 assets or devices to display within the custom field of a specific project or custom field set.
- Control which assets are available in Jira Service Management. You can modify the default saved DOQL query (the integration leverages Device42 Object Query Language) or create your own custom DOQL.