Setting Up the Freshservice Integration
This page covers the initial setup and installation of the Freshservice integration.
- For daily usage and operations, see Using the Freshservice Integration.
- For advanced data mapping customization, see Advanced Freshservice Mapping and Customization.
About the Device42 Freshservice Integration
Device42 integrates with Freshservice for seamless ITSM and CMDB integration, providing the following capabilities:
- Enhanced ITSM workflows with detailed device, user, and software information.
- An understanding of how changes to a particular application or network port could affect your business services.
- Flexible CMDB import options that ensure the right data is brought into the right place.
- A single login page for accessing both Device42 and Freshservice.
Install the Device42 Integration App on Freshservice
The installation process has three steps, which are discussed in more detail in the sections that follow.
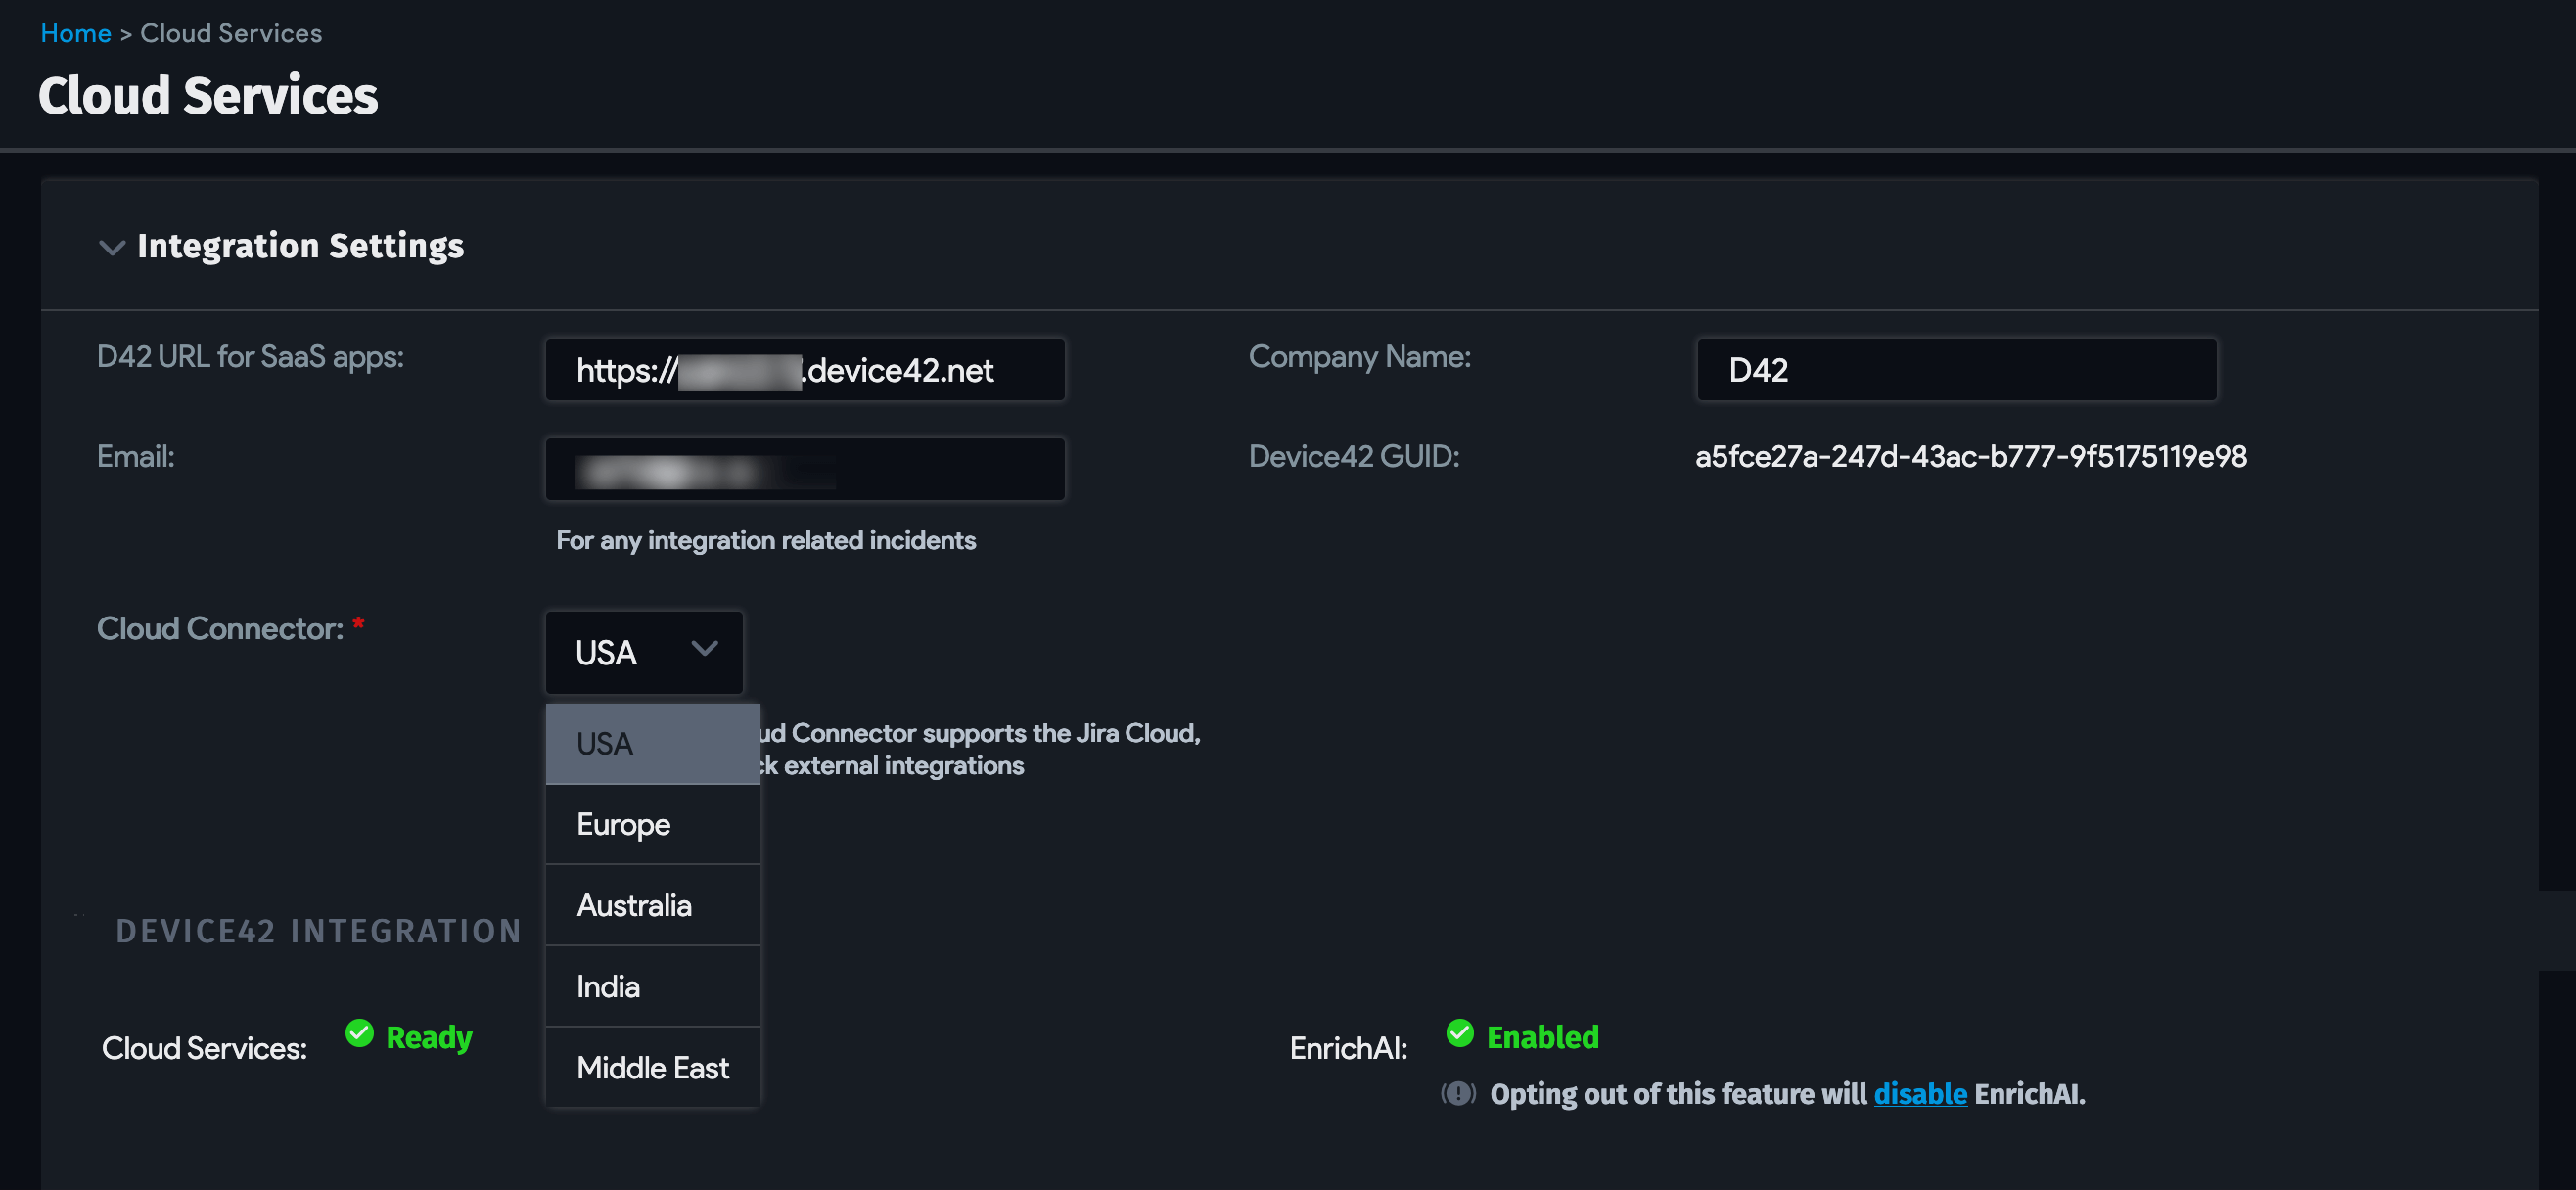
1. Enable the Cloud Connector in Device42
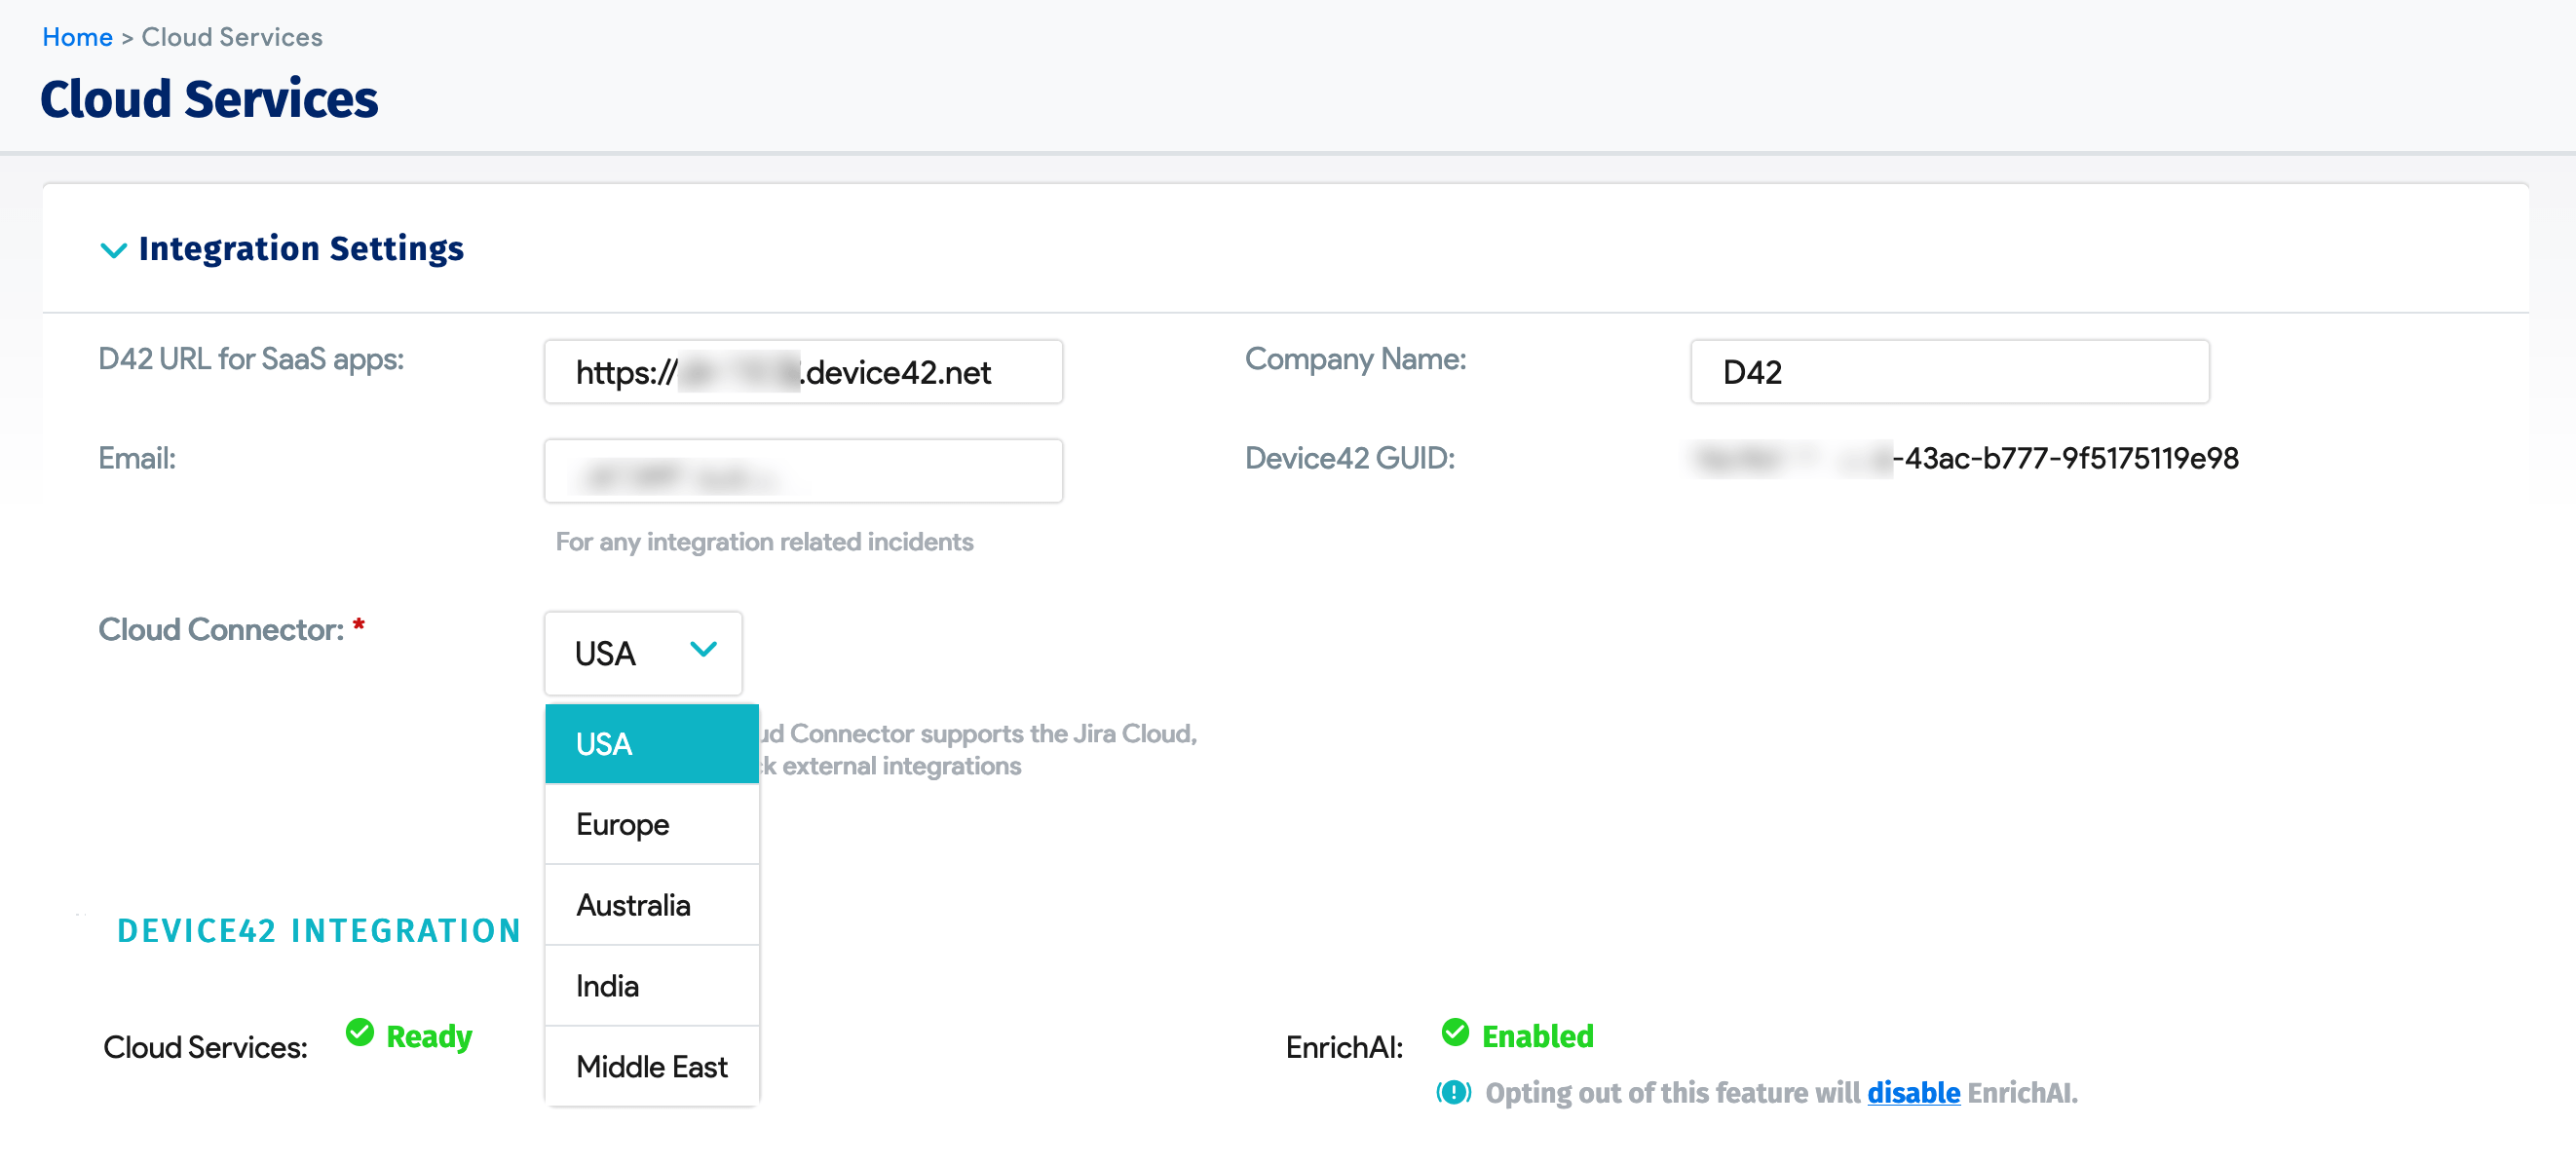
Ensure that cloud services are enabled and configured:
-
Navigate to Tools > Integrations > Cloud Services.
-
Enter your Device42 IP address or FQDN in the D42 URL for SaaS apps field.
-
Select your Cloud Connector location or environment. It's set to USA by default.
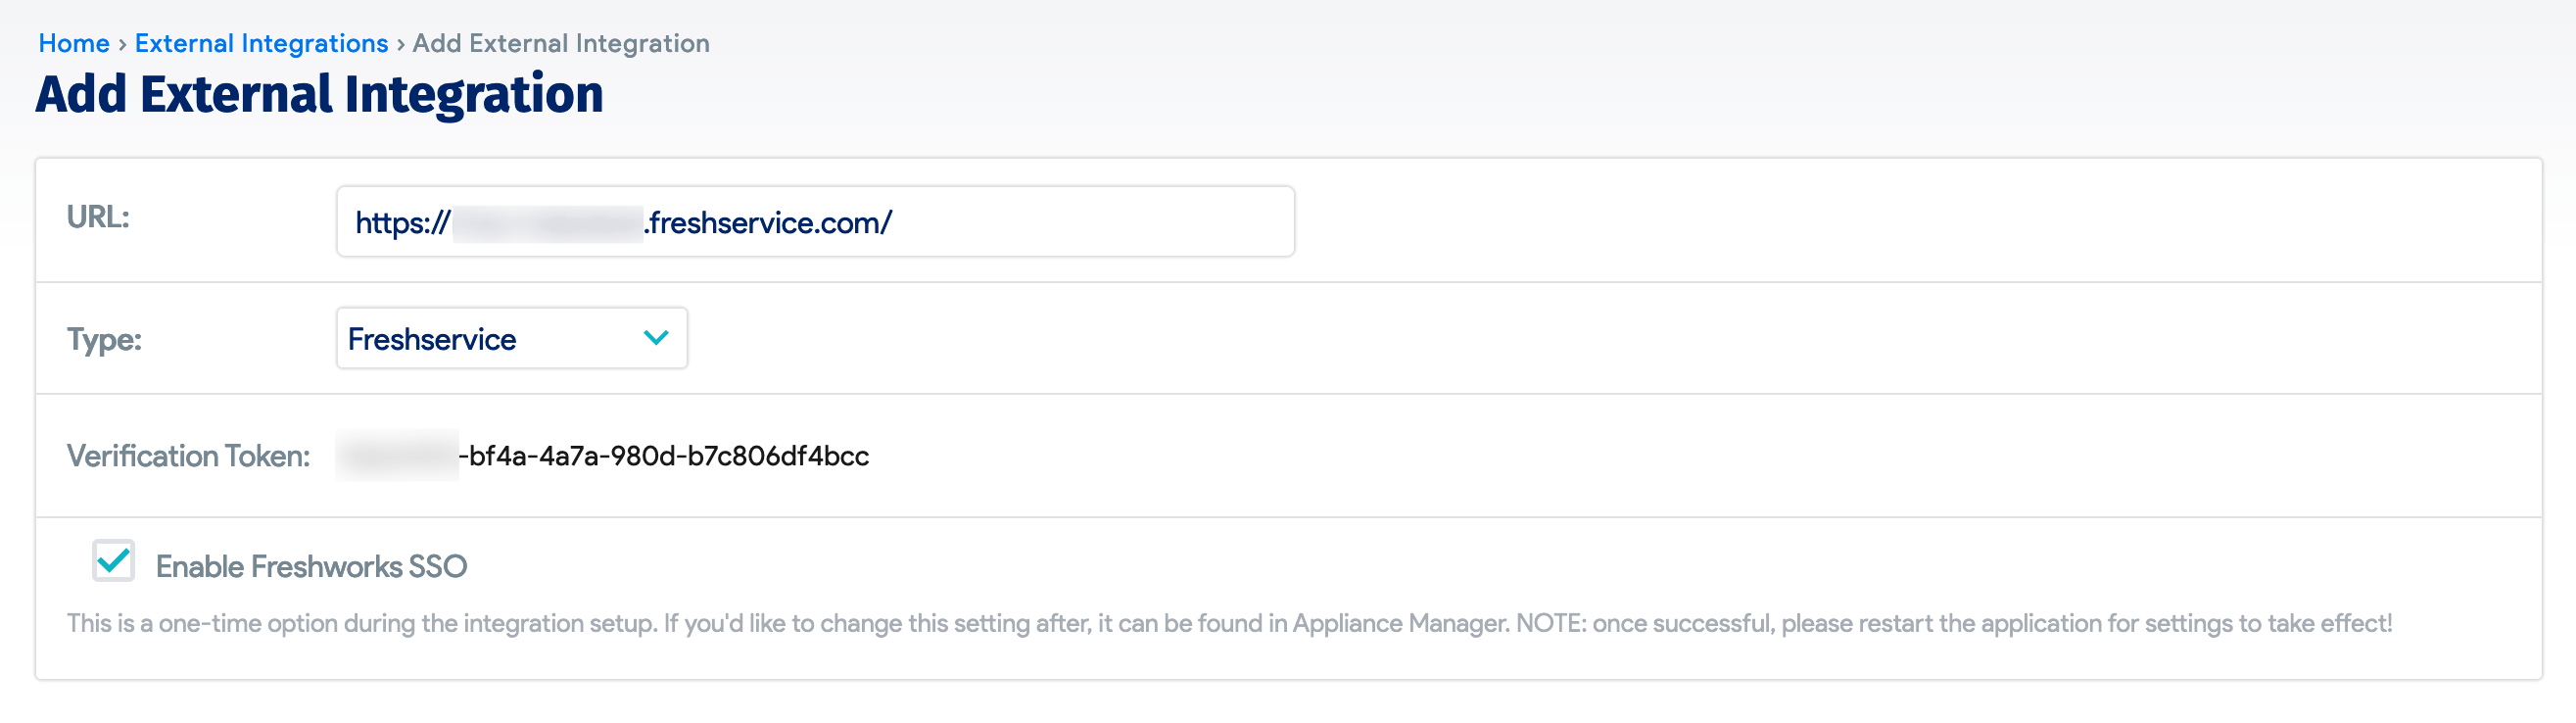
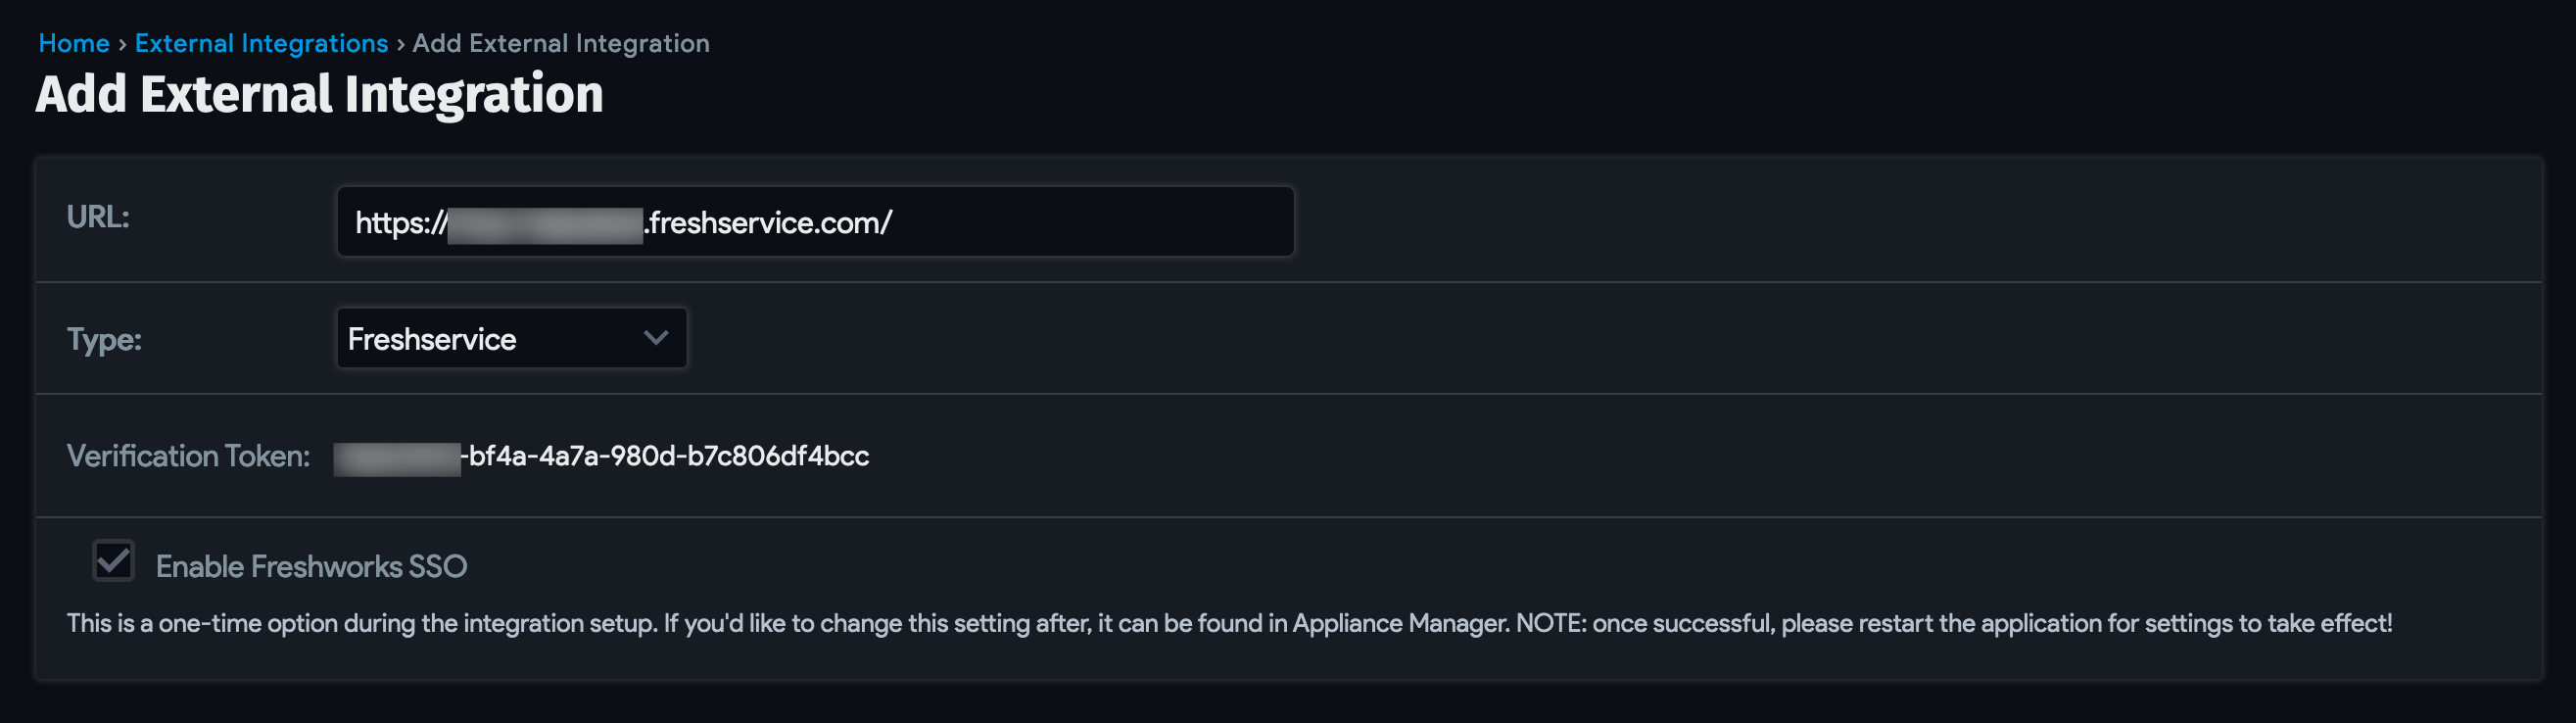
2. Create a Freshservice External Integration in Device42
-
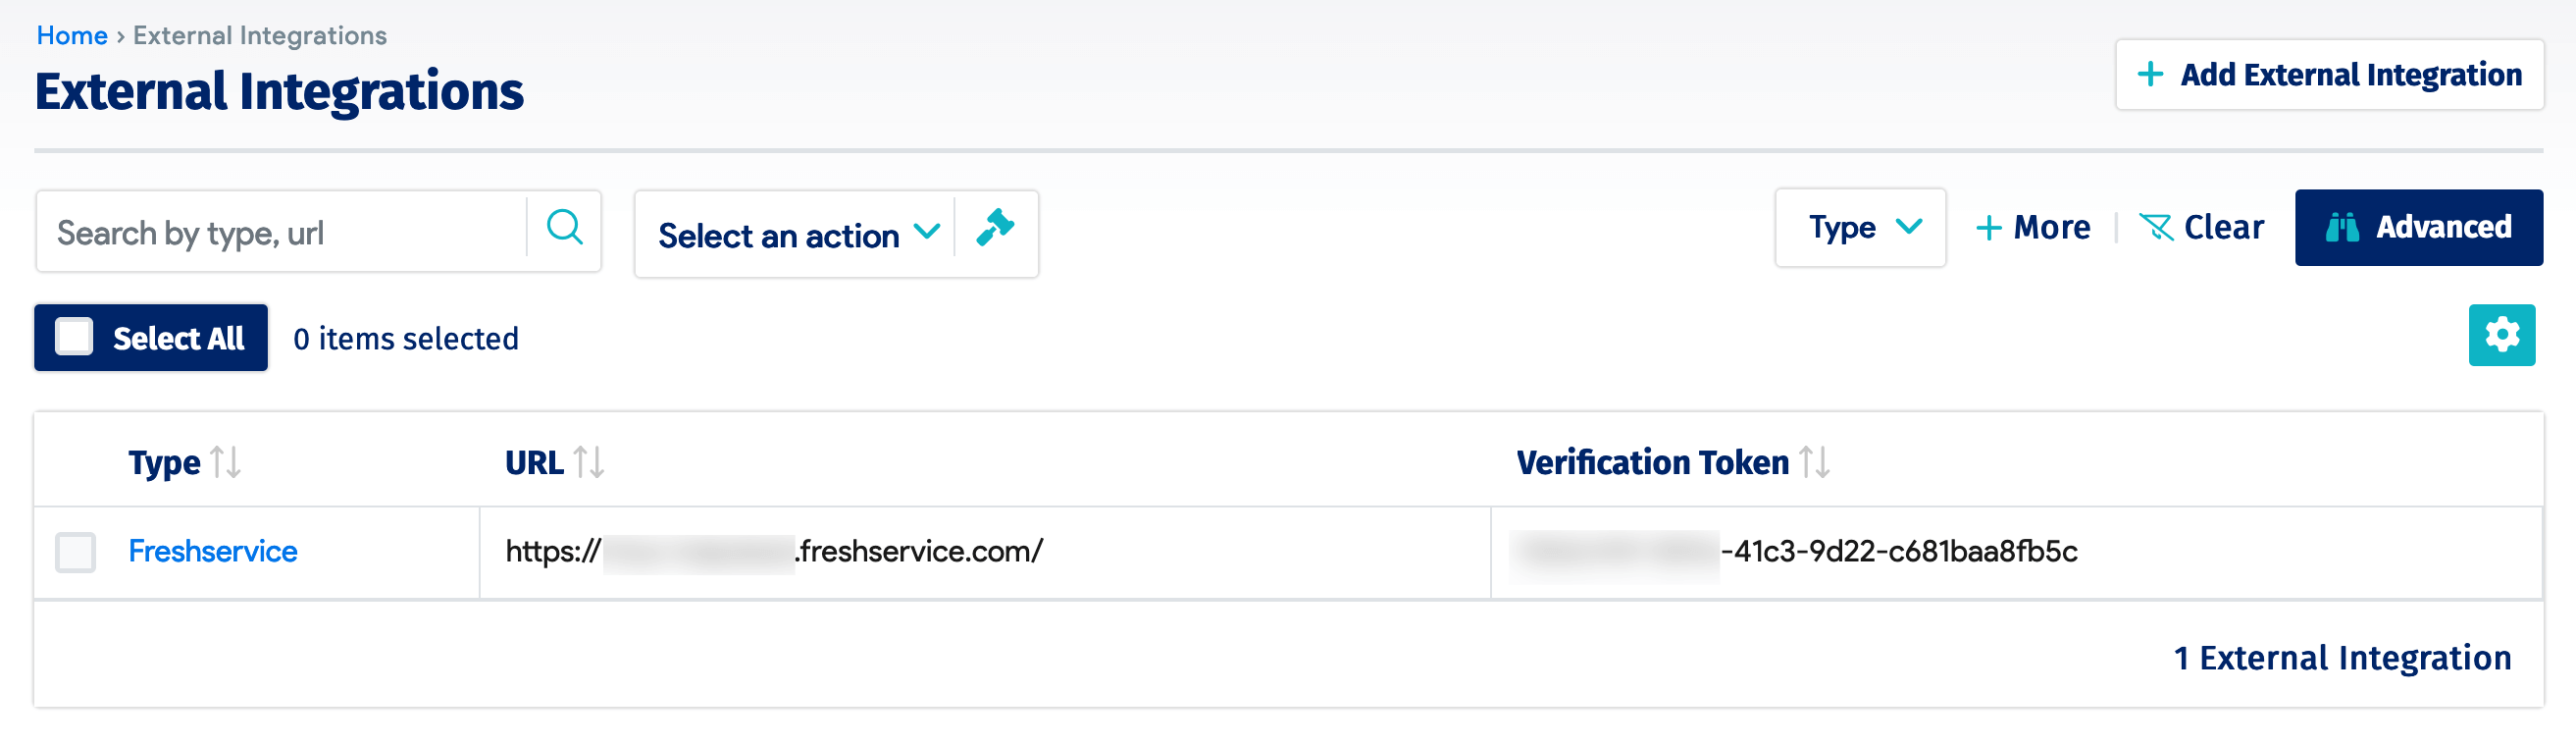
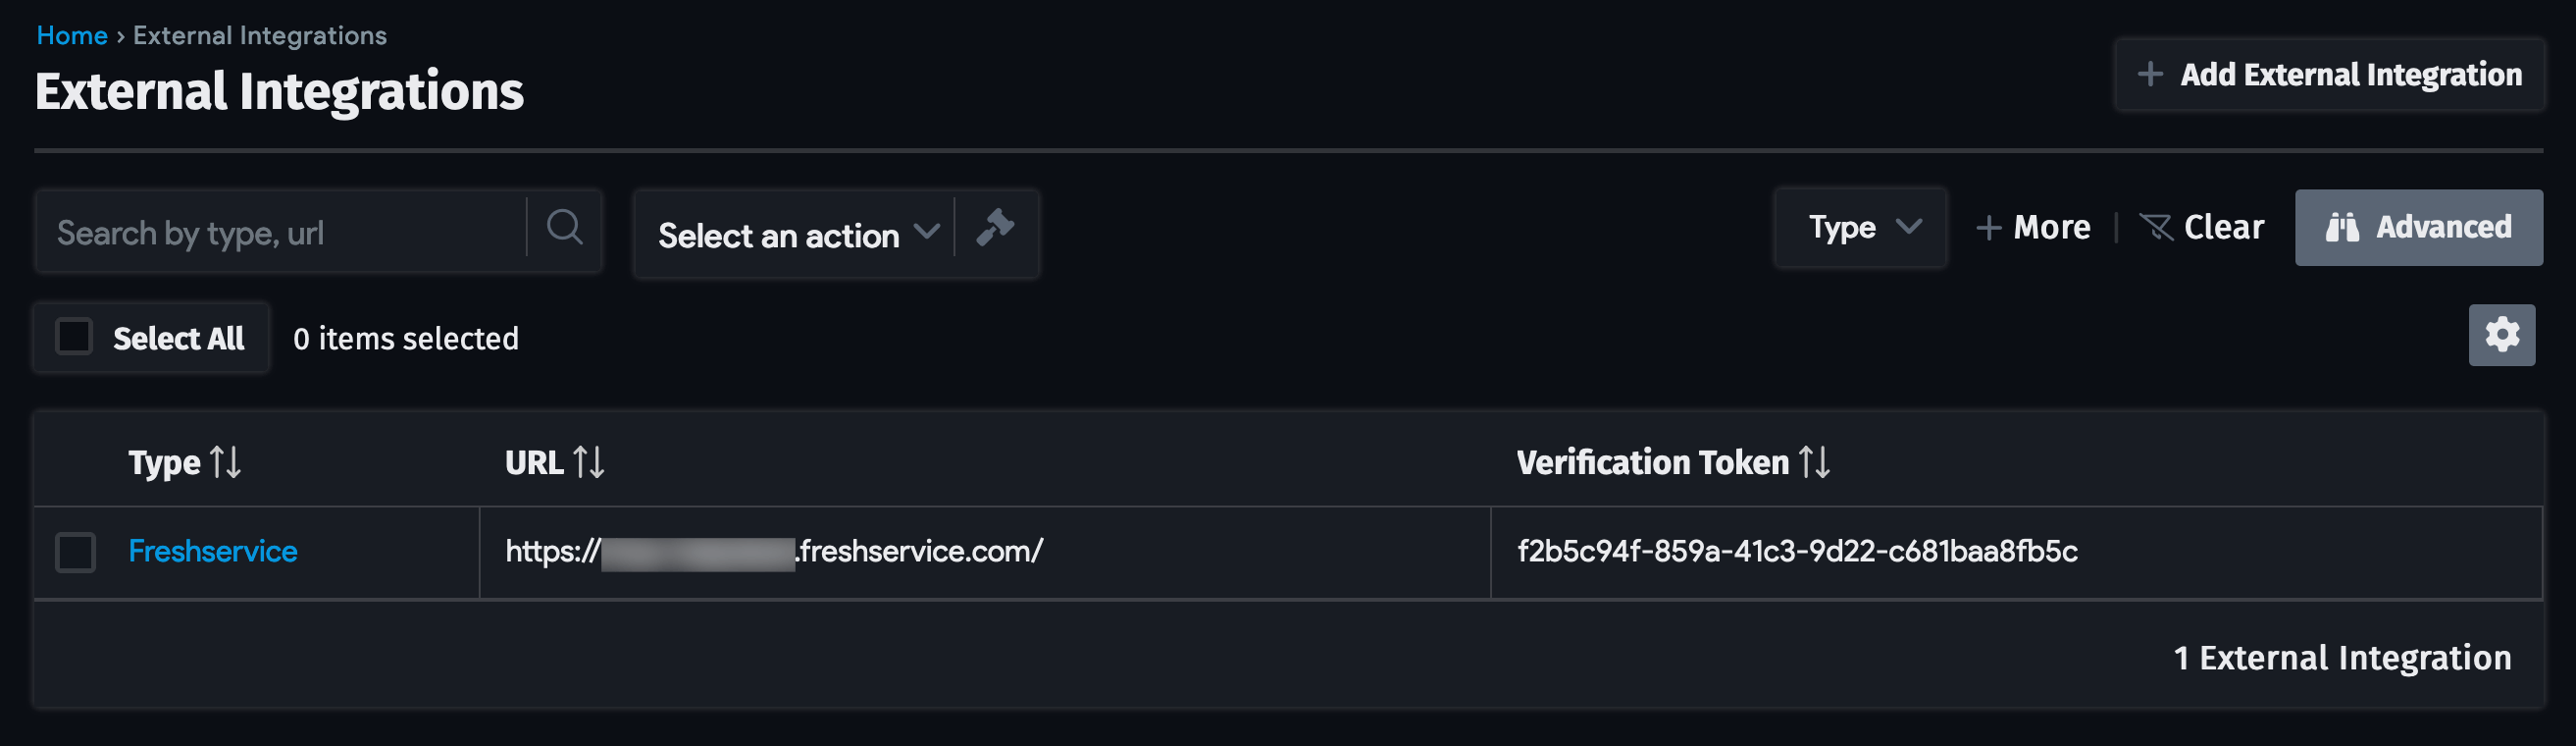
Navigate to Tools > Integrations > External Integrations and click + Add External Integration.
cautionPlease do not use the Verification Token generated when configuring the external integration, as this value will change when you save. Copy the token from the list page view after saving.
-
Enter the URL of your Freshservice instance.
-
Under Type, choose Freshservice.
-
You can optionally select Enable Freshworks SSO to activate single sign-on (SSO). We recommend using this feature for a seamless login experience when working with the integration.
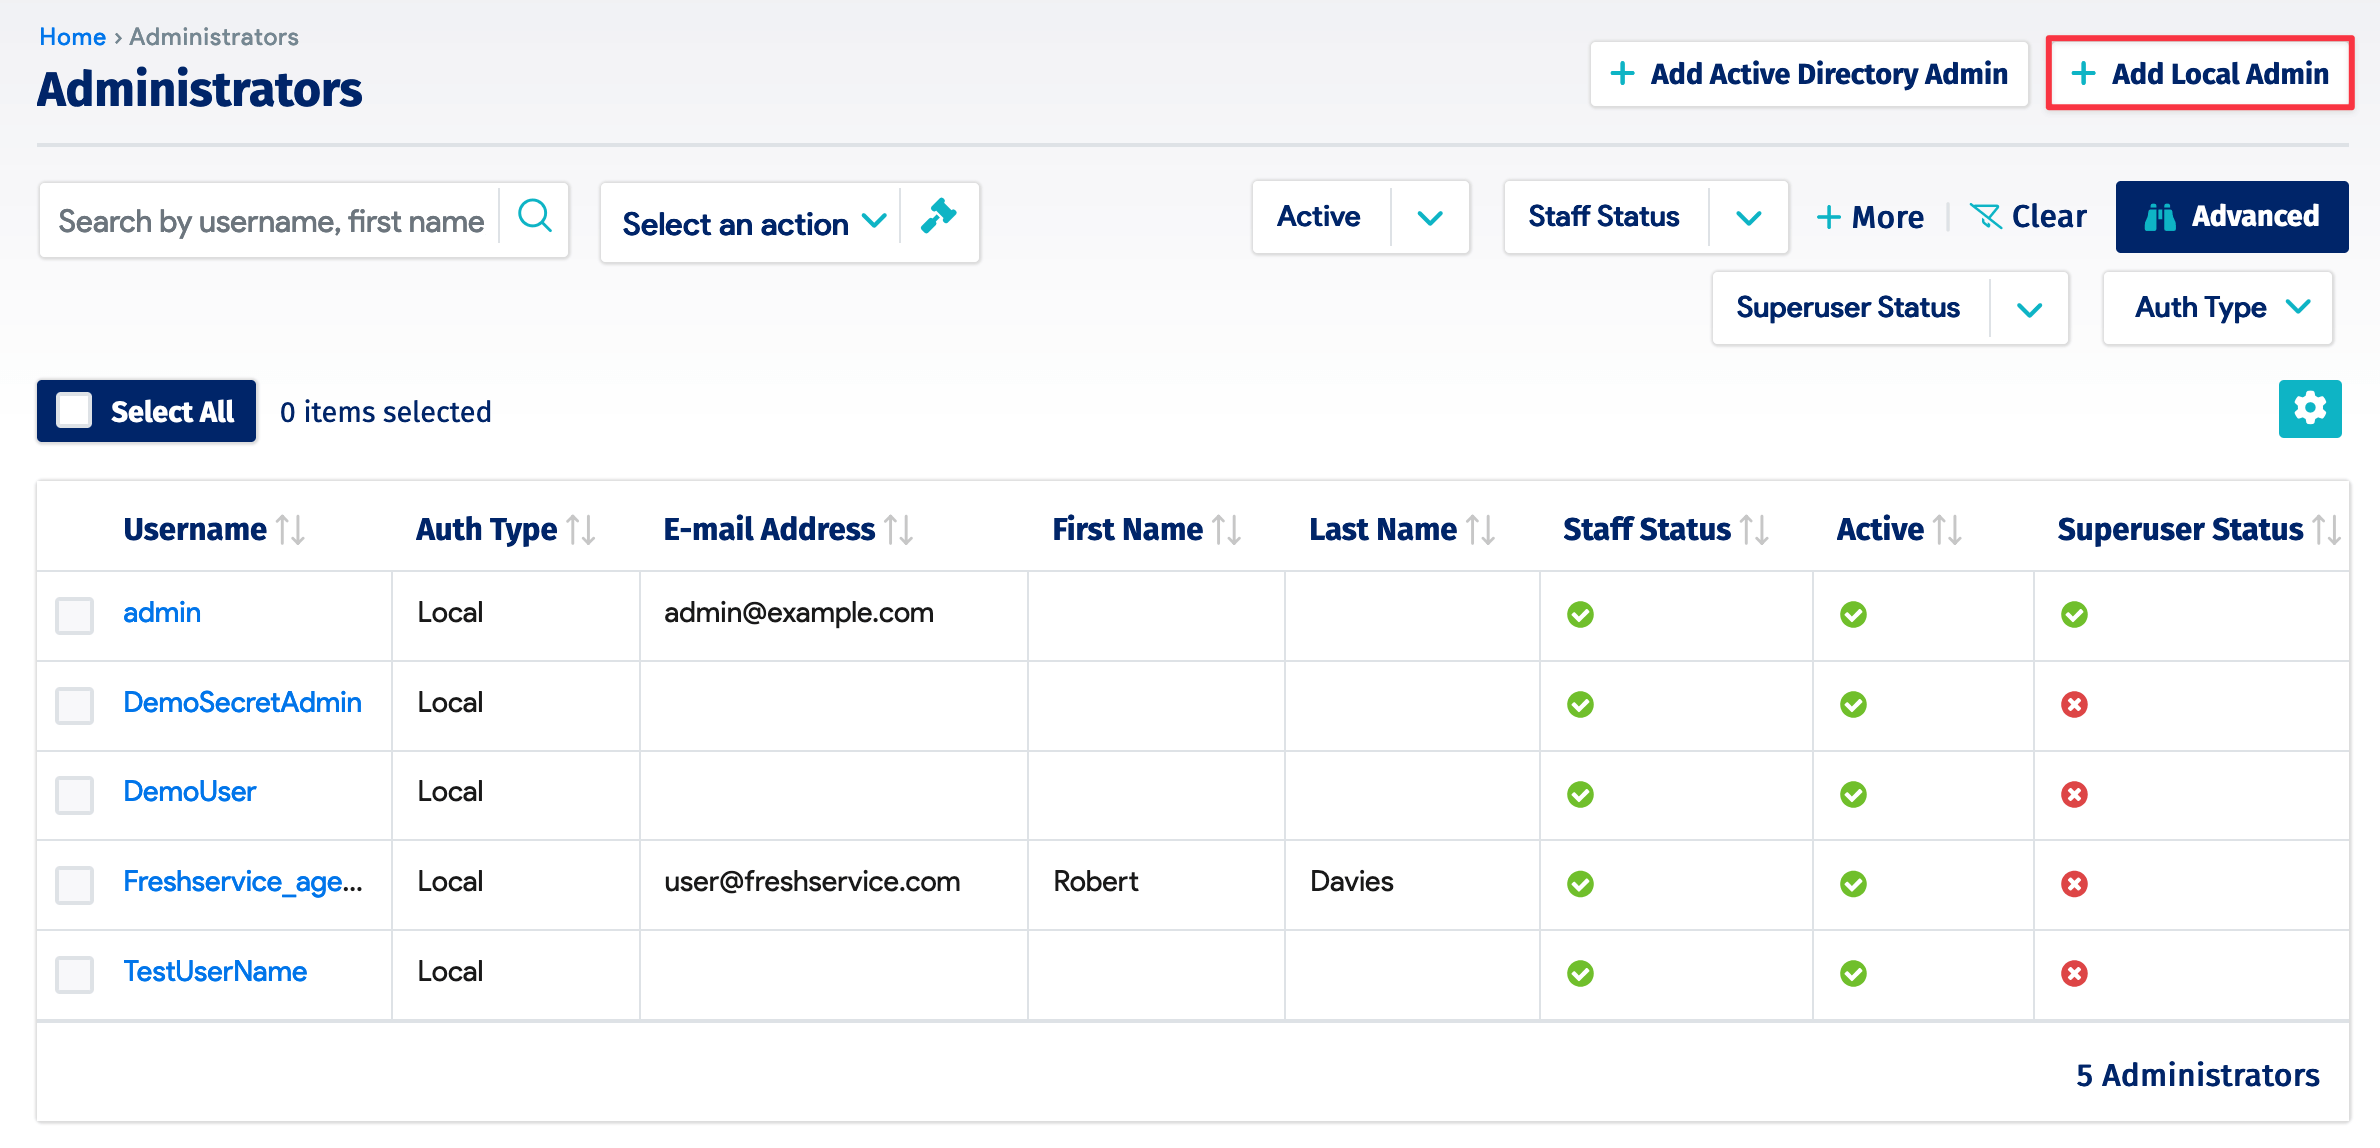
To enable the SSO feature, ensure that you have an administrator in your Device42 instance with the same email address as your Freshservice agent:
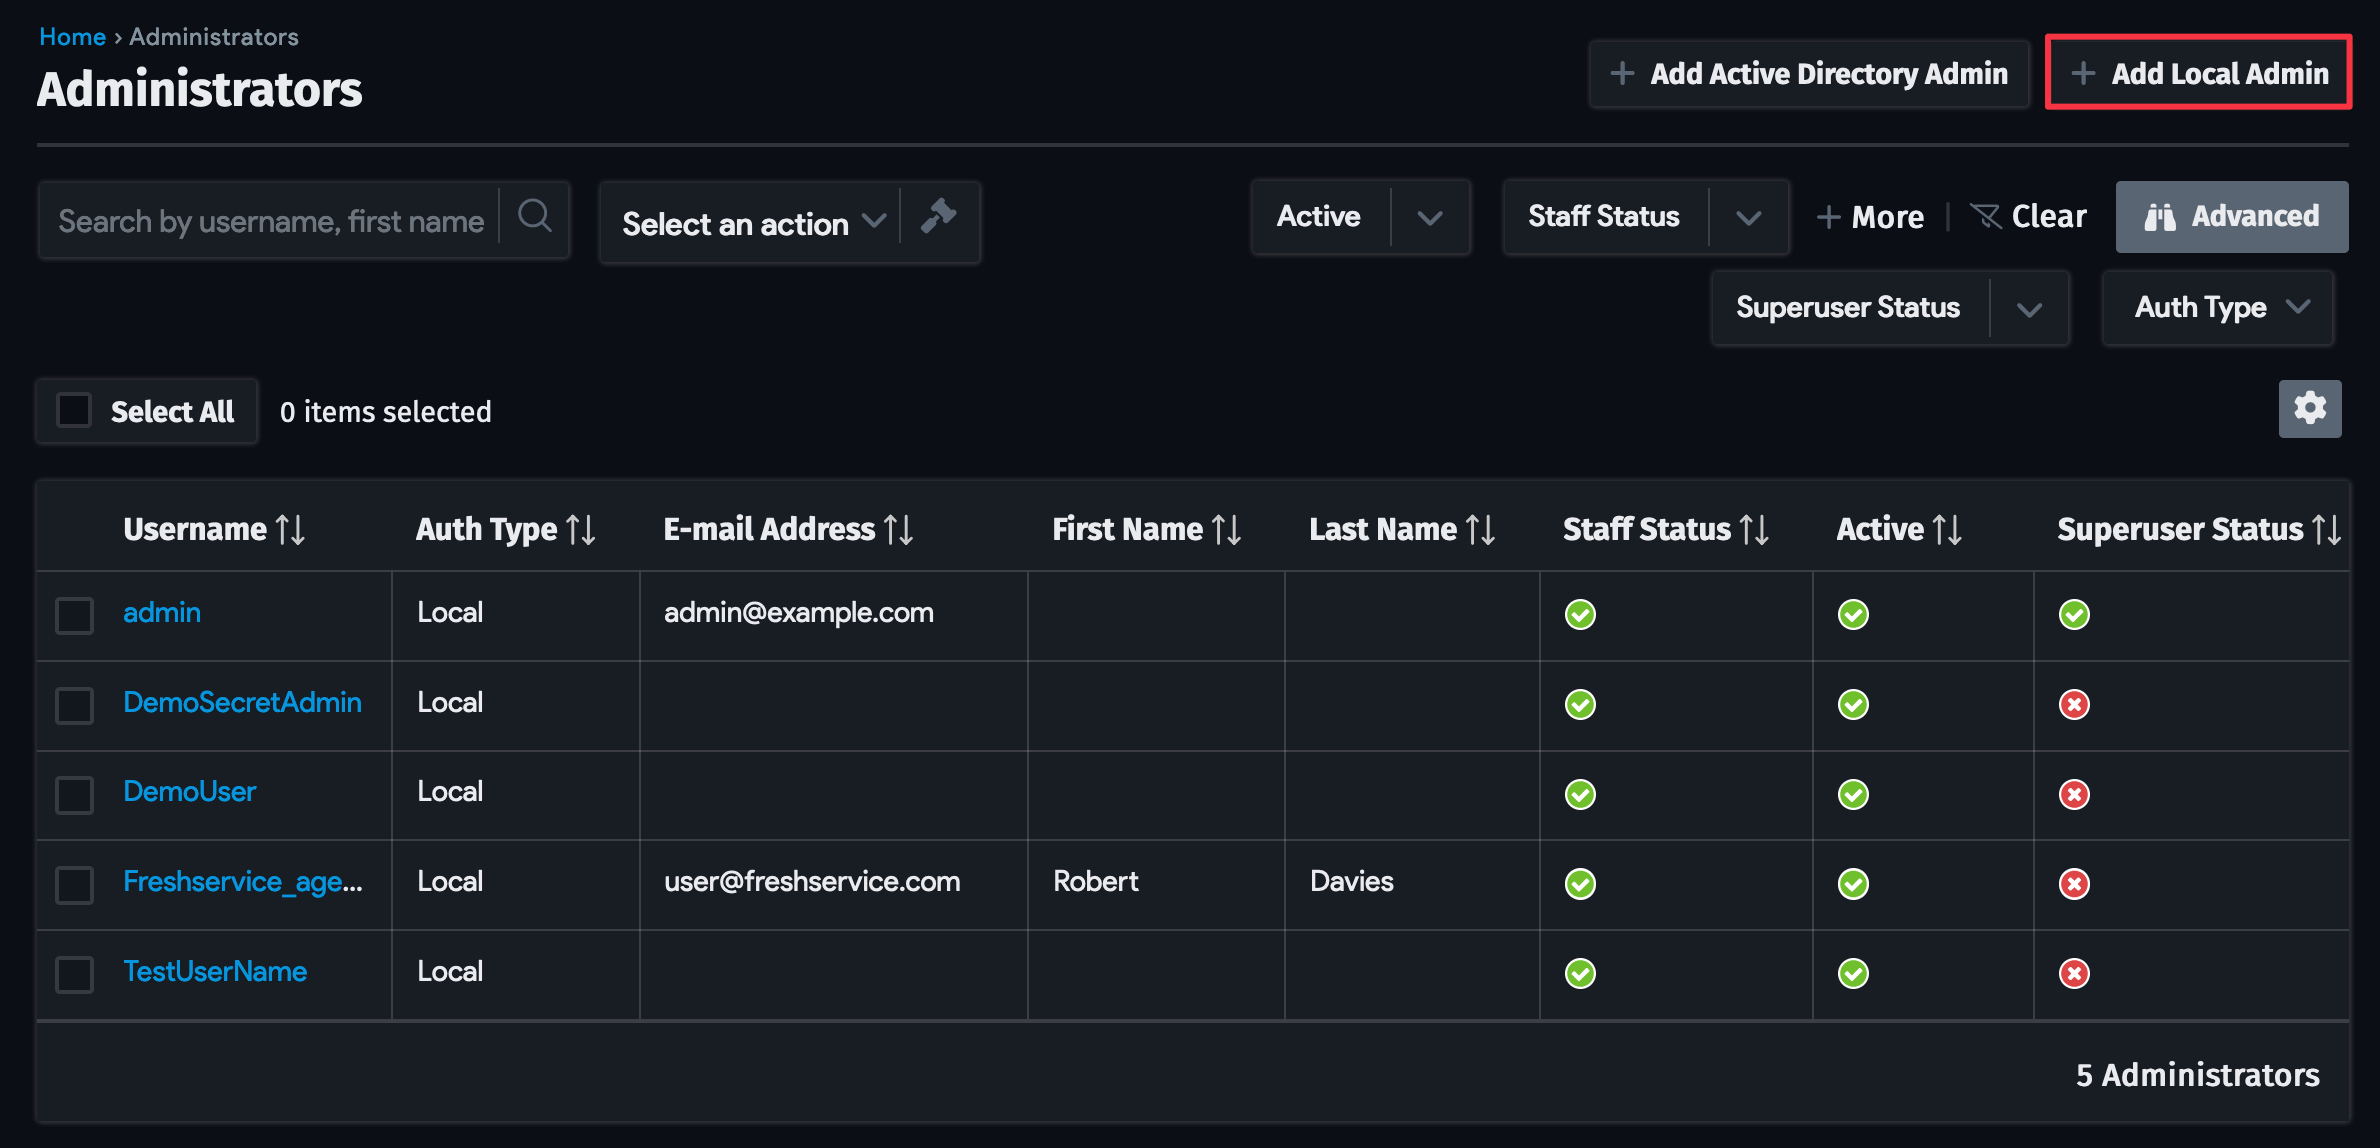
- Navigate to Tools > Admin & Permissions > Administrators.
- Click + Add Local Admin if you need to create an admin user with the email address associated with your Freshservice agent.
-
Click Save and copy the Verification Token from the table on the External Integrations list page.
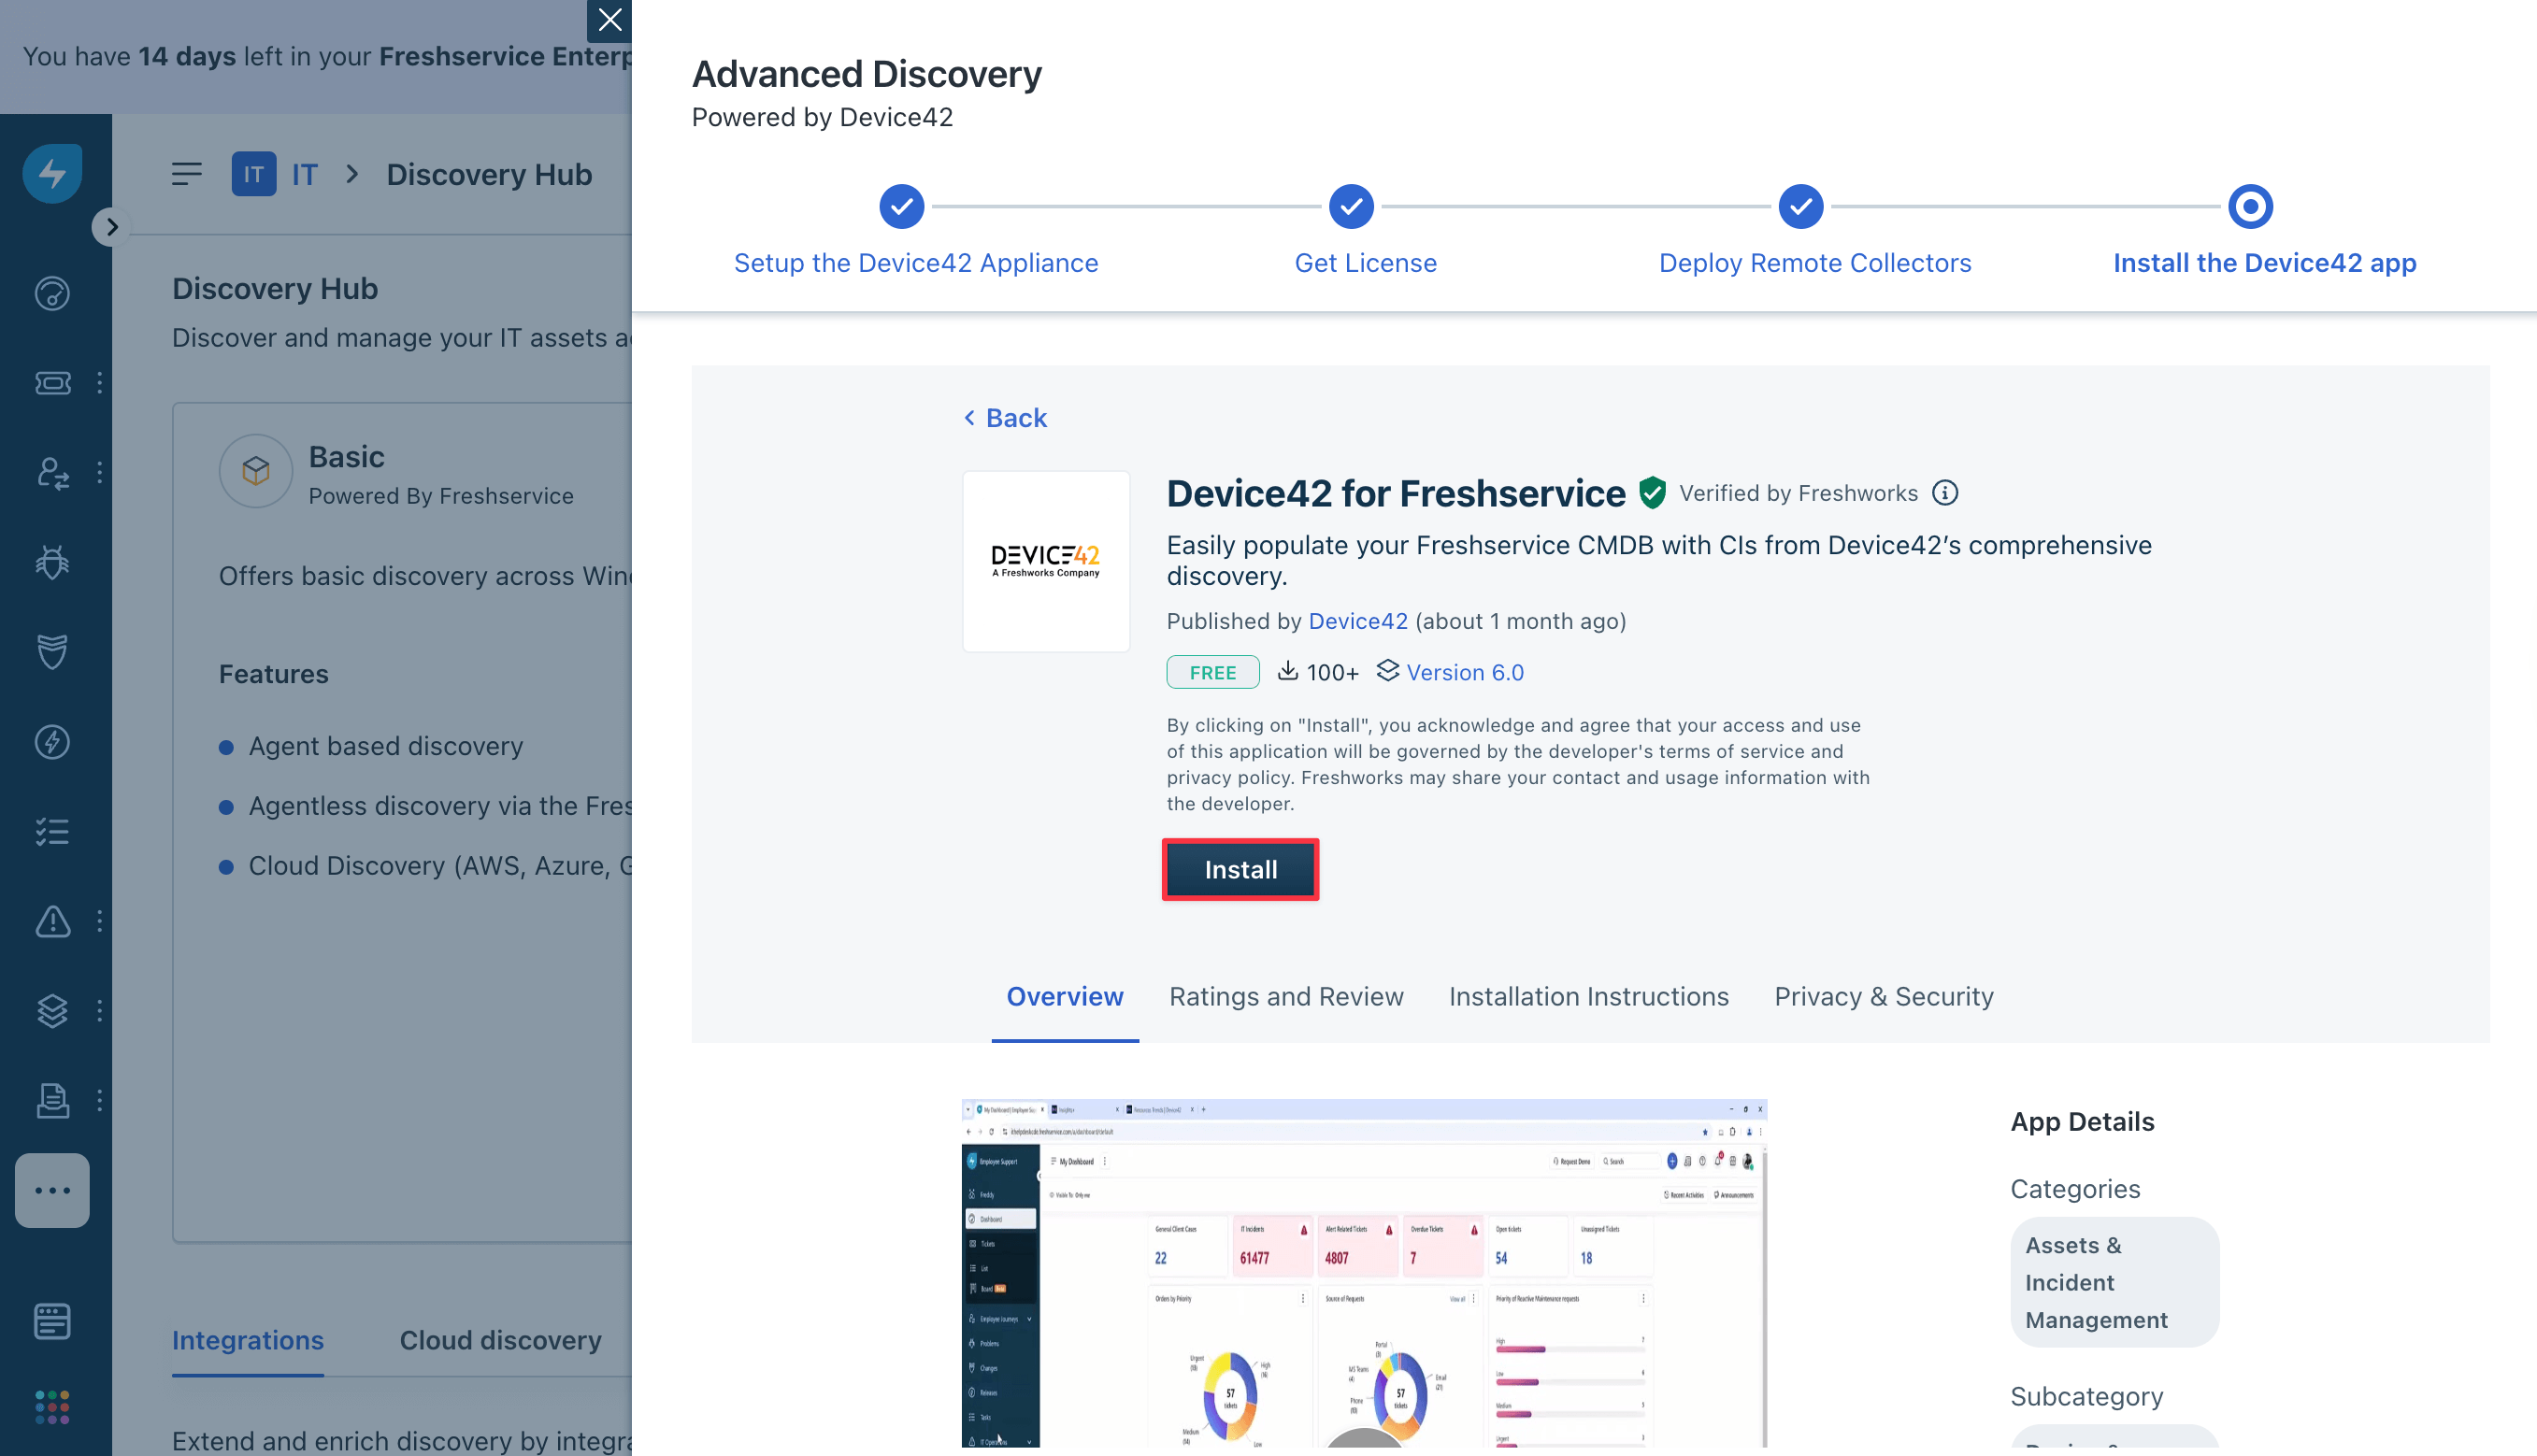
3. Install the Marketplace Integration App in Freshservice
Enable the Device42 integration in Freshservice using the Discovery Hub setup wizard.
-
Log in to your Freshservice agent account.
-
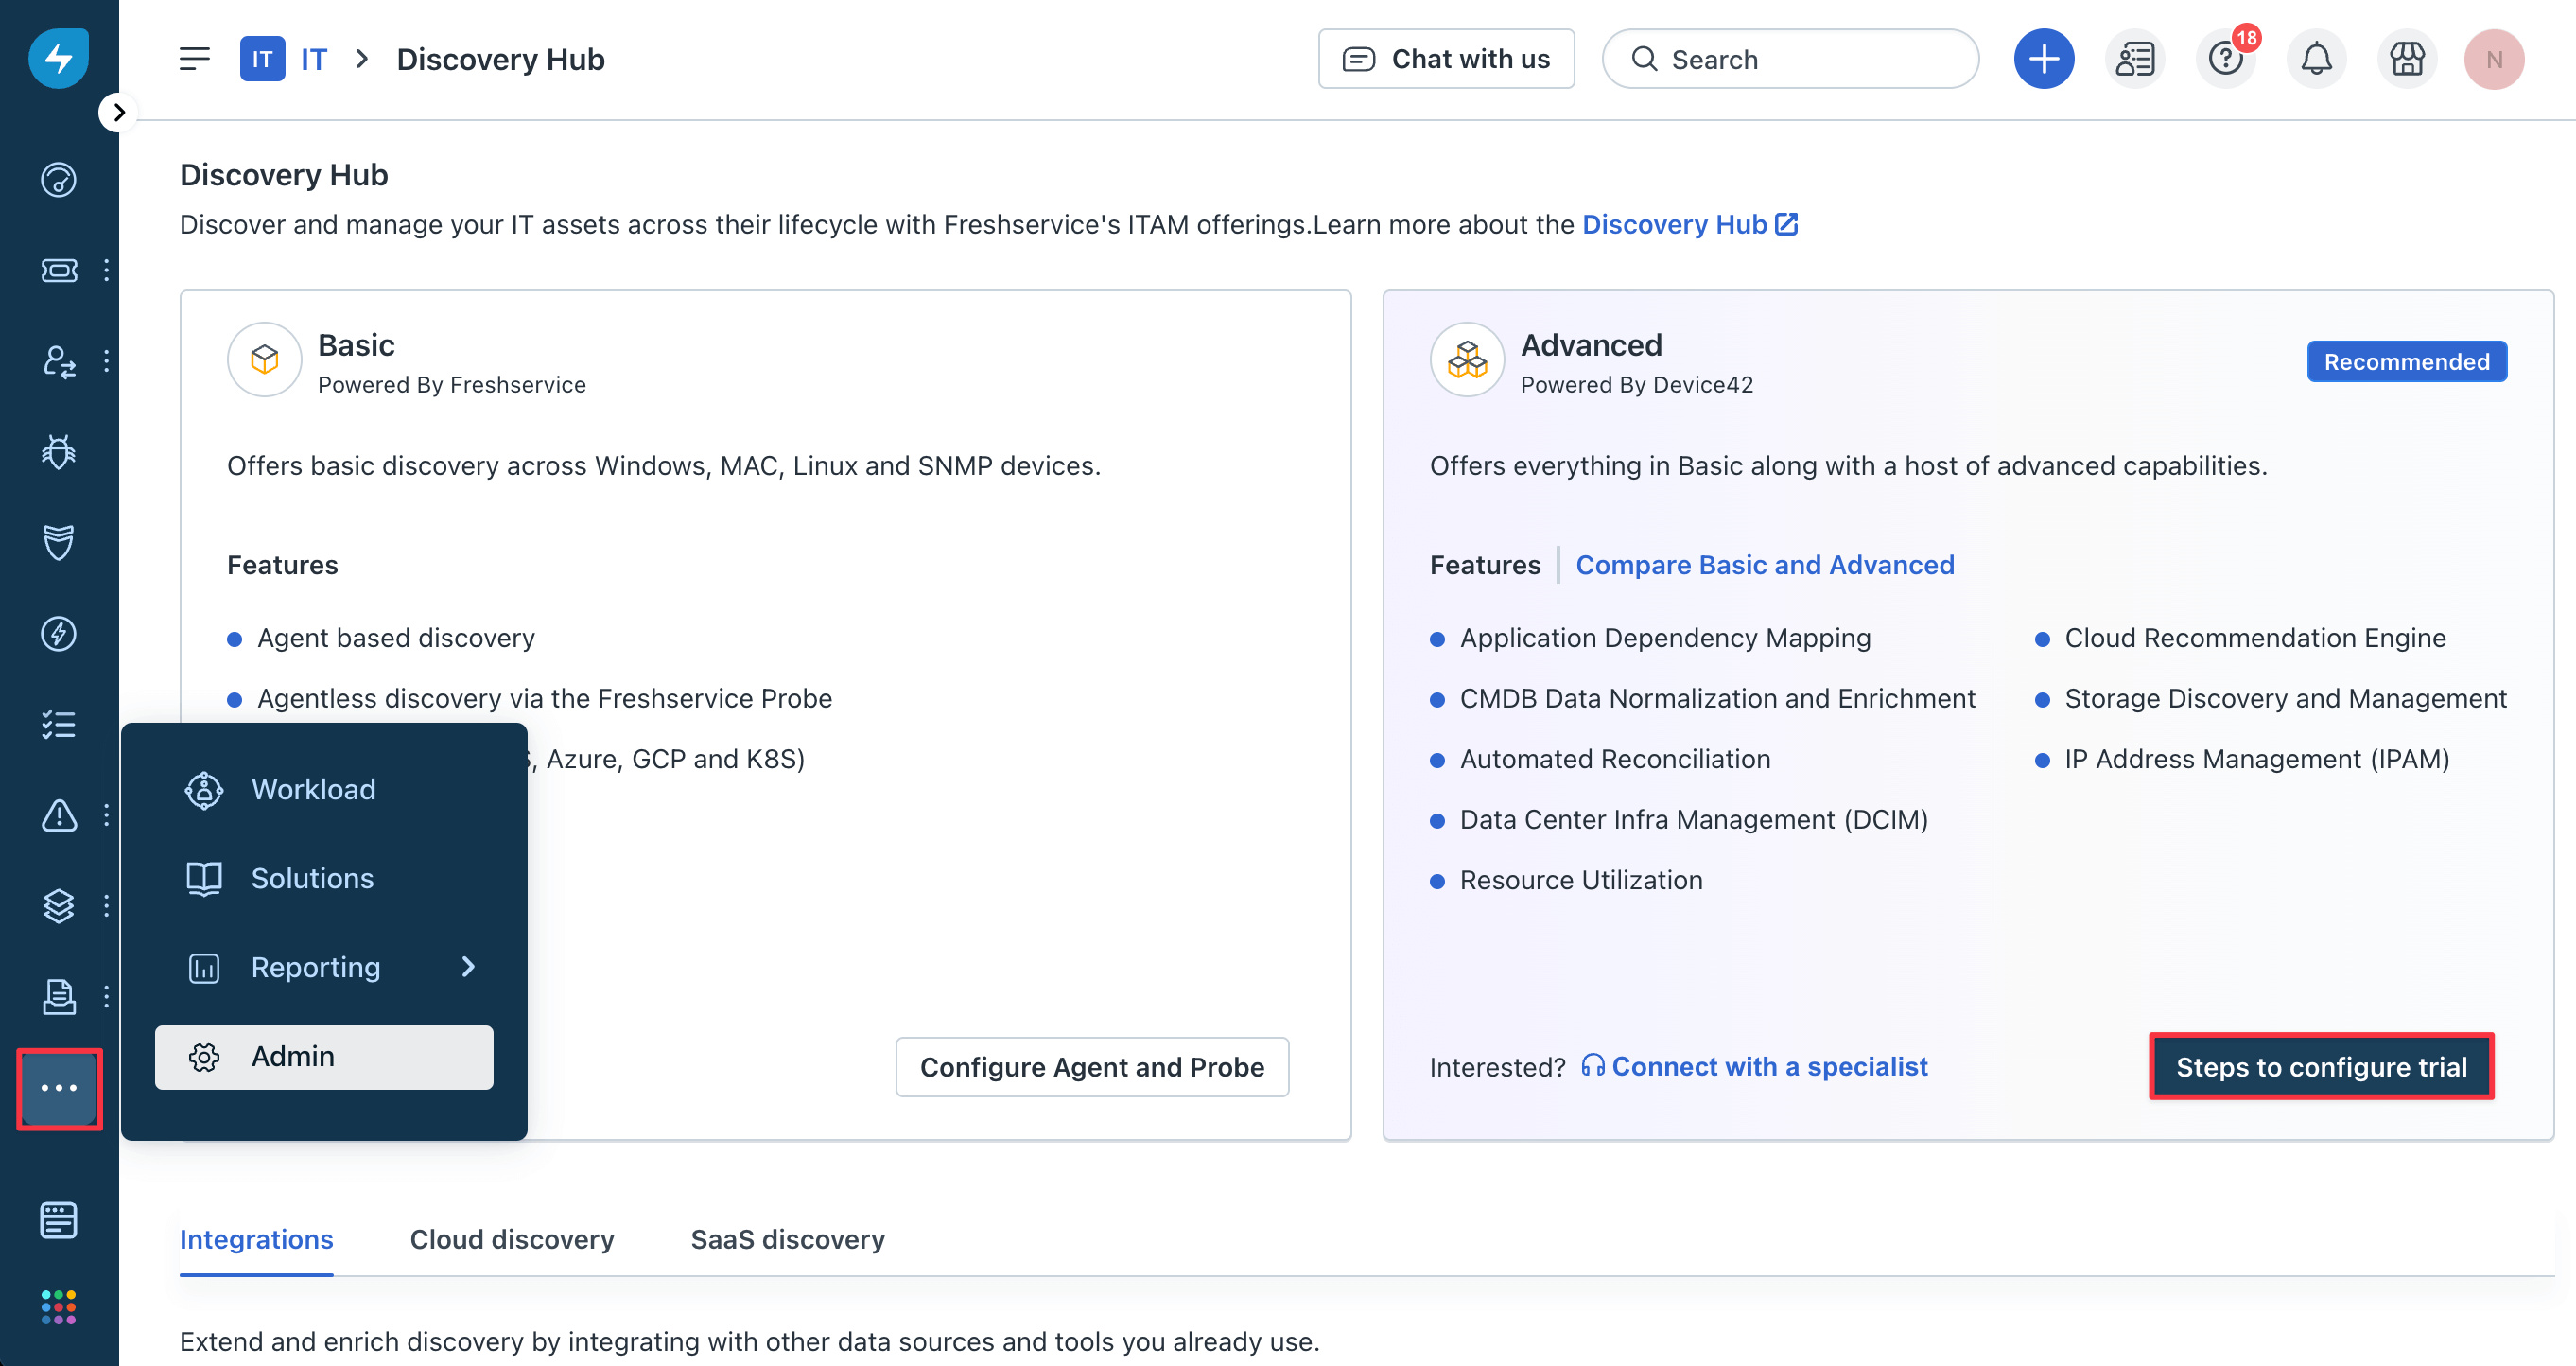
Click the ellipsis menu (located at the bottom of the left panel) and select Admin. Use the "Search admin" search bar to search for
hub. -
From the Discovery Hub view, click Steps to configure trial.
-
Click Next three times to get to the Install the Device42 app section of the installation wizard.
-
Install the Device42 for Freshservice app.
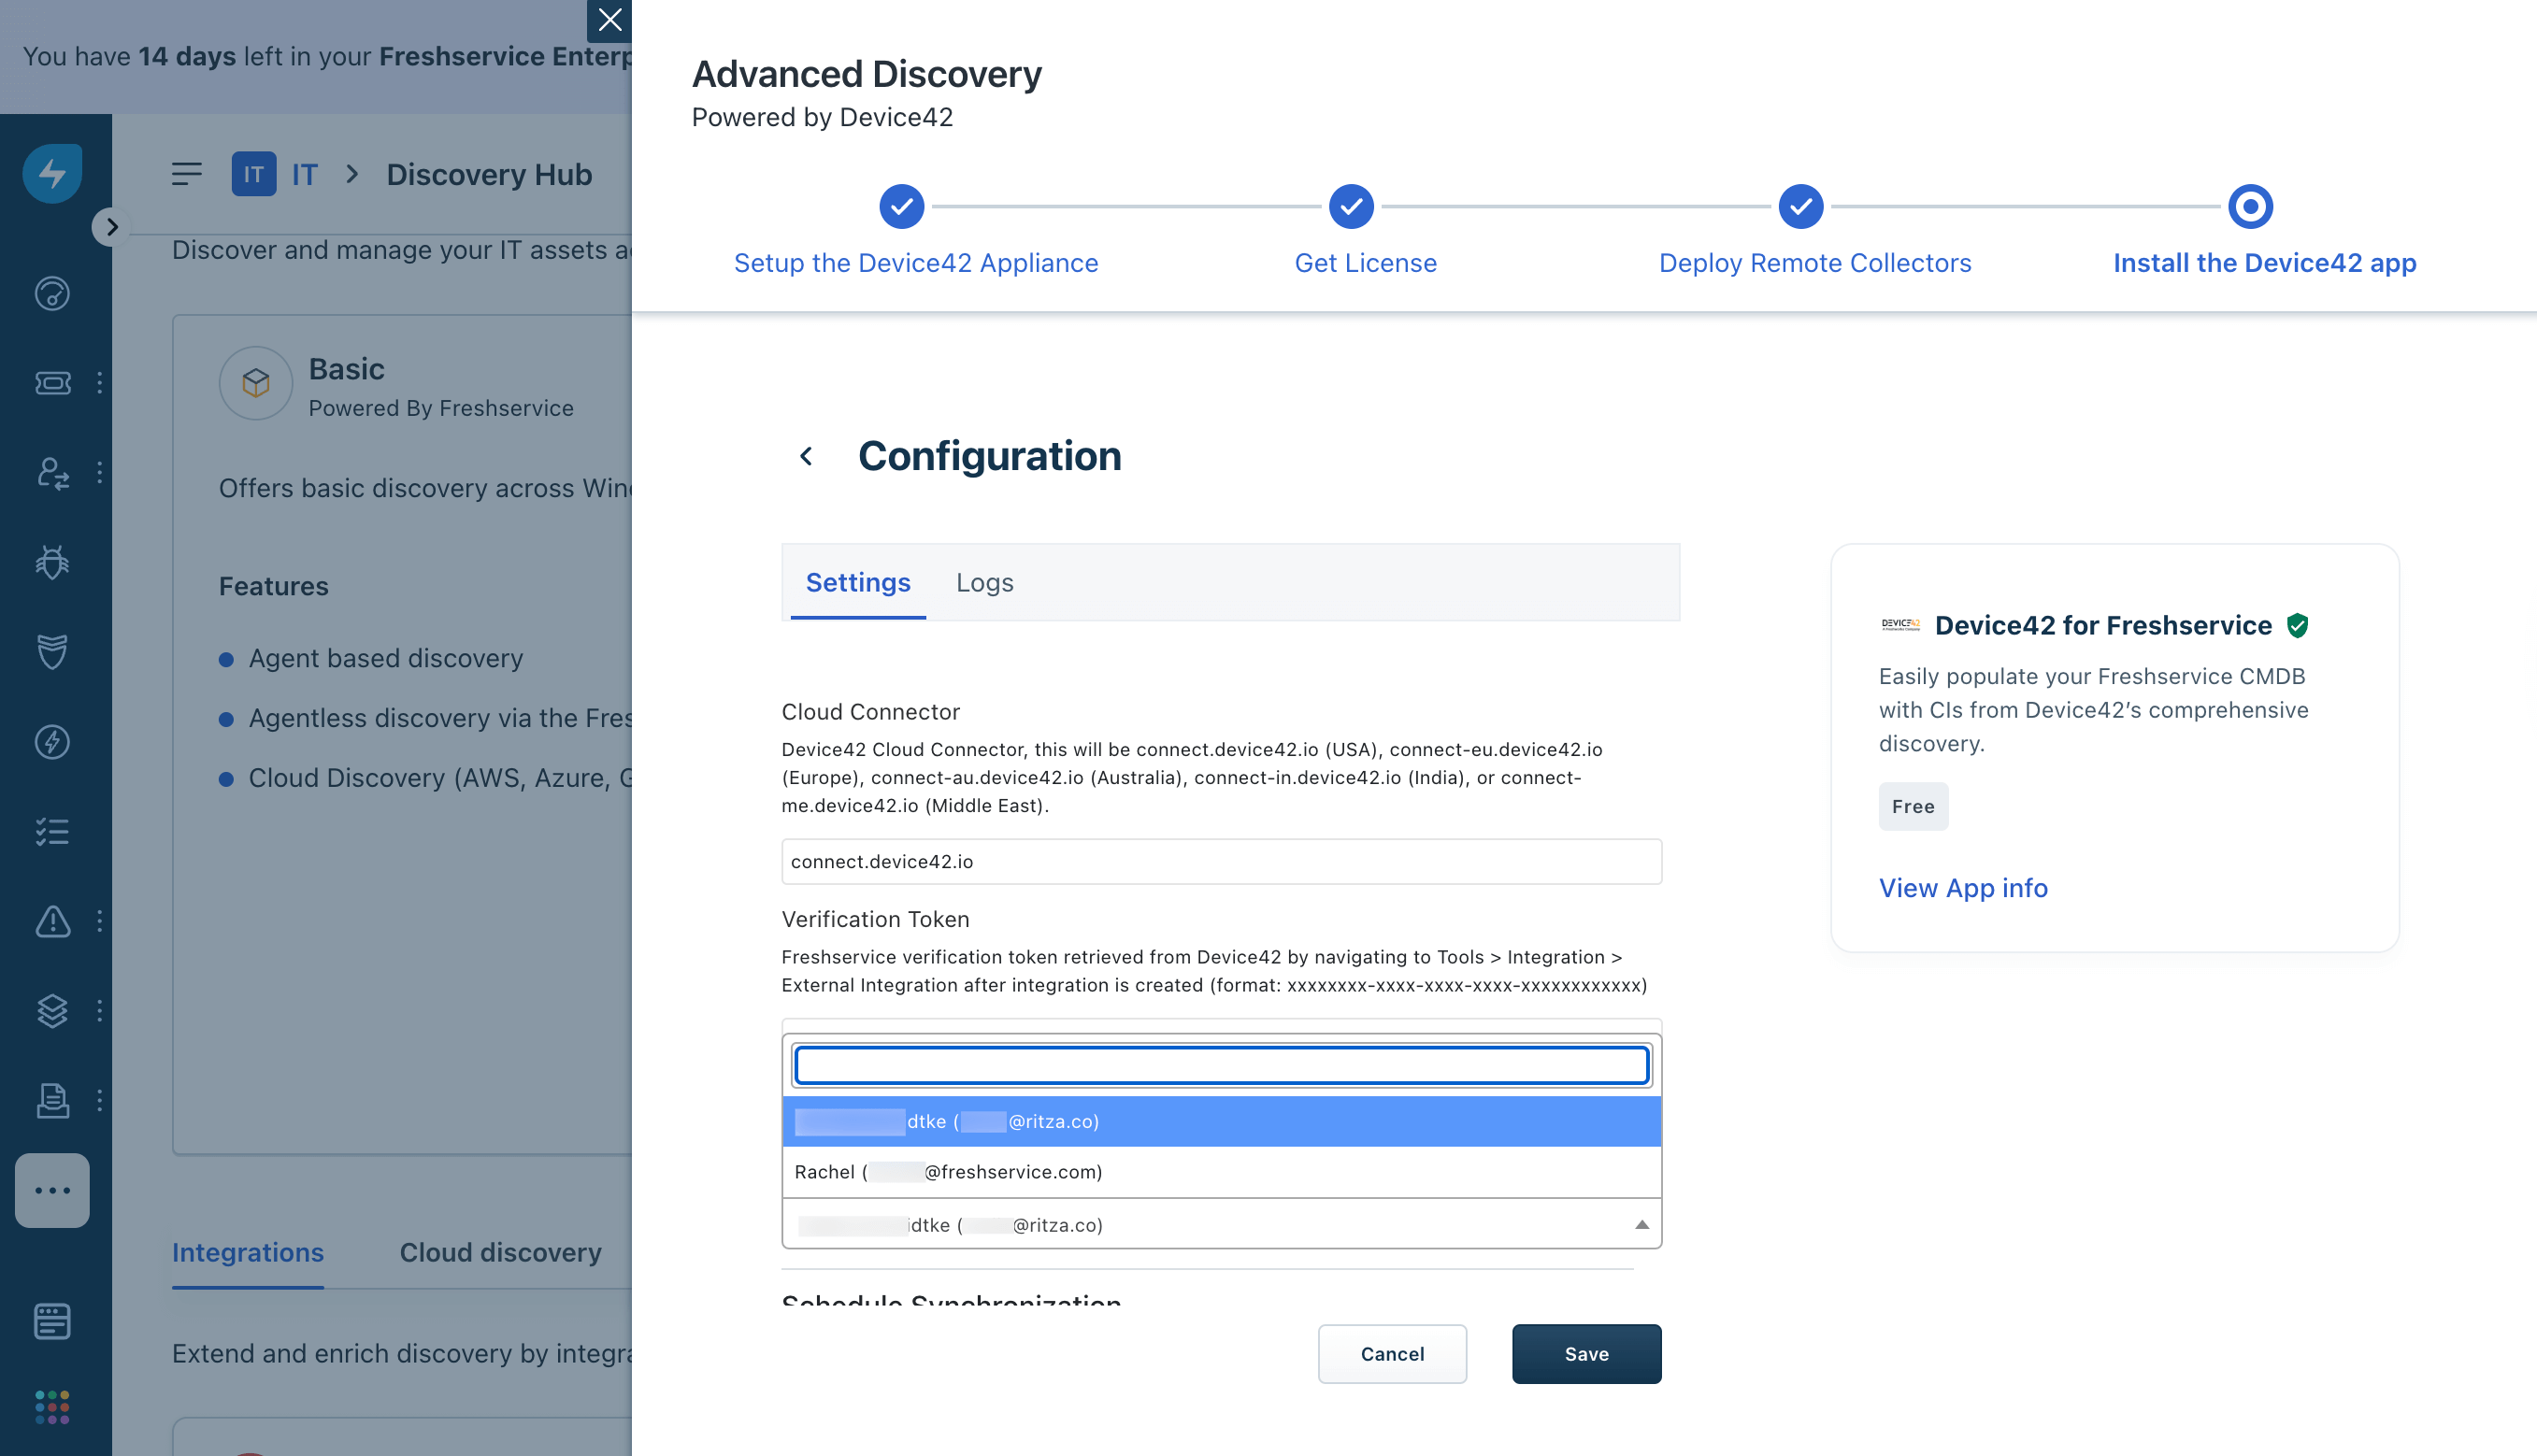
-
Fill in the fields on the form. Enter your Freshservice Domain Name.

- From the dropdown, choose the Cloud Connector region that matches the option you selected under Cloud Services in Device42 (see step 3 of the Enable the Cloud Connector in Device42 section above).
- Enter the Verification Token generated from the Device42 external integration you added. Make sure you're using the token from the External Integrations view page and not the token from the + Add External Integrations form.
-
Open the Freshservice Default Approver dropdown and select your admin user from the list. If the list is populated, then the information you've entered so far should be correct. If you are unable to select a user, check the URL and Cloud Connector.
-
Click Install to add the app to your Freshservice instance.
Complete the Single Sign-On Setup
To set up SSO, you need a user account in Device42 that mirrors your Freshservice user account and associated email address. That is, you need to have an admin user in Device42 with the same email address as your Freshservice agent.
After installing the integration app in Freshservice, set up an External Integration in Device42 and complete the SSO configuration in the Device42 Appliance Manager:
-
Ensure that you have checked the Enable SSO option on the Device42 External Integration. See Step 4 of the Create a Freshservice External Integration in Device42 section above.
-
From the Appliance Manager, navigate to Global Settings > SAML/SSO Settings.
-
Check the Enable Freshworks SSO and choose between the login options:
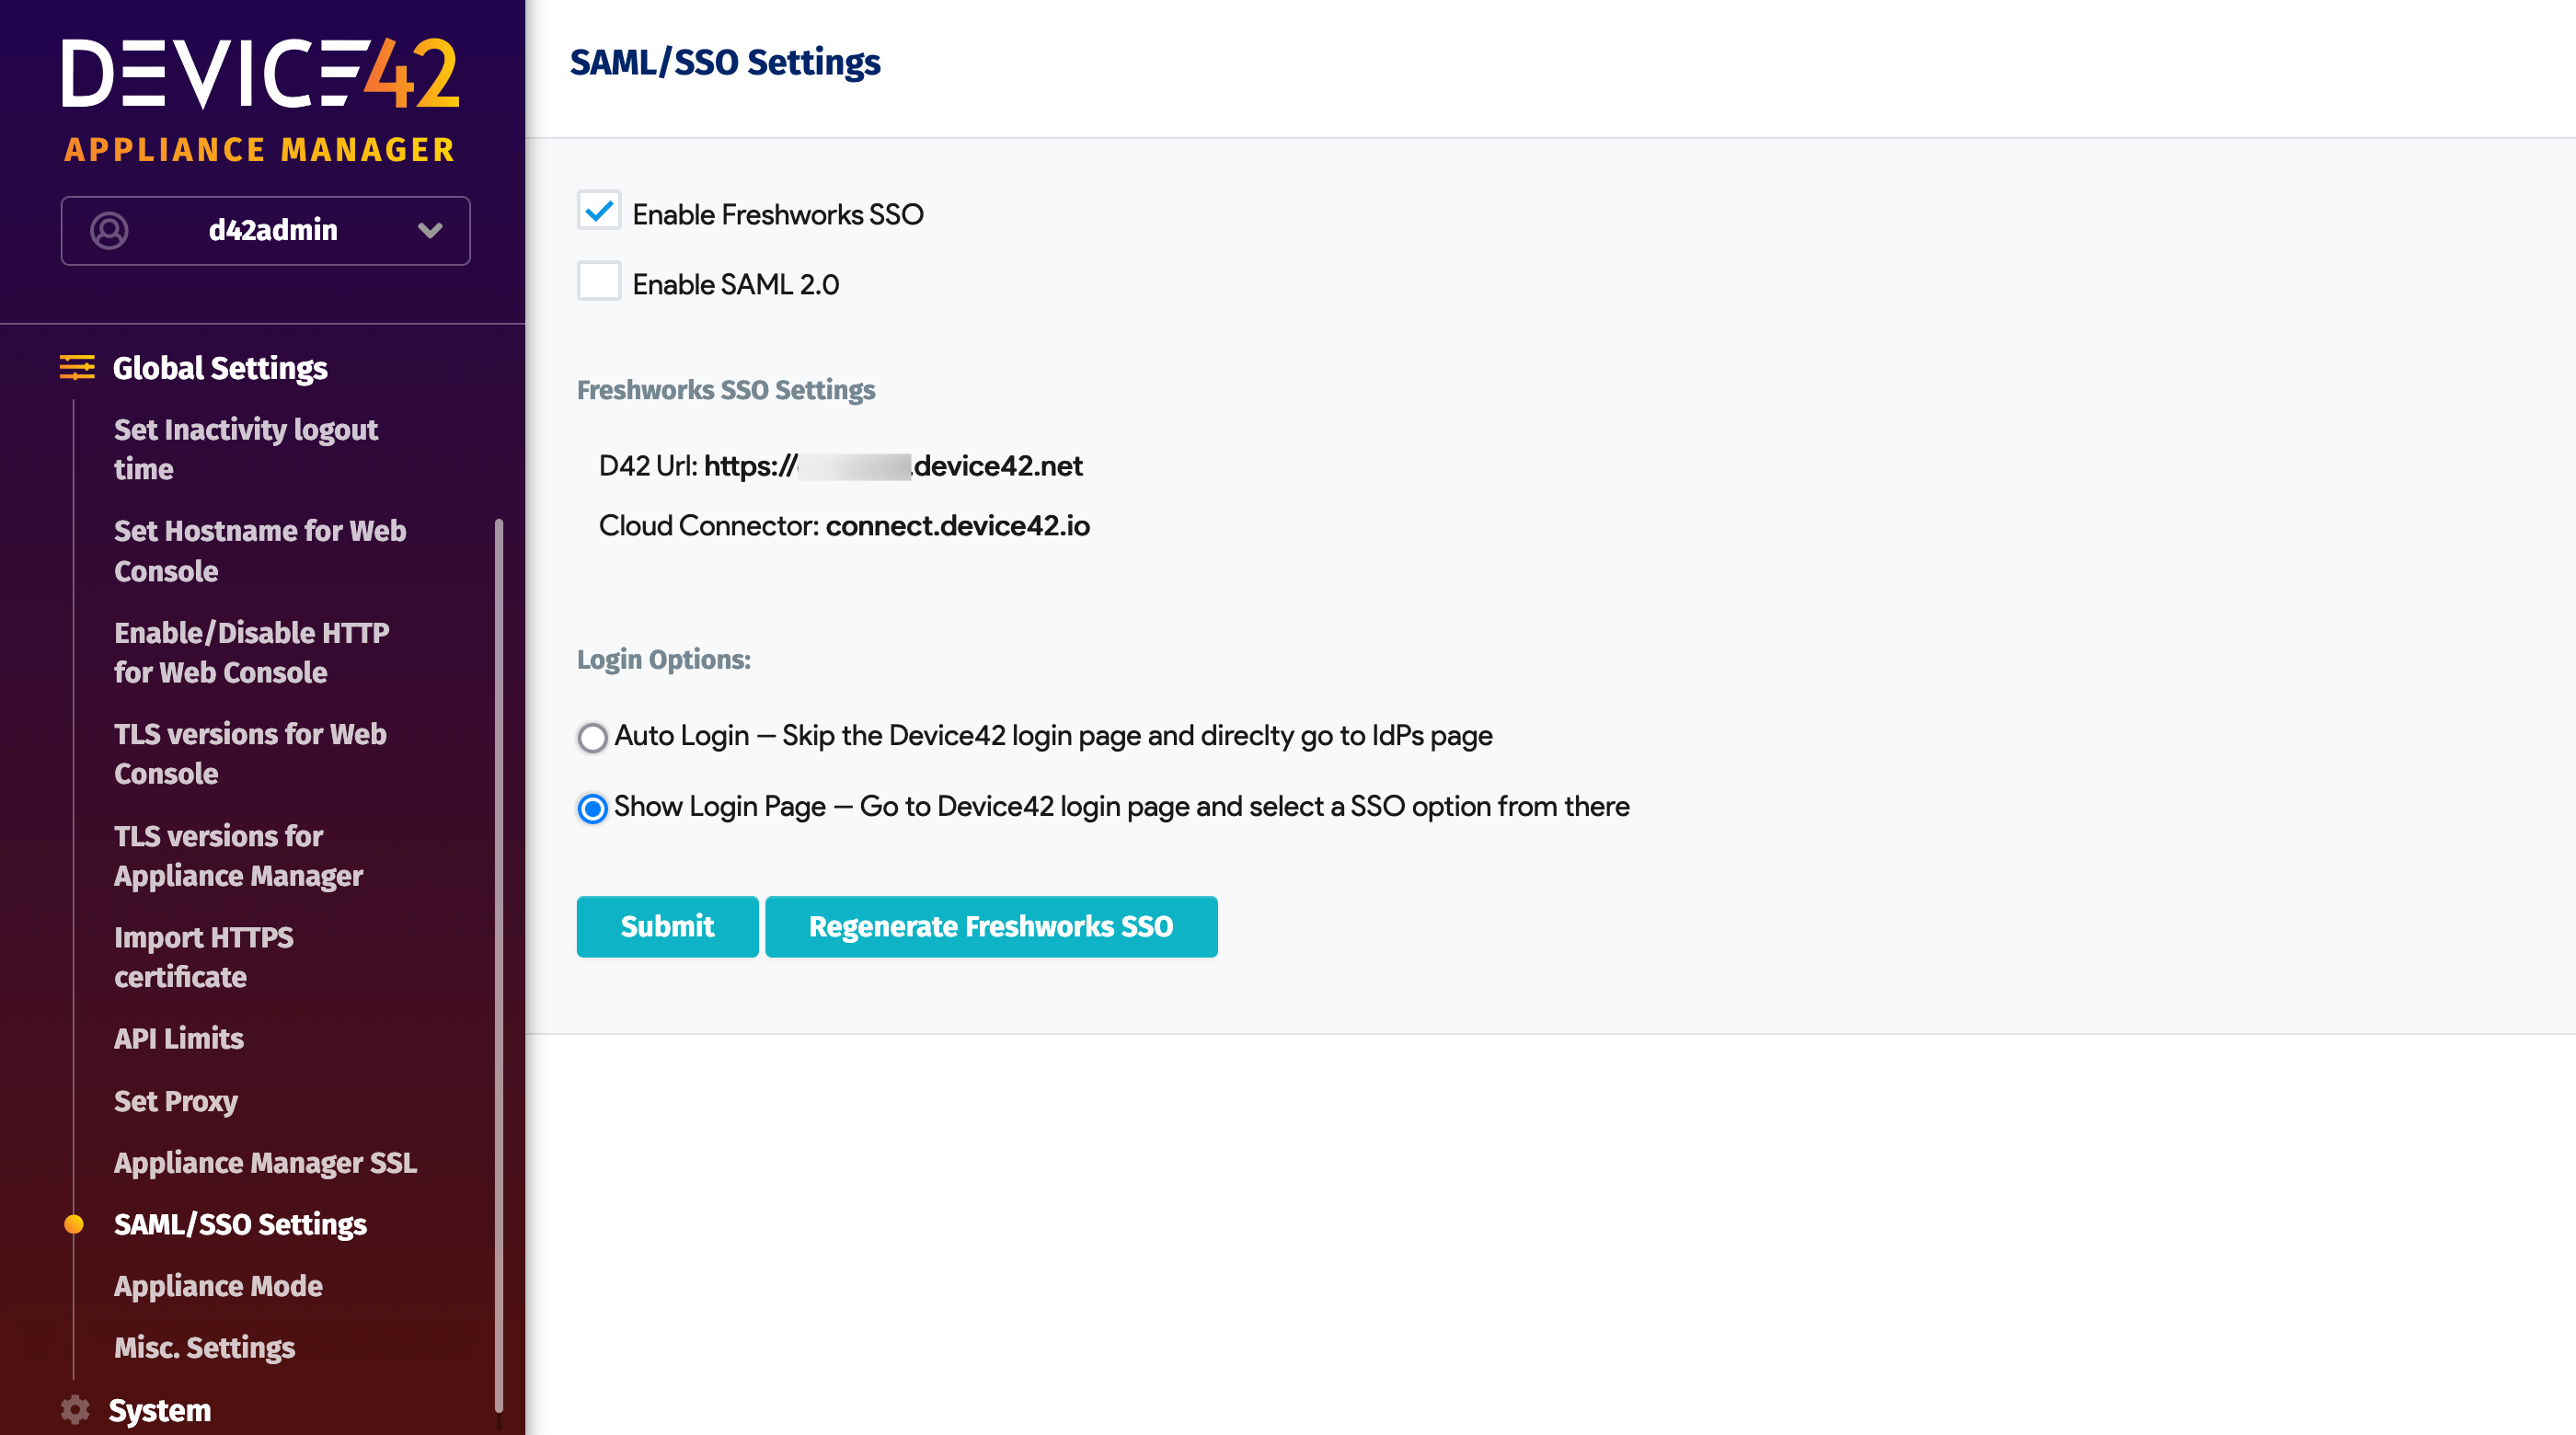
- Auto Login: Device42 will try to log you in automatically, without first directing you to the login page. If the automatic login fails, you will be directed to the login page.
- Show Login Page: Device42 will always direct you to the login page (with buttons for normal and SSO login).
-
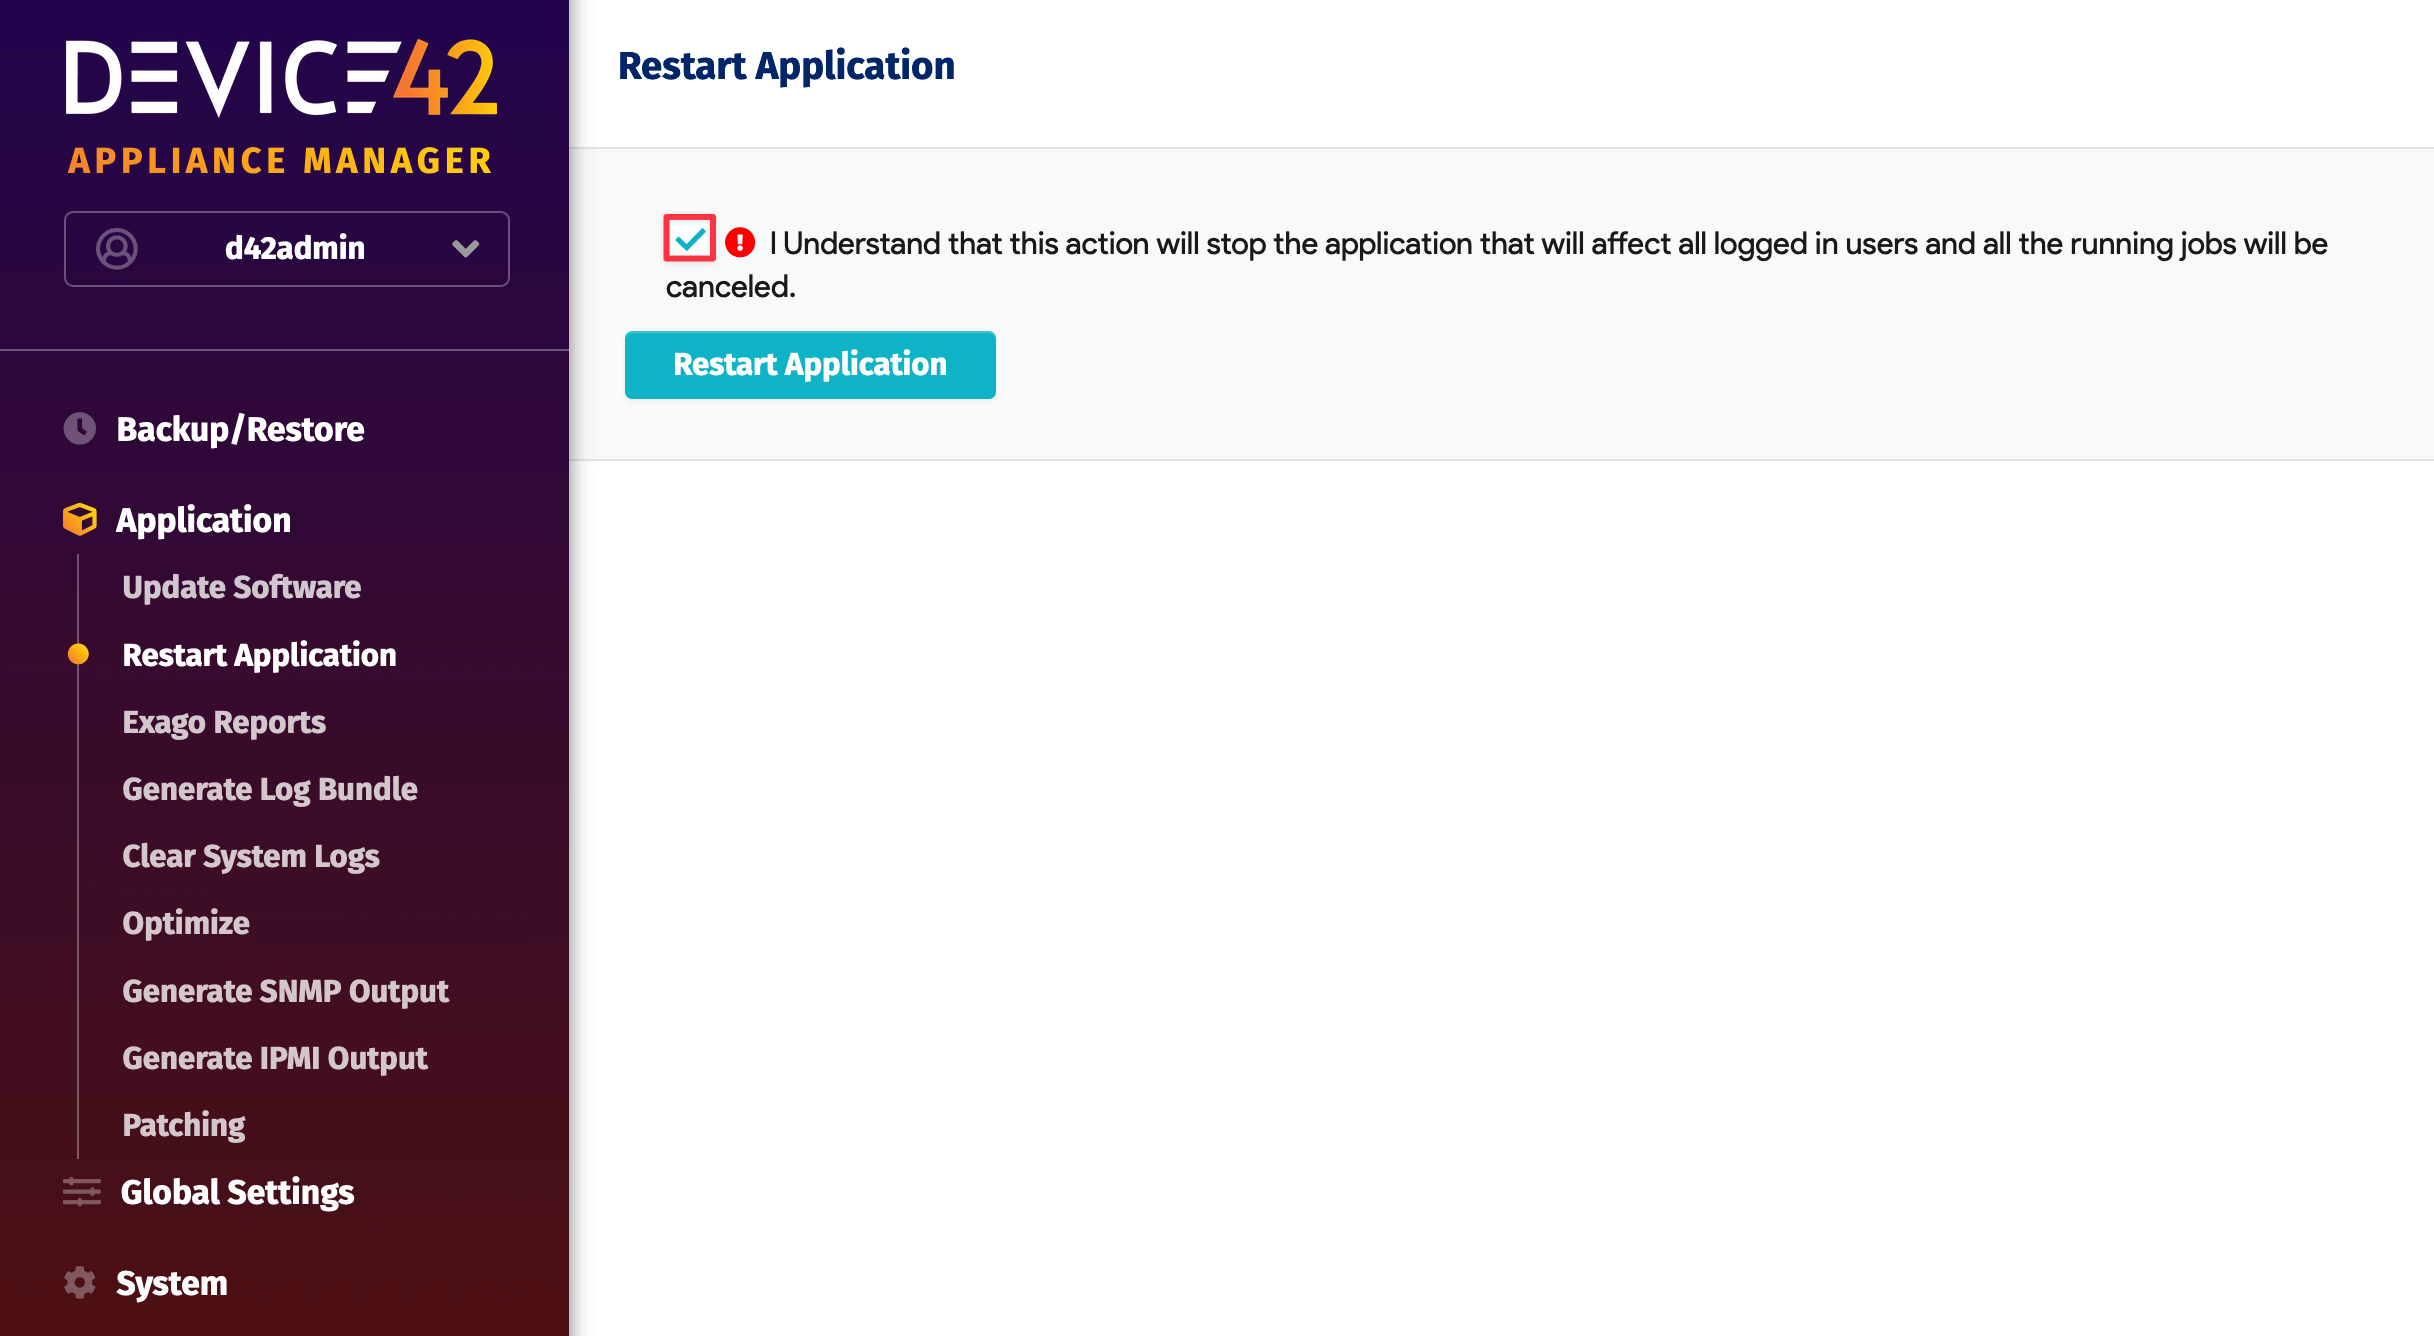
Restart your Device42 instance. From the Appliance Manager, go to Application > Restart Application and check the confirmation box before restarting Device42.
Test the SSO as follows:
-
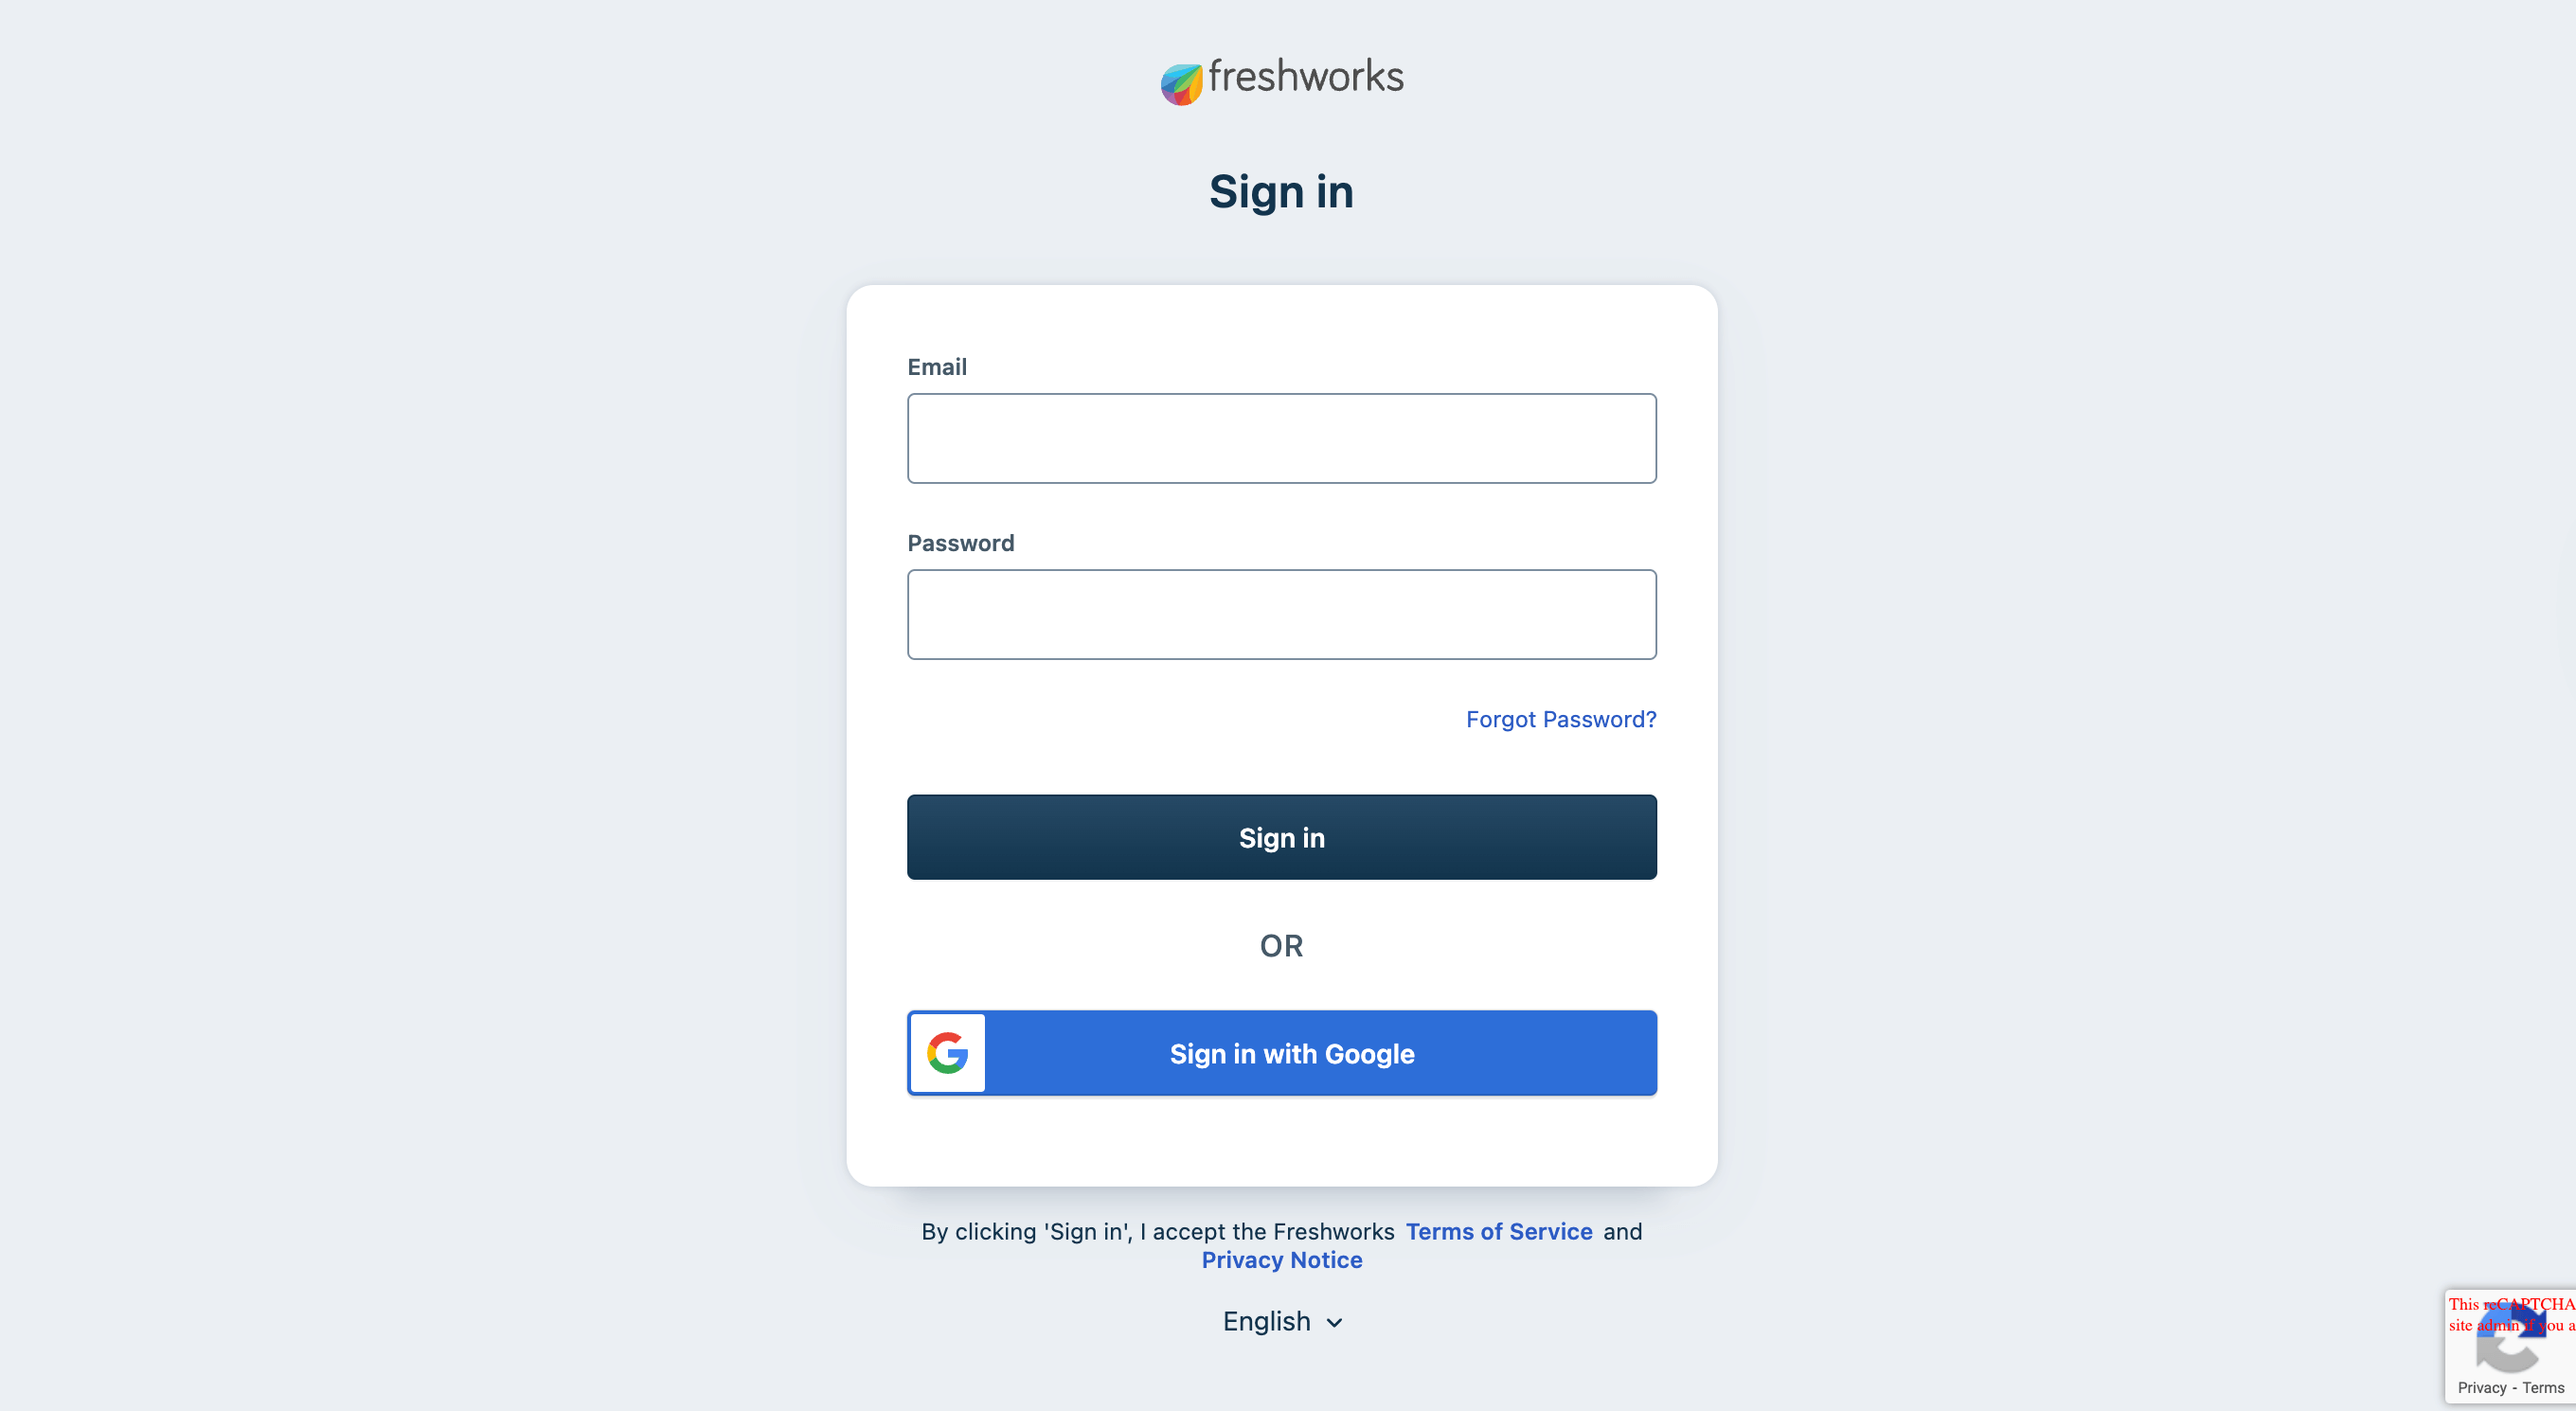
Log in to your Freshworks instance with the same email address as your Device42 admin user.
-
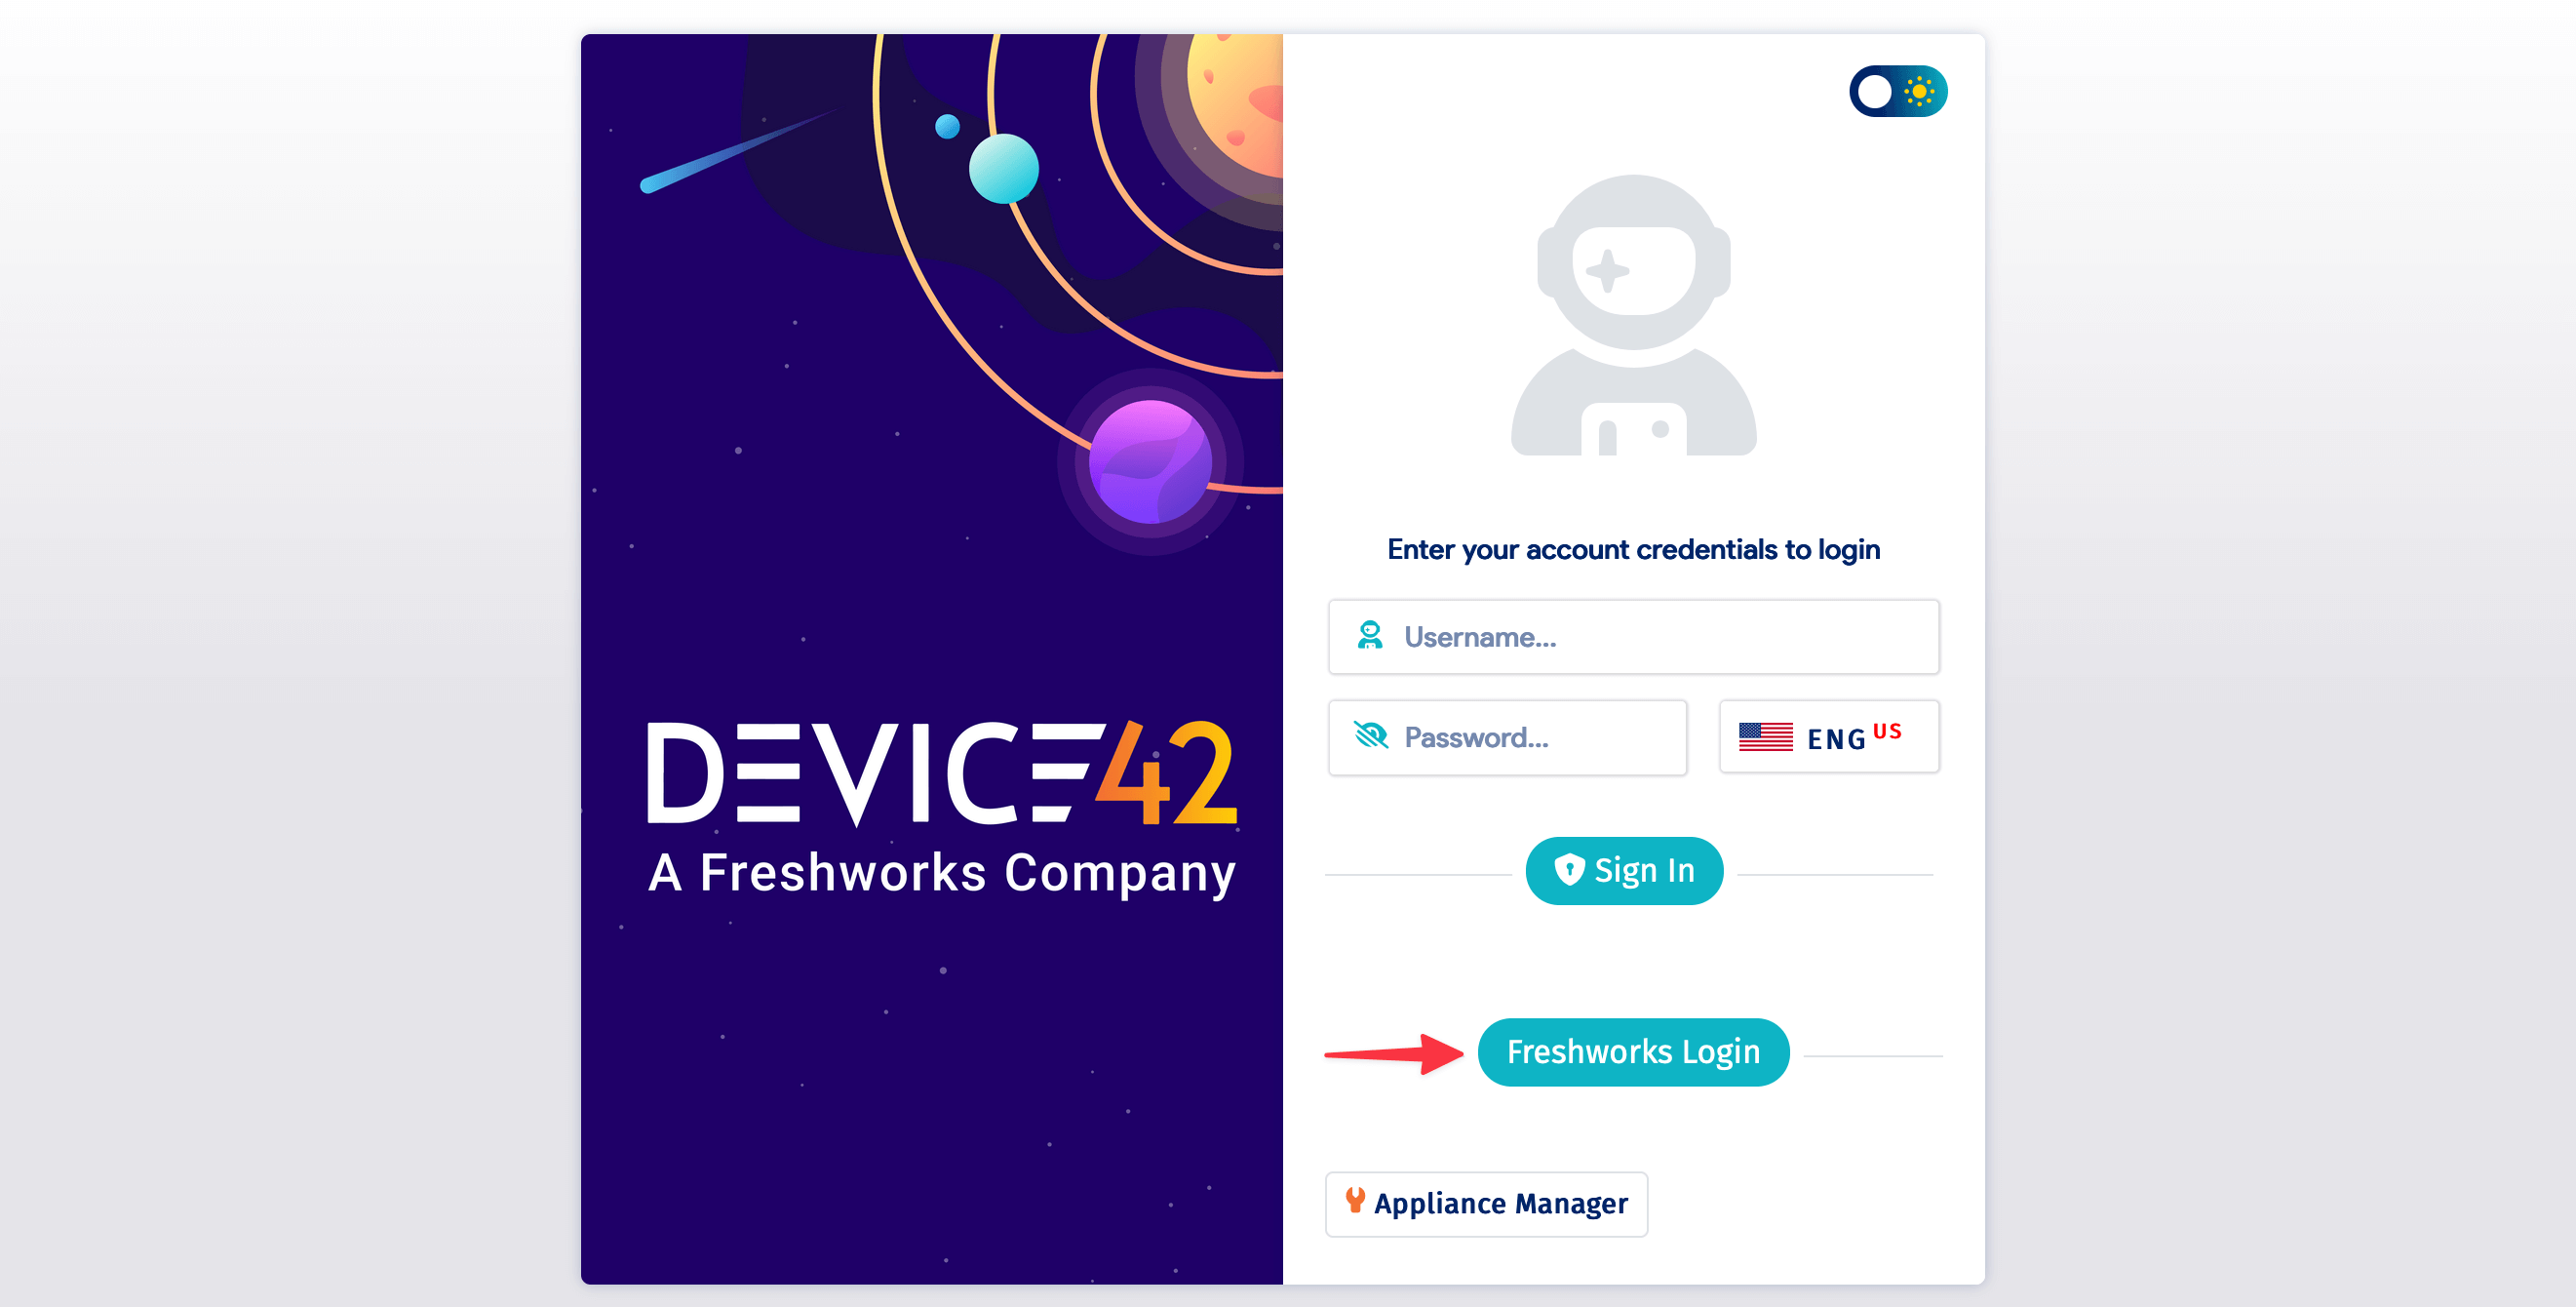
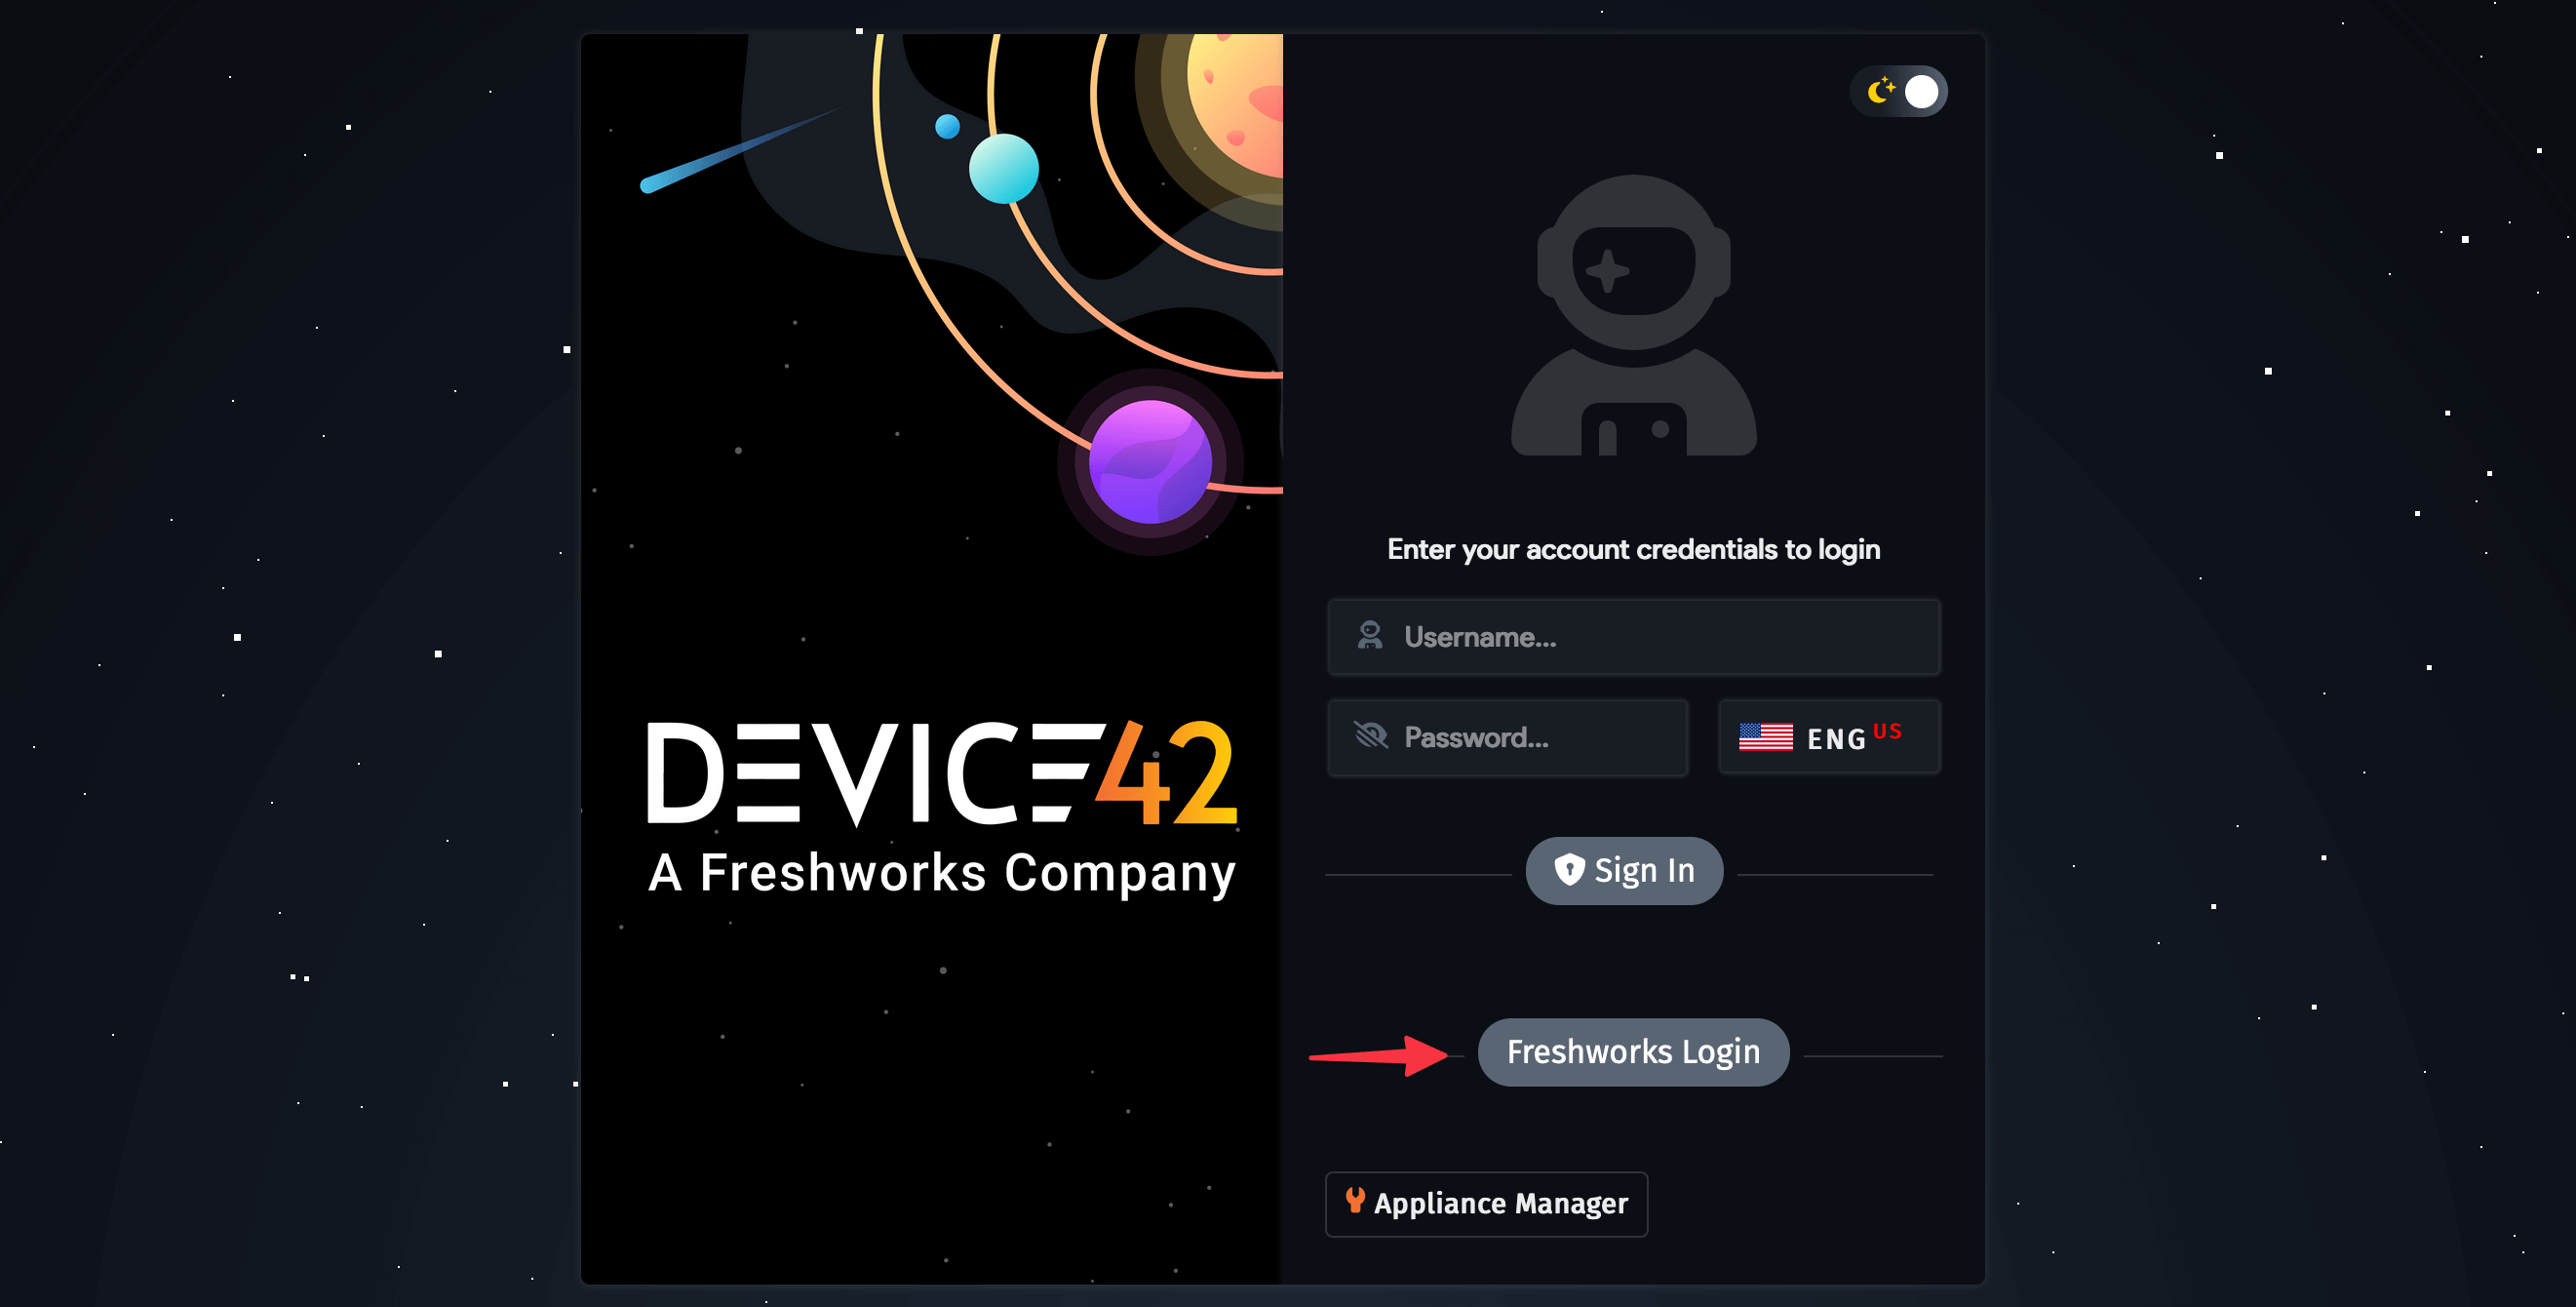
Log out of Device42 and refresh the page. Click on the new Freshworks Login button.
-
Authorize the Freshworks SSO the first time you use it.
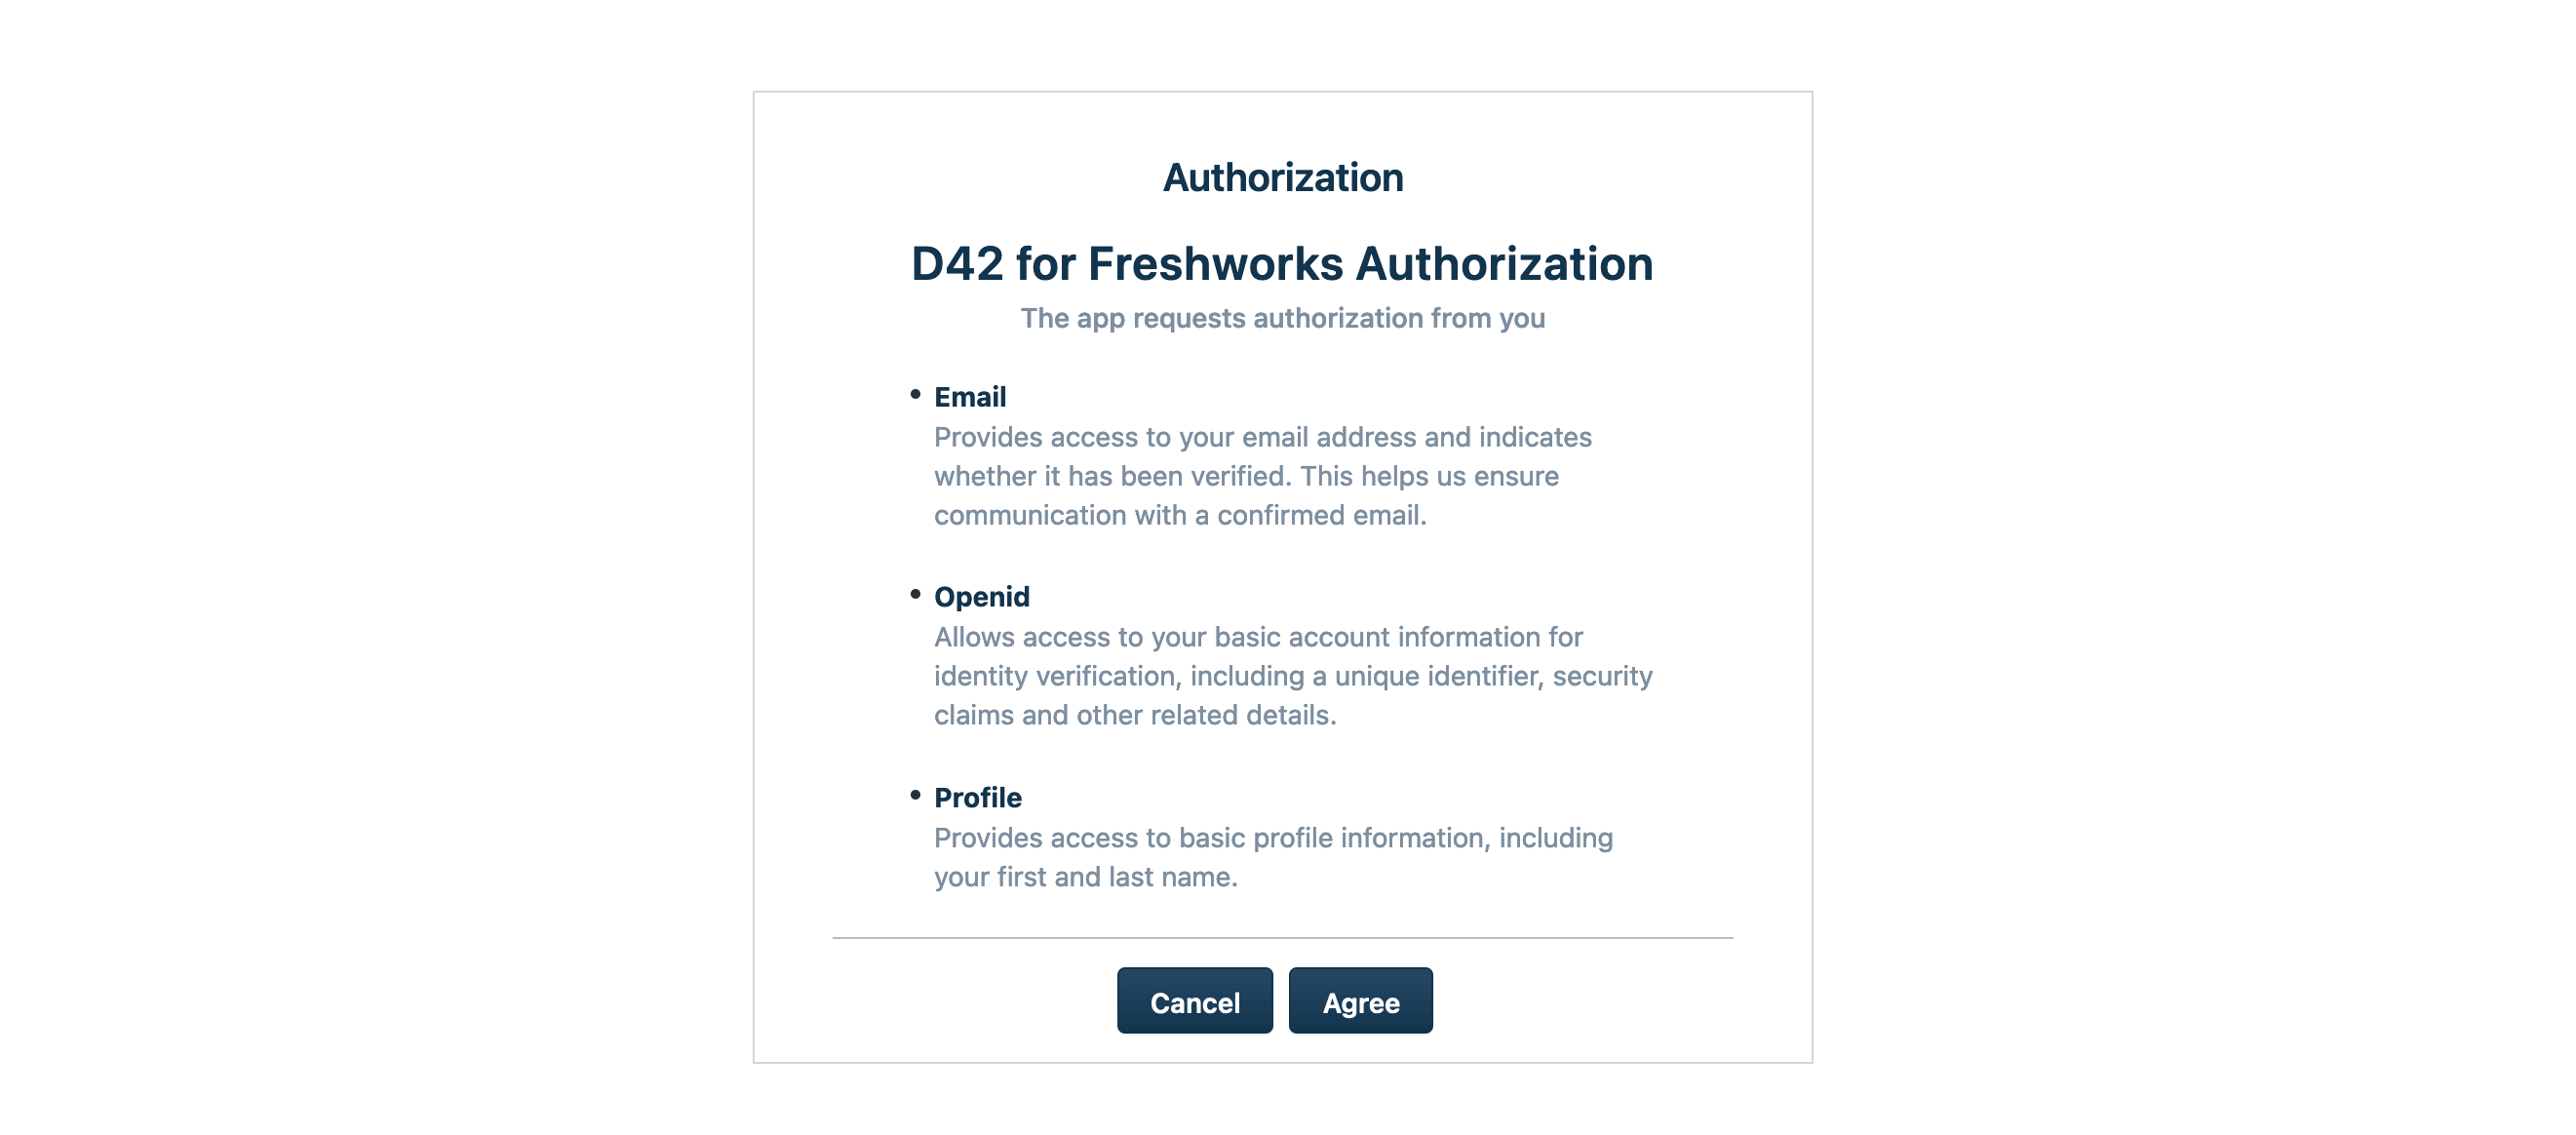
Now, when you're logged out of both Device42 and Freshservice, clicking the Freshworks Login button in Device42 will direct you to the Freshworks sign-in page.
Troubleshooting
Secure Tunnel Connection Error
If you see this error:
[ERROR] 2025-06-30T19:06:37Z main.go:327: Connection error, error: websocket: bad handshake, response: Error: secure tunnel already established with same instance ID. Is there another D42 instance running with same settings?
This means multiple Device42 instances are using the same GUID. Each Device42 instance must have a unique GUID. The primary should keep its GUID, and any duplicate GUIDs on other instances should be regenerated to be unique.
To action this:
- Check the GUID on your primary Device42 instance at Tools > Integrations > Cloud Services.
- Check the GUID of your other Device42 instances (hot standby, development, and so on).
- If the instances have the same GUID, regenerate the GUID on all instances except the primary one.
- Restart Device42 services on the instances where you changed the GUID.
Next Steps
Once you have completed the setup, you can:
- Use the Freshservice Integration for data synchronization, and understanding data flows.
- Customize the Freshservice Integration for advanced data mapping and XML configuration.