StackStorm Integration
StackStorm is well suited to automate a range of IT-management workflows. In response to a trigger event, you can get the StackStorm-Device42 integration to update device details, set user permissions, send Device42 data to other systems, and more.
Set Up the Integration
The steps for setting up the StackStorm integration are:
- Run StackStorm in a Docker container.
- Install the integration plugin (named "Device42 Package" in StackStorm).
- Configure the plugin using your Device42 credentials.
- Test the integration by querying for a specific device using a StackStorm action.
Before creating a fully automated workflow, we'll set up the StackStorm-Device42 integration. First, we'll run StackStorm in a Docker container and install the integration plugin (named "Device42 Package" in StackStorm). We'll configure the plugin using our Device42 credentials. Finally, we'll test the integration by querying for a specific device using a StackStorm action.
Install StackStorm Using Docker
Running StackStorm in a Docker container and managing it with Docker Compose is a quick and easy installation method for testing an automation workflow, but it's not designed to be used in production. View the other StackStorm installation options in the StackStorm docs.
Start by cloning the plugin GitHub repository:
git clone https://github.com/stackstorm/st2-docker
Change to the st2-docker folder and run the Docker container:
docker-compose up -d
See the StackStorm Docker documentation for more details.
Log In to StackStorm
Start the StackStorm command line st2 from the Docker container to log in to StackStorm.
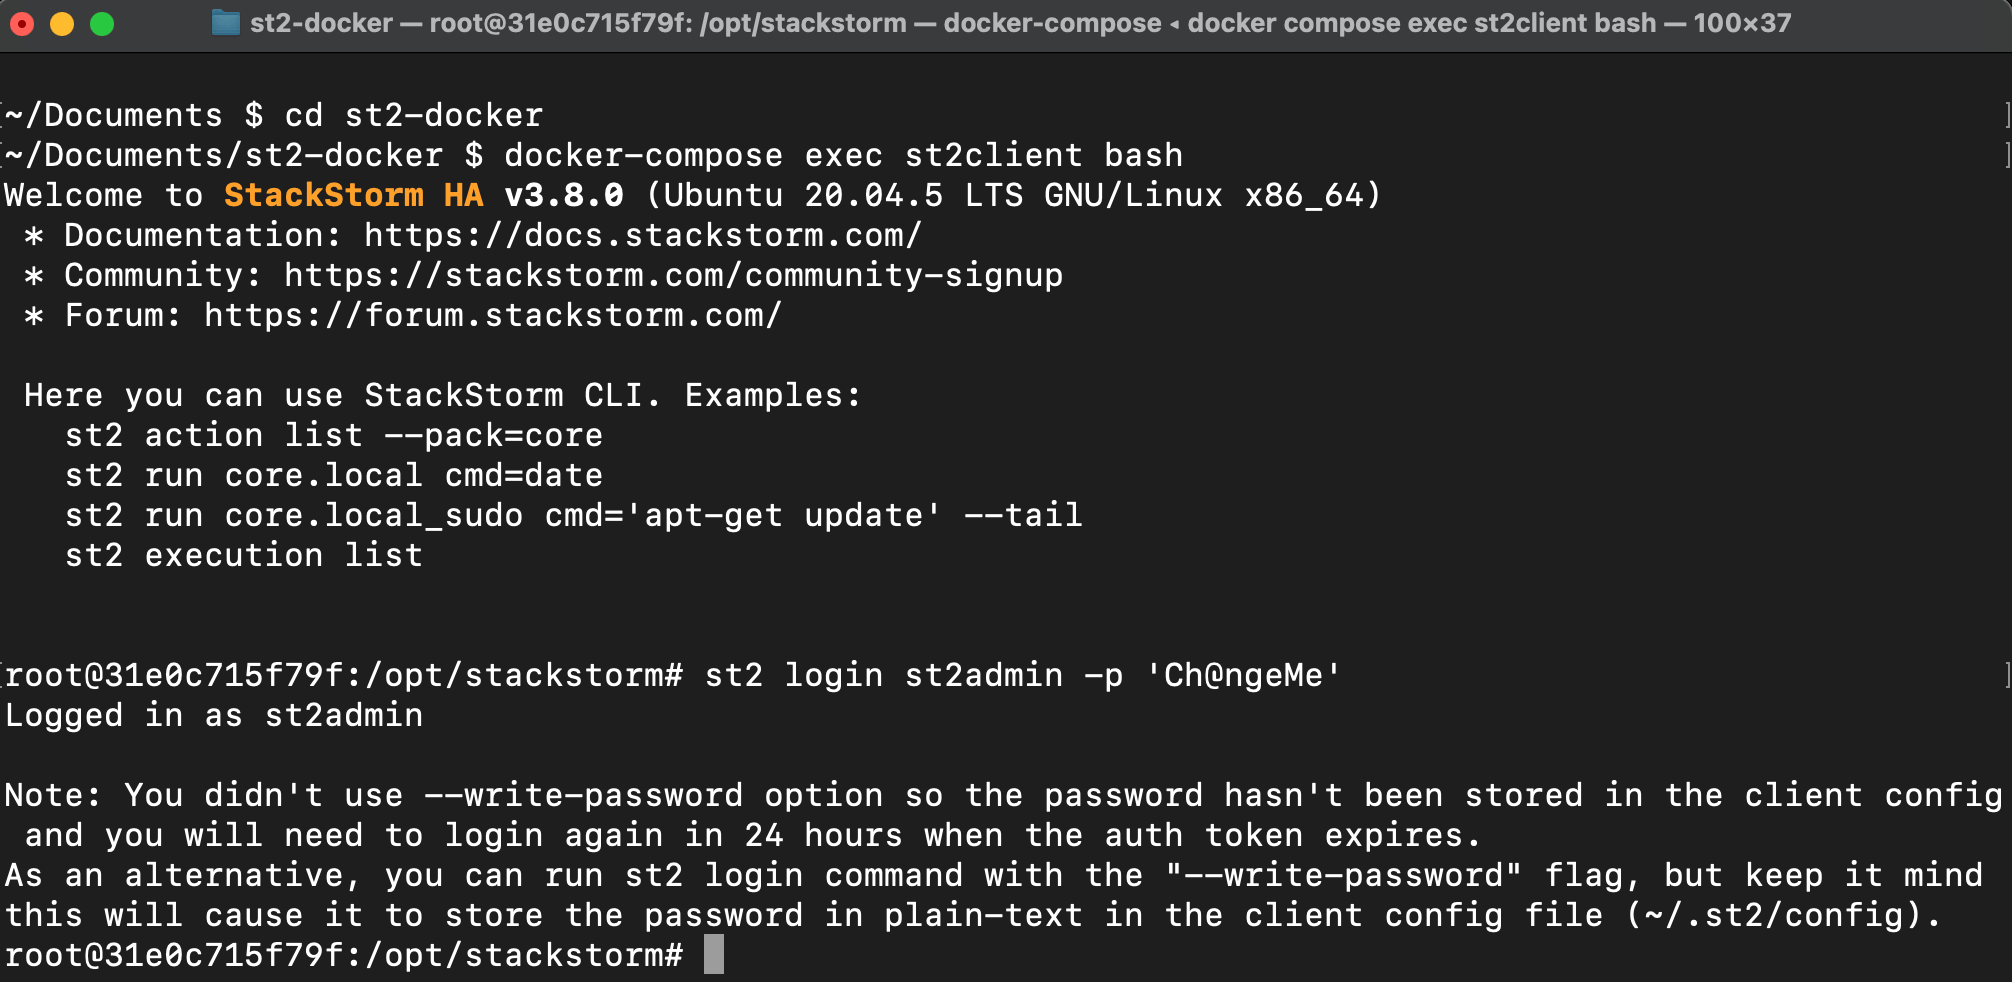
Change to the st2-docker directory:
cd st2-docker
Start the StackStorm CLI:
docker-compose exec st2client bash
Log in to StackStorm:
st2 login st2admin -p 'Ch@ngeMe'
Log in to the StackStorm web UI using the default username st2admin and password Ch@ngeMe.
Even if you're using the CLI, it's handy to have the StackStorm web UI open for quick feedback on communication attempts and to see the available actions under the Actions tab. Later, we'll use the get_device_by_id action to test the StackStorm-Device42 setup.

Install the Device42 Plugin
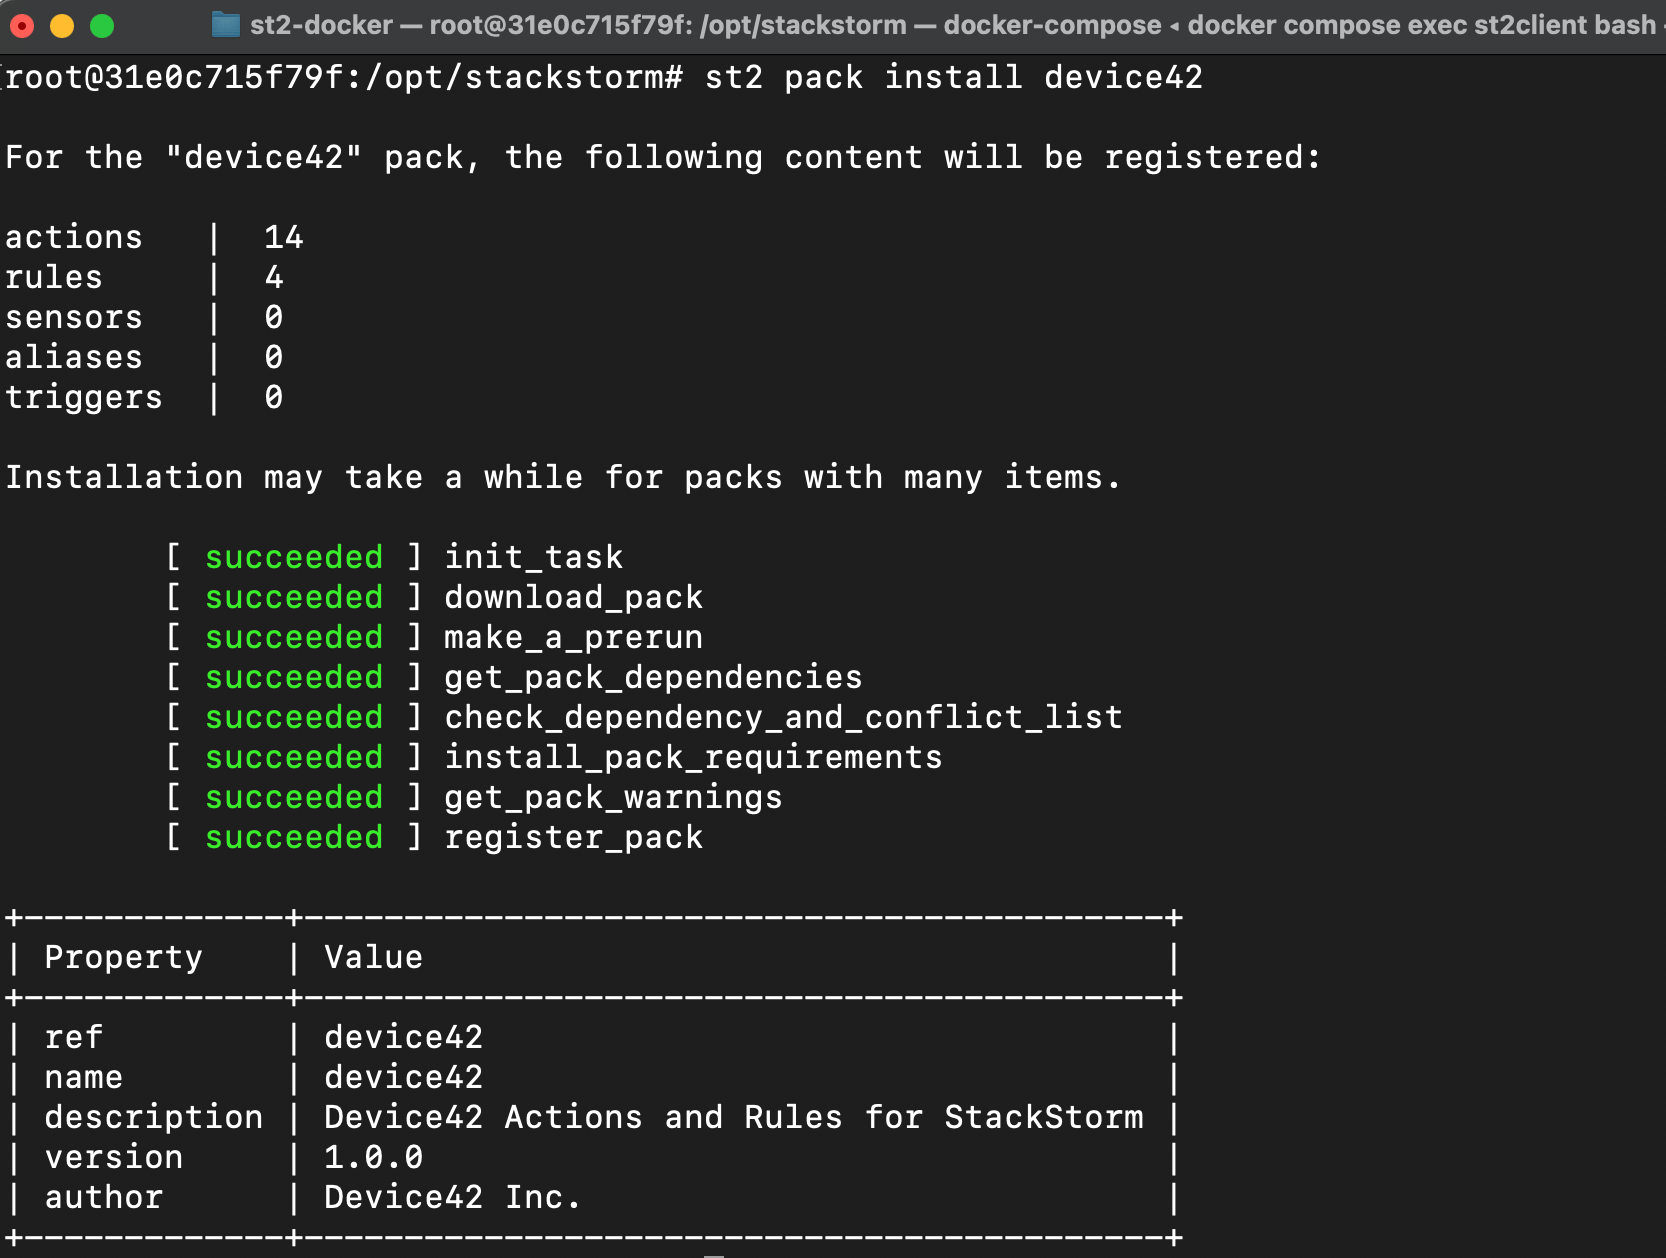
To install the official Device42 pack for StackStorm, log in to StackStorm and the CLI and run:
st2 pack install device42
You can also install the Device42 package using the StackStorm web UI. Navigate to the Packs tab and find Device42 from the list of available packs.
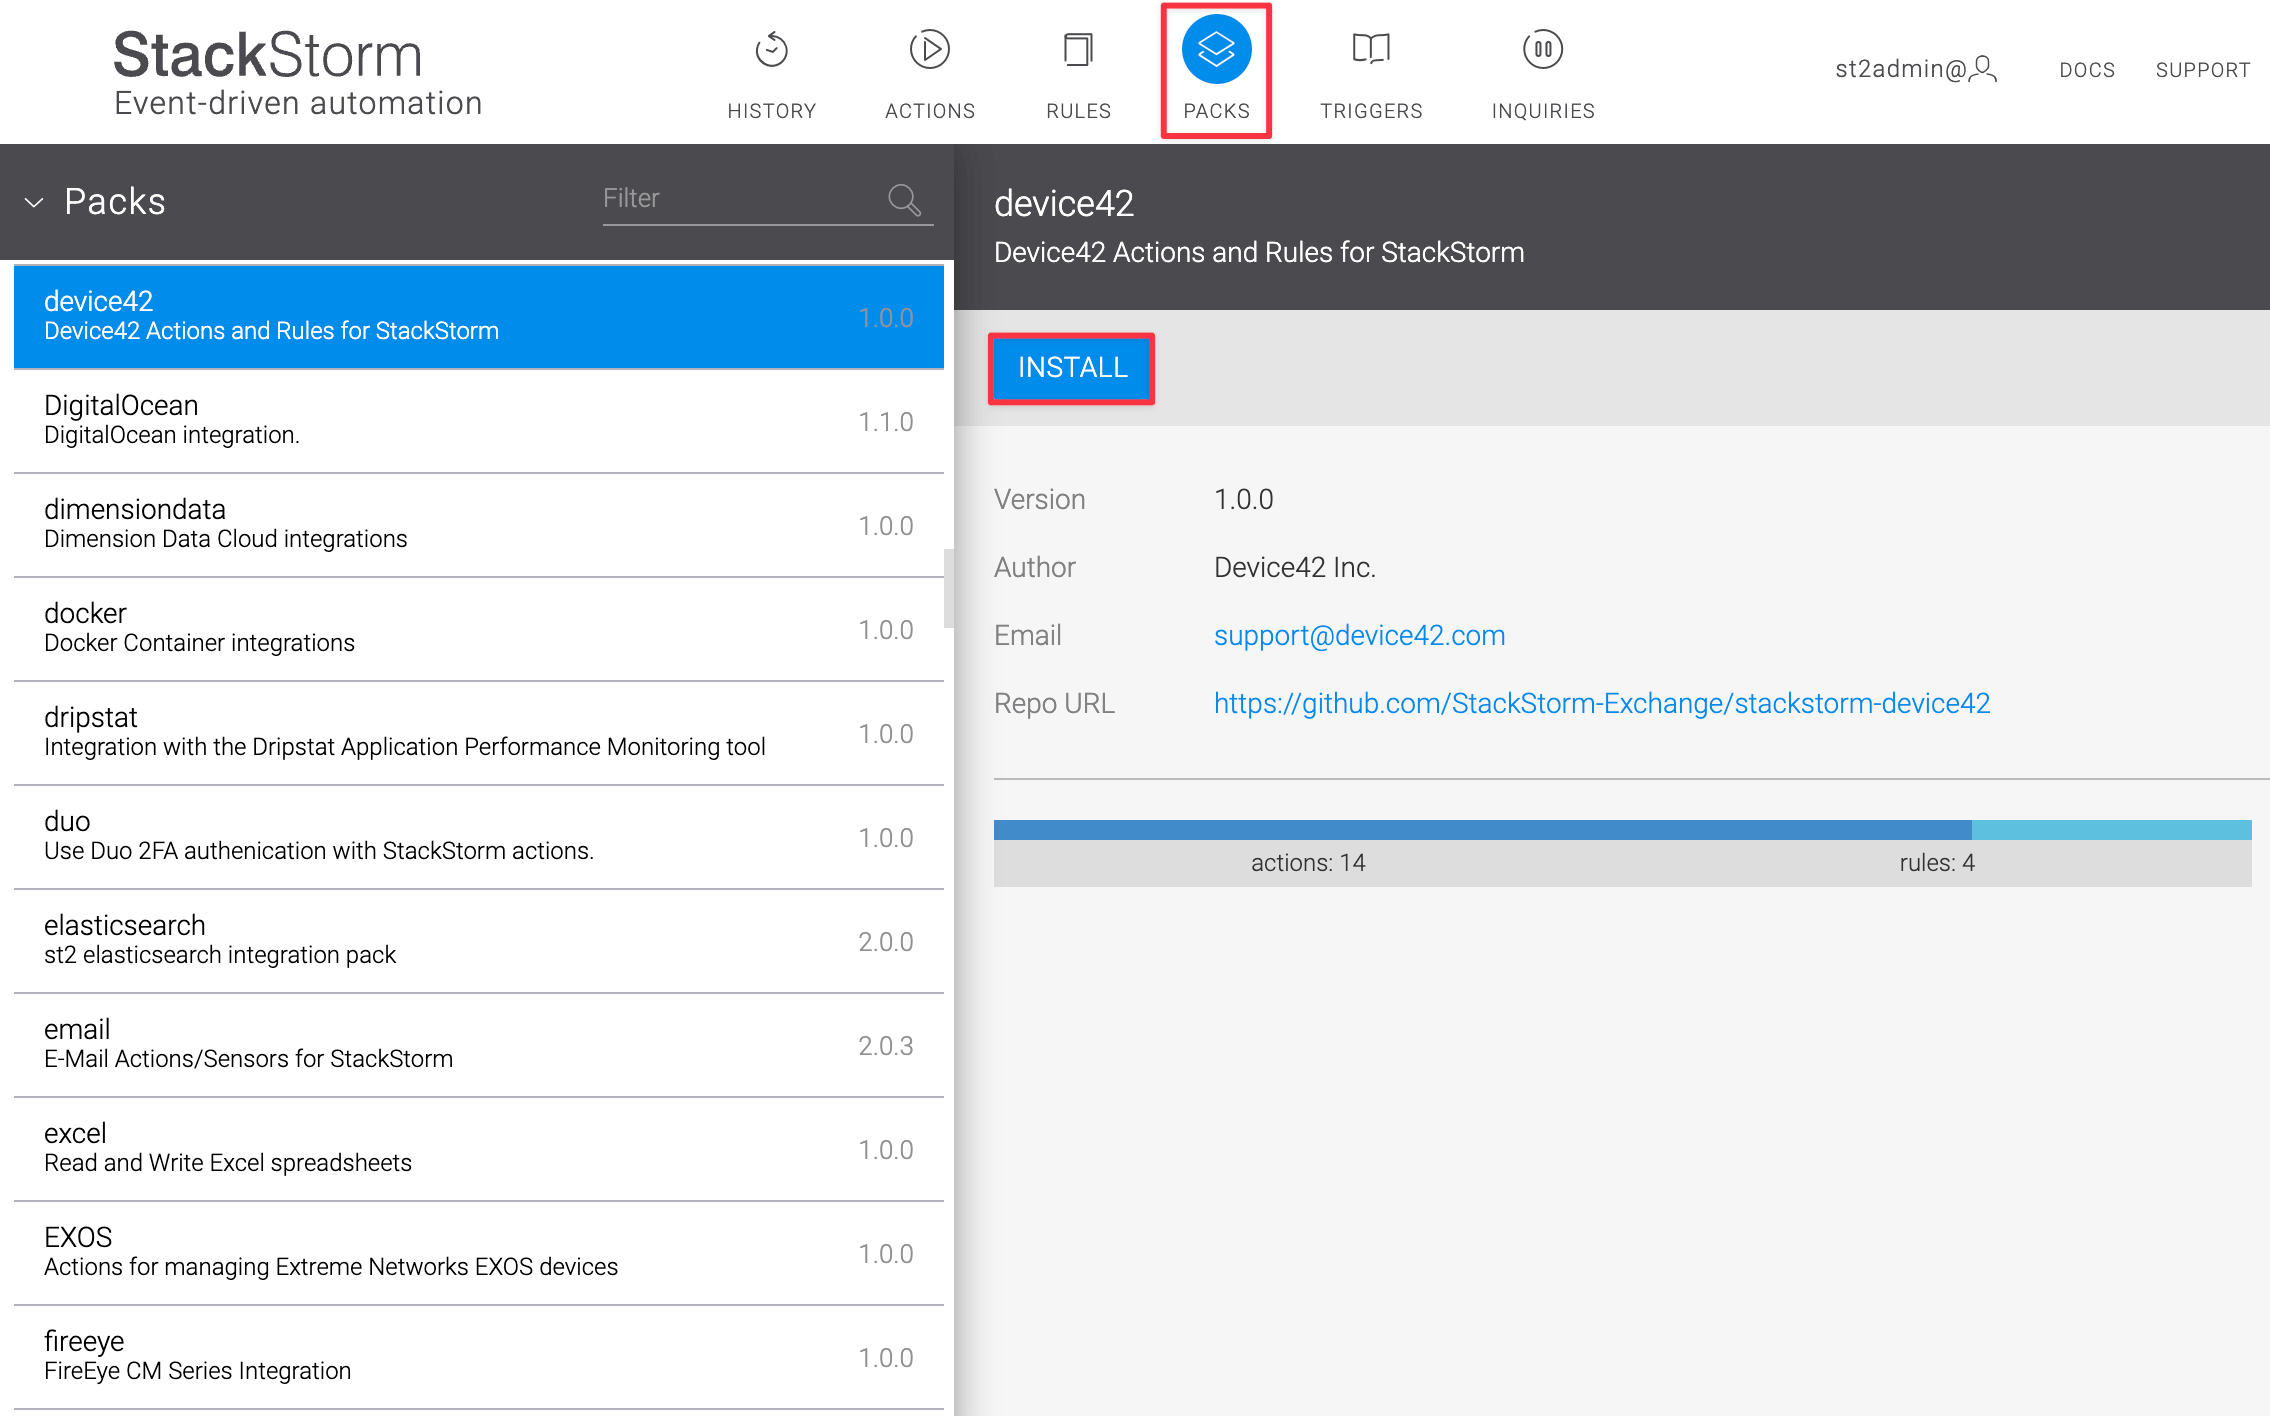
StackStorm is open-source, so you can look at the StackStorm-Device42 plugin code to see how it works and troubleshoot if necessary.
Configure the Device42 Plugin
Configure the Device42 plugin using either the command line or web UI. You'll need your Device42 server IP address, Device42 username, password, API path, and DOQL path details.
Click to expand the code block
st2 pack config device42 set d
d42_server: 'https://mydevice42ip/api/1.0/'
d42_username: 'Device42 username'
d42_password: 'Device42 password'
verify_certificate: true
d42_api_path: '/api/1.0/'
d42_doql_api_path: '/services/data/v1.0/query/'
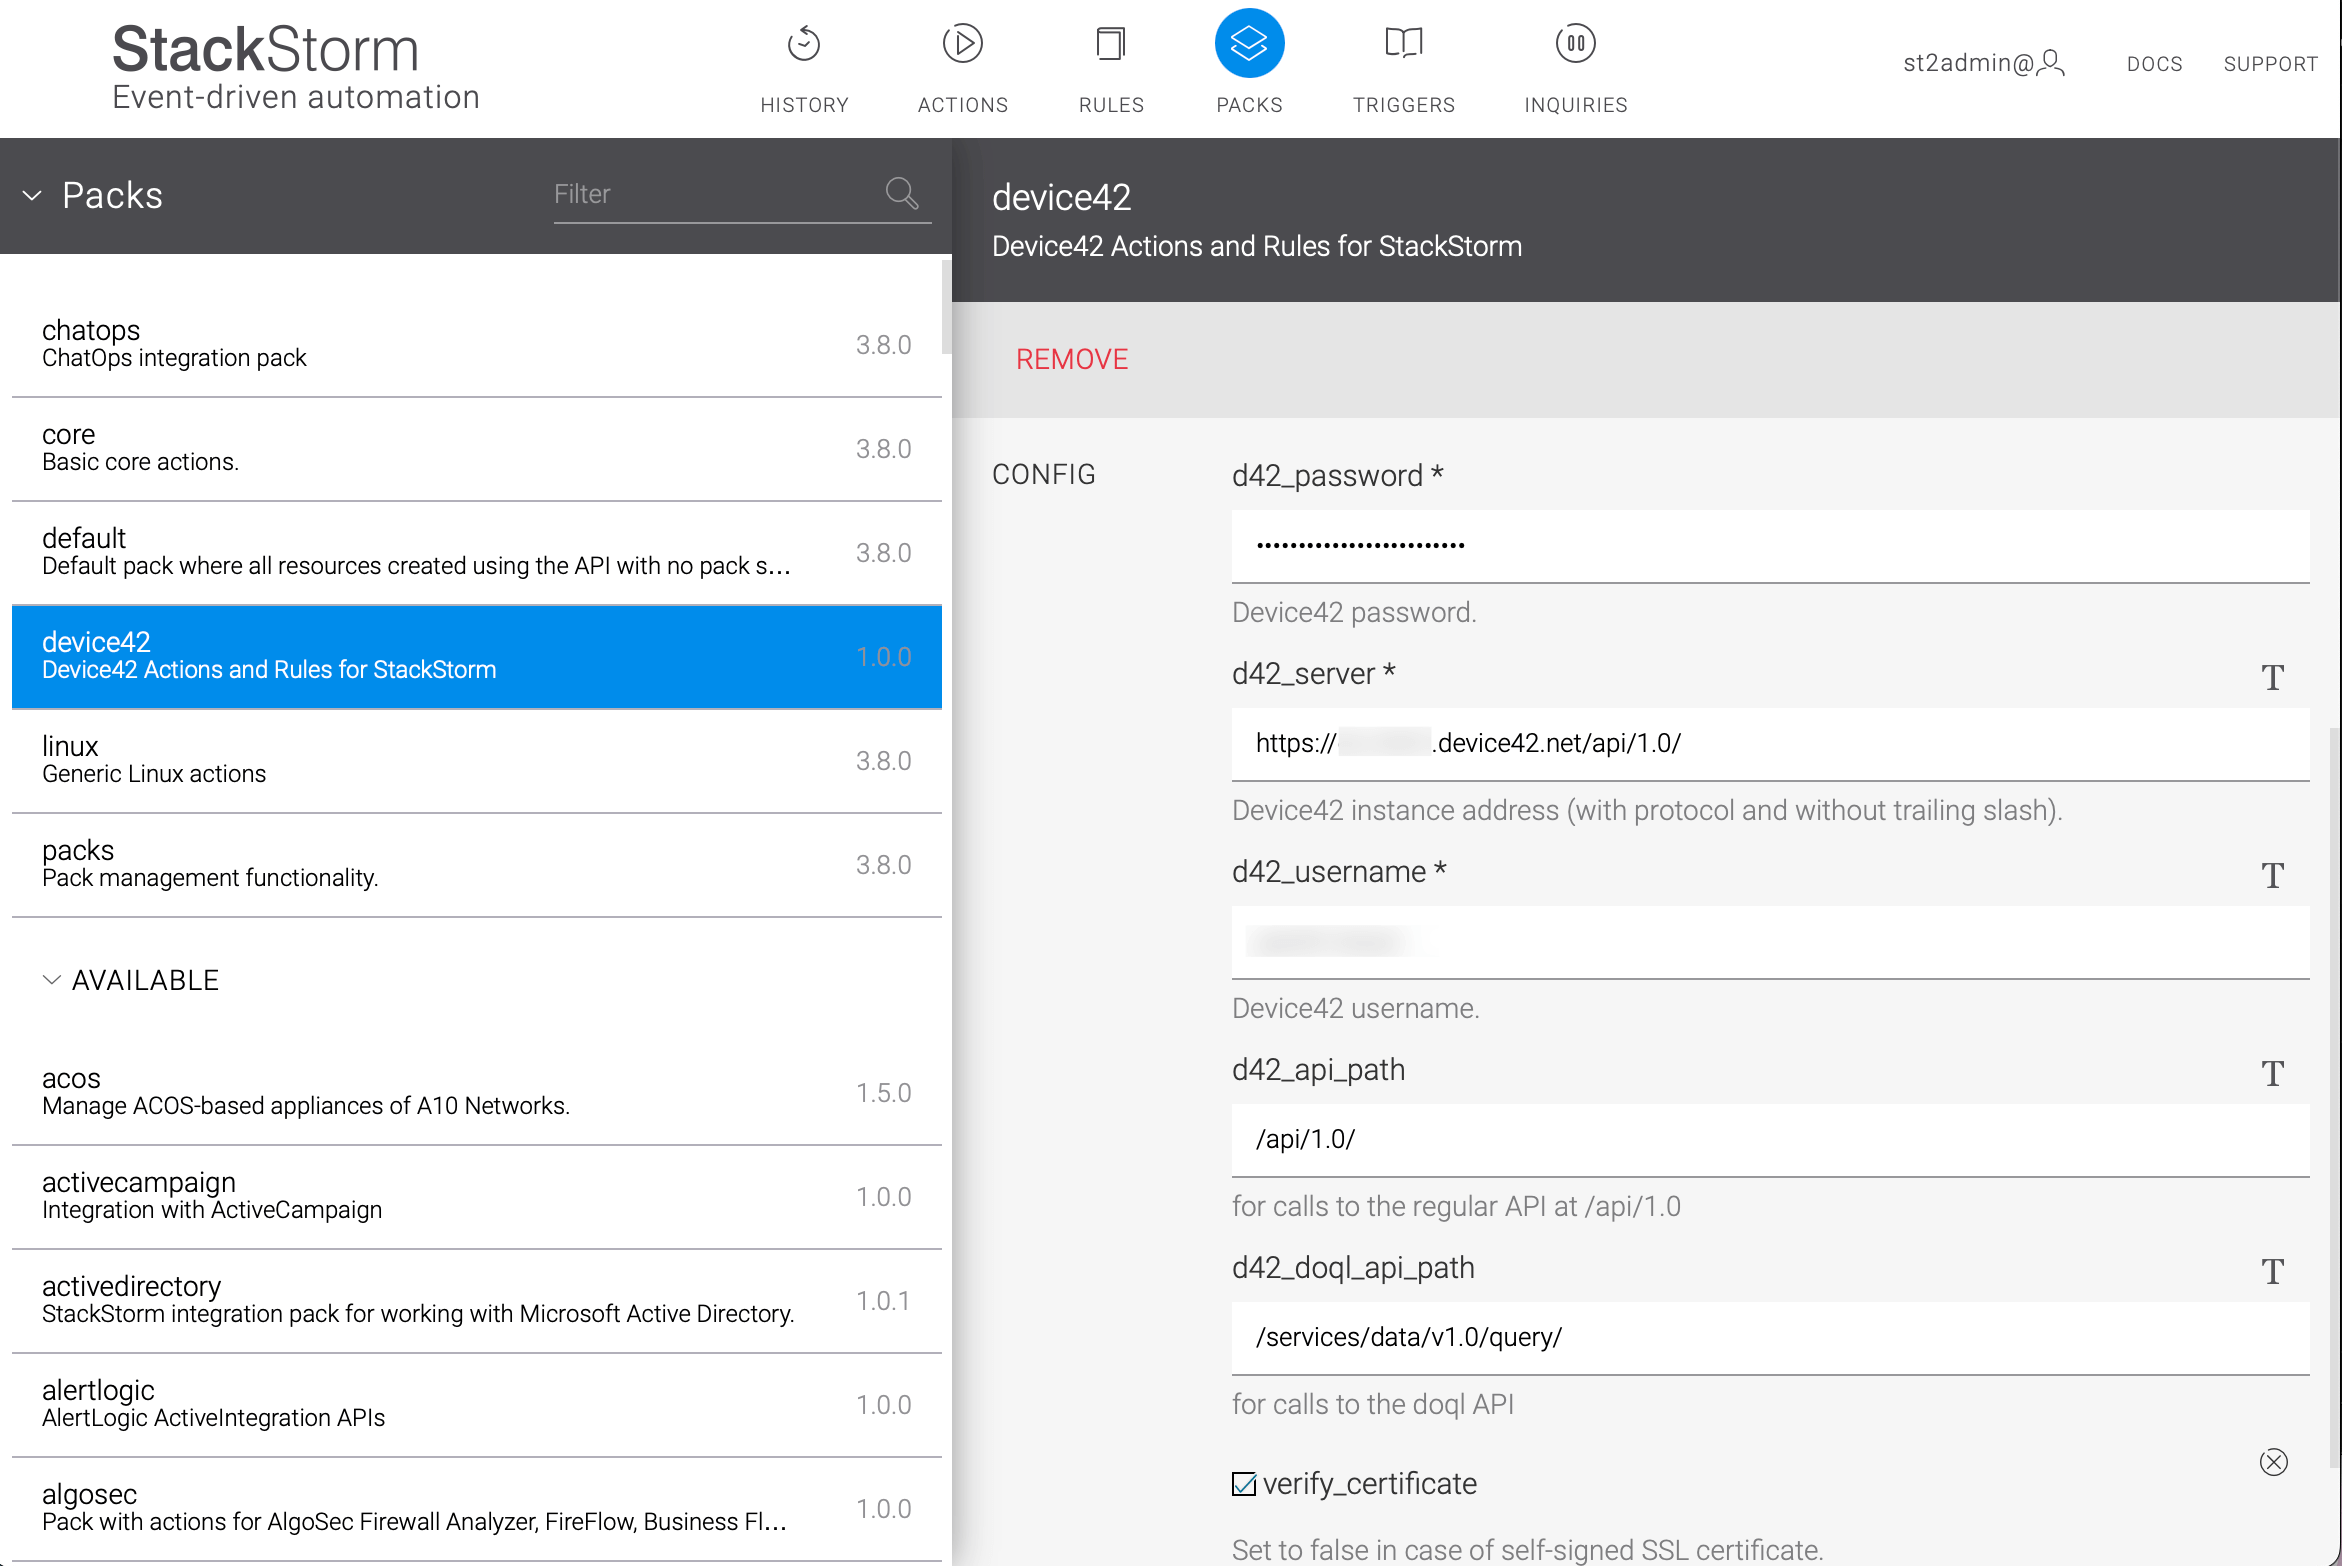
Using the StackStorm web UI
Enter your configuration information in the fields provided. Note that you should add a trailing slash to the d42_server endpoint despite the label saying otherwise.
Using Docker Compose and st2
Add your credentials to the device42.yaml file.
There are two device42.yaml files: One in the Docker volume and one in the container. The plugin uses the device42.yaml file that is part of the Docker volume. By default, you can find that config file here:
/var/snap/docker/common/var-lib-docker/volumes/st2-docker_stackstorm-packs-configs/_data/device42.yaml
If you don't find the device42.yaml file in the Docker volume, look for it by running:
find / -name device42.yaml
Open the config file using a text editor like Vim or Nano and add your environment variables to it.
vim /var/snap/docker/common/var-lib-docker/volumes/st2-docker_stackstorm-packs-configs/_data/device42.yaml
Save the file and tell StackStorm to load the new values by running:
st2ctl reload --register-configs
Test the Integration
Verify your setup by calling the get_device_by_id action, either in the StackStorm web UI or on the server.
st2 run device42.get_device_by_id device_id=113

Example Automation
Let's create an example automation to dynamically set user permissions for a device depending on the device's current lifecycle stage in Device42. The purpose of the automation is to assign which devices each user has access to at a given time, so permissions are granted and revoked as the device moves along the workflow.
For an overview of the architecture of this integration and additional information, see our in-depth Dynamic User Permissions with Device42 and StackStorm blog post.
In Device42, we will create the following lifecycle stages with matching permission groups, also known as admin groups, and a user for each group:
- Purchasing
- Mounting
- Deployment
- Production
We'll also create an object category for each lifecycle stage. It's the object category property that will grant role-based permissions when assigned to a device.
In total, we'll add the following four items each to the User, Permission Group, Lifecycle Event, and Object Category components in Device42:
| User | Permission Group | Lifecycle Event | Object Category |
|---|---|---|---|
| purchasing | purchasing_group | purchasing | purchasing_cat |
| mounting | mounting_group | mounting | mounting_cat |
| deployment | deploying_group | deploying | deploying_cat |
| production | production_group | production | production_cat |
Let's break down the automation using an example of adding the "mounting" lifecycle event to a device that's in the "purchasing" stage:
- The "purchasing" user updates the lifecycle event from "purchasing" to "mounting".
- A webhook is triggered in Device42, and sends data about the update to StackStorm.
- StackStorm adds the "mounting_cat" object category to the device.
- In Device42, the "mounting_cat" object category updates the device's user permissions to the "mounting_group".
- The "mounting" user can view and edit the device, and permissions are revoked for the "purchasing" user.
Configure Device42
To set up an automation, we need to do the following in Device42:
- Enable role-based permissions.
- Create four permission groups (also called admin groups).
- Create four users.
- Link the permission groups to object categories.
- Create four lifecycle events.
1. Enable Role-Based Permissions
Navigate to Tools > Settings > Global Settings. Click on Edit, and change the Role-Based Access Control Options field to On.
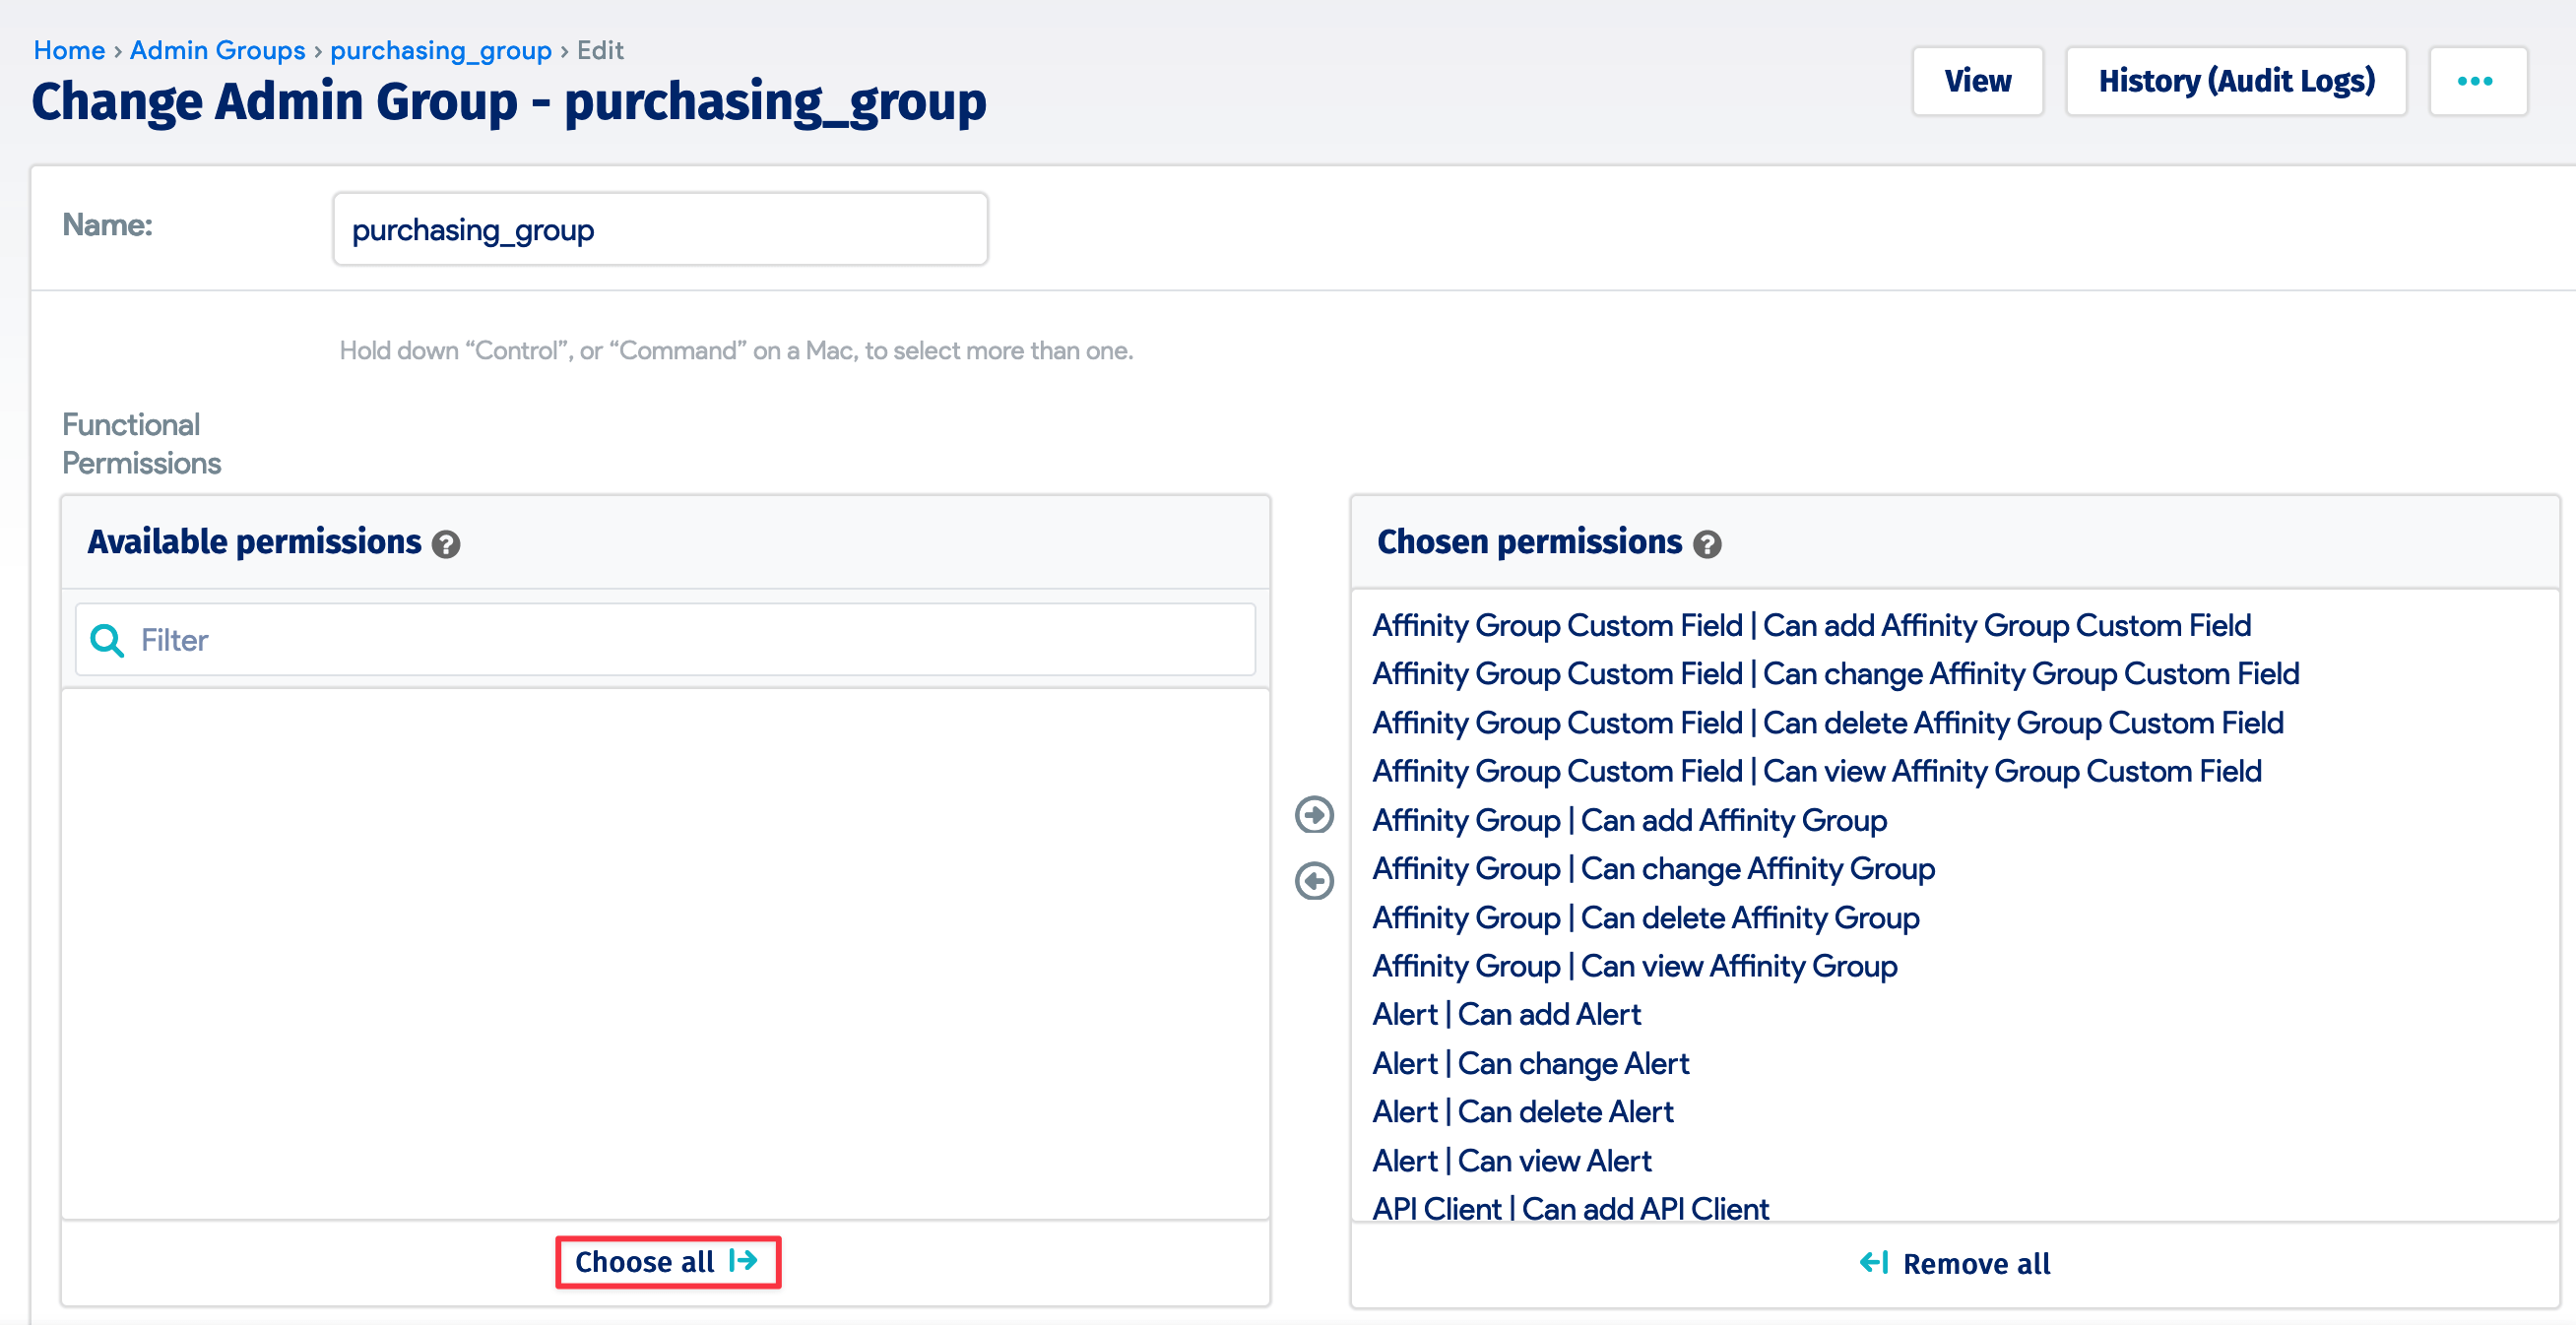
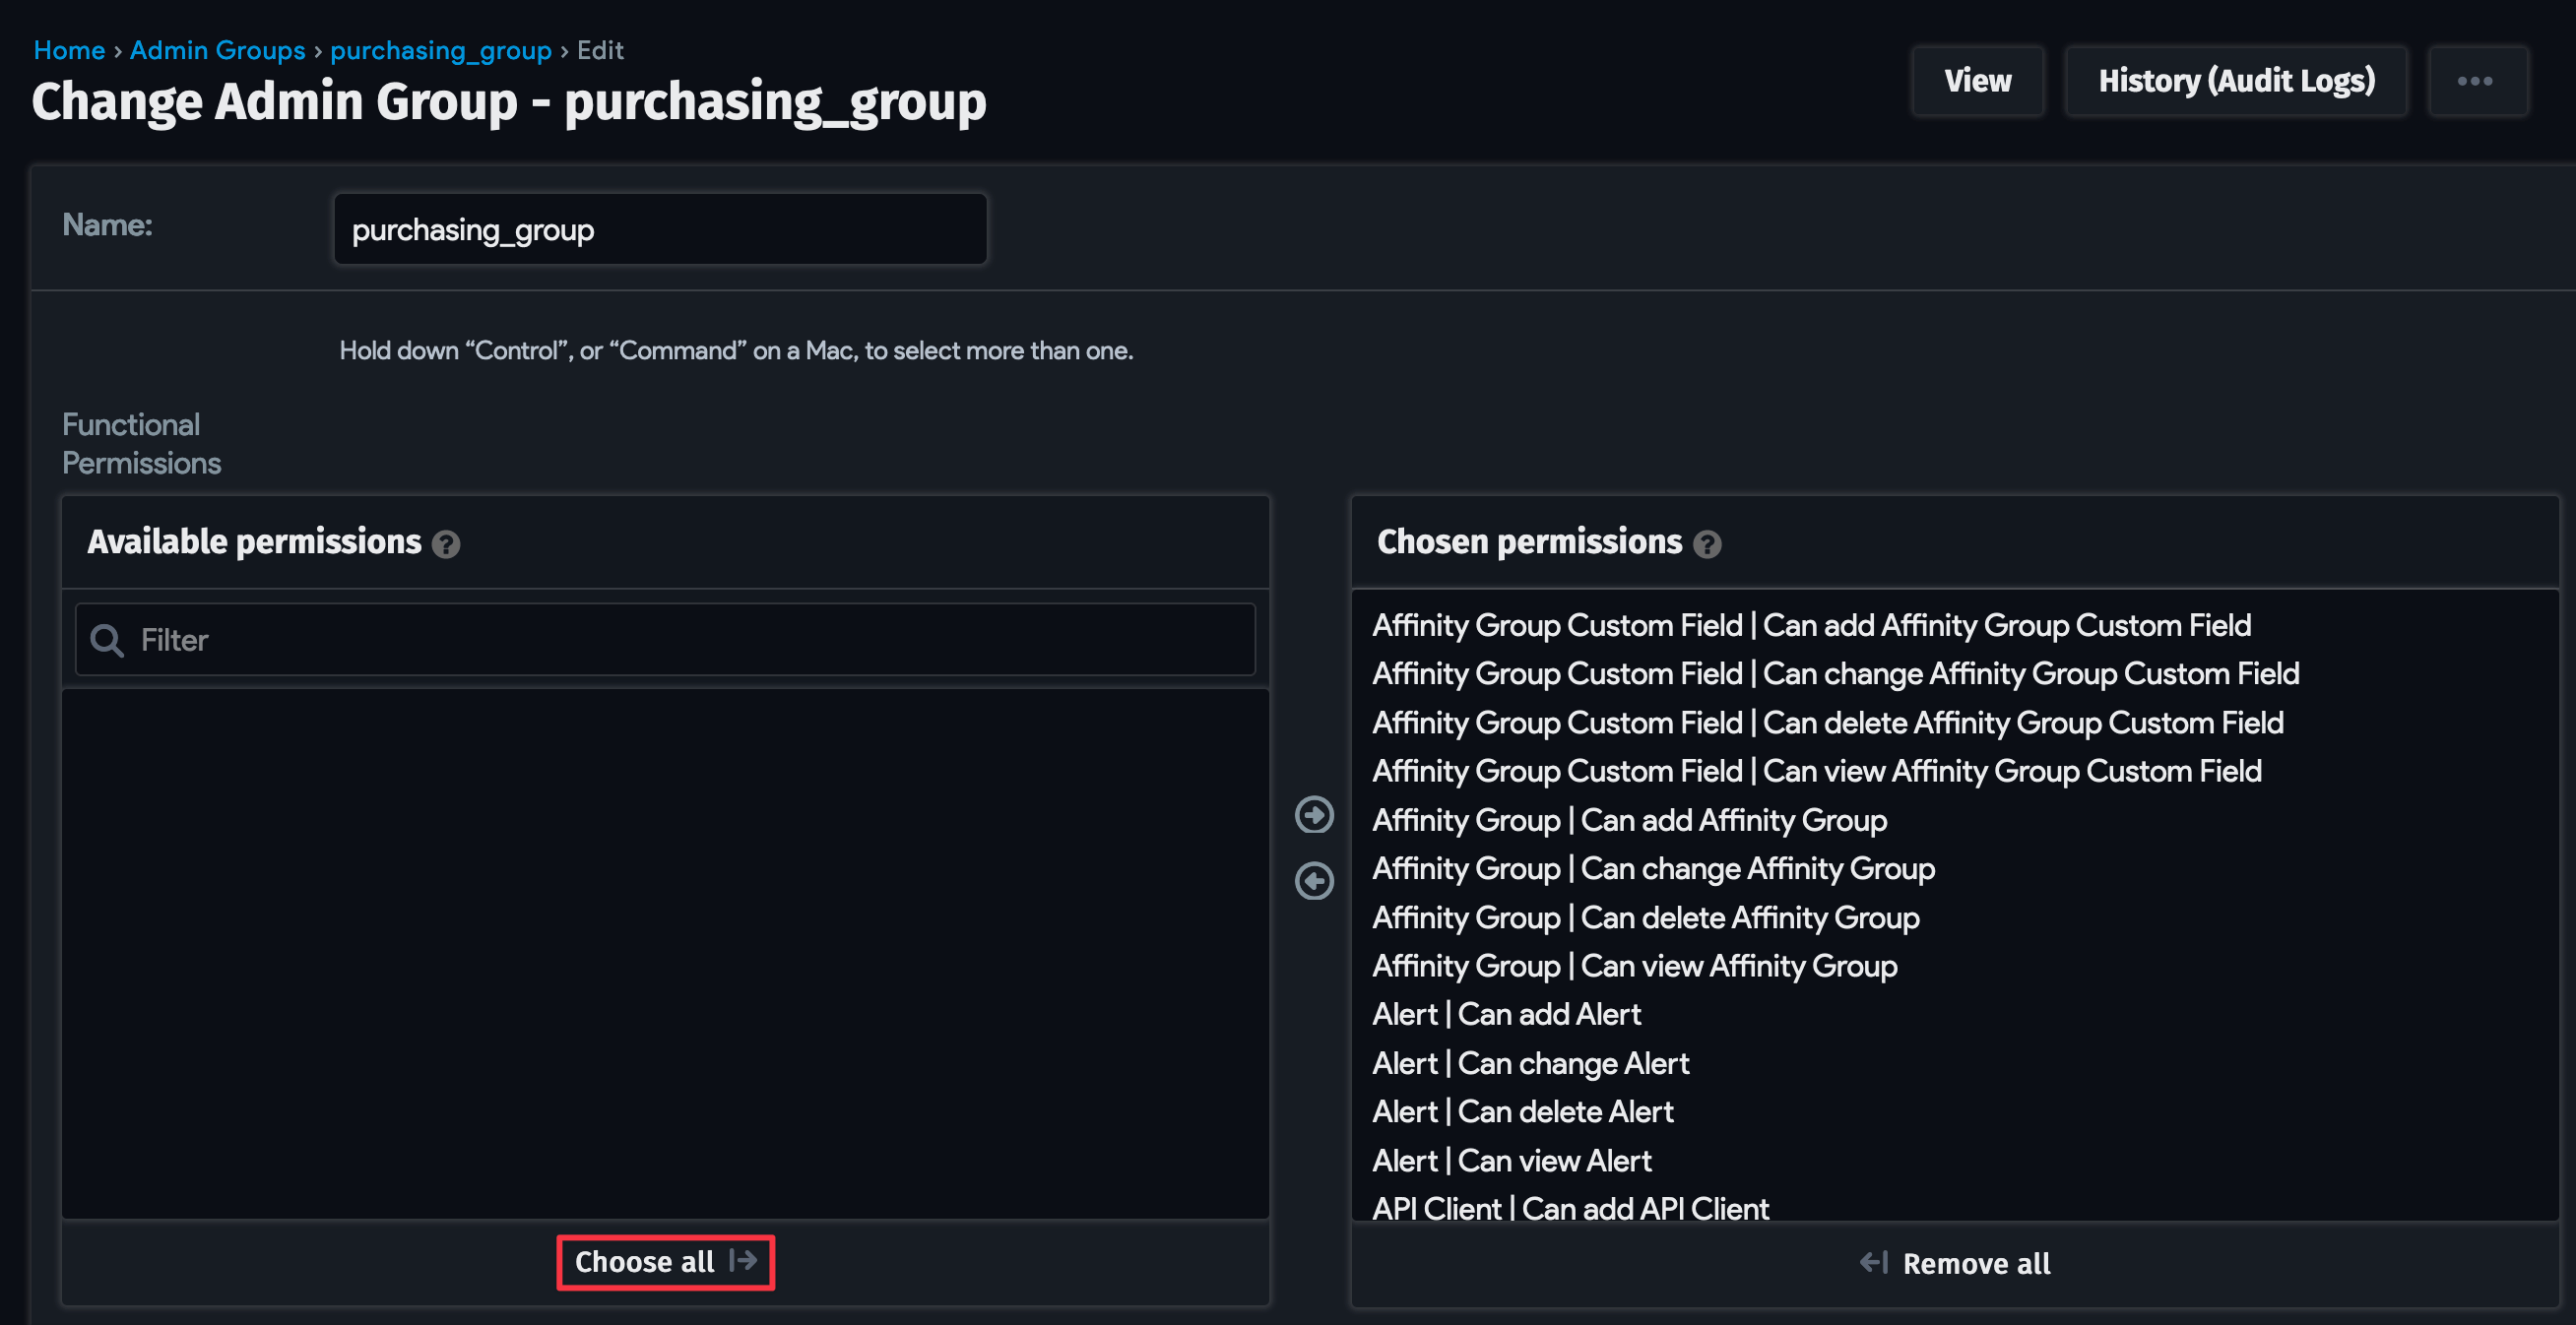
2. Create Four Permission Groups
Navigate to Tools > Admin Groups and click + Add Admin Group. Name the group "purchasing_group" and select the permissions for the user. For this demonstration, we granted all permissions with the Choose all button. Create the mounting, deploying, and production groups in the same way.
3. Create Four Users
To create a user, navigate to Tools > Administrator and click + Add Local Admin. Enter the username and password for the user and click Save and continue editing to reveal more fields. Scroll down to the Available groups section and choose the user's permission group from the list.
Do this for each of the four users we need, "purchasing", "mounting", "deployment", and "production", and add each new user to their respective permission group.
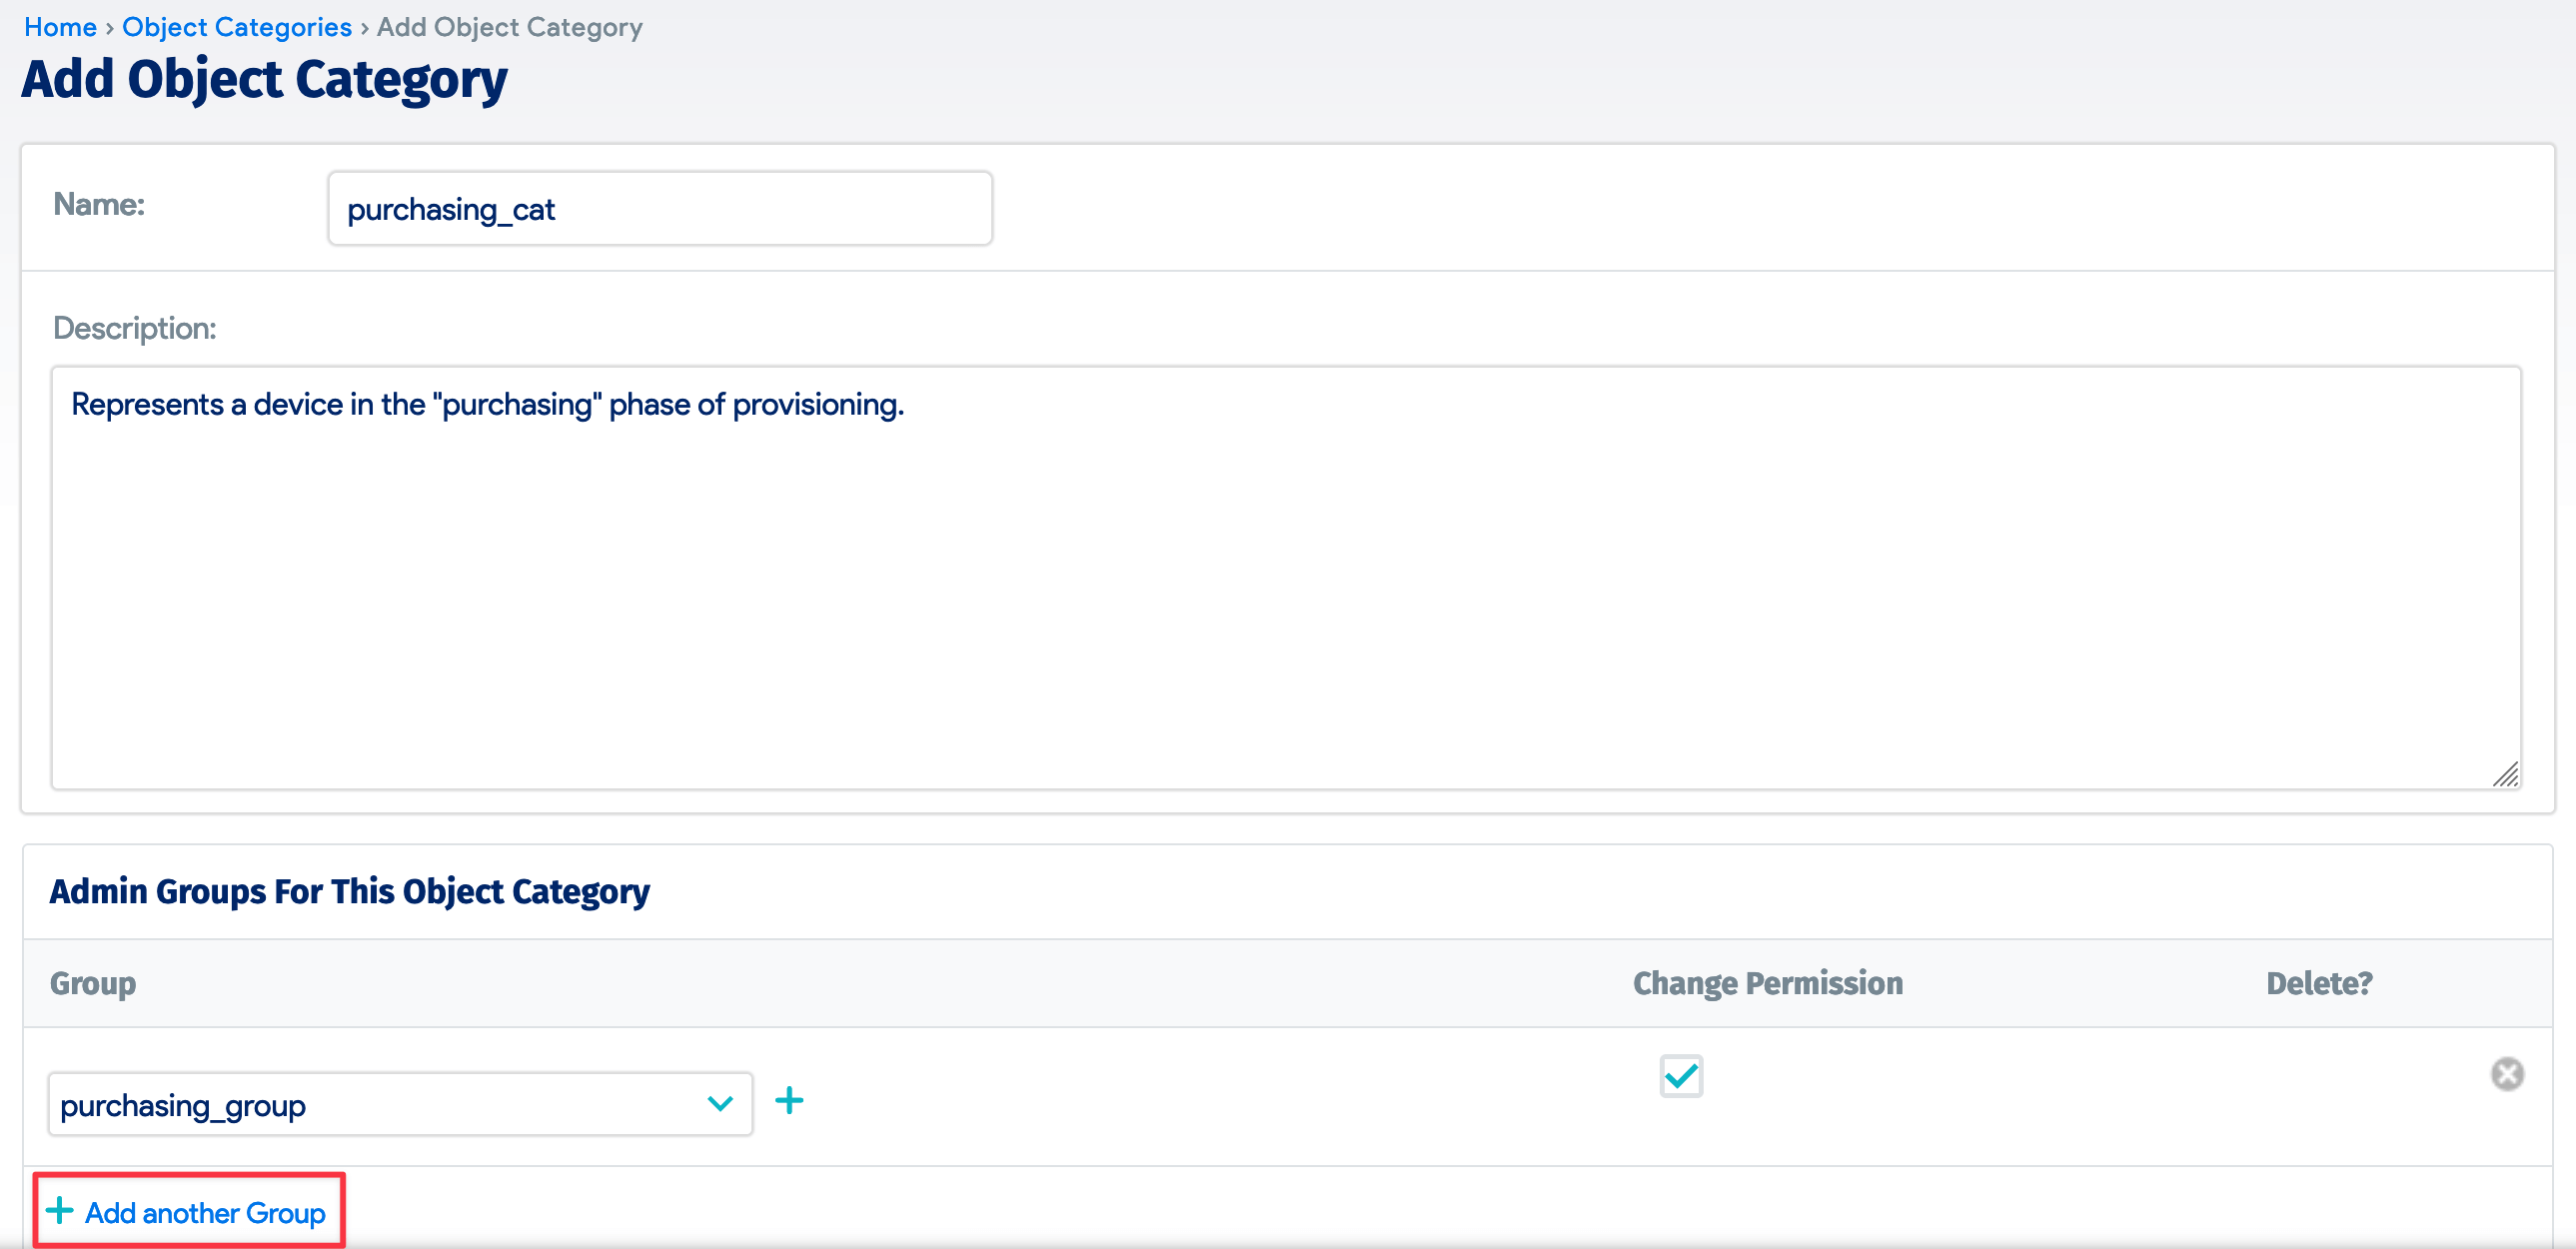
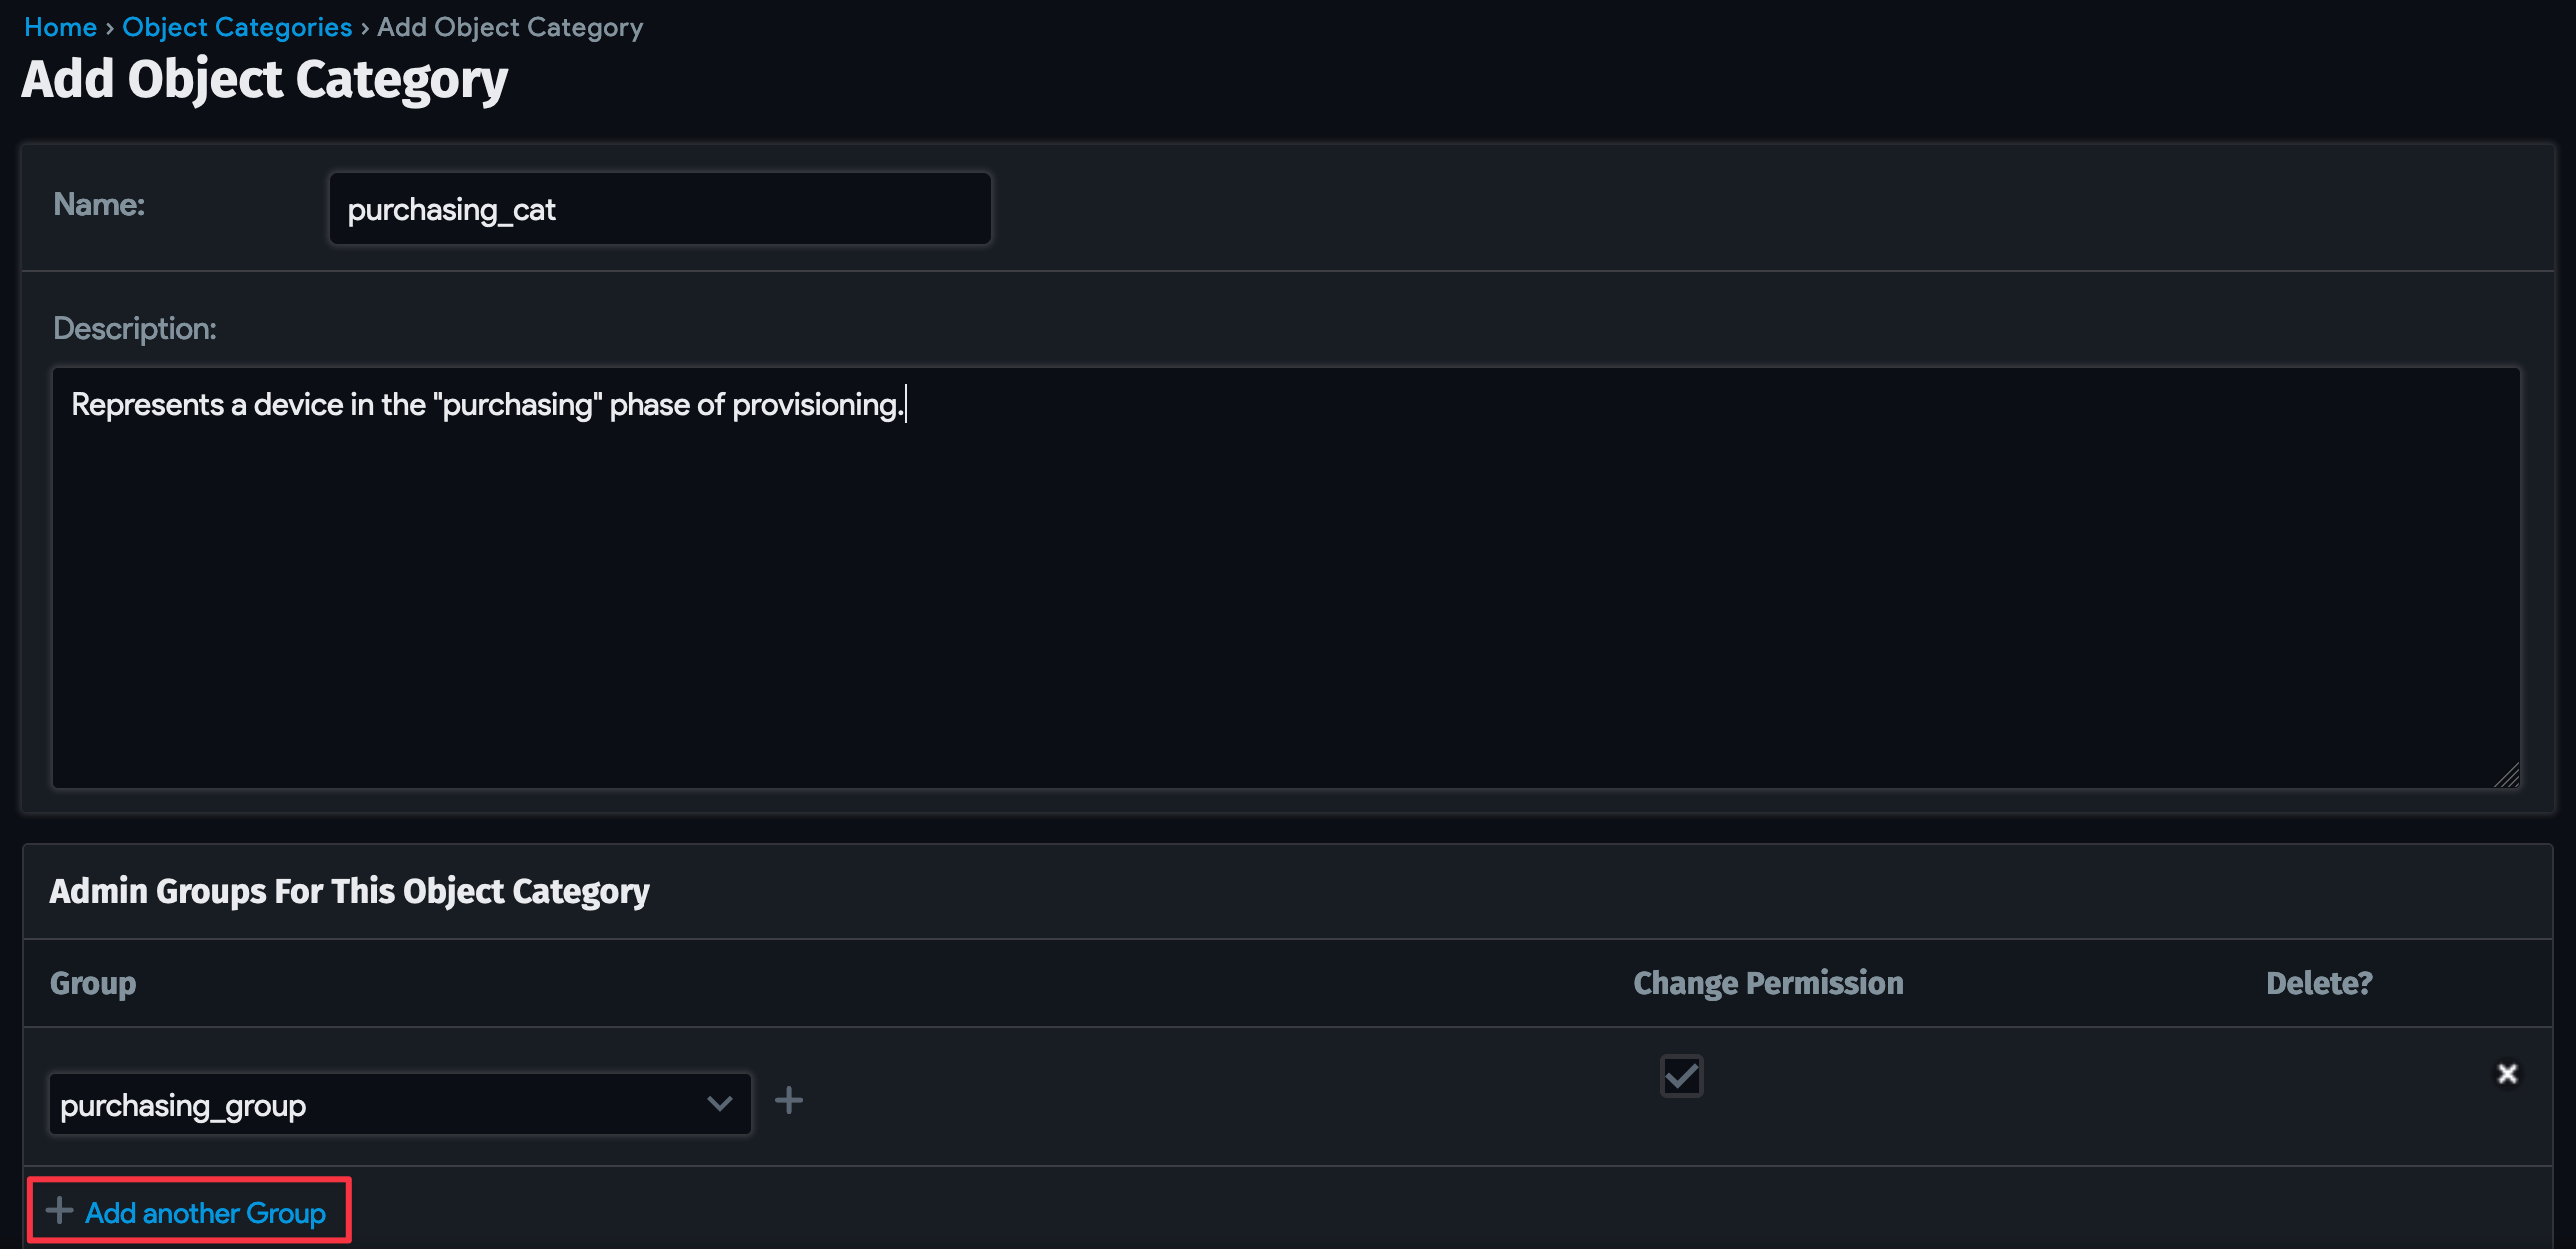
4. Link Permission Groups to Object Categories
For each of the four object categories, go to Infrastructure > Organization > Object Categories and click Add Object Category. Name the category and link it to its respective admin group by clicking *** Add another Group** and selecting the group from the dropdown menu.
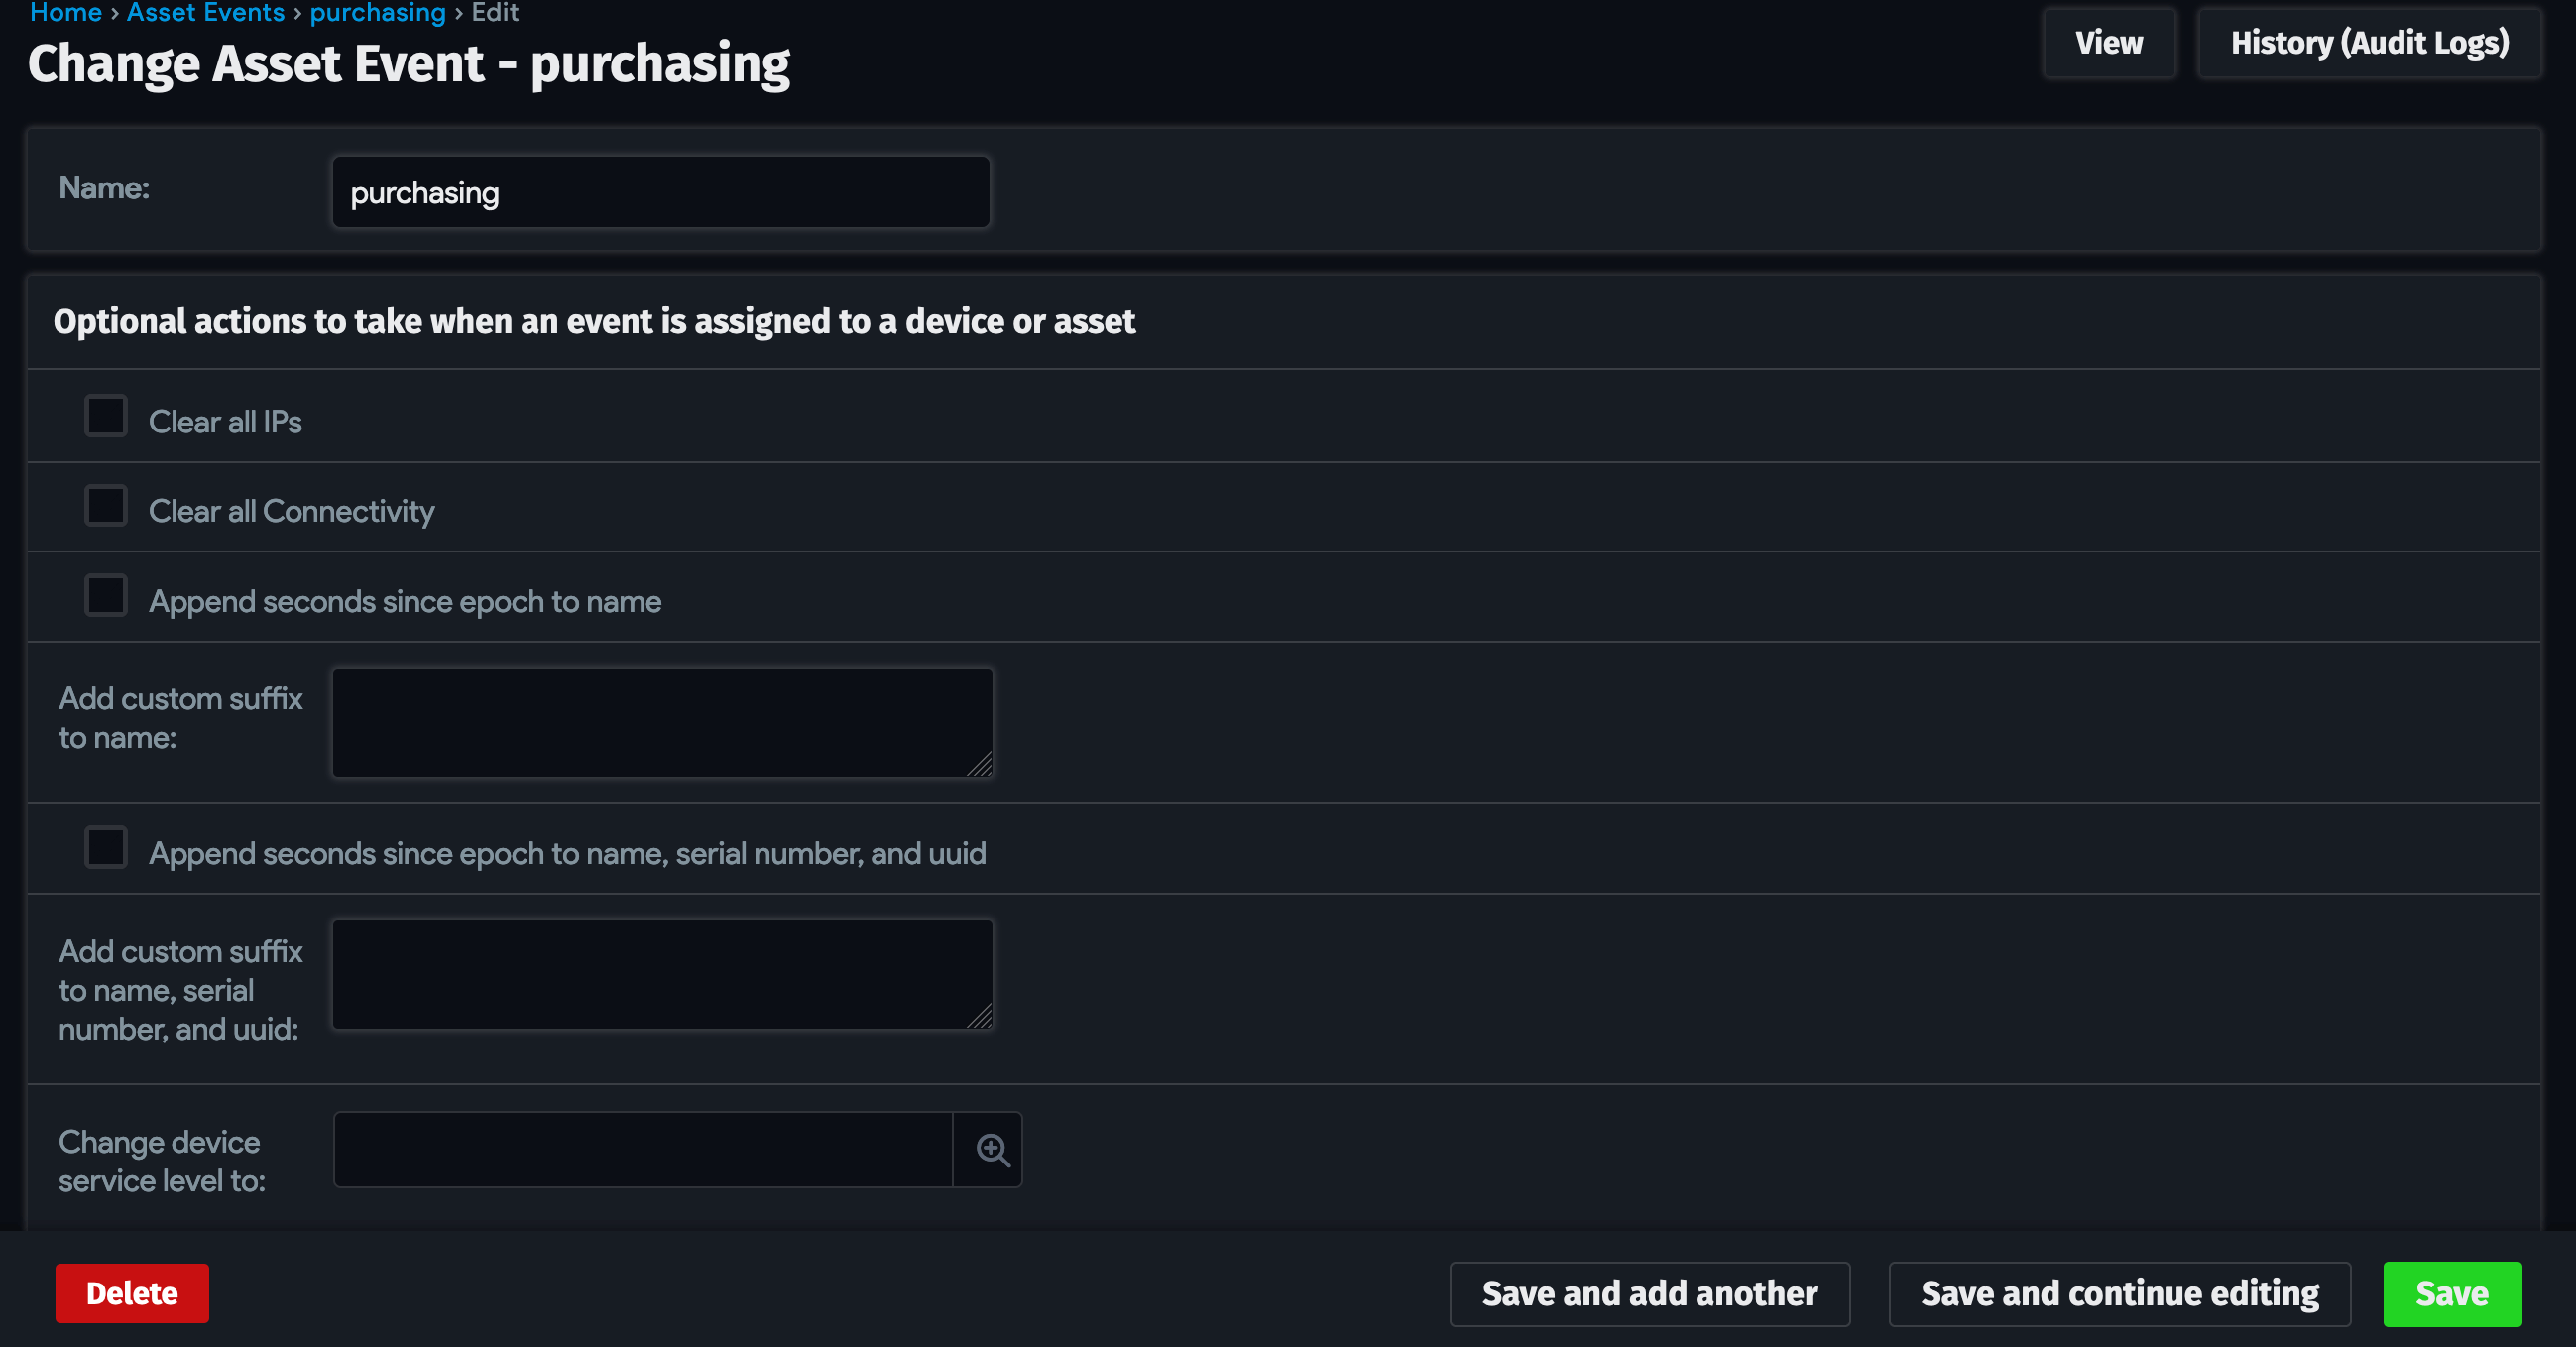
5. Create Four Lifecycle Events
For each of the four lifecycle events, navigate to Tools > Lifecycle Event Actions and click + Add Asset Event. Add the event Name and Save it. We won't be needing the other options for this automation.

Set Up the Automation
Now we'll configure the Device42 webhook to send data to StackStorm about updates to device lifecycle events. We'll use an API Key rather than the temporary token for authentication.
The steps for setting up an automation are:
- Generate a StackStorm API key.
- Create a webhook endpoint in Device42.
- Create an action in Device42.
- Create a JSON map of "lifecycle ID: object category" pairs for the StackStorm datastore.
- Test the automation.
1. Generate a StackStorm API Key
Log in to the st2 command line in StackStorm and enter the following command to generate an API key:
st2 apikey create -k -m ‘{“used_by”: “device42 webhook”}’
The API key will only be displayed once, so make sure you copy and save it in a password manager.
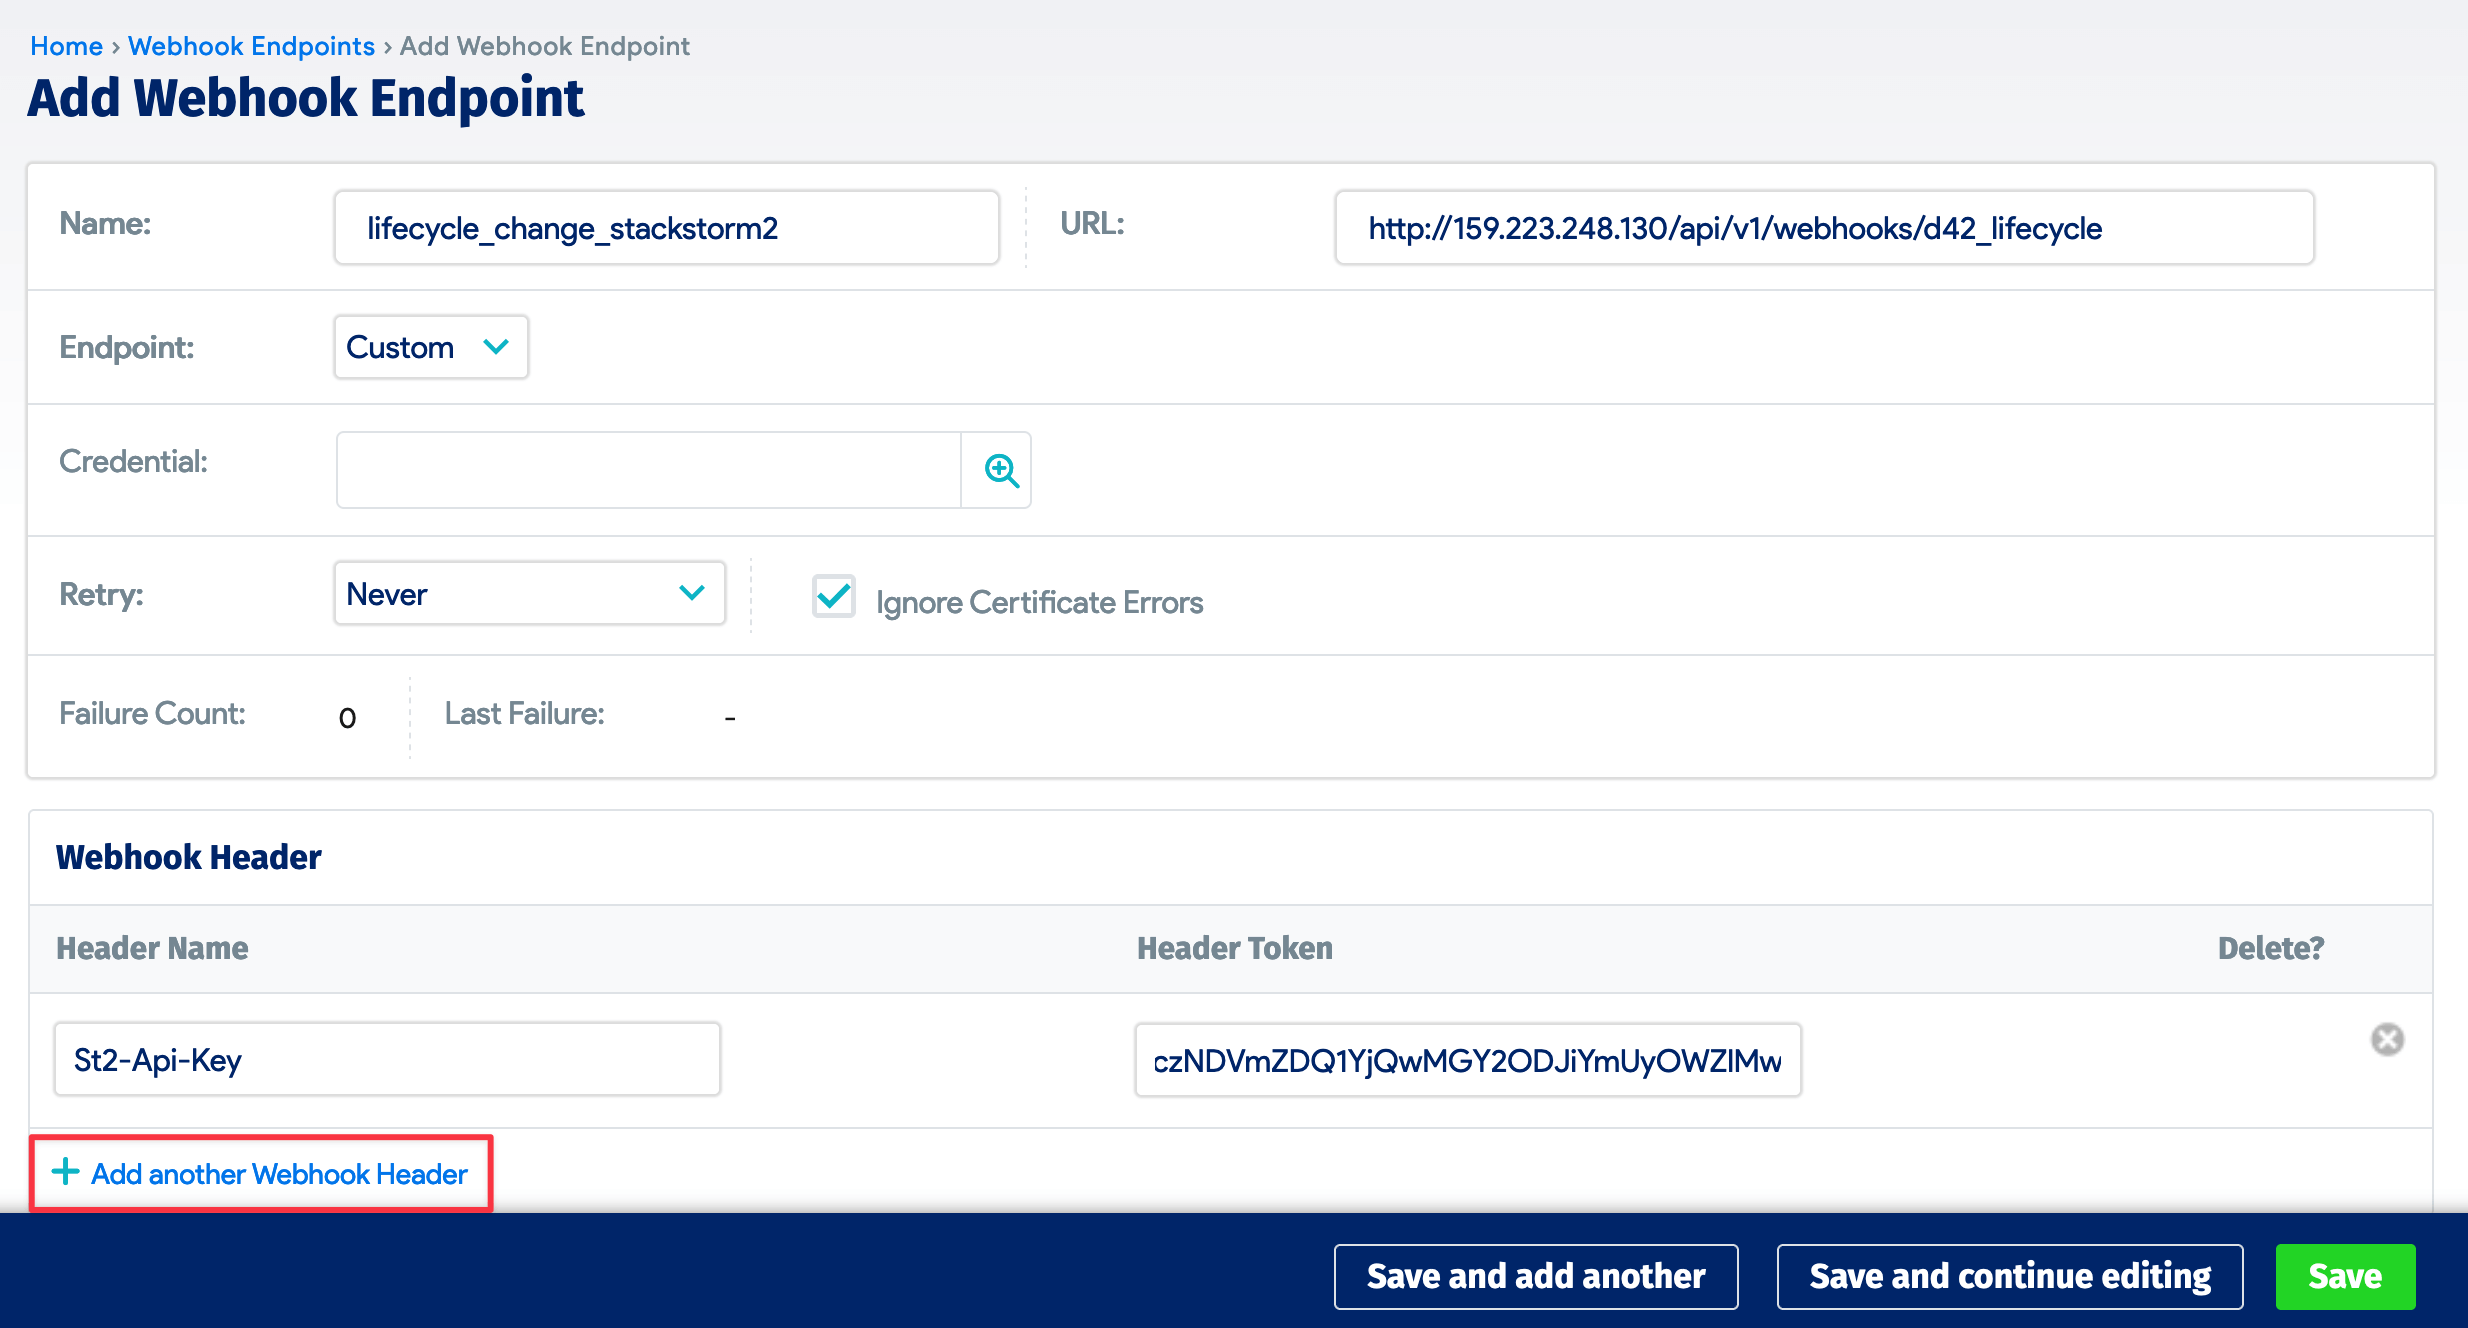
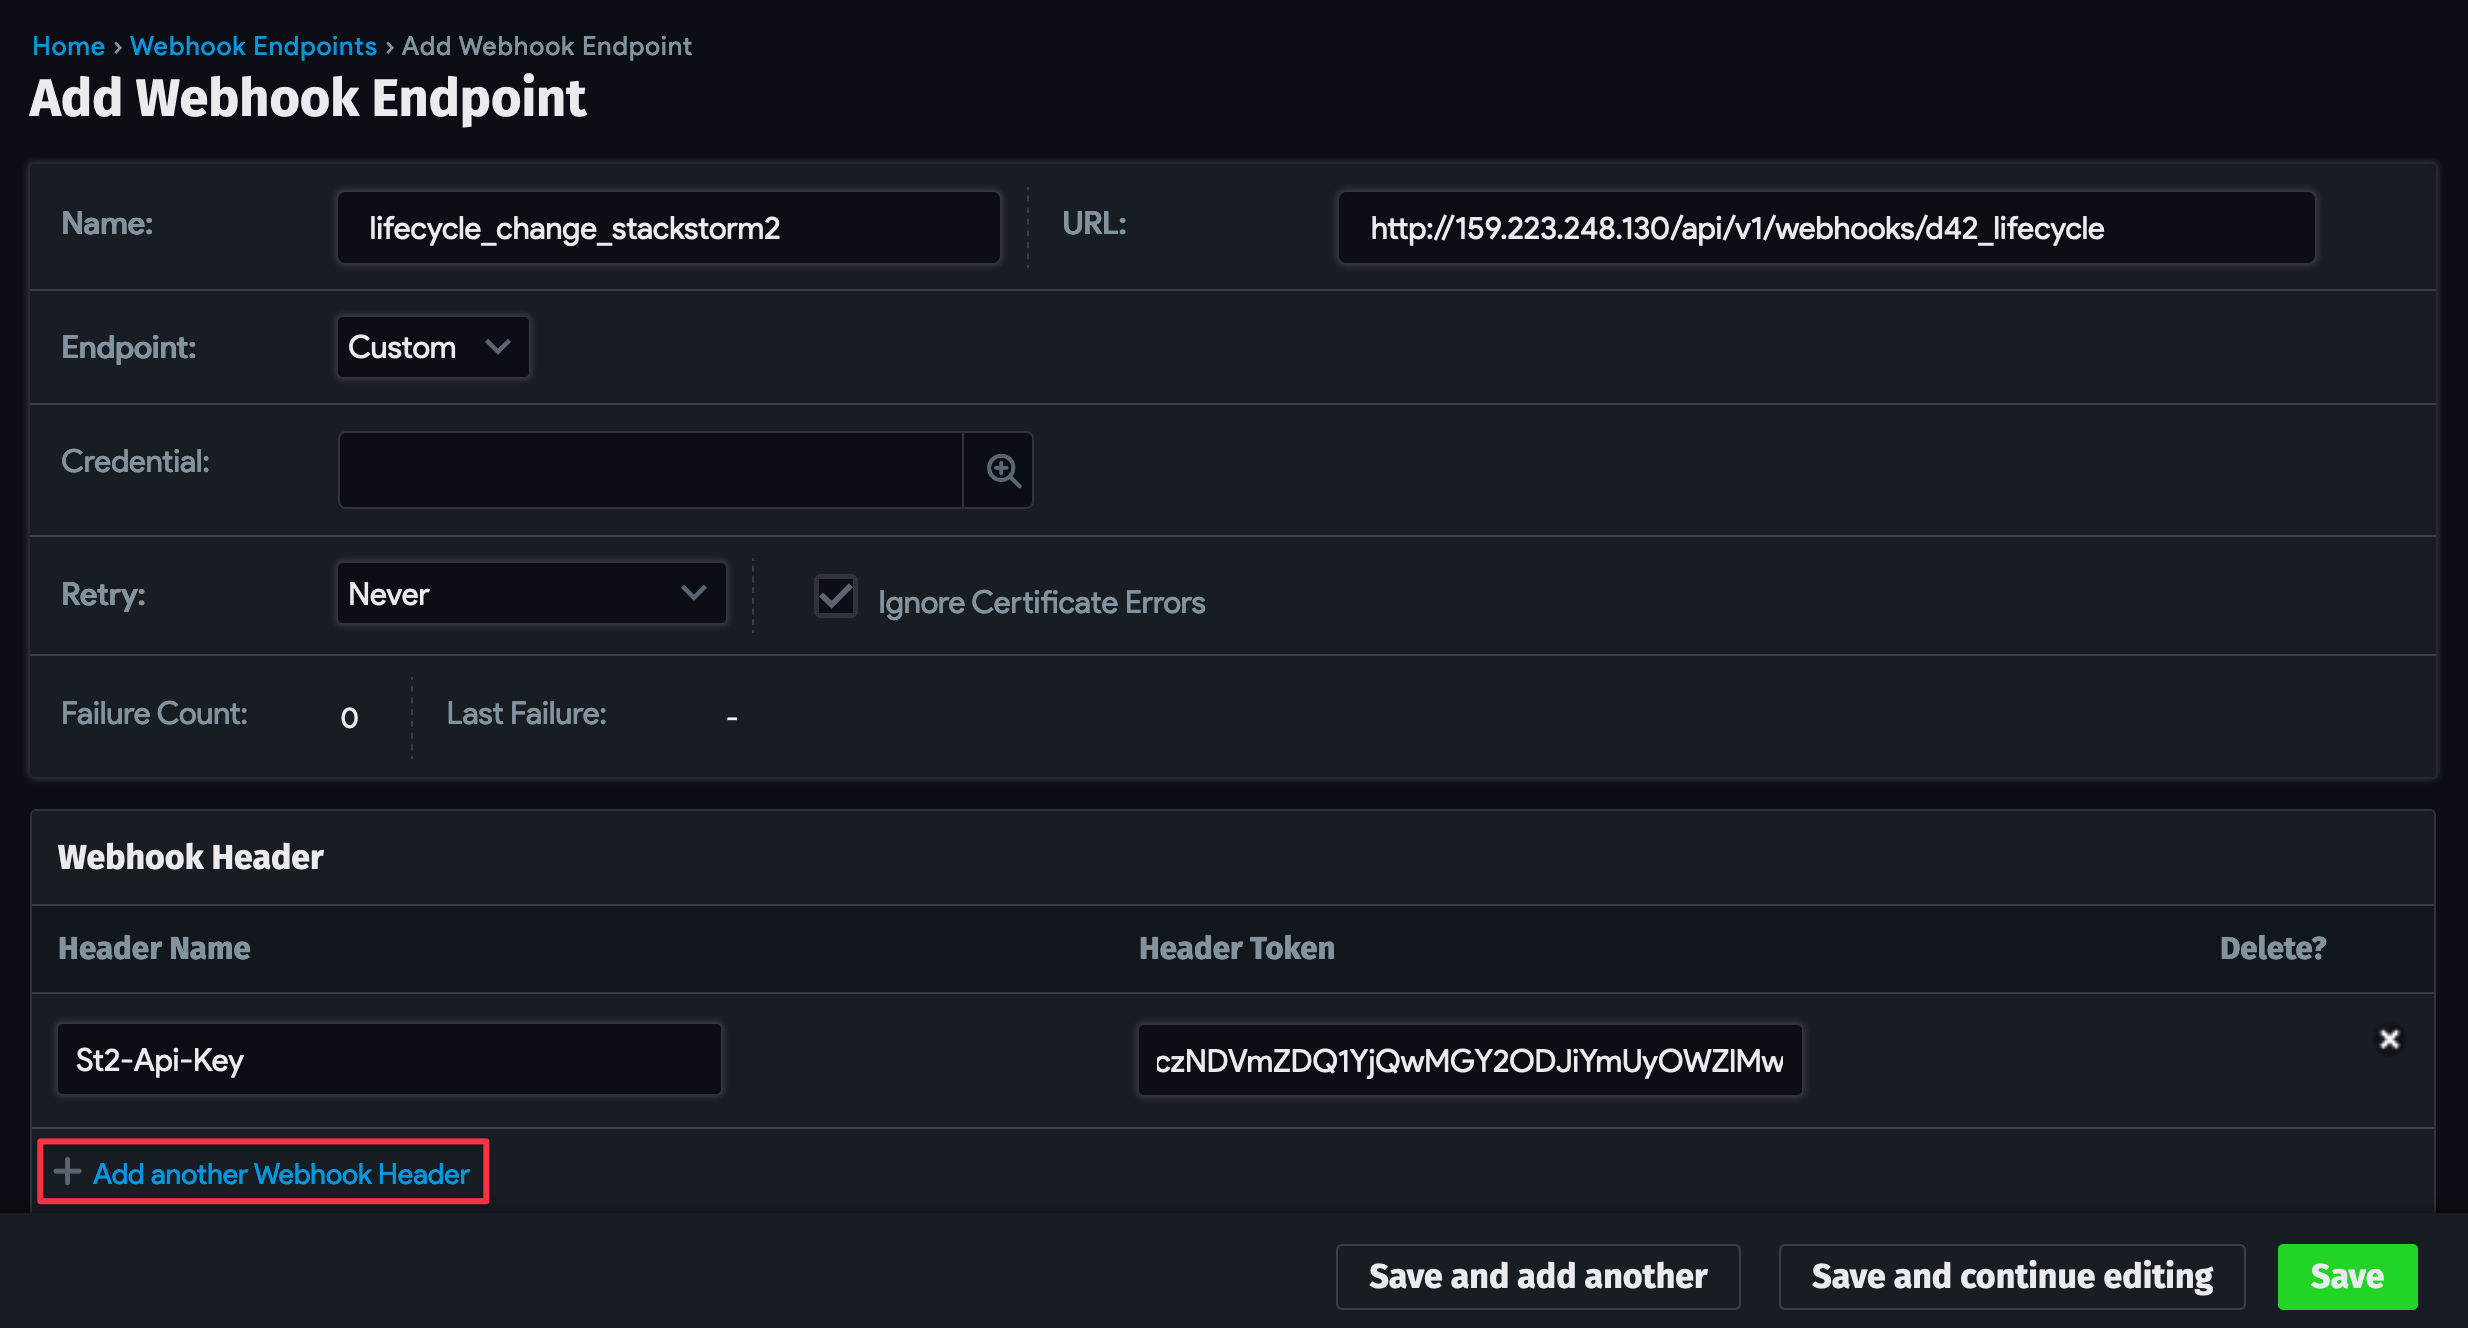
2. Create a Device42 Webhook Endpoint
Navigate to Tools > Endpoints and click + Add Webhook Endpoint. Give the endpoint a Name and add your Device42 server IP address to the URL:
/api/v1/webhooks/d42_lifecycle
Click + Add another Webhook Header, and paste your API key in the Header Token field. For the Header Name use:
St2-Api-Key
See the StackStorm documentation for more information on webhooks.
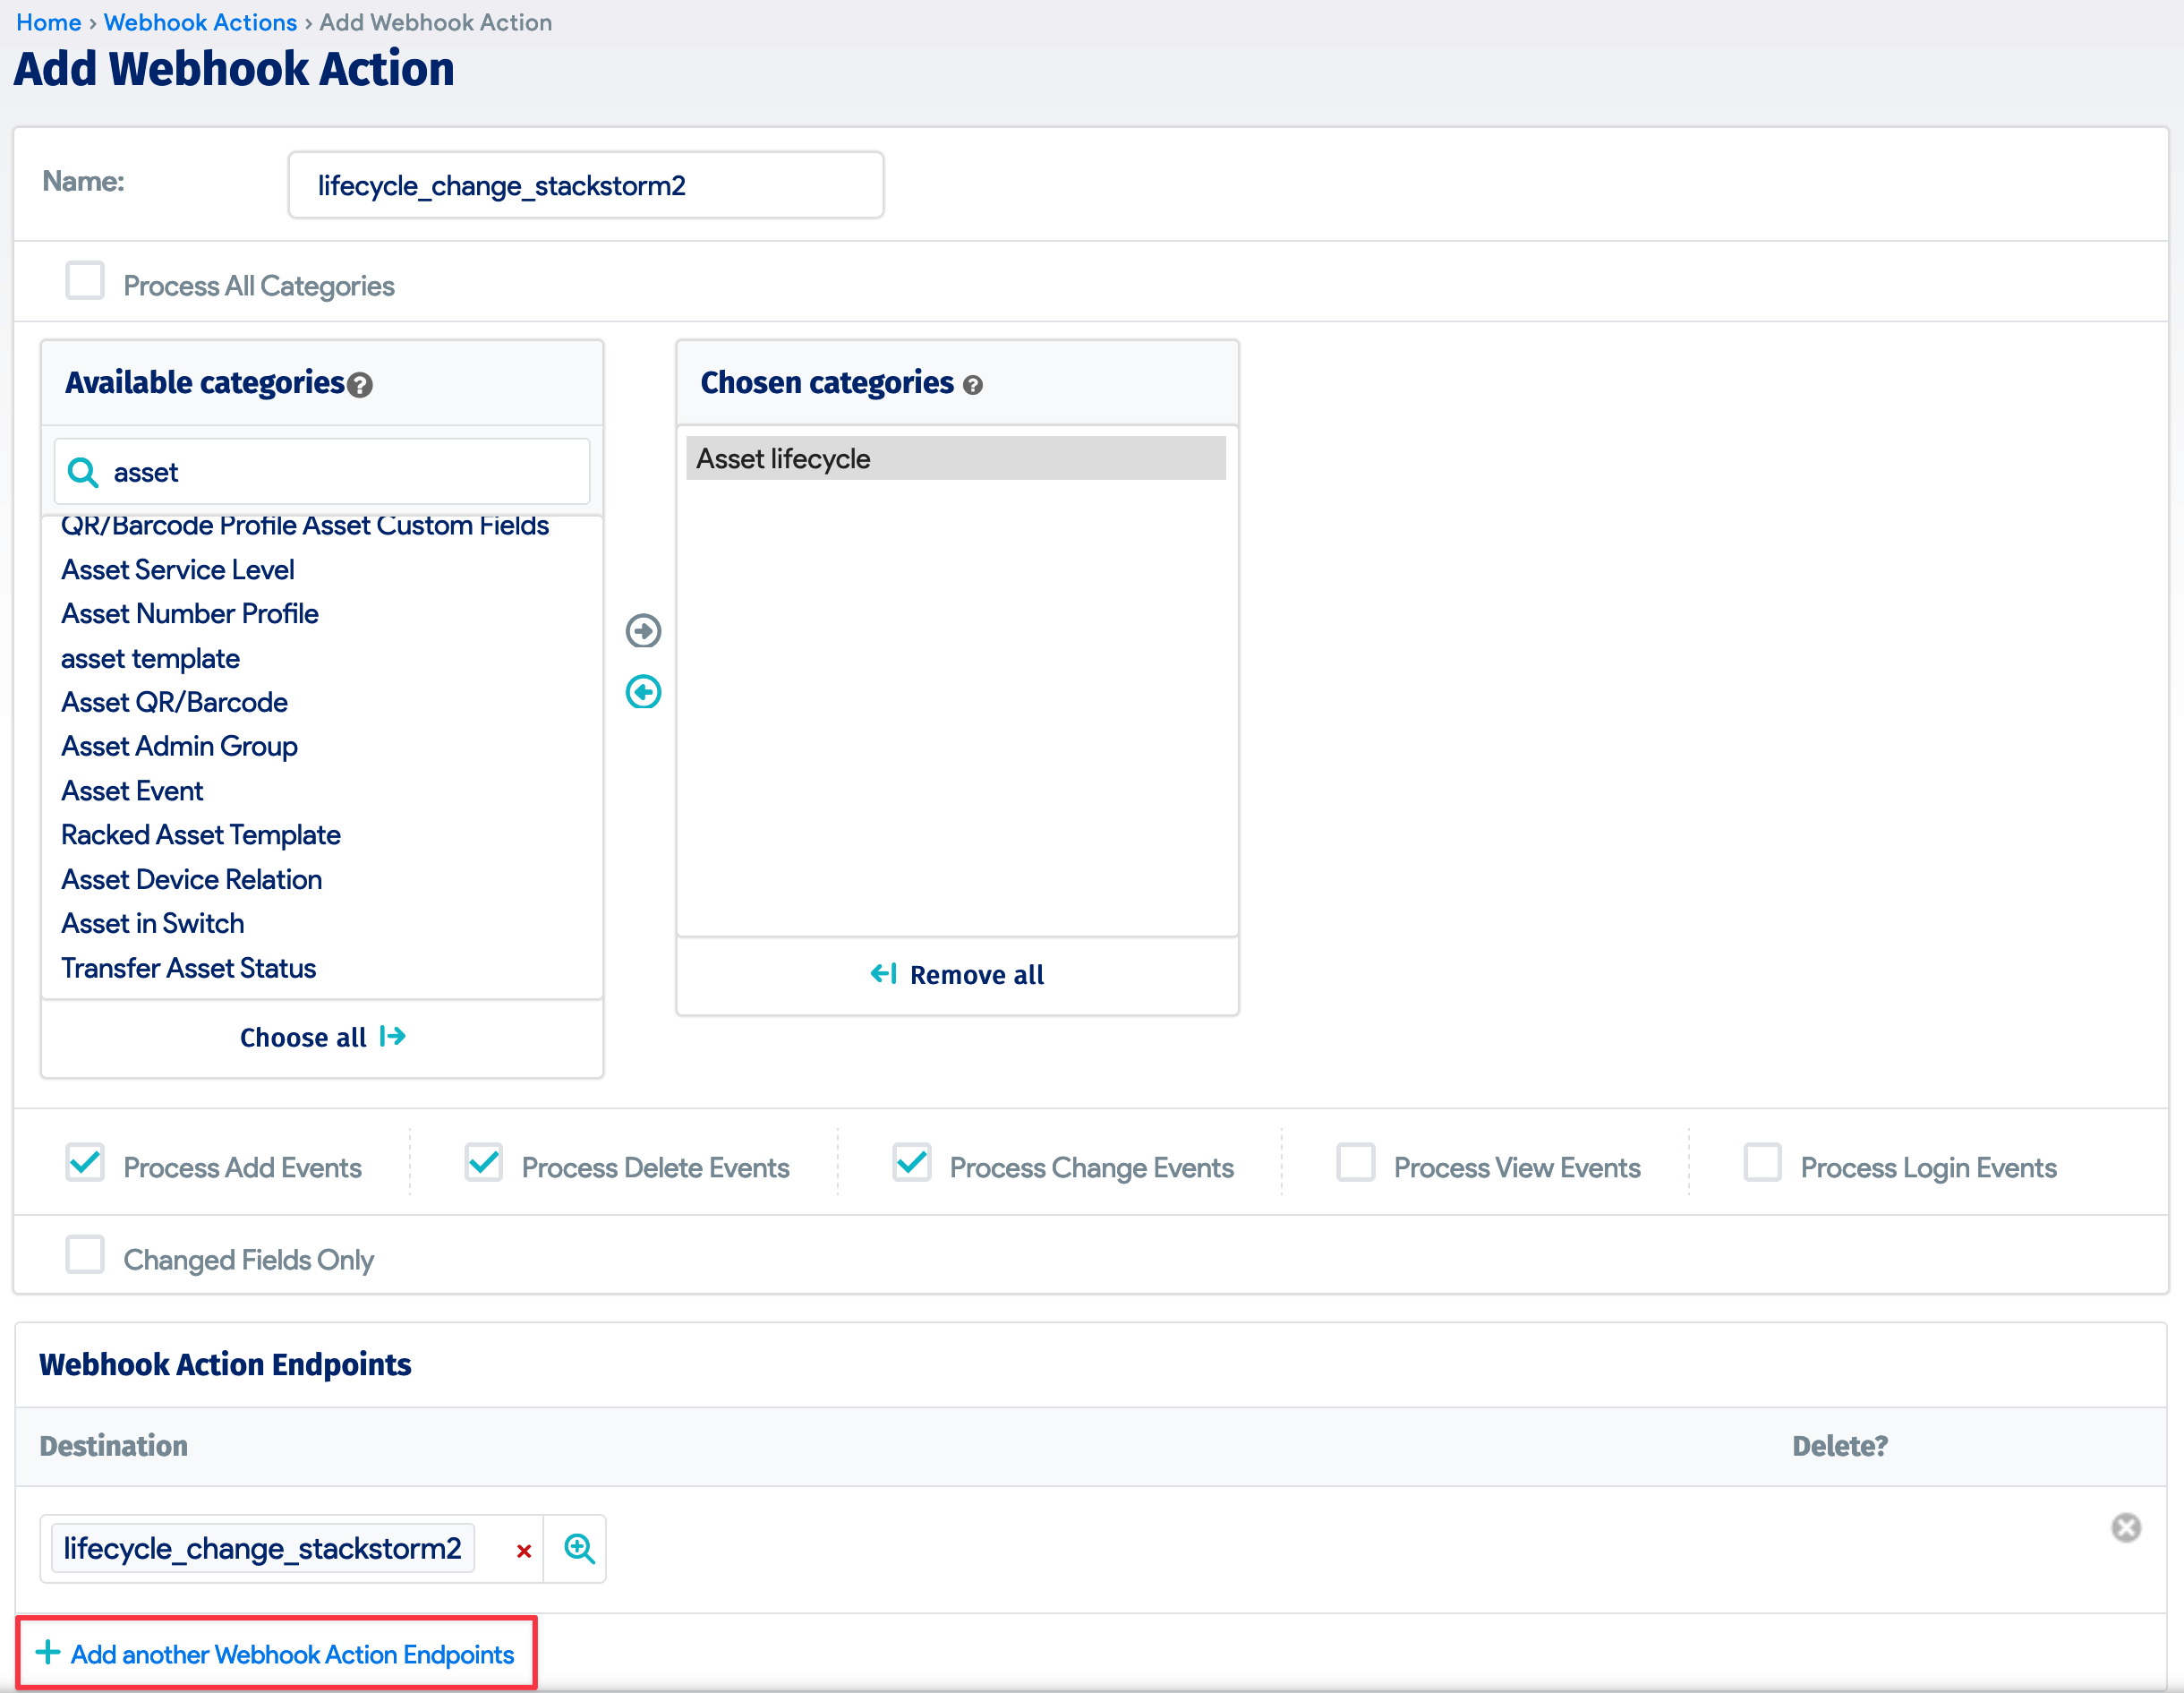
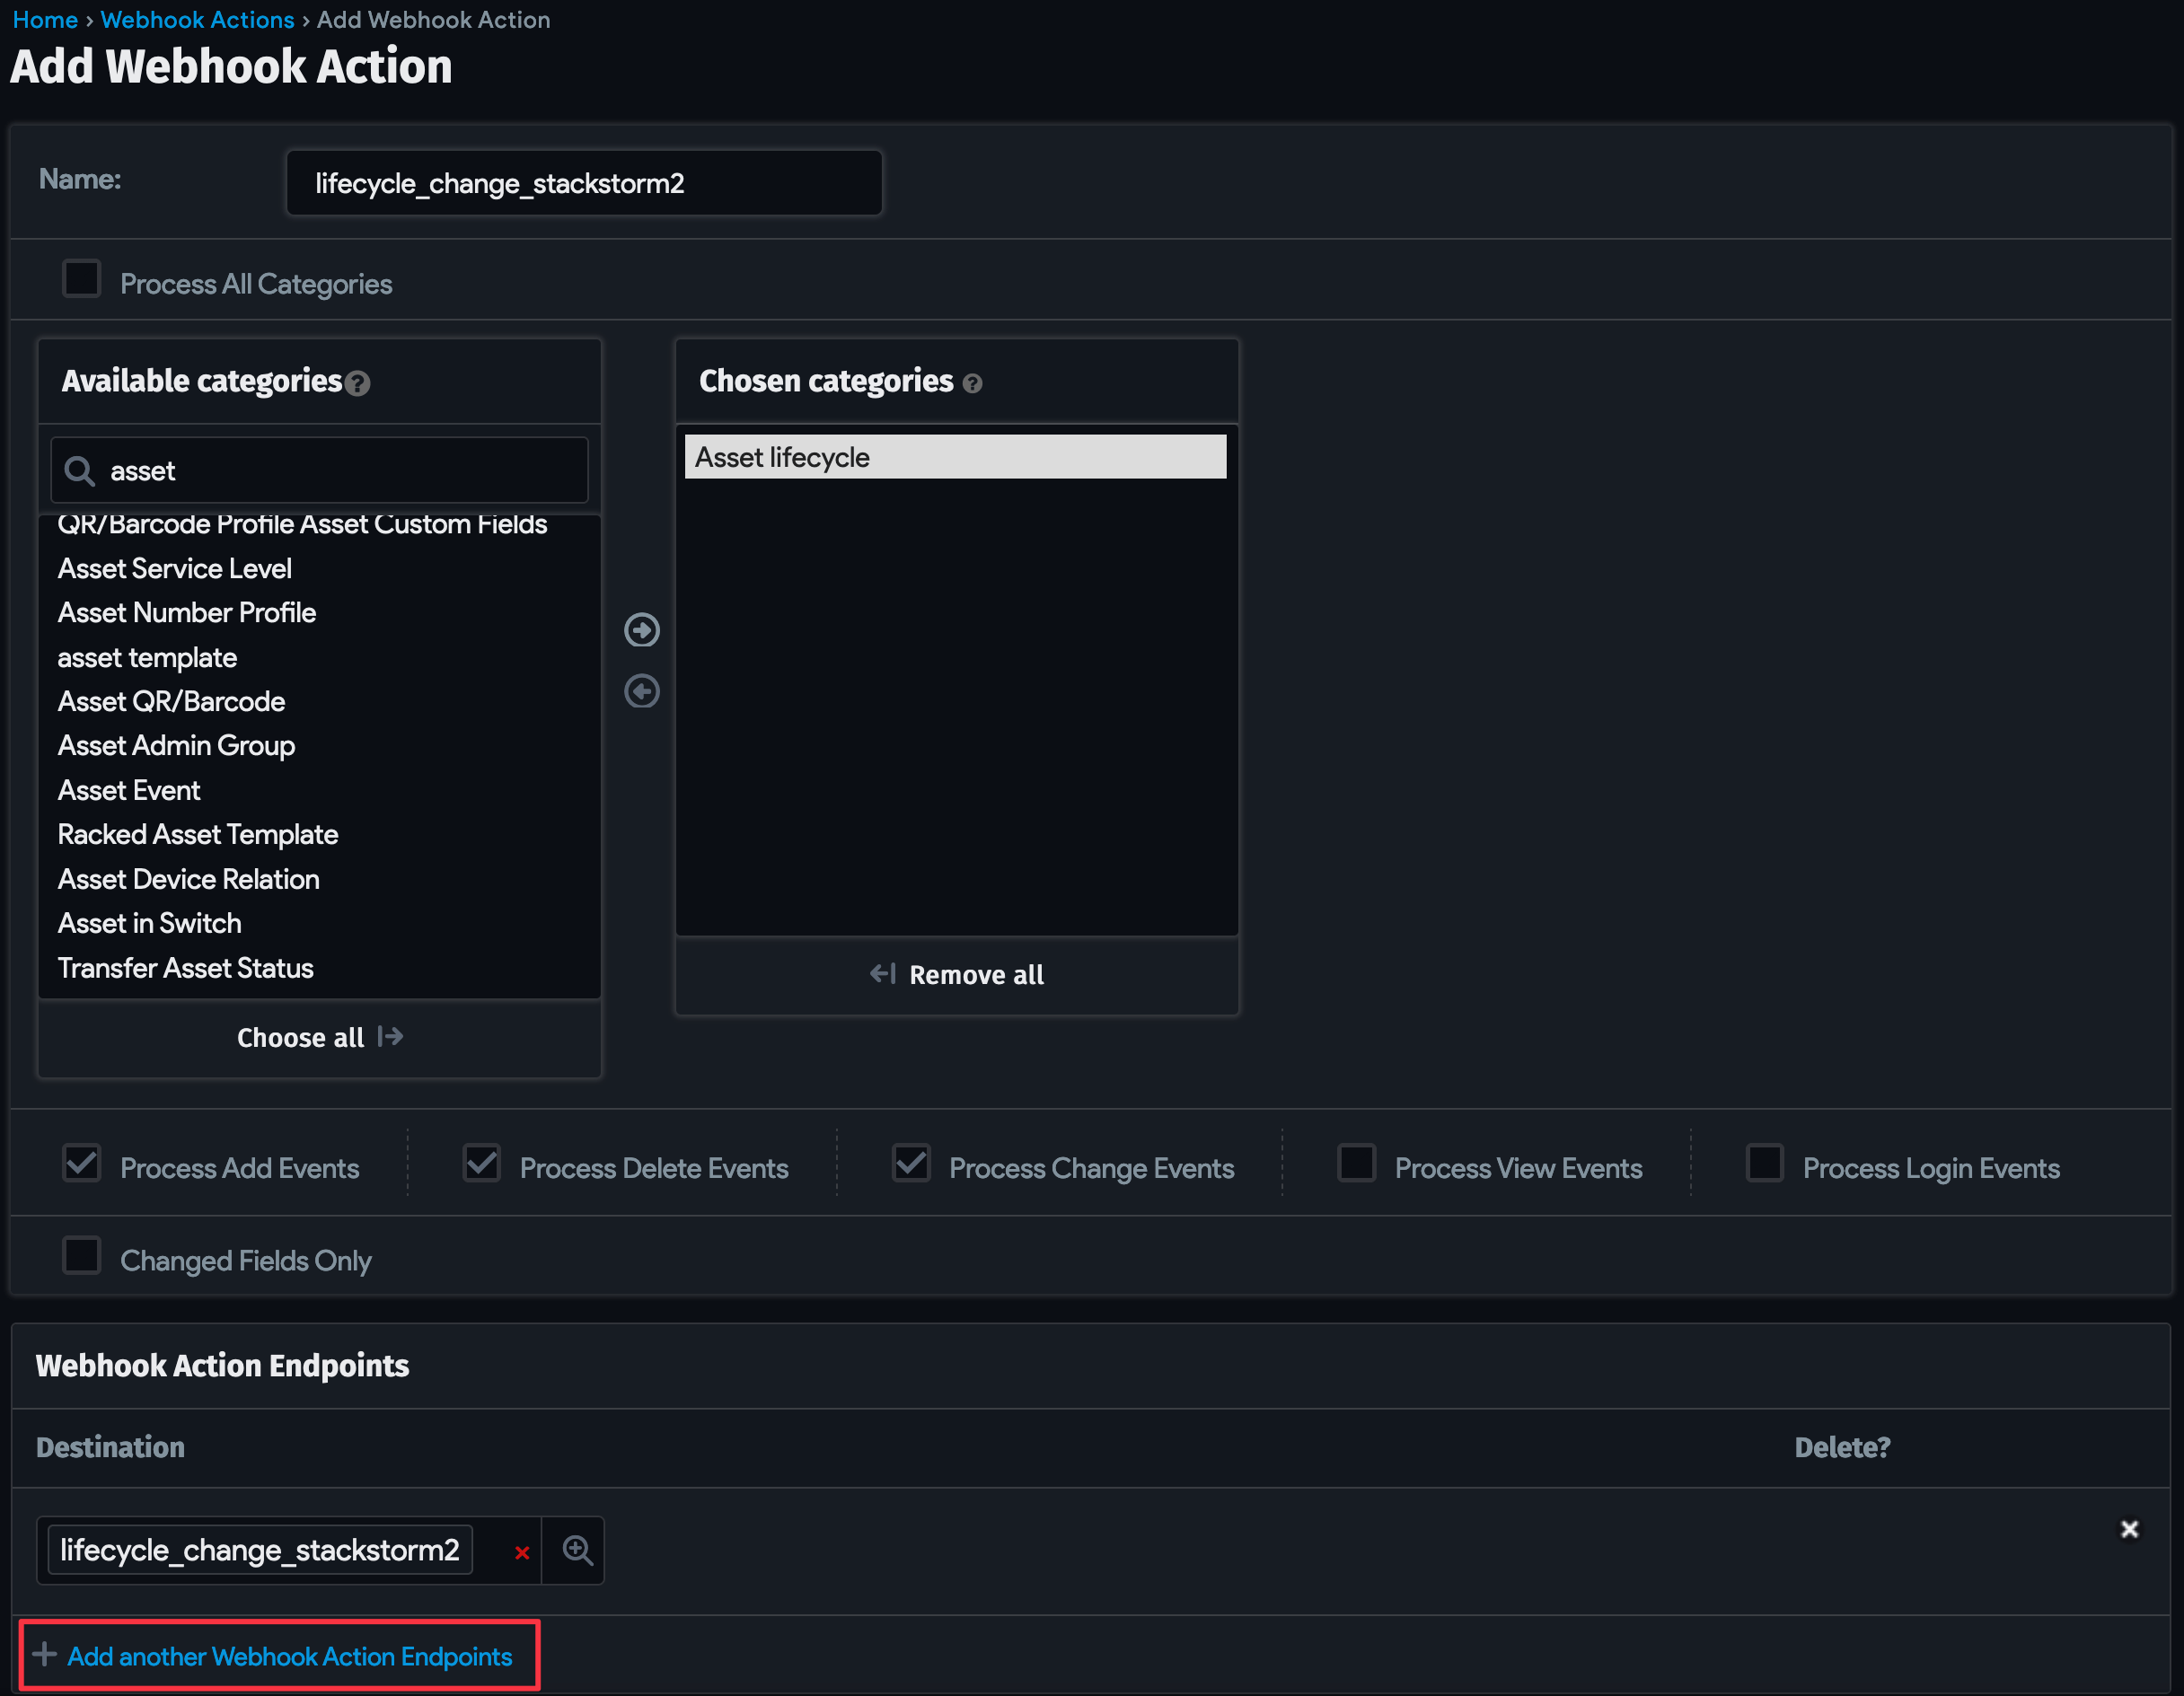
3. Create a Device42 Action
To add the action that triggers the webhook, navigate to Tools > Actions, and click the + Add Webhook Action button.
Search for "Asset lifecycle" under Available categories to define the category of configuration items to monitor for change. In this case, we want the webhook to be triggered when a device lifecycle stage is updated.
Next, click + Add another Webhook Action Endpoints to add the endpoint we created in the previous step.
4. Map the Lifecycle ID Property to the Object Category in StackStorm
For StackStorm to grant role-based user permissions based on a device's object category value, you need to link the lifecycle event data coming in from Device42 to object categories in StackStorm.
First, you'll need the lifecycle IDs assigned to the lifecycle event items we previously created. You can find a lifecycle event's ID by looking at its URL in the event view.

A more efficient way to retrieve all the IDs at once is to make a DOQL to query the Device42 API for the lifecycle IDs.
Once you have all the lifecycle event IDs, create a JSON file to map each event to its corresponding Object Category. For each key-value pair, use the lifecycle event ID as the "name" and the Object Category name as the "value", as in the code below. You can leave out the lc_ in front of the ID number if you prefer.
[
    {
        "name": "lc_7",
        "value": "purchasing_cat"
    },
    {
        "name": "lc_8",
        "value": "mounting_cat"
    },
    {
        "name": "lc_9",
        "value": "deploying_cat"
    },
    {
        "name": "lc_10",
        "value": "production_cat"
    }
]
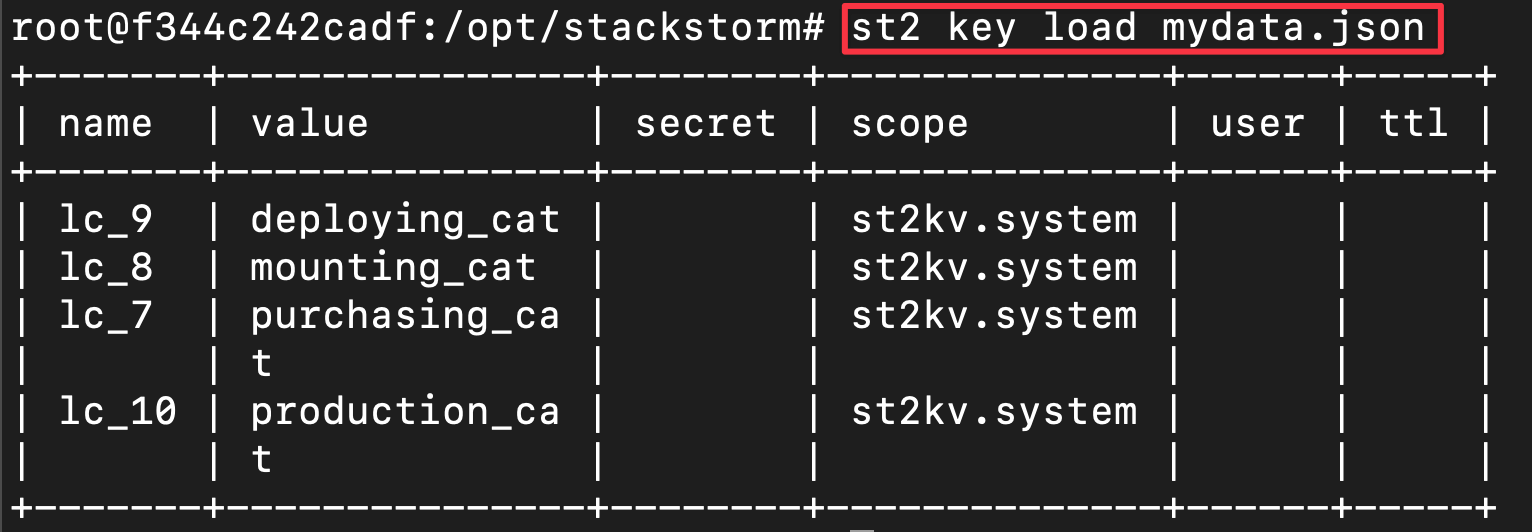
For this example, we named the file mydata.json.
Add the JSON file to the StackStorm directory and load the key-value pairs to the StackStorm datastore using the command (remember to change the filename to the name you used):
st2 key load mydata.json
Test the Automation
Test the automation by updating the asset lifecycle of a device to "mounting". Give the automation a couple of minutes to run, then check on the progress of the webhook by going to Tools > Webhooks > Pending. See connection errors by viewing the endpoint under Tools > Webhooks > Endpoints.
From StackStorm, you can look out for a POST request in the API logs:
Click to expand the code block
2024-01-17 13:27:07,763 INFO [-] 594a5f59-c6bb-41d9-9cd2-77b680d040bc - POST /v1/webhooks/d42_lifecycle with query={} (method='POST',path='/v1/webhooks/d42_lifecycle',remote_addr='172.18.0.17',query={},request_id='594a5f59-c6bb-41d9-9cd2-77b680d040bc')

2024-01-17 13:27:07,788 INFO [-] 594a5f59-c6bb-41d9-9cd2-77b680d040bc - 202 295 24.343ms (method='POST',path='/v1/webhooks/d42_lifecycle',remote_addr='172.18.0.17',status=202,runtime=24.343,content_length=295,request_id='594a5f59-c6bb-41d9-9cd2-77b680d040bc')
These logs are located in the /var/log/st2/st2api.log file. If you're using Docker, run the following command to see the logs in the terminal:
docker logs st2-docker_st2api_1
The StackStorm webhook troubleshooting page is a useful resource to consult for further debugging.
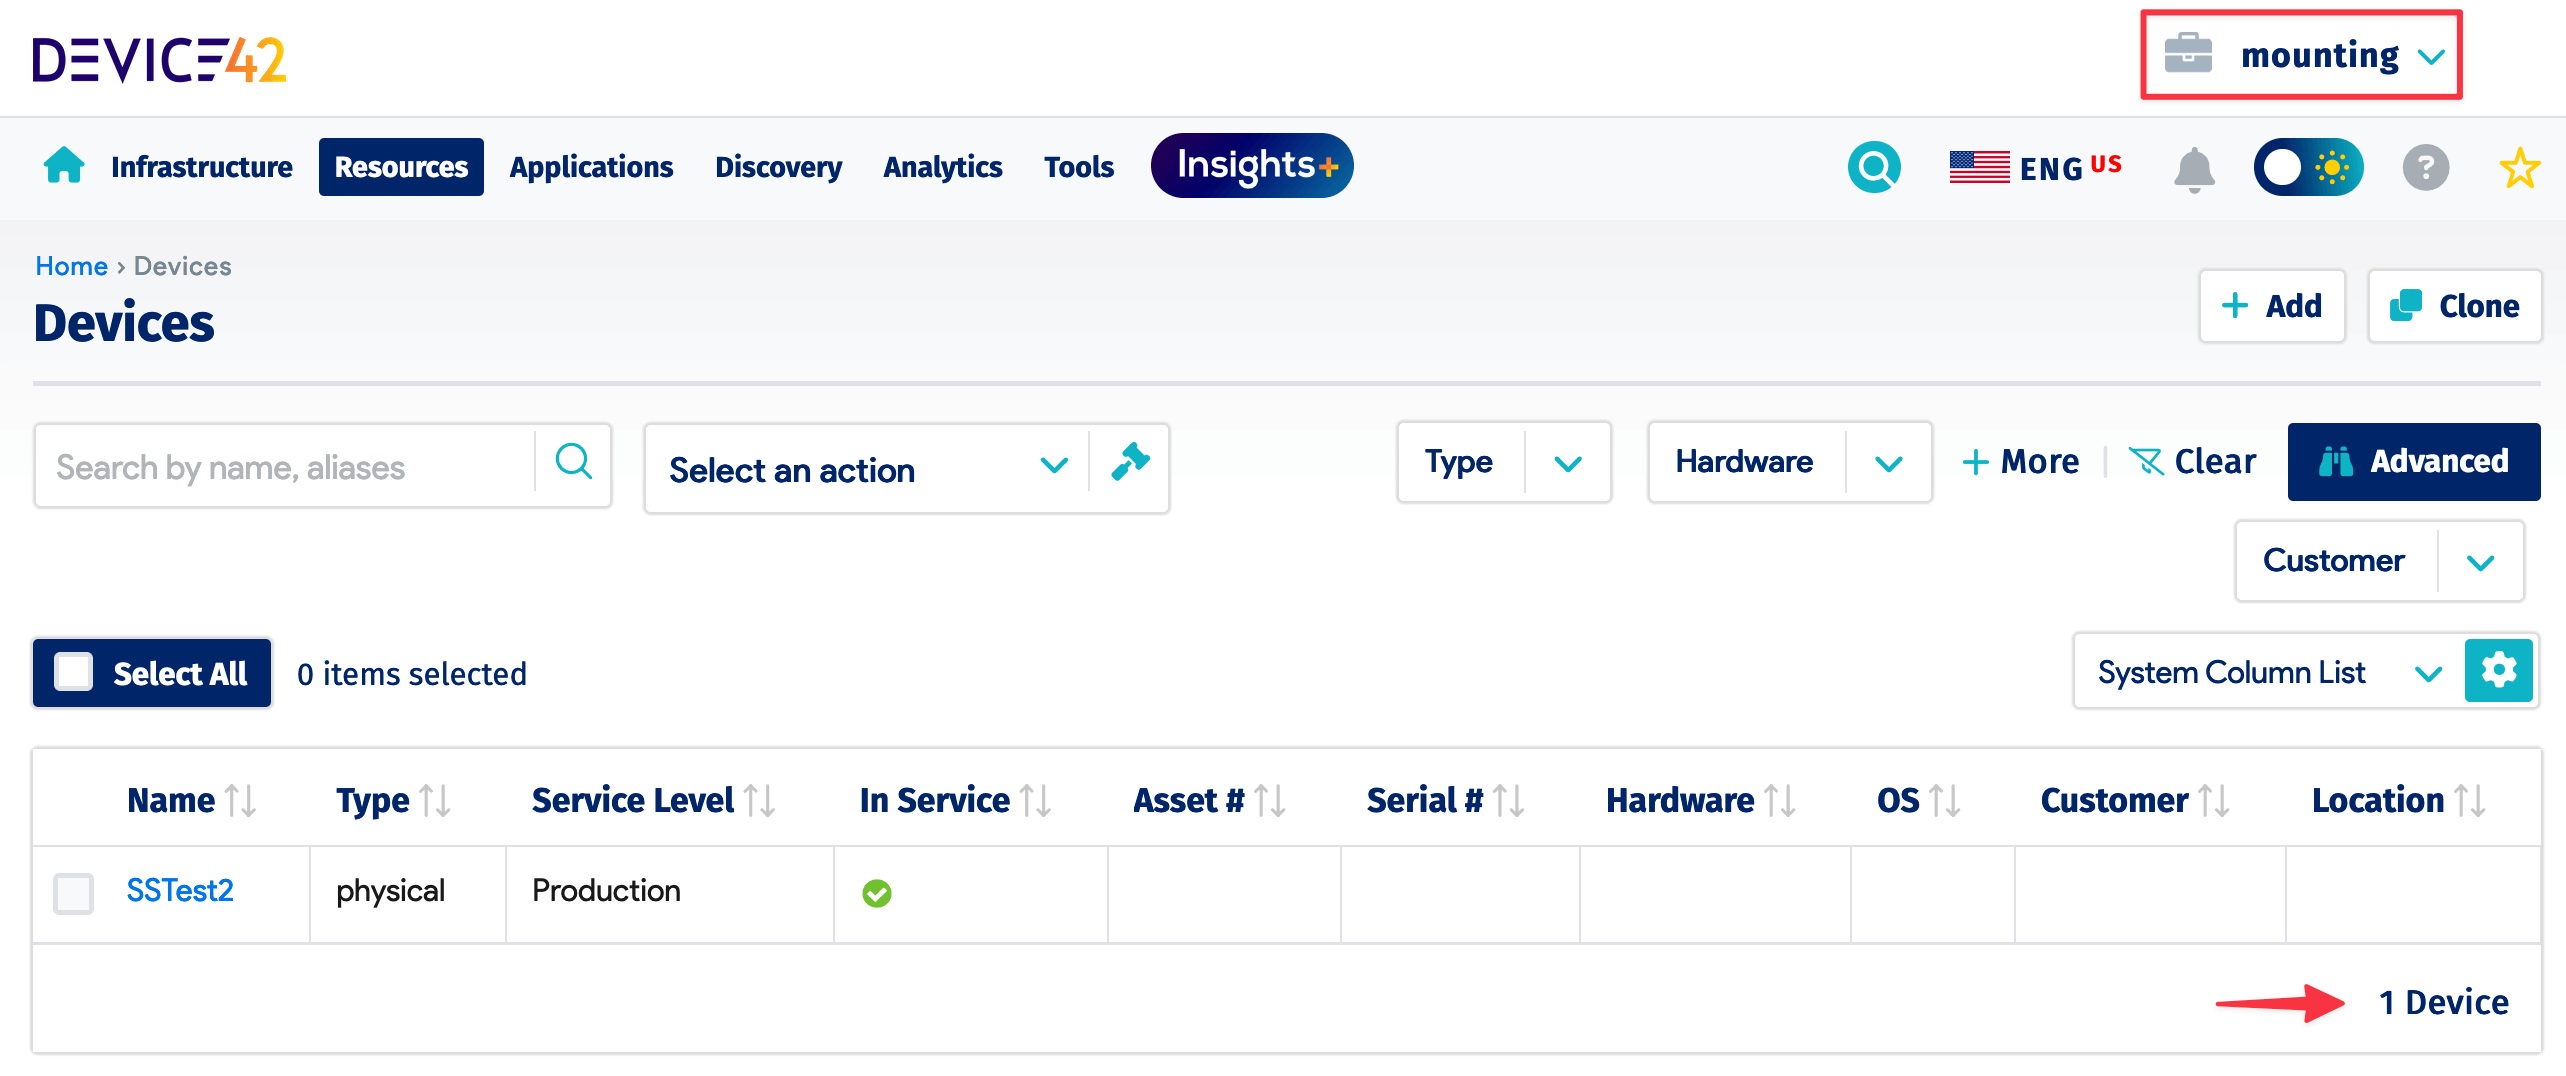
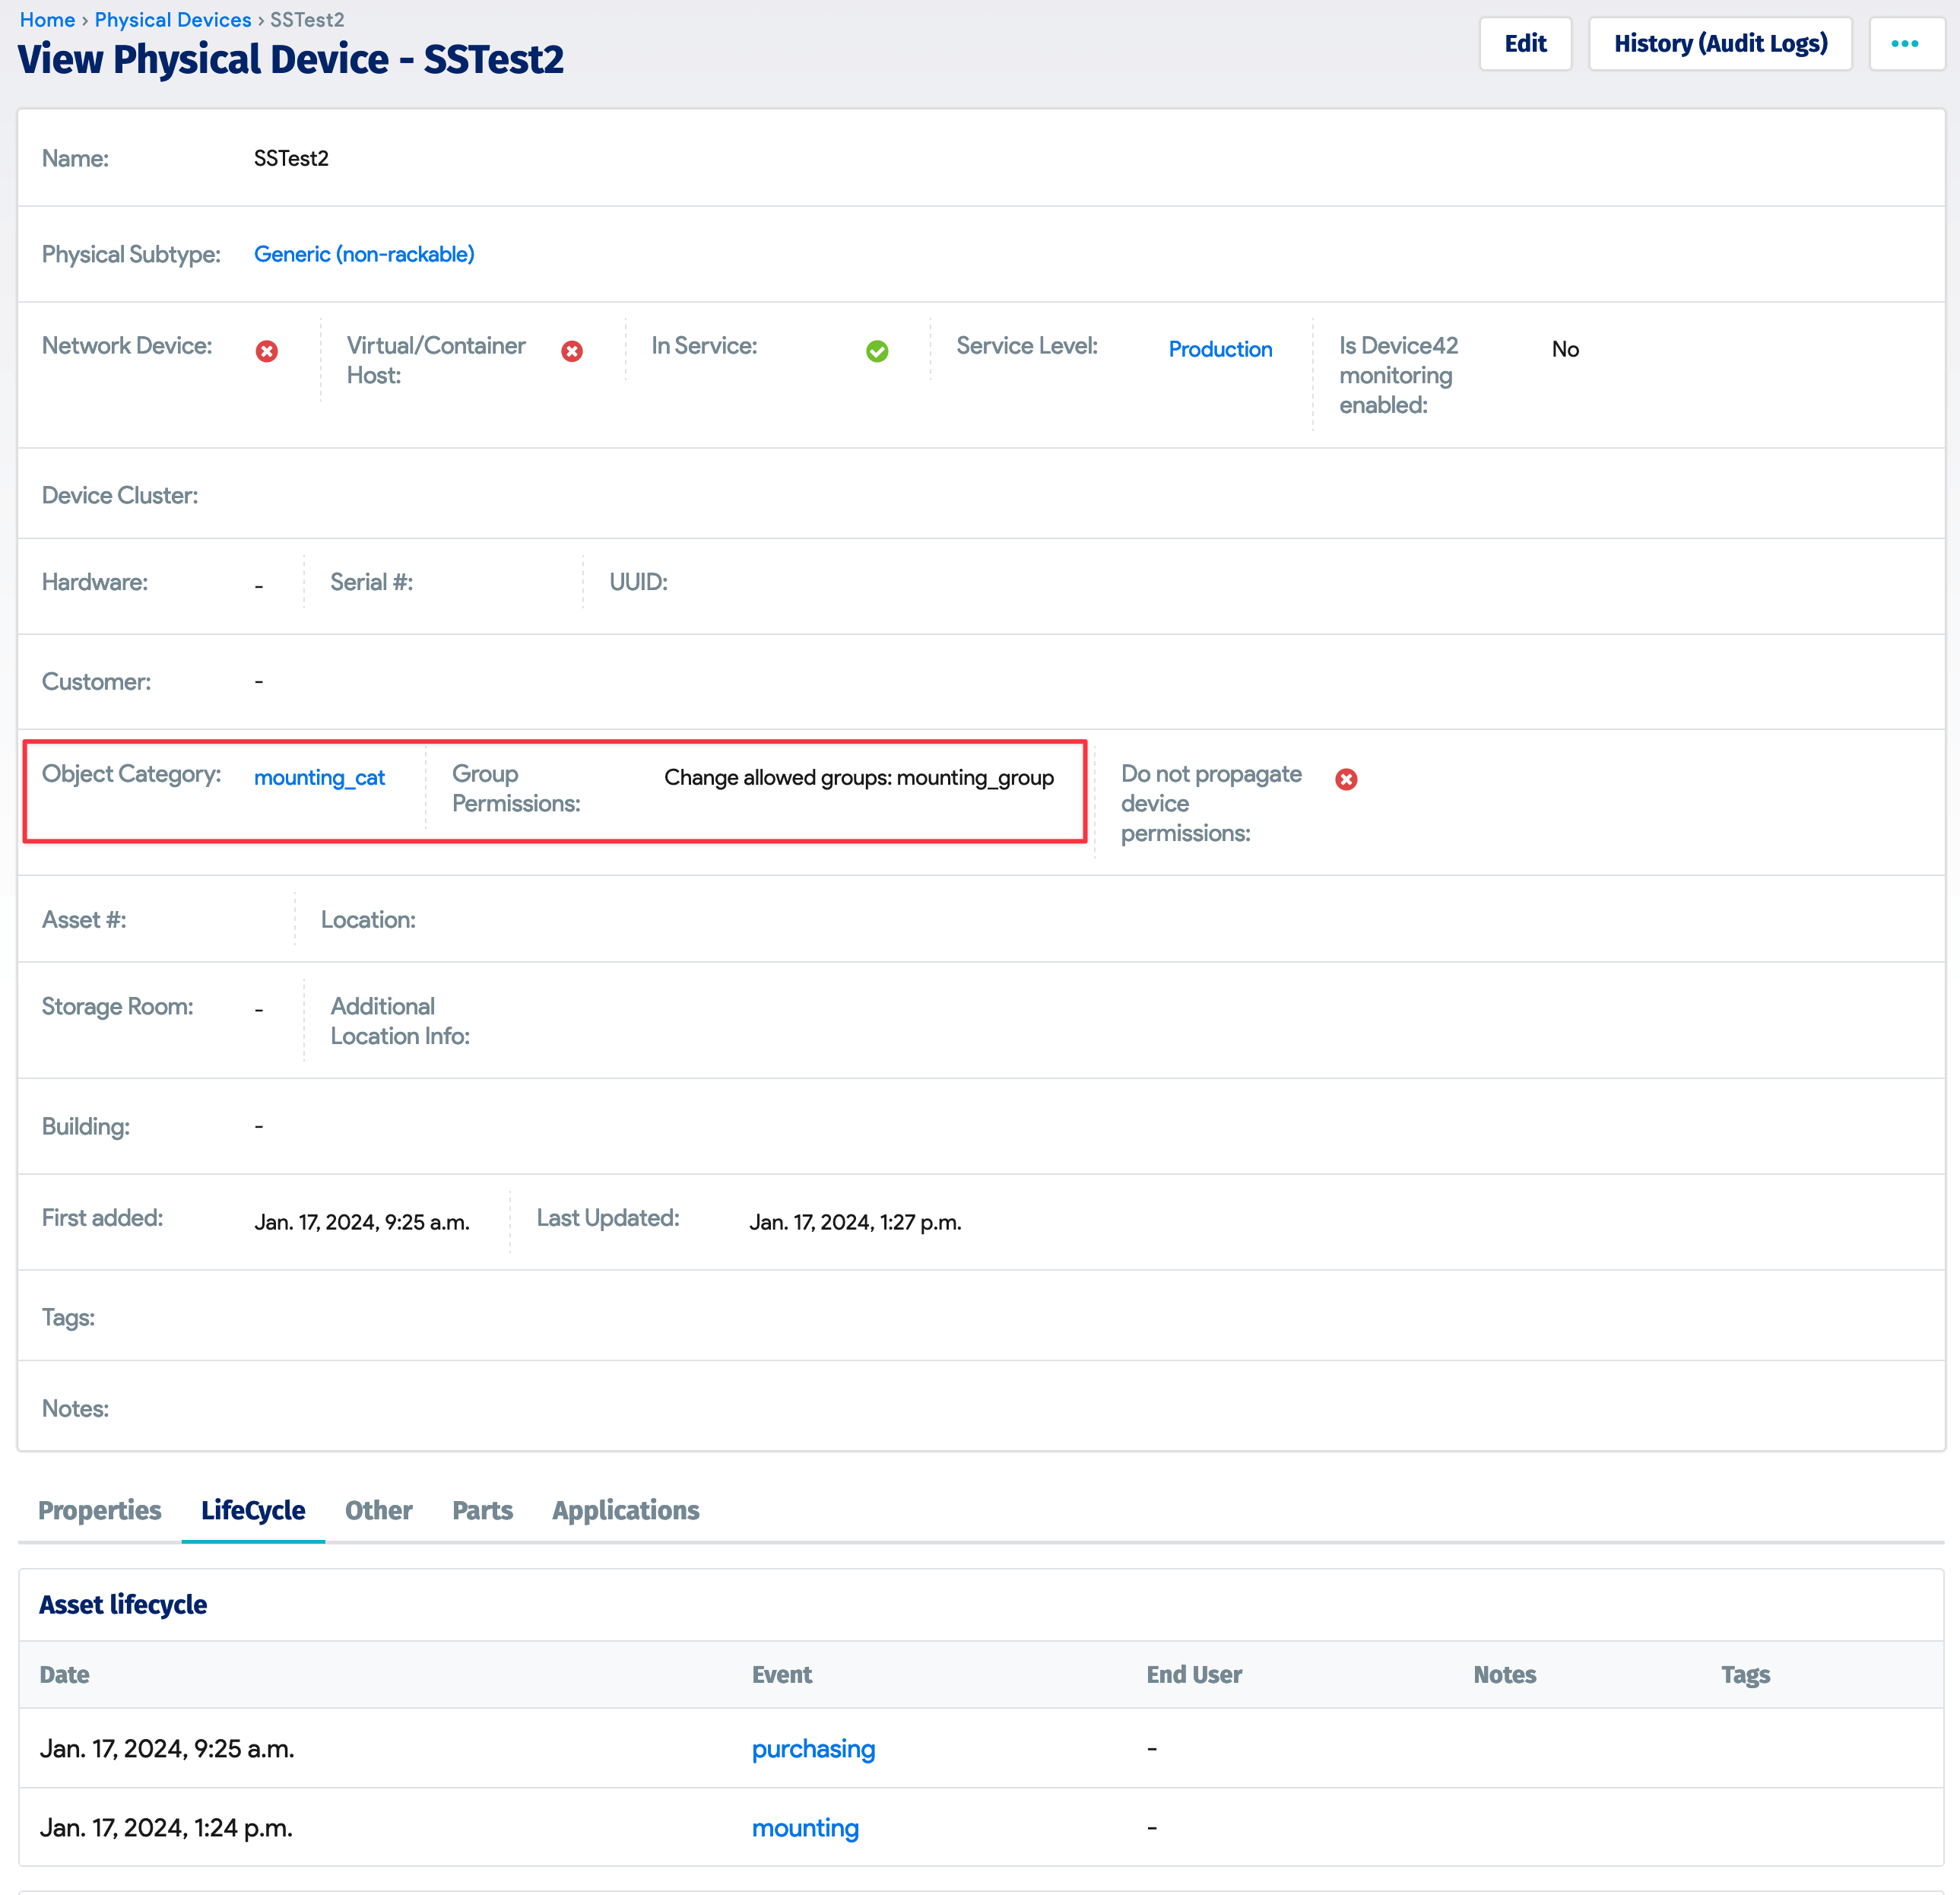
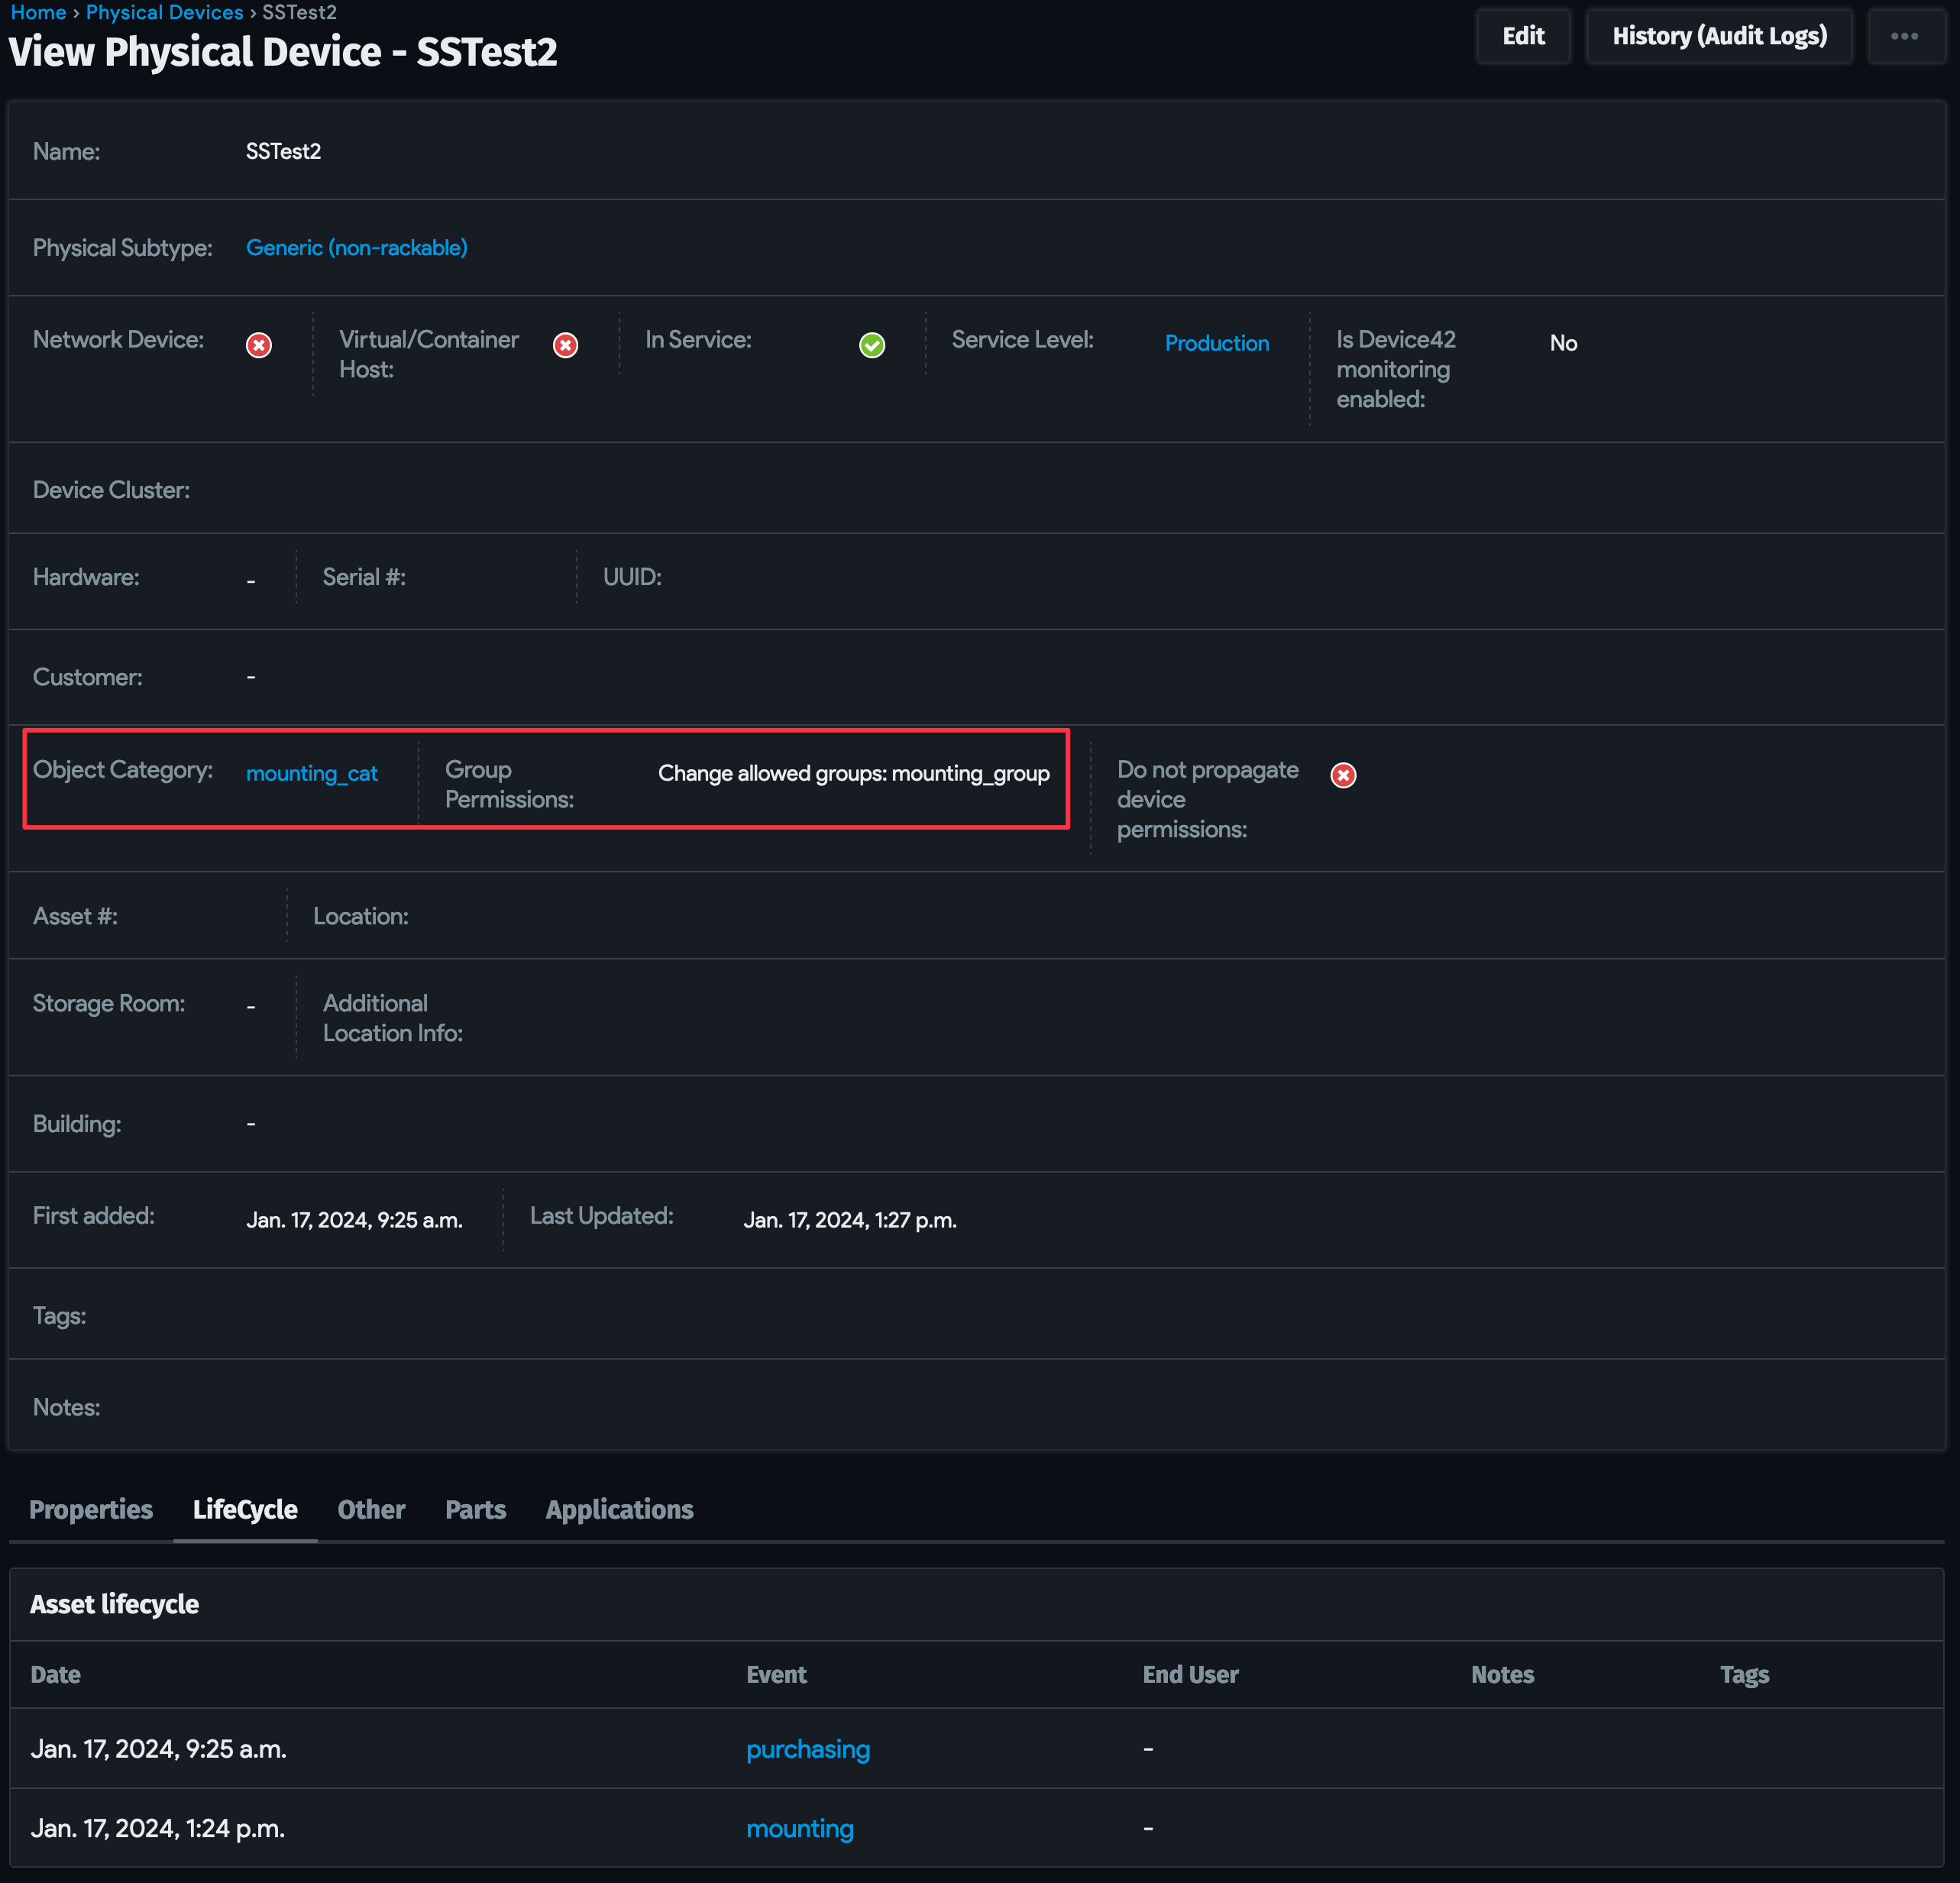
Refresh the device page. If automation has completed successfully, you'll see the Object Category value has changed to "mounting_cat", and the associated Group Permissions value is "mounting_group".
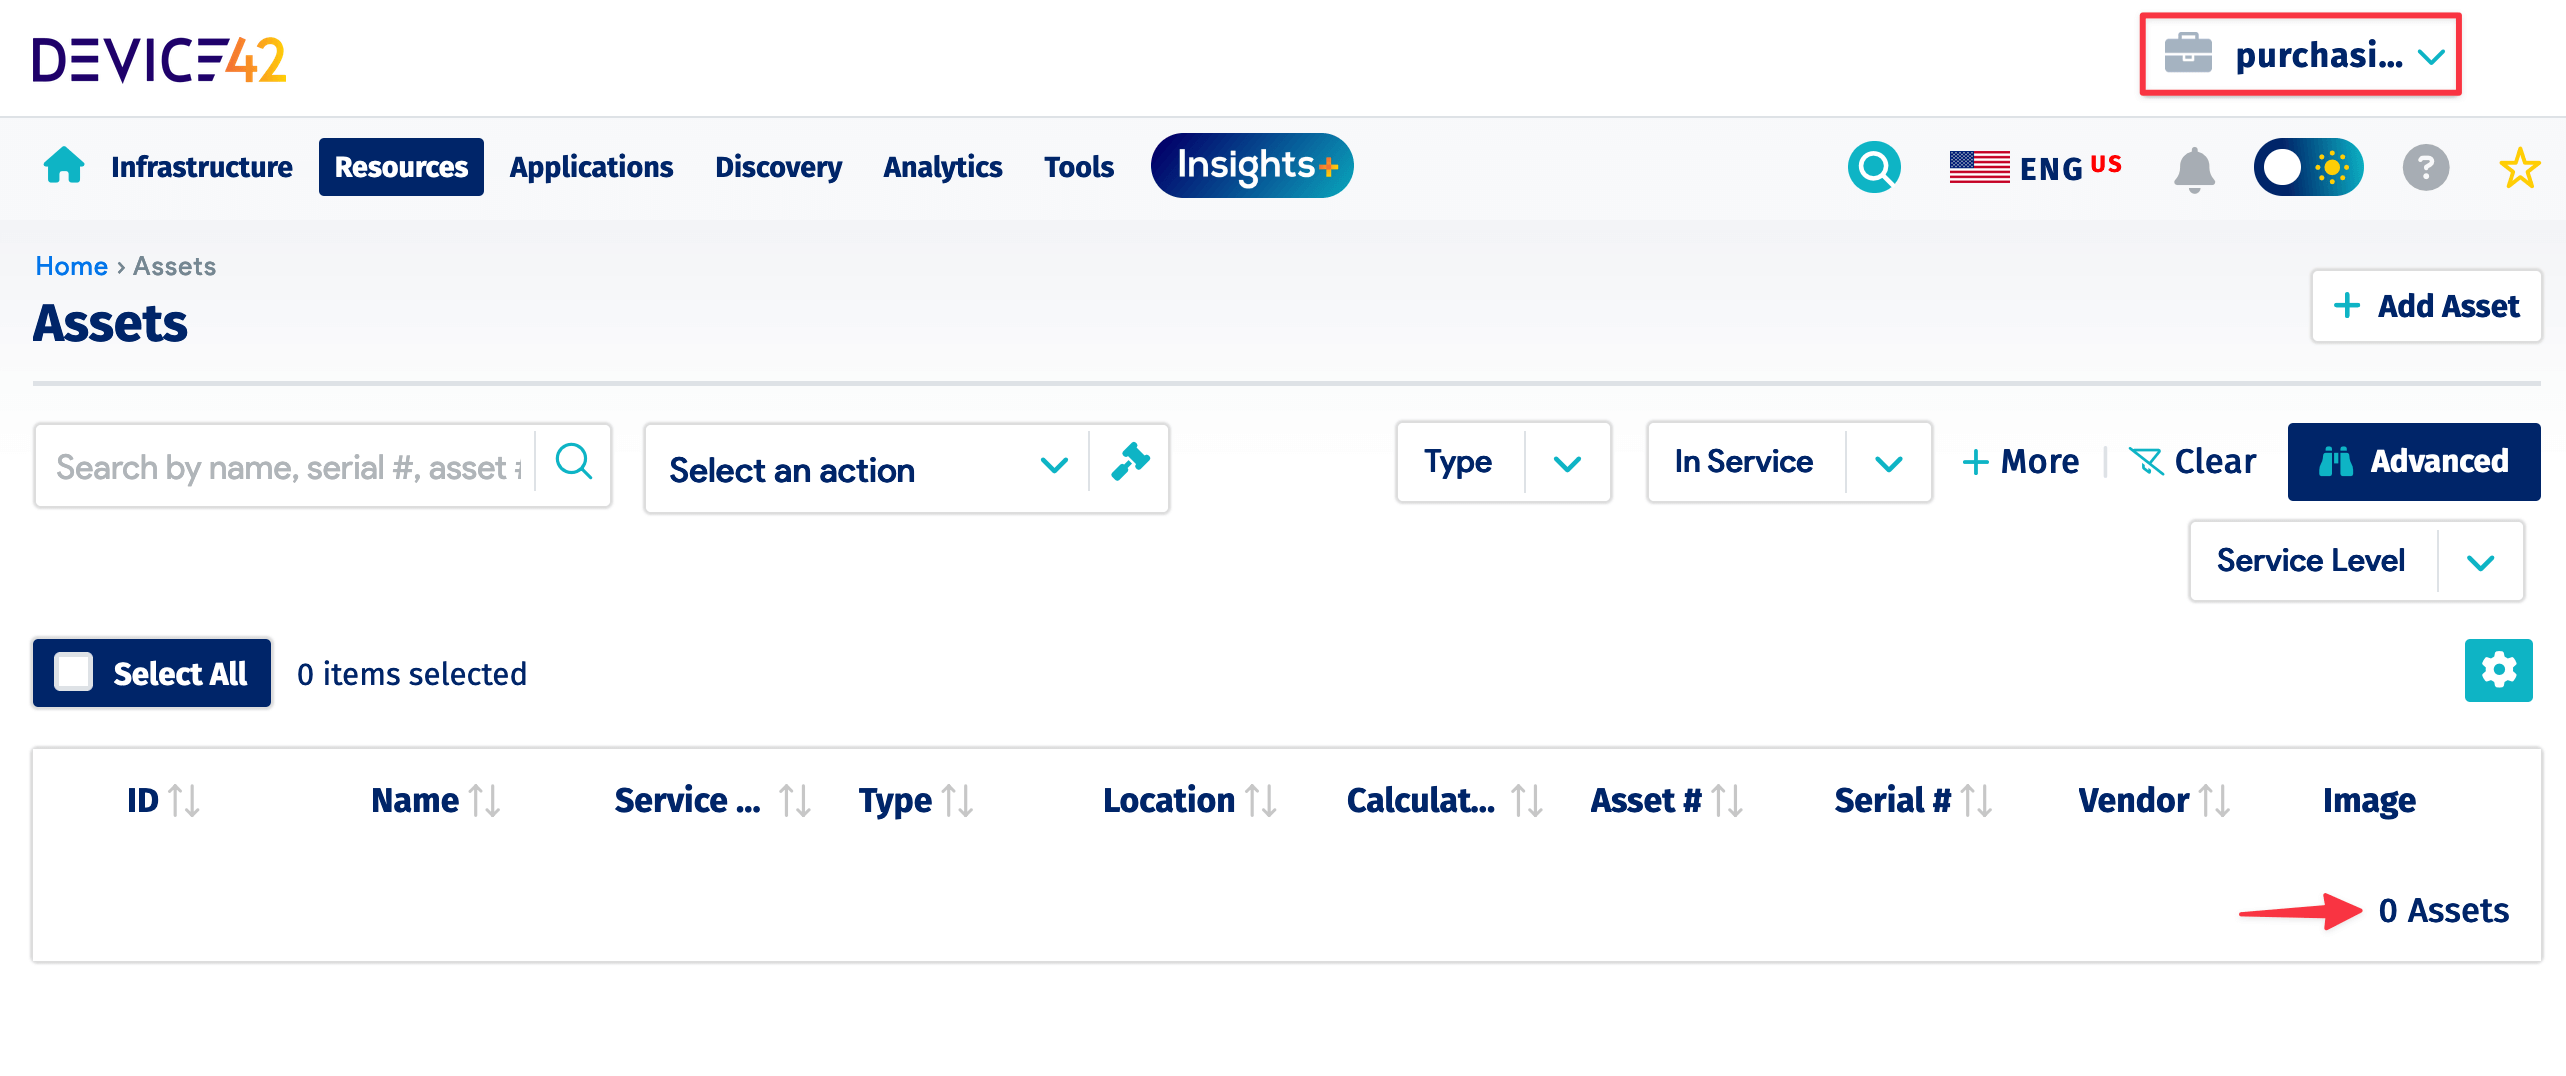
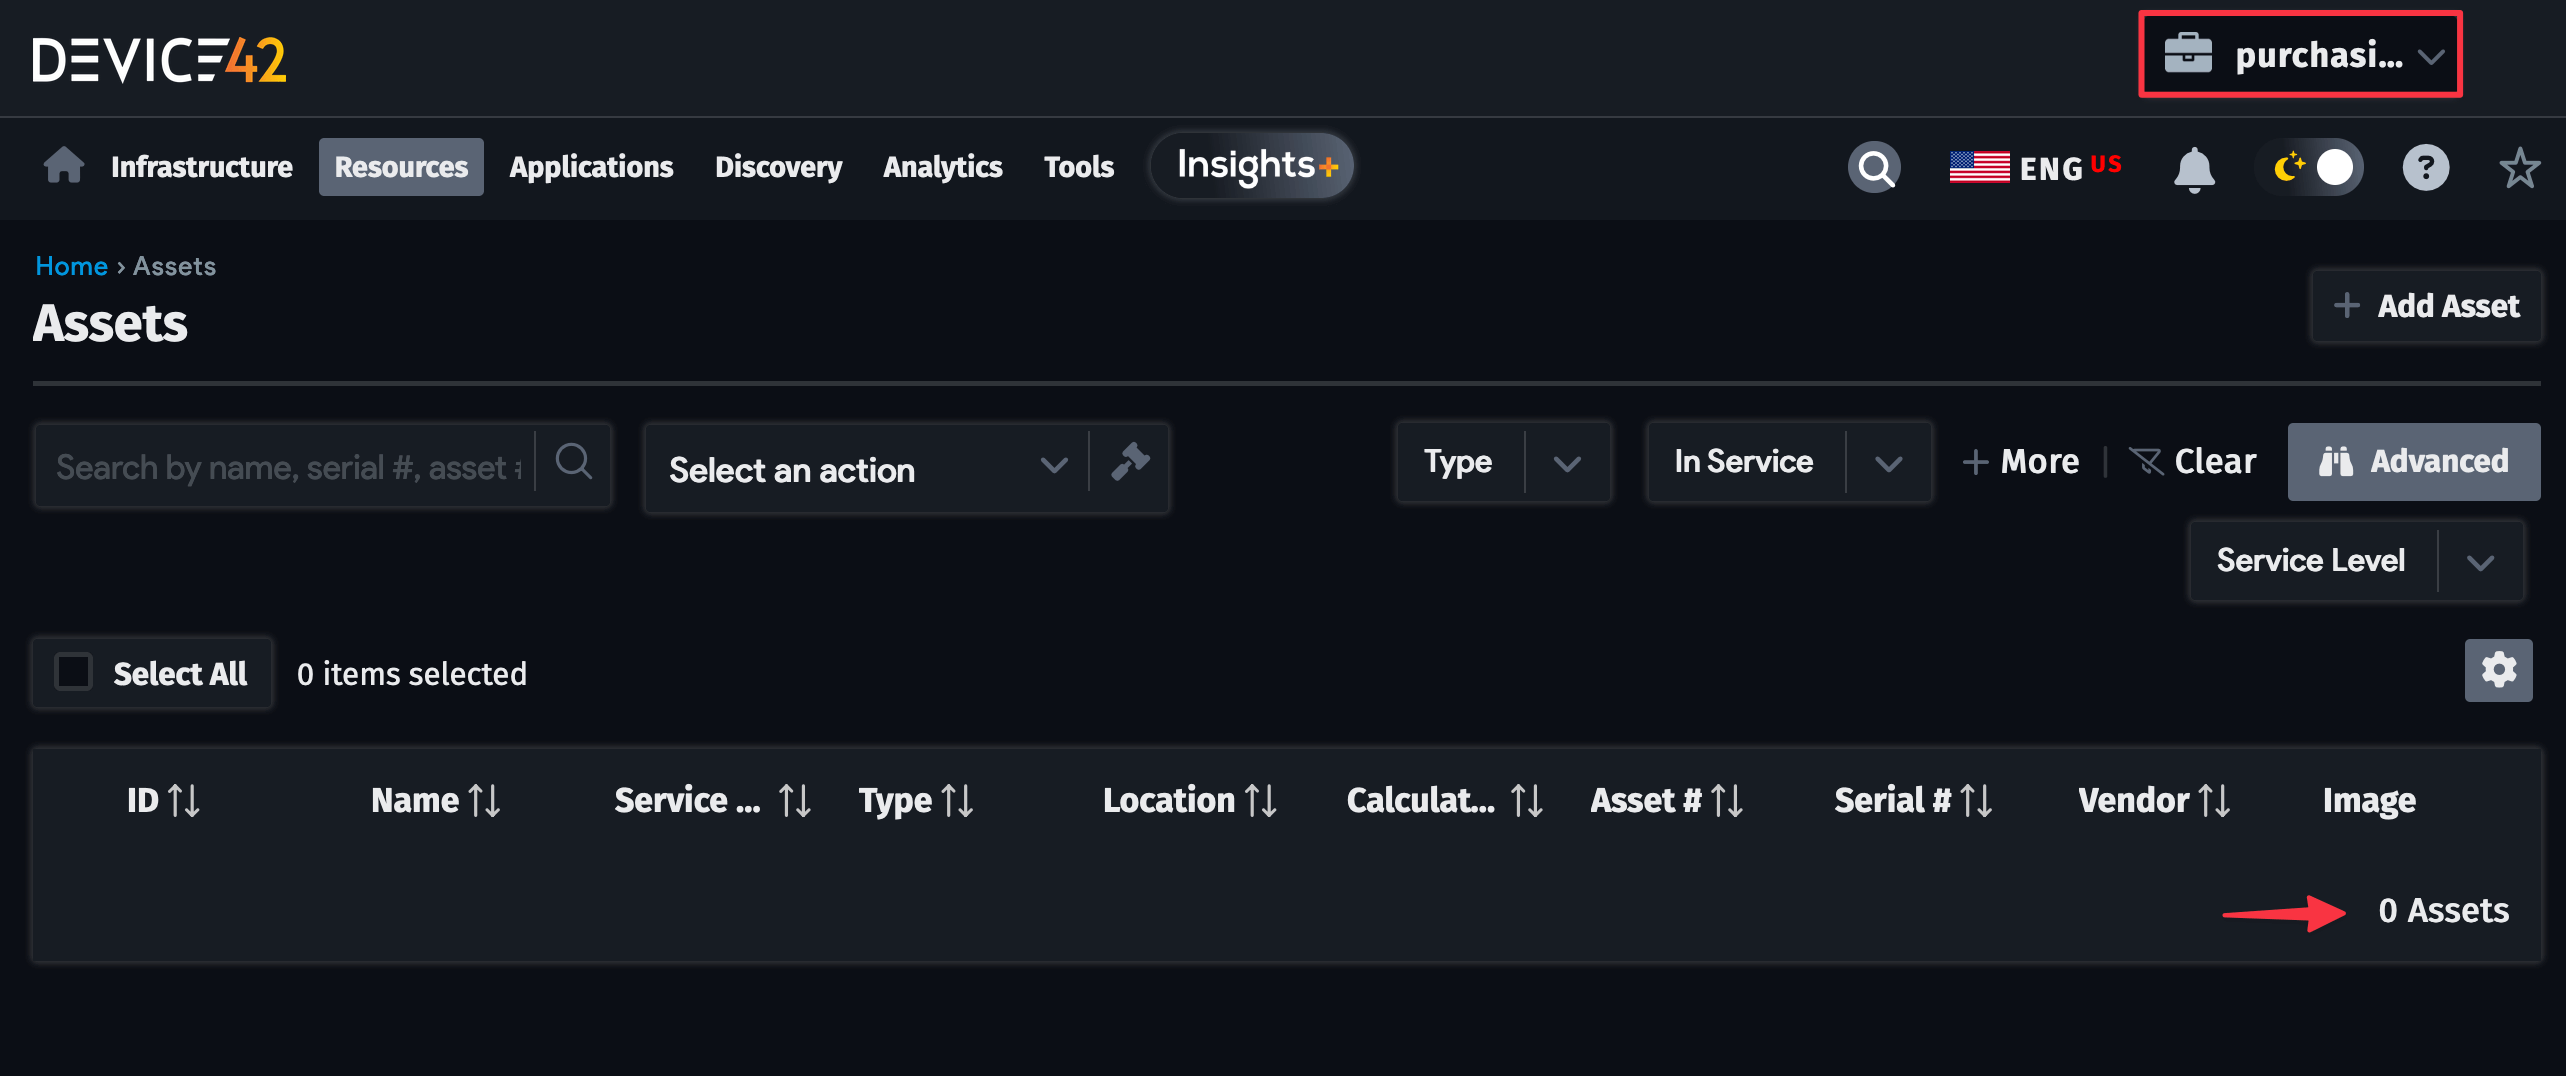
Check that user permissions change based on the lifecycle event. Log in to Device42 with the "purchasing" user credentials, and navigate to Resources > All devices. The updated device is no longer available to the "purchasing" user in the list page.
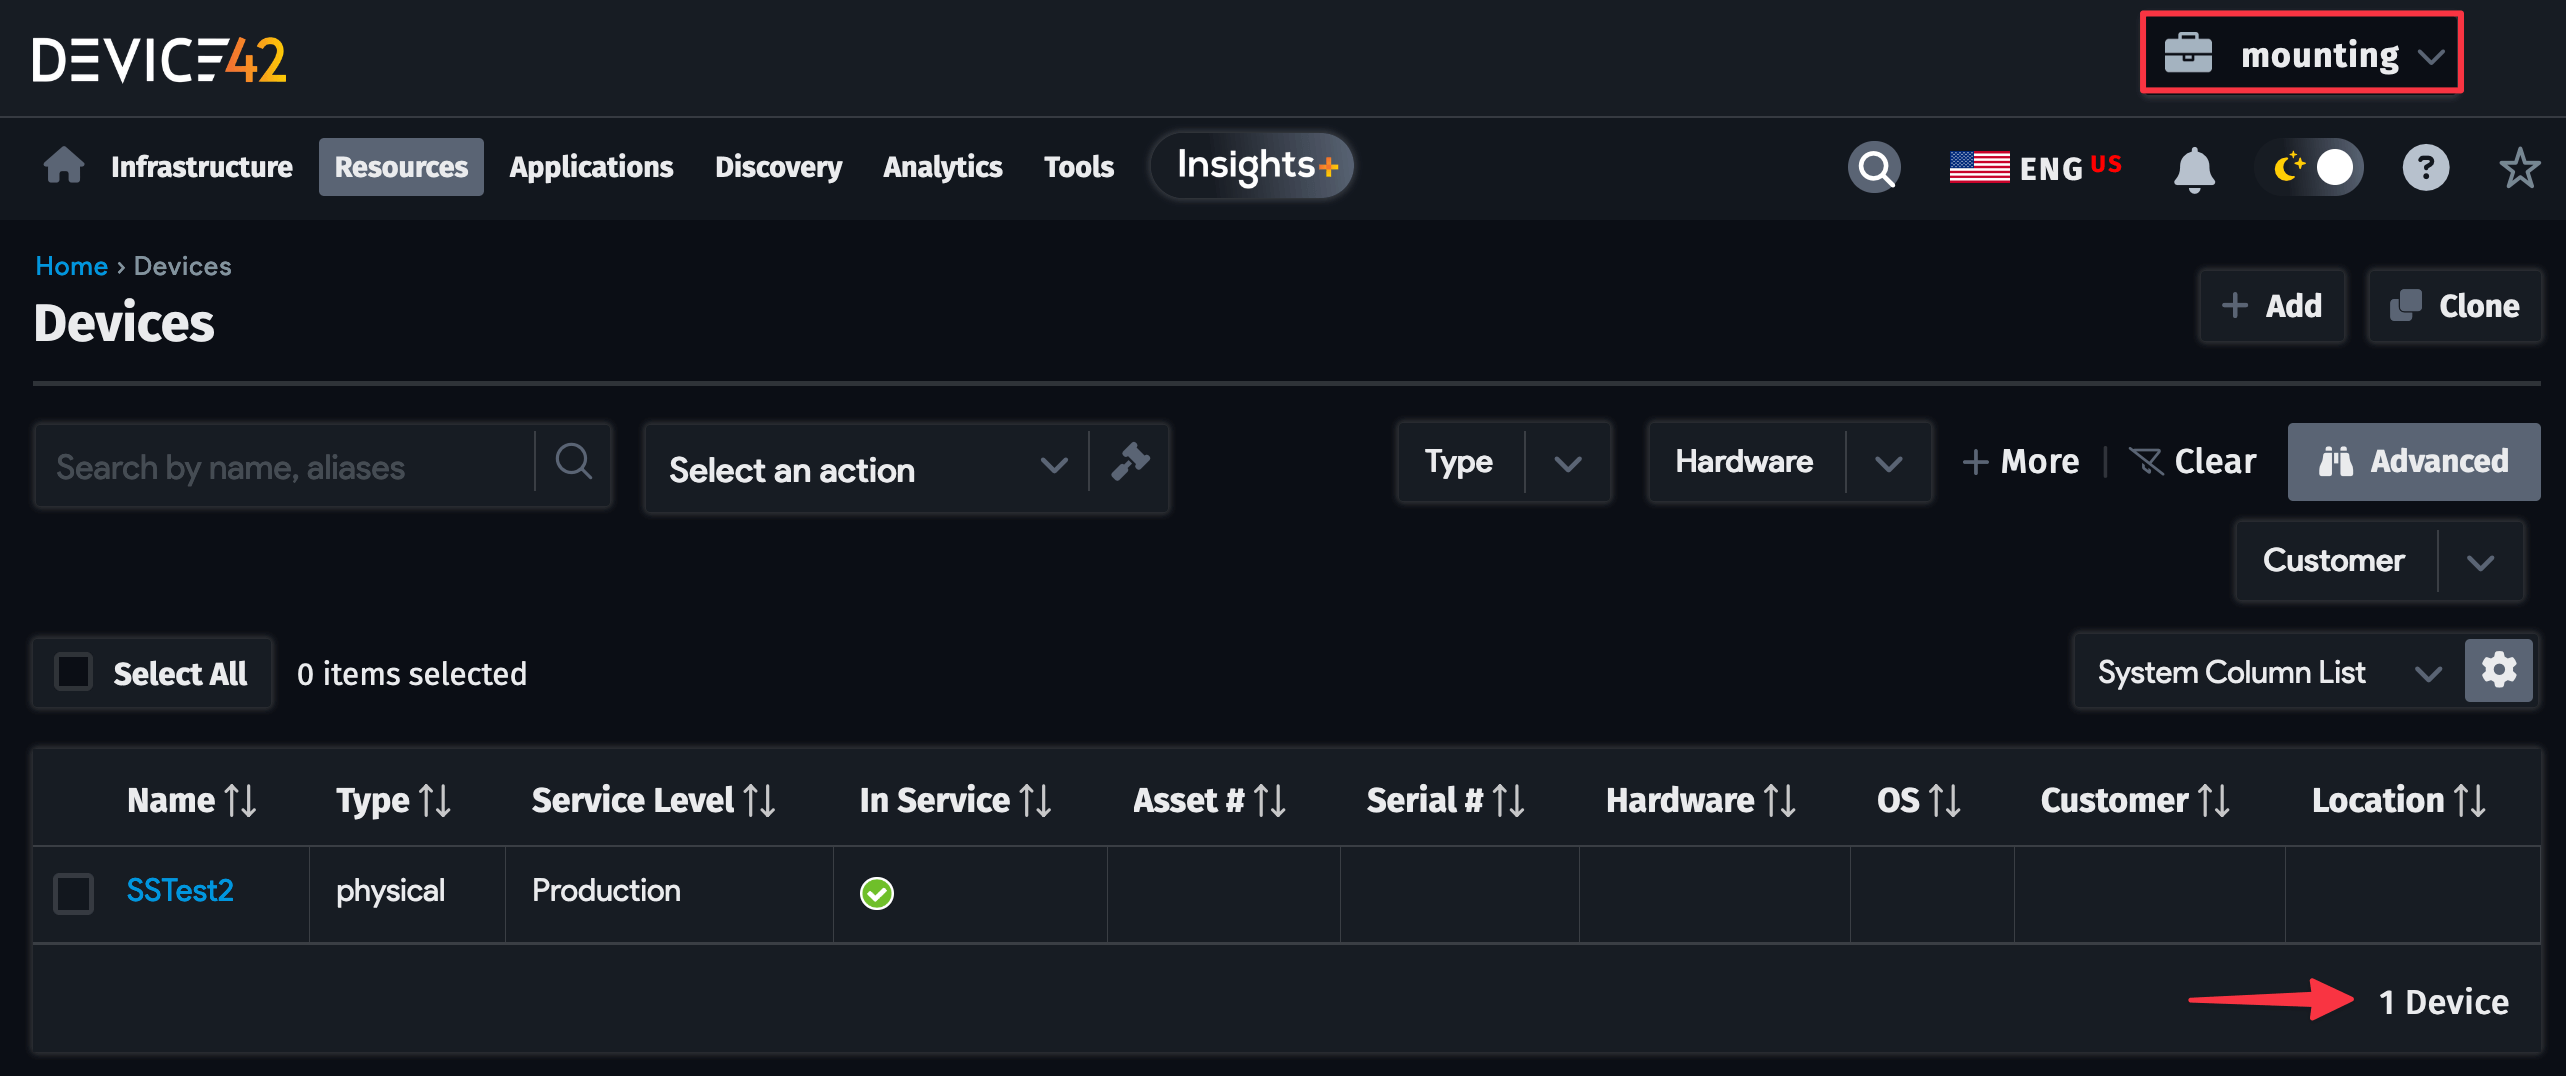
If you log in to Device42 as the "mounting" user, you should see the updated device. This confirms that the StackStorm-Device42 integration is working to create dynamic user permissions.