Add or Edit a Device
Devices represent the physical servers, virtual machines, blade chassis, clusters, and other compute resources in your environment. You can add devices manually or let discovery jobs populate them automatically.
This page covers the devices list page, the device details view, and how to add and edit devices. It also explains device type options, bulk actions, and what happens when you change a device type.
Discovery assigns the physical type to devices with hardware models. The other type and subtypes have been reclassified as the physical type and subtypes.
Devices List Page
Select Resources > Compute > All Devices to display a list of devices.
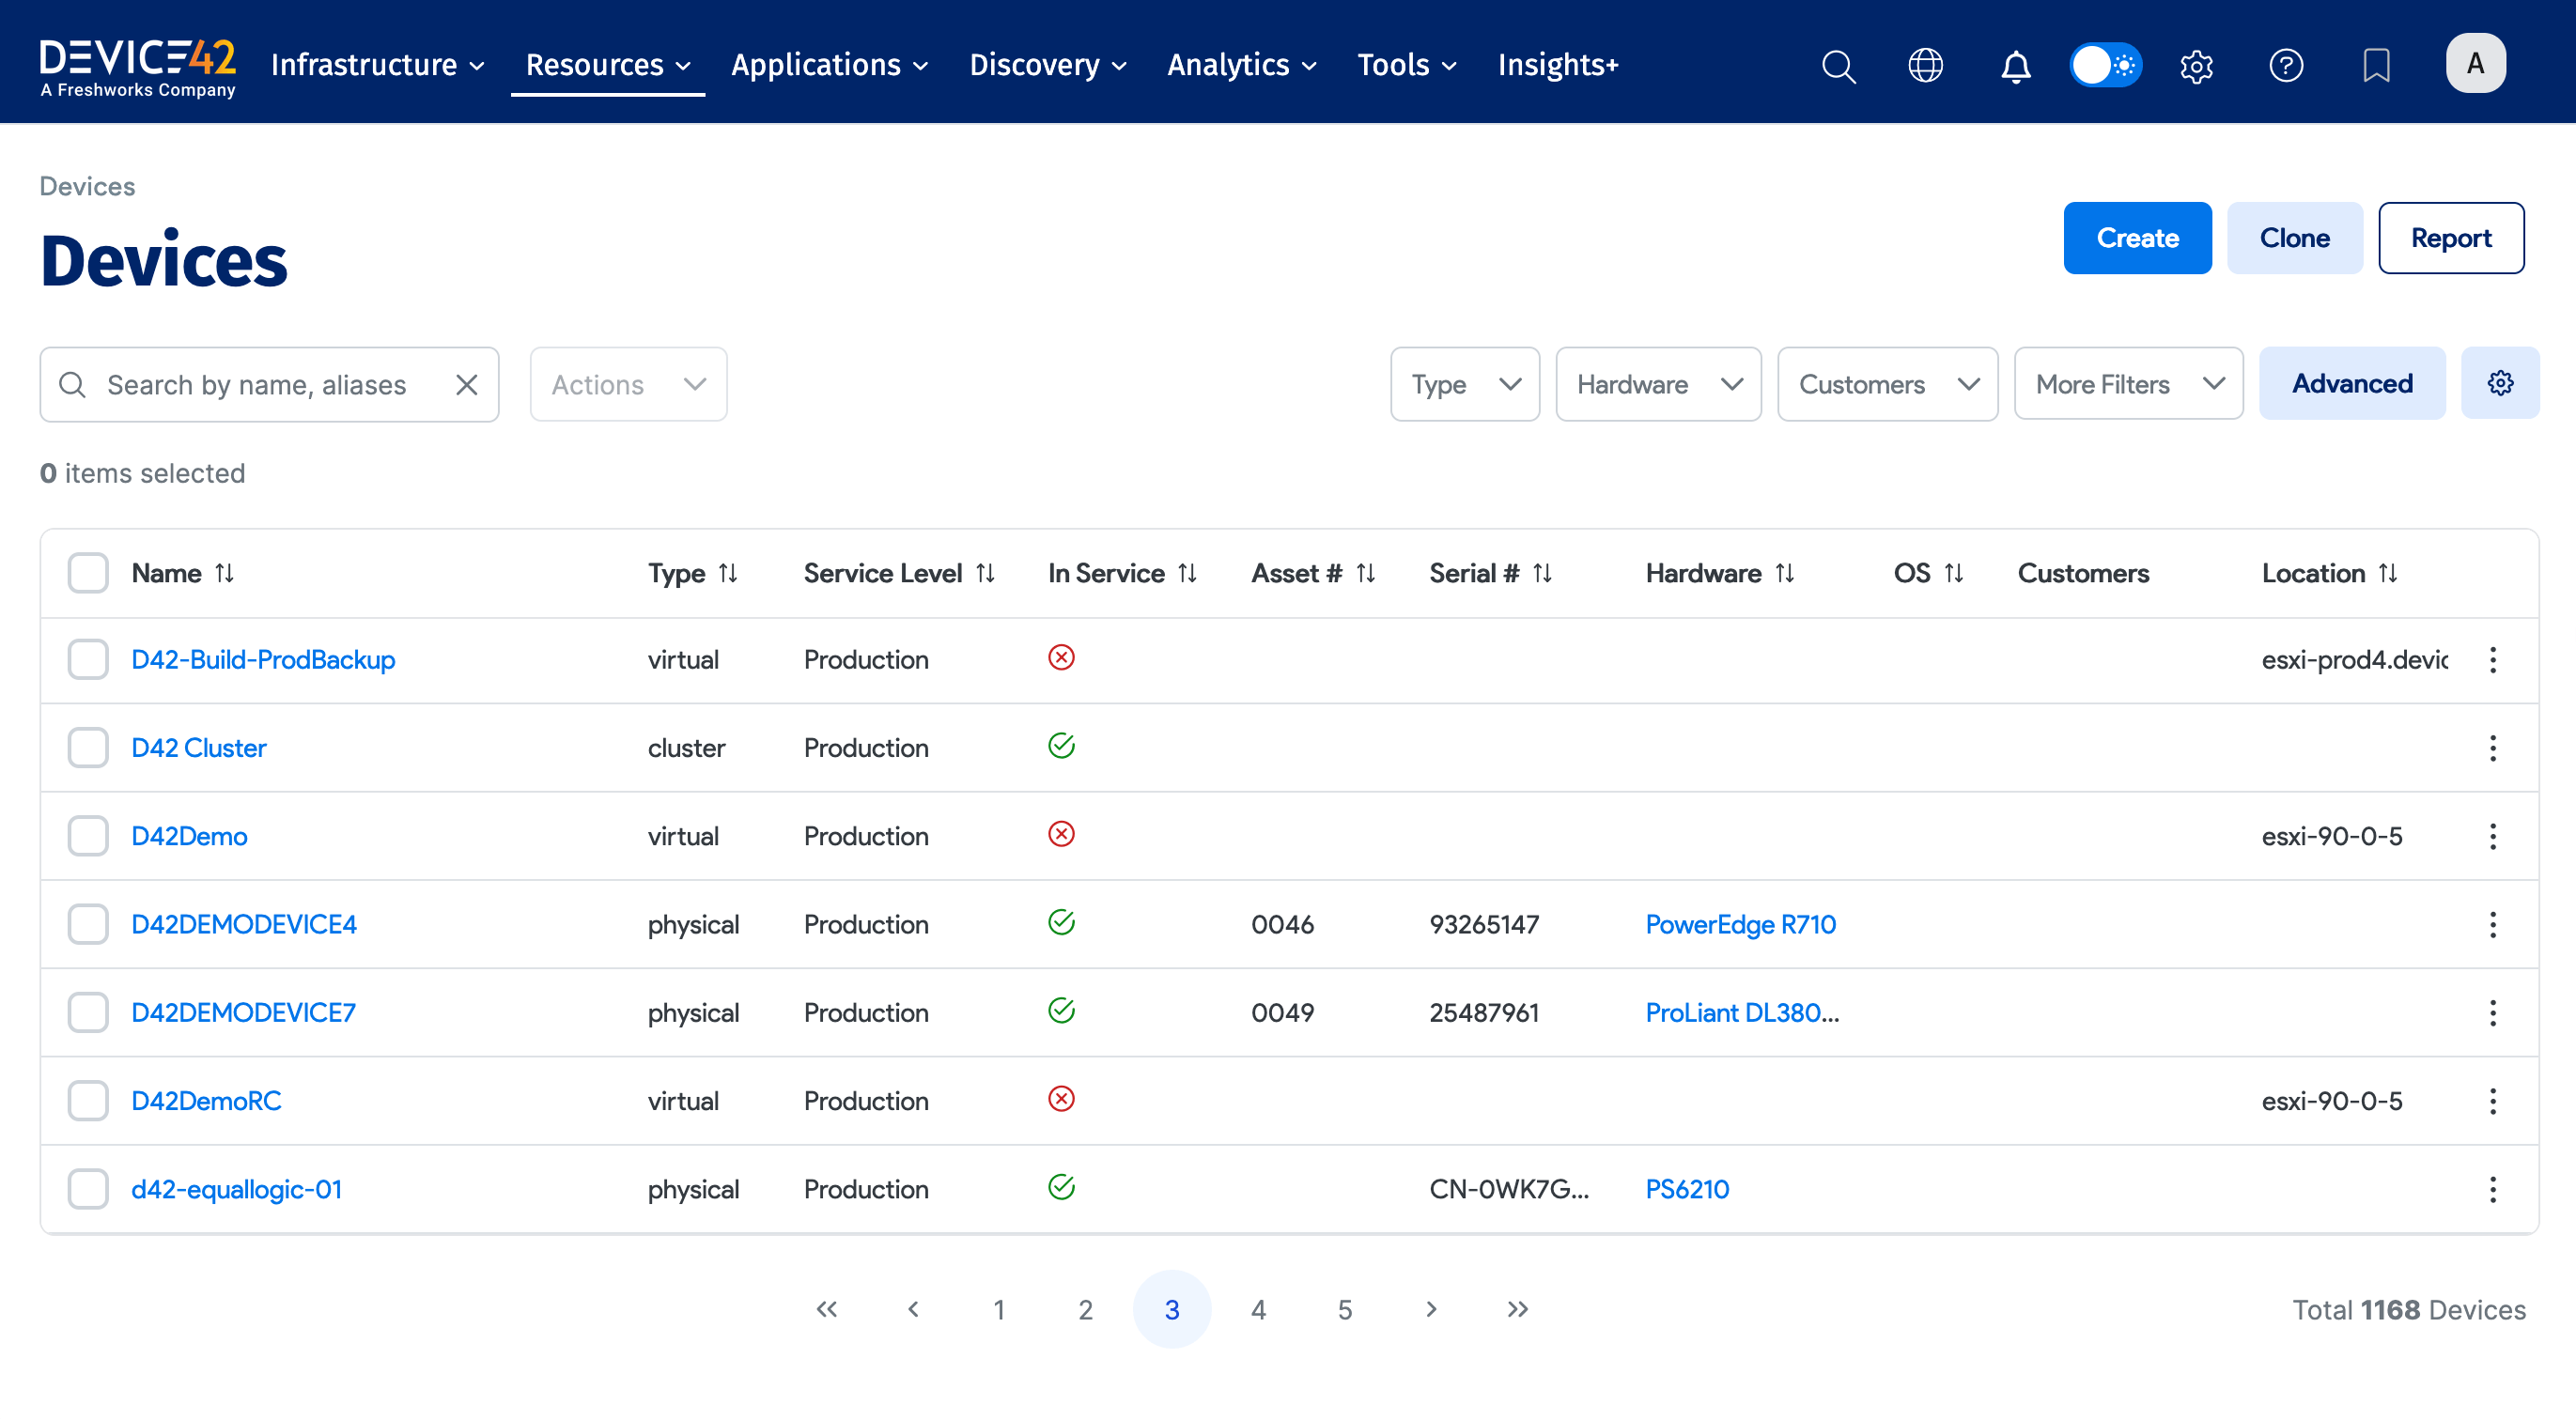
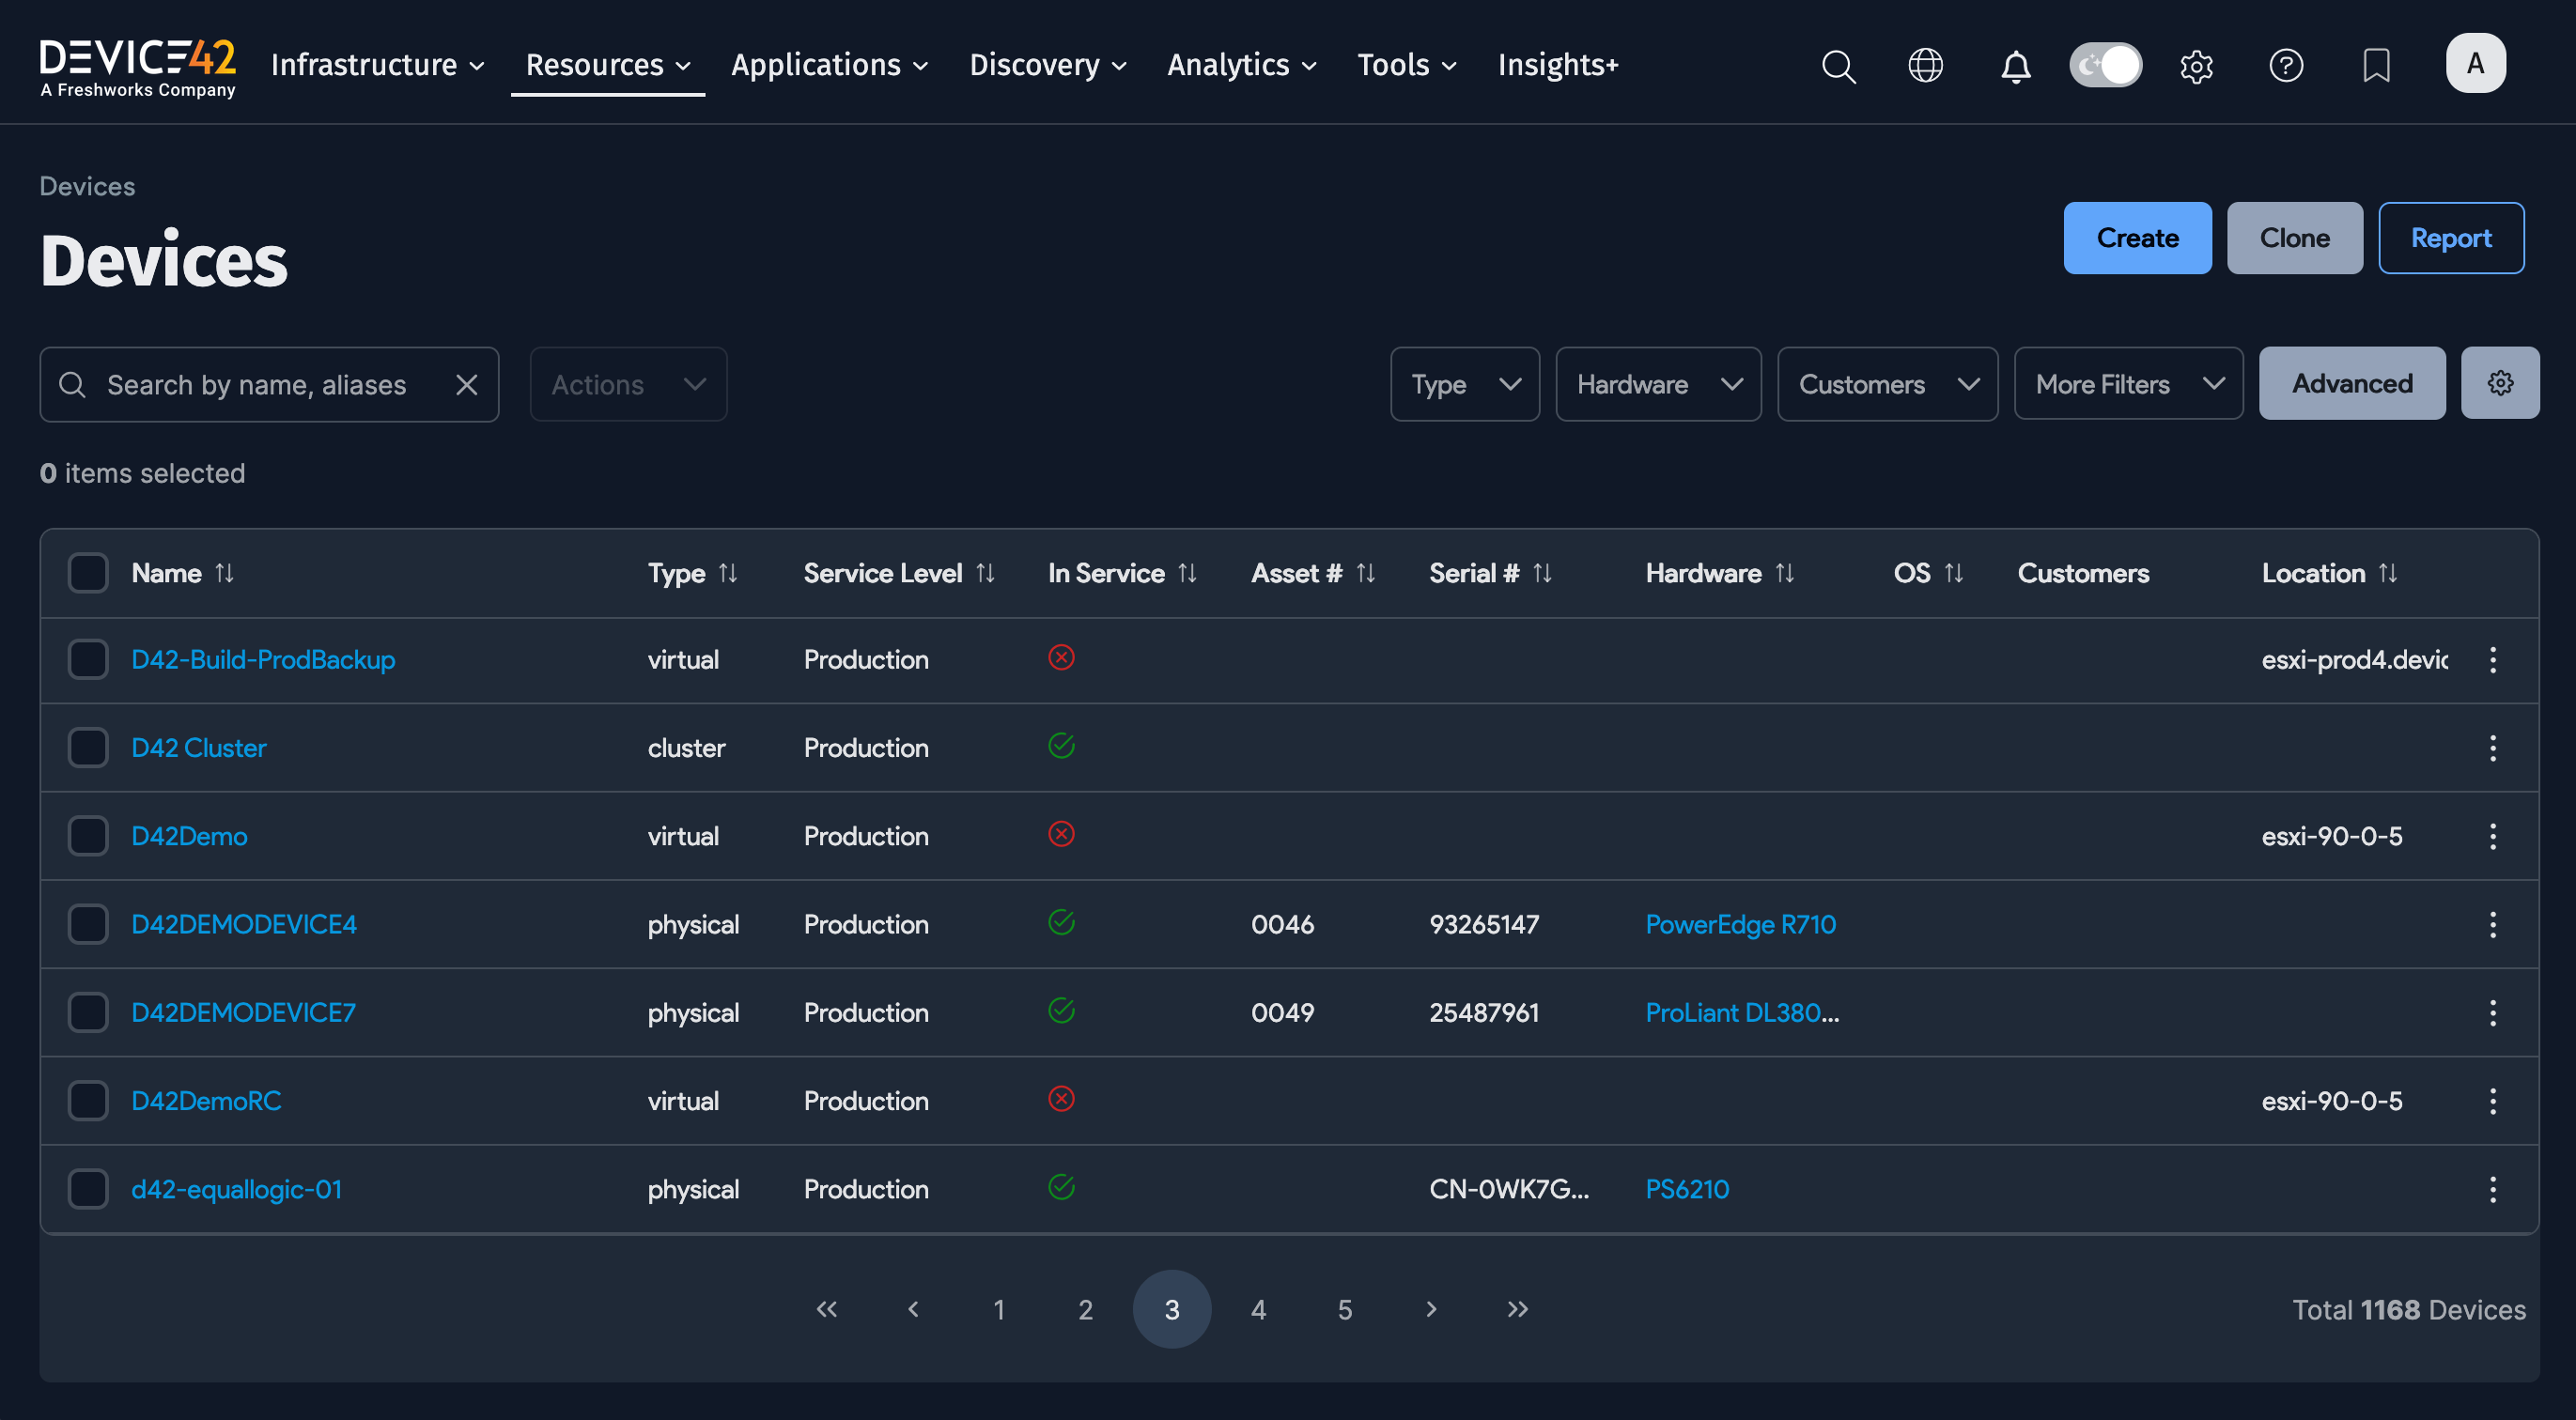
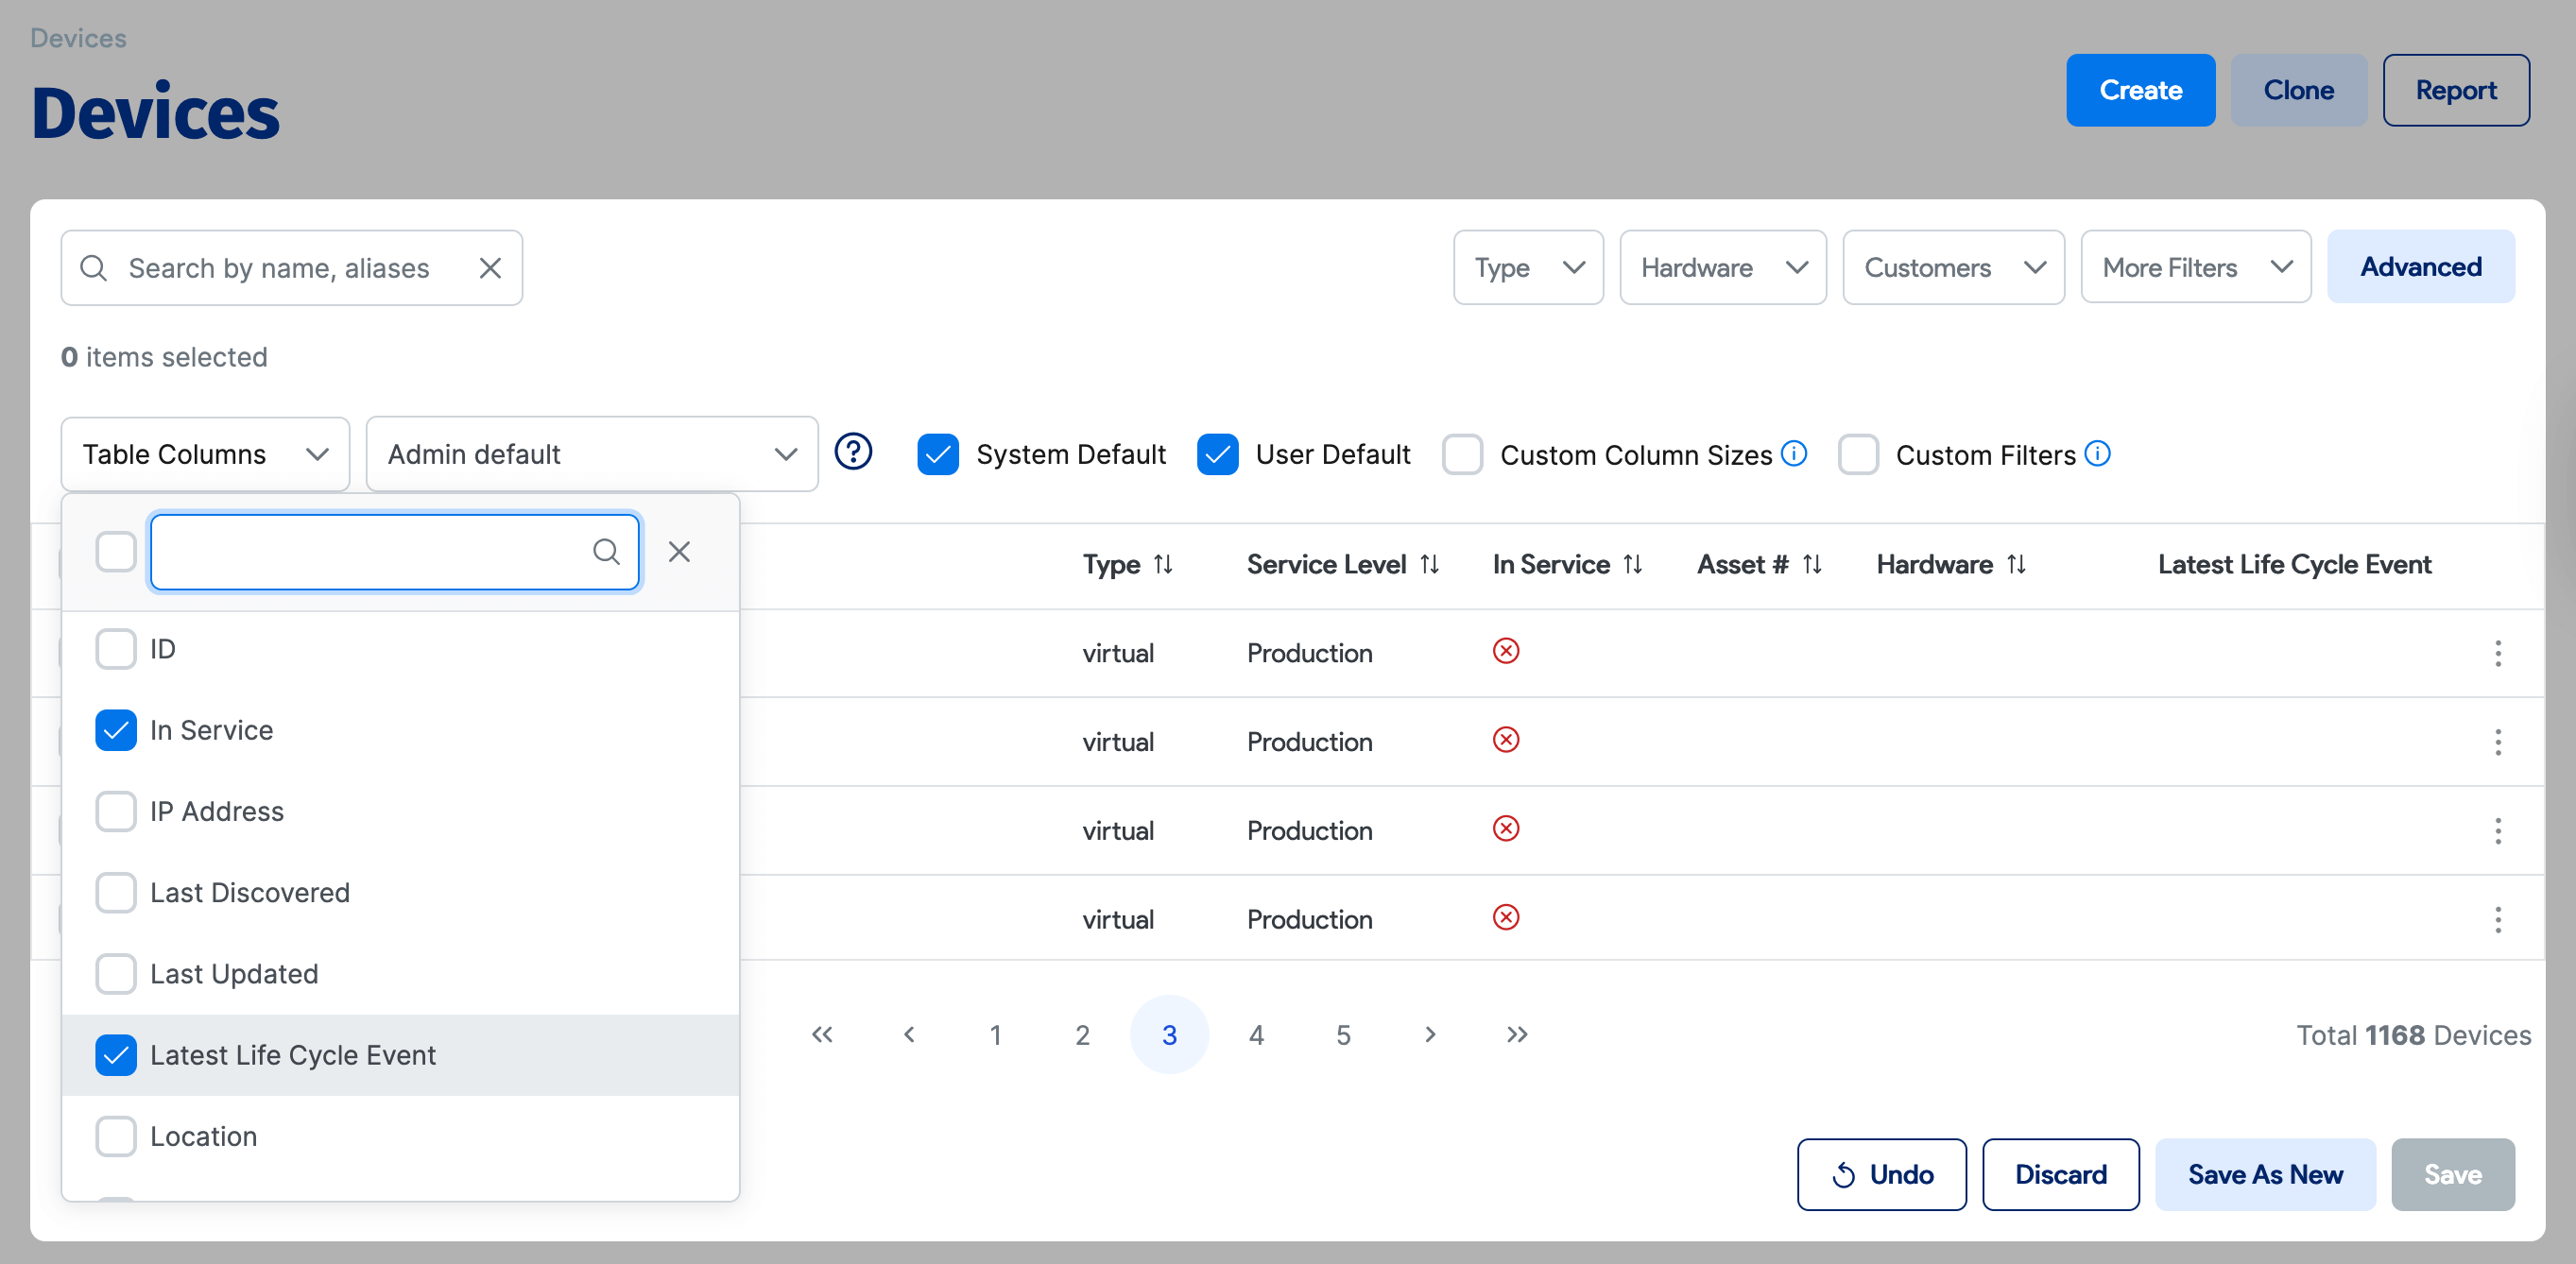
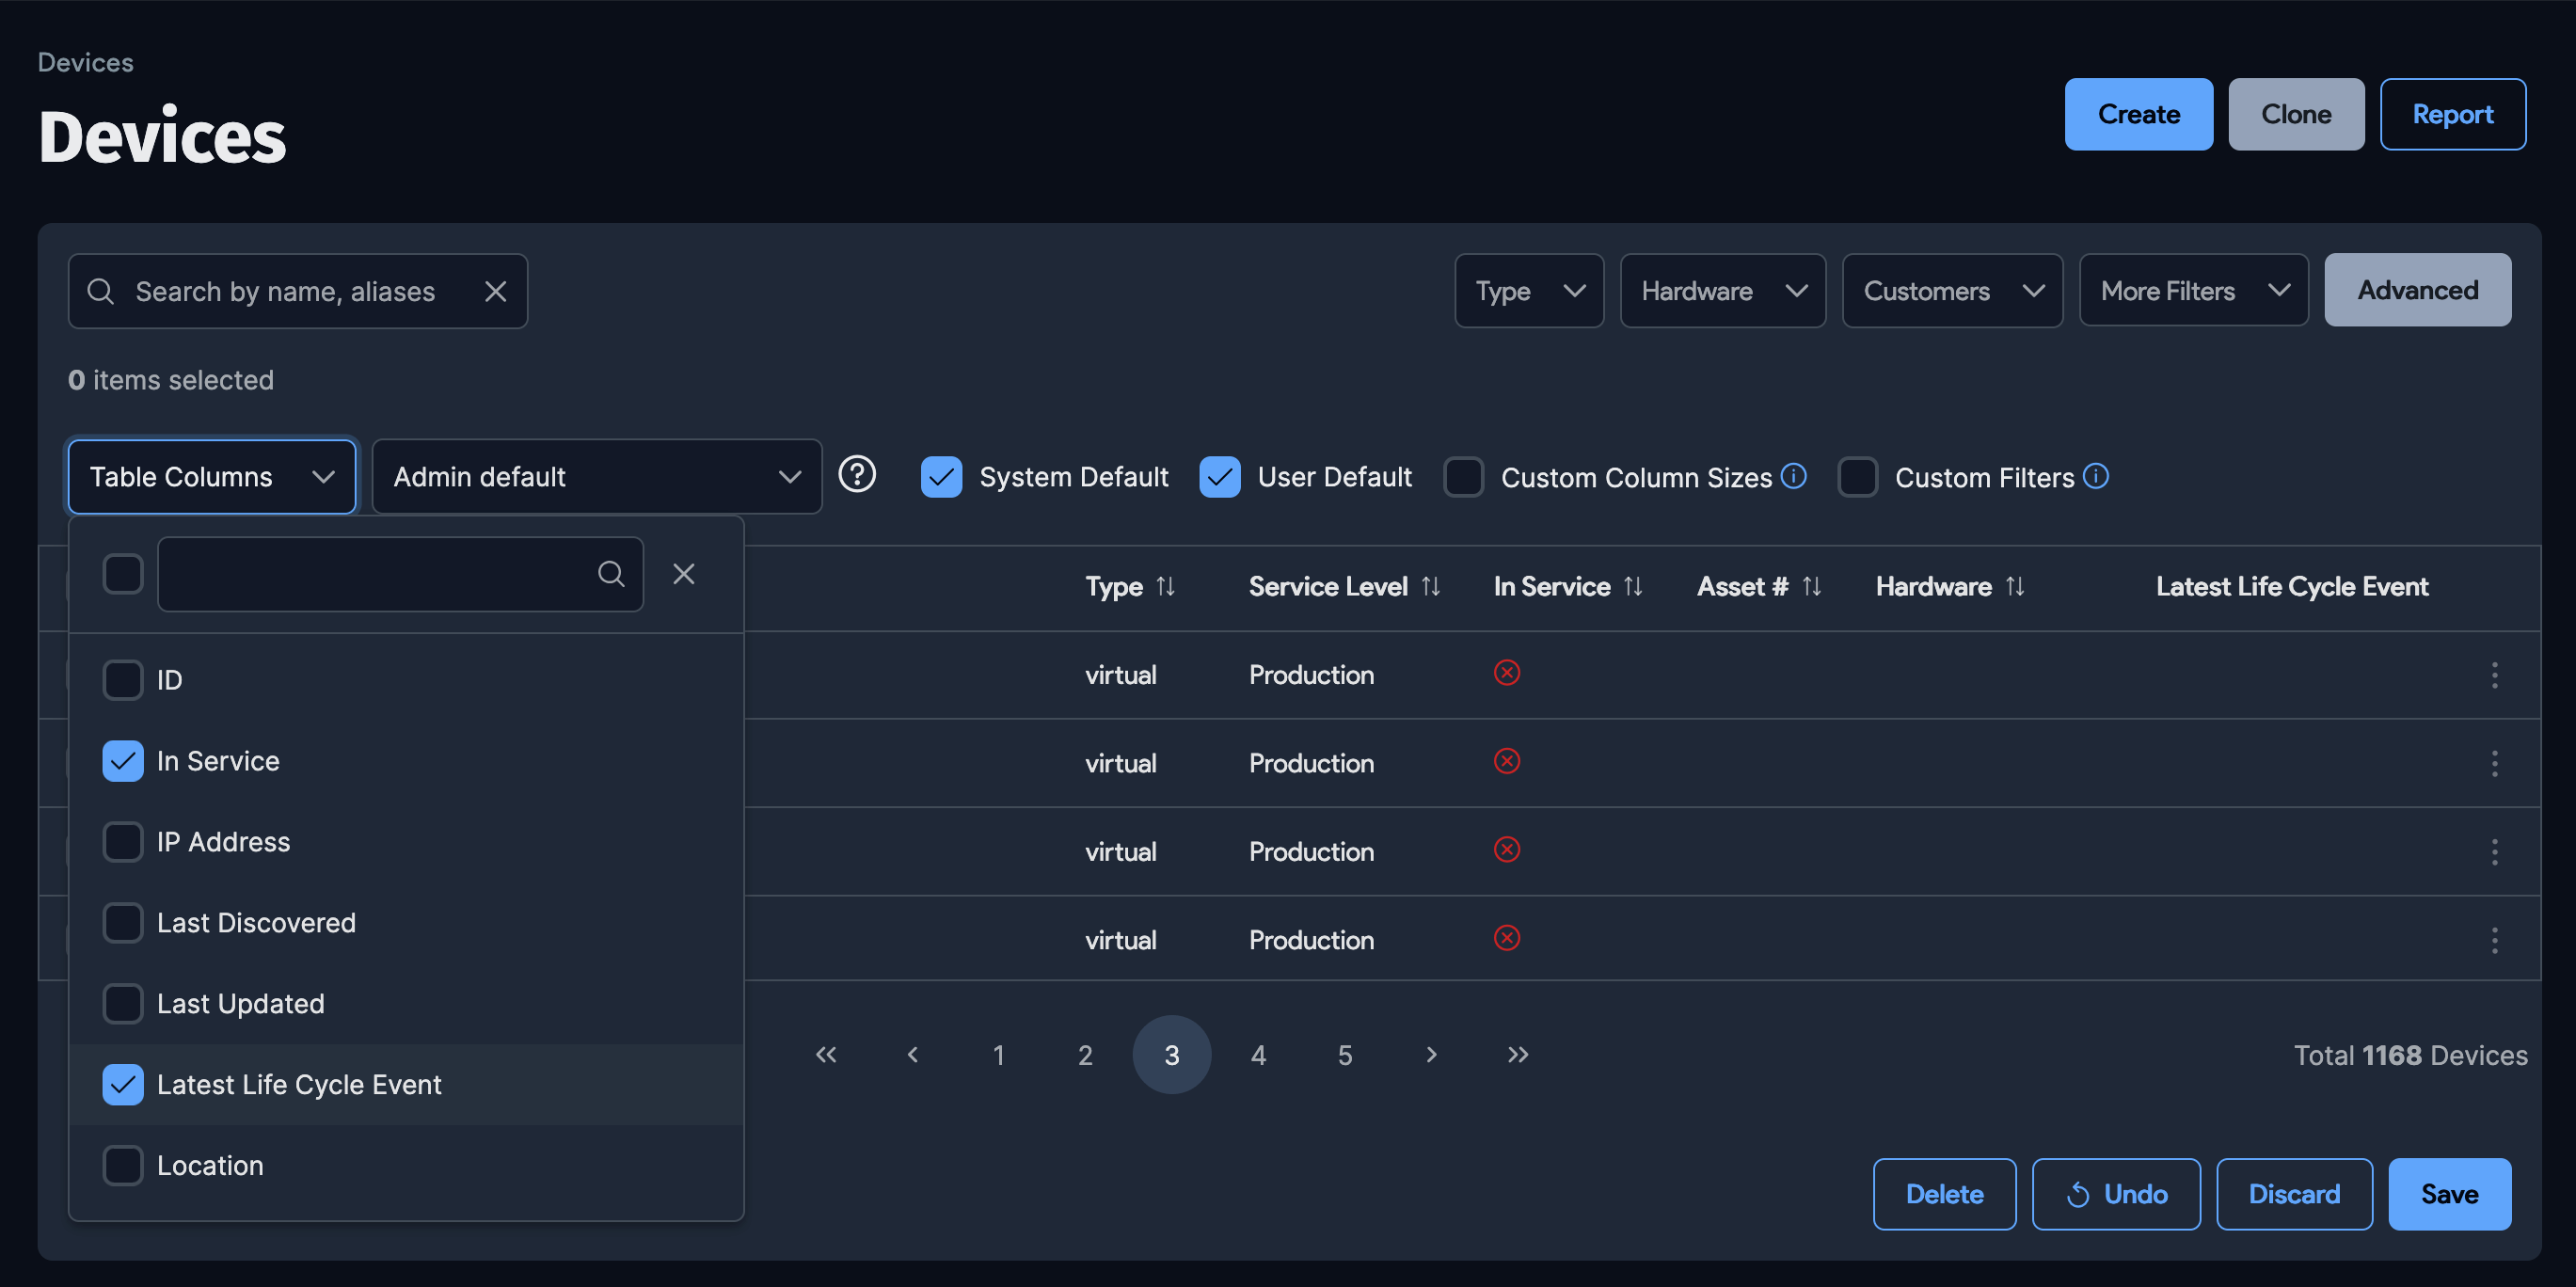
Configure the grid view to display the columns you want to see by clicking the gear icon. You can set the view as the System Default or the User Default using the checkboxes.
The Latest Life Cycle Event is a useful column to add to the default view for tracking the status of a device.
Device Details View
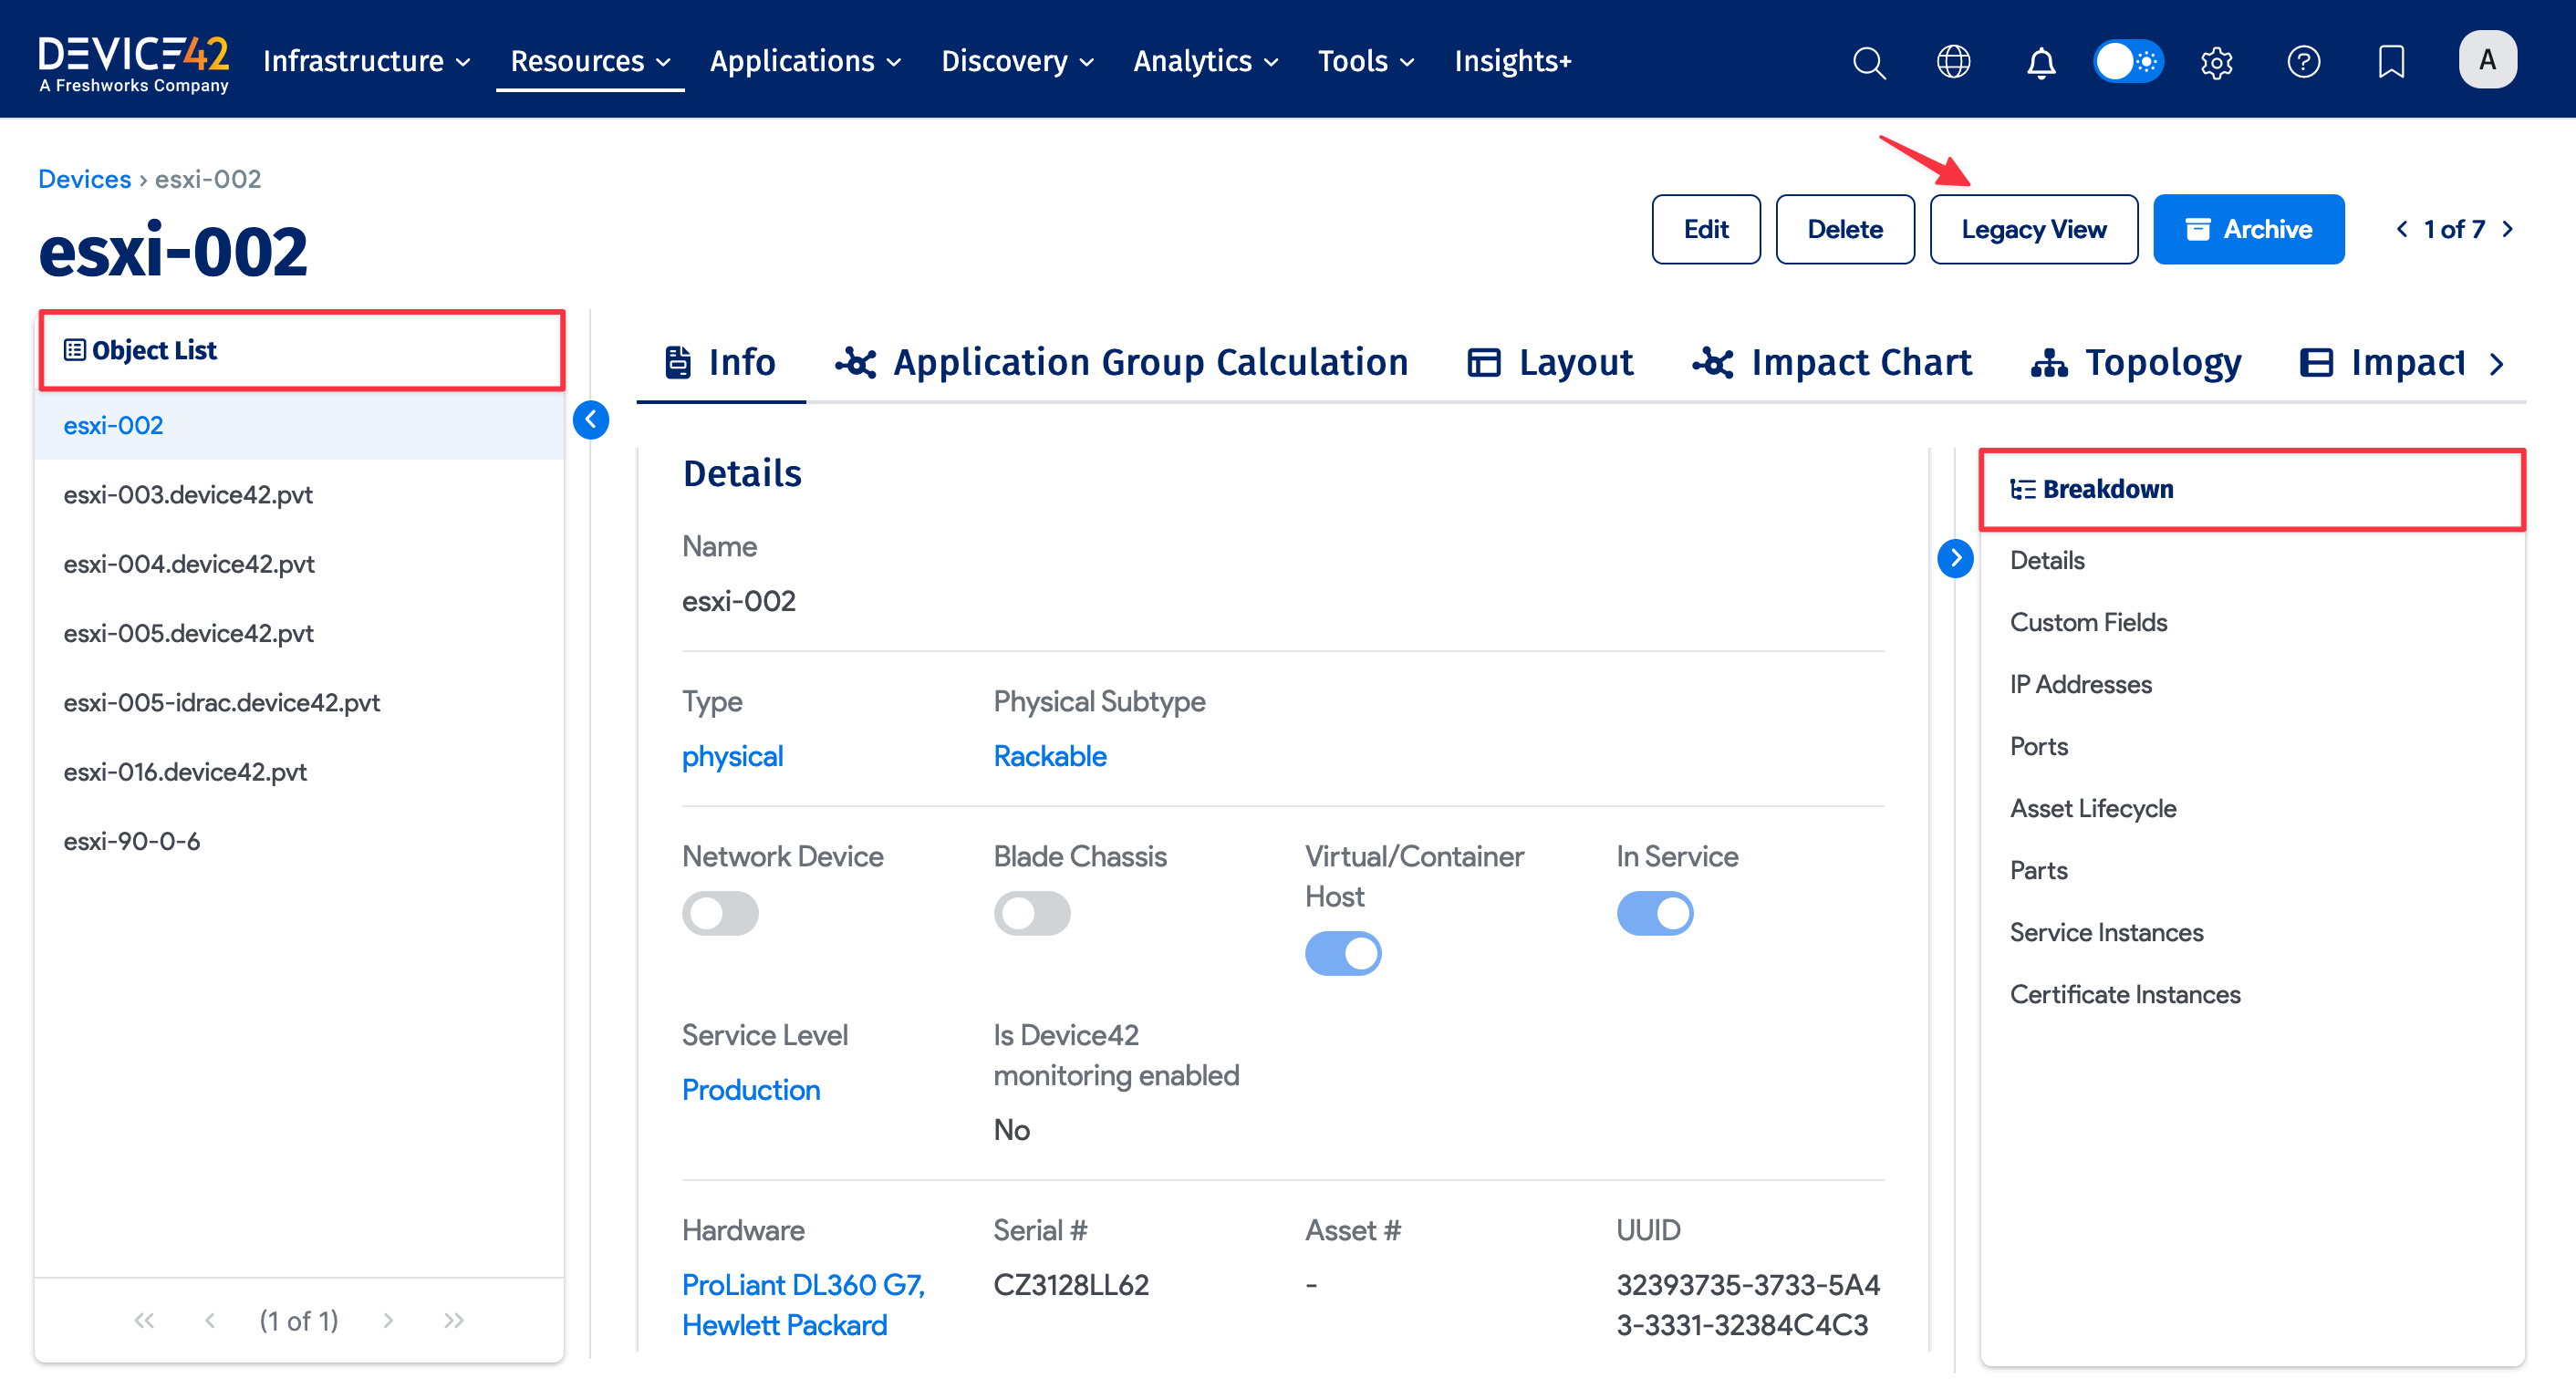
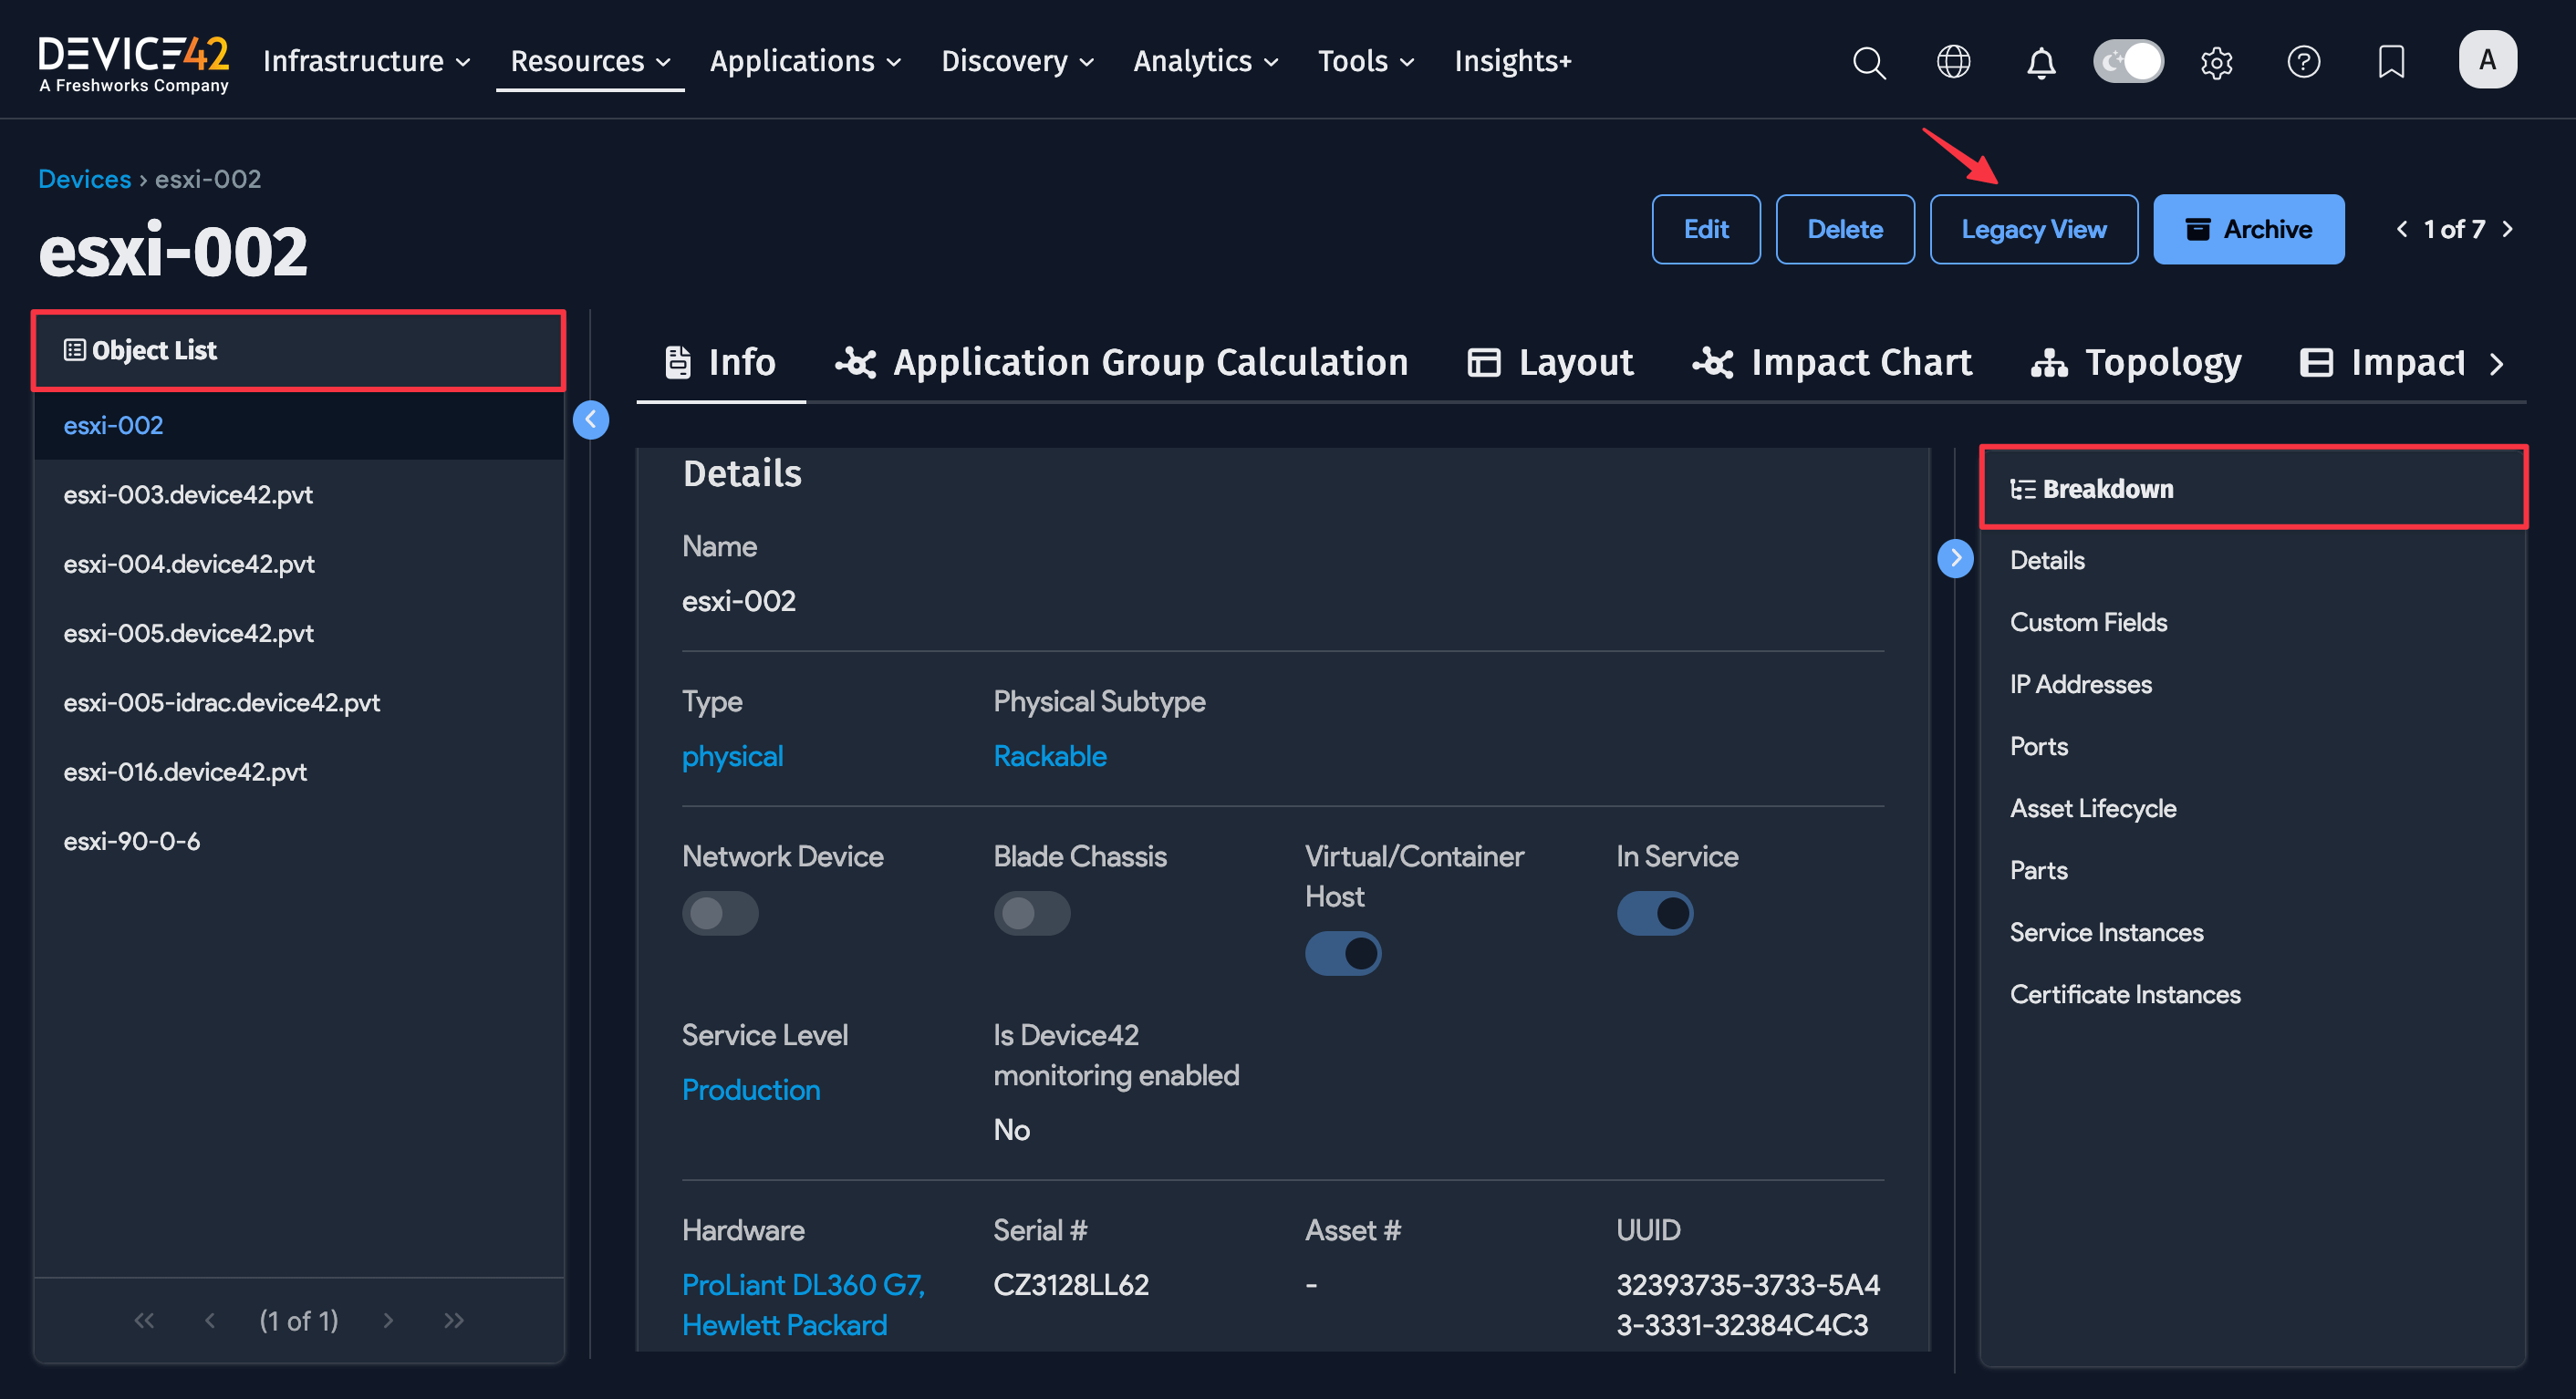
Click a device's name to open the device details view.
The device details page has two panels that you can hide and expand as needed:
- Object List (left): Navigate to different devices without returning to the list page. This panel displays the same items from the list page grid, and any filters or searches you applied carry over.
- Breakdown (right): Navigate between sections of the selected device's details.
UI Notes:
-
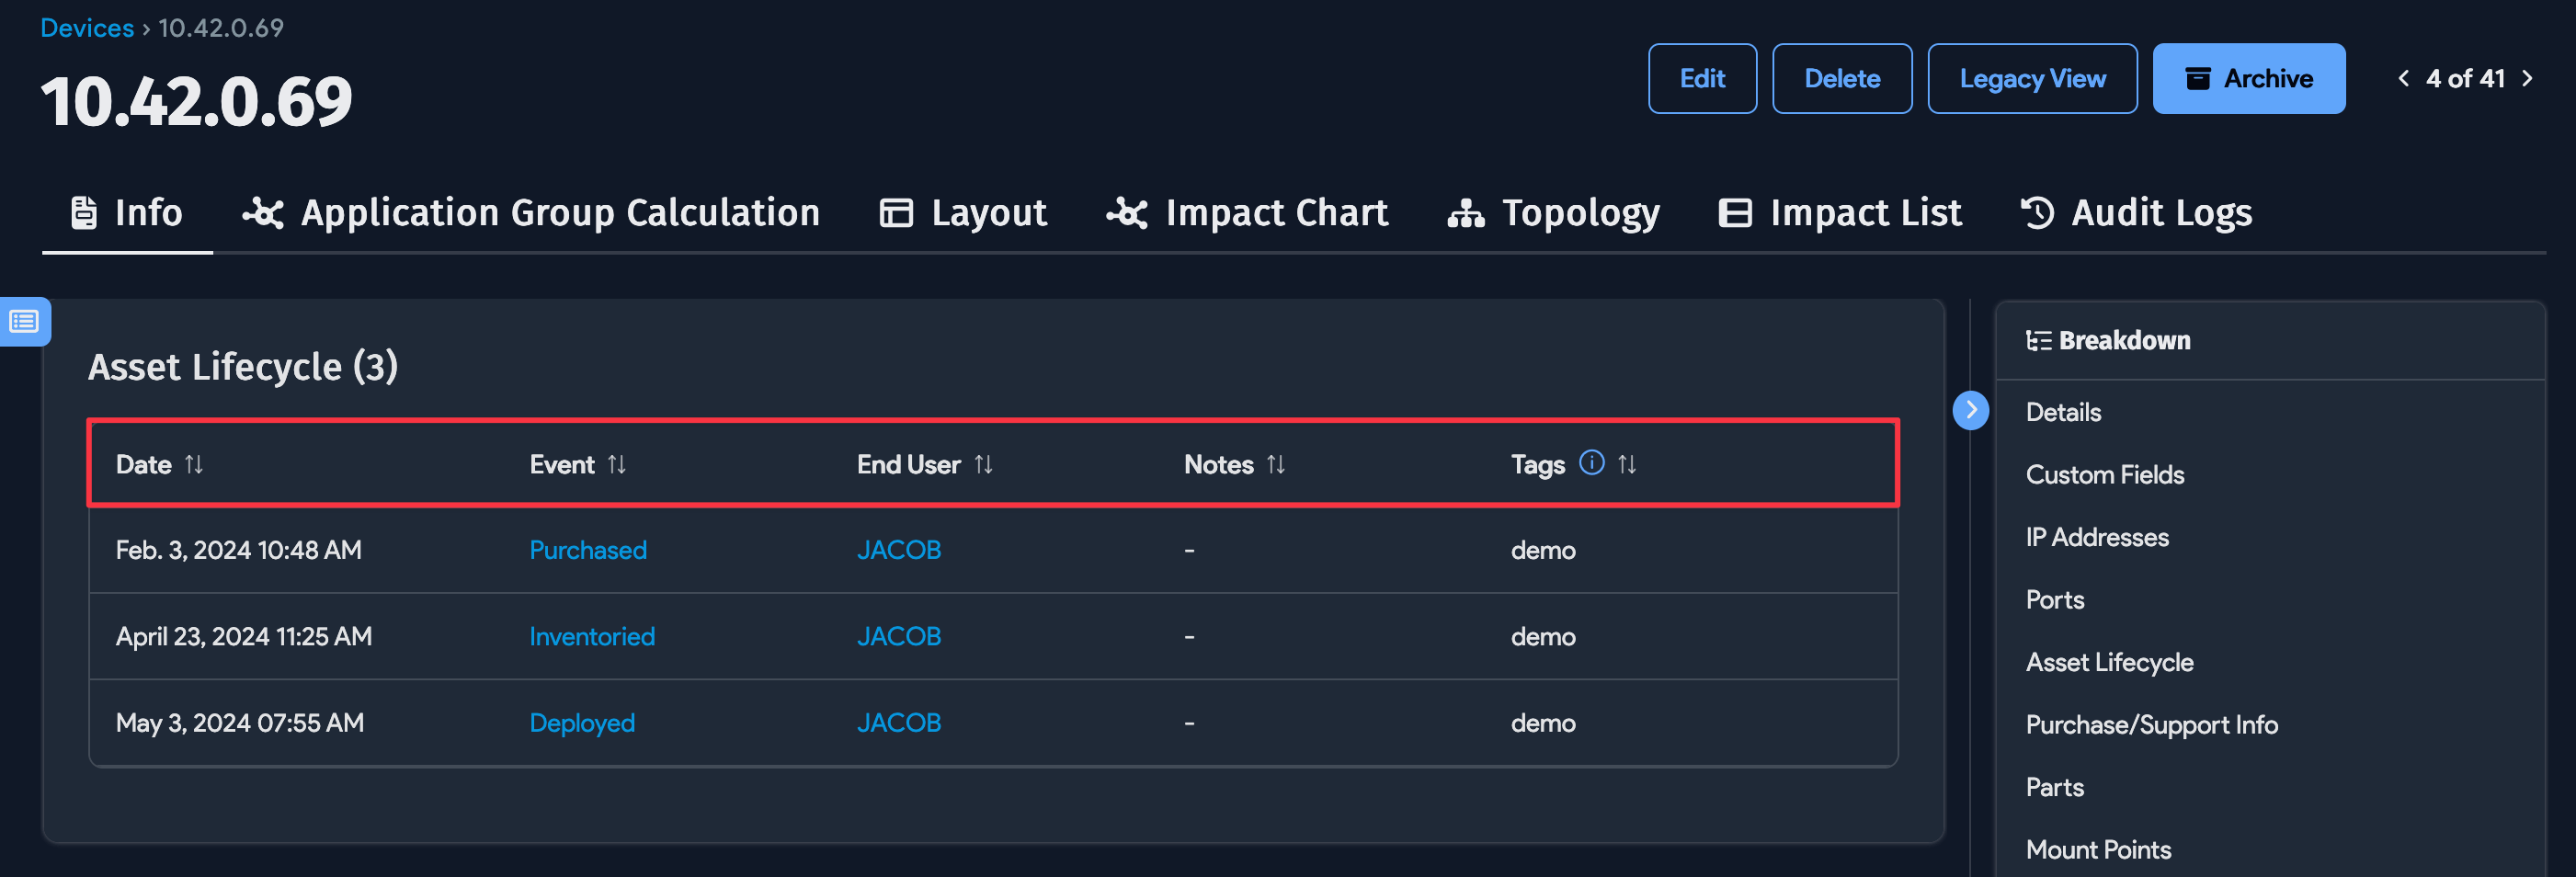
Columns under the Asset Lifecycle subview can be sorted in ascending or descending order.

-
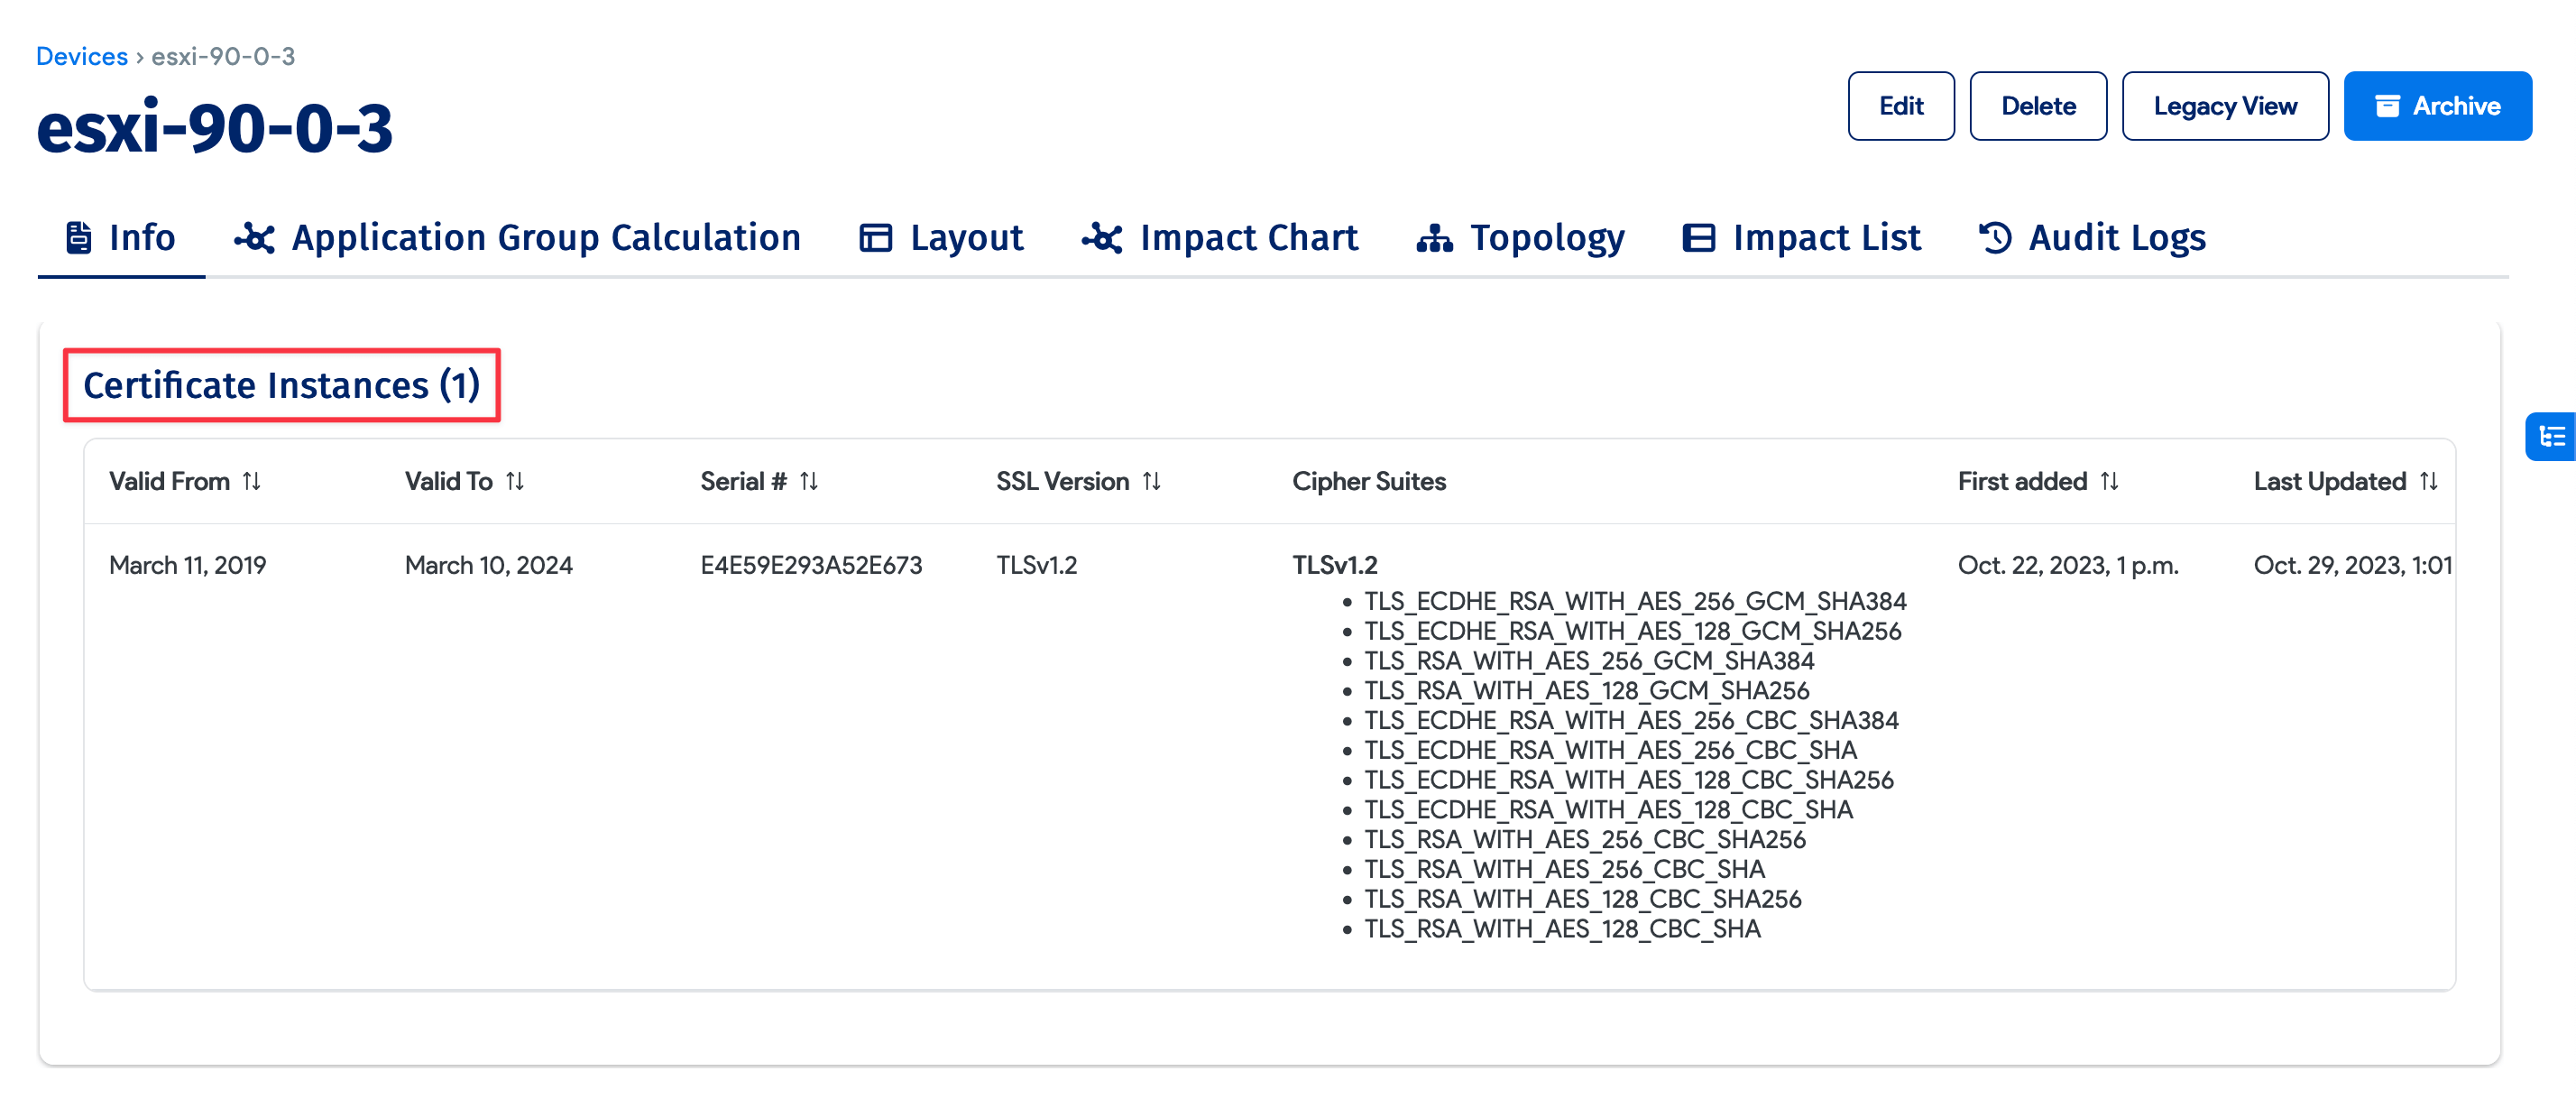
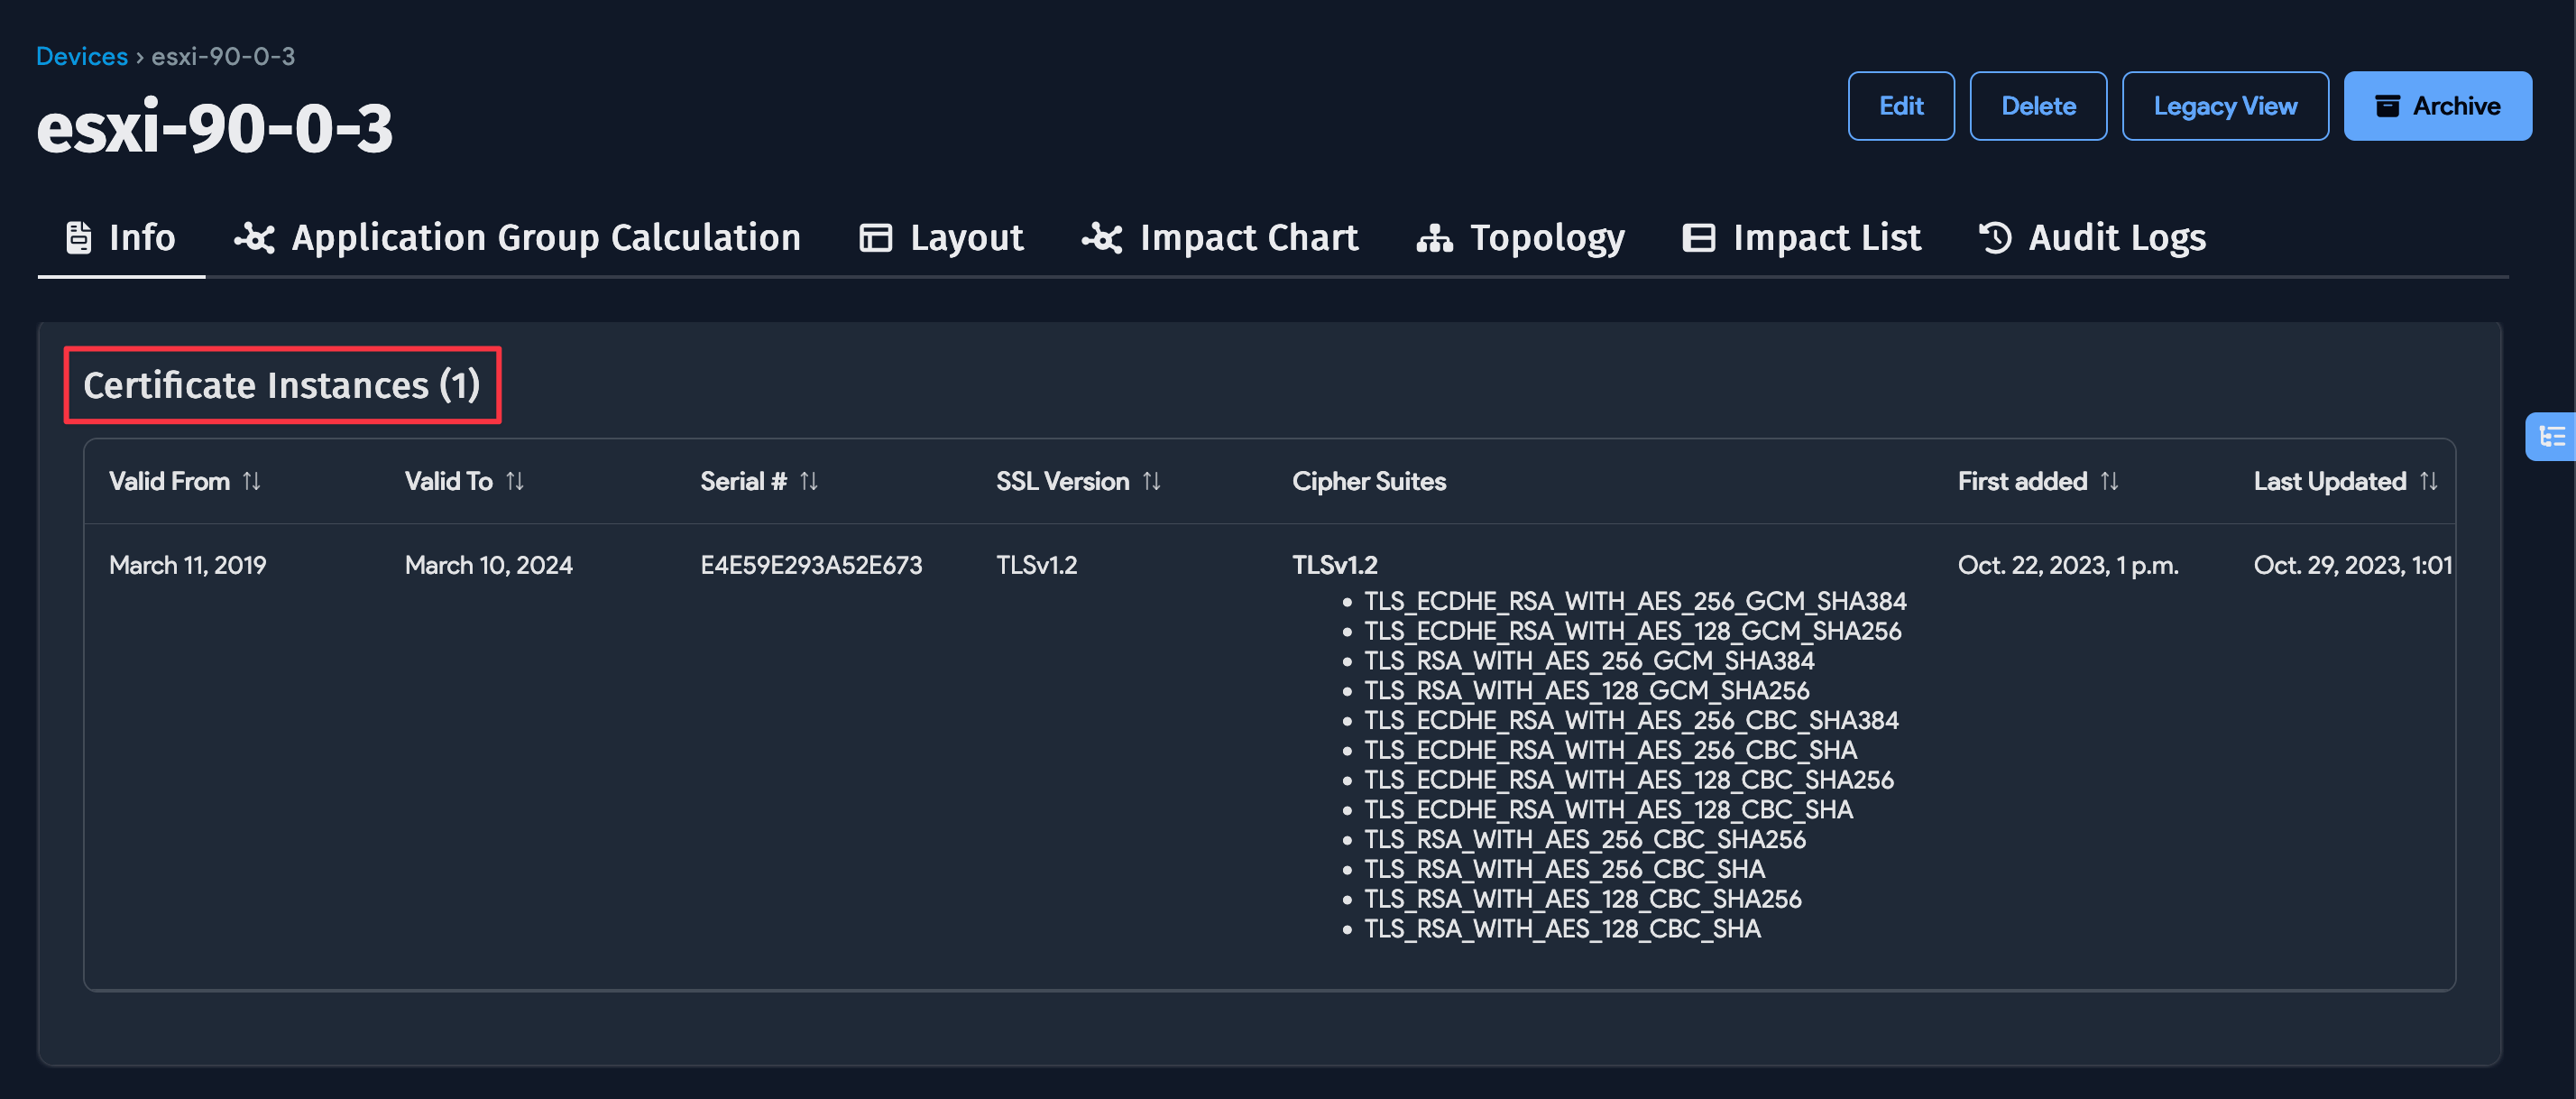
Discovered Certificate Instances are displayed in the device details view.
Object Category Visibility
The Object Category field is hidden when Role-Based Access Control (RBAC) is turned off globally. To see the field on view pages, use the Legacy View button.
The following Actions on the Devices list page are hidden when RBAC is off:
- Set Object Category
- Delete Object Category
You can enable RBAC under Tools > Settings > Global Settings.
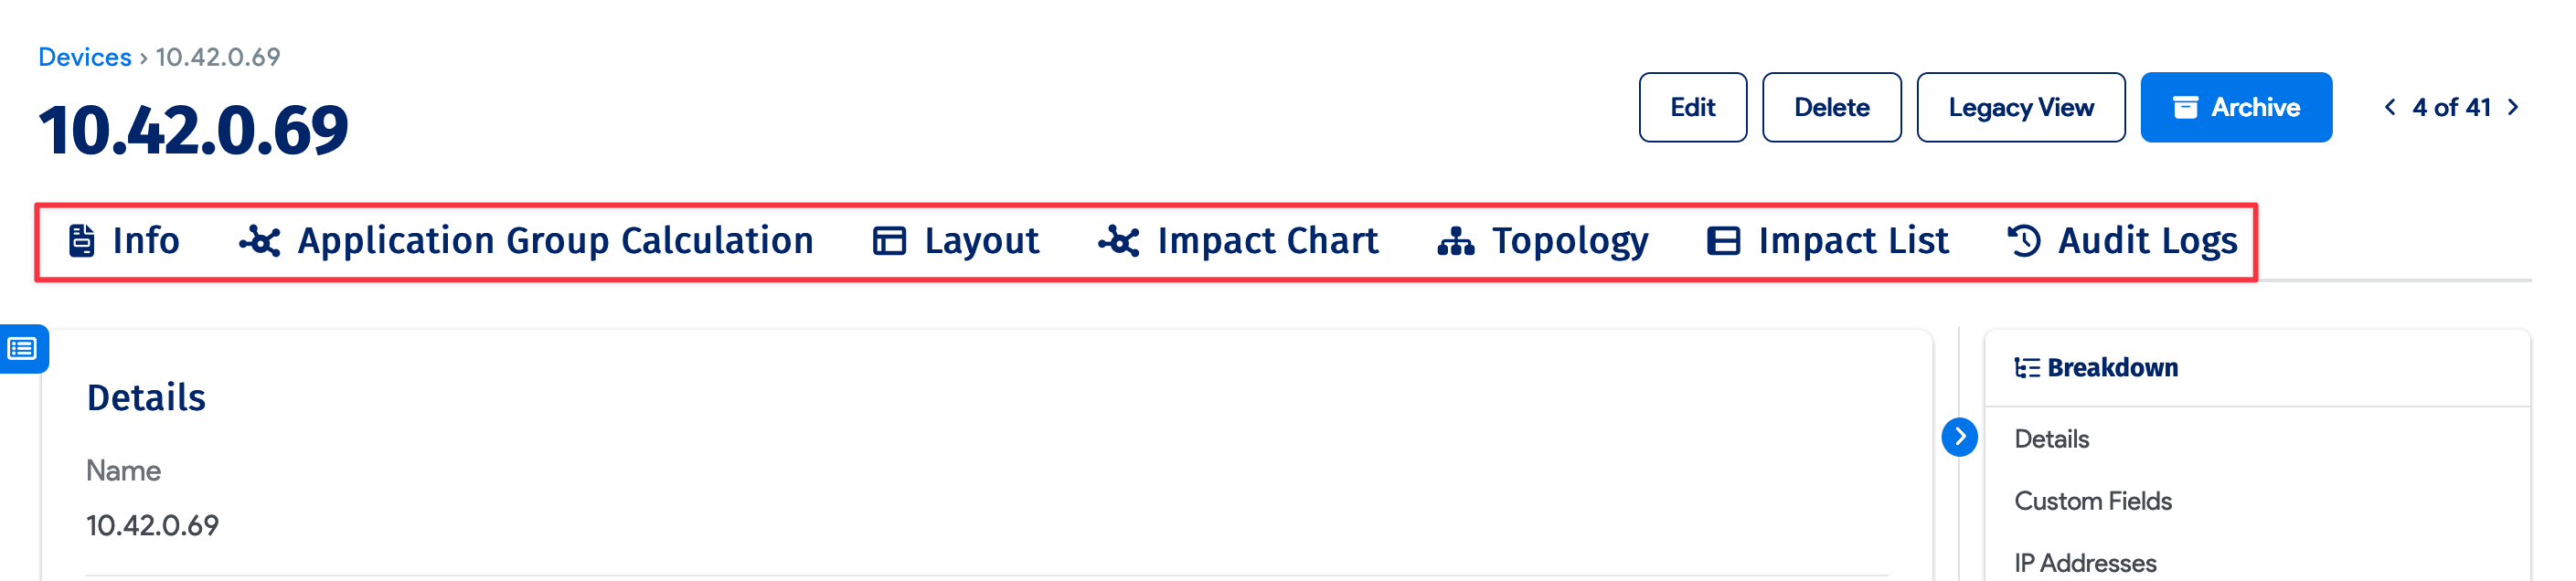
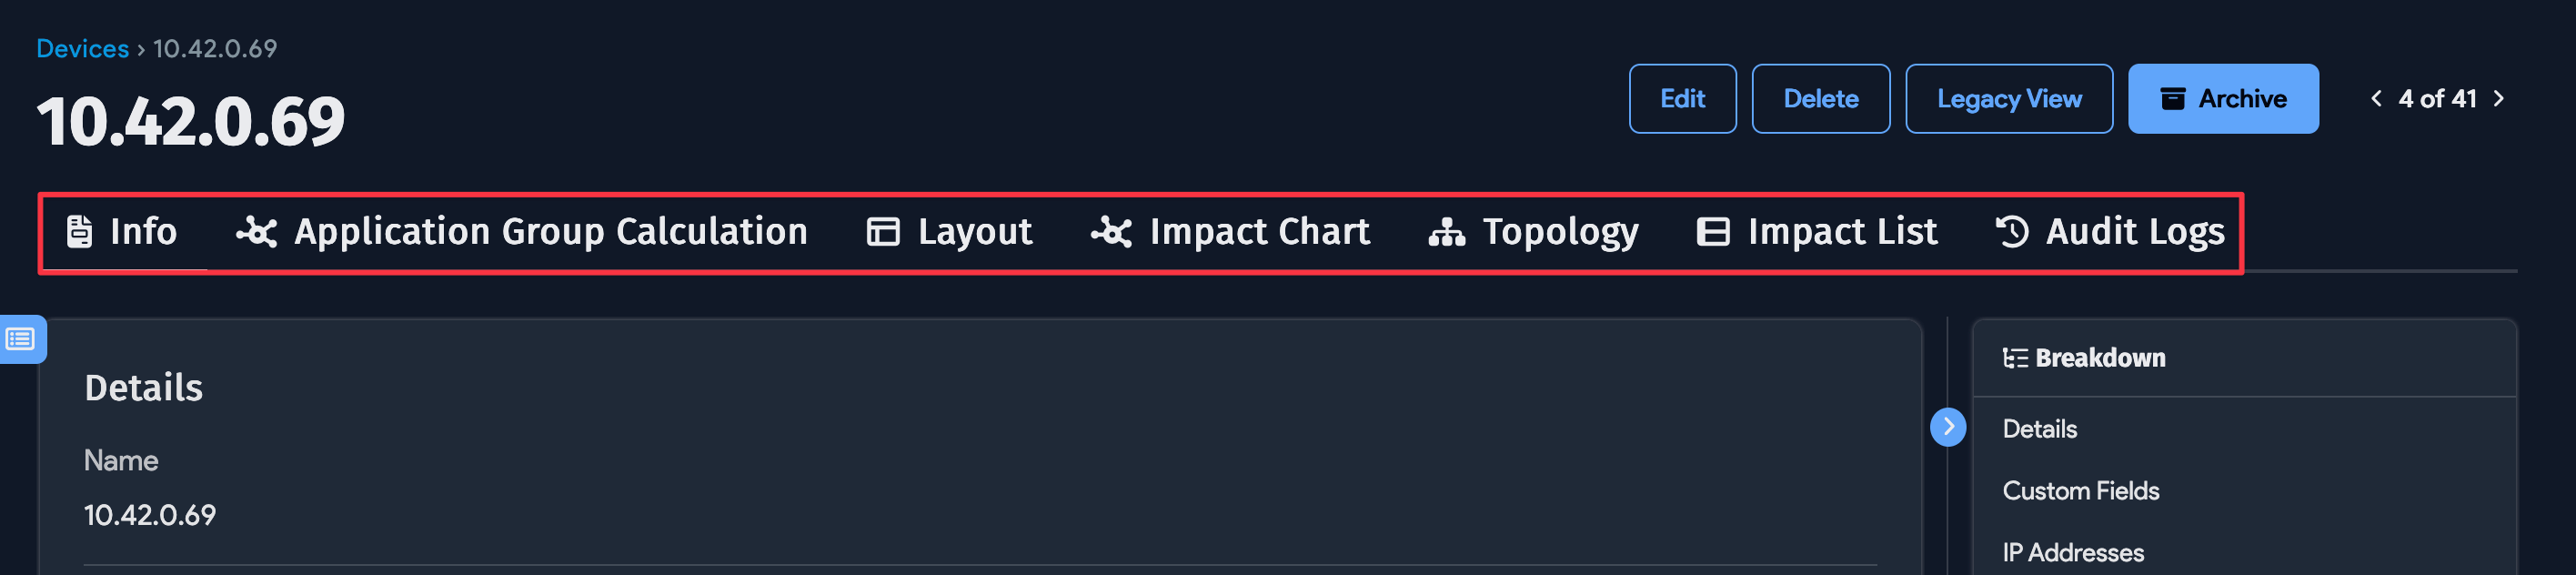
Subpage Options
Subpage buttons are displayed at the top of the device details view. Devices with conditional subpages, like Switch Ports and Power Consumption, also appear in this row. Typical subpages include:
- Info (basic device details)
- Application Group Calculation
- Layout
- Impact Chart
- Topology
- Impact List
- Audit Logs
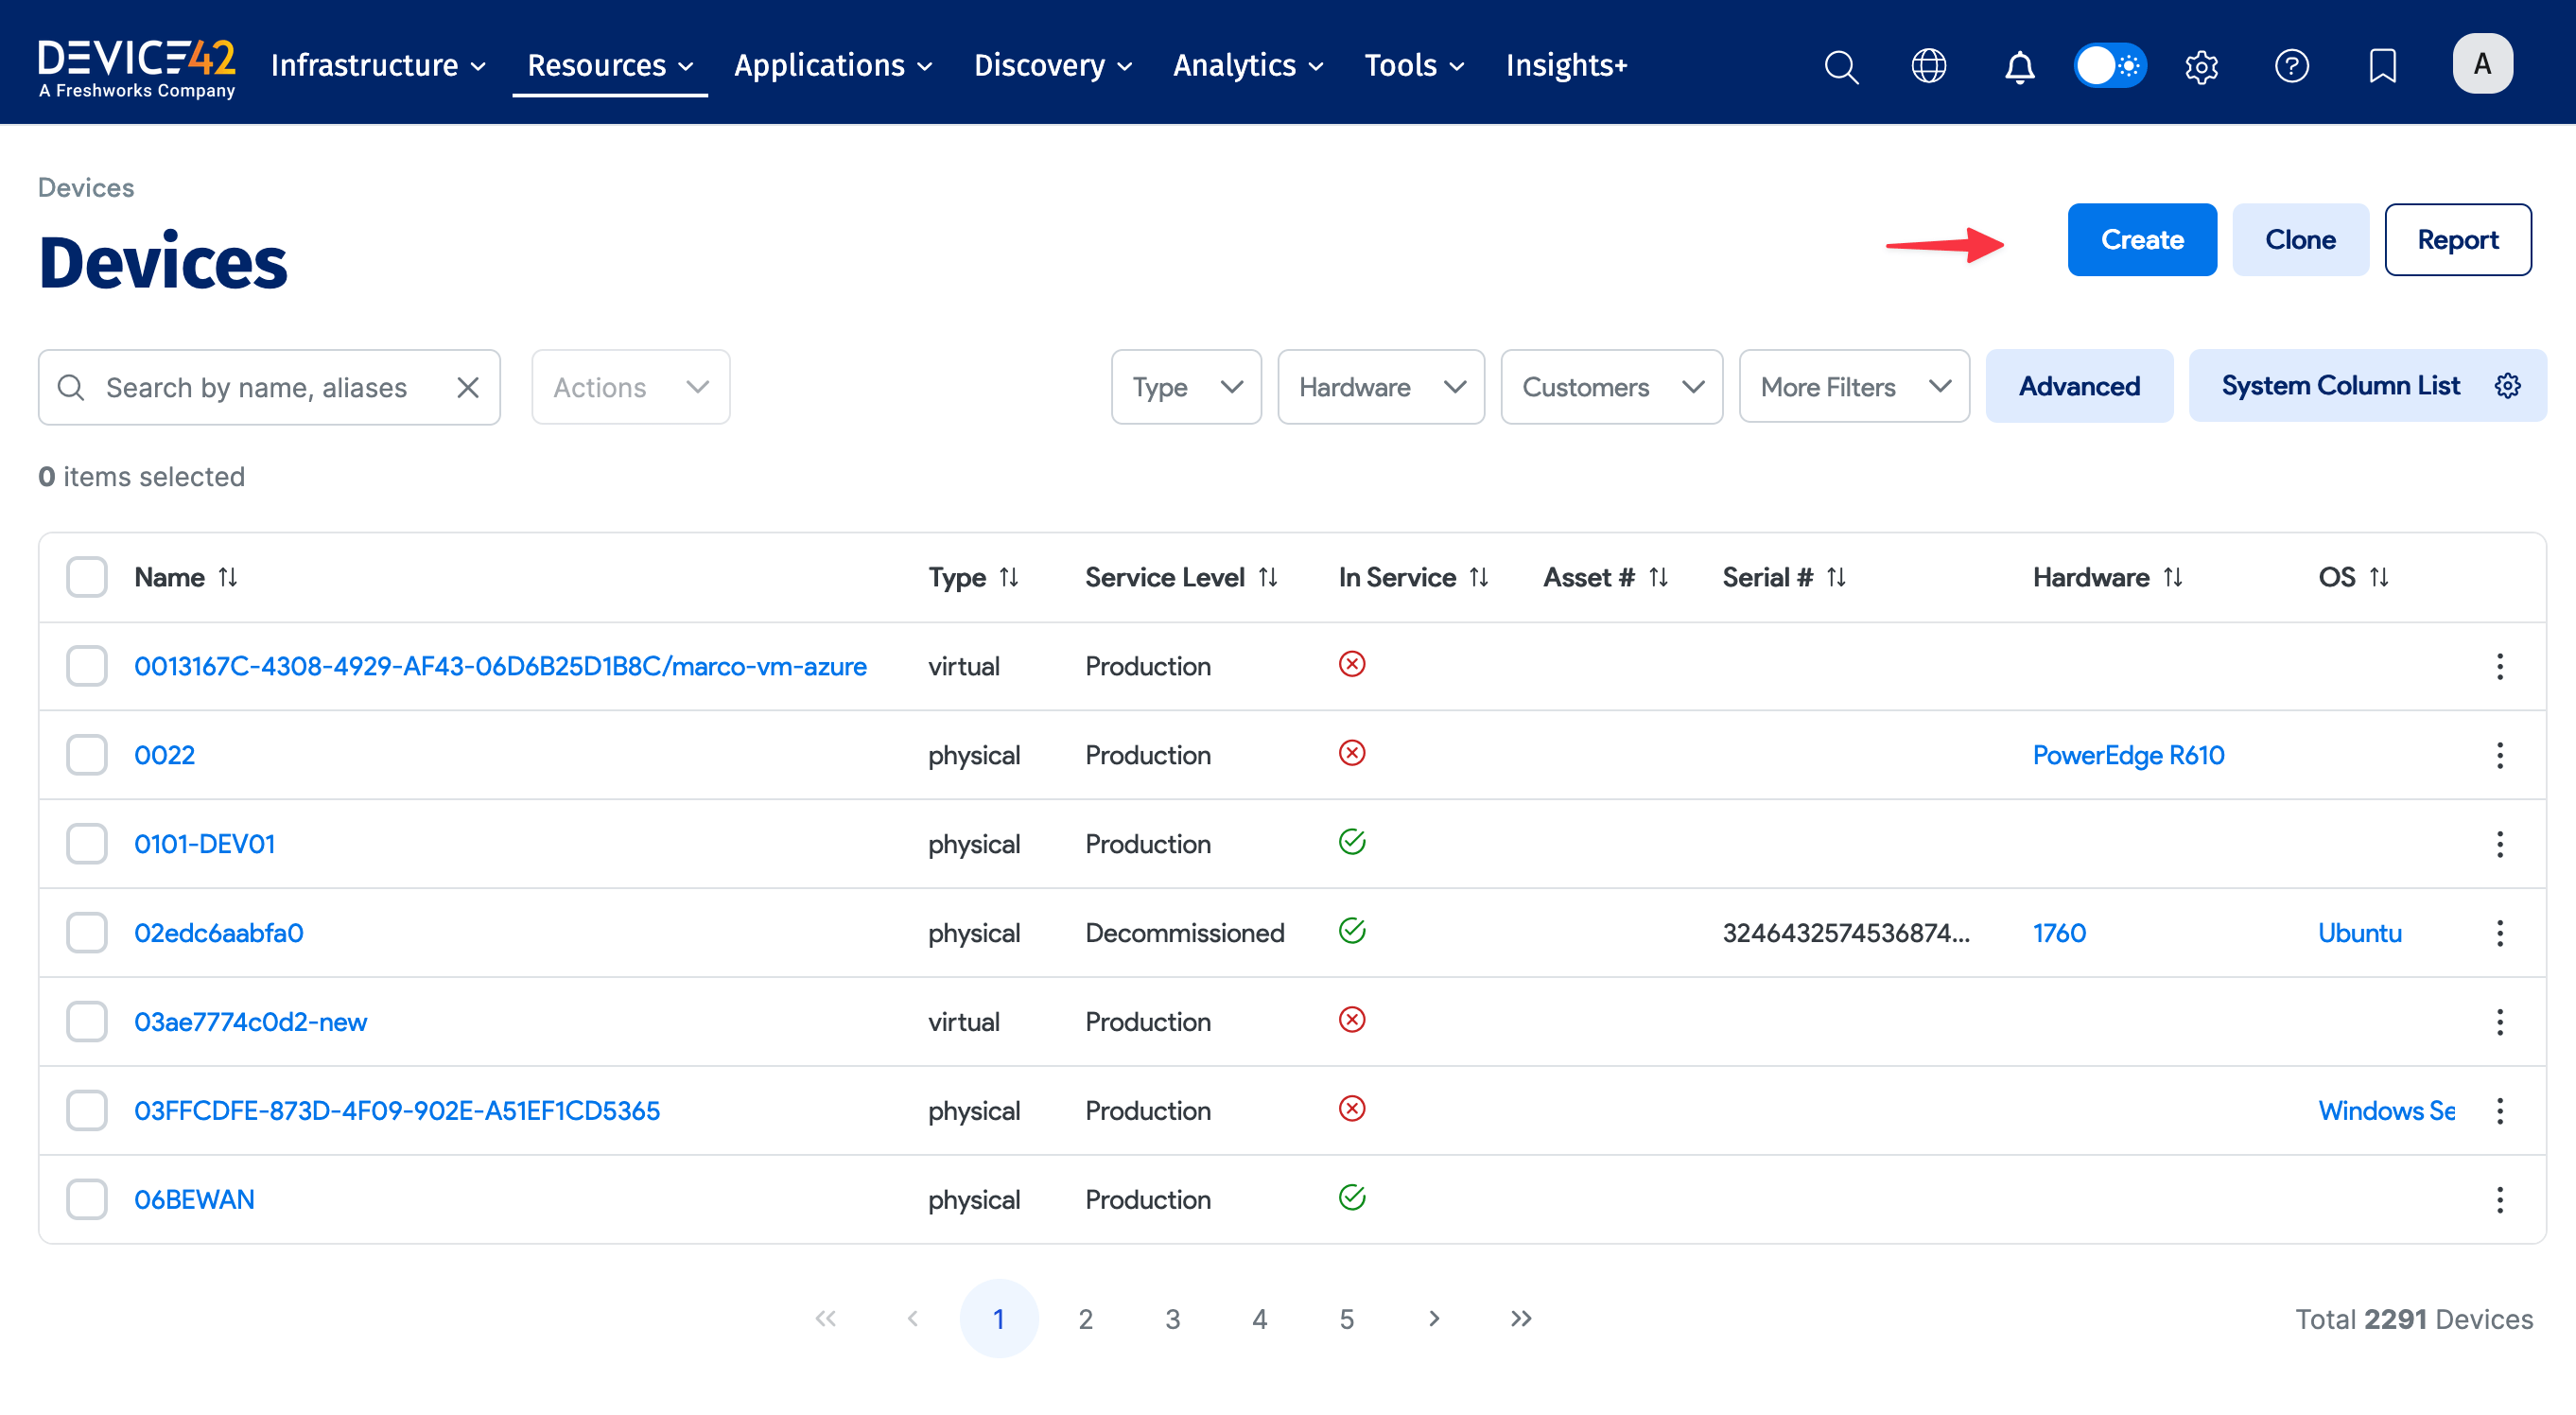
Add a Device
Select Resources > Compute > All Devices and click Create in the upper-right corner.
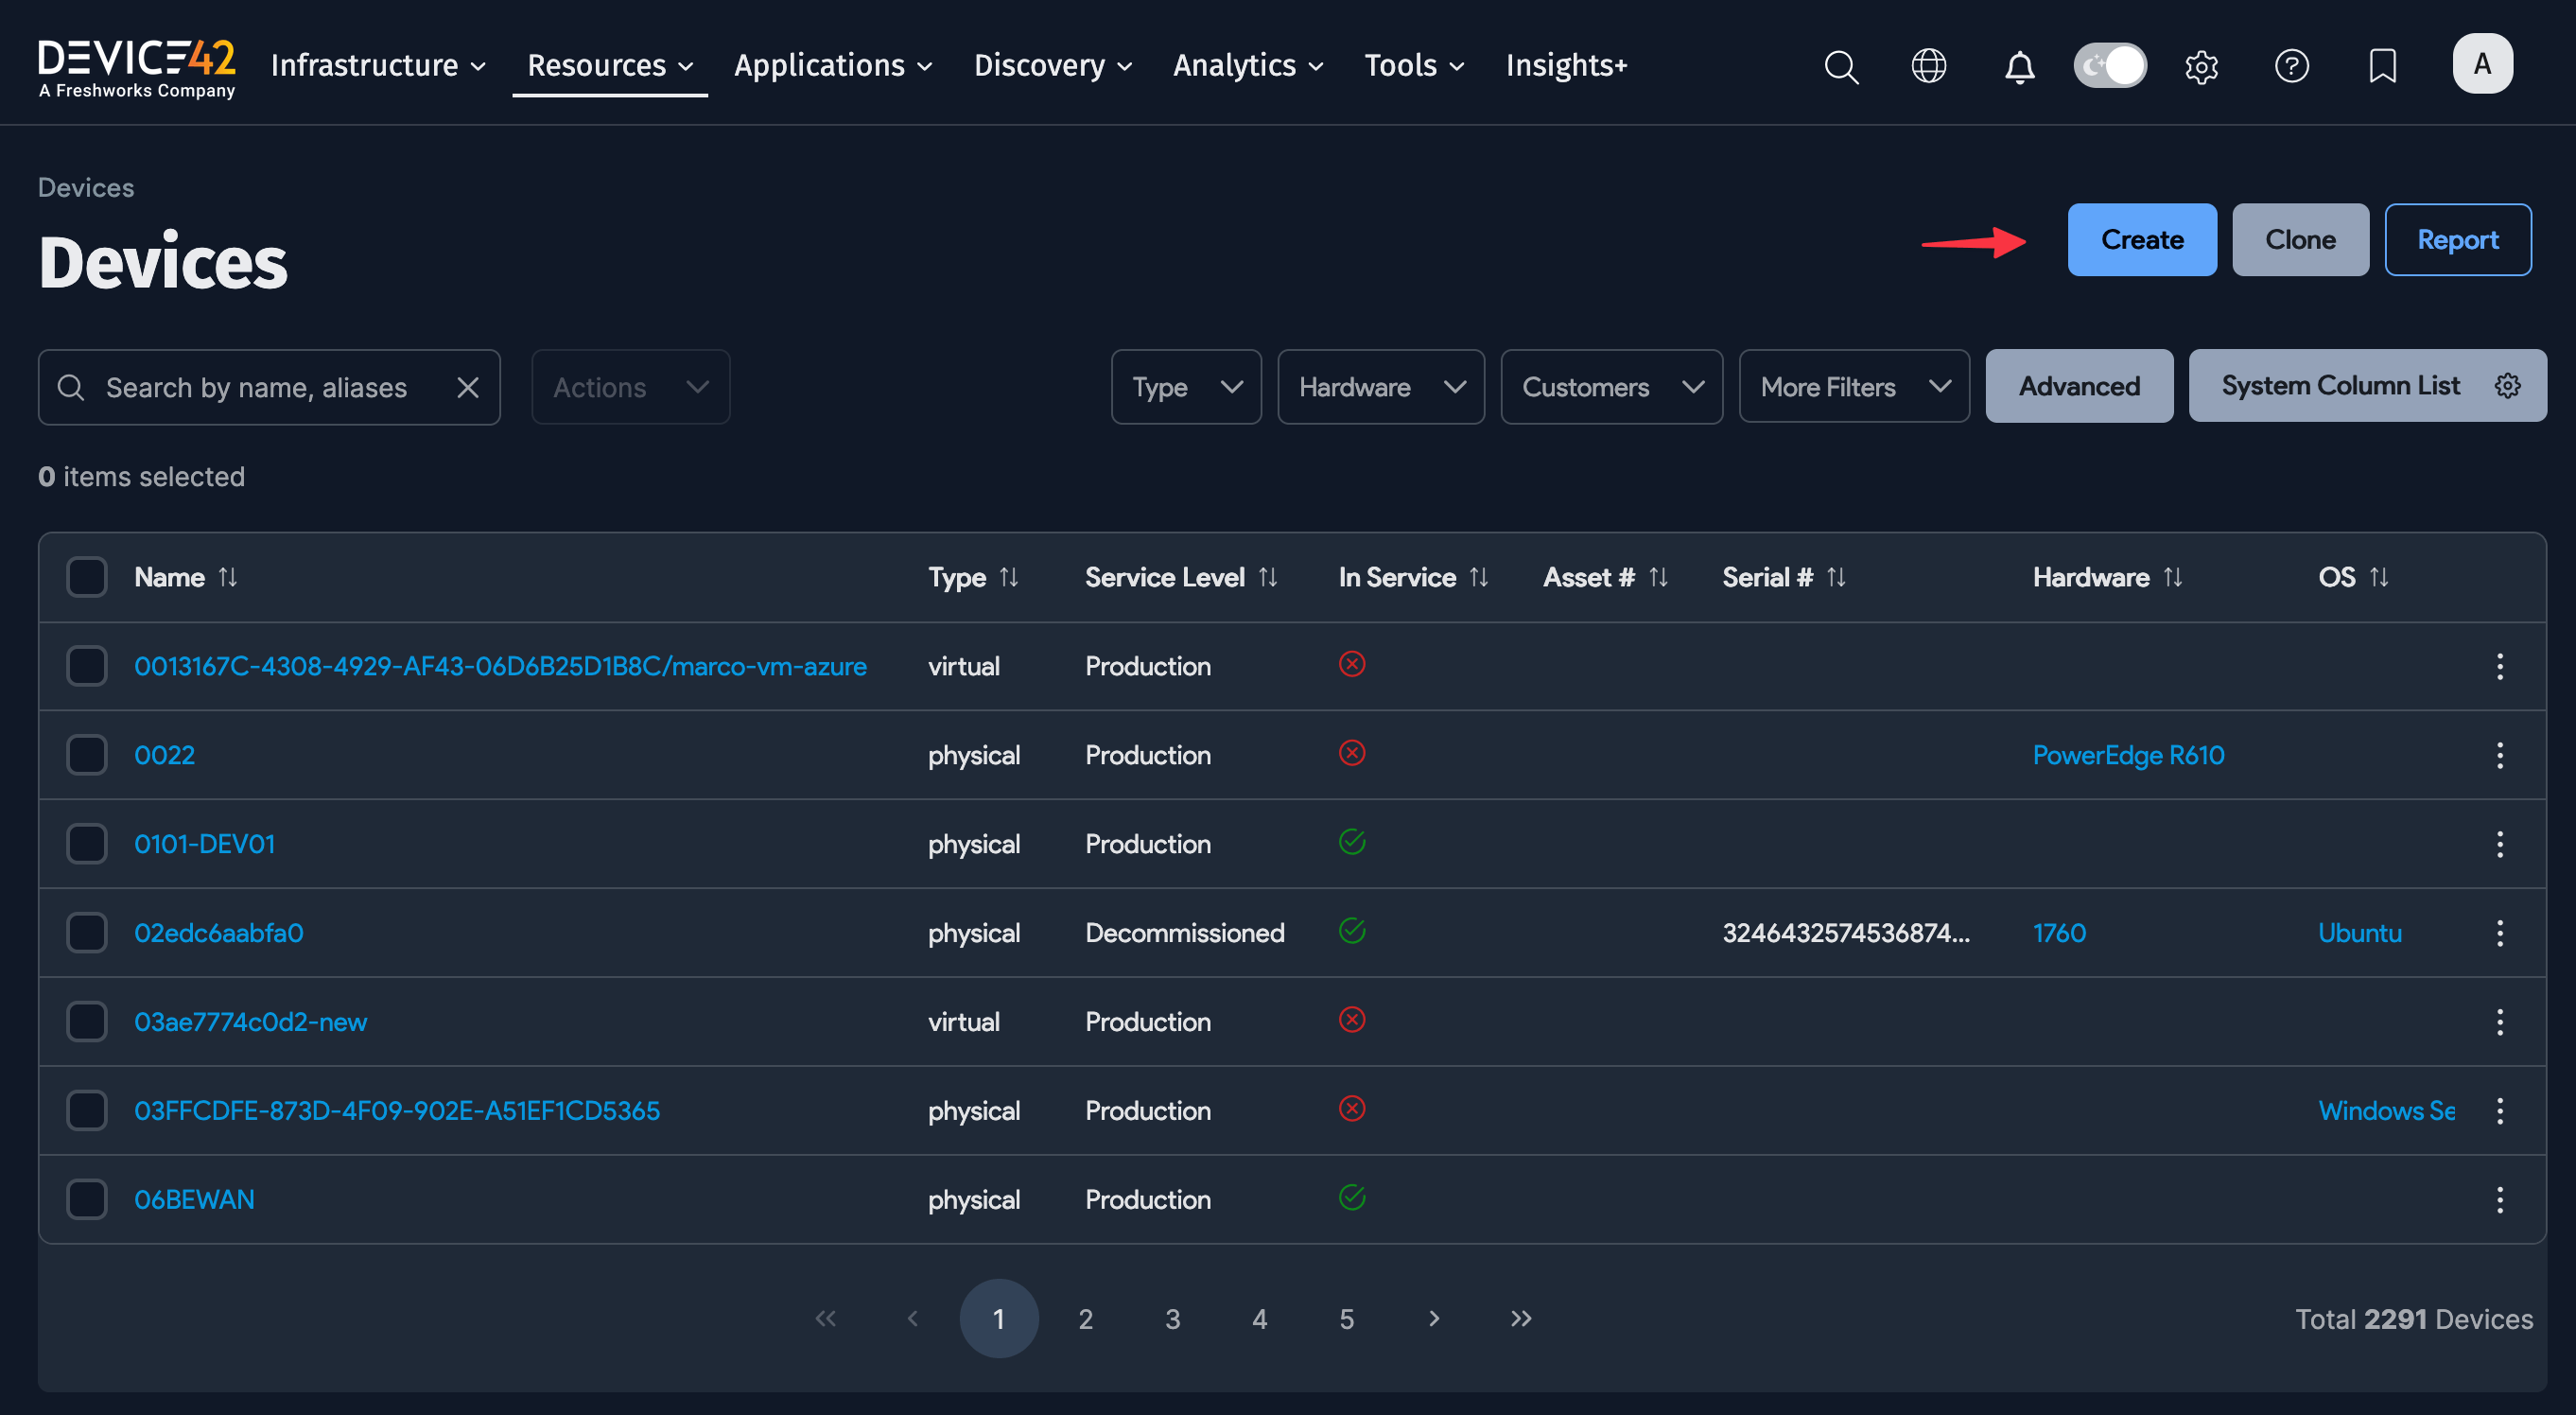
By default, new devices are assigned the In Service property and their Service Level is set to Production.
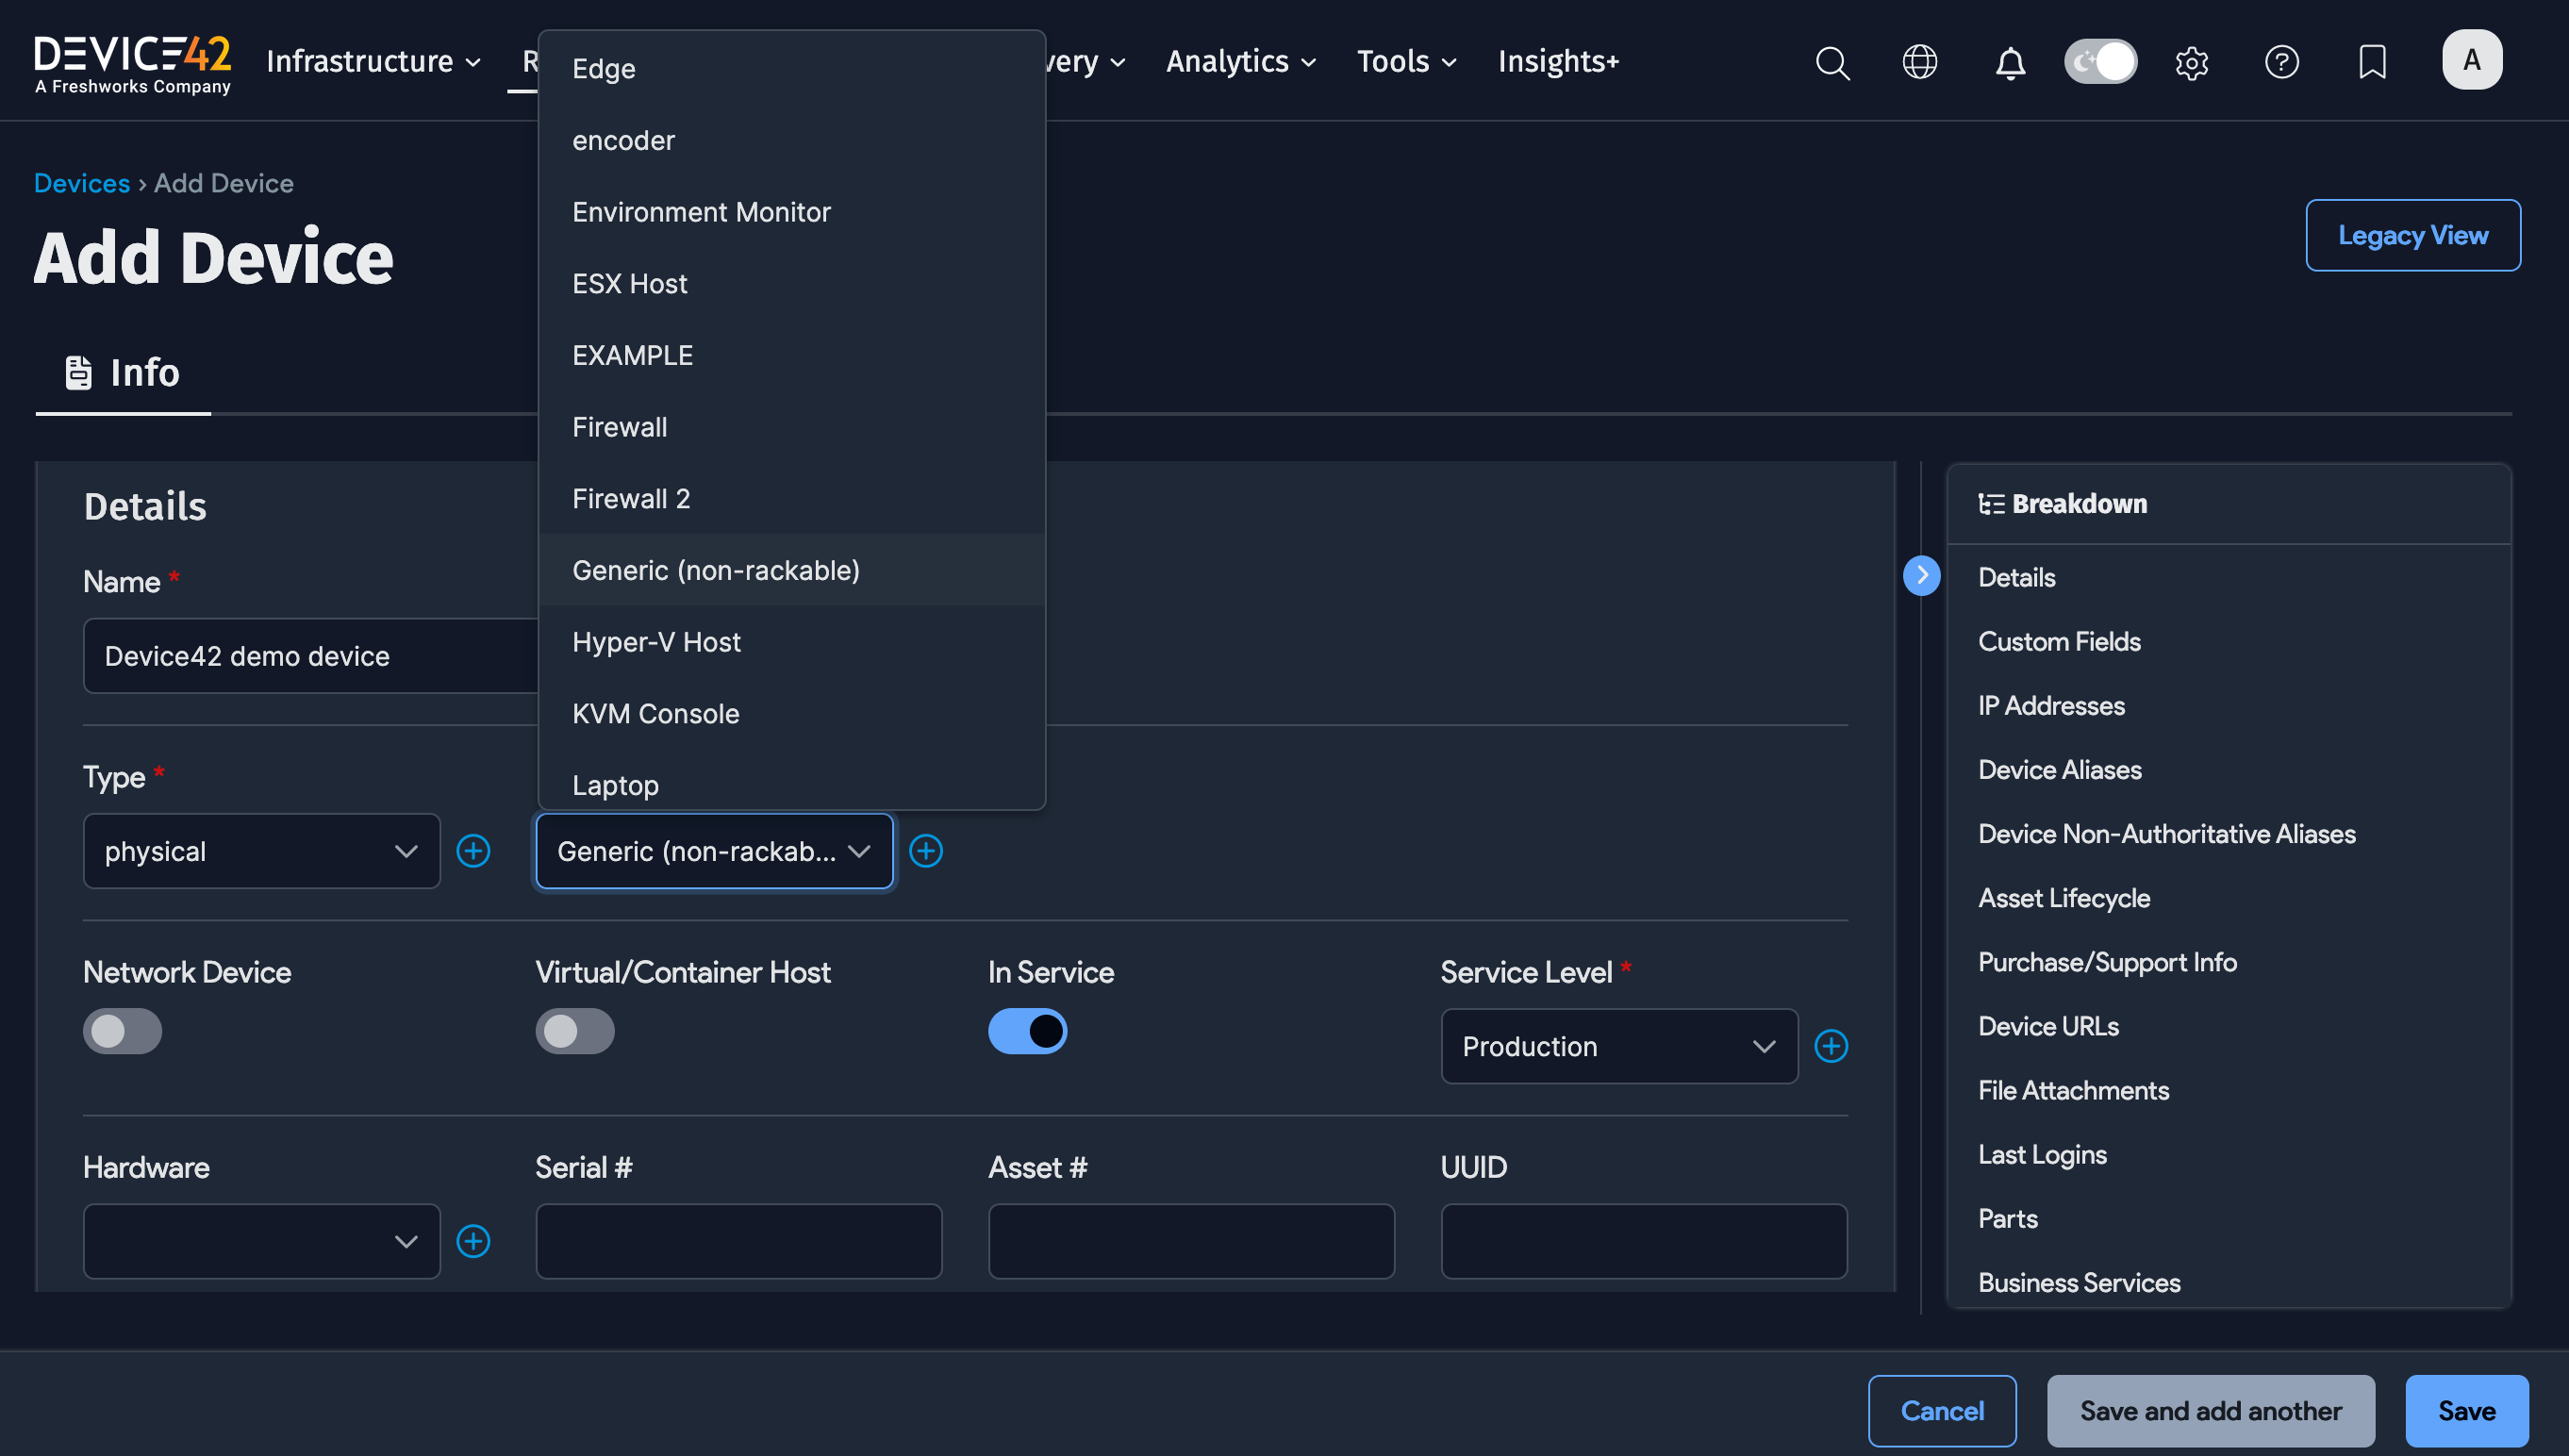
Enter a Name for the device and select physical, virtual, or cluster for the device Type.
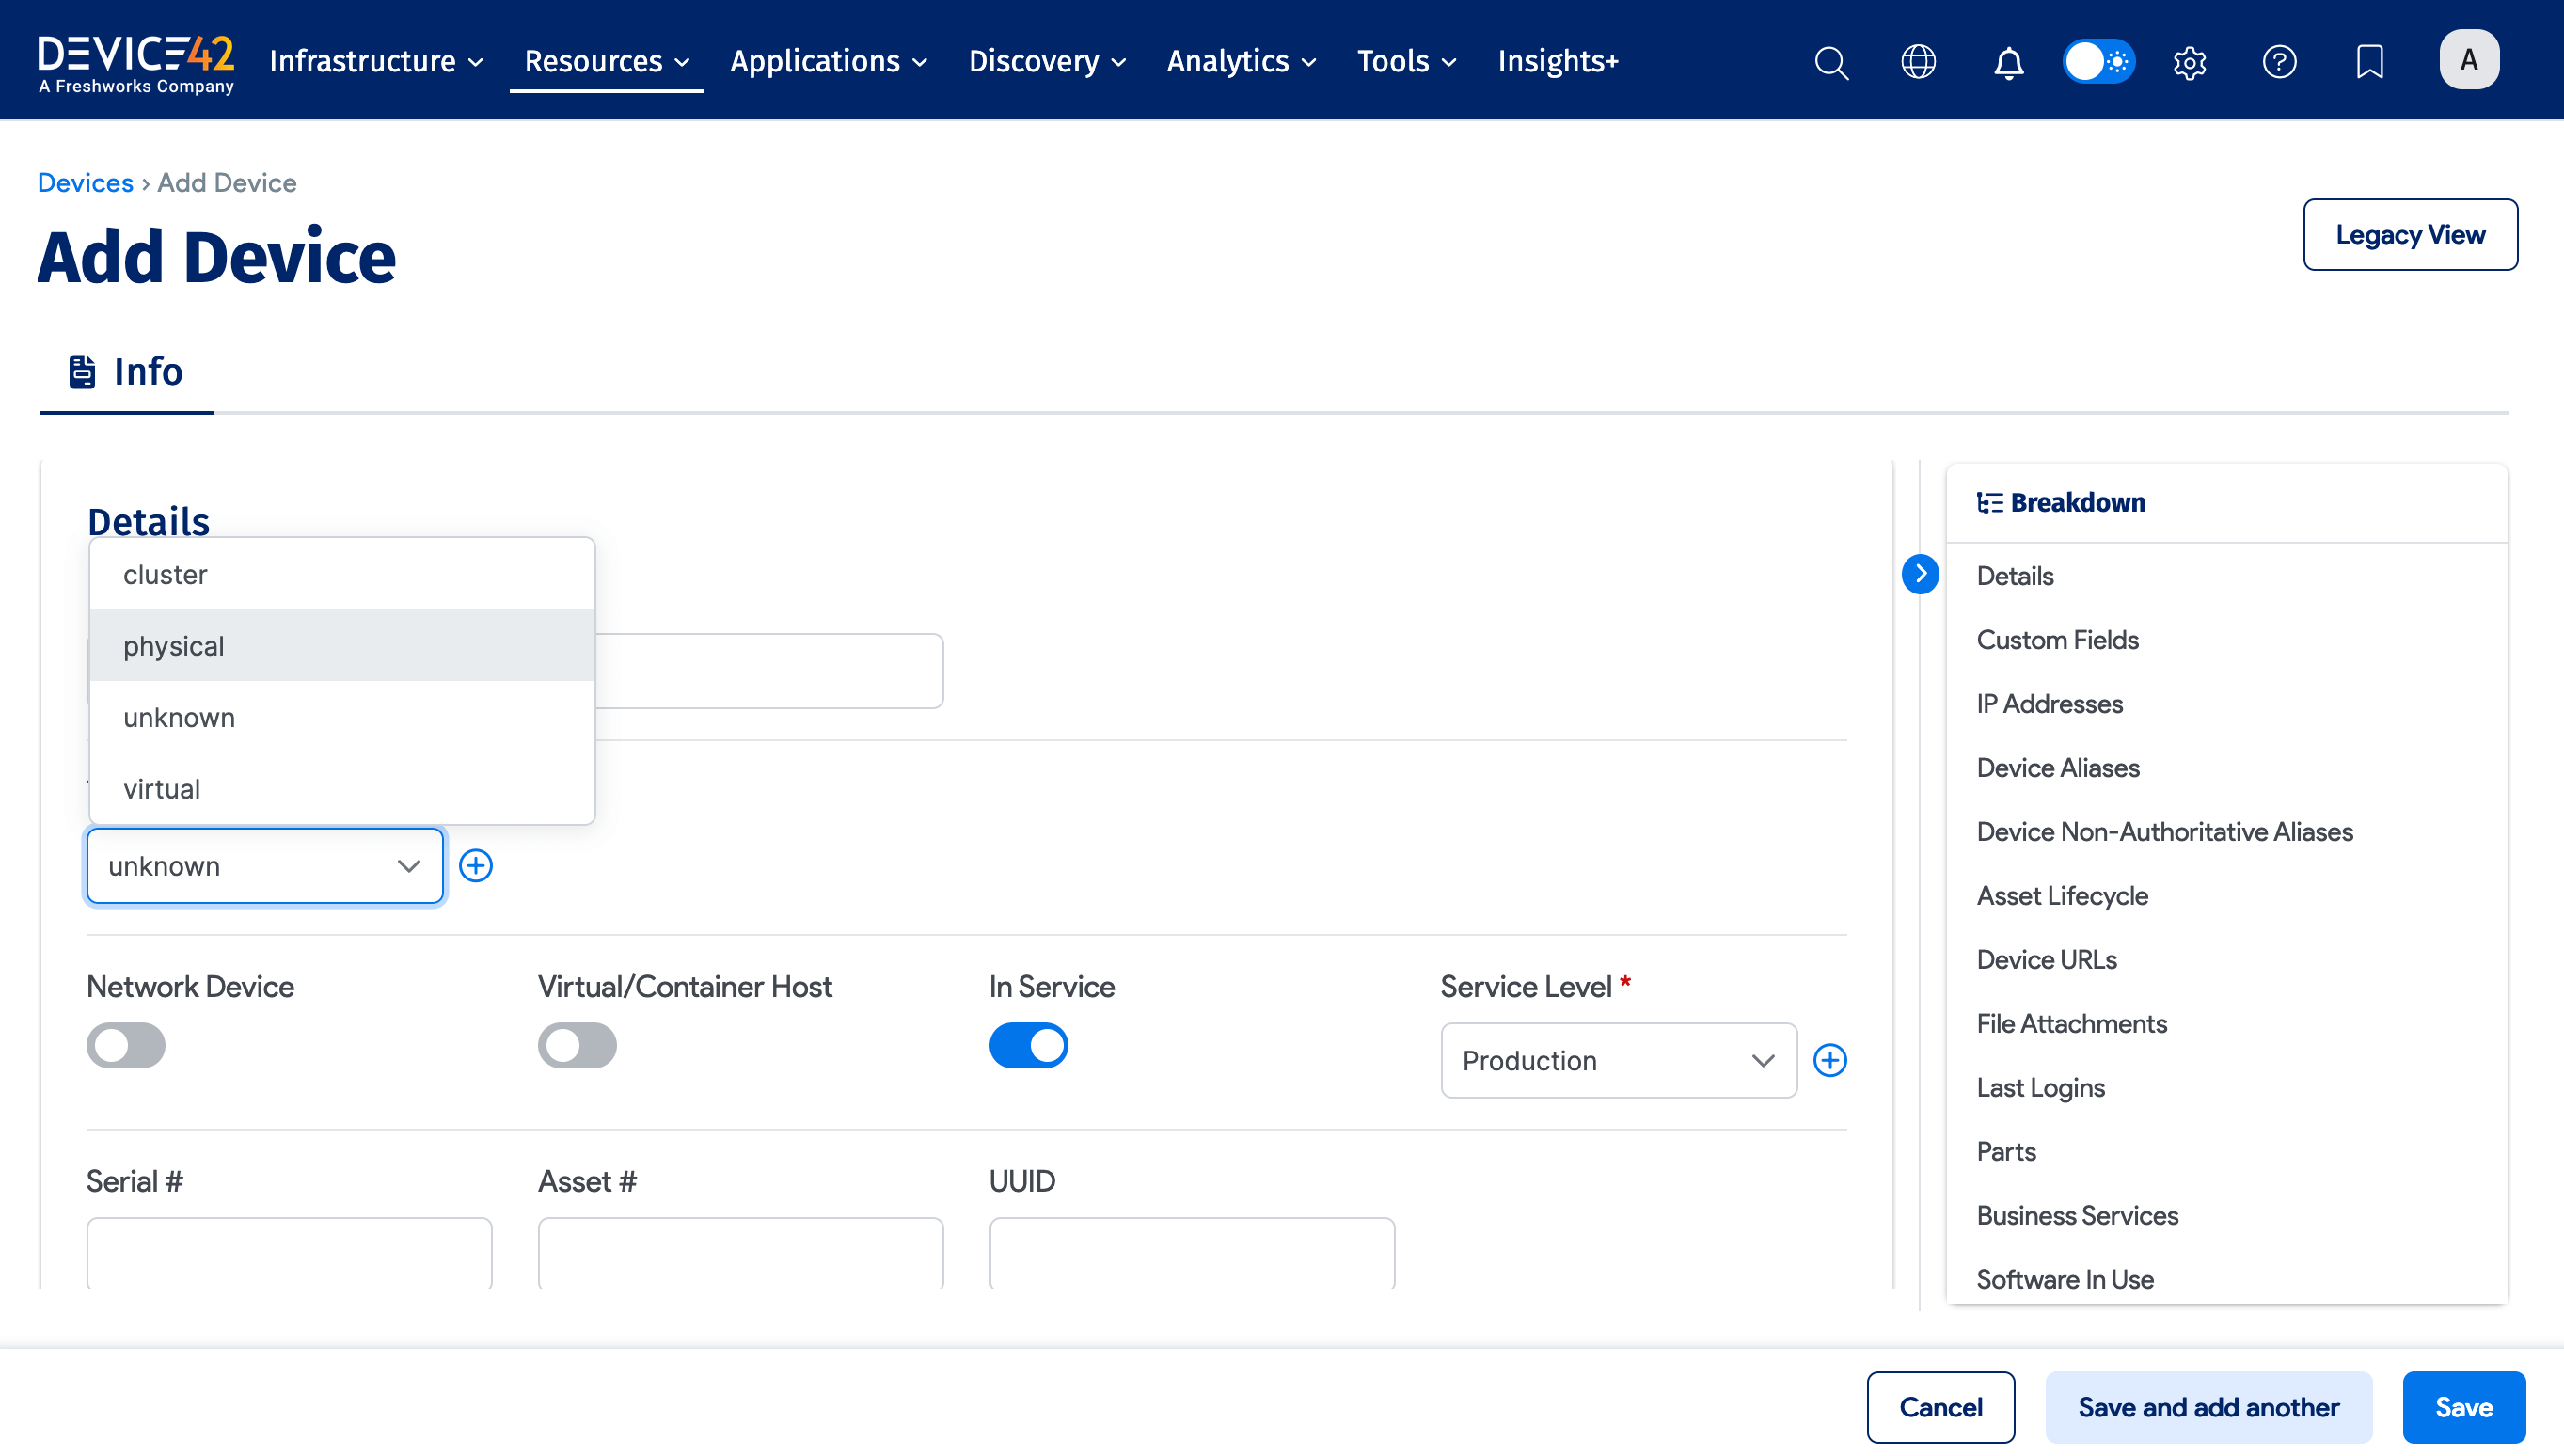
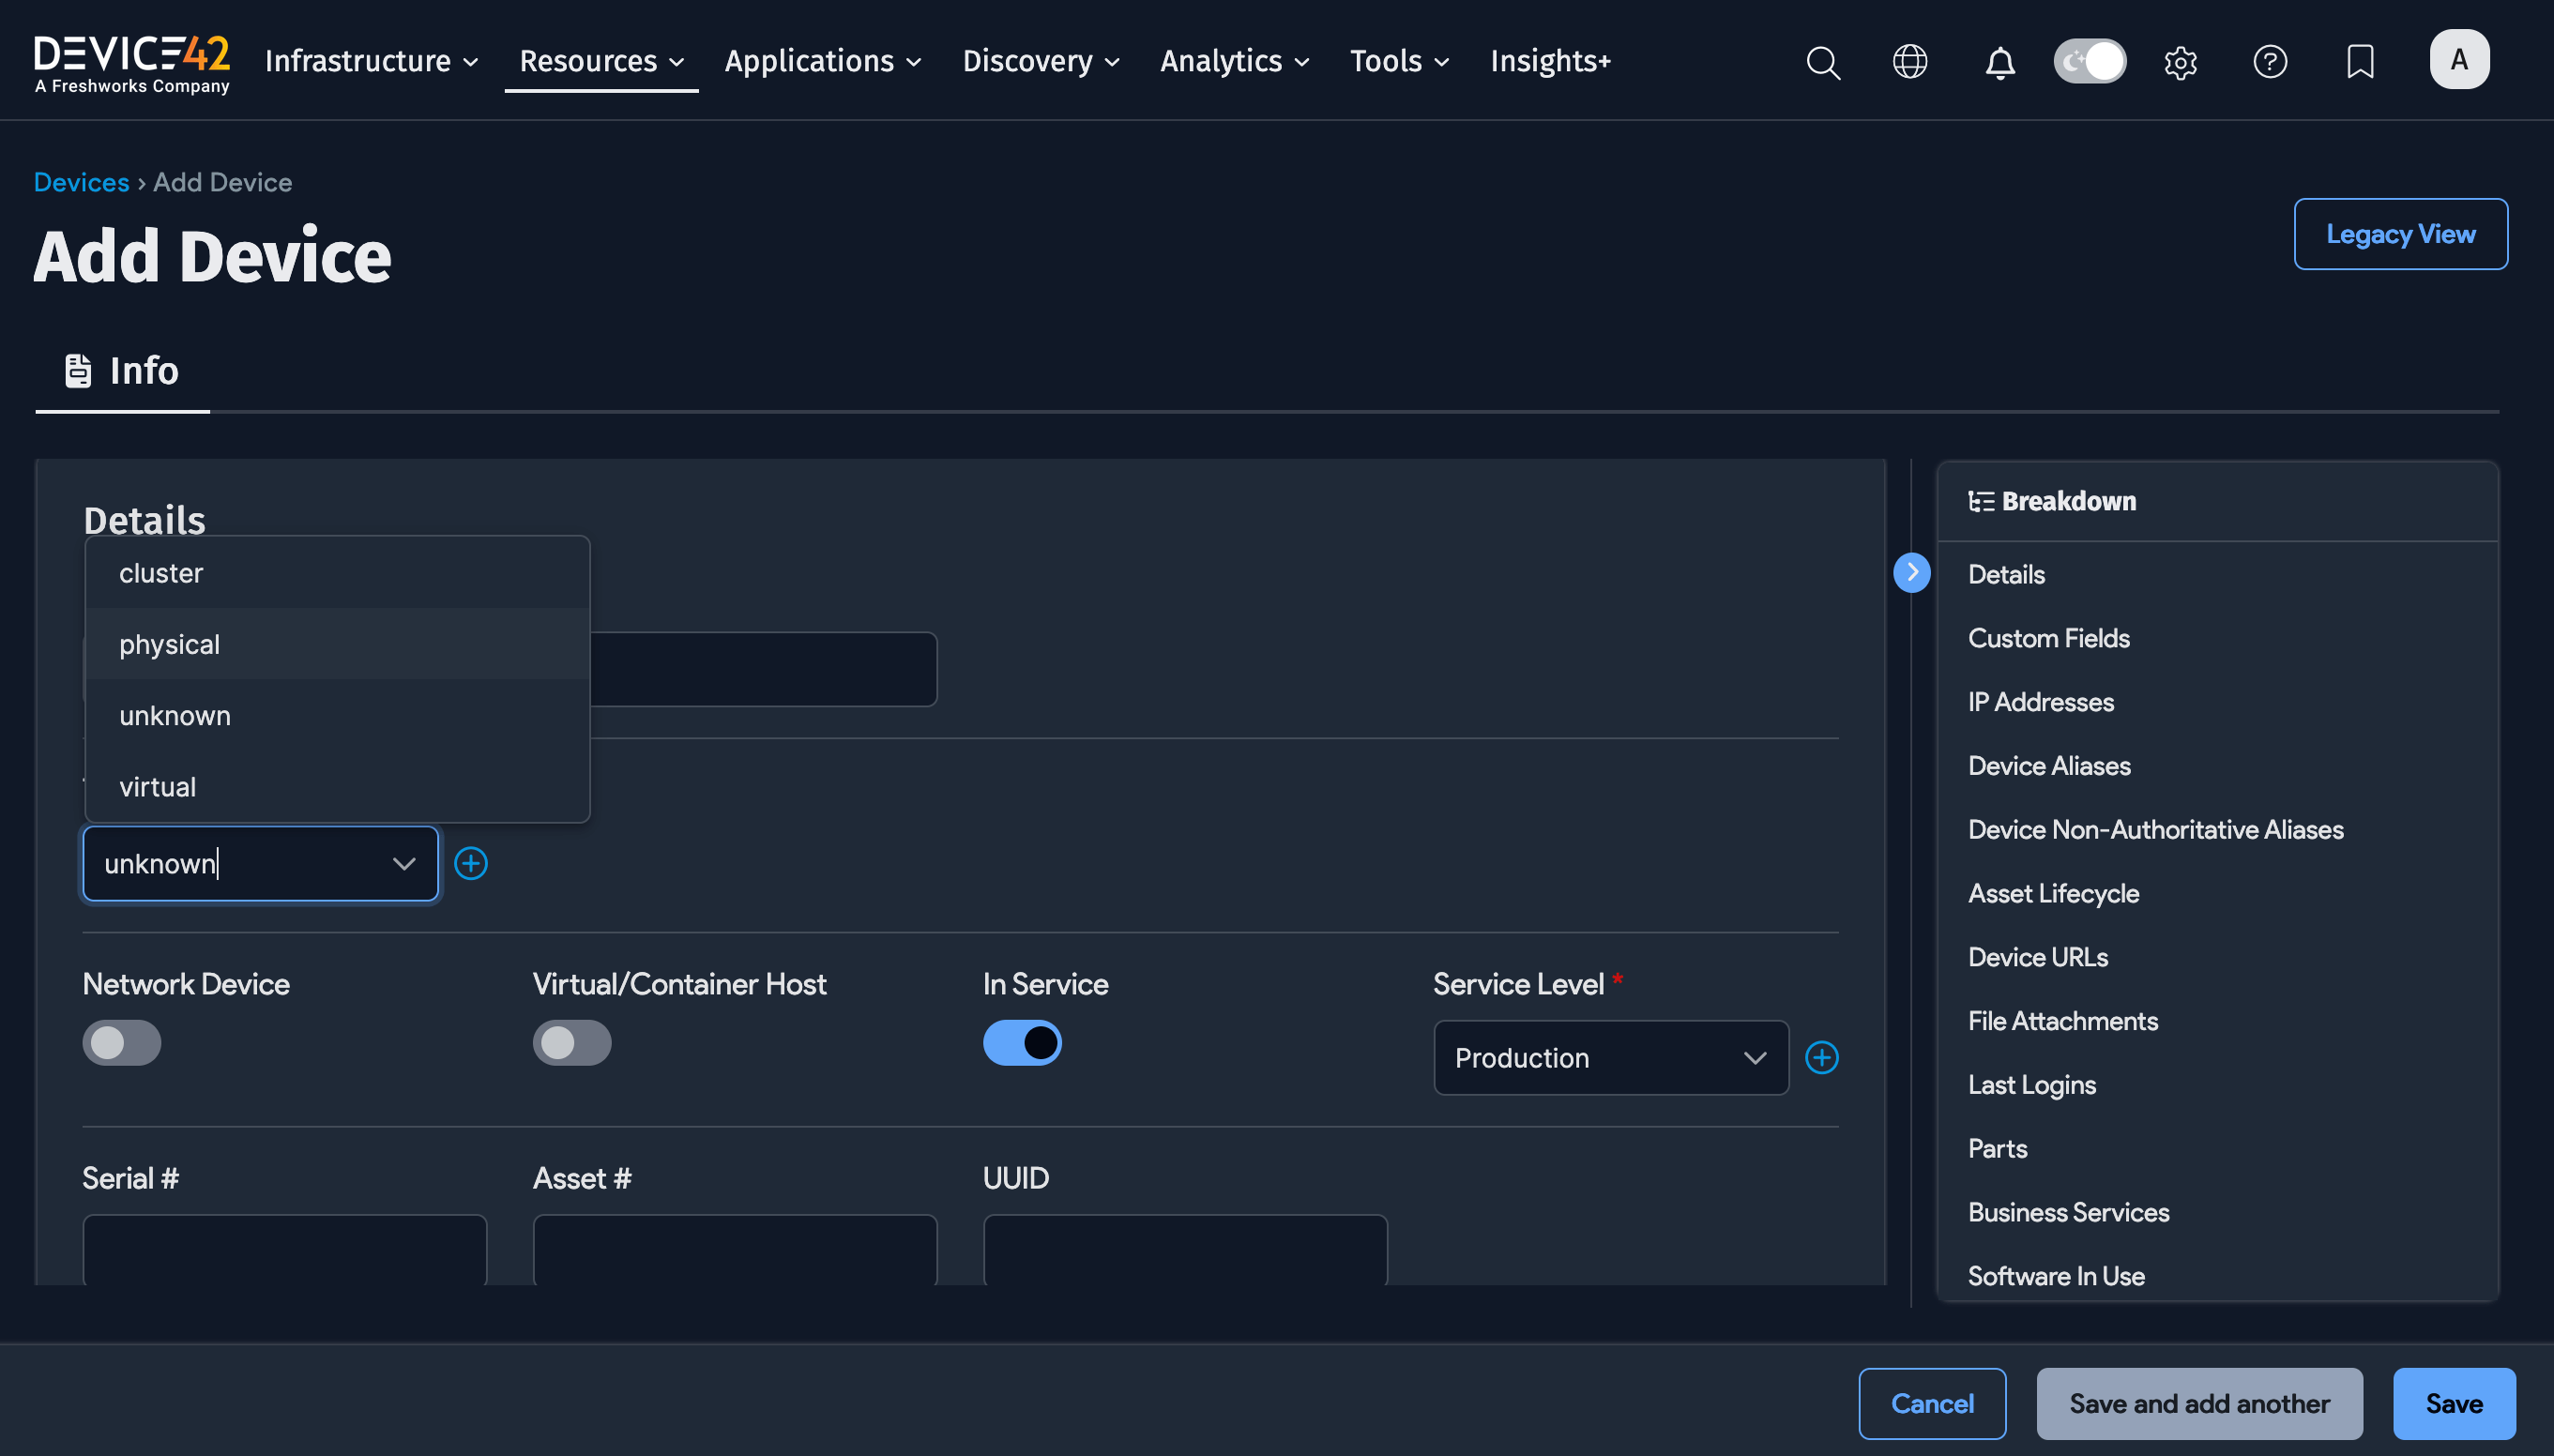
The fields differ based on the Type selected:
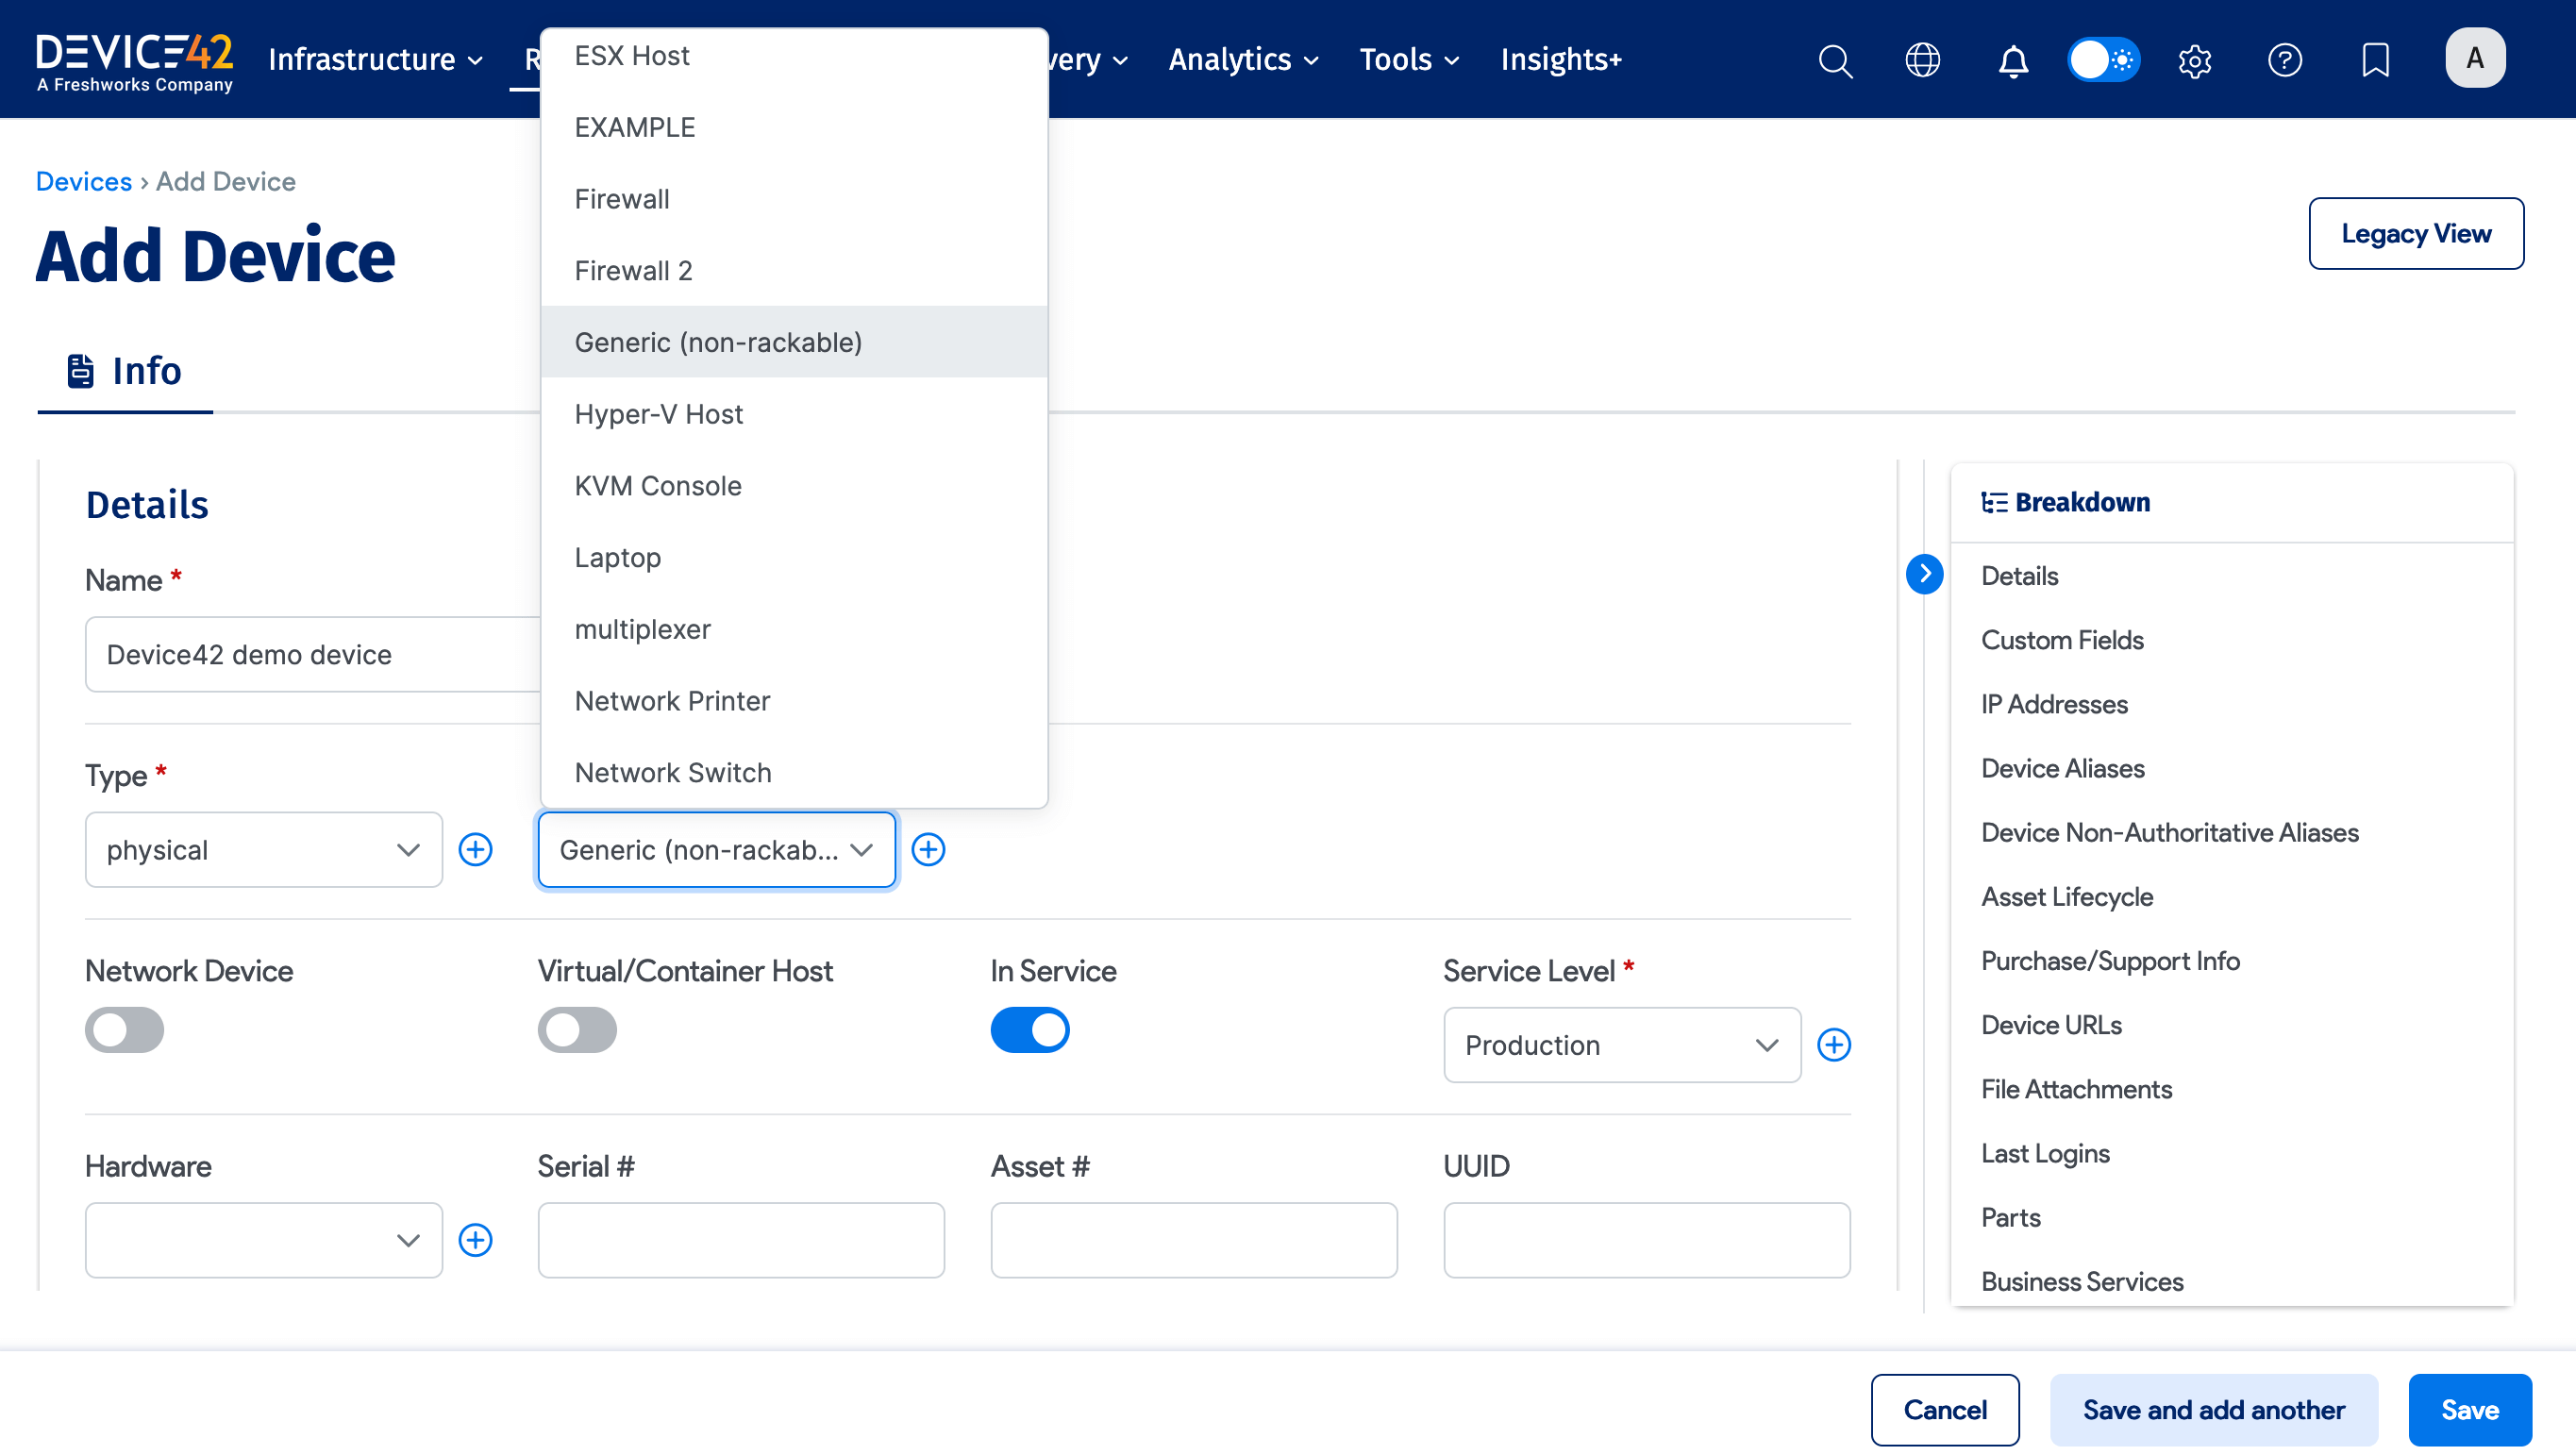
-
For physical devices, you can select or add a Physical Subtype.
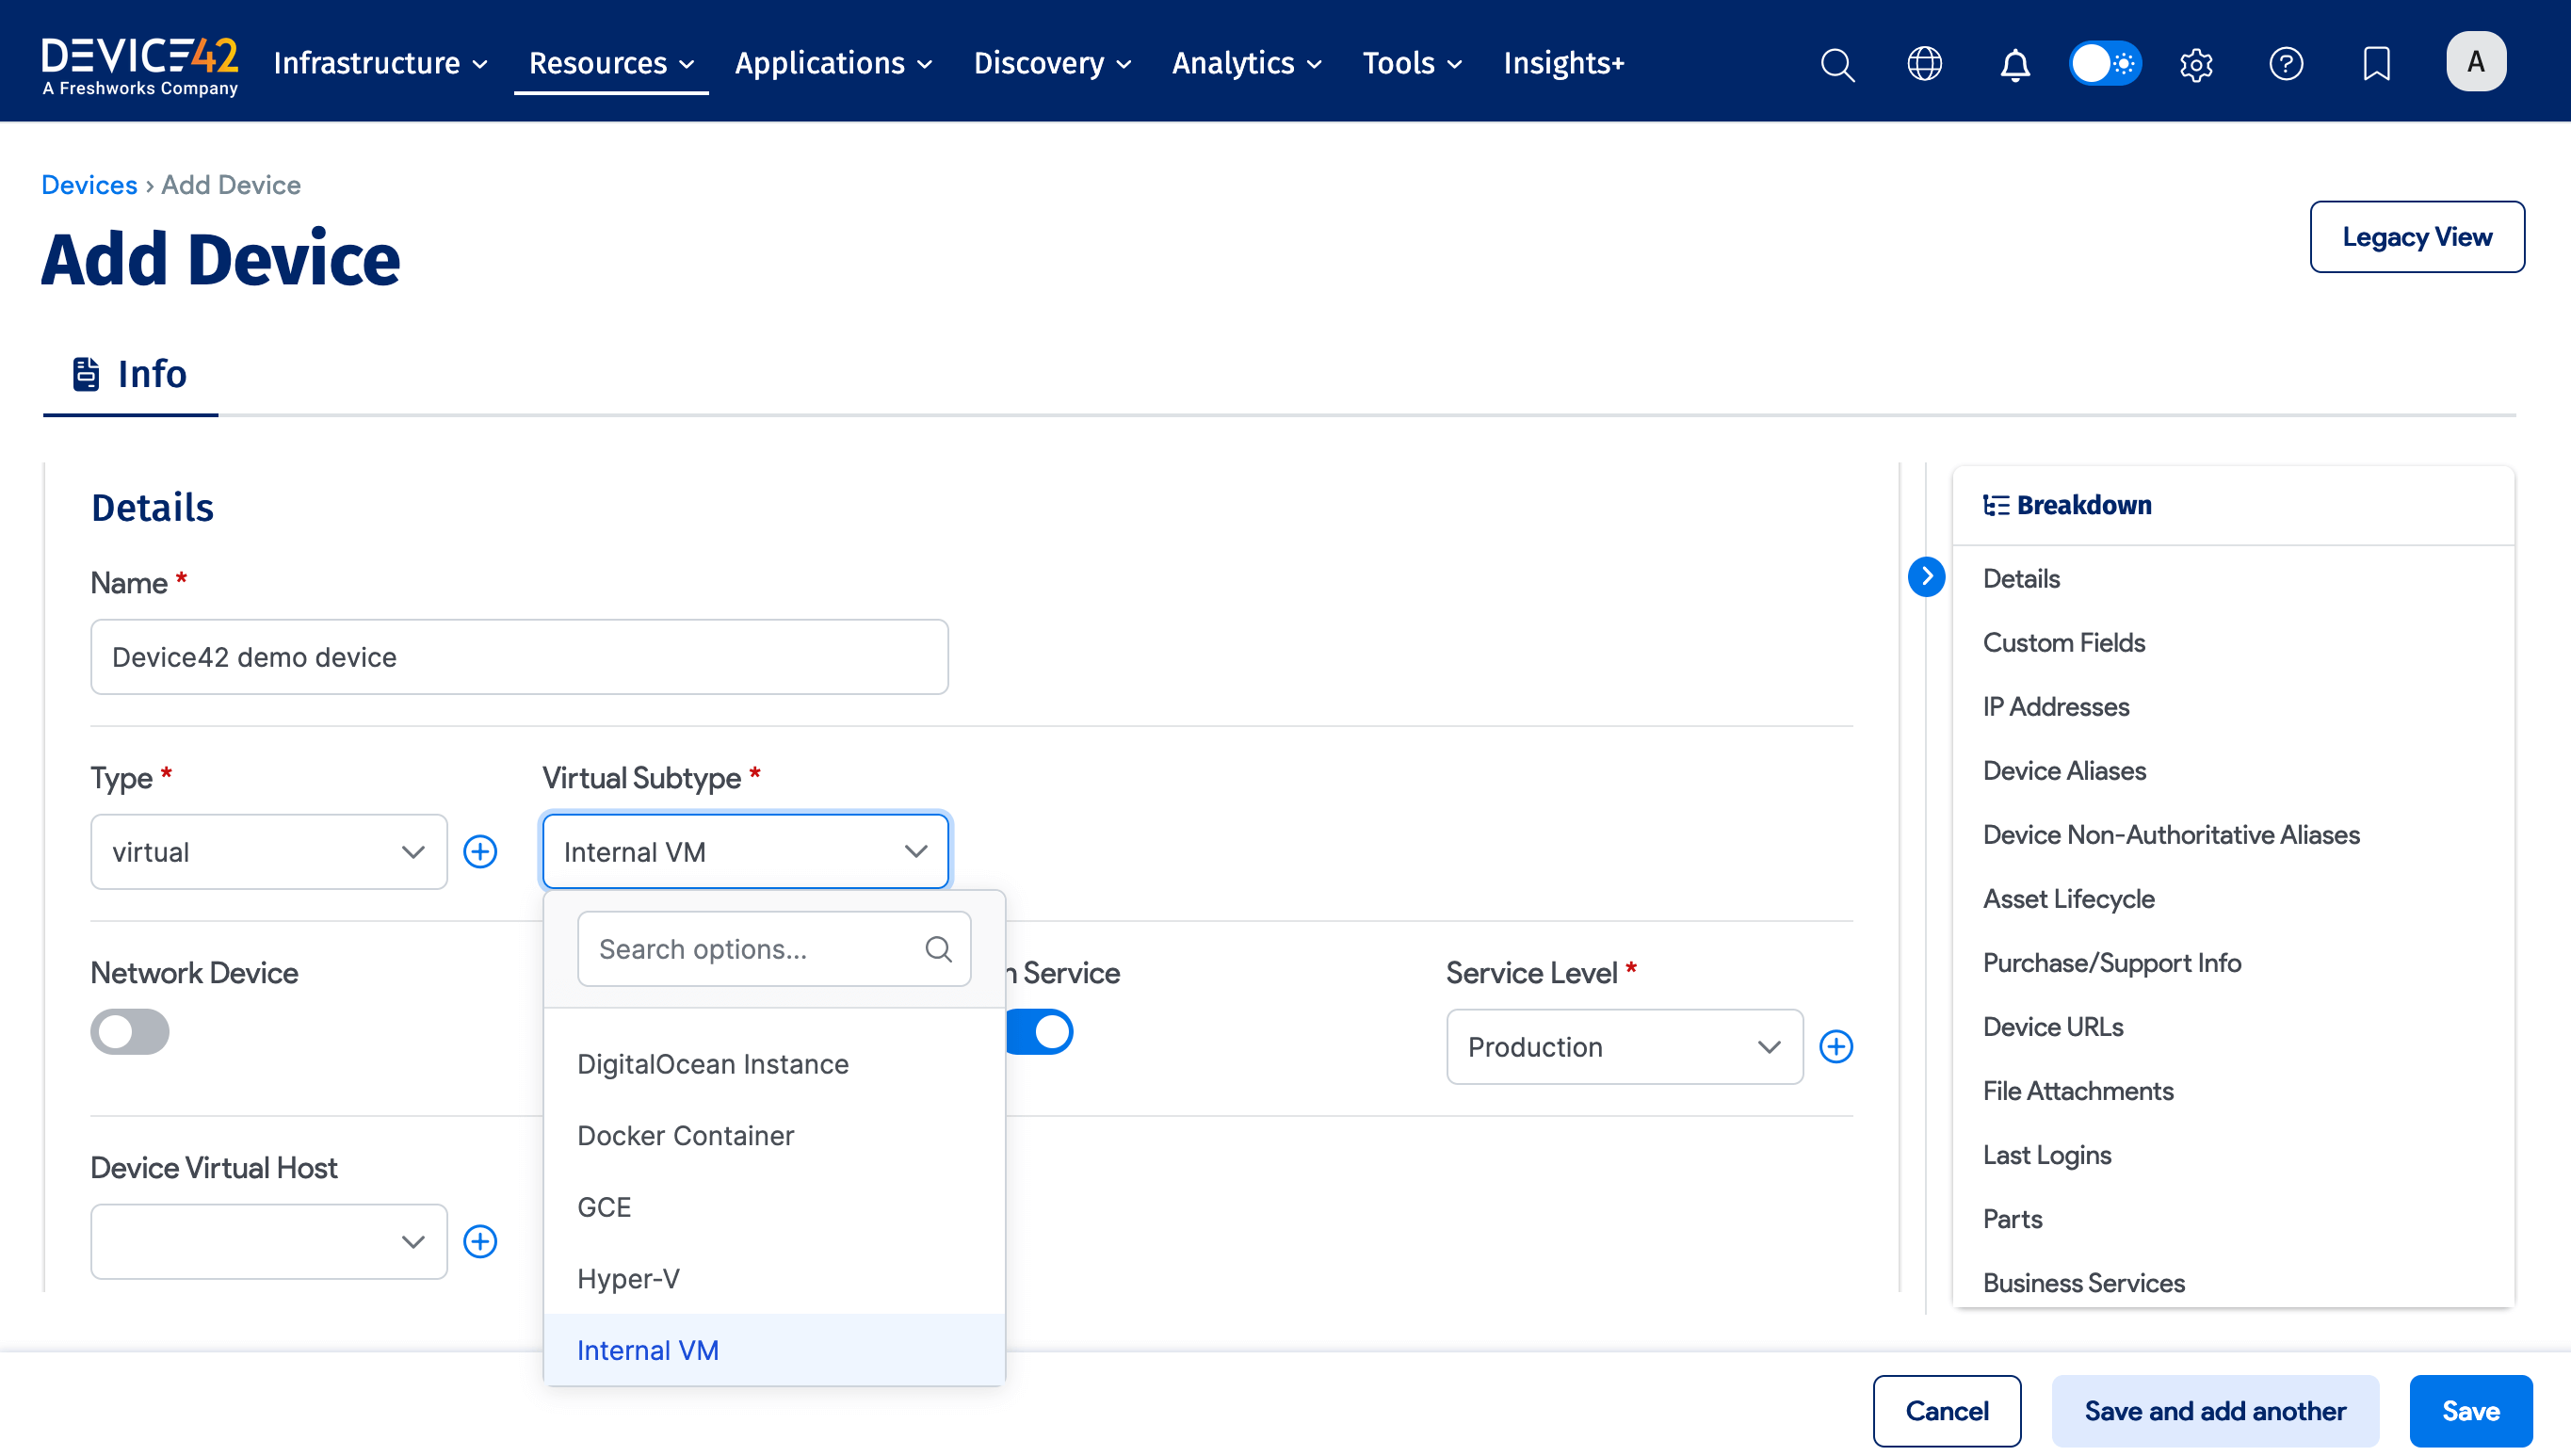
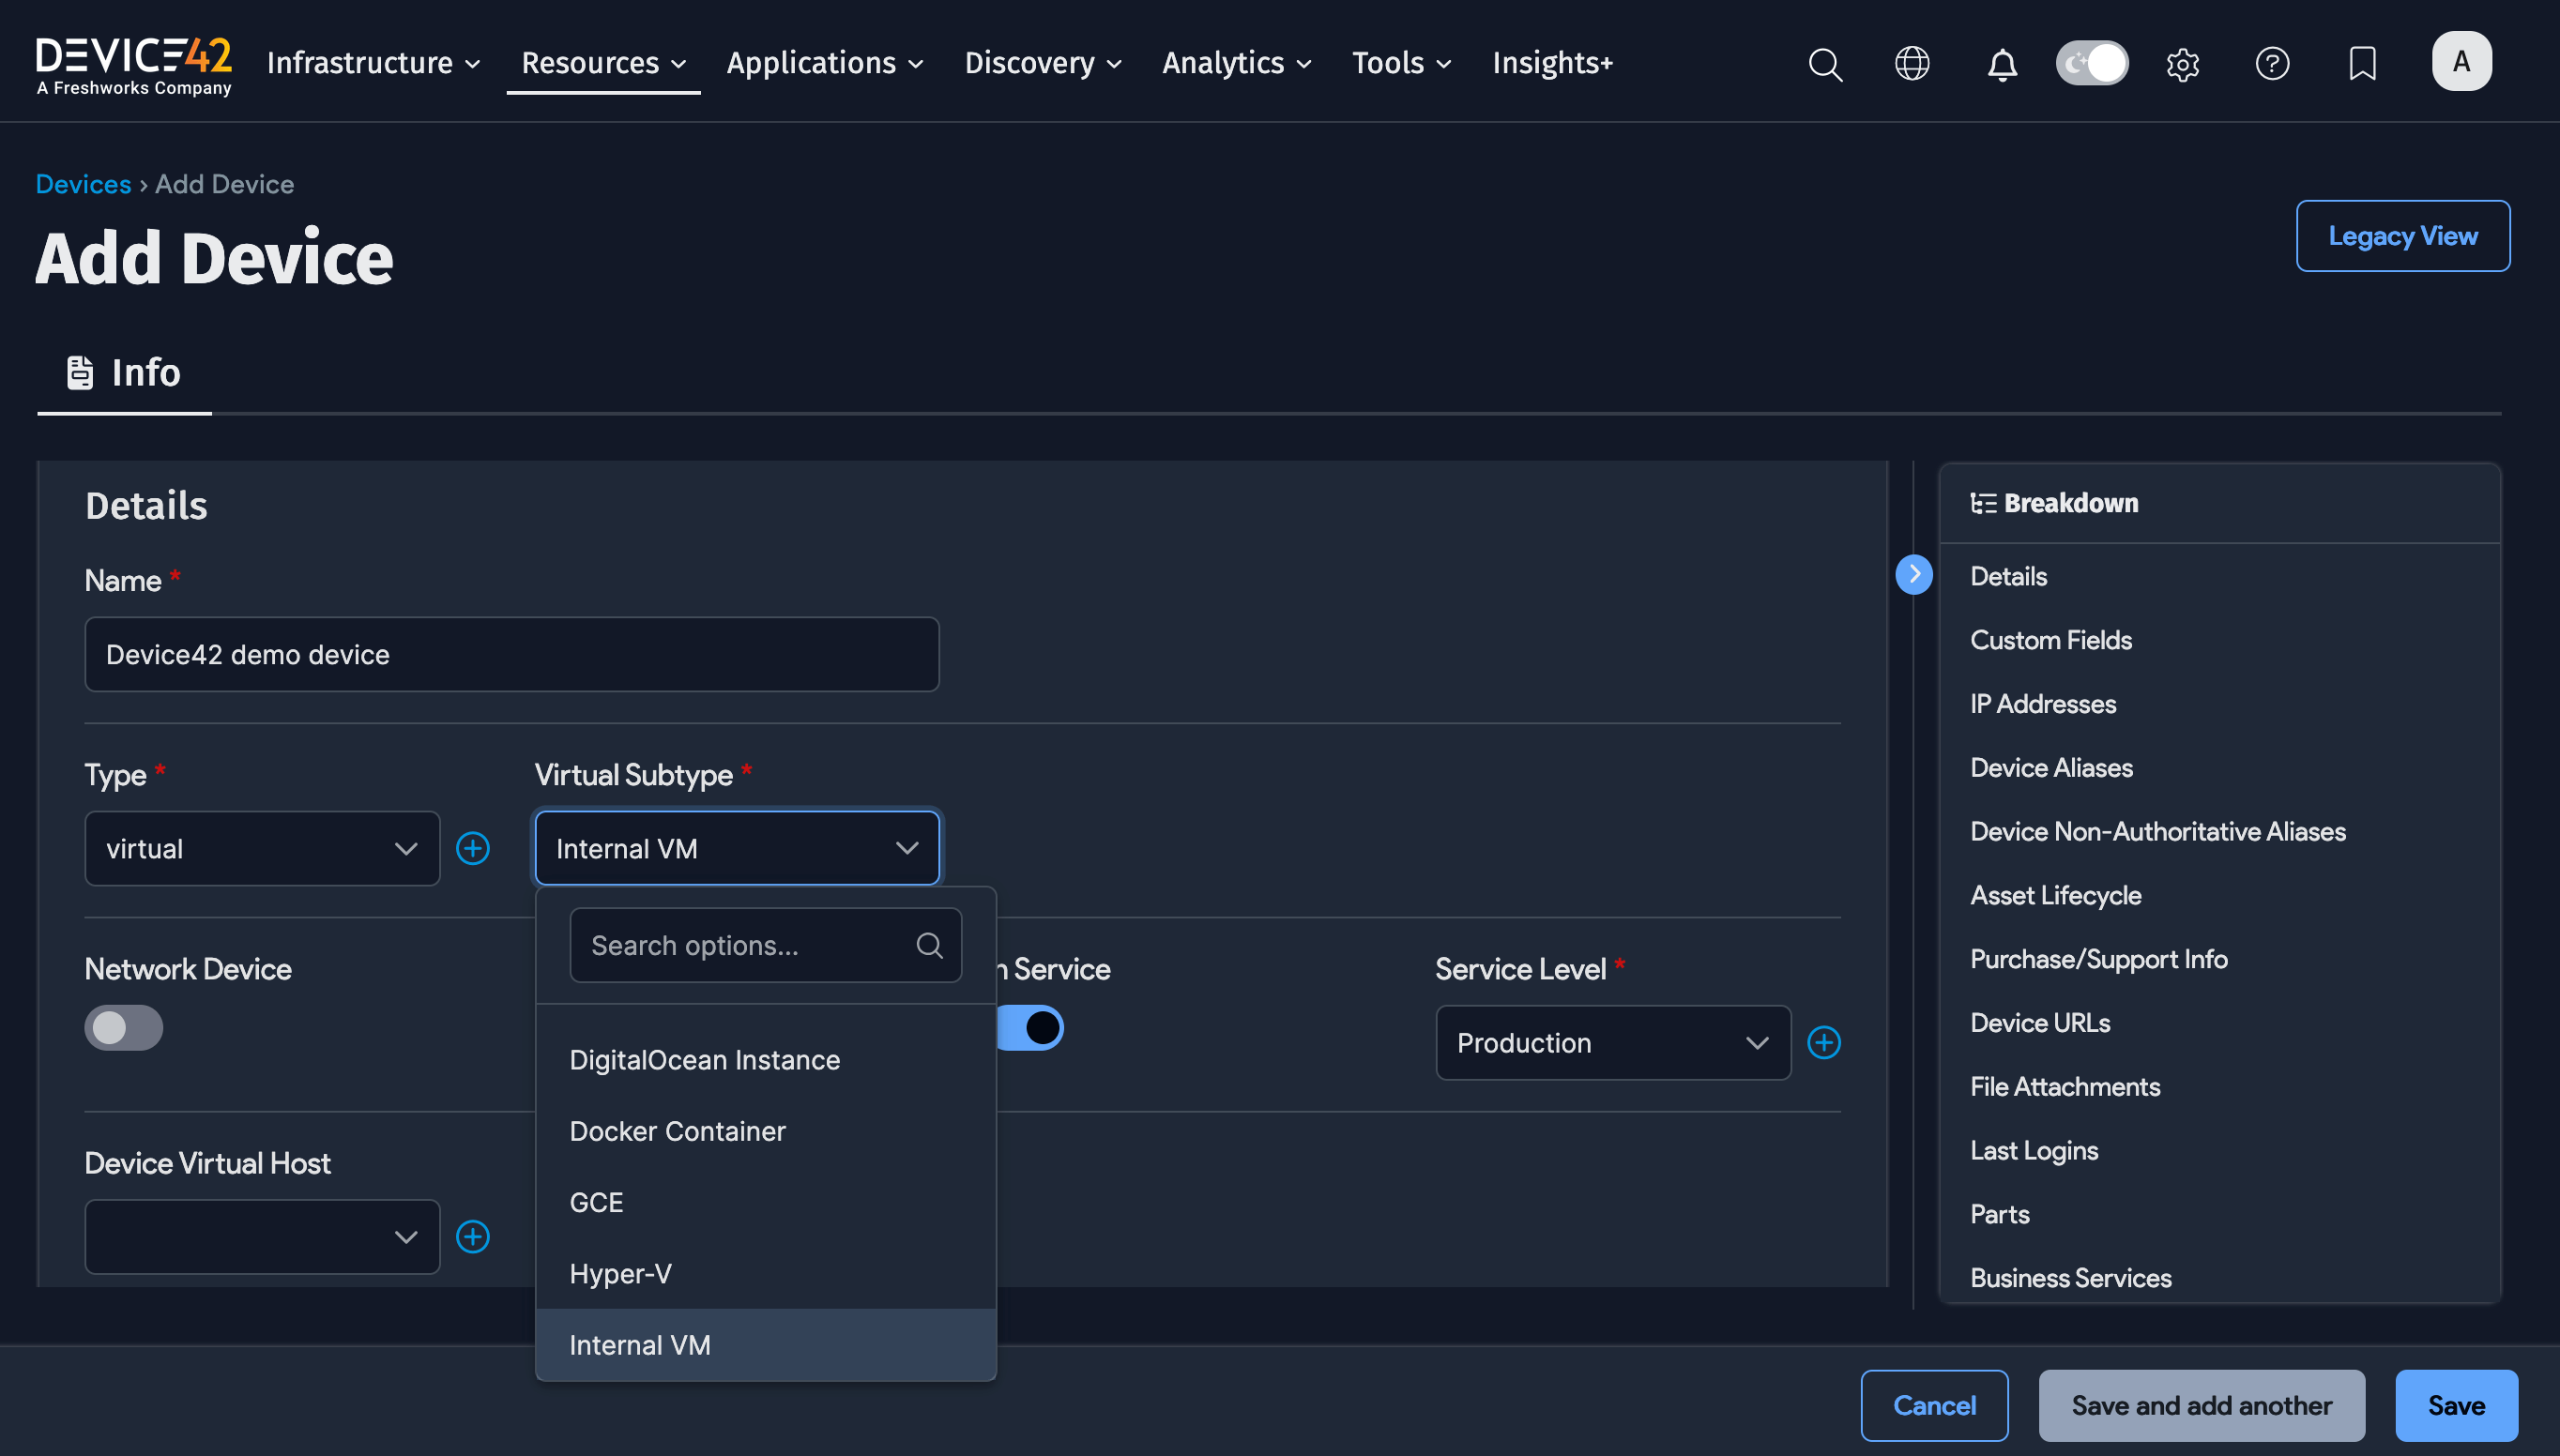
-
For virtual devices, you can select a Virtual Subtype.
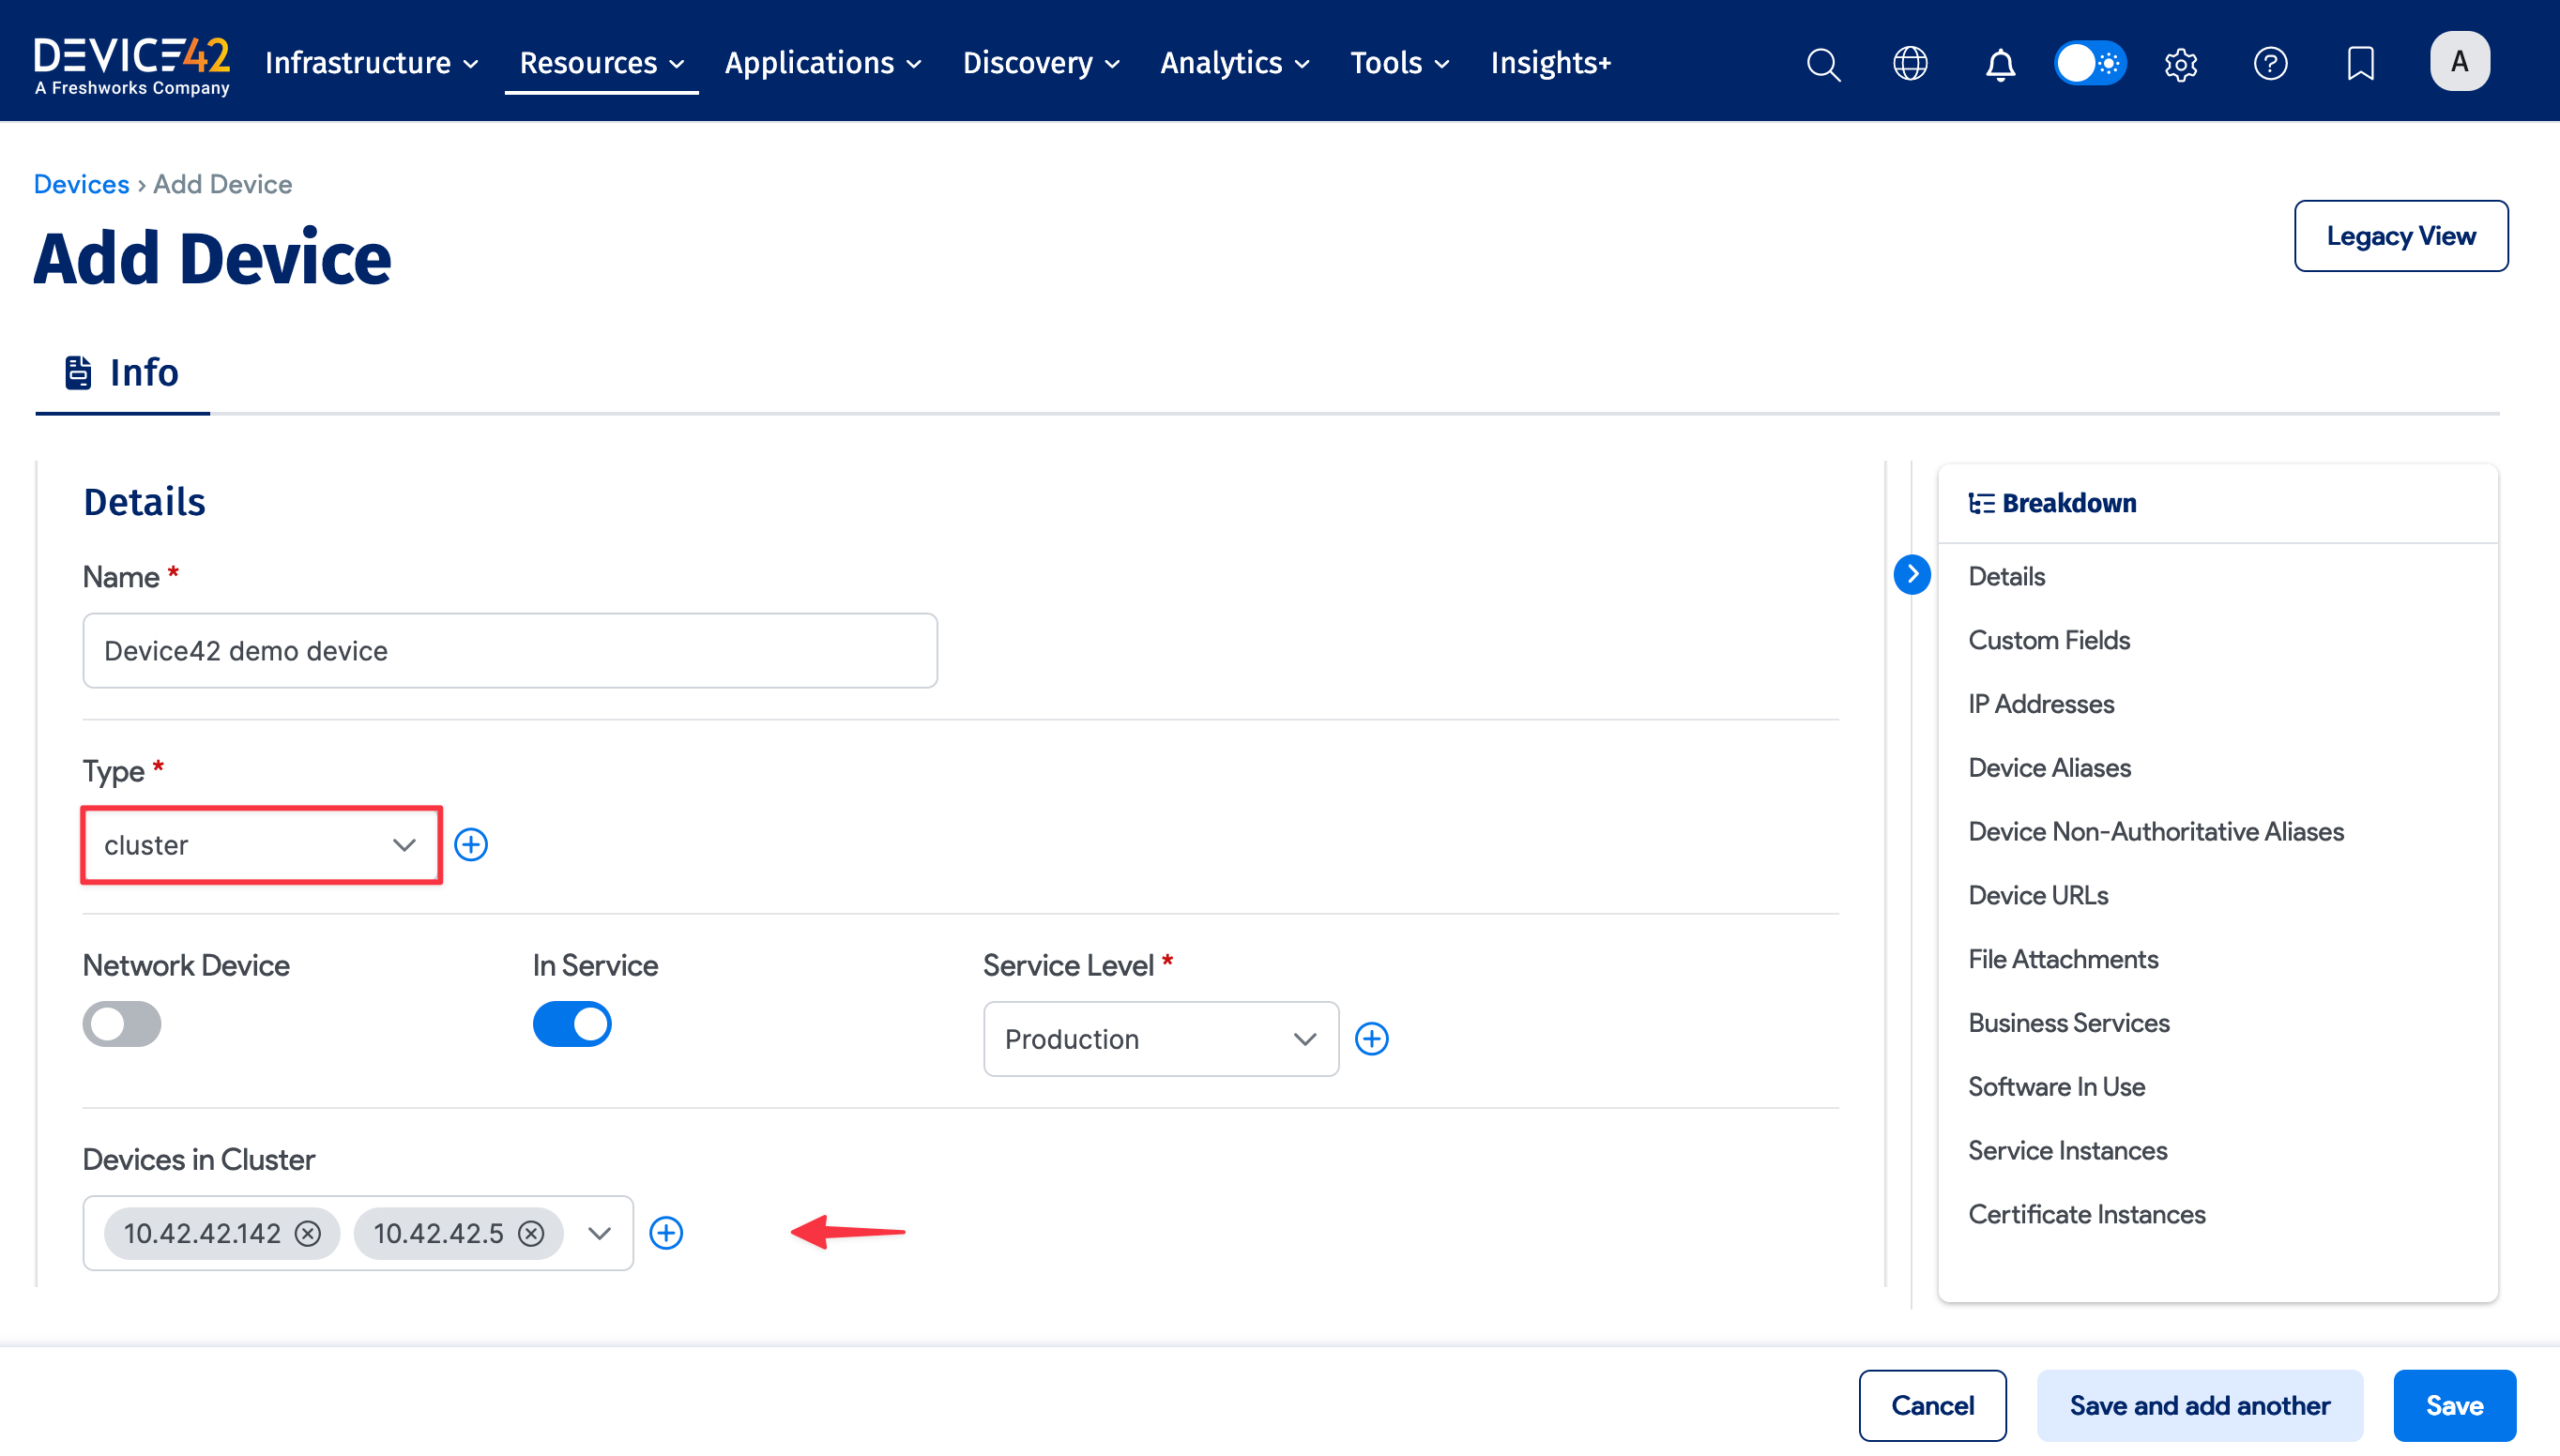
-
For cluster devices, the page displays an Available Devices in Cluster list.
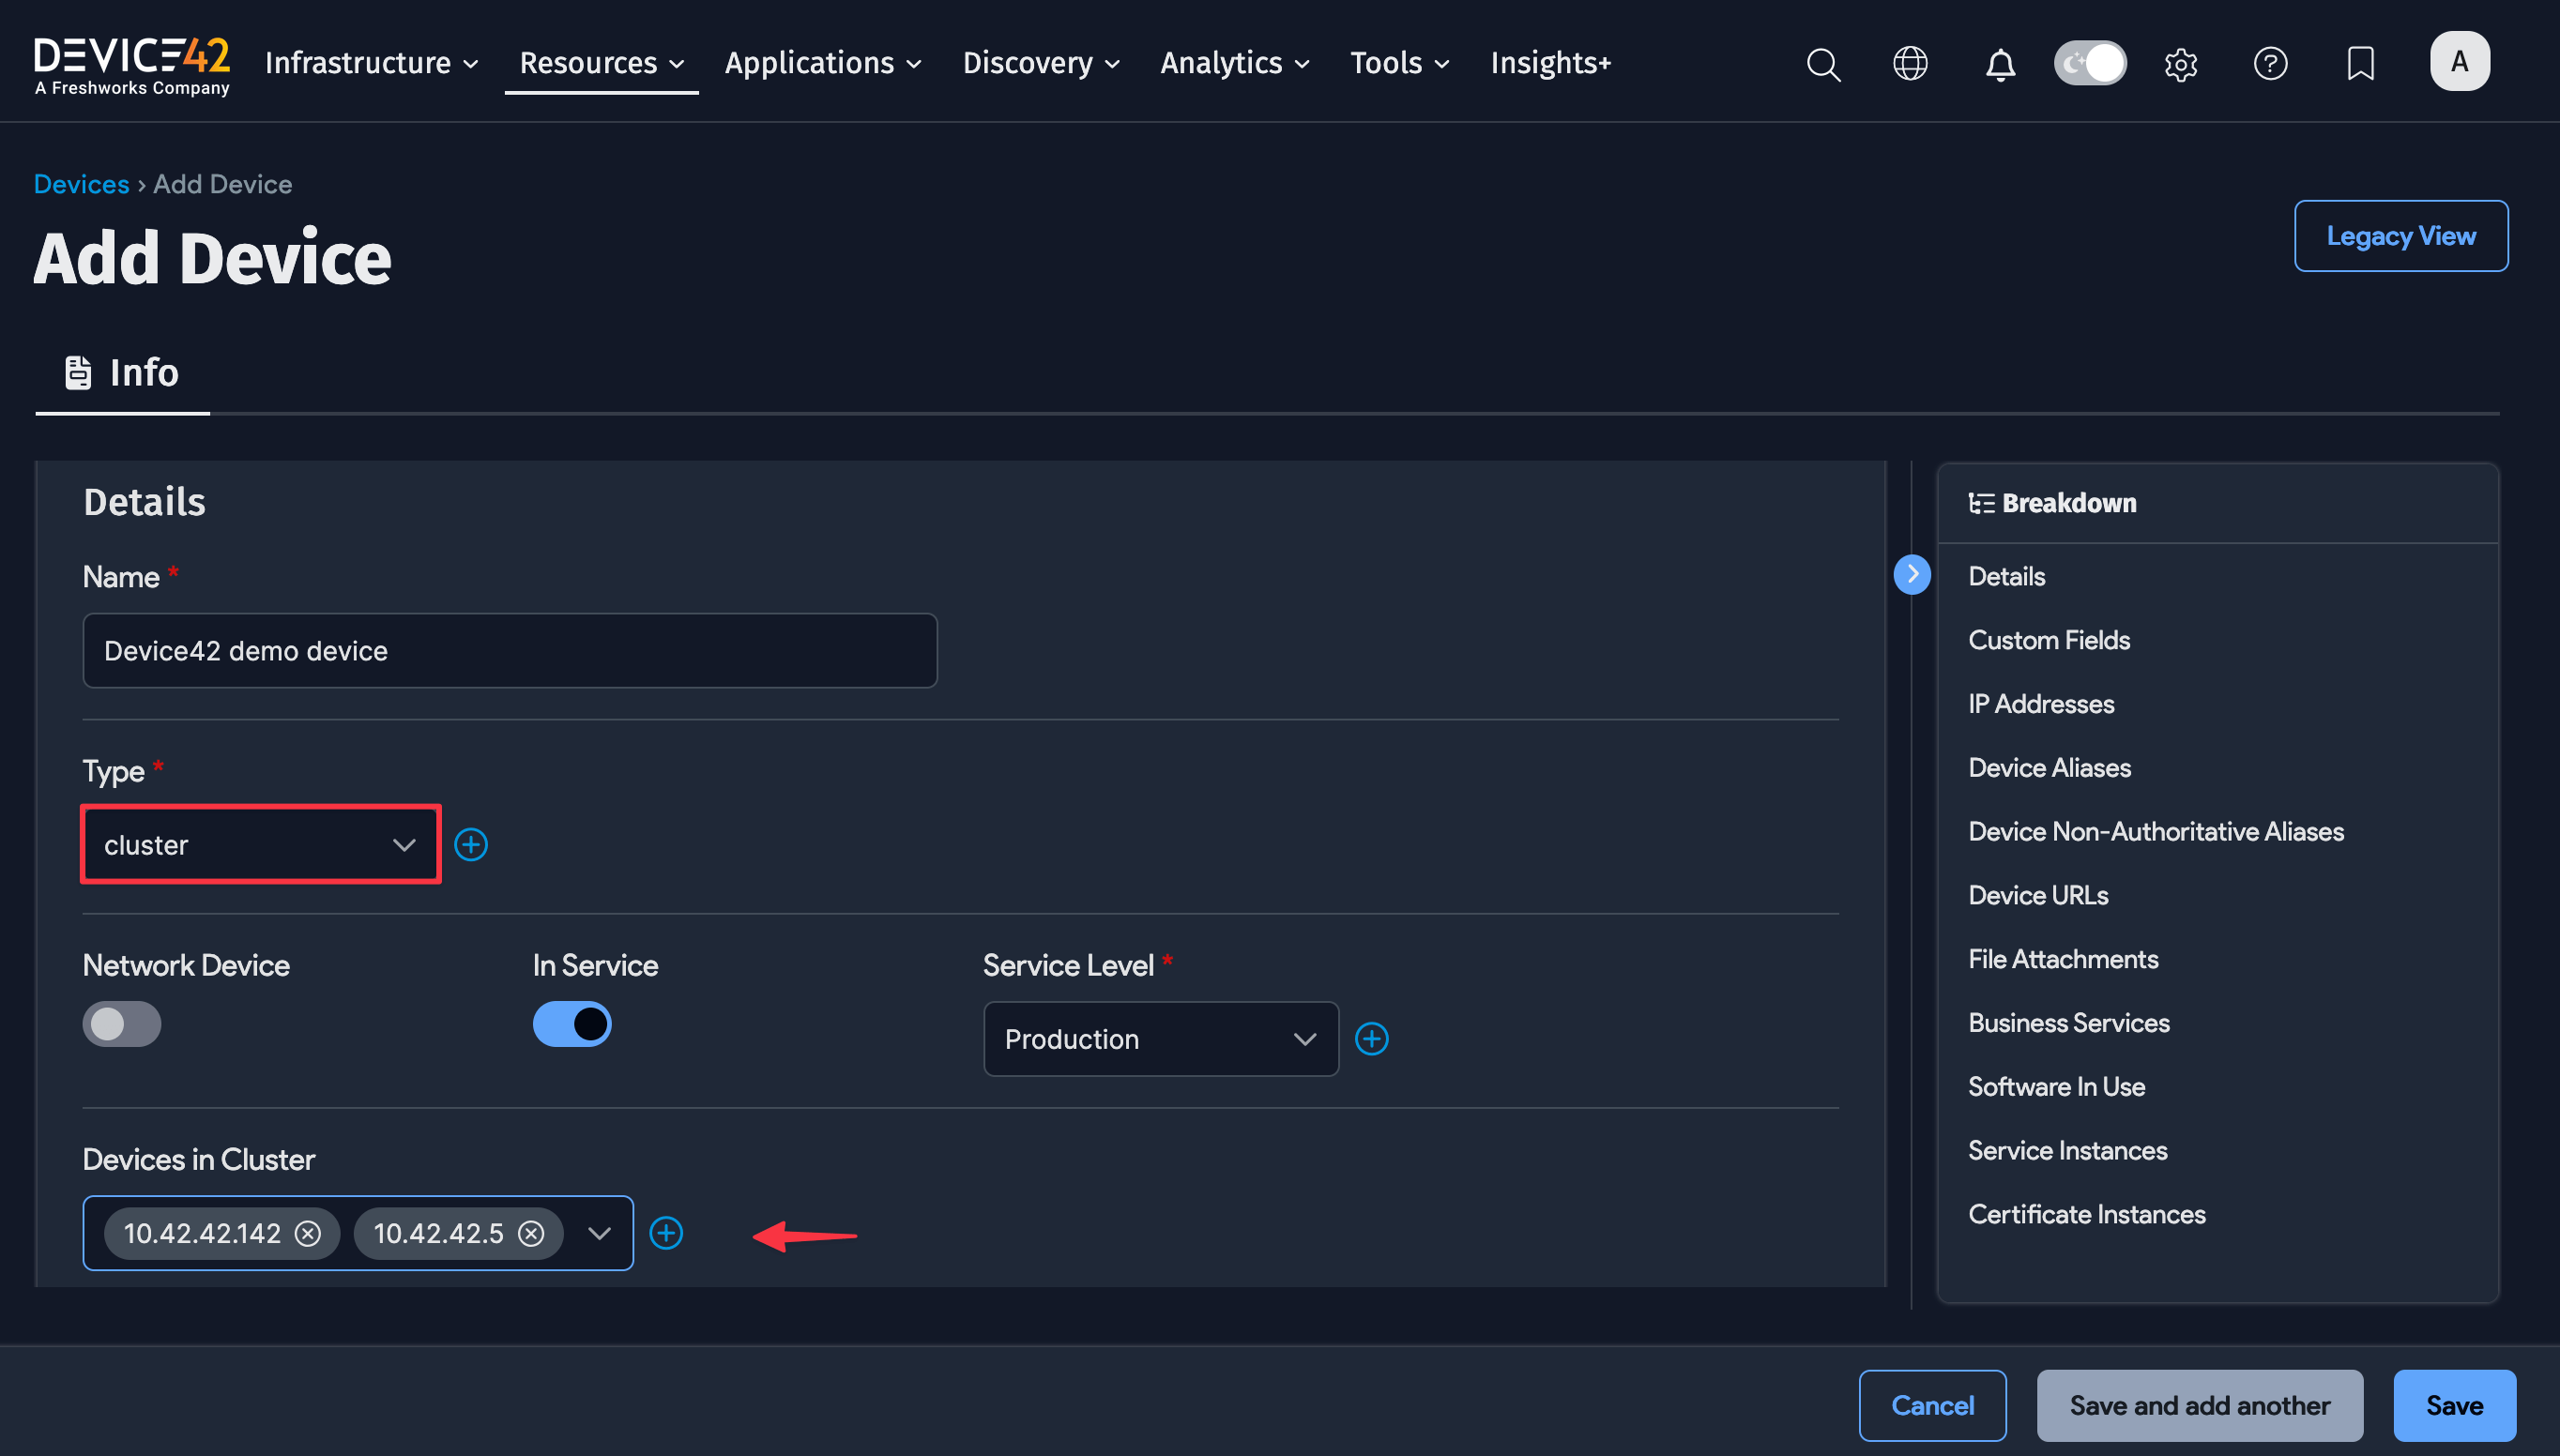
For dropdown menus that include related lookups, such as Physical Subtype, you'll see a + button to create new records. This button requires the necessary account permissions.
Edit a Device
Select Resources > Compute > All Devices to display a list of devices. Click a device Name to see the details for that device, and then click Edit in the top right of the view page.
The following example shows a network switch:
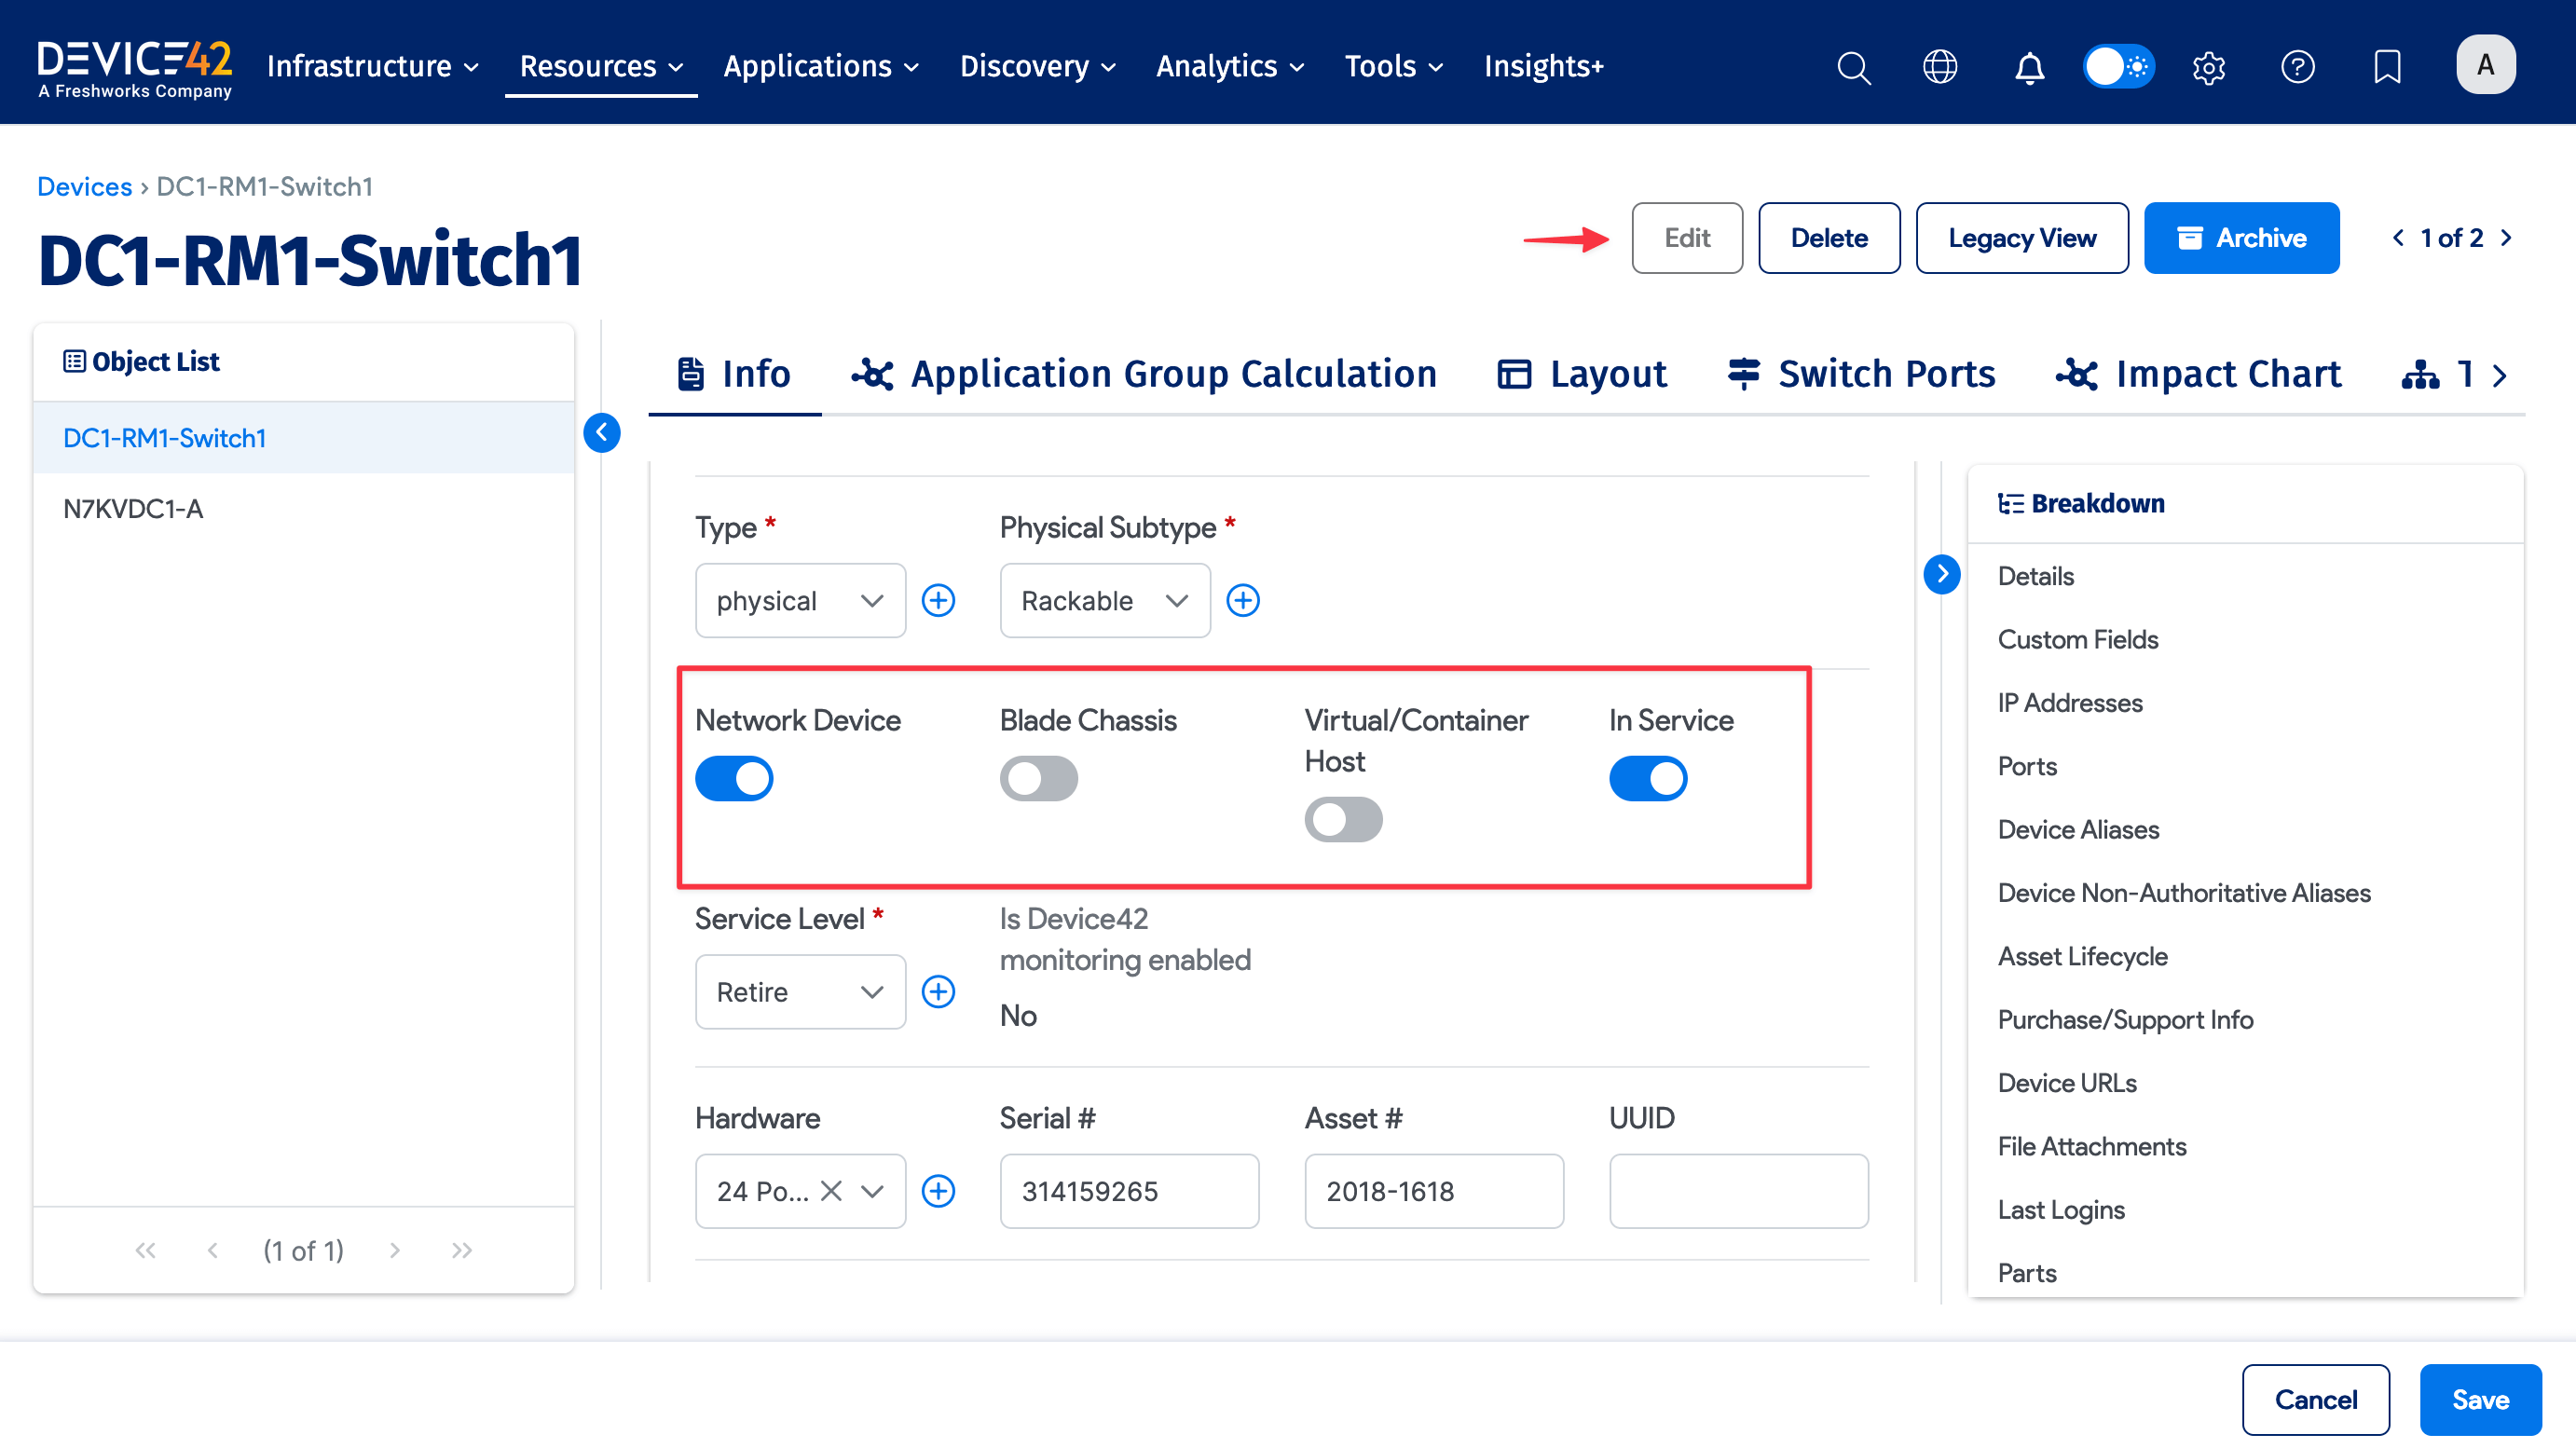
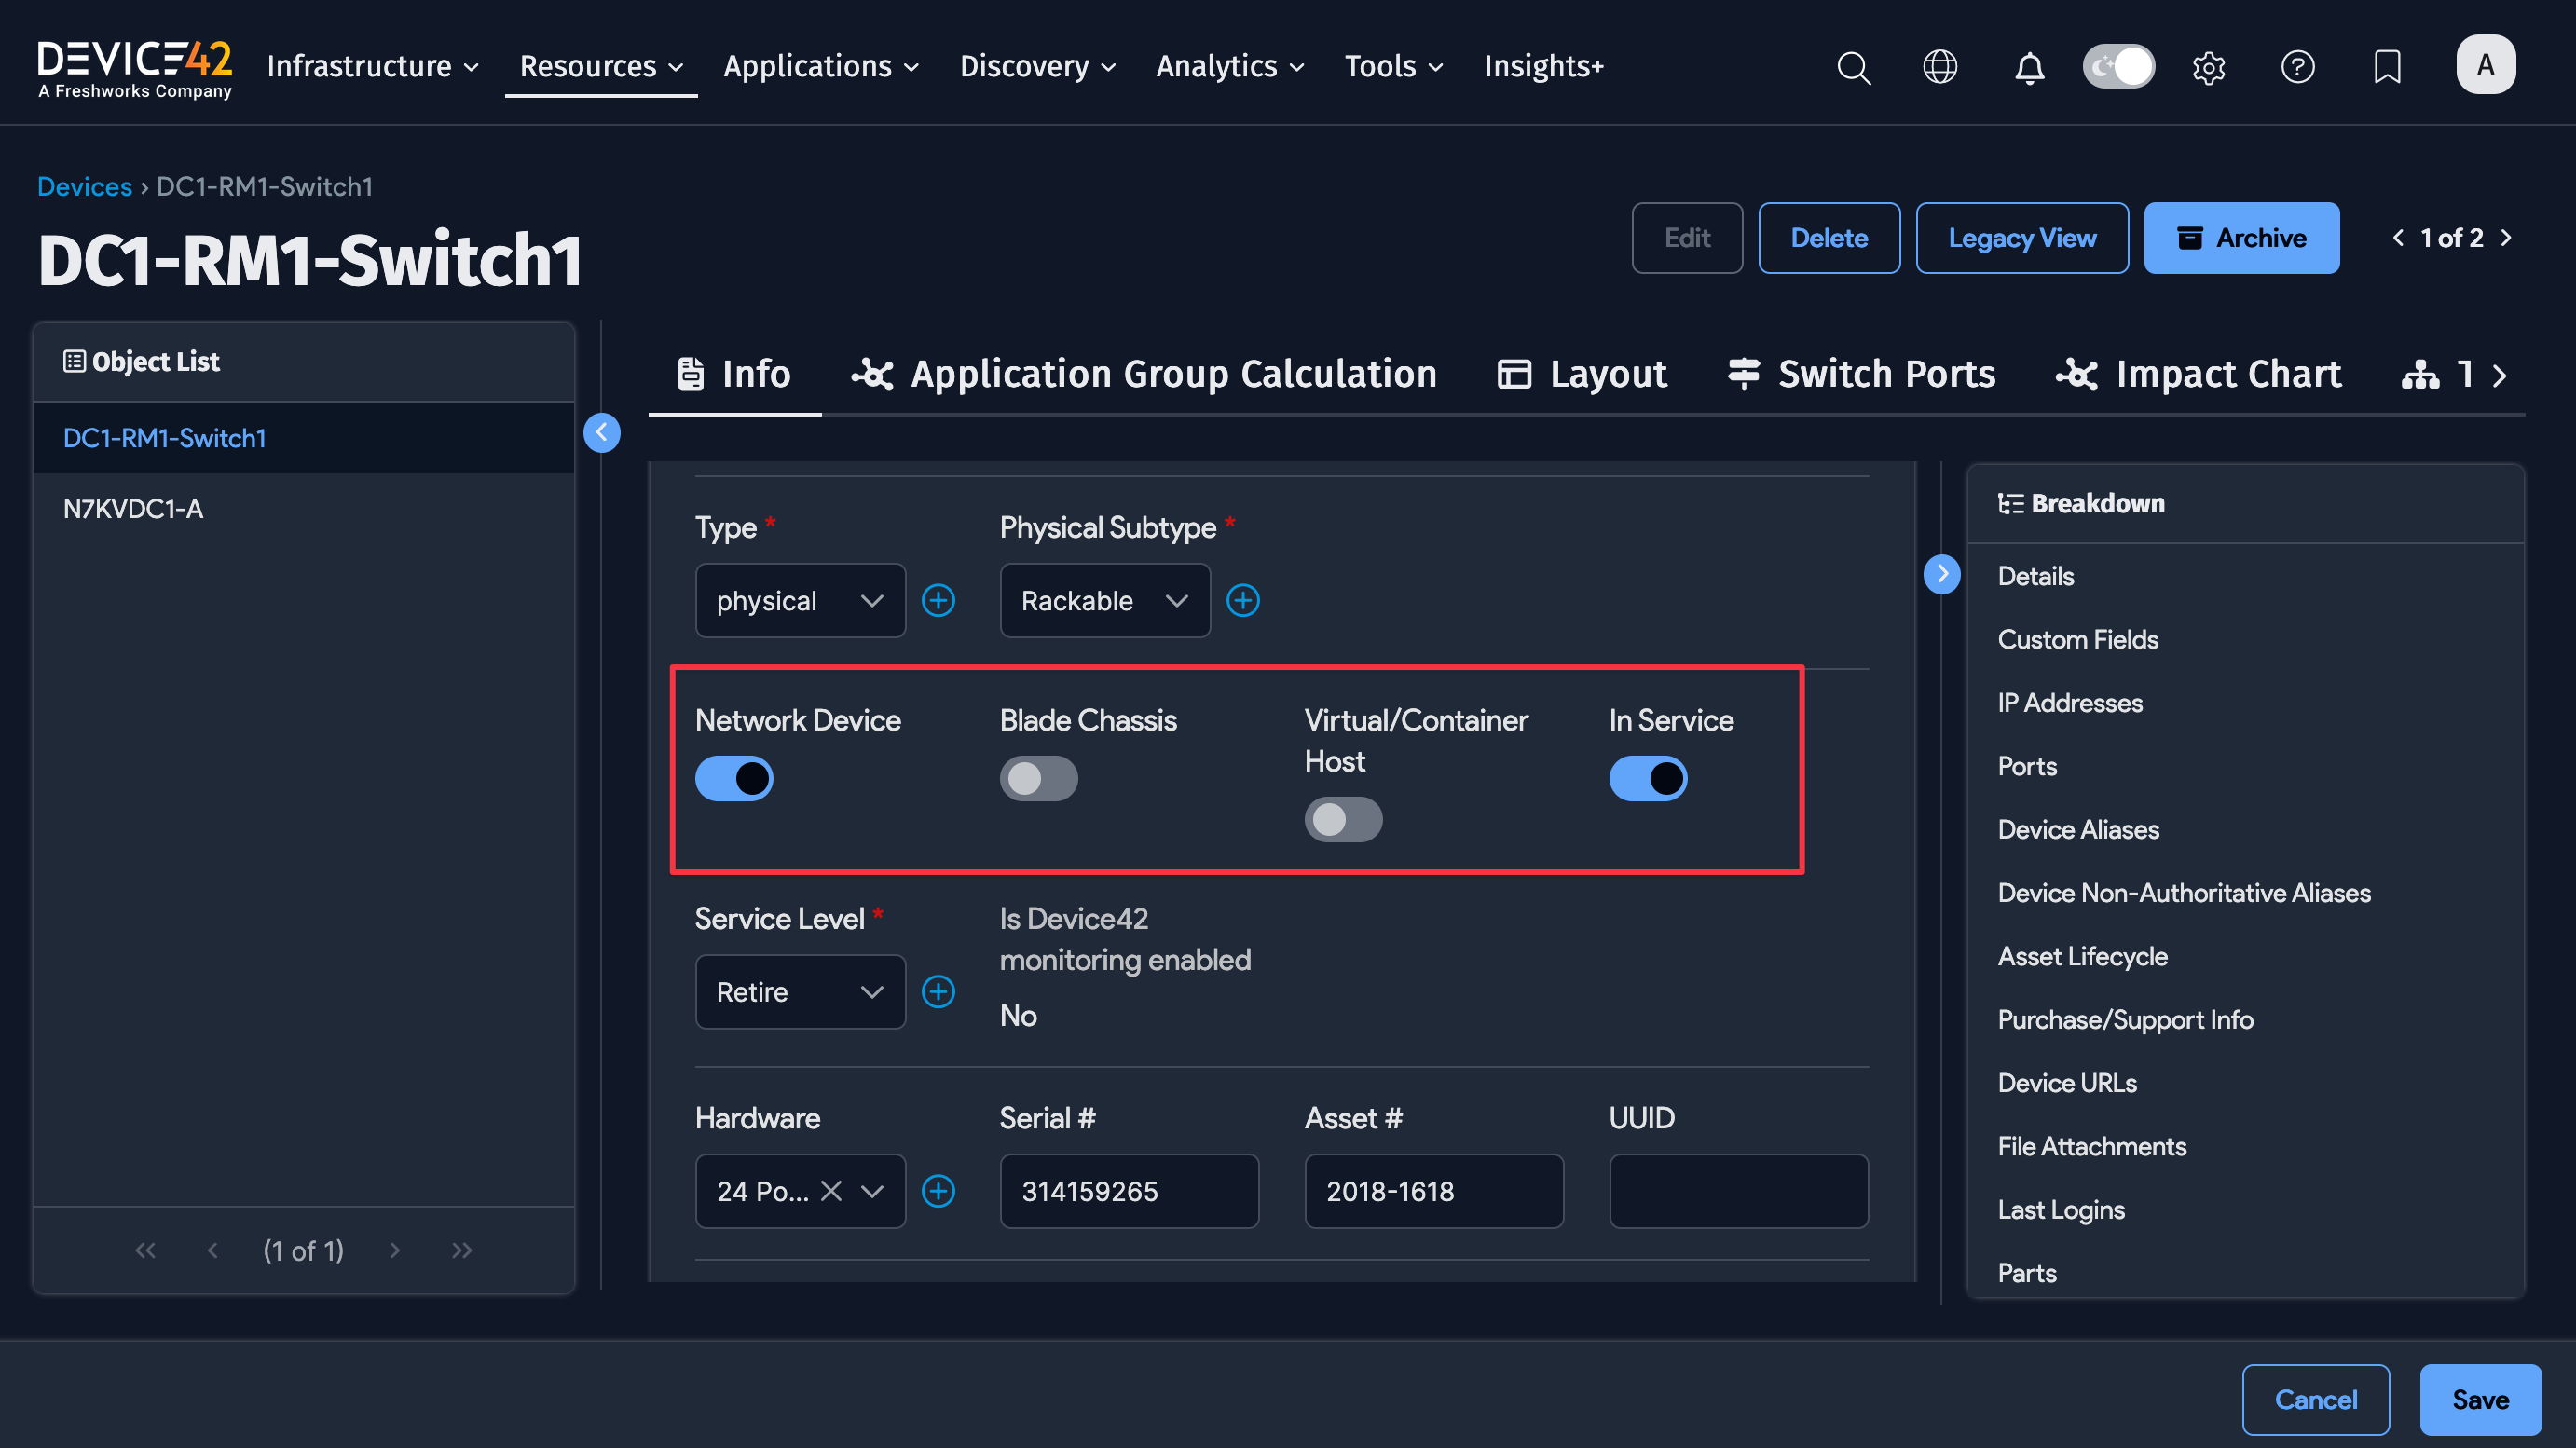
- Network Device, Blade Chassis, and Virtual/Container Host checkboxes: Select the correct attributes for the device. Switch ports can only be added to devices with Network Device checked, blades to a Blade Chassis, and guests to a Virtual/Container Host.
- Service Level: Set the device's production status. Select In Procurement to reserve rack space for a device that is awaiting installation.
- Serial # and Asset #: Displayed for physical and blade devices.
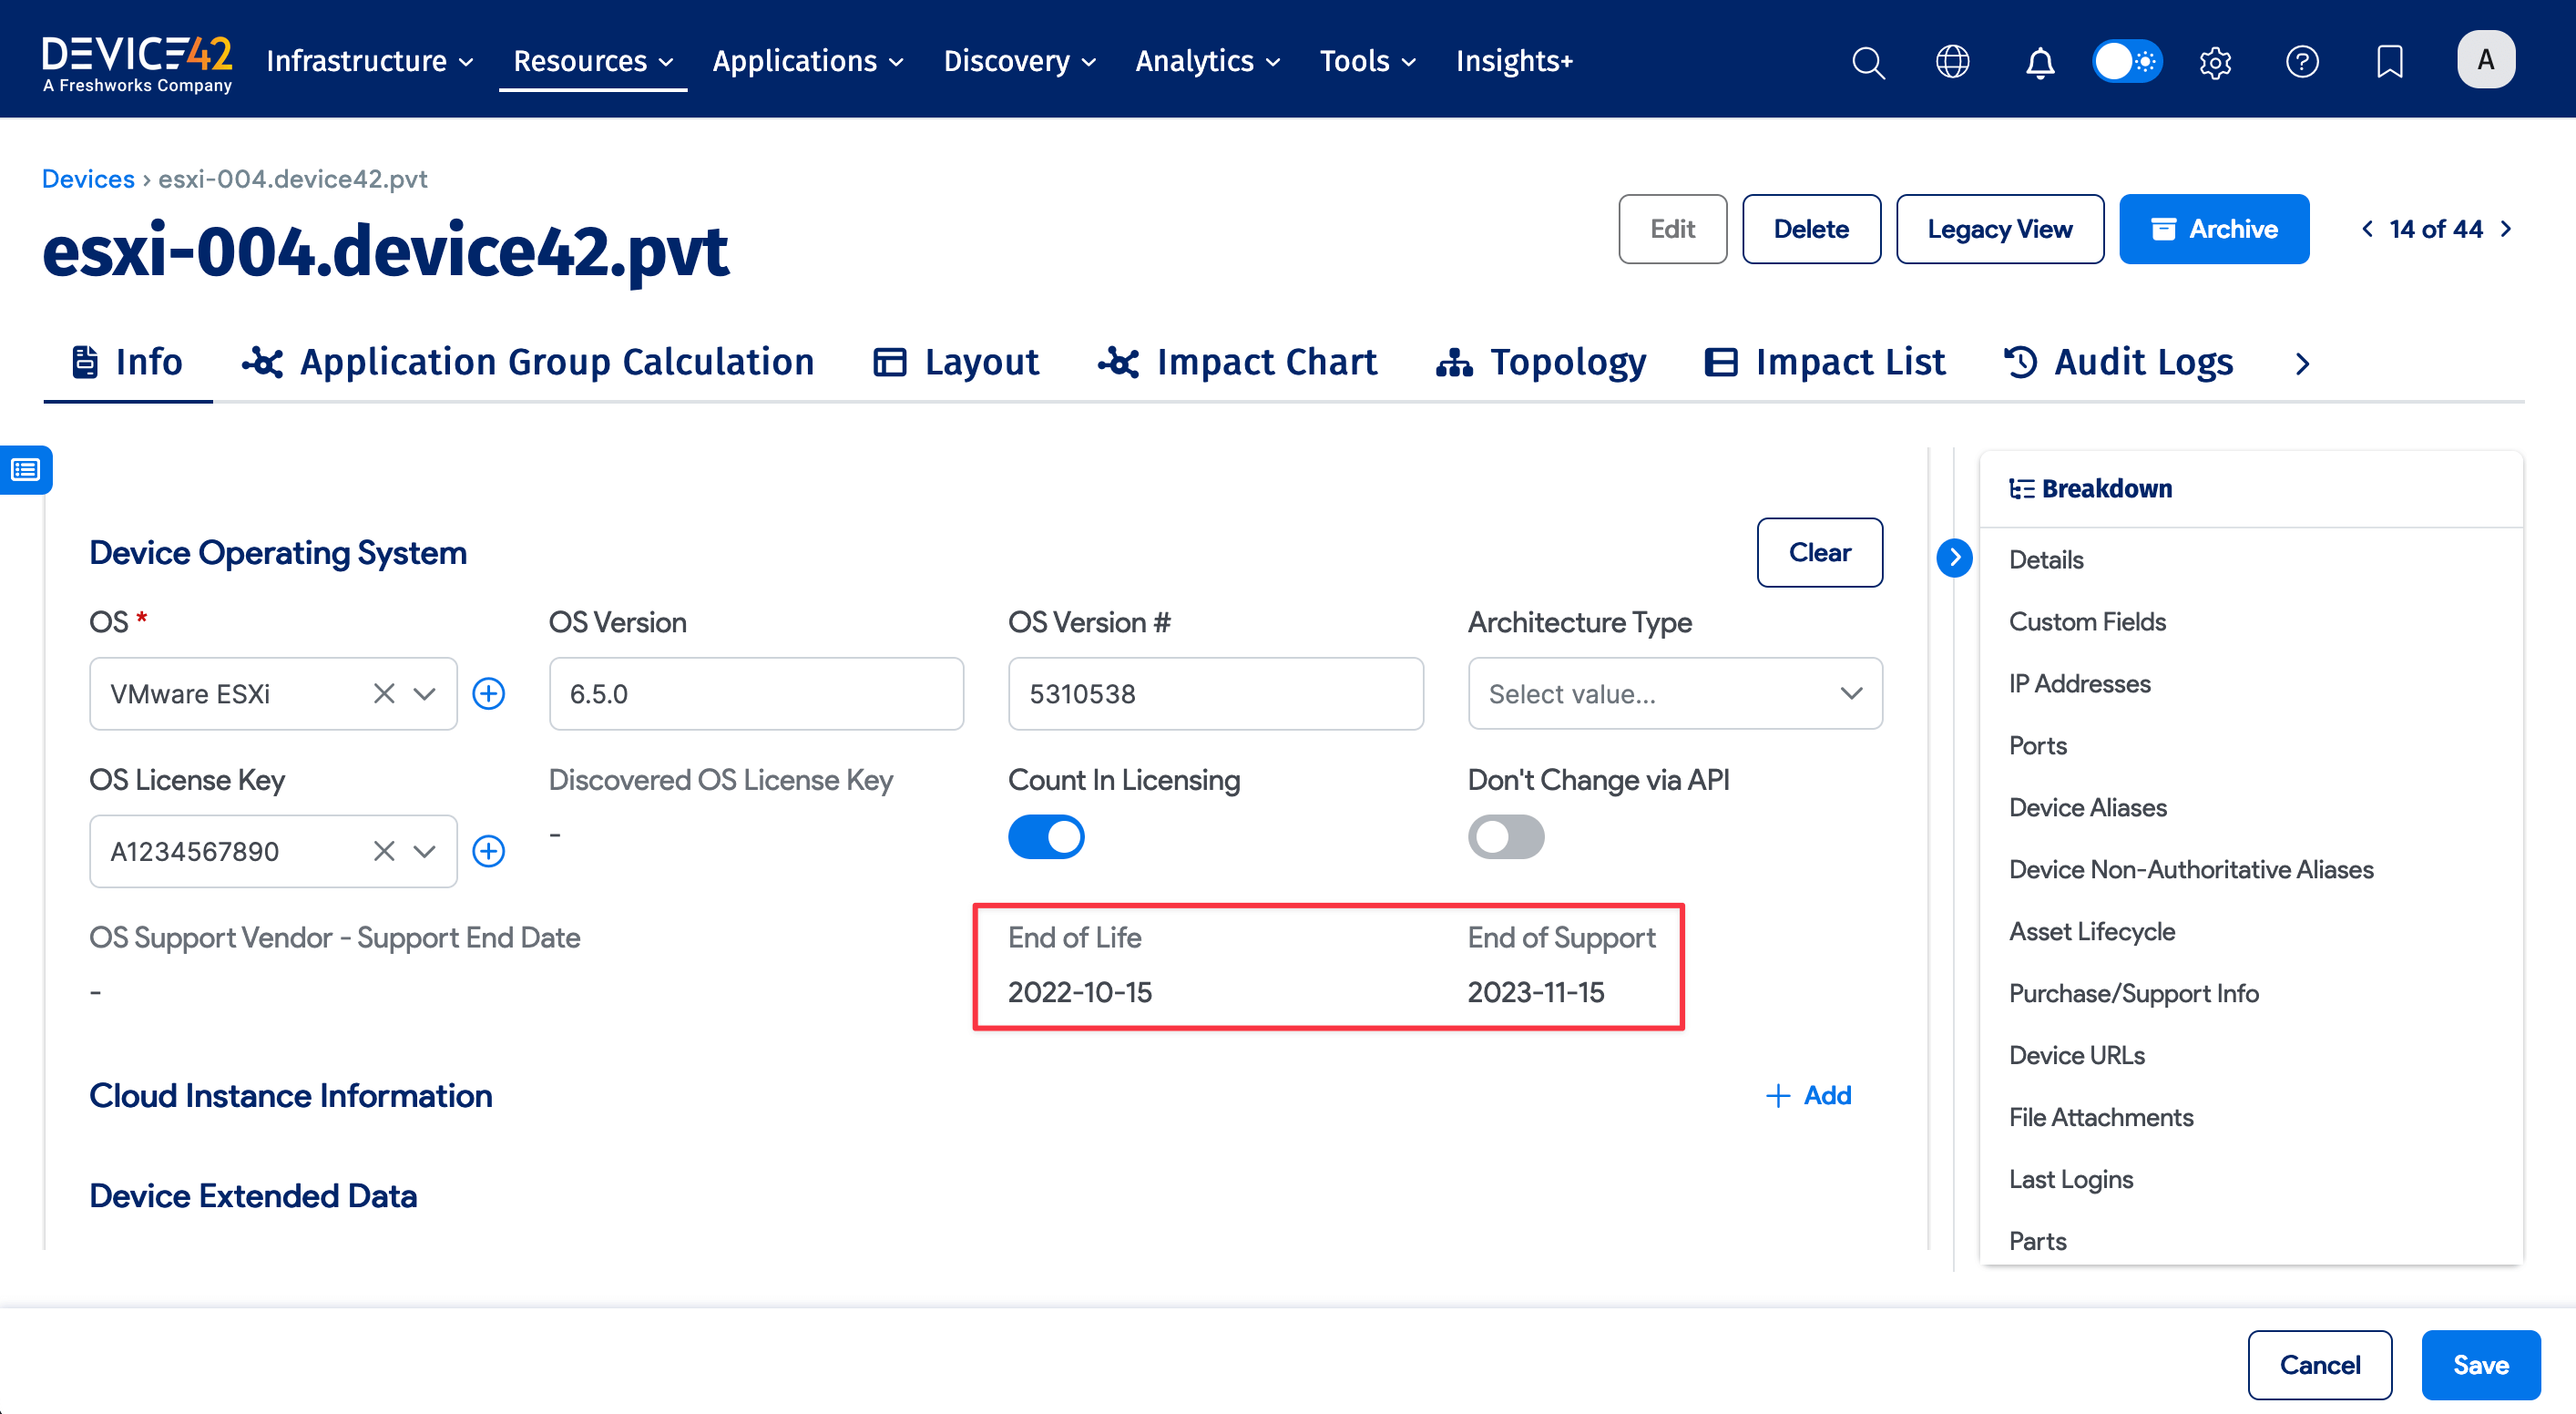
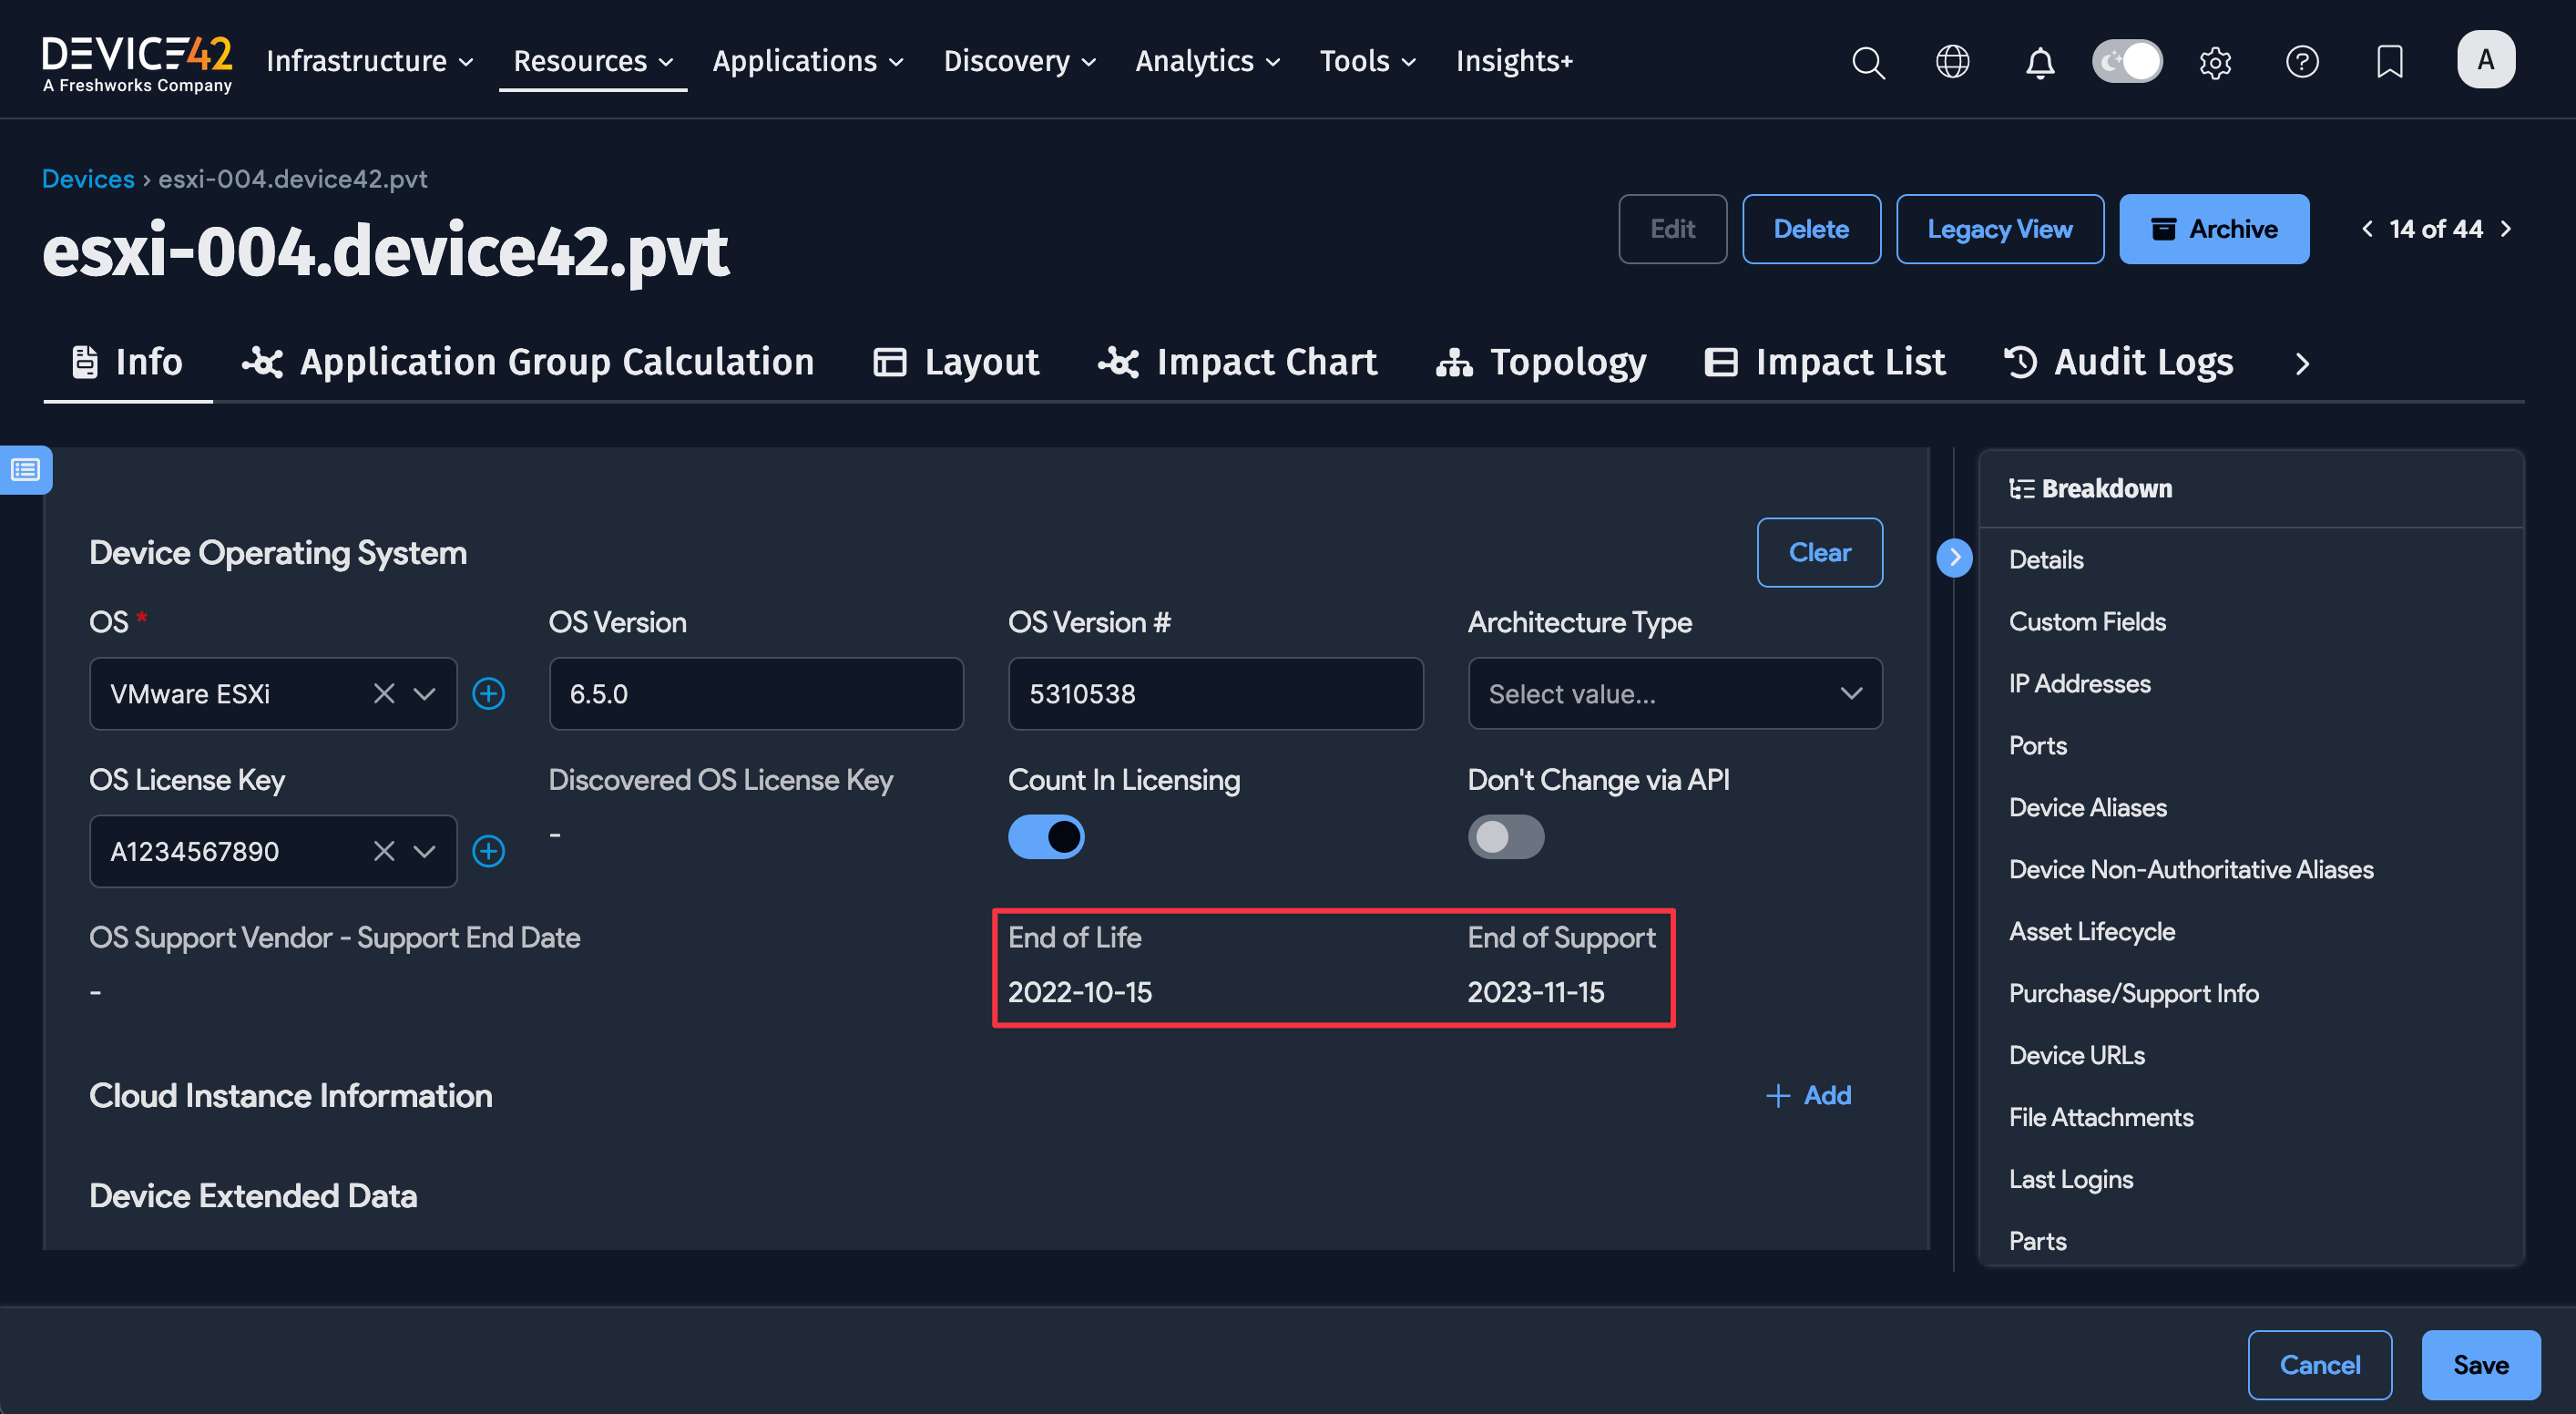
Non-Editable Fields
Fields populated through Enriched Data, like End of Life and End of Support, are not editable. To set these fields manually, disable the Enriched Data service and disconnect the record from Enriched Data.
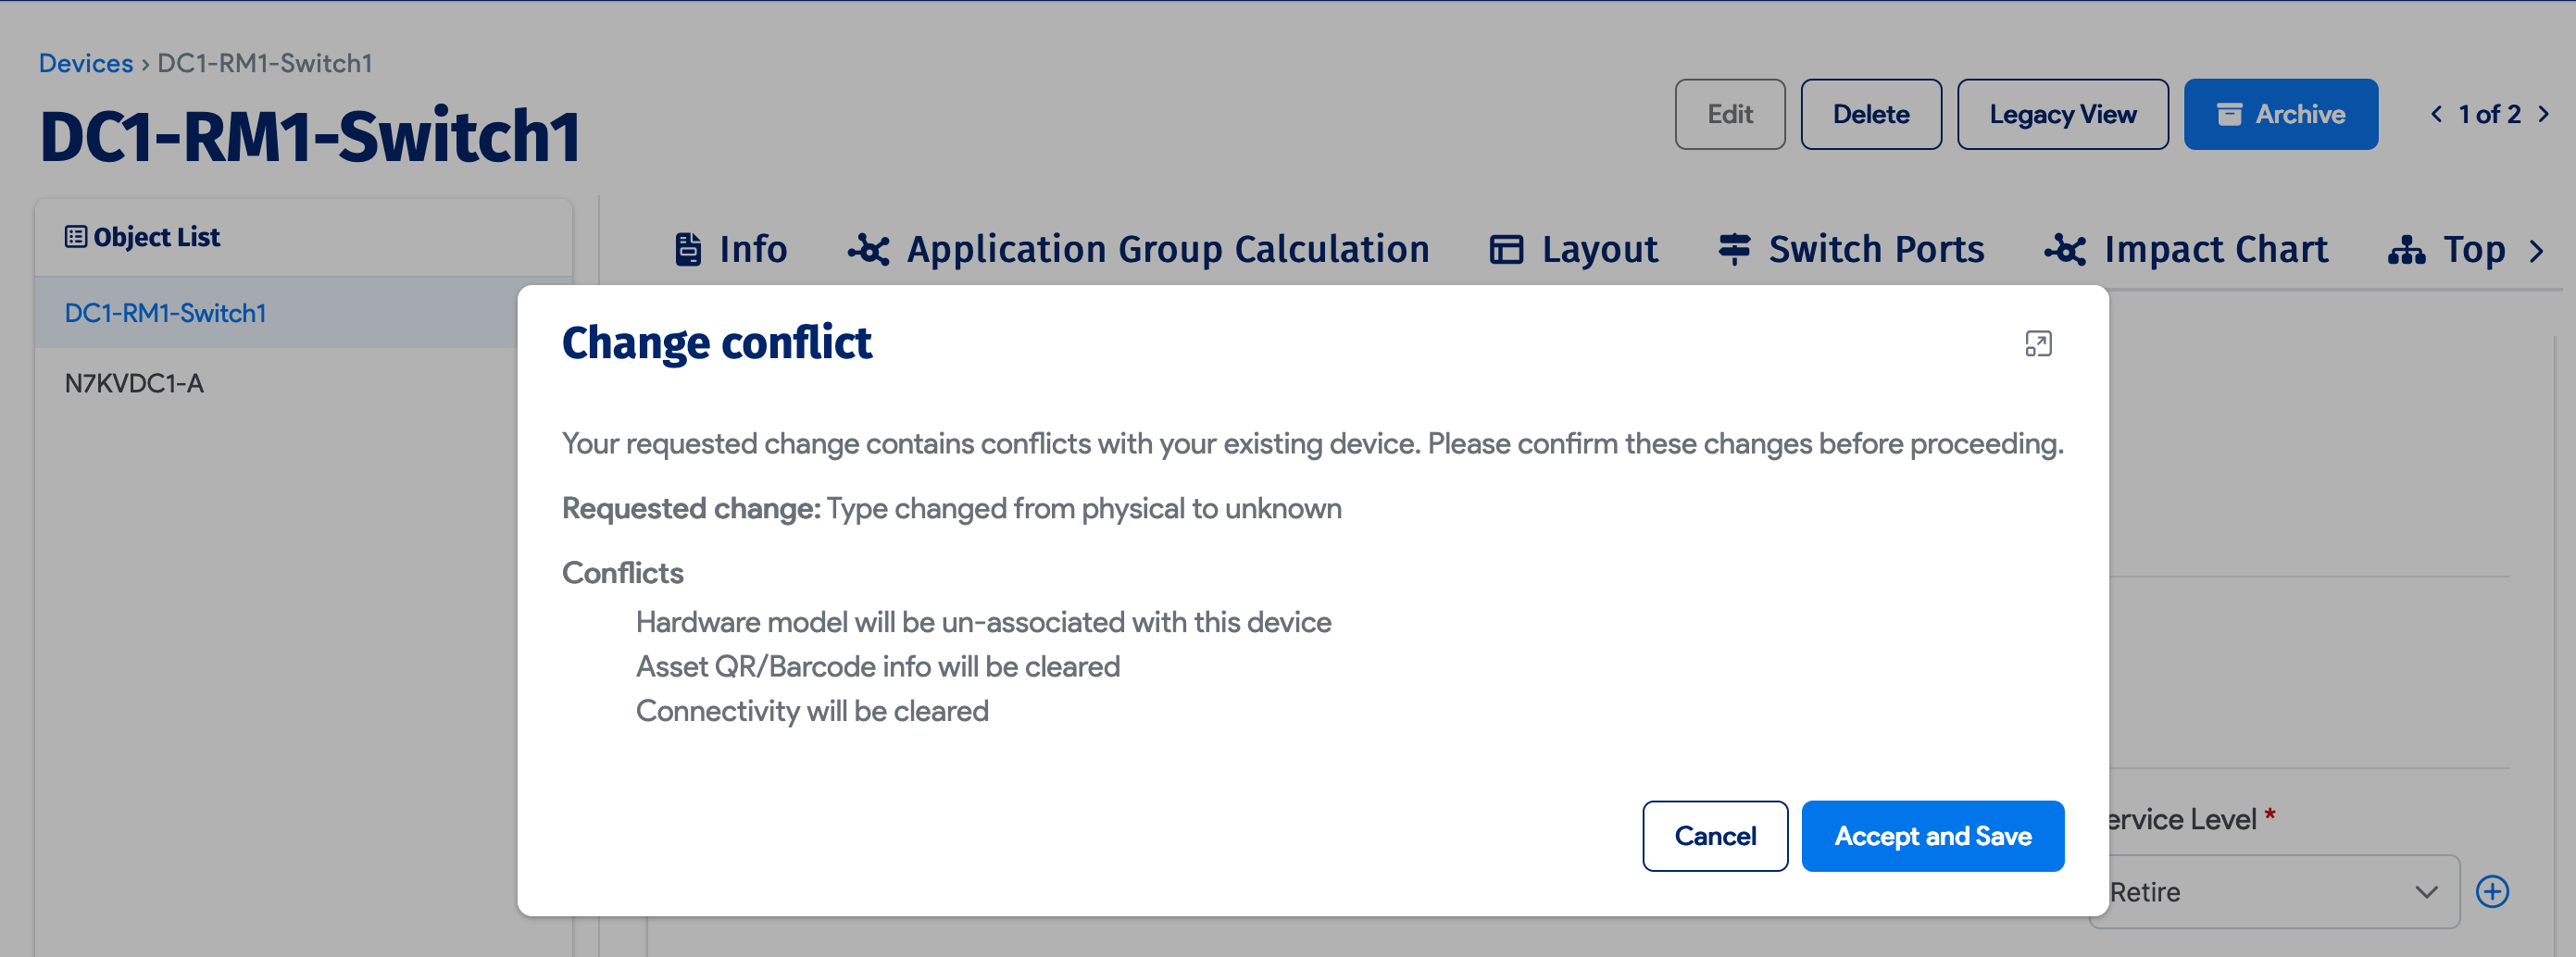
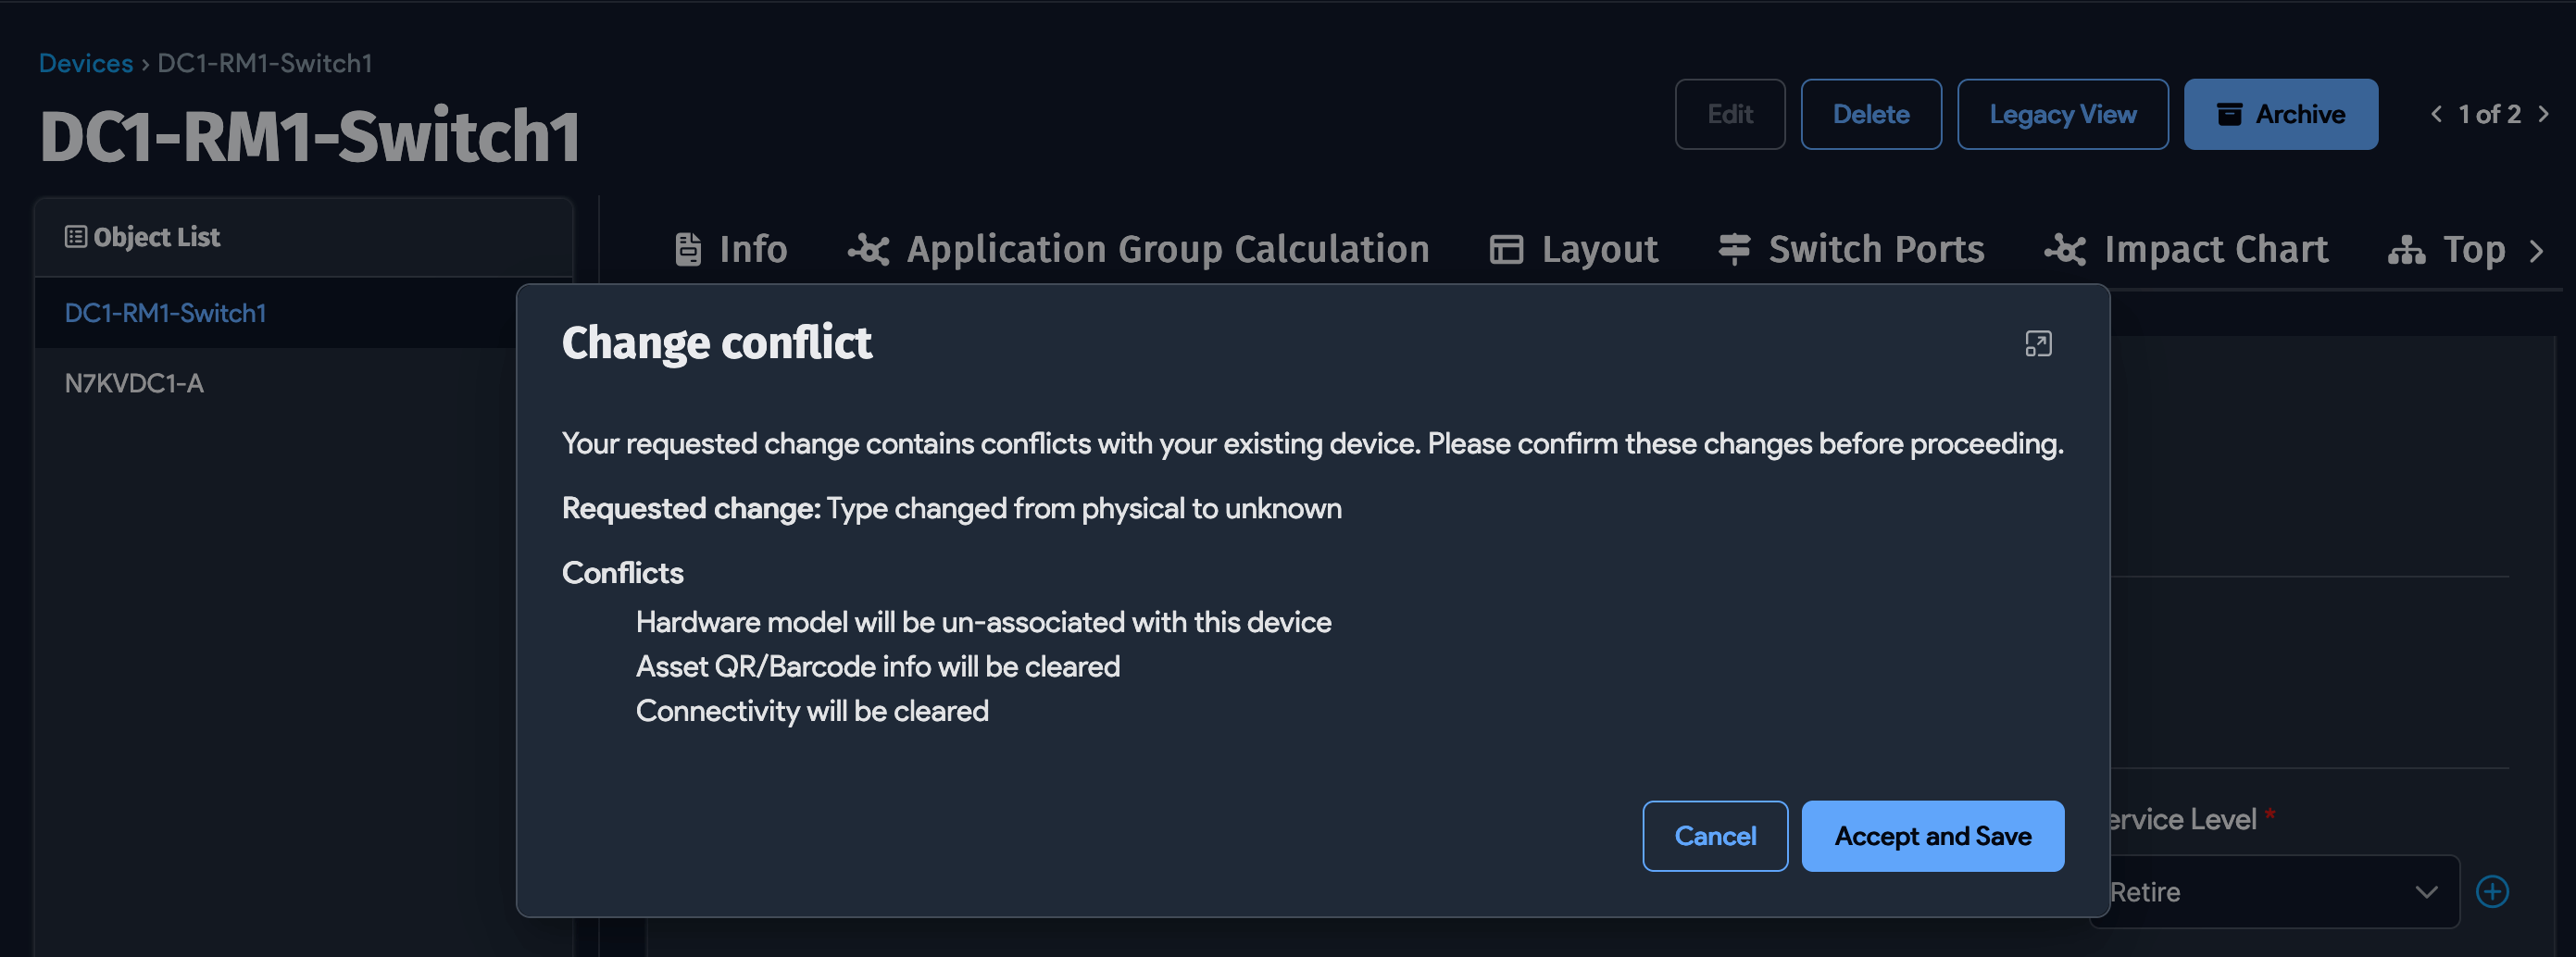
Change a Device Type
You can change a device type, for example from physical to virtual, cluster, or unknown. When you change a device type, you lose all attributes specific to that type.
Device42 displays an alert listing the attributes that will be lost.
The following table lists the attributes lost for each device type change:
| Original Type | Attributes Lost |
|---|---|
| Physical | Rack, room, or storage room information; hardware model; IP or power connectivity; blade chassis property; all blade information |
| Virtual | Virtual host property; cloud instance data |
| Blade | Blade host information; blade chassis slot number; hardware model; storage room information; IP or power connectivity |
| Cluster | All cluster associations |
For bulk actions like adding tags, deleting devices, and other list-level operations, see Device List View.