How To Update or Contribute Images
Each page of our documentation exists as a Markdown file located on our open-source GitHub repository. Updating an image consists of two broad steps:
- Upload the image to the
static/assets/imagesfolder. - Edit the link to the image in the relevant markdown file.
You won't have permission to make changes to the Device42 repository directly. Instead, make changes to your forked repository and submit those changes for review in a pull request. The changes you suggest will be implemented on the website after being reviewed by our team.
Here's an overview of the process:
- Fork the Device42 repository OR navigate to your existing forked Device42 repository.
- Create a new branch.
- Upload the new image to the
static/assets/imagesfolder and commit the change. - Change the file path in the Markdown document and commit the change.
- Open a pull request to submit your changes for review.
Watch the video below or read the detailed instructions that follow.
How Do I Update Images on GitHub? (Video tutorial)
In this video, we update the IronPython screenshot on the "Using APIs for Custom Autodiscovery" page. We begin having already forked a copy of the Device42 GitHub repository.
How Do I Update Images on GitHub? (Article)
In this written example, we'll update the "Download the sample script (api-sample.py)" screenshot on the "Using APIs for Custom Autodiscovery" page.
Let's get started.
Prerequisites: Fork the Repository
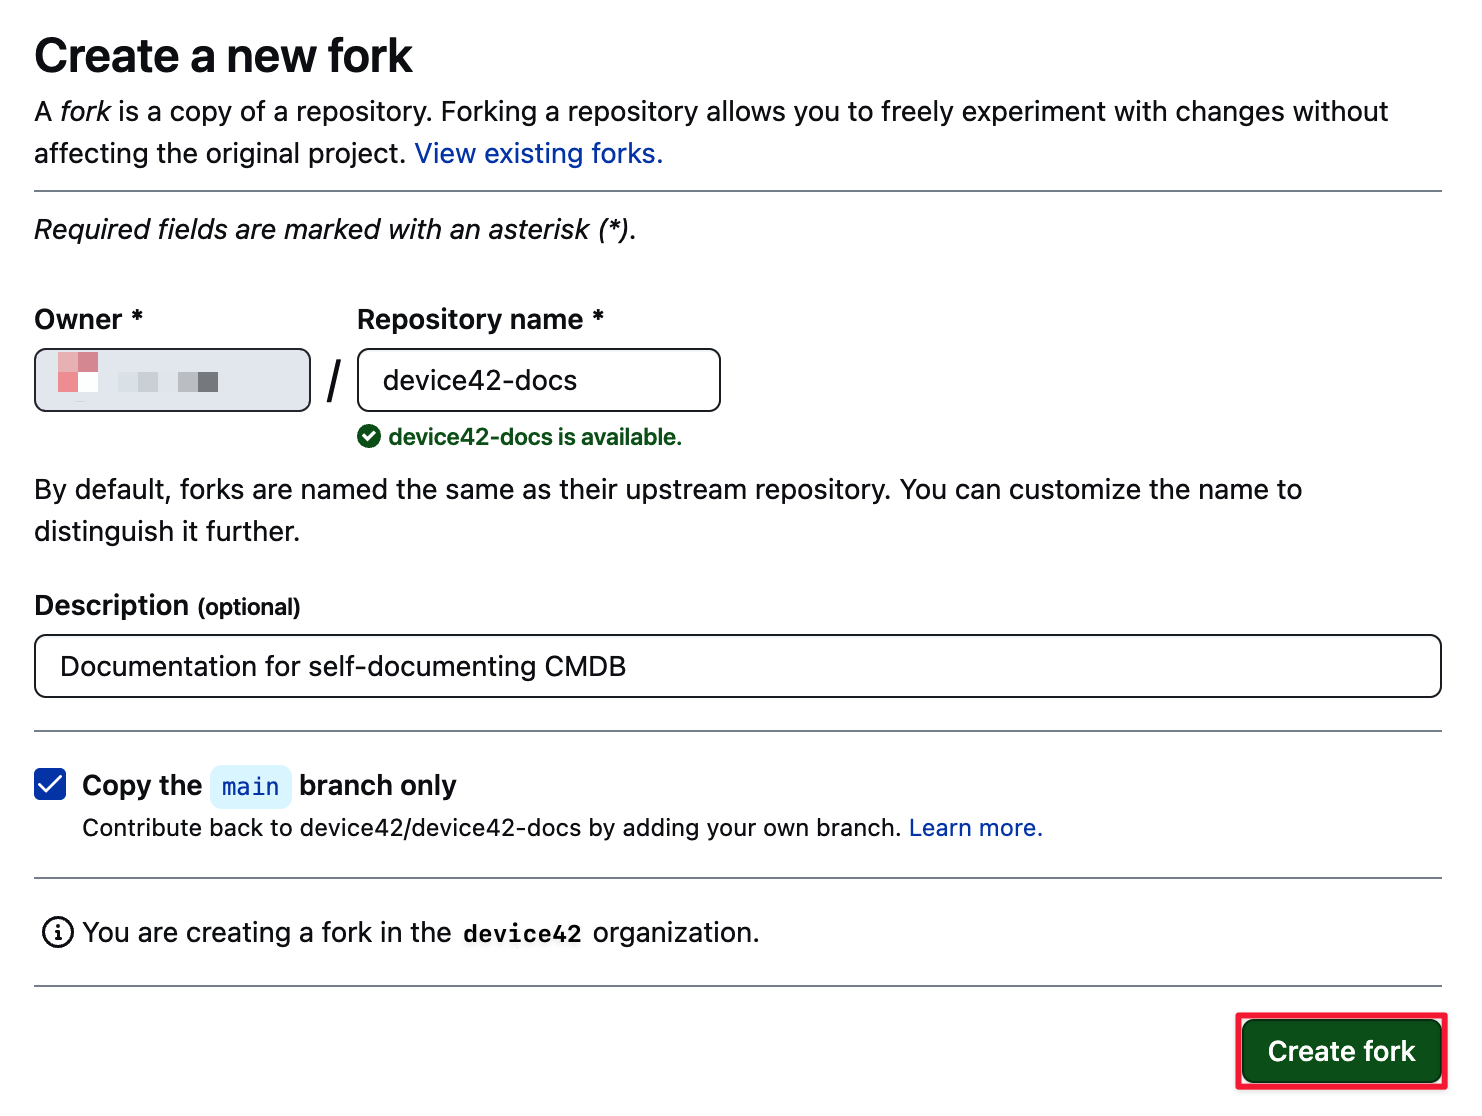
Create a GitHub account and fork the Device42 repository by clicking on the "Fork" button. Forking a repository creates a copy of the repository that you can safely make changes to without affecting the original.

In the dialog box that opens, click "Create fork".
Navigate to Your Forked Device42 Repository
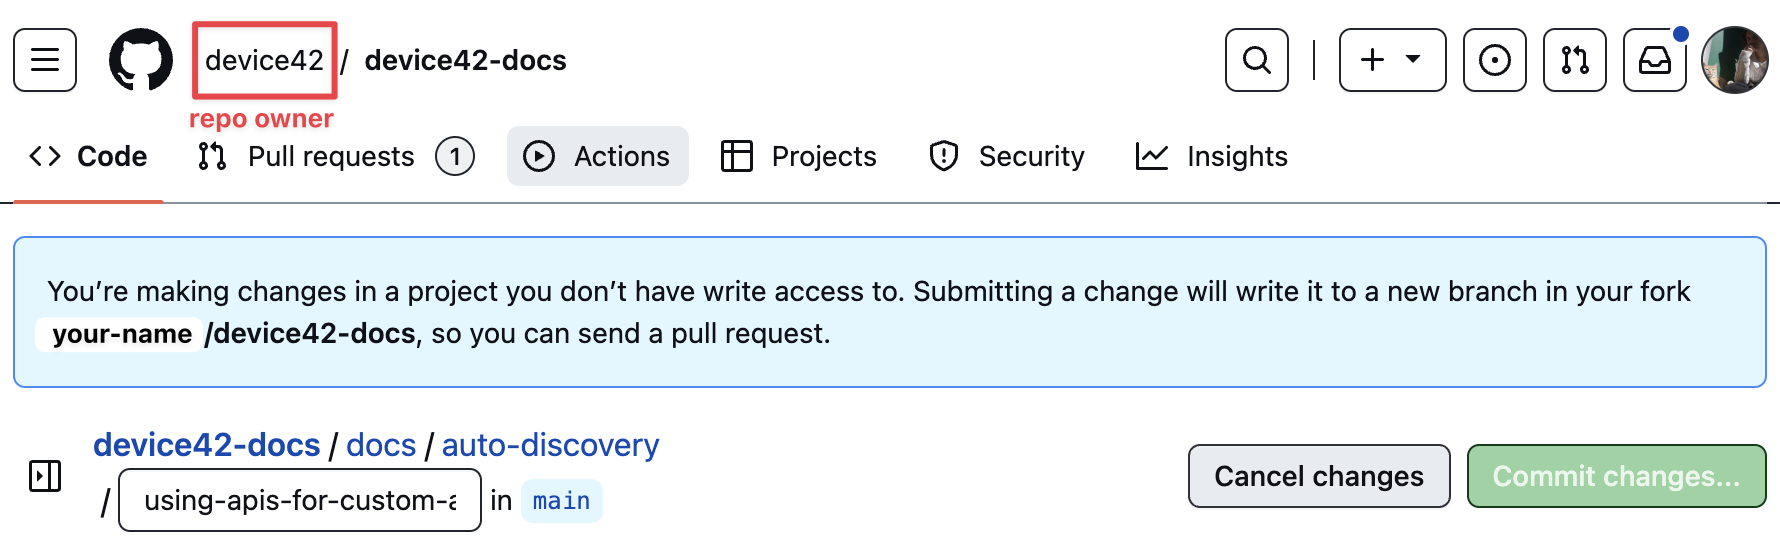
Click on the "Edit this page" link at the bottom of the document you want to edit and you'll be directed to the Device42 repository. On the top-left corner, you'll see device42 / device42-docs, meaning that device42 is the owner of the repository called device42-docs. When we navigate to our forked copy, it will display your-github-account-name / device42-docs.
To navigate to your forked repository, click on the "hamburger" menu icon (three horizontal lines) in the top-left corner. On the panel that opens, find and select your-github-account-name/device42-docs repository from the list.

You can also navigate to your repository as follows:
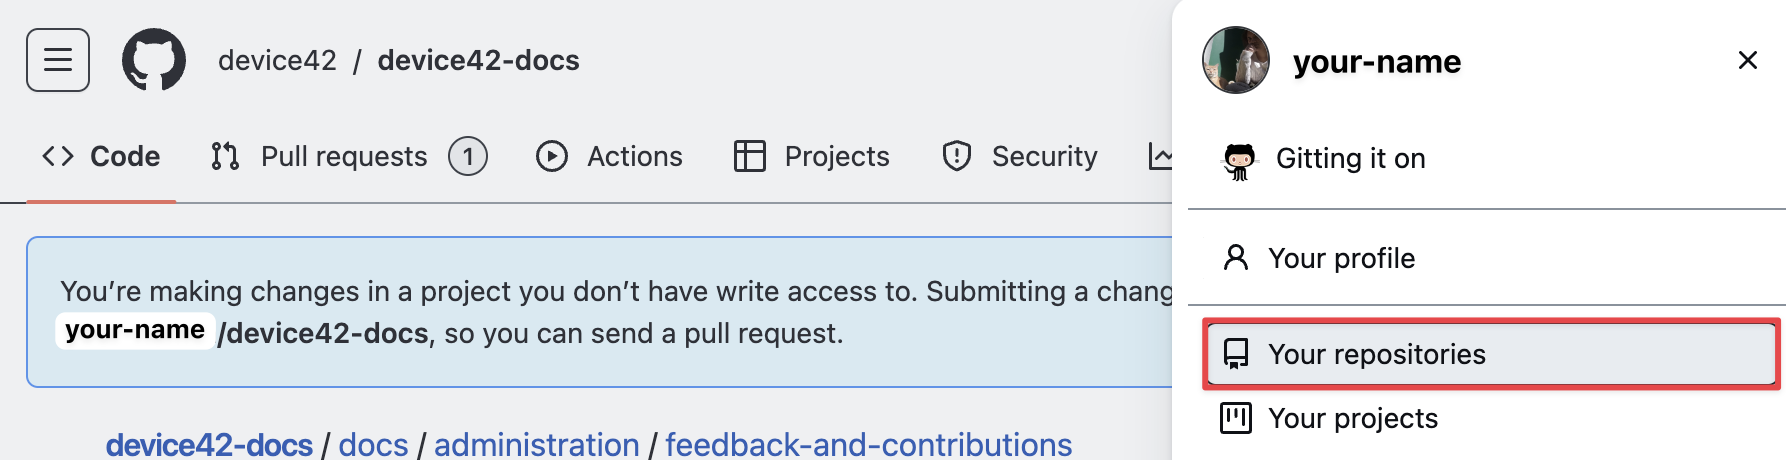
Click on your GitHub profile picture on the top-right and select "Your repositories".
Find and select the device42-docs repository.
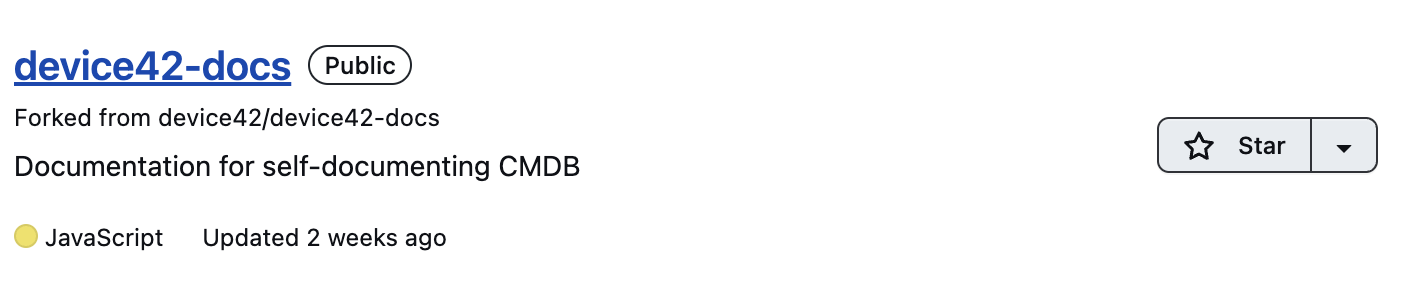
You should now see your-github-account-name / device42-docs in the top-left corner.
Create a New Branch
A branch is a contained area where you can make changes to a repository without your changes immediately affecting it.
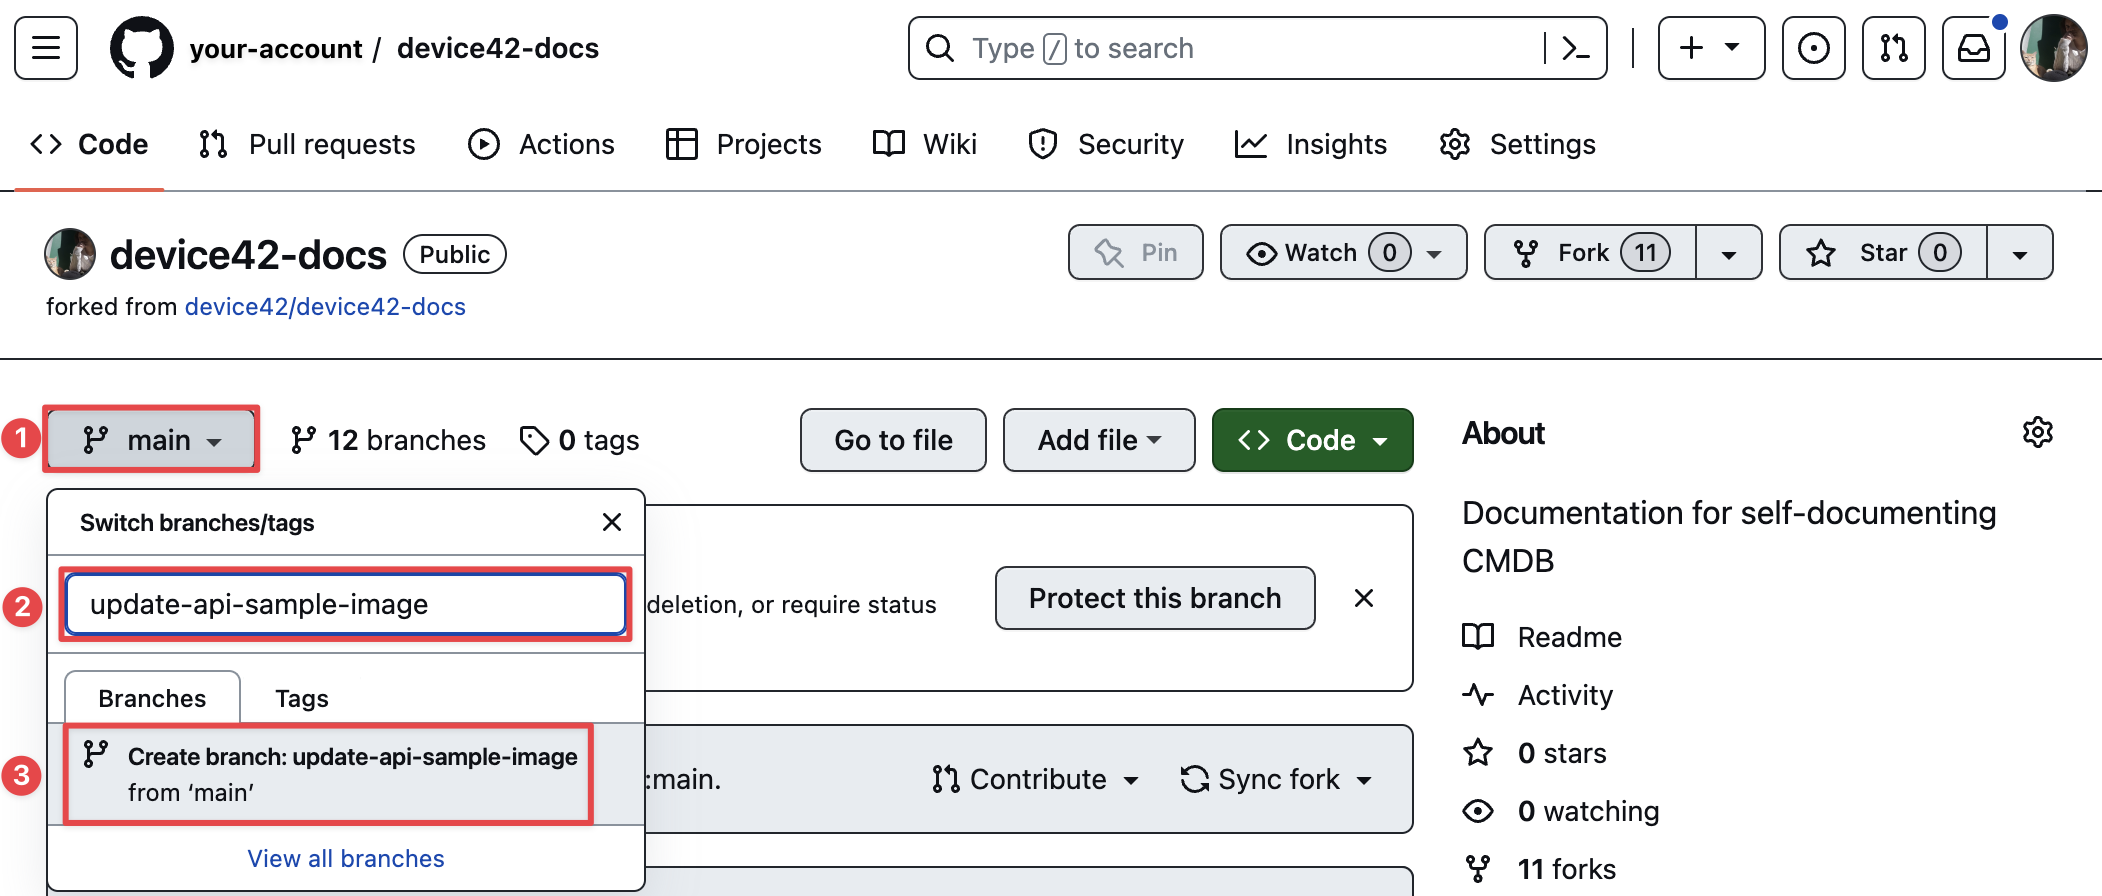
By default, you'll be on the main branch. To create a new branch, click on the dropdown menu labeled "main" (1). In the text box (2), name the new branch something descriptive. In this example, we named the branch update-api-sample-image. Note that words are separated by a dash symbol. Click on the "Create branch: update-api-sample-image" option that appears (3).
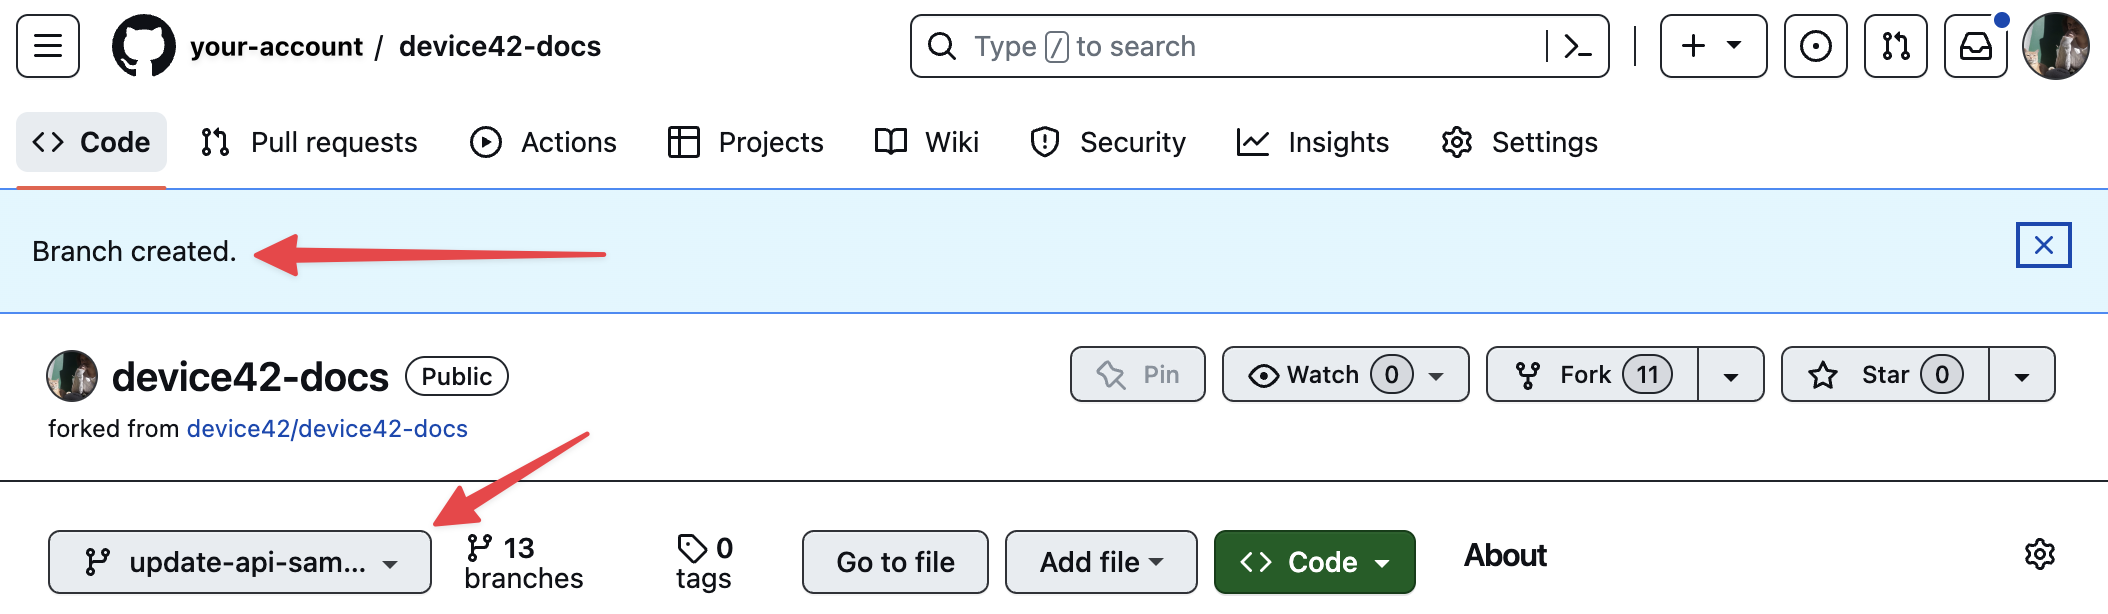
You'll see the "Branch created." message when the page reloads. The dropdown menu will display the name of the new branch instead of the original "main" branch.
Open the Images Folder
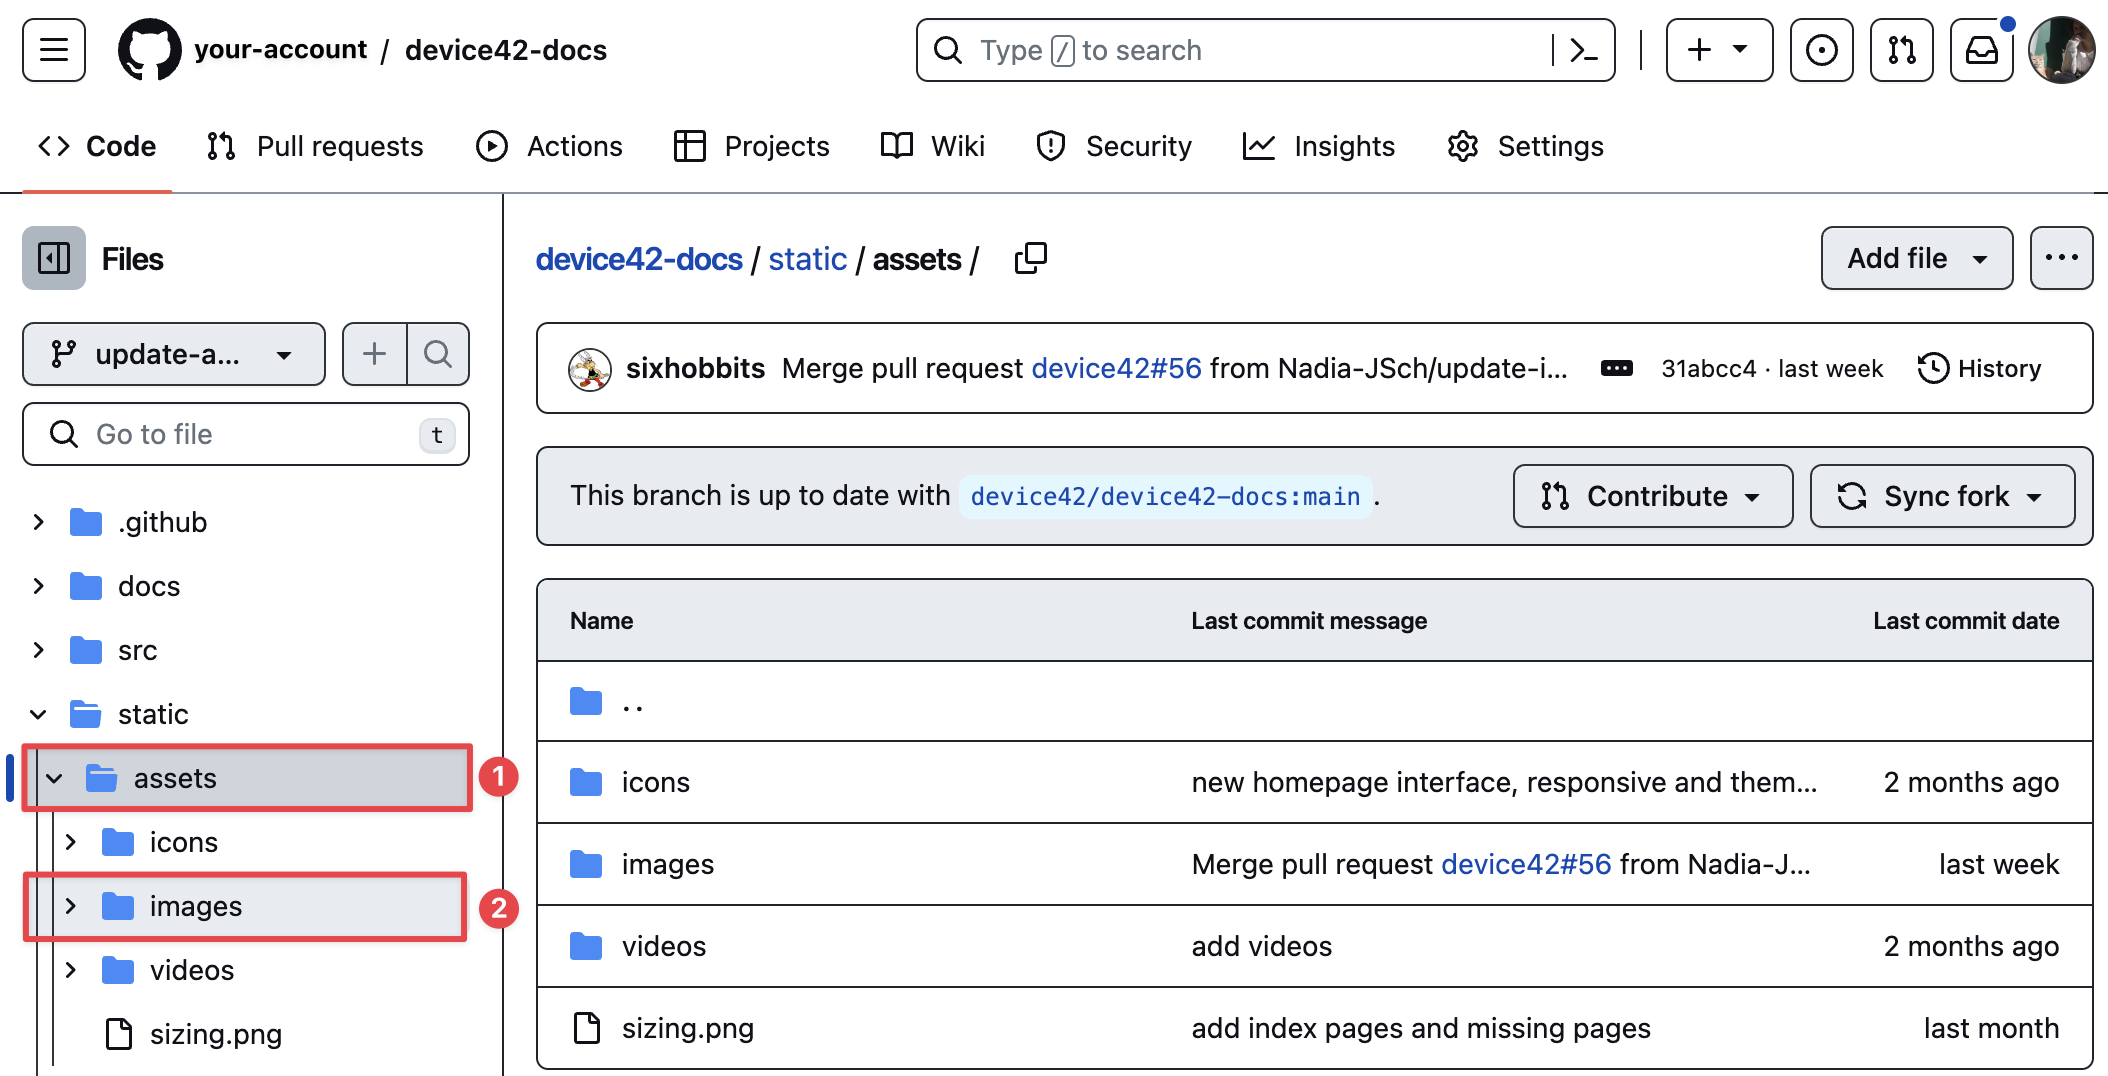
Now that we are "on" our new update-api-sample-image branch, we can make our changes and upload the new image to the images folder. Navigate to the static/assets/images folder by clicking on the static parent folder.

In the navigation window that opens on the left, click on the assets folder (1) and then the images subfolder (2).
Upload and Commit the New Image
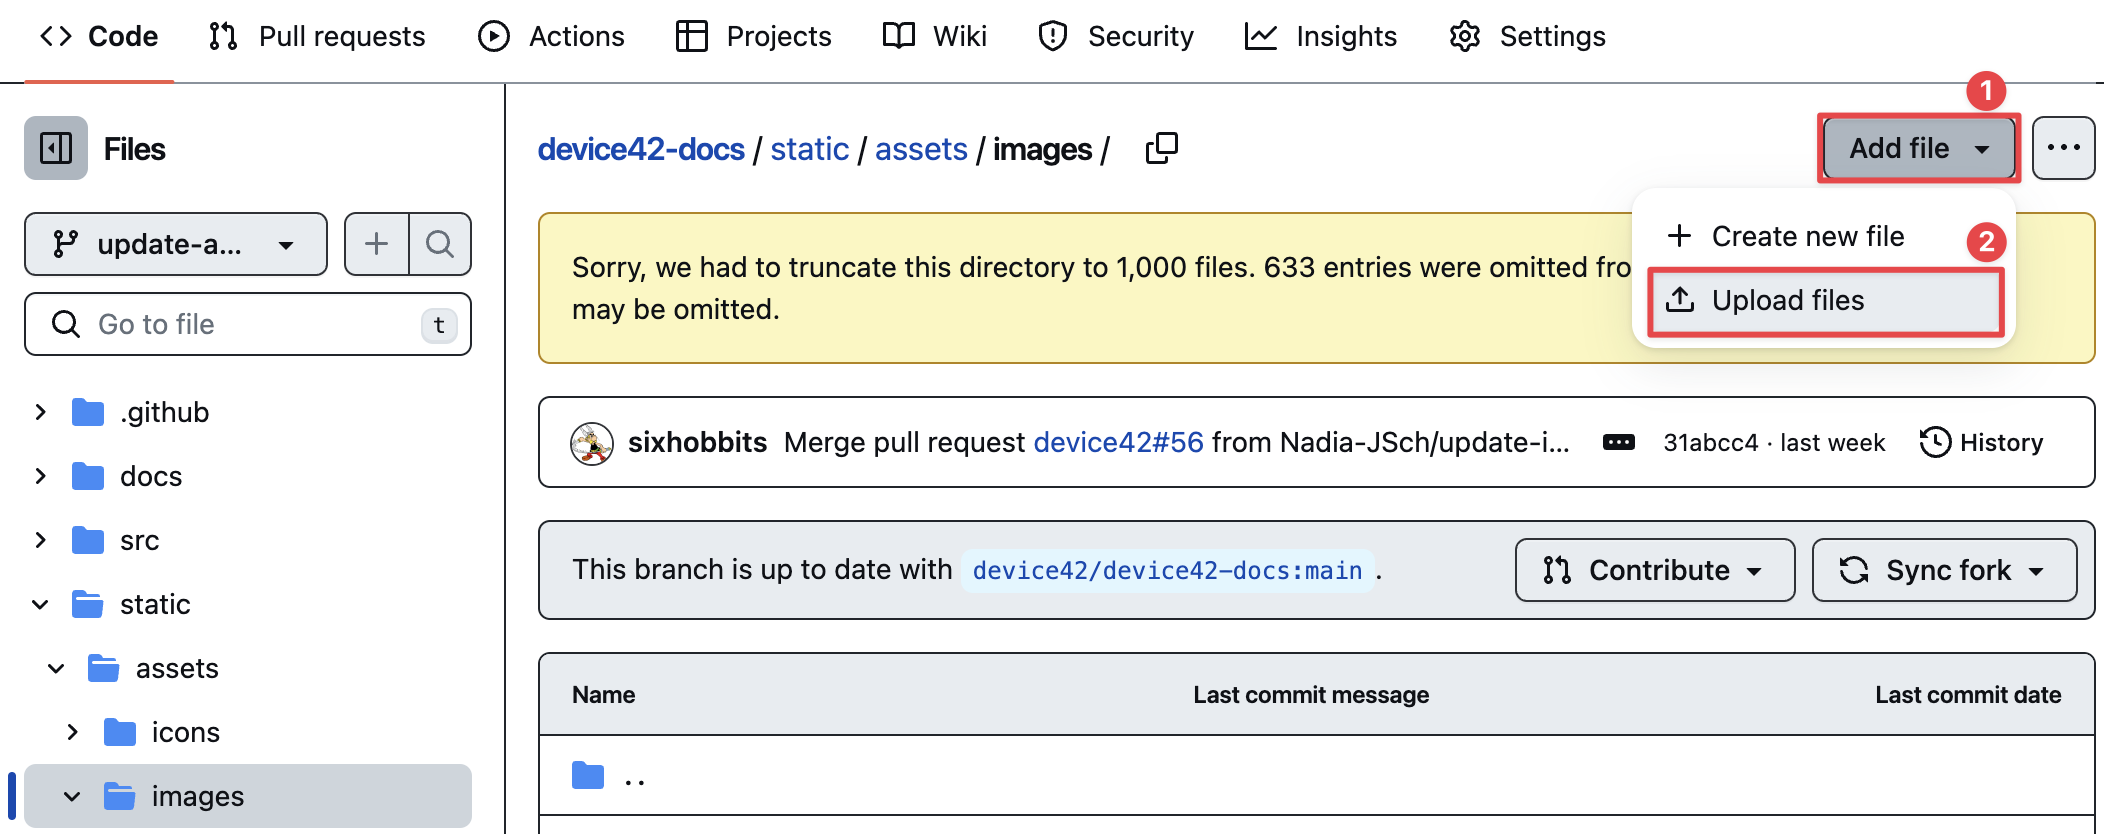
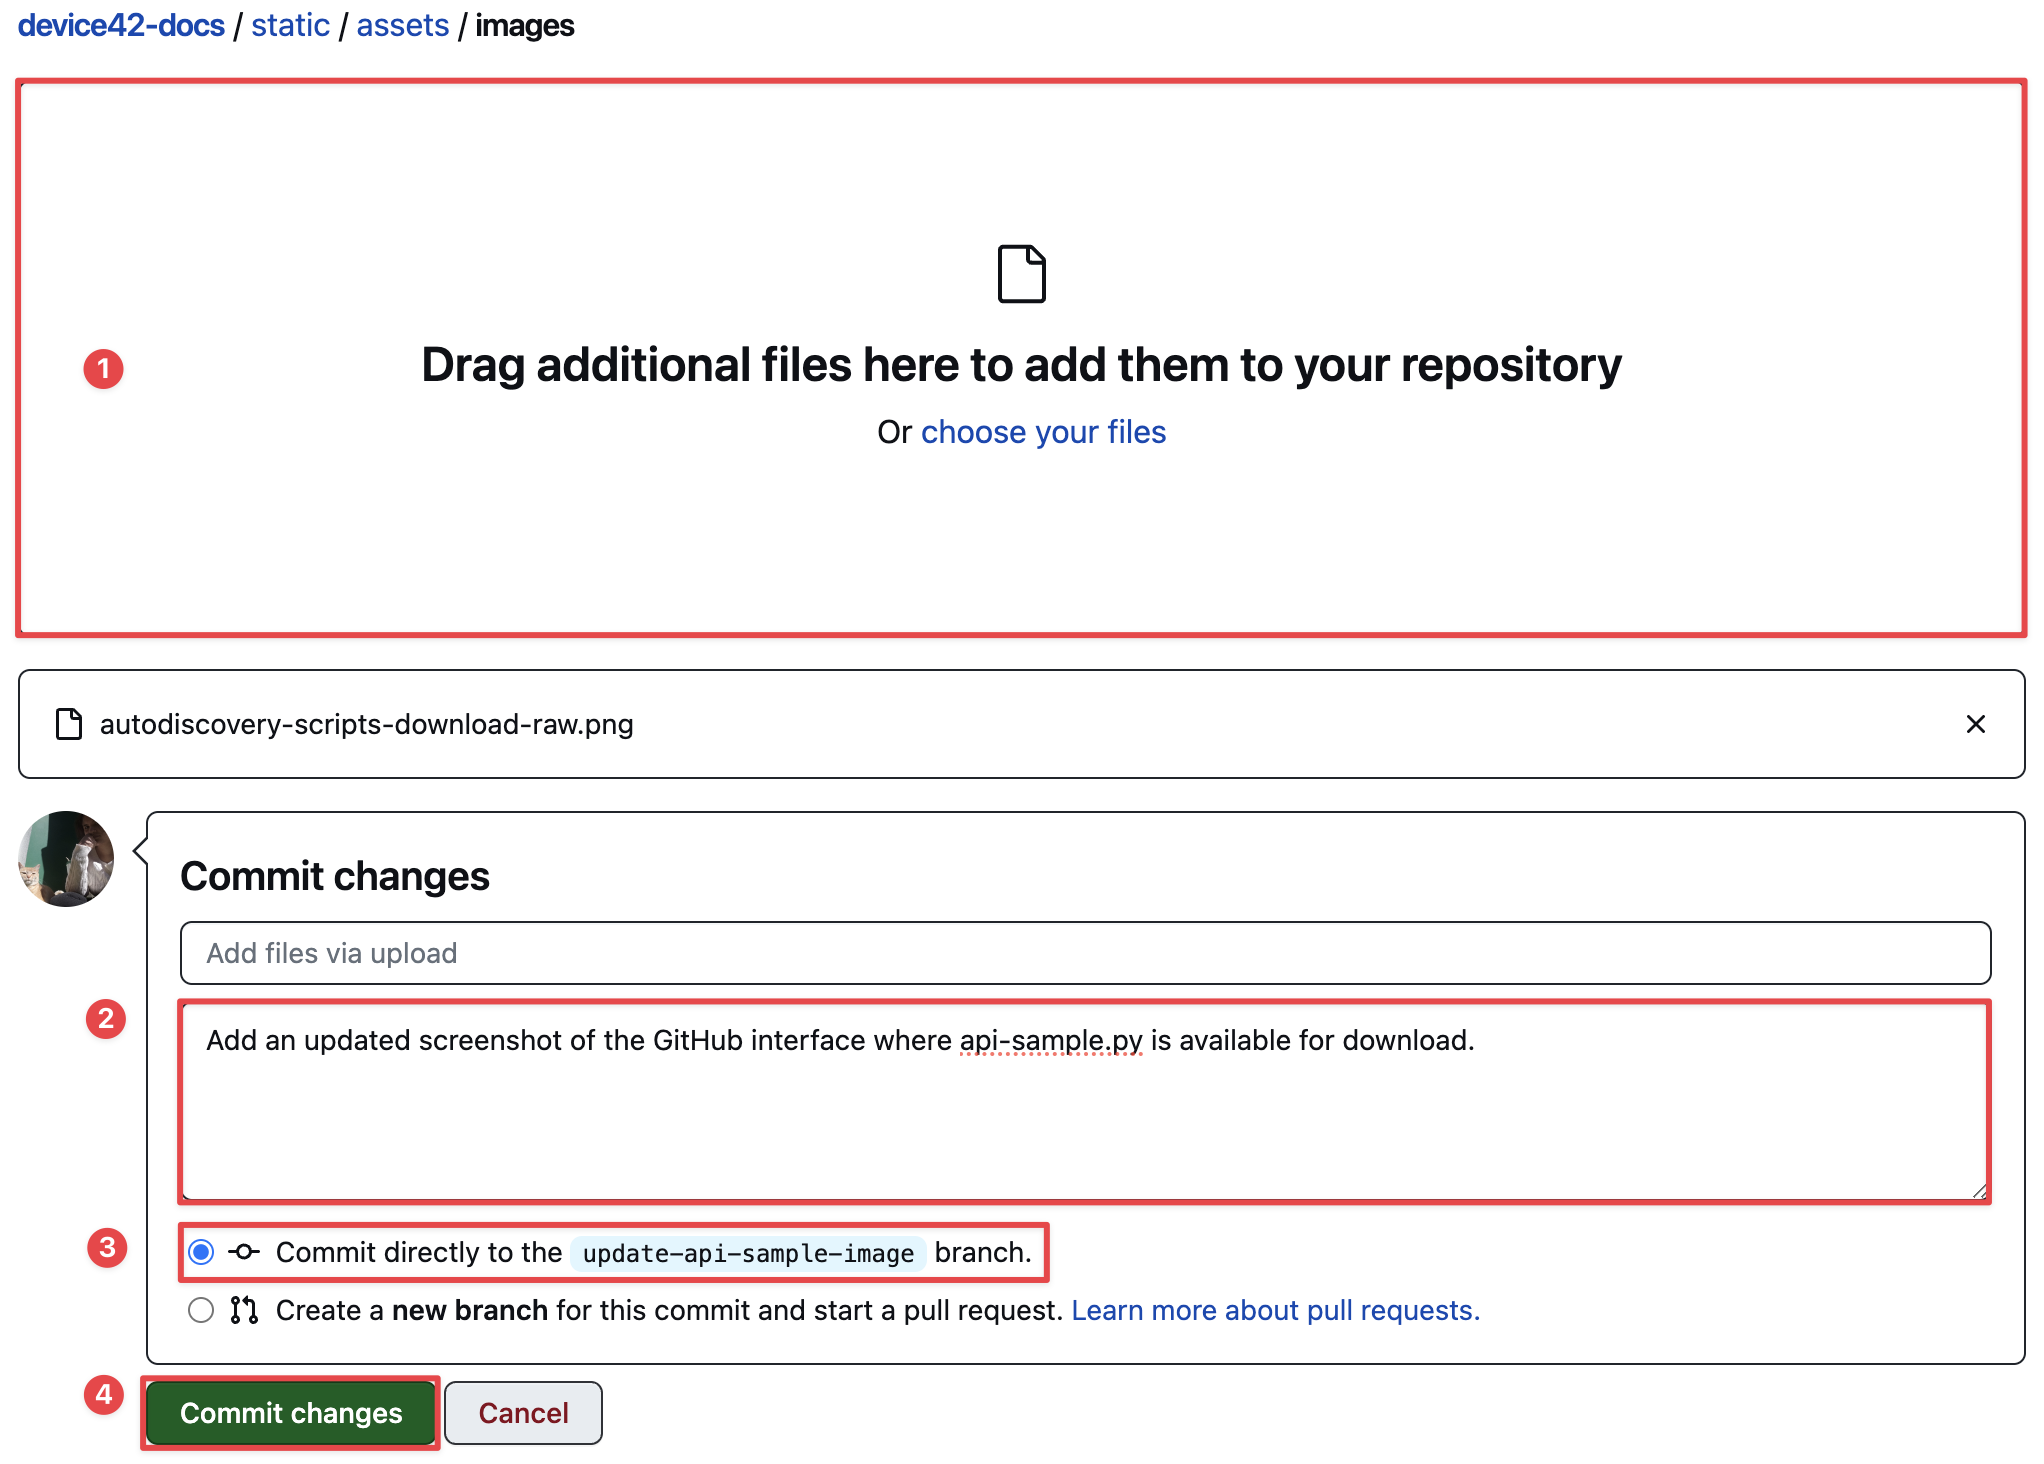
To upload your image to the images folder, click on the "Add file" dropdown menu on the right of the page (1). Select "Upload files" (2).
Add the image by either dragging the file to the box or selecting it from your file explorer (1). Save this change by committing it. Next, write a short explanation of the change you made (2) and keep the "Commit directly to the update-api-sample-image branch" option selected (3).
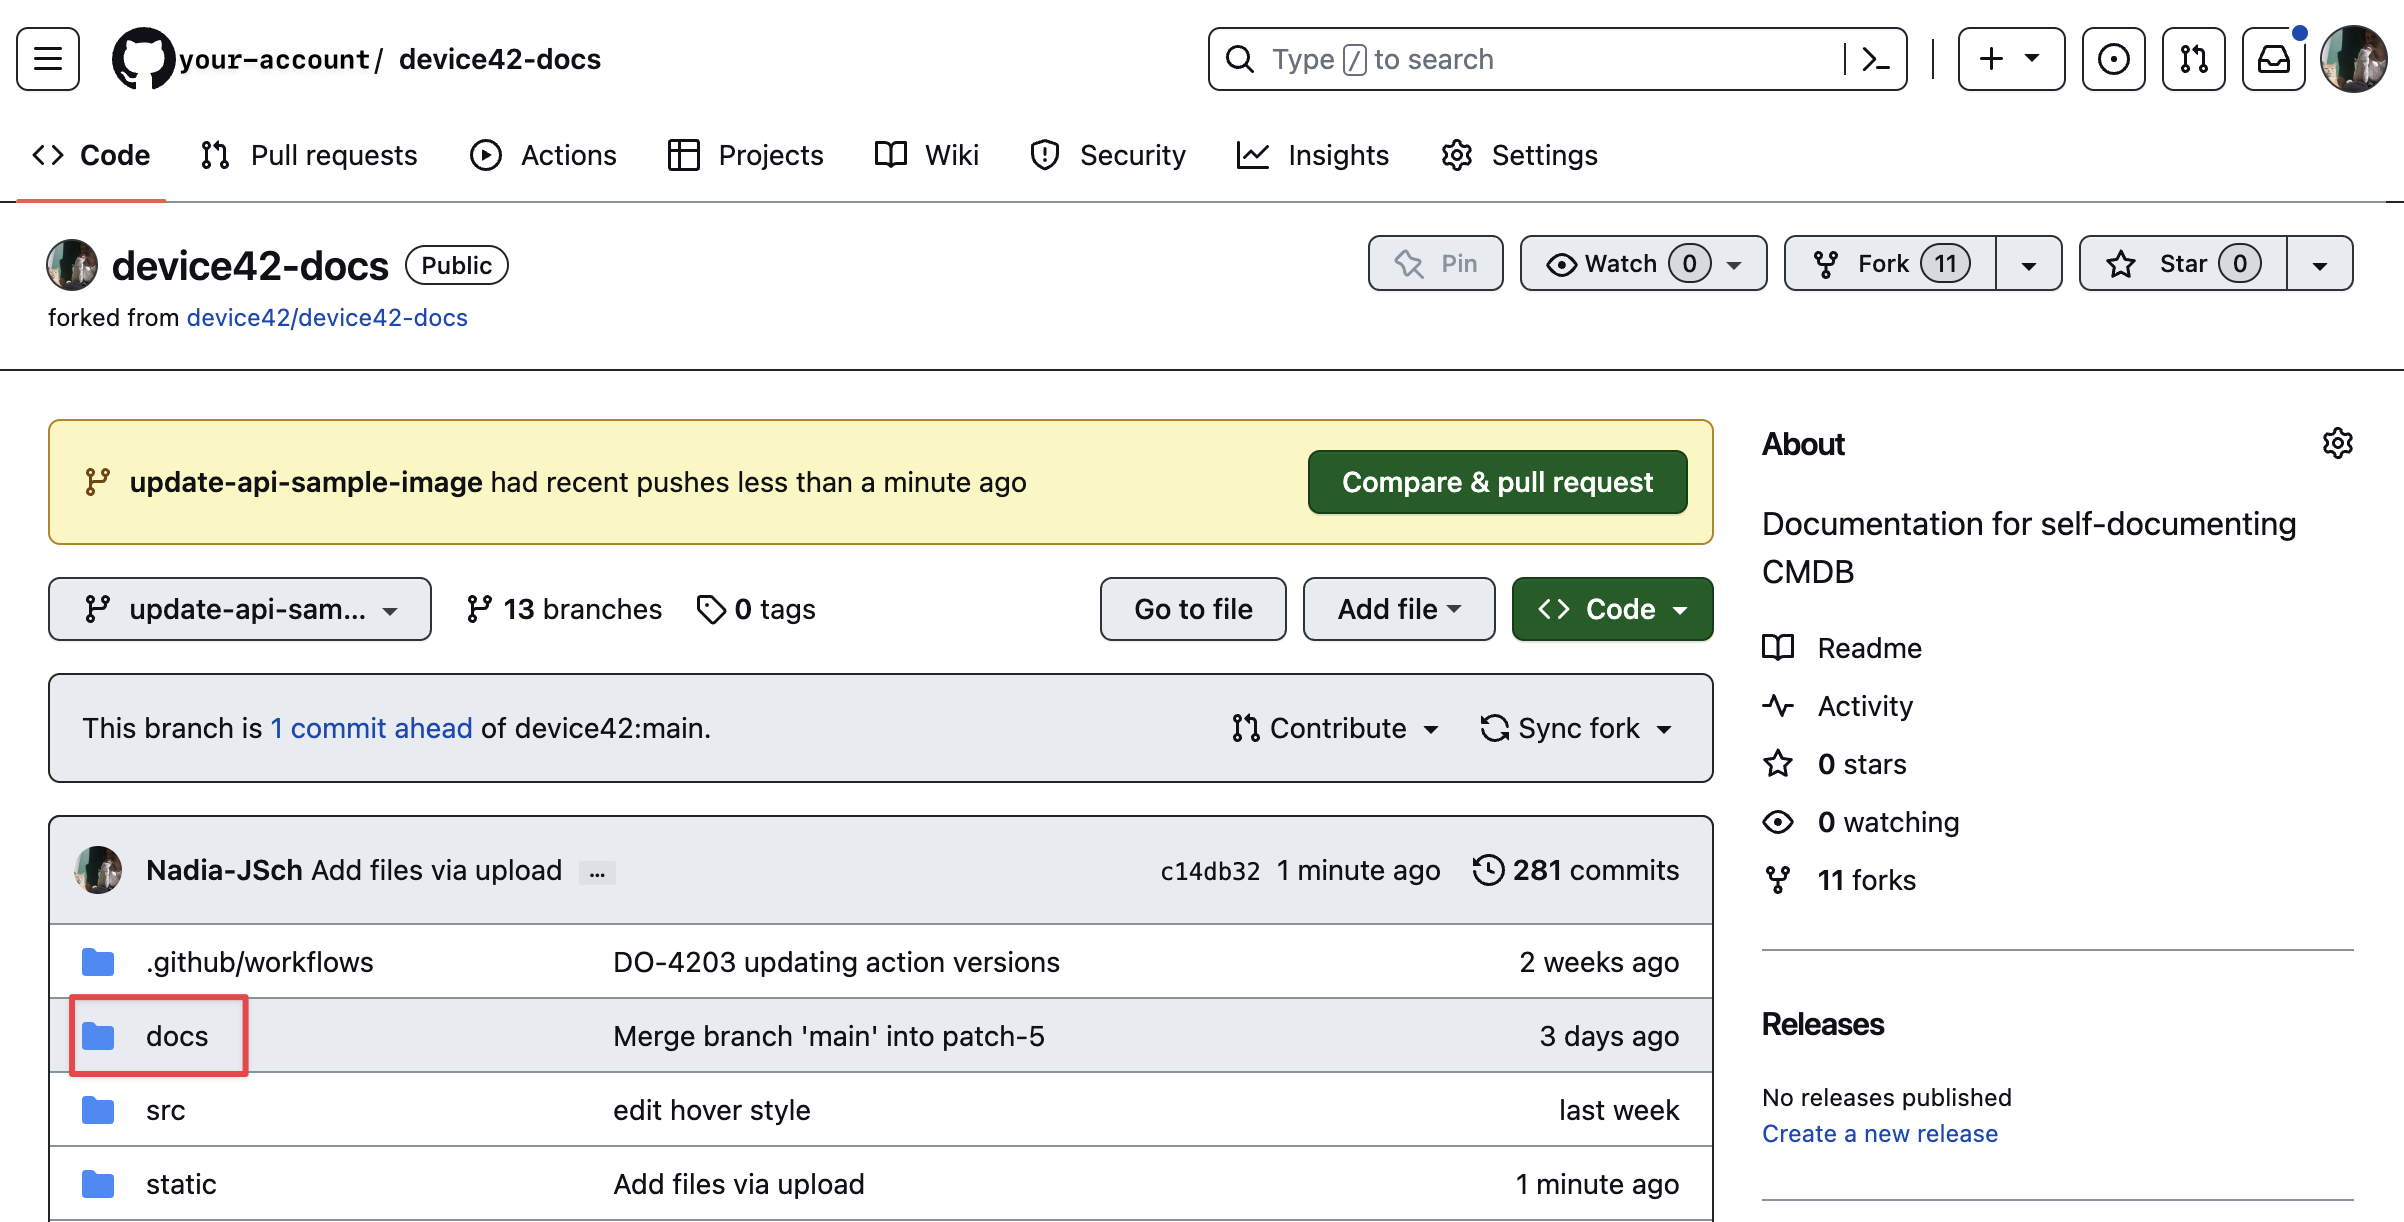
You'll see a notification on a yellow background that reads, "update-api-sample-image had recent pushes less than a minute ago". This means that the commit you made is now saved to the new branch. Before we click on "Compare & pull request", let's update the link to the image in the Markdown file.
Update The Markdown Link and Commit
To locate the Markdown file, open the docs parent folder.
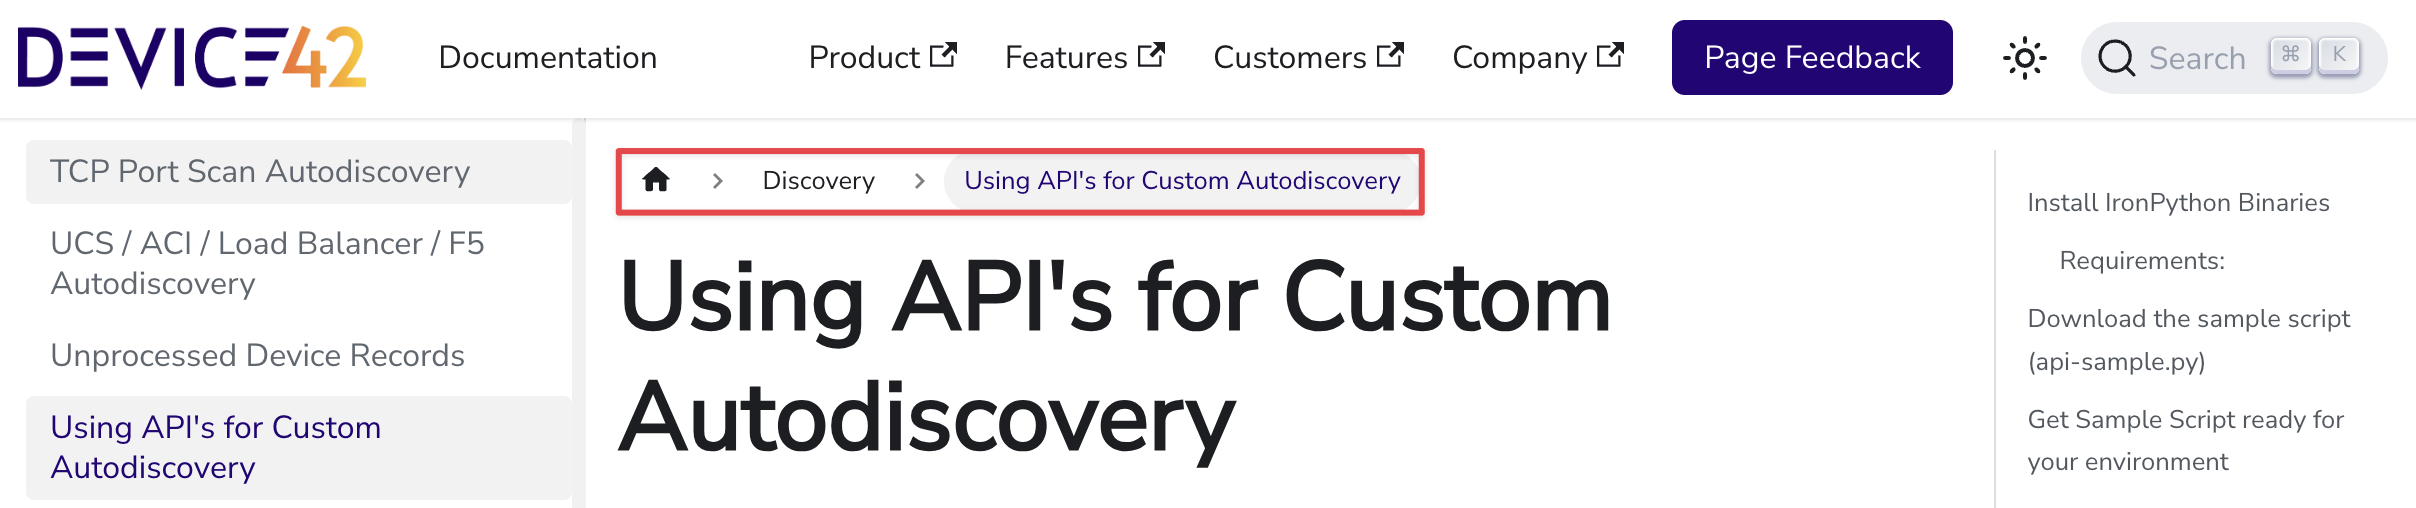
Determine the location of the Markdown file of the page you want to include the new image on. Go to the documentation website and note the folder structure at the top of the article. In this example, the "Using APIs for Custom Autodiscovery" page is in the "Discovery" folder.
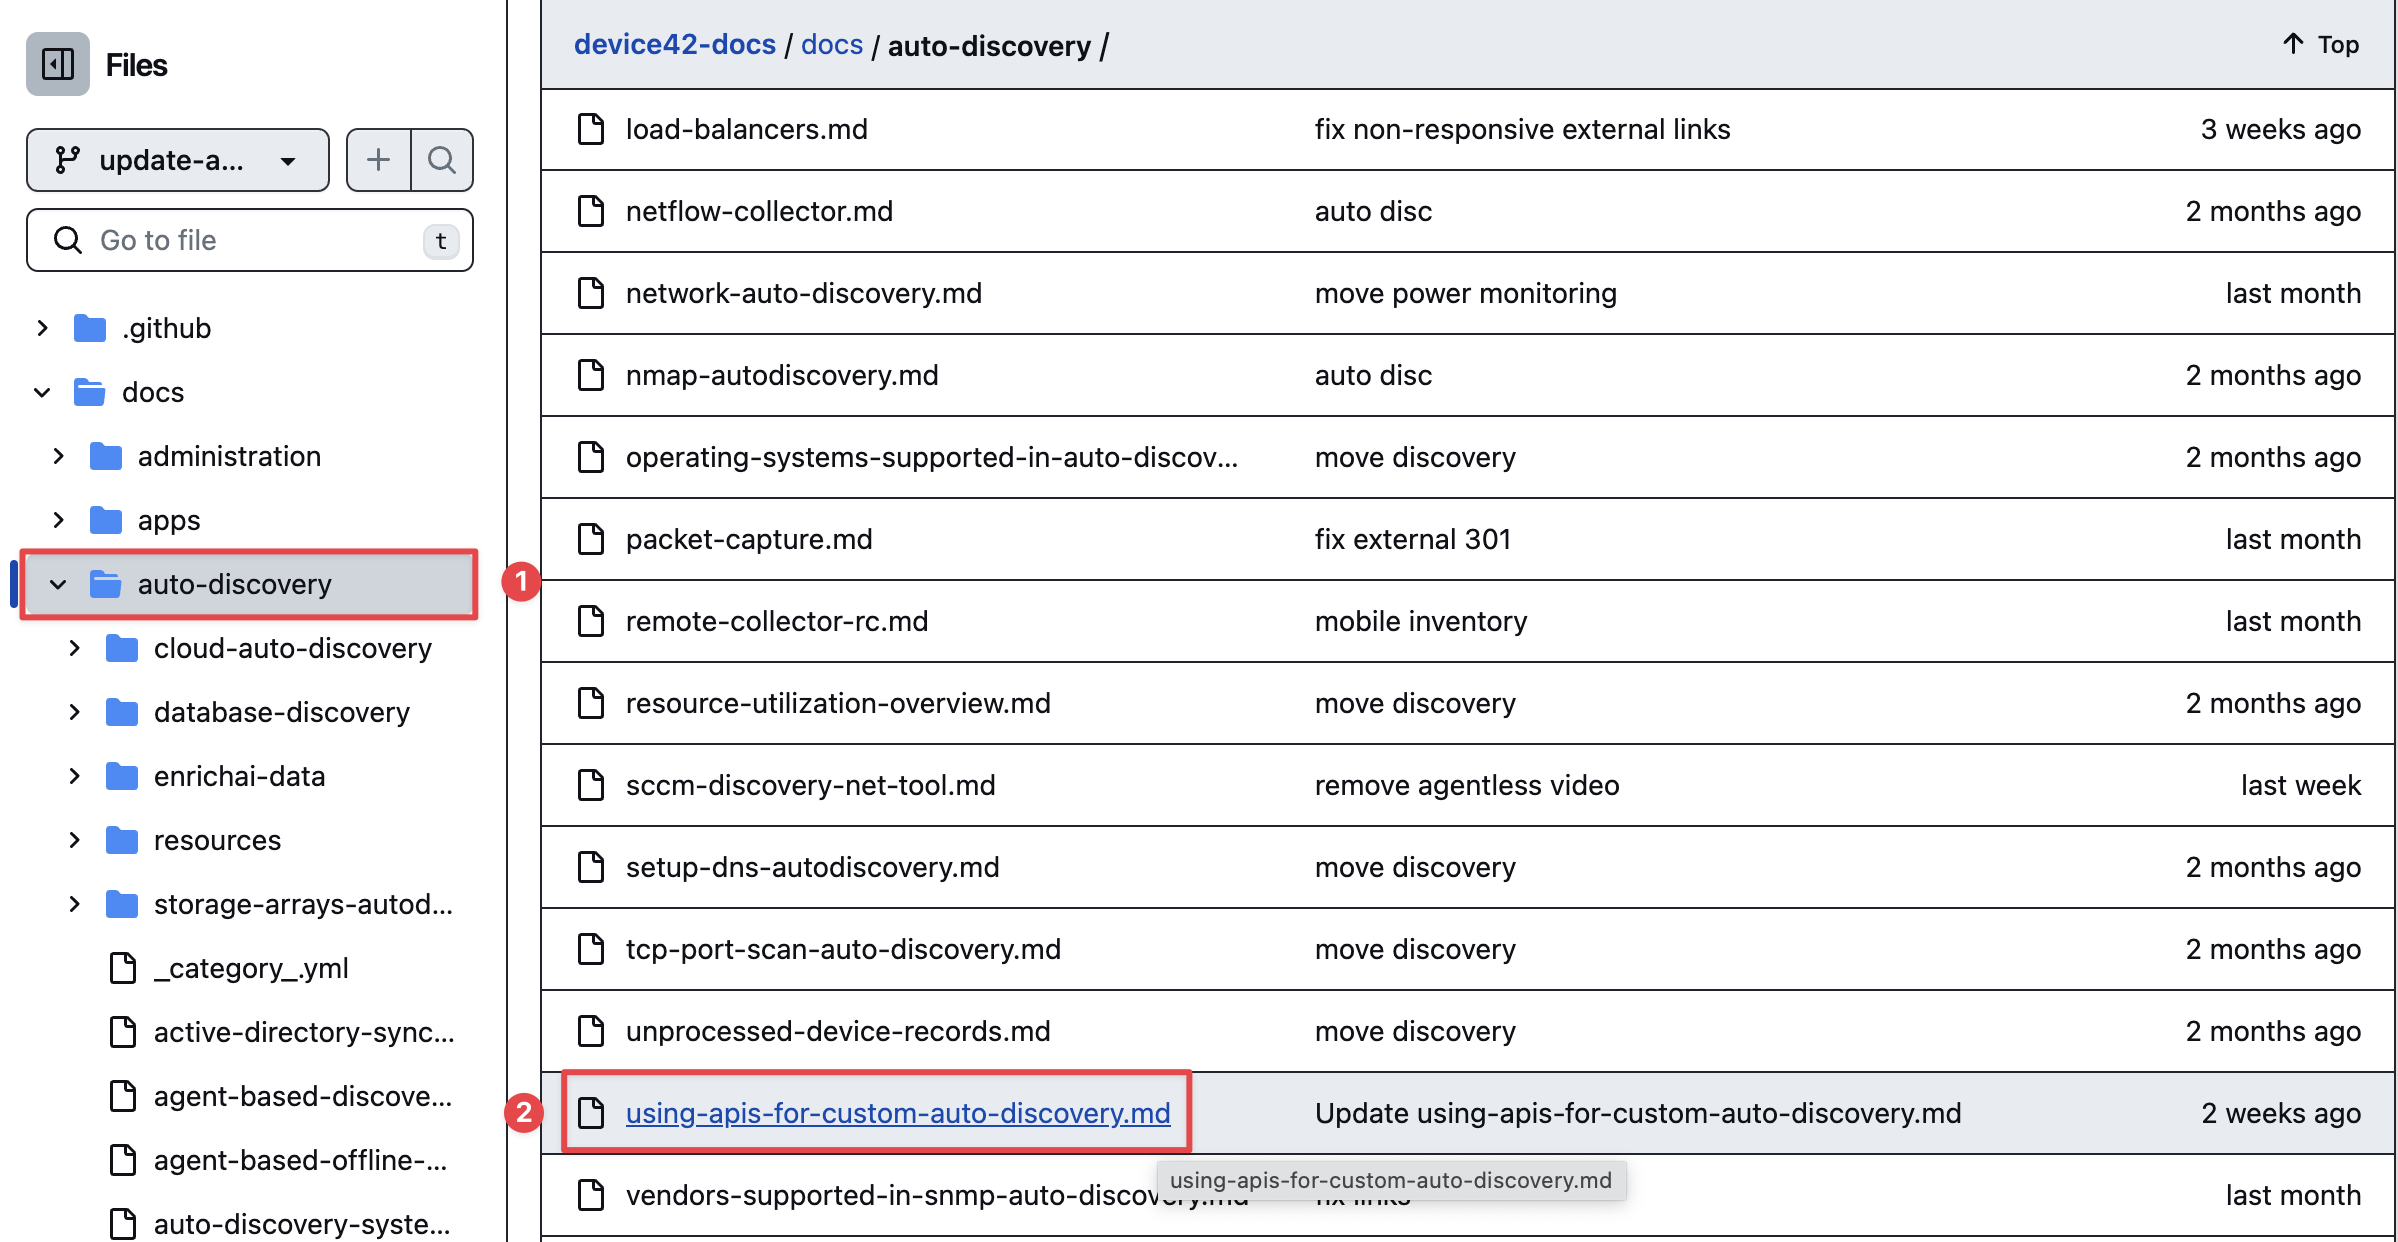
On GitHub, look for the Discovery folder in the docs parent folder. In this case, the closest match to "Discovery" is the folder named auto-discovery(2). In most cases, the folder names on the website will match those on the GitHub repository exactly.
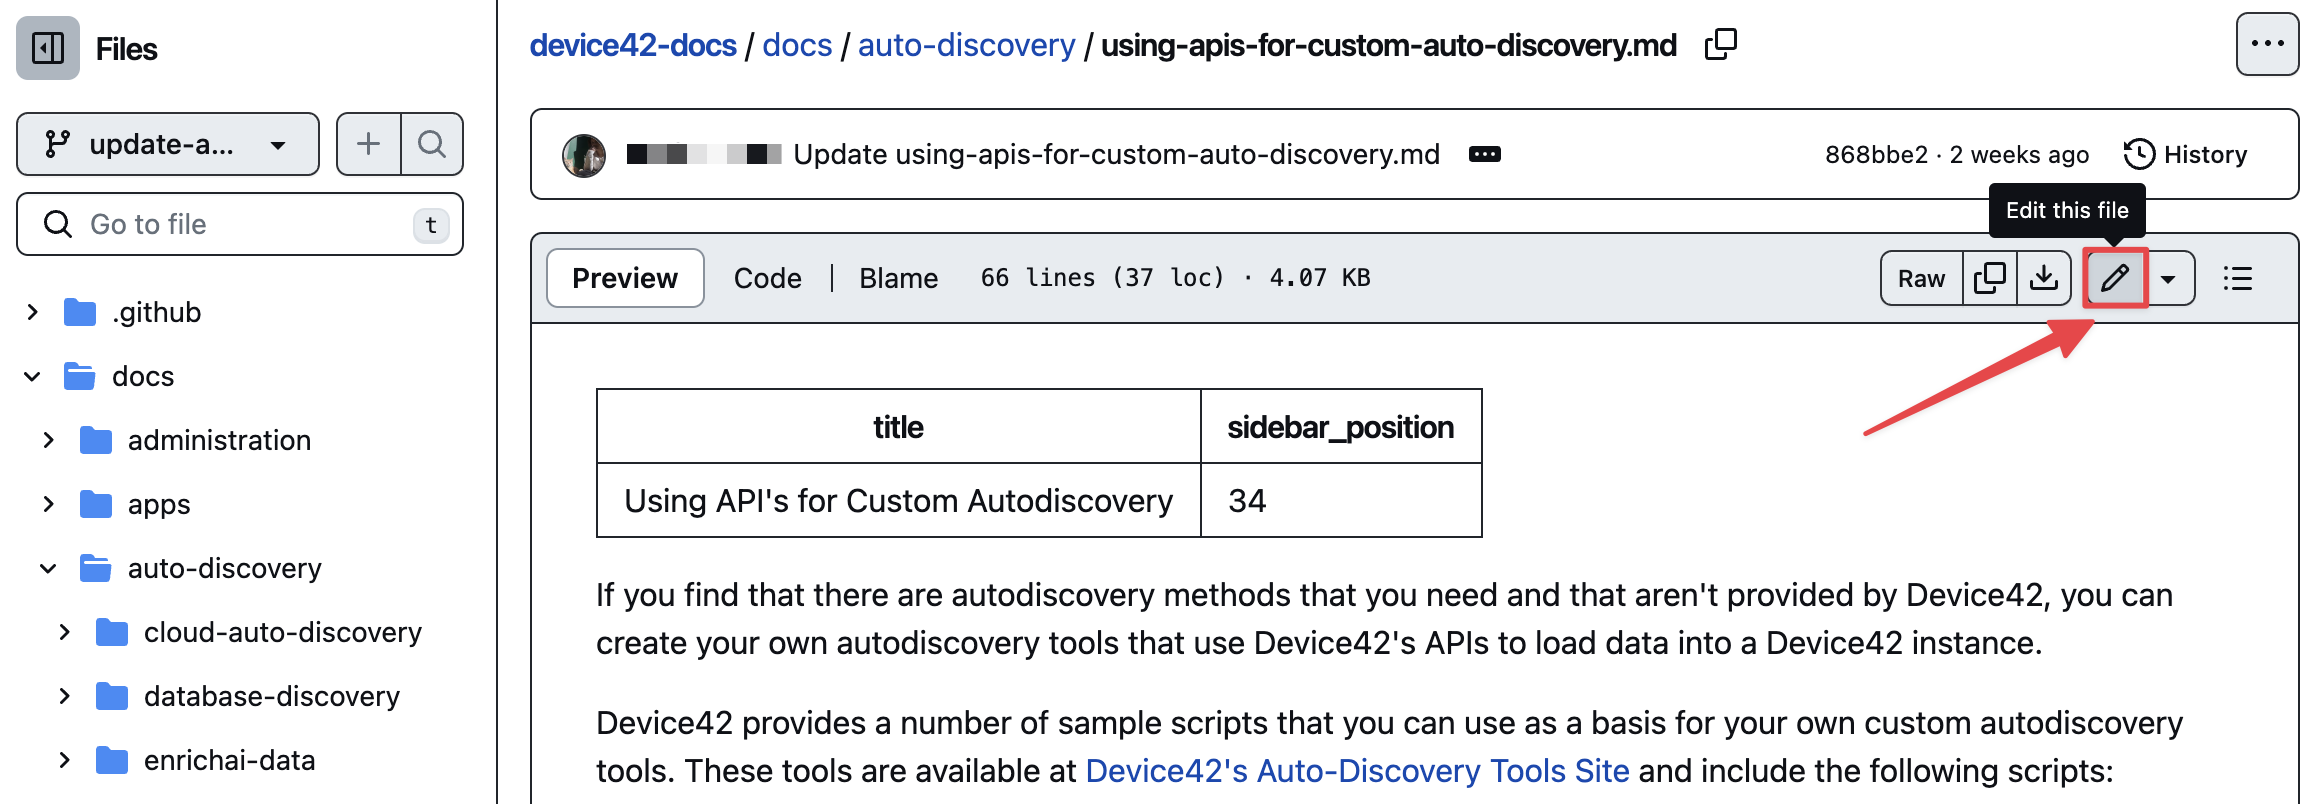
Find the Markdown file corresponding to the page you want to add the image to. In this example, the article is titled "Using APIs for Custom Autodiscovery", and the Markdown file is named using-apis-for-custom-auto-discovery.md.
Open the file and click on the pen icon in the right-hand corner to enter edit mode.
Find the link to the current image in the Markdown file by comparing the website text to the open file. In Markdown syntax, headings are denoted by one or more hash symbols. In this example, the heading "Download the Sample Script (api-sample.py)" on the website is written as ## Download the Sample Script (api-sample.py) in the Markdown file.
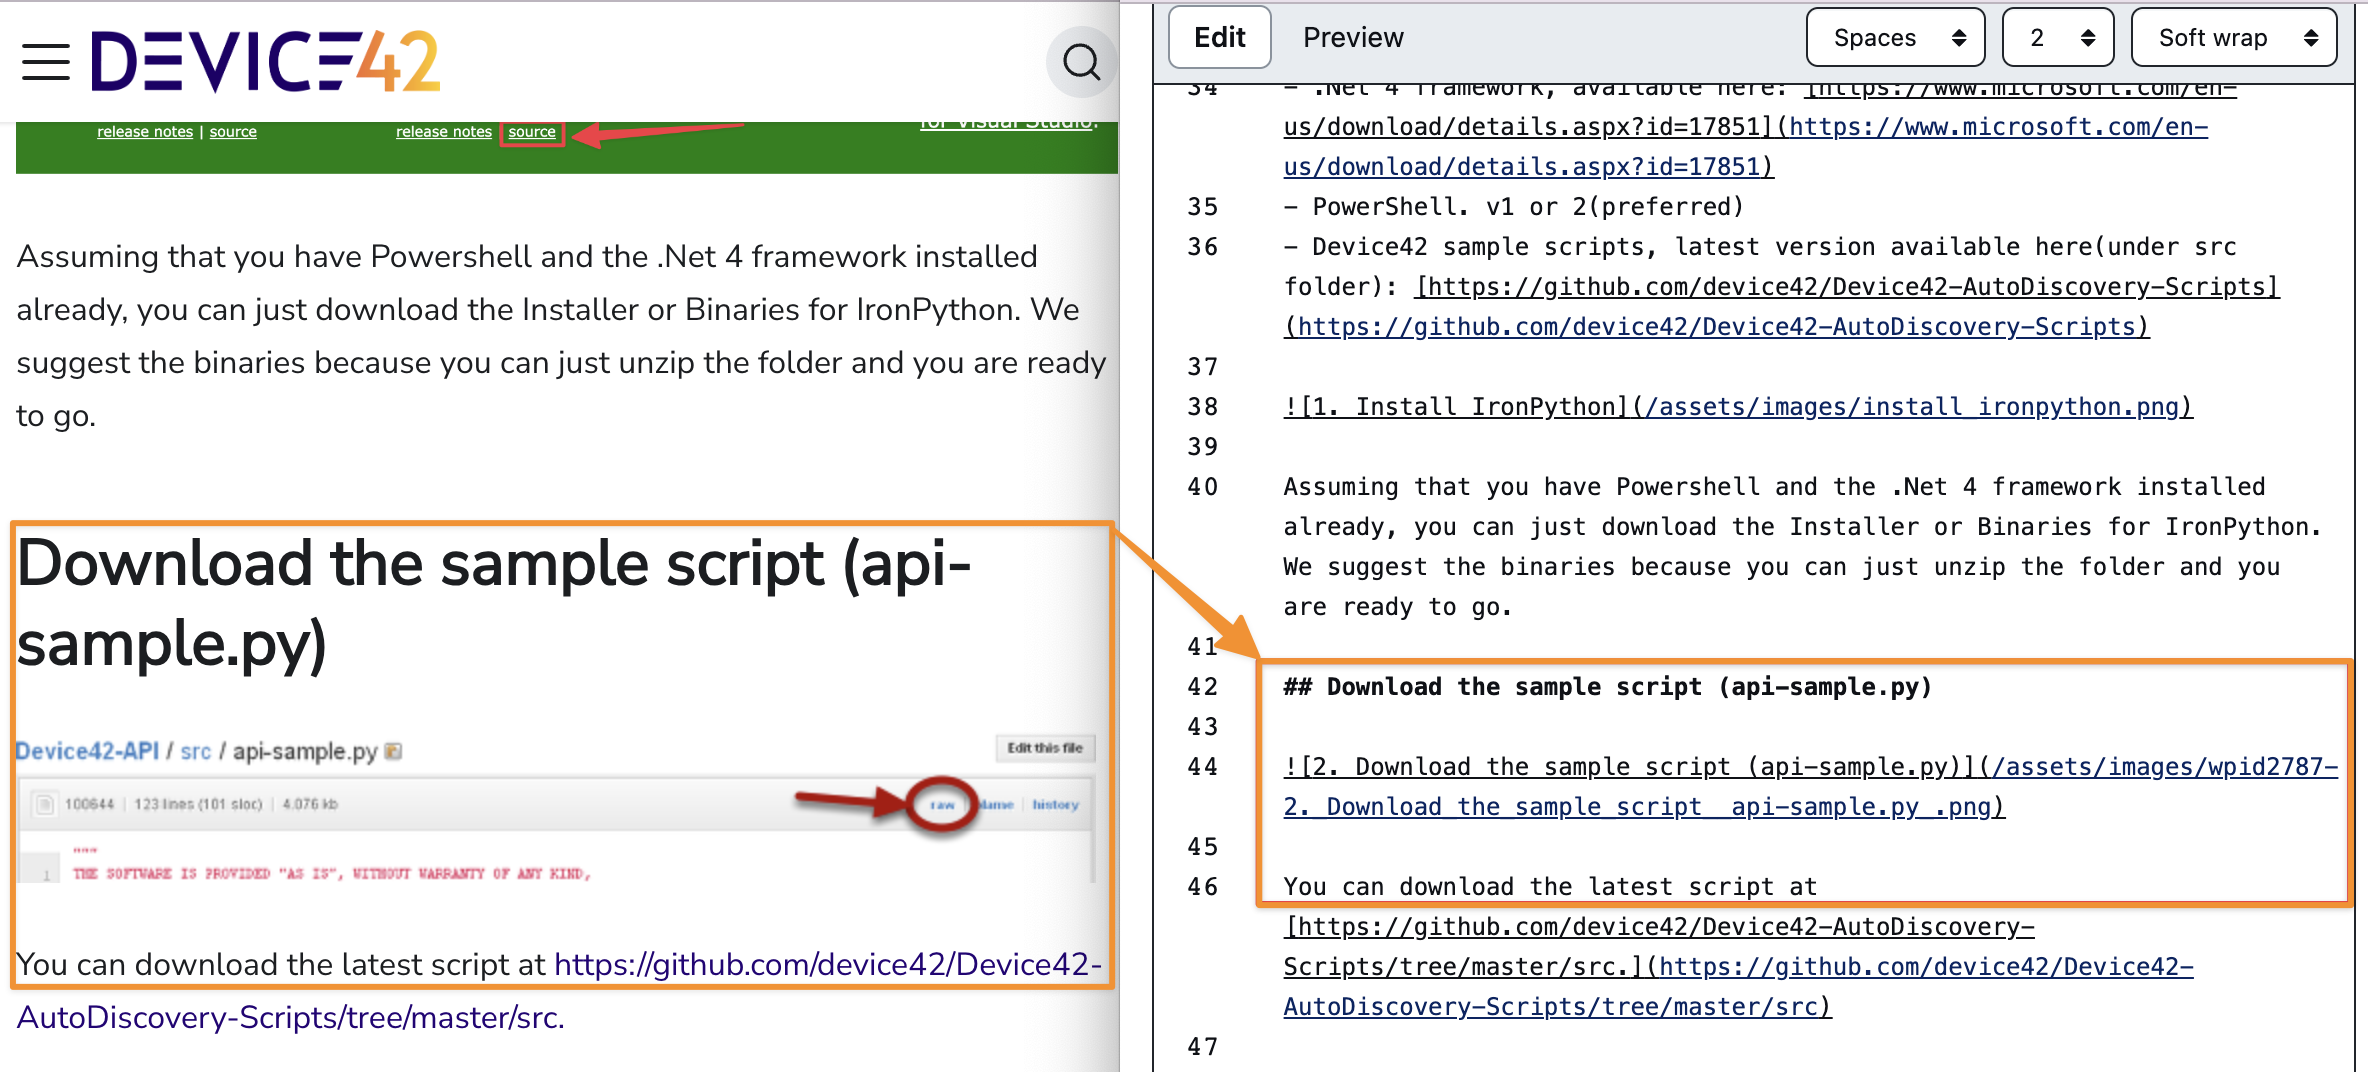
The image we want to update is below this heading on the website. The image link looks like  in the Markdown file. In Markdown syntax, image links begin with an exclamation mark (!) followed by square brackets, then parentheses. The text between the square brackets is called alt text and is only displayed on the website when the image cannot be displayed. The text between the parentheses is the file path to the image in the repository. We need to update the image name to our new image name.
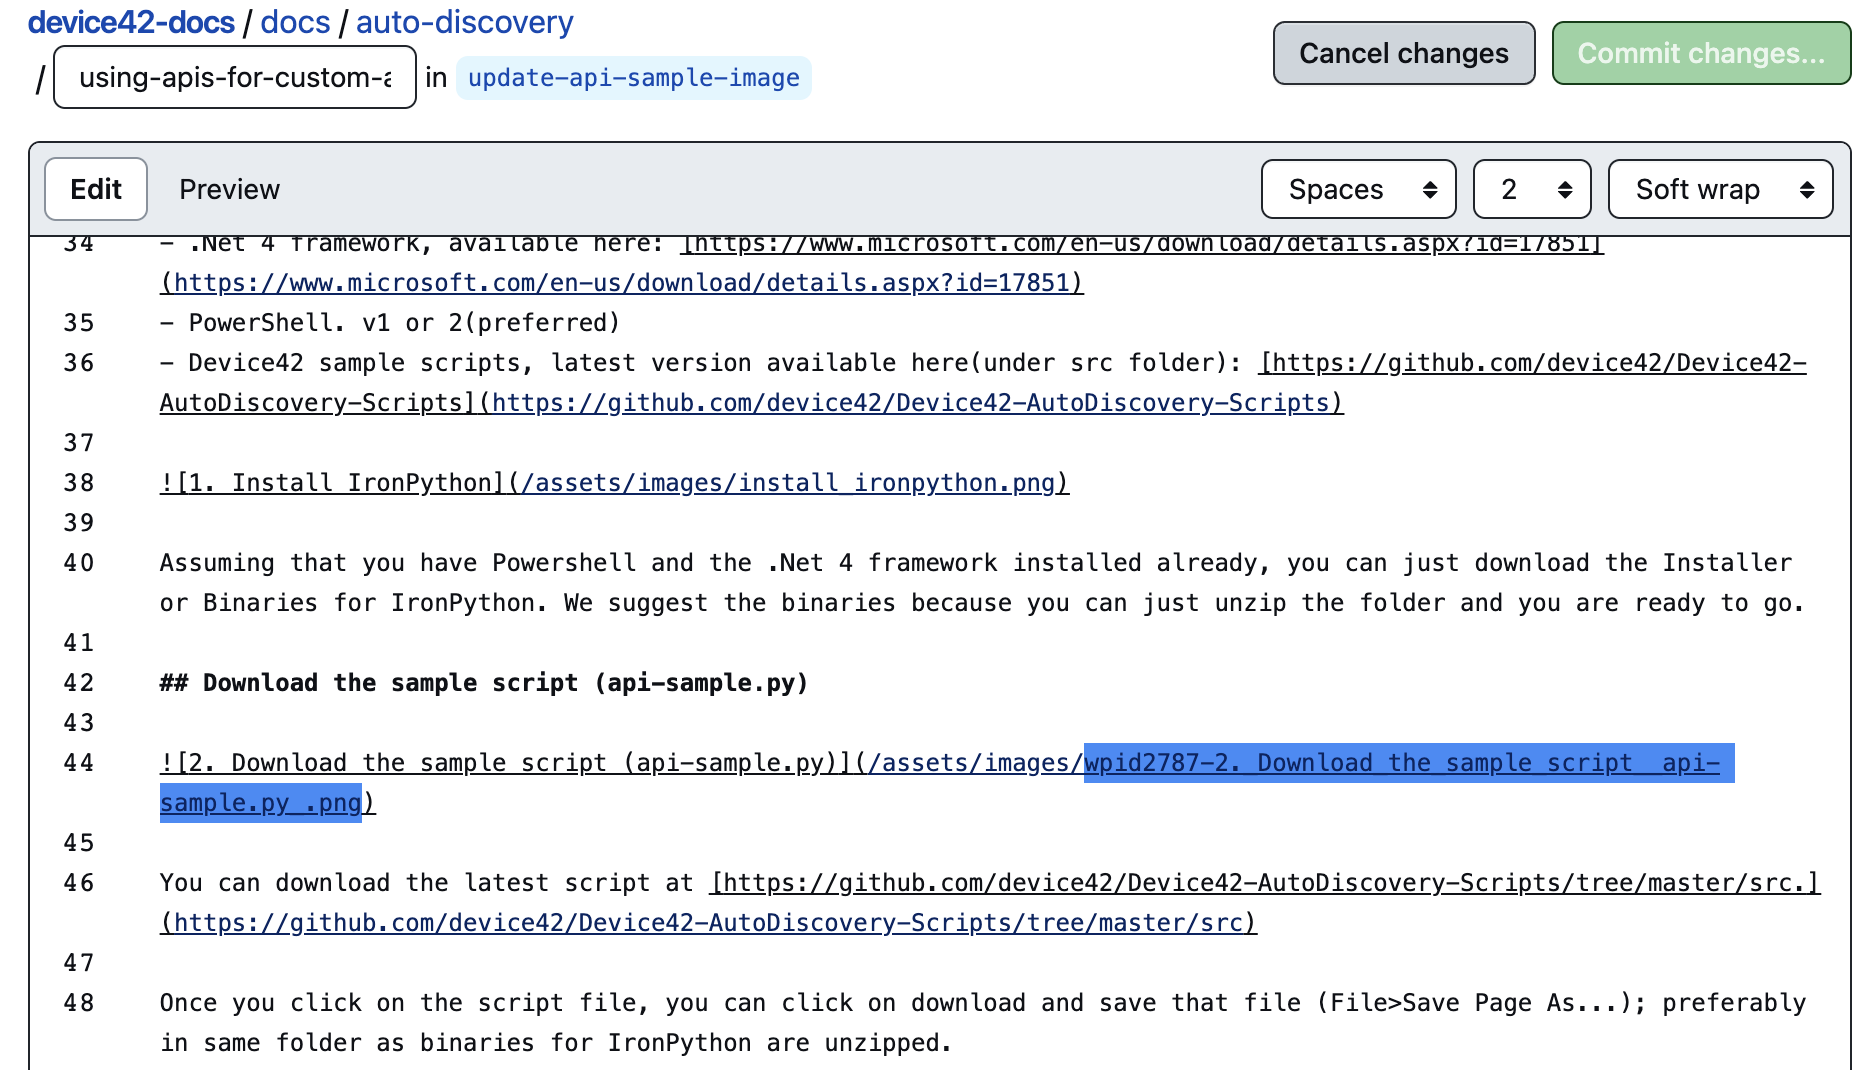
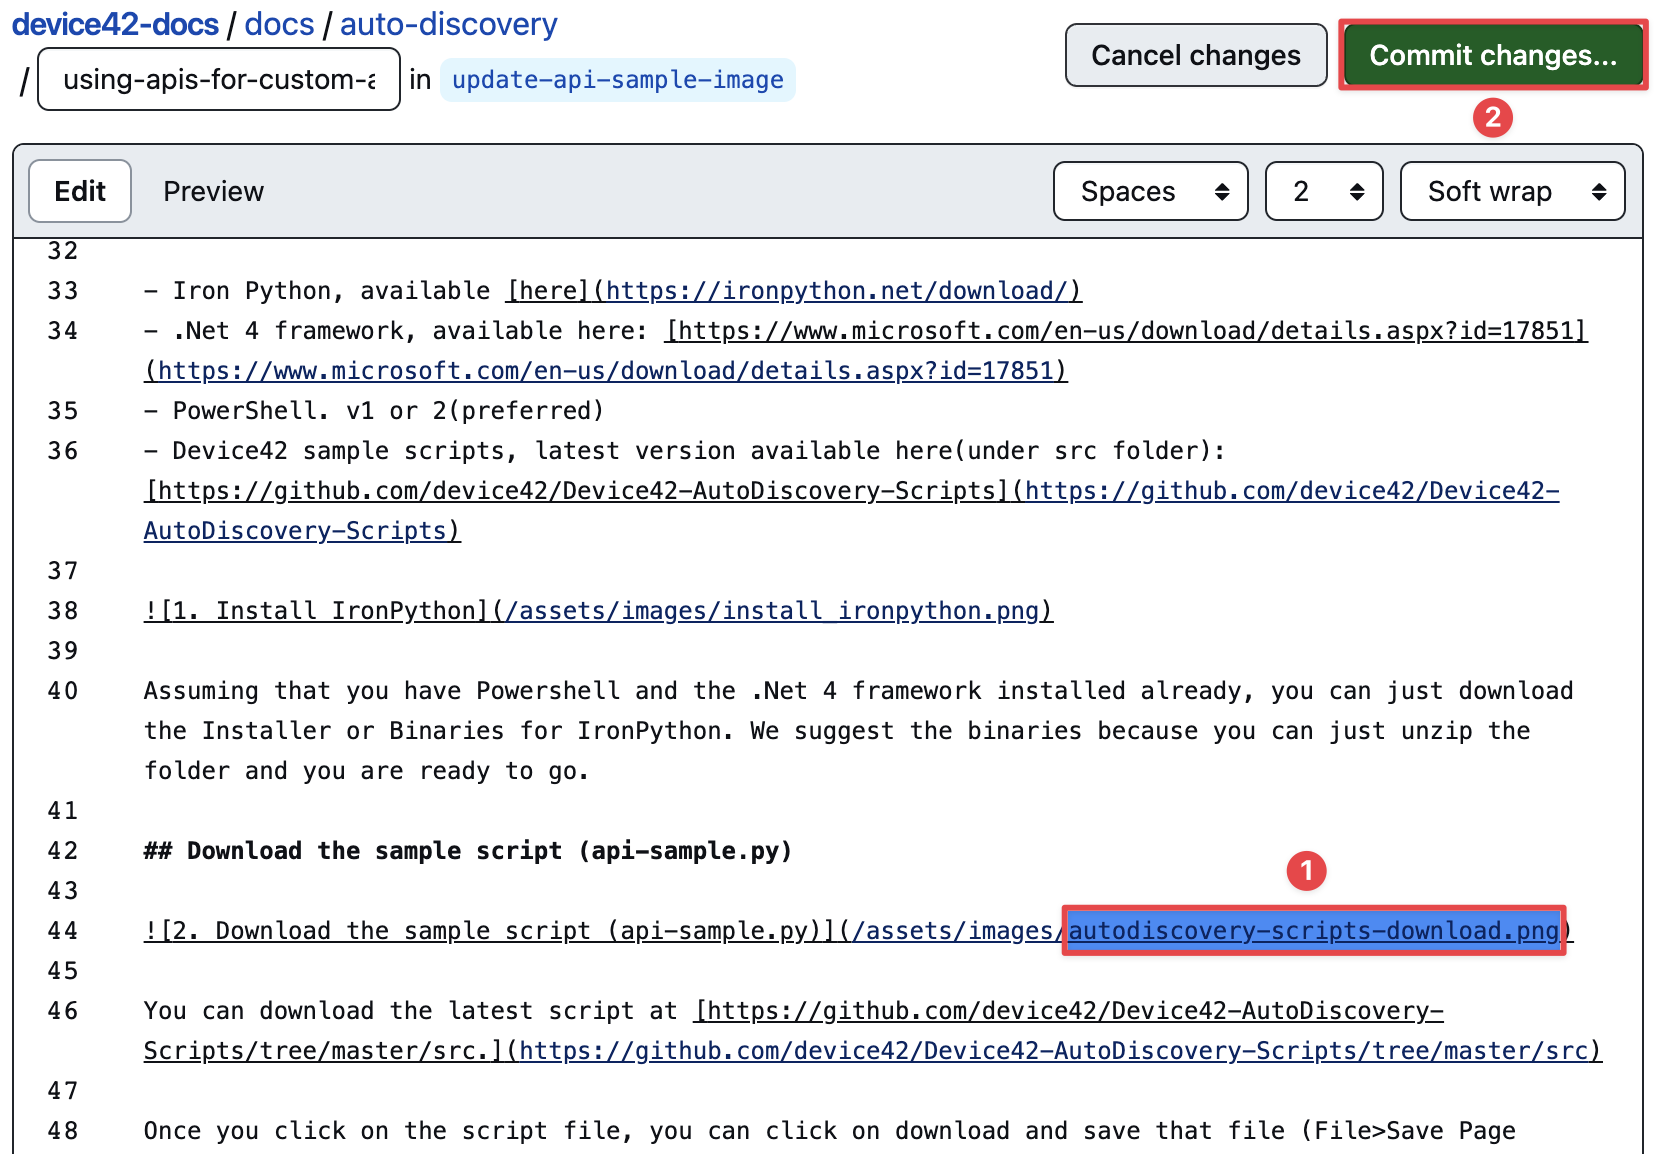
In this example, we change the old image name of wpid2787-2._Download_the_sample_script__api-sample.py_.png to autodiscovery-scripts-download.png (1). The /assets/images/ location preceding the image name will remain the same because the location of the image hasn't changed.
The "Commit changes..." button on the top-right corner (2) has become active now that we've made a change. Click on this button.
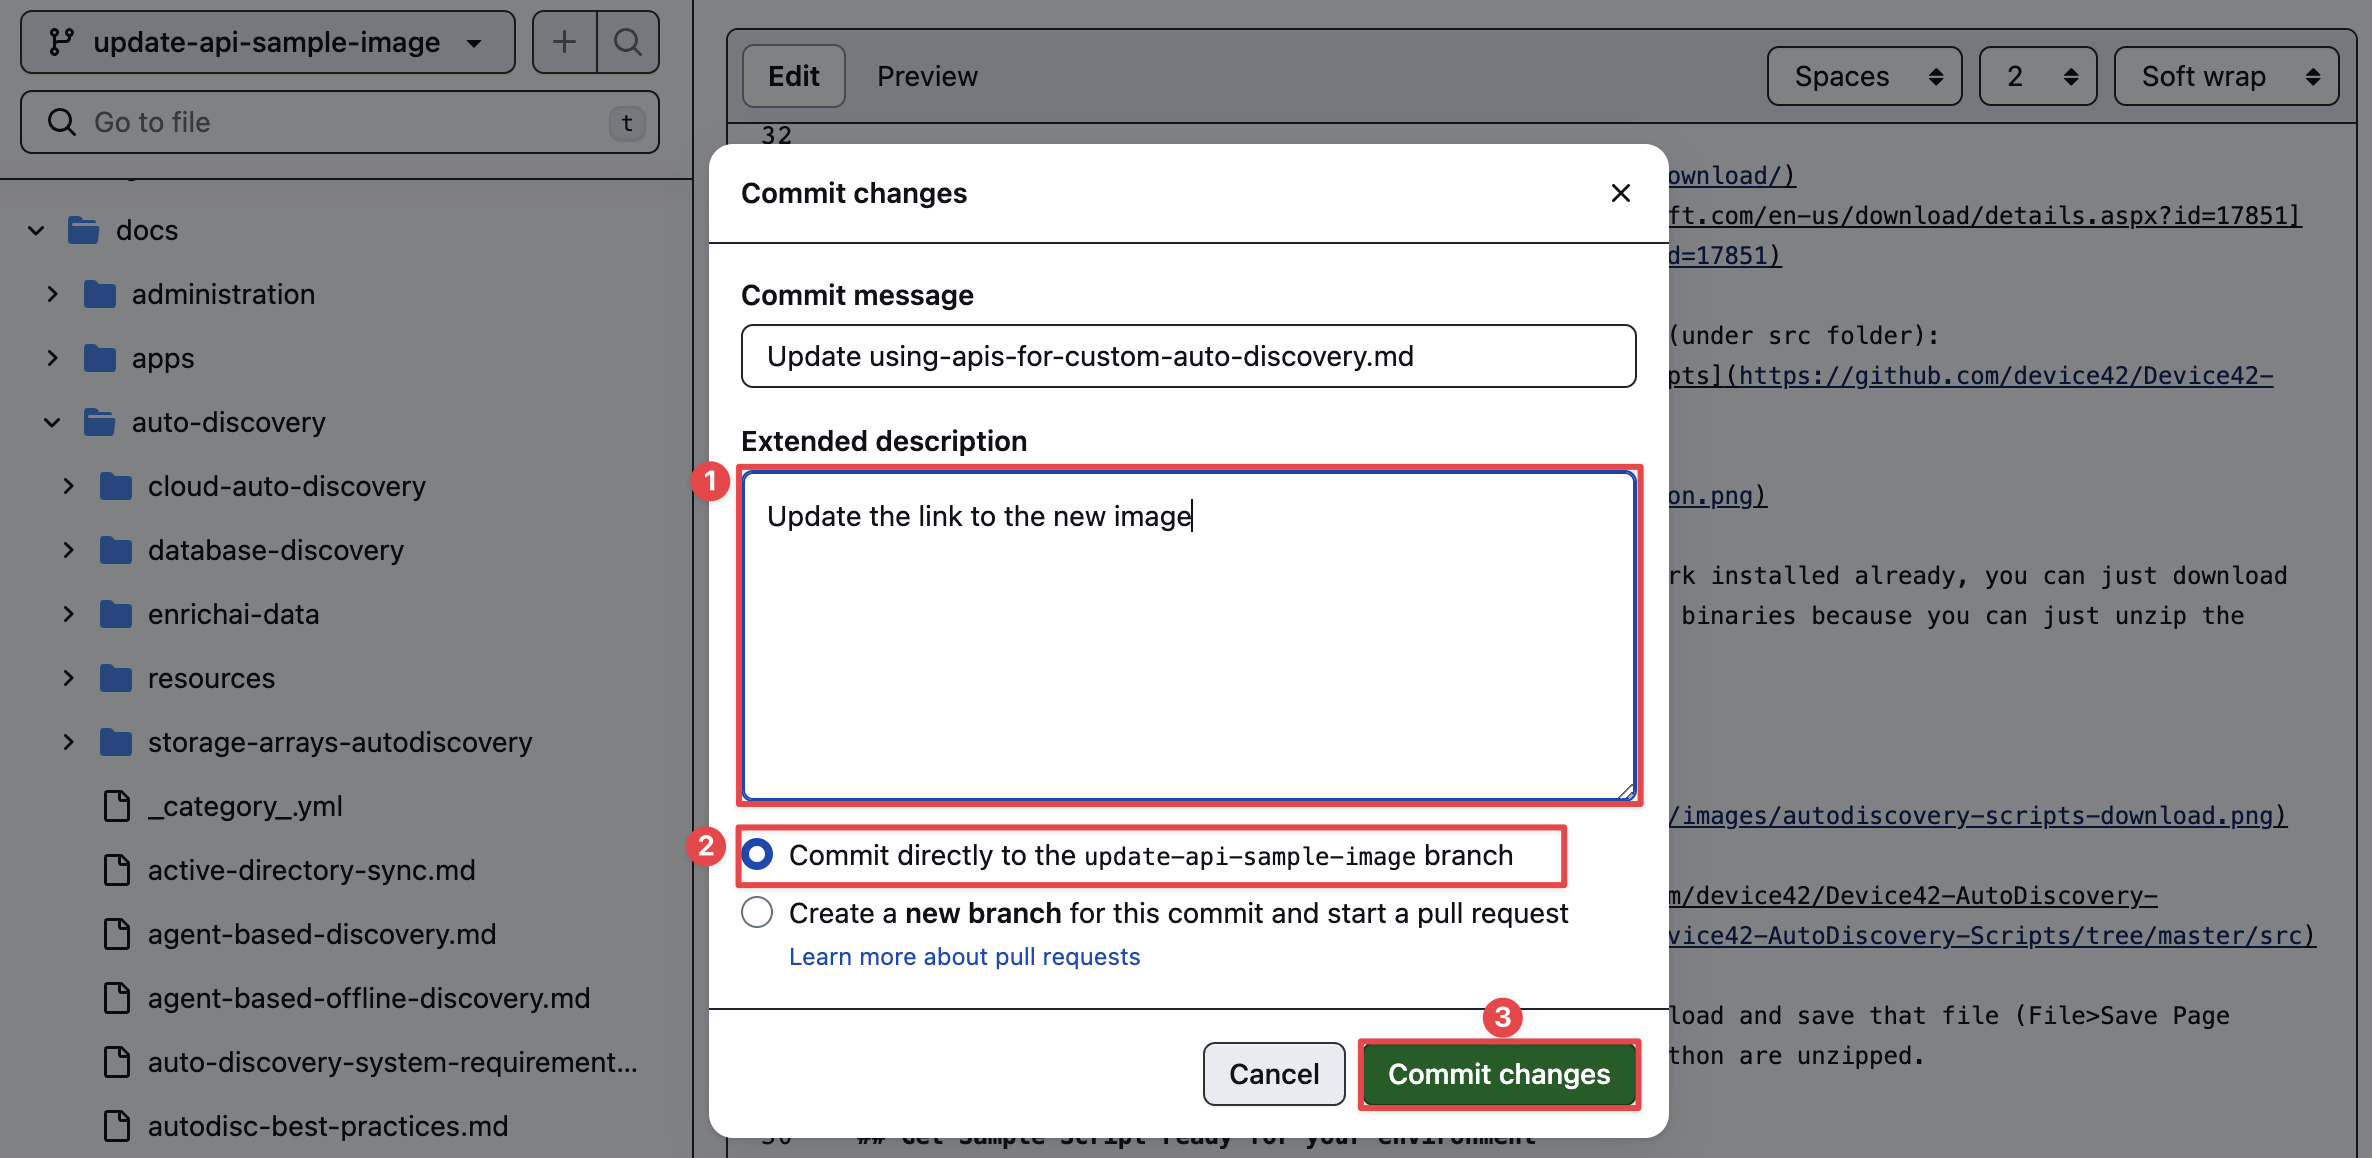
A modal window will open where we can briefly explain (1) the change we are committing to our update-api-sample-image branch. Keep the "Commit directly to the update-api-sample-image branch" option selected (2) and click the "Commit changes" button (3).
Create a Pull Request
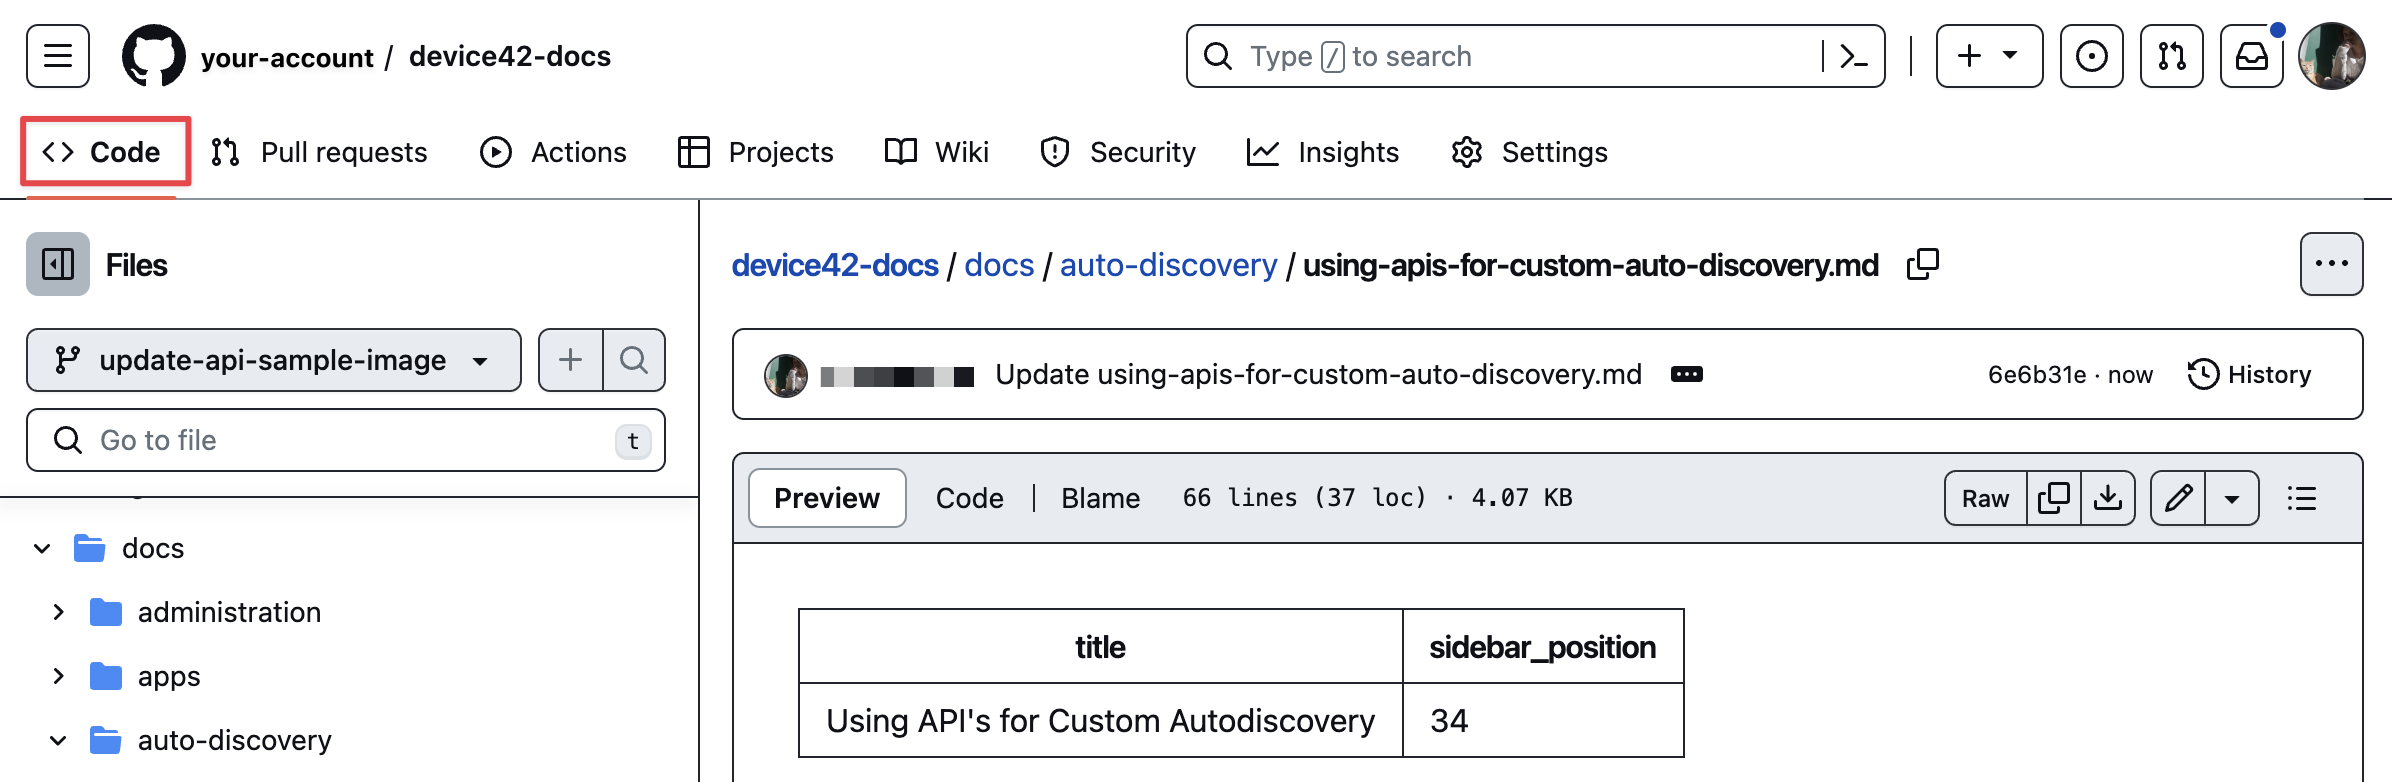
When the changes have been saved and the modal window closes, click on the "Code" button to go back to the repository overview page.
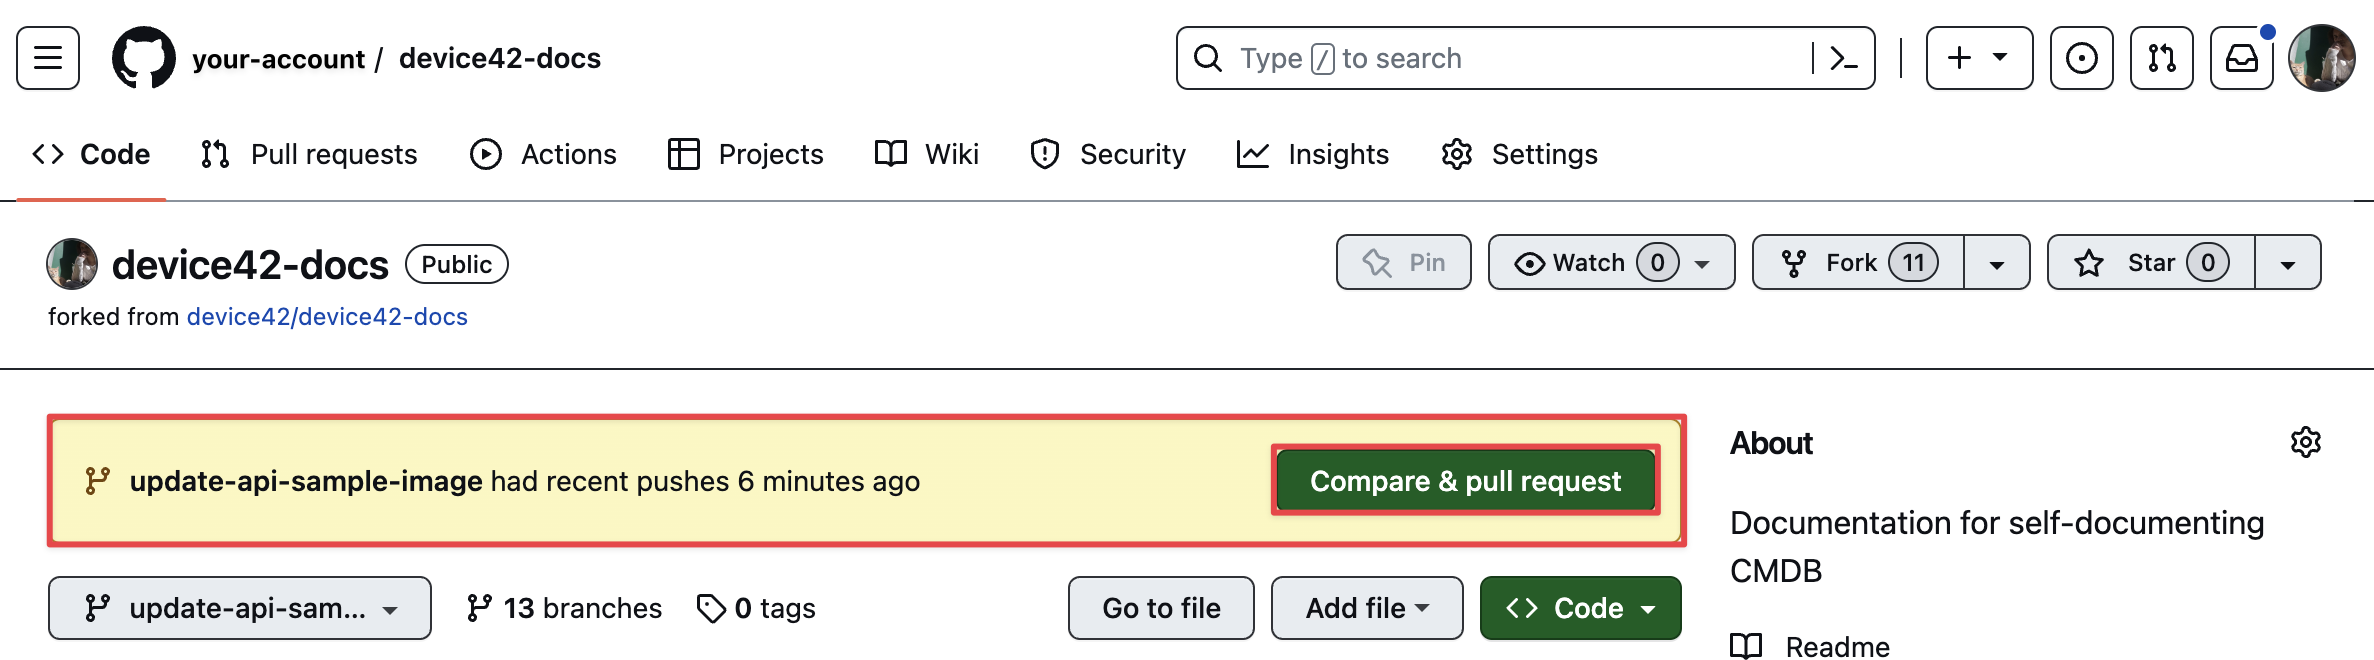
We'll now create a pull request to submit both of the changes we made. You'll see the yellow notification box with a message saying your branch "had recent pushes". In this example, the notification is "update-api-sample-image had recent pushes 6 minutes ago".
Click on the "Compare & pull request" button on the right of the yellow notification box.
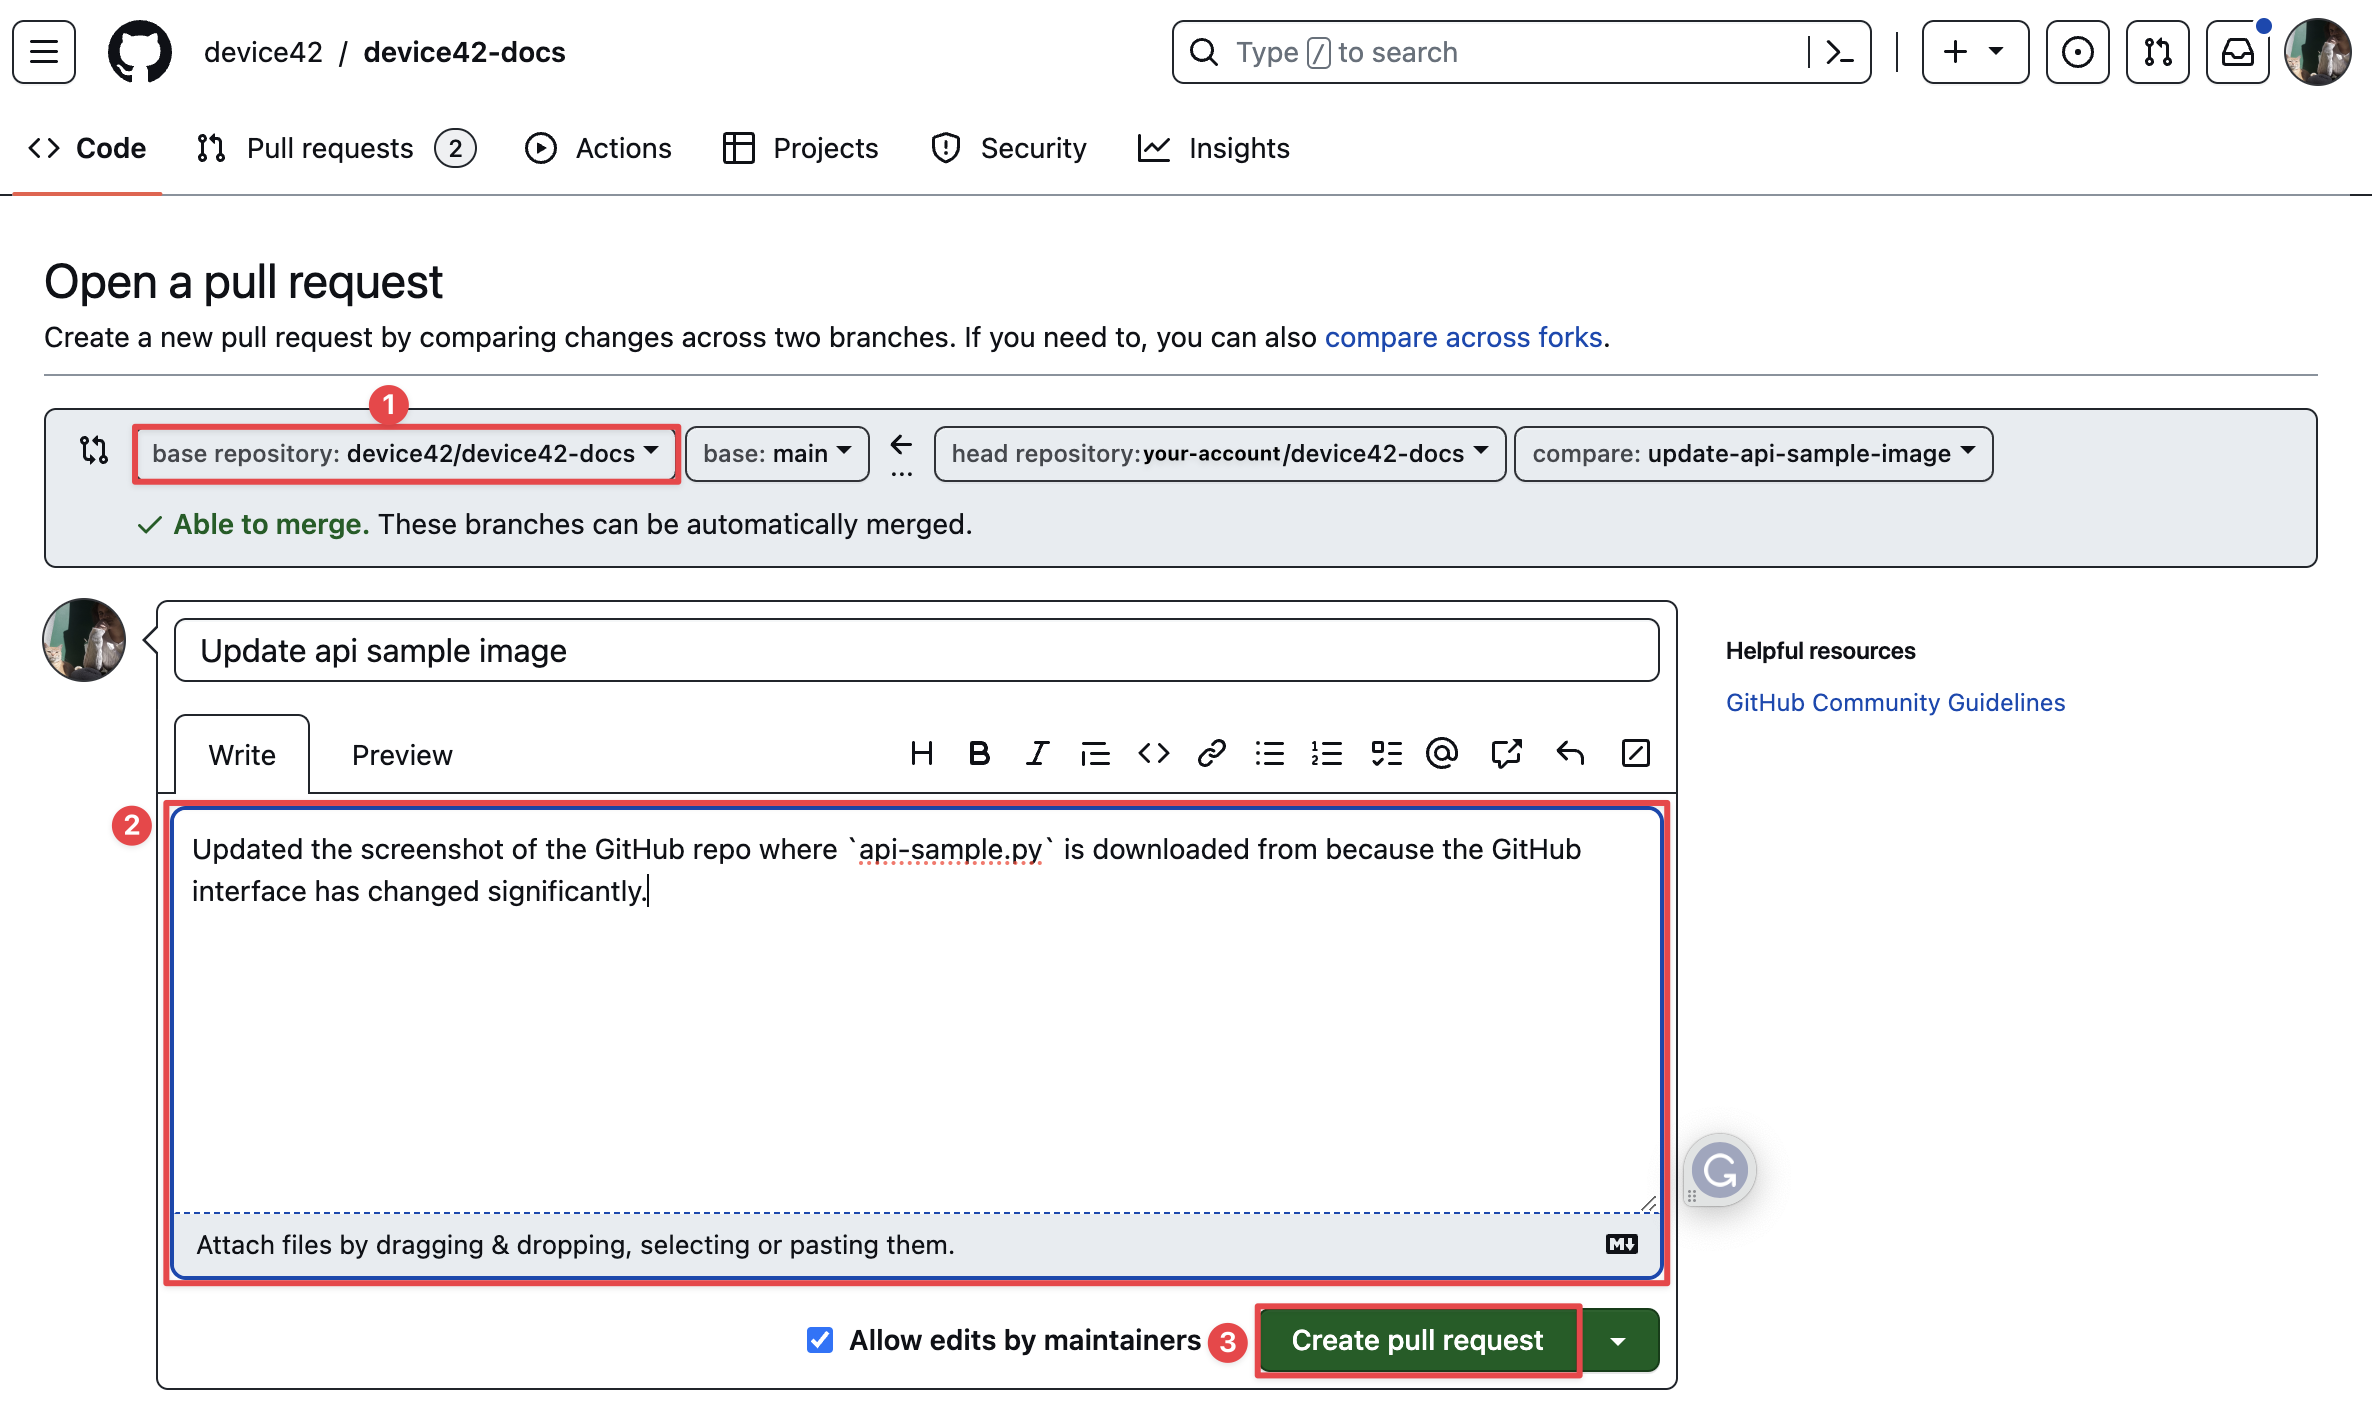
The "Open a pull request" page will open. Double-check that the base repository is device42-device42-docs (1). The base repository is where we're submitting the changes we made to our forked repository (called the "head repository").
You can give additional information about why you made the changes you did in the text box (2). Click on the "Create pull request" button to make the pull request.
Wait for Review
When your pull request has been submitted, you'll be directed to a page with the name and number of your pull request listed at the top (1). You can view the changes you've made by clicking on the "Files changed" tab (2). You'll see the commits you made listed on a timeline (3). Below that, you'll see crosses with "Review required" and "Merging is blocked" messages next to them. In the text box below, you can add additional comments about the pull request if needed.
Now you can wait for Device42 to review these changes. If your changes are approved, they will appear on the website.

View the Changes (optional)
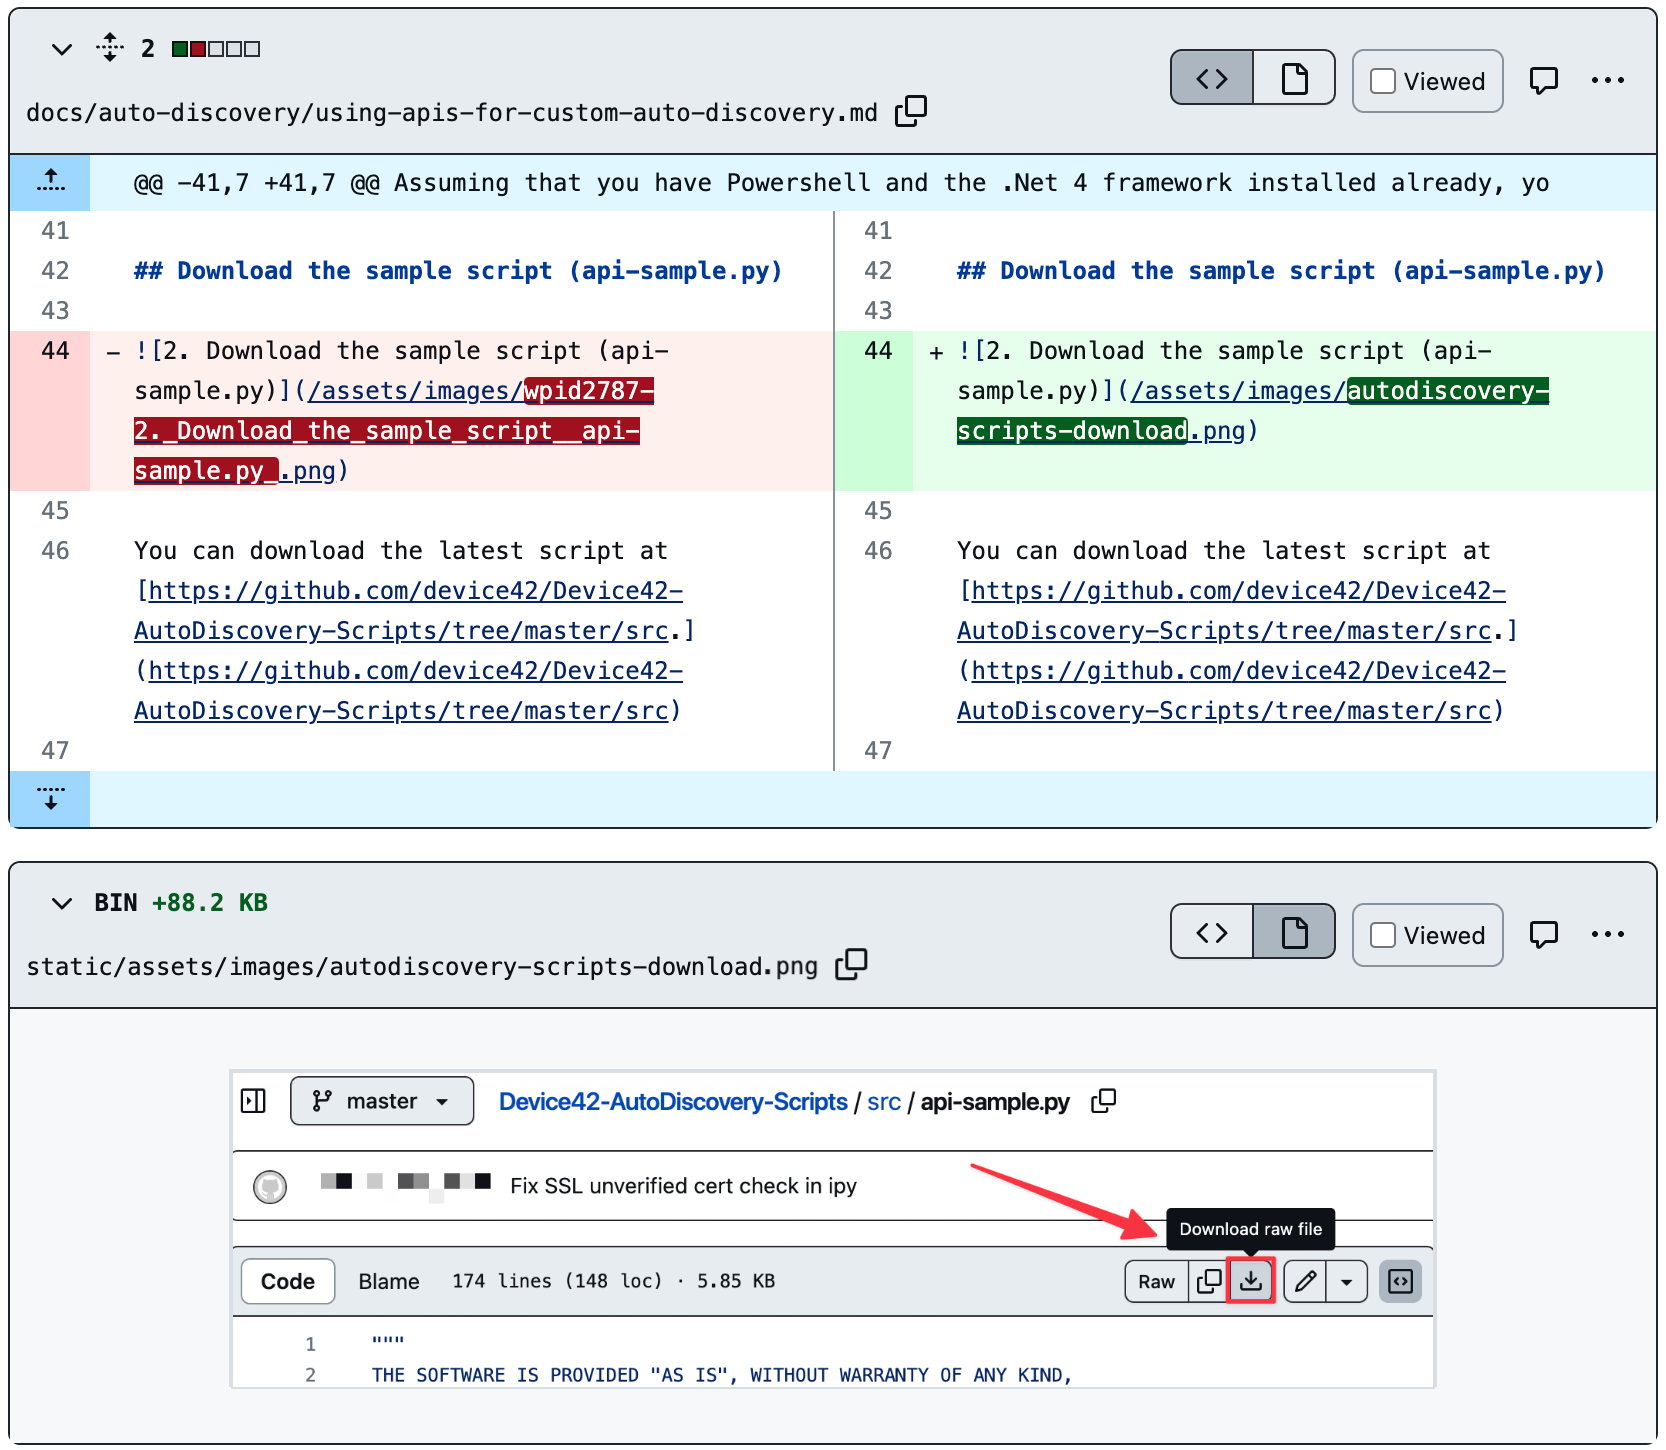
If you click on the "Files changed" tab, you can see the changes you've made and compare them to the previous Markdown version. The red highlighting on the left is the original version, and the green highlighting on the right shows the changes you made. In this example, we see that the name of the .png image was changed from wpid2787-2._Download_the_sample_script__api-sample.py_ to autodiscovery-scripts-download in the Markdown file. Below that, we see a preview of the new image we added.
Thank you for taking the time to contribute to the Device42 documentation. It helps us maintain our documentation for all Device42 users and is greatly appreciated!