Device42 Remote Collector - Installation
The Remote Collector (RC) is shipped as a virtual appliance and can be downloaded from our Autodiscovery software download page.
This guide provides step-by-step instructions for configuring your Remote Collector after initial deployment.
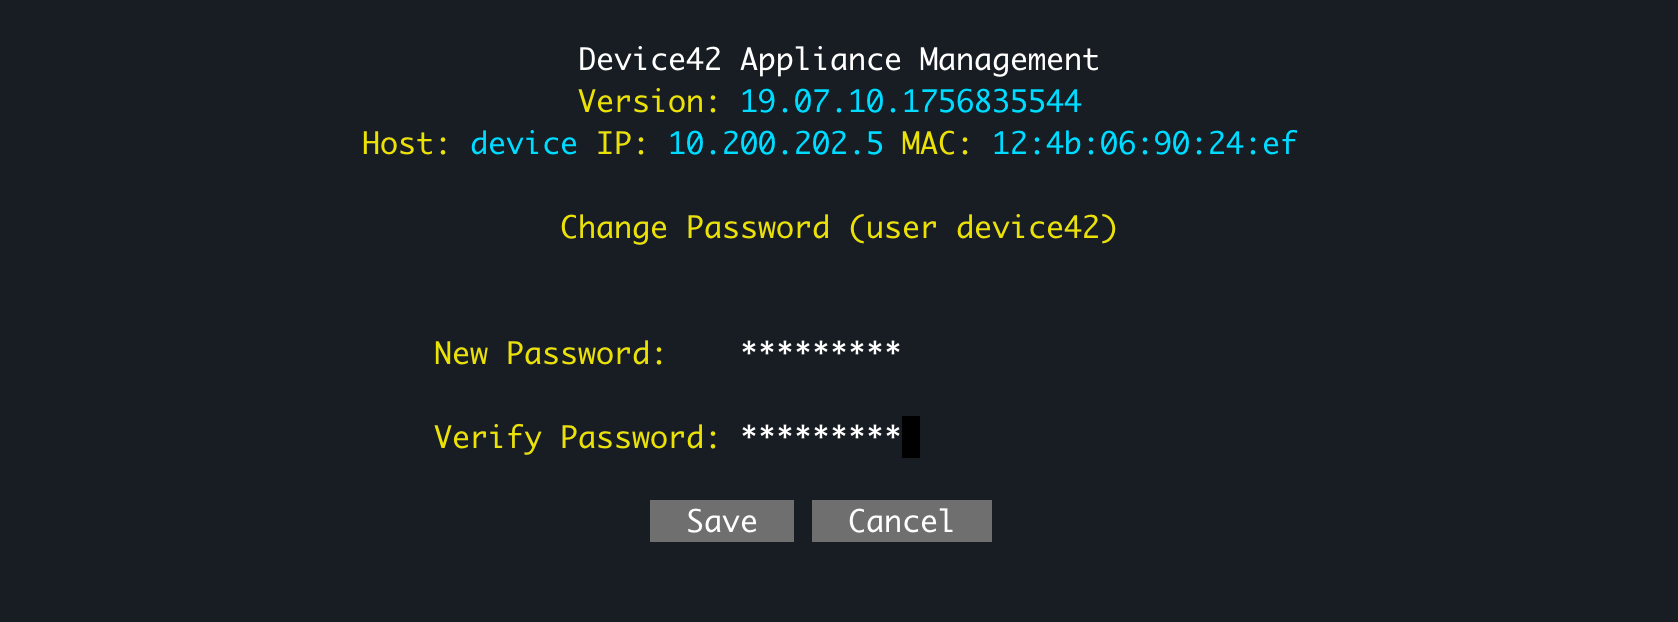
Step 1: Change User Password
- Navigate to the Virtual Machine console of the Remote Collector Appliance.
- Log in using the default credentials (Username is
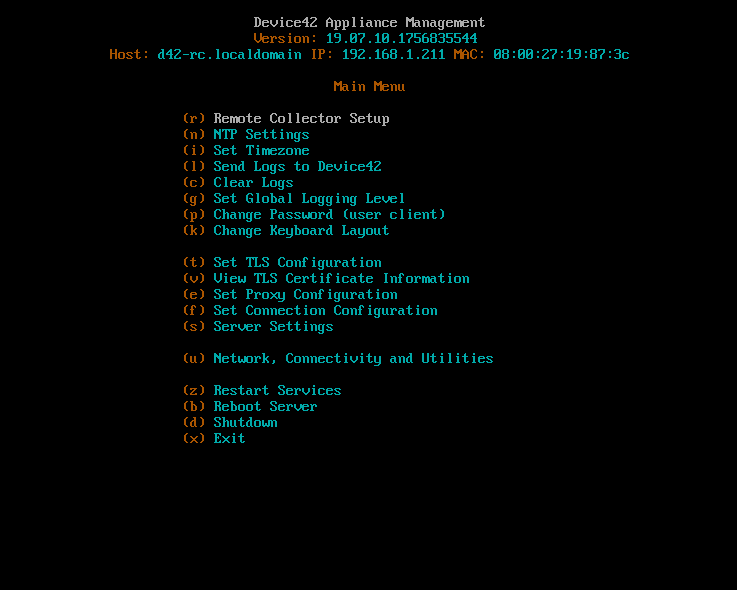
clientand Password isdevice42). - Choose option (p) to enter the Change Password (user client) menu.
- Enter and verify the new password.
- Choose the Save button.
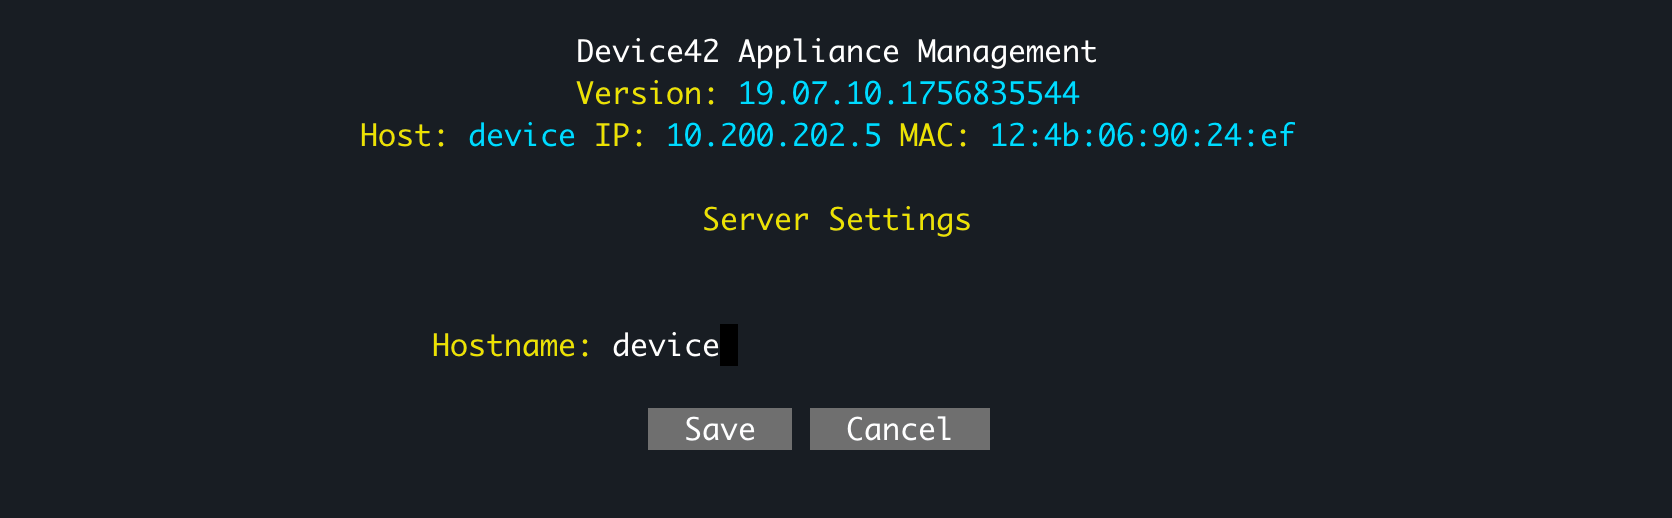
Step 2: Specify Hostname
- Choose option (s) to enter the Server Settings menu.
- Enter a hostname.
- Choose the Save button.
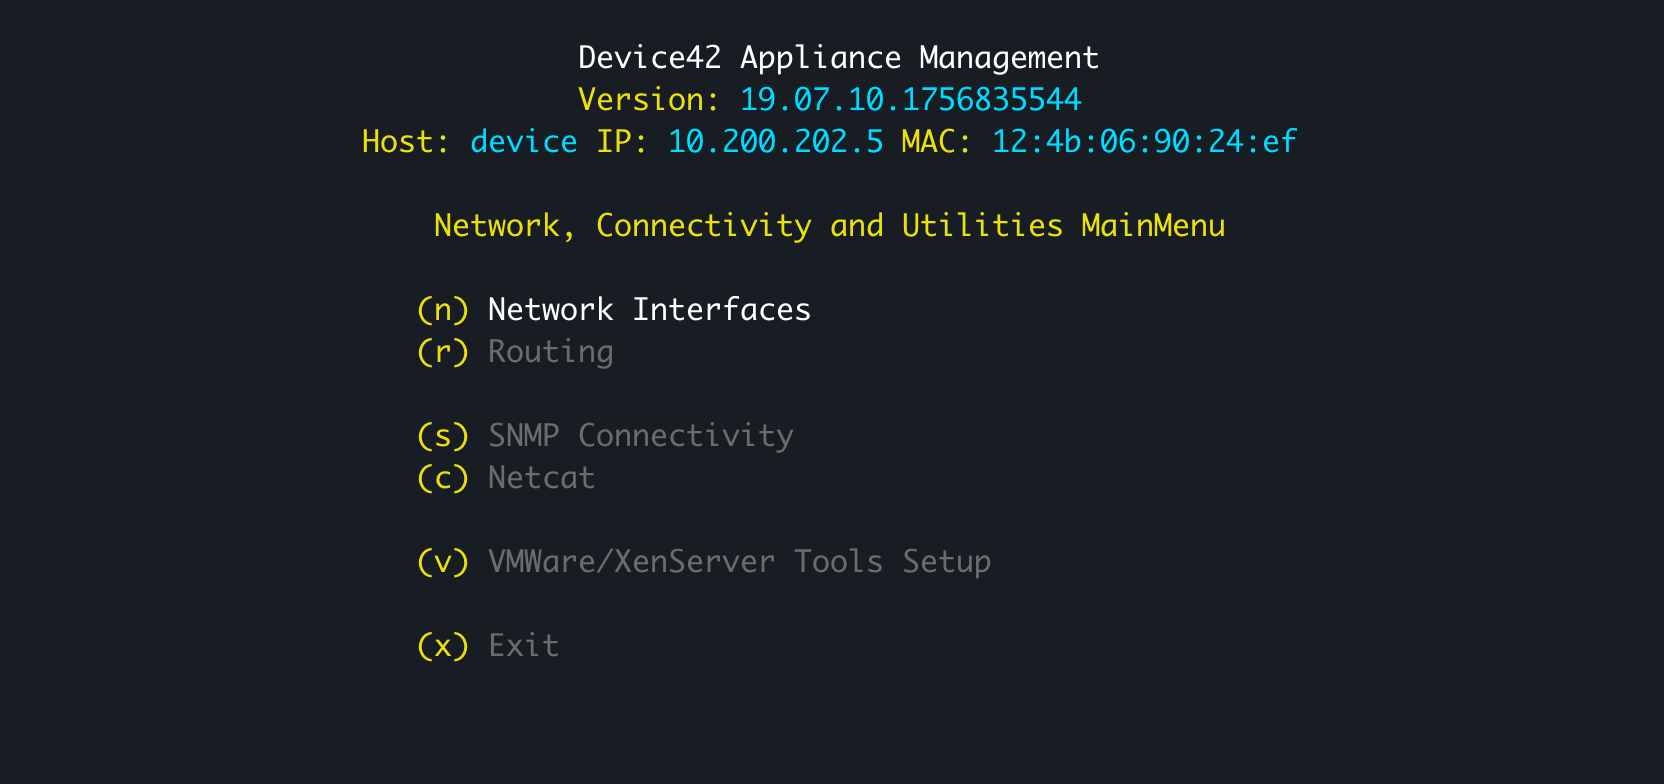
Step 3: Configure the Network Interface
-
Choose option (u) to enter the Network, Connectivity and Utilities menu.
-
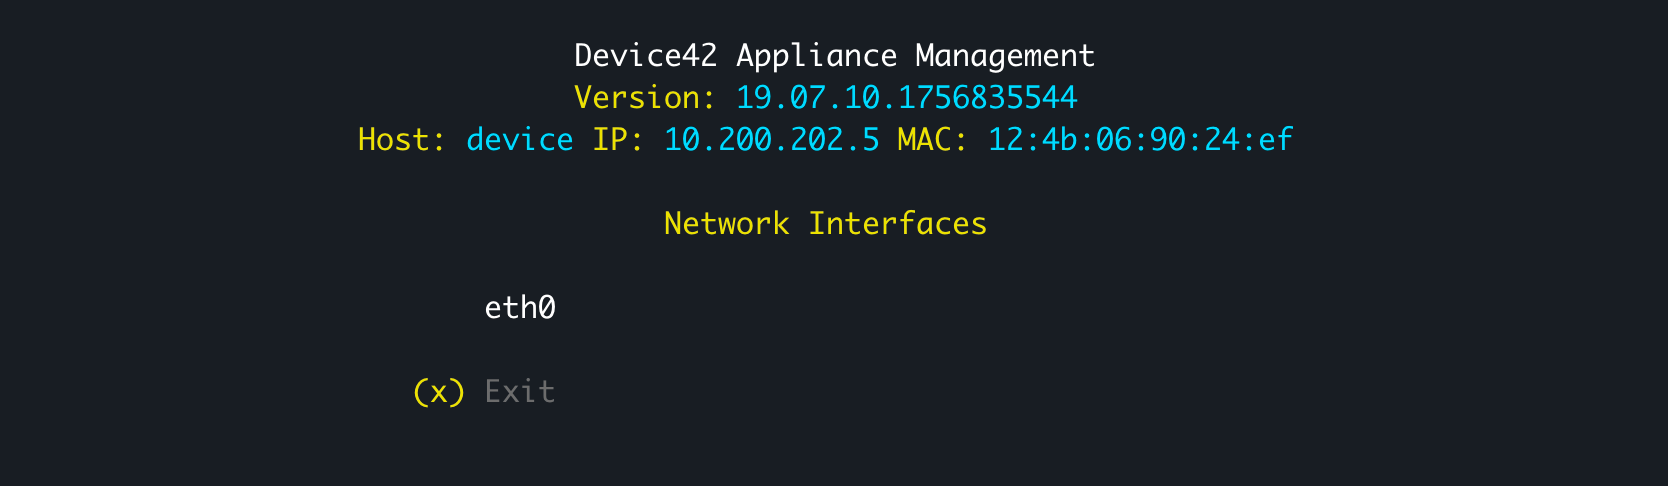
Choose option (n) to enter the Network Interfaces menu.
-
Select the default interface (highlighted in white) and press Enter.
-
If using a Static IP, deselect Use DHCP and enter the IP Address, Subnet, Gateway, and DNS server(s). If using IPv6, specify the IPv6 Address and Gateway.

-
Choose Save, then Exit, then Exit.
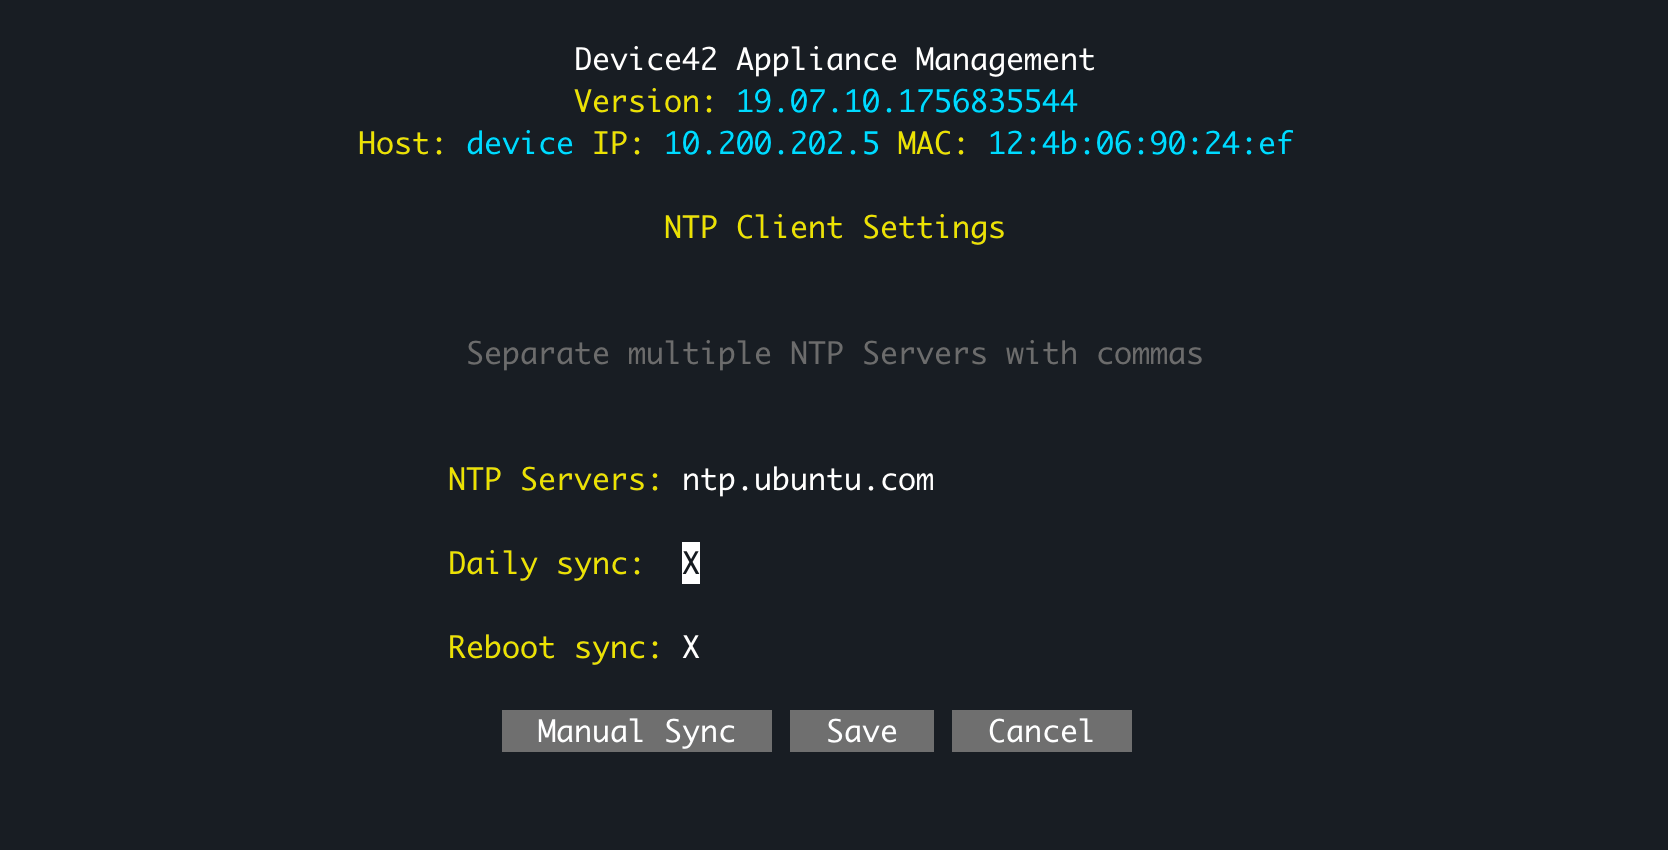
Step 4: Configure the NTP Settings
-
Choose option (n) to enter the NTP Client Settings menu.
-
Ensure Daily sync is chosen.
-
Optionally choose to sync on reboot (this enables an admin to reboot the RC within the Device42 interface, which can help resolve unusual RC behavior).
-
Choose Manual Sync should you choose to perform a manual sync now, else choose the Save button.
Step 5: Connect the Remote Collector to the Main Appliance
-
Choose option (r) to enter the Remote Collector Setup menu.
-
Enter the name of the Remote Collector.
-
Enter either the Hostname or IP Address of the Main Appliance.
-
Generate a One Time Password (OTP) from the Main Appliance, which will be entered later into this menu:
- Log into the Main Appliance.
- Choose Discovery > Remote Collectors.
- Click the Generate OTP button.
-
Enter the OTP.
-
Choose the Register button. Note the green acknowledgement text at the top of the main Appliance Management menu.
-
Navigate back to the Main Appliance and confirm the RC in the Remote Collectors menu shows a State of "connected".
Deployment Example
RCs are extremely flexible and make discovery with Device42 easier than ever. You can deploy one or more, with no logical limit to the number of RCs you can use.
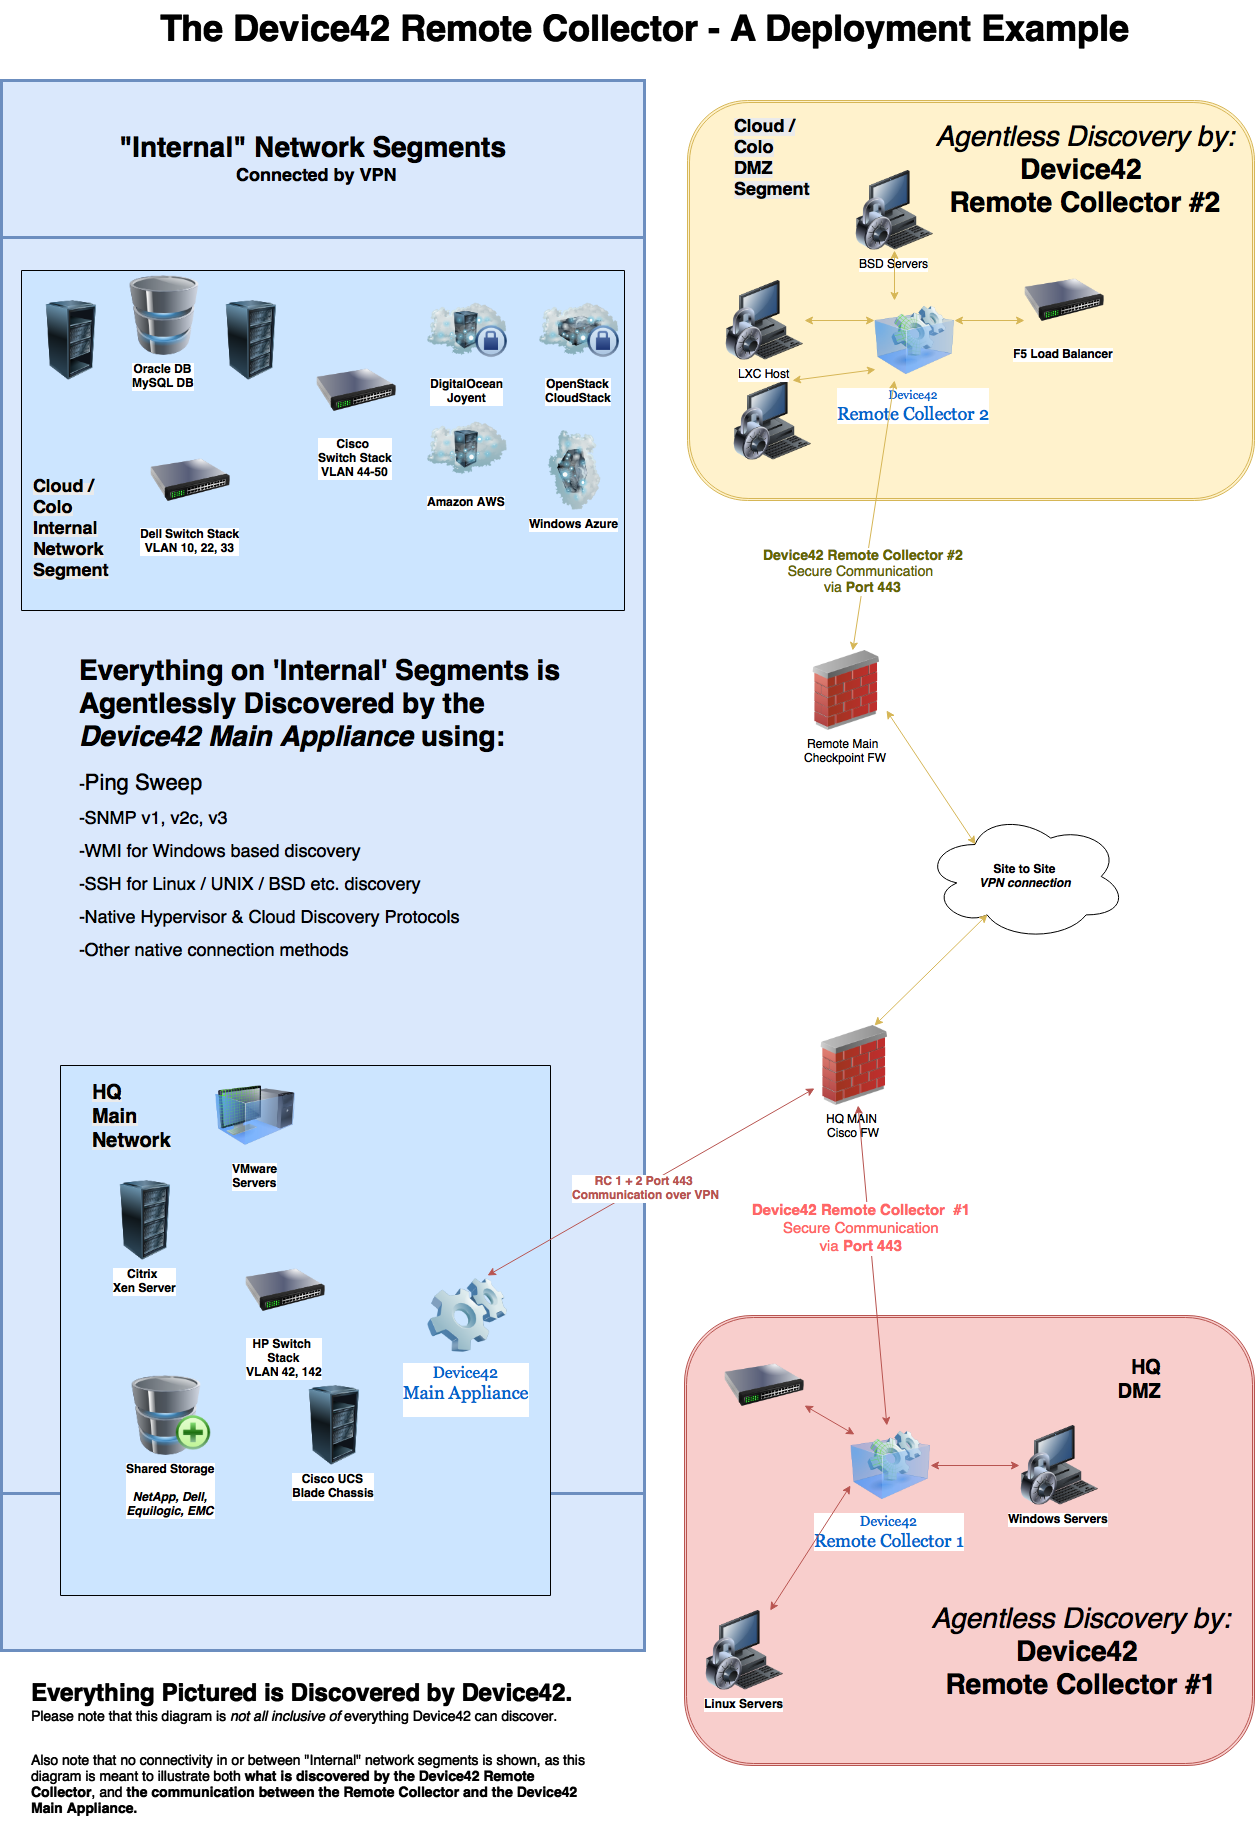
In the deployment example pictured above, an RC is deployed within each isolated DMZ network segment that, per firewall rules typical of a DMZ, the Device42 MA is normally unable to reach or discover directly. Deploying an RC to these segments bolsters security by saving the network administrator from making multiple temporary (or permanent and insecure) firewall rules (aka 'holes') to allow discovery traffic to pass from the MA over the wide range of ports used by various vendor APIs.
Please note that the diagram doesn't show the majority of network connectivity that would be present, and instead focuses on what is discovered by the MA and the RC, and the communication between them.
As mentioned briefly in the introduction, all communication and discovery information is securely transmitted between the RC and the MA once a connection is established via Port 443 (HTTPS/SSL). This means a single, secure, and easily monitored 1:1 rule allows for comprehensive and continuous discovery of the secured network segment - as often as scheduled or desired - without compromising its isolation or security.
Proxy Settings
The proxy settings within the MA and RC are set independently but are often identical. To reduce the potential for error, the RC can pick up preconfigured proxy settings. You can also view and edit the RC proxy settings within the RC view of the MA.
Scalability
Device42 RCs provide robust scalability by offloading discovery workloads from your MA. You can deploy multiple RCs for each MA. We recommend using one RC with one WDS for every 1,000 workloads.