Building Business Services in Device42
Business Applications are now named Business Services. Affinity Groups have also been renamed as Application Groups. See Calculation Rules (previously AppFocus Filters) for details on the new ADM flow.
Overview
This is a technical guide that will walk you through a step-by-step process of building Business Services within Device42. Once you have successfully performed discovery, apply the methods outlined below to create Application Groups and then leverage these groups to facilitate the process of building your Business Services.
Viewing Discovery Data
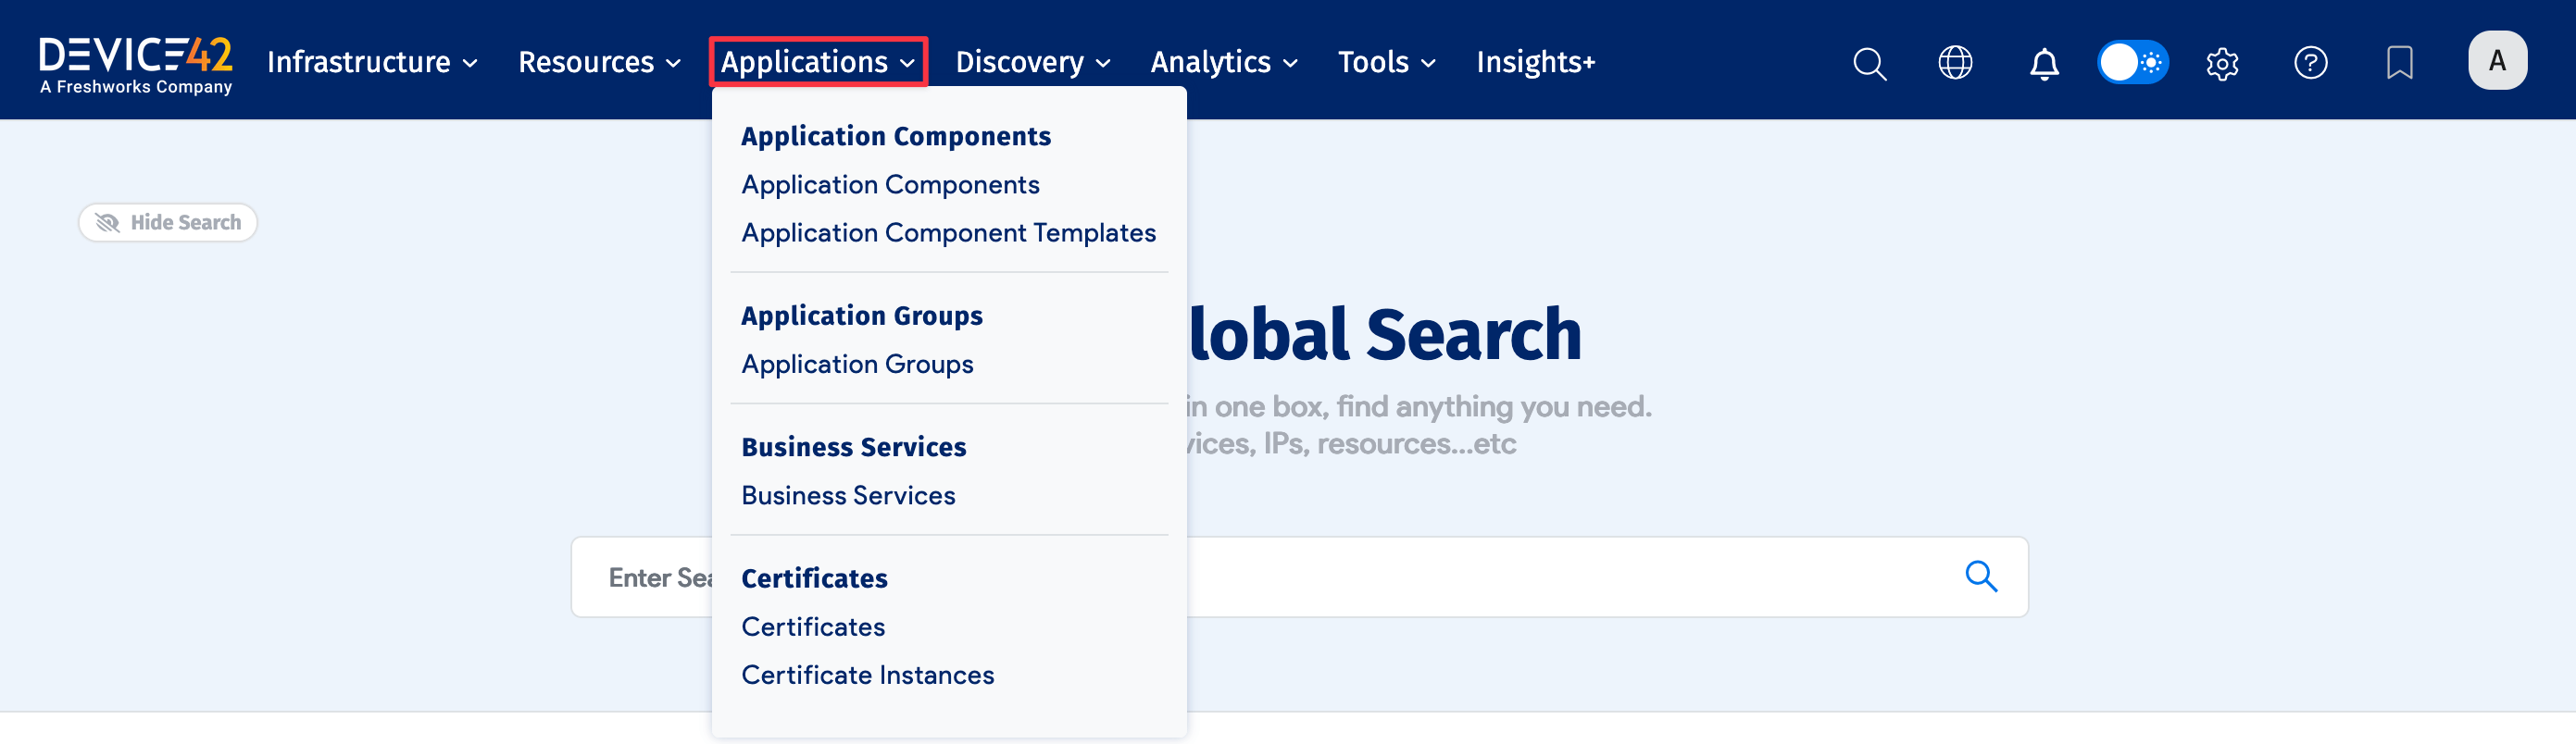
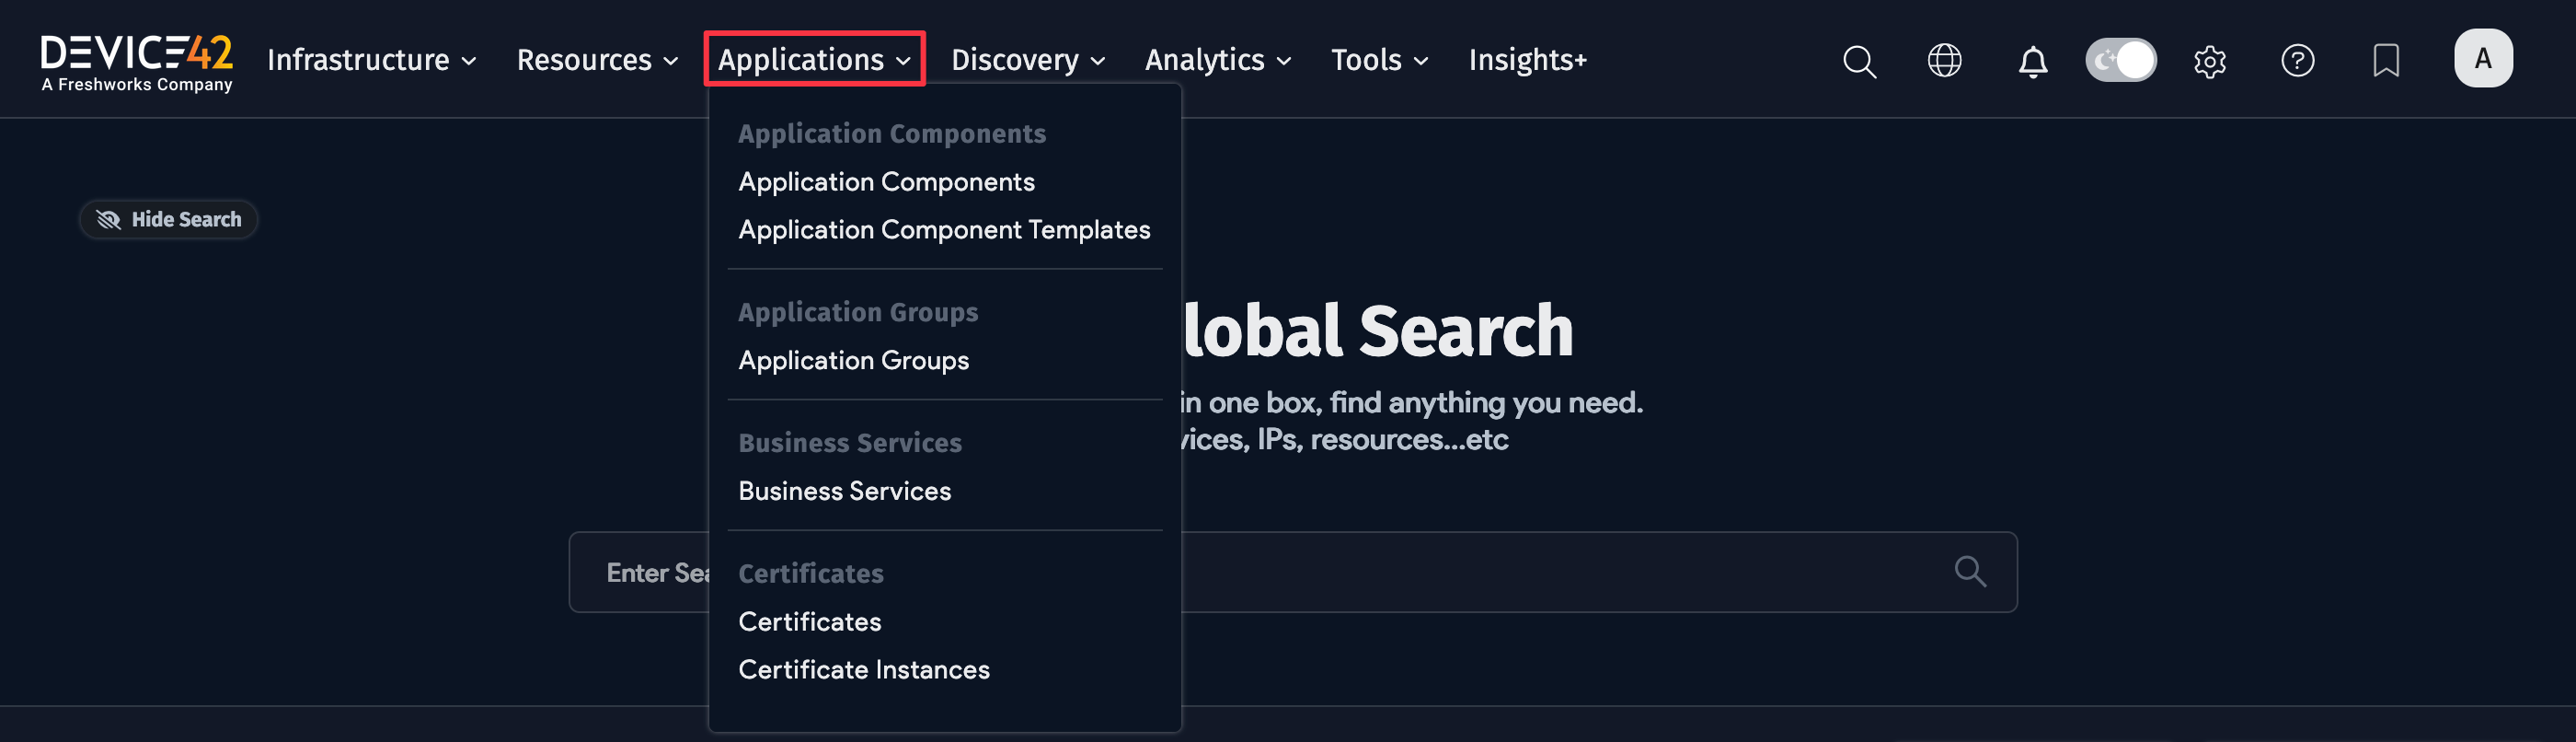
After you have performed successful discovery, all discovered Application Dependency data can be viewed under the Applications section in the Device42 main menu.
The Application Components section is where discovered infrastructure Application Components are stored. See a complete list of Device42’s supported applications here: ADM supported applications.
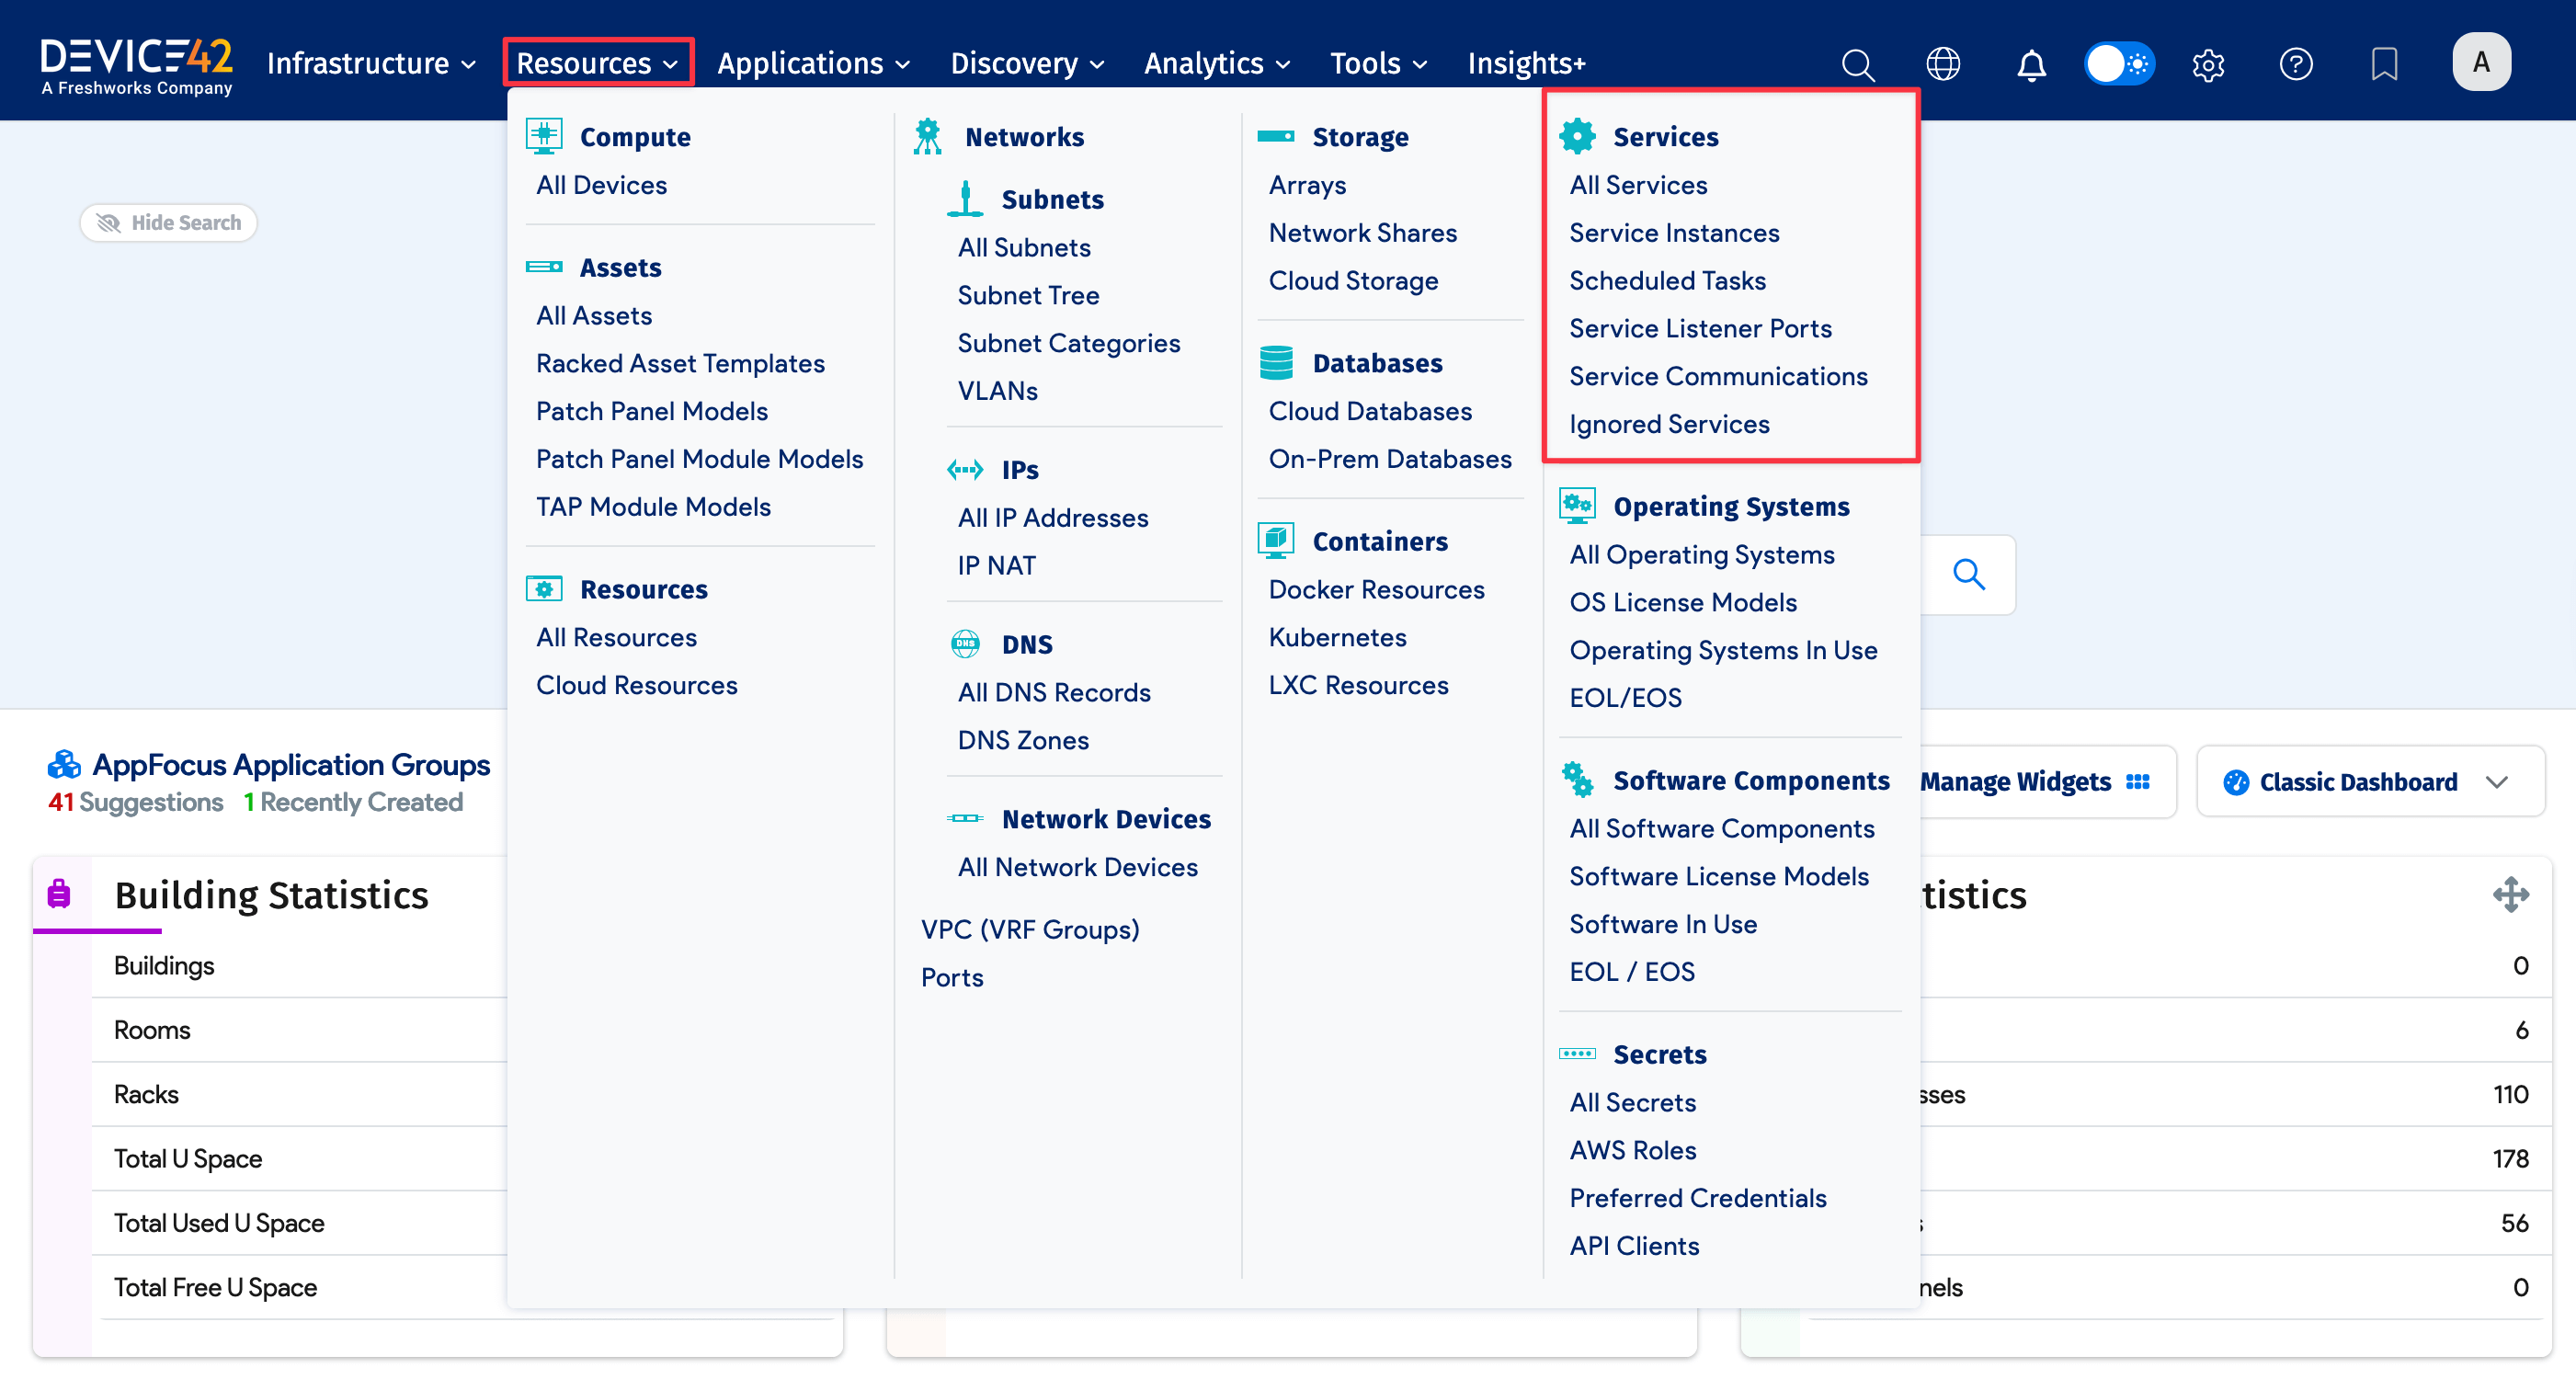
The Services section located under Resources > Services will provide you with list views of all your Services including Service Instances, Scheduled Tasks, Listener ports, and Service communications.

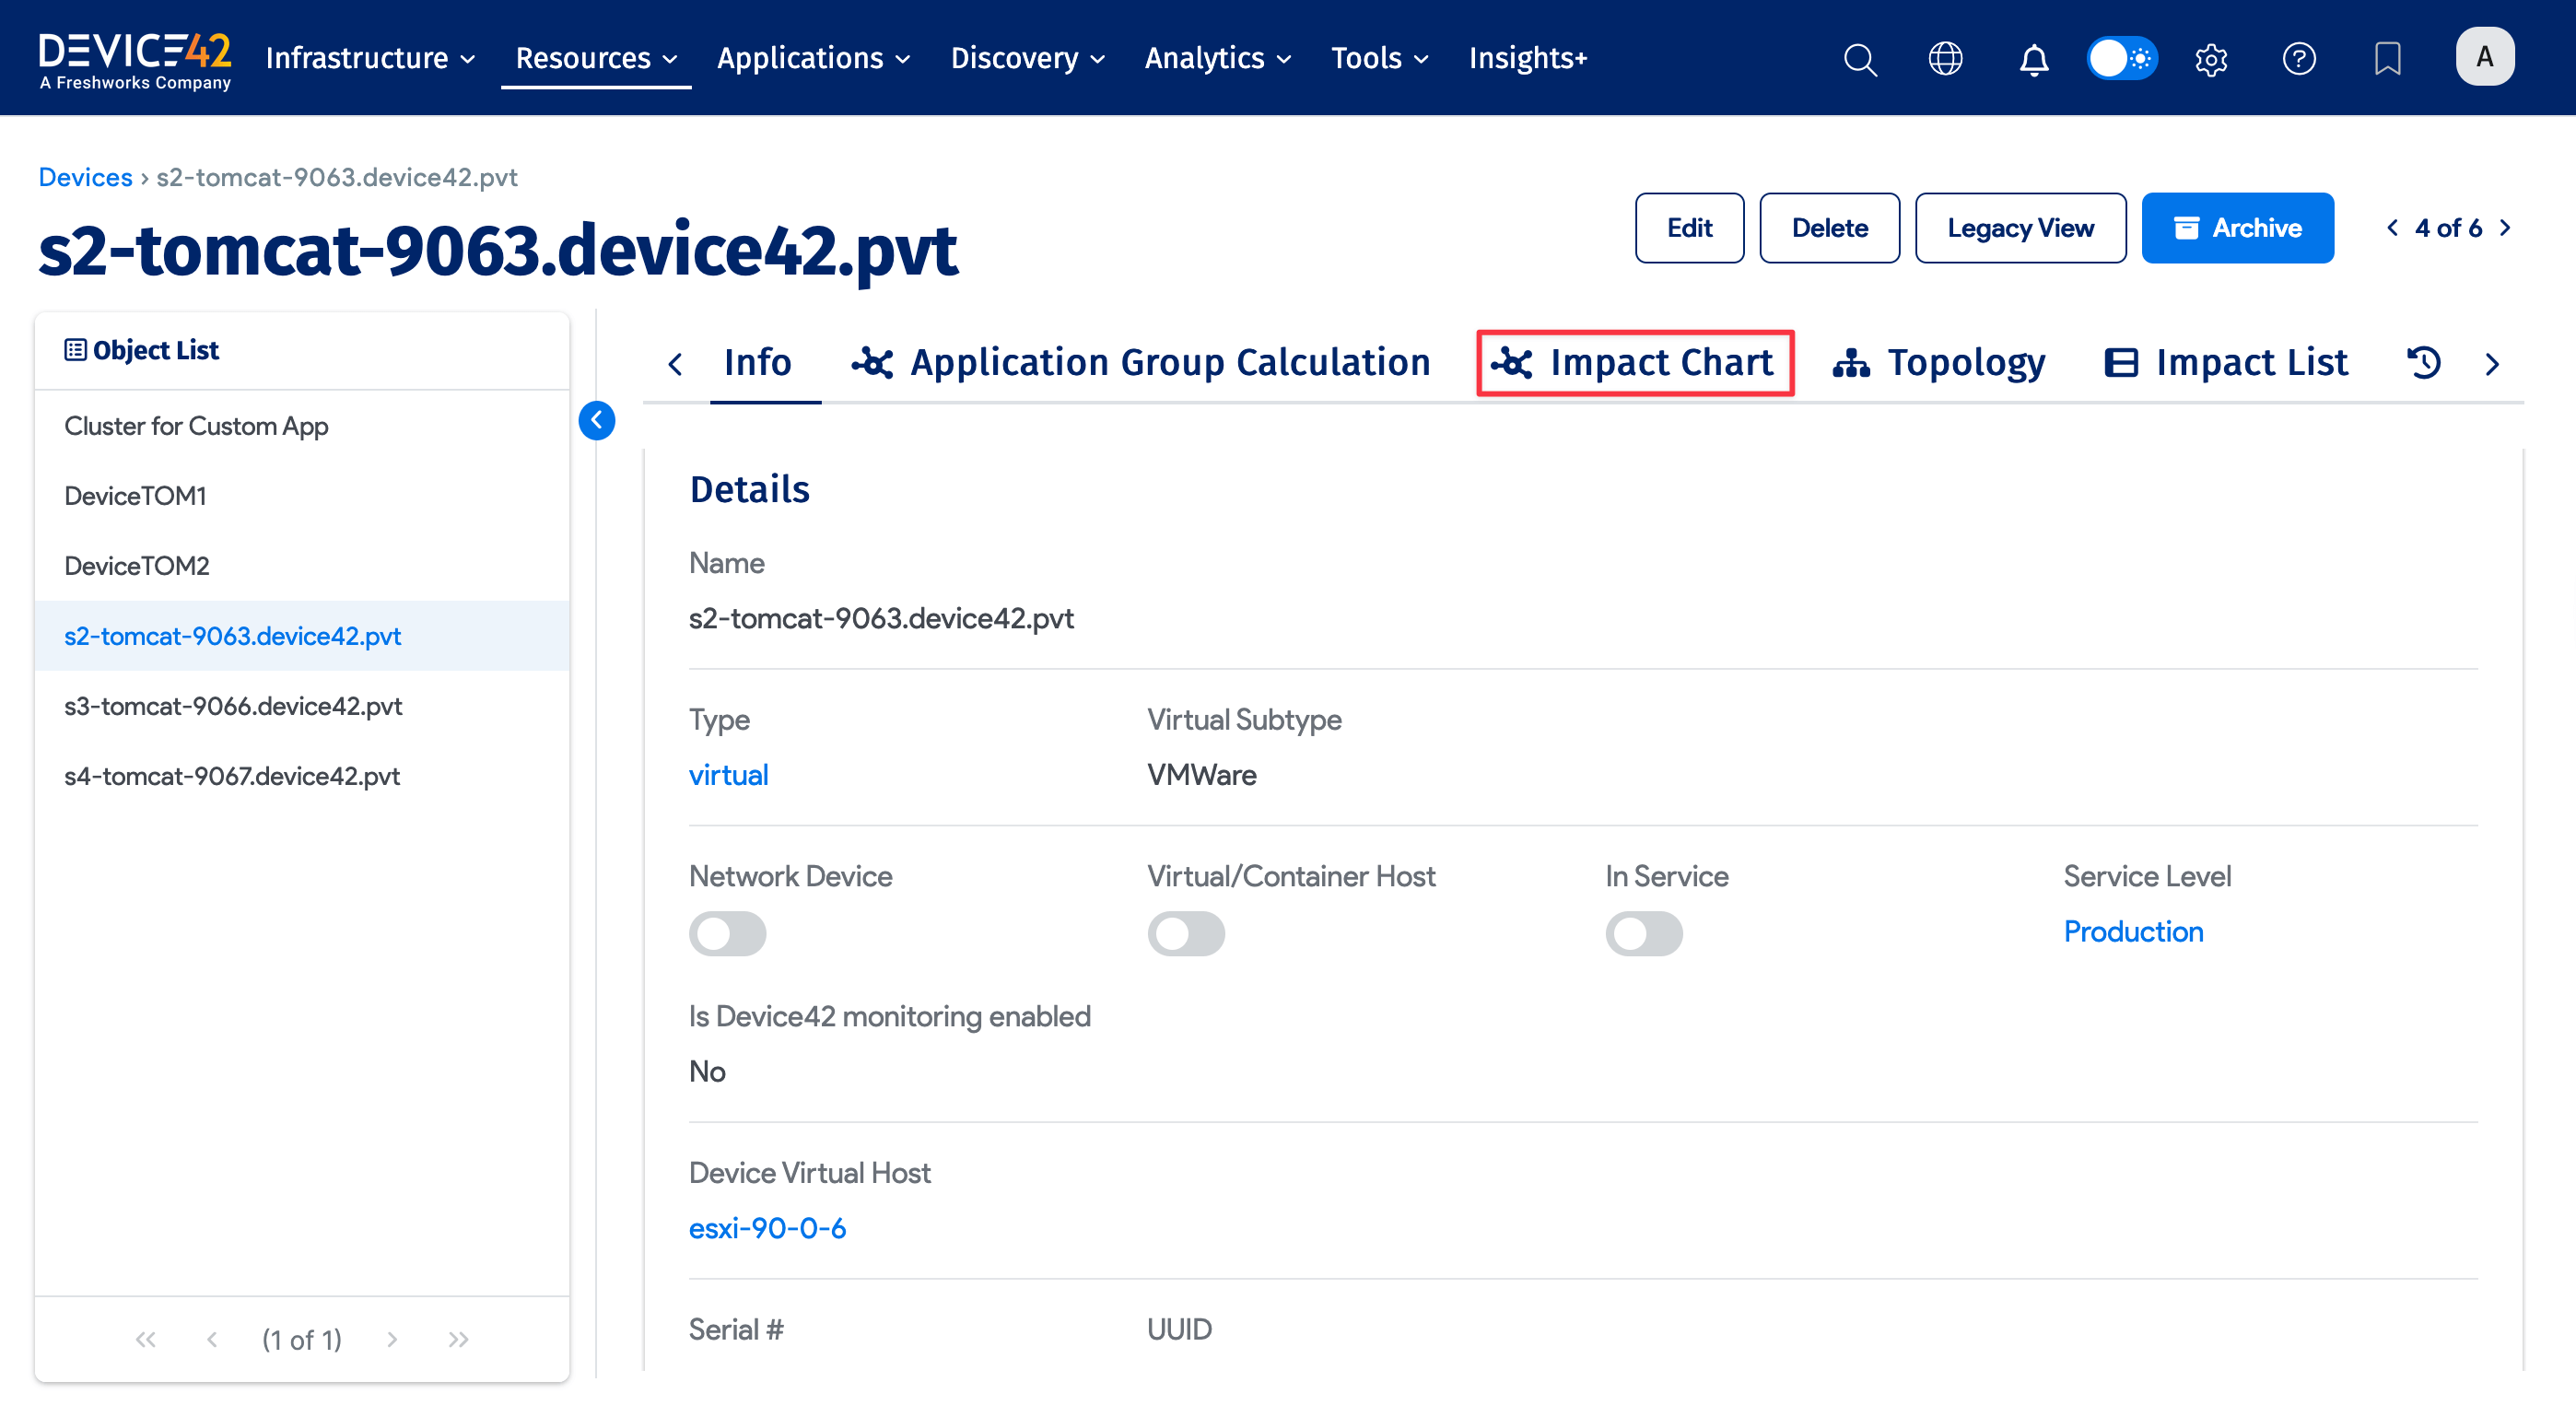
Device Topology
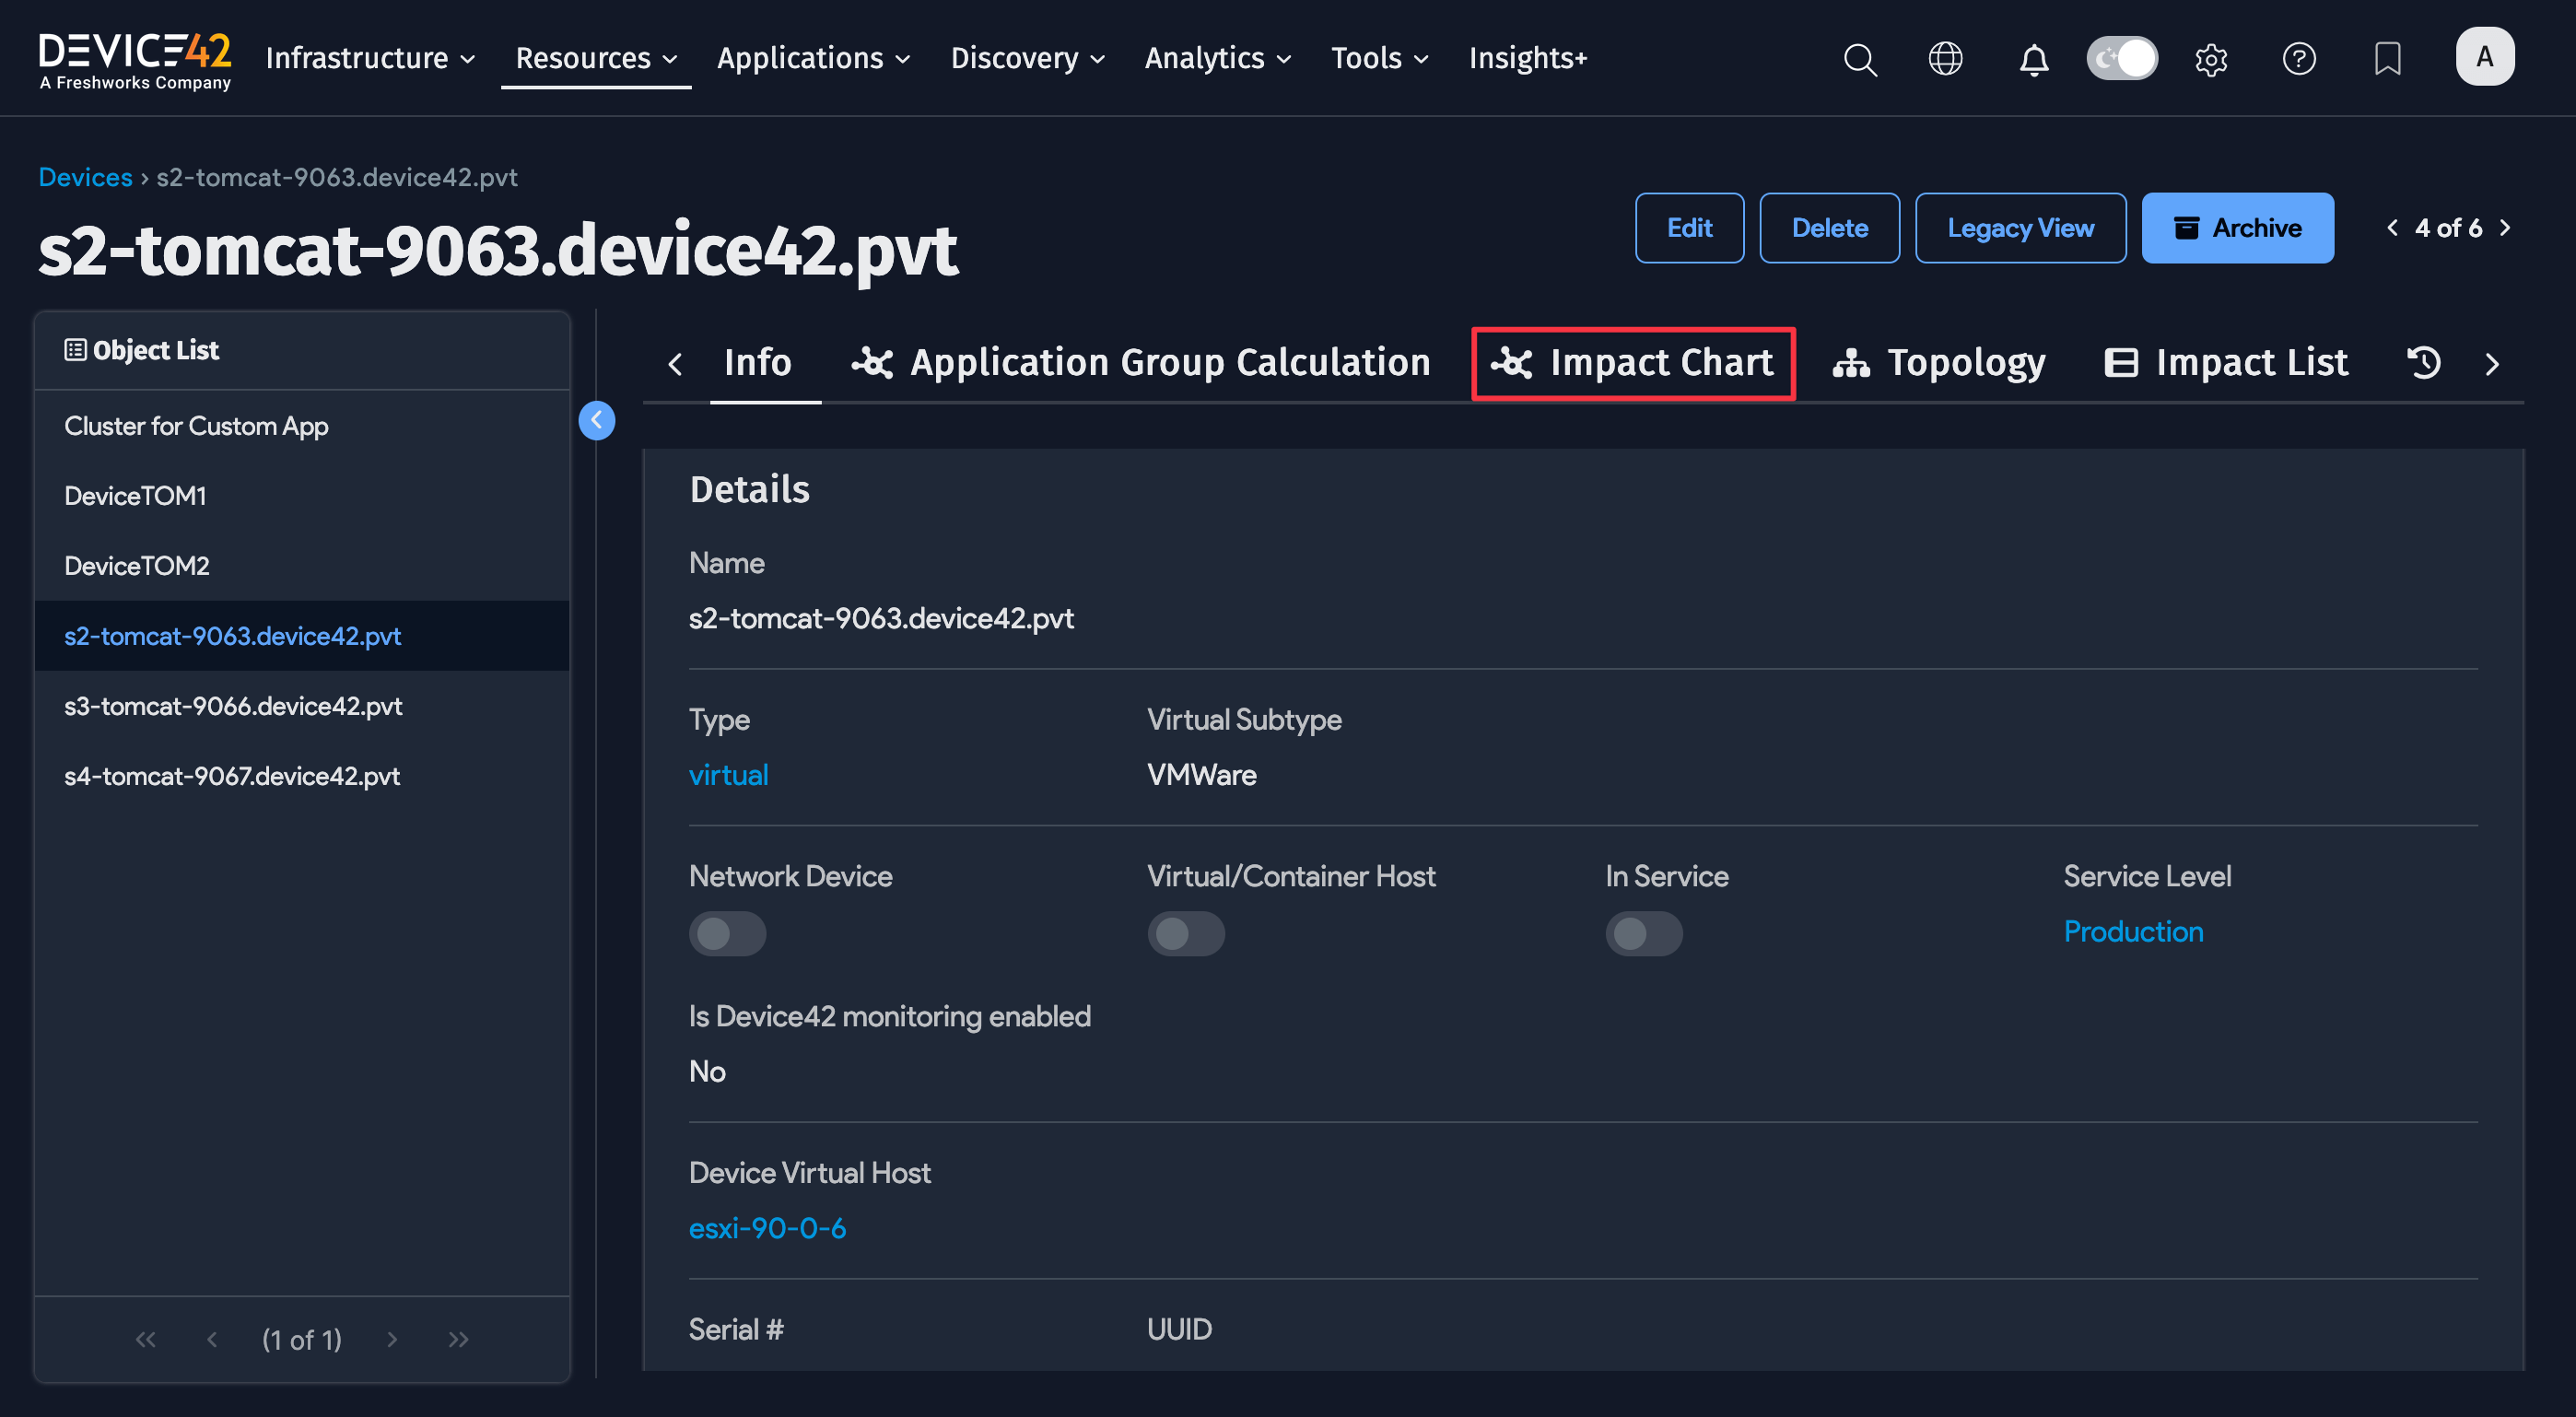
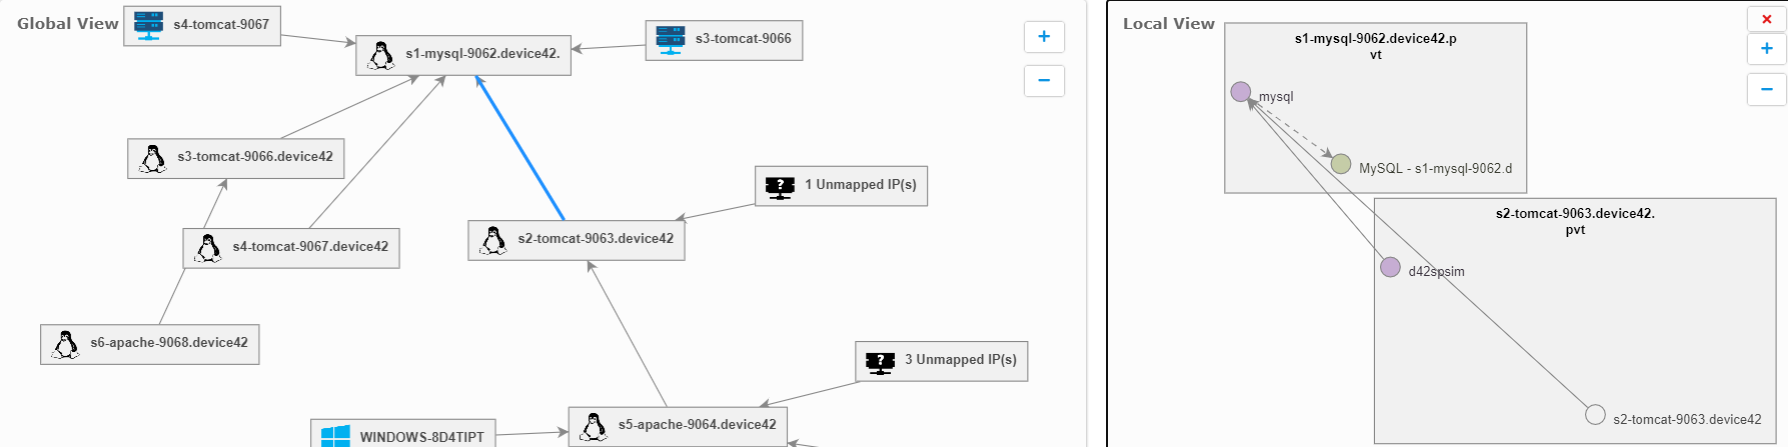
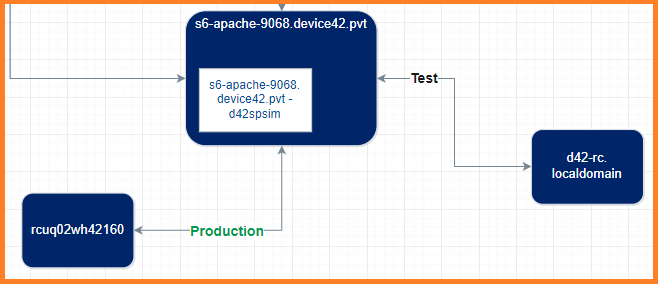
When viewing a device record (select Resources > All Devices from the main menu), the Topology view will display the inbound and outbound connectivity to the device.
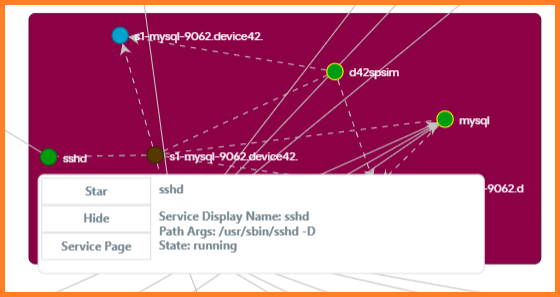
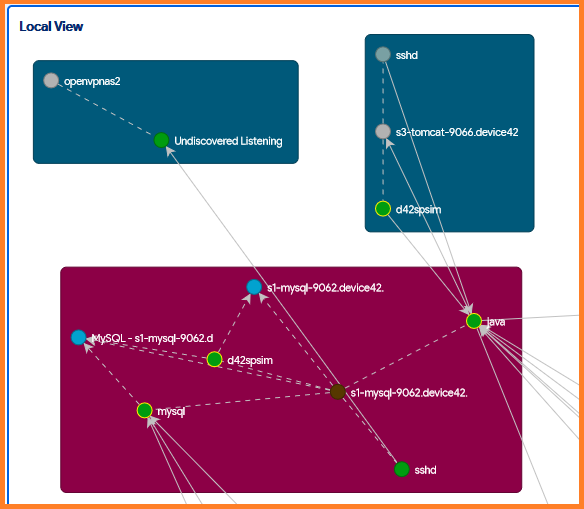
The Global View (left pane) displays a high-level view of the device's communication. The Local View (right pane) drills down to display the services and applications that build the connections used for communication. These are connections Device42 has detected to known devices (in Device42) since the very first time you performed the discovery.
To display connections to undiscovered devices, select Display Options above the Topology view and uncheck Hide client IP addresses with no device/Managed Resources. Any connections to undiscovered devices should be revealed.


When viewing a service in the device Topology view, you can hover over a Service to Star or Hide an individual service instance.
Undiscovered Listening Services
In the Local view of the Topology, you may notice Undiscovered Listening Services appear in the communication.
These services typically arise due to one of the following conditions:
- Device42 is discovering the services and service connections on the client device but is not actively discovering services and service connections on the listening device.
- Device42 is discovering the services on the listener side but lacks adequate permissions to match the PID to a service name.
- The Undiscovered Listening Service represents such a short-lived connection that Device42 can see the client connecting to that port but cannot match the listening service to a PID or service name on the listener side while the connection is alive (this is typical of services listening on ephemeral ports).
For highly active servers and environments, these visuals can be quite noisy, making it a challenge to identify the key relationships. To solve this, Device42 offers a feature known as Application Groups.
Application Groups
Application Groups are used to construct more consumable views of device interdependencies after the evaluation of all of a device's connections. By configuring Starting Points and End Points using Calculation Rules, you can limit device communication noise to just meaningful connections and better understand the impact or dependency of a particular device.
View the Application Groups documentation to learn more about generating Application Groups.
Enabling Application Groups
Applications Groups are enabled by default in Device42, but you can disable the feature at any time.
-
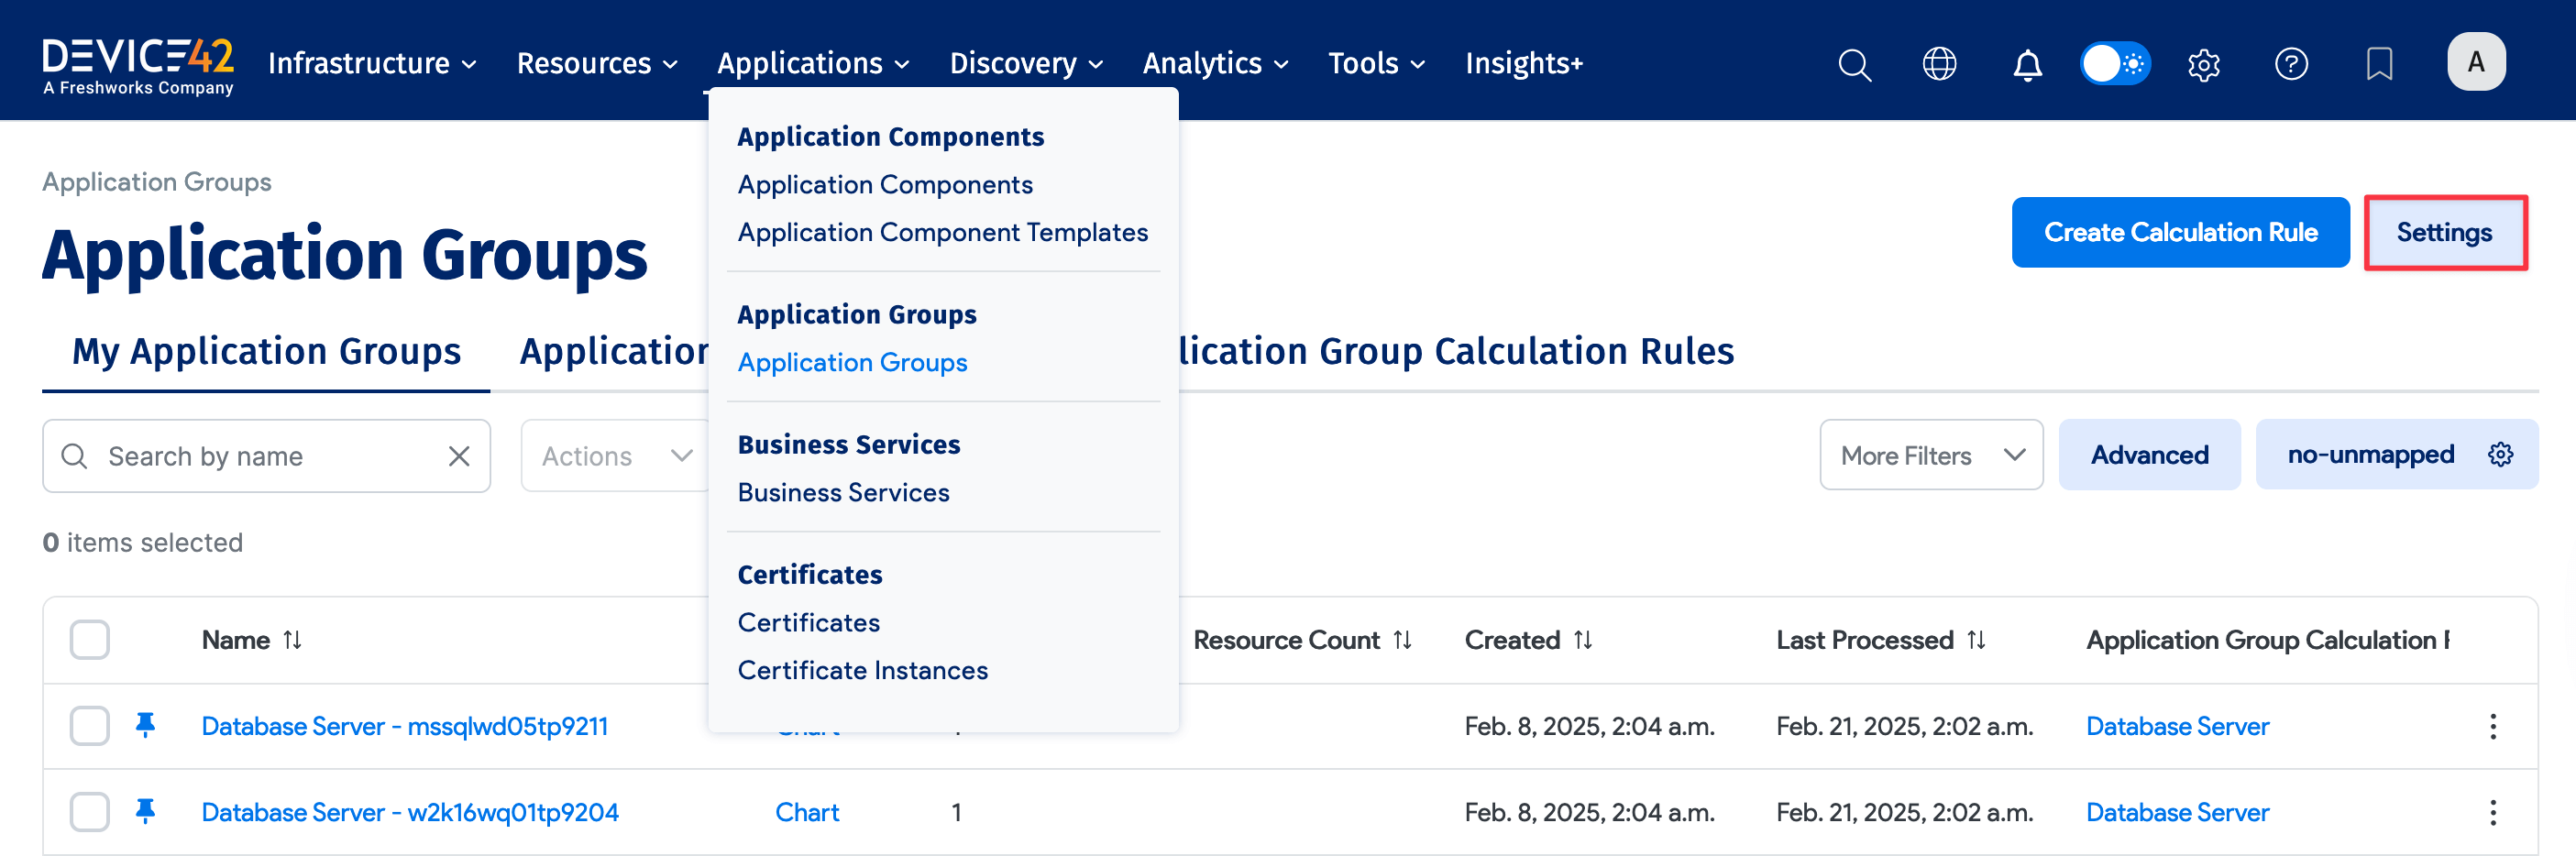
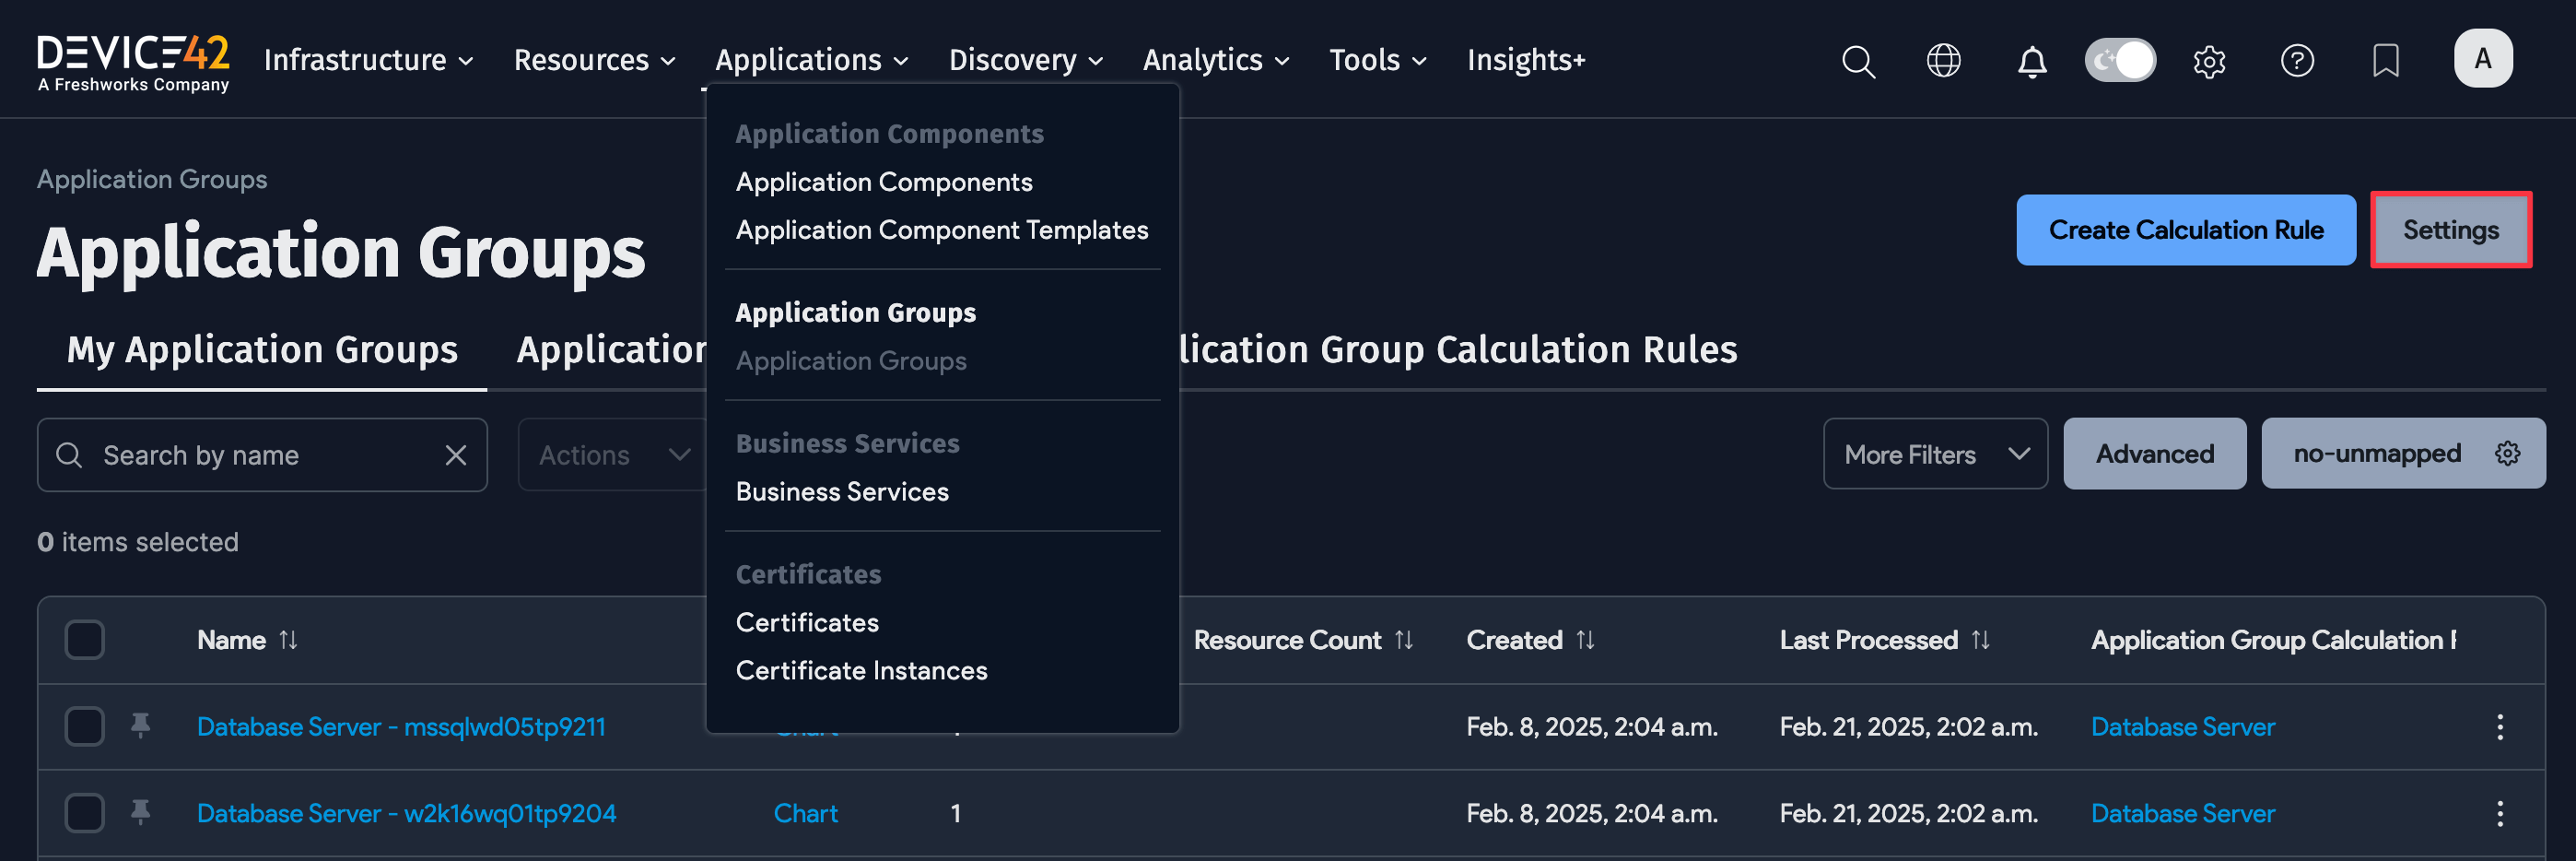
Select Applications > Application Groups, and then select Settings in the top-right corner of the page.
-
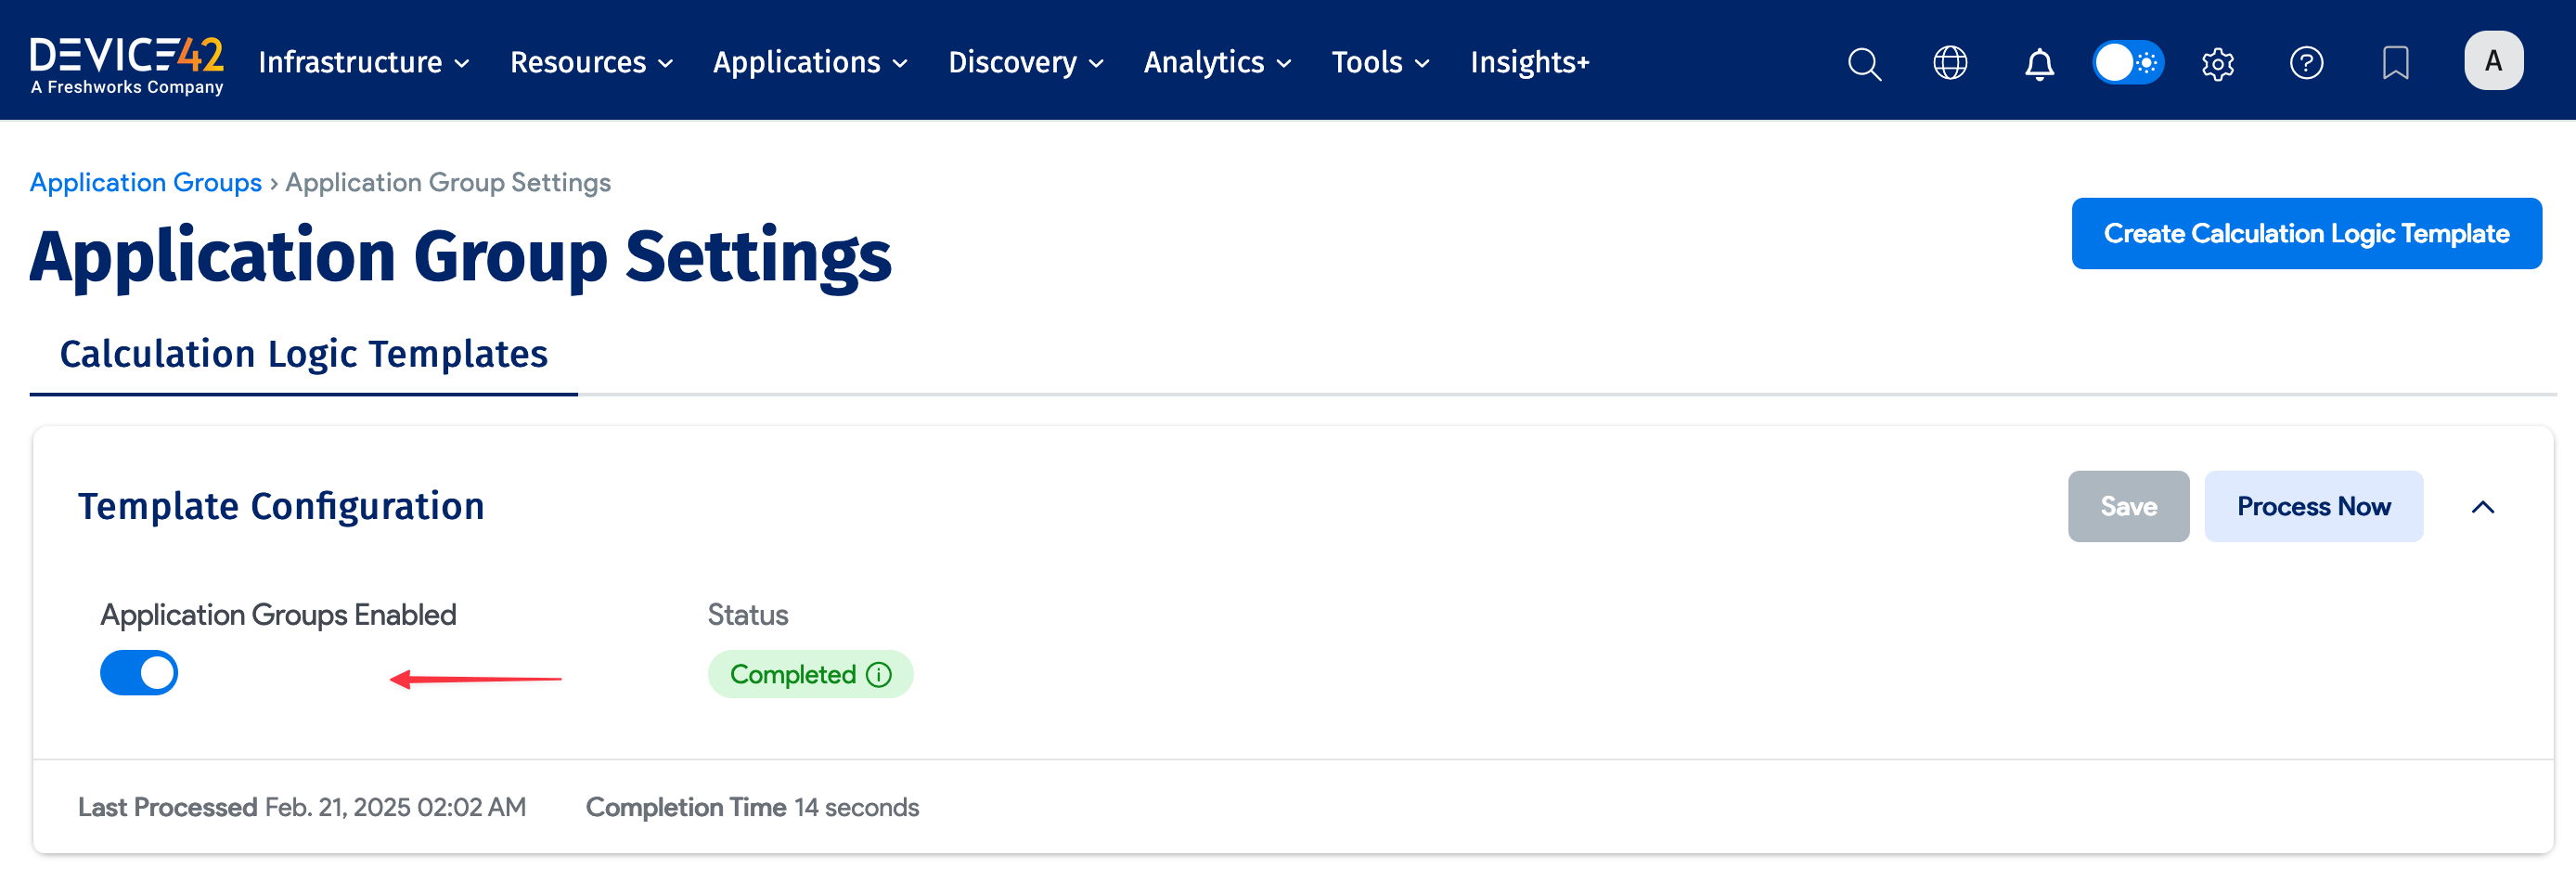
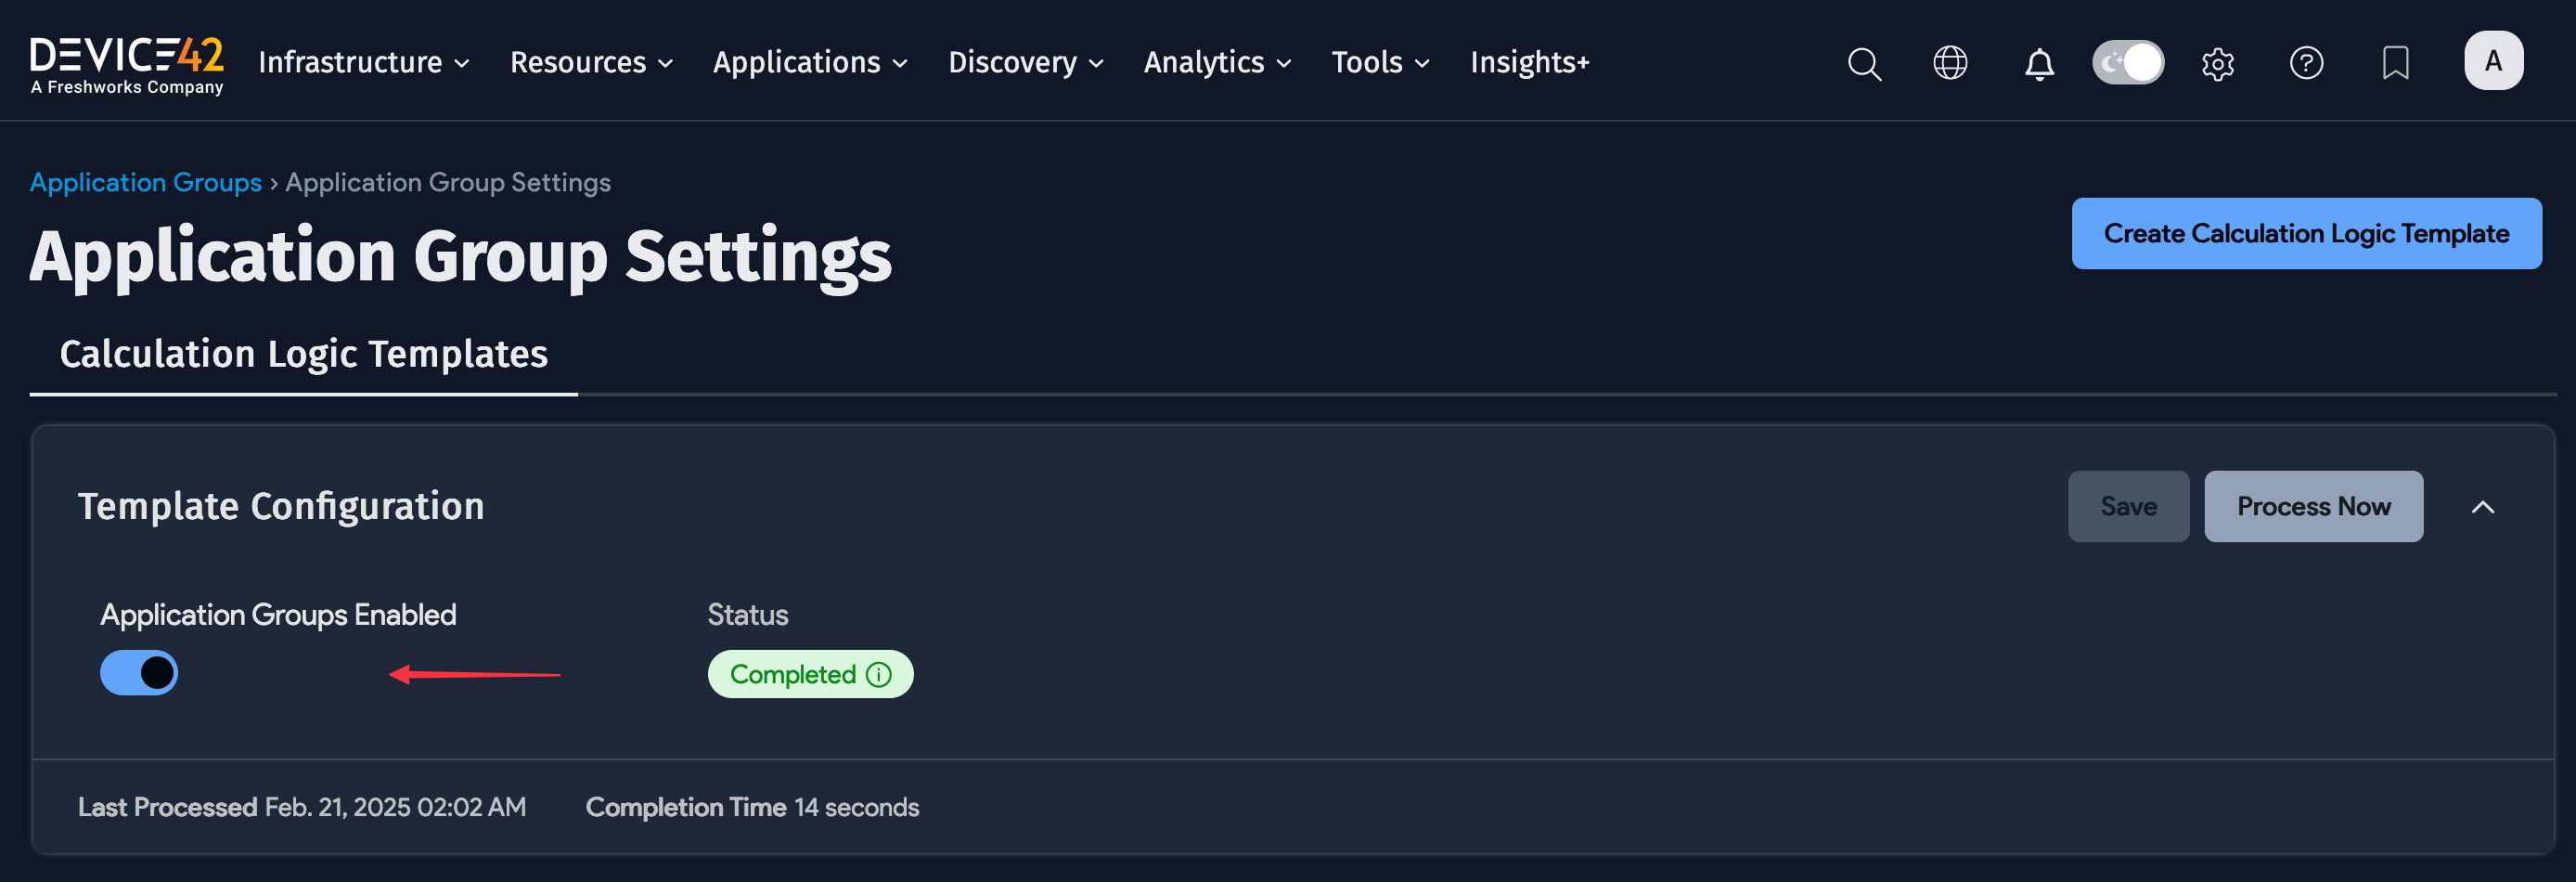
Next, toggle the Application Groups Enabled option.
For versions prior to 19.05: Pinning, Starring, and Hiding Services
Now that we have enabled Application Groups, we must identify which services we want to Pin, Star, and Hide to continue to build out our Application Groups.
Pinning a service will make it a focus point and build an Application Group for that device. By default, all database services are assigned a Topology Status of Pinned, and an Impact View is built for each discovered database server.
Starring a service will include that service and its connection in an Application Group if applicable. It is recommended to limit Pinning to database services (done by default), web services (optional), and any custom services that belong to a Business Application.
Hiding a service excludes it from topology and charts. By default, hidden services are excluded from Application Groups but this behavior can be overridden in our DOQL.
- The easiest method to understand the service connections that have been detected is to execute the Service Dependency Report.
Navigate to Reports > Advanced Reporting, expand the Pre-Defined Reports folder, expand the Application Discovery folder, right-click on the Service Dependency Report, and select Export As > Excel.
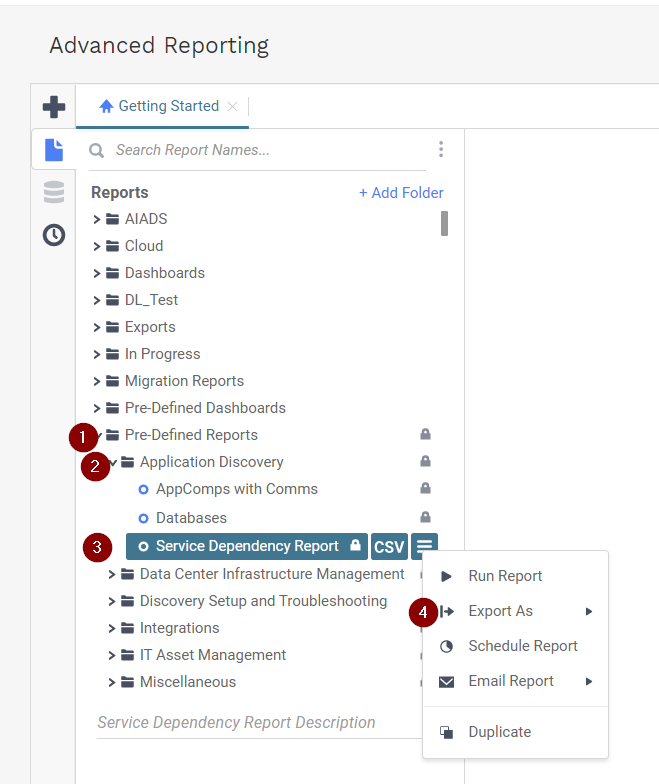
This report displays each connection that has been detected through discovery. Enable filtering to each column to help with sorting the data. Record the services under the Listener Service and Client Service columns that are important to you, as you want to make sure to Star those services in the next step. Please record the devices these services are running on. If there are any services you would like to Hide from your Application Group views, make a note of these.
- When this is completed, there are two common options for Pinning, Starring, and Hiding services
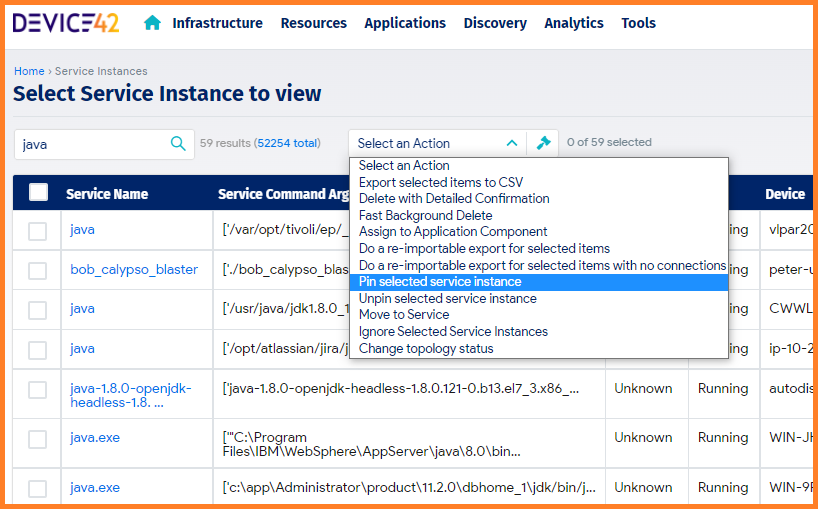
Option 1 (UI): Navigate to Resources > Services > Services Instances to view a list of ALL the service instances.
Search for a name of one of the recorded services you want to Star, select one or more service instances by selecting their check box, and then use the drop-down Action menu to set their Topology status to Starred or Hidden (the example below shows a service instance search for Java).
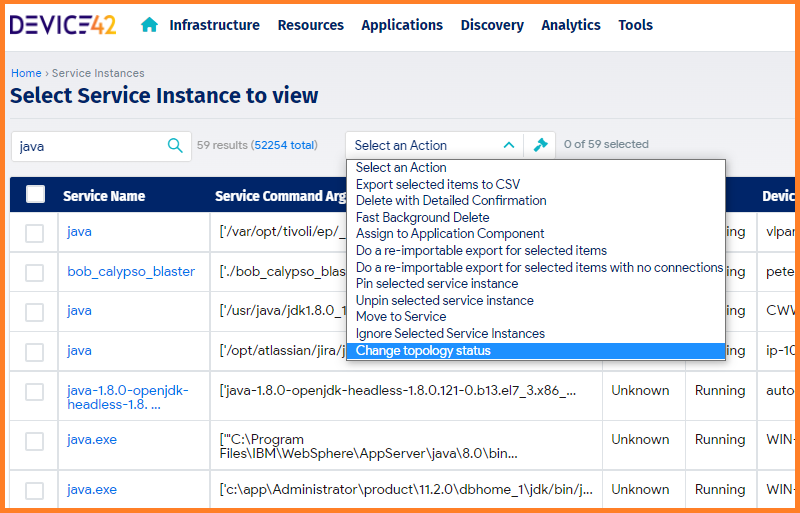
To Pin or Unpin a service instance, select the corresponding option from the same drop-down Action menu.
Option 2 (Excel): Navigate to Tools > Imports/Exports (xls), scroll down to Create or update Service Instances, and select Download Current Data to the right.
Add a column at the end named topology\status. Set the column Service_display_name to be filterable, then locate the services you recorded from the Service Dependency Report you generated above, and enter a value of either Starred or Hidden for their topology _status.
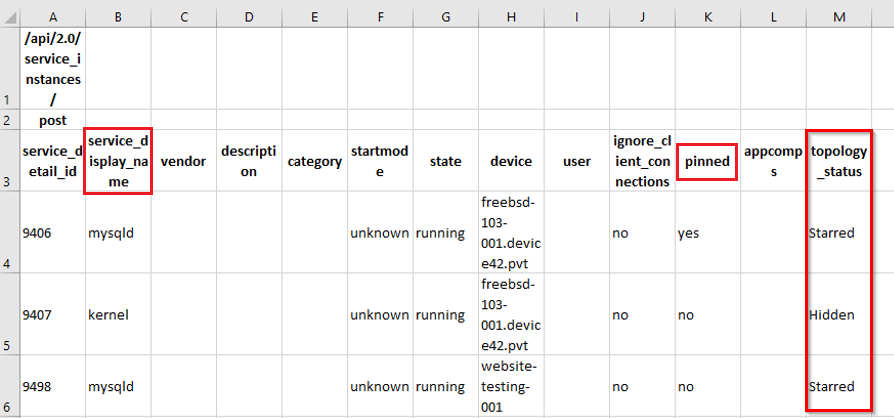
For any service instances you would like pinned, enter a value of yes under the pinned column.
After editing the Service Instances file, navigate back to Tools > Imports/Exports (xls) and import the XLS file back into Device42.
Once you have completed the process above, navigate back to Apps > Application Groups, select Configure then select Process Now.
After your Application Groups have been processed, select the Chart button next to an Impact or Dependency to see the view.

You should see a Global View to highlight the relationships and arrows to represent the direction of communication. By selecting any of the lines, a Local View will display the services and any Application Components that exist in that relationship.
Hovering over the timeline above the view will allow you to identify changes to this Application Group. This process runs every night to calculate connections that take place each day. As changes are detected, blue checkpoints are created to demonstrate a change has occurred to better understand the changes that occur in your environment.

For versions prior to 19.05: Refactoring Application Groups
- There are times when choosing a different query to generate your Application Groups may be better suited for your environment. Navigate to Tools > Integrations > Saved DOQL Queries.
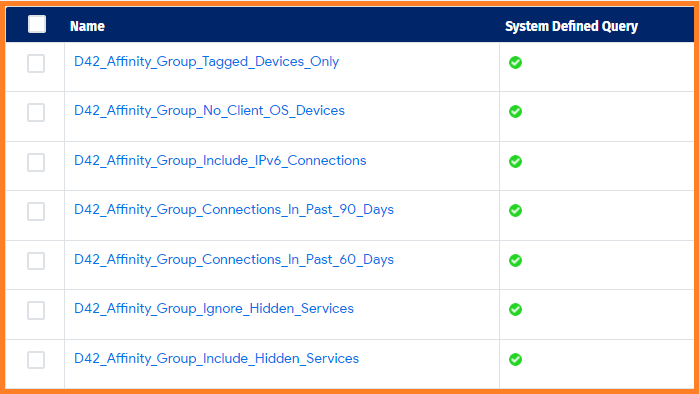
The name of the query provides some indication as to what the query is doing. Select the name to view the query itself.
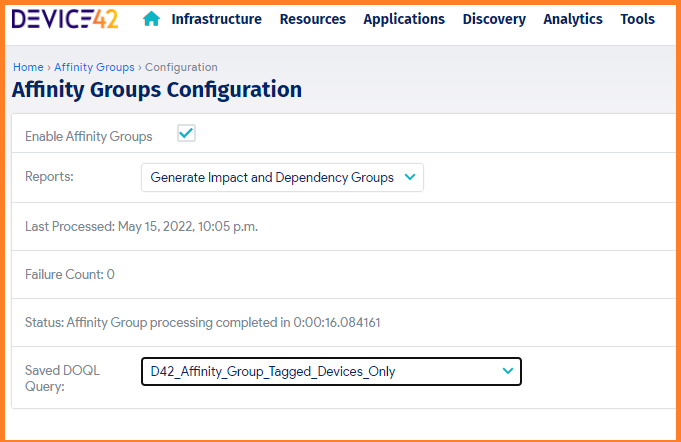
To choose one of these queries to generate your Application Groups, navigate to Apps > Application Groups and then select Configure. Choose your preferred query from the Saved DOQL Query drop-down menu.
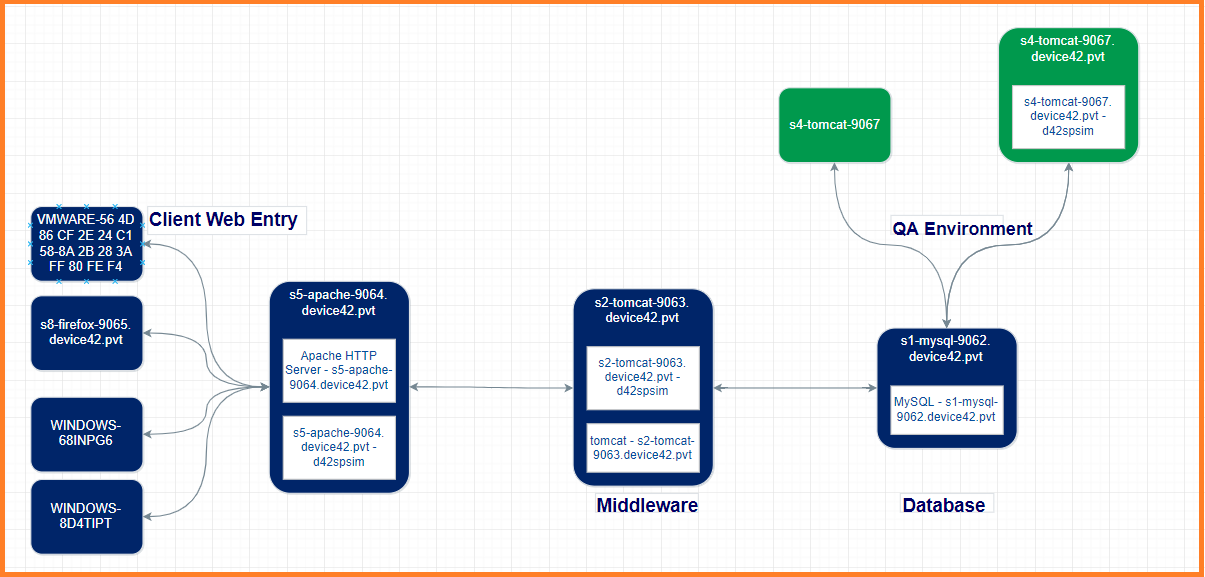
Building Business Services
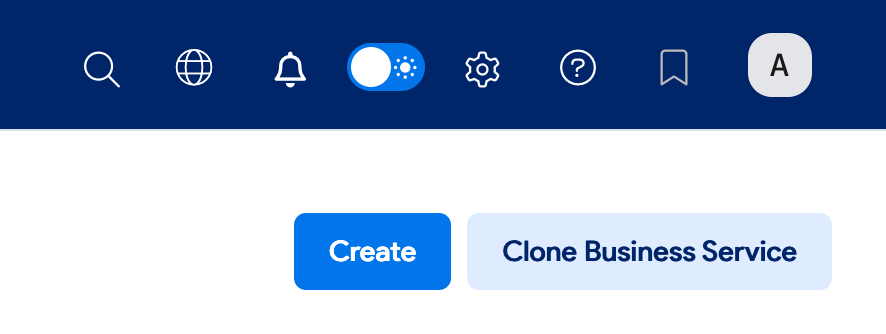
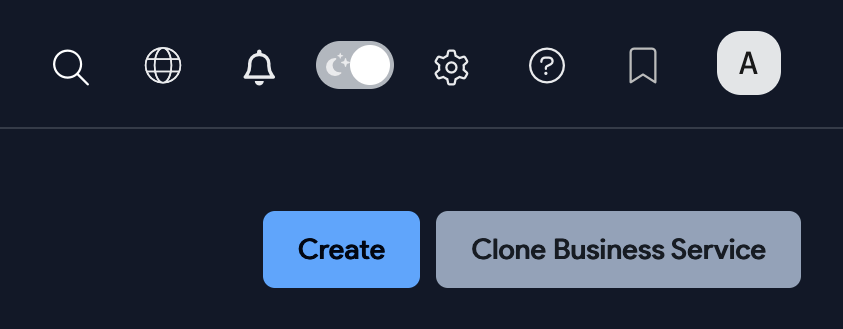
To build a Business Service, navigate to Applications > Business Services, and then click Create in the top right of the page.
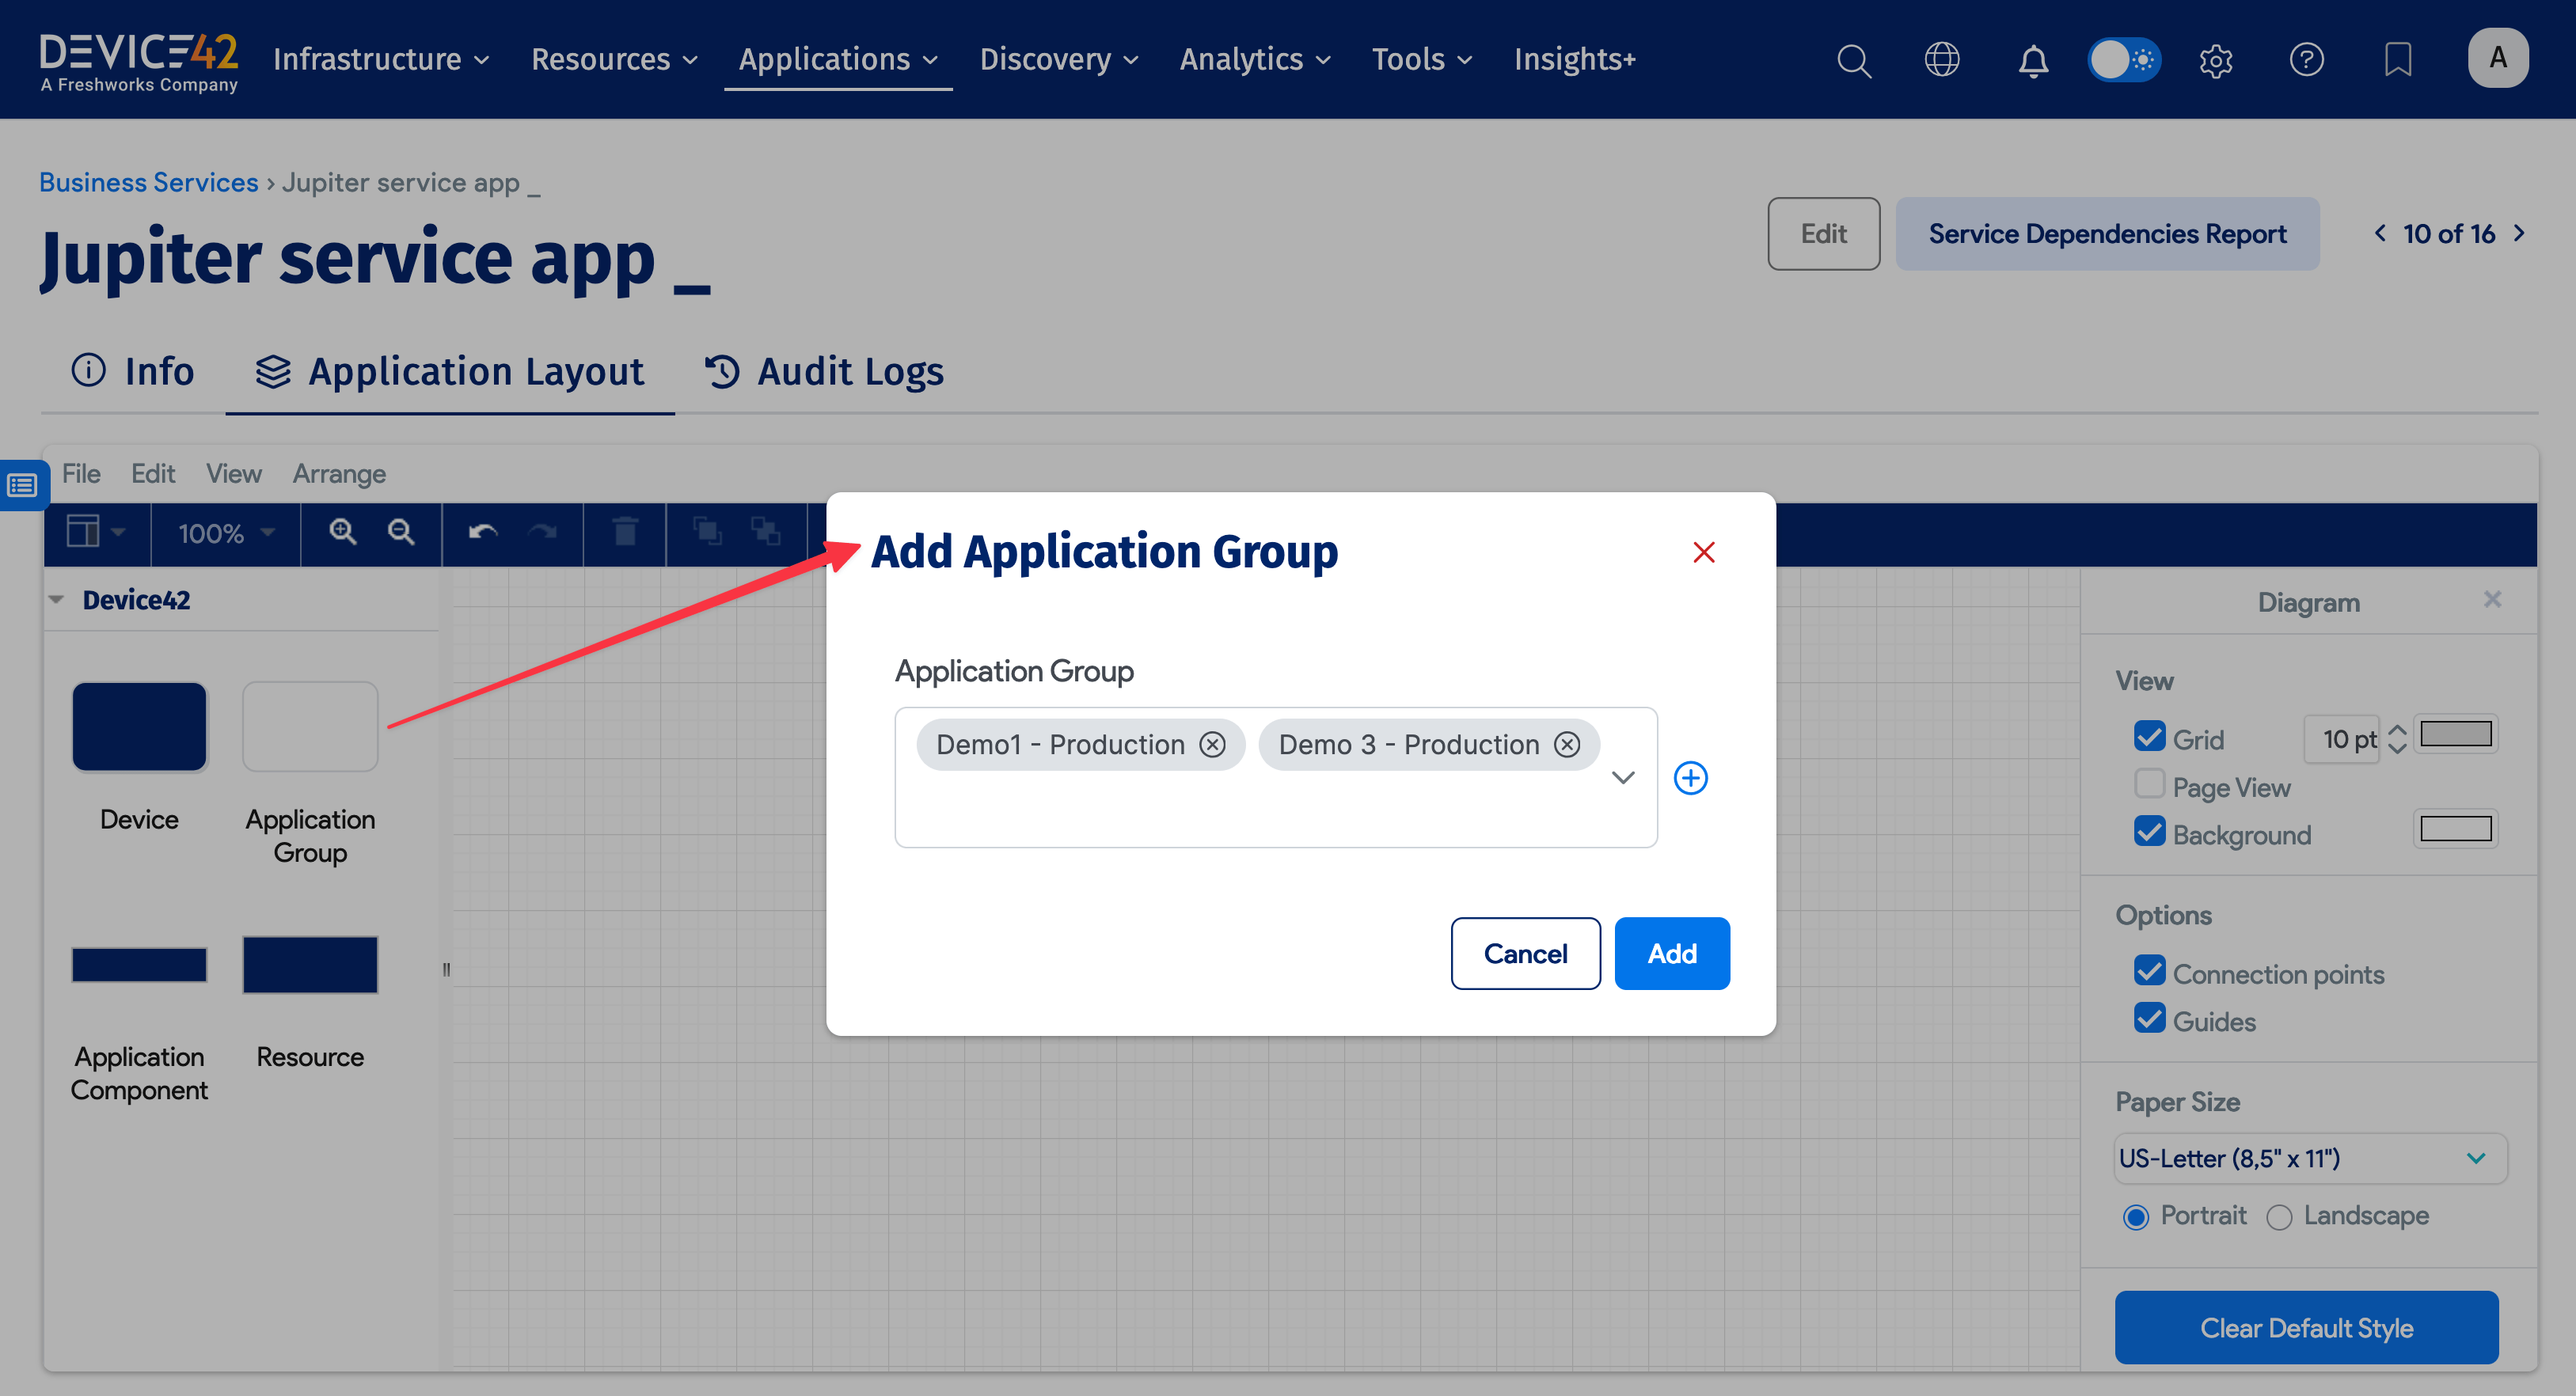
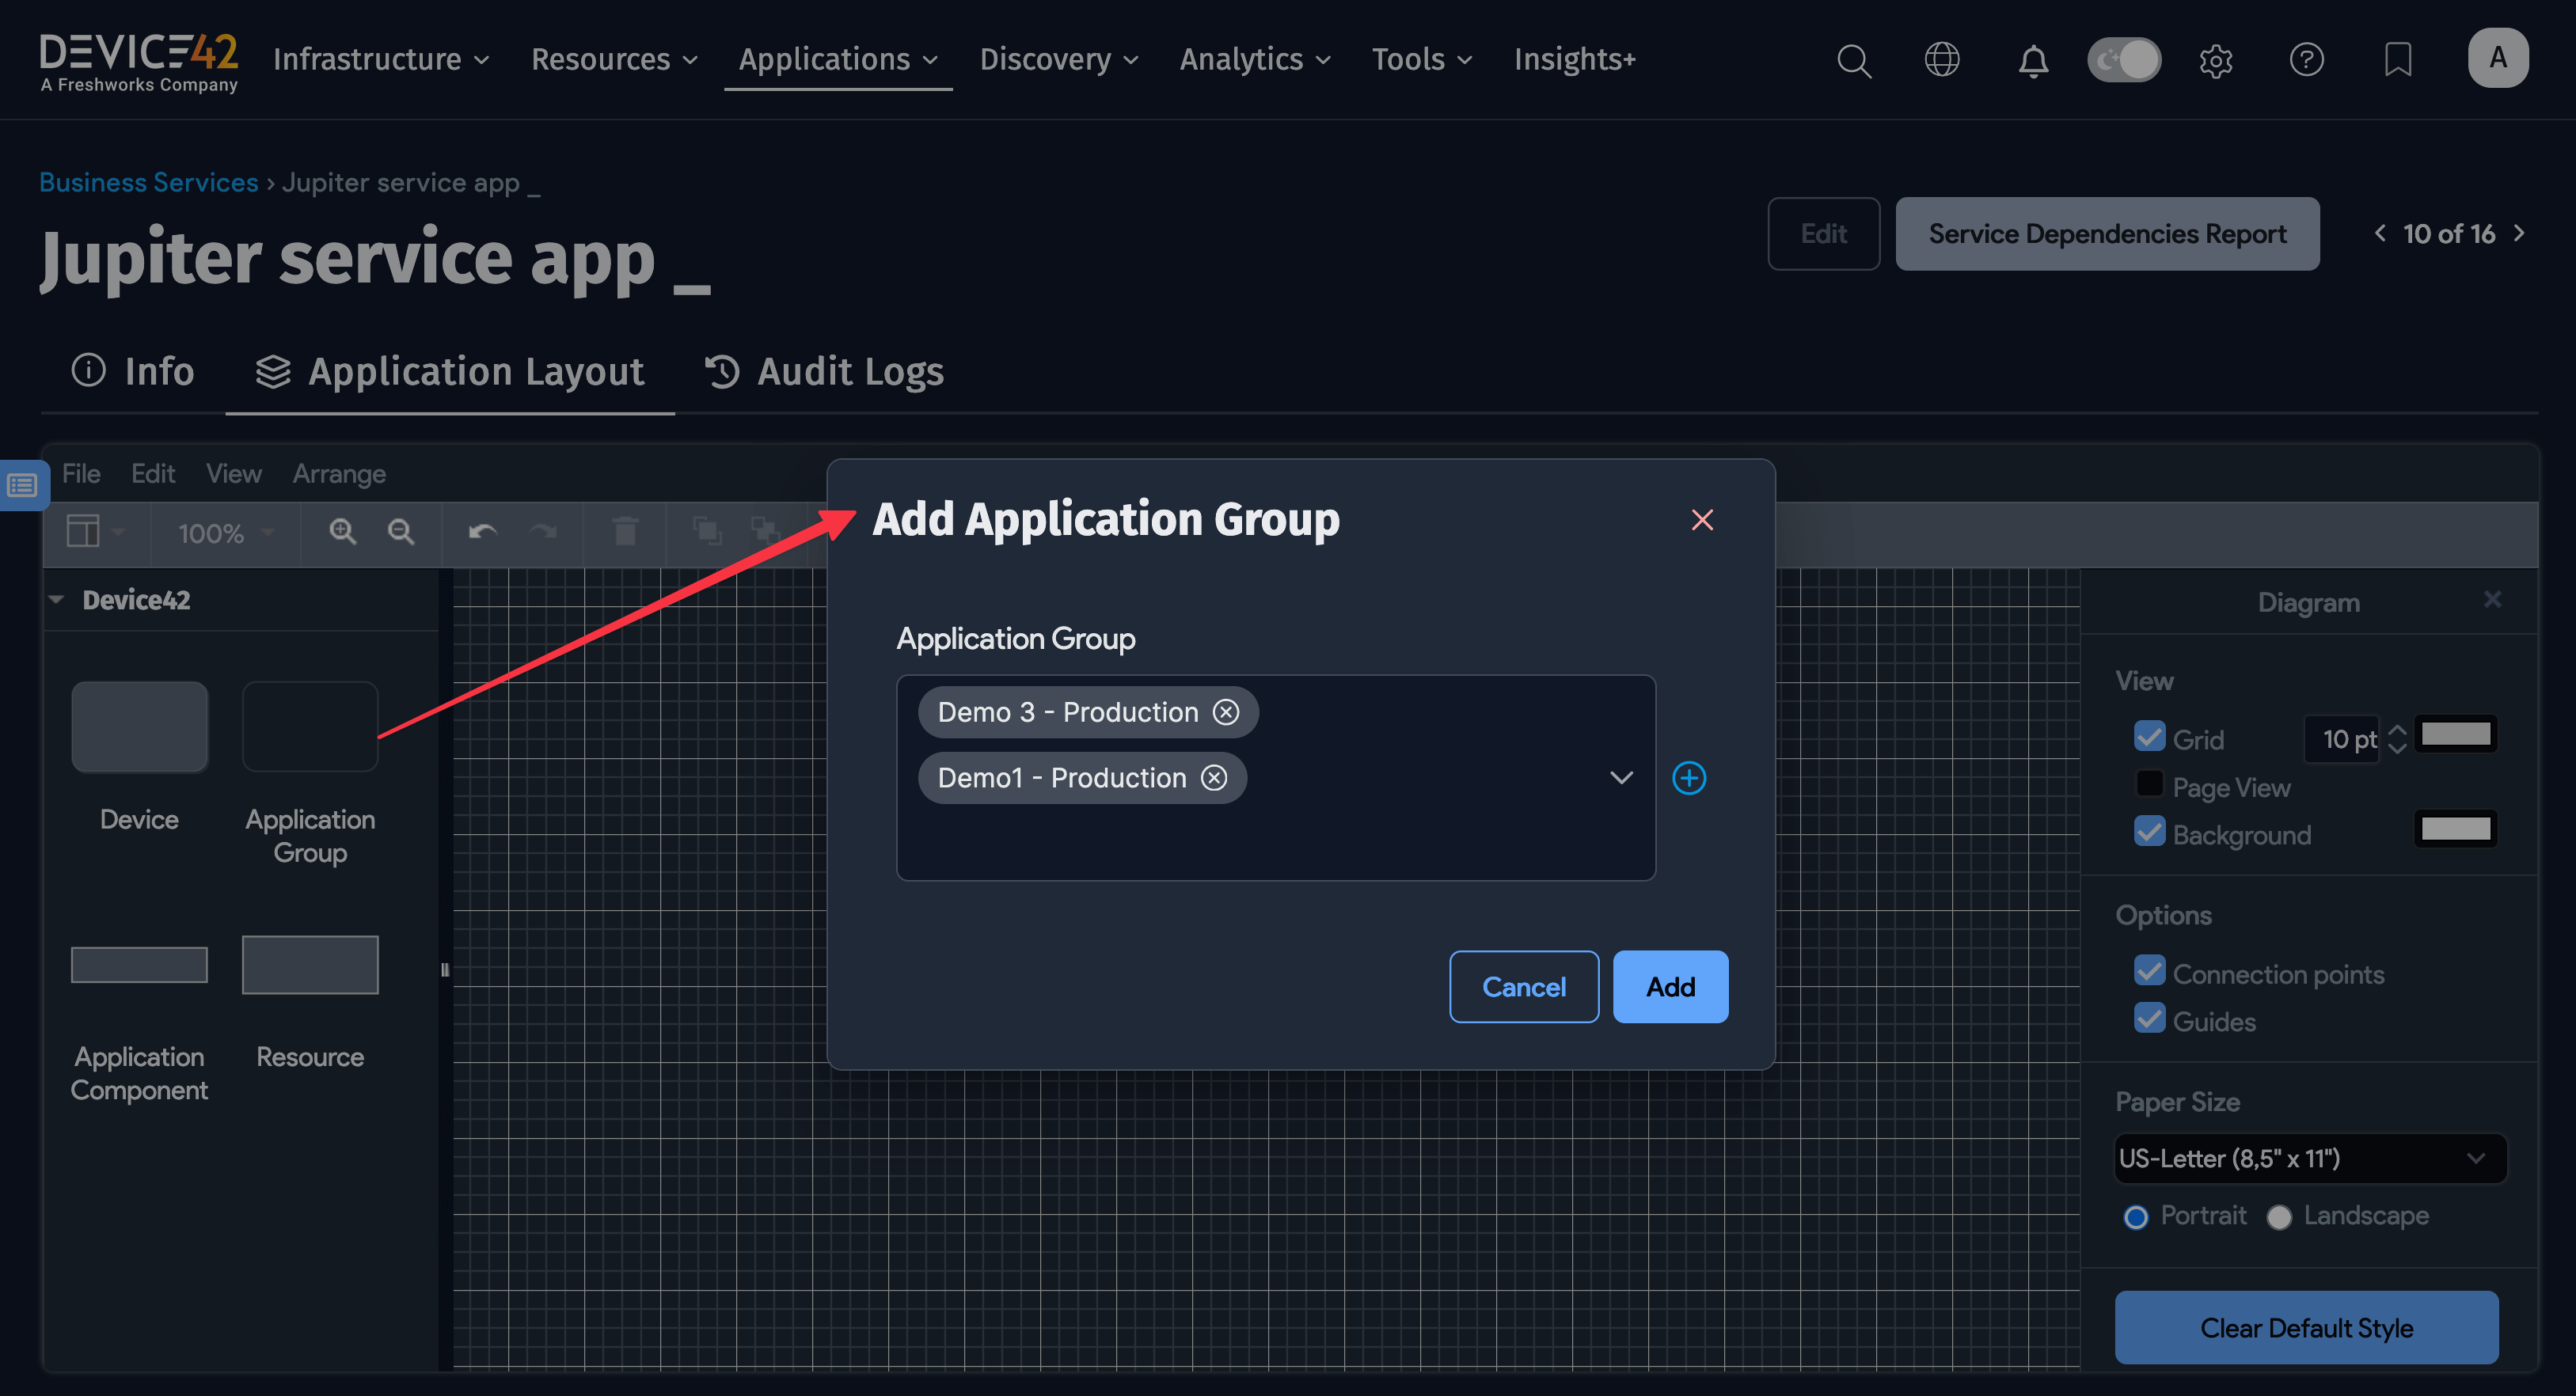
After naming and saving your new Business Service, click the Application Layout button and toggle on the Edit mode. You'll see a blank canvas. Drag items from the left panel to start building the Business Service.
Select Application Group and drag it onto the canvas and choose the group(s) you want to add and click Add to include it on the canvas.
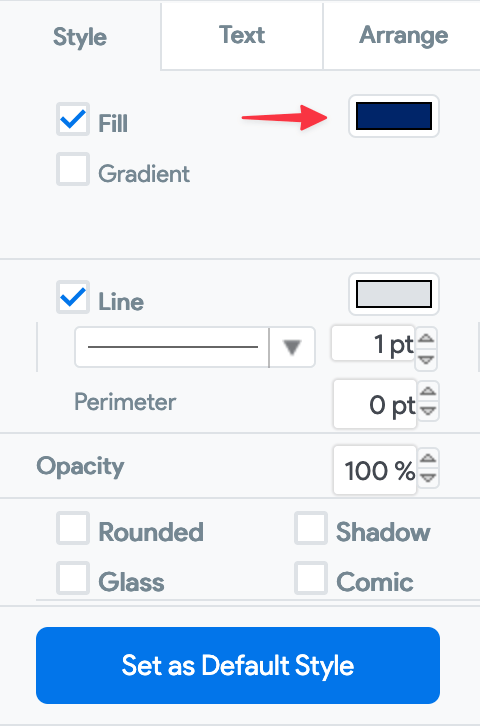
Once you have successfully imported everything, use the toolbars at the top right of the screen to label and color-code the objects.
Select a box with a device name, then use the Style tab on the right to change the color of this box.

Double-click a line or another area of the canvas to add text. Use this to represent a service, a port, or a logical grouping for the relationship.
Congratulations! You have now built a Business Service by leveraging Device42's discovery and Application Group capabilities.