Application Component Templates
You can use Application Component Templates to create and define your own Application Components based on services discovered by Hypervisor/*nix/Windows autodiscovery jobs run against *nix and Windows platforms.
Device42 adds the Application Components you create using templates to the Application Components list page.
Application Components now automatically suggest Application Groups that you can accept or ignore under Applications > Application Groups > Application Group Suggestions on the Main Appliance.
View Application Component Templates
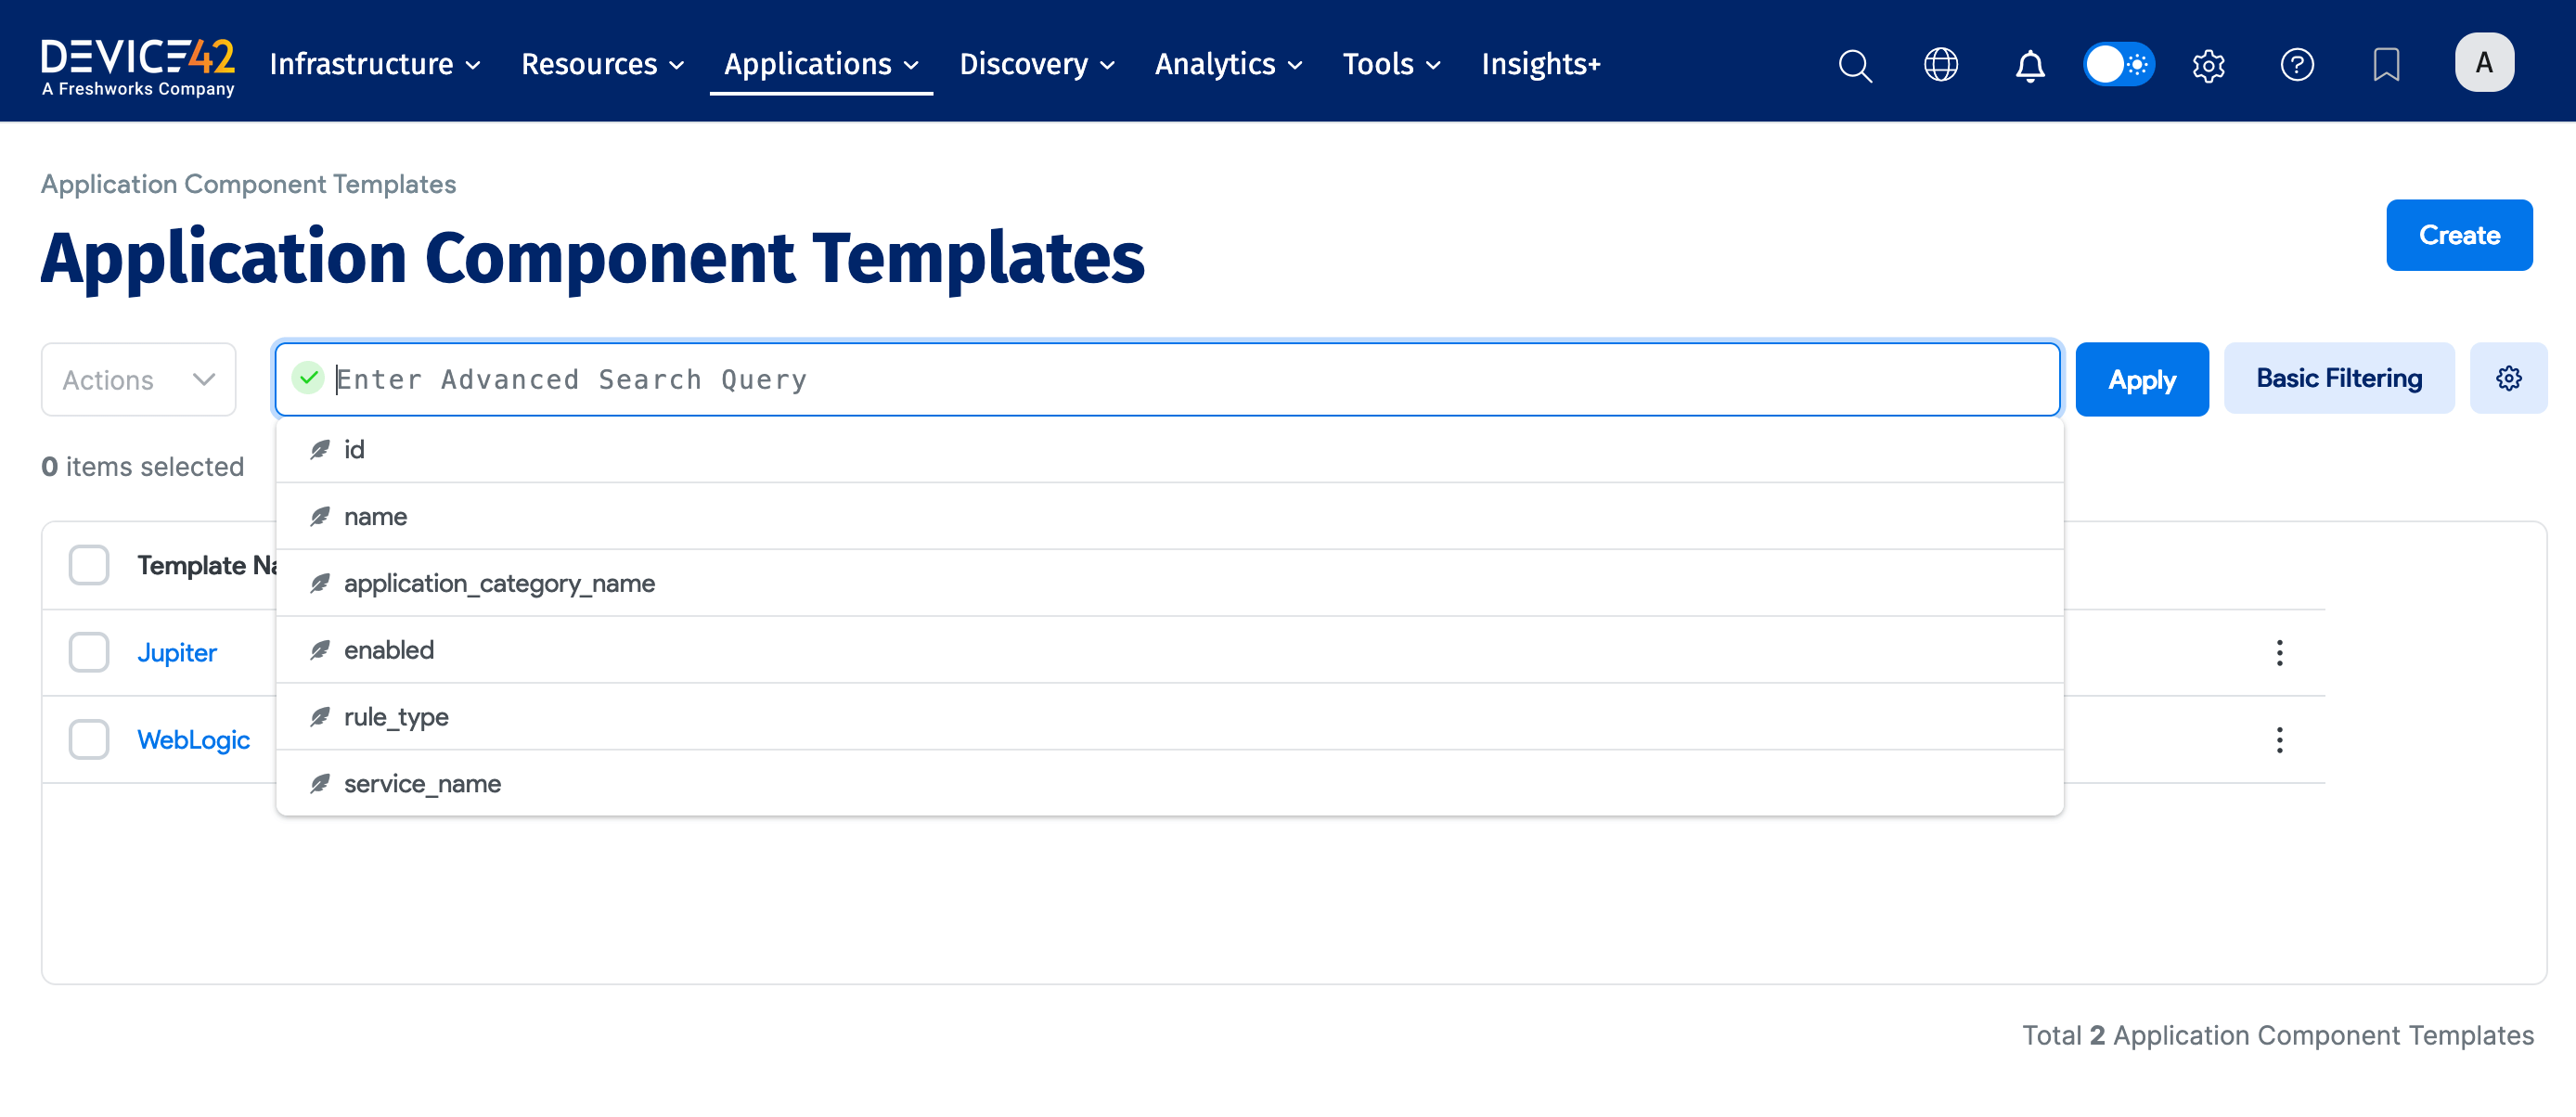
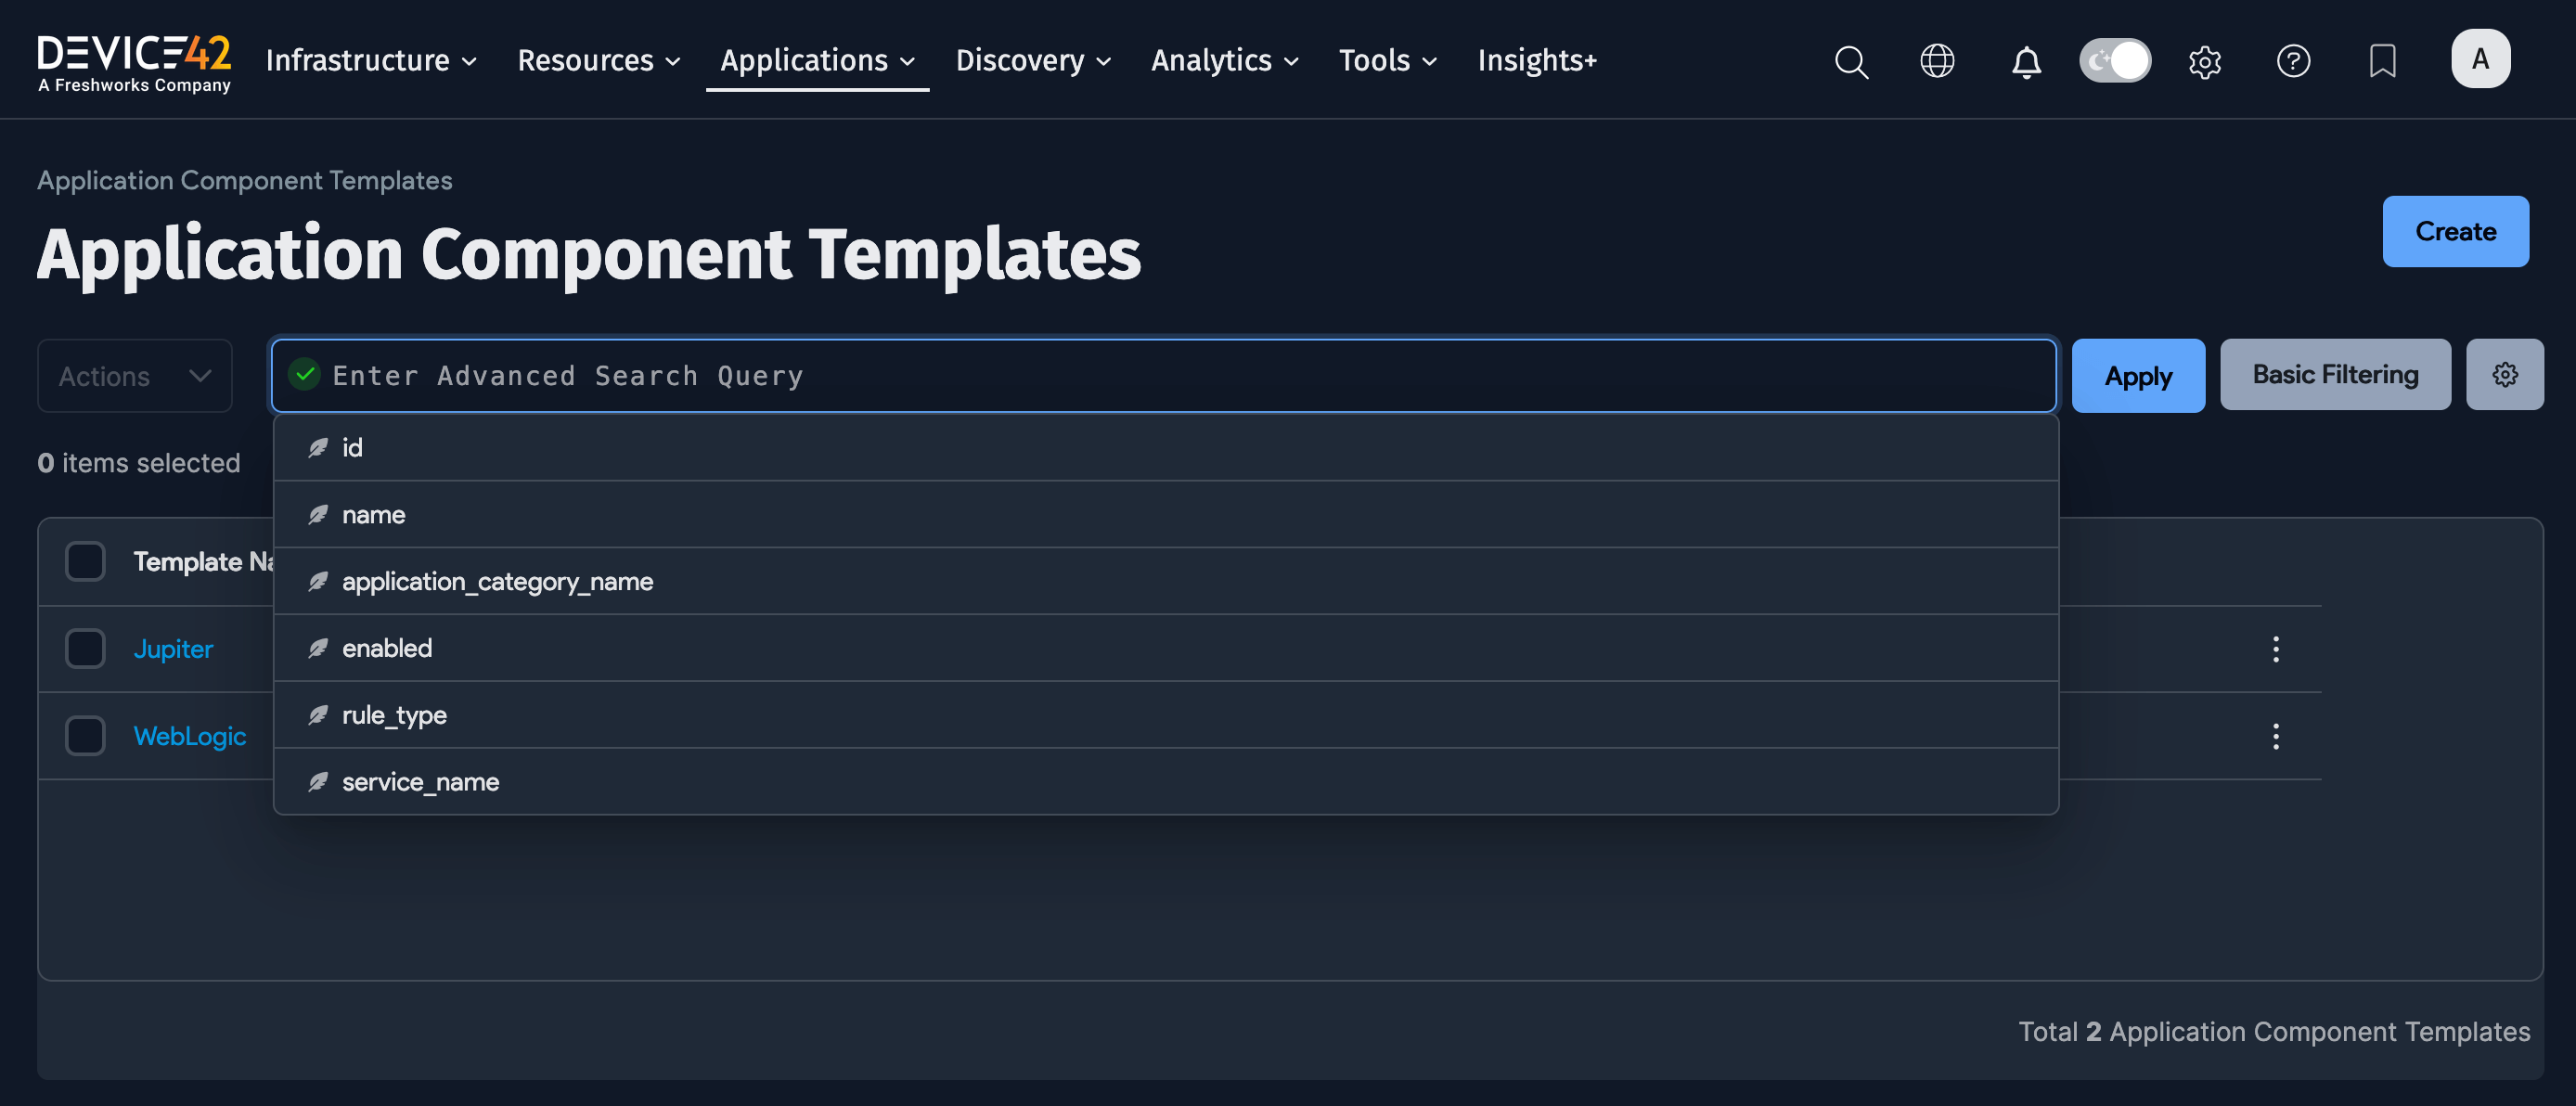
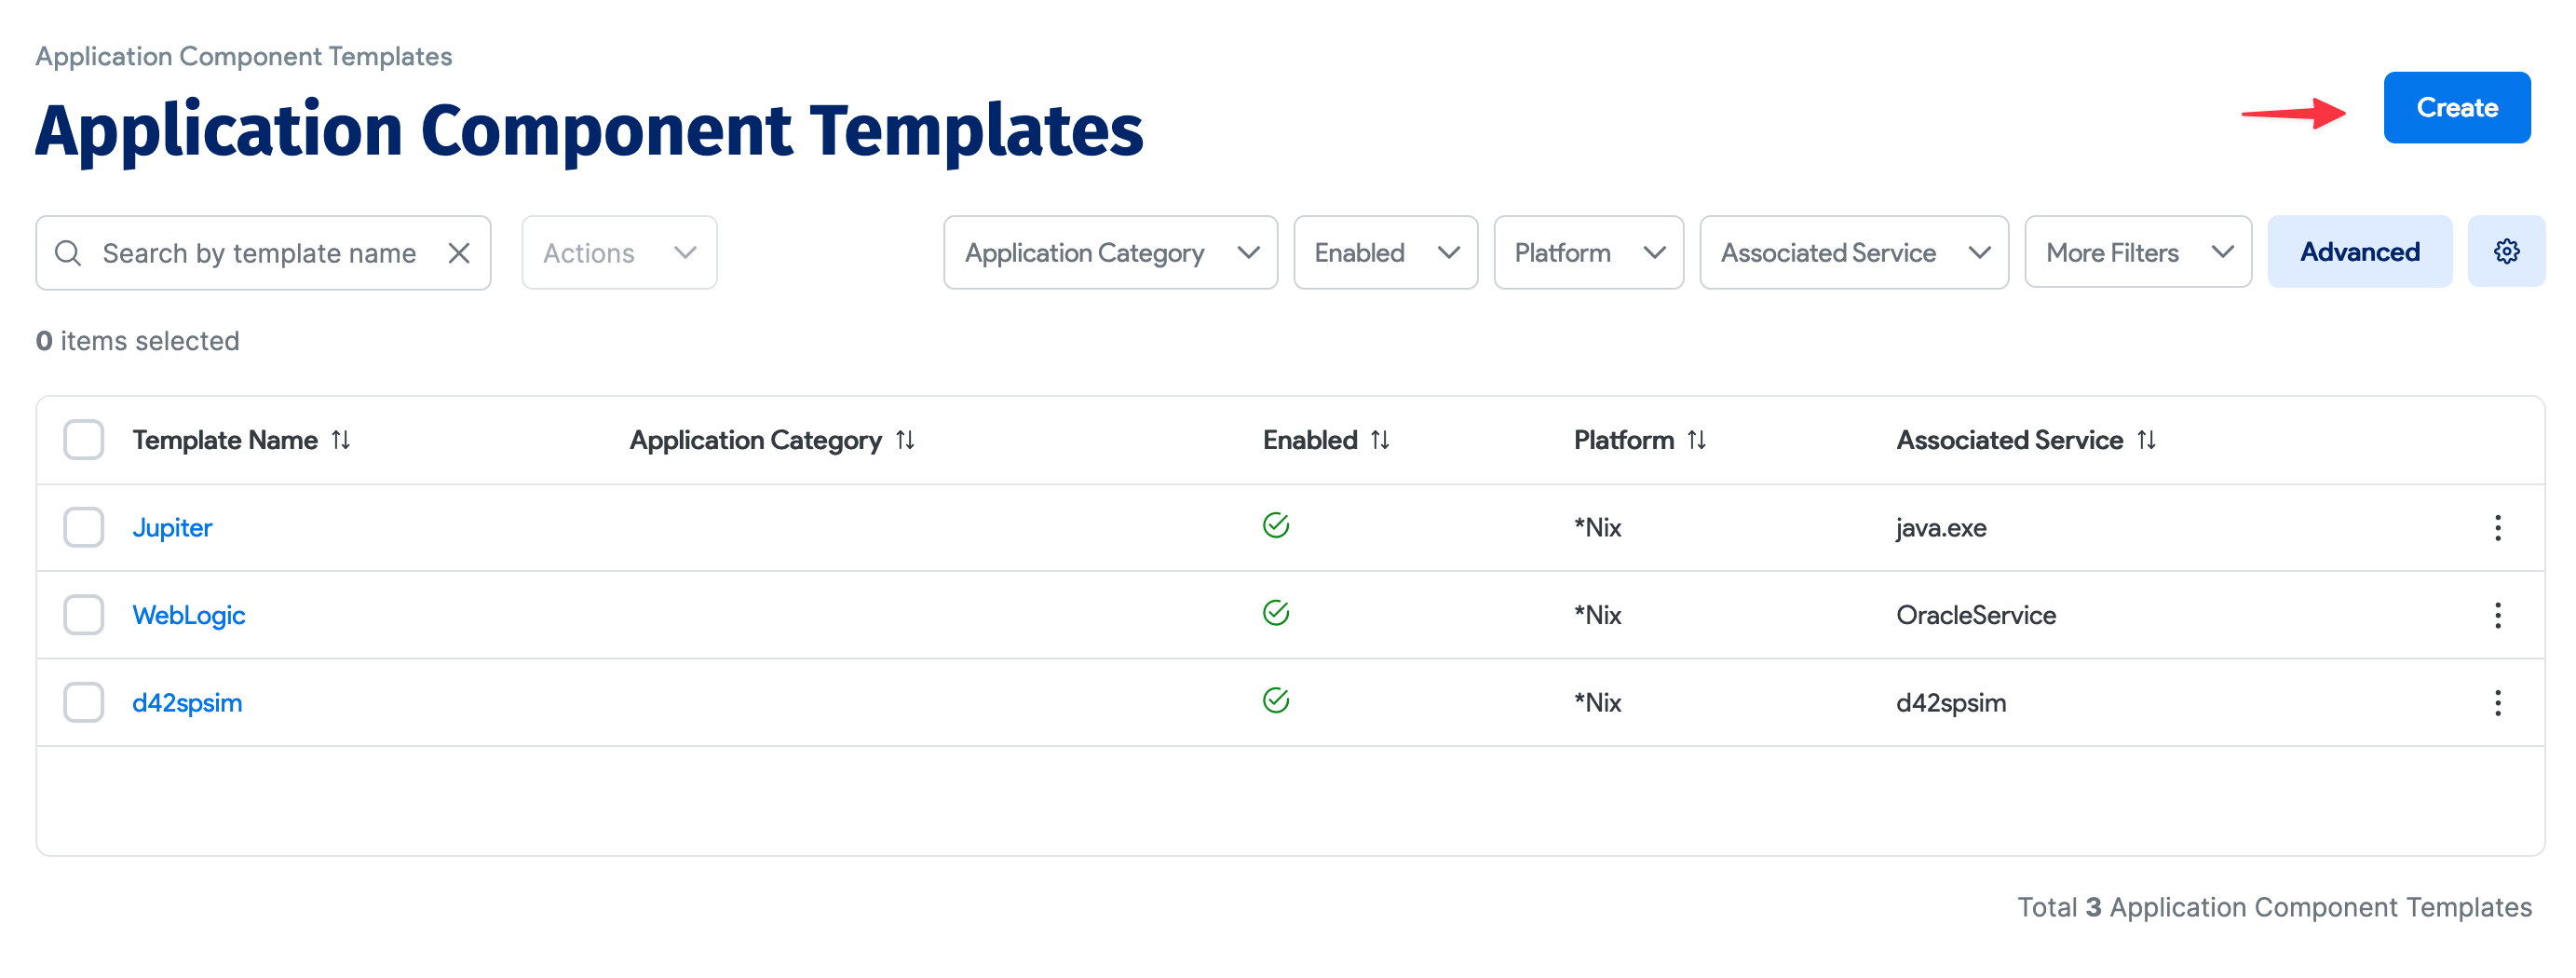
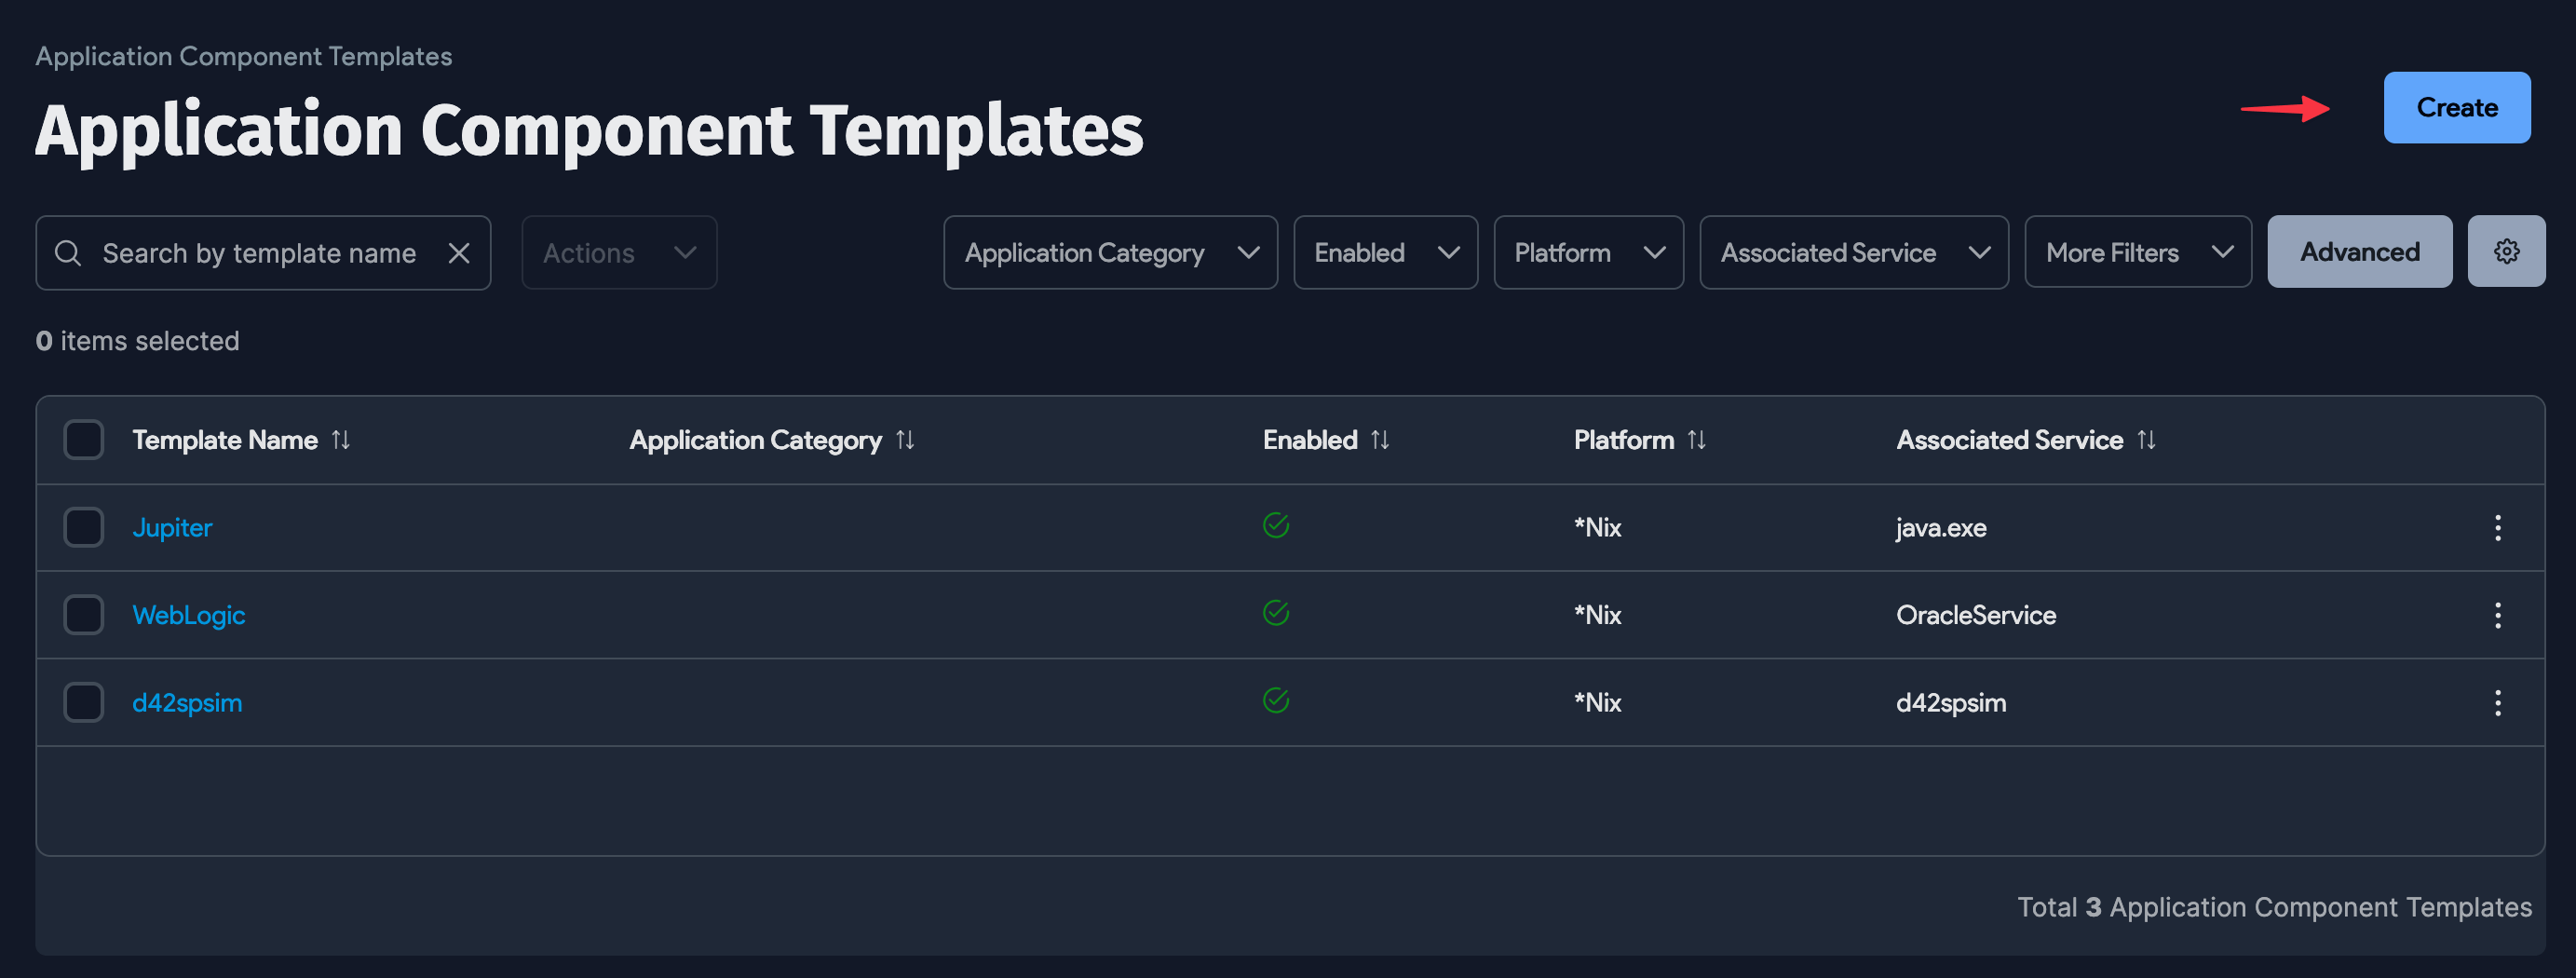
Select Applications > Application Component Templates from the Device42 menu to display the templates list.
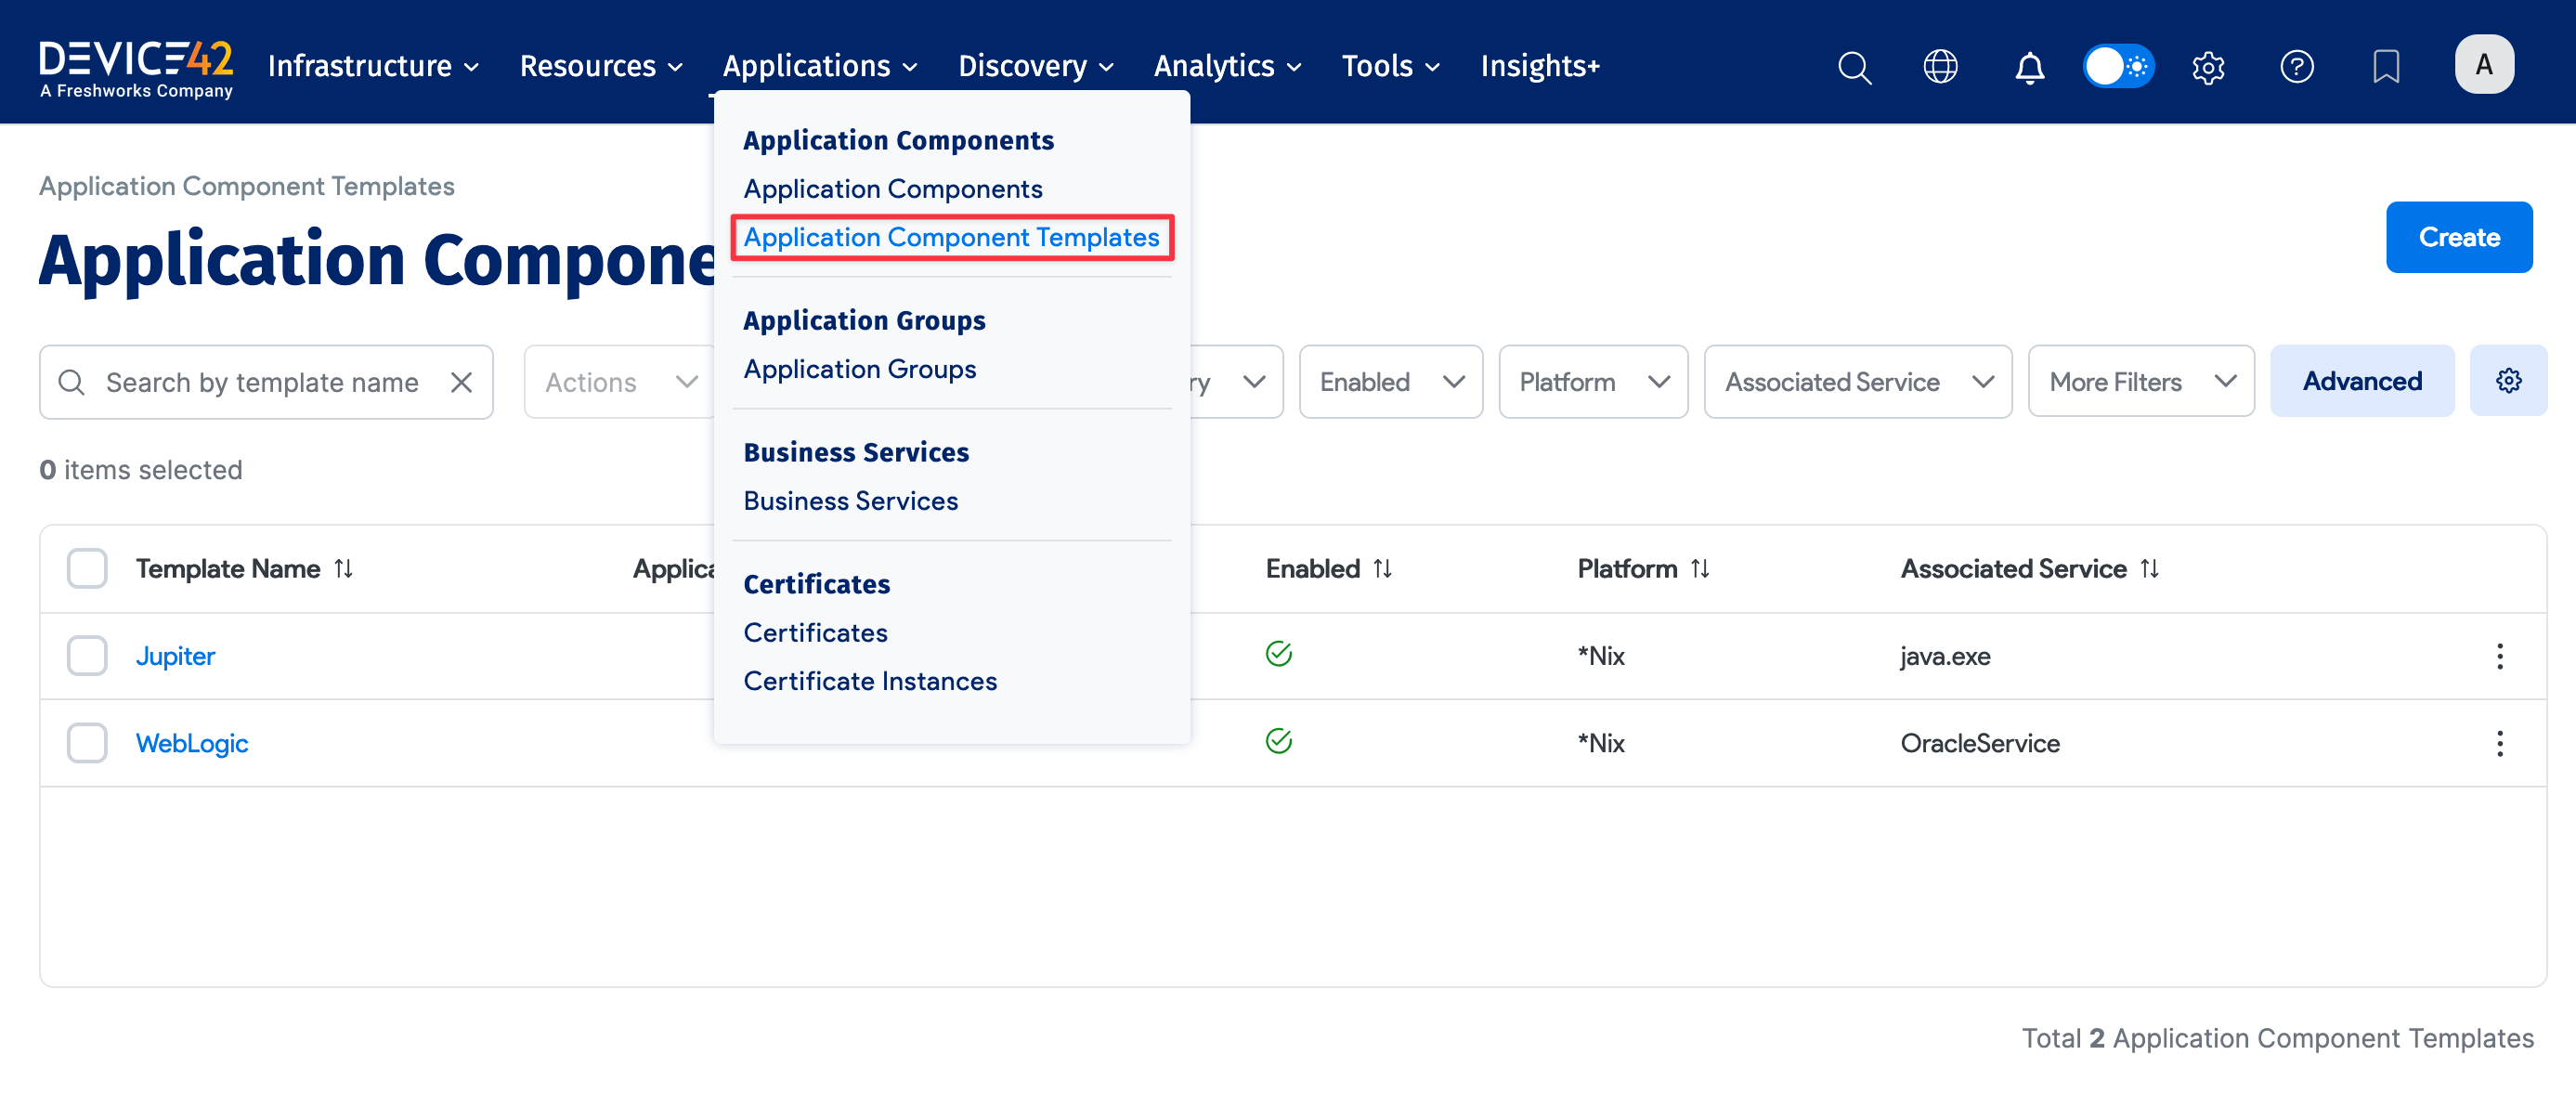
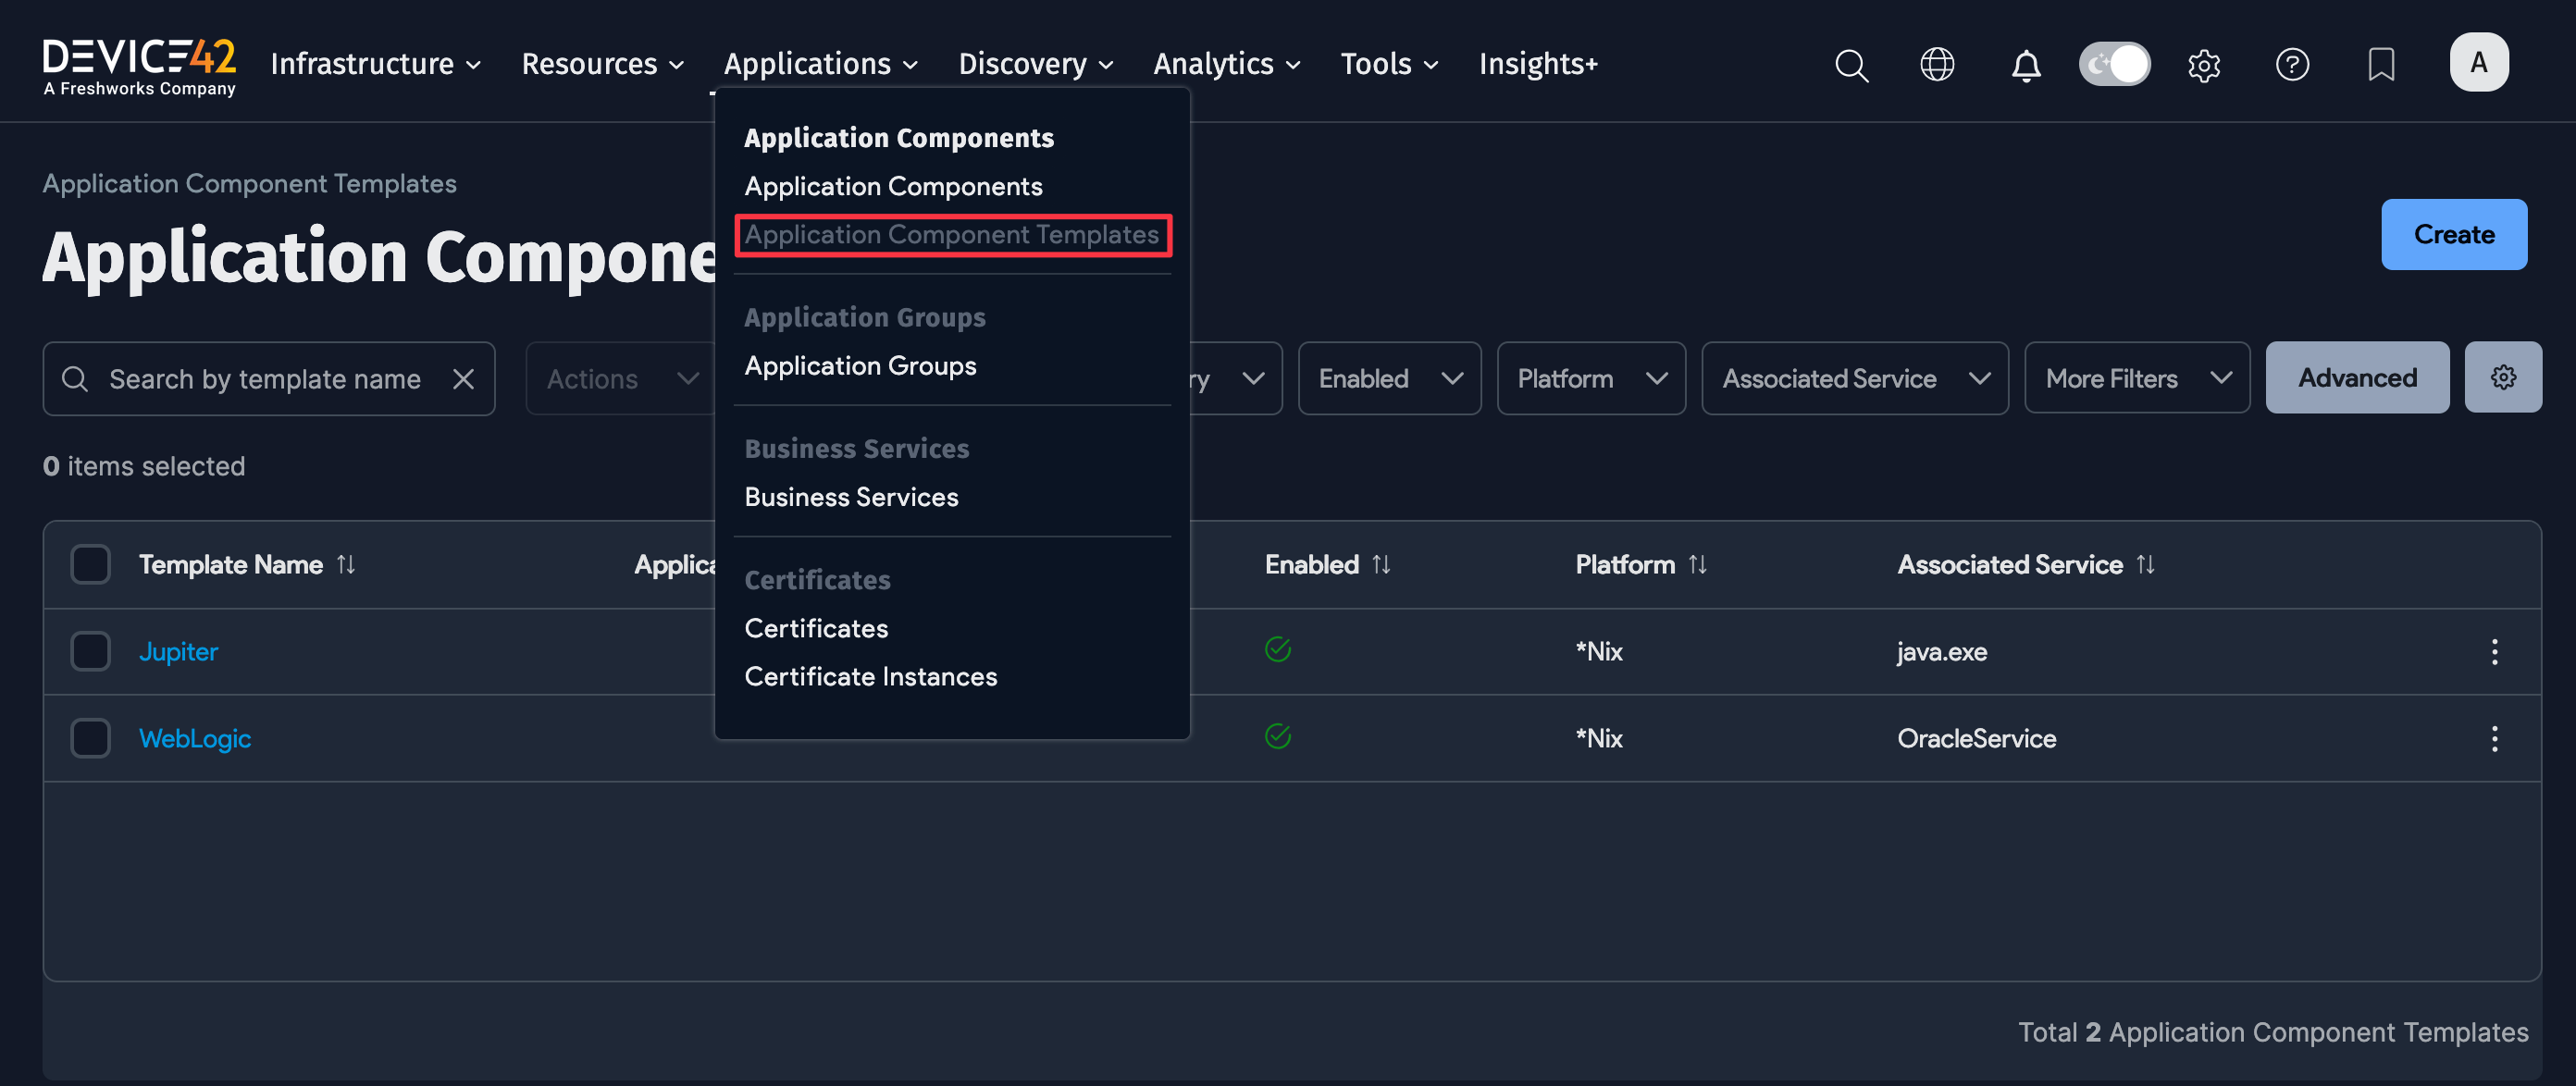
On the Application Component Templates list page, you can Search by template name, or filter the list by Application Category, Enabled, Platform, Associated Service, or by any of the options under More Filters.
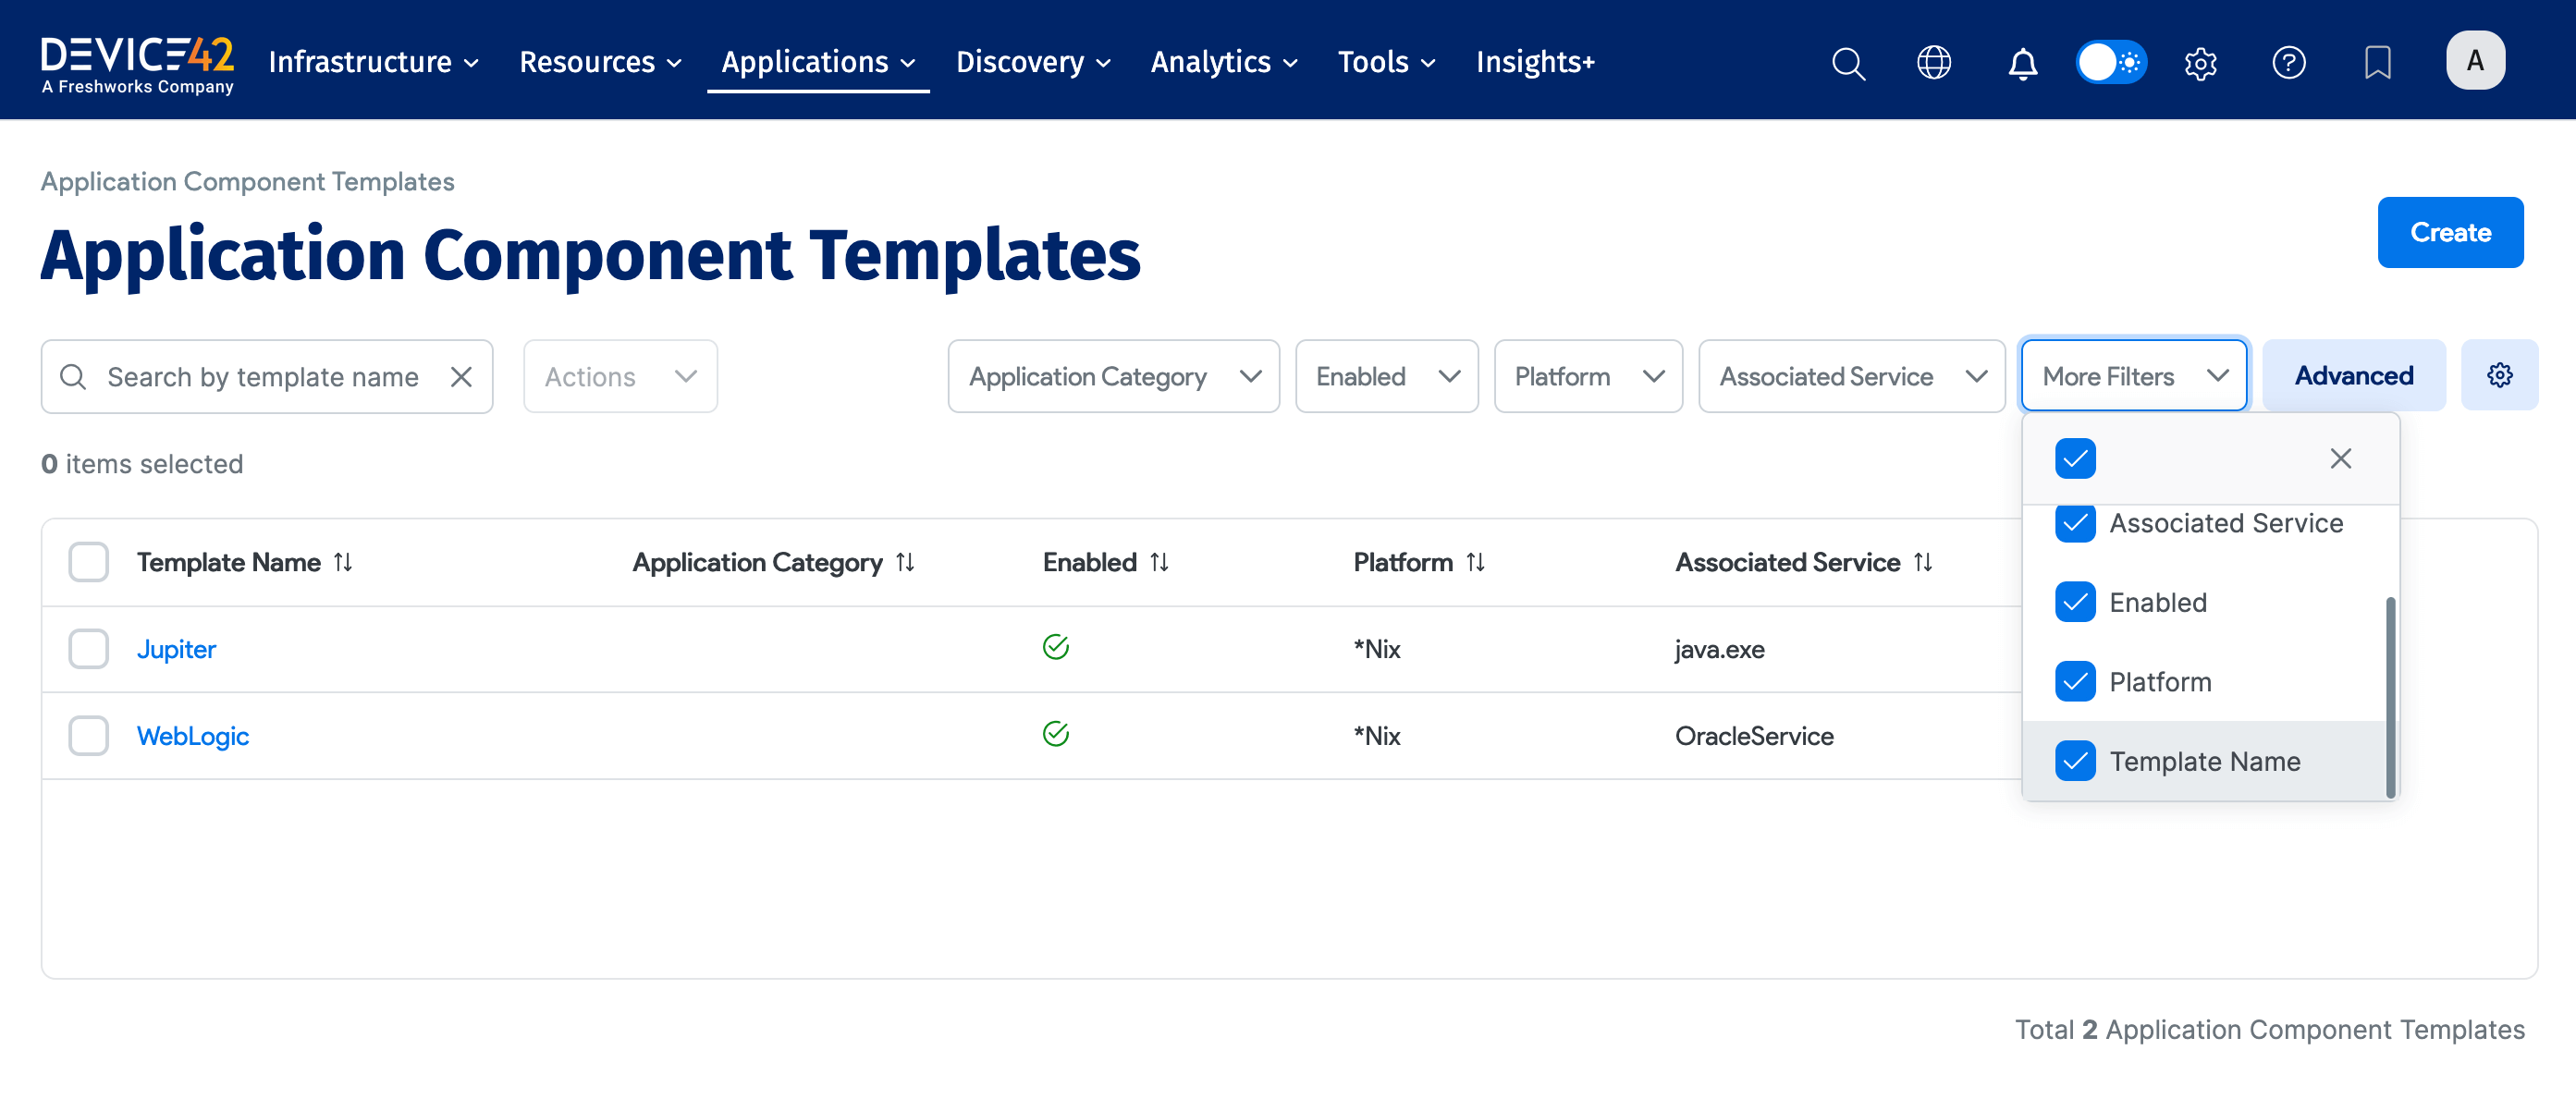
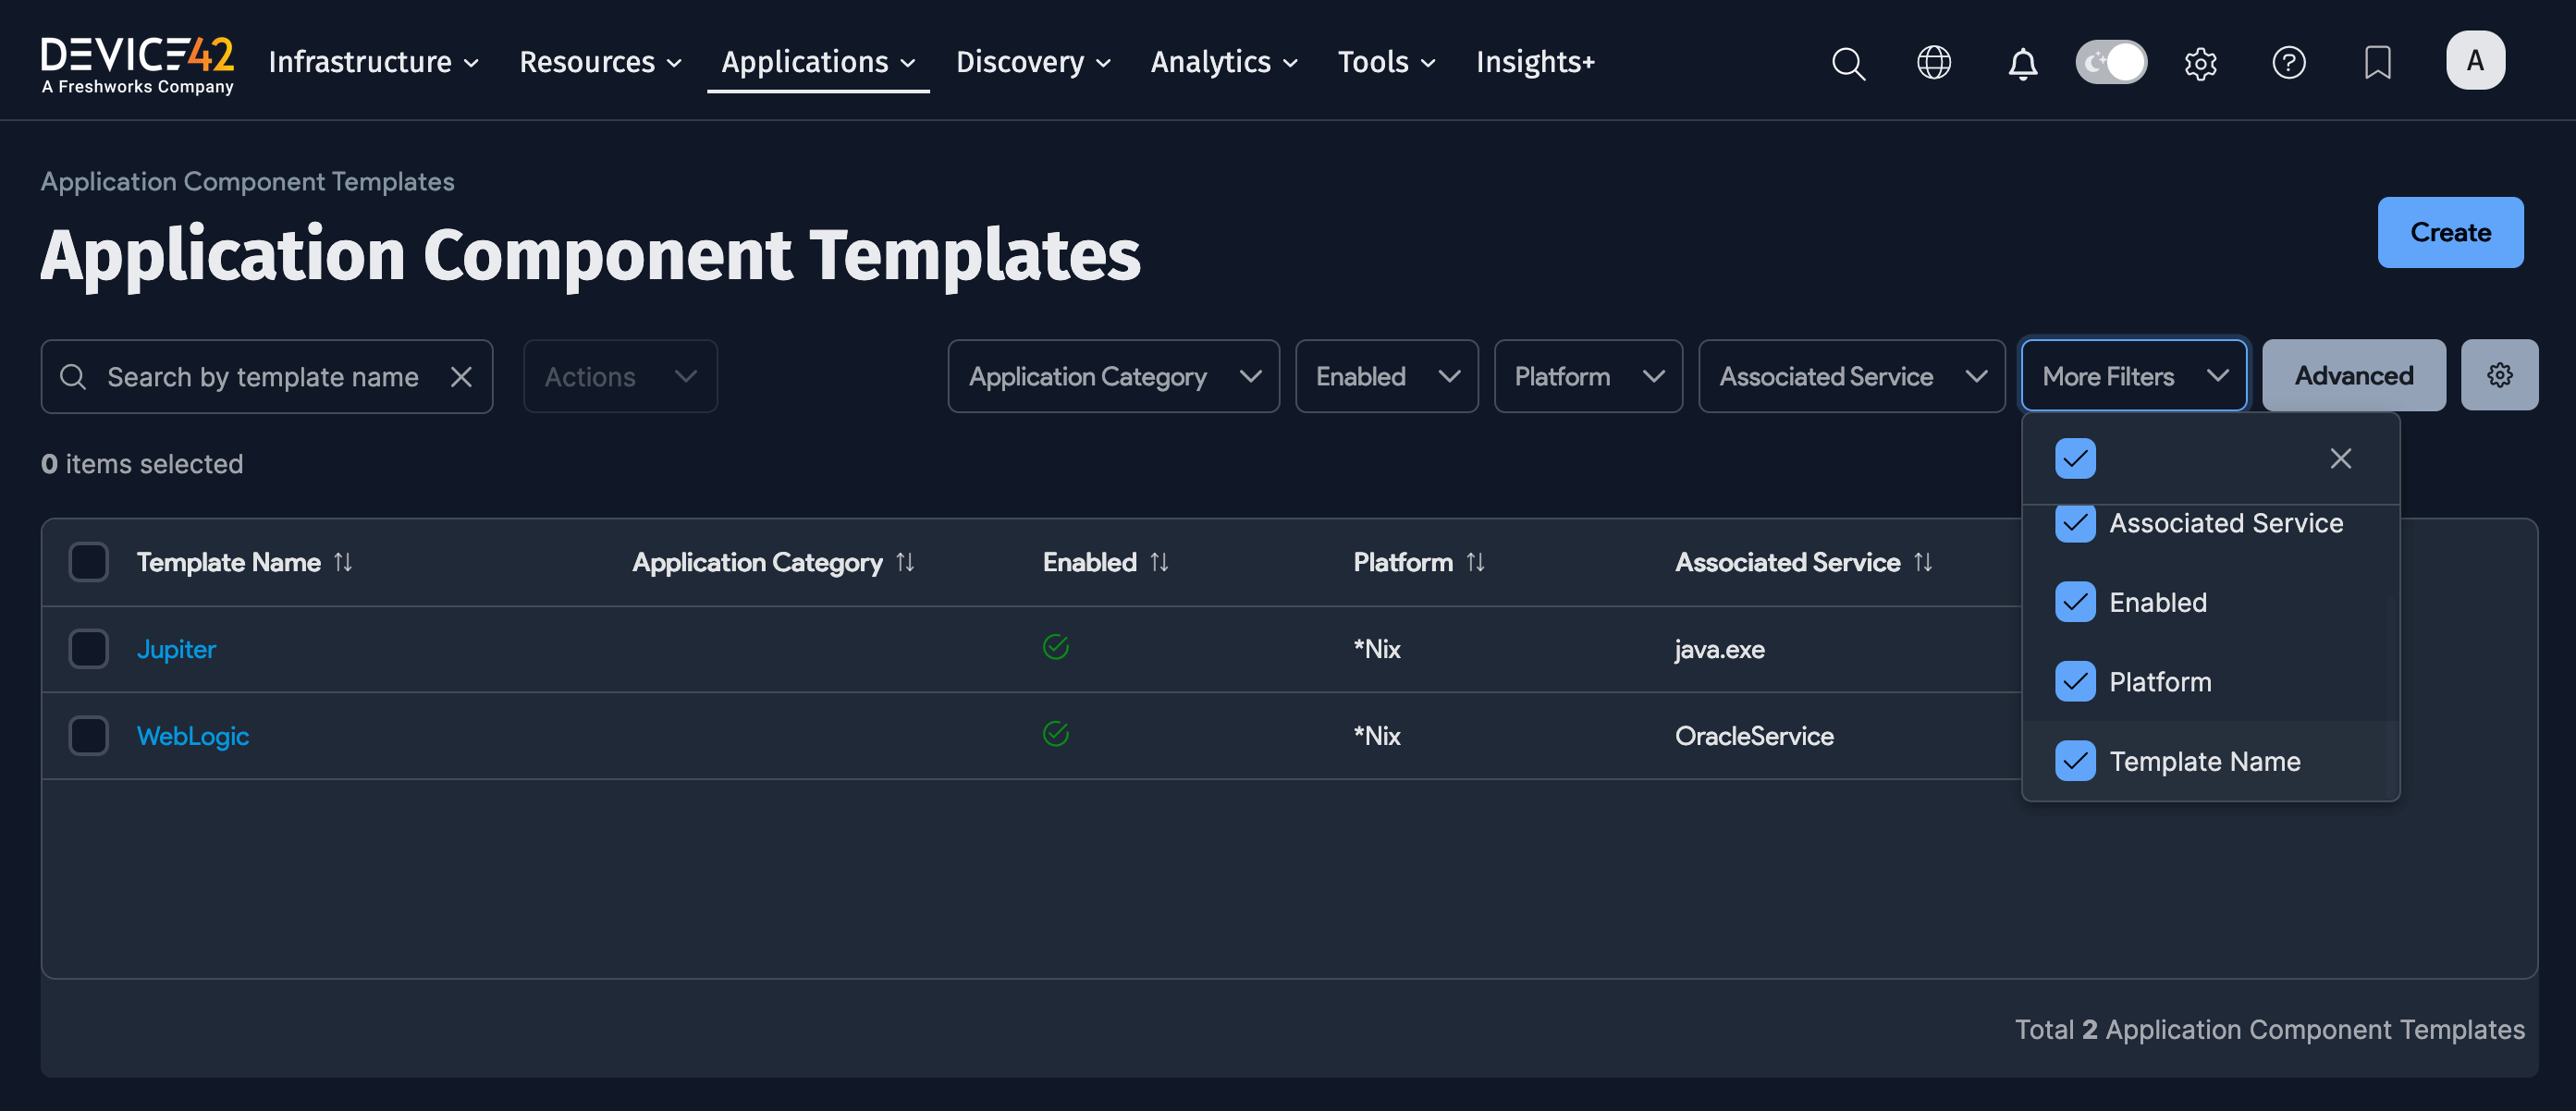
The Application Component Templates list page also includes an Advanced Search option you can use to construct more specific searches. See the Advanced Search Feature page for instructions.
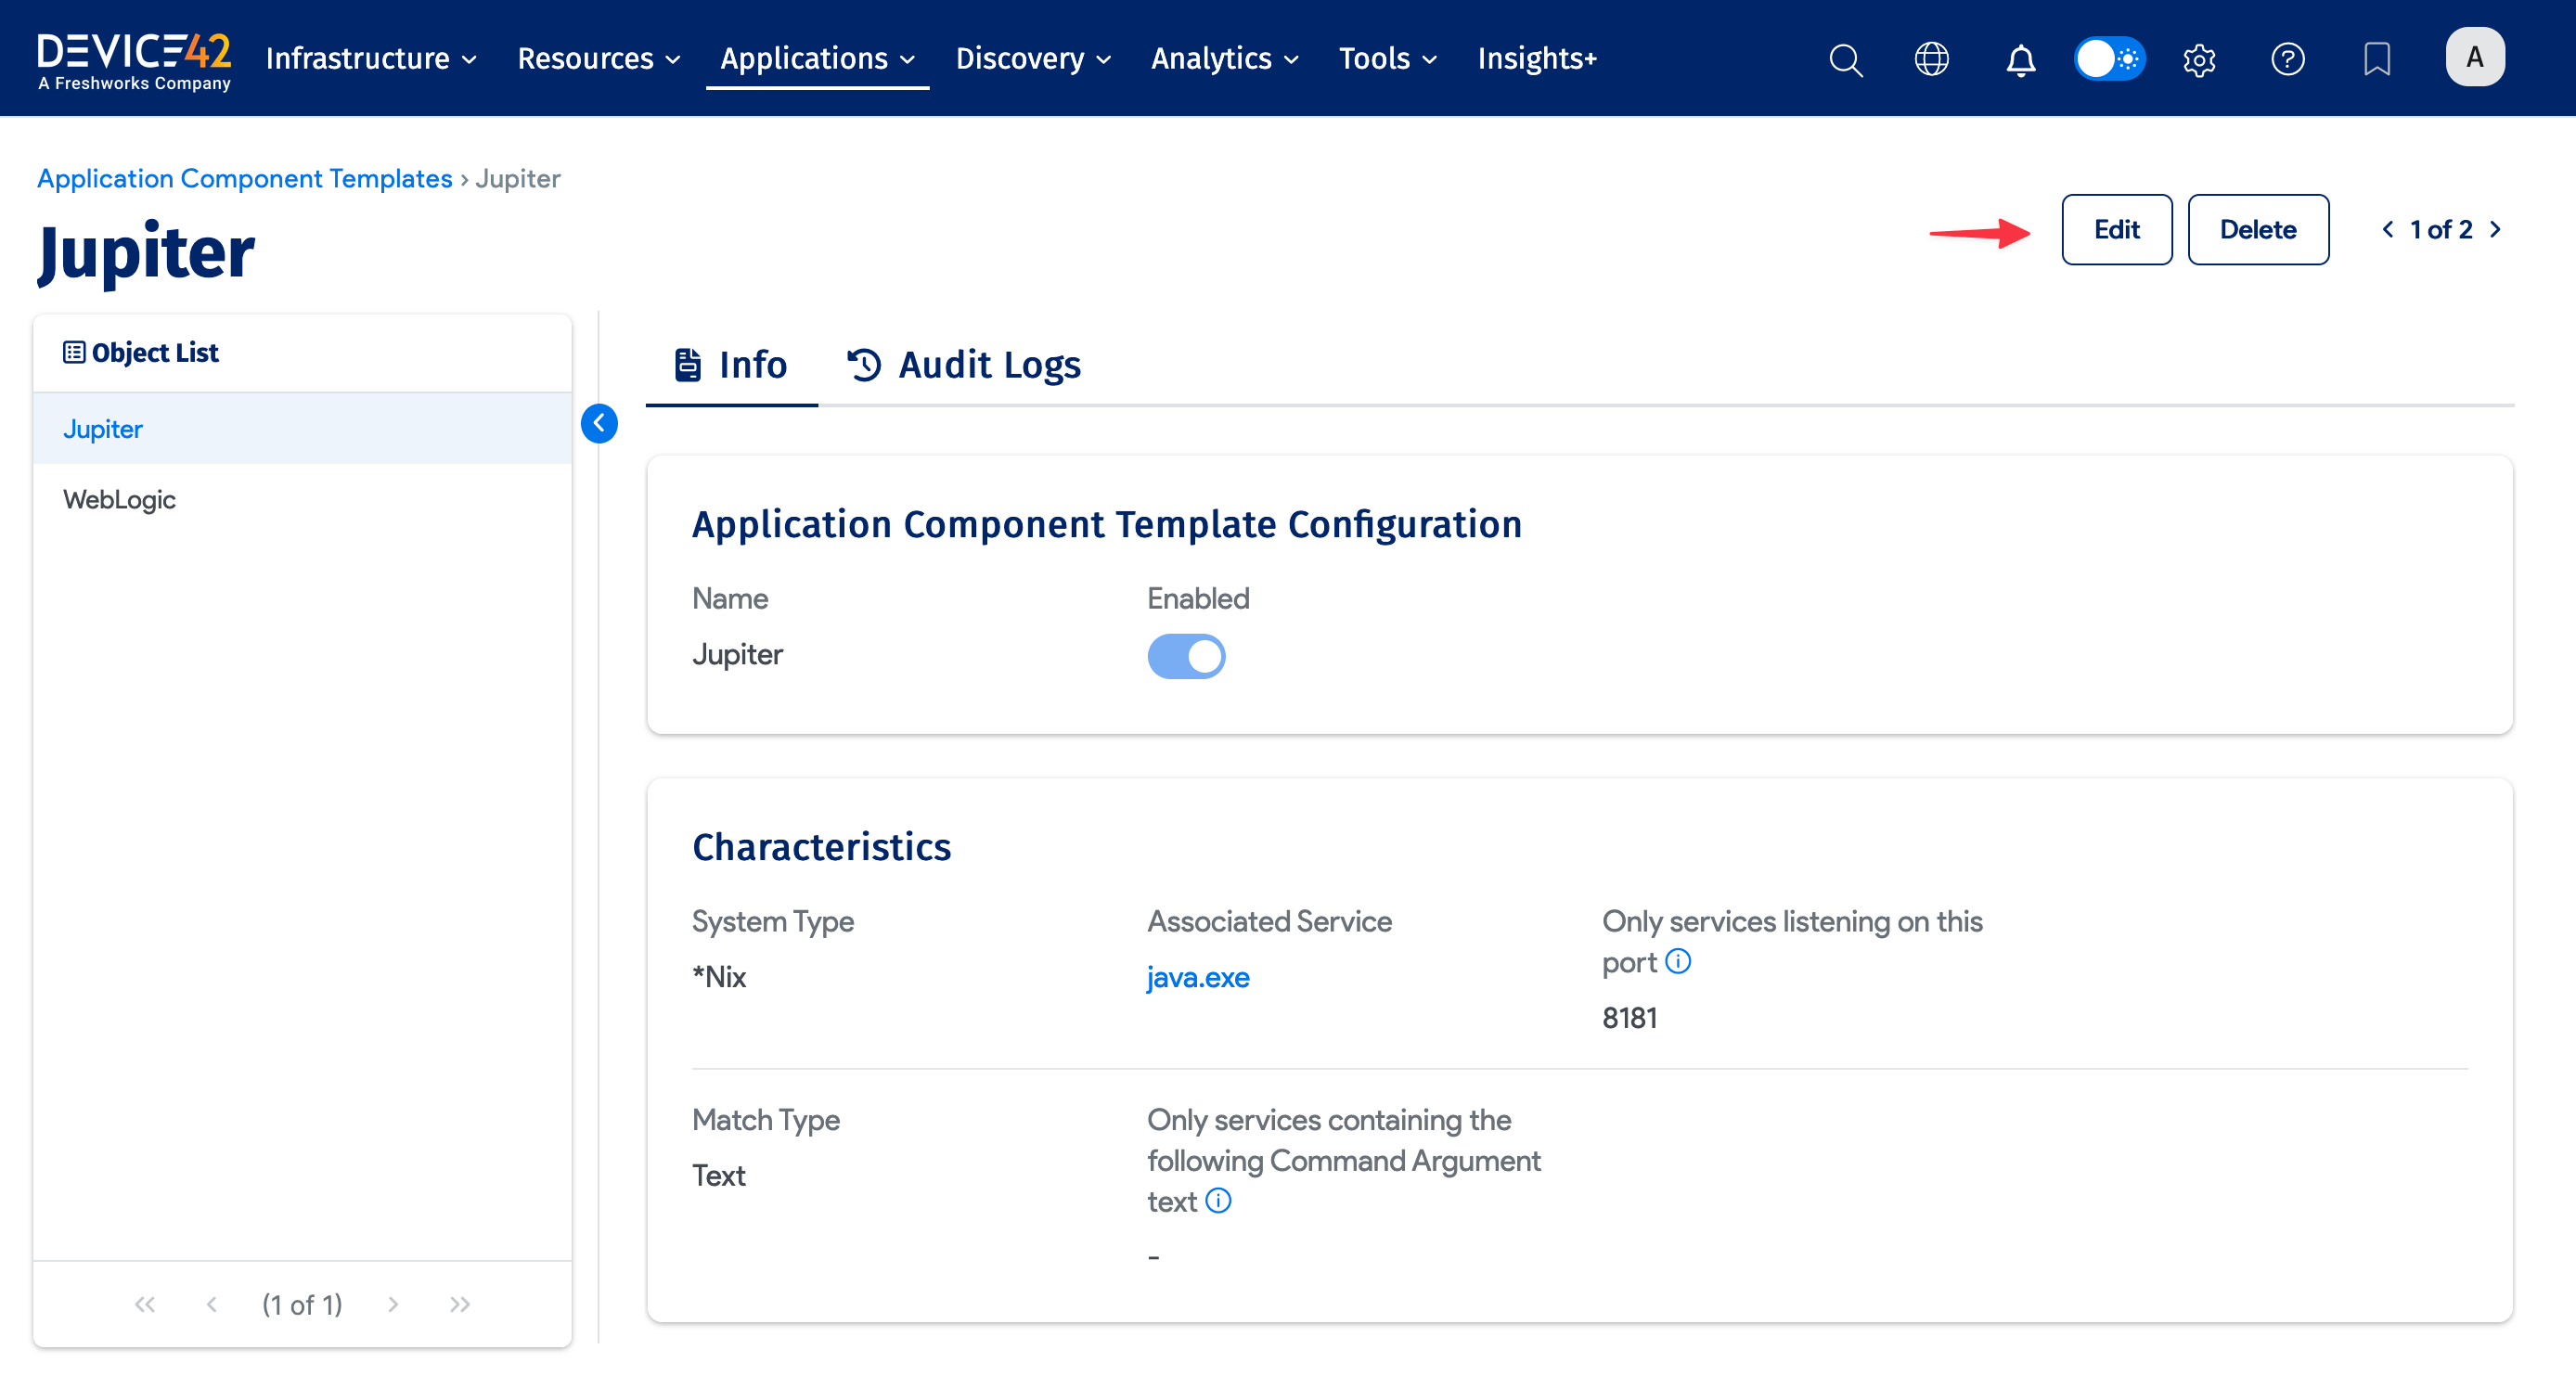
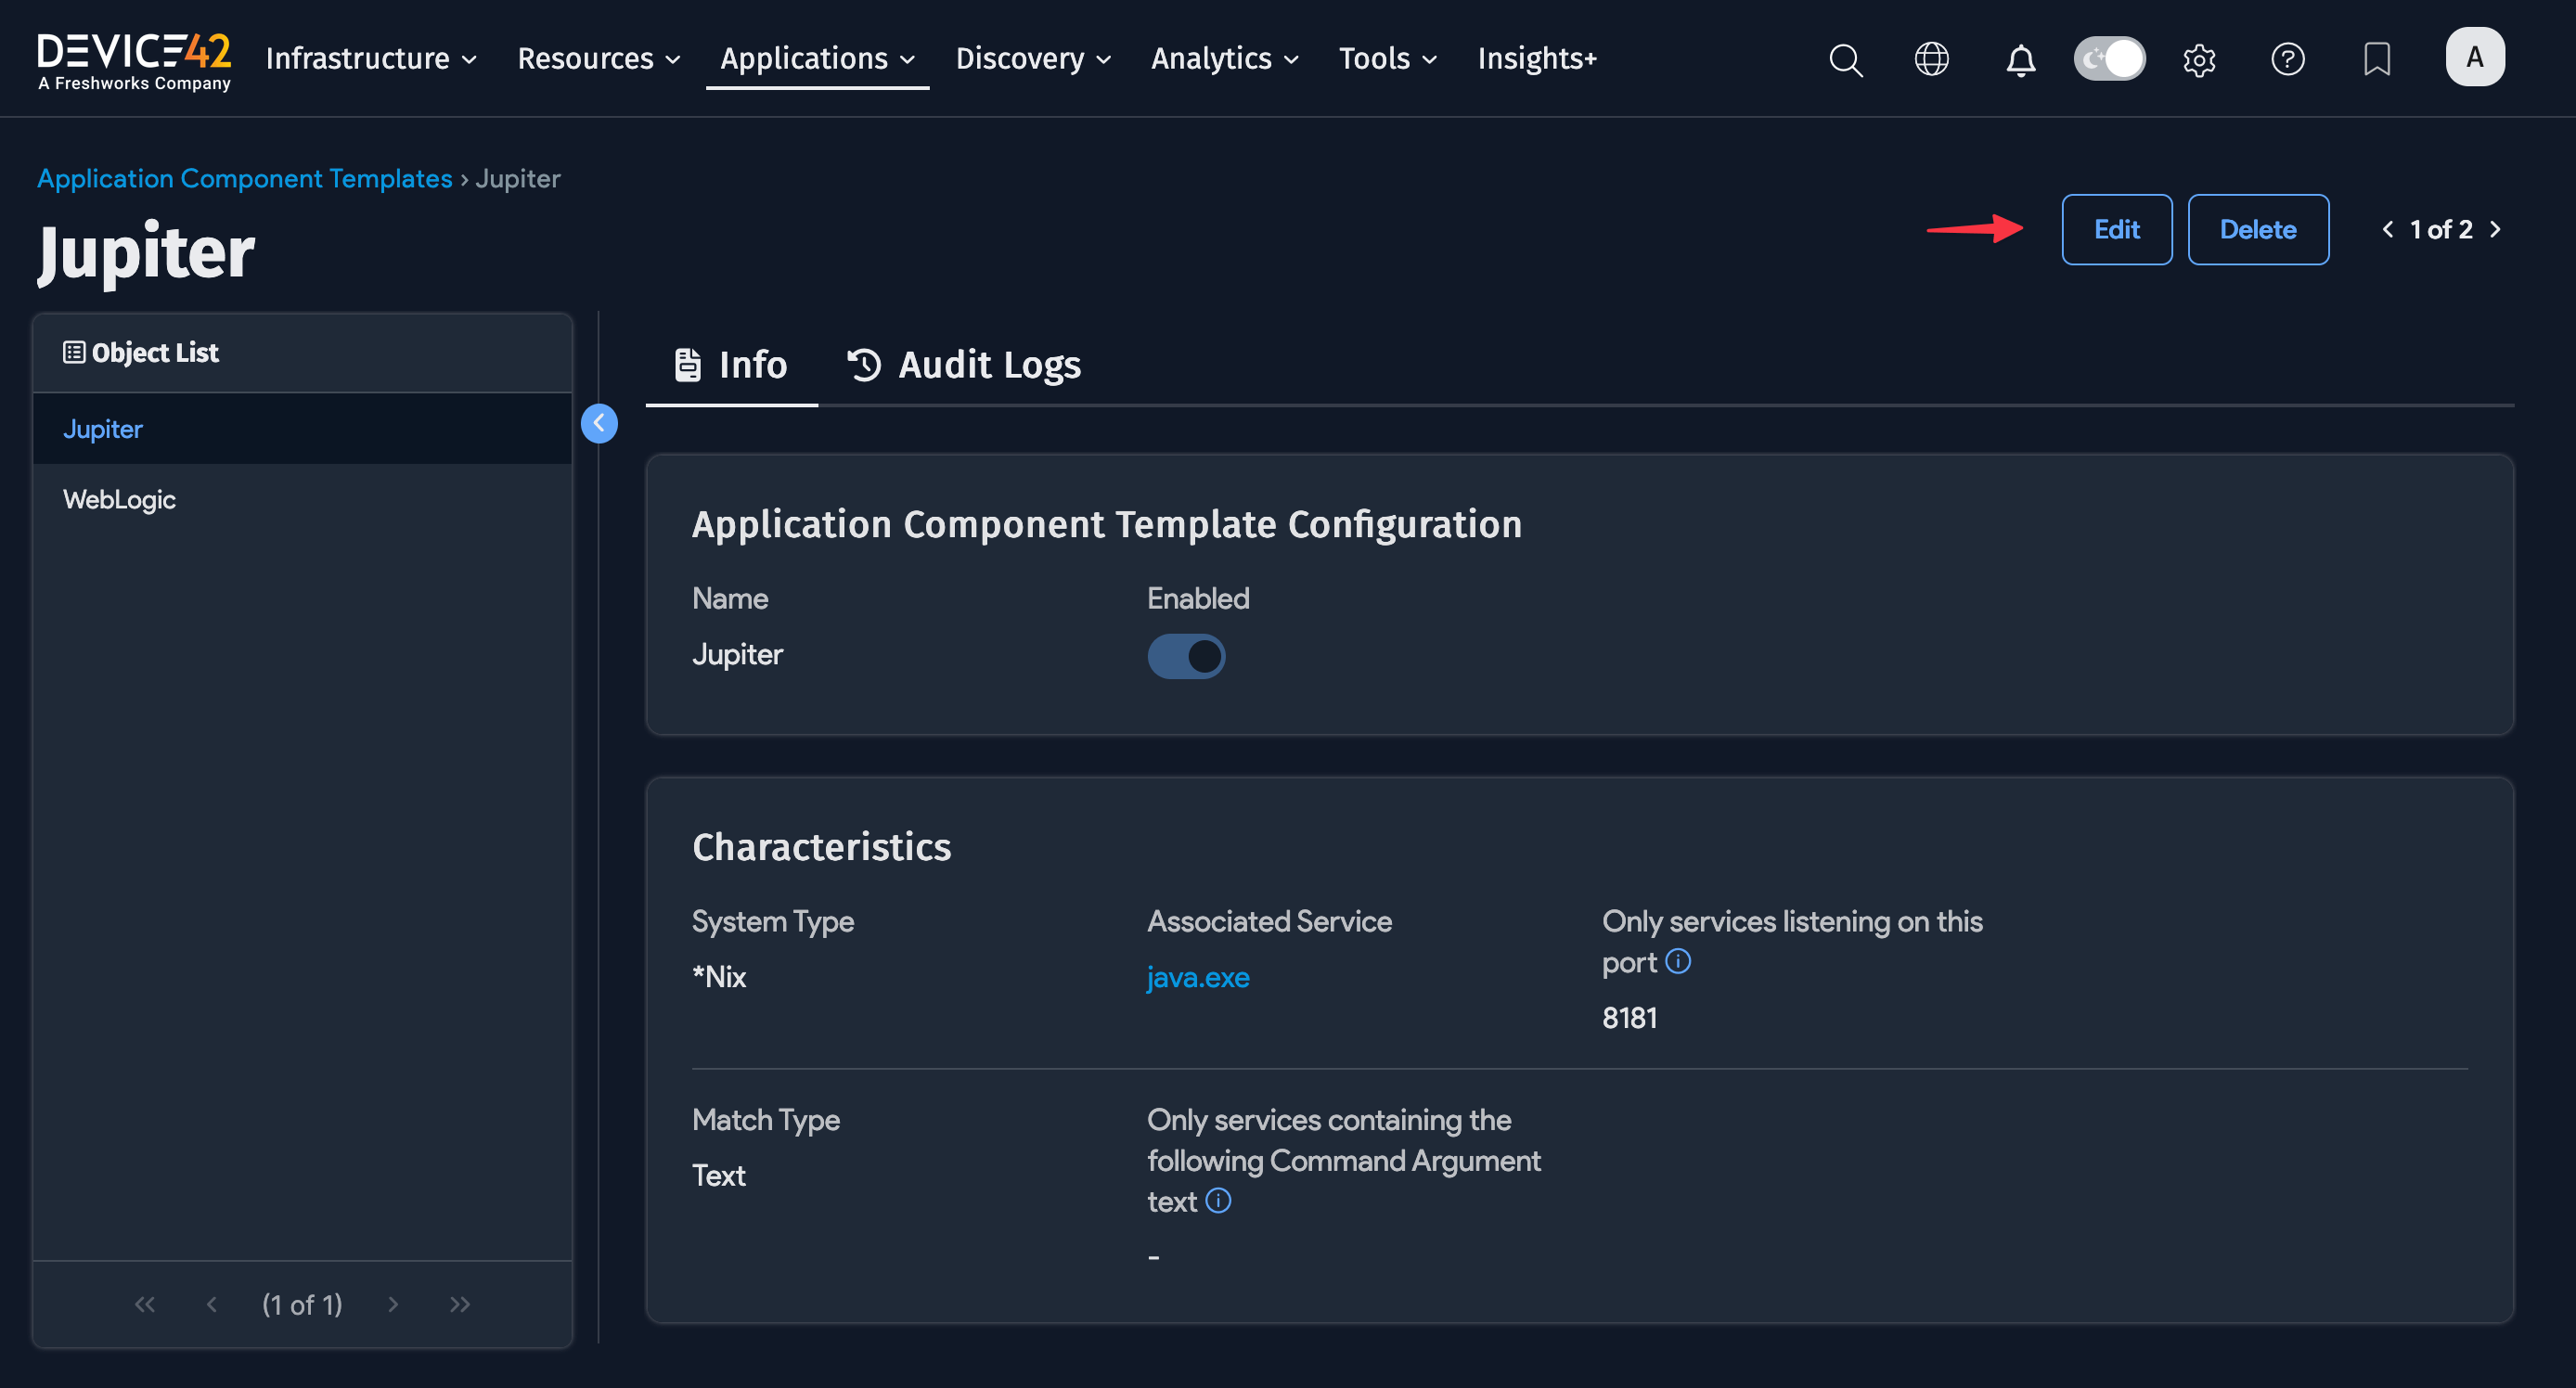
Click on a template name to see more details about that template. Click Edit in the upper right corner of the details page to change or update an existing template.
Add an Application Component Template
You can add a new template by clicking Create in the top right of the template list page.
Application Component Template Configuration
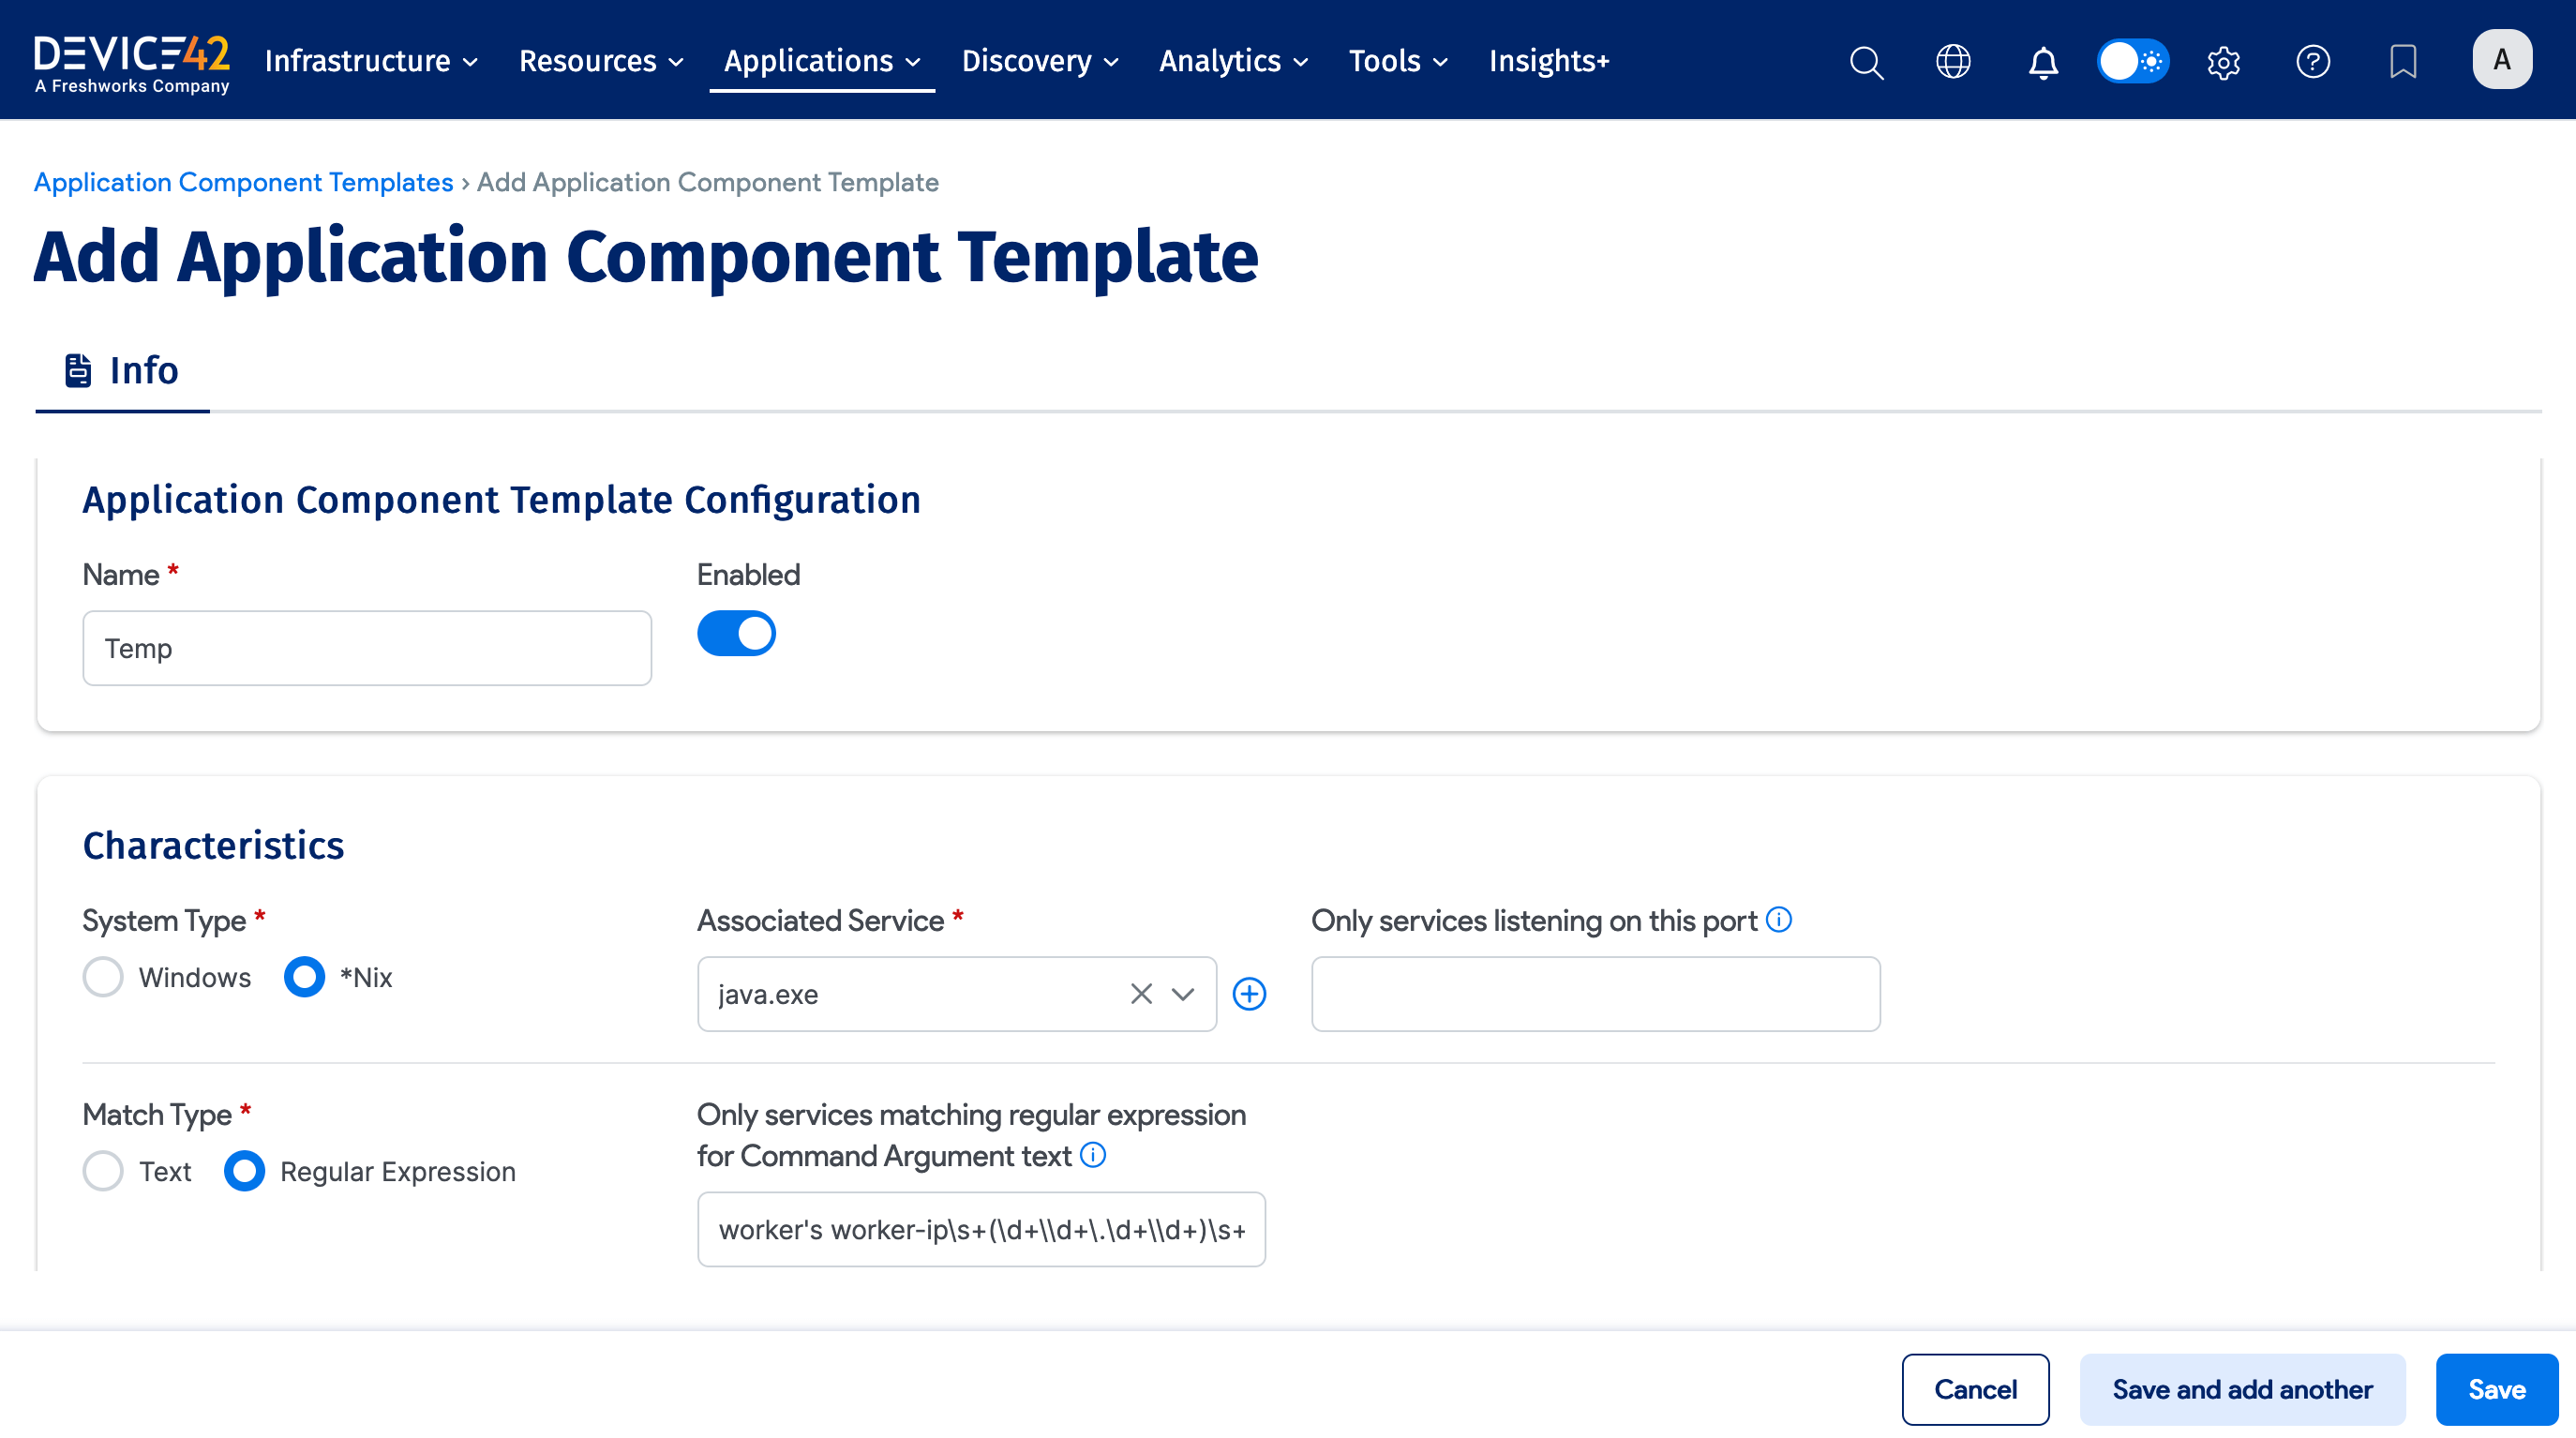
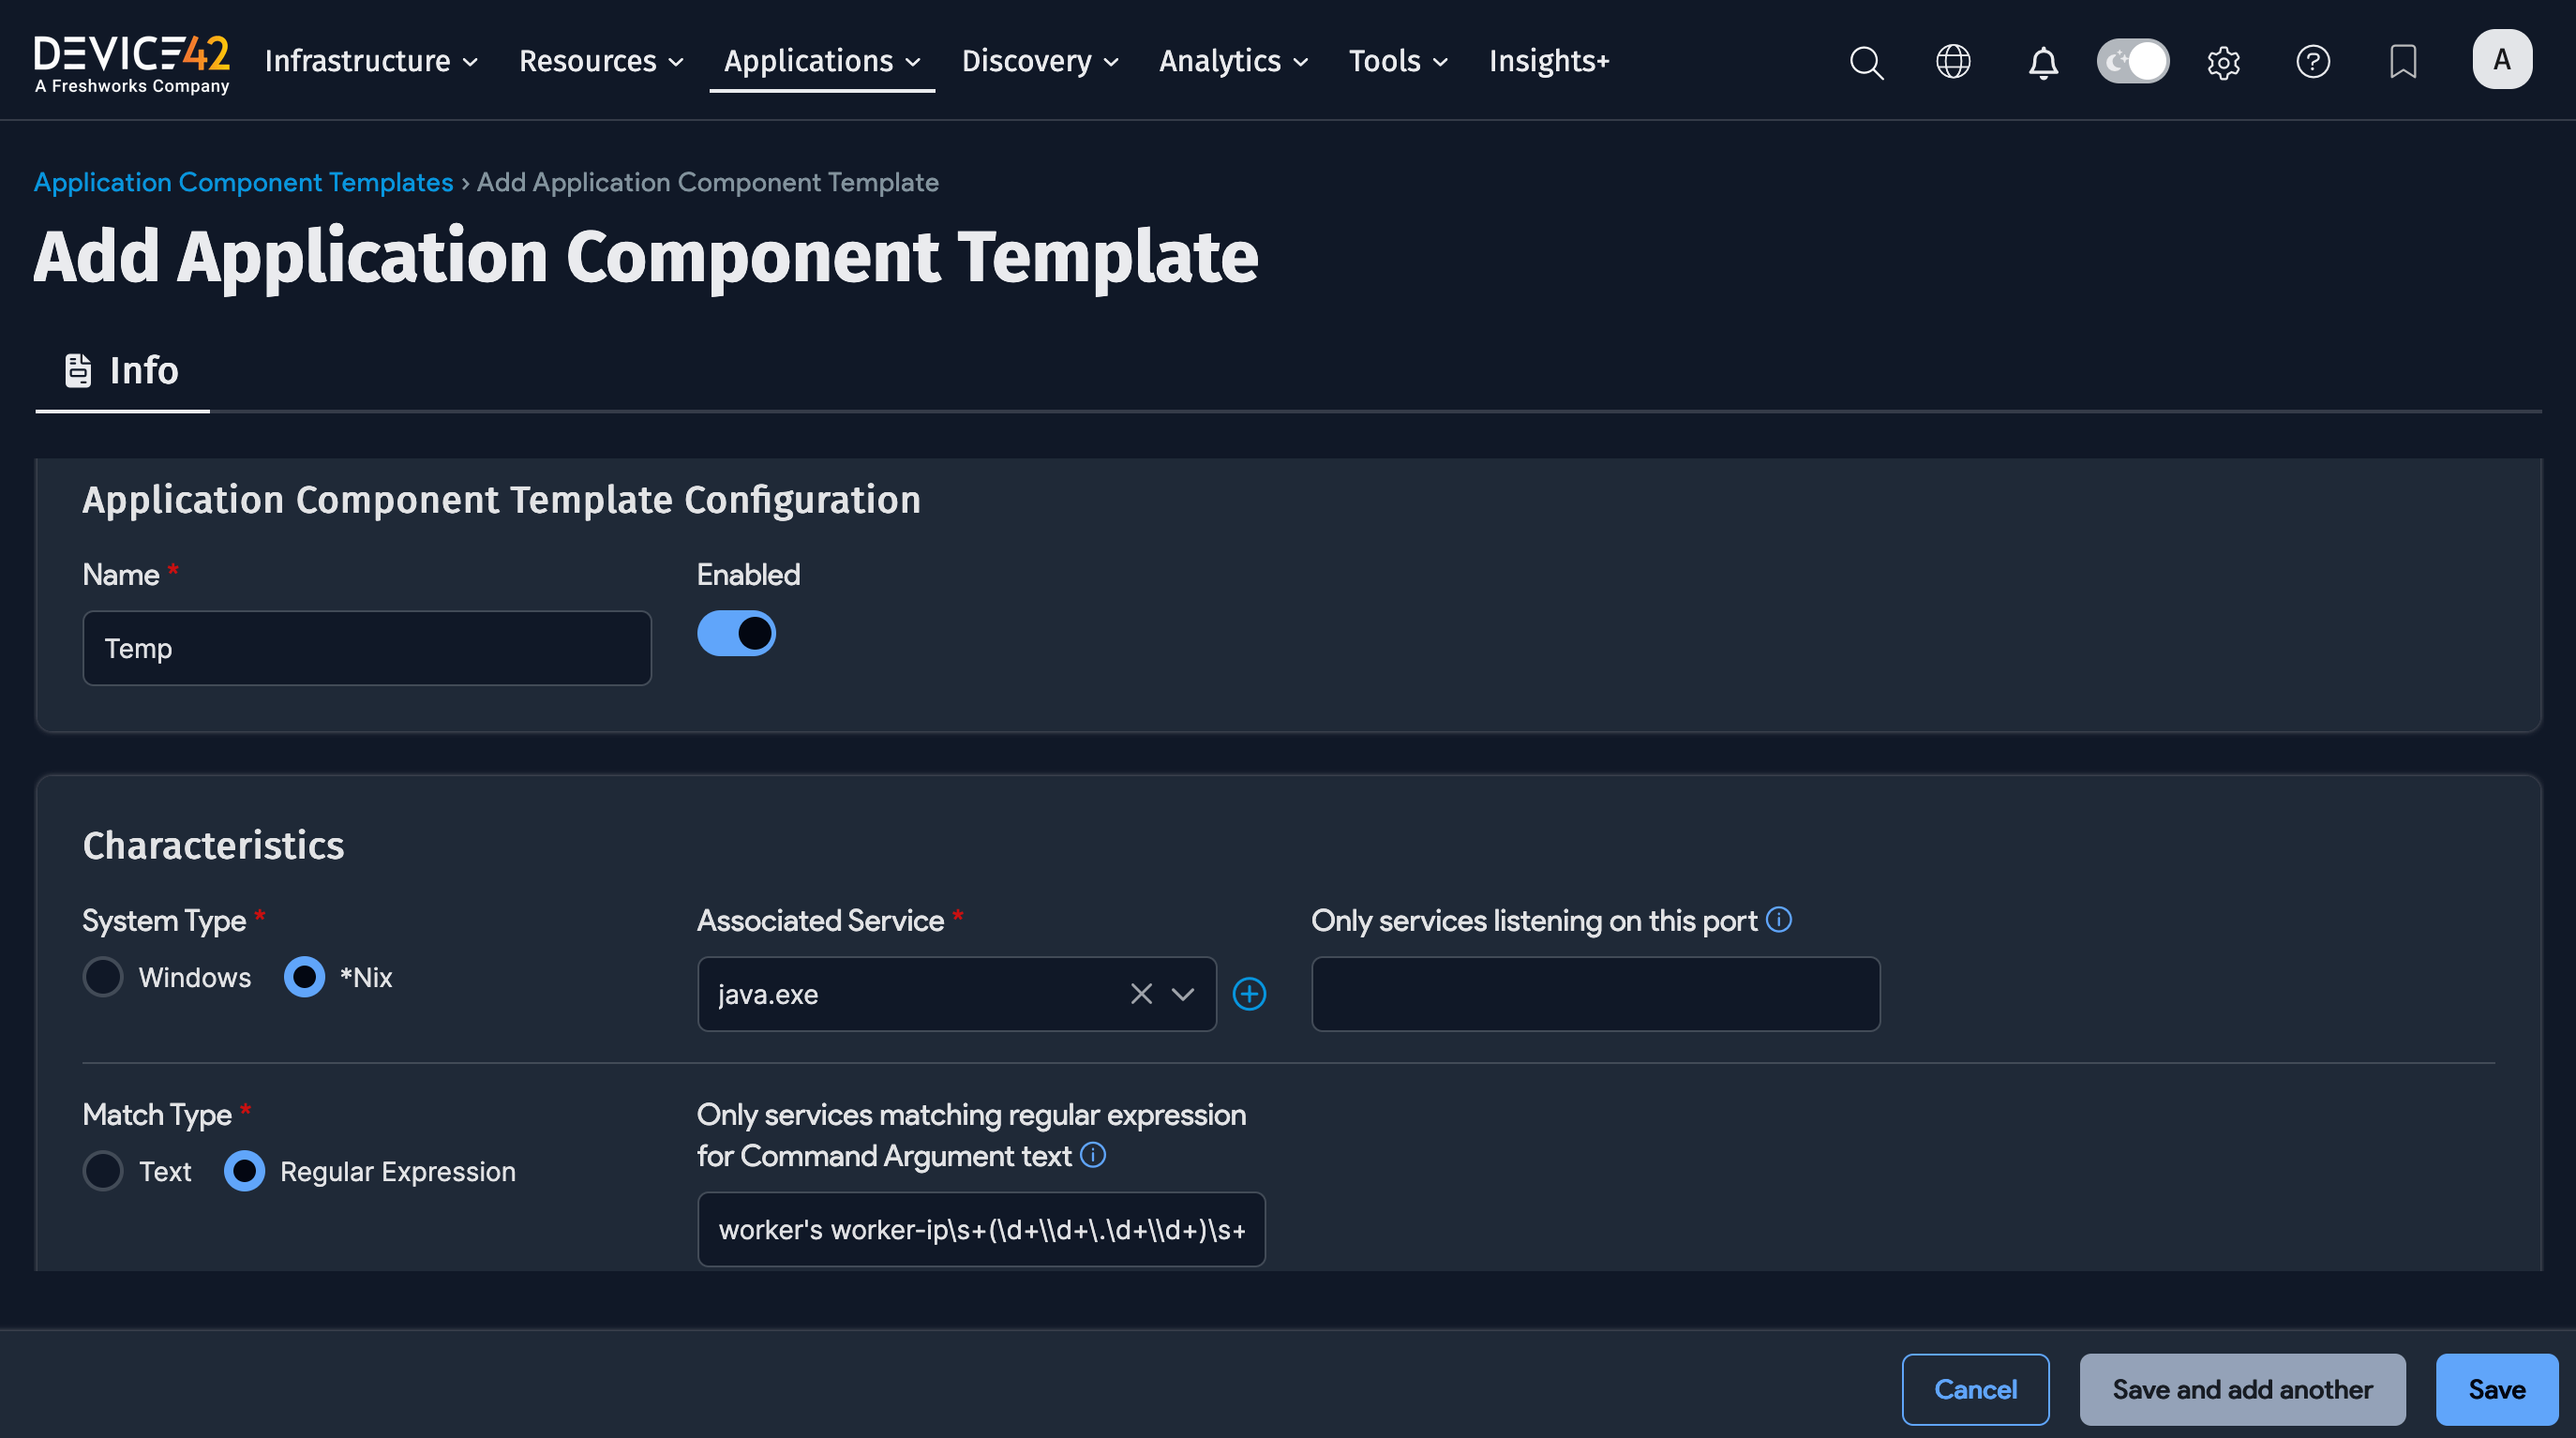
- Enter a Name for the template (required).
- Select whether the template should be Enabled for use in autodiscovery jobs. This option lets you enable or disable the template according to when you need it without having to delete it when it's not in use.
Characteristics
- Select the Service Type (Windows or *Nix) to specify which platform Device42 autodiscovery searches for the service(s) that the Application Component will be based on.(required).
- Select, enter, or add (using the plus sign icon) the Associated Service that autodiscovery will search for and use to create the Application Component (required).
- Enter a port in the Only services listening on this port field to limit autodiscovery to only the services that are listening on your chosen port. Leave the field empty to ignore the port.
- Select an Associated Software Component to limit Application Component creation to instances where the specified software is installed. This is useful when filtering by service alone is too broad, such as when an application uses a common service like Java.
- For Match Type, select Text or Regular Expression to specify how you want to filter services:
-
You can enter a Text string pattern that discovery will use to create more service-specific Application Components by only generating Application Components for services with Service Command Arguments that contain the string.


Performs simple text contains match on command argument text
-
Enter a Regular Expression for more control over how you want to filter services.
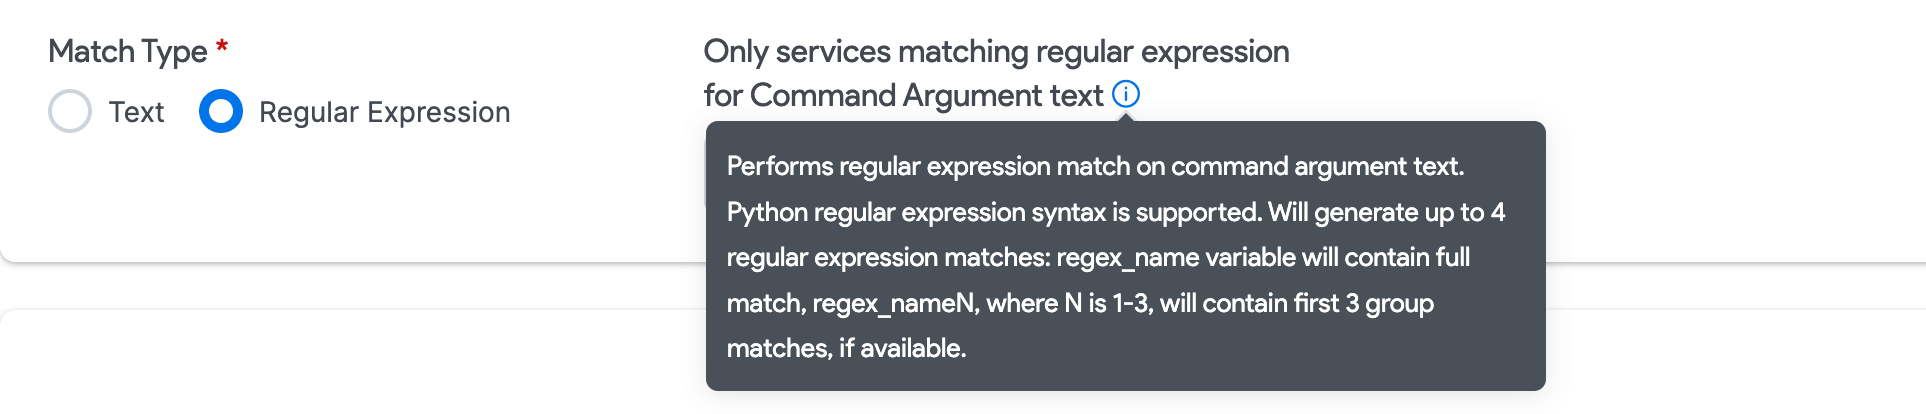
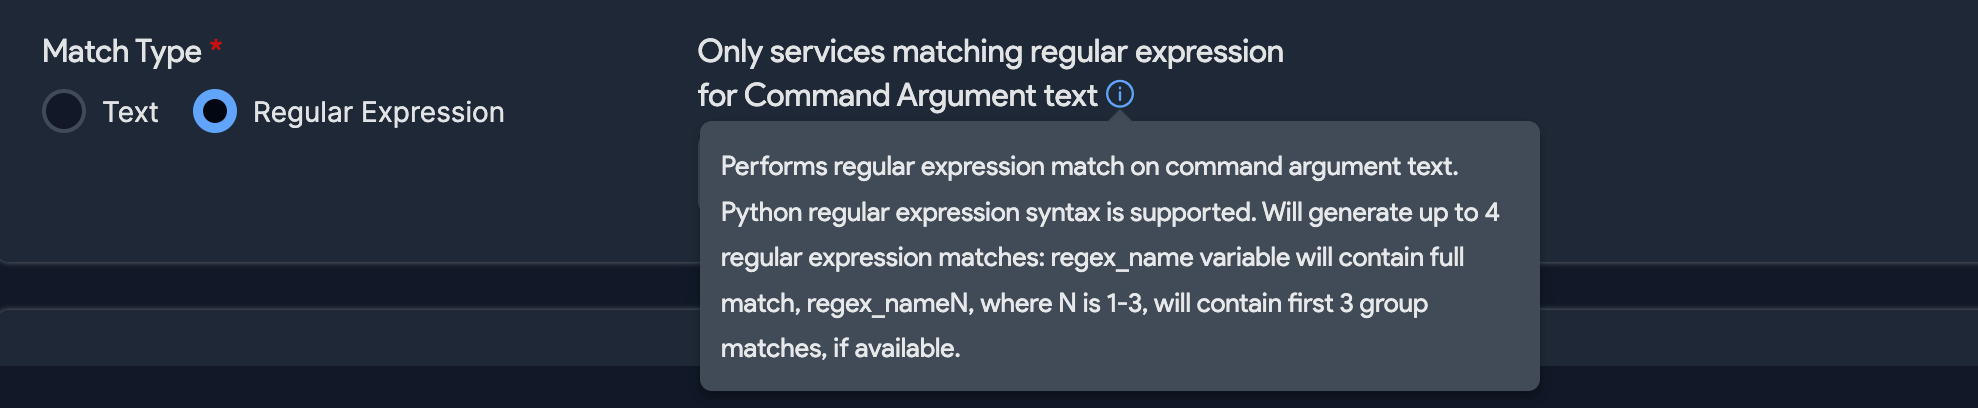
Performs regular expression match on command argument text. Python regular expression syntax is supported. Will generate up to 4 regular expression matches: regex_name variable will contain full match, regex_nameN, where N is 1-3, will contain first 3 group matches, if available.
-
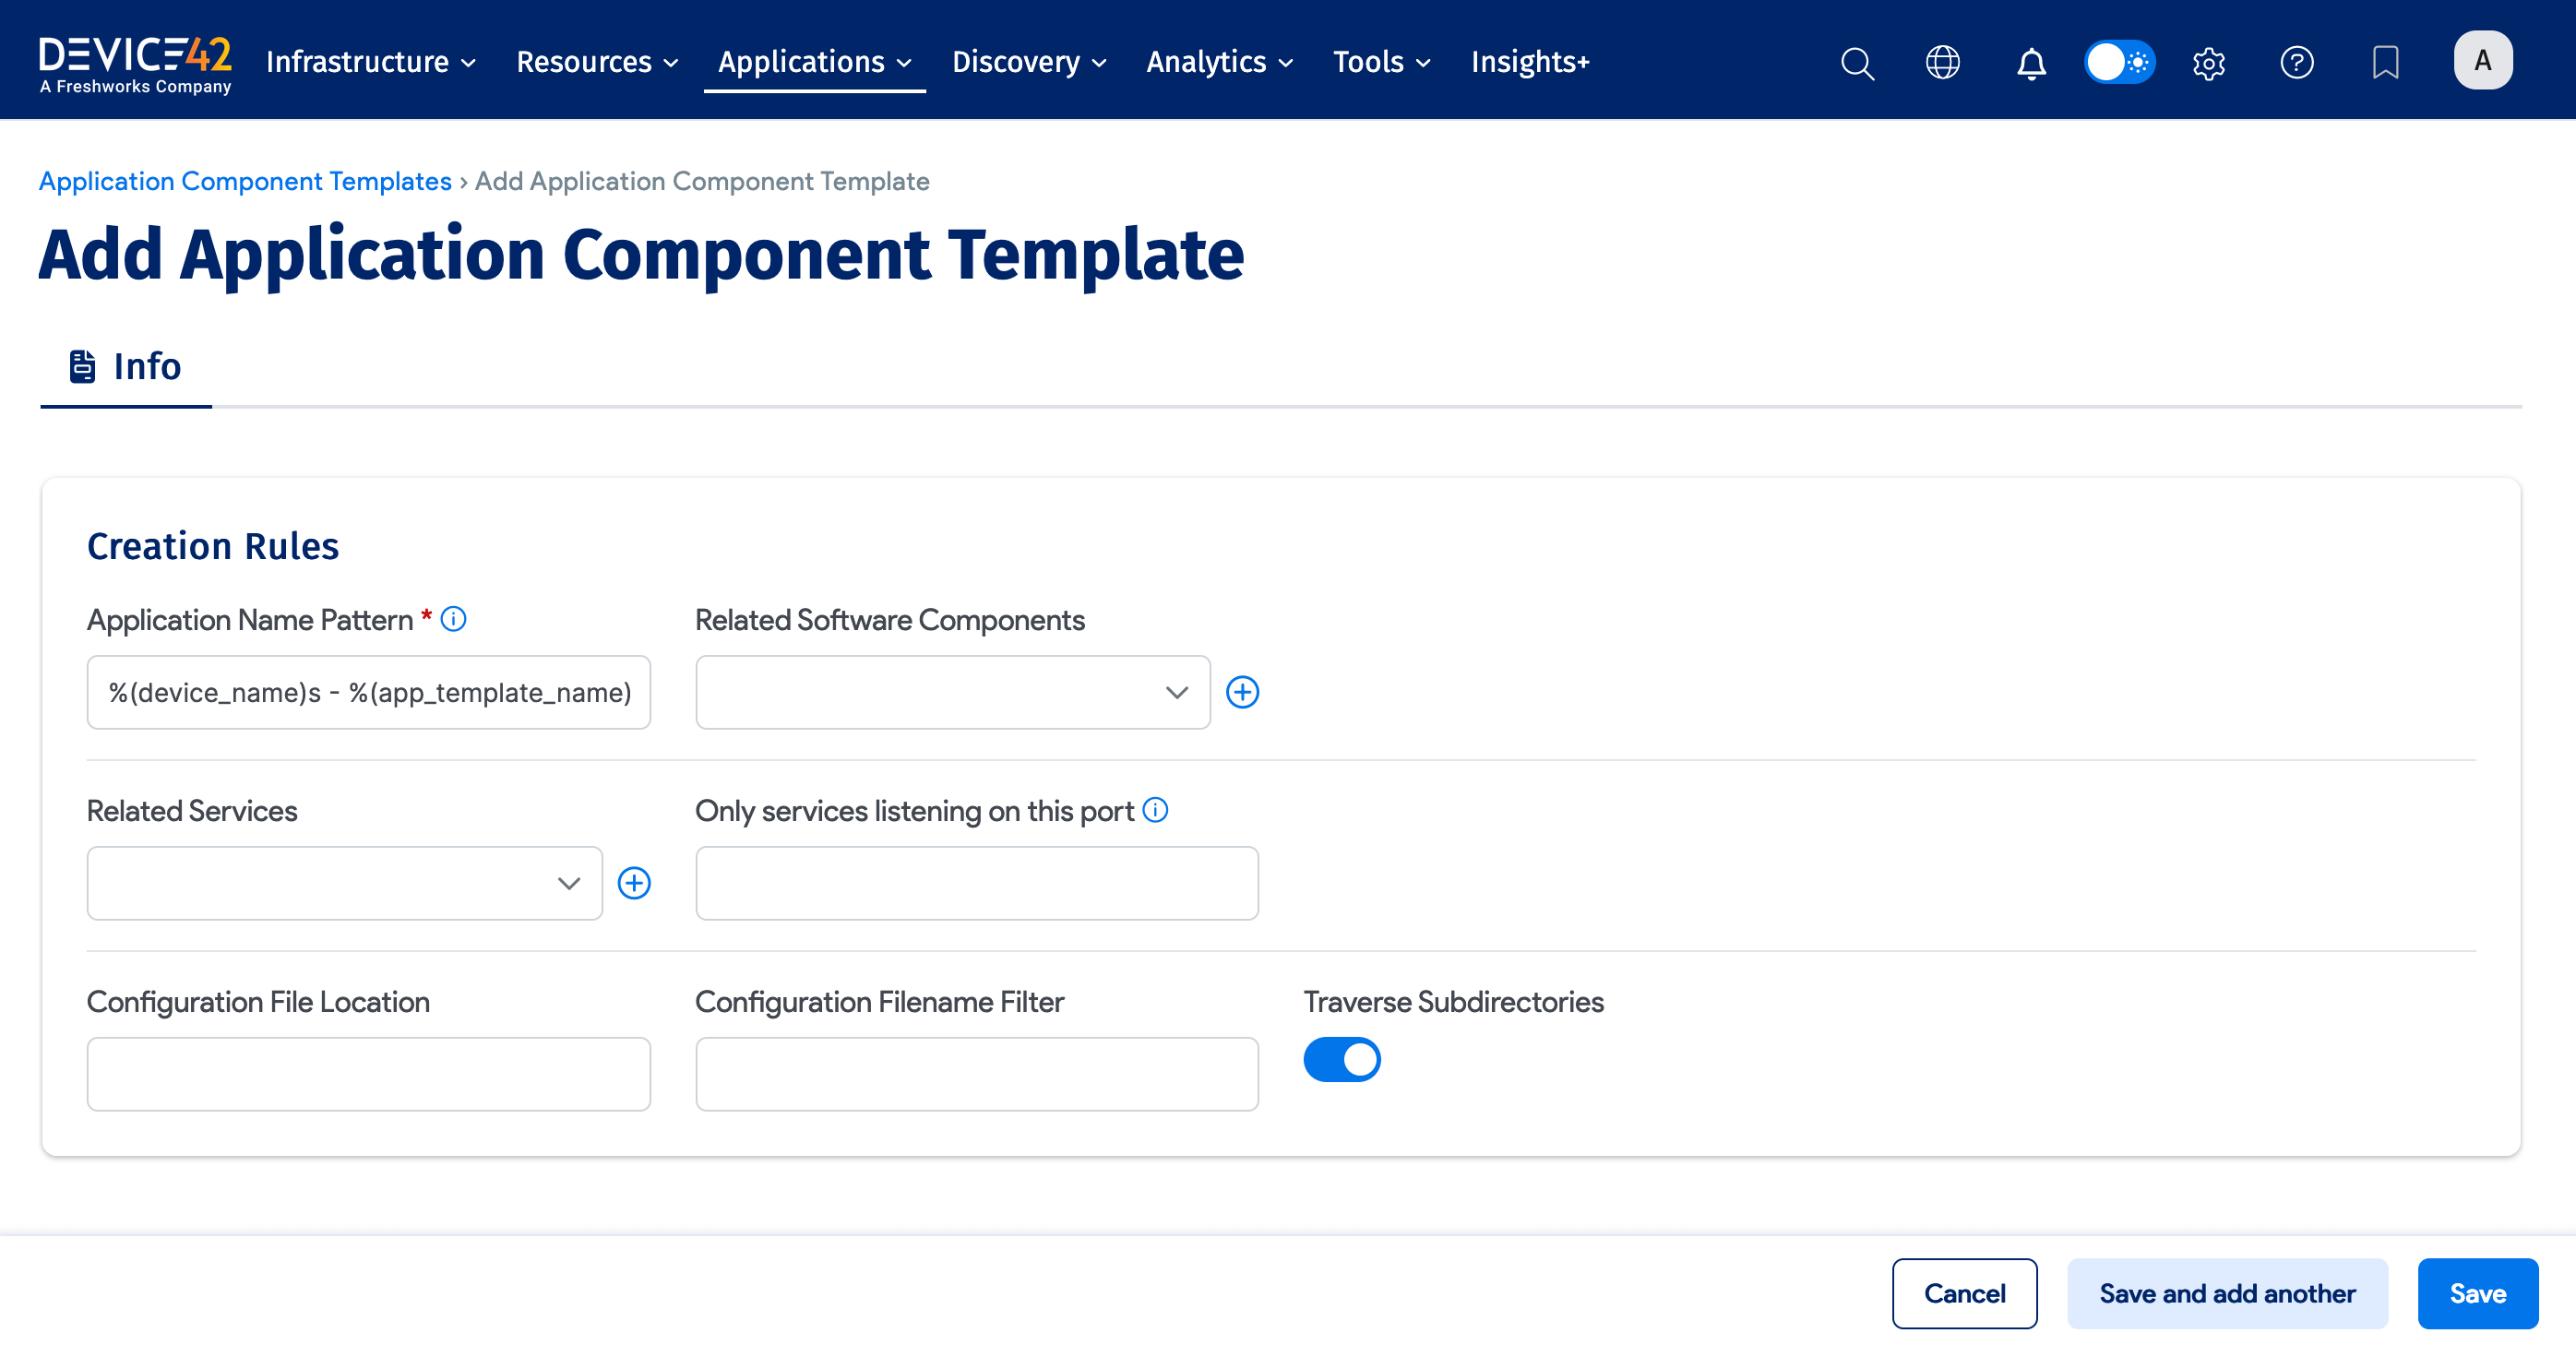
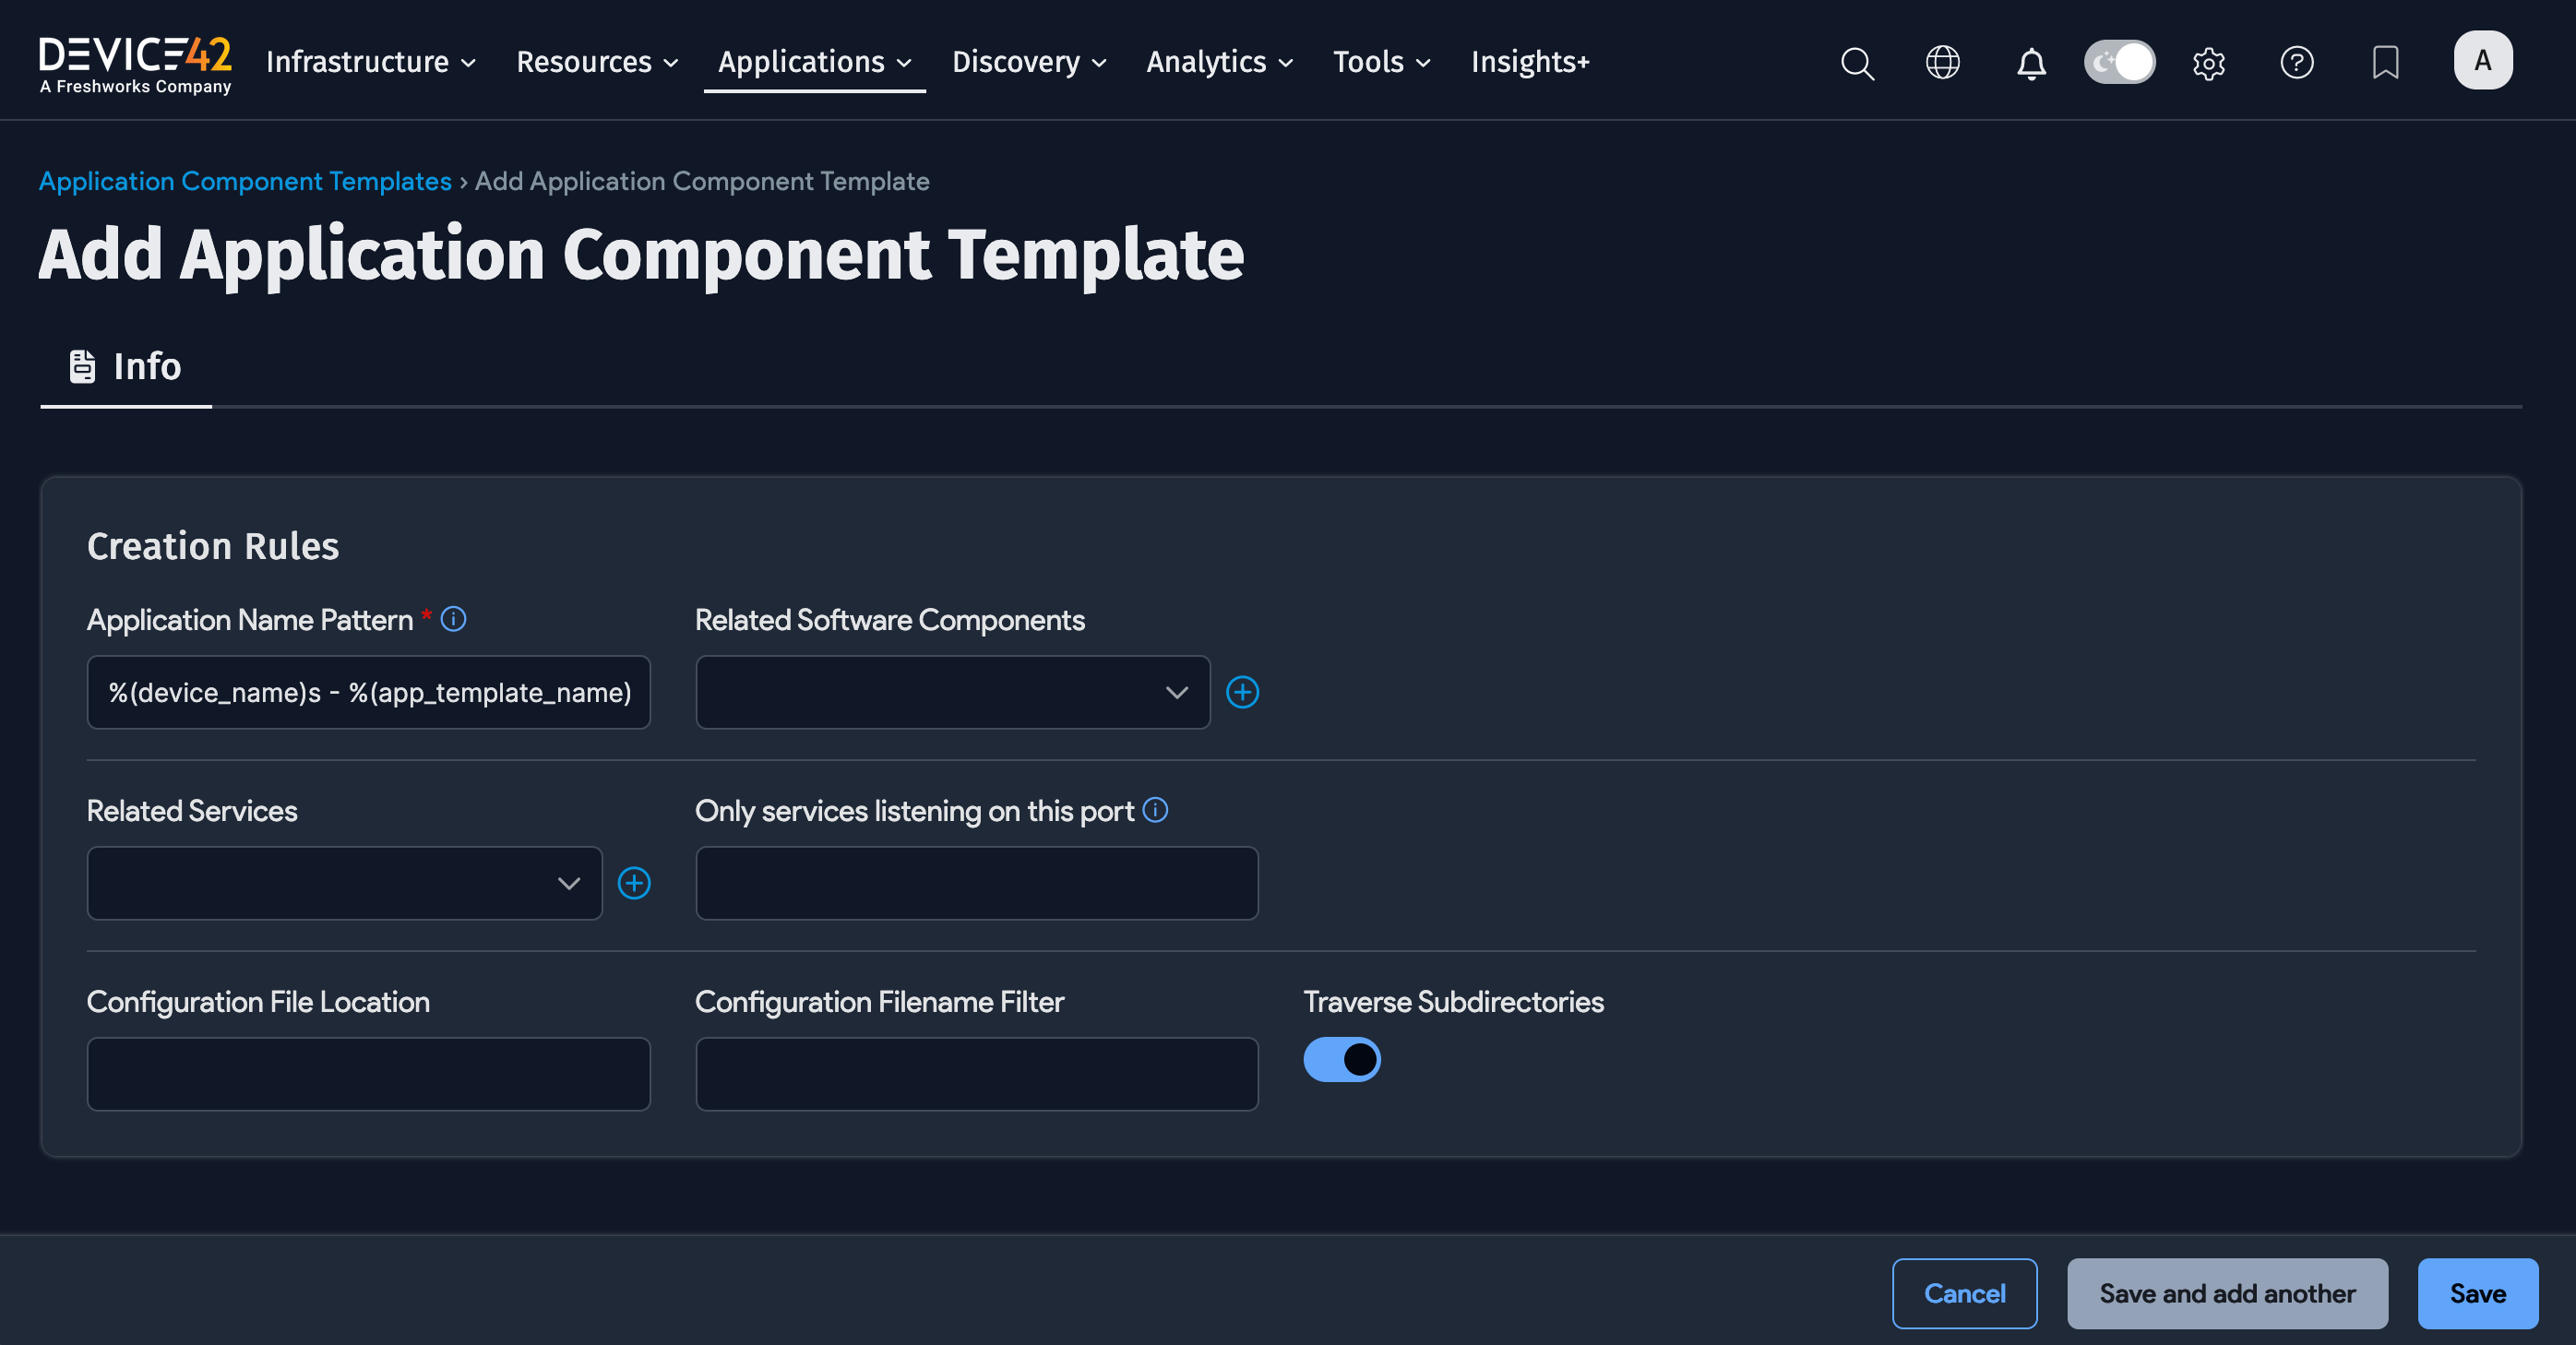
Creation Rules
-
Enter an Application Name Pattern to specify how the Application Component is named. You can use static text and the following variables to construct the Application Component name.
The pattern can contain the following variables:
%(device_name)s(required)%(discovered_listening_ip)s%(listening_port)s%(app_template_name)s
%(device_name)s, %(discovered_listening_ip)s, %(listening_port)s, %(app_template_name)sWhen you use regular expression matching, four additional variables are available:
%(regex_name)s(this will represent the full match),%(regex_name1)s%(regex_name2)s%(regex_name3)s(these will represent the first three group matches)
%(regex_name)s, %(regex_name1)s, %(regex_name2)s, %(regex_name3)s -
Select, enter, or add (using the plus sign icon) any Related Software Components or Related Services that should be associated with the Application Component. For Related Services, you can specify Only services listening on this port.
-
Enter a path in Configuration File Location to specify the directory that Device42 should search for configuration files.
-
Enter a name or partial name in the Configuration Filename Filter field to identify the configuration file(s).
-
Select Traverse subdirectories to have Device42 traverse the Configuration File Location directory.
Details Section


- Select the Application Category for the Application Component (either Application Layer, Database, Load Balancer, Other, or Web Server).
- Enter What is impacted by the Application Component.
- Select or add the Responsible Customer or Department.
- Enter any Tags you want for the Application Component.
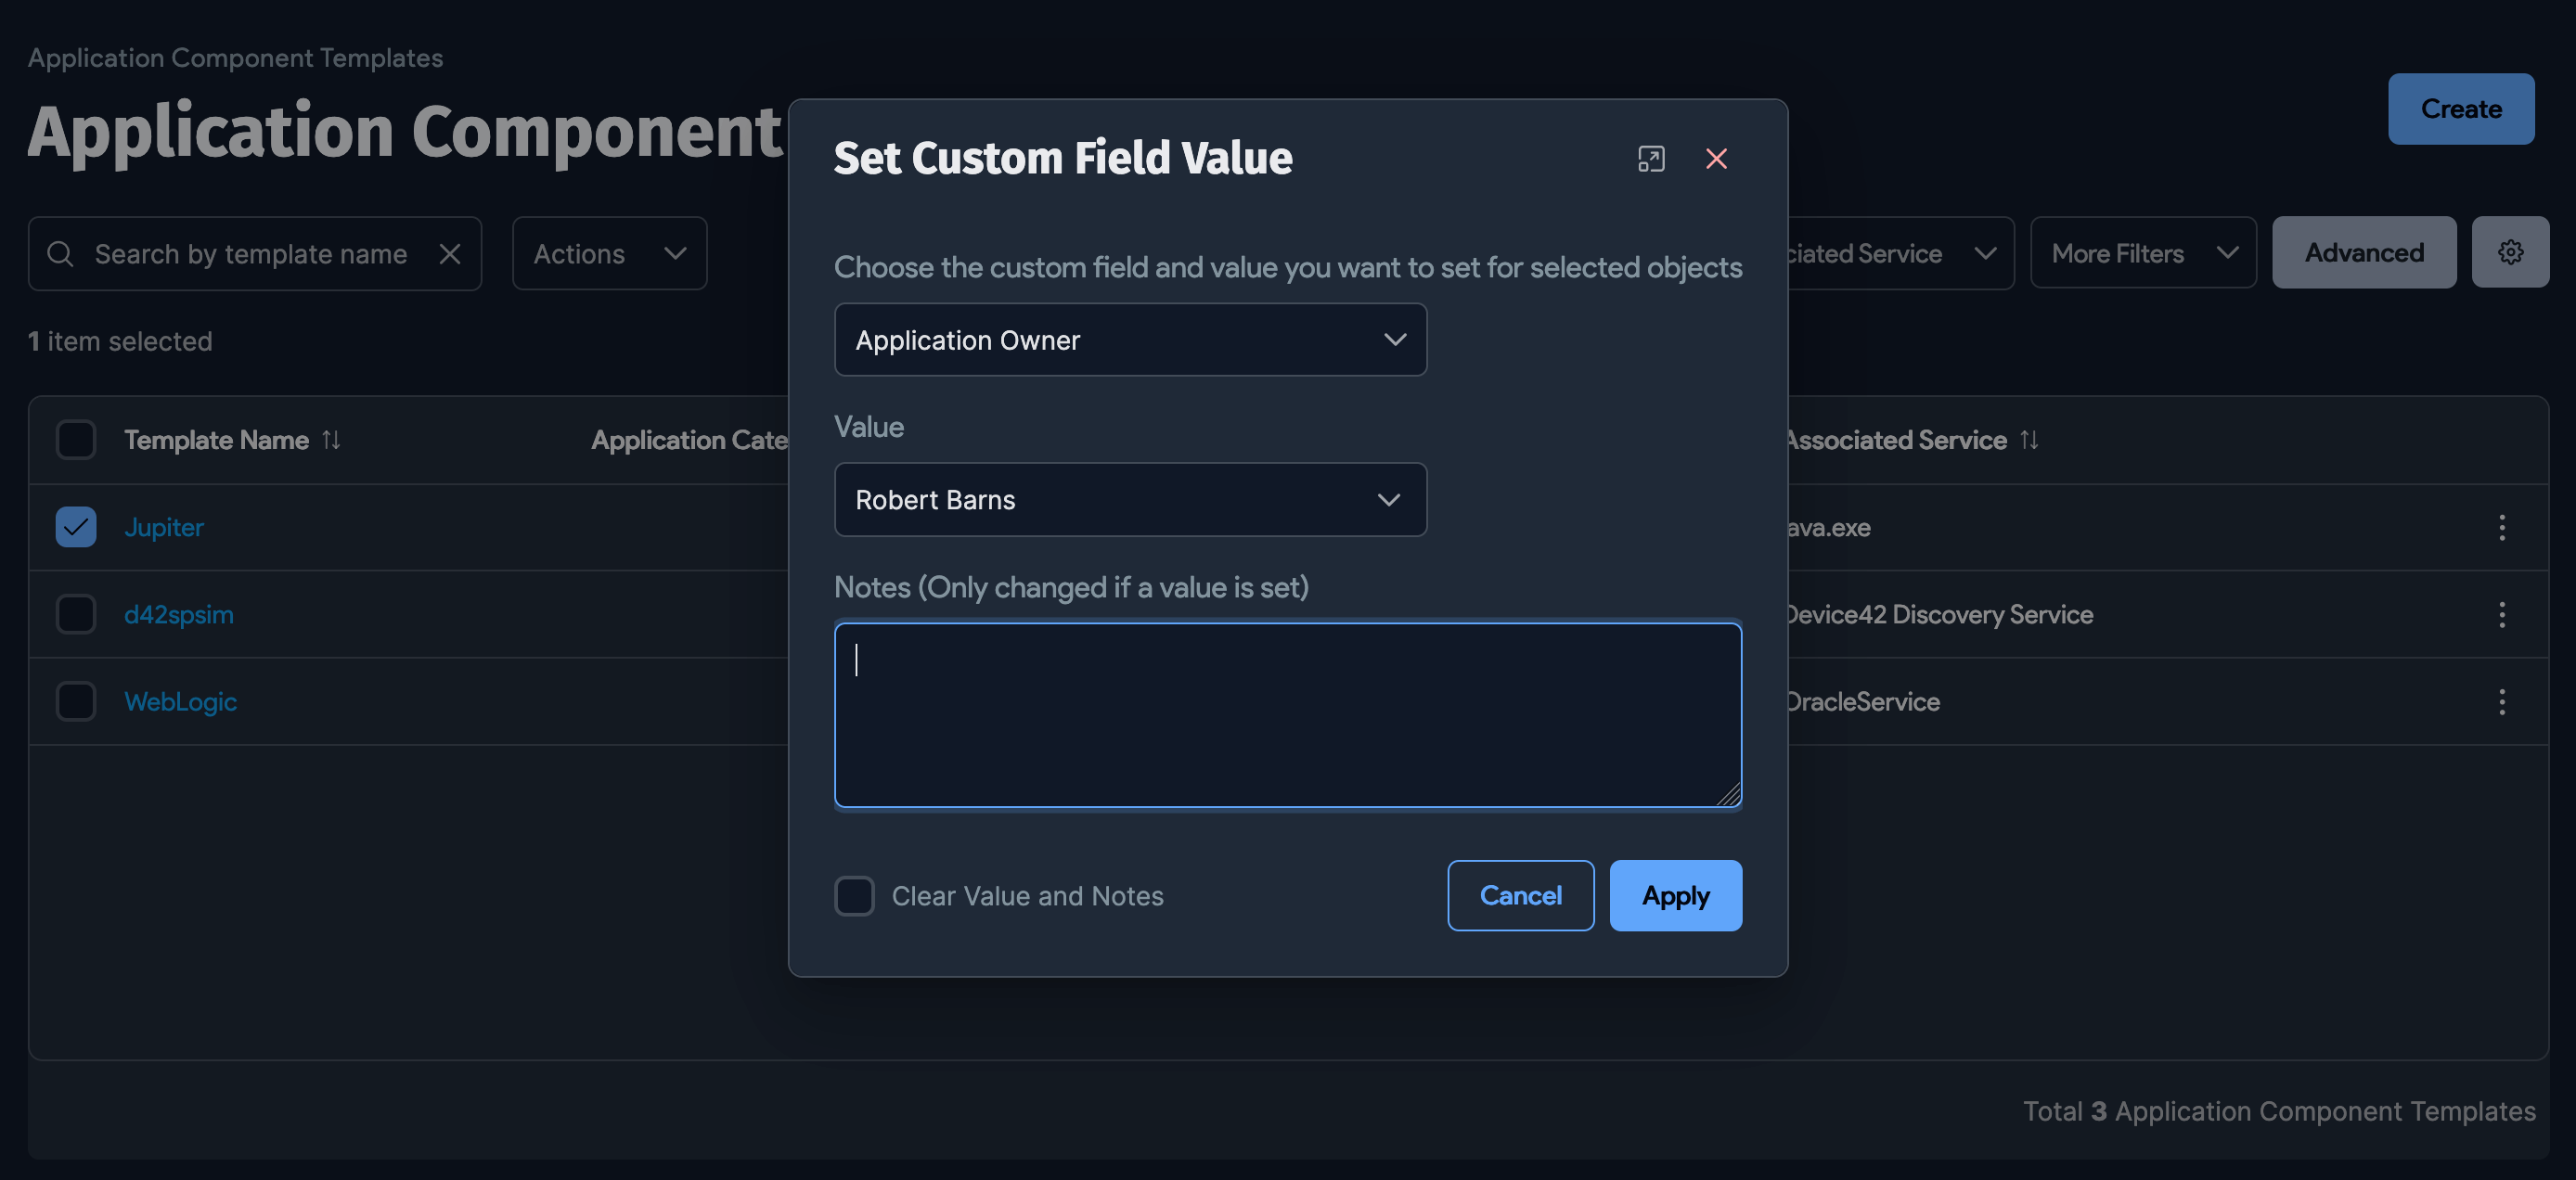
Custom Fields
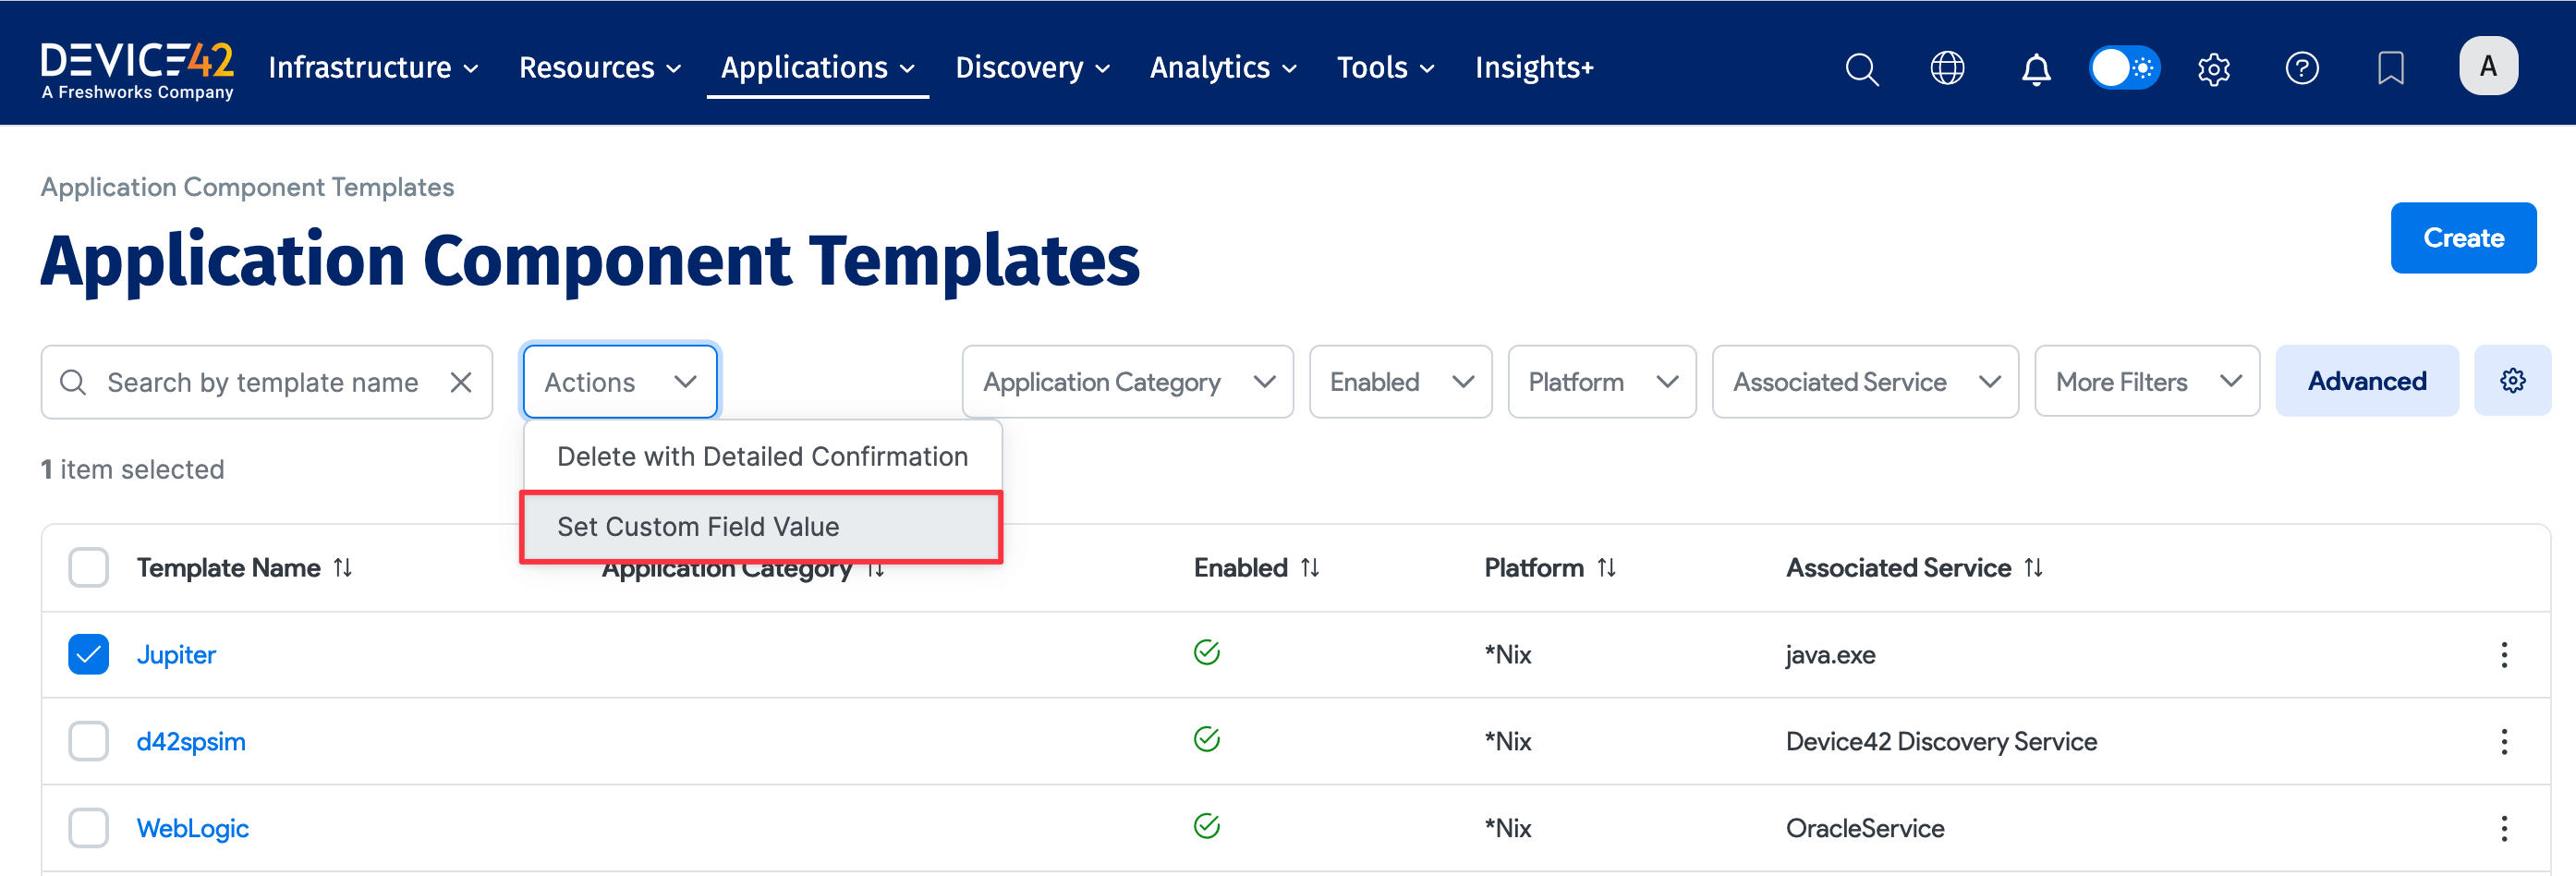
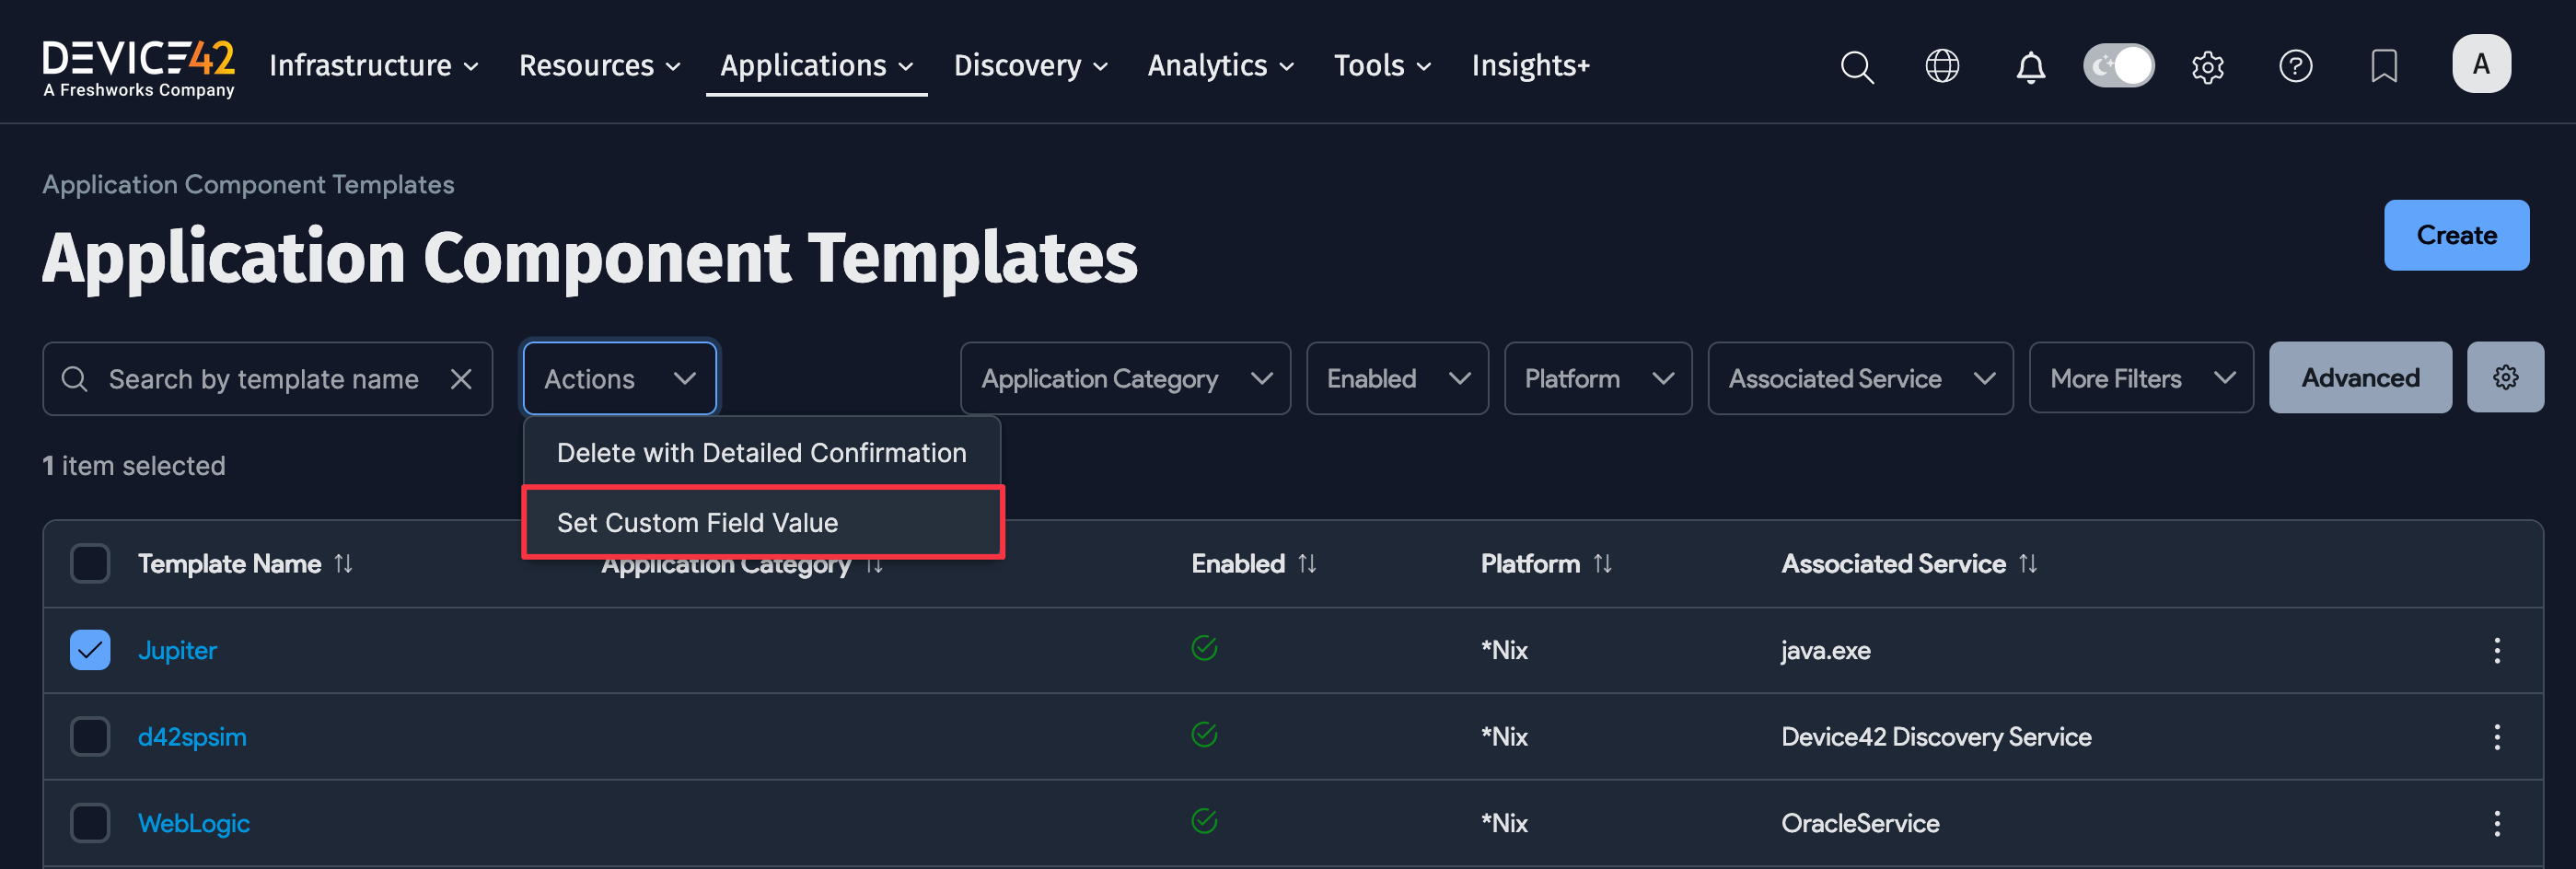
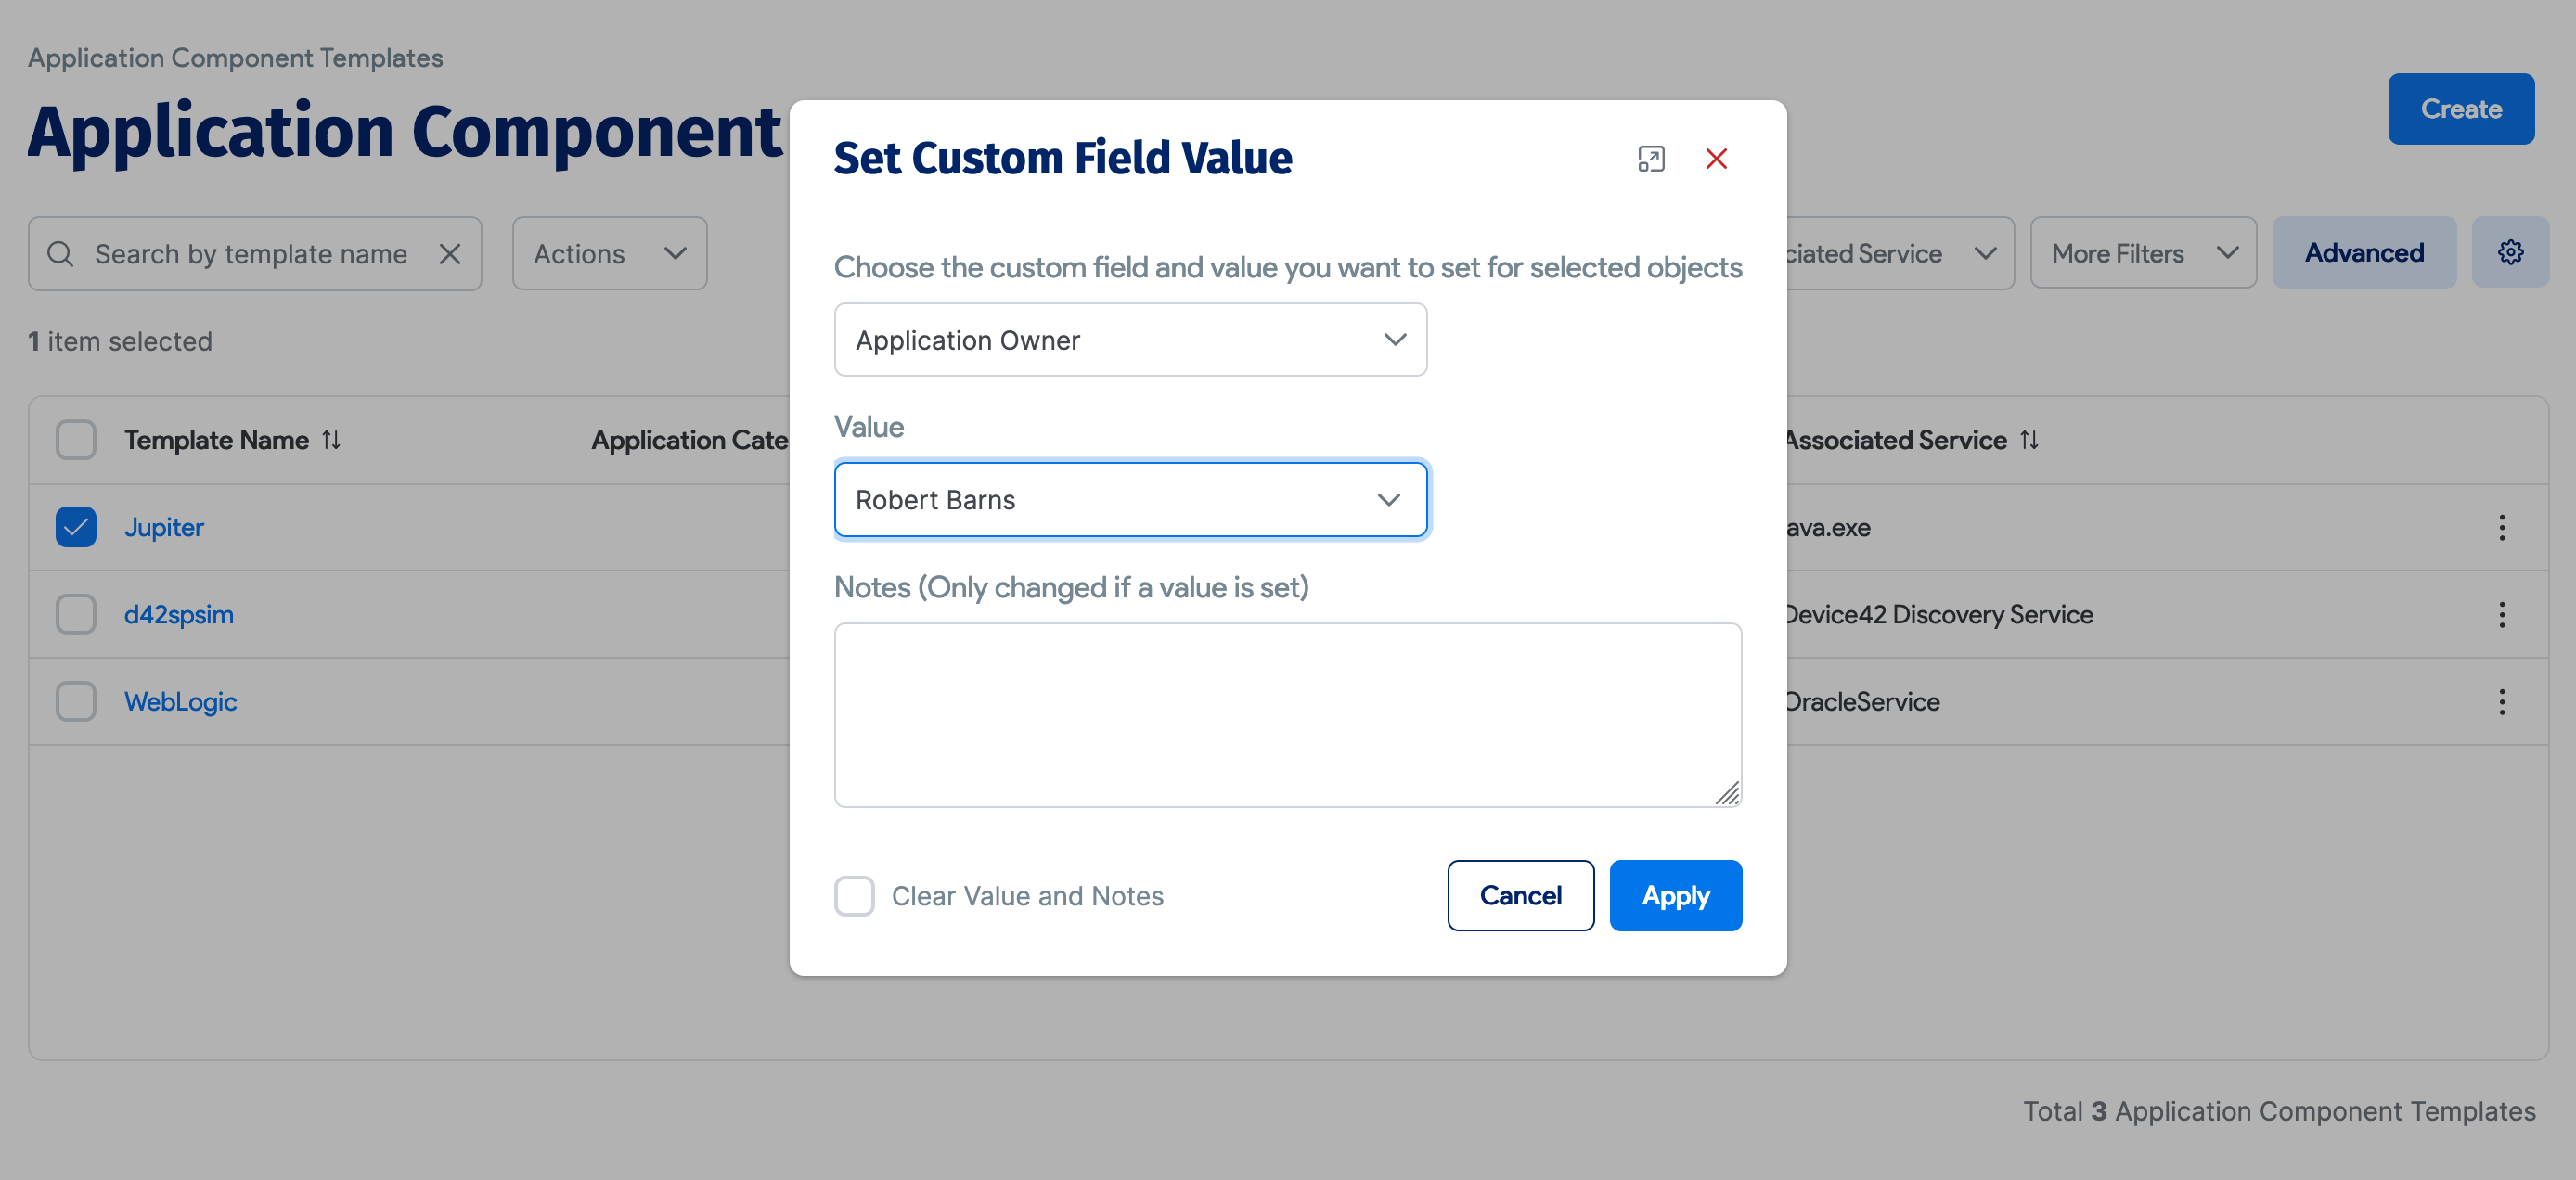
Select the templates to which you want to add the Custom Field values, then select Set Custom Field Value from the Actions menu.
-
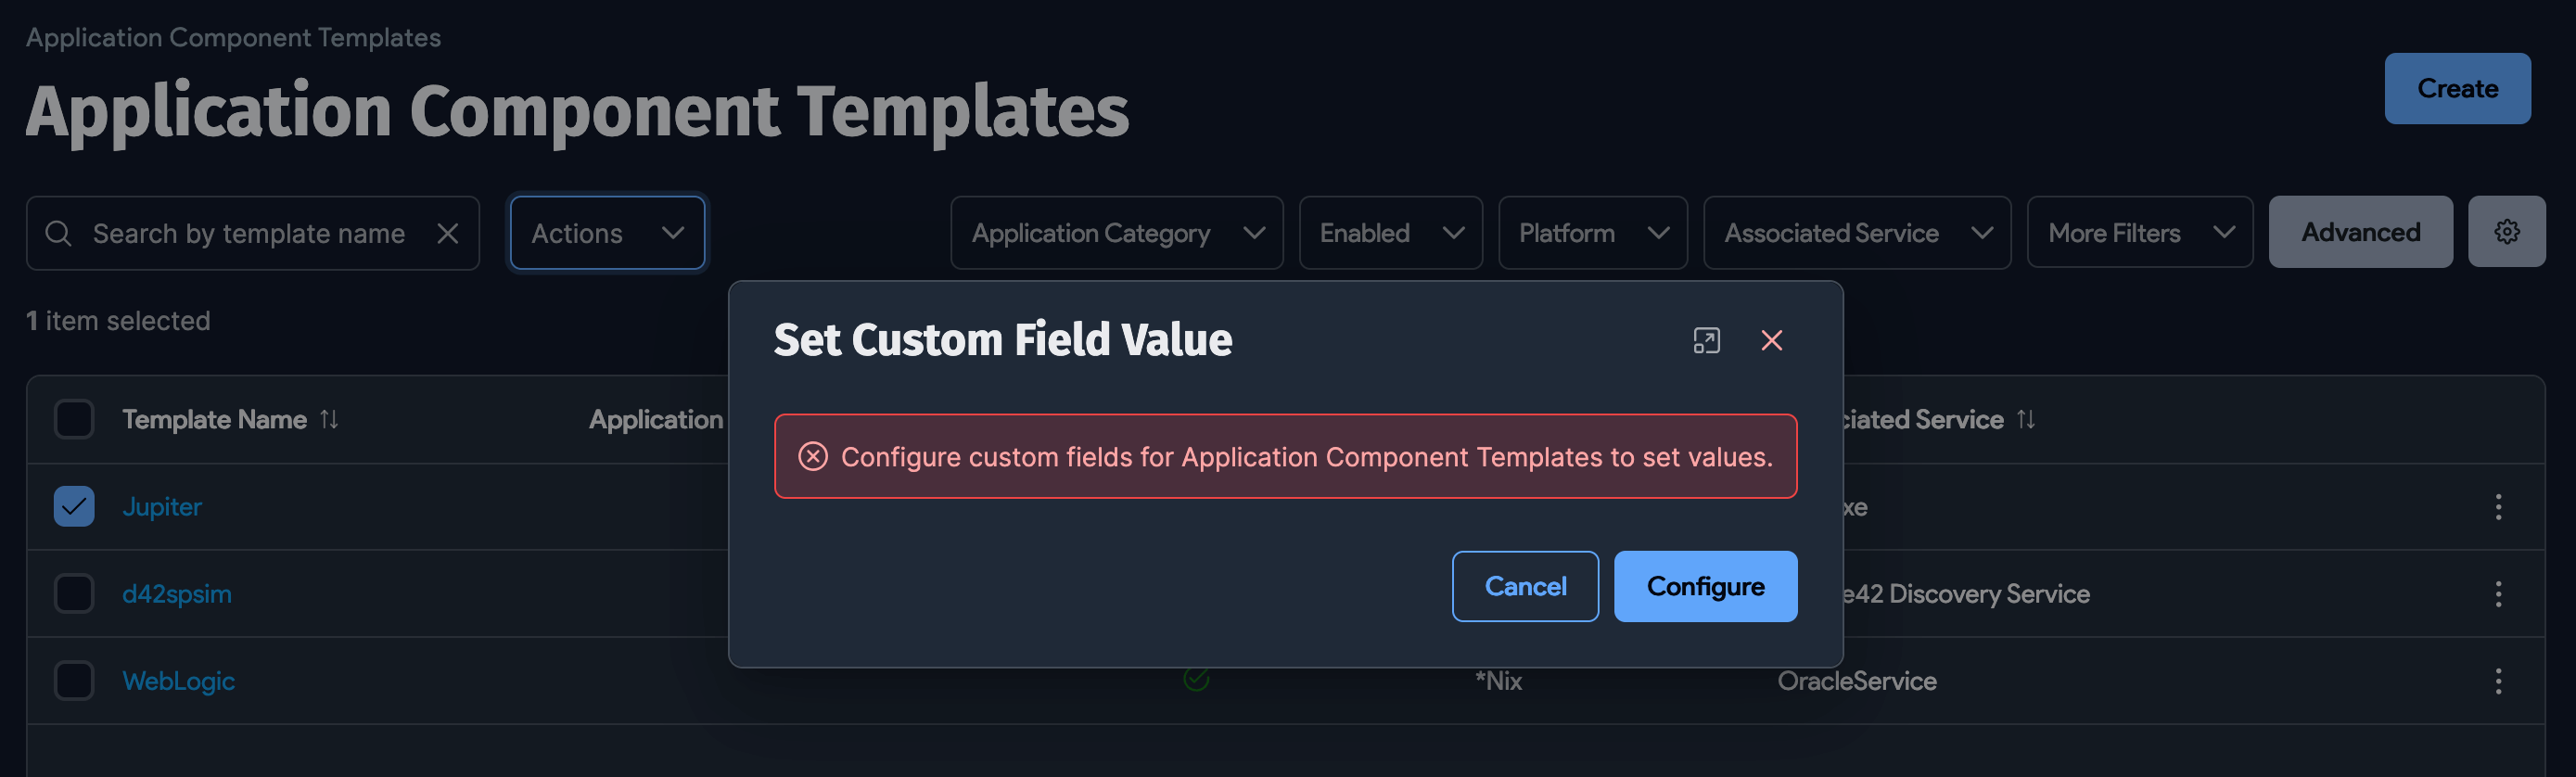
If you don't have any Custom Fields defined, you'll be guided to the Add Custom Field page where you can add one or several Custom Fields.

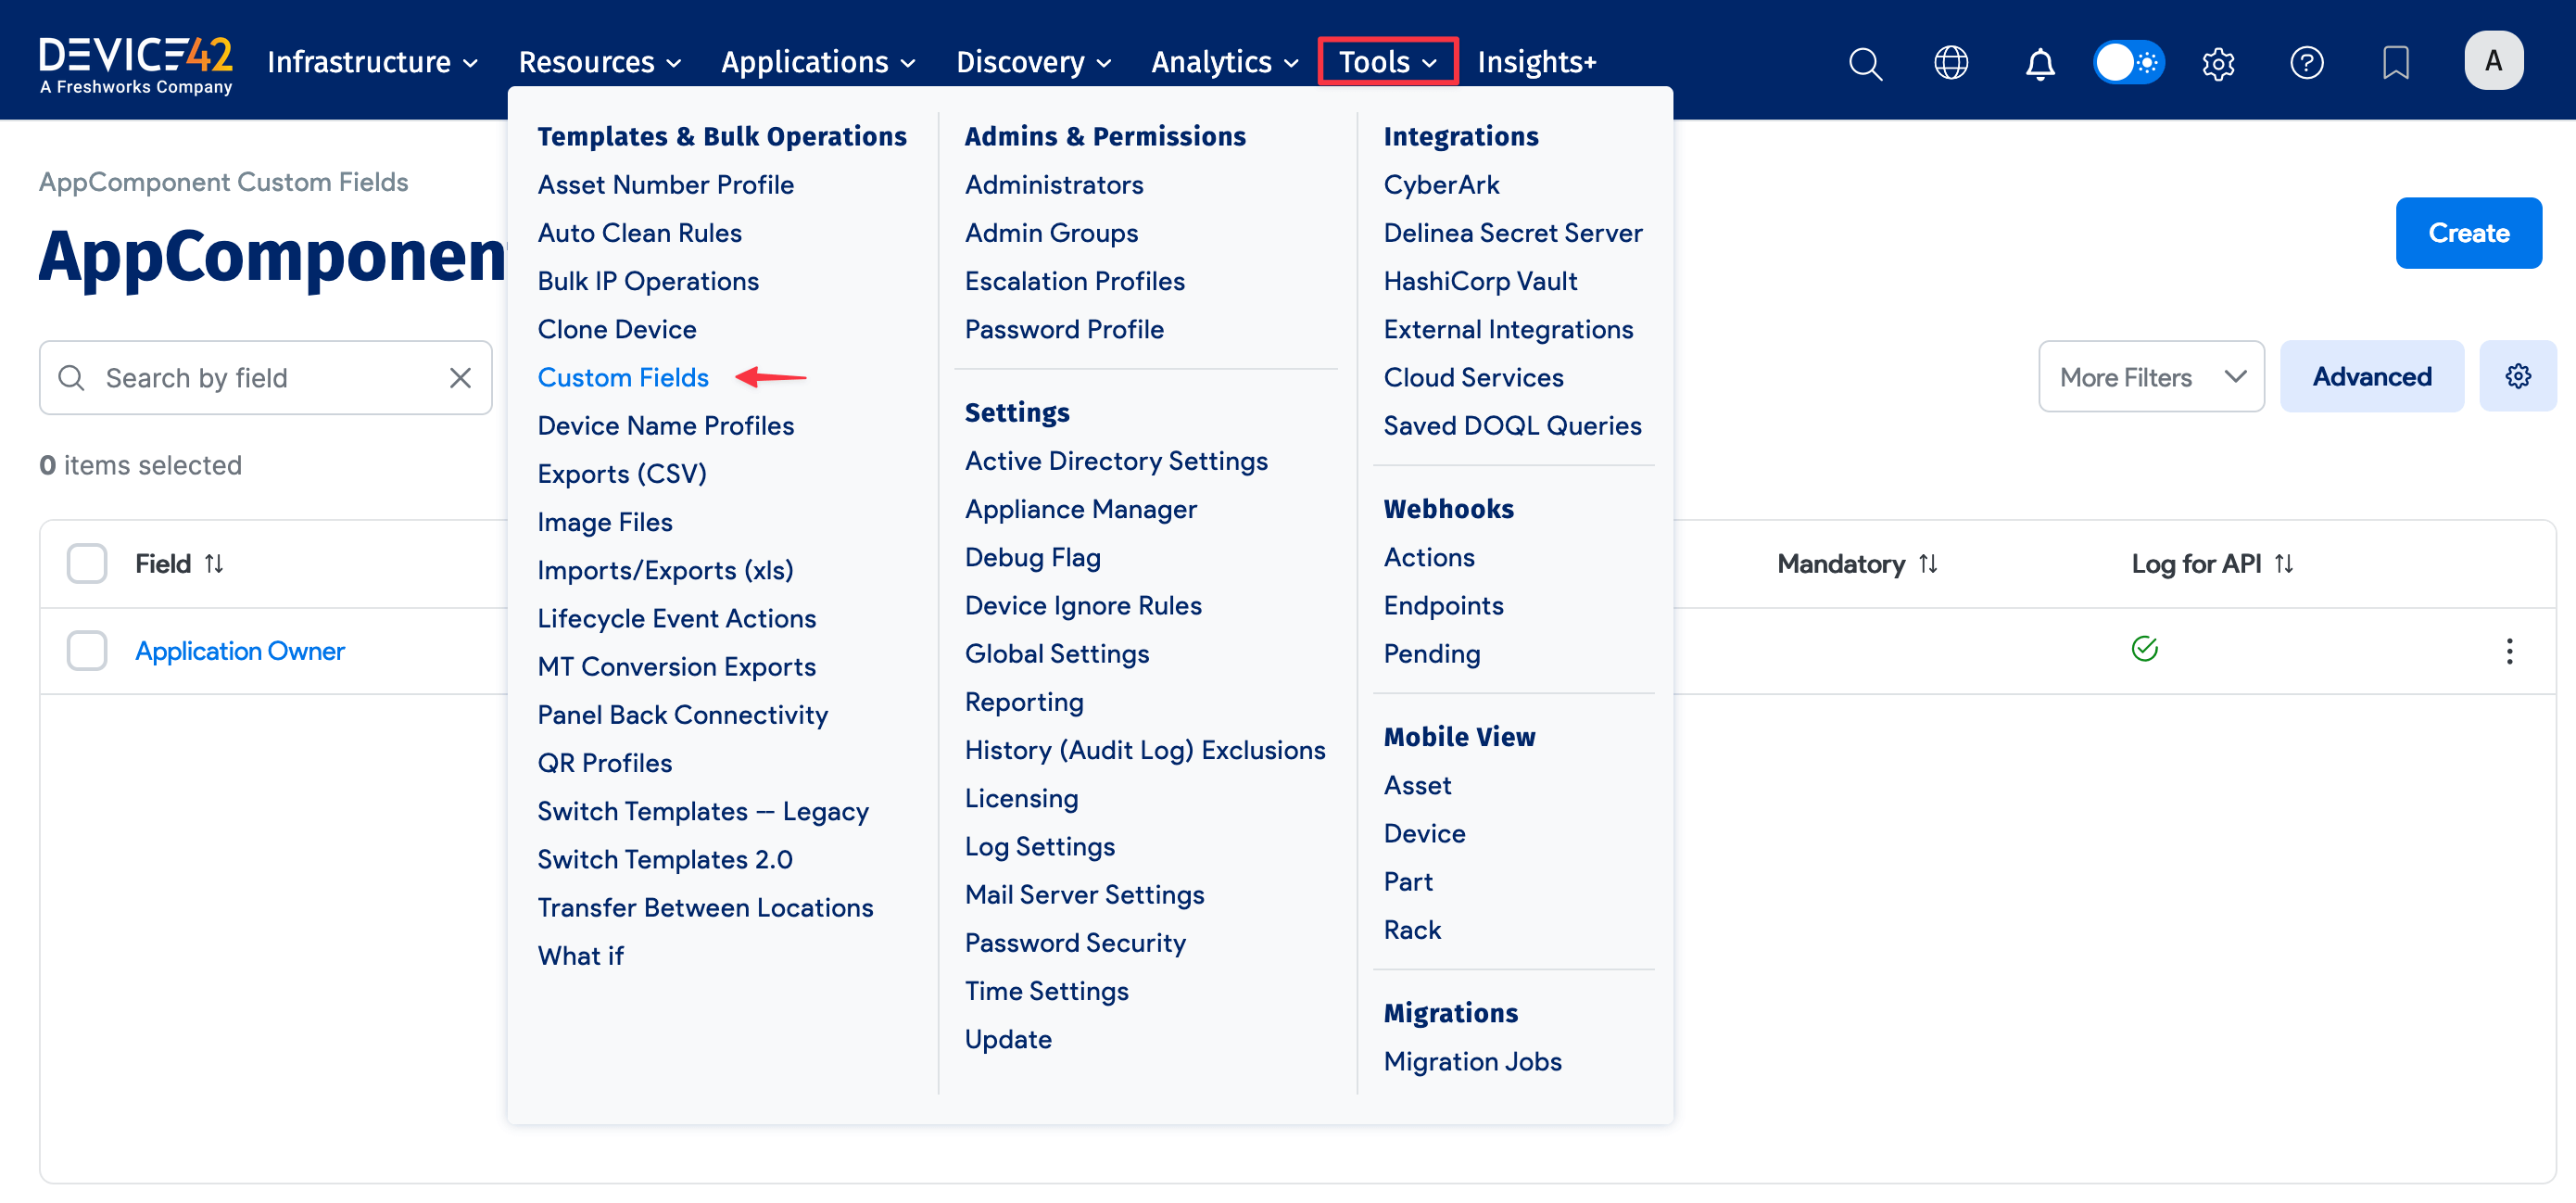
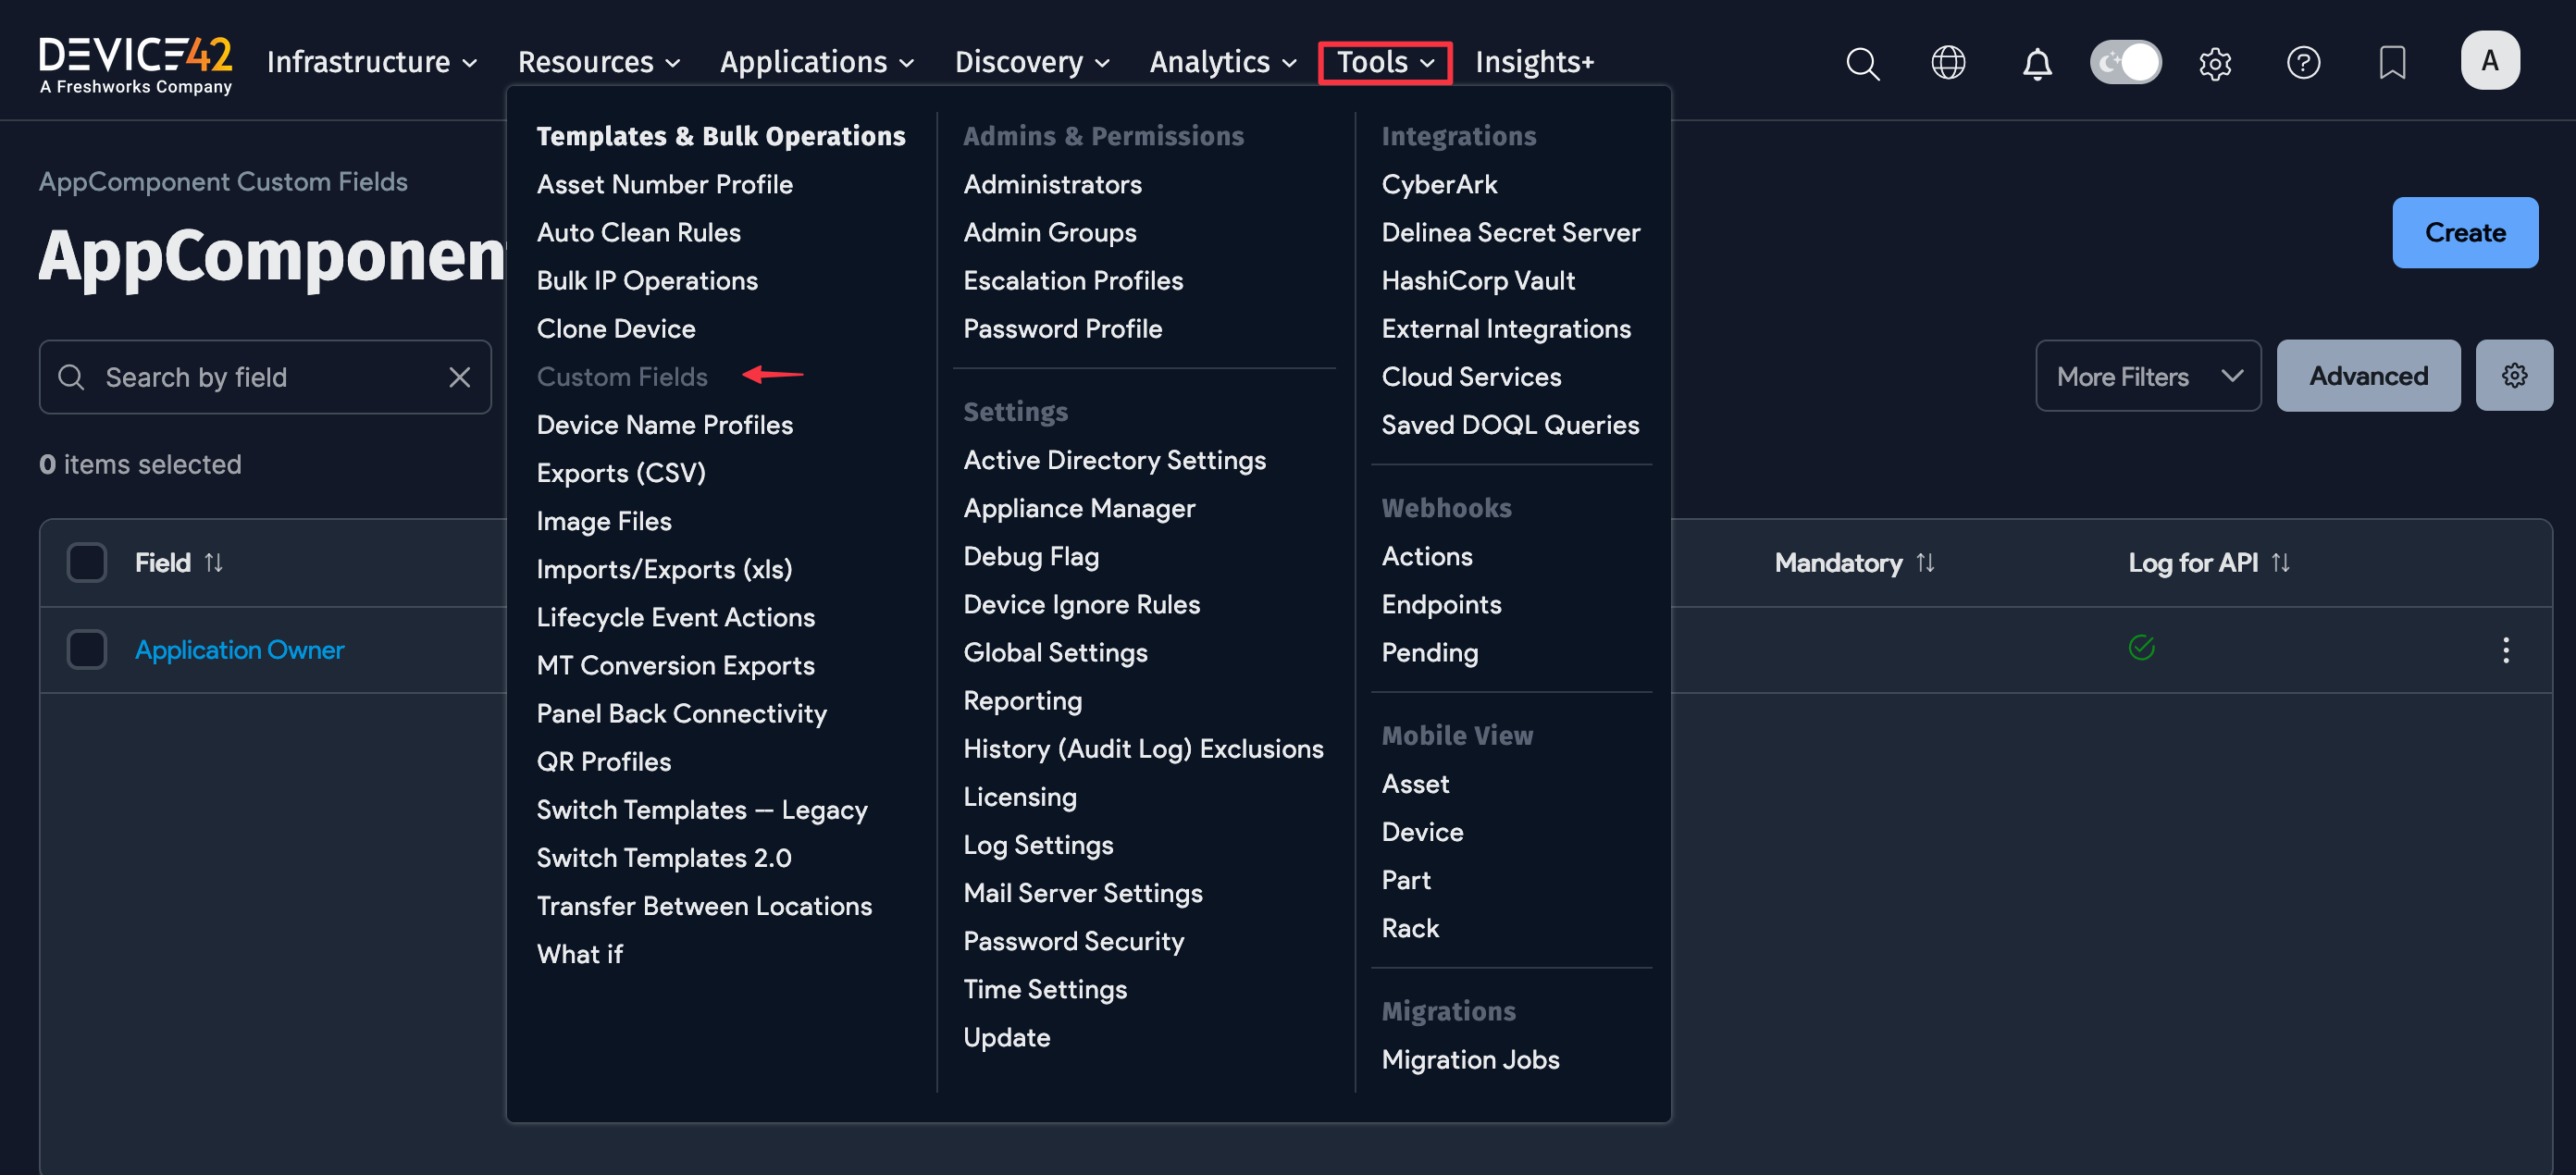
To create a new Custom Field, navigate to Tools > Custom Fields and click Create.
-
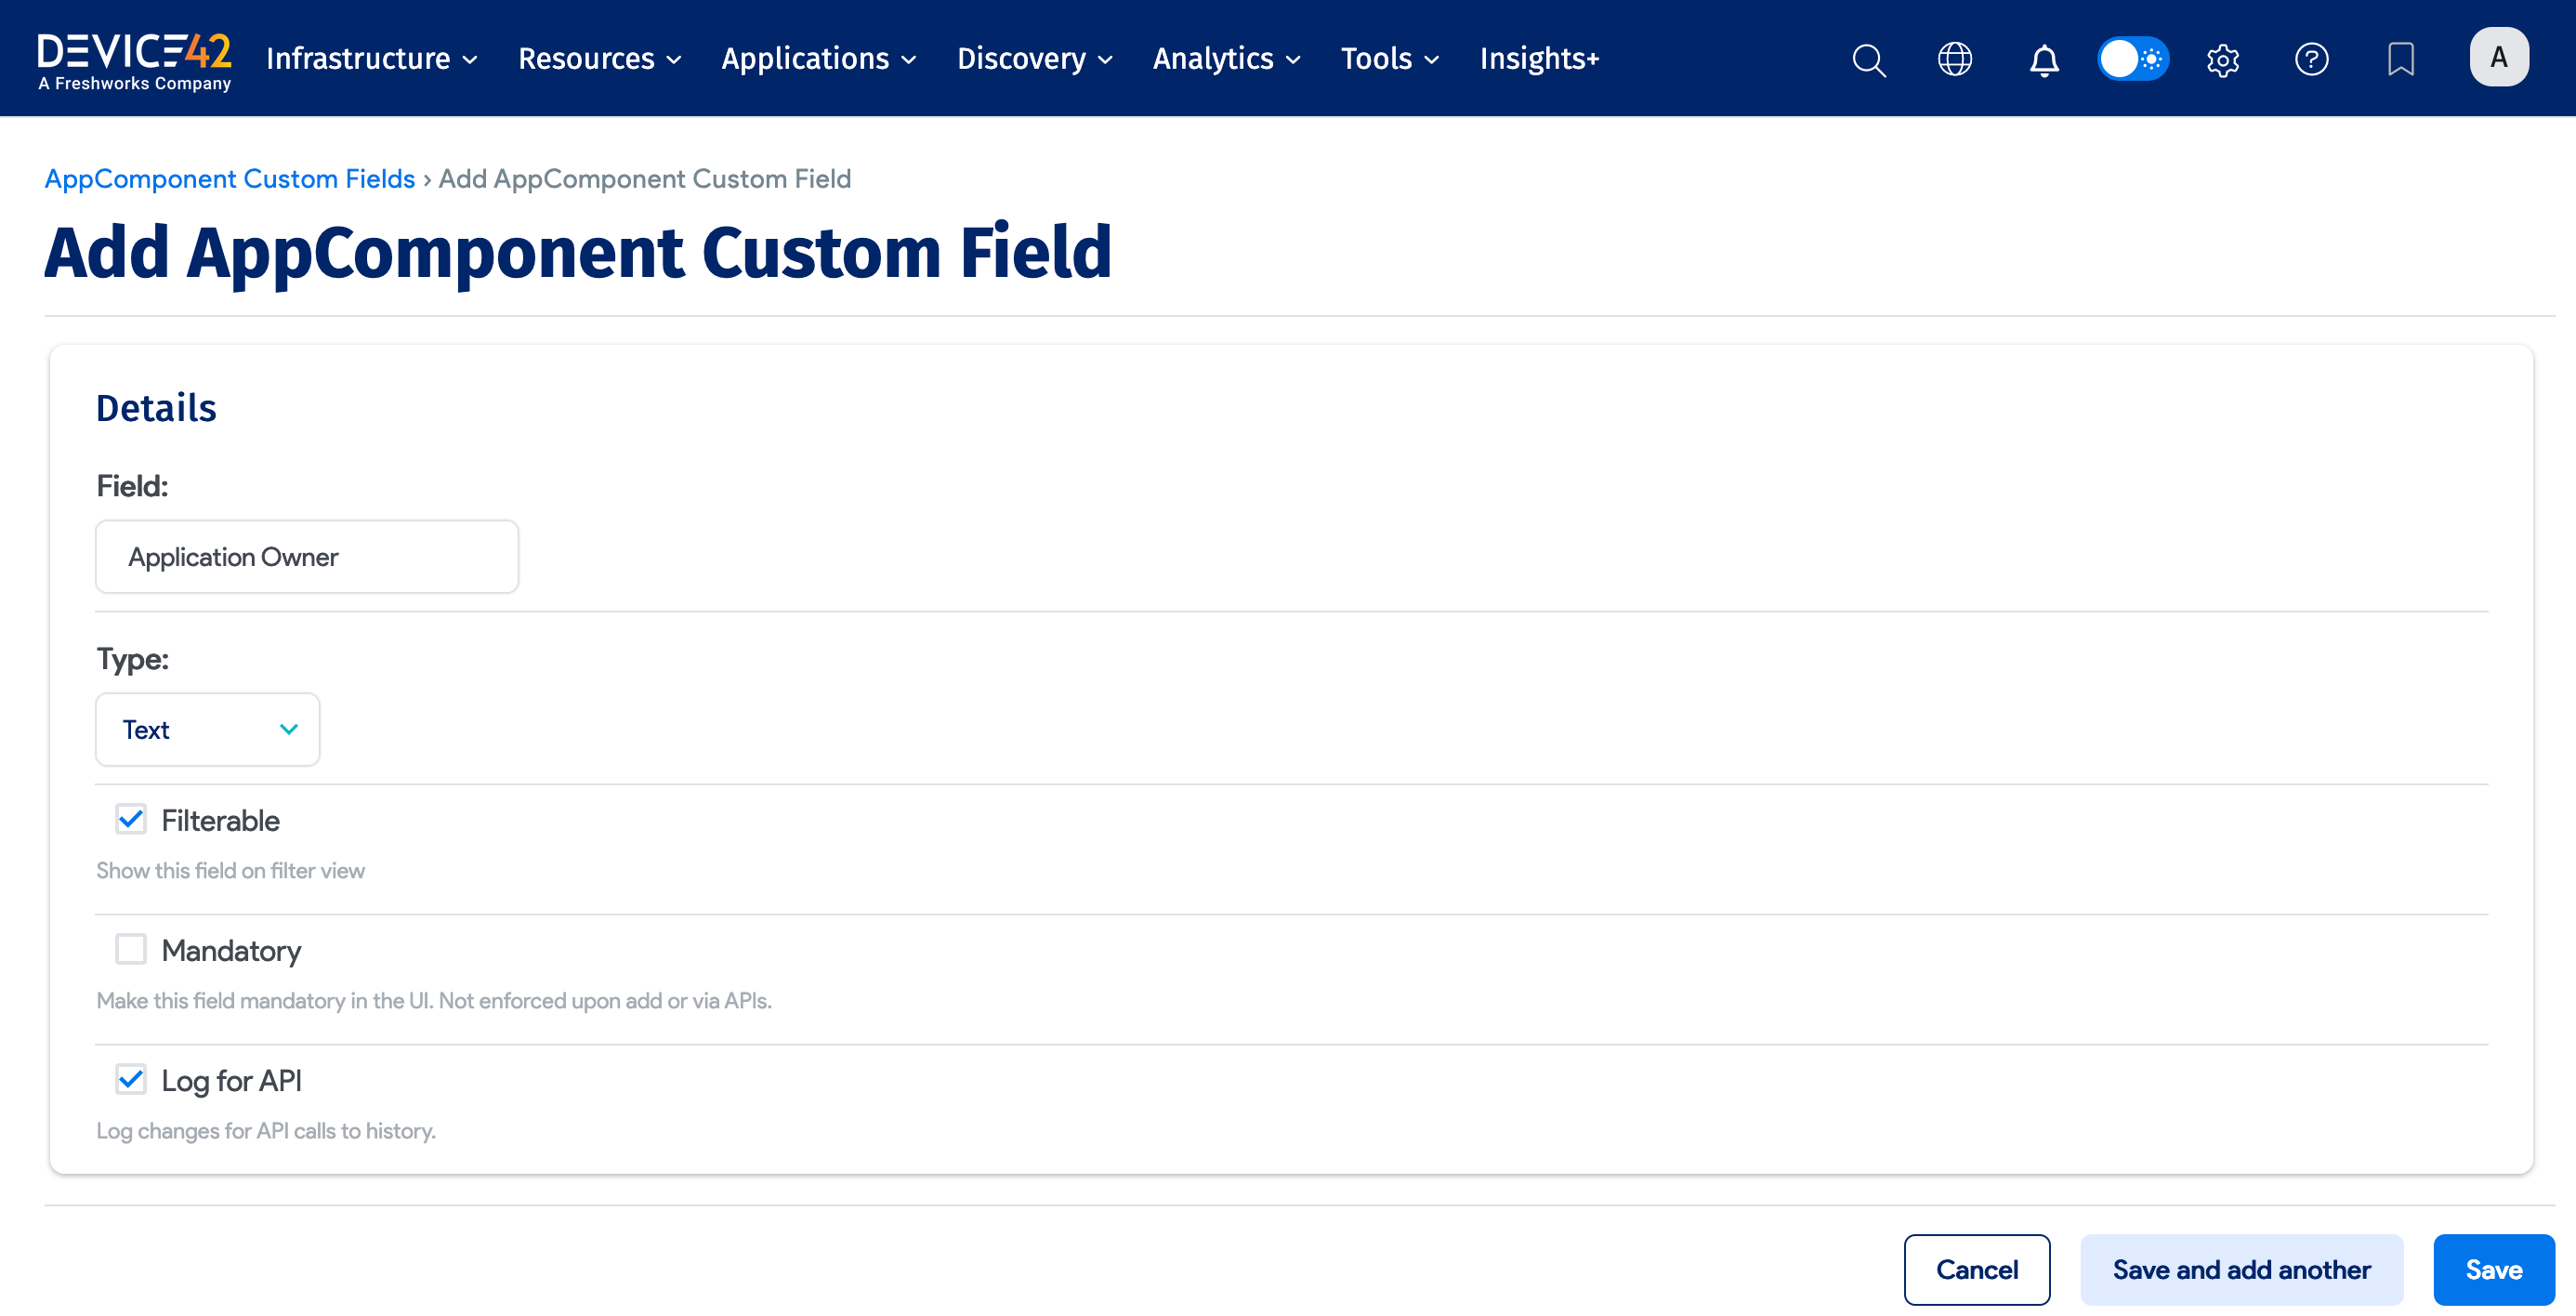
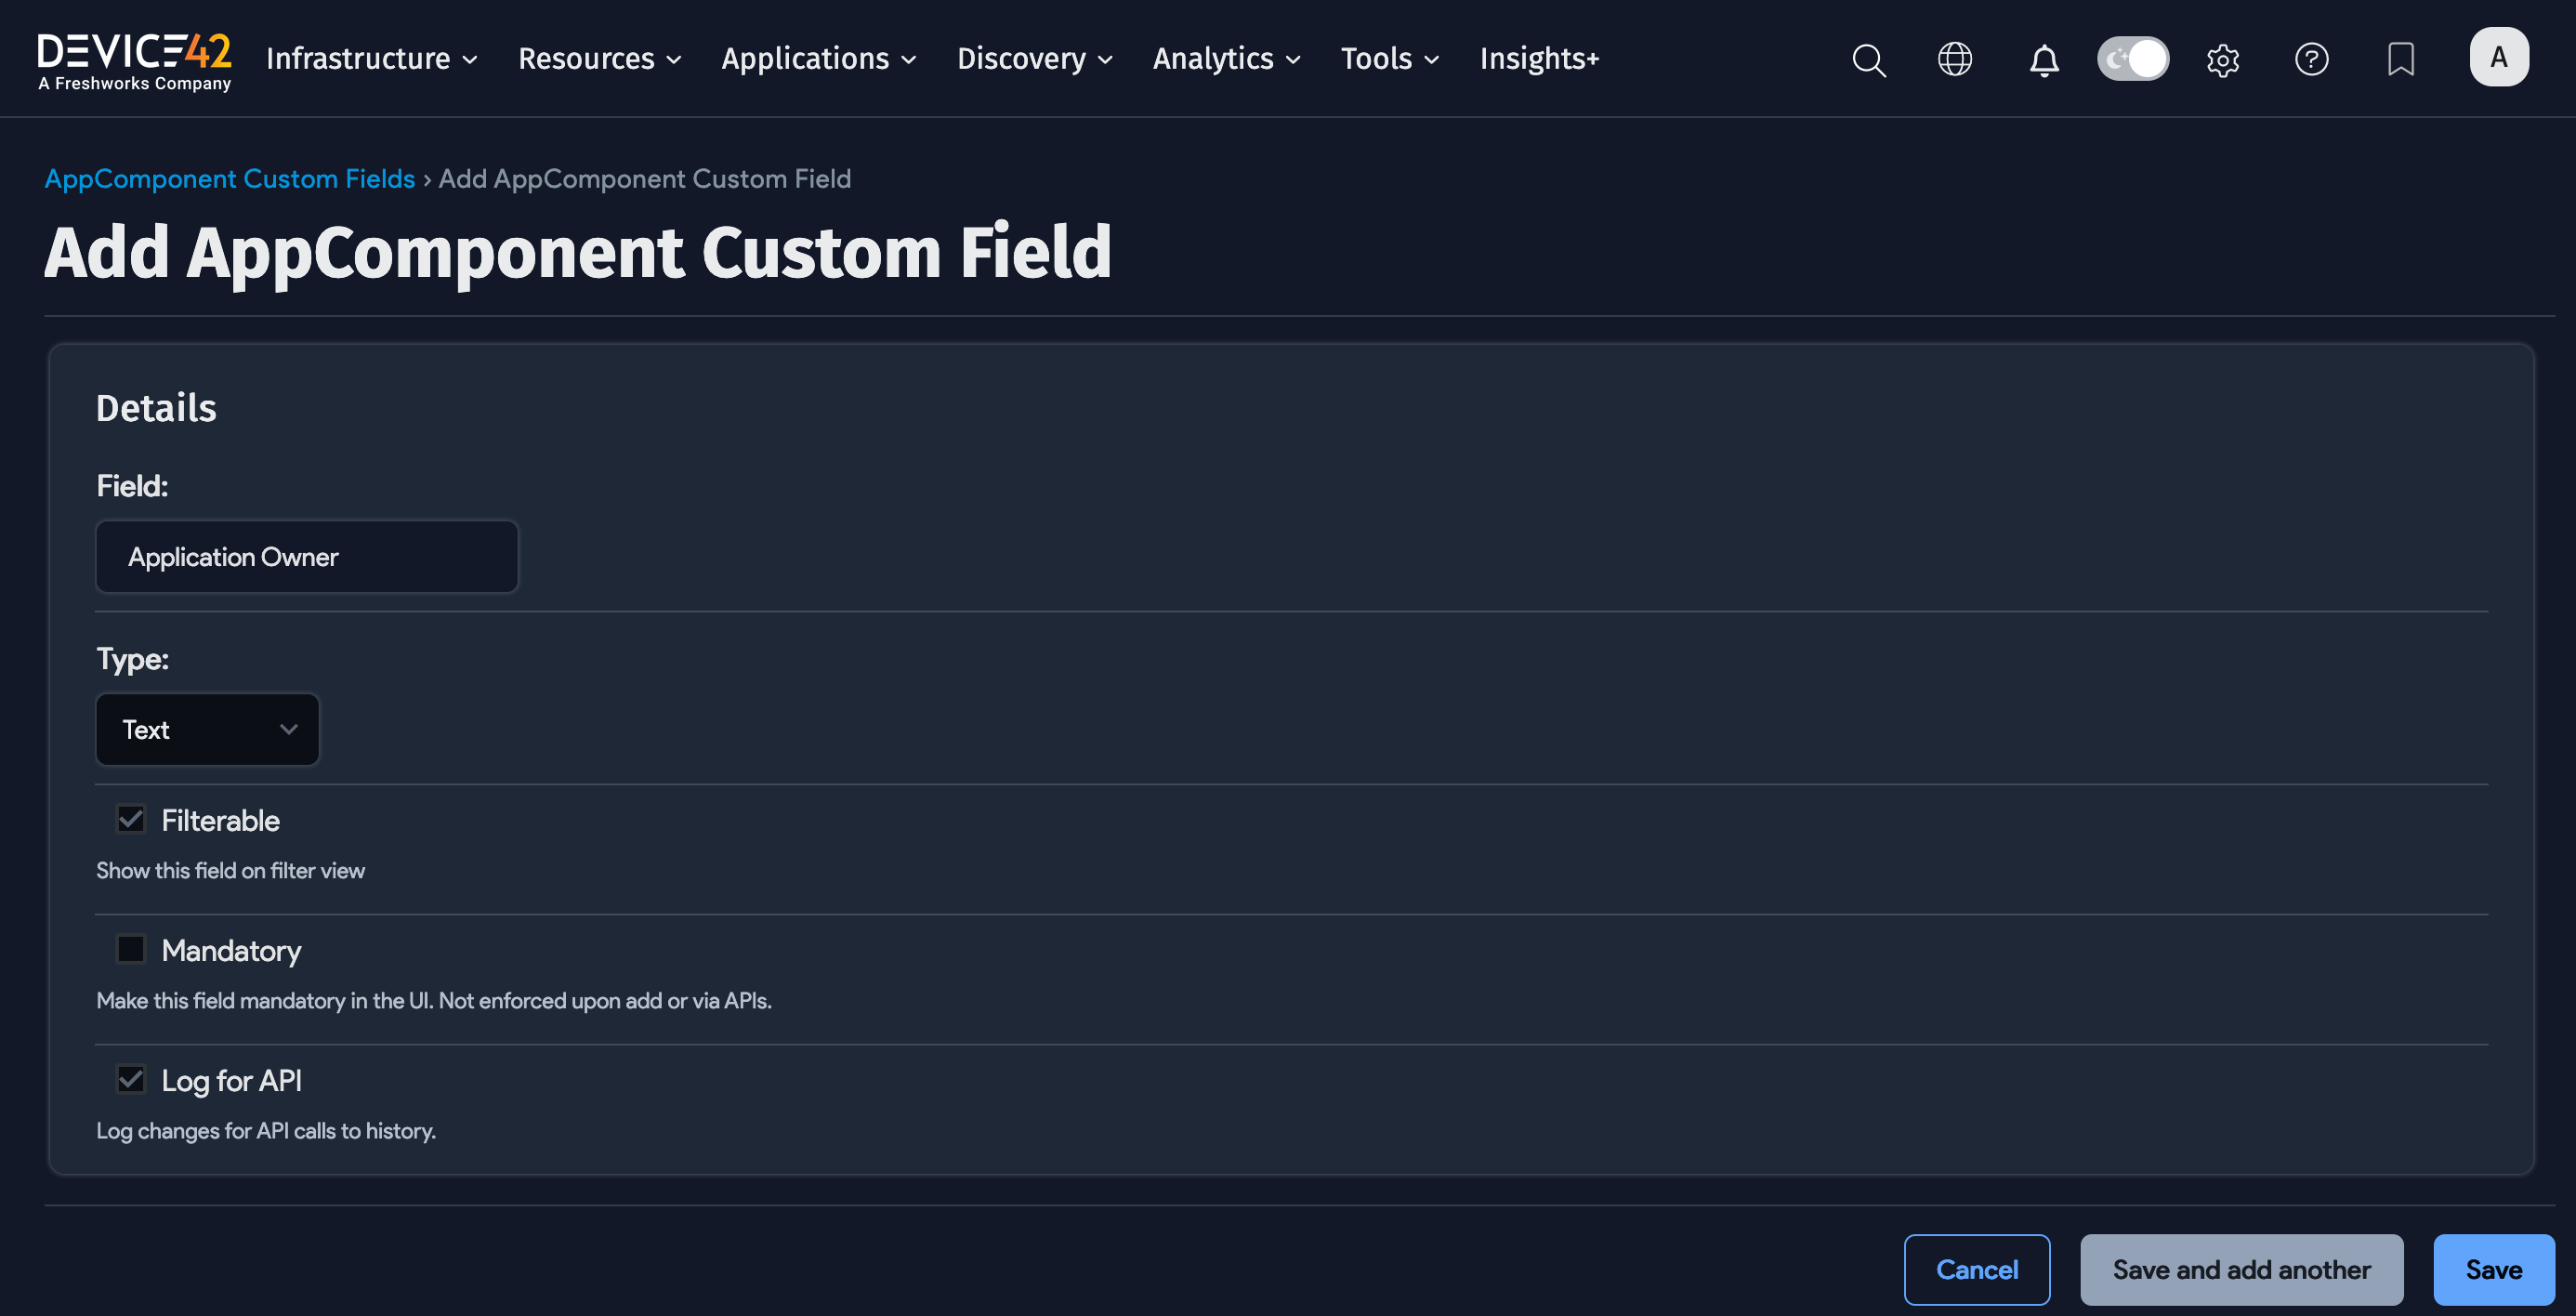
Configure the new Custom Field. Set the field type and use the checkboxes to specify whether it's Mandatory, whether it's Filterable, and whether it will Log for API (meaning changes for API calls are logged to history).
-
To add the Custom Field values, select the templates you want to edit and then select Set Custom Field Value from the Actions menu. Enter the Custom Fields values you want for the Application Component. You can also add Notes for each Custom Field.
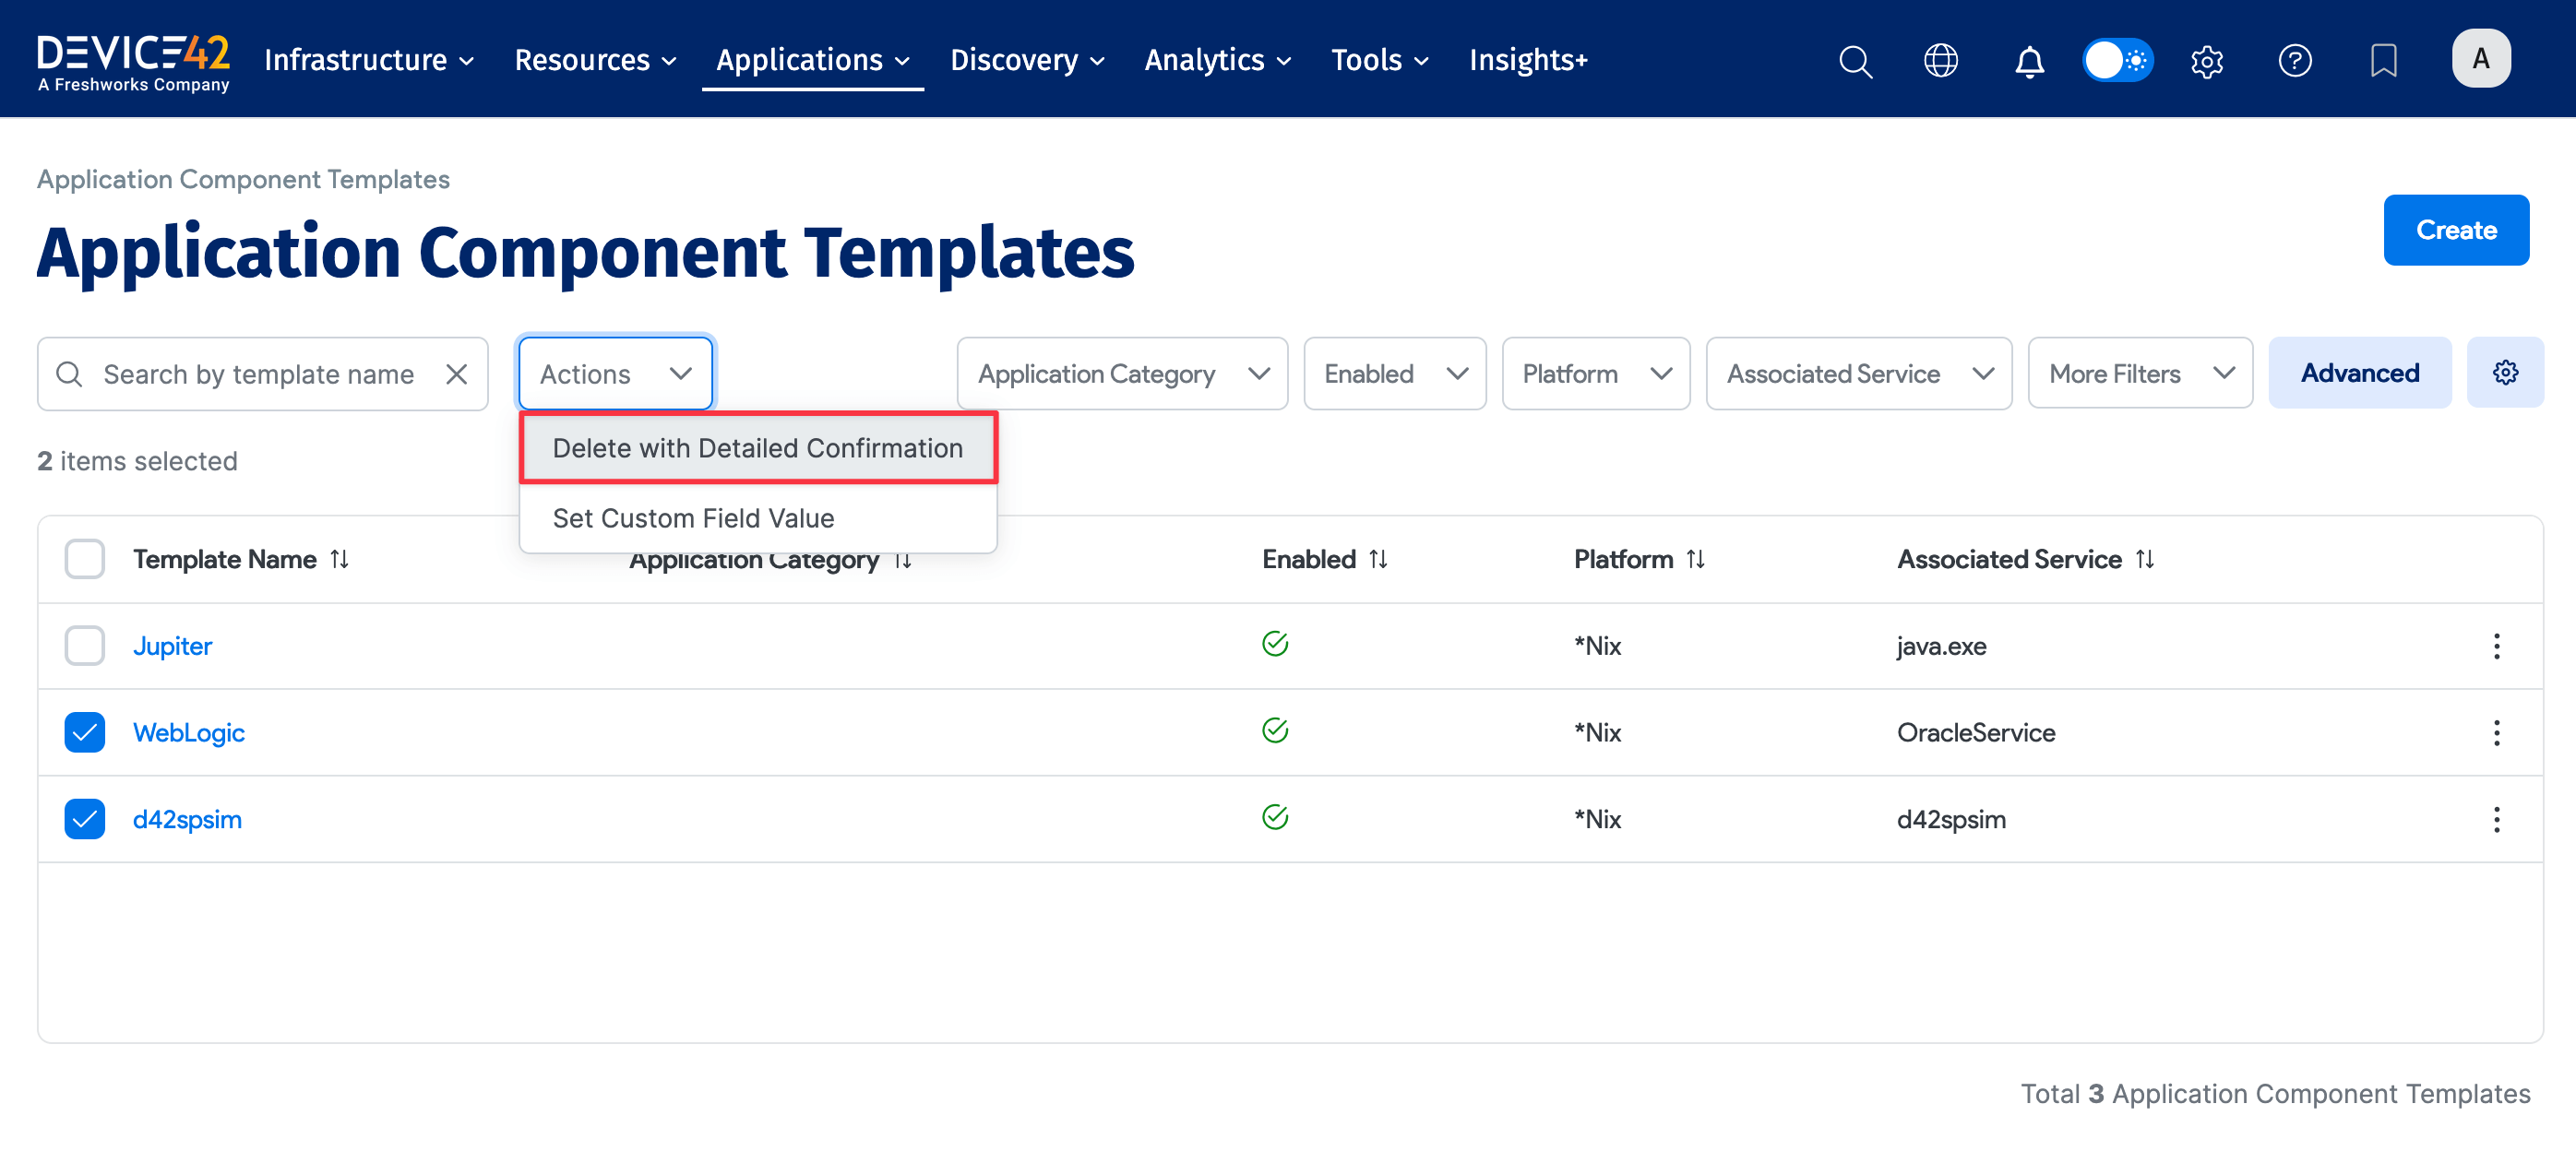
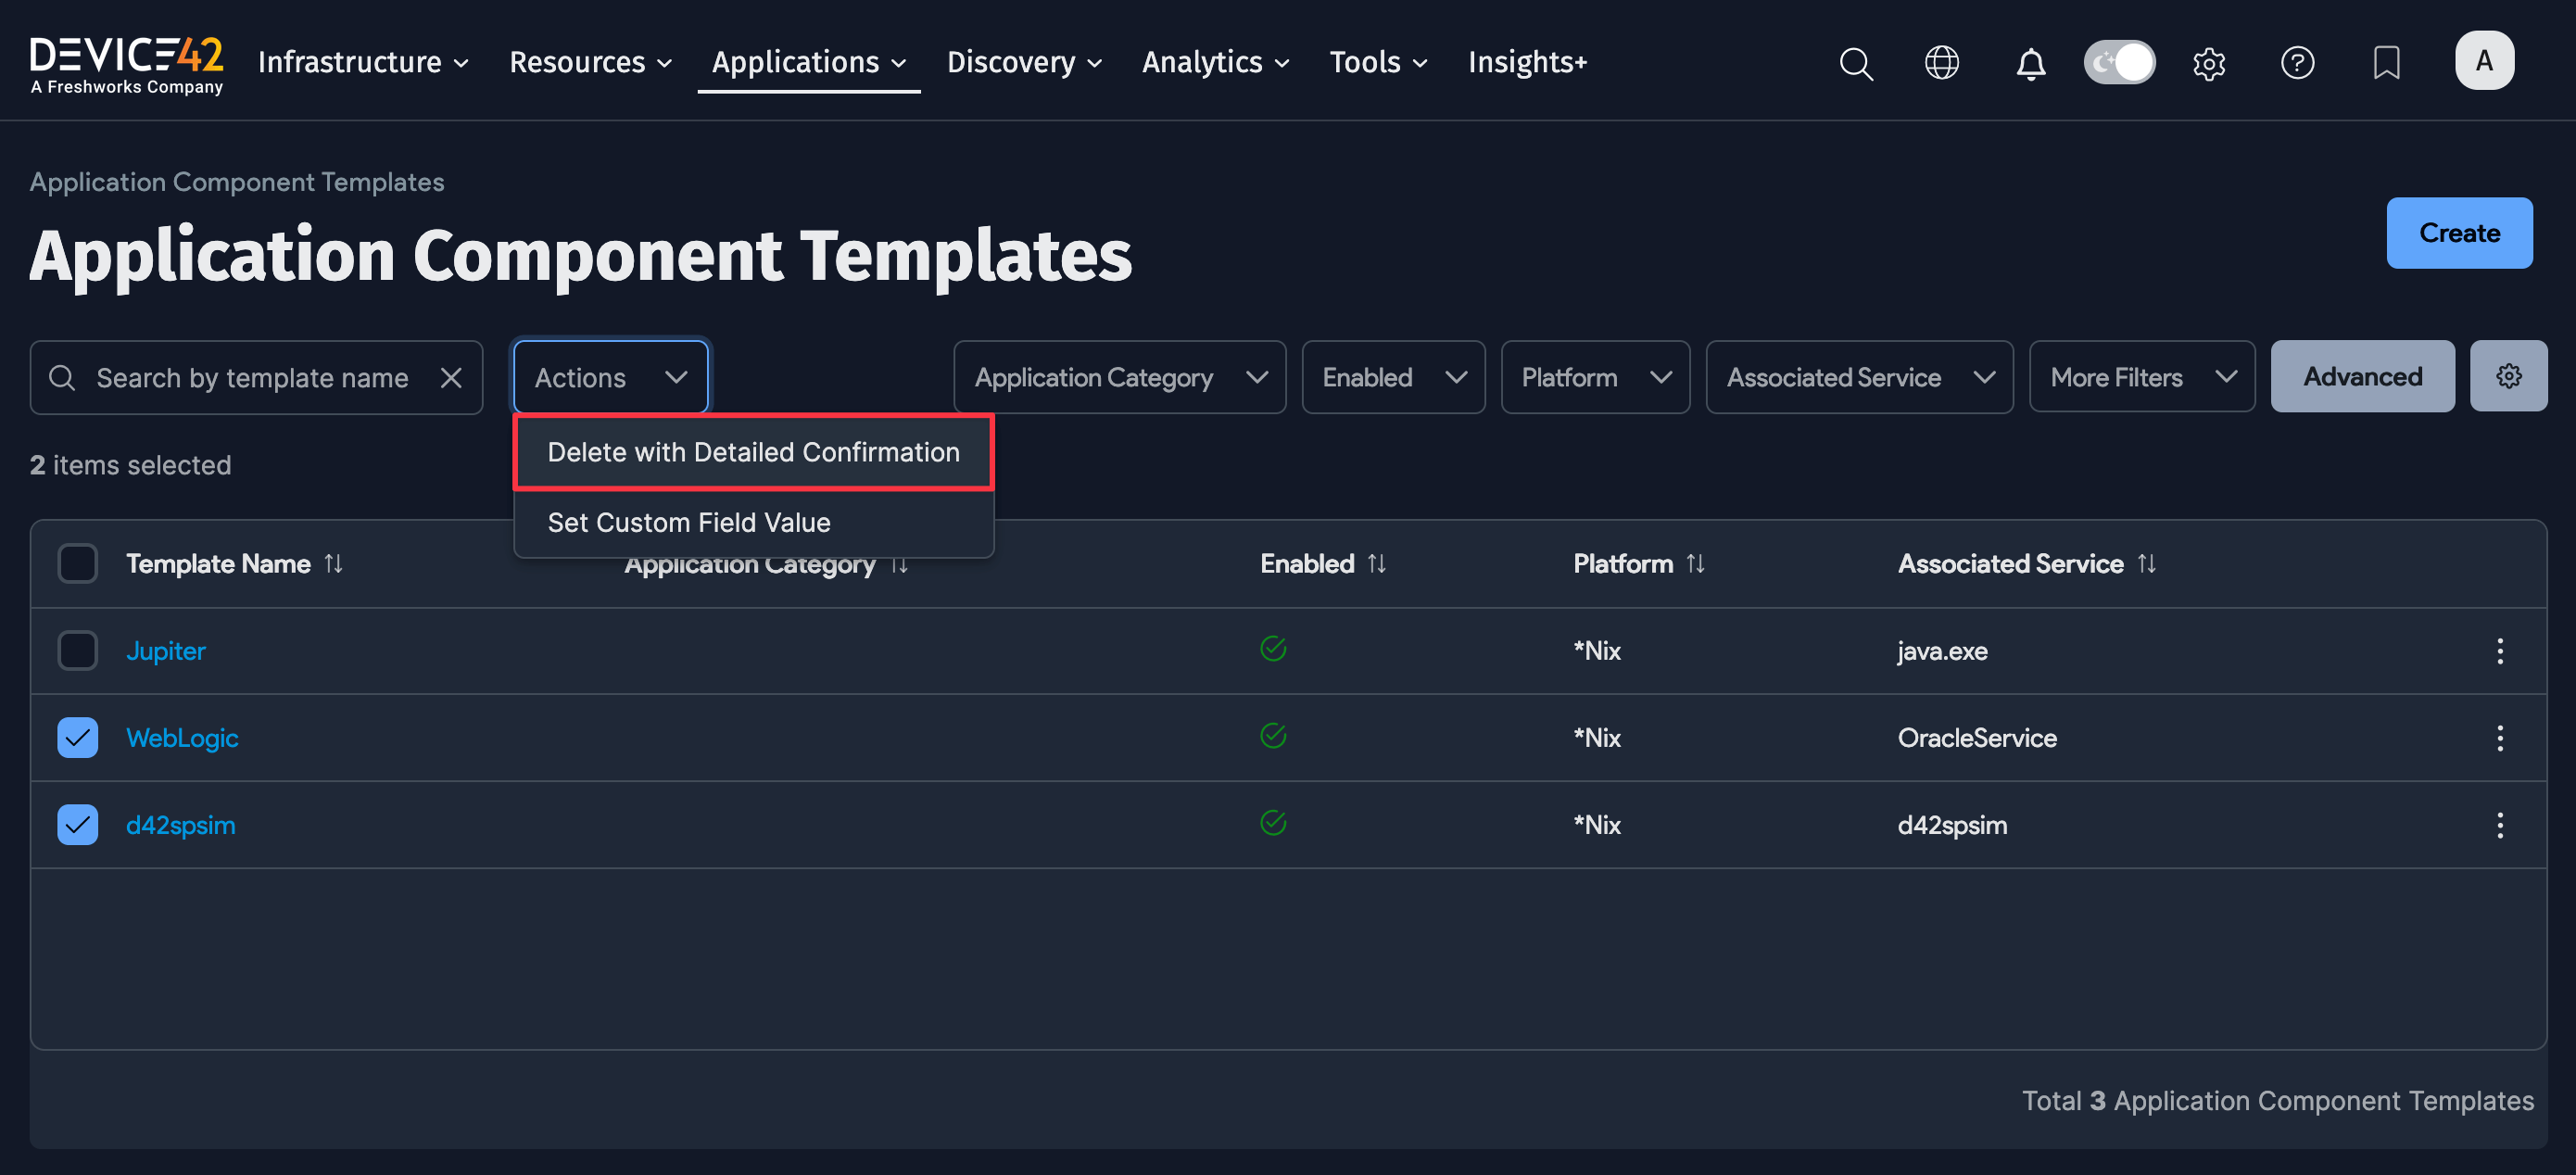
Delete Application Component Templates
-
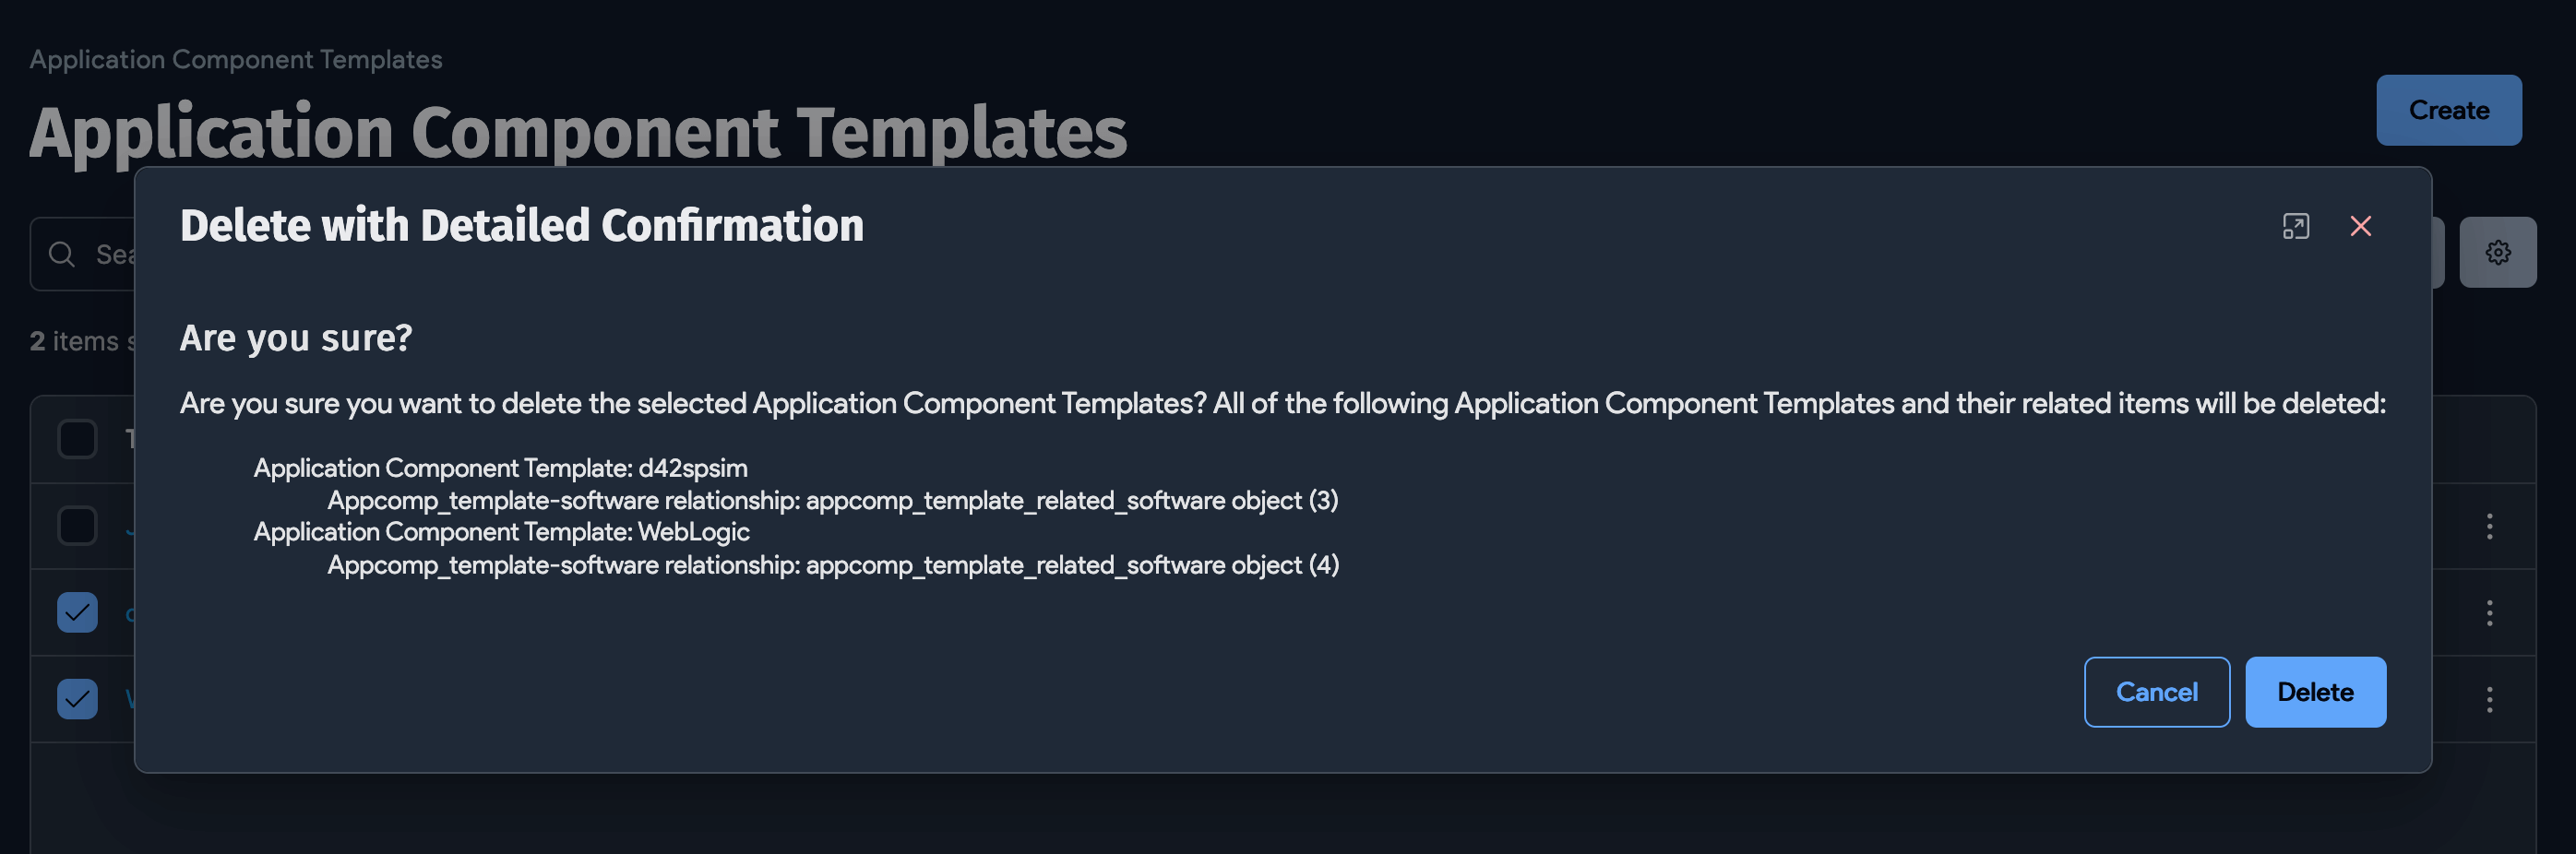
Select one or more templates from the list page, then select Delete with Detailed Confirmation from the Actions menu.
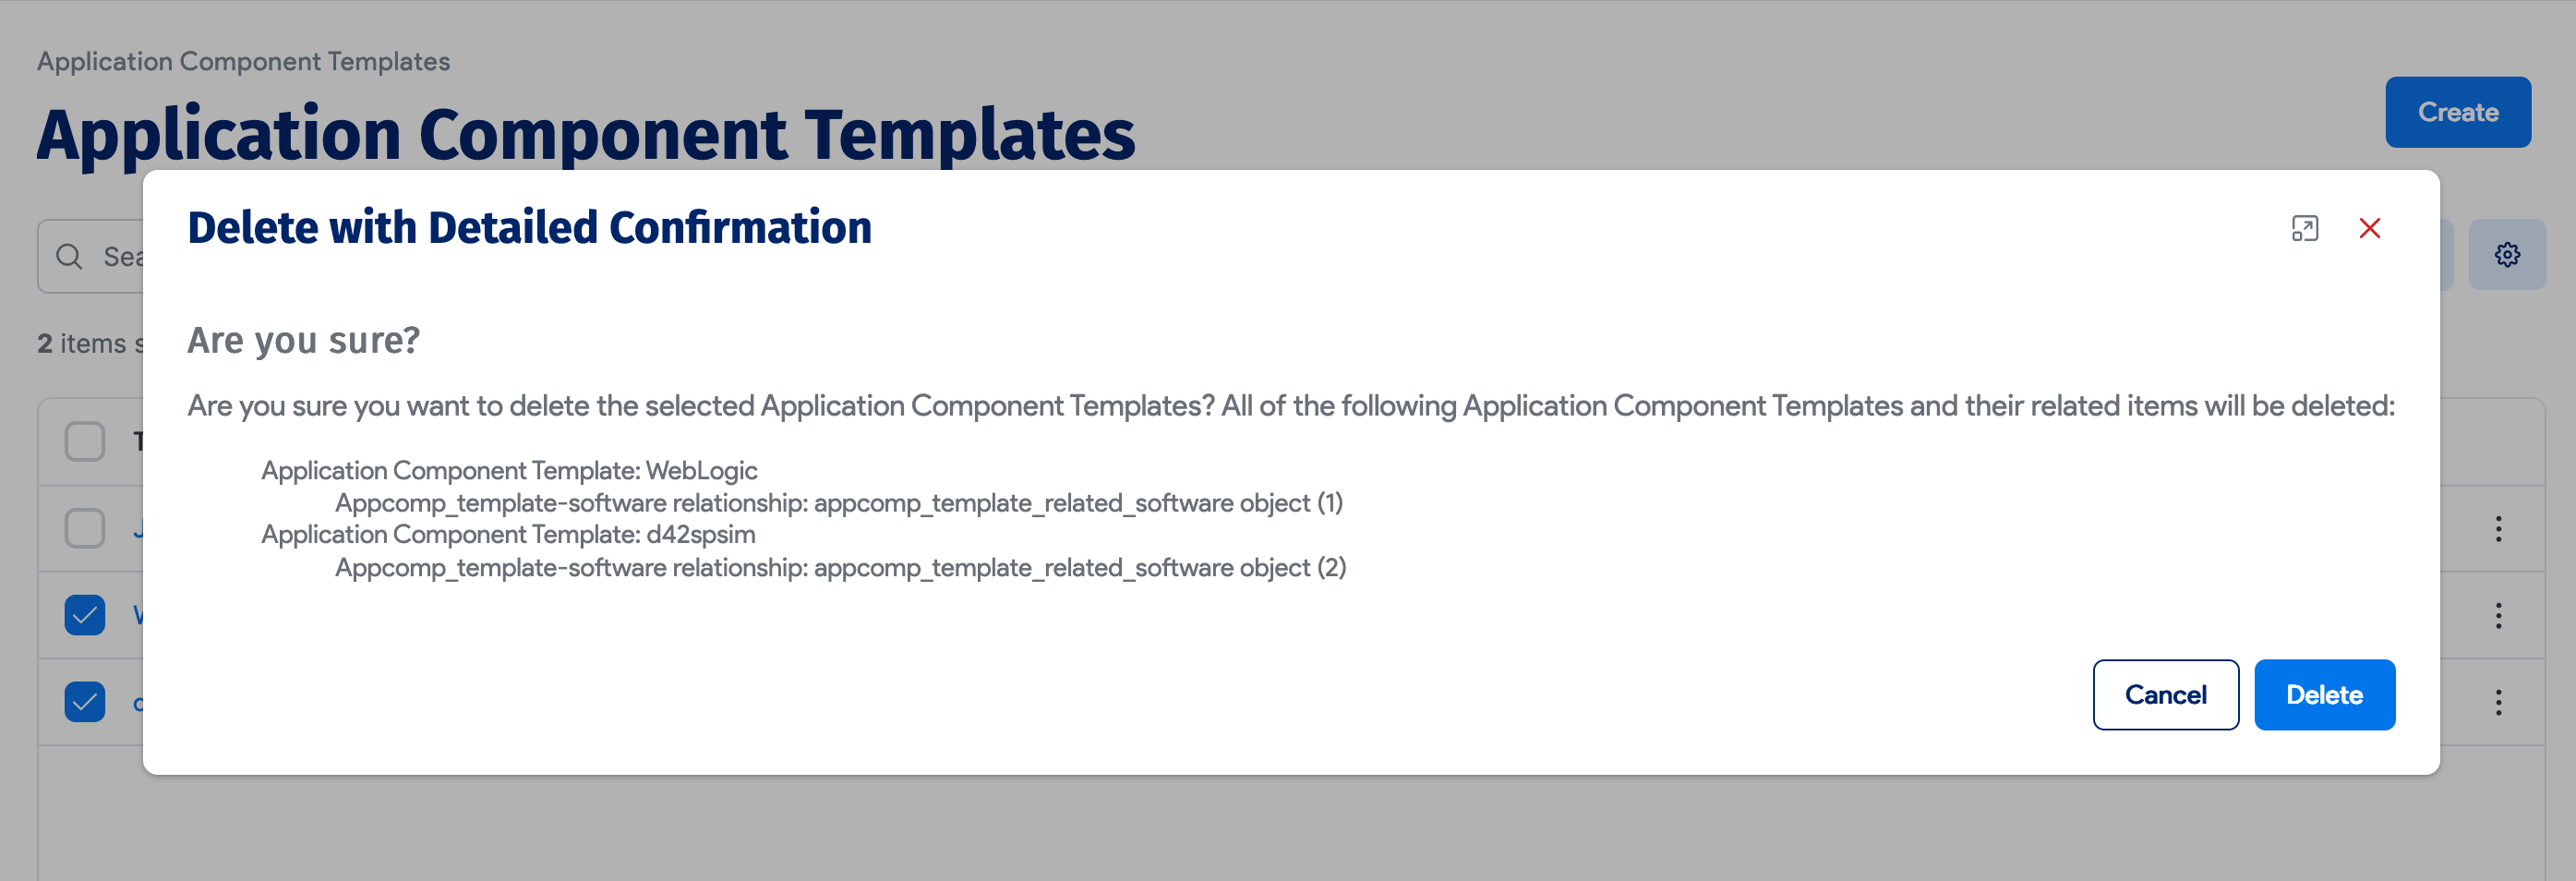
-
Click Delete to delete the template or Cancel to keep it.
Autodiscovery Options
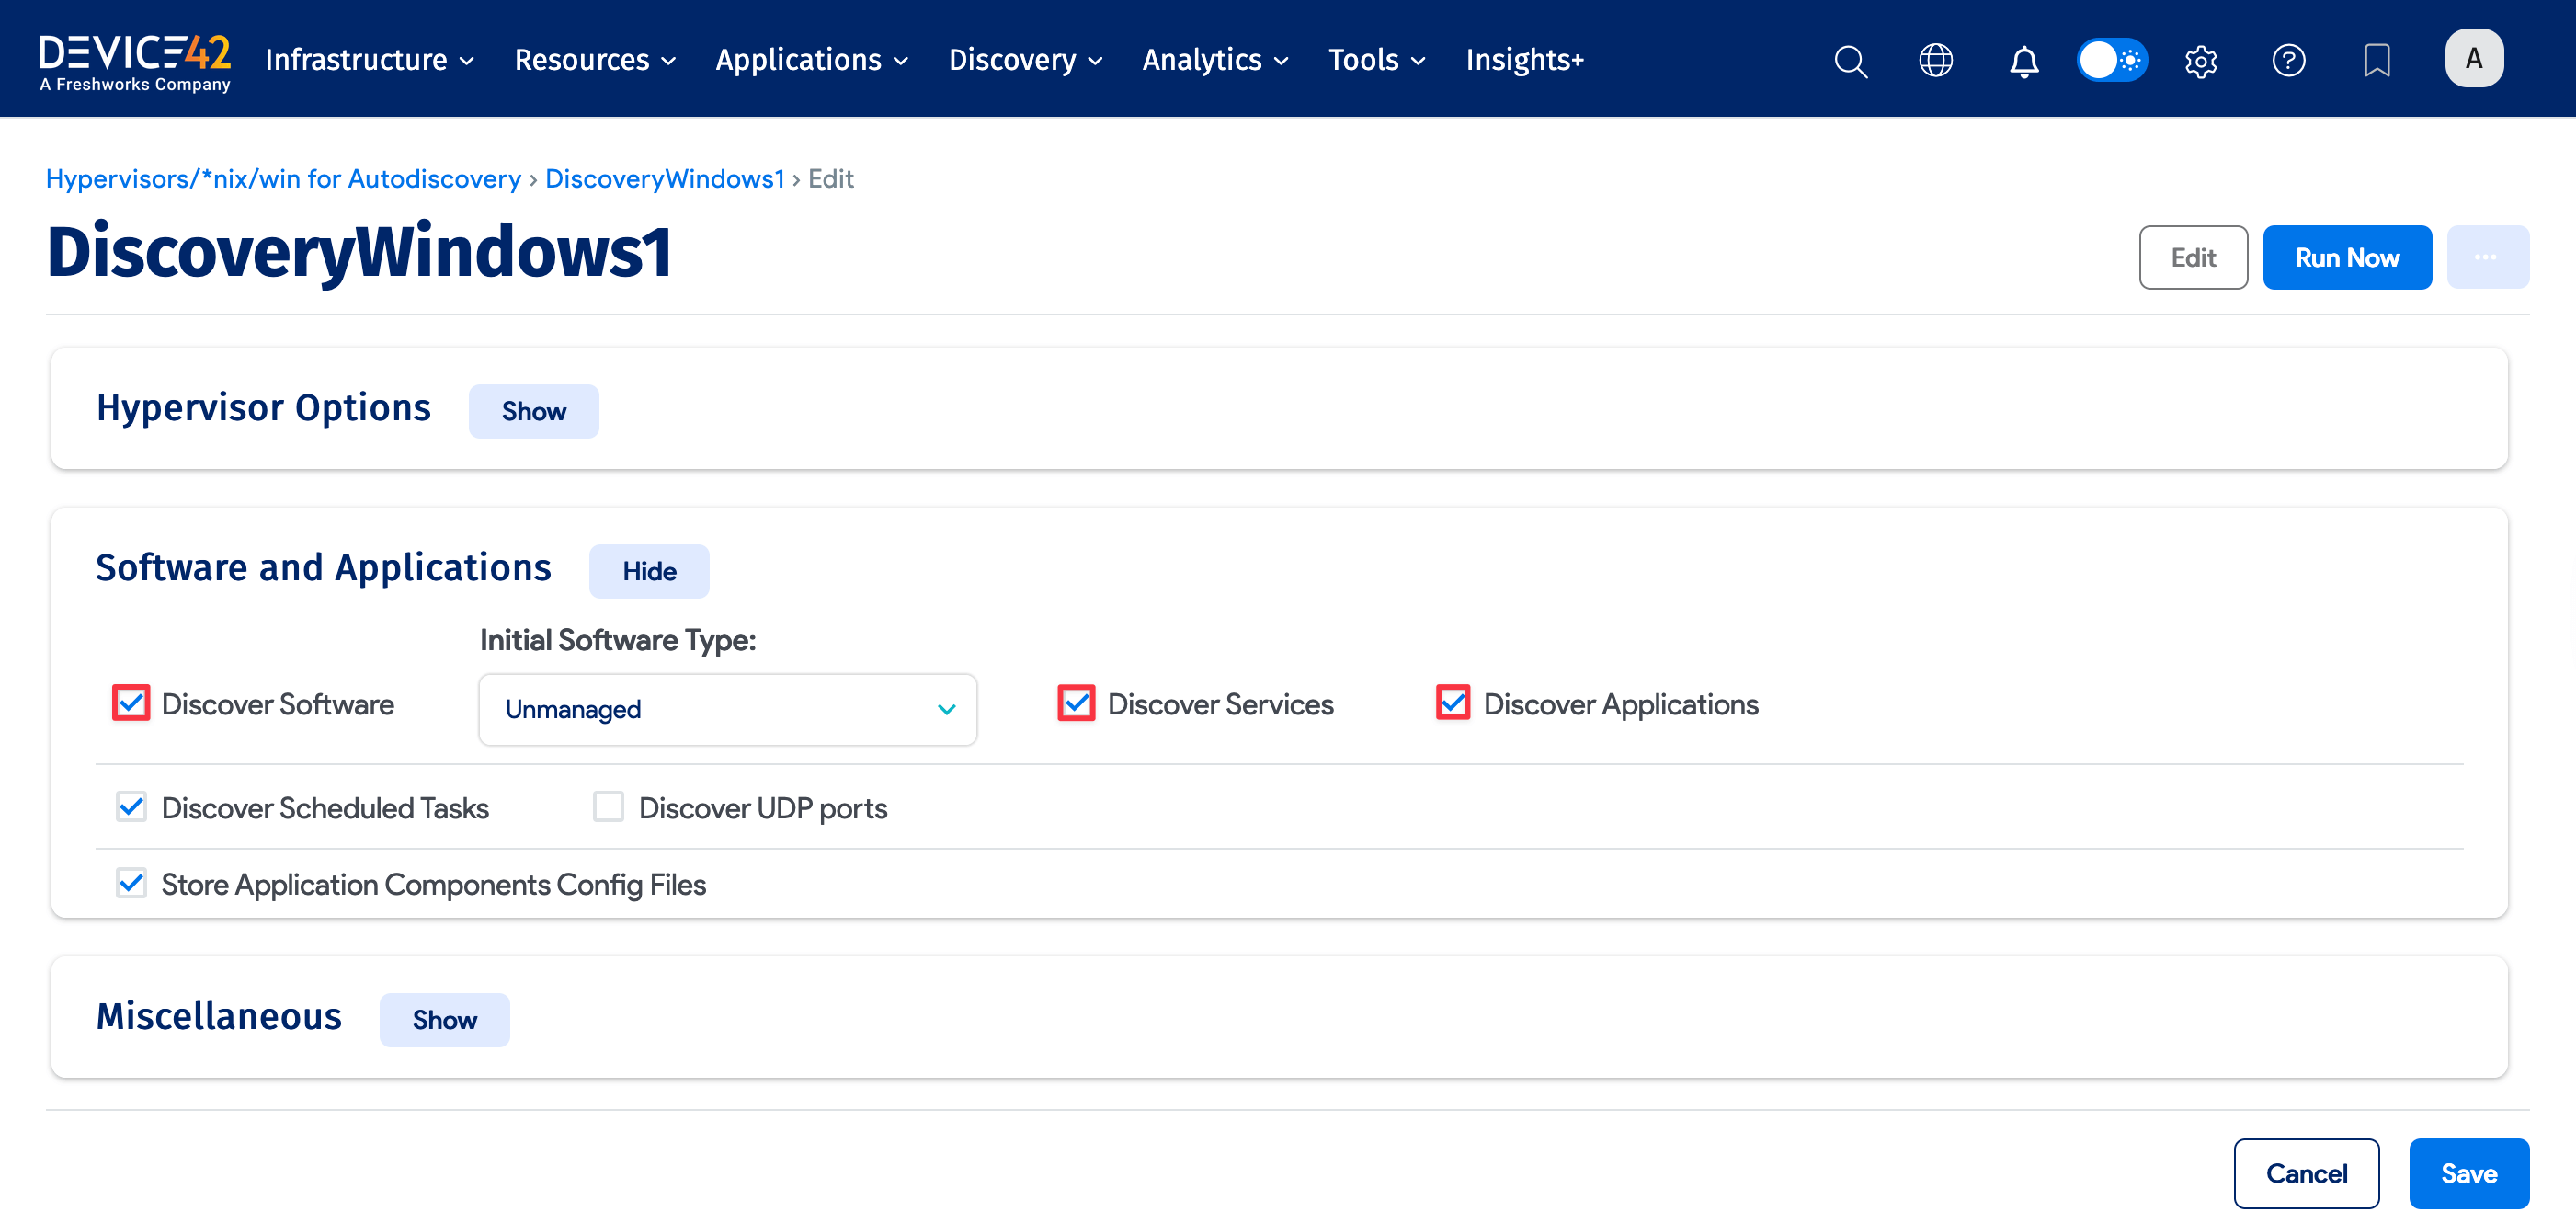
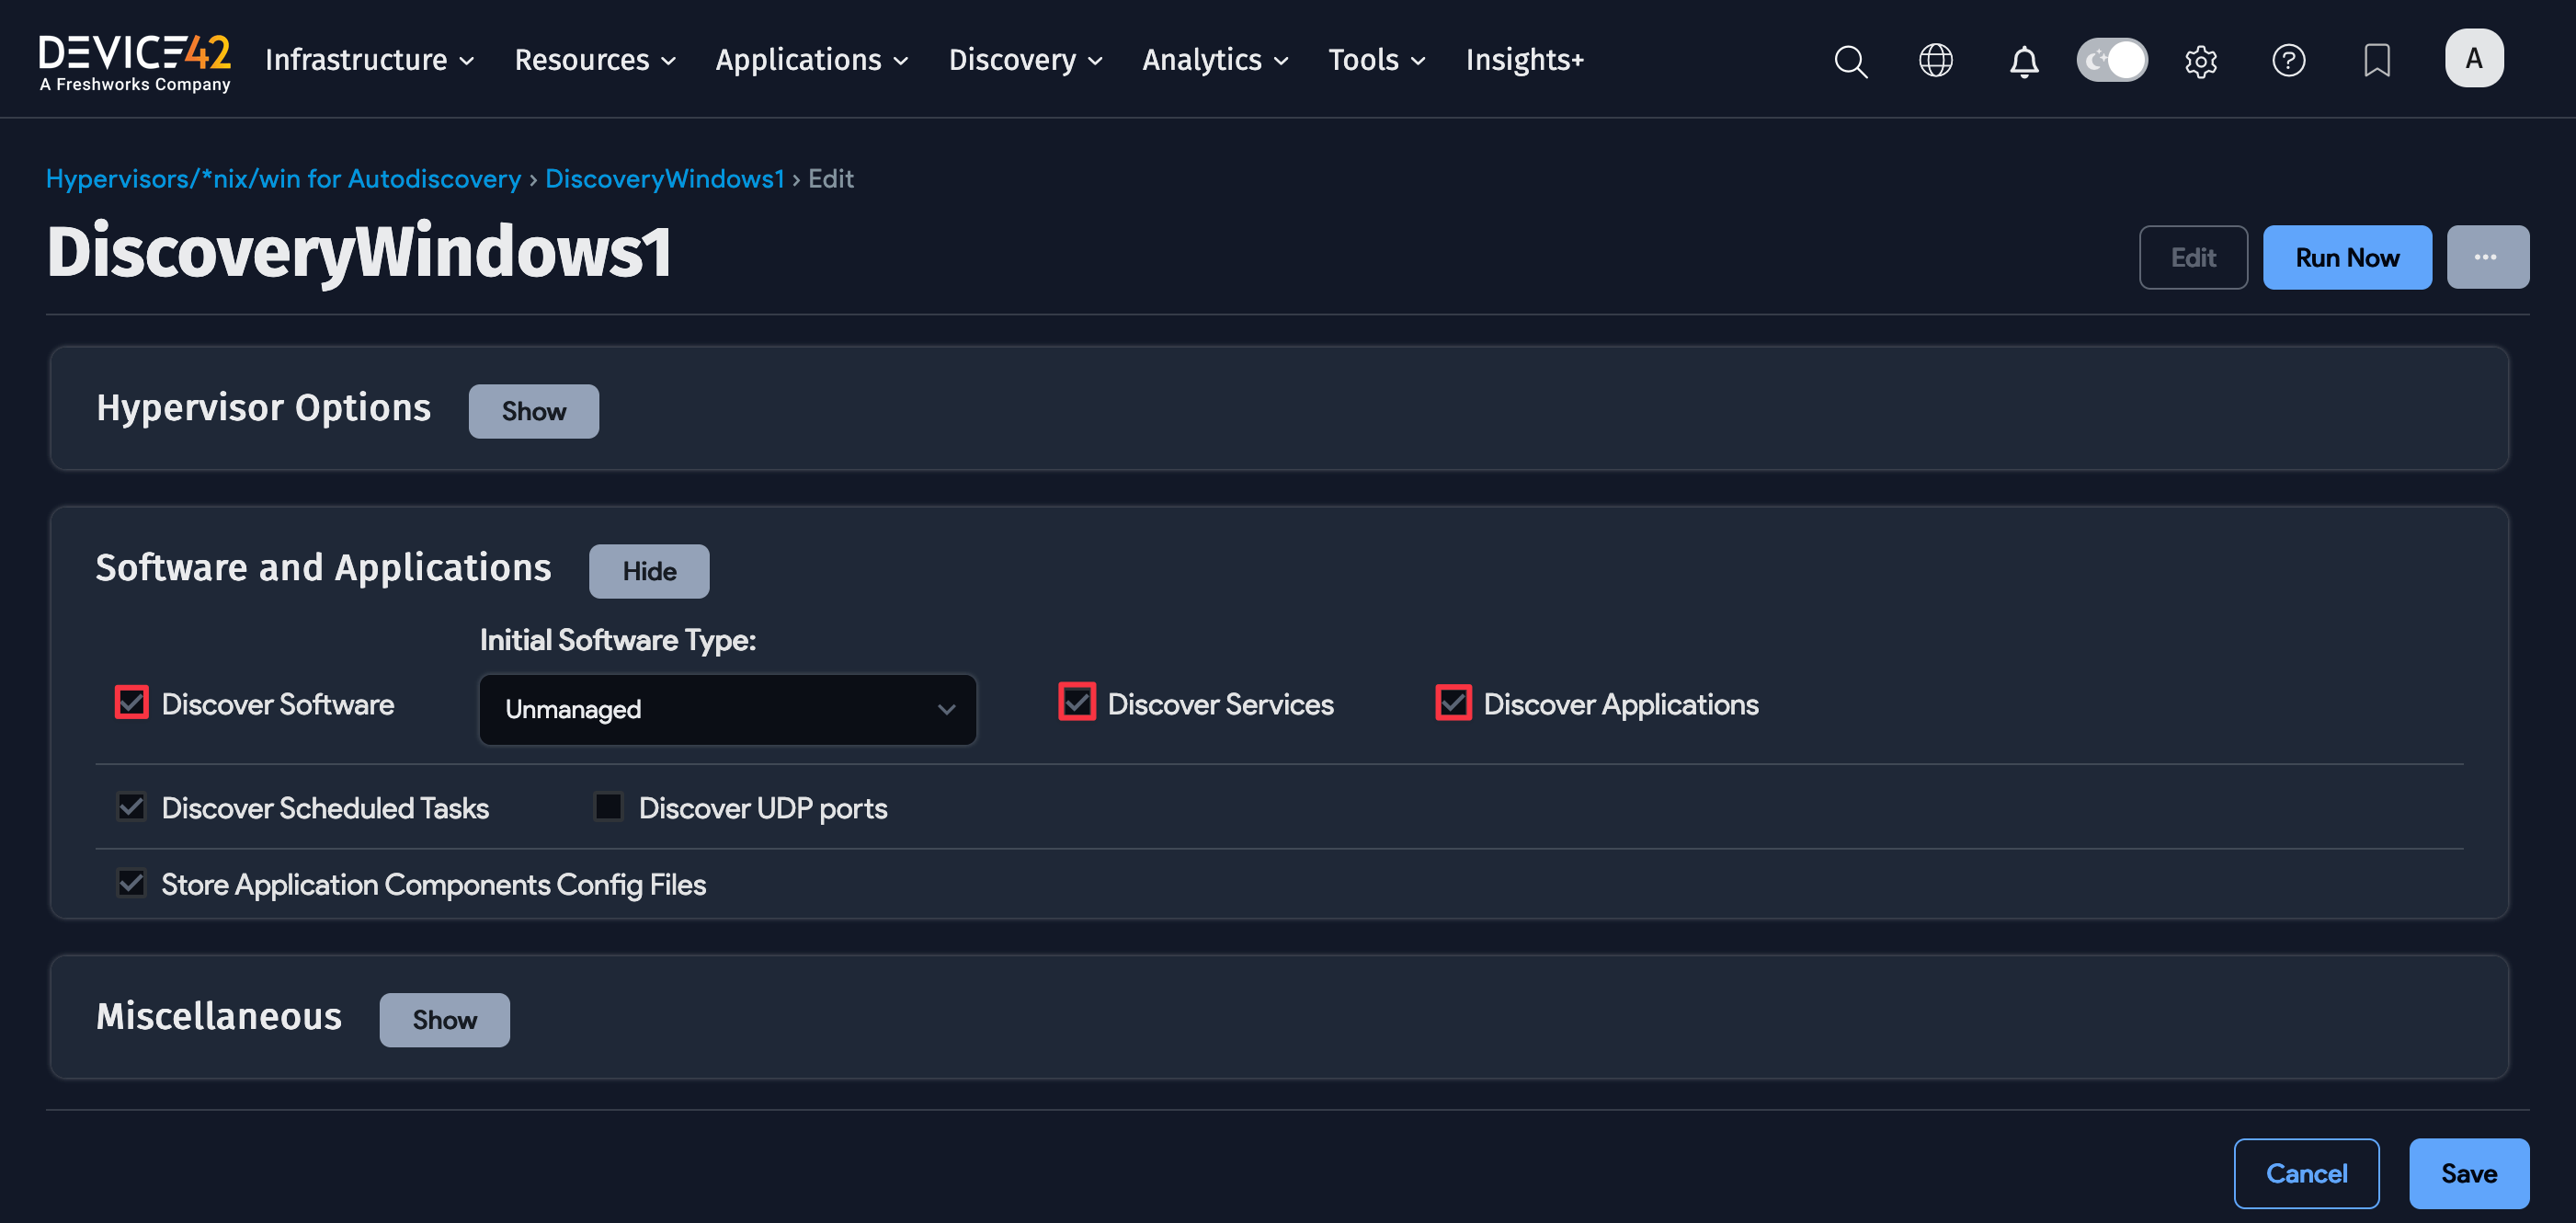
The Windows/*nix autodiscovery jobs you run will check to see which Application Component Templates are enabled and use them to create Application Components. When creating an autodiscovery job, the following necessary options are enabled by default in the Software and Applications tab:
- Discover Software
- Discover Services
- Discover Applications